Aspera Enterprise Server Admin Guide 3.7.3
|
|
|
- Preston Cole
- 6 years ago
- Views:
Transcription
1 Aspera Enterprise Server Admin Guide Linux Revision: Generated: 12/01/ :23
2 Contents 2 Contents Introduction... 7 Standard Installation...8 Requirements...8 Before Upgrading or Downgrading...8 Product Setup... 9 Upgrade Follow up Configuring the Firewall Securing Your SSH Server Changing and Securing the TCP Port Restricting User Access...16 Configuring Transfer Server Authentication Testing a Locally Initiated Transfer Updating the Product License Uninstalling Transferring Files with the Application Application Overview Managing Connections Creating SSH Keys in the GUI...30 Enabling a Transfer Proxy or HTTP Proxy Transferring Content and Managing Transfers Managing Transfers Scheduling and Customizing Transfers in Advanced Mode...40 Configuring Transfer Notifications Using Transfer Notifications Reporting Checksums Managing Users in the GUI Setting Up Users...54 Setting Up Groups Configuration Precedence Setting Up a User's Public Key on the Server...59 Testing a User-Initiated Remote Transfer Managing Global Transfer Settings in the GUI Global Bandwidth Settings (GUI)...61 Setting Up Virtual Links (GUI) Configuring the Transfer Server (GUI)...63 Managing Users from the Command Line Setting Up Transfer Users (Terminal)...66 Setting Up Transfer Groups (Terminal) Configuration Precedence... 70
3 Contents 3 Setting Up a User's Public Key on the Server...71 Testing a User-Initiated Remote Transfer Managing Global Transfer Settings from the Command Line Global Bandwidth Settings (Command Line)...74 Setting Up Virtual Links (Command Line) Configuring the Transfer Server (Command Line)...77 General Configuration Reference Configuration Methods Document Root Authorization...81 Server-Side Encryption at Rest (EAR) Bandwidth Network File Handling Configuring Filters to Include and Exclude Files...99 aspera.conf - Authorization aspera.conf - Transfer aspera.conf - File System aspera.conf - Filters to Include and Exclude Files Server-Side Symbolic Link Handling aspera.conf - Server-Side Encryption at Rest (EAR) Overview of Inline File Validation Inline File Validation with URI Inline File Validation with Lua Script ascp: Transferring from the Command Line Ascp Command Reference Ascp General Examples Ascp File Manipulation Examples Ascp Transfers with Object Storage and HDFS Configuring Multi-Session Transfers Applying Filters to Include and Exclude Files Creating SSH Keys (Command Line) Ascp FAQs ascp4: Transferring from the Command Line with A Introduction to A A4 Command Reference Using A4 from the GUI Pre- and Post-Processing (Prepost) Setting Up Pre/Post Processing Pre/Post Variables Pre/Post Examples Setting Up Notification Notification Examples Managing the Node API
4 Contents 4 Overview: Aspera Node API Node API Setup Node Admin Tool Configuring the Server for the Node API Redis DB Backup/Restore Setting up SSL for your Nodes Understanding the Watchfolder Architecture Aspera Watch Service and Aspera Watchfolders The Aspera Watch Services Manager (asperarund) Migrating Watch Services on Upgrade Working With Aspera Watch Service Starting the Aspera Watch Service asperawatchd Configuration Transferring and Deleting Files with the Aspera Watch Service Working With Aspera Watchfolders Creating a Watch Folder Configuring Watchfolder Services Creating a Watch Folder with the aswatchfolderadmin Utility Configuring Linux for Many Watchfolders Managing Watch Folders with aswatchfolderadmin Configuring the Watch Folder JSON Configuration File Watchfolder Configuration in aspera.conf Choosing User Accounts to Run Watchfolder Services Creating a Watch Folder with the Node API Configuring Watchfolder Services Configuring the Node API Creating a Watch Folder with the Node API Managing Watch Folders with the Node API Updating the Docroot of a Running asperawatchfolderd Service Managing Watch Folder Services Configuring for Other Aspera Products Configuring for Faspex Configuring for Shares Configuring for Aspera Files Set Up and Configure a Transfer User Configure the Server as a Files Node Configure Server Certificates Adding the Node to Files Configuring for Aspera for SharePoint Configuring for Object Storage and HDFS Getting Started with the Aspera Trapd Service General Trap Configuration Reference Setting Docroots for Object Storage and HDFS URL Encoding Docroot Restriction for URI Paths Configuring for Small File Uploads...253
5 Contents 5 Resuming Transfers to Object Storage and HDFS Naming Constraints Troubleshooting Trap Trapd Log Location Configuring the Transfer Server for AWS S3 Private Cloud Enabling AWS EC2/AWS S3 Using the Command Line Using AWS S3 IAM Roles Enabling AWS KMS Encryption for AWS S3 Cloud Storage Setting AWS S3 Storage Class Options Using AWS S3 Versioning with Aspera Enabling Cache-Control in AWS S File Time Stamp Preservation with Object Storage Parallel Transfers to AWS S3 and AWS EC Using Trap Links Disabling the Creation of 0 Byte Folder Objects in AWS S3 Storage on Upload Configuring the Transfer Server for Google Cloud Storage Set up Google Cloud Storage Using the Command Line Transferring Data between Google Cloud Storages that Belong to Different Projects Configuring the Transfer Server for IBM Bluemix Enabling IBM Cloud Object Storage (COS) - S3 Using the Command Line Configuring the Transfer Server for Hadoop Distributed File System (HDFS) Enabling Hadoop Distributed File System (HDFS) Storage Using the Command Line Configuring Kerberos for Hadoop Distributed File System (HDFS) Transfers Configuring the Transfer Server for OpenStack Swift Enabling OpenStack Swift Storage Using the Command Line Authentication and Authorization Installing SSL Certificates Setting Up Token Authorization Configuring Token Authorization from the GUI Token Generation (Node API) Token Generation (astokengen) Configuring Token Authorization in aspera.conf Access Key Authentication Asconfigurator Reference The asconfigurator Utility Syntax and Usage Examples Reading Output User, Group and Default Configurations Trunk (Vlink) Configurations Central Server Configurations HTTP Server Configurations Database Configurations Server Configurations Client Configurations Troubleshooting Using the Troubleshooter Clients Can't Establish Connection Error: Session Timeout During Ascp Transfers Logs Overwritten Before Transfer Completes
6 Contents 6 Disabling SELinux Appendix Restarting Aspera Services Testing and Optimizing Transfer Performance Log Files Accessing Shares from the GUI Product Limitations Technical Support Legal Notice
7 Introduction 7 Introduction IBM Aspera Enterprise Server is a universal file transfer server that uses FASP transfer technology to maximize upload and download speeds. Enterprise Server includes the following features: Feature Description FASP transport technology The file transfer protocol that maximizes transfer speeds over IP networks by eliminating the fundamental bottlenecks in conventional technologies. FASP features bandwidth control, resume, transfer encryption, content protection, and data integrity validation. Transfer server Allows an unlimited number of concurrent client transfers. Uses virtual links to manage aggregate bandwidth usage. Enterprise Server application GUI A graphical file transfer application for initiating and managing transfers, and for configuring transfer users and server settings. Pre- and Post-Processing (Prepost) Execute customizable actions when transfer events, such as the start and end of transfer sessions, occur. An notification script is included. Ascp The command-line file transfer program. A4 A command-line file transfer program similar to ascp, designed for the efficient transfer of large filesets. Aspera Watch Service A service that detects file system change and manages snapshots, optimized for speed, scale, and distributed sources. It discovers changes (new files and directories, deleted items, and renames) in source file systems immediately as they occur, eliminating the need to scan the file system. More features are available with additional licenses: Feature Description Aspera Sync A software application that provides high-speed and highly scalable, multi-directional, file-based replication and synchronization. Watchfolders A service to automate large-scale file and directory transfers, with support for ultralarge (10 million-item) directories and "growing file" sources.
8 Standard Installation 8 Standard Installation Requirements System requirements for IBM Aspera Enterprise Server: Product-specific Aspera license file. Linux kernel 2.4 or higher. Linux distributions/kernels released after the product release date might not be compatible. Glibc 2.5 or higher. SSH Server. Version 5.2 or higher is recommended. Screen resolution 1024 x 768 or higher for graphical user interface. If you plan to set up and use the Node API, you must also meet the following requirements on each node machine: Identify a directory that you plan to use for sharing data. When you set up the Aspera transfer user (Node API Setup), you set their absolute path (docroot) to this directory. The line localhost must appear in the hosts file. See /etc/hosts For UNIX-based nodes, SELinux must be set to "permissive" or "disabled", not "enforced". To check the status of SELinux, run the following: # sestatus If SELinux is set to "enforced", see Disabling SELinux. Using this application on a cloud platform and accessing the object-based cloud storage requires an On Demand license. To obtain an On Demand license, contact your Aspera account manager. Before Upgrading or Downgrading Upgrading The Aspera Enterprise Server installer automatically checks for an older version of the product on your system. If an older version is found, the installer automatically removes it before installing the new version. Although the installer performs your upgrade automatically, Aspera highly recommends completing the tasks below before upgrading. If you do not follow these steps, you risk installation errors or losing your former configuration settings. You cannot upgrade directly between different Aspera transfer products (such as from Point-to-Point to Desktop Client, or from Point-to-Point to Enterprise Server). To upgrade, you need to back up the configuration, uninstall the product, and perform a fresh install of the new version of the product. Downgrading Older installers do not check for newer versions of the application. You must prepare your machine as described below then uninstall the newer version before continuing with your downgrade. Newer versions of the Redis database are not compatible with older versions of the application. Your downgrade process depends on whether a backup of the older Redis DB is available, either as a separate backup file or as part of your backup of the var directory from the older version. With a backup: Follow the steps below to prepare your machine. Uninstall the application (for instructions, see Uninstalling). Copy the older Redis DB file into the var directory before installing the older (downgrade) version.
9 Standard Installation 9 /opt/aspera/var/ Without a backup: Follow the steps below to prepare your machine. Uninstall the application (for instructions, see Uninstalling) and delete the var and etc directories from your machine. Then do a fresh installation of the older version. The configuration files in the etc directory may be compatible with older versions, but not all configurations may be read. /opt/aspera/var/ /opt/aspera/etc/ Preparing for an Upgrade or Downgrade 1. Verify the version of your existing product. The steps required to prepare for an upgrade may differ depending on your current product version. To view the current product and version, run the following command: # ascp -A 2. If you were using the Aspera Watch Service or Watchfolders, set a docroot for the user running those services, if it is not already set. For more information on setting docroots for users, see Updating the Docroot of a Running asperawatchfolderd Service. Ensure that the filepath being watched, or the source_dir configured for the watch folder, is included in the docroot of the user. 3. Stop all FASP transfer-related applications, services and connections. ascp connections SSH connections The Enterprise Server application The asperarund service 4. Back up configuration and settings files. These files are found in the etc and var folders. /opt/aspera/etc/ (contains server configuration, web configuration, user settings, license info) /opt/aspera/var/ (contains Pre- and Post-Processing scripts, Connect Server) 5. Back up the Redis database. The Redis database is backed up as part of backing up the var directory, but Aspera recommends backing it up separately as well, particularly if it is stored on a different machine. # sudo /opt/aspera/bin/asnodeadmin -b /filepath/database.backup Product Setup Important: If this is a product upgrade, review all prerequisites described in Before Upgrading or Downgrading. To install Enterprise Server, log into your computer with root permissions, and follow the steps below. 1. Download the IBM Aspera product installer. Use the credentials provided to your organization by Aspera to access: If you need help determining your firm's access credentials, contact your Aspera account manager. 2. For product upgrades, ensure you have prepared your machine to upgrade to a newer version.
10 Standard Installation 10 Although the installer performs your upgrade automatically, Aspera highly recommends completing the tasks described in Before Upgrading or Downgrading. If you do not follow these steps, you risk installation errors or losing your configuration settings. 3. Run the installer To run the installer, run the following commands with the proper administrative permissions. Replace the product version accordingly. OS Commands RedHat, zlinux, CentOS Debian $ rpm -Uvh aspera-entsrv-version.rpm $ dpkg -i aspera-entsrv-version.deb 4. Install the license. The license can be installed using the GUI or from the command line. GUI: Launch the application by running the following command as root: # asperascp If this is a fresh install, an Enter License window appears. Either click Import License File and select the license file, or click Paste License Text to copy-and-paste the license file's content. The license information will appear in the window. Verify that it is correct and click Close. Terminal: Create the following file: /opt/aspera/etc/aspera-license Copy and paste your license key string into it, then save and close the file. To verify the license information, run the following command: $ ascp -A If you are updating your product license after the installation, see Updating the Product License. 5. Review or update OpenSSH authentication methods. Open your SSH Server configuration file from /etc/ssh/sshd_config with a text editor.
11 Standard Installation 11 To allow public key authentication, set PubkeyAuthentication to yes. To allow password authentication, set PasswordAuthentication to yes, for example:... PubkeyAuthentication yes PasswordAuthentication yes... Save the file then run the following to reload SSH: RedHat $ sudo service sshd restart Debian $ sudo /etc/init.d/ssh restart To further secure your SSH Server, see Securing Your SSH Server. 6. Troubleshooting If the installer freezes during installation, another Aspera product might be running on your computer. To stop all FASP transfer-related applications and connections, see Before Upgrading or Downgrading. Upgrade Follow up 1. If not using, disable the Aspera Watch Service. On an upgrade, the Aspera Watch Service is automatically enabled and a Watchfolder instance is automatically started as the default user (root). If you do not plan to use these services, you can disable them by running the following commands to retrieve the service ids and disable them. This stops Watch Service logging that otherwise continues in the backgournd. # /opt/aspera/bin/asrun send -g The output will look similar to the following: [asrun send] code=0, body={"services":[{"id":"52ca847a e1-9f9bb661cf298af1","configuration":{"enabled":true,"run_as": {"user":"root"},"type":"watchd"},"state":"running","state_changed_at":" t19:14:34z"}, {"id":"root","configuration":{"enabled":true,"run_as": {"user":"root"},"type":"watchfolderd"},"state":"running","state_changed_at":" t00:11:19z"} In the resulting output, find the IDs for the Watch Service and Watchfolder instances. You can identify the asperawatchd service by searching for the string "type":"watchd" and, before this entry in the output, locate the string following "id". You can identify the asperawatchfolderd service by searching for the string: "type":"watchfolderd". The ID for the asperawatchfolderd service is generally the name of the user running the service. To disable the services, run the following command for both the asperawatchd service id and the asperawatchfolderd service id: # /opt/aspera/bin/asrun send --disable watch_service_id For example, using the output shown above: # /opt/aspera/bin/asrun send --disable 52ca847a e1-9f9bb661cf298af1 # /opt/aspera/bin/asrun send --disable root The first command disables the Watch Service instance and the second disables the Watchfolder instance.
12 Standard Installation If upgrading and the Redis DB is run on another system: Update the KV store keys to the latest format. The local Redis DB schema is automatically updated by the installer, but non-local redis DB must be manually updated by running the following command as root: # /opt/aspera/bin/asnodeadmin --db-update 3. For all upgrades: Validate aspera.conf. The aspera.conf file is not overwritten during an upgrade and your configurations are preserved. However, the XML formatting, parameters, and acceptable values may have changed between your old version and new version. Run the following command to check aspera.conf for XML form and valid configuration settings: # /opt/aspera/bin/asuserdata -v Configuring the Firewall Your Aspera transfer product requires access through the ports listed below. If you cannot establish the connection, review your local corporate firewall settings and remove the port restrictions accordingly. Enterprise Server Configure your firewall to allow the following ports: Inbound TCP/22 (or other TCP port set for SSH connections): The port for SSH connections. Important: Aspera strongly recommends running the SSH server on a non-default port (allowing inbound SSH connections on TCP/33001, and disallowing inbound connections on TCP/22) to ensure that your server remains secure from SSH port scan attacks. For instructions on how to change your SSH port, see Securing Your SSH Server. If you have a legacy customer base utilizing TCP/22, then you can allow inbound connections on both ports. Please refer to the topic Securing Your SSH Server for details. The firewall on the server side must allow the open TCP port to reach the Aspera server. No servers are listening on UDP ports. When a transfer is initiated by an Aspera client, the client opens an SSH session to the SSH server on the designated TCP port and negotiates the UDP port over which the data transfer will occur. Inbound UDP/33001: The port for FASP transfers, which use UDP/33001 by default, although the server may also choose to run FASP transfers on another port. Local firewall: If you have a local firewall on your server (like iptables), verify that it is not blocking your SSH and FASP transfer ports (such as TCP/UDP 33001). If you are using Vlinks, you will need to allow the Vlink UDP port (55001, by default) for multicast traffic. For additional information on setting up Vlinks, see Setting Up Virtual Links (GUI). Remote Client Machines Typically, consumer and business firewalls allow direct outbound connections from client computers on TCP and UDP, and no configuration is required for Aspera transfers. In the special case of firewalls blocking direct outbound connections, usually with proxy servers for web browsing, the following ports must be allowed: Outbound TCP/33001: Allow outbound connections from the Aspera client on the TCP port (TCP/33001 by default, when connecting to a Windows server, or on another non-default port for other server operating systems). Outbound UDP/33001 (or a range, if required): Allow outbound connections from the Aspera client on the FASP UDP port (33001, by default). Local firewall: If you have a local firewall on the client (such as iptables), verify that it is not blocking your SSH and FASP transfer ports (such as TCP/UDP 33001). Important: Multiple concurrent clients cannot connect to a Windows Aspera server on the same UDP port. Similarly, multiple concurrent clients that are utilizing two or more user accounts cannot connect to a Mac OS X, FreeBSD, or Isilon Aspera server on the same UDP port. If connecting to these servers, you will

13 Standard Installation 13 need to allow a range of outbound connections from the Aspera client (that have been opened incrementally on the server side, starting at UDP/33001). For example, you may need to allow outbound connections on UDP/33001 through UDP/33010 if 10 concurrent connections are allowed by the server. Securing Your SSH Server Keeping your data secure is critically important. Aspera strongly recommends taking additional steps to set up and configure your SSH server to protect against common attacks. These steps include the following: 1. Changing the TCP port. 2. Restricting user access. 3. Configuring transfer server authentication. Changing and Securing the TCP Port Generally, SSH servers listen for incoming connections on TCP Port 22. As such, Port 22 is subject to countless, unauthorized login attempts by hackers who are attempting to access unsecured servers. An effective deterrent is simply to turn off Port 22 and run the service on a seemingly random port above 1024 (and up to 65535). To standardize the port for use in Aspera transfers, Aspera recommends setting the TCP port to The OpenSSH suite included in the installer uses TCP/22 as the default port for SSH connections. Remote Aspera clients attempt to establish an SSH connection with the server on port However, if the connection fails, the client retries the connection on port 22. Aspera recommends opening TCP/33001 and disabling TCP/22 to prevent security breaches of your SSH server. Open TCP/33001 and keep TCP/22 open until users are notified they should switch to TCP/ Once users are notified, block TCP/22 and allow traffic only on TCP/ Prerequisites: Before changing the default port for SSH connections, verify with your network administrators that TCP/33001 is open. Before closing port TCP/22, notify users of the change. Aspera recognizes that disabling the default SSH connection port (TCP/22) may affect your client users. When you change the port, ensure that you advise your users on how to configure the new port number, from the GUI (if available and used) and from the command line. GUI: To change the SSH port in Desktop Client, click Connections and select the entry for the server whose ports are changing. On the Connection tab, click Show Advanced Settings and enter the SSH port number in the SSH Port (TCP) field.
14 Standard Installation 14 Command line: Clients running FASP transfers from the command line can specify the port by using the -P option. The following steps require root privileges. 1. Open the SSH configuration file. /etc/ssh/sshd_config 2. Add the TCP/33001 SSH port. SSHD can listen on multiple ports, so you can have both TCP/33001 and TCP/22 open. To enable TCP/33001, add the port to your sshd_config file, as in the following example: Port 22 Port Once your client users have been notified of the port change to TCP/33001, disable TCP/22 and use only TCP/33001 by commenting out "Port 22" in your sshd_config file. For example: #Port 22 Port Disable non-admin SSH tunneling. These instructions require that OpenSSH 4.4 or newer is installed on your system in order to use the Match directive. Match allows you to selectively override certain configuration options when specific criteria (based on user, group, hostname, or address) are met. Open your SSH Server configuration file, sshd_config, with a text editor. Add the following lines to the end of the file (or modify them if they already exist): AllowTcpForwarding no Match Group root AllowTcpForwarding yes Depending on your sshd_config file, you might have additional instances of AllowTCPForwarding that are set to the default Yes. Review your sshd_config file for other instances and disable if necessary. Disabling TCP forwarding does not improve security unless users are also denied shell access, because they can still install their own forwarders. Review your user and file permissions, and see the steps below for instructions on modifying user shell access. 4. Update authentication methods Public key authentication can prevent brute-force SSH attacks if all password-based authentication methods are disabled. For this reason, Aspera recommends disabling password authentication in the sshd_config file and enabling private/public key authentication. To do so, add or uncomment PubkeyAuthentication yes and comment out PasswordAuthentication yes. PubkeyAuthentication yes #PasswordAuthentication yes PasswordAuthentication no Note: If you choose to leave password authentication enabled, be sure to advise account creators to use strong passwords and set PermitEmptyPasswords to "no". PermitEmptyPasswords no 5. Disable root login.
15 Standard Installation 15 By default, OpenSSH allows root logins. However, disabling root access helps maintain a more secure server. Aspera recommends disabling root access by commenting out PermitRootLogin yes in the sshd_config file and adding PermitRootLogin No. #PermitRootLogin yes PermitRootLogin no Administrators can use the su command when root privileges are necessary. 6. Restart the SSH server to apply new settings. To apply your new SSH server configuration settings, you must restart the server. Restarting your SSH server does not affect currently connected users. To restart or reload your SSH server, run the following commands: Linux Version RedHat, zlinux (restart) RedHat, zlinux (reload) Debian (restart) Debian (reload) Command $ sudo service sshd restart $ sudo service sshd reload $ sudo /etc/init.d/ssh restart $ sudo /etc/init.d/ssh reload 7. Review your logs periodically for attacks. You can view the state of active TCP connections by running the netstat command: # netstat -an -p tcp Typical output shows multiple, different IP addresses connected to specific ports: TCP TCP TCP TCP TCP TCP TCP : : : : : : : : : : : : : :443 CLOSE_WAIT ESTABLISHED TIME_WAIT ESTABLISHED ESTABLISHED ESTABLISHED ESTABLISHED If your server is under attack, you might see output similar to the following, in which the same IP address attempts to connect to contiguous ports (hundreds or thousands of times) and the connection is timing out (reporting a status of TIME_WAIT): TCP TCP TCP TCP TCP TCP TCP : : : : : : : : : : : : : :60980 TIME_WAIT TIME_WAIT TIME_WAIT TIME_WAIT TIME_WAIT TIME_WAIT TIME_WAIT If you see this, review your logs to determine the source and cause. Open your syslog, which is located in /var/log/auth.log or /var/log/secure, depending on your system configuration.
16 Standard Installation 16 Look for invalid users in the log, especially a series of login attempts with common user names from the same address, usually in alphabetical order. For example:... Mar 10 18:48:02 sku sshd[1496]: Failed password for invalid user alex from port 1585 ssh2... Mar 14 23:25:52 sku sshd[1496]: Failed password for invalid user alice from port 1585 ssh2... If you identify attacks, take the following steps: Double-check the SSH security settings in this topic. Report attackers to your ISP's address for abuse reports (often abuse@your_isp.com). Restricting User Access Restricting user access is a critical component of securing your server. By default, all user accounts are allowed to browse and read all files on the server. To limit a user's access to a portion of the system, set the account's shell to the Aspera secured shell (aspshell) and create a document root (docroot) for that user. The aspshell permits only the following operations: Run Aspera uploads and downloads to or from this computer. Establish connections in the application. Browse, list, rename, create, or delete contents. 1. Restrict user permissions with aspshell. By default, all system users can establish a FASP connection and are only restricted by file permissions. You can restrict the user's file operations through the aspshell, which permits only the following operations: Running Aspera uploads and downloads to or from this computer. Establishing connections in the application. Browsing, listing, creating, renaming, or deleting contents. These instructions explain one way to change a user account so that it uses the aspshell; there may be other ways to do so on your system. Open the following file with a text editor: /etc/passwd Add or replace the user's shell with aspshell. For example, to apply aspshell to the user aspera_user_1, use the following settings in this file:... aspera_user_1:x:501:501:...:/home/aspera_user_1:/bin/aspshell Set a user's docroot and restrict read, write, and browse privileges. When a user's docroot is empty (blank), that user has full access to your server's directories and files. To restrict the user, you must set a non-empty docroot. Run the following command to set a docroot for a specific user: #asconfigurator -x "set_user_data;user_name,username;absolute,docroot" You can further restrict access by disabling write privileges: #asconfigurator -x "set_user_data;user_name,username;write_allowed,false"
17 Standard Installation Run the asp-check tool to check for potential user-security issues. The asp-check tool performs the following secure checks: Identifies full-access users and reports how many exist on the system. The existence of full-access users does not necessarily indicate that your system is vulnerable. However, the system administrator must ensure that the existence of full-access users is intentional. Identifies restricted users and potential misconfigurations, including: incorrect login shell (one that is not restricted via aspshell), SSH tunnel access (which can be used to work around the restricted shell), and docroot settings that allow users to access the home directory. Note: A docroot setting that allows access to the home directory is not necessarily a security risk. However, a user with this docroot can download or upload SSH keys and upload.login scripts, which could be used to circumvent other access restrictions. Aspera highly recommends setting the docroot under a user's home directory (such as /home/jane/data) or in an alternate location (for example, /data). To run the asp-check tool, run the following command: # sudo /opt/aspera/bin/asp-check.sh Search results are displayed as in the following example. If potential issues are identified, review your users' settings before proceeding. Users with full access: 22 (not considered insecure) Restricted users: 0 Insecure users: 0 - no restricted shell (aspshell): 0 - docroot above home directory: 0 - ssh tunneling enabled: 0 Configuring Transfer Server Authentication For transfers initiated by a web application (such as Faspex, Shares, or Console), the client browser sends the transfer request to the server over an HTTPS connection. The transfer is executed by the Aspera FASP engine on the client machine, which connects to the transfer server by UDP. In so doing, the client machine must ensure the server's authenticity in order to protect the client against server impersonation and man-in-the-middle (MITM) attacks. To verify the authenticity of the transfer server, the web app passes the client a trusted SSH host key fingerprint of the transfer server. The client confirms the server's authenticity by comparing the server's fingerprint with the trusted fingerprint. 1. Set the host key fingerprint or path in the transfer server's aspera.conf file. Note: Server SSL certificate validation (HTTPS) is enforced if a fingerprint is specified in aspera.conf and HTTP fallback is enabled. If the client "falls back" to HTTP and the server has a selfsigned certificate, validation fails. The client requires a properly signed certificate. Setting the host key fingerprint: To retrieve your SHA-1 fingerprint, run the following command: # ssh-keygen -E sha1 -l -f /etc/ssh/ssh_host_rsa_key.pub The output lists the strength of the key, the hash algorithm, the fingerprint, the file from which the fingerprint was extracted, and the type of key, similar to the following, in which 7qdOwebGGeDeN7Wv+2dP3HmWfP3 is the fingerprint SHA1:7qdOwebGGeDeN7Wv+2dP3HmWfP3 ssh_key_filename (RSA)
18 Standard Installation 18 If your version of ssh-keygen does not support the -E option and you are using a Unix-like operating system, you can retrieve your SHA-1 fingerprint by running the following command: # cd /etc/ssh # cat ssh_host_rsa_key.pub awk '{print $2}' base64 -d sha1sum To set the SSH host key fingerprint, run the following command: # asconfigurator -x "set_server_data;ssh_host_key_fingerprint,fingerprint" This command creates a line similar to the following example of the <server> section of aspera.conf: <ssh_host_key_fingerprint>7qdowebggeden7wv+2dp3hmwfp3 </ssh_host_key_fingerprint> Setting the host key path: To set the SSH host key path instead of the fingerprint, from which the fingerprint will be extracted automatically, run the following command: # asconfigurator -x "set_server_data;ssh_host_key_path,ssh_key_filepath" This command creates a line similar to the following in the <server> section of aspera.conf: <ssh_host_key_path>/etc/ssh/ssh_host_rsa_key.pub </ssh_host_key_path> 2. Restart the node service to activate your changes. Run the following commands to restart asperanoded: # /etc/init.d/asperanoded restart Testing a Locally Initiated Transfer To make sure the software is working properly, follow these steps to set up a simple connection with the Aspera Demo Server and test download and upload transfers. Linux users may use the GUI or command line, and instructions for both are shown below. 1. Launch the application. Run the following command in a terminal window: $ asperascp 2. Add the Aspera Demo Server in the Connection Manager. Click Connections: In the Connection Manager, click to add a new connection, click OK to create a standard connection, and enter the following information, leaving the other options with their default values or blank:

19 Standard Installation 19 Field Value Host demo.asperasoft.com User aspera Authentication (Password) demoaspera 3. Test your connection to the remote server. Click Test Connection to determine whether you can reach the remote server with the settings you configured. An alert box opens and reports whether the connection is successful. 4. Connect to the Demo Server and download test files. From the main window, select the demo server entry and click the Connect button. On the server file browser (right panel), browse to the folder /aspera-test-dir-large, select the file 100MB, and click to download it to your local machine. You should see the session appear in the Transfer pane. 5. Upload to the Demo Server Select the same file (100MB) on the local file browser (left panel), go to the folder /Upload on the Demo Server, and click to upload it. 6. Download test files from the Demo Server. Use the following command to download, press y to accept the server's key, and enter the password demoaspera when prompted: # ascp -T aspera@demo.asperasoft.com:aspera-test-dir-large/100mb /tmp/ The transfer command is based on the following settings: Item Value Demo Server address demo.asperasoft.com Login account aspera

20 Standard Installation 20 Item Value password demoaspera Test file /aspera-test-dir-large/100mb Download location /tmp/ Transfer settings Fair transfer policy, target rate 10M, minimum rate 1M, encryption disabled. You should see the following session messages. The description from left to right is explained below: Item Description 100 MB The name of the file that is being transferred. 28% The percentage completed. 28 MB The amount transferred. 2.2 Gb/s The current transfer rate. 01:02 ETA The estimated time the transfer will complete. 7. Upload test files to the Demo Server. Run the command to upload the same file (100MB) back to the Demo Server, to its /Upload directory. Enter the password demoaspera when prompted: # ascp -T /tmp/100mb aspera@demo.asperasoft.com:upload/ Updating the Product License Linux users may update the license using the GUI or from the command line. Instructions for both are given below. 1. Run Aspera Enterprise Server. To update the license in the GUI, run the following command as root to start the application: # asperascp 2. Click Tools > License to open the license window.
21 Standard Installation Import the license file. You can either click the Import License File and select the license file, or click Paste License Text to paste the copied content of the license file. Verify that the license information that appears is correct and click Close. 4. Edit the license file. Open the following file with write permission: /opt/aspera/etc/aspera-license Replace the existing license key string with the new one and save the file. 5. Confirm the new license information is correct. Run the following command to display license information: # ascp -A 6. If you are using the Node API, reload the asperanoded service. # /opt/aspera/bin/asnodeadmin --reload Uninstalling To uninstall Enterprise Server, run the following command. Platform RedHat, CentOS Debian Command $ rpm -e aspera-entsrv $ dpkg -P aspera-entsrv
, run it with root permissions.")
22 Transferring Files with the Application 22 Transferring Files with the Application Application Overview Launching the Application To launch the desktop application, execute the following command in a terminal shell. To perform administrator tasks (such as server configuration, license updates, or configure notification templates), run it with root permissions. # asperascp The Application GUI Note: The Configuration button shown in the screenshots below is only enabled when the application is run as an Administrator. Item Description A Click Transfer to enter the transfer viewing mode. This is the default view when you launch the application, which shows the local and remote file browsers. B Select a transfer from the bottom pane and click Details to enter the transfer details viewing mode. This view shows the details of the selected transfer session, as well as the transfer control options. For more information, see Transferring Content and Managing Transfers. C Click Connections to open the Connection Manager window in which you can manage the remote endpoints. For more informations, see Managing Connections. D Click Configuration to open the Server Configuration window in which you can configure the FASP transfer settings. For more information, see the General Configuration Reference.

23 Transferring Files with the Application 23 Item Description E Click Preferences to set the local computer's default transfer settings, such as the FASP global bandwidth and the number of simultaneous transfers in the queue, and the SMTP server's information for transfer notifications. F Browse the local file system to view files to transfer. G When not connected, a list of the saved connections is displayed. When connected (by clicking on a Connection Name and clicking Connect), browse the remote file system. H Display previous, ongoing, and queued transfers. Manage the priority. The File Browser All options in the File Browser, including the file browser's contextual menu (Mouse right-click): Item Description A Path indicator/selector. B Go to the parent directory. C Create a new folder. D Choose between the list views and the detail view. E Create a new folder. F View the advanced upload or download window. G Decrypt the selected file if it is encrypted with the content protection. H Choose between the detail or the list views. Refresh the folder. I Options to manipulation the selected files. J Show the selected files' properties.
24 Transferring Files with the Application 24 Managing Connections To connect to a remote computer or to a server in the cloud, you need to add it in the Connection Manager. The sections below describe how to: Open the Connection Manger Use the Connection Manager to create or modify connections, with a full connection configuration reference Connect to a remote host Import and export connections Note: If you are planning to perform transfers with cloud storage, you must meet the following prerequisites: You (username) have permissions to access the cloud storage and the necessary authentication information (depending on the type of cloud storage). To transfer files with an S3 storage device using an S3 direct connection, you cannot have a local docroot, which will cause a transfer to fail. Be sure to confirm your docroot settings before attempting a transfer. Opening the Connection Manager Start the application.. Run the following command: # asperascp In the upper-right corner, click Connections to open the Connection Manager. Note: The Configuration button shown in the screenshots below is only enabled when the application is run as an Administrator. This opens the Connection Manager dialog. Using the Connection Manger Click to create a new connection. You can also use to duplicate a selected connection (to copy all information into a new profile) and to delete a connection profile.
 to authenticate a connection to cloud storage.")
 Access Key to create a connection to cloud storage and generate a new ATS access key to authenticate the connection.")
25 Transferring Files with the Application 25 When you create a new connection, the Create Connection dialog pops up in which you select the type of connection. Select Create a standard connection if you are not using the Aspera Transfer Service (ATS) to authenticate a connection to cloud storage. Select Create a standard connection for all connections that do not use the Aspera Transfer Service (ATS) to connect to cloud storage. Select Create a connection with a new Aspera Transfer Service (ATS) Access Key to create a connection to cloud storage and generate a new ATS access key to authenticate the connection. Select the storage type from the drop-down menu, and enter the required authentication information (depending on storage type). Entering a name is optional; it can be edited in the Connection Manager. Select Create a connection with an existing ATS Access Key to create a connection to cloud storage with an existing Aspera access key. Enter the Aspera access key ID and secret. Entering a name is optional; it can be edited in the Connection Manager. To name or rename a connection, click the orange connection profile name at the top of the screen to open the Rename Connection dialog. You can also launch the Rename Connection dialog by clicking once on an already selected connection name in the left panel of the Connection Manager. When you have entered the new name, save it by clicking OK (once in the Rename Connection dialog and again in the Connection Manager). The Connection Manager includes the following configuration tabs:
26 Transferring Files with the Application 26 Tab Description Connection Host information, such as the address, login credentials, and connection ports. Transfer Transfer session-related options, such as the transfer speed and retry rules. Tracking Options for tracking the transfer session, including the confirmation receipt and the notifications. Filters Create filters to skip files that match certain patterns. Security Enable the transfer encryption and the content protection. File Handling Set up resume rule, preserve transferred file attributes, and remove source files. The following tables describe the configuration options in these tabs. Connection Option Description Host Required The server's address, such as or companyname.com. User The login user for the server. Authentication Choose password or public key authentication. To use key-based authentication, see Creating SSH Keys in the GUI. Storage Type The default option is local storage. Use the drop-down menu to configure object storage. Connecting to object storage requires an ALEE-enabled Aspera server on the remote storage. Object storage types include the following: Akamai NetStorage Amazon S3: Requires your Access Id, Secret Access Key, and bucket path. The local machine must be reasonably time-synchronized in order to communicate with the Amazon servers. You can also select the Advanced button to modify the following settings: Host: Amazon S3 hostname (default: s3.amazonaws.com). Port: Default is port 443. HTTPS connection for file browsing: Enable for secure browsing. Server-side file encryption: Enable for AES256 encryption. Reduced redundancy storage class: Assign objects to a to the "reduced redundancy" storage class (durability of 99.99%). Google Storage: Requires your Project Number and bucket path. Limelight: Requires your Account, Username, and Password. IBM Cloud Object Storage - Swift: Requires your User name, API Key (Password), and Authentication Endpoint. Rackspace Swift: Requires your Storage Account and Access Key. Windows Azure: Requires your Storage Account and Access Key. Azure storage is set to use the Azure block blob REST API by default. To specify the REST API for page blobs, enter your account credentials then click Advanced. Select PAGE from the dropdown menu next to Api and click OK. Windows Azure SAS: Requires your Shared URL. Note: You can only choose special storage if you have full access to that storage on the cloud-based machine.
27 Transferring Files with the Application 27 Option Description Target Directory (or Bucket Path or Path for most cloud storage) The default directory when connecting to this computer. When left blank, browsing the remote host brings up either the user account's document root (docroot), or the last-visited folder. When a path is set, connecting to the host always brings up the exact directory. Share this connection... Select to share this connection with other users on your computer. When a connection is authenticated through Public Key, the SSH keys used by this connection should be shared as well. For more information, see Creating SSH Keys in the GUI. Advanced Settings > SSH Port (TCP) The TCP network port. Default: Note that if connecting on fails, the application attempts to establish a connection on port 22. If the connection on 22 succeeds, the setting is updated to 22. Advanced Settings > fasp Port (UDP) The UDP network port: Default: Advanced Settings > Connection Timeout Time out the connection attempt after the selected time. Test Connection Click this button to test the connection to the remote server with the settings you configured. An alert box opens and reports whether the connection is successful. Transfer Option Description Transfer Name Select from the following options: Automatically generate allows the user interface to generate the transfer name; Automatically generate and add prefix uses auto-generated name with a customizable prefix; Specify uses the user-specified name. Policy Select the FASP transfer policy. fixed Attempts to transfer at the specified target rate, regardless of the actual network capacity. This policy transfers at a constant rate and finishes in a guaranteed time. This policy typically occupies most of the network's bandwidth, and is not recommended in most file transfer scenarios. In fixed mode, a maximum (target) rate value is required. high Monitors the network and adjusts the transfer rate to fully utilize the available bandwidth up to the maximum rate. When congestion occurs, a it transfers at a rate twice of a session with fair policy. In this mode, both the maximum (target) and the minimum transfer rates are required. fair Monitors the network and adjusts the transfer rate to fully utilize the available bandwidth up to the maximum rate. When other types of traffic build up and congestion occurs, it shares bandwidth fairly by transferring at an even rate. In this mode, both the maximum (target) and the minimum transfer rates are required. low Similar to fair mode, the low policy uses the available bandwidth up to the maximum rate, but is much less aggressive when sharing bandwidth with other network traffic. When congestion builds up, the transfer rate is reduced to the minimum rate until other traffic retreats. Speed Select to specify the transfer rate. The target rate is constrained by the global bandwidth in the Preferences window. Refer to Global Bandwidth Settings (GUI). Retry Select to automatically retry the transfer after a recoverable failure for a set amount of time, in seconds, minutes or hours. You may set the initial and maximum retry intervals by clicking the More Options button.
28 Transferring Files with the Application 28 Option Description Initial interval: The first retry waits for the initial interval. Input in seconds, minutes or hours. Maximum interval: After the initial interval, the next interval doubles until the maximum interval is met, and then stops retrying after the retry time is reached. Input in seconds, minutes or hours. For example, if the retry is set for 180 seconds, the initial interval is 10 seconds, and the maximum interval is 60 seconds, then the transfer will retry at 10, 30, 70, 130, and 180 seconds after the first try, such that the interval progression is 10, 20, 40, 60, 60, and 50 seconds. The last interval is not the maximum because the retry period ends with a final retry. As another example, if the retry is set for 600 seconds, the initial interval is 30 seconds, and the maximum interval is 120 seconds, then the transfer will retry at 30, 90, 210, 330, 450, 570, and 600 seconds after the first try, such that the interval progression is 30, 60, 120, 120, 120, 120, and 30 seconds. Again, the last interval is not the maximum because the retry period ends with a final retry. Click the Show Advanced Settings button to reveal the following options: Show Advanced Settings Specify FASP datagram size (MTU): By default, the detected path MTU is used. Select this option to specify a value between 296 and bytes. Disable calculation of source files size before transferring: Select this option to turn off job size calculation on the client-side (if allowed by the server). Tracking Option Description Generate delivery confirmation receipt Select this option to create the delivery receipt file in the specified location. Send notifications Send out notifications based on specified events (start, complete, and error).see Using Transfer Notifications for more information. Filters Click Add and enter the pattern to exclude files or directories with the specified pattern in the transfer. The exclude pattern is compared with the whole path, not just the file name or directory name. Two special symbols can be used in the setting of patterns: Symbol Name Description * Asterisk Represents zero to many characters in a string, for example *.tmp matches.tmp and abcde.tmp.? Question mark Represents one character, for example t?p matches tmp but not temp. For more information on filter rule syntax, see Applying Filters to Include and Exclude Files. Security Option Description Encryption Select Encrypt data in transit to encrypt files during transfer. Encryption may decrease performance, especially at higher transfer speeds and with slower computers.
29 Transferring Files with the Application 29 Option Description Content Protection Select Encrypt uploaded files with a password to encrypt the uploaded files with the specified password. The protected file has the extension.aspera-env appended to the file name. Select Decrypt password-protected files downloaded to prompt for the decryption password when downloading encrypted files. File Handling Option Description Resume Select Resume incomplete files to enable the resume feature. Select the file comparison method from the When checking files for differences dropdown menu: Compare file attributes - Compares the sizes of the existing and original file. If they are the same, then the transfer resumes, otherwise the original file is transferred again. (Default) Compare sparse file checksums - Performs a sparse checksum on the existing file and resumes the transfer if the file matches the original, otherwise the original file is transferred again. Compare full file checksums - Performs a full checksum on the existing file and resumes the transfer if the file matches the original, otherwise the original file is transferred again. Under When a complete file already exists at the destination, select an overwrite rule when the same file exists at the destination. By default, files on the destination are overwritten if different from the source. File Attributes Select Preserve Access Time to set the access time of the destination file to the same value as that of the source file. Select Preserve Modification Timeto set the modification time of the destination file to the same value as that of the source file. Select Preserve Source Access Time to keep the access time of the source file the same as its value before the transfer. Note: Access, modification, and source access times cannot be preserved for node and Shares connections that are using cloud storage. Source Handling Select Automatically delete source files after transfer to delete the files that transferred successfully from the source. Select Delete empty source subdirectories to also remove the folder. Select Automatically move uploaded source files to a directory after transfer and specify the location on the source machine to which they should be moved. Only a path to an existing location on the client can be specified. Important: When managing connections, changes are not saved until you click OK. Selecting Cancel will discard any unsaved changes made in the Connection Manager, including the addition and removal of connections. Connecting to a Remote Host To connect to this remote host, double-click the connection in the Connection panel, or select it and click Connect.


30 Transferring Files with the Application 30 Importing and Exporting Connections You can also export and import your connection list to and from a text file. To export your connection list, right-click the remote server panel and select Export. To import your connection list, right-click the remote server panel and select Import. Both options are shown below (with "export" selected). Note: Exported and imported connections do not include passwords. Because the password encryption uses a per-user/per-machine cryptographic key, the encrypted passwords cannot be used on other machines. Since the passwords are not transferred, they must be re-entered once the connection has been imported. If you are exporting a connection that uses keys, then you will need to back up those keys manually and import separately. A shared connection that is exported or imported by a non-administrator will import as a regular connection (not as a shared connection). templates are not exported with the connection. Creating SSH Keys in the GUI Public key authentication (SSH Key) is a more secure alternative to password authentication that allows users to avoid entering or storing a password, or sending it over the network. Public key authentication uses the client computer to generate the key pair (a public key and a private key). The public key is then provided to the remote computer's administrator to be installed on that machine. To use your Aspera product's transfer-client functionality with public key authentication, follow the steps below. You can use the application GUI to generate key pairs and to import existing key pairs. You can also generate key pairs using the command line; for instructions, see Creating SSH Keys (Command Line). 1. Launch the application.

 Set a passphrase on your SSH key, which will be prompted for whenever it needs to use the key.")
31 Transferring Files with the Application 31 To launch the application, execute the following command in the shell: # asperascp 2. In the menu bar, click Tools > Manage Keys. 3. In the SSH Keys dialog, click to create a new key pair. The SSH Keys dialog is also available from the Connection tab in the Connection Manager. When you select Public Key for authentication, the Manage Keys button appears; clicking it opens the SSH Keys dialog. 4. In the New SSH Key Pair window, enter the requested information. Field Description Identity Name your key pair, such as with your user name. Passphrase (Optional) Set a passphrase on your SSH key, which will be prompted for whenever it needs to use the key. If you don't want the user to be prompted for passphrase when logging in, leave this field blank. Type Choose between RSA (default) and DSA keys.


32 Transferring Files with the Application 32 Field Description Access When sharing a connection with public key authentication, or a connection that is has a Hot Folder (on Windows machines), this option must be checked. Click OK when finished. The public key is displayed in the window and you may copy it to a clipboard or export it to a file that is easy to locate. The key is automatically saved as a file named identity.pub in the following location (in the example below, the public key filename is id_rsa.pub): /home/username/.ssh/id_rsa.pub 5. Distribute the public key. Provide the public key file to your server administrator so that it can be set up for your server connection. To copy or export the public key, select the key in the SSH Keys window, click Copy Public Key to Clipboard, and paste the string into an to send to the server administrator, or click Export to File and save the public key as a file. For information on how to install the public key on the server, see Setting Up a User's Public Key on the Server; however, the server may be installed on a different operating system from the client. 6. Set up connections using public key authentication. When your public key has been installed on the remote host by its server administrator, click Connections to open the Connection Manager.

33 Transferring Files with the Application 33 Select the connection for which you want to set up the key. In its Connection tab, select the Public Key Authentication option and select the key from the drop-down menu. Note: When you are sharing a connection with public key authentication (Share this connection with all users on this computer checkbox is checked), the SSH key should be shared as well. You can edit an existing key by opening the SSH Keys window. In the SSH Keys dialog, select a key and click the button to open the Edit SSH Key Pair dialog. Select Allow shared connections to use this key. Shared keys are moved to the Enterprise Server etc directory. Importing keys: To import keys created outside the GUI, go to Tools > Manage Keys to open the SSH Keys dialog. Click the button in the upper-left corner of the dialog to open a file browser. You can import the key pair by selecting either the private key or the public key; this will copy both keys into the user's.ssh directory. You cannot import a key pair if a key pair with the same identity already exists in the.ssh directory. Imported key pairs can be shared with other users. In the SSH Keys dialog, select a key and click the button to open the Edit SSH Key Pair dialog. Select Access to allow shared connections to use this key. Shared keys are moved to the Enterprise Server etc directory. Enabling a Transfer Proxy or HTTP Proxy If, for network security reasons, you are behind a transfer proxy server, you can enable the proxy for file transfer by configuring settings in the Preferences dialog. Preferences can be accessed either from the Preferences button, or from the Tools menu in the main toolbar.
34 Transferring Files with the Application 34 If you have admin privileges, you can enable transfer proxies for all users by setting global preferences. If you are a non-admin user, you can override global transfer-proxy settings for your own account, including enabling or disabling the feature. By default, proxy is disabled. Global Proxy Settings To enable or edit proxy settings globally, click Tools > Global Preferences. You must have admin privileges to set global preferences. To enable a transfer proxy, set the following: Select Enable transfer proxy. Enter the proxy server's hostname or IP address and port number. Select Secure if your proxy server allows secure connections. Enter your username and password to authenticate with your proxy server.


35 Transferring Files with the Application 35 To enable HTTP proxy, set the following: Select Enable HTTP proxy. Enter the HTTP proxy's hostname or IP address and port number. If your HTTP proxy requires authentication, select Authenticated and enter the username and password for your HTTP proxy. By default, all proxy settings are turned off. For global preferences, clicking Restore System Defaults clears all settings. User Proxy Settings To override the global settings, you can enter personal settings for your own account. Click Tools > Preferences or the Preferencesbutton:

36 Transferring Files with the Application 36 Under Proxy, the values inherited from the global proxy settings are displayed. To configure the transfer proxy settings: Select or unselect Enable transfer proxy to enable or disable transfer proxy. Enter the proxy server's hostname or IP address and port number. Select Secure if your proxy server allows secure connections. Enter your username and password to authenticate with your proxy server. Click Restore Defaults to revert all user settings to the global values. To configure the HTTP proxy settings: Select or unselect Enable HTTP proxy. Enter the HTTP proxy's hostname or IP address and port number. If your HTTP proxy requires authentication, select Authenticated and enter the username and password for your HTTP proxy.


37 Transferring Files with the Application 37 Note: If you are an admin, you can access the global proxy dialog by clicking the Global Preferences button. Click Restore Defaults to revert all user settings to the global values. Transferring Content and Managing Transfers Caution: Do not use the following characters in file or folder names: / \ " : '? > < & * The steps below describe how to initiate a transfer. Instructions for managing transfer progress, order, and rate follow. 1. Connect to the remote host. Double-click the connection in the Connection panel, or select it and click Connect. In the connections panel, the Target Directory shows either a specific path when the target directory is set, or the last-visited folder when left blank. For how to set up the target directory, see Managing Connections. 2. Initiate the transfer. To transfer content to or from the remote computer, select the content to transfer and then click the upload or download arrow.

, you can also transfer content without browsing the remote computer.")
38 Transferring Files with the Application Transfer content using drag-and-drop or copy-and-paste. You can transfer files or folders between the right and left browser panels and move them within the browser panels using drag-and-drop or copy-and-paste. You can copy files or folders within the browser panels using copyand-paste. 4. Transfer content without browsing the remote host. If you have entered the target directory for this connection (See Managing Connections), you can also transfer content without browsing the remote computer. To do so, select the files and fodlers from the left panel (local), select the connection name from the right panel (remote) and click target directory (as shown in the screenshot), or to push the content to the remote computer's to pull content from it. Note: If you attempt to transfer too many files, regardless of the method, the transfer is disabled and the following warning message is displayed: Too many files selected. Select fewer files, or transfer the folder containing your selection instead. The file limit is OS dependent. The limit does not apply to copy-and-paste operations within the same file browser panel. Managing Transfers The Transfers Panel: Start, Stop, and Reorder Transfers Once the transfer has been successfully initiated, a progress bar will appear in the Transfers panel. Click to start the selected transfer. Click to stop the selected transfer. Click to delete the selected transfer. If you have multiple ongoing transfers, use the indicates the transfer's order in the queue. and to change the selected transfer's priority. The # field The Details View: Adjust Transfer Rates and Policies of Active Transfers The Details button provides additional oversight and control (if you have permission) over transfers. Select a transfer session from the Transfers panel and click Details to view details and adjust settings.
.")
39 Transferring Files with the Application 39 The Details display shows the following information: Item Name Description A Details (tab) Transfer details, including status (rate and ETA) and statistics (session size, files transferred vs. total files to be transferred, average speed, time elapsed, RTT delay and average loss in percent). B Files (tab) All files being transferred in this session, along with each files' size and transfer progress. C Transfer controls Set the FASP transfer policy and transfer rate, if allowed. fixed Attempts to transfer at the specified target rate, regardless of the actual network capacity. This policy transfers at a constant rate and finishes in a guaranteed time. This policy typically occupies most of the network's bandwidth, and is not recommended in most file transfer scenarios. In fixed mode, a maximum (target) rate value is required. high Monitors the network and adjusts the transfer rate to fully utilize the available bandwidth up to the maximum rate. When congestion occurs, a it transfers at a rate twice of a session with fair policy. In this mode, both the maximum (target) and the minimum transfer rates are required. fair Monitors the network and adjusts the transfer rate to fully utilize the available bandwidth up to the maximum rate. When other types of traffic build up and congestion occurs, it shares bandwidth fairly by transferring at an even rate. In this mode, both the maximum (target) and the minimum transfer rates are required. low Similar to fair mode, the low policy uses the available bandwidth up to the maximum rate, but is much less aggressive when sharing bandwidth with other network traffic. When congestion builds up, the transfer rate is reduced to the minimum rate until other traffic retreats. Important: If --policy is not set, ascp uses the server-side policy setting (fair by default). D Transfer Monitor The transfer graph. Use the sliders on the vertical axis to adjust the transfer rate up or down (if allowed). Configuring Transfer Preferences If you have administrator privileges, you can set the target transfer rate for all users from the Global Preferences dialog. As an individual user, you can override the global settings from My Preferences. To update these settings, go to Tools > Global Preferences or Tools > Preferences. You can also open My Preferences from the Preferences button in the upper-right corner of the application's main window; from there you can also reach the Global Preferences dialog by clicking Global Preferences.
 Default Target Rate The initial download and upload rates for all transfers.")
40 Transferring Files with the Application 40 The following options are available under the Transfers tab: Item Description Global Bandwidth Limits The aggregated bandwidth cap for all FASP transfers on this computer. For more advanced bandwidth settings, see Bandwidth. (Set by administrators only.) Default Target Rate The initial download and upload rates for all transfers. Maximum Active Transfers The maximum number of concurrent upload transfers and download transfers. For information about settings under the tab, see Configuring Transfer Notifications. Scheduling and Customizing Transfers in Advanced Mode You can start a transfer in advanced mode to set per-session transfer options, such as filters, security, and scheduling, that override the default transfer settings. To initiate a transfer in advanced mode, right-click a file or folder to open the context menu and select Upload (in the client panel) or Download (in the server panel). The advanced transfer dialog includes the following configuration tabs:

41 Transferring Files with the Application 41 Tab Description Transfer The transfer session-related options, such as the transfer speed and retry rules. Tracking Options for tracking the transfer session, including the confirmation receipt and the notifications. Filters Create filters to skip files that match certain patterns. Security Enable the transfer encryption and the content protection. File Handling Set up resume rule, preserve transferred file attributes, and remove or move source files. Scheduling Schedule this transfer. Note: All configuration tabs, except Scheduling, are identical to those in the Connection Manager. For information on these tabs, see Managing Connections. The Scheduling tab is described below. Scheduling To enable transfer scheduling, select Schedule this transfer. When finished, click Transfer. The following scheduling options are available in the Transfer repeats dropdown menu: Does not repeat Set the time and date for a single transfer. Daily Set the time for a daily transfer. For End repeat, select Never to continue daily transfers indefinitely, or On and set an end date and time. Monday-Friday Set the time for a daily transfer only on weekdays. For End repeat, select Never to continue daily transfers indefinitely, or On and set an end date and time. Weekly Select the time and days of the week for a repeating transfer. For End repeat, select Never to continue weekly transfers indefinitely, or On and set an end date and time. Periodically Set the frequency to repeat the transfer, in minutes. Click Transfer to submit the scheduled transfer. The transfer is then listed under the Transfers tab, along with an icon ( ) under the # column. To modify the transfer, right-click it and select Edit to view the transfer settings.

42 Transferring Files with the Application 42 Note: When scheduling transfers, ensure that the application is running. Scheduled transfers do not run when the application is closed. Configuring Transfer Notifications Transfer notification s are triggered by three transfer session events: start, completion, and error. These s are generated from default or customized mail templates. The following instructions describe how to configure the SMTP server and to create or modify your templates. 1. Run Aspera Enterprise Serverwith root permissions.. To update the license in the GUI, run the following command as root to start the application: # asperascp 2. Open Global Preferences by clicking Tools > Global Preferences. 3. Click Mail to configure global notification settings. To turn on notifications for all users, select Enable notifications. When notifications are enabled you must enter the address from which the notifications are sent in the From Address field and enter the outgoing server host name in the Host field. The other values are optional. To test your settings, click Send test , which sends a test message to the From Address.

43 Transferring Files with the Application Set your personal mail preferences. To override the global mail settings and configure personal mail settings, click Tools > Preferences or click Preferences: Click Mail and edit the inherited global default values. To restore your settings to global values, click Restore Defaults.


44 Transferring Files with the Application Open the Mail Templates window by clicking Tools > Mail Templates. 6. To create a new template, click, or to edit an existing template, select the template and click


45 Transferring Files with the Application For new templates, name the template and select its base template. Select an existing template from the Based On menu. Click OK. 8. Edit the template text. The Edit Template window has four fields: Field Description Name The template name. HTML The HTML mail body. Click Insert Image to insert an image into the template. The image is copied to the template directory. Preview the template by clicking Preview. Text The plain text mail body. Preview the template by clicking Preview. Access Select Share this template with all users on this computer to allow other system users to access this template.
46 Transferring Files with the Application 46 The mail template supports MIME (Multipurpose Internet Mail Extensions) multipart messages. You can edit both the HTML and plain text versions of the mail body. The templates are rendered by Apache Velocity (for more information, see the Apache Velocity User Guide at Templates use two predefined variables: $formatter - Contains some utility methods $notifications - Holds the transfer notifications To iterate over notifications, use a foreach loop. A foreach loop generates content for each iteration of the loop. In the following example, a local $event variable is declared for use within the foreach loop: #foreach ($event in $notifications.getevents())... #end To generate content only under specific conditions, use a conditional statement. To construct a conditional statement, use #if, #else, and #end, with the following syntax: #if... #else... #end All conditional statements are categorized in four parts: the conditional (what must occur to trigger the action), session information (what action is triggered), time, and statistics. Conditional Use conditional tests in an if statement. For example: #if ($event.isfailed())... #end Statement Description $event.isstarted() If the transfer session is started. $event.iscompleted() If the transfer session is completed. $event.isended() If the transfer session is ended. $event.isfailed() If the transfer session is failed. Session Information Statement Description $event.getsourcehost() The source host name (or host address if the host name is not discoverable). $event.getsourcehostaddress() The source host address. $event.getsourcepaths() The source file path. $event.getdestinationhost() The destination host name (or host address if the host name is not discoverable). $event.getdestinationhostaddress() The destination host address. $event.getdestinationpath() The destination file path.
47 Transferring Files with the Application 47 Statement Description $event.getinitiatinghost() The session-initiating host name (or host address if the host name is not discoverable). $event.getinitiatinghostaddress() The session-initiating host address. $event.getid() The session ID. $event.getname() The session name. $event.gettype().getdescription() The session state. Three outputs: "STARTED", "FAILED", and "COMPLETED". $event.getuser() The transfer login. $event.getfiles() The files that are being transferred. Use this statement in a foreach loop: (Any text after ## is a comment) #foreach ($file in $event.getfiles()) ## $file is a new variable visible in this foreach loop. ## $file holds the complete file path and file name. ## $formatter.decodepath() is used to ensure a correct string decoding. $formatter.decodepath($file) #end Use the counter $velocitycount in an if statement to limit the output file count. For example, to list only the first ten files: #foreach ($file in $event.getfiles()) #if ($velocitycount > 10) #break #end $file #end $event.getmessage() The message that is entered in the Message field. $event.geterror() The error message. Time Statement Description $formatter.date(var, "lang", "format") Formatting the date and time output. Enter three values in the parenthesis: var is either $event.getstarttime() or $event.getendtime() lang is an abbreviated language name; for example, en for English. format is the display format. Use these symbols: yyyy The year; for example, MM Month of the year; for example, 03. dd Day of the month; for example, 26. HH Hour of the day; for example, 16. mm Minute. ss Second. z Time zone.
48 Transferring Files with the Application 48 Statement Description EEE The abbreviated weekday name; for example, Fri. For example, "EEE, yyyy-mm-dd HH:mm:ss z" shows Fri, :19:01 PST. $event.getstarttime() The session start time. $event.getendtime() The session end time. Statistics Statement Description $event.getsourcefilecount() The number of source files. $event.getcompletedfilecount() The number of files that successfully transferred. $event.getfailedfilecount() The number of files that failed to transfer. $event.getaverageratepercentage() The average transfer rate in bps. Enclose this statement with $formatter.formatrate() to simplify the output. $event.getaveragelosspercentage() The average packet loss percentage. $event.getsourcesizeb() The source file size. Enclose this statement with $formatter.tobestunit() to simplify the output. $event.gettransferredb() The transferred file size. Enclose this statement with $formatter.tobestunit() to simplify the output. $event.getwrittenb() The destination file size. Enclose this statement with $formatter.tobestunit() to simplify the output. 9. Click OK to save your changes. You can apply the notifications to a specific connection host or a transfer session. You can also customize the subject line of the notification s. For details, see Using Transfer Notifications. Using Transfer Notifications Transfer notifications can be sent upon transfer start, complete, and error. Follow these instructions to select and apply them to your transfer sessions: 1. Preview mail templates. Preview existing templates to decide which one to use. In the application, click Tools > Mail Templates to open the Mail Template window. Select an existing template and click. In the Edit Template window, click Preview to view the template's output example. For instructions on how to create a new template or edit an existing one, see Configuring Transfer Notifications. 2. Enable notifications for connections.

49 Transferring Files with the Application 49 To configure which s will be sent to specified recipients on specified events, click Connections on the main page of the application, select the connection, and select the Tracking tab. Select Send notifications, which enables you to do the following: Item Description When Check the events for which to send notifications. Subject Customize the subject line, which can use the same template fields as described in Configuring Transfer Notifications. To Enter the recipients, comma separated. Template Select a mail template. Message Optionally enter a message to include in the notifications. Click OK to save your changes. 3. Set up notifications for transfers. notifications can also be applied to transfer sessions. In the file browser of the application, right click the file or directory and click Upload or Download. Go to the Tracking tab and select Send notifications. Refer to the previous section for information on the settings.
50 Transferring Files with the Application 50 Reporting Checksums Enterprise Server can be configured to report source file checksums. To do so, both the server and client machines must be running Enterprise Server, Connect Server, or Point-to-Point Client version or higher. Checksum reporting is disabled by default. You can enable and configure checksum reporting on the server by using the following methods: Edit aspera.conf with asconfigurator. Set options in the client GUI. Set ascp command-line options (per-transfer configuration). Command-line options override the settings in aspera.conf and the GUI. Table of Checksum Configuration Options This table provides a summary of the checksum configuration options. See the following sections for instructions on setting the options by using asconfigurator, the application GUI, or in an ascp session. asconfigurator Option GUI Setting ascp Option file_checksum File checksum method --file-checksum=type Description Enable checksum reporting and specify the type of checksum to calculate for transferred files. any - Allow the checksum format to be whichever format the client requests. (Default in aspera.conf and the GUI) md5 - Calculate and report an MD5 checksum. sha1 - Calculate and report a SHA-1 checksum. sha256 - Calculate and report a SHA-256 checksum. sha384 - Calculate and report a SHA-384 checksum. sha512 - Calculate and report a SHA-512 checksum. Note: The default value for the ascp option is none, in which case the reported checksum is the one configured on the server, if any.
51 Transferring Files with the Application 51 asconfigurator Option GUI Setting ascp Option file_manifest File Manifest --file_manifest=output Description The file manifest is a file that contains a list of content that was transferred in a transfer session. The file name of the file manifest is automatically generated from the transfer session ID. When set to none, no file manifest is created. (Default) When set to text, a text file is generated that lists all files in each transfer session. file_manifest_path File Manifest Path --file_manifest_path=path The location where manifest files are written. The location can be an absolute path or a path relative to the transfer user's home directory. If no path is specified (default), the file is generated under the destination path at the receiver, and under the first source path at the sender. Note: File manifests can be stored only locally. Thus, if you are using S3 or other non-local storage, you must specify a local manifest path. Enabling checksum reporting by editing aspera.conf To enable checksum reporting, run the following asconfigurator command: # asconfigurator -x "set_node_data;file_checksum,checksum" To enable and configure the file manifest where checksum report data is stored, run the following commands: # asconfigurator -x "set_node_data;file_manifest,text" # asconfigurator -x "set_node_data;file_manifest_path,filepath" These commands create lines in aspera.conf as shown in the following example, where checksum type is md5, file manifest is enabled, and the path is /tmp. <file_system>... <file_checksum>md5</file_checksum> <file_manifest>text</file_manifest> <file_manifest_path>/tmp</file_manifest_path>... </file_system> Enabling checksum reporting from the GUI Click Configuration to open the Server Configuration window. Select the Global, Groups, or Users tab, depending on whether you want to enable checksum reporting for all users, or for a particular group or user. Under the File Handling tab, locate the setting for File checksum method. Check the override box and for the effective value, select any, md5, sha1, sha256, sha384, or sha512.


52 Transferring Files with the Application 52 To enable the file manifest, select the override check box for File Manifest and set the effective value to text. To set the path, select the override check box for File Manifest Path and set the effective value to the folder in which you want the manifest files saved. In the examples above, the manifest is generated when files are transferred and saved as a text file called asperatransfer-transfer_id-manifest.txt in the directory /tmp.
53 Transferring Files with the Application 53 Enabling checksum reporting in an ascp session To enable checksum reporting on a per-transfer-session basis, run ascp with the --file-checksum=hash option, where hash is sha1, md5, sha-512, sha-384, sha-256 or none. Enable the manifest with the option --file-manifest=output where output is either text or none. You can set the path to the manifest file with the option --file-manifest-path=path. For example: # ascp --file-checksum=md5 --file-manifest=text --file-manifest-path=/ tmp file aspera_user_1@ :/destination_path Setting up a Pre/Post-processing Script An alternative to enabling and configuring the file manifest to collect checksum reporting is to set up a pre/postprocessing script to report the values. The checksum of a transferred file is stored in the pre/post environment variable FILE_CSUM, which can be used in pre/post scripts to output file checksums. For example, the following script outputs the checksum to the file /tmp/ cksum.log: #!/bin/bash if [ $TYPE == File ]; then if [ $STARTSTOP == Stop ]; then echo "The file is: $FILE" >> /tmp/cksum.log echo "The file checksum is: $FILE_CSUM" >> /tmp/cksum.log chmod 777 $FILE fi fi For information on pre- and post-processing scripts and environment variables, see Pre- and Post-Processing (Prepost).
54 Managing Users in the GUI 54 Managing Users in the GUI Setting Up Users Note: This topic describes setting up transfer user accounts with the GUI. If you are setting up users in a terminal, see Setting Up Transfer Users (Terminal). The Aspera server uses your system accounts to authenticate connections from remote clients. The system users must be added and configured as Aspera transfer users before remote clients can run FASP transfers with the server. When creating transfer users, you may also specify user-specific settings, such as transfer bandwidth, docroot, and file handling. Follow the steps below to configure a system user account as an Aspera transfer user. 1. Restrict user permissions with aspshell. By default, all system users can establish a FASP connection and are only restricted by file permissions. You can restrict the user's file operations through the aspshell, which permits only the following operations: Running Aspera uploads and downloads to or from this computer. Establishing connections in the application. Browsing, listing, creating, renaming, or deleting contents. These instructions explain one way to change a user account so that it uses the aspshell; there may be other ways to do so on your system. Open the following file with a text editor: /etc/passwd Add or replace the user's shell with aspshell. For example, to apply aspshell to the user aspera_user_1, use the following settings in this file:... aspera_user_1:x:501:501:...:/home/aspera_user_1:/bin/aspshell Launch the Aspera server as root. Run the following command as root: # asperascp 3. Click Configuration to open the configuration settings window. 4. Add a system user to your Aspera server.

, select the Override box for Absolute Path and enter or select an existing path as the user's docroot --")
55 Managing Users in the GUI 55 In Server Configuration, select the Users tab and click the button to add a new user. In the Add User dialog, enter the username, then click OK. Note: Usernames cannot contain the "@" symbol, except when using the user@domain format. For additional information, see Product Limitations. 5. Set the user's docroot. You can limit a user's access to a given directory using the document root (docroot). The docroot can be set for individual users, groups, and globally. Individual user docroot: In the user's Docroot tab (Configuration > Users >username > Docroot), select the Override box for Absolute Path and enter or select an existing path as the user's docroot -- for example, / sandbox/aspera_user_1. Make sure that at least the Read Allowed and Browse Allowed are set to true. When finished, click OK or Apply. Global docroot: To set up a global docroot, in the Server Configuration window, click the Global tab. In the Docroot tab, select the Override box and enter the docroot into the Absolute Path field. This value will be duplicated in all user settings. If there is a pattern in the docroot of each user, for example, /sandbox/username, you can use a substitutional string. This allows you to assign an independent docroot to each user without setting it individually for each user. Substitutional String Definition Example $(name) system user's name /sandbox/$(name) $(home) system user's home directory $(home)/documents

56 Managing Users in the GUI Configure other settings for the specific user. These settings are located in the Docroot, Authorization, Bandwidth, Network, File Handling and Precedence tabs. Follow the hyperlinks in the table below for additional information. Category Description Document Root The document root settings. Authorization Connection permissions, token key, and encryption requirements. Bandwidth Incoming and outgoing transfer bandwidth and policy settings. Network Network IP, port, and socket buffer settings. File Handling File handling settings, such as file block size, overwrite rules, and exclude pattern. Setting Up Groups Note: These instructions describe how to set up transfer/user groups within the GUI. If you are configuring transfer/user groups within a Terminal, please refer to Setting Up Transfer Groups (Terminal). You can set up transfer settings based on your system user groups. If users belong to a group and do not have individual transfer settings, then the group's transfer settings will be applied. System user groups must be created prior to being added to Enterprise Server, they cannot be created in the GUI. Follow the steps below to add user groups to Enterprise Server. 1. Identify or create the user group(s) that you would like to add. For information on creating user groups, see your operating system documentation. 2. Launch the Aspera server as root. Run the following command as root: # asperascp 3. Click Configuration to open the configuration settings window.

57 Managing Users in the GUI Add the user group to your Aspera server. In the Server Configuration window, click the Groups tab then click and input the group's name. 5. Configure the group's transfer settings. These settings are located in the Docroot, Authorization, Bandwidth, Network, File Handling and Precedence tabs. Follow the hyperlinks in the table below for additional information. Category Description Document Root The document root settings. Authorization Connection permissions, token key, and encryption requirements. Bandwidth Incoming and outgoing transfer bandwidth and policy settings. Network Network IP, port, and socket buffer settings. File Handling File handling settings, such as file block size, overwrite rules, and exclude pattern. Configuration Precedence When a user is a member of multiple groups, the precedence setting can be used to determine priority. Configuration Precedence Enterprise Server gives precedence to settings as follows, where user settings have the highest priority and default settings have the lowest User Group (if a user belongs to more than one group, a precedence can be set for each group.) Global Default The table below shows the setting values that a user aspera_user_1 is assigned in bold. In this example, aspera_user_1 is a member of both the admin and xfer groups. The admin group's precedence setting is 0, which supersedes the xfer group's setting of 1: Options User aspera_user_1's Settings Group admin's Settings Group xfer's Settings Global Settings Default Settings Target rate 5M 10M 15M 40M 45M
58 Managing Users in the GUI 58 Options User aspera_user_1's Settings Group admin's Settings Group xfer's Settings Global Settings Default Settings Min rate n/a 2M 8M 3M 0 Policy n/a n/a Low Fair Fair Docroot n/a n/a n/a /pod/ $(name) n/a Encryption n/a n/a n/a n/a any Configuring Precedence of Groups You can configure a group's precedence from the GUI or by editing aspera.conf. GUI: To configure it from the GUI, launch the application and click Configuration. In the Server Configuration dialog, select the Groups tab, choose a group, and select the Precedence tab. (The Precedence tab does not appear if there are no groups.) Select the Override checkbox and enter a precedence number for the group. Note: A group's precedence setting must be greater than or equal to 0, where 0 is the highest precedence level. Editing aspera.conf: You can configure a group's precedence in aspera.conf by running the following asconfigurator command: # asconfigurator -x "set_group_data;group_name,group_name;precedence,value" Note: A group's precedence setting must be greater than or equal to 0, where 0 is the highest precedence level. This adds a <group> section to aspera.conf like the one below. In this example, group "admin" has higher precedence than group "xfer". <groups> <group> <name>admin</name> <precedence>0</precedence>... </group> <group> <name>xfer</name>
59 Managing Users in the GUI 59 <precedence>1</precedence>... </group> </groups> You can also edit aspera.conf manually by opening it with administrative privileges: /opt/aspera/etc/aspera.conf In the file, locate the entry for each group, add the <precedence> option, and assign a precedence value as shown in the example above. After editing the file, validate the XML form and option values by running the following command: # /opt/aspera/bin/asuserdata -v Setting Up a User's Public Key on the Server Public key authentication is an alternative to password authentication, providing a more secure authentication method that allows users to avoid entering or storing a password, or sending it over the network. A user generates a key pair (a public key and a private key) on the client computer and provides the public key to the administrator of the remote computer running Enterprise Server. The administrator sets up the client user's public key as described in the steps below. For information on how to create public keys, see Creating SSH Keys in the GUI or Creating SSH Keys (Command Line). 1. Obtain the client user's public key. The client user should send you a secure with the public key pasted in the message body or attached as a text file. 2. Install the public key in the user account on the server. In the home directory of the account that clients will use to access the server, create a directory called.ssh (if it doesn't already exist). In that folder, save the key file and name it authorized_keys. If authorized_keys already exists, append the key file to it. In the example that follows: aspera_user_1 is the server user account. /tmp/id_rsa.pub is where you have saved the public key. /home/aspera_user_1/.ssh/authorized_keys is where to install the public key Run the following commands to install the client's public key: # mkdir /home/aspera_user_1/.ssh # cat /tmp/id_rsa.pub > /home/aspera_user_1/.ssh/authorized_keys Run the following commands to change the key directory and keyfile's ownership to user aspera_user_1, to allow access by the aspera_user_1 group, and to set permission bits: # # # # chown chmod chmod chmod -R aspera_user_1:aspera_user_1 /home/aspera_user_1/.ssh 700 /home/aspera_user_1 700 /home/aspera_user_1/.ssh 600 /home/aspera_user_1/.ssh/authorized_keys
60 Managing Users in the GUI 60 Testing a User-Initiated Remote Transfer Follow the steps below to test an incoming connection from a remote client machine to the Enterprise Server. Prerequisites: The client machine must have an Aspera transfer product, such as IBM Aspera Desktop Client or IBM Aspera CLI, installed on it. Aspera CLI, the command line client, is freely available for download from the following site: The server must have at least one Aspera transfer user (a system user account that is configured to authenticate Aspera transfers) configured on it. For instructions on adding a transfer user, see Setting Up Users or Setting Up Transfer Users (Terminal). 1. On the client machine, verify your connection to Enterprise Server. Run a ping command to verify connectivity to the host. In this example, the address of Enterprise Server is and the output shows successful responses from the host. # ping PING ( ): 56 data bytes 64 bytes from : icmp_seq=0 ttl=64 64 bytes from : icmp_seq=1 ttl=64 64 bytes from : icmp_seq=2 ttl=64 64 bytes from : icmp_seq=3 ttl=64 64 bytes from : icmp_seq=4 ttl=64... time=8.432 time=7.121 time=5.116 time=4.421 time=3.050 ms ms ms ms ms If the output returns "Destination host unreachable," check the firewall configuration of the server. For more information, see Clients Can't Establish Connection. 2. On your client machine, initiate a transfer to Enterprise Server. Run the following command on your client machine (where aspera_user_1 is the example transfer user): # ascp -P T --policy=fair -l m 1000 /client-dir/files aspera_user_1@ :/dir This command specifies the following values for the transfer: Item Value Host Address Transfer User aspera_user_1 Files to upload /client-dir/files Destination Folder {user's docroot}/dir Transfer Options Maximum transfer rate = 10 Mbps (-l 10000) Minimum transfer rate = 1 Mbps (-m 1000) TCP port that is used to initiate the FASP session = (-P 33001). This command does not alter ascp or the configuration of your SSH server. Disable encryption (-T) Fair transfer policy (--policy=fair) If you cannot establish a connection to Enterprise Server, see Clients Can't Establish Connection.
61 Managing Global Transfer Settings in the GUI 61 Managing Global Transfer Settings in the GUI Global Bandwidth Settings (GUI) Aspera FASP transport has no theoretical throughput limit. Other than the network capacity, the transfer speed can be limited by user-configured rate settings and the resources of the local and remote machines. To set the transfer bandwidth for all FASP transfers, launch the application with administrator privileges and click Tools > Global Preferences. In the Global Preferences dialog, click Transfers. This window provides the following options: Item Description System-Wide Settings The aggregated bandwidth cap for all FASP transfers on this computer. For more advanced bandwidth settings, see Bandwidth. Default Target Rate The initial download and upload rates for all transfers. Maximum Active Transfers The maximum number of concurrent upload transfers and download transfers.

 and applies them to the default transfer settings.")
62 Managing Global Transfer Settings in the GUI 62 To override the default bandwidth limits, under System-Wide Settings select the boxes next to Limit Download Bandwidth and Limit Upload Bandwidth and enter new values in the fields. The global settings for download and upload bandwidth limits cannot be reset by non-admin users. However, users can view the global limit from the Preferences > Transfers dialog. Note: When global bandwidth limits are set, the application creates virtual links (Vlink) and applies them to the default transfer settings. For more information about Vlinks, see Setting Up Virtual Links (GUI). To set default target rates for uploads and downloads, enter new values in the fields next to Default Target Rate. To adjust the maximum active transfers for all users, enter new values in the fields next to Maximum Active Transfers. Non-admin users can adjust their personal default target rates and maximum active transfers above or below the default values. Setting Up Virtual Links (GUI) Virtual link (Vlink) is a feature that allows "virtual" bandwidth caps. Transfer sessions that are assigned to the same "virtual" link conform to the aggregate bandwidth cap and attain an equal share of it. Once you set up Vlinks, you can apply them in global or user settings. Note: To configure Vlinks, you must run your Aspera application as a root user in order to access the Configuration window. 1. Create a Vlink. Launch the application with administrator privileges and click Configuration > Vlinks. Click to add a new Vlink entry; enter a number between 1 and 255 and click OK. 2. Configure the Vlink.

63 Managing Global Transfer Settings in the GUI 63 Once the Vlink is created, you can name it, activitate it, and set the bandwidth capacity cap. See the table below for details. Field Description Values Default Vlink Name The Vlink name. This value has no impact on actual bandwidth capping. text string blank On Select true to activate the Vlink; select true or false false to deactivate it. false Capacity (kbps) Set the virtual bandwidth cap in Kbps. positive integer in When you apply the Vlink to a transfer Kbps (see below), the total bandwidth of all transfers assigned to this vlink is restricted to this value Apply a Vlink to a transfer. You can assign a Vlink to global or user settings. The example below assigns a Vlink to a user's incoming transfer session. In the Configuration window, click the Users tab and select the user to whose transfers you want to apply the Vlink. In the right panel, click the Bandwidth tab, select the override box in the Incoming Vlink ID row and select the Vlink to apply from the drop-down menu: Configuring the Transfer Server (GUI) Note: To configure the transfer server, you must run the application with admin or root privileges in order to enable the Configuration screen. Launching the Application and Opening the Configuration Window Run the following command as root: # asperascp Click Configuration. Configuring the Transfer Server

64 Managing Global Transfer Settings in the GUI 64 To configure the computer's Aspera Central transfer server, click Global tab in the left panel and select the Transfer Server. The Aspera Central transfer server's configuration parameters include: Setting Description Values Default Address The network interface address on which the transfer server listens. The default value of enables the transfer server to accept transfer requests from the local computer. If you set the address to , the transfer server can accept requests on all network interfaces. Alternatively, a specific network interface address may be specified. Valid IPv4 address Port The port on which the transfer server accepts transfer requests. Positive integer Persistent Storage Retain data that is stored in the database between reboots Enable or Disable Enable of Aspera Central. Persistent Storage The location in which to store data between reboots of Path Aspera Central. If the path is a directory, then a file is created with the default name central-store.db. Otherwise, the file is named as specified in the path. Valid system path If the application is installed in the default location, then the path is the following: /opt/ aspera/var/ Maximum Age (seconds) Maximum allowable age (in seconds) of data to be retained in the database. Positive integer Exit Central on Storage Error The behavior of the Aspera Central server if a database write error occurs. Ignore or Exit Ignore Compact Database on Startup Enable or disable compacting (vacuuming) the database when the transfer server starts. Enable or Disable Enable
65 Managing Global Transfer Settings in the GUI 65 Setting Description Values Default Files Per Session The maximum number of files that can be retained for persistent storage. Positive integer 1000 Ignore Empty Files Set to true to block the logging of zero-byte files. true or false true Ignore Notransfer Files Set to true to block the logging of files that were not transferred because they exist at the destination. true or false true
66 Managing Users from the Command Line 66 Managing Users from the Command Line Setting Up Transfer Users (Terminal) Aspera transfer products use system accounts to authenticate transfers, but these accounts require additional configuration. You can set global values for default transfer rate, docroot, and file handling rules, and can also specify user-specific settings. Follow these steps to set up transfer accounts in a command terminal: 1. Create default (global) transfer settings. To set default values to authorize transfers in and out, set the encryption key, and set the default docroot for all users, run the following commands (if not already set): $ $ $ $ asconfigurator asconfigurator asconfigurator asconfigurator -x -x -x -x "set_node_data;authorization_transfer_in_value,allow" "set_node_data;authorization_transfer_out_value,allow" "set_node_data;token_encryption_key,token_key" "set_node_data;absolute,docroot" These create the following lines in aspera.conf, found in the following location: /opt/aspera/etc/aspera.conf In the example below, the encryption key is secret and the default docroot is /sandbox/$(name). The substitutional string $(name) in the docroot setting can be used if your system users docroot settings have a pattern -- for example, /sandbox/(user name). This way you can assign independent docroot to each user by setting only the default docroot, instead of adding docroot for each user. <CONF version="2">... <default> <authorization> <transfer> <in> <value>allow</value> </in> <out> <value>allow</value> </out> </transfer> <token> <encryption_key>secret</encryption_key> </token> </authorization> <file_system> <access> <paths> <path> <absolute>/sandbox/$(name)</absolute> </path> </paths> </access> </file_system>... </default> </CONF>
67 Managing Users from the Command Line Restrict user permissions with aspshell. By default, all system users can establish a FASP connection and are only restricted by file permissions. You can restrict the user's file operations through the aspshell, which permits only the following operations: Running Aspera uploads and downloads to or from this computer. Establishing connections in the application. Browsing, listing, creating, renaming, or deleting contents. These instructions explain one way to change a user account so that it uses the aspshell; there may be other ways to do so on your system. Open the following file with a text editor: /etc/passwd Add or replace the user's shell with aspshell. For example, to apply aspshell to the user aspera_user_1, use the following settings in this file:... aspera_user_1:x:501:501:...:/home/aspera_user_1:/bin/aspshell Configure user-specific transfer settings. Besides the default (global) transfer settings, you can also create user-specific and group-specific transfer settings. The user-specific settings have the highest priority, overriding both group and global settings. To set user-specific values to authorize transfers in and out, set the user's docroot and target rate, then run the following commands: asconfigurator -x "set_user_data;user_name,username;authorization_transfer_in_value,allow" $ asconfigurator -x "set_user_data;user_name,username;authorization_transfer_out_value,allow" $ asconfigurator -x "set_user_data;user_name,username;absolute,docroot" $ asconfigurator -x "set_user_data;user_name,username;transfer_in_bandwidth_flow_target_rate_default,rate $ asconfigurator -x "set_user_data;user_name,username;transfer_out_bandwidth_flow_target_rate_default,rat $ These commands add the following section to aspera.conf, found in: /opt/aspera/etc/aspera.conf <?xml version='1.0' encoding='utf-8'?> <CONF version="2"> <aaa> <realms> <realm> <users> <user> <name>username</name> <authorization> <transfer> <in> <value>allow</value> </in> <out> <value>allow</value> </out> </transfer> </authorization> <file_system> <access>
68 Managing Users from the Command Line 68 <paths> <path> <absolute>docroot</absolute> </path> </paths> </access> </file_system> <transfer> <in> <bandwidth> <flow> <target_rate> <default>rate_in</default> </target_rate> </flow> </bandwidth> </in> <out> <bandwidth> <flow> <target_rate> <default>rate_out</default> </target_rate> </flow> </bandwidth> </out> </transfer> </user> </users> </realm> </realms> </aaa>... </CONF> For more information about other user settings, see aspera.conf - Authorization, aspera.conf - Transfer, and aspera.conf - File System. 4. Verify the configuration. If you modify aspera.conf by editing the text, use the following command to verify the XML form and values: # /opt/aspera/bin/asuserdata -v 5. Restart asperanoded and asperacentral to activate your changes. Run the following commands to restart asperanoded: # /etc/init.d/asperanoded restart Run the following command in a Terminal window to restart asperacentral: # /etc/init.d/asperacentral restart Setting Up Transfer Groups (Terminal) You can set up transfer settings based on your system's user groups. If users within a group do not have individual transfer settings, then the group's transfer settings will be applied. Please note that Enterprise Server doesn't create user groups on the operating system for you, so you must ensure that the groups currently exist before adding them to your Aspera product. Follow the steps below to add user groups to Enterprise Server in a Terminal.
69 Managing Users from the Command Line Determine the user groups you would like to add to your Aspera transfer product. Ensure that you have an existing user group on your operating system, or create a new user group. Please refer to your operating system's documentation for information on creating user groups. Enterprise Server reads group information from the following file: /etc/group 2. Add the user group to your Aspera transfer product When a transfer group is specified, it overwrites global settings and applies group configuration to corresponding users. To add group-specific transfer settings, you can use asconfigurator commands with the following syntax: # asconfigurator -x "set_group_data;group_name,groupname;parameter,value" For more information on available settings, see User, Group and Default Configurations and the references in the table below. Category Description Configuration Precedence When a user is a member of multiple groups, the precedence setting can be used to determine priority. aspera.conf - Authorization Connection permissions, token key, and encryption requirements. aspera.conf - Transfer Incoming and outgoing transfer bandwidth and policy settings. aspera.conf - File System Docroot, file and directory creation, access permissions, block sizes, and so on. You can also manually edit aspera.conf with a text editor. /opt/aspera/etc/aspera.conf Add the following section to aspera.conf: <?xml version='1.0' encoding='utf-8'?> <CONF version="2"> <aaa> <realms> <realm> <users>... <!-- user-specific settings --> </users> <groups> <group> <!-- Each group tag contains a group's profile. --> <name>aspgroup</name> <!-- The group name. --> <precedence>0</precedence> <!-- Group precedence. --> <authorization>...</authorization> <!-- Authorization settings. --> <transfer>...</transfer> <!-- Transfer settings. --> <file_system>...</file_system> <!-- File System settings. --> </group> <group>... <!-- Another group's settings--> </group> </groups> </realm> <realms> </aaa>... </CONF> 3. Verify your configuration.
70 Managing Users from the Command Line 70 When you have finished updating the group's settings in aspera.conf, use the following command to verify it (in this example, verify the group asp-group's settings): # /opt/aspera/bin/asuserdata -g asp-group 4. Restart asperanoded and asperacentral to activate your changes. Run the following commands to restart asperanoded: # /etc/init.d/asperanoded restart Run the following command in a Terminal window to restart asperacentral: # /etc/init.d/asperacentral restart Configuration Precedence Enterprise Server gives precedence to settings as follows, where user settings have the highest priority and default settings have the lowest User Group (if a user belongs to more than one group, a precedence can be set for each group.) Global Default The table below shows the setting values that a user aspera_user_1 is assigned in bold. In this example, aspera_user_1 is a member of both the admin and xfer groups. The admin group's precedence setting is 0, which supersedes the xfer group's setting of 1: Options User aspera_user_1's Settings Group admin's Settings Group xfer's Settings Global Settings Default Settings Target rate 5M 10M 15M 40M 45M Min rate n/a 2M 8M 3M 0 Policy n/a n/a Low Fair Fair Docroot n/a n/a n/a /pod/ $(name) n/a Encryption n/a n/a n/a n/a any Configuring Precedence of Groups You can configure a group's precedence from the GUI or by editing aspera.conf. GUI: To configure it from the GUI, launch the application and click Configuration.
 Select the Override checkbox and enter a precedence number for the group.")
71 Managing Users from the Command Line 71 In the Server Configuration dialog, select the Groups tab, choose a group, and select the Precedence tab. (The Precedence tab does not appear if there are no groups.) Select the Override checkbox and enter a precedence number for the group. Note: A group's precedence setting must be greater than or equal to 0, where 0 is the highest precedence level. Editing aspera.conf: You can configure a group's precedence in aspera.conf by running the following asconfigurator command: # asconfigurator -x "set_group_data;group_name,group_name;precedence,value" Note: A group's precedence setting must be greater than or equal to 0, where 0 is the highest precedence level. This adds a <group> section to aspera.conf like the one below. In this example, group "admin" has higher precedence than group "xfer". <groups> <group> <name>admin</name> <precedence>0</precedence>... </group> <group> <name>xfer</name> <precedence>1</precedence>... </group> </groups> You can also edit aspera.conf manually by opening it with administrative privileges: /opt/aspera/etc/aspera.conf In the file, locate the entry for each group, add the <precedence> option, and assign a precedence value as shown in the example above. After editing the file, validate the XML form and option values by running the following command: # /opt/aspera/bin/asuserdata -v Setting Up a User's Public Key on the Server Public key authentication is an alternative to password authentication, providing a more secure authentication method that allows users to avoid entering or storing a password, or sending it over the network. A user generates a key pair (a public key and a private key) on the client computer and provides the public key to the administrator of the remote computer running Enterprise Server. The administrator sets up the client user's public key as described in the steps below. For information on how to create public keys, see Creating SSH Keys in the GUI or Creating SSH Keys (Command Line). 1. Obtain the client user's public key.
72 Managing Users from the Command Line 72 The client user should send you a secure with the public key pasted in the message body or attached as a text file. 2. Install the public key in the user account on the server. In the home directory of the account that clients will use to access the server, create a directory called.ssh (if it doesn't already exist). In that folder, save the key file and name it authorized_keys. If authorized_keys already exists, append the key file to it. In the example that follows: aspera_user_1 is the server user account. /tmp/id_rsa.pub is where you have saved the public key. /home/aspera_user_1/.ssh/authorized_keys is where to install the public key Run the following commands to install the client's public key: # mkdir /home/aspera_user_1/.ssh # cat /tmp/id_rsa.pub > /home/aspera_user_1/.ssh/authorized_keys Run the following commands to change the key directory and keyfile's ownership to user aspera_user_1, to allow access by the aspera_user_1 group, and to set permission bits: # # # # chown chmod chmod chmod -R aspera_user_1:aspera_user_1 /home/aspera_user_1/.ssh 700 /home/aspera_user_1 700 /home/aspera_user_1/.ssh 600 /home/aspera_user_1/.ssh/authorized_keys Testing a User-Initiated Remote Transfer Follow the steps below to test an incoming connection from a remote client machine to the Enterprise Server. Prerequisites: The client machine must have an Aspera transfer product, such as IBM Aspera Desktop Client or IBM Aspera CLI, installed on it. Aspera CLI, the command line client, is freely available for download from the following site: The server must have at least one Aspera transfer user (a system user account that is configured to authenticate Aspera transfers) configured on it. For instructions on adding a transfer user, see Setting Up Users or Setting Up Transfer Users (Terminal). 1. On the client machine, verify your connection to Enterprise Server. Run a ping command to verify connectivity to the host. In this example, the address of Enterprise Server is and the output shows successful responses from the host. # ping PING ( ): 56 data bytes 64 bytes from : icmp_seq=0 ttl=64 64 bytes from : icmp_seq=1 ttl=64 64 bytes from : icmp_seq=2 ttl=64 64 bytes from : icmp_seq=3 ttl=64 64 bytes from : icmp_seq=4 ttl=64... time=8.432 time=7.121 time=5.116 time=4.421 time=3.050 ms ms ms ms ms If the output returns "Destination host unreachable," check the firewall configuration of the server. For more information, see Clients Can't Establish Connection. 2. On your client machine, initiate a transfer to Enterprise Server.
73 Managing Users from the Command Line 73 Run the following command on your client machine (where aspera_user_1 is the example transfer user): # ascp -P T --policy=fair -l m 1000 /client-dir/files aspera_user_1@ :/dir This command specifies the following values for the transfer: Item Value Host Address Transfer User aspera_user_1 Files to upload /client-dir/files Destination Folder {user's docroot}/dir Transfer Options Maximum transfer rate = 10 Mbps (-l 10000) Minimum transfer rate = 1 Mbps (-m 1000) TCP port that is used to initiate the FASP session = (-P 33001). This command does not alter ascp or the configuration of your SSH server. Disable encryption (-T) Fair transfer policy (--policy=fair) If you cannot establish a connection to Enterprise Server, see Clients Can't Establish Connection.
74 Managing Global Transfer Settings from the Command Line 74 Managing Global Transfer Settings from the Command Line Global Bandwidth Settings (Command Line) To configure global bandwidth preferences using asconfigurator commands, you first create a Vlink for each bandwidth setting and then assign the Vlink to the transfer. In the following example, Vlink 108 is used to limit the upload bandwidth (outgoing transfers) to 88 Mbps (88000 Kbps) and Vlink 109 is used to limit the download bandwidth (incoming transfers) to 99 Mbps (99000 Kbps). # asconfigurator -x "set_trunk_data;id,108;trunk_capacity,88000;trunk_on,true" # asconfigurator -x "set_trunk_data;id,109;trunk_capacity,99000;trunk_on,true" # asconfigurator -x "set_node_data;transfer_in_bandwidth_aggregate_trunk_id,108" # asconfigurator -x "set_node_data;transfer_out_bandwidth_aggregate_trunk_id,109" The commands create the following lines in aspera.conf. <?xml version='1.0' encoding='utf-8'?> <CONF version="2">... <trunks> <trunk> <!-- Create a Vlink with Kbps bandwidth cap. --> <id>108</id> <!-- ID: > <capacity> <schedule format="ranges">88000</schedule> </capacity> <on>true</on> </trunk> <trunk> <!-- Create a Vlink with Kbps bandwidth cap. --> <id>109</id> <!-- ID: > <capacity> <schedule format="ranges">99000</schedule> </capacity> <on>true</on> </trunk> </trunks> <default> <!-- Global settings.--> <transfer> <out> <!-- Use Vlink ID: 108 for global outgoing bandwidth. --> <bandwidth><aggregate><trunk_id>108</trunk_id></aggregate></ bandwidth> </out> <in> <!-- Use Vlink ID: 109 for global incoming bandwidth. --> <bandwidth><aggregate><trunk_id>109</trunk_id></aggregate></ bandwidth> </in> </transfer> </default> </CONF>
75 Managing Global Transfer Settings from the Command Line 75 The capacity of the Vlink is set within a <schedule> tag because the capacity can be scheduled as one value during a specified time period, and a default value at all other times. For more information on this configuration, see the knowledge base article Specifiying a time varying schedule for a Vlink at articles/ specifying-a-time-varying-schedule-for-a-vlink. You can edit aspera.conf manually, rather than running asconfigurator commands, by opening the file with write permissions from the following location: /opt/aspera/etc/aspera.conf Validate the aspera.conf file using the asuserdata utility: # /opt/aspera/bin/asuserdata -v Setting Up Virtual Links (Command Line) Virtual link (Vlink) is a feature that allows "virtual" bandwidth caps. Transfer sessions assigned to the same "virtual" link conform to the aggregate bandwidth cap and attain an equal share of it. This section first shows you how to set up Vlinks, then explains how to apply it to computers or users. Follow these steps to configure Vlinks: 1. Create Vlinks in aspera.conf using asconfigurator To create a Vlink using asconfigurator, run the following command: # asconfigurator -x "set_trunk_data;id,vlink_id;trunk_capacity,bandwidth;trunk_on,true" You can also specify a multicast port and time-to-live, among other settings. To see a complete list of parameters with their corresponding asconfigurator commands, run the following command: # /opt/aspera/bin/asuserdata -+ See the table below for a description of several parameters: Tag Description Values Default Vlink ID The Vlink ID. Sessions assigned with the positive integer between 1 N/A same trunk ID share the same bandwidth cap. and 255. Vlink Name The Vlink name. This value has no impact on text string actual bandwidth capping. blank Capacity This value reflects the virtual bandwidth cap in Kbps. When applying this Vlink to a transfer (e.g. Default outgoing), the transfer's bandwidth will be restricted by this value. positive integer in Kbps On Select true to activate this Vlink; select false to deactivate it. true/false false Multicast Port This sets the UDP port through which positive integer between virtual link sends and receives multicast and communication messages. Sessions sharing the same virtual bandwidth cap needs to have the same port number. To avoid port conflicts, it is recommended to use the default UDP port Do NOT set the port number
76 Managing Global Transfer Settings from the Command Line 76 Tag Description Values Default to the same one used by FASP data transfer (33001). Important: If you have a local firewall on your server (for example, Windows firewall, Linux iptables, or Mac ipfw), you will need to allow the Vlink UDP port (55001, by default) for multicast traffic. Multicast TTL This sets the Time-to-Live (TTL) field in the IP header for Vlink multicast packets. positive integer between 1 blank and 255 For example, to create a Vlink with an ID of 108, named "50Mbps cap", with a capacity of 50 Mbps (50000 kbps), run the following command: # asconfigurator -x "set_trunk_data;id,108;trunk_name,50mbps cap;trunk_capacity,50000;trunk_on,true" This creates the following text in aspera.conf: <CONF version="2">... <trunks> <trunk> <id>108</id> <name>50mbps cap</name> <capacity> <schedule format="ranges">50000</schedule> </capacity> <on>true</on> </trunk> </trunks> </CONF> <!-- Vlink ID --> <!-- Vlink Name --> <!-- Capacity --> <!-- On --> The capacity of the Vlink is set within a <schedule> tag because the capacity can be scheduled as one value during a specified time period, and a default value at all other times. For more information on this configuration, see the knowledge base article Specifiying a time varying schedule for a Vlink at hc/en-us/articles/ specifying-a-time-varying-schedule-for-a-vlink. You can edit aspera.conf manually, rather than running asconfigurator commands, by opening the file with write permissions from the following location: /opt/aspera/etc/aspera.conf Validate the aspera.conf file using the asuserdata utility: # /opt/aspera/bin/asuserdata -v 2. Apply a Vlink to a transfer You can assign a Vlink to global, group, or user settings for transfers in and out, as in the following commands: # asconfigurator -x "set_node_data;transfer_in_bandwidth_aggregate_trunk_id,id" # asconfigurator -x "set_group_data;group_name,groupname;transfer_out_bandwidth_aggregate_trunk_id,id" # asconfigurator -x "set_user_data;user_name,username;transfer_out_bandwidth_aggregate_trunk_id,id"
77 Managing Global Transfer Settings from the Command Line 77 For example, to set Vlink 108 as the default for transfers out and set Vlink 109 to the user aspera_user_1 for transfers out, you would run the following commands: # asconfigurator -x "set_node_data;transfer_out_bandwidth_aggregate_trunk_id,108" # asconfigurator -x "set_user_data;user_name,aspera_user_1;transfer_out_bandwidth_aggregate_trunk_id,109" These commands add the following lines to aspera.conf: <CONF version="2">... <default> <transfer> <out> <bandwidth><aggregate> <trunk_id>108</trunk_id> <!-- Vlink #108 for the default outgoing sessions. --> </aggregate></bandwidth> </out> <in>... </in> </transfer> </default> <aaa><realms><realm> <users> <user> <name>aspera_user_1</name> <transfer> <out> <bandwidth><aggregate> <trunk_id>109</trunk_id> <!-- Vlink #109 to the user aspera_user_1's outgoing sessions. --> </aggregate></bandwidth> </out> <in>... </in> </transfer> </user> </users> </realm></realms></aaa> </CONF> You can also manually edit aspera.conf, as described in the previous step. Configuring the Transfer Server (Command Line) To configure the Aspera Central transfer server in a Terminal, you can run asconfigurator commands with the following syntax: # asconfigurator -x "set_central_server_data;parameter,value" The Aspera Central transfer server's configuration parameters include:
78 Managing Global Transfer Settings from the Command Line 78 asconfigurator Description and aspera.conf parameter Values Default address This is the network interface address on which the Valid IPv4 transfer server listens. The default value address enables the transfer server to accept transfer requests from the local computer; The value allows the transfer server to accept requests on all network interfaces for this node. Alternatively, a specific network interface address may be specified port The port at which the transfer server accepts transfer requests Positive integer between 1 and persistent_store Retain data that is stored in the database between reboots of Aspera Central. Enable Disable Enable files_per_session The maximum number of files that can be retained for persistent storage. Positive integer 1000 persistent_store_path Path to store data between reboots of Aspera Central. If the path is currently a directory, then a file is created with the default name central-store.db. Otherwise, the file will be named as specified in the path. Valid system path /opt/ aspera/var/ persistent_store_max_age Maximum allowable age (in seconds) of data to be retained in the database. Positive integer (assuming the product is installed in the default location) persistent_store_on_error Terminate the Aspera Central server if an error writing to the database occurs. Ignore Exit Ignore compact_on_startup Enable or disable compacting (vacuuming) the database when the transfer server starts. Enable Disable Enable For more information on running asconfigurator commands to configure the Central Server, see Central Server Configurations. Running asconfigurator commands for the parameters in the table above creates text similar to the following in aspera.conf: <CONF version="2">... <central_server> <address> </address> <!-- Address --> <port>40001</port> <!-- Port --> <persistent_store>enable</persistent_store> <!-- Persistent store --> <files_per_session>1000</files_per_session> <!-- Files per session --> <persistent_store_path>blank</persistent_store_path> <!-- Persistent store path --> <persistent_store_max_age>86400</persistent_store_max_age> <!-- Max Age (sec) --> <persistent_store_on_error>ignore</persistent_store_on_error> <!-- Ignore on error -->
79 Managing Global Transfer Settings from the Command Line 79 <compact_on_startup>enable</compact_on_startup> startup--> </central_server> </CONF> <!-- Compact on You can edit aspera.conf manually, rather than running asconfigurator commands, by opening the file with write permissions from the following location: /opt/aspera/etc/aspera.conf Validate the aspera.conf file using the asuserdata utility: # /opt/aspera/bin/asuserdata -v
80 General Configuration Reference 80 General Configuration Reference Configuration Methods Users, groups, and transfers can be configured in several ways, all of which modify the XML file aspera.conf. In the GUI Click Configuration to open the Configuration Manager. For descriptions of the configuration settings available in the GUI, see Document Root, Authorization, Bandwidth, Network, and File Handling. Manually editing aspera.conf Open aspera.conf in a text editor with write permission and add or edit the text in XML format. For templates of aspera.conf parameter settings, see aspera.conf - Authorization, aspera.conf - Transfer, and aspera.conf File System. You can find aspera.conf in the following location: /opt/aspera/etc/aspera.conf Running asconfigurator commands Run asconfigurator commands from a Terminal window to automatically insert parameter settings as wellformed XML into aspera.conf. For a description of asconfigurator syntax and a list of parameters and values, see the Asconfigurator Reference. For more description of the parameters and values, see the aspera.conf references listed above. Document Root Aspera strongly recommends setting a docroot (a limited area of the server's file system) for Aspera users. The default blank configuration gives users full access to the server's file system with read, write, and browse privileges. To configure the docroot options, click Configuration and set configurations for Global, Groups, and Users under their respective Docroot tabs. Select Override in the Absolute Path row to set a docroot and adjust read, write, and browse privileges. User docroot settings take precedence over group settings, which take precedence over global settings. The following table describes the docroot configuration options:
81 General Configuration Reference 81 Field Description Values Default Absolute Path The docroot: the area of the file system that is accessible to Aspera users. The default empty value gives users access to the entire file system. You can set one global docroot and then further restrict access to the file system by group or individual user. Docroot paths require specific formatting depending on where the transfer server's storage is located. file path or URI undefined (total access) Format examples Local storage absolute path /home/bear/movies Local storage in URI format (required for server-side encryption-at-rest, not supported by the Aspera Watch Service) file:////home/bear/movies Cloud or on-premises object storage For more information, see Setting Docroots for Object Storage and HDFS. You can also set multiple docroots and make them conditional based on the IP address from which the connection is made by editing aspera.conf. To do so, edit the absolute path setting by adding the IP address using the following syntax: <absolute peer_ip="ip_address">path</ absolute> Read Allowed Setting this to true (default) allows users to transfer from the designated area of the file system as specified by the Absolute Path value. true false true Write Allowed Setting this to true (default) allows users to transfer to the designated area of the file system as specified by the Absolute Path value. true false true Browse Allowed Setting this to true (default) allows users to browse the directory. true false true Authorization To set the Authorization configuration options, including connection permissions, token key, and encryption requirements, click Configuration and modify values for the Global, Groups, and Users tabs under their respective Authorization tabs. Select Override in the option's row to set an effective value.

82 General Configuration Reference 82 The following table lists all configuration options on the Authorization tab: Setting Description Values Default Incoming Transfers To enable users to transfer to this computer, allow, deny, or leave the default setting of allow. Set to deny token to prevent transfers to this computer. Set to token to allow only transfers initiated with valid tokens to this computer. Token-based transfers are typically used by web applications such as Faspex and require a Token Encryption Key. allow Incoming External Provider URL Set the URL of the external authorization provider for incoming transfers. The default empty setting disables external authorization. Aspera servers can be configured to check with an external authorization provider. This SOAP authorization mechanism can be useful to organizations requiring custom authorization rules. Requires a value for Incoming External Provider SOAP Action. HTTP URL blank Incoming External Provider SOAP Action The SOAP action required by the external authorization provider for incoming transfers. Required if External Authorization is enabled. text string blank Outgoing Transfers To enable users to transfer friom this computer, leave the default setting of allow. Set to deny allow, deny, or token allow
83 General Configuration Reference 83 Setting Description Values Default Outgoing External Provider Set the URL of the external authorization URL provider for outgoing transfers. The default empty setting disables external authorization. Aspera servers can be configured to check with an external authorization provider. This SOAP authorization mechanism can be useful to organizations requiring custom authorization rules. Requires a value for Outgoing External Provider Soap Action. HTTP URL blank Outgoing External Provider The SOAP action required by the external Soap Action authorization provider for outgoing transfers. Required if External Authorization is enabled. text string blank Token Encryption Cipher Set the cipher used to generate encrypted authorization tokens. aes-128, aes-192, or aes-256 aes-128 Token Encryption Key Set the secret text phrase that will be used to authorize those transfers configured to require token. Aspera recommends setting a token encryption key of at least 20 random characters. For more information, see Configuring Token Authorization from the GUI. text string blank Token Life (seconds) Set the token expiration for users of web-based transfer applications. positive integer (24 hrs) Token Filename Hash Set the algorithm with which filenames inside transfer tokens should be hashed. Use MD5 for backward compatibility. sha1, md5, or sha-256 sha-256 Strong Password Required for Content Encryption Set to true to require the password for content encryption to contain at least 6 characters, of which at least 1 is non-alphanumeric, at least 1 is a letter, and at least 1 is a digit. true or false false Content Protection Secret Enable server-side encryption-at-rest (EAR) using the specified passphrase. Files uploaded to this server will be encrypted. Files downloaded will be decrypted. passphrase (none) Content Protection Required Set to true to require that content be left encrypted at the destination. true or false false to prevent transfers from this computer. Set to token to allow only transfers initiated with valid tokens from this computer. Token-based transfers are typically used by web applications such as Faspex and require a Token Encryption Key. Users are required to enter a password during upload to encrypt the files on the server. Users will be given the option when downloading to decrypt during transfer.
84 General Configuration Reference 84 Setting Description Values Default Do encrypted transfers in FIPS certified encryption mode Set to true for ascp to use a FIPS 140-2certified encryption module. When enabled, transfer start is delayed while the FIPS module is verified. true or false false any, noneaes-128, aes-192, or aes-256 any When you run ascp in FIPS mode (that is, <fips_enabled> is set to true in aspera.conf), and you use passphraseprotected SSH keys, you must use keys generated by running ssh-keygen in a FIPS-enabled system, or convert existing keys to a FIPScompatible format using a command such as the following: openssl pkcs8 -topk8 -v2 aes128 -in id_rsa -out new-id_rsa Important: When set to true, all ciphers and hash algorithms that are not FIPS compliant will abort transfers. Encryption Allowed Set the type of transfer encryption accepted by this computer. Set to any to allow both encrypted and non-encrypted transfers to this computer. Set to none to allow only non-encrypted transfers. Set to aes-128 to allow only encrypted transfers. Server-Side Encryption at Rest (EAR) Capabilities When files are uploaded from an Aspera client to the server, server-side encryption-at-rest (EAR) saves files on disk in an encrypted state. When downloaded from the server, server-side EAR first decrypts files automatically, and then the transferred files are written to the client's disk in an unencrypted state. Server-side EAR provides the following advantages: It protects files against attackers who might gain access to server-side storage. This is important primarily when using NAS storage or cloud storage, where the storage can be accessed directly (and not just through the computer running Aspera Enterprise Server, Connect Server or Point-to-Point Client). It is especially suited for cases where the server is used as a temporary location--for example, when a client uploads a file and another one downloads it. Server-side EAR can be used together with client-side EAR. When used together, content is doubly encrypted. Server-side EAR doesn't create an "envelope" as client-side EAR does. The transferred file stays the same size as the original file. The server stores the encryption and various metadata necessary for server-side EAR separately. (By contrast, client-side EAR creates a file envelope containing both the encrypted contents of the file and the encryption metadata, and it also changes the name of the file by adding the file extension.aspera-env.) It works with both regular transfers (FASP) and HTTP fallback transfers. Limitations and Considerations Server-side EAR is not designed for cases where files need to move in an encrypted state between multiple computers. For that purpose, client-side EAR is more suitable: files are encrypted when they first leave the

85 General Configuration Reference 85 client, then stay encrypted as they move between other computers, and are decrypted when they reach the final destination and the passphrase is available. Do not mix server-side EAR and non-ear transfers. Doing so can cause problems for clients by overwriting files when downloading or uploading. Server-side EAR does not work with multi-session transfers (using ascp -C or node API multi_session set to greater than 1). Configuring Server-Side EAR 1. Set the docroot in URI format. Server-side EAR requires the storage to have a docroot in URI format, such that it is prefixed with file:///. The third slash ( / ) does not serve as the root slash for an absolute path. For example, a docroot of /home/xfer would be set as file:////home/xfer and a docroot of C:\Users\xfer would be set as file:///c: \Users\xfer. To configure the docroot options, click Configuration and set configurations for Global, Groups, and Users under their respective Docroot tabs. Select Override in the Absolute Path row to set a docroot and adjust read, write, and browse privileges. User docroot settings take precedence over group settings, which take precedence over global settings. 2. Set the password. The server-side EAR password can be set for all users (global), per group, or per user. In the Server Configuration dialog, click the Authorization tab and locate the setting for Content Protection Secret. Select the override box and enter the password.

86 General Configuration Reference Optional: Require encryption and/or a strong password. In addition to setting a password, you can set options to cause server-side EAR to fail if a password is not given or if a password is not strong enough. In the Authorization tab, select the override box next to Strong Password Required for Content Encryption and Content Protection Required and select true. Bandwidth To set the Bandwidth configuration options, including target transfer rates, transfer policies, and vlinks, click Configuration and modify values for the Global, Groups, and Users under their respective Bandwidth tabs. Select Override in the option's row to set an effective value.

87 General Configuration Reference 87 The following table lists all configuration options: Field Description Values Default Incoming Vlink ID Set the Vlink ID for incoming transfers. predefined value Vlinks are a mechanism to define aggregate transfer policies. The default setting of 0 disables Vlinks. One Vlink the virtual equivalent of a network trunk represents a bandwidth allowance that may be allocated to a node, a group, or a user. Vlink ID is defined in each Vlink created in Aspera Console. Vlink ID is a unique numeric identifier. 0 Incoming Target Rate Cap (Kbps) Set the Target Rate Cap for incoming transfers. The Target Rate Cap is the maximum target rate that a transfer can request, in kilobits per second. No transfer may be adjusted above this setting, at any time. The default setting of unlimited signifies no Target Rate Cap. Clients requesting transfers with initial rates above the Target Rate Cap will be denied. positive integer unlimited Incoming Target Rate Default (Kbps) Set the initial rate for incoming transfers, in kilobits per second. Users may be able to modify this rate in real time, if allowed. positive integer 10000
88 General Configuration Reference 88 Field Description Values Default true or false false This setting is not relevant to transfers with a Policy of fixed. Incoming Target Rate Lock Set to false to allow users to adjust the transfer rate once an incoming transfer is started. Set to true to prevent real-time modification of the transfer rate. Incoming Minimum Rate Cap (Kbps) Set the Minimum Rate Cap for incoming positive integer or unlimited transfers. The Minimum Rate Cap is a level, unlimited specified in kilobits per second, below which an incoming transfer will not slow, despite network congestion or physical network availability. The default value of unlimited effectively turns off the Minimum Rate Cap. Incoming Minimum Rate Default (Kbps) Set the initial minimum rate for incoming transfers, in kilobits per second. Users may be able to modify this rate in real time, if allowed. This setting is not relevant to transfers with a Policy of fixed. positive integer 0 Incoming Minimum Rate Lock Set to false (default) to allow users to adjust the minimum transfer rate once an incoming transfer is started. Set to true to prevent real-time modification of the minimum transfer rate. This setting is not relevant to transfers with a Policy of Fixed. true or false false Incoming Bandwidth Policy Default Set the default Bandwidth Policy for incoming transfers. The default policy value may be overridden by client applications initiating transfers. fixed, high, fair / regular, low, or any fair fixed Attempts to transfer at the specified target rate, regardless of the actual network capacity. This policy transfers at a constant rate and finishes in a guaranteed time. This policy typically occupies most of the network's bandwidth, and is not recommended in most file transfer scenarios. In fixed mode, a maximum (target) rate value is required. high Monitors the network and adjusts the transfer rate to fully utilize the available bandwidth up to the maximum rate. When congestion occurs, a it transfers at a rate twice of a session with fair policy. In this mode, both the maximum (target) and the minimum transfer rates are required. fair Monitors the network and adjusts the transfer rate to fully utilize the available bandwidth up to the maximum rate. When other types of traffic build up and congestion occurs, it shares bandwidth fairly by transferring at an even rate. In
89 General Configuration Reference 89 Field Description Values Default fixed, high, fair / regular, low, or any any this mode, both the maximum (target) and the minimum transfer rates are required. low Similar to fair mode, the low policy uses the available bandwidth up to the maximum rate, but is much less aggressive when sharing bandwidth with other network traffic. When congestion builds up, the transfer rate is reduced to the minimum rate until other traffic retreats. Incoming Bandwidth Policy Allowed Set the allowed Bandwidth Policy for incoming transfers. Aspera transfers use fixed, high, fair and low policies to accommodate network-sharing requirements. When set to any, the server will not deny any transfer based on policy setting. When set to high, transfers with a Policy of high and less aggressive transfer policies (e.g. fair or low) will be permitted. When set to fair, transfers of fair and low will be permitted, while fixed transfers will be denied. When set to low, only transfers with a Bandwidth Policy of low will be allowed. Incoming Bandwidth Policy Lock Set to false (default) to allow users to true or false adjust the Bandwidth Policy once an incoming transfer is started. Set to true to prevent real-time modification of the Bandwidth Policy. false Outgoing Vlink ID Set the Vlink ID for outgoing transfers. Vlinks predefined value are a mechanism to define aggregate transfer policies. The default setting of 0 disables Vlinks. One Vlink the virtual equivalent of a network trunk represents a bandwidth allowance that may be allocated to a node, a group, or a user. Vlink ID is defined in each Vlink created in Aspera Console. The Vlink ID is a unique numeric identifier. 0 Outgoing Target Rate Cap (Kbps) Set the Target Rate Cap for outgoing transfers. positive integer The Target Rate Cap is the maximum target rate that a transfer can request, in kilobits per second. No transfer may be adjusted above this setting, at any time. The default setting of unlimited signifies no Target Rate Cap. Clients requesting transfers with initial rates above the Target Rate Cap will be denied. unlimited Outgoing Target Rate Default (Kbps) Set the initial rate for outgoing transfers, in kilobits per second. Users may be able to modify this rate in real time, if allowed. This setting is not relevant to transfers with a Policy of Fixed positive integer
90 General Configuration Reference 90 Field Description Outgoing Target Rate Lock Set to false (default) to allow users to adjust the transfer rate once an outgoing transfer is started. Set to true to prevent real-time modification of the transfer rate. Values Default true or false false Outgoing Minimum Rate Cap (Kbps) Set the Minimum Rate Cap for outgoing positive integer transfers. The Minimum Rate Cap is a level specified in kilobits per second, below which an outgoing transfer will not slow, despite network congestion or physical network availability. The default value of Unlimited effectively turns off the Minimum Rate Cap. unlimited Outgoing Minimum Rate Default Set the initial minimum rate for outgoing transfers, in kilobits per second. Users may be able to modify this rate in real time, if allowed. This setting is not relevant to transfers with a Policy of Fixed. positive integer 0 Outgoing Minimum Rate Lock Set to false (default) to allow users to adjust the minimum transfer rate once an outgoing transfer is started. Set to true to prevent real-time modification of the minimum transfer rate. This setting is not relevant to transfers with a Policy of Fixed. true or false false Outgoing Bandwidth Policy Set the default Bandwidth Policy for outgoing fixed, high, Default transfers. The default policy value may be fair, low overridden by client applications initiating transfers. fixed Attempts to transfer at the specified target rate, regardless of the actual network capacity. This policy transfers at a constant rate and finishes in a guaranteed time. This policy typically occupies most of the network's bandwidth, and is not recommended in most file transfer scenarios. In fixed mode, a maximum (target) rate value is required. high Monitors the network and adjusts the transfer rate to fully utilize the available bandwidth up to the maximum rate. When congestion occurs, a it transfers at a rate twice of a session with fair policy. In this mode, both the maximum (target) and the minimum transfer rates are required. fair Monitors the network and adjusts the transfer rate to fully utilize the available bandwidth up to the maximum rate. When other types of traffic build up and congestion occurs, it shares bandwidth fairly by transferring at an even rate. In this mode, both the maximum (target) and the minimum transfer rates are required. fair
91 General Configuration Reference 91 Field Description Values Default low Similar to fair mode, the low policy uses the available bandwidth up to the maximum rate, but is much less aggressive when sharing bandwidth with other network traffic. When congestion builds up, the transfer rate is reduced to the minimum rate until other traffic retreats. Outgoing Bandwidth Policy Set the allowed Bandwidth Policy for fixed, high, Allowed outgoing transfers. Aspera transfers use fixed, fair (regular), high, fair and low policies to accommodate low, or any network-sharing requirements. When set to any, the server will not deny any transfer based on policy setting. When set to high, transfers with a Policy of high and less aggressive transfer policies (e.g. fair or low) will be permitted. When set to fair, transfers of fair and low will be permitted, while fixed transfers will be denied. When set to low, only transfers with a Bandwidth Policy of low will be allowed. any Outgoing Bandwidth Policy Set to false (default) to allow users to true or false Lock adjust the Bandwidth Policy once an outgoing transfer is started. Set to true to prevent real-time modification of the Bandwidth Policy. false Network To set the Network configuration options, including the network IP, port, and socket buffer settings, click Configuration and modify values for the Global, Groups, and Users under their respective Network tabs. Select Override in the option's row to set an effective value.

92 General Configuration Reference 92 The following table describes the configuration options: Option Description Values Default Bind IP Address Specify an IP address for server-side ascp to bind its UDP connection. If a valid IP address is given, ascp sends and receives UDP packets only on the interface corresponding to that IP address. valid IPv4 address blank Important: The bind address should only be modified (changed to an address other than ) if you, as the System Administrator, understand the security ramifications of doing so, and have undertaken precautions to secure the SOAP service. Bind UDP Port Prevent the client-side ascp process from using the specified UDP port. integer between 1 and Server UDP Port reuse Set to true (default) to allow different processes to reuse the same UDP port at the server. Set to false to disable UDP port reuse. true or false true Disable Packet Batching Set to true to send data packets back-to-back (no true or sending a batch of packets). This results in smoother data false traffic at a cost of higher CPU usage. false Maximum Socket Buffer (bytes) Set the upper bound of the UDP socket buffer of an ascp session below the input value. The default of 0 will cause the Aspera sender to use its default internal buffer size, which may be different for different operating systems. positive integer 0 Minimum Socket Buffer (bytes) Set the minimum UDP socket buffer size for an ascp session. positive integer 0 RTT auto correction Set to true to enable auto correction of the base true or (minimum) RTT measurement. This feature is helpful for false maintaining accurate transfer rates in hypervisor-based virtual environments. false
 transfer direction. This feature is useful for boosting speed in bi-directional transfers.")
93 General Configuration Reference 93 Option Description Values Default Reverse path congestion inference Set to true to prevent the transfer speed of a session from being adversely affected by congestion in the reverse (non data-sending) transfer direction. This feature is useful for boosting speed in bi-directional transfers. true or false true File Handling To set the File Handling configuration options, including file block size, overwrite rules, andt exclude pattern, click Configuration and modify values for the Global, Groups, and Users under their respective File Handling tabs. Select Override in the option's row to set an effective value. The following table lists all configuration options: Field Description Values Default Run at File Start Enables validation when starting a file. This happens before file transfer starts. For more information on inline file validation, see Overview of Inline File Validation. uri, lua_script, or none none Run at File Stop Enables validation when reporting file transfer end. This happens after file transfer is complete and file is closed. For more information on inline file validation, see Overview of Inline File Validation. uri, lua_script, or none none Run at Session Start Enables validation when an ascp session starts. For more information on inline file validation, see Overview of Inline File Validation. uri, lua_script, or none none Run at Session Stop Enables validation when an ascp session ends. For more information on inline file validation, see Overview of Inline File Validation. uri, lua_script, or none none
94 General Configuration Reference 94 Field Description Values Run when Crossing File Threshold Enables validation when a set threshold in the file uri, transfer is reached. For more information on inline lua_script, file validation, see Overview of Inline File Validation. or none Default none Note: For threshold validation, it is possible for the file transfer to complete before the file threshold validation response comes back (because ascp doesn't pause file transfers during file threshold validation); therefore, a complete file transfer could happen even with validation failure. Base64-Encoded Lua Action Script For Lua API validation, enter the base64-encoded value. If both this option and File Path to Lua Action Script option are defined, this value is ignored. For more information on inline file validation, see Overview of Inline File Validation. Base64-encoded blank string This value must be defined if any of the following values are set to lua_script: Run at File Start, Run at File Stop, Run at Session Start, Run at Session Stop, Run when Crossing File Threshold. File Path to Lua Action Script For Lua API validation, enter a file path. If both this option and the Base64-Encoded Lua Action Script option are defined, this value is the one recognized by the system. Filepath blank This value must be defined if any of the following values are set to lua_script: validation_file_start validation_file_stop validation_ session_start validation_session_stop validation_threshold For more information on inline file validation, see Overview of Inline File Validation. File Create Mode Set the file creation mode (permissions). If specified, positive integer create files with these permissions (for example, (octal) 0755), irrespective of File Create Grant Mask and permissions of the file on the source computer. Only takes effect when the server is a non-windows receiver. undefined File Create Grant Mask Set the mode for newly created files if File Create Mode is not specified. If specified, file modes will be set to their original modes plus the Grant Mask values. Only takes effect when the server is a nonwindows receiver and when File Create Mode is not specified. positive integer (octal) 644 Directory Create Mode Set the directory creation mode (permissions). If specified, create directories with these permissions irrespective of Directory Create Grant Mask and permissions of the directory on the source computer. positive integer (octal) undefined
95 General Configuration Reference 95 Field Description Values Default 755 Only takes effect when the server is a non-windows receiver. Directory Create Grant Mask Set the mode for newly created directories if Directory Create Mode is not specified. If specified, directory modes will be set to their original modes plus the Grant Mask values. Only takes effect when the server is a non-windows receiver and when Directory Create Mode is not specified. positive integer (octal) Read Block Size (bytes) Set the maximum number of bytes that can be stored within a block as the block is being transferred from the source disk drive to the receiver. The default of zero causes the Aspera sender to use its default internal buffer size, which may vary by operating system. This is a performance-tuning parameter for an Aspera sender (which only takes effect if the sender is a server). positive integer, 0 where 500MB or 524,288,000 bytes is the maximum block size. Write Block Size (bytes) Set the maximum bytes within a block that an ascp receiver can write to disk. The default of zero causes the Aspera receiver to use its default internal buffer size, which may vary by operating system. This is a performance-tuning parameter for an Aspera receiver (which only takes effect if the receiver is a server). positive integer, 0 where 500MB or 524,288,000 bytes is the maximum block size. Number of I/O read threads Set the number of threads the Aspera sender uses to read file contents from the source disk drive. It takes effect on both client and server, when acting as a sender. The default of zero causes the Aspera sender to use its internal default, which may vary by operating system. This is a performance-tuning parameter for an Aspera sender. positive integer 0 Number of I/O write threads Set the number of threads the Aspera receiver uses to positive integer write the file contents to the destination disk drive. It takes effect on both client and server, when acting as a receiver. The default of zero causes the Aspera receiver to use its internal default, which may vary by operating system. This is a performance-tuning parameter for an Aspera receiver. 0 Number of Dir Scanning Threads Set the number of threads the Aspera sender uses to scan directory contents. It takes effect on both client and server, when acting as a sender. The default of zero causes the Aspera sender to use its internal default. This is a performance-tuning parameter for an Aspera sender. positive integer 0 Number of Metadata Threads. Set the number of threads the Aspera receiver uses to create directories or 0 byte files. It takes effect on both client and server, when acting as a receiver. The default of zero causes the Aspera receiver to use its internal default, which may vary by operating system. This is a performance-tuning parameter for an Aspera receiver. positive integer 0
96 General Configuration Reference 96 Field Description Values Default Sparse File Checking Set to true to enable sparse file checking, which tells the Aspera receiver to avoid writing zero blocks and save disk space. The default of false to tell the Aspera reciever to write all the blocks. This is a performance-tuning parameter for an Aspera receiver. true or false false Behavior on Attr Error Set behavior for when operations attempt to set or change file attributes (such as POSIX ownership, ACLs, or modification time) and fail. Setting to yes returns an error and causes the operation to fail. Setting to no logs the error and the operation continues no or yes yes Compression Method for File Transfer Set the compression method to apply to transfers. It applies to both the client and server. lz4, qlz, zlib, or none lz4 Use File Cache Set to true (default) to enable per-file memory caching at the data receiver. File level memory caching improves data write speed on Windows platforms in particular, but uses more memory. This is a performance tuning parameter for an Aspera receiver. true or false true Aspera suggests using a file cache on systems that are transferring data at speeds close to the performance of their storage device, and disable it for system with very high concurrency (because memory utilization will grow with the number of concurrent transfers). Max File Cache Buffer (bytes) Set the maximal size allocated for per-file memory cache (see Use File Cache) in bytes. The default of zero will cause the Aspera receiver to use its internal buffer size, which may be different for different operating systems. This is a performance tuning parameter for an Aspera receiver. positive integer 0 Resume Suffix Set the file name extension for temporary metadata files used for resuming incomplete transfers. Each data file in progress will have a corresponding metadata file with the same name plus the resume suffix specified by the receiver. Metadata files in the source of a directory transfer are skipped if they end with the sender's resume suffix. text string.aspx Symbolic Link Actions Set the actions to be taken upon encountering a symbolic link on the server side. The action to take depends on both the platform and the particular application context. Combinations of choices are logically OR'ed before use. For example, use none alone to mean skip, and shut out other choices; when both follow and follow_wide are present, the latter is recognized. none, follow,create create, follow, follow_wide, or any combination of the above delimited by commas To set a combination of actions, you must manually edit the configuration file aspera.conf in a text
97 General Configuration Reference 97 Field Description Values Default none or times blank (use the client setting) allow or deny allow editor with administrative privileges. Find the file in the following location: /opt/aspera/etc/aspera.conf Aspera recommends you set one value in the GUI to create the entry, then manually add other values. Save then validate your edits by running the following command: # /opt/aspera/bin/asuserdata -v Preserve Attributes Set the file creation policy. Set to none to not preserve the timestamps of source files. Set to times to preserve the timestamp of the source files at destination. Note: For Limelight storage, only the preservation of modification time is supported. Overwrite Set to allow to allow Aspera clients to overwrite existing files on the server, as long as file permissions allow that action. Note: The deny setting does not work, and clients are still allowed to overwrite files on the server if file permissions allow it. File Manifest Set to text to generate a text file "receipt" of all text, files within each transfer session. Set to disable to disable, or not create a File Manifest. The file manifest is a file none containing a list of everything that was transferred in a given transfer session. The filename of the File Manifest itself is automatically generated based on the transfer session's unique ID. The location where each manifest is written is specified by the File Manifest Path value. If no File Manifest Path is specified, the file will be generated under the destination path at the receiver, and under the first source path at the sender. none File Manifest Path Specify the location to store manifest files. Can be an text string absolute path or a path relative to the transfer user's home. blank Note: File manifests can only be stored locally. Thus, if you are using S3, or other non-local storage, you must specify a local manifest path. File Manifest Suffix Specify the suffix of the manifest file during file transfer. text string.asperainprogress Pre-Calculate Job Size Set to yes to enable calculating job size before transferring. Set to no to disable calculating job size before transferring. Set to any to follow client configurations. yes, no, or any any
98 General Configuration Reference 98 Field Description Convert Restricted Windows Characters To enable the replacement of reserved Windows single-byte, characters in file and directory names with a non-restricted non-reserved character, set to the single byte, character non-restricted character that will be used for the replacement. Only applies to files written to the local Windows file system; to enable on the peer it must be set on the peer's system. blank File Filter Pattern List Exclude or include files and directories with the text entries specified pattern in the transfer. Add multiple entries for more inclusion/exclusion patterns. To specify an inclusion, start the pattern with '+ ' (+ and a whitespace). To specify an exclusion, start the pattern with '- ' (- and a whitespace). Two symbols can be used in the setting of patterns: blank Values Default A "*" (asterisk) represents zero to many characters in a string. For example, *.tmp matches.tmp and abcde.tmp. A "?" (question mark) represents a single character. For example, t?p matches tmp but not temp. For details on specifying rules, see Applying Filters to Include and Exclude Files. This option applies only when the server is acting as a client. Servers cannot exclude files or directories uploaded or downloaded by remote clients. Partial File Name Suffix Set the filename extension on the destination text string computer while the file is being transferred. Once the file has been completely transferred, this filename extension is removed. blank Note: This option only takes effect when it is set on the receiver side. File Checksum Method Set the type of checksum to calculate for transferred files. The content of transfers can be verified by comparing the checksum value at the destination with the value read at the source. any, md5, sha1, sha256, sha384, or sha512 any Async Log Directory Set an alternative location for the Sync server's log files. If empty, log files go to the default location, or the location specified by the client with -R. filepath blank Async Log Level Set the amount of detail in the Sync server activity log. disable, log, dbg1, or dbg2 log Async Snapdb Directory Set an alternative location for the Sync server's snapshot DB files. filepath blank


99 General Configuration Reference 99 Configuring Filters to Include and Exclude Files Filters allow you to refine the list of files (or directories) designated for transfer. With filters, you indicate which files in the transfer list to skip or include. At runtime, ascp looks for filters in two locations: on the ascp command line, and in aspera.conf. When filtering rules are found in aspera.conf, they are applied before rules on the command line. Filters can be set in the aspera.conf file either from the GUI, or by modifying it directly with an editor or asconfigurator. If no filtering rules are specified, ascp transfers all source files in the transfer list. This topic describes how to configure filters from the GUI. Note: Filter settings apply only when the server is acting as a client. Servers cannot exclude files or directories uploaded or downloaded by remote clients. Specifying Filtering Rules from the File Handling Configuration Tab To specify filtering rules from the GUI, click the Configuration button to open the Server Configuration dialog. Select the File Handling tab, and scroll down to File Filter Pattern List. Click the override checkbox to enable you to enter values to override any inherited settings for this option. To specify filtering rules, click the button. This opens a Define dialog where you can type in filtering rules. If rules were added earlier, either through the GUI or through aspera.conf, they will appear in the window. Click the button to add a new filtering rule, or click the button to delete a rule that you've selected. A rule consists of a "+" or "-" sign (indicating whether to include or exclude), followed by a space character, followed by a pattern. A pattern can be a file or directory name, or a set of names expressed with UNIX glob patterns (described below).
100 General Configuration Reference 100 Note: Do not confuse the GUI's line-add and line-delete buttons and with the include/exclude characters "+" or "-" that are part of rule syntax. The purpose of each is different and they are unrelated. To determine which files to transfer, each file in the set of source files to transfer (the transfer list) is evaluated by the filters as follows: 1. The first (or next) file or directory in the transfer list is compared to the first rule. 2. If the file matches the pattern, it's included or excluded, and for this file, filtering stops. 3. If the file does not match, it's compared with the next rule and the process is repeated for each rule until a match is found or until all rules have been tried. 4. If the file did not match any rules, it is included in the transfer. Filtering operates only on the set of files and directories in the transfer list. That is, an include option cannot add files or directories that are not already part of the transfer list. Filtering is a process of exclusion, and "+" rules act as overrides to any "-" rules that follow them. For example, consider the following example rules when the transfer set is file*: + file2 - file[0-9] The transfer set is all files that start with file). If file1, file2, and filea are in /tmp/l, they are filtered as follows: 1. When file1 is compared with the first rule (+), no match is found, and filtering continues. When file1 is compared with the second rule (-), there is a match; file1 is therefore excluded from transfer, and filtering stops for file1. 2. When file2 is compared with the first rule, there is a match; file2 is therefore included in the transfer, and filtering stops for file2. 3. When filea is compared with the first rule, no match is found. When it is compared with the second rule, again no match is found. Because no further rules exclude it, filea is therefore included in the transfer. If directories or files reside in directories that have already been excluded, they will also be excluded and therefore not checked against any further rules. For example, consider the following rules: - /above/ + /above/below The file /above/below is never considered because its parent directory /above/ has already been excluded. Creating Rule Patterns In order to filter directories and files to be transferred, their names are matched against patterns (globs) that include wildcards and special characters. The patterns use the standard globbing syntax found in UNIX systems along with several extensions. Character case: Case always matters, even if the scanned file system does not enforce such a distinction. For example, "debug" does not match "Debug". To match both, the pattern should be "[Dd]ebug". Partial matches: With globs, unlike standard regular expressions, the entire filename or directory name must match the pattern. That is, abcdef matches the pattern abc*f but abcdefg does not. Pattern position: A pattern given with "+" will match a path only if it falls directly under the transfer directory. However, a pattern given with "-" will match a path regardless of where (at which level) the path falls under the transfer directory. For example, given the pattern 'zzz*' and a transfer directory AAA: The "+" option matches only if the path to the zzz file (or directory) falls directly under AAA. That is, AAA/zzz. The "-" option matches regardless of the where the path to the zzz file (or directory) falls under AAA. For example, AAA/abc/def/zzz. Standard Globbing: Wildcards and Special Characters
101 General Configuration Reference 101 / The only recognized path separator. \ Quotes any character literally, including itself. The \ character is exclusively a quoting operator, not a path separator. * Matches zero or more characters, except a /, or the. when preceded immediately by a / character.? Matches any single character, except a /, or a. when preceded immediately by a / character. [ ] Matches exactly one of a set of characters, except a / or a. preceded immediately by a / character. [^ ] When ^ is the first character, matches exactly one character not in the set. [! ] When! is the first character, matches exactly one character not in the set. [x-x] Matches exactly one of a range of characters. [:xxxxx:] For details about this type of wildcard, see any POSIX-standard guide to globbing. Globbing Extensions: Wildcards and Special Characters /** Like * but also matches the / character, or a. preceded immediately by a / (that is, the. in /. ). * or /** at end of pattern Matches both directories and files. / at end of pattern Matches directories only. With -N, no files under matched directories or their subdirectories are included in the transfer. All subdirectories are still included, although their files will not be included. However, with -E, excluding a directory also excludes all files and subdirectories under it. no / or * at end of pattern Matches files only. / at start of pattern Must match the entire string from the root of the transfer set. (Note: The leading / does not refer to the system root or the docroot.) Standard Globbing Examples Wildcard Example Matches Does Not Match / abc/def/xyz abc/def/xyz abc/def \ abc\? abc? abc\? abc/d abcd * abc*f abcdef abc.f abc/f abcefg? abc?? abcde abc.z abcdef abc/d abc/. [ ] [abc]def adef cdef abcdef ade [^ ] [^abc]def zdef.def 2def bdef /def /.def [! ] [!abc]def zdef.def 2def cdef /def /.def [:xxxxx:] [[:lower:]]def cdef ydef Adef 2def.def Globbing Extension Examples Wildcard Example Matches Does Not Match /** a/**/f a/f a/.z/f a/d/e/f a/d/f/ za/d/f
 abc/ / at start of rule /abc/def /abc/def xyz/abc/def Rule Composition Example Transfer Result + rule")
102 General Configuration Reference 102 Wildcard Example Matches Does Not Match * at end of rule abc* abc/ abcfile /** at end of rule abc/** abc/.file abc/d/e/ abc/ / at end of rule abc/*/ abc/dir abc/file no / at end of rule abc abc (file) abc/ / at start of rule /abc/def /abc/def xyz/abc/def Rule Composition Example Transfer Result + rule Includes all files and directories whose names match rule. Because there is no "-", all the originally specified files and directories are included anyway; in other words, by itself, a "+" rule does nothing. - rule Excludes all files and directories whose names match rule. + rule1 - rule2 - rule1 + rule2 Includes all files and directories whose names match rule1. Excludes all that match rule2, except those that also matched rule1. Excludes all files and directories whose names match rule1. Because there is no "-" following the "+", all files and directories not already excluded by the preceding "-" are included anyway; in other words, a trailing "+" rule does nothing to change the result. Testing Your Filtering Rules If you plan to use filtering rules, it's best to test them first. An easy way to try filtering rules, or to learn how they work, is to set up source and destination directories and use demo.asperasoft.com as the Aspera server: 1. On your computer, create a small set of directories and files that generally matches a file set you typically transfer. Since filenames are all that matter, the size of the files can be small. 2. Place the file set in an accessible location, for example /tmp/src. 3. Upload the file set to the Aspera demo server as user "aspera". Specify the demo-server target directory Upload. When you are prompted for the password, enter "demoaspera". For more information about setting up a connection to demo.asperasoft.com, see Testing a Locally Initiated Transfer. 4. Create a destination directory on your computer, for example /tmp/dest. 5. You can now download your files from the demo server to /tmp/dest and test your filtering rules. For example:

103 General Configuration Reference Compare the list of files transferred to the list of your original files. Example Filter Rules The example rules below are based on downloading a directory AAA from demo.asperasoft.com to /tmp/ dest on your computer: The examples below use the following file set: AAA/abc/def AAA/abc/.def AAA/abc/.wxy/def AAA/abc/wxy/def AAA/abc/wxy/.def AAA/abc/wxy/tuv/def AAA/abc/xyz/def/wxy AAA/wxyfile AAA/wxy/xyx/ AAA/wxy/xyxfile Key for interpreting results: < xxx/yyy = Excluded xxx/yyy = Included zzz/ = directory name zzz = filename (1) Transfer everything except files and directories starting with ".": + * - AAA/** Results: AAA/abc/def AAA/abc/wxy/def AAA/abc/wxy/tuv/def AAA/abc/xyz/def/wxy AAA/wxyfile AAA/wxy/xyx/ AAA/wxy/xyxfile < AAA/abc/.def < AAA/abc/.wxy/def < AAA/abc/wxy/.def (2) Exclude directories and files whose names start with wxy - wxy*
104 General Configuration Reference 104 Results: AAA/abc/def AAA/abc/.def AAA/abc/.wxy/def AAA/abc/xyz/def/ < AAA/abc/wxy/def < AAA/abc/wxy/.def < AAA/abc/wxy/tuv/def < AAA/abc/xyz/def/wxy < AAA/wxyfile < AAA/wxy/xyx/ < AAA/wxy/xyxfile (3) Include directories and files that start with "wxy" if they fall directly under AAA: + wxy* - AAA/** Results: AAA/wxy/ AAA/wxyfile < AAA/abc/def < AAA/abc/.def < AAA/abc/.wxy/def < AAA/abc/wxy/def < AAA/abc/wxy/.def < AAA/abc/wxy/tuv/def < AAA/abc/xyz/def/wxy < AAA/wxy/xyx/ < AAA/wxy/xyxfile (4) Include directories and files at any level that start with wxy, but do not include dot-files, dot-directories, or any files under the wxy directories (unless they start with wxy). However, subdirectories under wxy will be included: + */wxy* - AAA/** Results: AAA/abc/wxy/tuv/ AAA/abc/xyz/def/wxy AAA/wxyfile AAA/wxy/xyx/ < AAA/abc/def < AAA/abc/.def < AAA/abc/.wxy/def < AAA/abc/wxy/def * < AAA/abc/wxy/.def < AAA/abc/wxy/tuv/def < AAA/wxy/xyxfile * Even though wxy is included, def is excluded because it's a file. (5) Include wxy directories and files at any level, even those starting with ".": + */wxy* - */wxy/** - AAA/**
105 General Configuration Reference 105 Results: AAA/abc/wxy/def AAA/abc/wxy/.def AAA/abc/wxy/tuv/def AAA/abc/xyz/def/wxy AAA/wxyfile AAA/wxy/xyx/ AAA/wxy/xyxfile < AAA/abc/def < AAA/abc/.def < AAA/abc/.wxy/def (6) Exclude directories and files starting with wxy, but only those found at a specific location in the tree: + /AAA/abc/wxy* Results: AAA/abc/def AAA/abc/.def AAA/abc/.wxy/def AAA/abc/xyz/def/wxy AAA/wxyfile AAA/wxy/xyx/ AAA/wxy/xyxfile < AAA/abc/wxy/def < AAA/abc/wxy/.def < AAA/abc/wxy/tuv/def (7) Include the wxy directory at a specific location, and include all its subdirectories and files, including those starting with ".": + AAA/abc/wxy/** - AAA/** Results: AAA/abc/wxy/def AAA/abc/wxy/.def AAA/abc/wxy/tuv/def < AAA/abc/def < AAA/abc/.def < AAA/abc/.wxy/def < AAA/abc/xyz/def/wxy < AAA/wxyfile < AAA/wxy/xyx/ < AAA/wxy/xyxfile aspera.conf - Authorization This topic describes how to manually modify the <authorization/> section of aspera.conf. You can also add and edit these parameters using asconfigurator commands. For more information on using asconfigurator, see User, Group and Default Configurations. 1. Open aspera.conf. You can find the aspera.conf configuration file at: /opt/aspera/etc/aspera.conf
106 General Configuration Reference Add or locate the <authorization> section, as in the example below. <authorization> <transfer> <in> <value>allow</value> <!-- Incoming Transfer --> <external_provider> <url>...</url> <!-- Incoming External Provider URL --> <soap>...</soap> <!-- Incoming External Provider SOAP Action --> </external_provider> </in> <out> <value>allow</value> <!-- Outgoing Transfer --> <external_provider> <url>...</url> <!-- Outgoing External Provider URL --> <soap>...</soap> <!-- Outgoing External Provider SOAP Action --> </external_provider> </out> </transfer> <token> <encryption_type>aes-128</encryption_type> <!-- Token Encryption Cipher --> <encryption_key> </encryption_key> <!-- Token Encryption Key --> <filename_hash> </filename_hash> <!-- Token Filename Hash --> <life_seconds>86400</life_seconds> <!-- Token Life (seconds) --> </token> </authorization> 3. Configuration options reference. Field Description Values Default Incoming Transfers To enable users to transfer to this computer, leave the default setting of allow. Set to deny to prevent transfers to this computer. Set to token to allow only transfers initiated with valid tokens to this computer. Token-based transfers are typically used by web applications such as Faspex and require a Token Encryption Key. allow, deny, or token allow Incoming External Provider URL Set the URL of the external authorization provider for incoming transfers. The default empty setting disables external authorization. Aspera servers can be configured to check with an external authorization provider. This SOAP authorization mechanism can be useful to organizations requiring custom authorization rules. Requires a value for Incoming External Provider SOAP Action. HTTP URL blank Incoming External Provider SOAP Action The SOAP action required by the external authorization provider for incoming transfers. Required if External Authorization is enabled. text string blank Outgoing Transfers To enable users to transfer friom this computer, leave the default setting of allow. Set to deny to prevent transfers from this computer. Set to token to allow only transfers initiated with valid tokens from this computer. Token-based transfers are typically used by web applications such as Faspex and require a Token Encryption Key. allow, deny, or token allow Outgoing External Provider URL Set the URL of the external authorization provider for outgoing transfers. The default empty setting disables external authorization. HTTP URL blank
107 General Configuration Reference 107 Field Description Values Default blank Aspera servers can be configured to check with an external authorization provider. This SOAP authorization mechanism can be useful to organizations requiring custom authorization rules. Requires a value for Outgoing External Provider Soap Action. Outgoing External Provider Soap Action The SOAP action required by the external authorization provider for outgoing transfers. Required if External Authorization is enabled. text string Token Encryption Cipher Set the cipher used to generate encrypted authorization tokens. aes-128, aes-128 aes-192, or aes-256 Token Encryption Key Set the secret text phrase that will be used to authorize those transfers configured to require token. Aspera recommends setting a token encryption key of at least 20 random characters. For more information, see Configuring Token Authorization from the GUI. text string Token Filename Hash Set the algorithm with which filenames inside transfer tokens should be hashed. Use MD5 for backward compatibility. sha1, sha-256 md5, or sha-256 Token Life (seconds) Set the token expiration for users of web-based transfer applications. positive integer blank (24 hrs) 4. Save and validate aspera.conf. Run the following command to confirm that the XML is correctly formatted and the parameter settings are valid: # /opt/aspera/bin/asuserdata -v aspera.conf - Transfer This topic describes how to manually modify the <transfer> section of aspera.conf, which includes parameters for inline validation (see Overview of Inline File Validation for more information). You can also add and edit these parameters using asconfigurator commands. For more information on using asconfigurator, see User, Group and Default Configurations. 1. Open aspera.conf. You can find the aspera.conf configuration file at: /opt/aspera/etc/aspera.conf 2. Add or locate the <transfer/> section, as in the example below. <transfer> <in> <bandwidth> <aggregate> <trunk_id>109</trunk_id> </aggregate> <flow> <target_rate> <cap></cap> <default>10000</default> <lock>false</lock> <!-- Incoming VLink ID --> <!-- Incoming Target Rate Cap --> <!-- Incoming Target Rate Default --> <!-- Incoming Target Rate Lock -->
108 General Configuration Reference 108 </target_rate> <min_rate> <cap></cap> <!-- Incoming Minimum Rate Cap --> <default></default> <!-- Incoming Minimum Rate Default --> <lock>false</lock> <!-- Incoming Minimum Rate Lock --> </min_rate> <policy> <cap></cap> <!-- Incoming Policy Allowed --> <default></default> <!-- Incoming Policy Default --> <lock>false</lock> <!-- Incoming Policy Lock --> </policy> <priority> <cap></cap> <!-- Incoming Priority Allowed --> <default></default> <!-- Incoming Priority Default --> <lock>false</lock> <!-- Incoming Priority Lock --> </priority> <network_rc> <module></module> <!-- Incoming Rate Control Module --> <tcp_friendly>no</tcp_friendly> <!-- Incoming TCP Friendly Mode --> </network_rc> </flow> </bandwidth> </in> <out> <bandwidth> <aggregate> <trunk_id>109</trunk_id> <!-- Outgoing VLink ID --> </aggregate> <flow> <target_rate> <cap></cap> <!-- Outgoing Target Rate Cap --> <default>10000</default> <!-- Outgoing Target Rate Default --> <lock>false</lock> <!-- Outgoing Target Rate Lock --> </target_rate> <min_rate> <cap></cap> <!-- Outgoing Minimum Rate Cap --> <default>0</default> <!-- Outgoing Minimum Rate Default --> <lock>false</lock> <!-- Outgoing Minimum Rate Lock --> </min_rate> <policy> <cap></cap> <!-- Outgoing Policy Allowed --> <default></default> <!-- Outgoing Policy Default --> <lock>false</lock> <!-- Outgoing Policy Lock --> </policy> <priority> <cap></cap> <!-- Outgoing Priority Allowed --> <default></default> <!-- Outgoing Priority Default --> <lock>false</lock> <!-- Outgoing Priority Lock --> </priority> <network_rc> <module></module> <!-- Outgoing Rate Control Module --> <tcp_friendly>no</tcp_friendly> <!-- Outgoing TCP Friendly Mode --> </network_rc> </flow> </bandwidth> </out> <protocol_options> <bind_ip_address></bind_ip_address> <! - Bind IP Address --> <bind_udp_port>33001</bind_udp_port> <!-- Bind UDP Port --> <disable_batching>false</disable_batching> <!-- Disable Packet Batching --> <batch_size>1</batch_size> <!-- Batch Size --> <datagram_size>1000</datagram_size> <!-- Datagram Size --> <max_sock_buffer>0</max_sock_buffer> <!-- Maximum Socket Buffer (bytes)--> <min_sock_buffer>0</min_sock_buffer> <!-- Minimum Socket Buffer (bytes)--> <rtt_autocorrect>false</rtt_autocorrect> <!-- RTT auto correction --> <rtt_reverse_infer>false</rtt_reverse_infer> <!-- Reverse path congestion inference -> </protocol_options> <encryption> <content_protection_strong_pass_required>false </content_protection_strong_pass_required> <!-- Strong Password Required for Content Protection --> <content_protection_required>false </content_protection_required> <!-- Content Protection Required --> <allowed_cipher>any</allowed_cipher> <!-- Encryption Allowed --> <fips_mode>false</fips_mode> <!-- Transfer in FIPS certified encryption mode --> </encryption>
109 General Configuration Reference 109 <validation_file_start>as_null</validation_file_start> <!-- Validation File Start --> <validation_file_stop>as_null</validation_file_stop> <!-- Validation File Stop --> <validation_session_start>as_null</validation_session_start> <!-- Validation Session Start --> <validation_session_stop>as_null</validation_session_stop> <!-- Validation Session Stop --> <validation_threshold>as_null</validation_threshold> <!-- Validation Threshold --> <validation_uri>as_null</validation_uri> <!-- Validation URI --> <validation_threshold_kb>0</validation_threshold_kb> <!-- Validation Threshold KB --> <validation_threads>5</validation_threads> <!-- Validation Threads --> <validation_lua_script_base64></validation_lua_script_base64> <!-- Validation Lua Script Base64 --> <validation_lua_script_path></validation_lua_script_path> <!-- Validation Lua Script Path --> </transfer> 3. Configuration options reference. Field Description Incoming Vlink ID Set the Vlink ID for incoming transfers. predefined value Vlinks are a mechanism to define aggregate transfer policies. The default setting of 0 disables Vlinks. One Vlink the virtual equivalent of a network trunk represents a bandwidth allowance that may be allocated to a node, a group, or a user. Vlink ID is defined in each Vlink created in Aspera Console. Vlink ID is a unique numeric identifier. 0 Incoming Target Rate Cap (Kbps) Set the Target Rate Cap for incoming positive integer transfers. The Target Rate Cap is the maximum target rate that a transfer can request, in kilobits per second. No transfer may be adjusted above this setting, at any time. The default setting of unlimited signifies no Target Rate Cap. Clients requesting transfers with initial rates above the Target Rate Cap will be denied. unlimited Incoming Target Rate Default (Kbps) Set the initial rate for incoming transfers, positive integer in kilobits per second. Users may be able to modify this rate in real time, if allowed. This setting is not relevant to transfers with a Policy of fixed Incoming Target Rate Lock Set to false to allow users to adjust the transfer rate once an incoming transfer is started. Set to true to prevent real-time modification of the transfer rate. true or false false positive integer or unlimited unlimited Incoming Minimum Rate Set the Minimum Rate Cap for incoming Cap (Kbps) transfers. The Minimum Rate Cap is a level, specified in kilobits per second, below which an incoming transfer will not slow, despite network congestion or physical network availability. The default Values Default
110 General Configuration Reference 110 Field Description Values Default value of unlimited effectively turns off the Minimum Rate Cap. Incoming Minimum Rate Set the initial minimum rate for incoming positive integer Default (Kbps) transfers, in kilobits per second. Users may be able to modify this rate in real time, if allowed. This setting is not relevant to transfers with a Policy of fixed. 0 Incoming Minimum Rate Set to false (default) to allow users to true or false Lock adjust the minimum transfer rate once an incoming transfer is started. Set to true to prevent real-time modification of the minimum transfer rate. This setting is not relevant to transfers with a Policy of Fixed. false Incoming Bandwidth Policy Allowed Set the allowed Bandwidth Policy for incoming transfers. Aspera transfers use fixed, high, fair and low policies to accommodate network-sharing requirements. When set to any, the server will not deny any transfer based on policy setting. When set to high, transfers with a Policy of high and less aggressive transfer policies (e.g. fair or low) will be permitted. When set to fair, transfers of fair and low will be permitted, while fixed transfers will be denied. When set to low, only transfers with a Bandwidth Policy of low will be allowed. fixed, high, fair / regular, low, or any any Incoming Bandwidth Policy Default Set the default Bandwidth Policy for incoming transfers. The default policy value may be overridden by client applications initiating transfers. fixed, high, fair / regular, low, or any fair fixed Attempts to transfer at the specified target rate, regardless of the actual network capacity. This policy transfers at a constant rate and finishes in a guaranteed time. This policy typically occupies most of the network's bandwidth, and is not recommended in most file transfer scenarios. In fixed mode, a maximum (target) rate value is required. high Monitors the network and adjusts the transfer rate to fully utilize the available bandwidth up to the maximum rate. When congestion occurs, a it transfers at a rate twice of a session with fair policy. In this mode, both the maximum (target) and the minimum transfer rates are required. fair Monitors the network and adjusts the transfer rate to fully utilize
111 General Configuration Reference 111 Field Description Values Default the available bandwidth up to the maximum rate. When other types of traffic build up and congestion occurs, it shares bandwidth fairly by transferring at an even rate. In this mode, both the maximum (target) and the minimum transfer rates are required. low Similar to fair mode, the low policy uses the available bandwidth up to the maximum rate, but is much less aggressive when sharing bandwidth with other network traffic. When congestion builds up, the transfer rate is reduced to the minimum rate until other traffic retreats. Incoming Bandwidth Policy Lock Set to false (default) to allow users to adjust the Bandwidth Policy once an incoming transfer is started. Set to true to prevent real-time modification of the Bandwidth Policy. true or false false Incoming Priority Allowed The highest priority your client can request. Use the value 0 to unset this option; 1 to allow high priority, 2 to enforce normal priority. 0, 1, or 2 1 Incoming Priority Default The initial priority setting. Use the value 0 to unset this option, 1 to allow high priority; 2 to enforce normal priority 0, 1, or 2 2 Incoming Priority Lock To disallow your clients change the priority, set the value to true true or false false Module (for incoming rate control) Located within the incoming </ delay-odp, network_rc> stanza, this hidden setting delay-adv, or air is meant for advanced users to select an incoming rate control module (which will only be applied at the local "receiver" side). It should only be used with special instructions for debugging. Options include: TCP Friendly (for incoming rate control) blank delay-odp: queue scaling controller delay-adv: advanced rate controller air: FASP air Located within the incoming </ yes or no network_rc> stanza, this hidden setting is meant for advanced users to turn TCP-friendly mode on or off (which will only be applied at the local "receiver" side when the transfer policy is set to fair). It should only be used with special instructions for debugging. If turned on ("yes"), this mode allows an incoming no
112 General Configuration Reference 112 Field Description Values Default FASP transfer to maintain relative fair bandwidth share with a TCP flow under congestion. Outgoing Vlink ID Set the Vlink ID for outgoing transfers. predefined value Vlinks are a mechanism to define aggregate transfer policies. The default setting of 0 disables Vlinks. One Vlink the virtual equivalent of a network trunk represents a bandwidth allowance that may be allocated to a node, a group, or a user. Vlink ID is defined in each Vlink created in Aspera Console. The Vlink ID is a unique numeric identifier. 0 Outgoing Target Rate Cap (Kbps) Set the Target Rate Cap for outgoing positive integer transfers. The Target Rate Cap is the maximum target rate that a transfer can request, in kilobits per second. No transfer may be adjusted above this setting, at any time. The default setting of unlimited signifies no Target Rate Cap. Clients requesting transfers with initial rates above the Target Rate Cap will be denied. unlimited Outgoing Target Rate Default (Kbps) Set the initial rate for outgoing transfers, positive integer in kilobits per second. Users may be able to modify this rate in real time, if allowed. This setting is not relevant to transfers with a Policy of Fixed Outgoing Target Rate Lock Set to false (default) to allow users to adjust the transfer rate once an outgoing transfer is started. Set to true to prevent real-time modification of the transfer rate. true or false false Outgoing Minimum Rate Cap (Kbps) Set the Minimum Rate Cap for outgoing transfers. The Minimum Rate Cap is a level specified in kilobits per second, below which an outgoing transfer will not slow, despite network congestion or physical network availability. The default value of Unlimited effectively turns off the Minimum Rate Cap. positive integer unlimited Outgoing Minimum Rate Default Set the initial minimum rate for outgoing positive integer transfers, in kilobits per second. Users may be able to modify this rate in real time, if allowed. This setting is not relevant to transfers with a Policy of Fixed. 0 Outgoing Minimum Rate Lock Set to false (default) to allow users to true or false adjust the minimum transfer rate once an outgoing transfer is started. Set to true to prevent real-time modification of the minimum transfer rate. This setting is not relevant to transfers with a Policy of Fixed. false
113 General Configuration Reference 113 Field Description Outgoing Bandwidth Policy Allowed Set the allowed Bandwidth Policy for fixed, high, outgoing transfers. Aspera transfers fair (regular), use fixed, high, fair and low policies low, or any to accommodate network-sharing requirements. When set to any, the server will not deny any transfer based on policy setting. When set to high, transfers with a Policy of high and less aggressive transfer policies (e.g. fair or low) will be permitted. When set to fair, transfers of fair and low will be permitted, while fixed transfers will be denied. When set to low, only transfers with a Bandwidth Policy of low will be allowed. any Outgoing Bandwidth Policy Default Set the default Bandwidth Policy for outgoing transfers. The default policy value may be overridden by client applications initiating transfers. fair fixed Attempts to transfer at the specified target rate, regardless of the actual network capacity. This policy transfers at a constant rate and finishes in a guaranteed time. This policy typically occupies most of the network's bandwidth, and is not recommended in most file transfer scenarios. In fixed mode, a maximum (target) rate value is required. high Monitors the network and adjusts the transfer rate to fully utilize the available bandwidth up to the maximum rate. When congestion occurs, a it transfers at a rate twice of a session with fair policy. In this mode, both the maximum (target) and the minimum transfer rates are required. fair Monitors the network and adjusts the transfer rate to fully utilize the available bandwidth up to the maximum rate. When other types of traffic build up and congestion occurs, it shares bandwidth fairly by transferring at an even rate. In this mode, both the maximum (target) and the minimum transfer rates are required. low Similar to fair mode, the low policy uses the available bandwidth up to the maximum rate, but is much less aggressive when sharing bandwidth with other network traffic. When congestion builds up, the transfer rate is Values fixed, high, fair, low Default
114 General Configuration Reference 114 Field Description Values Default reduced to the minimum rate until other traffic retreats. Outgoing Bandwidth Policy Lock Set to false (default) to allow users to adjust the Bandwidth Policy once an outgoing transfer is started. Set to true to prevent real-time modification of the Bandwidth Policy. true or false false Outgoing Priority Allowed The highest priority your client can request. Use the value 0 to unset this option; 1 to allow high priority, 2 to enforce normal priority. 0, 1, or 2 1 Outgoing Priority Default The initial priority setting. Use the value 0 to unset this option, 1 to allow high priority; 2 to enforce normal priority. 0, 1, or 2 2 Outgoing Priority Lock true or false false delay-odp, delay-adv, or air blank To prevent your clients from changing the priority, set the value to true. Module (for outgoing rate Located within the outgoing <network_rc> stanza, this hidden control) setting is meant for advanced users to select an outgoing rate control module (which will only be applied at the local "receiver" side). It should only be used with special instructions for debugging. Options include: delay-odp: queue scaling controller delay-adv: advanced rate controller air: FASP air TCP Friendly (for outgoing rate control) Located within the outgoing yes or no <network_rc> stanza, this hidden setting is meant for advanced users to turn TCP-friendly mode on or off (which will only be applied at the local "receiver" side when the transfer policy is set to fair). It should only be used with special instructions for debugging. If turned on ("yes"), this mode allows an outgoing FASP transfer to maintain relative fair bandwidth share with a TCP flow under congestion. Bind IP Address Specify an IP address for server-side valid IPv4 address blank ascp to bind its UDP connection. If a valid IP address is given, ascp sends and receives UDP packets only on the interface corresponding to that IP address. Important: The bind address should only be modified (changed to an address other than ) if you, as the System Administrator, understand the no
115 General Configuration Reference 115 Field Description Values Default security ramifications of doing so, and have undertaken precautions to secure the SOAP service. Bind UDP Port Prevent the client-side ascp process from using the specified UDP port. integer between 1 and Disable Packet Batching Set to true to send data packets back-toback (no sending a batch of packets). This results in smoother data traffic at a cost of higher CPU usage. true or false false Batch Size When set to "0" (default), the system uses a pre-computed batch size. Set this to "1" for high concurrency servers (senders) in order to reduce CPU utilization in aggregate. Integer 0 Datagram Size Sets the datagram size on the server side. Integer If size is set with both -Z (client side) and <datagram_size> (server side), the <datagram_size> setting is used. In cases where the client-side is pre-3.3, datagram size is determined by the -Z setting, regardless of the server-side setting for <datagram_size>. In such cases, if there is no -Z setting, datagram size is based on the discovered MTU and the server logs the message "LOG Peer client doesn't support alternative datagram size" Maximum Socket Buffer (bytes) Set the upper bound of the UDP socket buffer of an ascp session below the input value. The default of 0 will cause the Aspera sender to use its default internal buffer size, which may be different for different operating systems. positive integer 0 Minimum Socket Buffer (bytes) Set the minimum UDP socket buffer size for an ascp session. positive integer 0 RTT auto correction Set to true to enable auto correction of the base (minimum) RTT measurement. This feature is helpful for maintaining accurate transfer rates in hypervisor-based virtual environments. true or false false Reverse path congestion inference Set to true to prevent the transfer speed of a session from being adversely affected by congestion in the reverse (non datasending) transfer direction. This feature is useful for boosting speed in bi-directional transfers. true or false true Strong Password Required for Content Encryption Set to true to require the password for content encryption to contain at least 6 characters, of which at least 1 is non- true or false false
116 General Configuration Reference 116 Field Description Values Default true or false false alphanumeric, at least 1 is a letter, and at least 1 is a digit. Content Protection Required Set to true to require that content be left encrypted at the destination. Users are required to enter a password during upload to encrypt the files on the server. Users will be given the option when downloading to decrypt during transfer. Encryption Allowed Set the type of transfer encryption accepted by this computer. Set to any to allow both encrypted and non-encrypted transfers to this computer. Set to none to allow only non-encrypted transfers. Set to aes-128 to allow only encrypted transfers. any, noneaes-128, aes-192, or aes-256 any Do encrypted transfers in FIPS certified encryption mode Set to true for ascp to use a FIPS certified encryption module. When enabled, transfer start is delayed while the FIPS module is verified. true or false false When you run ascp in FIPS mode (that is, <fips_enabled> is set to true in aspera.conf), and you use passphraseprotected SSH keys, you must use keys generated by running ssh-keygen in a FIPS-enabled system, or convert existing keys to a FIPS-compatible format using a command such as the following: openssl pkcs8 -topk8 v2 aes128 -in id_rsa out new-id_rsa Important: When set to true, all ciphers and hash algorithms that are not FIPS compliant will abort transfers. Run at File Start Enables validation when starting a file. uri, This happens before file transfer starts. For lua_script, or more information on inline file validation, none see Overview of Inline File Validation. none Run at File Stop Enables validation when reporting file transfer end. This happens after file transfer is complete and file is closed. For more information on inline file validation, see Overview of Inline File Validation. uri, lua_script, or none none Run at Session Start Enables validation when an ascp session starts. For more information on inline file validation, see Overview of Inline File Validation. uri, lua_script, or none none
117 General Configuration Reference 117 Field Description Values Default Run at Session Stop Enables validation when an ascp session ends. For more information on inline file validation, see Overview of Inline File Validation. uri, lua_script, or none none Run when Crossing File Threshold Enables validation when a set threshold in the file transfer is reached. For more information on inline file validation, see Overview of Inline File Validation. uri, lua_script, or none none Note: For threshold validation, it is possible for the file transfer to complete before the file threshold validation response comes back (because ascp doesn't pause file transfers during file threshold validation); therefore, a complete file transfer could happen even with validation failure. Validation Threshold KB Threshold validation occurs- after the Positive integer threshold value defined in this option is met during file download (when at least the threshold KB of the file is downloaded). Since threshold validation can only be triggered periodically (every second in the worst case), the file must be large enough to trigger this validation. 0 The Validation Threshold option must also be specified (uri or lua) if this option is to be recognized by the system. If Validation Threshold is also enabled, and this value is not specified (or set to 0), the ascp session will exit with an error. Validation Threads Setting a value enables multiple validations Positive integer to happen in parallel in validator threads. 5 Note: If the number of validation threads is not set to 1, then muliple threads may perform different types of validations for different (or the same) files at the same time. In such a situation, the response of a validation_file_stop at the end of a file download might come before the response of a validation_threshold for the same file. Validation URI External URL used for validation calls. When this parameter is defined, at least two validations, validation_file_start and validation_file_stop will happen for every file. The entry should define a URL, port, and URL handler for validation. For URL none
118 General Configuration Reference 118 Field Description Values Default Base64-encoded string blank example, SimpleValidator This value must be defined if any of the following values are set to uri: Base64-Encoded Lua Action Script validation_file_start validation_file_stop validation_ session_start validation_session_stop validation_threshold For Lua API validation, enter the base64encoded value. If both this option and File Path to Lua Action Script option are defined, this value is ignored. For more information on inline file validation, see Overview of Inline File Validation. This value must be defined if any of the following values are set to lua_script: Run at File Start, Run at File Stop, Run at Session Start, Run at Session Stop, Run when Crossing File Threshold. File Path to Lua Action Script For Lua API validation, enter a file path. If Filepath both this option and the Base64-Encoded Lua Action Script option are defined, this value is the one recognized by the system. blank This value must be defined if any of the following values are set to lua_script: validation_file_start validation_file_stop validation_ session_start validation_session_stop validation_threshold For more information on inline file validation, see Overview of Inline File Validation. 4. Save and validate aspera.conf. Run the following command to confirm that the XML is correctly formatted and the parameter settings are valid: # /opt/aspera/bin/asuserdata -v aspera.conf - File System This topic describes how to manually modify the <authorization/> section of aspera.conf. You can also add and edit these parameters using asconfigurator commands. For more information on using asconfigurator, see User, Group and Default Configurations. 1. Open aspera.conf.
119 General Configuration Reference 119 You can find the aspera.conf configuration file at: /opt/aspera/etc/aspera.conf 2. Add or locate the <file_system /> section, as in the example below. <file_system> <access> <paths> <path> <absolute peer_ip="ip_address">/path/$(name)</absolute> <!-- Absolute Path (conditional) --> <absolute>/path/$(name)</absolute> <!-- Absolute Path --> <read_allowed>true</read_allowed> <!-- Read Allowed --> <write_allowed>true</write_allowed> <!-- Write Allowed --> <dir_allowed>true</dir_allowed> <!-- Browse Allowed --> </path> </paths> </access> <read_block_size>0</read_block_size> <!-- Read Block Size --> <write_block_size>0</write_block_size> <!-- Write Block Size --> <read_threads>0</read_threads> <! - Number of I/O Read Threads --> <write_threads>0</write_threads> <! - Number of I/O Write Threads --> <scan_threads>0</scan_threads> <!-- Number of Dir Scanning Threads --> <meta_threads>0</meta-threads> <!-- Number of Metadata Threads --> <sparse_file>false</sparse_file> <!-- Sparse File Checking --> <fail_on_attr_error>yes</fail_on_attr_error> <!-- Behavior on Attr Error --> <compression_method>lz4</compression_method> <!-- Compression Method for File Transfer --> <use_file_cache>true</use_file_cache> <!-- Use File Cache --> <max_file_cache_buffer>0</max_file_cache_buffer> <!-- Max File Cache Buffer--> <resume_suffix>.aspx</resume_suffix> <!-- Resume Suffix --> <preserve_attributes> </preserve_attributes> <!-- Preserve Attributes --> <overwrite>allow</overwrite> <!-- Overwrite --> <file_manifest>disable</file_manifest> <!-- File Manifest --> <file_manifest_path>path</file_manifest_path> <!-- File Manifest Path --> <file_manifest_inprogress_suffix>.aspera-inprogress</file_manifest_inprogress_suffix --> <!-- File Manifest Suffix --> <pre_calculate_job_size>any</pre_calculate_job_size><!-- Pre-Calculate Job Size --> <replace_illegal_chars></replace_illegal_chars> <!-- Convert Restricted Windows Characters --> <storage_rc> <adaptive>true</adaptive> <!-- Storage Rate Control --> </storage_rc> <filters> <!- File Filter Pattern List --> <filter>rule1</filter> <filter>rule2</filter> </filters> <file_create_mode> </file_create_mode> <!-- File Create Mode --> <file_create_grant_mask>644</file_create_grant_mask><!-- File Create Grant Mask --> <directory_create_mode> </directory_create_mode> <!-- Directory Create Mode --> <directory_create_grant_mask>755</directory_create_grant_mask> <!-- Directory Create Grant Mask --> <partial_file_suffix>.partial</partial_file_suffix> <!-- Partial File Suffix --> <file_checksum>any</file_checksum> <!- File Checksum Method --> </file_system> 3. Configuration options reference. Field Description Values Default Absolute Path The docroot: the area of the file system that is accessible to Aspera users. The default empty value gives users access to the entire file system. You can set one global docroot and then further restrict access to the file system by group or individual user. Docroot paths require specific formatting depending on where the transfer server's storage is located. file path or URI undefined (total access)
120 General Configuration Reference 120 Field Description Values Default Format examples Local storage absolute path /home/bear/movies Local storage in URI format (required for serverside encryption-at-rest, not supported by the Aspera Watch Service) file:////home/bear/movies Cloud or on-premises object storage For more information, see Setting Docroots for Object Storage and HDFS. You can also set multiple docroots and make them conditional based on the IP address from which the connection is made by editing aspera.conf. To do so, edit the absolute path setting by adding the IP address using the following syntax: <absolute peer_ip="ip_address">path</ absolute> Read Allowed Setting this to true (default) allows users to transfer from the designated area of the file system as specified by the Absolute Path value. true false true Write Allowed Setting this to true (default) allows users to transfer to the designated area of the file system as specified by the Absolute Path value. true false true Browse Allowed Setting this to true (default) allows users to browse the directory. true false true Read Block Size (bytes) Set the maximum number of bytes that can be stored within a block as the block is being transferred from the source disk drive to the receiver. The default of zero causes the Aspera sender to use its default internal buffer size, which may vary by operating system. This is a performance-tuning parameter for an Aspera sender (which only takes effect if the sender is a server). positive 0 integer, where 500MB or 524,288,000 bytes is the maximum block size. Write Block Size (bytes) Set the maximum bytes within a block that an ascp receiver can write to disk. The default of zero causes the Aspera receiver to use its default internal buffer size, which may vary by operating system. This is a performance-tuning parameter for an Aspera receiver (which only takes effect if the receiver is a server). positive 0 integer, where 500MB or 524,288,000 bytes is the maximum block size. Number of I/O read threads Set the number of threads the Aspera sender uses to positive read file contents from the source disk drive. It takes integer effect on both client and server, when acting as a sender. The default of zero causes the Aspera sender to use its internal default, which may vary by operating 0
121 General Configuration Reference 121 Field Description Values Default system. This is a performance-tuning parameter for an Aspera sender. Number of I/O write threads Set the number of threads the Aspera receiver uses to positive write the file contents to the destination disk drive. It integer takes effect on both client and server, when acting as a receiver. The default of zero causes the Aspera receiver to use its internal default, which may vary by operating system. This is a performance-tuning parameter for an Aspera receiver. 0 Number of Dir Scanning Threads Set the number of threads the Aspera sender uses to positive scan directory contents. It takes effect on both client integer and server, when acting as a sender. The default of zero causes the Aspera sender to use its internal default. This is a performance-tuning parameter for an Aspera sender. 0 Number of Metadata Threads. Set the number of threads the Aspera receiver uses to positive create directories or 0 byte files. It takes effect on both integer client and server, when acting as a receiver. The default of zero causes the Aspera receiver to use its internal default, which may vary by operating system. This is a performance-tuning parameter for an Aspera receiver. 0 Sparse File Checking Set to true to enable sparse file checking, which tells the Aspera receiver to avoid writing zero blocks and save disk space. The default of false to tell the Aspera reciever to write all the blocks. This is a performance-tuning parameter for an Aspera receiver. false Behavior on Attr Error no or yes Set behavior for when operations attempt to set or change file attributes (such as POSIX ownership, ACLs, or modification time) and fail. Setting to yes returns an error and causes the operation to fail. Setting to no logs the error and the operation continues yes Compression Method for File Transfer Set the compression method to apply to transfers. It applies to both the client and server. lz4 Use File Cache Set to true (default) to enable per-file memory true or caching at the data receiver. File level memory false caching improves data write speed on Windows platforms in particular, but uses more memory. This is a performance tuning parameter for an Aspera receiver. true or false lz4, qlz, zlib, or none true Aspera suggests using a file cache on systems that are transferring data at speeds close to the performance of their storage device, and disable it for system with very high concurrency (because memory utilization will grow with the number of concurrent transfers). Max File Cache Buffer (bytes) Set the maximal size allocated for per-file memory cache (see Use File Cache) in bytes. The default of zero will cause the Aspera receiver to use its internal buffer size, which may be different for different positive integer 0
122 General Configuration Reference 122 Field Description Values Default operating systems. This is a performance tuning parameter for an Aspera receiver. Resume Suffix Set the file name extension for temporary metadata text string files used for resuming incomplete transfers. Each data file in progress will have a corresponding metadata file with the same name plus the resume suffix specified by the receiver. Metadata files in the source of a directory transfer are skipped if they end with the sender's resume suffix..aspx Preserve Attributes Set the file creation policy. Set to none to not preserve the timestamps of source files. Set to times to preserve the timestamp of the source files at destination. none or times blank (use the client setting) allow or deny allow Note: For Limelight storage, only the preservation of modification time is supported. Overwrite Set to allow to allow Aspera clients to overwrite existing files on the server, as long as file permissions allow that action. Note: The deny setting does not work, and clients are still allowed to overwrite files on the server if file permissions allow it. File Manifest Set to text to generate a text file "receipt" of all files within each transfer session. Set to disable to not create a File Manifest. The file manifest is a file containing a list of everything that was transferred in a given transfer session. The filename of the File Manifest itself is automatically generated based on the transfer session's unique ID. The location where each manifest is written is specified by the File Manifest Path value. If no File Manifest Path is specified, the file will be generated under the destination path at the receiver, and under the first source path at the sender. text, disable, or none none File Manifest Path Specify the location to store manifest files. Can be an absolute path or a path relative to the transfer user's home. text string blank.asperainprogress Note: File manifests can only be stored locally. Thus, if you are using S3, or other non-local storage, you must specify a local manifest path. File Manifest Suffix Specify the suffix of the manifest file during file transfer. text string Pre-Calculate Job Size Set to yes to enable calculating job size before transferring. Set to no to disable calculating job size before transferring. Set to any to follow client configurations. yes, no, or any any Convert Restricted Windows Characters To enable the replacement of reserved Windows singlecharacters in file and directory names with a nonbyte, nonreserved character, set to the single byte, non-restricted character that will be used for the replacement. Only blank
123 General Configuration Reference 123 Field Description Values applies to files written to the local Windows file system; to enable on the peer it must be set on the peer's system. restricted character Default File Create Mode Set the file creation mode (permissions). If specified, positive create files with these permissions (for example, 0755), integer irrespective of File Create Grant Mask and permissions (octal) of the file on the source computer. Only takes effect when the server is a non-windows receiver. undefined File Create Grant Mask Set the mode for newly created files if File Create Mode is not specified. If specified, file modes will be set to their original modes plus the Grant Mask values. Only takes effect when the server is a non-windows receiver and when File Create Mode is not specified. positive integer (octal) 644 Directory Create Mode Set the directory creation mode (permissions). If specified, create directories with these permissions irrespective of Directory Create Grant Mask and permissions of the directory on the source computer. Only takes effect when the server is a non-windows receiver. positive integer (octal) undefined Directory Create Grant Mask Set the mode for newly created directories if Directory positive Create Mode is not specified. If specified, directory integer modes will be set to their original modes plus the Grant (octal) Mask values. Only takes effect when the server is a non-windows receiver and when Directory Create Mode is not specified. 755 File Filter Pattern List Exclude or include files and directories with the text entries specified pattern in the transfer. Add multiple entries for more inclusion/exclusion patterns. To specify an inclusion, start the pattern with '+ ' (+ and a whitespace). To specify an exclusion, start the pattern with '- ' (- and a whitespace). Two symbols can be used in the setting of patterns: blank A "*" (asterisk) represents zero to many characters in a string. For example, *.tmp matches.tmp and abcde.tmp. A "?" (question mark) represents a single character. For example, t?p matches tmp but not temp. For details on specifying rules, see Applying Filters to Include and Exclude Files. This option applies only when the server is acting as a client. Servers cannot exclude files or directories uploaded or downloaded by remote clients. Partial File Name Suffix Set the filename extension on the destination computer while the file is being transferred. Once the file has been completely transferred, this filename extension is removed. Note: This option only takes effect when it is set on the receiver side. text string blank
124 General Configuration Reference 124 Field Description Values Default File Checksum Method Set the type of checksum to calculate for transferred files. The content of transfers can be verified by comparing the checksum value at the destination with the value read at the source. any, md5, any sha1, sha256, sha384, or sha Save and validate aspera.conf. Run the following command to confirm that the XML is correctly formatted and the parameter settings are valid: # /opt/aspera/bin/asuserdata -v aspera.conf - Filters to Include and Exclude Files Filters allow you to refine the list of files (or directories) designated for transfer. With filters, you indicate which files in the transfer list to skip or include. At runtime, ascp looks for filters in two locations: on the ascp command line, and in aspera.conf. Filters can be set in the aspera.conf file either from the GUI, or by modifying it directly with an editor or asconfigurator. When filtering rules are found in aspera.conf, they are applied before rules on the command line. If no filtering rules are specified, ascp transfers all source files in the transfer list. This topic describes how to specify rules by editing aspera.conf or using asconfigurator. Note: Filter settings apply only when the server is acting as a client. Servers cannot exclude files or directories uploaded or downloaded by remote clients. Setting Filter Rules in aspera.conf The ascp -N and -E options let you specify filter rules individually for each transfer, while filter options configured in aspera.conf allow you to have the same rules applied to all transfers. Filter rules that ascp finds in aspera.conf are always applied before any command-line rules. This allows you to specify individual command-line rules to augment a core set specified in aspera.conf. Filter rules can be set in aspera.conf in the following ways: from the GUI. For details, see Configuring Filters to Include and Exclude Files. by modifying aspera.conf directly with a text editor by modifying aspera.conf with the asconfigurator tool. This section describes how to use the asconfigurator method. However, any of the examples can also be created by editing aspera.conf directly. Below is a section of an aspera.conf file showing settings for filter rules. In this example, the filter rules are in the <default> section, which is where global options are set: <default> <file_system> <filters> <filter>+ file.txt</filter> <filter>- *.txt</filter> </filters> </file_system> </default> Each rule is specified with a separate <filter> option. A rule consists of a "+" or "-" sign (indicating whether to include or exclude), followed by a space character, followed by a pattern. A pattern can be a file or directory name, or a set of names expressed with UNIX glob patterns (described below). (The equivalent ascp command options for the above example are: -N 'file.txt' -E '*.txt' )
125 General Configuration Reference 125 To determine which files to transfer, each file in the set of transfer files (the transfer list) is evaluated by the filter rules in top-down order, as follows: 1. The first (or next) file or directory in the transfer list is compared to the first rule. 2. If the file matches the pattern, it's included (if +) or excluded (if -), and for this file, filtering stops. 3. If the file does not match, it's compared with the next rule and the process is repeated for each rule until a match is found or until all rules have been tried. 4. If the file did not match any rules, it is included in the transfer. Filtering is a process of exclusion, and "+" rules act as overrides to any "-" rules that follow them. Filtering operates only on the set of files and directories in the transfer list. That is, an include option cannot add files or directories that are not already part of the transfer list. If directories or files reside in directories that have already been excluded, they will also be excluded and therefore not checked against any further rules. For example, consider the following rules: - /above/ + /above/below The file /above/below is never considered because its parent directory /above/ has already been excluded. Creating Rule Patterns In order to filter directories and files to be transferred, their names are matched against patterns (globs) that include wildcards and special characters. The patterns use the standard globbing syntax found in UNIX systems along with several extensions. Character case: Case always matters, even if the scanned file system does not enforce such a distinction. For example, "debug" does not match "Debug". To match both, the pattern should be "[Dd]ebug". Partial matches: With globs, unlike standard regular expressions, the entire filename or directory name must match the pattern. That is, abcdef matches the pattern abc*f but abcdefg does not. Pattern position: A pattern given with "+" will match a path only if it falls directly under the transfer directory. However, a pattern given with "-" will match a path regardless of where (at which level) the path falls under the transfer directory. For example, given the pattern 'zzz*' and a transfer directory AAA: The "+" option matches only if the path to the zzz file (or directory) falls directly under AAA. That is, AAA/zzz. The "-" option matches regardless of the where the path to the zzz file (or directory) falls under AAA. For example, AAA/abc/def/zzz. For details on using wildcards and special characters to build rule patterns, see Applying Filters to Include and Exclude Files. Running Asconfigurator In order to run asconfigurator successfully, you must (1) have write access to aspera.conf, and (2) not be executing it from aspshell, which does not allow running asconfigurator. The set commands for user, group, and global filter settings use the following syntax: asconfigurator -x "set_user_data;user_name,username;file_filters, rule1 rule2... rulen" asconfigurator -x "set_group_data;group_name,groupname;file_filters, rule1 rule2... rulen" asconfigurator -x "set_node_data;file_filters, rule1 rule2... rulen" Each rule argument, including the first, must begin with a " " character, which serves as the separator between multiple rules.
126 General Configuration Reference 126 To clear rules, run asconfigurator by specifying "file_filters," without rule arguments. Note that the comma in "file_filters," is still required. See the example below. Note: Running asconfigurator replaces the specified settings; it does not add to them. Examples The following example creates the aspera.conf <default> code shown above: $ asconfigurator -x "set_node_data;file_filters, + file.txt - *.txt" The following example sets filters for user asp1, producing the result below: # asconfigurator -x "set_user_data;user_name,asp1;file_filters, + abc/wxy/ tuv/** - abc/**/def" <aaa> <realms> <realm> <users> <user> <name>asp1</name> <file_system> <filters> <filter>+ abc/wxy/tuv/**</filter> <filter>- abc/**/def</filter> </filters> </file_system> </user> </users> </realm> </realms> </aaa> The following example clears all filters for the group asgroup, producing the result below: # asconfigurator -x "set_group_data;group_name,asgroup;file_filters," <groups> <group> <name>asgroup</name> <file_system> <filters /> </file_system> </group> </groups> For further information on the use of asconfigurator, see Asconfigurator Reference. Server-Side Symbolic Link Handling Aspera handles symbolic links in ascp based on settings configured in the aspera.conf file, found in the following location: /opt/aspera/etc/aspera.conf
127 General Configuration Reference 127 Configuration Options The following configuration options are set in the <file_system> section of the aspera.conf file: <file_system> <symbolic_links>comma-separated_options</symbolic_links> </file_system> Note: If no option is specified, the configuration defaults to create, follow. Option Description Client Behavior Server Behavior create Create symbolic links with arbitrary targets. This is the default. Skip if not configured. Symbolic links are always copied to the server if the client requests. follow Follow symbolic links with targets inside docroot. If at any point the path goes outside the docroot, ascp will not complete the transfer. This is option set by default. Symbolic links are always copied to the server if the client requests. Skip if not configured. Follow symbolic links with targets inside the docroot. Note: If the docroot is a symbolic link and is specified as the source or destination: As the receiver, follow the target widely (no docroot constraint) and unconditionally, regardless of the symbolic link actions that are configured/requested. Note: If the docroot is a symbolic link and is specified as the source or destination: As the sender, follow the target widely (no docroot constraint) and unconditionally, regardless of the symbolic link actions that are configured/requested. follow_widefollow symbolic links with arbitrary targets, even if the targets are outside the docroot. Symbolic links are always copied to the server if the client requests. Note: If the docroot is a symbolic link and is specified as the source or destination: As the receiver, follow the target widely (no docroot constraint) and unconditionally, regardless of the symbolic link actions that are configured/requested. none Take no action with symbolic links. Take no action with symbolic links. Take no action with symbolic links. aspera.conf - Server-Side Encryption at Rest (EAR) Capabilities When files are uploaded from an Aspera client to the server, server-side encryption-at-rest (EAR) saves files on disk in an encrypted state. When downloaded from the server, server-side EAR first decrypts files automatically, and then the transferred files are written to the client's disk in an unencrypted state. Server-side EAR provides the following advantages: It protects files against attackers who might gain access to server-side storage. This is important primarily when using NAS storage or cloud storage, where the storage can be accessed directly (and not just through the computer running Aspera Enterprise Server, Connect Server or Point-to-Point Client).
128 General Configuration Reference 128 It is especially suited for cases where the server is used as a temporary location--for example, when a client uploads a file and another one downloads it. Server-side EAR can be used together with client-side EAR. When used together, content is doubly encrypted. Server-side EAR doesn't create an "envelope" as client-side EAR does. The transferred file stays the same size as the original file. The server stores the encryption and various metadata necessary for server-side EAR separately. (By contrast, client-side EAR creates a file envelope containing both the encrypted contents of the file and the encryption metadata, and it also changes the name of the file by adding the file extension.aspera-env.) It works with both regular transfers (FASP) and HTTP fallback transfers. Limitations and Considerations Server-side EAR is not designed for cases where files need to move in an encrypted state between multiple computers. For that purpose, client-side EAR is more suitable: files are encrypted when they first leave the client, then stay encrypted as they move between other computers, and are decrypted when they reach the final destination and the passphrase is available. Do not mix server-side EAR and non-ear transfers. Doing so can cause problems for clients by overwriting files when downloading or uploading. Server-side EAR does not work with multi-session transfers (using ascp -C or node API multi_session set to greater than 1). Configuring Server-Side EAR 1. Set the docroot in URI format. Server-side EAR requires the storage to have a docroot in URI format, such that it is prefixed with file:///. The third slash ( / ) does not serve as the root slash for an absolute path. For example, a docroot of /home/xfer would be set as file:////home/xfer and a docroot of C:\Users\xfer would be set as file:///c: \Users\xfer. To set the docroot for a user, group, or default, from the command line, run the appropriate asconfigurator command: # asconfigurator -x "set_user_data;user_name,username;absolute,file:///filepath" # asconfigurator -x "set_group_data;group_name,group_name;absolute,file:///filepath" # asconfigurator -x "set_node_data;absolute,file:///filepath" This creates lines similar to the example below, in which the user asp1 has a docroot set to file:////users/ testing/public: <user> <name>asp1</name>... <file_system> <access> <paths> <path> <absolute>file:////users/testing/public</absolute> </path> </paths> </access> </file_system>... </user> To manually edit aspera.conf, open it from the following location and insert text similar to the example above. /opt/aspera/etc/aspera.conf
129 General Configuration Reference Set the password. The server-side EAR password can be set for all users (global), per group, or per user. You can specify these settings using asconfigurator or manually editing aspera.conf: To set the EAR password for a user, group, or default, run the appropriate command: # asconfigurator -x "set_user_data;user_name,username;transfer_encryption_content_protection_secret,passp # asconfigurator -x "set_group_data;group_name,group_name;transfer_encryption_content_protection_secret,p # asconfigurator -x "set_node_data;transfer_encryption_content_protection_secret,passphrase" Setting the default value (gobal setting) creates the following text in aspera.conf: <default> <transfer> <encryption> <content_protection_secret>passphrase</content_protection_secret> </encryption> </transfer>... </default> Setting a value for a user, such as asp1, creates the following text in aspera.conf: <user> <name>asp1</name> <transfer> <encryption> <content_protection_secret>passphrase</content_protection_secret> </encryption> </transfer>... </user> To manually add a passphrase, open aspera.conf and insert text similar to the examples above, depending on your specifications. 3. Optional: Require content protect and/or strong passwords. In addition to setting a password, you can set options to cause server-side EAR to fail if a password is not given or if a password is not strong enough. For example, the following asconfigurator command adds both these options for all users (global): # asconfigurator -x "set_node_data;transfer_encryption_content_protection_required,true; \ transfer_encryption_content_protection_strong_pass_required,true" This command adds the following text in aspera.conf: <default> <transfer> <encryption> <content_protection_secret>passphrase</content_protection_secret> <content_protection_required>true</content_protection_required> <content_protection_strong_pass_required>true</ content_protection_strong_pass_required> </encryption> </transfer>... </default>
130 General Configuration Reference 130 To manually enable these options, open aspera.conf and insert text similar to the example above. 4. Save your changes to aspera.conf then validate them by running the following command: # /opt/aspera/bin/asuserdata -v Overview of Inline File Validation If an executable file containing malicious code is uploaded to the server, the malicious code can subsequently be executed by an external product that integrates with an Aspera product. Inline file validation is a feature that enables file content to be validated while the file is in transit, as well as when the transfer is complete. You can include or exclude files with certain characteristics; for example: Accept only files of certain types (extensions) Examine the.zip / archive files for unapproved file types Disallow files greater that a certain size The validation check is made with a Lua script.or with a RESTful call to an external URL. The mode of validation used (URL or Lua) is defined in the Enterprise Server GUI or aspera.conf. Note: Inline file validation with Lua script is only available for Enterprise Server products that are v or above. Defining Values for Inline File Validation Parameters The following parameters for inline file validation set the method of file validation (uri, lua, or none). They can be set in the GUI (Global Configuration > Filehandling options) or manually (by editing the aspera.conf or running the asconfigurator command). run run run run run at file start at file stop at session start at session stop when crossing file threshold Two additional parameter values--specifically for inline validation with a Lua script--can be set either in the GUI or manually: base64-encoded Lua action script file path to Lua action script The following parameters can only be set manually: validation threshold_kb validation threads validation uri (for inline validation with URI, only) For more detailed information about these parameters, see File Handling (defining values in the UI) or aspera.conf Transfer (defining values in aspera.conf). Inline Validation with URI or Lua Script For information on the process of validation with a URL or Lua script, see Inline File Validation with URI or Inline File Validation with Lua Script.
131 General Configuration Reference 131 Inline File Validation with URI For general information about inline file validation, see Overview of Inline File Validation. Configuration To set up a validation handler for inline file validation, define a URL in the <transfer> section of aspera.conf and define values for the REST service. The code examples in the steps below are for an admin using a Java servlet deployed on an Apache web server, but this process is generalizable to other programming languages and other servers. 1. Configure the REST service. web.xml must have values for the <servlet> and <servlet_mapping> sections to provide the necessary information for validation. Note: The <servlet-name> (URL handler) value is reused in both aspera.conf (in the next step) and custom code (see Custom Code for Including and Excluding Files, below). <?xml version="1.0" encoding="utf-8"?> <web-app xmlns=" xmlns:xsi=" xsi:schemalocation=" xmlns.jcp.org/xml/ns/javaee/web-app_3_1.xsd" version="3.1"> <servlet> <servlet-name>simplevalidator</servlet-name> <servlet-class>aspera.validation.simplevalidator</servlet-class> </servlet> <servlet-mapping> <servlet-name>simplevalidator</servlet-name> <url-pattern>/simplevalidator/validation/files</url-pattern> </servlet-mapping> </web-app> 2. Edit the <transfer> section in aspera.conf to add the server's IP address and port, and the servlet name (URL handler) found in web.xml. For example: <transfer> <validation_uri> </transfer> Validation Requests and Returned Responses During the inline validation process, ascp automatically generates a JSON-based request. The call is made with the URL already defined in aspera.conf. For example: POST URL/validation/files HTTP/1.1 Content-type: application/json The system then generates a JSON accepted or error response (OK or Bad Request). Sample JSON accepted response: The "file_encryption" field is only returned if server-side EAR is present. HTTP 200 OK {
132 General Configuration Reference 132 } "id" : " ", "file_encryption" : { "passphrase" : "supersecret" } "aspera_response_object_name" : { "startstop" : "start" "xfer_id" : "AAAA-BBBB",... "file_csum" : "a1000abf882", "file_csum_type" : "sha2-256" } Sample JSON error response: If a file validation fails, it terminates the session with an error message from the URI. HTTP 400 Bad Request { "error" : { "code" : "1022", "message" : "The file fails validation" } } Custom Code for Including and Excluding Files Administrators can include or exclude files by enabling whitelisting, blacklisting, or another method of their own design. You can do this by creating custom code in the programming language of your choice, using a web server that runs a REST service. (Connect Server users have the option to use the web server associated with that installation). The following is an example of custom code that creates a file blacklist, using a Java servlet deployed on an Apache web server. Note that this code uses the servlet name SimpleValidator, which was defined in web.xml above. package aspera.validation; import com.google.gson.gson; import com.google.gson.jsonobject; import import import import import import import javax.servlet.servletexception; javax.servlet.annotation.webservlet; javax.servlet.http.httpservlet; javax.servlet.http.httpservletrequest; javax.servlet.http.httpservletresponse; java.io.bufferedreader; = "SimpleValidator") public class SimpleValidator extends HttpServlet { protected void dopost(httpservletrequest request, HttpServletResponse response) throws ServletException, IOException { StringBuilder filerequestjson = new StringBuilder(); BufferedReader reader = request.getreader(); String line = ""; Gson gson = new Gson(); System.out.println("Got Validation request..."); while (line!= null) { line = reader.readline(); if (!(line == null)) { filerequestjson.append(line).append("\n"); }
133 General Configuration Reference 133 } ValidationInput validationinput = gson.fromjson(filerequestjson.tostring(), ValidationInput.class); System.out.println("FileData JSON: " + filerequestjson.tostring()); if (validationinput.file!= null && validationinput.file.endswith(".sh") validationinput.file.endswith(".exe")) { file!!"); JsonObject innerobject = new JsonObject(); innerobject.addproperty("message", "Cannot transfer executable innerobject.addproperty("code", 1); JsonObject jsonobject = new JsonObject(); jsonobject.add("error", innerobject); response.getoutputstream().println(jsonobject.tostring()); response.setstatus(httpservletresponse.sc_internal_server_error); } else { JsonObject jsonobject = new JsonObject(); jsonobject.addproperty("success", true); jsonobject.addproperty("data", "File is ok to transfer"); jsonobject.addproperty("code", 1); response.getoutputstream().println(jsonobject.tostring()); } } response.setstatus(httpservletresponse.sc_ok); } return; Inline File Validation with Lua Script For general information about inline file validation, see Overview of Inline File Validation To use a Lua script for inline file validation, the administrator creates a base-64 encoded Lua action script and sets the path to that script in the GUI or in the <transfer> section of aspera.conf. During the inline validation, ascp automatically generates a request; the parameters for the Lua call are passed to a Lua script defined in aspera.conf. The parameters for Lua calls are passed to Lua scripts by using the array 'env_table'. The following is an example request body: env_table["startstop"] = "running" env_table["xfer_id"] = "AAAA-BBBB" env_table["session_id"] = " " env_table["host"] = " " env_table["client_ip"] = " " env_table["user"] = "admin" env_table["userid"] = 24 env_table["direction"] = "send" env_table["target_rate_kbps"] = 0 env_table["min_rate_kbps"] = 0 env_table["rate_policy"] = "fair"
134 General Configuration Reference 134 env_table["cipher"] = "aes-128" env_table["cookie"] = "xyz" env_table["manifest_file"] = "/data/manifests/aspera-transfer-1234.txt" env_table["file"] = "/data/home/luke/test.mpg" env_table["size"] = env_table["start_byte"] = 0 env_table["bytes_written"] = 0 env_table["tags"] = "tags" env_table["file_name_encoding"] = "utf8" env_table["file_csum"] = "a1000abf882" env_table["file_csum_type"] = "sha2-256" Lua Request Body Parameters and Values Field Description Values "startstop" Sets the type of validation start, stop, or running "xfer_id" Value used to identify a transfer session String "session_id" Value used to identify a validation session String "host" Server hostname or IP address Hostname or IP address "client_ip" Client IP address IP address "user" SSH account login name String "user_id" Value used to identify the user String "direction" Direction of transfer (send or receive) send or recv "target_rate_kbps" Target rate (in kbps) for file transfer Integer with ascp "min_rate_kbps" Minimum rate (in kbps) for file transfer with ascp Integer "rate_policy" Defines the ascp rate policy. This value is taken from the default configuration in the GUI or aspera.conf, if not defined here. fixed, fair, high, or low "cipher" The encryption cipher for file data. String; AES128, ANY, or NONE "cookie" The cookie sent to the client system String "manifest_file" Path to manifest file, which contains a list of transferred files. The command for this in ascp is --filemanifest-path=file_path Filepath "file" Path to file being validated Filepath "size" Allowable file size Integer (up to 64-bit) "start_byte" Integer "bytes_written" Integer "tags" The JSON request passes the supplied tag values to ascp,
135 General Configuration Reference 135 Field Description Values which in turn passes the tags to the validator. "file_name_encoding" String "file_csum" File checksum String "file_csum_type" File checksum type md5, sha1, or any The returned values from Lua can be used to indicate validation success, validation failure, the script error, or to change the file destination: Status Lua return value Validation success No value or LRET_OK Change file destination LRET_REDIRECT_DST followed by a new destination path for the file. This option is only available at file transfer start, returning it at any other state results in an error. Validation failure LRET_INVALID, optionally followed by a failure description string Script error LRET_ERROR followed by an error number or error description string Lua File Interfaces Three Lua file interfaces allow Lua scripts to reference files: lua_stat, lua_file_delete, and lua_rename. lua_stat("file_path") Used to gather metadata for the single file specified by file_path, where file_path is relative to the docroot, if defined. Metadata output include the following: stat_data["exists"] = "true" "false" stat_data["size"] = file_size stat_data["blocks"] = file blocks stat_data["blocksize"] = block_size stat_data["type"] = "Invalid" "S_IFDIR" "S_IFREG" "S_IFCHR" "S_IFBLK" "S_IFIFO" "S_IFSOCK" "S_IFLNK" "Block stream" "Custom" "Unknown" stat_data["mode format"] = "Windows format" "Linux format" stat_data["mode"] = filemode (format based on mode format above) stat_data["uid"] = uid stat_data["gid"] = gid stat_data["ctime"] = ctime stat_data["mtime"] = mtime stat_data["atime"] = atime lua_file_delete("file_path") Deletes the single file specified by file_path, where file_path is relative to the docroot, if defined. lua_rename("old_file_path","new_file_path") Renames the file specified by old_file_path with the new name specified by new_file_path, both of which are relative to the docroot, if defined.
136 General Configuration Reference 136 Lua Logging Interface You can output simple text strings (format strings are not supported) to the Aspera logs using the ascp log interfaces. For example, to log when the Lua script started, enter the following line in a Lua script: lua_log("lua script started") This produces the following log entry: xxxxxx LOG lua: Lua script started The following ascp logging functions are supported: as_log as_err as_dbg1 as_dbg2 as_dbg3 as_dbg4 To use the ascp log functions in your Lua script, replace as with lua.
137 ascp: Transferring from the Command Line 137 ascp: Transferring from the Command Line Ascp Command Reference The executable ascp (Aspera secure copy) is a command-line FASP transfer program. The tables below describe the complete command usage, including general syntax guidelines, supported environment variables, a synopsis, and command options. General Syntax Guidelines Item Decription symbols used in the paths Use single-quote (' ') and forward-slashes (/) on all platforms. Characters to avoid / \ " : '? > < & * Environment Variables If needed, you can set the following environment variables for use with the ascp command: Item Initiation Command Password ASPERA_SCP_PASS=password Token ASPERA_SCP_TOKEN=token Cookie ASPERA_SCP_COOKIE=cookie Content Protection Password ASPERA_SCP_FILEPASS=password Proxy Server Password ASPERA_PROXY_PASS=proxy_server_password Ascp Usage ascp options [[user@]srchost:]source_file1[,source_file2,...] [[user@]desthost:]target_path For examples of ascp commands, see Ascp General Examples. Important: If you do not specify a username for the transfer, the local username is authenticated (by default). If you are authenticating on a Windows machine as a domain user, the transfer server strips the domain from the username. For example, Administrator is authenticated rather than DOMAIN \Administrator. Thus, you must specify the domain explicitly. Special Considerations for URI Paths URIs are supported in paths, but only under the following restrictions: URIs can only be specified on the command line. If the source paths are URIs, they must all be in the same cloud storage account. No docroot (download), local docroot (upload), or source prefix can be specified. If a destination path is a URI, no docroot (upload) or local docroot (download) can be specified. The special schemes stdio:// and stdio-tar:// are supported only on the client. They cannot be used as an upload destination or download source. If required, specify the URI passphrase as part of the URI or set it as an environment variable (ASPERA_SRC_PASS or ASPERA_DST_PASS, depending on the direction of transfer).
138 ascp: Transferring from the Command Line 138 Transfer Testing with Minimal Storage Requirements For ascp transfer testing purposes, you can use a faux:// argument in place of the source file and target path to send random data and not write it to disk at the destination. For more information, see Testing and Optimizing Transfer Performance. For examples, see Ascp General Examples. Ascp Options Option Description -h, --help Display usage. -A, --version Display version and license information; then exit. -T Disable encryption for maximum throughput. -c Specify the encryption cipher for file data. Options are aes128, aes192, aes256, or none. This overrides the setting for transport_cipher in aspera.conf. -d Create target directory if it doesn't already exist. Note: This option is automatically applied for uploads to object storage. -q Quiet mode (to disable progress display). -v Verbose mode (prints connection and authentication debug messages in the log file). For information on log files, see Log Files. -6 Enable IPv6 address support. When using IPv6, the numeric host can be written inside brackets. For example, [2001:0:4137:9e50:201b:63d3:ba92:da] or [fe80::21b:21ff:fe1c:5072%eth1]. -D -DD -DDD Specify the debug level, where each D is an additional level of debugging. -l max_rate Set the target transfer rate in Kbps (default: Kbps). If the ascp client does not specify a target rate, the rate is acquired from the server aspera.conf setting. If local or server aspera.conf rate caps are specified, the "starting" (default) rates is not higher than the cap. -m min_rate Set the minimum transfer rate in Kbps (efault: 0. If the ascp client does not specify a minimum rate, the rate is acquired from the server aspera.conf setting. If local or server aspera.conf rate caps are specified, the "starting" (default) rates is not higher than the cap. -u user_string Apply a user string, such as variables for pre- and post-processing. -i private_key_file Use public key authentication and specify the SSH private key file. Typically, the private key file is in the directory $HOME/.ssh/id_algorithm. Multiple private key files can be specified using multiple -i arguments. The keys are tried in order and the process ends when a key passes authentication or when all keys have been tried and authentication fails. -w{r f} Test bandwidth from server to client (r) or client to server (f). Currently a beta option. -K probe_rate Set probing rate (Kbps) when measuring bottleneck bandwidth. (Default: 100Kbps) -k { } Enable resuming partially transferred files at the specified resume level (default: 0). This must be specified for your first transfer; otherwise, it does not work for subsequent transfers. Resume levels: -k 0 Always retransfer the entire file. -k 1 Check file attributes and resume if the current and original attributes match.
139 ascp: Transferring from the Command Line 139 Option Description -k 2 Check file attributes and do a sparse file checksum; resume if the current and original attributes/checksums match. -k 3 Check file attributes and do a full file checksum; resume if the current and original attributes/checksums match. When a complete file exists at the destination (no.aspx), the source file size is compared with the destination file size. When a partial file and a valid.aspx file exist at the destination, the source file size is compared with the file size recorded inside the.aspx file. -Z dgram_size Specify the datagram size (MTU) for FASP. By default, the detected path MTU is used. (Range: bytes) Note: As of version 3.3, datagram size can also be enforced by the server using <datagram_size> in aspera.conf. If size is set with both -Z (client side) and <datagram_size> (server side), the <datagram_size> setting is used. If the client-side is pre-3.3, datagram size is determined by the -Z setting, regardless of the server-side setting for <datagram_size>. In this case, if there is no -Z setting, datagram size is based on the discovered MTU and the server logs the message "LOG Peer client doesn't support alternative datagram size". -g read_size Set the read-block size, in bytes. A read_size of 1M is 1 MB. The maximum block size is 500 MB. The default of 256K causes the Aspera sender to use its default internal buffer size. This is a performance-tuning parameter for an Aspera sender, which takes effect only if the sender is a server. It specifies the maximum number of bytes that can be stored within a block as the block is transferred from the source disk to the receiver. This option overrides the client's configuration file setting for this feature if set. The server uses its configuration file setting for this feature if it's set, otherwise it uses read_size if set; however, it does not use settings in the client configuration file. -G write_size Set the write-block size, in bytes. A write_size of 1M is 1 MB. The maximum block size is 500 MB. The default of 256K causes the Aspera receiver to use its default internal buffer size. This is a performance-tuning parameter for an Aspera receiver, which takes effect only if the receiver is a server. It specifies the maximum number of bytes within a block that an ascp receiver can write to disk. This option overrides the client's configuration file setting for this feature if set. The server uses its configuration file setting for this feature if it's set, otherwise it uses write_size if set; however, it does not use settings in the client configuration file. -L local_log_dir[:size] Specify a logging directory in the local host, instead of using the default directory. Optionally set the size of the log file (default 10 MB). -R remote_log_dir Specify a logging directory in the remote host, instead of using the default directory. -S remote_ascp Specify the name of the remote ascp binary (if different). -e prepost Specify an alternate pre/post command. Use the complete path and file name. -O fasp_port Set the UDP port to be used by FASP for data transfer. (Default: 33001) -P ssh-port Set the TCP port to be used for FASP session initiation. (Default: 22) -C nid:ncount Enable multi-session transfers (also known as parallel transfers) on a multi-node/ multi-core system. Specify the node ID (nid) and count (ncount) in the format 1:2, 2:2. The valid range of values for nid and ncount is 1-128, and nid must be less than or
140 ascp: Transferring from the Command Line 140 Option Description equal to ncount. Assign each participant to an independent UDP port. Large files can be split across sessions, see --multi-session-threshold. -E pattern -N pattern Exclude (-E) or include (-N) files or directories from the transfer using the specified pattern. This option can be used multiple times to exclude/include many patterns. Up to 16 -E and -N patterns can be used. The following two symbols can be used in specifying the pattern: A "*" (asterisk) represents zero or more characters in a string. For example *.tmp matches.tmp and abcde.tmp. A "?" (question mark) represents a single character. For example t?p matches tmp but not temp. Rules are applied in the order in which they are encountered, with the first rule taking precedence. For details on specifying rules, see Applying Filters to Include and Exclude Files. --exclude-newerthan=mtime Exclude files from the transfer based on when the file was last changed. This feature does not include directories. --exclude-olderthan=mtime -f config_file Specify an alternate Aspera configuration file (default is aspera.conf). -W token_string Specify the token string for the Transfer only part of a file. This option only works when downloading a single file and does not support resuming. The argument to "-@" may omit either or both numbers, and the ":" delimiter. For example, -@3000:6000 transfers bytes from position 3000 to position 6000; -@1000: transfers from 1000 to the end of the file; and -@:1000 transfers from beginning to X rexmsg_size Adjust the maximum size in bytes of a retransmission request. (Max: 1440). --mode=mode Specify the transfer direction, where mode is either send or recv. Requires -host. --user=username The user name to be authenticated by the transfer server. Important: If you do not specify a username for the transfer, the local username is authenticated (by default). If you are authenticating on a Windows machine as a domain user, the transfer server strips the domain from the username. For example, Administrator is authenticated rather than DOMAIN\Administrator. Thus, you must specify the domain explicitly. --host=hostname The server's address. Requires --mode. --keepalive Run ascp in persistent mode. Requires --mode and --host. --save-beforeoverwrite Saves a copy of an existing file if a transfer would overwrite the file. If the filename is filename.ext, the file is saved as filename.yyyy.mm.dd.hh.mm.ss.index.ext (where index is set to 1 at the beginning of each second and incremented for each file saved during the same second) in the same directory before the new file is written. File attributes are maintained in the renamed file. --policy=fixed high fair low Set the FASP transfer policy.
141 ascp: Transferring from the Command Line 141 Option Description fixed Attempts to transfer at the specified target rate, regardless of the actual network capacity. This policy transfers at a constant rate and finishes in a guaranteed time. This policy typically occupies most of the network's bandwidth, and is not recommended in most file transfer scenarios. In fixed mode, a maximum (target) rate value is required. high Monitors the network and adjusts the transfer rate to fully utilize the available bandwidth up to the maximum rate. When congestion occurs, a it transfers at a rate twice of a session with fair policy. In this mode, both the maximum (target) and the minimum transfer rates are required. fair Monitors the network and adjusts the transfer rate to fully utilize the available bandwidth up to the maximum rate. When other types of traffic build up and congestion occurs, it shares bandwidth fairly by transferring at an even rate. In this mode, both the maximum (target) and the minimum transfer rates are required. low Similar to fair mode, the low policy uses the available bandwidth up to the maximum rate, but is much less aggressive when sharing bandwidth with other network traffic. When congestion builds up, the transfer rate is reduced to the minimum rate until other traffic retreats. Important: If --policy is not set, ascp uses the server-side policy setting (fair by default). --sourceprefix=prefix Add prefix to the beginning of each source path. This can be either a conventional path or a URI; however, it can only be a URI if there is no root defined. --src-base=prefix Specify the prefix to be stripped off from each source object. The remaining portion of the source path is kept intact at the destination. Special care must be taken when using this option with cloud storage. Example: The "clips" directory on the remote computer contains the following folders and files: /clips/outgoing/file1 /clips/outgoing/foldera/file2 /clips/outgoing/folderb/file3 To transfer all folders and files within the "outgoing" folder but not the "outgoing" folder itself, run the following command: # ascp -d --src-base=/clips/outgoing/ root@ :/ clips/outgoing/ /incoming Result: The following folders and files appear in the "incoming" directory at the destination. Files outside of the source base (for example, /temp/file4) are not transferred, and warnings are generated. (docroot)/incoming/file1 (docroot)/incoming/foldera/file2 (docroot)/incoming/folderb/file3 If the same transfer is run without --src-base=/clips/outgoing/, then the following folders and files appear at the destination: (docroot)/incoming/outgoing/file1 (docroot)/incoming/outgoing/foldera/file2 (docroot)/incoming/outgoing/folderb/file3
142 ascp: Transferring from the Command Line 142 Option Description For further examples, with and without --src-base, see Ascp File Manipulation Examples Use with URIs The --src-base option performs a character-to-character match with the source path specifying a file or directory. For cloud storage, --src-base must specify the URI in the same manner as the source parameters. For example, if the source includes an embedded passphrase, the source base must also include an embedded passphrase or it does not match the source files/directories). --file-list=filename Extract a list of sources to transfer from filename. The file list supports UTF-8 files and input from standard input through "-". If the sources are URIs, the list file should not exceed 24kb. The sources can exist on either the local host or the remote host (for download), but not on both. Each source must be specified on a separate line, for example: src src2... srcn Multiple --file-list options are not supported in one ascp command. If multiple file lists are specified, all but the last are ignored. In addition, you cannot include file names in a command with --file-list. Only files from the file list are transferred. --file-pairlist=filename Extract a list of sources and corresponding destinations from filename. There is no command-line equivalent for specifying file pairs. If the sources or destination are URIs, the list file should not exceed 24kb. Each source and each destination must be specified on a separate line: src1 dst1 src2 dst2... srcn dstn Source content is specified using the full file or directory path. Destination directories are specified relative to the transfer user's docroot, which is specified as a "." at the end of the ascp command. For example, # ascp --file-pair-list=filepairlist.txt --mode=send -user=username --host=host_ip_address. Multiple --file-list options are not supported in one ascp command. If multiple file lists are specified, all but the last are ignored. In addition, you cannot include file names in a command with --file-list. Only files from the file list are transferred. --dest64 Indicate that the destination is base64 encoded. --sourceprefix64=prefix Indicate that the specified source prefix is base64 encoded. If a non-encoded source prefix is also specified on the command line, the later argument takes precedence.
143 ascp: Transferring from the Command Line 143 Option Description --symboliclinks=method Specify the rule to handle symbolic links. This option takes following values: (Default: follow). follow Follow symbolic links and transfer the linked files. copy Copy only the alias file. If a file with the same name exists on the destination, the symbolic link is not copied. copy+force Copy only the alias file. If a file with the same name exists on the destination, the symbolic link replaces the file. If the file of the same name on the destination is a symbolic link to a directory, it is not replaced. skip Skip the symbolic links. Important: On Windows, the only option is skip. --remove-aftertransfer Remove all source files (excluding the source directory) after they are successfully transferred. Requires write permissions on the source. --move-aftertransfer=archivedir Move source files and copy source directories to archivedir after they are successfully transferred. Requires write permissions on the source and the archivedir. Because directories are copied, the original source tree remains in place. The archivedir is created if it does not already exist. If the archive directory cannot be created, the transfer proceeds and the source files remain in their original location. Example upload: # ascp --move-after-transfer=c:\users\pat\archive C: \Users\Pat\srcdir\file0012 Pat@ :/ Results: file0012 is uploaded to Pat's docroot on , the server (destination). On the current machine (source), file0012 is moved (not copied) to C:\Users \Pat\Archive Example download: # ascp --move-after-transfer=archive Pat@ :/ srcdir C:\Users\Pat Results: srcdir is downloaded to C:\Users\Pat on the current machine (destination). On the server (source), srcdir is moved (not copied) to the archive directory Pat@ :/Archive. When the file or directory is moved to the archive, no portion of the path above the transferred file or directory is included, unless the --src-base option is specified. The --src-base=prefix option preserves paths in the archive directory the same way it preserves them with transfers. That is, when --src-base=prefix is specified, files are moved to the archivedir and they include the portion of the path that remains when prefix is removed. Example: # ascp --src-base=c:\users\pat --move-after-transfer=c: \Users\Pat\Archive C:\Users\Pat\srcdir\file0012 Pat@ :/ Results:
144 ascp: Transferring from the Command Line 144 Option Description file0012 is uploaded to Pat's docroot on The file includes the path minus the prefix C:\Users\Pat that is, srcdir/file0012. On the current machine (source), file0012 is moved to C:\Users\Pat \Archive. The file includes the path minus the prefix C:\Users\Pat that is, C:\Users\Pat\Archive\srcdir\file0012. Once files have been moved to the archive, the original source directory tree remains intact. To remove empty source directories that remain after files have been moved, add the flag --remove-empty-directories to the ascp command. This removes empty source directories, except for those that are specified as the source to transfer. Restrictions: archivedir must be on the same file system as the source. If the specified archive is on a separate file system, it is created (if it does not exist), but an error is generated and files are not moved to it. For cloud storage, archivedir must be in the same cloud storage account. archivedir is subject to the same docroot restrictions as the source. --remove-after-transfer and --move-after-transfer are mutually exclusive. Including both in the same command generates an error. Empty directories are not saved to archivedir. --remove-emptydirectories Remove empty source directories once the transfer has completed (not including a directory specified as the source to transfer). Do not use if multiple processes (ascp or other) might access the source directory at the same time. --remove-emptysource-directory Remove the source directory argument itself (for use with --remove-emptydirectories). --skip-specialfiles Skip special files (for example, devices and pipes). --filemanifest=output Generate a list of all transferred files, where output is none or text (Default: none) --file-manifestpath=directory Specify the path to the file manifest. --file-manifestinprogresssuffix=suffix Specify the suffix of the file manifest's temporary file. (Default:.asperainprogress) --precalculatejob-size Calculate total size before transfer. The server side aspera.conf setting overrides the ascp command-line option. --overwrite=method Overwrite destination files with source files of the same name. This option takes the following values (Default: diff): Important: File manifests can only be stored locally. Thus, if you are using S3, or other non-local storage, you must specify a local manifest path. never Never overwrite the file. However, if the parent folder is not empty, its access, modify, and change times may still be updated. always Always overwrite the file. diff Overwrite the file if it is different from the source. If a complete file at the destination is the same as the source then it is not overwritten. Partial files are overwritten or resumed depending on the resume policy. diff+older Overwrite the file if it is older and different than the source. older Overwrite the file if its timestamp is older than the source timestamp.
145 ascp: Transferring from the Command Line 145 Option Description Important: If the overwrite method is diff or diff+older, difference is determined by the resume policy (-k{ }). If -k 0 or no -k is specified, the source and destination files are always considered different and the destination file is always overwritten. If -k 1, the source and destination files are compared based on file attributes (currently file size). If -k 2, the source and destination files are compared based on sparse checksum. If -k 3, the source and destination files are compared based on full checksum. --file-crypt=crypt Encrypt or decrypt files for client-side encryption-at-rest (EAR). Valid values are encrypt and decrypt. Set the passphrase (required) with the environment variable ASPERA_SCP_FILEPASS. Encrypted files have the file extension.aspera-env. If a client-side encrypted file is downloaded with an incorrect password, the download is successful but the file is still encrypted and still has the file extension.asperaenv. --filechecksum=hash Report checksums for transferred files, where hash is sha1, md5, sha-512, sha-384, sha-256 or none. (Default: none) --retrytimeout=secs Specify the timeout duration in seconds for a retry attempt. --partial-filesuffix=suffix Filename extension on the destination computer while the file is being transferred. Once the file has been completely transferred, this filename extension is removed. (Default: blank) Note: This option only takes effect when it is set on the receiver side. --proxy=proxy_url Specify the address of the Aspera proxy server. proxy_url takes the form of: dnat[s]://[username]@server:port The default ports for DNAT and DNATS protocols are 9091 and preserve-fileowner-uid (OS X and Linux/UNIX systems only.) Preserve transferred files' owner information (uid). Note: This option requires the transfer user be authenticated as a superuser. --preserve-fileowner-gid (OS X and Linux/UNIX systems only.) Preserve transferred files' group information (gid). Note: This option requires the transfer user be authenticated as a superuser. --preservecreation-time --preservemodification-time --preserve-accesstime --preserve-sourceaccess-time -p Preserve creation time [Windows only]: Set the file/directory creation time at the destination to that of the source. If the destination is a non-windows host, this option is ignored. (Note: Do not confuse this with UNIX ctime, which represents "change time", indicating the time when metadata was last updated.) Preserve modification time: Set the file/directory modification time at the destination to that of the source. Preserve access time: Set the file/directory access time (the last time the file was read or written) at the destination to that of the source. This results in the destination file having the access time that the source file had prior to the copy operation. The act of copying the source file to the destination results in an update to the source file's access time. Preserve source access time: Restore the access time of the file at the source once the copy operation is complete (because the file system at the source regards the transfer operation as an access).
146 ascp: Transferring from the Command Line 146 Option Description -p is equivalent to setting --preserve-modification-time and -preserve-access-time (and --preserve-creation-time, on Windows). On Windows, modification time may be affected when the system automatically adjusts for Daylight Savings Time (DST). For details, see the Microsoft KB article, Cloud storage support for timestamp settings depends on the cloud storage implementation. See the documentation for your cloud storage option to determine which of these settings are supported. For Limelight, only the preservation of modification time (mtime) is supported. --ignore-host-key If you are prompted to accept a host key when connecting to a remote host, ascp ignores the request. --checksshfp=fingerprint Check whether fingerprint matches the server SSH host key fingerprint specified in the server's aspera.conf. Aspera fingerprint convention is to use a hex string without the colons; for example, f74e5de9ed0d62feaf0616ed1e851133c42a0082. Note: When the HTTP fallback feature is enabled and the client "falls back" to HTTP, this option enforces server SSL certificate validation (HTTPS). Validation fails if the server has a self-signed certificate; a properly signed certificate is required. --apply-localdocroot Apply the local docroot. This option is equivalent to setting the environment variable ASPERA_SCP_DOCROOT. --multi-sessionthreshold=threshold This option augments the -C option, which enables multi-session transfers (also known as parallel transfers). With the threshold option, if the size of the files to be transferred is greater than or equal to threshold, files are split across multiple sessions. If the total file size is less than the threshold or no threshold is set (default), files are not split. The client node API can specify the multi-session-threshold, and this is passed to the ascp command line. If the client doesn't specify a value, then the multi_session_threshold_default is taken from the server. A default value for the threshold can be specified in aspera.conf by setting multi_session_threshold_default. Setting it to 0 (zero) means "do not split". The command-line setting overrides the aspera.conf setting. Note: For cloud transfers, file-splitting is currently (3.6.0) supported for S3 only. Multi-session uploads to cloud storage:currently only supported for S3. Unlike noncloud file splitting, files for transfer to cloud storage are sent in chunks, with the chunk size is specified by <chunk_size> in aspera.conf: <central_server>... <transfer> <protocol_options> <transfer> <chunk_size>0</chunk_size> </transfer> </protocol_options> </transfer> </central_server> File-splitting needs to respect a minimum split size, which for cloud storage is a part, such that each ascp call must deliver full parts. Thus, the chunk size must be equal to the cloud-storage part size. If the file size is greater than the multi-session threshold
147 ascp: Transferring from the Command Line 147 Option Description but smaller than the chunk size, then the file is not split. Set chunk size and part size as follows: 1. In aspera.conf set the chunk size to some value greater than 5 MB (the minimum part size), for example: <chunk_size> </chunk_size> <!-- 64 MB --> 2. In /opt/aspera/etc/trapd/s3.properties set the upload part size (default 64 MB) to the same value as the chunk size and set a ONE_TO_ONE gathering policy: aspera.transfer.upload.part-size=64mb aspera.transfer.gathering-policy=one_to_one --delete-beforetransfer --preservexattrs=mode --remote-preservexattrs=mode --preserveacls=mode --remote-preserveacls=mode Delete files that exist at the destination but not at the source, before any files are transferred. Requires write permissions on the destination. Do not use with multiple sources, keepalive, URI storage, or HTTP fallback. The utility asdelete provides the same capability. Preserve extended attributes (xattrs) and/or access control lists (ACLs) when transferring files between different types of file systems. mode can be native, metafile, or none (default): native xattrs and ACLs are preserved using native capabilities of the file system. However, this storage mode is not supported on all file systems. metafile none xattrs and ACLs for a file (say, readme.txt) are preserved in a second file, whose name is composed of the name of the primary file with.aspera-meta appended to it; for example, readme.txt.aspera-meta. The Aspera metafiles are platform independent and can be copied between hosts without loss of information. This storage mode is supported on all file systems. xattrs and ACLs are not preserved. This storage mode is supported on all file systems. The modes of preserving xattrs and ACLs on each side of the transfer are the same, even if specified differently. The metafile mode silently takes precedence. The options with the remote- prefix specify the storage mode used on the remote file system. If not specified, the default behavior is to use the same storage mode specified for the local file system. A remote option with mode set to native may be overridden by the remote ascp if that mode is not supported there. Older versions of ascp do not support this feature. Thus, these options may be overridden by the peer, to none, and ascp stops and reports the problem is incompatible FASP protocol versions. The amount of xattr/acl data per file that can be transferred successfully is subject to ascp's internal PDPU size limitation.
148 ascp: Transferring from the Command Line 148 Ascp Options for HTTP Fallback Option Description -y {0 1} Enable HTTP Fallback transfer server when UDP connection fails. Set to 1 to enable (default: 0). -j {0 1} Encode all HTTP transfers as JPEG files. Set to 1 to enable (default: 0). -Y key_file The HTTPS transfer's key file name. -I cert_file The HTTPS certificate's file name. -t port Specify the port for HTTP Fallback Server. -x proxy_server Specify the proxy server address used by HTTP Fallback. Ascp General Examples The following are examples of initiating FASP file transfers using the ascp command: Fair-policy transfer Fair-policy transfer with maximum rate 100 Mbps and minimum at 1 Mbps, without encryption, transfer all files in \local-dir\files to : # ascp -T --policy=fair -l 100m -m 1m /local-dir/files root@ :/remote-dir Fixed-policy transfer Fixed-policy transfer with target rate 100 Mbps, without encryption, transfer all files in \local-dir\files to : # ascp -T -l 100m /local-dir/files root@ :/remote-dir Specify UDP port for transfer Perform a transfer with UDP port 42000: # ascp -l 100m -O /local-dir/files user@ :/remote-dir Public key authentication Transfer with public key authentication using key file <home dir>/.ssh/aspera_user_1-key localdir/files: $ ascp -T -l 10m -i ~/.ssh/aspera_user_1-key local-dir/files root@ :/remote-dir Username or filepath contains a space Enclose the target in double-quotes when spaces are present in the username and remote path: # ascp -l 100m local-dir/files "User Name@ :/remote directory" Content is specified in a file pair list Specify source content to transfer to various destinations in a file pair list. Source content is specified using the full file or directory path. Destination directories are specified relative to the transfer user's docroot, which is specified as a "." at the end of the ascp command. For example, the following is a simple file pair list, filepairlist.txt that lists two source folders, folder1 and folder2, with two destinations, tmp1 and tmp2: /tmp/folder1 tmp1 /tmp/folder2
149 ascp: Transferring from the Command Line 149 tmp2 # ascp --user=user_1 --host= mode=send --file-pair-list=/tmp/ filepairlist.txt. This command and file pair list create the following directories within the transfer user's docroot on the destination: /tmp1/folder1 /tmp2/folder2 Network shared location transfer Send files to a network shares location \\ \nw-share-dir, through the computer : # ascp local-dir/files root@ :"// /nw-share-dir/" Parallel transfer on a multicore system Use parallel transfer on a dual-core system, together transferring at the rate 200Mbps, using UDP ports and Two commands are executed in different Terminal windows: # ascp -C 1:2 -O l 100m /file root@ :/remote-dir & # ascp -C 2:2 -O l 100m /file root@ :/remote-dir Upload with content protection Upload the file space\file to the server with password protection (password: secret): $ export ASPERA_SCP_FILEPASS=secRet; ascp -l 10m --file-crypt=encrypt local-dir/file root@ :/remote-dir/ Download with content protection and decryption Download from the server and decrypt while transferring: $ export ASPERA_SCP_FILEPASS=secRet; ascp -l 10m --file-crypt=decrypt root@ :/remotedir /local-dir Decrypt a downloaded, encrypted file If the password-protected file file1 is downloaded on the local computer without decrypting, decrypt file1.aspera-env (the name of the downloaded/encrypted version of file1) to file1: $ export ASPERA_SCP_FILEPASS=secRet; /opt/aspera/bin/asunprotect -o file1 file1.aspera-env Download through Aspera forward proxy with proxy authentication User Pat transfers the file /data/file1 to /Pat_data/ on , through the proxy server at with the transfer user aspera_proxy and transfer user password pa33w0rd. After running the command, Pat is prompted for the ascp password. # ascp --proxy dnat://aspera_proxy:pa33w0rd@ /data/file1 Pat@ :/Pat_data/ Test transfers using faux:// For information on the syntax, see Testing and Optimizing Transfer Performance. Transfer random data (no source storage required) Transfer 20 GB of random data as user root to file newfile in the directory /remote-dir on : #ascp --mode=send --user=root --host= faux:///newfile?20g /remote-dir Transfer a file but do not save results to disk (no destination storage required)
150 ascp: Transferring from the Command Line 150 Transfer the file /tmp/sample as user root to , but do not save results to disk: #ascp --mode=send --user=root --host= /temp/sample faux:// Transfer random data and do not save result to disk (no source or destination storage required) Transfer 10 MB of random data from as user root and do not save result to disk: #ascp --mode=send --user=root --host= faux:///dummy?10m faux:// Ascp File Manipulation Examples Below are examples of using the ascp command to manipulate files. Upload a directory Upload a directory, /content/, to the remote server The following produces /storage/content/ * on the remote server: # ascp /data/content/ root@ :/storage/ Upload only the contents of a directory Upload only the contents of /content/ to the remote server, stripping the srcbase path and preserving the rest of the file structure. The following produces /storage/* on the remote server: # ascp --src-base=/data/content /data/content/ root@ :/storage Upload a directory to a new directory Upload /content/ to the remote server and create a new folder, /storage2, to contain it. The following produces /storage2/content/* on the remote server: # ascp -d /data/content/ root@ :/storage2/ Download only the contents of a directory Download the contents of /storage/content/ from the remote server, while stripping the srcbase path and preserving the rest of the file structure. The following produces /data/* on the local machine: # ascp --src-base =/storage/content root@ :/storage/content/ /data Upload only the contents of a file and a directory to a new directory Upload a file, /monday/file1and a directory, /tuesday/*, to the /storage directory on the remote server, while stripping the srcbase path and preserving the rest of the file structure. The following produces / storage/monday/file1and /storage/tuesday/* on the remote server: # ascp --src-base=/data/content /data/content/monday/file1 /data/content/ tuesday/ root@ :/storage Download only the contents of a file and a directory to a new directory Download a file, /monday/file1, and a directory, /tuesday/*, from the remote server, while stripping the srcbase path and preserving the rest of the file structure. The following produces /data/monday/file1 and / data/tuesday/* on the local machine: # ascp --src-base=/storage/content root@ :/storage/content/monday/ file1 root@ :/storage/content/tuesday/ /data Delete a local directory once it has been transferred to the remote server
151 ascp: Transferring from the Command Line 151 Remove /content/ from the local machine after its contents (excluding partial files) have been transferred to the remote server. The following produces /storage/content/* on the remote server: # ascp -k2 -E "*.partial" --remove-after-transfer --remove-emptydirectories /data/content root@ :/storage Delete a local directory once its contents have been transferred to the remote server Remove /content/ from the local machine after the contents (excluding partial files) have been transferred to the remote server, while stripping the srcbase path and preserving the rest of the file structure. The following produces /storage/* on the remote server: # ascp -k2 -E "*.partial" --src-base=/data/content --remove-after-transfer --remove-empty-directories /data/content root@ :/storage Important: For version 2.7.1, the "-d" option is required when specifying the "--src-base" option if the target directory does not exist. As of version , this constraint has been removed. Ascp Transfers with Object Storage and HDFS With an Aspera On Demand-entitled Aspera server installed in your cloud or on-premises object storage, you can use ascp to transfer to and from it. The syntax of an ascp command transferring to cloud or on-premises object storage depends on how you authenticate the transfer. The following options for authenticating to the object storage are described below: Specify the storage password or secret key in the transfer user's docroot. (Preferred method) Set the storage password or secret key as an environment variable. Specify the storage password or secret key in the command line. Authenticating the Aspera Transfer User You must enter the transfer user's password each time you run an ascp transfer, unless you either set the transfer user's password as an environment variable or set up an SSH key (token) and specify it in the command. Environment Variable:To set the transfer user's password as the value of the ASPERA_SCP_PASS environment variable, run the following command: # export ASPERA_SCP_PASS = password SSH Key:To authenticate with an SSH key, configure token authorization as described in Aspera Enterprise Server Admin Guide: Setting Up Token Authorization. When you run the ascp transfer, specify the SSH key as an option: # ascp -i path_to_private_key... With Docroot Configured: Authenticate in the Docroot If your transfer user account has a docroot set, ascp transfers to and from AWS S3, IBM COS - S3, Google Cloud Storage, Akamai, Softlayer, and Azure are the same as regular ascp transfers. For command syntax examples, see Ascp General Examples. For instructions on configuring a docroot for these types of storage, see Aspera Enterprise Server Admin Guide (Linux): Docroot Path Formatting for Cloud, Object, and HDFS Storage. You are prompted for the transfer user's password upon running these commands unless you have set the ASPERA_SCP_PASS environment variable or are using an SSH key, as described previously.
152 ascp: Transferring from the Command Line 152 With No Docroot Configured: Authenticate with Environment Variables You can set an environment variable (ASPERA_DEST_PASS) with the storage password or access key using the command below: # export ASPERA_DEST_PASS = secret_key With this and ASPERA_SCP_PASS set, run ascp with the syntax listed in the table above, but you do not need to include the storage password or access key, and are not prompted for the Aspera password upon running the command. Note: The ASPERA_DEST_PASS variable is not applicable to Google Cloud Storage or AWS S3 using IAM roles. With No Docroot Configured: Authenticate in the Command Line If you do not have a docroot configured and do not set an environment variable (described previously), you must authenticate in the command line. In the examples below, you include the storage password or secret key as part of the destination path. You are prompted for the transfer user's password upon running these commands unless you have set the ASPERA_SCP_PASS environment variable or are using an SSH key, as described above. Storage Platform ascp Syntax and Examples AWS S3 If you are using IAM roles, you do not need to specify the access ID or secret key for your S3 storage. Upload syntax: # ascp options --mode=send --user=username -host=s3_server_addr source_files s3://access_id:secret_key@s3.amazonaws. Upload example: # ascp --mode=send --user=bear -host=s3.asperasoft.com bigfile.txt s3://1k3c18fbwf9902:geyu...aqxuxttvhwtc@s3.amazonaws.com/ demos2014 Dowload syntax: # ascp options --mode=recv --user=username -host=s3_server_addr s3://access_id:secret_key@s3.amazonaws.com/my_bucket my_source_path destination_path Download example: # ascp --mode=recv --user=bear --host=s3.asperasoft.com s3://1k3c18fbwf9902:geyu...aqxuxttvhwtc@s3.amazonaws.com/ demos2014/bigfile.txt /tmp/ Azure Upload syntax: # ascp options --mode=send --user=username -host=server_address source_files azu://storage_account:storage_access_ke Upload example: # ascp --mode=send --user=as037d8eda429737d6 -host=dev d2.azure.asperaondemand.com bigfile.txt
153 ascp: Transferring from the Command Line 153 Storage Platform ascp Syntax and Examples Dowload syntax: # ascp options --mode=recv --user=username -host=server azu://storage_account:storage_access_key@blob.core.windows.n Download example: # ascp --mode=recv --user=as037d8eda429737d6 -host=dev d2.azure.asperaondemand.com azu:// astransfer:znfmtu...nbtkhb@blob.core.windows.net/abc / downloads Google Cloud Storage Note: The examples below require that the VMI running the Aspera server is a Google Compute instance. # ascp options --mode=send --user=username -host=server_address source_files gs:///my_bucket/my_path Upload example: # ascp --mode=send --user=bear --host= bigfile.txt gs:///2017_transfers/data Dowload syntax: # ascp options --mode=recv --user=username -host=server gs:///my_bucket/my_path/source_file destination_path Download example: # ascp --mode=recv --user=bear --host= gs:///2017_transfers/data/bigfile.txt /data HDFS Aspera recommends running ascp transfers with HDFS with a docroot configured. IBM COS - S3 Upload syntax: # ascp options --mode=send --user=username -host=server_address source_files s3://access_id:secret_key@accessor_endp Upload example: # ascp --mode=send --user=bear -host=s3.asperasoft.com bigfile.txt s3://3iti3oiufeh233:krcew...aiuwq@ /demo2017 Dowload syntax: # ascp options --mode=send --user=username -host=server_address s3://access_id:secret_key@accessor_endpoint/vault_na source_files destination_path
154 ascp: Transferring from the Command Line 154 Storage Platform ascp Syntax and Examples Download example: # ascp --mode=send --user=bear --host=s3.asperasoft.com s3://3iti3oiufeh233:krcew...aiuwq@ /demo2017 / tmp/ IBM Cloud Object Storage (COS) Swift and IBM Bluemix Aspera recommends running ascp transfers with IBM Cloud Object Storage (COS) - Swift and IBM Bluemix with a docroot configured. OpenStack Swift Upload syntax: # ascp options --mode=send --user=username -host=ip_addr source_files swift://account_id:api_key@auth_url/my_bucket Example Upload: # ascp --mode=send --user=bear -host= bigfile.txt swift:// XYZO :bob:437e...bc16@sjc01.objectstorage.service.networklayer.com test Dowload syntax: # ascp options --mode=recv --user=username -host=ip_addr swift://account_id:api_key@auth_url/my_bucket/ my_source_path destination_path Download example: # ascp --mode=recv --user=bear --host= swift:// XYZO :bob:437e29...f616@sjc01.objectstorage.service.networklayer.c test/bigfile.txt /tmp/ Note: Swift requires additional Trapd configuration settings that can be included as queries attached to the docroot, with the format docroot?setting. For example, for an upload to IBM COS - Swift, the path is written as follows: swift:// XYZO :bob:437e...bc16@sjc01.objectstorage.service.networklayer test?aspera.swift.endpoint.auth-path=/auth/v1.0 Configuring Multi-Session Transfers Enterprise Server and Connect Server can achieve significant performance improvements by using multi-session transfers (also known as parallel transfers and multi-part transfers) on multi-node and multi-core systems. To enable multi-session transfers, run ascp with the option -C nid:ncount, where nid is the node ID and ncount is the number of nodes or cores. Assign each session (or invocation) its own UDP port. You can also specify that individual files may be split between multiple sessions by specifying the companion option --multi-session-threshold=threshold. The threshold value specifies, in bytes, the smallestsize file that can be split. That is, files greater than or equal to the threshold are split, while those smaller than the threshold are not.
155 ascp: Transferring from the Command Line 155 A default value for the threshold can be specified in aspera.conf by setting <multisession_threshold_default> in the <default> section. To set a value (in bytes) from the command line, run the following: # asconfigurator -x "set_node_data;transfer_multi_session_threshold_default,threshold" The value of the multi-session threshold depends on the target rates that a single ascp transfer can achieve on your system for files of a given size, as well as the typical distribution of file sizes in the transfer list. If the multisession threshold is set to 0 (zero), files are not split. The command-line setting overrides the aspera.conf setting. If the client's aspera.conf does not specify a default value for the threshold, then the server's setting is used (if specified). If neither the client nor the server set a multi-session threshold, then no files are split. Using Multi-Session to Transfer Between Nodes The following example shows a multi-session transfer on a dual-core system. Together, the two sessions can transfer at up to 2 Gbps and each session uses a different UDP port. To run simultaneous ascp transfers, you can run each command from its own terminal window, or run a script in a single terminal, or by backgrounding processes with the shell. Since no multi-session threshold is specified on the command line or in aspera.conf, no file splitting occurs. # ascp -C 1:2 -O l 1000m /dir :/remote_dir # ascp -C 2:2 -O l 1000m /dir :/remote_dir If dir01 contains multiple files, ascp distributes the files between each command to get the most efficient throughput. If dir01 contains only one file, only one of the commands transfers the file. In the following example, the multi-session threshold is used to enable file splitting: # ascp -C 1:2 -O l 100m --multi-session-threshold= /dir :/remote_dir # ascp -C 2:2 -O l 100m --multi-session-threshold= /dir :/remote_dir In this case, if dir01 contains multiple files, all files less than 5 MB are distributed between sessions, while all files 5 MB or larger are split and then distributed between sessions. If dir01 contains only one file and that file is 5 MB or larger, then the file is split, otherwise the file is transferred by one session. Using Multi-Session to Transfer to an Aspera Transfer Cluster Note: For cloud transfers, file-splitting is currently only supported for AWS S3. To run a multi-session transfer to an Aspera Transfer Cluster (ATC), configure the ATC and the client. The transfer request is initiated by the client through the Node API using a curl command to HTTP POST a JSON file with the transfer specifications. Configuring the Aspera Transfer Cluster 1. Confirm that <chunk_size> is set to a value equal to or greater than the minimum part size. For transfers to cloud storage, files are split into chunks, and the chunk size is specified by <chunk_size> in aspera.conf. File-splitting must respect a minimum split size for cloud storage, known as a part. If a file is larger than the multi-session threshold but smaller than the chunk/part size, it is not split. To view the cluster's transfer configuration, log into the Aspera Transfer Cluster Manager (ATCM). Select the cluster (in this case jmoore-se-demo-cluster), click the Action button, and click Edit Transfer Configuration.

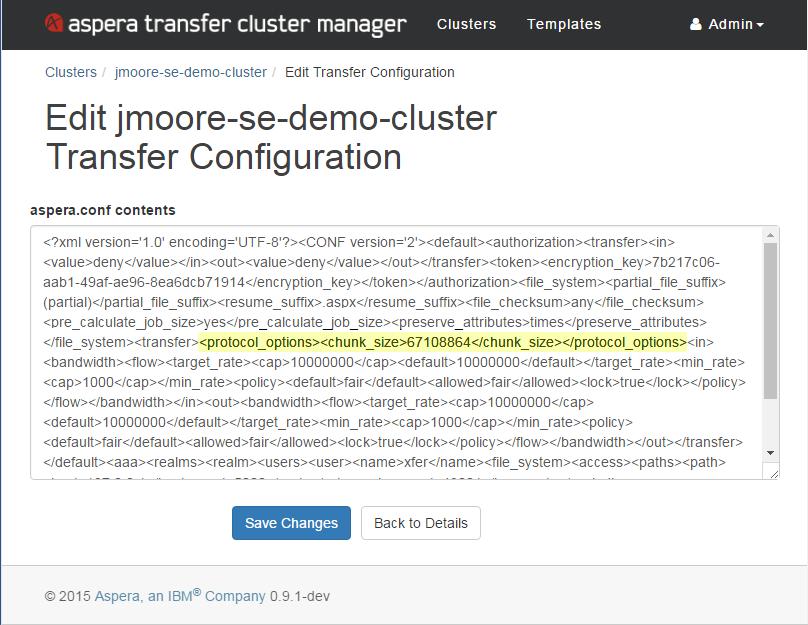
156 ascp: Transferring from the Command Line 156 Confirm that the text string <transfer><protocol_options><chunk_size> </ chunk_size> </protocol_options></transfer> is present.
157 ascp: Transferring from the Command Line 157 If chunk size is not set, SSH to the instance (for instructions, see the Aspera Transfer Cluster Manager Deployment Guide: Customizing the Cluster Manager or Cluster Node Images) and run the following command: # asconfigurator -x "set_node_data;transfer_protocol_options_chunk_size, " Confirm that chunk size equals part size by opening the file /opt/aspera/etc/trapd/s3.properties on the ATC and looking for the following lines: aspera.transfer.upload.part-size=64mb aspera.transfer.gathering-policy=one_to_one 2. Set the scaling policy. From the Action drop-down menu, select Edit Auto Scaling Policy. In this example for a 20-node cluster, set Max Nodes and Min Available Nodes to 20. Also ensure that Max Start Frequency Count is greater than or equal to the values for Max Nodes and Min Available Nodes. Configuring the Aspera Client Transfer System 1. Configure multi-session threshold and URI docroot restriction on the Aspera Enterprise Server or Connect Server. To set the multi-session threshold, run the following command. In this example, the value is set to bytes: # asconfigurator -x "set_node_data;transfer_multi_session_threshold_default, " To transfer files to and from cloud storage, you must configure a docroot restriction on your cloud-based transfer server instead of a docroot absolute path. A configuration with both a docroot absolute path (docrooted user) and a restriction is not supported. To set a restriction, run the following command. For more information on
158 ascp: Transferring from the Command Line 158 setting docroot restrictions for cloud storage, see the Aspera Enterprise Server Admin Guide for Linux: Docroot Restriction for URI Paths. In this example, no restrictions are set on the users by setting the value to *. # asconfigurator -x "set_node_data;file_restriction,*" These commands result in an aspera.conf with the following text: <?xml version='1.0' encoding='utf-8'?> <CONF version="2"> <default> <file_system> <access> <paths> <path> <restrictions> <restriction>*</restriction> </restrictions> </path> </paths> </access> </file_system> <transfer> <multi_session_threshold_default> </ multi_session_threshold_default> </transfer> </default> <aaa/>... </CONF> 2. Create a JSON transfer request file. In the example file below, named ms-send-80g.json, the file 80g-file is being sent to the ATC jmoorese-demo-cluster.dev.asperacloud.net where the transfer user is xfer, using token authorization and the multi-session upload cookie. { } "transfer": { "remote_host": "jmoore-se-demo-cluster.dev.asperacloud.net", "remote_user": "xfer", "token": "Basic QVVrZ3VobUNsdjBsdjNoYXAxWnk6dXI0VGZXNW5", "target_rate_kbps": , "destination_root":"/", "multipart": 75, "paths": [ { "source": "/80g-file" } ], "ssh_port": 33001, "fasp_port": 33001, "direction": "send", "overwrite" : "always", "cookie": "multi-session upload" } Running and Monitoring the Transfer 1. Initiate the transfer through the Node API with an HTTP POST of the JSON transfer request using a curl command.

159 ascp: Transferring from the Command Line 159 In the example below, the JSON file ms-send-80g.json is posted by the node user ak_data using the password aspera, from the node server localhost where the HTTPS port is the default $ curl -k -v -X POST ak_data:aspera@localhost:9092/transfers 2. Monitor transfer progress, bandwidth utilization, and the distribution of transfers for each cluster node. On UNIX/Linux systems, view bandwidth utilization from a terminal by running nload on the client system by running the following command. In this example, the vertical scale is set to 10 Gbps and the device is ens1f0. $ nload -u g -o ens1f0 The nload report shows bandwidth utilization at 9+ Gbps: In the ATCM UI, click Action > Monitor Nodes to view the transfer distribution and utilization for each of the 20 nodes in the cluster:

160 ascp: Transferring from the Command Line 160 Applying Filters to Include and Exclude Files Filters allow you to refine the list of files (or directories) designated for transfer. With filters, you indicate which files in the transfer list to skip or include. At runtime, ascp looks for filters in two locations: on the ascp command line, and in aspera.conf. Filters can be set in the aspera.conf file either from the GUI, or by modifying it directly with an editor or asconfigurator. When filtering rules are found in aspera.conf, they are applied before rules on the command line. If no filtering rules are specified, ascp transfers all source files in the transfer list. This topic describes filtering using option flags on the ascp command line. Note: Filter settings apply only when the server is acting as a client. Servers cannot exclude files or directories uploaded or downloaded by remote clients. Specifying Rules on the Command Line To specify filtering rules on the ascp command line, use the -E and -N options: -E pattern Exclude files or directories matching pattern.
161 ascp: Transferring from the Command Line 161 -N pattern Include files or directories matching pattern. Each rule consists of a -E or -N option and its pattern. A pattern can be a file or directory name, or a set of names expressed with UNIX glob patterns. To determine which files to transfer, each file in the set of source files to transfer (the transfer list) is evaluated by the filters as follows: 1. ascp compares the next file (or directory) in the transfer list to the first rule. 2. If the file matches the pattern, ascp includes it (-N) or excludes it (-E) and for this file, filtering stops. 3. If the file does not match, ascp compares it with the next rule and repeats the process for each rule until a match is found or until all rules have been tried. 4. If the file never matches any rules, it is included in the transfer. Filtering operates only on the set of files and directories in the transfer list. That is, an include option (-N) cannot add files or directories that are not already part of the transfer list. Filtering is a process of exclusion, and -N rules act as overrides to any -E rules that follow them. For example, consider the following example command: $ ascp -N 'file2' -E 'file[0-9]' /tmp/l/file* user1@examplehost:/tmp The transfer set is file* (all files that start with file). If file1, file2, and filea are in /tmp/l, they are filtered as follows: 1. When file1 is compared with the first rule (-N), no match is found, and filtering continues. When file1 is compared with the second rule (-E), there is a match; file1 is therefore excluded from transfer, and filtering stops for file1. 2. When file2 is compared with the first rule, there is a match; file2 is therefore included in the transfer, and filtering stops for file2. 3. When filea is compared with the first rule, no match is found. When it is compared with the second rule, again no match is found. Because no further rules exclude it, filea is therefore included in the transfer. If directories or files reside in directories that have already been excluded, they will also be excluded and therefore not checked against any further rules. Thus, with the command-line options -E '/above/' -N '/above/ below', the file /above/below is never considered because its parent directory /above/ has already been excluded. Creating Rule Patterns In order to filter directories and files to be transferred, their names are matched against patterns (globs) that include wildcards and special characters. The patterns use the standard globbing syntax found in UNIX systems as well as several Aspera extensions to the standard. Character case: Case always matters, even if the scanned file system does not enforce such a distinction. For example, "debug" does not match "Debug". To match both, the pattern should be "[Dd]ebug". Single quotes: Patterns must be interpreted only by ascp, not by the command shell. For this reason, patterns that contain wildcards should be surrounded by single quotes to protect them from expansion by the shell. (Even if patterns contain no wildcards, they can still be surrounded by single quotes.) Partial matches: With globs, unlike standard regular expressions, the entire filename or directory name must match the pattern. That is, abcdef matches the pattern abc*f but abcdefg does not. Pattern position: A pattern given with -N will match a path only if it falls directly under the transfer directory. However, a pattern given with -E will match a path regardless of where (which level) the path falls under the transfer directory. For example, given the pattern 'zzz*' and a transfer directory AAA: The -N option matches only if the path to file (or directory) zzz falls directly under AAA. That is, AAA/zzz. The -E option matches regardless of the where the path to file (or directory) zzz falls under AAA. For example, AAA/abc/def/zzz.
162 ascp: Transferring from the Command Line 162 Standard Globbing: Wildcards and Special Characters / The only recognized path separator. \ Quotes any character literally, including itself. The \ character is exclusively a quoting operator, not a path separator. * Matches zero or more characters, except a /, or the. when preceded immediately by a / character.? Matches any single character, except a /, or a. when preceded immediately by a / character. [ ] Matches exactly one of a set of characters, except a / or a. preceded immediately by a / character. [^ ] When ^ is the first character, matches exactly one character not in the set. [! ] When! is the first character, matches exactly one character not in the set. [x-x] Matches exactly one of a range of characters. [:xxxxx:] For details about this type of wildcard, see any POSIX-standard guide to globbing. Globbing Extensions: Wildcards and Special Characters /** Like * but also matches the / character, or a. preceded immediately by a / (that is, the. in /. ). * or /** at end of pattern Matches both directories and files. / at end of pattern Matches directories only. With -N, no files under matched directories or their subdirectories are included in the transfer. All subdirectories are still included, although their files will not be included. However, with -E, excluding a directory also excludes all files and subdirectories under it. no / or * at end of pattern Matches files only. / at start of pattern Must match the entire string from the root of the transfer set. (Note: The leading / does not refer to the system root or the docroot.) Standard Globbing Examples Wildcard Example Matches Does Not Match / abc/def/xyz abc/def/xyz abc/def \ abc\? abc? abc\? abc/d abcd * abc*f abcdef abc.f abc/f abcefg? abc?? abcde abc.z abcdef abc/d abc/. [ ] [abc]def adef cdef abcdef ade [^ ] [^abc]def zdef.def 2def bdef /def /.def [! ] [!abc]def zdef.def 2def cdef /def /.def [:xxxxx:] [[:lower:]]def cdef ydef Adef 2def.def Globbing Extension Examples
163 ascp: Transferring from the Command Line 163 Wildcard Example Matches Does Not Match /** a/**/f a/f a/.z/f a/d/e/f a/d/f/ za/d/f * at end of rule abc* abc/ abcfile /** at end of rule abc/** abc/.file abc/d/e/ abc/ / at end of rule abc/*/ abc/dir abc/file no / at end of rule abc abc (file) abc/ / at start of rule /abc/def /abc/def xyz/abc/def Rule Composition Example Transfer Result -N rule Includes all files and directories whose names match rule. Because there is no -E, all the originally specified files and directories are included anyway; in other words, by itself, a -N rule does nothing. -N rule1 -E rule2 Includes all files and directories whose names match rule1. Excludes all that match rule2, except those that also matched rule1. -E rule Excludes all files and directories whose names match rule. -E rule1 -N rule2 Excludes all files and directories whose names match rule1. Because there is no -E following the -N, all files and directories not already excluded by the preceding -E are included anyway; in other words, a trailing -N rule does nothing to change the result. Testing Your Filter Rules If you plan to use filtering rules, it's best to test them first. An easy way to test filtering rules, or to learn how they work, is to set up source and destination directories and use demo.asperasoft.com as the Aspera server: 1. On your computer, create a small set of directories and files that generally matches a file set you typically transfer. Since filenames are all that matter, the files can be small. 2. Place the file set in an accessible location, for example /tmp/src. 3. Upload the file set to the Aspera demo server as user "aspera". Specify the demo-server target directory Upload. You will be prompted for the password, which is "demoaspera": $ ascp /tmp/src aspera@demo.asperasoft.com:upload/ 4. Create a destination directory on your computer, for example /tmp/dest. 5. You can now download your files from the demo server to /tmp/dest, running the ascp commands with -N and -E to test your filtering rules. For example: $ ascp -N 'wxy/**' -E 'def' aspera@demo.asperasoft.com:upload/src/abc/ / tmp/dest 6. Compare the destination directory with the source to determine whether files were filtered as expected. $ diff -r dest/ src/ The diff output will show the missing (untransferred) files and directories.
164 ascp: Transferring from the Command Line 164 Example Filter Rules The example rules below are based on running a command such as the following to download a directory AAA from demo.asperasoft.com to /tmp/dest: $ ascp rules aspera@demo.asperasoft.com:upload/aaa /tmp/dest The examples below use the following file set: AAA/abc/def AAA/abc/.def AAA/abc/.wxy/def AAA/abc/wxy/def AAA/abc/wxy/.def AAA/abc/wxy/tuv/def AAA/abc/xyz/def/wxy AAA/wxyfile AAA/wxy/xyx/ AAA/wxy/xyxfile Key for interpreting example results below: < xxx/yyy = Excluded xxx/yyy = Included zzz/ = directory name zzz = filename (1) Transfer everything except files and directories starting with ".": -N '*' -E 'AAA/**' Results: AAA/abc/def AAA/abc/wxy/def AAA/abc/wxy/tuv/def AAA/abc/xyz/def/wxy AAA/wxyfile AAA/wxy/xyx/ AAA/wxy/xyxfile < AAA/abc/.def < AAA/abc/.wxy/def < AAA/abc/wxy/.def (2) Exclude directories and files whose names start with wxy: -E 'wxy*' Results: AAA/abc/def AAA/abc/.def AAA/abc/.wxy/def AAA/abc/xyz/def/ < AAA/abc/wxy/def < AAA/abc/wxy/.def < AAA/abc/wxy/tuv/def < AAA/abc/xyz/def/wxy < AAA/wxyfile < AAA/wxy/xyx/
165 ascp: Transferring from the Command Line 165 < AAA/wxy/xyxfile (3) Include directories and files that start with "wxy" if they fall directly under AAA: -N 'wxy*' -E 'AAA/**' Results: AAA/wxy/ AAA/wxyfile < AAA/abc/def < AAA/abc/.def < AAA/abc/.wxy/def < AAA/abc/wxy/def < AAA/abc/wxy/.def < AAA/abc/wxy/tuv/def < AAA/abc/xyz/def/wxy < AAA/wxy/xyx/ < AAA/wxy/xyxfile (4) Include directories and files at any level that start with wxy, but do not include dot-files, dot-directories, or any files under the wxy directories (unless they start with wxy). However, subdirectories under wxy will be included: -N '*/wxy*' -E 'AAA/**' Results: AAA/abc/wxy/tuv/ AAA/abc/xyz/def/wxy AAA/wxyfile AAA/wxy/xyx/ < AAA/abc/def < AAA/abc/.def < AAA/abc/.wxy/def < AAA/abc/wxy/def * < AAA/abc/wxy/.def < AAA/abc/wxy/tuv/def < AAA/wxy/xyxfile * Even though wxy is included, def is excluded because it's a file. (5) Include wxy directories and files at any level, even those starting with ".": -N '*/wxy*' -N '*/wxy/**' -E 'AAA/**' Results: AAA/abc/wxy/def AAA/abc/wxy/.def AAA/abc/wxy/tuv/def AAA/abc/xyz/def/wxy AAA/wxyfile AAA/wxy/xyx/ AAA/wxy/xyxfile < AAA/abc/def < AAA/abc/.def < AAA/abc/.wxy/def
166 ascp: Transferring from the Command Line 166 (6) Exclude directories and files starting with wxy, but only those found at a specific location in the tree: -E '/AAA/abc/wxy*' Results: AAA/abc/def AAA/abc/.def AAA/abc/.wxy/def AAA/abc/xyz/def/wxy AAA/wxyfile AAA/wxy/xyx/ AAA/wxy/xyxfile < AAA/abc/wxy/def < AAA/abc/wxy/.def < AAA/abc/wxy/tuv/def (7) Include the wxy directory at a specific location, and include all its subdirectories and files, including those starting with ".": -N 'AAA/abc/wxy/**' -E 'AAA/**' Results: AAA/abc/wxy/def AAA/abc/wxy/.def AAA/abc/wxy/tuv/def < AAA/abc/def < AAA/abc/.def < AAA/abc/.wxy/def < AAA/abc/xyz/def/wxy < AAA/wxyfile < AAA/wxy/xyx/ < AAA/wxy/xyxfile Creating SSH Keys (Command Line) Public key authentication (SSH Key) is a more secure alternative to password authentication that allows users to avoid entering or storing a password, or sending it over the network. Public key authentication uses the client computer to generate the key-pair (a public key and a private key). The public key is then provided to the remote computer's administrator to be installed on that machine. Note: You can use the application GUI to create SSH keys or import existing keys for use with a selected user account. For instructions, see Creating SSH Keys in the GUI. If you are using this machine as a client to connect to other Aspera servers with public key authentication, you can create key-pairs from the command line, as follows: 1. Create a.ssh directory in your home directory if it does not already exist: $ mkdir /home/username/.ssh Go to the.ssh folder: $ cd /home/username/.ssh 2. Run ssh-keygen to generate an SSH key-pair. Run the following command in the.ssh folder to create a key pair. For key_type, specify either RSA (rsa) or ED25519 (ed25519). At the prompt for the key-pair's filename, press ENTER to use the default name id_rsa
167 ascp: Transferring from the Command Line 167 or id_ed25519, or enter a different name, such as your username. For a passphrase, you can either enter a password, or press return twice to leave it blank: # ssh-keygen -t key_type Note: When you run ascp in FIPS mode (<fips_enabled> is set to true in aspera.conf), and you use passphrase-protected SSH keys, you must either (1) use keys generated by running ssh-keygen in a FIPS-enabled system, or (2) convert existing keys to a FIPS-compatible format using a command such as the following: # openssl pkcs8 -topk8 -v2 aes128 -in id_rsa -out new-id_rsa 3. Retrieve the public key file. The key-pair is generated to your home directory's.ssh folder. For example, assuming you generated the key with the default name id_rsa: /home/username/.ssh/id_rsa.pub Provide the public key file (for example, id_rsa.pub) to your server administrator so that it can be set up for your server connection. The instructions for installing the public key on the server can be found in the Setting Up a User's Public Key on the Server; however, the server may be installed on an operating system that is different from the one where your client has been installed. 4. Start a transfer using public key authentication with the ascp command. To transfer files using public key authentication on the command line, use the option -i private_key_file. For example: $ ascp -T -l 10M -m 1M -i ~/.ssh/id_rsa myfile.txt jane@ :/space In this example, you are connecting to the server ( , directory /space) with the user account jane and the private key ~/.ssh/id_rsa. Ascp FAQs 1. How do I control the transfer speed? You can specify a transfer policy that determines how a FASP transfer utilizes the network resource, and you can specify target and minimum transfer rates where applicable. In an ascp command, use the following flags to specify transfer policies that are fixed, fair, high, or low: Policy Fixed Fair High Low Command template --policy=fixed -l target_rate --policy=fair -l target_rate -m min_rate --policy=high -l target_rate -m min_rate --policy=low -l target_rate -m min_rate The policies have the following characteristics: fixed Attempts to transfer at the specified target rate, regardless of the actual network capacity. This policy transfers at a constant rate and finishes in a guaranteed time. This policy typically occupies most of
168 ascp: Transferring from the Command Line 168 the network's bandwidth, and is not recommended in most file transfer scenarios. In fixed mode, a maximum (target) rate value is required. high Monitors the network and adjusts the transfer rate to fully utilize the available bandwidth up to the maximum rate. When congestion occurs, a it transfers at a rate twice of a session with fair policy. In this mode, both the maximum (target) and the minimum transfer rates are required. fair Monitors the network and adjusts the transfer rate to fully utilize the available bandwidth up to the maximum rate. When other types of traffic build up and congestion occurs, it shares bandwidth fairly by transferring at an even rate. In this mode, both the maximum (target) and the minimum transfer rates are required. low Similar to fair mode, the low policy uses the available bandwidth up to the maximum rate, but is much less aggressive when sharing bandwidth with other network traffic. When congestion builds up, the transfer rate is reduced to the minimum rate until other traffic retreats. 2. What transfer speed should I expect? How do I know if something is "wrong" with the speed? Aspera's FASP transport has no theoretical throughput limit. Other than the network capacity, the transfer speed may be limited by rate settings and resources of the computers. To verify that your system's FASP transfer can fulfill the maximum bandwidth capacity, prepare a client machine to connect to this computer, and test the maximum bandwidth. Note: This test typically occupies most of a network's bandwidth. Aspera recommends this test be performed on a dedicated file transfer line or during a time of low network activity. On the client machine, start a transfer with fixed bandwidth policy. Start with a lower transfer rate and gradually increase the transfer rate toward the network bandwidth (for example, 1 MB, 5 MB, 10 MB, and so on). Monitor the transfer rate; at its maximum, it should be slighly below your available bandwidth: $ ascp -l 1m source-file destination To improve the transfer speed, also consider upgrading the following hardware components: Component Description Hard disk The I/O throughput, the disk bus architecture (such as RAID, IDE, SCSI, ATA, and Fiber Channel). Network I/O The interface card, the internal bus of the computer. CPU Overall CPU performance affects the transfer, especially when encryption is enabled. 3. How do I ensure that if the transfer is interrupted or fails to finish, it will resume without retransferring the files? Use the -k flag to enable resume, and specify a resume rule: -k 0 Always retransfer the entire file. -k 1 Check file attributes and resume if the current and original attributes match. -k 2 Check file attributes and do a sparse file checksum; resume if the current and original attributes/ checksums match. -k 3 Check file attributes and do a full file checksum; resume if the current and original attributes/ checksums match. Corruption or deletion of the.asp-meta file associated with an incomplete transfer will often result in a permanently unusable destination file even if the file transfer resumed and successfully transferred. 4. How does Aspera handle symbolic links? The ascp command follows symbolic links by default. This can be changed using --symboliclinks=method with the following options: follow Follow symbolic links and transfer the linked files. copy Copy only the alias file. If a file with the same name exists on the destination, the symbolic link is not copied.
169 ascp: Transferring from the Command Line 169 copy+force Copy only the alias file. If a file with the same name exists on the destination, the symbolic link replaces the file. If the file of the same name on the destination is a symbolic link to a directory, it is not replaced. skip Skip the symbolic links. Important: On Windows, the only option is skip. 5. What are my choices for overwriting files on the destination computer? In ascp, you can specify the --overwrite=method rule with the following method options: never Never overwrite the file. However, if the parent folder is not empty, its access, modify, and change times may still be updated. always Always overwrite the file. diff Overwrite the file if it is different from the source. If a complete file at the destination is the same as the source then it is not overwritten. Partial files are overwritten or resumed depending on the resume policy. diff+older Overwrite the file if it is older and different than the source. older Overwrite the file if its timestamp is older than the source timestamp. Important: If the overwrite method is diff or diff+older, difference is determined by the resume policy (k{ }). If -k 0 or no -k is specified, the source and destination files are always considered different and the destination file is always overwritten. If -k 1, the source and destination files are compared based on file attributes (currently file size). If -k 2, the source and destination files are compared based on sparse checksum. If -k 3, the source and destination files are compared based on full checksum.
170 ascp4: Transferring from the Command Line with A4 170 ascp4: Transferring from the Command Line with A4 Introduction to A4 Aspera A4 is an optimized transfer engine based on FASP technology. A4 is designed for sending extremely large sets of individual files efficiently, and it supports UDP multicast. The executable, ascp4, is similar to ascp and shares many of the same options and capabilities. For more information on using ascp4 for UDP multicast, see the IBM Aspera Faspstream User Guide. Both ascp4 and ascp are automatically installed with IBM Aspera Enterprise Server, Connect Server, Point-toPoint, and Desktop Client applications. As installed, ascp is used for transfers intiated from the GUI and ascp4 transfers can only be initiated from the command line. For information on how to make GUI-initiated transfers use ascp4, see Using A4 from the GUI. A4 Command Reference Supported environment variables, the general syntax, and command options for A4 are described in the following section. ascp4 exits with a 0 on success or a 1 on error. The error code is logged in the ascp4 log file. Important: Not all standard ascp options are available with ascp4. To use ascp4 to transfer with object storage, you must set the chunk size on the server to 64 kb for transfers that include primarily small files, and set it to 1 Mb for transfers that include primarily large files. If the chunk size is not set on the server, then the transfer fails. Environment Variables If needed, you can set the following environment variables for use with the ascp4 command. Item Setting Password ASPERA_SCP_PASS=password Token ASPERA_SCP_TOKEN=token Cookie ASPERA_SCP_COOKIE=cookie ascp4 Syntax ascp4 options [[user@]srchost:]source_file1[,source_file2,...] [[user@]desthost:]target_path User If you do not specify a username for the transfer, the local username is authenticated by default. Note: If you are authenticating on a Windows machine as a domain user, the transfer server strips the domain from the username. For example, Administrator is authenticated rather than DOMAIN \Administrator. Thus, you must specify the domain explicitly. Target path If there are multiple source arguments, then the target path must be a directory.
171 ascp4: Transferring from the Command Line with A4 171 To describe filepaths, use single-quote (' ') and forward-slashes (/) on all platforms. Avoid the following characters in filenames: / \ " : '? > < & *. URIs are supported in paths, but only under the following restrictions: URI target paths can be specified only on the command line. If the source paths are URIs, they must all be in the same cloud storage account. No docroot (download), local docroot (upload), or source prefix can be specified. If a destination path is a URI, no docroot (upload) or local docroot (download) can be specified. The special schemes stdio:// and stdio-tar:// are supported only on the client. They cannot be used as an upload destination or download source. If required, specify the URI passphrase as part of the URI or set it as an environment variable (ASPERA_SRC_PASS or ASPERA_DST_PASS, depending on the direction of transfer). Ascp4 Options Option Description -h, --help Display usage reference, then exit. -A, --version Display version and license information, then exit. -T Disable encryption for maximum throughput. -p Preserve file timestamps for source modification time (mtime) and last access time (atime). Important: On Windows, mtime and atime can be affected when the system automatically adjusts for Daylight Savings Time (DST). For details, see the Microsoft KB article, -q Quiet mode. This option disables the progress display. -l max_rate Set the target transfer rate. (Default: 10 Mbps) This option accepts suffixes "G/ g" for Giga, "M/m" for Mega, "K/k" for Kilo, and "P/p/%" for percentage, and decimals are allowed. If the client does not specify a target rate, the server target rate is used. If local or server rate caps are specified, the "starting" (default) rate does not exceed the cap. -m min_rate Set the minimum transfer rate in Kbps. (Default: 0) If the client does not specify a minimum rate, the server minimum rate is used. If local or server rate caps are specified, the "starting" (default) rate does not exceed the cap. -i private_key_file Use public key authentication and specify the private key file. Typically, the private key file is in the directory $HOME/.ssh/. -Z dgram_size Specify the datagram size (MTU) for FASP. By default, the detected path MTU is used. (Range: bytes) Note: As of version 3.3, datagram size can be enforced by setting <datagram_size> in aspera.conf on the server. If size is set with both -Z (client side) and <datagram_size> (server side), the server setting is used. If the client-side is pre-3.3, datagram size is determined by the -Z setting, regardless of the server-side setting for <datagram_size>. If pre-3.3 client does not specify -Z, then datagram size is based on the discovered MTU and the server logs the message "LOG Peer client doesn't support alternative datagram size". -X rexmsg_size Set the maximum size of a retransmission request in bytes. (Max: 1440). -L local_log_dir Specify a local logging directory.
172 ascp4: Transferring from the Command Line with A4 172 Option Description -R remote_log_dir Specify a remote logging directory. Note: Client users that are restricted to aspshell are not allowed to use this option. -O fasp_port Set the UDP port for FASP transfers. (Default: 33001) -P ssh-port Set the TCP port for FASP session initiation. (Default: 22) -E pattern Exclude (-E) or include (-N) files or directories with the specified pattern from the transfer. Up to 16 -E and -N patterns can be used. The following two symbols can be used in the pattern: -N pattern * (asterisk) represents zero or more characters in a string, for example *.tmp matches.tmp and abcde.tmp.? (question mark) represents a single character, for example t?p matches tmp but not temp. Rules are applied in order, and each rule is applied to the files that were filtered by the preceeding rules. --mode=mode Specify the transfer direction, either send or recv. Requires --host. --host=host The server's hostname or address. If a value is not provided, the source files or the target path must specify the host name as "host:filename". Requires --mode. --policy=xfer_policy Set the transfer policy, which can be any of the following: fixed Attempts to transfer at the specified target rate, regardless of the actual network capacity. This policy transfers at a constant rate and finishes in a guaranteed time. This policy can occupy most of the network's bandwidth, and is not recommended in most file transfer scenarios. Requires a maximum (target) rate value. high Monitors the network and adjusts the transfer rate to fully utilize the available bandwidth up to the maximum rate. When congestion occurs, the transfer rate is twice as fast as fair. Requires both the maximum (target) and the minimum transfer rates. fair Monitors the network and adjusts the transfer rate to fully utilize the available bandwidth up to the maximum rate. When congestion occurs, bandwidth is shared fairly by transferring at an even rate. Requires both the maximum (target) and the minimum transfer rates. low Similar to fair mode, the low policy uses the available bandwidth up to the maximum rate, but is less aggressive. When congestion occurs, the transfer rate is reduced to the minimum rate until other traffic retreats. If --policy is used, it is reflected in the GUI. If --policy is not used, ascp4 uses the server-side setting (fair by default). --user=username The username authenticated by the transfer server. If you do not specify a username for the transfer, the local username is authenticated by default. Note: If you are authenticating on a Windows machine as a domain user, the transfer server strips the domain from the username. For example, Administrator is authenticated rather than DOMAIN \Administrator. Thus, you must specify the domain explicitly. symbolic-links=method Specify how to handle symbolic links. On Windows, the only option is skip. On other operating systems, this option takes following values (default: follow): follow Follow symbolic links and transfer the linked files.
173 ascp4: Transferring from the Command Line with A4 173 Option Description --src-base=prefix copy Copy only the alias file. If a file with the same name exists on the destination, the symbolic link is not copied. skip Skip symbolic links. Specify the prefix that is deleted from the file path of each source object. The remaining portion of the source path is kept intact at the destination. Available only in send mode (--mode=send). Example: Using --src-base The directory /clips on the server contains the following folders and files: /clips/outgoing/file1 /clips/outgoing/foldera/file2 /clips/outgoing/folderb/file3 To transfer all the folders and files in /clips/outgoing (but not /outgoing itself) to the /incoming directory at the destination, run the following command: # ascp4 -d --src-base=/clips/outgoing/ root@ :/clips/outgoing/ /incoming At the destination, the following folders and files appear in /incoming: (docroot)/incoming/file1 (docroot)/incoming/foldera/file2 (docroot)/incoming/folderb/file3 Files outside of the source base (for example, /temp/file4) are not transferred, and warnings are generated. Example: Without --src-base If the source item is a folder and --src-base is not used, then the contents of the folder and the folder itself are transferred. For example, run the same command as in the previous example but without --src-base: # ascp4 -d root@ :/clips/outgoing/ /incoming At the destination, the following folders and files appear in /incoming: (docroot)/incoming/outgoing/file1 (docroot)/incoming/outgoing/foldera/file2 (docroot)/incoming/outgoing/folderb/file3 If the source object is a single file and --src-base is not used, then only the file is transferred. For example: # ascp4 -d root@ :/clips/outgoing/file1 root@ :/ clips/outgoing/foldera/file2 /incoming At the destination, the following files appear in /incoming: (docroot)/incoming/file1 (docroot)/incoming/file2
174 ascp4: Transferring from the Command Line with A4 174 Option Description --file-list=filename Specify the source content in a file that contains a list of filepaths. The file list supports UTF-8 files and input from standard input through "-". The sources can exist on either the local host or the remote host (in terms of download), but not on both. Each source must be specified on a separate line: src src2... srcn Important: Multiple --file-list options are not supported in one ascp4 command. If multiple file lists are specified, all but the last are ignored. In addition, you cannot include file names in a command with --file-list. Only files from the file list are transferred. Paths in file lists cannot use user@host:filepath syntax. You must use --user with --file-list. --faspmgr-io Run A4 in API mode using FASP manager I/O. A4 reads FASPMGR4 commands from management and executes them. The FASPMGR4 commands are PUT/ WRITE/STOP to open/write/close on a file on the server. --delete-before Delete files that exist at the destination but not at the source before starting the transfer. Objects in the destination with the same name but different type or size as objects in the source are not deleted. Requires write permissions on the destination. Do not use with multiple sources, keepalive, URI storage, or HTTP fallback. Using --delete-before can be faster than --delete-after because the destination data set used to compare objects may be smaller before the transfer occurs. Can also be specified as --delete-before-transfer. --delete-after Delete files that exist at the destination but not at the source after all files are transferred. Objects in the destination with the same name but different type or size as objects in the source are not deleted. Requires write permissions on the destination. Do not use with multiple sources, keepalive, URI storage, or HTTP fallback. Using --delete-after can be slower than --delete-before because the destination data set used to compare objects may be larger after the transfer occurs. Can also be specified as --delete-after-transfer. --preserve-fileowner-uid Preserve the owner information (uid) of transferred files. --preserve-fileowner-gid Preserve group information (gid) of transferred files. --preserve-accesstime Preserve the file timestamps (same as -p). --preserve-sourceaccess-time Preserve the file timestamps (same as -p). Note: Requires that the transfer user be authenticated as a superuser. Note: Requires that the transfer user be authenticated as a superuser.
175 ascp4: Transferring from the Command Line with A4 175 Option Description --preservemodification-time Preserve the file timestamps (same as -p). --preserve-creationtime Preserve the file timestamps (same as -p). --chunk-size=bytes Buffer size that is used for storage read/write operations as well as for an internal transmission and compression "unit". Valid range: 4 kb Mb. --read-threads=num Number of storage "read" threads (sender only). Default: 2. --write-threads=num Number of storage "write" threads (receiver only). Default: 2. Note: For ascp4 transfers to object or HDFS storage, write threads cannot exceed the maximum number of jobs configured for Trapd (default: 15). To use more threads, open /opt/aspera/etc/ trapd/trap.properties on the server and set the value for aspera.session.upload.max-jobs to one larger than the number of write threads. For example, # Number of jobs allowed to run in parallel for uploads. # Default is 15 aspera.session.upload.max-jobs=50 --scan-threads=num Number of directory "scan" threads (sender only). Default: 2. --meta-threads=num Number of directory "creation" threads (receiver only). Default: 2. --compression=method Compress file data inline. The method can be one of: none, zlib, or lz4. Default is lz4. --compressionhint=num For use with compression algorithms that allow you to set compression level (currently only zlib). A lower value results in less, but faster, data compression (0 = no compression). A higher value results in greater, slower compression. Acceptable values are -1 to 9, where -1 is "balanced". Default: compare=method The compare method can be size, size+mtime, md5, md5-sparse, sha1, or sha1-sparse. If the --overwrite method is diff or diff+older, the default compare method is size. --overwrite=method Overwrite files at the destination with source files of the same name. (Default: always) This option can use the following methods: always Always overwrite the file. never Never overwrite the file. If the destination contains partial files that are older or the same as the source files and resume is enabled, the partial files resume transfer. Partial files with checksums or sizes that differ from the source files are not overwritten. diff Overwrite if the file is different from the source, depending on the compare method (default is size). If resume is not enabled, partial files are overwritten if they are different from the source, otherwise they are skipped. If resume is enabled, only partial files with different sizes or checksums from the source are overwritten; otherwise, files resume. diff+older Overwrite if the destination is older and different from the source, depending on the compare method (default is size). If resume is not enabled, partial files are overwritten if they are older and different from the source, otherwise they are skipped. If resume is enabled, only partial files
176 ascp4: Transferring from the Command Line with A4 176 Option Description that are different and older than the source are overwritten, otherwise they are resumed. older Overwrite if the destination timestamp is older than the source timestamp. --resume Resume a copy rather than retransfer if partial files are present at the destination and they do not differ from the source file based on the compare method. If the files no longer match, then the source file is retransferred. -k resume_level Enable resumption of partial transfers. The resume_level can be 0 (default), 1, 2, or 3. -k 0: Always retransfer the entire file (same as --overwrite=always). -k 1: Check file modification time and size and resume if they match (same as --overwrite=diff --compare=size --resume). -k 2: Check sparse checksum and resume if they match (same as -overwrite=diff --compare=md5-sparse --resume). -k 3: Check full checksum and resume if they match (same as -overwrite=diff --compare=md5 --resume). --sparse-file Enable A4 to write sparse files to disk. This option prevents A4 from writing zero content to disk for sparse files; A4 writes a block to disk if even one bit is set in that block. If no bits are set in the block, A4 does not write the block (by default A4 blocks are 64K). --no-read In test mode, do not read the contents of source files. --no-write In test mode, do not write the contents of destination files. --no-open In test mode, do not actually open or write the contents of destination files. --memory=bytes Maximum memory that the local ascp4 process is allowed. Default 256MB. --remote-memory=bytes Maximum memory that the remote ascp4 process is allowed. Default 256MB. --exclude-newerthan=mtime Exclude files from the transfer based on when the file was last changed. This option does not apply to directories. --exclude-olderthan=mtime Using A4 from the GUI Transfers intiated from the GUI use ascp and ascp4 transfers can be run only from the command line. You can make transfers initiated from the GUI use ascp4 by following these steps. 1. Back up the ascp executable. Locate the ascp executable. /opt/aspera/bin/ascp Rename the file ascp-version.bak. 2. In the same directory, make a copy of ascp4 and rename it ascp. The transfer server now uses ascp4 for transfers initiated from the GUI. Important: Not all standard ascp options are available with ascp4.
177 Pre- and Post-Processing (Prepost) 177 Pre- and Post-Processing (Prepost) Setting Up Pre/Post Processing Your Aspera server can execute a shell script from a pre-defined location: /opt/aspera/var/ The script is executed as a result of four transfer events: Session start Session end Start of each individual file transfer in the session End of each individual file transfer in the session The aspera-prepost script can also execute additional shell scripts, Perl scripts, native executables, and Java programs. Aspera sets several environment variables for aspera-prepost that you can use in your own custom scripts. These environment variables are described in detail in Pre/Post Variables. Depending on usage, pre- and postprocessing may consume a large amount of system resources. Be sure to evaluate your system performance and apply this feature appropriately. Caution: When creating pre- and post-processing scripts, unsafe scripts can compromise a server. As with CGI scripts, you should take precautions in testing a pre/post script before placing it into use (such as taint checking and ensuring proper quotes). You should also be aware of user permissions; pre/post scripts run as the user who authenticates the transfer. To prevent a pre/post script from performing an action with elevated or special user permissions, the script needs to check the $USER variable. Follow the steps below to set up pre/post processing for your Aspera transfer product: 1. Set up the shell script file. Locate the following file: /opt/aspera/var/aspera-prepost.disable This file runs the perl script aspera-notif.pl, which is an notification script that sends s (according to user-defined filters) to one or more recipients. Filters and lists are defined in the Aspera configuration file aspera.conf, which is located in /opt/aspera/etc. Copy the contents of aspera-prepost.disable into a new file, and name it as follows: /opt/aspera/var/aspera-prepost Ensure that execute privileges are enabled (at least r-xr-xr-x). 2. Create your scripts. The pre/post processing script, aspera-prepost, can contain the pre/post processing steps, as well as execute other programs. Often, aspera-prepost checks for certain conditions (based on environment variables), and then calls a specific external executable based on those conditions. aspera-prepost is executed as a result of a the start and end of a transfer session, as well as the start and end of the transfer of an individual file in the session. You can use the variables TYPE and STARTSTOP to specify a particular state. For the complete list of all variables, see Pre/Post Variables. 3. Include custom scripts in aspera-prepost.
178 Pre- and Post-Processing (Prepost) 178 Custom scripts can be written directly into the script file aspera-prepost. For example, to add the custom script script1.pl to your pre/post script, insert the following line (into aspera-prepost):... perl script1.pl... Pre/Post Variables The following tables list all pre/post variables for setting up pre- and post-processing. Pre/post variable considerations: Pre/post variables are case-sensitive. Pre/post variables that can be arbitrarily long (values marked with * below) are truncated by prepost scripts. For Type Session and Type File Variable Description Values Example COOKIE The user-defined cookie string. string* "$COOKIE" == cookie-string DIRECTION The transfer direction. "$DIRECTION" == send ERRCODE The error code. string "$ERRCODE" == 1 ERRSTR The error string. string "$ERRSTR" == FASP error MANIFESTFILE The full path to the manifest file. string* "$MANIFESTFILE" == /log PEER The peer name or IP address. string or valid IPv4 address "$PEER" == SECURE Transfer encryption. "$SECURE" == no SESSIONID The session id. string "$SESSIONID" == 1 STARTSTOP The status start or stop. Start Stop "$STARTSTOP" == Start STATE The transfer state. started success failed "$STATE" == success TYPE The event type. Session File "$TYPE" == Session USER The user name string "$USER" == aspera_user_1 USERID The user ID string "$USERID" == 501 USERSTR The user string, such as additional variables. string* "$USERSTR" == -q send recv yes no
179 Pre- and Post-Processing (Prepost) 179 For Type Session Variable Description Values Example FILE1 The first file. string* "$FILE1" == first-file FILE2 The second file. string* "$FILE2" == second-file FILECOUNT The number of files. positive integer "$FILECOUNT" >= 5 FILELAST The last file. string* "$FILELAST" == last-file LICENSE The license account and serial number. string "$LICENSE" == license-string MINRATE The initial minimum rate, in Kbps. positive integer "$MINRATE" == 50 PEERLICENSE The peer's license account and serial number. string "$PEERLICENSE" == licensestring RATEMODE The transfer policy. "$RATEMODE" == adapt SOURCE The full path of the source file. string* "$SOURCE"== /tmp TARGET The full path of the target directory. string* "$TARGET" ==. TARGETRATE The initial target rate, in Kbps. positive integer "$TARGETRATE" == 100 TOTALBYTES The total bytes transferred. positive integer "$TOTALBYTES" >= TOTALSIZE The total size of files being transferred in bytes. positive integer "$TOTALSIZE" >= Variable Description Values Example DELAY The measured network delay, in ms. positive integer "$DELAY" <= 1 FILE The file name. string* "$FILE" == file-name FILE_CSUM Destination checksum of the most recently transferred file. string "$FILE_CSUM" == checksum LOSS The network loss in percentage. double-digit fixed point value "$LOSS" >= 5.00 OVERHEAD The total number of duplicate packets. positive integer "$OVERHEAD" >= 1 RATE The transfer rate in Kbps. double-digit fixed point value "$RATE" >= REXREQS The total number of retransmission requests. positive integer "$REXREQS" >= 3 adapt fixed For Type File
.")
180 Pre- and Post-Processing (Prepost) 180 Variable Description Values Example SIZE The file size in bytes. positive integer "$SIZE" >= STARTBYTE The start byte if resumed. positive integer "$STARTBYTE" >= Pre/Post Examples Pre- and post-processing script examples are shown below (bash syntax). To run these examples on your own system, do the following: Save the example to /opt/aspera/var/myscript.sh. Ensure that the script file is executable -- for example: $ chmod +x /opt/aspera/var/myscript.sh Add the line /opt/aspera/var/myscript.sh to /opt/aspera/var/aspera-prepost to call myscript.sh. Be sure there is no exit condition in aspera-prepost before you call your script. 1. Shell - Change file and directory permissions. In the shell script, change file and directory permissions after receiving, and log into the file /tmp/p.log: #!/bin/bash if [ $TYPE == File ]; then if [ $STARTSTOP == Stop ]; then echo "The file is: $FILE" >> /tmp/p.log chmod 777 $FILE fi fi 2. Shell - Forward files to another computer. In the shell script, transfer received files to a third computer , and remove the local copy. Important: For this example to work properly, the server's host key must be cached. #!/bin/bash TARGET=aspera@ :/tmp RATE=10m export ASPERA_SCP_PASS=aspera if [ $TYPE == File ]; then if [ $STARTSTOP == Stop ]; then if [ $STATE == success ]; then if [ $DIRECTION == recv ]; then logger -plocal2.info "Move file $FILE to $TARGET"
181 Pre- and Post-Processing (Prepost) 181 ascp -T -o RemoveAfterTransfer=yes -l $RATE $FILE $TARGET fi fi fi fi 3. Shell - Create a log of successfully transferred files. In the shell script, store successfully transferred files as a list into the file /tmp/aspera.transfer.log: #!/bin/bash if [ $TYPE == File ]; then if [ $STARTSTOP == Stop ]; then if [ $SIZE -gt 0 ]; then if [ `expr $SIZE - $STARTBYTE` -gt 0 ]; then echo `date` >> /tmp/aspera.transfer.log echo "$STATE $FILE $SIZE bits transferred" >> /tmp/ aspera.transfer.log fi fi fi fi Setting Up Notification The notification feature is a built-in pre- and post-processing application that generates customized s based on transfer events. Your server should have pre- and post-processing configured in order to run this application. For details, see Setting Up Pre/Post Processing. notification requires an SMTP server that matches the following configurations: An open SMTP server you can reach on your network. The SMTP Server must not use any external authentication or SSL. The following steps explain how to set up notification: 1. Prepare the notification configuration template. Open the aspera.conf file: /opt/aspera/etc/aspera.conf Locate or create the section < NOTIF>...</ NOTIF>: <CONF version="2">... < NOTIF> <MAILLISTS mylist = "asperausers@example.com, admin@example.com" myadminlist = "admin@example.com" /> <FILTER MAILLISTS = "mylist" TARGETDIR = "/content/users" /> <MAILCONF DEBUG = "0" FROM = "asperaserver@example.com" MAILSERVER = "mail.example.com" SUBJECT = "Transfer %{SOURCE} %{TARGET} - %{STATE}" BODYTEXT =
182 Pre- and Post-Processing (Prepost) 182 "Aspera transfer: %{STATE}%{NEWLINE}%{TOTALBYTES} bytes in %{FILECOUNT} files: %{FILE1}, %{FILE2},...%{FILELAST}." /> </ NOTIF> </CONF> 2. Set up the basic Notification function in <MAILCONF/> <MAILCONF/> defines the general configuration, including the sender, the mail server, and the body text. In the SUBJECT and BODYTEXT options, the pre- and post-processing variables can be used with the format %{variable}, such as %{STATE} for the variable STATE. For the complete list of the variables, see Pre/Post Variables. MAILCONF Field Description Values Example FROM The address to send notifications from. (Required) a valid FROM="admin@example.com" address MAILSERVER The outgoing mail server (SMTP). (Required) A valid URL MAILSERVER="mail.example.com" SUBJECT General subject of the . text string SUBJECT="Transfer:%{STATE}" BODYTEXT General body of the . text string BODYTEXT="Transfer has %{STATE}." DEBUG Print debugging info and write to the logs. "0" = off, "1" DEBUG="0" = on 3. Create mailing lists in <MAILLISTS />. <MAILLISTS /> defines sets of mailing lists. For example, to create the following mailing list: Item Value Mailing list name list1 s to include janedoe@companymail.com, johndoe@companymail.com Specify the mailing list in the following form: <MAILLISTS list1 = "janedoe@companymail.com, johndoe@companymail.com" /> 4. Set up mailing filters in <FILTER />. <FILTER /> defines notification conditional filters. When the conditions are met, a customized is sent to the indicated mailing list. Multiple filters are allowed. The values in the filter are matched as substrings, for example, USER = root means the value would match strings like root, treeroot, and root1. The pre- and post-processing variables can be used with the format %{variable}, such as %{STATE} for the variable STATE. For the complete list of the variables, see Pre/Post Variables. FILTER Field Description Values Example MAILLISTS Required The lists to send to. Separate lists with comma (,). text string MAILLISTS="mylist" USER Login name of the user who transferred the files. text string USER="aspera_user_1"
183 Pre- and Post-Processing (Prepost) 183 FILTER Field Description Values Example SRCIP Source IP of the files. a valid IPv4 SRCIP=" " address DESTIP Destination IP of the files. a valid IPv4 DESTIP=" " address SOURCE The top-level directories and files that were transferred. text string SOURCE="/folder1" TARGETDIR The directory that the files were sent to. text string TARGETDIR="/folder2" SUBJECTPREFIX The subject, preceded by the SUBJECT in <MAILCONF />. text string SUBJECTPREFIX="Sub" BODYPREFIX The body, preceded by the BODYTEXT in <MAILCONF />. text string BODYPREFIX="Txt" TOTALBYTESOVER Send when total bytes transferred is over this number. This only applies to s sent at the end of a transfer. positive integer TOTALBYTESOVER="9000" SENDONSESSION Send for the entire session. yes / no SENDONSESSION="yes" SENDONSTART Send when transfer is started. This setting is dependent on SENDONSESSION="yes". yes / no SENDONSTART="yes" SENDONSTOP Send when transfer is stopped. This setting is dependent on SENDONSESSION="yes". yes / no SENDONSTOP="yes" SENDONFILE Send for each file within a session. yes / no SENDONFILE="yes" Notification Examples 1. Notify a specified mailing list when a transfer session is completed. < NOTIF> <MAILLISTS list1 ="janedoe@company .com, johndoe@company .com" /> <MAILCONF FROM="Aspera Notifier <admin@company .com>" MAILSERVER="smtp.company .com" BODYTEXT="%{NEWLINE}Powered by Aspera Inc." /> <FILTER MAILLISTS="list1" SENDONSESSION="yes" SUBJECTPREFIX="Aspera Transfer - %{USER} " BODYPREFIX="Status: %{STATE}%{NEWLINE} File Count: %{FILECOUNT}" /> </ NOTIF>
184 Pre- and Post-Processing (Prepost) Notify the specified mail list when a session is initiated and completed. < NOTIF> <MAILLISTS list1 ="janedoe@company .com, johndoe@company .com" /> <MAILCONF FROM="Aspera Notifier <admin@company .com>" MAILSERVER="smtp.company .com" SUBJECT=" by %{USER}" BODYTEXT="%{NEWLINE}Powered by Aspera Inc." /> <FILTER MAILLISTS="list1" SENDONSTART="yes" SENDONSTOP="no" SUBJECTPREFIX="Transfer Started" BODYPREFIX="Source: %{PEER}%{NEWLINE} Target: %{TARGET}" /> <FILTER MAILLISTS="list1" SENDONSTART="no" SENDONSTOP="yes" SUBJECTPREFIX="Transfer Completed" BODYPREFIX=" Status: %{STATE}%{NEWLINE} File Count: %{FILECOUNT}%{NEWLINE} Source: %{PEER}%{NEWLINE} Target: %{TARGET}%{NEWLINE} Bytes Transferred: %{TOTALBYTES} Bytes%{NEWLINE} " /> </ NOTIF> 3. Send different notifications for regular transfers and for Aspera Sync transfers. In the example below, when Aspera Sync triggers a transfer (assuming only Aspera Sync uses the folder /syncfolder), an message is sent to "mediagroup". When a regular transfer occurs (files are sent to /upload), a different notification is sent to "medialead" and "admingroup". < NOTIF> <MAILLISTS mediagroup ="johndoe@company .com, janedoe@company .com" medialead ="janedoe@company .com" admingroup ="admin@company .com, root@company .com" /> <MAILCONF FROM="Aspera Notifier <admin@company .com>" MAILSERVER="smtp.company .com" BODYTEXT="%{NEWLINE}Powered by Aspera Inc." /> <FILTER MAILLISTS="mediaGroup" SENDONSESSION="yes" DESTIP=" " TARGETDIR="/sync-folder" SUBJECTPREFIX="Aspera Sync #1 - From %{PEER}" BODYPREFIX="Status: %{STATE}%{NEWLINE} File Count: %{FILECOUNT}" />
185 Pre- and Post-Processing (Prepost) 185 <FILTER MAILLISTS="mediaLead,adminGroup" SENDONSESSION="yes" TARGETDIR="/upload" SUBJECTPREFIX="Transfer - %{USER}" BODYPREFIX=" Status: %{STATE}%{NEWLINE} Source: %{PEER}%{NEWLINE} File Count: %{FILECOUNT}%{NEWLINE} Bytes Transferred: %{TOTALBYTES} Bytes%{NEWLINE} " /> </ NOTIF>
186 Managing the Node API 186 Managing the Node API Overview: Aspera Node API The Aspera Node API is a feature of IBM Aspera Enterprise Server that provides a RESTful interface for full programmatic control of the Aspera transfer server environment. The Node API (asperanoded) is a daemon that provides node-specific services such as browsing, searching, creating and deleting files and directories, and setting up transfers over HTTP or HTTPS. The Node API includes the following features and functionality: An HTTPS (by default port 9092) and HTTP (by default port 9091) interface. An API in JSON data format. The API is authenticated and the node daemon uses its own application-level users (node users). A node admin utility, asnodeadmin, for adding and managing node users and passwords. For more information, see Node Admin Tool. It logs to syslog, akin to asperacentral, except for RedHat which logs to /var/log/messages. You can use the Node API to set up the following configurations: Set up a remote transfer server for Aspera Faspex. In this configuration, the Aspera Faspex Web UI is on Machine A, while the transfer server (an Enterprise Server node) is on Machine B. Machine A communicates with Machine B over HTTPS, by default. Set up nodes for Aspera Shares. In this configuration, the Aspera Shares Web UI is on Machine A, while content nodes (Enterprise Server nodes) are created on Machines B, C and D. Users can then be granted permission to access specific directories (shares) on nodes B, C and D. Node API Setup The Aspera Node API comes with your installation of Enterprise Server. To use it, you must set up a Node username and password and configure your server. 1. Create an Aspera transfer user. The Aspera transfer user authenticates the actual ascp transfer, and must be an operating system user on the node. If the operating system user does not exist, create the user.create a user account for example, aspera_user_1 by running the following command: # useradd aspera_user_1 Configure the operating system user in Enterprise Server to make it an Aspera transfer user. For instructions, see Setting Up Users or Setting Up Transfer Users (Terminal). Note: The Aspera transfer user must have a docroot configured (see aspera.conf - File System). After setting the user's docroot, restart the Node service, as described in Configuring the Server for the Node API. 2. Configure the Aspera transfer user with a Node API username and password. Aspera's Web applications authenticate to the remote node service using a Node API username and password. The following command creates a Node API username and password, and associates it with a file transfer user, in this example aspera_user_1. Different nodes may use different Node API username-password pairs. # /opt/aspera/bin/asnodeadmin -a -u node_api_username -p node_api_passwd x aspera_user_1
187 Managing the Node API (Optional) Change HTTPS port and/or SSL certificate. The Aspera Node API provides an HTTPS interface for encrypted communication between node machines (on port 9092, by default). To modify the HTTPS port, see Configuring the Server for the Node API. For information on maintaining and generating a new SSL certificate, see Setting up SSL for your Nodes. Node Admin Tool The asnodeadmin tool is used to manage (add, modify, delete, and list) node users. Root privileges are required. Usage examples follow the list of asnodeadmin options. Syntax: # /opt/aspera/bin/asnodeadmin [options] To view asnodeadmin options run the following command: # /opt/aspera/bin/asnodeadmin -h Options Options: -h,--help -A,--version -f conf_file --reload conf file Display usage. Display version. Conf file pathname (default: aspera.conf). Reload configuration settings, including the (also done implicitly upon user add, modify and delete). -a,--add Add a user (also reloads configuration). -d,--del[ete] Delete an existing user (also reloads configuration). -m,--mod[ify] Modify an existing user (also reloads configuration). --acl-add Add new ACLs for a user. May be used with -m or -a. --acl-set Sets ACLs (clears old ACLs) for a user. May be used with -m or -a. --acl-del Deletes ACLs for a user. May be used with -m. --acl-list Lists all current ACLs for a user. --internal Required for adding, modifying, or deleting internal users. -l,--list List users. -u,--user=username Specify username. -p,--{pwd password}=passwd Specify password. -x,--xuser=xfer_username Specify system transfer user. -b,--backup=filename Back_up user data to a file. -r,--restore=filename Restore user data from a file. -P Display hashed passwords as well when listing users. -L local_log_dir Local logging directory (default: no logging). -D... Debug level (default: no debug output). --show-transfer-queue Displays the current transfer queue --transfer-log-del xnid Delete an individual transfer from the activity log. --access-key access_key Specifies which access_key --transfer-logdel, --bearer-create, and --bearer-verify uses --transfer-log-cleanup Delete all transfers from the activity log older than activity_retention_hrs. --show-transfer-log Displays the output of data. --bearer-create Generate bearer token.
188 Managing the Node API key-file-path Specifies the file path to read and write pem files for --bearer-create. --token-key-length Specifies the RSA key length for --bearercreate. --user-id user_id Specifies the user-id for --bearer-create. --group-ids id1,id2,... Specifies the group-id for --bearer-create. --scope-role role Specifies the scope role for --bearer-create. --expires-at utc_date Specifies the expiration date for --bearercreate. --bearer-verify Verify bearer token. --db-status Display the database status. --db-startup Start up the database. --db-shutdown Shut down the database. --db-cleanup Clean up the database. --db-update Update KV store keys format to the latest version. --db-update-local Update KV store keys format to the latest version only if using the local redis. --transfer-bandwidth-cleanup Removes invalid bandwidth data. --transfer-bandwidth-del-all Deletes all bandwidth counter data. --interruptible Forces bandwidth-del-all to run so that it can be stopped while running. Usage Examples These examples use short options; run asnodeadmin -h to see the corresponding long options. 1. Add node username usr1 with the node username password pass1 (you are prompted to enter if the -p option is not given) and associate them with the transfer user aspera: # /opt/aspera/bin/asnodeadmin -au usr1 -x aspera [-p pass1] 2. Add node username usr2 with node username password pass2 and associate them with transfer user root: # /opt/aspera/bin/asnodeadmin -au usr2 -p pass2 -x root 3. Modify node username usr1 by assigning a different password, pass1.1: # /opt/aspera/bin/asnodeadmin -mu usr1 -p pass List node usernames in the current user database: # /opt/aspera/bin/asnodeadmin -l 5. Delete node username usr1: # /opt/aspera/bin/asnodeadmin -du usr1 Configuring the Server for the Node API The server can be configured for the Node API by using the asconfigurator tool from the command line or by editing the server section of aspera.conf. To configure your node for the Node API using asconfigurator, use this general syntax: # /opt/aspera/bin/asconfigurator -x "set_server_data;option,value"
189 Managing the Node API 189 To manually edit aspera.conf, open it in a text editor with administrative privileges from the following location: /opt/aspera/etc/aspera.conf Configuration options and values are described in the following table and example aspera.conf. To view the current settings, run the following command: # /opt/aspera/bin/ asuserdata -a Validate aspera.conf after manually editing it to confirm your configuration is correct by running the following command: # /opt/aspera/bin/asuserdata -v Node API Configuration Options Certain services must be restarted for changes in the settings to take effect, as described in the To Activate Changes column. The commands to restart these services are given following the table. asconfigurator option aspera.conf setting server_name <server_name> Description and Values To Activate Changes... Hostname or IP address. Restart node service Default: hostname http_port <http_port> HTTP service port. Value is an integer , default This setting is overridden by <listen>. Restart node service https_port <https_port> HTTPS service port. Value is an integer , default This setting is overridden by <listen>. Restart node service enable_http <enable_http> Enable HTTP for the Node API services by Restart node setting to true. Default: false. This setting is service overridden by <listen>. enable_https <enable_https> Enable HTTPS for the Node API services by setting to true (default). This setting is overridden by <listen>. Restart node service Number of worker threads. Default: 20. Restart node service workers <workers> Number of ascp workers per transfer. Default: transfers_multi_session_default <transfers_multi_session_default> 1. Restart node service If a transfer fails, node will try to restart it for the specified time, default 20m. If a transfer restarts and makes some progress, then the retry timer is reset and the next time if fails, it will again try to restart it for 'retry_duration'. The backoff interval for retrying within this duration is internal to the application, and the number of retries may vary depending on the transfer queue. Restart node service. transfers_retry_duration <transfers_retry_duration>
190 Managing the Node API 190 asconfigurator option aspera.conf setting transfers_retry_all_failures <transfers_retry_all_failures> listen <listen> Description and Values To Activate Changes... Setting to true will retry all transfers, including transfers otherwise considered unretriable. Default: false. Restart node service. To bind asperanoded on a specific address Restart node (or addresses), specify a comma-delimited service list of listening ports. Ports have the format [ip_address:]port[s]. To specify a secure port, add 's' to the end of the port number, for example 127:0:0:1:9092s. The IP address is optional; however, if no IP address is specified then the port binds to all network interfaces on the server, rather than to the single address. Setting this option overrides <http_port>, <https_port>, <enable_http>, and <enable_https>. cert_file <cert_file> max_response_entries <max_response_entries> max_response_time <max_response_time> db_dir <db_dir> Full pathname of SSL certificate (.pem and existing support for.chain). Restart node service Default: /opt/aspera/etc/ aspera_server_cert.pem Maximum number of entries to return in a response. Default: Reload node configuration. Maximum amount of time to wait for a longrunning operation. Default: 10. Reload node configuration. Path to the directory where the database file is saved. Before changing this value, you should back up your database. See Redis DB Backup/ Restore. Restart the node and DB services. Default: /opt/aspera/var db_port <db_port> ssl_ciphers <ssl_ciphers> Database service port. Value is an integer , default: Before changing this value, you should back up your database. See Redis DB Backup/Restore. Restart the node and DB services. The SSL encryption ciphers that the server will Restart node allow, each separated by a colon (:). Default: all service. of the following: TLS_ECDHE_RSA_WITH_AES_128_CBC_SHA TLS_ECDHE_RSA_WITH_AES_256_CBC_SHA TLS_ECDHE_RSA_WITH_3DES_EDE_CBC_SHA DHE-RSA-AES256-SHA DHE-DSS-AES256-SHA AES256-SHA AES128-SHA256
191 Managing the Node API 191 asconfigurator option aspera.conf setting Description and Values To Activate Changes... DHE-RSA-AES128-SHA DHE-DSS-AES128-SHA RC2-CBC-MD5 This option may also be set in the <client> section, in which case, when this machine functions as a client, the specified ciphers are requests to the server. If any of the ciphers in the server's allow list coincide with those in the client's request list, communication is allowed; otherwise it is denied. If you override this setting, the override is always used. However, if you do not override it, the default setting depends on the settings for <ssl_protocol>. If <ssl_protocol> is set to sslv23, then a large, relatively weak selection of suites is allowed. If the protocol is anything else, then a smaller, stronger selection of suites is allowed. Many older web browsers cannot handle the stronger set of suites, in which case you may encounter compatibility issues. ssl_protocol <ssl_protocol> The SSL protocol versions that the server will allow. This option may also be set in the <client> section, in which case, when this machine is a client, the specified protocols function as requests to the server. If any of the protocols in the server's allow list coincide with those in the client's request list, communication is allowed; otherwise it is denied. Restart node service. Supported values: tlsv1, tlsv1.1, and tlsv1.2. Default: tlsv1. Example Node API Configuration in aspera.conf <server> <server_name>your_hostname</server_name> <http_port>9091</http_port> <https_port>9092</https_port> <enable_http>false</enable_http> <enable_https>true</enable_https> <workers>20</workers> <transfers_multi_session_default>1</transfers_multi_session_default> <transfers_retry_all_failures>false</transfers_retry_all_failures> <transfers_retry_duration>20m</transfers_retry_duration> <listen> </listen> <cert_file>/opt/aspera/etc/aspera_server_cert.pem</cert_file> <max_response_entries>1000</max_response_entries> <max_response_time_sec>10</max_response_time_sec> <db_dir>/opt/aspera/var</db_dir> <db_port>31415</db_port> <proxy>... </proxy>
192 Managing the Node API 192 <ssl_ciphers>tls_ecdhe_rsa_with_aes_128_cbc_sha: :RC2-CBC-MD5</ ssl_ciphers> <ssl_protocol>tlsv1</ssl_protocol> </server> Restarting and Reloading Services Note: Running the commands below requires root privileges. Restart the Node Service: $ sudo /etc/init.d/asperanoded restart Reload the Node Configuration: # sudo /opt/aspera/bin/asnodeadmin --reload Restart the Node and database Services: $ sudo /etc/init.d/asperanoded stop $ sudo /opt/aspera/bin/asnodeadmin --db-shutdown $ sudo /etc/init.d/asperanoded start Note: The database service is started automatically when you restart the node service. Redis DB Backup/Restore Follow these instructions to back up and restore the Redis database (and your user data up to the point-in-time of the backup operation). Note that the backup and restore operations should be used for the following scenarios: If you need to change the Redis database port number (by changing the value for <db_port> in aspera.conf, as described in Configuring the Server for the Node API), back up the Redis database, change the port number, then restore the database. Basic backup and restore (after a data-loss event). 1. Back up the Redis database by running the following command: # sudo /opt/aspera/bin/asnodeadmin -b /filepath/database.backup Important: When backing up the Redis database, all user data up to that point in time will be saved to the backup file. Restoring the database (see Step 2, below) does not delete users added after this snapshot was taken. Thus, if you added any users after backing up the database, they will still exist in the system and will not be affected by the restore operation. 2. Restore the Redis database by running the following command: # sudo /opt/aspera/bin/asnodeadmin -r /filepath/database.backup Note: If you do not want to keep users that have been added since the last backup operation, you can delete them after performing the restore with the following command: # sudo /opt/aspera/bin/asnodeadmin-du username 3. Restart the asperanoded service using the following command. $ sudo /etc/init.d/asperanoded restart
193 Managing the Node API 193 Setting up SSL for your Nodes The Aspera Node API provides an HTTPS interface for encrypted communication between node machines (on Port 9092, by default). For example, if you are running the Faspex Web UI or the Shares Web UI on Machine A, you can encrypt the connection (using SSL) with your transfer server or file-storage node on Machine B. Enterprise Server nodes are preconfigured to use Aspera's default, self-signed certificate (aspera_server_cert.pem), located in the following directory: /opt/aspera/etc/ About PEM Files: The PEM certificate format is commonly issued by Certificate Authorities. PEM certificates have extensions that include.pem,.crt,.cer, and.key, and are Base-64 encoded ASCII files containing "-----BEGIN CERTIFICATE-----" and "-----END CERTIFICATE-----" statements. Server certificates, intermediate certificates, and private keys can all be put into the PEM format. To generate a new certificate, follow the instructions below. 1. Generate a Private Key and Certificate Signing Request (CSR) using OpenSSL. In a Terminal window, run the following command (where my_key_name.key is the name of the unique key that you are creating and my_csr_name.csr is the name of your CSR): $ openssl req -new -nodes -keyout my_key_name.key -out my_csr_name.csr 2. At the prompt, enter your X.509 certificate attributes. Important: The Common Name field must be filled in with the fully qualified domain name of the server to be protected by SSL. If you are generating a certificate for an organization outside the U.S., go to select Country codes, and click codes. to view a list of two-letter ISO country Generating a 1024 bit RSA private key writing new private key to 'my_key_name.key' ----You are about to be asked to enter information that will be incorporated into your certificate request. What you are about to enter is what is called a Distinguished Name or a DN. There are quite a few fields but you can leave some blank For some fields there will be a default value, If you enter '.', the field will be left blank. ----Country Name (2 letter code) [US]:Your_2_letter_ISO_country_code State or Province Name (full name) [SomeState]:Your_State_Province_or_County Locality Name (eg, city) []:Your_City Organization Name (eg, company) [Internet Widgits Pty Ltd]:Your_Company Organizational Unit Name (eg, section) []:Your_Department Common Name (i.e., your server's hostname) []:secure.yourwebsite.com Address []:johndoe@yourwebsite.com You are also prompted to input "extra" attributes, including an optional challenge password. Note: Manually entering a challenge password when starting the server can be problematic in some situations, for example, when starting the server from the system boot scripts. Skip entering a challenge password by pressing Enter....
194 Managing the Node API 194 Please enter the following 'extra' attributes to be sent with your certificate request A challenge password []: An optional company name []: After finalizing the attributes, the private key and CSR are saved to your root directory. Important: If you make a mistake when running the OpenSSL command, you may discard the generated files and run the command again. After successfully generating your key and CSR, be sure to guard your private key, as it cannot be re-generated. 3. If required, send the CSR to your Certifying Authority (CA). Once completed, you will have a valid, signed certificate. Note: Some certificate authorities provide a CSR generation tool on their website. For additional information, check with your CA. 4. If required, generate a self-signed certificate. You may need to generate a self-signed certificate for the following reasons: You don't plan on having your certificate signed by a CA. You plan to test your new SSL implementation while the CA is signing your certificate. To generate a self-signed certificate through OpenSSL, run the following command: # openssl x509 -req -days 365 -in my_csr_name.csr -signkey my_key_name.key -out my_cert_name.crt This creates a certificate that is valid for 365 days. 5. Create the.pem file. Note: Before overwriting the existing.pem file, be sure to back up this file as aspera_server_cert.old), in the following directory: /opt/aspera/etc/ Copy and paste the entire body of the key and cert files into a single text file and save the file as aspera_server_cert.pem. The order of the text in the new.pem file depends on if you have individual certificate files or a bundle of certificates. Individual certificate files: 1. The private key. 2. The primary server's certificate. 3. The intermediate certificates, if any (if more than one, begin with the least authoritative and proceed in ascending order). 4. The root certificate. Bundle of certificates: 1. The private key. 2. The primary server's certificate. 3. The entire bundle (as one file). For a certificate bundle, create a new file named aspera_server_cert.chain in the same directory as the.pem files. Copy and paste the root certificate into this file, followed by the bundle. 6. Enable SSL options in aspera.conf. For information about enabling specific SSL protocols with <ssl_protocol> and enabling specific encryption ciphers with <ssl_ciphers>, see Configuring the Server for the Node API.
195 Managing the Node API Restart the node service by running the following command: $ sudo /etc/init.d/asperanoded restart
196 Understanding the Watchfolder Architecture 196 Understanding the Watchfolder Architecture Aspera Watch Service and Aspera Watchfolders The Aspera Watch Service (asperawatchd) is used to monitor changes to file systems by taking snapshots and analyzing the difference between them. You can use ascp commands to transfer updated and new files to a remote machine. The output from asperawatchd can also be used by Aspera Watchfolders to automatically transfer new files added to a source folder to an Aspera client, as well as by Aspera Sync (see Aspera Sync Admin Guide.) The Aspera Watch Service Manager (asperarund) As of Enterprise Server version 3.7.1, Aspera Watches and Watchfolders are managed by the Aspera Watch Service Manager (asperarund), which allows easy management of the asperawatchfolderd and asperawatchd services. Most importantly, asperarund allows admins to start services under different users without having to switch between the different contexts. The asperarund service starts automatically upon installation, just as other Aspera services (such as Aspera Central) do. You can find asperarund as a system daemon. If you upgraded from Enterprise Server version 3.6.1, and you had the asperawatchd and asperawatchfolderd services enabled and configured, you must manually migrate any services that are run by a user other than root. For more information, see Migrating Watch Services on Upgrade. For more information on asperarund, see The Aspera Watch Services Manager (asperarund). The Aspera Watch Service The Aspera Watch Service (asperawatchd) is a file system change detection and snapshot service that is optimized for speed, scale, and distributed sources. Changes in source file systems (new files and directories, deleted items, and renames) are detected immediately, eliminating the need to scan the file system. Requirements: The asperawatchd service comes packaged with Enterprise Server and no additional license is necessary. Watch Service commands are run from the command line. To enable asperawatchd, see Starting the Aspera Watch Service. For information on asperawatchd configuration options, see asperawatchd Configuration. To use asperawatchd to create snapshots of directories and transfer new and updated files to remote machines, see Transferring and Deleting Files with the Aspera Watch Service. Aspera Watchfolders The Aspera Watchfolder service (asperawatchfolderd) enables large-scale, automated file and directory transfers, including ultra-large directories with over 10 million items and directories with "growing" files. Watchfolders uses input from asperawatchd to automate file transfers from a source folder to a destination system. Watchfolders is run by the client and the Aspera server endpoint does not need additional software to transfer content. Clients can also specify local or remote post-transfer processing actions. Requirements: You must have a valid, watchfolder-enabled license installed. Important: As of version 3.7.1, Watchfolders uses the asperarund Aspera Service Manager to start the asperawatchd and asperawatchfolderd services. If you upgraded from version and were using these services, see Migrating Watch Services on Upgrade for instructions on migrating your configuration. You can use the following tools to create and manage watch folders:
197 Understanding the Watchfolder Architecture 197 The aswatchfolder admin tool. See Creating a Watch Folder. The Node API. See Creating a Watch Folder with the Node API IBM Aspera Console. See the IBM Aspera Console Admin Guide: Working with Watchfolders. The Aspera Watch Services Manager (asperarund) The Aspera Watch Services Manager As of Enterprise Server version 3.7.1, Aspera Watches and Watchfolders are managed by the Aspera Watch Service Manager (asperarund), which allows easy management of the asperawatchfolderd and asperawatchd services. Most importantly, asperarund allows admins to start services under different users without having to switch between the different contexts. The asperarund service starts automatically upon installation, just as other Aspera services (such as Aspera Central) do. You can find asperarund as a system daemon. If you upgraded from Enterprise Server version 3.6.1, and you had the asperawatchd and asperawatchfolderd services enabled and configured, you must manually migrate any services that are run by a user other than root. For more information, see Migrating Watch Services on Upgrade. The asperarund service stores configurations of asperawatchd and asperawatchfolderd services in its database. These configurations are stored using the following commands: # /opt/aspera/sbin/asperawatchd --user username # /opt/aspera/sbin/asperawatchfolderd --user username The asperarund daemon automatically starts and preserves services in its configuration, restarting services if they fail. Using the asrun Utility You can use the asrun utility to view, enable, disable, or delete services. To view a list of running services, run the following command: # /opt/aspera/bin/asrun send -g The output is similar to the following: [asrun send] code=0, body={"services":[{"id":"52ca847a e1-9f9bb661cf298af1","configuration":{"enabled":true,"run_as": {"user":"root"},"type":"watchd"},"state":"running","state_changed_at":" t19:14:34z"}, {"id":"root","configuration":{"enabled":true,"run_as": {"user":"root"},"type":"watchfolderd"},"state":"running","state_changed_at":" t00:11:19z"} In the resulting output, find the ID for the service you wish to manage. You can identify the asperawatchd service by seraching for the string: "type":"watchd". You can identify the asperawatchfolderd service by searching for the string: "type":"watchfolderd". The ID for the asperawatchfolderd service is generally the name of the user running the service. The syntax for disabling, enabling, and deleting a service is similar to the command to retrieve a list of running services: # /opt/aspera/bin/asrun send --sub-command=watch_service_id Sub-Command Description disable Stop a service. The service information is preserved by asrund in the database.
198 Understanding the Watchfolder Architecture 198 Sub-Command Description enable Enable a stopped service. delete Stop a service and remove its entry from the database. A deleted service cannot be reenabled. Note: When deleting the asperawatchfolderd service, all existing watch folders started with that service are also deleted. Note: If the asrun command runs successfully, asrun returns the following message: [asrun send] code=0, body= Usage Examples Disable the asperawatchfolderd service with "id":"admin": # /opt/aspera/bin/asrun send --disable="admin" [asrun send] code=0, body= Re-enable the asperawatchfolderd service with "id":"admin": # /opt/aspera/bin/asrun send --enable="admin" [asrun send] code=0, body= Delete the asperawatchfolderd service with "id":"admin": # /opt/aspera/bin/asrun send --delete="admin" [asrun send] code=0, body= Migrating Watch Services on Upgrade As of Enterprise Server version 3.7.1, Aspera Watches and Watchfolders are managed by the Aspera Watch Service Manager (asperarund), which allows easy management of the asperawatchfolderd and asperawatchd services. Most importantly, asperarund allows admins to start services under different users without having to switch between the different contexts. If you upgraded from Enterprise Server version 3.6.1, and you had the asperawatchd and asperawatchfolderd services enabled and configured, you must manually migrate any services that are run by a user other than root. Scenario 1: User is "root" If the user is root, the installer first stops the asperawatchd and asperawatchfolderd services and removes them from running services. The installer restarts the services using the following command: # /opt/aspera/sbin/asperawatchd --user root # /opt/aspera/sbin/asperawachfolderd --user root Due to the new deployment model, users running asperawatchd and asperawatchfolderd services must have a docroot set in aspera.conf. If you didn't have a docroot set for your user, see Updating the Docroot of a Running asperawatchfolderd Service.
199 Understanding the Watchfolder Architecture 199 Scenario 2: User is Not "root" If the user is not root, the installer does not automatically migrate the services. You must manually start the service under the user that was running the asperawatchd and asperawatchfolderd services. Before you perform the migration steps, confirm or set the following for the user running the services: a docroot in aspera.conf. permissions to write to the default log directory if no directory is specified. You can set the docroot with the following asconfigurator command: # /opt/aspera/bin/asconfigurator -x "set_user_data;user_name,username;absolute,docroot" Note: URI docroots (for example, paths to cloud storage or file://path) are not currently supported by asperawatchd and asperawatchfolderd. Only local file systems can be monitored. The asconfigurator command adds the following configuration to the <aaa> section of aspera.conf (in this example, the docroot is set to /): <aaa> <realms> <realm> <users> <user> <name>root</name> <file_system> <access> <paths> <path> <absolute>/</absolute> </path> </paths> </access> </file_system> </user> </users> </realm> </realms> </aaa> You can find the aspera.conf configuration file at: /opt/aspera/etc/aspera.conf Validate the aspera.conf file using the asuserdata utility: # /opt/aspera/bin/asuserdata -v After setting the docroot and ensuring the user has write permissions to the log directory, start the services with the following commands: # /opt/aspera/sbin/asperawatchd --user username # /opt/aspera/sbin/asperawatchfolderd --user username This command starts the services running under the designated user. Creating and Managing Watch Folders You can use the following tools to create and manage watch folders: The aswatchfolder admin tool. See Creating a Watch Folder.
200 Understanding the Watchfolder Architecture 200 The Node API. See Creating a Watch Folder with the Node API IBM Aspera Console. See the IBM Aspera Console Admin Guide: Working with Watchfolders.
201 Working With Aspera Watch Service 201 Working With Aspera Watch Service Starting the Aspera Watch Service The Aspera Watch Service (asperawatchd) is a file system change detection and snapshot service for speed, scale and distributed sources. It discovers changes (such as new files and directories, deleted items, and renames) in source file systems as they occur, eliminating the need to scan the file system. It can be used on any local or shares (CIFS, NFS) host. When used in conjunction with ascp commands, the Aspera Watch Service allows for fast detection and send of new and deleted items. By comparing snapshots of the file directory it is watching, asperawatchd generates file lists for ascp commands for transfers and delete requests. To start asperawatchd, follow these steps: 1. Configure a docroot for the user who will run the service. The docroot is a security feature that allows you to restrict the area asperawatchfolderd can access. If you need to acces the entire file system, you can set the docroot path as /, but you cannot leave it empty. Set the docroot for the user using the asconfigurator utility: # asconfigurator -x "set_user_data;user_name,username;absolute,docroot" For example: # asconfigurator -x "set_user_data;user_name,root;absolute,/" success user_name: root Note: URI docroots (for example, paths to cloud storage or file://path) are not currently supported by asperawatchd and asperawatchfolderd. Only local file systems can be monitored. The asconfigurator command adds the following configuration to the <aaa> section of aspera.conf: <aaa> <realms> <realm> <users> <user> <name>root</name> <file_system> <access> <paths> <path> <absolute>/</absolute> </path> </paths> </access> </file_system> </user> </users> </realm> </realms> </aaa> 2. Ensure the user has permissions to write to the default log directory if no directory is specified.
202 Working With Aspera Watch Service 202 For more information about configuring log directories, see asperawatchd Configuration. 3. Configure the asperawatchd service to run under your user. The following command adds the asperawatchd service to the asperarund database; asperarund automatically starts and preserves services in its database. The asperarund service must be running. # /opt/aspera/sbin/asperawatchd --user username 4. Verify that asperawatchd is running under the given user. Use the aswatchadmin utlity to retrieve a list of running daemons. Daemons are named with the username you passed in when starting the service. For example, if you used the root user to run your services, you should see the root daemon listed when you run the following commands: # /opt/aspera/bin/aswatchadmin query-daemons [aswatchadmin query-daemons] Found a single daemon: root 5. Create a watch. A watch is a directory watched by the asperawatchd service. To create a watch, run the following command, where daemon is the username used to start the asperawatchd service and filepath is the directory to watch.: # /opt/aspera/bin/aswatchadmin create-watch daemon filepath You can configure asperawatchd to watch multiple directories by creating more than one watch, but Aspera recommends specifying a single watch at the top level directory. Though you can specify as many watches as needed, (for example, one for each directory), specifying a single watch is the most efficient use of memory. For example, to monitor both the /data/d1 and /data/d2 directories, specify /data as the path for the watch. With the Watch Service configured, you can now monitor watches and manage their files as they change. For more information on using watches, see Transferring and Deleting Files with the Aspera Watch Service. The Watch Service can also be used with Watchfolders and IBM Aspera Sync if those services are enabled by your product license. asperawatchd Configuration The asperwatchd settings can be configured by using the asconfigurator tool from the command line or by editing the server section of aspera.conf. With these settings you can manage the snapshot database, snapshot frequency, and logging. To view current asperawatchd settings, run the following command: # /opt/aspera/bin/asuserdata -a Configure from the Command Line: To configure asperawatchd by using asconfigurator commands, use this general syntax: # /opt/aspera/bin/asconfigurator -x "set_server_data;option,value" Options and values are described in the following table. Configure in aspera.conf: To edit aspera.conf, open it in a text editor with administrative privileges. /opt/aspera/etc/aspera.conf
203 Working With Aspera Watch Service 203 For an example of the asperawatchd configuration in aspera.conf, see the sample that follows the table of options and values. Validate aspera.conf after any manual edits by running the following command: # /opt/aspera/bin/asuserdata -v asperawatchd Configuration Options asconfigurator option aspera.conf setting Description Default watchd_max_directories <max_directories> The maximum number of directories that can be watched (combined across all watches) This setting is used only on Linux machines to overwrite the system value /proc/sys/fs/inotify/ max_user_watches. To overwrite the system value with the aspera.conf value, run the setup procedure in the admin tool: # aswatchadmin setup watchd_max_snapshots <max_snapshots> The number of snapshots that are stored in the database before the oldest are overwritten watchd_snapshot_min_interval <snapshot_min_interval> The maximum amount of time between snapshots. If this period passes without the minimum number of changes to trigger a snapshot, a new snapshot is taken. 3s watchd_snapshot_min_changes <snapshot_min_changes> The minimum number of changes 100 that trigger a snapshot. If this number is reached before the snapshot minimum interval passes, a new snapshot is taken. watchd_log_dir <log_dir> Specify the log directory. The Aspera logging file watchd_log_level <log_level> Set the log level. log watchd_db_spec <db_spec> Define how the local machine connects to the Redis database. redis: :31415:domain watchd_scan_period <scan_period> The amount of time between asperawatchd assessments of the watches (from end of one to start of the next). asperawatchd assesses watches for change independent of the snapshot minimum interval and 30m
204 Working With Aspera Watch Service 204 asconfigurator option aspera.conf setting Description Default snapshot minimum changes to ensure that changes are captured. Example WatchD Configuration in aspera.conf... <server> <watchd> <max_directories> </max_directories> <max_snapshots>10000</max_snapshots> <snapshot_min_interval>3s</snapshot_min_interval> <snapshot_min_changes>100</snapshot_min_changes> <log_dir></log_dir> <log_level>log</log_level> <db_spec>redis:host:31415:domain</db_spec> <scan_period>30m</scan_period> </watchd> </server> Transferring and Deleting Files with the Aspera Watch Service When used in conjunction with ascp commands, the Aspera Watch Service (asperawatchd) allows for fast detection and sending of new and deleted items. By comparing snapshots of the file directory it is watching, asperawatchd generates file lists for ascp commands for transfers requests. To generate snapshots and file lists, you must first configure and start asperawatchd. For more information, see Configuring the Aspera Watch Service. Process Overview Determine the domain under which the watchd service is running. Retrieve the uuid of the watcher for the watched directory. Take a snapshot of the current state of the directory. Generate a snapshot differential between the previous state and the current state and save it in a file list. Use the file list in an ascp command (to send created and modified files) or in an asdelete command (to delete files). Viewing Active watchd Domains To view domains under which watchd service is running, run the following command: # /opt/aspera/bin/aswatchadmin create-watch query-daemons The output will be similar to the following example in which root is the domain: Found 2 daemons: root Retrieving the Watcher uuid To generate a file list for all the changes in a directory, first retrieve the uuid of the watcher of the watched directory. # /opt/aspera/bin/aswatchadmin query-watches domain
205 Working With Aspera Watch Service 205 Note: If the datastore is different from the default redis:localhost:31415:domain, specify the datastore using the argument --db-spec=datastore:host:port:domain. The output will have the following format: Found a single watch: uuid, path=filepath The uuid looks like e565a3e3-e25e-44c2-9d68-db1d59cef4c7. Copy the uuid to input into the snapshot command. Taking a Snapshot A snapshot represents the structure of the file system at a particular point of time; asperawatchd compares two snapshots to detect file system changes and generate a file list of those changes. To take a snapshot, run the following command with the watcher uuid associated with the file system. # /opt/aspera/bin/aswatchadmin create-snapshot domain uuid For example, to take a snapshot of the watch with the uuid from the previous section: # /opt/aspera/bin/aswatchadmin create-snapshot root e565a3e3-e25e-44c2-9d68db1d59cef4c7 Successfully created snapshot 1. Sending New and Modified Files Take another snapshot of the directory, generate and save a list of the files that have been created or modified since the previous snapshot, then run an ascp command to send those files to another location. # /opt/aspera/bin/aswatchadmin snapshotdifferential domain uuid snapshot_number_1 snapshot_number_2 --excluderemove --escape + --format +PATH # ascp --file-list /filelist --source-prefix=/prefix --mode=send -user=username --host=host /target_directory For example: # /opt/aspera/bin/aswatchadmin snapshot-differential root e565a3e3e25e-44c2-9d68-db1d59cef4c exclude-remove --escape + --format +PATH # ascp --file-list ~/filelist --source-prefix=/data/d1 --mode=send -user=aspera --host= /data/d2 file1 100% 10MB 9.7Mb/s 00:07 file2 100% 10MB 9.7Mb/s 00:16 file3 100% 10MB 9.7Mb/s 00:26 file4 100% 10MB 9.7Mb/s 00:33 10MB 10MB 9.7Mb/s 9.7Mb/s 00:42 00:51 file5 100% file6 100% Completed: 61440K bytes transferred in 52 seconds (96454 bits/sec), in 6 files. Tip: Aspera recommends using the source prefix option in conjunction with file lists to keep the file smaller. Alternatively, you can format the generated file list with a source prefix by specifying the prefix in the -format option. For example, specifying --format /data/d1{\$path} adds the prefix "/data/d1" to every entry in the file list.
206 Working With Aspera Watch Service 206 Removing Files from the Target Directory The asdelete utility compares the source directory with the target directory and deletes extraneous files from the target directory. # /opt/aspera/bin/asdelete --host host --auth-name username --authpass password /source_directory /target_directory For example: # /opt/aspera/bin/asdelete --host auth-name root --auth-pass! XF345lui@0 /data/d1 /data/r1 Check the target directory to confirm deletion of the correct files. Other aswatchadmin Commands To view a list of all aswatchadmin commands, run the following: # /opt/aspera/bin/aswatchadmin --help
207 Working With Aspera Watchfolders 207 Working With Aspera Watchfolders Creating a Watch Folder Important: If you upgraded from Enterprise Server 3.6.1, Connect Server 3.6.1, or Point-to-Point 3.6.1, and you had the asperawatchd and asperawatchfolderd services enabled and configured, you may have to make manually migrate your services depending on the user is running the services. For further details, see Migrating Watch Services on Upgrade. A watch folder is an automation of file transfers from a source to a destination system. Files placed into a source folder are automatically transferred to the destination. It runs on the client side only and the recipient Aspera server endpoint does not need additional software components to support receiving data. The instructions below uses curl commands to create watch folders. Process Overview: 1. Make sure the asperarund service is running. Although asperarund starts automatically upon install, make sure the service is running, as watchfolder uses the service to start the asperawatchd and asperawatchfolderd watch services. 2. Configure the asperawatchd and asperawatchfolderd watch services. 3. Create a watch folder using the aswatchfolderadmin utility. You can also configure watch folders by interacting with the Node API or by using IBM Aspera Console. For more information, see Creating a Watch Folder with the Node API and the IBM Aspera Console Admin Guide. Configuring Watchfolder Services Watchfolders uses the Aspera Watchfolder service (asperawatchfolderd) and the output from the Aspera Watch Service (asperawatchd) to automatically transfer new files added to a source folder on an Aspera node. Follow the instructions below to start the two services. 1. Select a user account to run your services. Watchfolder services must be run under a user with access to every area of your file system in which you intend to create a watch folder. Watchfolders allows you to run multiple instances of these services under different users. Most users run these services under one user. Choose a user that has access to your entire file system. If you need to run multiple instances of these services to access every area of your file system, see Choosing User Accounts to Run Watchfolder Services. 2. Configure a docroot for the chosen user. The docroot is a security feature that allows you to restrict the area asperawatchfolderd can access. If you need to acces the entire file system, you can set the docroot path as /, but you cannot leave it empty. Set the docroot for the user using the asconfigurator utility: # asconfigurator -x "set_user_data;user_name,username;absolute,docroot" For example: # asconfigurator -x "set_user_data;user_name,root;absolute,/" success user_name: root Note: URI docroots (for example, paths to cloud storage or file://path) are not currently supported by asperawatchd and asperawatchfolderd. Only local file systems can be monitored.
208 Working With Aspera Watchfolders 208 The asconfigurator command adds the following configuration to the <aaa> section of aspera.conf: <aaa> <realms> <realm> <users> <user> <name>root</name> <file_system> <access> <paths> <path> <absolute>/</absolute> </path> </paths> </access> </file_system> </user> </users> </realm> </realms> </aaa> 3. Ensure the user has permissions to write to the default log directory if no directory is specified. For more information about configuring log directories, see asperawatchd Configuration. 4. Configure the asperawatchd and asperawatchfolderd services to run under your user. The following commands add the services in the asperarund database; asperarund automatically starts and preserves services in its database. The asperarund service must be running. # /opt/aspera/sbin/asperawatchd --user username # /opt/aspera/sbin/asperawatchfolderd --user username 5. Verify that asperawatchd and asperawatchfolderd is running under the given user. Use the aswatchadmin and aswatchfolderadmin admin tools to retrieve a list of running daemons. Daemons are named with the username you passed in when starting the service. For example, if you used the root user to run your services, you should see the root daemon listed when you run the following commands: # /opt/aspera/bin/aswatchadmin query-daemons [aswatchadmin query-daemons] Found a single daemon: root # /opt/aspera/bin/aswatchfolderadmin query-daemons [aswatchfolderadmin query-daemons] Found a single daemon: root Creating a Watch Folder with the aswatchfolderadmin Utility The instructions below uses the aswatchfolderadmin utility to create watch folders. 1. Create and configure a JSON configuration file for your watch folder. You must configure the following fields for a valid JSON configuration for a watch folder: Field Description id (optional) A unique ID for the watchfolder. If this field is not configured, a uuid is automatically generated for the watchfolder.
209 Working With Aspera Watchfolders 209 Field Description source_dir The source directory, relative to the user's docroot. When asperawatchd detects a new file in this location, asperawatchfolderd starts an ascp session to transfer the file to target directory. This directory must be within the docroot set for the user running asperawatchd. target_dir The target directory, relative to the user's docroot. If this is a remote directory, define the remote machine in the host field and provide SSH crednetials for the remote machine in the user and pass fields. host The host of the target directory. The host can be specified with an IPv4 or IPv6 address. The preferred format for IPv6 addresses is x:x:x:x:x:x:x:x, where each of the eight x is a hexadecimal number of up to 4 hex digits. Zone IDs (for example, %eth0) can be appended to the IPv6 address. user The username for the host of the target directory. pass The password for the host of the target directory. { } "source_dir": "source_directory", "target_dir": "target_directory", "transport": { "host": "host", "user": "username", "pass": "password" } For example: { } "source_dir": "/src", "target_dir": "/dest", "transport": { "host": " ", "user": "watchfolder_admin", "pass": "XF324cd28" } For a full reference to the options you can configure, see Configuring the Watch Folder JSON Configuration File. Save the configuration file. 2. Create a watch folder using the aswatchfolderadmin utility. The aswatchfolderadmin utility creates a watch folder given the ID of an asperawatchfolderd daemon and a properly formatted JSON file. You can use the aswatchfolderadmin query-daemons command to retrieve a list of daemons.
210 Working With Aspera Watchfolders 210 To create a new watch folder, run the following command: # /opt/aspera/bin/aswatchfolderadmin create-folder daemon_name f json_file For example, given the root daemon and a valid JSON file saved as watchfolderconf.json, the output of the aswatchfolderadmin command should look like the following: # /opt/aspera/bin/aswatchfolderadmin create-folder root -f watchfolder_conf.json [aswatchfolderadmin create-folder] Successfully created instance b394d0ee-1cda-4f0d-b785-efdc6496c585. If aswatchfolderadmin errors out with error code err=28672, check that your docroot has been properly configured to provide access to the source directory. If you need to make changes to your docroot, see Updating the Docroot of a Running asperawatchfolderd Service. 3. Verify that the watch folder is running. Use the aswatchfolderadmin utility to retrieve a list of running watch folders: # /opt/aspera/bin/aswatchfolderadmin query-folders daemon_name For example: # /opt/aspera/bin/aswatchfolderadmin query-folders root [aswatchfolderadmin query-folders] Found a single watchfolder: b394d0ee-1cda-4f0d-b785-efdc6496c Test your watch folder. Add files to the source directory you configured in the JSON configuration file. If the configuration is correct, Watchfolder detects the new files, starts a transfer, and the added files appear in the target directory. After creating your watch folder, you can manage the watch folder using the aswatchfolderadmin utility. For more information, see Managing Watch Folders with aswatchfolderadmin. Configuring Linux for Many Watchfolders To create many (>100) watchfolders on Linux machines, you must adjust three system settings and then reload the sysctl.conf file to activate them. 1. Increase the maximum number of watches allowed by the system. Check the current value by running the following command: $ cat /proc/sys/fs/inotify/max_user_watches To permanently increase the number of available watches (to a value that is greater than the number of files to watch, such as ), add the configuration to /etc/sysctl.conf: $ sudo echo "fs.inotify.max_user_watches=524288" >> /etc/sysctl.conf 2. Increase the maximum number of inotify instances, which correspond to the number of asperawatchd instances. On many systems, the default value is 128, meaning only 128 asperawatchd watches can be created. Check the current value by running the following command: $ cat /proc/sys/fs/inotify/max_user_instances
211 Working With Aspera Watchfolders 211 To permanently increase the number of available watchfolders (to a value that is greater than the number of desired watchfolder instances, such as 1024), add the configuration to /etc/sysctl.conf: $ sudo echo "fs.inotify.max_user_instances=1024" >> /etc/sysctl.conf 3. Increase the open file limit. Check the current value by running the following command: $ cat /proc/sys/fs/file-max To permanently increase the open file limit (to a value that is greater than the number of desired watches, such as ), add the configuration to /etc/sysctl.conf: $ sudo echo "fs.file-max= " >> /etc/sysctl.conf 4. Reload systemd settings to activate the new settings. To reload systemd settings, either reboot the machine or run the following command: $ sudo sysctl -p /etc/sysctl.conf Managing Watch Folders with aswatchfolderadmin You can use the aswatchfolderadmin utility to create, remove, and manage watch folders. This documentation describes how to retrieve a list of watch folders, update the configuration of watch folder, and delete a watch folder. For instructions on creating a watch folder with aswatchfolderadmin utility, see Creating a Watch Folder. The aswatchfolderadmin sub-commands used to manage watch folders require you to specify the asperawatchfolderd daemon that owns the watchfolder. To retrieve a list of daemons, you can run the querydaemons sub-command: # /opt/aspera/bin/aswatchfolderadmin query-daemons [aswatchfolderadmin query-daemons] Found a single daemon: root Retrieve a List of Watch Folders Using the aswatchfolderadmin utility to configure a watch folder requires the ID of the watch folder. To retrieve a list of watch folder IDs, run the following command: # /opt/aspera/bin/aswatchfolderadmin query-folders daemon If you have two watch folders configured under the user root, running the query-folders sub-command may return output similar to below: # /opt/aspera/bin/aswatchfolderadmin query-folders root [aswatchfolderadmin query-folders] Found 2 watchfolders: 3354f360-dfa e-074cd9d4551b b394d0ee-1cda-4f0d-b785-efdc6496c585 Updating a Watch Folder To update a watch folder configuration, you must first retrieve the watch folder's configuration, make the desired changes, and then save the configuration as a JSON file. You cannot pass a new configuration file to the update-
212 Working With Aspera Watchfolders 212 folder sub-command, because the new configuration file must match the old file exactly, except for the changes you are making. To retrieve the configuration file, run the following command: # /opt/aspera/bin/aswatchfolderadmin query-folders daemon watch_folder_id -c Copy the configuration into an editor and make your changes. Note: When aswatchfolderadmin returns the JSON configuration, it obfuscates the password for the host with asterisks (******). You must enter the password again as part of your changes. Save the file. Run the following command, specifying the modified configuration file as the JSON file: # /opt/aspera/bin/aswatchfolderadmin update-folder daemon watchfolder_id f json_file For example: # /opt/aspera/bin/aswatchfolderadmin update-folder root 3354f360dfa e-074cd9d4551b -f watchfolder_conf.json [aswatchfolderadmin update-folder] Successfully updated instance b394d0ee-1cda-4f0d-b785-efdc6496c585 Deleting a Watch Folder To remove a watch folder, run the following command: # /opt/aspera/bin/aswatchfolderadmin delete-folder daemon watchfolder_id For example: # /opt/aspera/bin/aswatchfolderadmin update-folder root 3354f360dfa e-074cd9d4551b [aswatchfolderadmin update-folder] Successfully deleted instance b394d0ee-1cda-4f0d-b785-efdc6496c585 Configuring the Watch Folder JSON Configuration File To create a Watch Folder, you must provide a valid JSON configuration file, regardless of whether you are using the aswatchfolderadmin utility or the Node API. This reference provides the following information: Requirements for a minimal JSON configuration and a sample configuration A full JSON template Details on the configuration optoins found in the template Minimal JSON Configuration A minimal JSON configuration for a watch folder uses the fields in the following table: Field Description id (optional) A unique ID for the watchfolder. If this field is not configured, a uuid is automatically generated for the watchfolder. source_dir The source directory, relative to the user's docroot. When asperawatchd detects a new file in this location, asperawatchfolderd starts an ascp session to
213 Working With Aspera Watchfolders 213 Field Description transfer the file to target directory. This directory must be within the docroot set for the user running asperawatchd. target_dir The target directory, relative to the user's docroot. If this is a remote directory, define the remote machine in the host field and provide SSH crednetials for the remote machine in the user and pass fields. host The host of the target directory. The host can be specified with an IPv4 or IPv6 address. The preferred format for IPv6 addresses is x:x:x:x:x:x:x:x, where each of the eight x is a hexadecimal number of up to 4 hex digits. Zone IDs (for example, %eth0) can be appended to the IPv6 address. user The username for the host of the target directory. pass The password for the host of the target directory. { } "source_dir": "source_directory", "target_dir": "target_directory", "transport": { "host": "host", "user": "username", "pass": "password" } For example: { } "source_dir": "/src", "target_dir": "/dest", "transport": { "host": " ", "user": "watchfolder_admin", "pass": "XF324cd28" } Sample JSON Configuration File { "source_dir":"/src", "target_dir":"/dest", "id":"b394d0ee-1cda-4f0d-b785-efdc6496c585", "cool_off":"30s", "snapshot_creation_period":"10s", "meta":{ "version":0, "name":"aspera_watchfolder" }, "drop":{ "detection_strategy":"cool_off_only", "cool_off":"5s" }, "post_processing":{
214 Working With Aspera Watchfolders 214 "local":{ "type":"transfer_none", "archive_dir":"/watchfolder_sessions/{$uuid}_{$datetime}" } }, "filters":[ { "type":"glob", "pattern":"*.txt", "rule":"exclude" }, { "type":"regex", "pattern":".*\\.txt", "rule":"include" } ], "packages":{ "timeout":"10s", "parsers":[ { "final_transfer":"list", "filters":[ { "type":"regex", "rule":"include", "pattern":".*\\.txt" } ] } ] }, "transport":{ "host":"", "user":"aspx2", "pass":"", "proxy":"dnat://aspx1:@localhost:9001", "keypath":"", "fingerprint":"", "cookie":"", "tags":{ }, "error_handling":{ "file":{ "max_retries":3, "retry_timeout":"3s" }, "drop":{ "retry_period":"1m" } }, "regular":{ "max_parallel":10, "connect_timeout":"10s", "policy":"fair", "min_rate":"0b", "target_rate":"10m", "tcp_port":22, "udp_port":33001, "read_blk_size":"", "write_blk_size":"", "datagram_size":"", "rexmsg_size":"", "cipher":"aes128",
215 Working With Aspera Watchfolders 215 "overwrite":"diff", "resume":"none", "preserve_uid":false, "preserve_gid":false, "preserve_time":false, "preserve_creation_time":false, "preserve_modification_time":false, "preserve_access_time":false, "queue_threshold":"5s", "sample_period":"2s" } } }, "growing_file":{ "max_parallel":8, "policy":"fair", "min_rate":"", "target_rate":"10m", "tcp_port":22, "udp_port":33001, "datagram_size":"", "cipher":"aes128", "completion_timeout":"5s", "memory":"2m", "chunk_size":"128k", "force_send_after":"2s", "filters":[ { "type":"regex", "rule":"include", "pattern":".*\\.growing" } ] } Top Level Configuration { } "source_dir":"/src", "target_dir":"/dest", "id":"b394d0ee-1cda-4f0d-b785-efdc6496c585", "cool_off":"30s", "snapshot_creation_period":"10s",... Field Description Default source_dir The source directory, relative to the user's docroot. When asperawatchd detects a new file in this location, asperawatchfolderd starts an ascp session to transfer the file to target directory. This directory must be within the docroot set for the user running asperawatchd. None: must be explicitly configured target_dir The target directory, relative to the user's docroot. If this is a remote directory, define the remote machine None: must be explicitly configured
216 Working With Aspera Watchfolders 216 Field Description Default in the host field and provide SSH crednetials for the remote machine in the user and pass fields. id Value used to identify a watch folder. None: automatically generated If this field is not configured at creation, a uuid is automatically generated for and assigned to the watch folder. cool_off The duration watchfolder waits to 3s take a directory snapshot to check for new files. snapshot_creation_period The duration watchfolder uses to determine what files are included in the current drop. 3s Meta Fields { }... "meta":{ "version":0, "name":"aspera_watchfolder" },... Field Description Default version Specifies the current version of the configuration. When updating the configuration, this value must match the version stored by the server. Otherwise, the update is rejected. 0 name The value specified in this field is added to the cookie reported by ascp. N/A Drop Fields A watchfolder groups new or updated files it detects in its source folder into "drops". A drop is defined by the duration set by the snapshot_creation_period. All files in a given drop are transferred in the same transfer session, post-processed together, and reported as a unit. { }... "drop":{ "detection_strategy":"cool_off_only", "cool_off":"5s" },...
217 Working With Aspera Watchfolders 217 Field Description Default detection_strategy The strategy this watchfolder uses to detect files dropped into the source folder. COOL_OFF_ONLY cool_off COOL_OFF_ONLY: Create a drop that includes new files added within the duration of the cool_off field. TOP_LEVEL_FILES: Create a drop for each file placed in the top level of the source folder. TOP_LEVEL_DIRS: Create a drop for each directory placed in the top level of the source folder. This drop also includes the subdirectories and files in the top level directory. The duration allowed for new files to be included in a drop. This field is only relevant for the COOL_OFF_ONLY detection strategy. Aspera recommends choosing a multiple of the specified snapshot_creation_period for predictable results. 5s Post Processing Fields { }... "post_processing":{ "local":{ "type":"transfer_none", "archive_dir":"/watchfolder_sessions/{$uuid}_{$datetime}" } },... Field Description Default type Determines whether files are archived, deleted, or kept after transfer of a drop. TRANSFER_NONE TRANSFER_NONE: Files stay in the source directory. TRANSFER_ARCHIVE: Files in the source directory are moved to a final archive after successful transfer.
218 Working With Aspera Watchfolders 218 Field Description archive_dir TRANSFER_DELETE: Files in the source directory are deleted after successful transfer. The destination of archived files, relative to the user's docroot, for use when the post processing type is TRANSFER_ARCHIVE. The path can be determined using the following variables: Default N/A {$TIMESTAMP} (Drop creation time in seconds since epoch) {$DAY_OF_MONTH} (Time format for drop's creation time) {$MONTH} {$YEAR} {$HOUR} {$MINUTE} {$SECOND} {$DATETIME} (alias for {$YEAR}{$MONTH} {$DAY_OF_MONTH}{$HOUR}{$MINUTE} {$SECOND}) {$UUID} {$NAME} {$STATE} {$FILE::STATE} (such as SUCCEEDED, FAILED) Filter Fields { }... "filters":[ { "type":"glob", "pattern":"*.txt", "rule":"exclude" }, { "type":"regex", "pattern":".*\\.txt", "rule":"include" } ],... Field Description Default type The type of filter. Supported filters are GLOB and REGEX. N/A
219 Working With Aspera Watchfolders 219 Field Description Default pattern The filter pattern. N/A rule The rule for the filter. Supported rules are INCLUDE and EXCLUDE. N/A Packages Fields { }... "packages":{ "timeout":"10s", "parsers":[ { "final_transfer":"list", "filters":[ { "type":"regex", "rule":"include", "pattern":".*\\.txt" } ],... } ] },... Field Description Default final_transfer Defines which file has to be transferred last. LIST filters LIST: The last file in the package list is transferred last. LAST_FILE_IN_LIST: The files are transferred without any specific order. A list of filters as described in the Filter Fields section above. N/A The transport object } }... "transport":{ "host":" ", "user":"aspx2", "pass":"xf324cd28", "token":"fiewle535etn23teiw234n5sewtnseonts", "proxy":"dnat://aspx1:xf324cd28@localhost:9001", "keypath":"~/.ssh/id_rsa", "fingerprint":"stringalsdjkfad",... }
220 Working With Aspera Watchfolders 220 Option Description Default host The hostname of the destination node. N/A user The SSH account login name. N/A pass The SSH account password. N/A token The token key string. Not valid for use with growing files. N/A proxy The address of an Aspera high-speed N/A proxy server. The proxy syntax is: keypath The path to the private key file used for public key authentication. N/A Note: If a relative path is provided, the file at the relative path is checked for existence. If the relative path is not found, $HOME/.ssh/ is prepended to the relative path. fingerprint Fingerprint to check against server SSH host key fingerprint N/A Error Handling Fields } }... "transport":{... "error_handling":{ "file":{ "max_retries":3, "retry_timeout":"3s" }, "drop":{ "retry_period":"1m" } },... } Watch folder error handling distinguishes between two different error categories: File-Specific Errors: These errors increase the file retry count every time a failure occurs. When the max_retries count is reached, the file is marked as failed and the session attempts to transfer the next file in the drop queue. All errors except the following: License error Authentication error Any other error in establishing an ascp session Other Errors: These errors do not increase the file retry count. If a given error re-occurs again and again, the same file is retried until the drop s retry_period is exceeded. Then, the drop is marked as failed.
221 Working With Aspera Watchfolders 221 Option Description Default max_retries When the maximum retry count is reached, the file is marked as failed. 3 retry_timeout Retry attempts are spaced by the timeout parameter. 3s retry_period If no bytes are transferred during this period and no file is completed, the drop and all remaining incomplete files of the drop are marked as failed. 1m The regular object (for ascp Sessions) { }... "transport":{... "regular":{ "max_parallel":10, "connect_timeout":"10s", "policy":"fair", "min_rate":"0b", "target_rate":"10m", "tcp_port":22, "udp_port":33001, "read_blk_size":"", "write_blk_size":"", "datagram_size":"", "rexmsg_size":"", "cipher":"aes128", "overwrite":"diff", "resume":"none", "preserve_uid":false, "preserve_gid":false, "preserve_time":false, "preserve_creation_time":false, "preserve_modification_time":false, "preserve_access_time":false, "queue_threshold":"5s", "sample_period":"2s", "raw_options":["-l","/tmp/log"], "content_protect_password":"ear_password" },... } Field Description Default max_parallel The maximum number of concurrent ascp sessions the watch folder can initiate. 10 connect_timeout Timeout duration in seconds before considering ascp has failed. 10s policy Defines how ascp manages the bandwidth. The policy can be set to the following values: FAIR FIXED FAIR HIGH
222 Working With Aspera Watchfolders 222 Field Description Default LOW min_rate Minimum rate in bytes that ascp can use. 0B target_rate The target rate in megabytes that ascp should use. 10M tcp_port The TCP port used for the FASP session. 22 udp_port The UPD port used by FASP for data transfer. read_blk_size The read block size. Default determined by settings in aspera.conf write_blk_size The write block size. Default determined by settings in aspera.conf datagram_size The datagram size (MTU) for FASP. Uses the detected path MTU. rexmsg_size The maximum size of a retransmission request. Determined by ascp cipher The encryption cipher for file data. You can chooose AES128 or NONE. AES128 overwrite Determines if a file is overwritten if it already already exists at the destination. You can choose: DIFF resume NEVER ALWAYS DIFF OLDER DIFF+OLDER Determine if partial transfers are resumed. NONE NONE: Always transfer the entire file FILE_ATTRIBUTES: Resume if file attributes match. SPARSE_CHECKSUM: Resume if file attributes and sparse checksum match. FULL_CHECKSUM: Resume if file attributes and full checksum match. preserve_uid Preserve the file owner user ID. false preserve_gid Preserve the file owner group ID. false preserve_time This option is equivalent to configuring preserve_creation_time, false
223 Working With Aspera Watchfolders 223 Field Description Default preserve_modification_time, and preserve_access_time. preserve_creation_time Set creation time of the destination be set to that of the source. If the destination is a non-windows host, this option is ignored. false preserve_modification_time Set the modification time of the destination file be set to that of the source. false preserve_access_time Set the access time of the destination to be set to that of the source. The destination file ends up with the access time of the source file prior to the transfer. false queue_threshold Watch folder controls the amount of 5s data pushed to ascp for transferring. When the capacity is reached, the watch folder waits before pushing new data. This capacity is based on the effective bandwidth reported by ascp. sample_period Period used to compute the current bandwidth. Used with queue_threshold to compute the amount of data pushed to ascp. raw_options Enable the use of new ascp options disabled that are not yet available in the configuration. Optionally set logging of raw options. 2s Note: This option requires that raw options are also enabled in aspera.conf. content_protect_password Provide the encryption-at-rest password. The growing Object (for faspstream Sessions) {... "transport":{... "growing_file":{ "max_parallel":8, "policy":"fair", "min_rate":"", "target_rate":"10m", "tcp_port":22, "udp_port":33001, "datagram_size":"", "cipher":"aes128", "completion_timeout":"5s", N/A
224 Working With Aspera Watchfolders 224 } } } "memory":"2m", "chunk_size":"128k", "force_send_after":"2s", "filters":[ { "type":"regex", "rule":"include", "pattern":".*\\.growing" } ] Option Description Default max_parallel The maximum number of concurrent faspstream sessions the watch folder can initiate. 8 policy Defines how faspstream manages the bandwidth. The policy can be set to the following values: FAIR FIXED FAIR HIGH LOW min_rate Minimum rate in bytes that faspstream can use. 0B target_rate The target rate in megabytes that faspstream should use. 10M tcp_port The TCP port used for the session. 22 udp_port The UPD port used for data transfer datagram_size The datagram size (MTU) for FASP. Uses the detected path MTU. cipher The encryption cipher for file data. You can chooose AES128 or NONE. AES128 completion_timeoutthe duration before the session is considered complete. A growing file is considered completed when there is no new data for the duration of this timeout. 20s force_send_after Force faspstream to send data after the given time, even if the chunk is not full. 2s memory The maximum amount of memory the faspstream binary is allowed to use. 2M chunk_size Packet size for transfers over the network. 128K filters A file is a growing file if the filename matches the given filter. N/A Watchfolder Configuration in aspera.conf Watchfolder can be configured using the asconfigurator tool from the command line or by editing the server section of aspera.conf. To configure the Watchfolder using asconfigurator, use this general syntax: #/opt/aspera/bin/asconfigurator -x "set_default_data;option,value"
225 Working With Aspera Watchfolders 225 Possible options and values are described in the table below. To edit aspera.conf, open it in a text editor with administrative privileges. /opt/aspera/etc/aspera.conf An example of the watchfolderd configuration in aspera.conf is provided after the table below. Remember to validate aspera.conf after any editing to confirm your configuration is correct. Run the following command: / /opt/aspera/bin/asuserdata -v To view the current settings, run the following command: # /opt/aspera/bin/asuserdata -a Watchfolder Configuration Options The table below provides a reference of the configuration options for watchfolderd. asconfigurator option aspera.conf setting Description Default watchfolderd_db_spec <db_spec> Define how the local machine connects to the Redis database. redis: :31415[:domain] watchfolderd_log_dir <log_directory> Set the log directory. undefined (goes to the Aspera logging file) watchfolderd_log_level <log_level> Set the log level. Options are disable, log log, dbg1, or dbg2. watchfolderd_purge_drops_max_age Set the drop maximum age. Drops older than this age are purged. <purge_drops_max_age> 1d watchfolderd_purge_drops_max_files Set the maximum number files across all drops. Once this number <purge_drops_max_files> is reached, drops will be purged until the file count is less than the specified number watchfolderd_raw_options <raw_options> Set to enabled to allow ascp transfers initiated by Watchfolder to use new ascp options before they are built into the application. disabled Example watchfolderd Configuration in aspera.conf... <default> <watchfolderd> <db_spec>redis: :31415</db_spec> <log_directory> </log_directory> <log_level>log</log_level> <purge_drops_max_age>1d</purge_drops_max_age> <purge_drops_max_files> </purge_drops_max_files>
226 Working With Aspera Watchfolders 226 </watchfolderd> </default> Choosing User Accounts to Run Watchfolder Services Watchfolder services must be run under a user with access to every area of your file system in which you intend to create a watch folder. Watchfolders allows you to run multiple instances of these services under different users. Most users run these services under one user. Choose a user that has access to your entire file system. You may need to run multiple instances of these services to access every area of your file system. For example, your file system may include mounted storage from the marketing department and another from the release team. In such a scenario, you may not have a single user that can access files in both mounted storages, or your administrative account has access to the entire file system, but your policy prohibits running the asperawatchd and asperawatchfolderd services under that user account. There are two ways to configure watch folders depending on your scenario. See the chart below for the configuration that matches your scenario: Configuration #1 This is the simplest and most common configuration of watchfolder services. Choose an account that has read permissions for all your files and follow the instructions in Creating a Watch Folder. Configuration #2 If you cannot run watchfolder services under the administrative account or you do not have a single user that has access to the entire file system, you must run pairs of asperawatchd and asperawatchfolderd services under enough users to access your entire file system. For example, if you have user mounted storage from the marketing department that can only be accessed by user xasp1, and another storage from the release team, which can only be accessed by user xasp2, you need to run a pair of asperawatchd and asperawatchfolderd services under each user. Aspera recommends using the Node
227 Working With Aspera Watchfolders 227 API to configure services and manage watch folders in a multi-user context. You can interact with the Node API using IBM Aspera Console or using curl commands from the command line. For more information on using Watchfolders with Console, see the IBM Aspera Console Admin Guide: Working with Watchfolders. For instructions on creating watch folders using Node API, see Creating a Watch Folder with the Node API. Creating a Watch Folder with the Node API Important: If you upgraded from Enterprise Server 3.6.1, Connect Server 3.6.1, Point-to-Point 3.6.1, or Desktop Client 3.6.1, and you had the asperawatchd and asperawatchfolderd services enabled and configured, you may have to make manually migrate your services depending on the user is running the services. For further details, see Migrating Watch Services on Upgrade. A watch folder is an automation of file transfers from a source to a destination system. Files placed into a source folder are automatically transferred to the destination. It runs on the client side only and the recipient Aspera server endpoint does not need additional software components to support receiving data. Process Overview: 1. Make sure the asperarund service is running. Although asperarund starts automatically upon install, make sure the service is running, as watchfolder uses the service to start the asperawatchd and asperawatchfolderd watch services. 2. Configure the asperawatchd and asperawatchfolderd watch services. 3. Configure the Node API. 4. Create a watch folder using the aswatchfolderadmin utility. Configuring Watchfolder Services Watchfolders uses the Aspera Watchfolder service (asperawatchfolderd) and the output from the Aspera Watch Service (asperawatchd) to automatically transfer new files added to a source folder on an Aspera node. Follow the instructions below to start the two services. 1. Select a user account to run your services. Watchfolder services must be run under a user with access to every area of your file system in which you intend to create a watch folder. Watchfolders allows you to run multiple instances of these services under different users. Most users run these services under one user. Choose a user that has access to your entire file system. If you need to run multiple instances of these services to access every area of your file system, see Choosing User Accounts to Run Watchfolder Services. 2. Configure a docroot for the chosen user. The docroot is a security feature that allows you to restrict the area asperawatchfolderd can access. If you need to acces the entire file system, you can set the docroot path as /, but you cannot leave it empty. Set the docroot for the user using the asconfigurator utility: # asconfigurator -x "set_user_data;user_name,username;absolute,docroot" For example: # asconfigurator -x "set_user_data;user_name,root;absolute,/" success user_name: root Note: URI docroots (for example, paths to cloud storage or file://path) are not currently supported by asperawatchd and asperawatchfolderd. Only local file systems can be monitored.
228 Working With Aspera Watchfolders 228 The asconfigurator command adds the following configuration to the <aaa> section of aspera.conf: <aaa> <realms> <realm> <users> <user> <name>root</name> <file_system> <access> <paths> <path> <absolute>/</absolute> </path> </paths> </access> </file_system> </user> </users> </realm> </realms> </aaa> 3. Ensure the user has permissions to write to the default log directory if no directory is specified. For more information about configuring log directories, see asperawatchd Configuration. 4. Configure the asperawatchd and asperawatchfolderd services to run under your user. The following commands add the services in the asperarund database; asperarund automatically starts and preserves services in its database. The asperarund service must be running. # /opt/aspera/sbin/asperawatchd --user username # /opt/aspera/sbin/asperawatchfolderd --user username 5. Verify that asperawatchd and asperawatchfolderd is running under the given user. Use the aswatchadmin and aswatchfolderadmin admin tools to retrieve a list of running daemons. Daemons are named with the username you passed in when starting the service. For example, if you used the root user to run your services, you should see the root daemon listed when you run the following commands: # /opt/aspera/bin/aswatchadmin query-daemons [aswatchadmin query-daemons] Found a single daemon: root # /opt/aspera/bin/aswatchfolderadmin query-daemons [aswatchfolderadmin query-daemons] Found a single daemon: root Configuring the Node API 1. Create a Node API user and map it to a system account. The user account must have administrative (root / sudo) privileges to interact with asperawatchfolderd. # /opt/aspera/bin/asnodeadmin -a -u node_username -p node_password x admin_user --acl-set "admin,impersonation" For example: # /opt/aspera/bin/asnodeadmin -a -u watchfolder_user -p X245lskd3 -x root --acl-set "admin,impersonation"
229 Working With Aspera Watchfolders 229 Adding, modifying, or deleting a node-user triggers automatic reloading of the user database and the node's configuration and license files. For more information on the Node API, see your transfer server's administrator guide. 2. Verify that you correctly added the node user. # /opt/aspera/bin/asnodeadmin -l List of node user(s): user system/transfer user ==================== ======================= node_api_user system_user acls ==================== [admin] Given the example in the previous step, the output should look like the following: # /opt/aspera/bin/asnodeadmin -l user system/transfer user ==================== ======================= watchfolder_user root acls ==================== [admin,impersonation] Creating a Watch Folder with the Node API The instructions below uses curl commands to create watch folders. 1. Retrieve a list of running asperawatchfolder daemons. Daemons are named with the username passed in when starting the service. Run the following aswatchfolderadmin command: # /opt/aspera/bin/aswatchfolderadmin query-daemons [aswatchfolderadmin query-daemons] Found a single daemon: root 2. Create and configure a JSON configuration file for each watch folder. You must configure the following fields for a valid JSON configuration for a watch folder: Field Description id (optional) A unique ID for the watchfolder. If this field is not configured, a uuid is automatically generated for the watchfolder. source_dir The source directory, relative to the user's docroot. When asperawatchd detects a new file in this location, asperawatchfolderd starts an ascp session to transfer the file to target directory. This directory must be within the docroot set for the user running asperawatchd. target_dir The target directory, relative to the user's docroot. If this is a remote directory, define the remote machine in the host field and provide SSH crednetials for the remote machine in the user and pass fields. host The host of the target directory. The host can be specified with an IPv4 or IPv6 address. The preferred format for IPv6 addresses is x:x:x:x:x:x:x:x, where each of the eight x is a hexadecimal number of up to 4 hex digits. Zone IDs
230 Working With Aspera Watchfolders 230 Field Description (for example, %eth0) can be appended to the IPv6 address. user The username for the host of the target directory. pass The password for the host of the target directory. { } "source_dir": "source_directory", "target_dir": "target_directory", "transport": { "host": "host", "user": "username", "pass": "password" } For example: { } "source_dir": "/src", "target_dir": "/dest", "transport": { "host": " ", "user": "watchfolder_admin", "pass": "XF324cd28" } For a full reference to the options you can configure, see Configuring the Watch Folder JSON Configuration File. Save the configuration file. 3. Verify that a Node API user has been configured correctly for the system user running the asperawatchd and asperawatchfolderd services. # /opt/aspera/bin/asnodeadmin -l List of node user(s): user system/transfer user ==================== ======================= node_api_user system_user acls ==================== [admin] 4. Use the Node API start a watch folder instance with the JSON configuration file. Pass the configuration file into a curl command to start a watch folder with the Node API: # cat path/to/json_file curl -k --user node_api_user:node_api_password X POST Tip: By default, the Node API port is For example: # cat ~/watchfolder_conf.json curl -k --user watchfolder_admin:xf324cd28 -X POST { "id": "b394d0ee-1cda-4f0d-b785-efdc6496c585" } 5. Verify the watch folder is running.
231 Working With Aspera Watchfolders 231 Retrieve the status of the new watch folder using the following curl command: # curl -k --user node_api_user:node_api_password For example: # curl -sk --user watchfolder_admin:xf324cd28 v3/watchfolders/b394d0ee-1cda-4f0d-b785-efdc6496c585/state Make sure the state of the watch folder in the resulting out put is "state":"healthy". 6. Test your watch folder. Add files to the source directory you configured in the JSON configuration file. If the configuration is correct, Watchfolder detects the new files, starts a transfer, and the added files appear in the target directory. After creating your watch folder, you can manage the watch folder using the Node API. For more information, see Managing Watch Folders with the Node API. Managing Watch Folders with the Node API You can use the Node API to create, remove, and manage watch folders. The instructions below uses curl commands to interact with the Node API. This documentation covers how to retrieve a list of watch folders, update the configuration of watch folder, and delete a watch folder. For instructions on creating a watch folder with the Node API, see Creating a Watch Folder with the Node API. Retrieve a list of watch folders To retrieve a list of watch folders, run the following curl command: # curl -k --user node_api_user:node_api_password v3/watchfolders For example: # curl -k --user watchfolder_admin:xf324cd28 watchfolders { "ids" : [ "b394d0ee-1cda-4f0d-b785-efdc6496c585" ] } If there are no running watch folders, the server returns the following output. { "ids" : [ ] } Check state, statistics, and status of a watch, transfer, or watch folder curl -ks -u node_api_user:node_api_password> watchfolders/watchfolder_id/state
232 Working With Aspera Watchfolders 232 In the following example, the output shows watch folder errored due to a configuration option that was not set. Errors with ascp transfers are displayed similarly in the transport section. # curl -ks --user watchfolder_admin:xf324cd28 watchfolders/b394d0ee-1cda-4f0d-b785-efdc6496c585/state { "state": "HEALTHY", "statistics": { "files_transferred": 0, "files_succeeded": 0, "files_failed": 0, "files_skipped": 0, "files_ignored": 0, "files_disappeared_before_cool_off": 0, "files_unsatisfied_dependency": 0, "files_never_appeared": 0, "bytes_completed": 0, "bytes_written": 0 }, "components": { "watch": { "state": "HEALTHY", "state_changed_at": " T20:18:47Z" }, "transport": { "state": "UNKNOWN", "state_changed_at": " T20:17:48Z" }, "watchfolderd": { "state": "HEALTHY", "state_changed_at": " T20:18:47Z", "last_error": "UAC don't allow raw_options", "last_error_at": " T20:18:10Z" } } } Query and save a configuration for a specific watch folder curl -ks -u node_api_user:node_api_password> watchfolders/watchfolder_id For example: # curl -ks --user watchfolder_admin:xf324cd28 watchfolders/b394d0ee-1cda-4f0d-b785-efdc6496c585 Copy the output in a.json file. Updating a watch folder To update a watch folder configuration, you must first retrieve the watch folder's configuration, make the desired changes, and then save the configuration as a JSON file. You cannot use a new configuration file, because the new configuration file must match the old file exactly, except for the changes you are making. Follow the steps provided prevoiusly to query and save a configuration for the watch folder. Next, open the file in an editor, make your changes, and save the file. Note: When aswatchfolderadmin returns the JSON configuration, it obfuscates the password for the host with asterisks (******). You must enter the password again as part of your changes.
233 Working With Aspera Watchfolders 233 Run the following command, specifying the modified configuration file as the JSON file: # cat path/to/json_file curl -k --user node_api_user:node_api_password -X PUT For example: # curl -k --user watchfolder_admin:xf324cd28 -X PUT To verify that the configuration was updated, retrieve the configuration file again and look for your changes. Moving a watch folder from one user or daemon to another To move a watch folder configuration, you must first retrieve the watch folder's configuration, make the desired changes, and then create a new watch folder with the modified configuration file. Follow the steps provided prevoiusly to query and save a configuration for the watch folder. Open the configuration file in an editor and make the following changes: Remove the "id" field. Remove the "version" field. Re-enter the password in the "pass" field. Set proper watchfolderd IDs in the ("wfd_id") fields Save the configuration file and then run the following command, specifying the modified configuration file as the JSON file: # cat path/to/json_file curl -k --user node_api_user:node_api_password -X POST For example, to change the user to admin2, run the following: # cat ~/watchfolder_conf.json curl -k --user admin2:xf324cd28 -X POST { "id": "b394d0ee-1cda-4f0d-b785-efdc6496c585" } To verify that the configuration was updated, retrieve the configuration file again and look for your changes. Deleting a watch folder To remove a watch folder, run the following command: # curl -sk --user node_api_user:node_api_password -X DELETE For example: # curl -k --user watchfolder_admin:xf324cd28 -X DELETE To verify that the watch folder was removed, retrieve the list of watch folders with the command as shown above. If the watch folder ID is no longer listed, the watch folder was successfully deleted.
234 Working With Aspera Watchfolders 234 Updating the Docroot of a Running asperawatchfolderd Service If, when creating a watch folder, aswatchfolderadmin errors out with error code err=28672, check that your docroot has been properly configured to provide access to the source directory specified in the JSON configuration file. You may have specified a destination that is not permitted by the docroot of the user running asperawatchfolderd, or you may have no docroot configured at all. If you need to make changes to your docroot, follow the instructions below to update your docroot and restart the asperawatchfolderd service. 1. Update the docroot for the user running asperawatchfolderd. The docroot is a security feature that allows you to restrict the area asperawatchfolderd can access. If you need to acces the entire file system, you can set the docroot path as /, but you cannot leave it empty. Set the docroot for the user using the asconfigurator utility: # asconfigurator -x "set_user_data;user_name,username;absolute,docroot" For example: # asconfigurator -x "set_user_data;user_name,root;absolute,/" success user_name: root Note: URI docroots (for example, paths to cloud storage or file://path) are not currently supported by asperawatchd and asperawatchfolderd. Only local file systems can be monitored. The asconfigurator command adds the following configuration to the <aaa> section of aspera.conf: <aaa> <realms> <realm> <users> <user> <name>root</name> <file_system> <access> <paths> <path> <absolute>/</absolute> </path> </paths> </access> </file_system> </user> </users> </realm> </realms> </aaa> You can find the aspera.conf configuration file at: /opt/aspera/etc/aspera.conf 2. Restart the asperawatchfolderd service to pick up the changes to the docroot. Use the asrun utility to disable and enable the asperawatchfolderd service. For more information about asrun and the asperarund service manager, see The Aspera Watch Services Manager (asperarund). # /opt/aspera/bin/asrun send --disable="username"
235 Working With Aspera Watchfolders 235 # /opt/aspera/bin/asrun send --enable="username" Managing Watch Folder Services Query watchd or watchfolderd services # /opt/aspera/bin/asrun send -g A query returns output similar to the following example, in which one watchd service and one watchfolderd service are returned: [asrun send] code=0, body={"services":[{"id":"52ca847a e1-9f9bb661cf298af1","configuration":{"enabled":true,"run_as": {"user":"root"},"type":"watchd"},"state":"running","state_changed_at":" t19:14: {"id":"root","configuration":{"enabled":true,"run_as": {"user":"root"},"type":"watchfolderd"},"state":"running","state_changed_at":" t Restart watchd or watchfolderd services # /opt/aspera/bin/asrun send --disable service_id # (wait for service to shutdown) # /opt/aspera/bin/asrun send --enable service_id Delete watchd or watchfolderd services Note: Running this command for an asperawatchfolderd service removes all corresponding keys from Redis. If you do not want to remove the service from Redis, use the disable command above. # /opt/aspera/bin/asrun send -d service_id
236 Configuring for Other Aspera Products 236 Configuring for Other Aspera Products Configuring for Faspex The steps below describe configuring IBM Aspera Enterprise Server as the transfer server for IBM Aspera Faspex. 1. Install Enterprise/Connect Server. If you haven't already, follow the steps in Standard Installation to install Enterprise Server. The transfer server can be set up in either of the following configurations: locally, on the same host as Faspex remotely, on a separate host Note: For a local setup, most configuration is taken care of automatically when Faspex is installed in a later step. For this reason, Enterprise Server/Connect Server should be installed first. All steps must be performed as root. 2. Create the system user on the transfer-server host. The system user authenticates the actual ascp transfer and must be an operating system account. Run the following commands to: (1) create the group faspex; (2) create the system user faspex; and (3) configure it to use the Aspera secure shell, aspshell. # /usr/sbin/groupadd -r faspex # /usr/sbin/useradd -r faspex -s /bin/aspshell-r -g faspex 3. Create and configure the Faspex packages directory. Run the following commands to create the packages directory /home/faspex/faspex_packages: # mkdir -p /home/faspex/faspex_packages # chown -R faspex:faspex /home/faspex/faspex_packages 4. Add the faspex user to Enterprise/Connect Server. Launch the desktop application and click Configuration. In Server Configuration, open the Users tab. Then click the button.
237 Configuring for Other Aspera Products 237 In the Add User dialog that appears, fill in the name faspex and click OK. The faspex user is added to the user list. To specify a docroot, select faspex in the user list and click the Docroot tab in the right panel. For the Absolute Path setting, select the Override box, and under Effective Value fill in the following: /home/faspex/faspex_packages For the read, write, and browse settings, select the Override boxes and select true. You can also add and configure the faspex user for Enterprise Server by modifying aspera.conf, instead of using the application GUI. For details, see Setting Up Users. 5. Configure server settings. In a Terminal window, run the following commands to set the server name with the name or IP address of your server, enable persistent storage (persistent storage is enabled by default), and ensure that the faspex user has browse privileges: # asconfigurator -x "set_server_data;server_name,server_ip_or_name" # asconfigurator -x "set_central_server_data;persistent_store,enable" # asconfigurator -x "set_user_data;username,faspex;dir_allowed,true" 6. Restart Aspera Central and Aspera NodeD services to activate your changes. Run the following command in a Terminal window to restart asperacentral: # /etc/init.d/asperacentral restart
238 Configuring for Other Aspera Products 238 Run the following commands to restart asperanoded: # /etc/init.d/asperanoded restart 7. Verify that you have a valid Faspex-enabled license installed. From the command line: In a Terminal window, run the following command and inspect the output, which lists the enabled settings: # ascp -A Enabled settings: connect, mobile, cargo, node, proxy, http_fallback_server, group_configuration, shared_endpoints, desktop_gui If the list includes connect and http_fallback_server, you have a Faspex-enabled server license. In the Enterprise Server GUI: Click Tools > License and if Connect Clients Enabled and Http Fallback Server Enabled are set to Yes, you have a Faspex-enabled license. If you update your Enterprise Server license (see Updating the Product License), you must reload the asperanoded service afterwards. Reload the asperanoded service by running the following command: # /opt/aspera/bin/asnodeadmin --reload 8. Set up the node user. Associate the transfer user faspex with a node username and password by running the asnodeadmin command, as in the following example in which node-admin is the node user, s3cur3_p433 is the node user's password, and faspex is the system user. Then run asnodeadmin again to reload asperanoded. # /opt/aspera/bin/asnodeadmin -a -u node-admin -p s3cur3_p433 -x faspex > asnodeadmin.exe --reload 9. Install the Connect key. Locate your Connect key: /opt/aspera/var/aspera_tokenauth_id_rsa.pub Create a.ssh folder (if it does not already exist) in the faspex user's home directory by running the following command: # mkdir -p /home/faspex/.ssh Run the following commands to create the keyfile authorized_keys (if it does not already exist), and append the key text to it: # cat /opt/aspera/var/aspera_tokenauth_id_rsa.pub >> /home/faspex/.ssh/ authorized_keys Run the following commands to change the key directory and keyfile's ownership to the faspex user, to allow access by the faspex group, and to set permission bits: # # # # chown chmod chmod chmod -R faspex:faspex /home/faspex/.ssh/authorized_keys 600 /home/faspex/.ssh/authorized_keys 700 /home/faspex 700 /home/faspex/.ssh 10. Ensure the firewall is set up correctly on your transfer server. For details, see Configuring the Firewall. 11. Configure your remote transfer server in the Faspex Web GUI.
239 Configuring for Other Aspera Products 239 Follow the instructions in the Aspera Faspex Admin Guide: Transfer Server for configuring your remote transfer server in the Faspex Web GUI underserver > File Storage. Configuring for Shares The steps below show how to set up IBM Aspera Enterprise Server as a transfer server for IBM Aspera Shares. The procedure assumes you have already set up your Shares application. For general information on setting up a transfer server (using the Node API), see Managing the Node API. 1. Install Enterprise/Connect Server. Follow the instructions in Standard Installation to install Enterprise Server either locally (on the same host as Shares) or remotely. The steps below must be performed as root. 2. Create an Aspera transfer user. The Aspera transfer user authenticates the actual ascp transfer, and must be an operating system user on the node. If the operating system user does not exist, create the user.create a user account for example, aspera_user_1 by running the following command: # useradd aspera_user_1 Configure the operating system user in Enterprise Server to make it an Aspera transfer user. For instructions, see Setting Up Users or Setting Up Transfer Users (Terminal). Note: The Aspera transfer user must have a docroot configured (see aspera.conf - File System). After setting the user's docroot, restart the Node service, as described in Configuring the Server for the Node API. 3. Configure the Aspera transfer user with a Node API username and password. Aspera's Web applications authenticate to the remote node service using a Node API username and password. The following command creates a Node API username and password, and associates it with a file transfer user, in this example aspera_user_1. Different nodes may use different Node API username-password pairs. # /opt/aspera/bin/asnodeadmin -a -u node_api_username -p node_api_passwd x aspera_user_1 4. Copy the public key to the transfer user s SSH file. For example, if the file transfer user is aspera_user_1, the standard location for the public key is in the user's home directory, as follows: /home/aspera_user_1/.ssh/authorized_keys The Aspera-provided key file is located in: /opt/aspera/var/aspera_tokenauth_id_rsa.pub On the command line, run the following to create the user's public key folder (if it does not already exist): # mkdir /home/aspera_user_1/.ssh
240 Configuring for Other Aspera Products 240 Run the following commands to create the keyfile authorized_keys (if it does not already exist), and append the key text to it. Update the directory permissions and ownership if necessary. # cat /opt/aspera/var/aspera_tokenauth_id_rsa.pub >> /home/ aspera_user_1/.ssh/authorized_keys Run the following commands to change the key directory and keyfile's ownership to user aspera_user_1, to allow access by the aspera_user_1 group, and to set permission bits: # chown -R aspera_user_1:aspera_user_1 /home/aspera_user_1/.ssh/ authorized_keys # chmod 600 /home/aspera_user_1/.ssh/authorized_keys # chmod 700 /home/aspera_user_1 # chmod 700 /home/aspera_user_1/.ssh 5. (Optional) Change HTTPS port and/or SSL certificate. The Aspera Node API provides an HTTPS interface for encrypted communication between node machines (on port 9092, by default). To modify the HTTPS port, see Configuring the Server for the Node API. For information on maintaining and generating a new SSL certificate, see Setting up SSL for your Nodes. 6. Configure server settings. In a Terminal window, run the following commands to set the server name with the name or IP address of your server, enable persistent storage (persistent storage is enabled by default), and enable HTTP and HTTPS: # # # # asconfigurator asconfigurator asconfigurator asconfigurator -x -x -x -x "set_server_data;server_name,server_ip_or_name" "set_central_server_data;persistent_store,enable" "set_http_server_data;enable_http,true" "set_http_server_data;enable_https,true" 7. Enable token authorization for the transfer user. From the Enterprise Server GUI: Click Configuration, select the transfer user, and click the Authorization tab. In the rows for Incoming Transfers and Outgoing Transfers, select the Override box, then select token from the dropdown menu under Effective Value. In the row for Token Encryption Key, select the Override box, then enter the encryption key in the field under Effective Value. The encryption key should be a string of random characters (at least 20 recommended). For illustrated instructions, see Setting Up Token Authorization. Using the command line: In a Terminal window, run the following commands: # asconfigurator -x "set_user_data;user_name,username;authorization_transfer_in_value,token" # asconfigurator -x "set_user_data;user_name,username;authorization_transfer_in_value,token" # asconfigurator -x "set_user_data;user_name,username;token_encryption_key,encryption_key" The encryption key should be a string of random characters (at least 20 recommended). Alternatively, you can configure token-authorization settings to apply to all users in a group or to apply them globally for all users. For more information, see User, Group and Default Configurations. 8. Restart Aspera Central and Aspera NodeD to activate your new configuration. Run the following command in a Terminal window to restart asperacentral: # /etc/init.d/asperacentral restart Run the following commands to restart asperanoded: # /etc/init.d/asperanoded restart 9. Ensure that the firewall is set up correctly on your transfer server
241 Configuring for Other Aspera Products 241 For details, see Configuring the Firewall. Configuring for Aspera Files Aspera Connect Server, or Enterprise Server with a Connect-enabled license, must be configured to use the Aspera Node API, which is required to connect these standalone, on-premise systems to Aspera Files. The server accesses the Node API using a node API username and password, that is associated with a local system account called xfer. All transfers and system operations on the computer are run under xfer. Thus, to add a server as a Files node, on the server you must create the system user, configure it as an Aspera transfer user, associate the transfer user with a node username and password, and configure the server to work with Files. Files users access the Node API and Files nodes using access keys, which can be created on the server or in the Files UI. System Requirements: Connect Server or Enterprise Server with a Connect-enabled license version or later. The public DNS name of the system must be accessible from all internal and external clients, as well as the computer itself. Set Up and Configure a Transfer User 1. Create a system user named xfer. Files requires this name. 2. Restrict user permissions with aspshell. By default, all system users can establish a FASP connection and are only restricted by file permissions. You can restrict the user's file operations through the aspshell, which permits only the following operations: Running Aspera uploads and downloads to or from this computer. Establishing connections in the application. Browsing, listing, creating, renaming, or deleting contents. These instructions explain one way to change a user account so that it uses the aspshell; there may be other ways to do so on your system. Open the following file with a text editor: /etc/passwd Add or replace the user's shell with aspshell. For example, to apply aspshell to the user aspera_user_1, use the following settings in this file:... aspera_user_1:x:501:501:...:/home/aspera_user_1:/bin/aspshell Ensure that the user has read and write privileges to the local directories or mounts that Aspera must access. 4. Set a docroot restriction, rather than a docroot. The docroot restriction allows access only to the specified storage. To set a docroot restriction, run the following command: # asconfigurator -x "set_user_data;user_name,username;file_restriction,path" The restriction path syntax depends on the storage: Local storage: <restriction>file:////*</restriction> S3 storage: <restriction>s3://*</restriction> Swift storage: <restriction>swift//*</restriction> Azure storage: <restriction>azu://*</restriction>
242 Configuring for Other Aspera Products 242 For example, to set a docroot restriction for xfer to S3 storage, the command is as follows: # asconfigurator -x "set_user_data;user_name,xfer;file_restriction,s3://*" 5. Configure the transfer user for token authorization. # asconfigurator -x "set_user_data;user_name,xfer;authorization_transfer_in_value,token;authorization_tra Aspera recommends that the key be a random string of at least 20 characters. 6. Assign the SSH public key associated with the IBM Aspera Connect Browser Plug-in to xfer. The Connect Plug-in uses the default Aspera key pair. Run the following commands to create the.ssh directory, copy the default public key into that directory and rename it authorized_keys, and set permissions on the file, run the following commands: $ mkdir /home/xfer/.ssh $ cp /opt/aspera/var/aspera_tokenauth_id_rsa.pub /home/xfer/.ssh/ authorized_keys $ chmod 700 /home/xfer/.ssh $ chmod 600 /home/xfer/.ssh/authorized_keys $ chown -R xfer:xfer /home/xfer/.ssh 7. Create a node username and associate it with the system user xfer. Run the following command with root or administrator permissions: # /opt/aspera/bin/asnodeadmin -a -u node_user -p node_user_passwd -x xfer For example: # /opt/aspera/bin/asnodeadmin -a -u nuser-001 -p!472830x4n -x xfer Note: The node username password must meet the password requirements set in Files. 8. List the node usernames to confirm that your command was successful. # /opt/aspera/bin/asnodeadmin -l Configure the Server as a Files Node 1. Ensure SSHD is running on port For information on configuring TCP ports, see Securing Your SSH Server. You must also manually configure the <WEB> section of aspera.conf; see the Aspera Connect Server Admin Guide: Configuring Your Web UI Settings. 2. Configure a file extenstion to identify files that are still being transferred. To set an extension for files that are partially transferred, such as.partial, run the following command: # asconfigurator -x "set_node_data;partial_file_suffix,.partial" The extension is removed once the file transfer is complete. 3. Enable activity logging by running the following command: # asconfigurator -x "set_server_data;activity_logging,true"
243 Configuring for Other Aspera Products Configure the HTTPS service to use port 443 by running the following command: # asconfigurator -x "set_server_data;https_port,443" 5. Enable recursive counts by running the following command: # asconfigurator -x "set_server_data;files_recursive_counts_workers,value" For value, enter a number from one to eight. Lower values (one or two) result in slower updates but less load on Redis. Higher values (4 to 8) increase the load on Redis and the machine should have twice as many cores. If your Redis database is very large and you set a high number of recursive counts workers, you may encounter outof-memory problems. To offset this issue, you can increase the time between background Redis save events and number of key changes by running the following command: # asconfigurator -x "set_server_data;db_config_save,time key_changes" The default value is 900 1, which sets the background save schedule for every 15 minutes (900 seconds) if at least one key changes. To set this change, you must shut down the Redis database (it is restarted in the next step) by running the following command with root or Administrator privileges: # /opt/aspera/bin/asnodeadmin --db-shutdown 6. Restart the Aspera Central, Aspera NodeD, and Aspera HTTPD services. Run the following command in a Terminal window to restart asperacentral: # /etc/init.d/asperacentral restart Run the following commands to restart asperanoded: # /etc/init.d/asperanoded restart Run the following commands to restart asperahttpd: # /etc/init.d/asperahttpd restart Configure Server Certificates Both the Files application and the browser in use must be able to validate the SSL certificate of the node you are adding, including all intermediate certificates. Because an intermediate certificate may be known to your browser but not to the Files application, an add-node procedure may seem successful in the browser, but workspace operations (for example, create.workspace, create.membership) fail. In this case, Files displays a warning symbol in the Operations tab of a workspace you attempt to create on this node. To correct or avoid this problem, provide a bundle of chained certificates, typically provided by the certificate authority, concatenated to the signed server certificate. Note that you must list the server certificate before the chained certificates. For example: $ cat bundle.crt > This ensures that both the Files application and the browser can verify the node certificates. Use the concatenated file in the ssl_certificate directive. For example: server { listen server_name ssl_certificate ssl_certificate_key ssl;
244 Configuring for Other Aspera Products 244 } For procedures to verify the SSL certificates, see Installing SSL Certificates. Adding the Node to Files Once you have created a system user on the server, configured the user for Aspera, associated it with a node username, configured the server, and verified your SSL certificates, you may add it as a node in the Files UI. In the process you are asked for an existing access key and secret, or you can create a new one. If you prefer to manually create an access key on the server, see the instructions in Access Key Authentication. Configuring for Aspera for SharePoint IBM Aspera Enterprise Server must be configured to work as a transfer server for IBM Aspera for Microsoft SharePoint. These instructions assume that you have already set up your Microsoft SharePoint environment and configured (provisioned) it for SharePoint apps. Note: In order to use IBM Aspera Enterprise Server as the transfer server for Aspera for SharePoint, you must run Enterprise Server on Windows 2012 or 2012 R2; or on Linux. Aspera recommends you run Enterprise/Connect Server on a Linux host. The basic steps are: 1. Install the transfer server. 2. Create a system user on the transfer server host. 3. Create a directory to be the transfer user's docroot. 4. Create the SSH key for the system user. 5. Add the new system user as a transfer user to Enterprise/Connect Server. 6. Specify a docroot for the new transfer user. 7. Modify aspera.conf. 8. Ensure that the firewall is set up correctly on your transfer server host. 9. Verify your transfer server license. 10. Set up a node user. 11. Configure the Aspera for SharePoint application. These steps are described in detail below. All steps must be performed as root. 1. Install the transfer server. If you haven't already, follow the steps in Standard Installation to install Enterprise Server. The transfer server that you use with Aspera for SharePoint must be installed on a host separate from your Microsoft SharePoint environment hosts. 2. Create a system user on the transfer server. The system user authenticates the actual ascp transfer and must be an operating system account. Run the following command to (1) create the system user sharepoint; (2) configure it to use the Aspera secure shell, aspshell; and (3) create the group sharepoint and assign the new system user to it. # /usr/sbin/useradd -r sharepoint -s /bin/aspshell-r -g sharepoint 3. Create a directory to be the system user's docroot. This must be a location owned by the system user. You will use this location later in the configuration process, at Step Create the.ssh directory and public key file for the system user. The standard location for the public key is in the user's home directory:/home/sharepoint/.ssh/ authorized_keys.
: # mkdir /home/aspera_user_1/.")
245 Configuring for Other Aspera Products 245 The Aspera-provided key file is located in: /opt/aspera/var/aspera_tokenauth_id_rsa.pub On the command line, run the following to create the user's public key directory (if it does not already exist): # mkdir /home/aspera_user_1/.ssh Run the following commands to create the file authorized_keys (if it does not already exist), and append the key text to it. # cat /opt/aspera/var/aspera_tokenauth_id_rsa.pub >> /home/ sharepoint/.ssh/authorized_keys Run the following commands to change the directory and file's ownership to system user sharepoint, to allow access by the sharepoint group, and to set permission bits: # # # # chown chmod chmod chmod -R sharepoint:sharepoint /home/sharepoint/.ssh/authorized_keys 600 /home/sharepoint/.ssh/authorized_keys 700 /home/sharepoint 700 /home/sharepoint/.ssh 5. Add the sharepoint system user as a transfer user to Enterprise/Connect Server. Note: This step can also done by modifying aspera.conf. For details, see Setting Up Transfer Users (Terminal). Launch the Enterprise Server desktop application as administrator, and click Configuration. In the Server Configuration dialog, select the Users tab. Then click the button. In the Add User dialog that appears, type sharepoint and click OK. The system user sharepoint is then added to the user list. 6. Specify a docroot for the new transfer user sharepoint. Still in the Server Configuration dialog, select the Users tab and do the following: Make sure sharepoint is selected in the user list.
 /Users/sharepoint/ or whatever location you created in Step 3 ad Allowed selected")
246 Configuring for Other Aspera Products 246 Open the Docroot tab in the right-hand panel. Set the following on the Docroot tab: Row Override Setting Effective Value Setting Absolute Path selected (checked) /Users/sharepoint/ or whatever location you created in Step 3 ad Allowed selected (checked) true Write Allowed selected (checked) true Browse Allowed selected (checked) true 7. Configure the server. In a Terminal window, run the following commands to set the server name with the name or IP address of your server, enable persistent storage (persistent storage is enabled by default), ensure the transfer user has browse privileges, and enable token authorization for the transfer user, and enable HTTP and HTTPS: # # # # asconfigurator -x "set_server_data;server_name,server_ip_or_name" asconfigurator -x "set_central_server_data;persistent_store,enable" asconfigurator -x "set_user_data;username,username;dir_allowed,true" asconfigurator -x "set_user_data;user_name,username;authorization_transfer_in_value,token" # asconfigurator -x "set_user_data;user_name,username;authorization_transfer_in_value,token" # asconfigurator -x "set_user_data;user_name,username;token_encryption_key,encryption_key" Alternatively, you can configure token-authorization settings to apply to all users in a group or to apply them globally for all users. For more information, see User, Group and Default Configurations. 8. Restart the Aspera Central, Aspera NodeD, and Aspera HTTPD services to activate your configuration changes. Run the following command in a Terminal window to restart asperacentral: # /etc/init.d/asperacentral restart Run the following commands to restart asperanoded: # /etc/init.d/asperanoded restart Run the following commands to restart asperahttpd: # /etc/init.d/asperahttpd restart 9. Ensure that the firewall is set up correctly on your transfer server host.
247 Configuring for Other Aspera Products 247 For details, see Configuring the Firewall. 10. Verify your transfer server license is Connect-enabled. From the command line: In a Terminal window, run the following command and inspect the output, which lists the enabled settings: # ascp -A Enabled settings: connect, mobile, cargo, node, proxy, http_fallback_server, group_configuration, shared_endpoints, desktop_gui If the list includes connect, you have a Connect-enabled server license. In the Enterprise Server GUI: Click Tools > License and if Connect Clients Enabled is set to Yes, then you have a Connect-enabled license. When you update your Enterprise Server license (see Updating the Product License), you must reload the asperanoded service afterwards by running the following command: # /opt/aspera/bin/asnodeadmin --reload 11. Configure the transfer user with a Node API username and password. Run the asnodeadmin command to create the node_sharepoint node user, assign it a password, and associate it with the sharepoint transfer user: # /opt/aspera/bin/asnodeadmin -a -u node_sharepoint -p s3cur3_p433 -x sharepoint Reload the asperanoded service: # /opt/aspera/bin/asnodeadmin --reload Verify the node user. Run the following command: # /opt/aspera/bin/asnodeadmin -l The output for this command should resemble the following: List of node user(s): user ==================== sharepointnode spnode system/transfer user ======================= sharepoint aspera_user_1 acls ==================== [] [] 12. Configure the transfer server in the Aspera for SharePoint application. Add the transfer server to your Aspera for SharePoint installation, mapping it to a document library. For details, see the IBM Aspera for Microsoft SharePoint Administrator's Guide. Note: The transfer server must be installed, configured, and running before you configure it in Aspera for SharePoint.
248 Configuring for Object Storage and HDFS 248 Configuring for Object Storage and HDFS Getting Started with the Aspera Trapd Service Trapd is the Aspera service that enables Aspera servers to write to cloud or on-premises object storage, as well as Hadoop Distributed File System (HDFS). Trapd is currently only available with Enterprise Server for Linux. The Enterprise Server should be in close proximity to the object storage to reduce any latency. Requirements and Set Up Trapd is included with Aspera On Demand applications and Aspera Enterprise Server for Linux 64-bit. Trapd is enabled in Aspera On Demand, but is disabled by default in Enterprise Server. Trapd can be enabled by running the following command: # /opt/aspera/bin/astrap-config.sh enable The Aspera server must be configured to access the object storage. For stand-alone servers, this configuration is typically done when setting the docroot in aspera.conf (see Setting Docroots for Object Storage and HDFS). The Aspera client may also specify the object storage path and credentials as part of the transfer command (see Ascp Transfers with Object Storage and HDFS). For multi-tenant use cases, such as the Aspera Transfer Cluster Manager (ATCM) or the Aspera Transfer Service (ATS), configuration is done as part of creating an access key (see the documentation for those products for more information). Configuration For general information about configuring Trapd, see General Trap Configuration Reference. For information about using Trapd features, see Working with Trap. Trapd works with many types of storage and comes packaged with templates of configuration files for all supported storage types. For more information, see the topics relevant to your storage type. General Trap Configuration Reference Setting Docroots for Object Storage and HDFS Docroot path syntax is typically a protocol followed by URL-encoded storage account access credentials and a path in that storage. Aspera-required object storage configuration properties can also be set in the docroot or set in the protocol-specific Trapd.properties configuration file. The general syntax is: protocol://user:password@object_storage_url/path/[?storage_configuration] Docroot paths may be set to cloud or on-premises object storage in the Enterprise Server GUI or by editing aspera.conf using asconfigurator. To set the docroot for a user with asconfigurator, run the following command: # asconfigurator -x "set_user_data;user_name,username;absolute,docroot" The docroot can also be configured manually by adding the following text to /opt/aspera/etc/ aspera.conf: <user> <name>username</name>
249 Configuring for Object Storage and HDFS <file_system> <access><paths><path> <absolute>docroot</absolute> </path></paths></access> </file_system> </user> Note: After setting the docroot, you must restart the Asperanoded service by running the following command: # service asperanoded restart Object Storage Docroot Formats Docroot Formatting Requirements: The protocol prefixes for cloud-based docroot paths are case sensitive. For example, "s3://" is the correct prefix for S3 storage and "S3://" does not work. The variable components of URI docroots must be URL encoded, unless you are entering them in the Enterprise Server GUI. For more information, see URL Encoding. AWS S3 Aspera recommends using IAM assumed roles, in which case the docroot has the format: s3://s3.amazonaws.com/my_bucket/ For more information on the IAM roles required for Aspera, see the following knowledge base article: Without IAM roles, you must specify your access_id and secret_key. You can find these values in the AWS Management Console by clicking your login name and selecting Security Credentials from the drop-down menu. The docroot includes this information with the following format: s3://access_id:secret_key@s3.amazonaws.com/my_bucket The docroot can also be used to set storage configuration properties including AWS storage class, infrequent acccess, server encryption, or AWS KMS encryption, by adding the appropriate option: s3://s3.amazonaws.com/my_bucket/?storage-class=reduced_redundancy s3://s3.amazonaws.com/my_bucket/?storage-class=infrequent_access s3://s3.amazonaws.com/my_bucket/?server-side-encryption=aes256 s3://s3.amazonaws.com/my_bucket/?server-side-encryption=aws_kms These options can be combined as in the following example, where the & that combines the queries must be URI encoded: s3://s3.amazonaws.com/my_bucket/?storageclass=reduced_redundancy&server-side-encryption=aes256 Azure blob azu://storage_account:storage_access_key@blob.core.windows.net/path_to_blob Google Cloud Storage
250 Configuring for Object Storage and HDFS 250 If the instance was set up with a Google service account, the docroot is set as: gs:///my_bucket/my_path Without a Google service account, obtain the.p12 private key for your storage. For instructions on generating a private key, see the Google Cloud Platform documentation: Save the.p12 file in /opt/aspera/etc/trap. You can specify the project ID and path to the private key either as part of the docroot URI, as in the following example: gs:// _address@storage.googleapis.com/my_bucket/? aspera.gssession.projectid=project_id&aspera.gssession.pk12=path_to_private_ absolute> Note: The _address is the service account ID associated with the storage. You must URL encode the "@" when entering the address in the docroot. For example, if the service account ID is test@developer.gserviceaccount.com, then it is entered in the docroot as: test%40developer.gserviceaccount.com Hadoop Distributed File System (HDFS) hdfs://username@name_node_address:ipc_port/path_to_folder Where username is that of an Enterprise Server transfer user. You can use any transfer user on the Enterprise Server because the HDFS URI indicates which user is connecting to HDFS. IBM Cloud Object Storage (COS) - S3 s3://access_id:secret_key@accessor_endpoint/vault_name OpenStack Swift, including IBM COS - Swift The following is the basic docroot format for all Swift-based object storage systems, including IBM Cloud Object Storage (COS) - Swift: swift://account_id:api_key@auth_url/my_bucket The auth_url is the URL pointing to the Keystone Admin service and is entered in the docroot without the preceding " For example, if auth_url is reported as then the auth_url is lonidentity.open.softlayer.com in the docroot. Additional docroot requirements for OpenStack Swift: Additional configuration of Trapd is required for OpenStack Swift-based storages to use the KeyStone idenity service. These can be set in the docroot, with the format docroot?setting. For SoftLayer (including IBM COS - Swift), add?aspera.swift.endpoint.auth-path=/ auth/v1.0 to the docroot. For example, a docroot for IBM COS - Swift is written: swift:// XYZO :bob:437e...bc16@sjc01.objectstorage.service.networklayer.com/ test?aspera.swift.endpoint.auth-path=/auth/v1.0
251 Configuring for Object Storage and HDFS 251 URL Encoding Docroots pointing to object storage are written as URIs, in which the variable components such as access IDs, passwords and secret keys, bucket names, and paths to folders must be URL encoded. For example, when setting a docroot for AWS S3 with the following format: s3://access_id:secret_key@s3.amazonaws.com/my_bucket The values for access_id, secret_key, my_bucket, and my_path must be URL encoded while preserving the separators (: and /). URL Encoding Characters The following reserved characters are often included in passwords and secret keys: Character! # $ & ' ( ) * + URL encoded %23 %24 %26 %27 %28 %29 %2A %2B Character. / : ; [ ] URL encoded %2F %3A %3B %3D %3F %40 %5B %5D %21 %2C To URL encode other characters and to encode entire strings at once, you may use the online tool: Select UTF-8 as the target. Examples AWS S3 docroot with the following inputs: access_id = abc+d secret_key = ef/gh my_bucket/my_path = unicode###/movies The encoded URI is: s3://abc%2bd:ef%2fgh@s3.amazonaws.com/unicode%e6%96%87%e4%bb %B6%E5%A4%B9%2Fmovies Note: The forward slash between the bucket name and path is also encoded. If the docroot also contains queries, for example if the following aspera.conf settings are specified as part of the docroot: storage-class=reduced_redundancy server-side-encryption=aes256 The "&" between the two settings must be encoded as & because the URI is in an XML file, as follows: s3://abc%2bd:ef%2fgh@s3.amazonaws.com/unicode%e6%96%87%e4%bb %B6%E5%A4%B9%2Fmovies?storage-class=REDUCED_REDUNDANCY&server-sideencryption=AES256
252 Configuring for Object Storage and HDFS 252 Docroot Restriction for URI Paths If you are using IBM Aspera Files or Aspera On Demand with Console to transfer files to and from cloud storage, you must configure a docroot restriction on your cloud-based transfer server instead of a docroot absolute path. A configuration with both a docroot absolute path (docrooted user) and a restriction is not supported. The primary purpose of restrictions is to allow access to certain storage (for example, Amazon S3) for clients that have their own storage credentials. A docroot restriction limits the files a client is allowed to access for browsing and transfers. Files are rejected unless they match any restrictions that are present. Restriction Syntax Restrictions work for URI paths and are processed in the following order: If a restriction starts with "!", any files that match are rejected. If a restriction does not start with a "!", any files that match are kept. If any restrictions other than "!" exist, and the file does not match any of them, the file is rejected. Files that fail restrictions during directory iteration are ignored as if they do not exist. Restriction syntax is specific to the storage: Storage Type Format Example local storage file:////* S3 and IBM Cloud Object Storage (Cleversafe) s3://* Swift storage swift//* Azure storage azu://* To add a restriction, follow these steps: 1. Add a restriction. Restrictions can be added to specific users or to all users. Note: For Aspera on Demand, you can also enter these settings from Console. To add a restriction for a user, for example the Files system user xfer restricted to \s3://*, run the following command: # asconfigurator -x "set_user_data;user_name,xfer;file_restriction,\s3:// *" To add a restriction that applies to all users, such as \s3://*, run the following command: # asconfigurator -x "set_node_data;file_restriction,\s3://*" 2. Validate your changes. # /opt/aspera/bin/asuserdata -v You can also check your configuration by opening /opt/aspera/etc/aspera.conf in a text editor. A restriction configuration will look similar to the following, with a user-specific configuration in the <user> section and an all-users configuration in the <default> section: <paths> <path> <restrictions> <restriction>s3://*</restriction> </restrictions> </path>
253 Configuring for Object Storage and HDFS 253 </paths> Configuring for Small File Uploads If you need to upload many small files (100 Kb or less) to object storage, Aspera recommends using the configuration described below to optimize transfer speed. These instructions require you to configure settings on the server and the client, both of which must be running an Aspera product version or higher. Check the version of your Aspera product by running the following command: # ascp -A Configuring the Server 1. Disable pre-calculating job size. You can disable the pre-calculate job size option by editing aspera.conf or through Aspera Console. Editing aspera.conf: Run the following command as root: # asconfigurator -x "set_node_data;pre_calculate_job_size,no" This command adds the following text to the <file_system> section of /opt/aspera/etc/ aspera.conf: <file_system>... <pre_calculate_job_size>no</pre_calculate_job_size> </file_system> Using Aspera Console: Log into Console as admin and go to Nodes > edit > Configuration > Advanced File Handling. In the row for Pre-Calculate Job Size, select the OVERRIDE box, then select no from the drop-down menu.

254 Configuring for Object Storage and HDFS Run the Trapd setup script: # /opt/aspera/bin/astrap-config.sh enable 3. Modify the Trapd configuration. Open /opt/aspera/etc/trapd/trap.properties. Locate the following line: #aspera.session.upload.start-check-small-file.enabled=true Uncomment the line and change the value to false: aspera.session.upload.start-check-small-file.enabled=false Note: After making this change, Trap does not check if a directory already exists in your object storage with the same name as a file you are transferring into the storage. For example, if you upload a file named "foo" and your object storage container already has a directory named "foo," your container will have both a file "foo" and a directory "foo." 4. Restart Trapd: # /etc/init.d/asperatrapd restart
 In the GUI, click Connections. Select the connection you wish to modify then click File Handling. Unselect Resume incomplete files.")
255 Configuring for Object Storage and HDFS 255 Configuring the Client Transfers initiated by the client can be optimized for many small files to object storage from the Aspera GUI or by using ascp command options. 1. Disable resuming incomplete files. (Recommended) In the GUI, click Connections. Select the connection you wish to modify then click File Handling. Unselect Resume incomplete files. Click OK to apply this setting to all transfers with this connection. Transfers initiated from the command line automatically re-transfer the entire file by default (equivalent to -k 0), unless preceding transfers have specified a different value for -k. In this case, you must use the -k 0 option. 2. Configure the resume options if resume must be used. If you must have resume enabled, the following settings optimize resume for transfer speed. In the GUI, click Connections. Select the connection you wish to modify then click File Handling. Under When checking files for differences, select Compare file attributes from the drop-down menu. Under When a complete file already exists at the destination, select Always overwrite from the drop-down menu. Click OK to apply these settings to all transfers with this connection.

256 Configuring for Object Storage and HDFS 256 To specify the same settings in an ascp command line transfer, run ascp with the following option: $> ascp -k 1 --overwrite=always Disable calculation of source files size before transferring with the GUI. This optional step makes the start of the transfer faster by avoiding the calculation before the transfer commences. Transfers initiated from the command line do not calculate source files size before transferring by default. In the GUI, click Connections. Select the connection you wish to modify then click Transfer. Select Disable calculation of source files size before transferring. Click OK to apply this setting to all transfers with this connection. If you do not see this option, click Show Advanced Settings to make it visible.

257 Configuring for Object Storage and HDFS 257 Resuming Transfers to Object Storage and HDFS File transfer resume works differently when the target is object storage, and the process depends on the storage platform. Files are transferred to object storage in parts, which are finalized into a complete object once all parts have uploaded. Configuring File Resume: You can configure file resume as for regular transfers using the GUI or command line. In the GUI, go to Connections > File Handling and select Resume incomplete files. Files in object or HDFS storage can be compared using timestamps but not checksums. Thus, in the server GUI, select Compare file attributes from the dropdown menu for When checking files for differences. To specify the same resume policy in an ascp command, use the option -k 1. Resume Behavior: Resume does not occur if the file is smaller than one part. In general, a file resumes if at least one part has been transferred to the destination. During a transfer, browsing the storage through the GUI or Node API shows partial transfers as filename.partial files. These may be real files or placeholders, depending on the storage type. Real.partial files are visible with the storage's default browser whereas placeholder.partial files are not. When the upload is complete, real.partial files are deleted and placeholder.partial files are no longer produced.
258 Configuring for Object Storage and HDFS 258 Naming Constraints Path names in Hadoop Distributed File System (HDFS) By default, each component of a path is limited to 255 bytes in UTF-8 encoding. This value can be configured in the Hadoop configuration file (/etc/hadoop/conf/hdfs-default.xml) by changing the value of dfs.namenode.fs-limits.max-component-length. A value of 0 disables the limit but may create incompatibilities with other file systems that do not support long paths. Bucket and Container Names Many object storage platforms (including AWS S3, Google Cloud Storage, and Azure, require DNS-compliant bucket names, with additional constraints specific to certain platforms. Container names in object storage using the OpenStack Swift API, do not need to be DNS-compliant, as described below. Rules for DNS-compliance: Names must be between three and 63 characters long. Names must be a series of one or more labels, with adjacent labels separated by a period (.). Labels can contain lowercase letters, numbers, and hyphens (-), but must start and end with a lowercase letter or a number (labels cannot start or end with a period). Periods may not be adjacent to another period or a hyphen and nor can a hyphen be adjacent to another hyphen. For example, "..", "--", "-.", and ".-" are not valid. Labels cannot be formatted as IP addresses (for example, ). Additional Information: Object Storage Platform Additional Information on Bucket Names AWS S3 For more information, see: BucketRestrictions.html Google Cloud Storage Names containing periods may be up to 222 characters total, but each label must be no more than 63 characters. Names may not begin with "goog", nor contain "google" or close misspellings of "google." For more information, see: naming#requirements Azure For more information, see: storageservices/fileservices/naming-andreferencing-containers--blobs--and-metadata? redirectedfrom=msdn Container Names in OpenStack Swift: Container names must be unique within each account and consist of one to 256 UTF-8 characters. Names can start with any character and contain any character except forward slash (/). For more information, see:
259 Configuring for Object Storage and HDFS 259 Object Names, Key Names, and Blob Names In general, object names, key names, and blob names must be a sequence of Unicode characters whose UTF-8 encoding is one to 1024 bytes long. This format applies to AWS S3, Google Cloud Storage, and Azure. Object storage using the OpenStack Swift API has no restrictions on object names. The following character sets are generally safe: Alphanumeric characters: 0-9, a-z, A-Z!-_.*'() The following characters may require special handling, such as URL encoding or referencing as HEX: &$@=;:+,? spaces ASCII character ranges 00-1F hex (0-31 decimal) and 7F (127 decimal). Avoid the following characters: \{}^%`[]"<~# Non-printable ASCII characters ( decimal characters) Object Storage Platform Additional Information on Object Name, Key Name, or Blob Name Requirements AWS S3 For more information, see: UsingMetadata.html#object-keys Google Cloud Storage Names cannot contain Carriage Return or Line Feed characters Avoid control characters that are illegal in XML 1.0 (#x7f -#x84 and #x86-#x9f) For more information, see: naming#objectnames Azure Blob names are case sensitive. Avoid blob names that end with a period, a forward slash (/), or a sequence of the two. Blob names cannot contain more than 254 path segments, where a path segment is the string between delimiter characters (such as the forward slash) that correspond to the name of a virtual directory. For more information, see: storageservices/fileservices/naming-and-referencingcontainers--blobs--and-metadata Object Metadata Names (Keys) and Values Object metadata is a set of name-value pairs. Users can often add customized metadata names, within the constraints of the object storage platform.
260 Configuring for Object Storage and HDFS 260 Object Storage Platform Object Metadata Name Requirements AWS S3 Name-value pairs must conform to US-ASCII when using REST, and to UTF-8 when using SOAP or browser-based uploads (POST requests). When using the REST API, user-defined metadata names must begin with "x-amz-meta-". PUT request headers are limited to 8 Kb, of which 2 Kb may be user-defined metadata. User-defined metadata is calculated as the total bytes of the UTF-8 encoded name and value. For more information, see: UsingMetadata.html#object-metadata Google Cloud Storage Custom metadata names must begin with "x-googmeta-". Each individual metadata entry is limited to bytes, and 512 Kb for the total metadata server. For more information, see: OpenStack Swift Metadata names are case-insensitive. Names may contain ASCII 7-bit characters that are not control (0-31) characters, DEL, or a separator character. Underscores (_) are silently converted to hyphens (-). For more information, see: index.html Azure Metadata names must follow the naming rules for C# identifiers. The combined size of the name-value pair may not exceed 8 Kb. For more information, see: storageservices/fileservices/naming-and-referencingcontainers--blobs--and-metadata Troubleshooting Trap Trapd Log Location If you have problems with transfers to cloud, object, or HDFS storage, Aspera Support may ask to view your logs. The log files are found in the following location: /opt/aspera/var/log/trapd
261 Configuring for Object Storage and HDFS 261 This directory contains the following log files: Log name Description aspera-trapd.log Main log. aspera-trapd-debug-log.log Debug log. aspeartrapd-start.log Start/stop information and version. buffer-pool.log Shared memory. example: gc _15_52_32.log Java VM garbage collector. The file name starts with gc- and is followed by a timestamp. http-tx.log HTTP requests (only appears when Trapd is run in debug mode). std_out.log Redirection of standard streams. File is usually empty. storage-perf.log HTTP connections performances (only appears when Trapd is run in debug mode). trapd_stdout.log Startup script and thread dump. transfer-stats.log Transfer statistics. tx.log Transfer logs. You can also determine the version of Trapd by running the following command: # /etc/init.d/asperatrapd version Configuring the Transfer Server for AWS S3 Private Cloud Enabling AWS EC2/AWS S3 Using the Command Line An Aspera server with an On Demand entitlement can be configured to transfer with AWS EC2/AWS S3. Prerequisites: You have AWS EC2 and AWS S3 subscriptions. Using the IAM service is optional but recommended. You can SSH into your AWS EC2 instance as root. For instructions, see instances/connecting-to-instance. The Linux Kernel on your server is or higher. Run the following command to confirm: $ uname -a Set up AWS EC2 and Configure an Instance to Support Aspera Use the AWS Management Console to prepare an instance to host your Aspera server. 1. Set up an IAM role that has an EC2 Trust Relationship (recommended). For more information, see Using AWS S3 IAM Roles. 2. Create a key pair by using the EC2 Console. For instructions, see: Warning: You must save the private key file when it is created in the AWS management console; this is the only time it is available. If you lose your private key, you cannot access your instance.
262 Configuring for Object Storage and HDFS Create a security group that allows inbound connections on TCP/22, TCP/33001, and UDP/ For more information on managing security groups, see: 4. Launch an EC2 Linux instance. For instructions, see On the Configure Instance Details page, specify the IAM role and security group you prepared. 5. Gather information for connecting to your instance. To connect to your instance using an SSH client (rather than the Amazon EC2 Console), you need the following information: Instance ID - See the Amazon EC2 Console Instance ID column. Public DNS name of the instance - See the Amazon EC2 Console Public DNS (IPv4) column. If this column is hidden, click the Show/Hide icon and select Public DNS (IPv4). Fully qualified path of the.pem file (the private key) for the instance key pair. 6. Prepare to SSH into your instance. From the command line, change directories to the one containing your private key file. Change permissions on the private key file to ensure that it is not publicly viewable. For example, if your private key file is user1_key.pem, run the following command: # chmod 400 /filepath/user1_key.pem If you are using a third party to access S3, you might want to verify your RSA key fingerprint when you SSH into your instance. Get the fingerprint from your machine by running the following command: # ssh-keygen -lf /filepath/user1_key.pem 7. SSH into your instance. # ssh -i /filepath/private_key.pem ec2-user@public_dns_name If desired, confirm the RSA key fingerprint returned in the output matches that of your machine (see previous step), then enter yes. The output announces that the instance is now a known host. Once connected, elevate to root privileges: # sudo -i 8. Update sshd_config to enable port and password authentication. Open /etc/ssh/sshd_config and make the following changes: Enable TCP/33001 by adding the text Port For example,... Port 22 Port Enable password authentication by uncommenting the line #PasswordAuthentication no and changing the value to yes. For example,... PasswordAuthentication yes Save your changes. 9. Restart the sshd service to activate the changes. # service sshd restart
263 Configuring for Object Storage and HDFS Configure the local firewall. Ensure that the local firewall is configured to support Aspera. Allow inbound connections on TCP/22, TCP/33001, and UDP/ Verify that /etc/hosts contains an entry for localhost. 12. Disable SELinux. For instructions, see Disabling SELinux. Warning: If this procedure is done incorrectly, you system might be unable to boot. Install, Configure, and Enable Aspera 1. Install the Aspera server application on your VMI. Use your customer login credentials to download the Aspera installer and product guide from the Aspera website: If you need help with your credentials, contact your Aspera account manager. Follow the instructions in the product guide to install and set up the server. 2. Create Aspera system user accounts and set passwords. The Aspera server uses the system accounts to authenticate connections and these must be in place before you can transfer. 3. Enable Entitlement and register by running the following commands: # /opt/aspera/bin/asalee-config.sh enable # service asperanoded restart # /opt/aspera/bin/alee-admin register customer_id entitlement_id To entitle Faspex (v ), Shares (v ), or Console (v ), run the corresponding command. To entitle Faspex: # export RAILS_ENV=production # asctl faspex:rake entitlement:config_license_server EL_KEY="entitlement_id" EL_CUSTOMER_ID="customer_id" To entitle Shares: # /opt/aspera/shares/bin/run bash -c 'cd /opt/aspera/ shares/u/shares && RAILS_ENV=production bundle exec rake aspera:ami:entitlement:config_license_server EL_KEY="entitlement_id" EL_CUSTOMER_ID="customer_id" To entitle Console: # cd /opt/aspera/console/ # export RAILS_ENV=production # export PATH=/opt/aspera/common/ ruby/bin:$path # rake aspera:ami:entitlement:config_license_server EL_KEY="entitlement_id" EL_CUSTOMER_ID="customer_id" 4. Enable the Aspera Trapd service by running the following command: # /opt/aspera/bin/astrap-config.sh enable 5. Set the transfer user's docroot to S3 storage. Run the following command, using this docroot syntax if you are using an IAM role. # asconfigurator -x "set_user_data;user_name,username;absolute,s3:// s3.amazonaws.com/my_bucket/"
264 Configuring for Object Storage and HDFS 264 Restart asperanoded to activate your changes: # aservice asperanoded restart 6. Run a test transfer. Use Aspera Enterprise Server, Point to Point, or Desktop Client (or the Connect plug-in if you install Shares, Faspex, or Connect Server on your instance) to run test transfers with your Aspera server on AWS S3. On your local machine, run the following command: $ ascp -P T --policy=fair -l local_filepath username@gc_instance_ip_address:/ Where local_filepath is a directory on the local machine with the files you want to transfer to AWS S3. If your set up and transfer command are successful, files appear in your AWS S3 bucket. Using AWS S3 IAM Roles To avoid setting S3 storage credentials in a transfer user's docroot, you can use your AWS Identity and Access Management (IAM) roles to set docroots to S3 storage. Prerequisites: You launched your Aspera On Demand product or installed Enterprise Server on an Amazon Machine Image (AMI). You have an S3 bucket. You have permissions to create IAM roles or change the policies of your IAM. In the following steps, you create an IAM role that has access to your S3 storage, an IAM policy, and an IAM role that is assigned the new policy Log into AWS Management Console as admin and create an IAM role that has access to your S3 storage. Go to Services > IAM > Policies. Click Create Policy. Click Select for Create Your Own Policy. Create the policy. Name the policy: "s3_node_access". Enter the following policy into the Policy Document to allow all actions on all S3 resources: { } "Statement": [ { "Sid": "Stmt ", "Action": [ "s3:*" ], "Effect": "Allow", "Resource": [ "*" ] } ] 5. Click Create Policy. 6. Go to Services > IAM > Roles. Click Create New Role. 7. Enter "s3_access" and click Next Step. 8. On the Select Role Type panel, choose AWS Service Roles, and click Select for the Amazon EC2 role type. 9. Select the "s3_node_access" policy. Click Next Step. Then click Create Role. 10. Launch an AMI using the IAM role that has access to S3 storage.
265 Configuring for Object Storage and HDFS Set the transfer user's docroot. Connect to your server through SSH, elevate to the root user, and set the S3 docroot by running the following commands: # ssh -i identity_file -p ec2-user@ec2_host_ip # sudo su # asconfigurator -x "set_user_data;user_name,xfer;absolute,s3:// s3.amazonaws.com/my_bucket/ 12. Restart the Aspera NodeD service. # aservice asperanoded restart 13. Test your configuration. Perform a test transfer from an Aspera client to the S3 storage. For information on starting a transfer, see Ascp Transfers with Object Storage and HDFS. Enabling AWS KMS Encryption for AWS S3 Cloud Storage AWS Key Management Service (KMS) is an Amazon web service that uses customer master keys to encrypt objects in AWS S3 cloud storage. You can configure S3 server-side encryption with KMS system-wide or on a user-by-user basis. Prerequisites: Aspera server version or later. Your server is located in the same region as your S3 bucket. You have root access to your Aspera server, so that you can edit configurations and restart services. You know which KMS Key to use (the default key or a specific one). Note: To use a specific KMS key, you must access your AWS console and create a key using the AWS IAM role console. For instructions on creating keys for KMS, see AWS Key Management Service Developer Guide: Creating Keys at The following instructions describe how to configure S3 server-side encryption with KMS and verify that objects uploaded to your bucket are encrypted. System-Wide Configuration To enable system-wide S3 server-side encryption with KMS, configure the s3.properties file on the server. 1. Log in to your Aspera server as root. # ssh -i identity_file -p ec2-user@ec2_host_ip # sudo su 2. Open the s3.properties file with a text edtior. The file is located at /opt/aspera/etc/trapd/s3.properties. 3. Configure the system to use S3 SSE with KMS using either the default Amazon key or a specific key you generated. Using the default AWS KMS key: Locate the following line: #server-side-encryption=none Uncomment the line and set the value to AWS_KMS. For example: server-side-encryption=aws_kms
266 Configuring for Object Storage and HDFS 266 Specify a KMS key: Locate the following line: #server-side-encryption-aws-kms-key-id Uncomment the line and set the value to your key, using either the full arn of the AWS key or the ID. For example: server-side-encryption-aws-kms-key-id = arn:aws:kms:uswest-2: :key/9120a b0f-1ca9d90j8ec3 Setting a value for server-side-encryption-aws-kms-key-id automatically sets serverside-encryption=aws_kms. 4. Save and exit the configuration file. 5. Restart the Aspera Trapd service to activate your changes. # /etc/init.d/asperatrapd restart Individual Docroot Configuration To enable S3 server-side encryption with KMS for specific users, append?server-sideencryption=aws_kms to the S3 docroot of the transfer users. You can do this in IBM Aspera Console or using the asconfigurator tool. The examples below use asconfigurator. 1. Log in to your Aspera server as root. # ssh -i identity_file -p ec2-user@ec2_host_ip # sudo su 2. Configure the docroot. Set the docroot by running the following command: # asconfigurator -x "set_user_data;user_name,username;absolute,docroot" The docroot format depends on which KMS key you use: Using the default AWS KMS key with IAM roles s3://s3.amazonaws.com/my_bucket/?server-side-encryption=aws_kms For example, run the following command with the asconfigurator tool for a user with the username xfer: # asconfigurator -x "set_user_data;user_name,xfer;absolute,s3:// s3.amazonaws.com/aspera_s3_bucket/aspera_bucket?server-sideencryption=aws_kms" If you are not using IAM roles, you must specify the access ID and secret key in your docroot, as described in Setting Docroots for Object Storage and HDFS. Specifying a KMS key s3://s3.amazonaws.com/my_bucket/?server-side-encryption-aws-kms-keyid=your_aws_kms_key_id For example, run the following command with the asconfigurator tool for a user with the username xfer: # asconfigurator -x "set_user_data;user_name,xfer;absolute,s3:// s3.amazonaws.com/aspera_s3_bucket/aspera_bucket?server-side-encryptionaws-kms-key-id=9120a b0f-1ca9d90j8ec3"
267 Configuring for Object Storage and HDFS 267 If you are not using IAM roles, you must specify the access ID and secret key in your docroot, as described in Setting Docroots for Object Storage and HDFS. Verify KMS Encryption Verify that encryption has been correctly set up for the IAM role. 1. Upload and download a package to the S3 bucket using an Aspera client. 2. Log in to the AWS Console. 3. View object properties. Go to the S3 service and find the object you just uploaded. Go to Properties > Details. The Server Side Encryption option shows one of the following encryption modes: Default encryption (no KMS): AES-256 Using the Amazon default master key: Using AWS KMS master key: aws/s3 (default) Using a specific master key: Using AWS KMS master key: my-s3-kms-key The encryption mode should match the key you used to configure KMS. Setting AWS S3 Storage Class Options AWS S3 offers several storage options, including Standard, Standard - Infrequent Access, and Reduced Redundancy Storage. Your Aspera transfer server is configured for Standard storage by default. You can configure your Aspera transfer server to work with other storage classes by editing s3.properties, which sets the default storage class for all transfers to S3. You can also set the storage class in the docroot, as described in Setting Docroots for Object Storage and HDFS. To set the default storage class for all transfers, follow the instructions below. 1. Log in to your Aspera server as root. # ssh -i identity_file -p ec2-user@ec2_host_ip # sudo su 2. Open the s3.properties file with a text edtior. The file is located at /opt/aspera/etc/trapd/s3.properties. 3. Enable Reduced Redundancy or Infrequent Access Storage. Locate the following section: # Define storage class. # This property overrides the legacy 's3service.default-storage-class' # Valid values are STANDARD, REDUCED_REDUNDANCY, INFREQUENT_ACCESS # Default value is STANDARD #storage-class=standard Uncomment the last line and enter the desired storage type. For example, to set the default storage class as Reduced Redundancy, enter the following: storage-class=reduced_redundancy 4. Save your changes then restart the Aspera Trapd service to activate them. # /etc/init.d/asperatrapd restart
268 Configuring for Object Storage and HDFS 268 Using AWS S3 Versioning with Aspera The AWS S3 bucket version feature enables you to retain multiple versions of an object in the same bucket. By default, Aspera uploads overwrite any object that has the same name as a source file. As of v3.7.3, Aspera transfers can be configured to work more gracefully with S3 versioning. Prerequisites Versioning must be enabled on the AWS S3 bucket. For instructions, see: Enterprise Server or later. Before upgrading from a previous version, make a backup and then delete /opt/ aspera/etc/trapd/s3.properties. After upgrading, copy your customizations from the backup into the new s3.properties file that was created during the installation process. Enabling S3 Versioning with Aspera Transfers The configuration file /opt/aspera/etc/trapd/s3.properties contains the following properties that let Trapd detect if S3 versioning is enabled and change the default behavior of Aspera uploads: # The period after which a bucket is checked again for cross-region transfers or # bucket versioning. # Default is (15 minutes) #aspera.session.check-bucket.frequency= # Whether to retrieve the bucket versioning status. To retrieving the bucket # versioning status one must be the owner of the bucket and have the permission # "s3:getbucketversioning" # Default is false #aspera.session.retrieve-bucket-versioning=false # The assumed bucket versioning status when aspera.session.retrieve-bucketversioning is false. # Default is false (assume bucket is not versioned). #aspera.session.assumed-bucket-versioning=false To enable S3 versioning: If the user is the owner of the bucket, uncomment aspera.session.retrieve-bucket-versioning and set it to true. If the user is not the owner of the bucket or does not have permission to check the bucket status, set or leave aspera.session.retrieve-bucket-versioning to false. Uncomment aspera.session.assumed-bucket-versioning and set it to true. Aspera Versioning Behavior File handling in a versioning-enabled AWS S3 bucket depends on if the S3 versioning feature in Aspera is enabled. With Aspera S3 versioning enabled: When a file is first uploaded to the bucket, the object is created with a version ID. When a source file is skipped during an upload because it exists in the bucket, the existing object and its ID do not change. When an object is overwritten in the bucket, the new version of the object is created and assigned a version ID while the original object is left unmodified with the original ID. Note: The Enterprise Server GUI does not display all the versions of an object. To view all the versions, use the Amazon S3 console or AWS SDKs.
269 Configuring for Object Storage and HDFS 269 When an object is deleted, the file initially disappears from the Enterprise Server GUI; however, in the Amazon S3 console and AWS SDKs output, the object is replaced with a delete marker. This delete marker becomes the current object version. Previous versions are retained and, upon refresh, the original object reappears in the Enterprise Server GUI. With Aspera S3 versioning disabled: When a file is first uploaded to the bucket, the object is created with a version ID. When an object is overwritten, the object is replaced by a delete marker and then a new version ID, indicating that the object has been deleted and rewritten. Enabling Cache-Control in AWS S3 Use cache-control request headers in AWS S3 to avoid repeatedly uploading or serving the same files on a per-bucket basis. For more information on cache-control options in AWS S3, see: 1. Login to your Aspera server as root. # ssh -i identity_file -p ec2-user@ec2_host_ip # sudo su 2. Create a mapping file to set cache directives. The cache-control mapping file is a.txt file that contains the mapping between file extensions and cache directives. The following is sample mapping file content: * no-cache jpg public zip These lines set the following directives: * defines a default value, in this case setting cache-control to no-cache for all files files with the.jpg extension have cache-control set to public files ending with.zip have no cache control set The file can have any name and be saved in any location. The path to the file is used to configure Trapd, and if the file is saved in /opt/aspera/etc/trapd, then in the next step you need to specify only the file name. 3. Enable cache-control in Trapd. Open /opt/aspera/etc/trapd/s3.properties and locate the following section: # Path to a file defining a 'Cache-Control' mapping. # The path can be an absolute path otherwise it's the name of a file expected to # be in /opt/aspera/etc/trapd. # The mapping defines 'Cache-Control' to be used based on the file extension: # - the special extension '*' defines a default value # - leaving the cache directive empty means that no 'Control-Cache' would be set. # - a line starting with # is a comment and is ignored. # # Example # * no-cache # jpg public # zip # would by default set a 'Cache-Control' to 'no-cache' # files ending with '.jpg' would have 'Cache-Control' set to 'public' # files ending with '.zip' would have no 'Cache-Control' set #
270 Configuring for Object Storage and HDFS 270 # Default is undefined (no Cache-Control is set) #aspera.s3session.cache-control-map= Uncomment the last line and set the value as the path to your cache-control mapping file. The path can be just the name of the file if you have saved it in /opt/aspera/etc/trapd, otherwise enter the full path to the file. For example, if the mapping file, my-cache-control.txt, is in /trapd, then the line is as follows: aspera.s3session.cache-control-map=my-cache-control.txt If the file has been saved elsewhere, use the full path: aspera.s3session.cache-control-map=/user1/s3_settings/my-cache-control.txt Save your changes. 4. Restart Trapd to activate your changes. # /etc/init.d/asperatrapd restart 5. Perform a test upload and confirm that the cache-control option is set according to the mapping file. File Time Stamp Preservation with Object Storage Object storage platforms do not have native support for preserving the modification, access, or creation times of files that are transferred into object storage from traditional file systems. You can configure your Aspera server (version 3.5 or later) and client to preserve the original time stamps on the files and folders when they are transferred in and out of object storage. Time stamps are preserved as metdata associated with the uploaded object, and can be retrieved upon download. 1. Log in to your Aspera server as root. # ssh -i identity_file -p ec2-user@ec2_host_ip # sudo su 2. Configure the server to preserve file attributes. Run the following commands: # asconfigurator -x "set_node_data;preserve_attributes,times" # asconfigurator -x "set_node_data;preserve_attributes_pvcl_read,enable" # asconfigurator -x "set_node_data;preserve_attributes_pvcl_write,enable" These commands add the following text to /opt/aspera/etc/aspera.conf: <default> <file_system>... <preserve_attributes_pvcl_read>enable</preserve_attributes_pvcl_read> <preserve_attributes_pvcl_write>enable</ preserve_attributes_pvcl_write> <preserve_attributes>times</preserve_attributes> </file_system> </default> 3. Configure the client to preserve file attributes. Set the preserve file attributes in the GUI or by using ascp command line options. GUI: Click Connections. Select the connection you wish to modify then click File Handling. Select Preserve access time and Preserve modification time, as required. You can also select Preserve source access time. This option restores the access time on the source to the last access time before the transfer, which is considered an access. Click OK to apply these settings to all transfers with this connection.
 on the source.")
271 Configuring for Object Storage and HDFS 271 Command line: ascp has four options for time stamp preservation that can be used individually or in combination: ascp Option Action -p Preserve all time stamps from the source. Equivalent to setting -preserve-modification-time and --preserve-accesstime. --preserve-modification- Preserve the time the object was last modified (write) on the source. time --preserve-access-time Preserve the time the file was last accessed (read or write) on the source. This restores the access time of the cloud object to the last access of the file prior to transfer, which the source considers an access. Use with -preserve-source-access-time to have the access times of the cloud object and the source file match.
272 Configuring for Object Storage and HDFS 272 ascp Option Action --preserve-sourceaccess-time Restore the access time of the source file to the last access prior to transfer, which the source considers an access. Parallel Transfers to AWS S3 and AWS EC2 Parallel transfers to cloud storage allow faster uploads by splitting large sets of files across multiple ascp sessions. They are currently supported only for command-line transfers to AWS S3 and AWS EC2. If you are uploading to a cluster, you must use access keys for authentication rather than IAM roles to run parallel transfers, unless you are using Assumed roles. Server Configuration to Support Parallel Transfers SSH into your Aspera server: # ssh -i identity_file -p ec2-user@ec2_host_ip # sudo su Set a value for the chunk size that is greater than 5 Mb by running the following command (this example sets the chunk size to 64 Mb): # asconfigurator -x "set_node_data;transfer_protocol_options_chunk_size, " Open /opt/aspera/etc/trapd/s3.properties. Set the upload part-size to the same value as the chunk size (the default is 64 Mb) and set the gathering policy to ONE_TO_ONE, as in the following example: aspera.transfer.upload.part-size=64mb aspera.transfer.gathering-policy=one_to_one Ascp Command Syntax ascp --tags={\"aspera\":{\"xfer_id\"[:\"optional_tag\"]}} C nid:ncount [[user@]srchost:]source_file1[,source_file2,...] [[user@]desthost:]target_path Notes on the command syntax: The xfer_id tag is required and identifies the upload across multiple ascp sessions. If an upload is restarted with the same xfer_id then the transfer is resumed, but if a different xfer_id is used then the upload is completely restarted. The -C nid:ncount option is used to specify the node ID (nid) and count (ncount) in the format 1:2, 2:2. The valid range of values for nid and ncount is 1 through 128, and nid must be less than or equal to ncount. Parallel transfer behavior: The ascp session for the first chunk creates the AWS upload and the ascp sessions for the other chunks might wait until the AWS upload exists. When a chunk is uploaded, the ascp session evaluates if all parallel transfers are complete. If more than four chunks are pending, the chunk is finished and the ascp session terminates. If four or fewer chunks are pending, the chunk waits for the remaining chunks to upload, then the upload is finalized. If the source content is smaller than the chunk size, only one ascp session is launched.
273 Configuring for Object Storage and HDFS 273 Using Trap Links Trap links are small text files that reference a single target object in your AWS S3 storage. With a Trap link, you can save an object in a different location and with a different name without actually duplicating the object. For use cases, see the examples following the configuration instructions. Limitations: The target and link file must be accessible with the same storage credentials. When uploading a link file, Aspera does not check if an object with the trap link file name exists at the destination. For example, if you create the object test and upload a link file.test.asp-trapd-lnk to the same folder, the Aspera client file browser (such as an Enterprise Server GUI) shows two objects with the name test. Any file operations on test are performed on the real object, not the link file. Configure your Aspera server and create Trap links: 1. Log in to your Aspera server as root. # ssh -i identity_file -p ec2-user@ec2_host_ip # sudo su 2. Enable symlink support in s3.properties or the docroot. In s3.properties:open /opt/aspera/etc/trapd/s3.properties. Locate the following line: #aspera.session.support.symlink = false Uncomment the line and change the value to true: aspera.session.support.symlink = true Save your changes. In the docroot: Set symlink support in the docroot as a query, for example: s3://user1:password@s3.amazonaws.com/path? aspera.session.support.symlink=true 3. Restart Trapd to activate your changes. # /etc/init.d/asperatrapd restart 4. Create a trap link file. On a computer from which you can upload to your object storage, create a text file with a name that follows the format:.name.asp-trapd-lnk The file name must start with a dot (.) and end with the asp-trapd-lnk suffix. The name is the object name that is returned when browsing the object storage with an Aspera client; browsing an object store with the storage's default browser, such as AWS Console for S3, shows the link file as is. The content of the object is the complete path to the target object, including the bucket or container name. The path should not be URL encoded. 5. Upload the trap link file to the desired location in object storage. Example 1: Providing a descriptive filename You have an object in AWS S3 with the following path: /mybucket/production/content/ mpeg To rename it for your Aspera clients as World-Cup Best-of-day 1.mpeg, create a link file with the following properties:
274 Configuring for Object Storage and HDFS 274 name:.world-cup Best-of-day 1.mpeg.asp-trapd.lnk content: /mybucket/production/content/ mpeg Upload the link file to the shared bucket. Now when Aspera clients browse the bucket, they see the World-Cup Best-of-day 1.mpeg object. Example 2: Accessing content between buckets You have uploaded a 200 MB file with the following path: /mybucket/music/album2/200mb On the client you create a link file with the following properties: name:.awesome.mp4.asp-trapd-lnk content: /mybucket/music/album2/200mb Upload the link file to the desired location, for example /mybucket/transfer. Now when browsing / mybucket/transfer through the Aspera client, you see a file called Awesome.mp4 that is 200 MB. When you download it, it has the same content as the /mybucket/music/album2/200mb file. Example 3: Creating a Faspex package with existing files in cloud storage Using the link file from example 1,.World-Cup Best-of-day 1.mpeg.asp-trapd.lnk, you upload the link file to the Faspex internal storage location. The target file is not copied nor renamed, but when the package is downloaded, the file is received as World-Cup Best-of-day 1.mpeg. Disabling the Creation of 0 Byte Folder Objects in AWS S3 Storage on Upload When you upload files located in folders to S3 storage, Aspera creates a 0 byte folder object to represent the folder. These objects enable Aspera clients, such as IBM Aspera Desktop Client and IBM Aspera Shares, to represent the folders in their user interfaces. If you programatically upload many (millions) of objects and folders to S3 storage, disabling this feature decreases the number of objects that are created. Warning: Disabling this option also disables browsing folders in your object storage using Aspera clients. 1. SSH to your S3 instance as root. # ssh -i identity_file -p ec2-user@ec2_host_ip # sudo su 2. Disable the creation of folder objects. Open /opt/aspera/etc/trapd/s3.properties and locate the following line: #aspera.session.browse.mkdir.allowed = true Uncomment the line and set the value to false, as follows: aspera.session.browse.mkdir.allowed = false 3. Restart Trapd. # /etc/init.d/asperatrapd restart Configuring the Transfer Server for Google Cloud Storage Set up Google Cloud Storage Using the Command Line An Aspera server with an On Demand entitlement can be set up to transfer with Google Cloud Storage. Prerequisites:
275 Configuring for Object Storage and HDFS 275 You have a Google Cloud account. You have a bucket in Google Cloud Storage. You can SSH into your Google instance as root. For instructions, see instances/connecting-to-instance. Your Linux Kernel is or higher. Run the following command to confirm: $ uname -a Create a VM instance on Google Cloud 1. Log in to Google Developers Console Select the relevant project or create a new one. 3. Generate an SSH key pair on the remote computer that will be used to connect to the instance. # ssh-keygen -t rsa 4. Create a new instance. Click Dashboard > Take a VM quickstart. For more details, see instances/creating-and-starting-an-instance. 5. In the VM instances dialog, enter the details of your instance. Enter the name, zone, machine type, boot disk, and firewall (select the HTTP and HTTPS boxes if you are using Connect Server). 6. Click Management, disk, networking, access & security options to configure these options. For Project Access, select Enable Compute Engine service account. On the Access & security tab, make the following changes: For SSH Keys, add the SSH key you created. For User info, select Enabled from the drop-down menu. For Compute, select Read Write from the drop-down menu. For Cloud User Accounts, select Read Write from the drop-down menu. For Storage, select Full from the drop-down menu. Click Create to create your instance. Configure the Instance to Support Aspera 1. SSH into your instance as root. # ssh username@gc_instance_ip_address When the connection is established, elevate to root privileges: # sudo -i 2. Update sshd_config to enable port and password authentication. Open /etc/ssh/sshd_config and make the following changes: Enable TCP/33001 by adding the text Port For example,... Port 22 Port 33001
276 Configuring for Object Storage and HDFS 276 Enable password authentication by uncommenting the line #PasswordAuthentication no and changing the value to yes. For example,... PasswordAuthentication yes Save your changes. 3. Restart the sshd service to activate the changes. # service sshd restart 4. Configure the local firewall. Ensure that the local firewall is configured to support Aspera. Allow inbound connections on TCP/22, TCP/33001, and UDP/ Verify that /etc/hosts contains an entry for localhost. 6. Disable SELinux. For instructions, see Disabling SELinux. Warning: If this procedure is done incorrectly, you system might be unable to boot. 7. Confirm that the Google firewall allows connections on the ports used by Aspera FASP (TCP/22, TCP/33001, and UDP/33001). If the ports are not open, you can use gcloud, an internal tool built into the CentOS image, to configure the firewall. For more information on using gcloud, see For more information on configuring Google firewall, see networking#firewalls. To open TCP/33001 for SSH connections, run the following command: # gcloud compute firewall-rules create allow-fasp-ssh --description "fasp ssh channel" --allow tcp:33001 To open UDP/33001 for FASP transfers, run the following command: # gcloud compute firewall-rules create allow-fasp-data --description "fasp data channel" --allow udp:33001 If you need to access the Node API, you need to open TCP/9092 by running: # gcloud compute firewall-rules create allow-node-api --description "node api channel" --allow tcp:9092 Install, Configure, and Enable Aspera 1. Install the Aspera server application on your VMI. Use your customer login credentials to download the Aspera installer and product guide from the Aspera website: If you need help with your credentials, contact your Aspera account manager. Follow the instructions in the product guide to install and set up the server. 2. Create Aspera system user accounts and set passwords. The Aspera server uses the system accounts to authenticate connections and these must be in place before you can transfer.
277 Configuring for Object Storage and HDFS Set the MTU size on the instance to # asconfigurator -x "set_node_data;transfer_protocol_options_datagram_size,1460" 4. Enable Entitlement and register by running the following commands: # /opt/aspera/bin/asalee-config.sh enable # service asperanoded restart # /opt/aspera/bin/alee-admin register customer_id entitlement_id To entitle Faspex (v ), Shares (v ), or Console (v ), run the corresponding command. To entitle Faspex: # export RAILS_ENV=production # asctl faspex:rake entitlement:config_license_server EL_KEY="entitlement_id" EL_CUSTOMER_ID="customer_id" To entitle Shares: # /opt/aspera/shares/bin/run bash -c 'cd /opt/aspera/ shares/u/shares && RAILS_ENV=production bundle exec rake aspera:ami:entitlement:config_license_server EL_KEY="entitlement_id" EL_CUSTOMER_ID="customer_id" To entitle Console: # cd /opt/aspera/console/ # export RAILS_ENV=production # export PATH=/opt/aspera/common/ ruby/bin:$path # rake aspera:ami:entitlement:config_license_server EL_KEY="entitlement_id" EL_CUSTOMER_ID="customer_id" 5. Enable the Aspera Trapd service by running the following command: # /opt/aspera/bin/astrap-config.sh enable 6. Set the transfer user's docroot to Google Cloud Storage. # asconfigurator -x "set_user_data;user_name,username;absolute,gs:///my_bucket/my_path" Restart asperanoded activate the changet: # service asperanoded restart 7. Verify the docroot for the transfer user. Run the following command to view the settings associated with the transfer user: # /opt/aspera/bin/asuserdata -u username The output for docroot option set should be:... docroot option set: canonical_absolute=gs:///my_bucket/my_path/ canonical_show_as=/ absolute: "gs:///my_bucket/my_path/" 8. Run a test transfer.

278 Configuring for Object Storage and HDFS 278 Use Aspera Enterprise Server, Point to Point, or Desktop Client (or the Connect plug-in if you install Shares, Faspex, or Connect Server on your instance) to run test transfers with your Aspera server on Google Cloud. On your local machine, run the following command on your client machine : $ ascp -P T --policy=fair -l local_filepath username@gc_instance_ip_address:/ Where local_filepath is a directory on the local machine with the files you want to transfer to Google Cloud. If your set up and transfer command are successful, files appear in your Google Cloud Storage bucket. Transferring Data between Google Cloud Storages that Belong to Different Projects If Google Cloud Storages belongs to different projects but are under the same account, you can transfer content between them. For example, if an Aspera client has access to Project A but not Project B, that client can transfer content between storage in Project A and storage in Project B by creating a private key in Project B and configuring it on the transfer server in Project A. Prerequisites: You can create or access a service account (IAM and Admin) in the target project You can create a private key in the target project Both projects have Aspera transfer servers installed on virtual machines 1. Open the service accounts manager for the target project. In the Google Cloud Platform Console, click Service accounts then Select a project and select the target project. Click Open. 2. Create a dedicated service account and private key in.p12 format. Click Create Service Account. In the popup window that appears, take the following steps: Enter a service account name Select a role you wish to grant to the service account Select Furnish a new private key and P12 key type Click Create Warning: Save the private key to a secure location and record the private key's password. This is the only opportunity you have to view the password. For more information on Google Cloud service accounts, see: 3. On the transfer server in the client-accessible project, add the private key to Trapd. Copy the private key file into the following directory on the Aspera transfer server in the client-accessible project: /opt/aspera/etc/trapd For example: /opt/aspera/etc/trapd/999996a b2e4aef12345e d800eprivatekey.p12 4. Modify the docroot of the transfer user to point to the project and specify the private key file.
279 Configuring for Object Storage and HDFS 279 On the Aspera transfer server in the client-accessible project, set the docroot by running the following command: # asconfigurator -x "set_user_data;user_name,username;absolute,docroot" Where docroot has the format shown below: gs:// _address@storage.googleapis.com/my_bucket/? aspera.gssession.projectid=project_id&aspera.gssession.pk12=path_to_private_key_pk The _address is that of the service account and must be URL encoded. For example, gs://service-account%40demoresource-1234.gserviceaccount.com@storage.googleapis.com/ bucket1/2017files/? aspera.gssession.projectid= &aspera.gssession.pk12=/opt/ aspera/etc/trapd/999996a b2e4aef12345e d800e-privatekeyprivatekey.p12 5. Restart asperanoded to activate your changes. # aservice asperanoded restart 6. Transfer content between projects. Configuring the Transfer Server for IBM Bluemix Enabling IBM Cloud Object Storage (COS) - S3 Using the Command Line You can configure your Aspera server to enable transfers with IBM Cloud Object Storage (COS) - S3. Note: If IBM COS - S3 is on-premises, the Aspera transfer server must also be on-premises. If IBM COS S3 is in the Cloud, the Aspera transfer server must be in the same region. Prerequisites: You have an IBM Cloud account. You have a vault and know your access id and password. You have installed an Aspera transfer server on a VM instance in IBM Cloud. You can SSH into your VM instance as root. Your Linux Kernel is or higher. Run the following command to confirm: $ uname -a Your local and cloud firewalls allow FASP-required connections (TCP/22, TCP/33001, UDP/33001). 1. If IBM COS - S3 is in the Cloud, connect to your server through SSH and elevate to the root user. # ssh -i identity_file -p user@host_ip_address # sudo su 2. Set the transfer user's docroot. # asconfigurator -x "set_user_data;user_name,username;absolute,docroot" Where docroot has the following syntax: s3://access_id:secret_key@accessor_endpoint/vault_name
280 Configuring for Object Storage and HDFS Open and modify /opt/aspera/etc/trapd/s3.properties. # vi /opt/aspera/etc/trapd/s3.properties IBM COS - S3 does not support retrieving the vault location, so this feature must be disabled. Find the line #aspera.session.check-bucket.transfer=true, uncomment it, and change the value to false. For example: #Whether to check against cross-region transfers #Default is true aspera.session.check-bucket.transfer=false Using vault names in requests does not work if DNS is not configured. To disable the use of vault names in the request hostname, find the line #s3service.disable-dns-buckets=false, uncomment the line, and change the value to true. For example: #Disable use of bucket name in request hostname. #Default (and recommended) is false s3service.disable-dns-buckets=true 4. Enable the Trapd service. # /opt/aspera/bin/astrap-config.sh enable 5. Restart Trapd to activate your changes. # /etc/init.d/asperatrapd restart Configuring the Transfer Server for Hadoop Distributed File System (HDFS) Enabling Hadoop Distributed File System (HDFS) Storage Using the Command Line IBM Aspera Enterprise Server can be configured to transfer to and from HDFS storage. Settings must be changed in both the HDFS and Enterprise Server configuration files, as described below. 1. Login to any HDFS node. 2. Record the NameNode address and IPC port to use in configuring Enterprise Server. Open /etc/hadoop/conf/core-site.xml and look for the line <name>fs.defaultfs</name>. The <value> setting below it specifies the NameNode address and IPC port. For example, if the NameNode address is hadoop-node.aspera.us and the IPC port is 8020, then the entry looks like the following: <property> <name>fs.defaultfs</name> <value>hdfs://hadoop-node.aspera.us:8020</value> </property> Keep the file open for the next step. 3. Configure HDFS to allow Enterprise Server to connect to it. Open /etc/hadoop/conf/core-site.xml if it is not already open. Enable the hdfs superuser to impersonate users and add the Enterprise Server host, or hosts in the case of clusters, to the list of hosts allowed to connect to the NameNode. The host value can be a comma-delimited list of IP addresses, IP address ranges in CIDR format, or host names: <property> <name>hadoop.proxyuser.hdfs.groups</name>
281 Configuring for Object Storage and HDFS 281 <value>*</value> </property> <property> <name>hadoop.proxyuser.hdfs.hosts</name> <value>host</value> </property> Note: If you are using Kerberos, Aspera recommends specifying a user other than the superuser as the user allowed to impersonate other users. For more information, see Configuring Kerberos for Hadoop Distributed File System (HDFS) Transfers. Save and close the file. 4. Restart HDFS to activate your changes. If you are using an Amazon EMR cluster, run the following commands: # stop hadoop-hdfs-namenode # start hadoop-hdfs-namenode 5. Configure the docroot in Enterprise Server's aspera.conf. Run the following asconfigurator command to set the HDFS docroot for the HDFS user: # asconfigurator -x "set_user_data;user_name,username;absolute,hdfs://username@name_node_address:ipc_port Where username is that of an Enterprise Server transfer user. You can use any transfer user on the Enterprise Server because the HDFS URI indicates which user is connecting to HDFS. For example, if the HDFS user is xfer, the NameNode address is hadoop-node.aspera.us, and the IPC port is 8020, then the command is the following: # asconfigurator -x "set_user_data;user_name,xfer;absolute,hdfs:// xfer@hadoop-node.aspera.us:8020/user/xfer" 6. Ensure that the HDFS super user matches the name of the user running the NameNode service. The HDFS super user is specified in /opt/aspera/etc/trapd/hdfs.properties in the following line, in which hdfs is the default: #aspera.hdfs.superuser.name = hdfs The HDFS super user specified in hdfs.properties must match the name of the actual user who runs the NameNode service on the NameNode node. If the user running the NameNode service is not hdfs, uncomment the line and enter the correct super username. Save and close the file. 7. Restart Trapd to activate your changes. # /etc/init.d/asperatrapd restart Enterprise Server can be configured to use Kerberos for HDFS transfers. For more instructions, see Configuring Kerberos for Hadoop Distributed File System (HDFS) Transfers. Configuring Kerberos for Hadoop Distributed File System (HDFS) Transfers Aspera Enterprise Server can be configured to use Kerberos for Hadoop Distributed File System (HDFS) transfers by creating a new Kerberos principal and editing the hdfs.properties configuration file, as described below. 1. On the Kerberos key distribution center (KDC), create a new principal. The principal must have a name with the pattern: name/host@domain. For example, if the user is trap, the host is hadoop-node.aspera.us, and the domain is ASPERA.US, then the principal name is: trap/hadoopnode.aspera.us@aspera.us.
282 Configuring for Object Storage and HDFS Configure HDFS for the user. Open /etc/hadoop/conf/core-site.xml. Enable the principal to impersonate users and add the Enterprise Server IP address to the list of hosts allowed to connect to the NameNode. If the user is trap and the host is hadoop-node.aspera.us, the configuration is as follows: <property> <name>hadoop.proxyuser.trap.groups</name> <value>*</value> </property> <property> <name>hadoop.proxyuser.trap.hosts</name> <value>hadoop-node.aspera.us, ip_address</value> </property> Save your changes and close the file. 3. Restart HDFS to activate your changes. 4. Export a keytab file for this principal and copy it to: /opt/aspera/etc/trapd/hdfs.keytab 5. Configure Trapd for Kerberos in hdfs.properties. Open /opt/aspera/etc/trapd/hdfs.properties and find the following section: # The authentication method to use. Valid values are SIMPLE KERBEROS # Default is 'SIMPLE' #aspera.hdfs.security.method = SIMPLE # The path to the keytab file to use when Kerberos is enabled. # Default: /opt/aspera/etc/trapd/hdfs.keytab #aspera.hdfs.security.key-tab.file = /opt/aspera/etc/trapd/hdfs.keytab # The Kerberos principal to use to access the name node. # Example: trap/hadoop-node.aspera.us@aspera.us # Default: none. #aspera.hdfs.security.principal = To enable Kerberos, Uncomment the line #aspera.hdfs.security.method = SIMPLE and change the value to KERBEROS: aspera.hdfs.security.method = KERBEROS Uncomment the line #aspera.hdfs.security.principal = and enter the name of the principle. Using the example principal, trap/hadoop-node.aspera.us@aspera.us: aspera.hdfs.security.principal = trap/hadoop-node.aspera.us@aspera.us 6. Configure Kerberos. Open /etc/krb5.conf and edit as necessary with the principal and domain set in hdfs.properties. 7. Restart Trapd to activate your changes. # /etc/init.d/asperatrapd restart
283 Configuring for Object Storage and HDFS 283 Configuring the Transfer Server for OpenStack Swift Enabling OpenStack Swift Storage Using the Command Line These instructions describe how to configure Enterprise Server on a virtual machine image (VMI) in a private or public cloud that uses OpenStack Swift storage. Prerequisites: You have a Swift container. You launched a cloud virtual machine instance. You can SSH into your server as root. You have Linux Kernel or higher. 1. SSH into your VMI as root: # ssh root@host_ip_address 2. Update sshd_config to enable port and password authentication. Open /etc/ssh/sshd_config and make the following changes: Enable TCP/33001 by adding the text Port For example,... Port 22 Port Enable password authentication by uncommenting the line #PasswordAuthentication no and changing the value to yes. For example,... PasswordAuthentication yes Save your changes. 3. Restart the sshd service to activate the changes. # service sshd restart 4. Configure the local firewall. Ensure that the local firewall is configured to support Aspera. Allow inbound connections on TCP/22, TCP/33001, and UDP/ Verify that /etc/hosts contains an entry for localhost. 6. Disable SELinux. For instructions, see Disabling SELinux. Warning: If this procedure is done incorrectly, you system might be unable to boot. 7. Create Aspera system user accounts and set passwords. The Aspera server uses the system accounts to authenticate connections and these must be in place before you can transfer. 8. Install the Aspera server application on your VMI. Use your customer login credentials to download the Aspera installer and product guide from the Aspera website: If you need help with your credentials, contact your Aspera account manager. Follow the instructions in the product guide to install and set up the server.
284 Configuring for Object Storage and HDFS Enable Entitlement and register by running the following commands: # /opt/aspera/bin/asalee-config.sh enable # service asperanoded restart # /opt/aspera/bin/alee-admin register customer_id entitlement_id To entitle Faspex (v ), Shares (v ), or Console (v ), run the corresponding command. To entitle Faspex: # export RAILS_ENV=production # asctl faspex:rake entitlement:config_license_server EL_KEY="entitlement_id" EL_CUSTOMER_ID="customer_id" To entitle Shares: # /opt/aspera/shares/bin/run bash -c 'cd /opt/aspera/ shares/u/shares && RAILS_ENV=production bundle exec rake aspera:ami:entitlement:config_license_server EL_KEY="entitlement_id" EL_CUSTOMER_ID="customer_id" To entitle Console: # cd /opt/aspera/console/ # export RAILS_ENV=production # export PATH=/opt/aspera/common/ ruby/bin:$path # rake aspera:ami:entitlement:config_license_server EL_KEY="entitlement_id" EL_CUSTOMER_ID="customer_id" 10. Enable the Aspera Trapd service by running the following command: # /opt/aspera/bin/astrap-config.sh enable 11. Set an OpenStack Swift docroot for the transfer user. # asconfigurator -x "set_user_data;user_name,username;absolute,swift://account_id:api_key@auth_url/my_buc Values for account_id, api_key, auth_url, and my_bucket must be URL encoded. For instructions, see URL Encoding. 12. Restart the Aspera Noded service. # aservice asperanoded restart
285 Authentication and Authorization 285 Authentication and Authorization Installing SSL Certificates This topic assumes you have a signed root certificate or certificate bundle (root certificate with chained or intermediary certificates) from an authorized Certificate Authority to configure on your Aspera transfer server. If you need to request a certificate from a Certificate Authority (CA), see the article How to Generate a Certificate Signing Request (CSR) in the Aspera Support Knowledgebase. Procedure Overview This procedure describes how to install SSL certificates for an Aspera transfer server. The procedure uses three files: aspera_server_key.pem aspera_server_cert.pem aspera_server_cert.chain Created automatically during transfer server installation. Resides in the default Aspera installation directory: / opt/aspera/etc Contains the default private key. In this procedure, you replace the default private key with the new private key generated with the certificate signing request (CSR). Created automatically during transfer server installation. Resides in the default Aspera installation directory: / opt/aspera/etc Contains the default self-signed certificate. In this procedure, you replace the default self-signed certificate with the content described in step 3 below. You create this file, as described below. You place the file in the same directory as aspera_server_key.pem and aspera_server_cert.pem. You place the certificate bundle (chained or intermediary certificates) from the CA in this file. The default filenames and locations can be changed by configuring settings in the transfer server's aspera.conf file, using asconfigurator commands: # asconfigurator -x "set_http_server_data;cert_file,path/certfile.pem" # asconfigurator -x "set_http_server_data;key_file,path/keyfile.pem" # asconfigurator -x "set_server_data;cert_file,path/certfile.chain" Note: The chain file for asperanoded must match the location and name of the asperanoded certfile, but with the.chain extension. The commands add the following text to aspera.conf: <http_server>... <key_file>path/keyfile.pem</key_file> --> <!-- key file for asperahttpd
286 Authentication and Authorization 286 <cert_file>path/certfile.pem</cert_file> <!-- cert file for asperahttpd -->... </http_server> <server>... <cert_file>path/certfile.chain</cert_file> asperanoded -->... </server> <!-- cert file for The aspera.conf is located in: /opt/aspera/etc/aspera.conf Install Certificates 1. Back up the default private key and self-signed certificate, using the following commands: # cd /opt/aspera/etc # cp aspera_server_key.pem aspera_server_key.pem.bak # cp aspera_server_cert.pem aspera_server_cert.pem.bak 2. In aspera_server_key.pem, replace the existing content with the new private key generated with the certificate signing request (CSR). 3. In aspera_server_cert.pem, replace the existing content with the following, in the order shown: a. the new private key b. the server certificate c. any chained or intermediary certificates from the CA in order of ascending authority, for example: intermediary certificate 1 intermediary certificate 2 intermediary certificate 3 d. the root certificate from the CA 4. Create a new file named aspera_server_cert.chain. This file must reside in the same directory as the.pem files. If you have a certificates bundle from the CA, the contents of aspera_server_cert.chain must consist of the following, in the order shown: a. the server certificate b. the certificates bundle, which includes the root certificate If you do not have a certificates bundle from the CA, the contents of aspera_server_cert.chain must consist of the following, in the order shown: a. the server certificate b. any chained or intermediary certificates from the CA in order of ascending authority, for example: intermediary certificate 1 intermediary certificate 2 intermediary certificate 3 c. the root certificate from the CA Restart Services Restart the services asperacentral, asperahttpd, and asperanoded using the following commands: # service asperacentral restart
287 Authentication and Authorization 287 # service asperahttpd restart # service asperanoded restart Verify Proper Installation To verify the root certificate and the certificate chain, run the command-line tool openssl to connect to the asperanoded service. For example, assuming you are using the default node port (HTTPS 9092): # /opt/aspera/bin/openssl s_client -connect myserver:9092 The output returned from this command will show a return value of 0 for success or 1 for failure. Success: The following sample output shows that verification was successful because verify return is 0. depth=2 C = US, O = "VeriSign, Inc.", OU = VeriSign Trust Network, OU = "(c) 2006 VeriSign, Inc. For authorized use only", CN = VeriSign Class 3Public Primary Certification Authority - G5 verify error:num=20:unable to get local issuer certificate verify return:0 Failure: The following sample ouput shows that verification failed because verify return is 1. depth=0 C = US, ST = California, L = Emeryville, O = IBM, OU = Aspera Inc IT Department, CN = *.asperafiles.com verify error:num=20:unable to get local issuer certificate verify return:1 depth=0 C = US, ST = California, L = Emeryville, O = IBM, OU = Aspera Inc IT Department, CN = *.asperafiles.com verify error:num=27:certificate not trusted verify return:1 depth=0 C = US, ST = California, L = Emeryville, O = IBM, OU = Aspera Inc IT Department, CN = *.asperafiles.com verify error:num=21:unable to verify the first certificate verify return:1 Note: You must see as many elements in the output as there are certificates in the chain. In the example below, there is one root certificate and two chained certificates, and therefore the output must show three elements to prove the installation was successful. Success: The following example shows a successful verification for one root certificate and two intermediary certificates in the chain: Certificate chain 0 s:/c=us/st=california/l=emeryville/o=ibm/ou=aspera Inc IT Department/ CN=*.asperafiles.com i:/c=us/o=symantec Corporation/OU=Symantec Trust Network/CN=Symantec Class 3 Secure Server CA - G4 1 s:/c=us/o=symantec Corporation/OU=Symantec Trust Network/CN=Symantec Class 3 Secure Server CA - G4 i:/c=us/o=verisign, Inc./OU=VeriSign Trust Network/OU=(c) 2006 VeriSign, Inc. - For authorized use only/cn=verisign Class 3 Public Primary Certification Authority - G5 2 s:/c=us/o=verisign, Inc./OU=VeriSign Trust Network/OU=(c) 2006 VeriSign, Inc. - For authorized use only/cn=verisign Class 3 Public Primary Certification Authority - G5 i:/c=us/o=verisign, Inc./OU=Class 3 Public Primary Certification Authority Failure: The following example shows an unsuccessful verification, since only the root certificate is displayed. Certificate chain
288 Authentication and Authorization s:/c=us/st=california/l=emeryville/o=ibm/ou=aspera Inc IT Department/ CN=*.asperafiles.com i:/c=us/o=symantec Corporation/OU=Symantec Trust Network/CN=Symantec Class 3 Secure Server CA - G4 If verification is unsuccessful, run the following command to inspect your certificate content: # /opt/aspera/bin/openssl x509 -in certificate.crt -text -noout Setting Up Token Authorization When accounts on a transfer server are configured to require token authorization, only transfers initiated with a valid token are allowed to transfer to or from the server. The token authorization requirement can be set for individual users, entire user groups, or globally for all users. Token authorization can be set independently for incoming transfers and outgoing transfers. Note: Token authorization is required for initiating transfers with the Shares product. Set up token authorization for a transfer user as follows: 1. Choose or create the transfer user on the server. The examples below use the transfer user aspera_user_1. 2. Log in as the user to ensure that any created files are owned by the user. Create the directory.ssh and the file authorized_keys if they don't already exist. For example: /home/aspera_user_1/.ssh/authorized_keys 3. Append the token-authorization public key to the user's authorized_keys file. Aspera provides a public key in the file aspera_tokenauth_id_rsa.pub stored in the following location: /opt/aspera/var/aspera_tokenauth_id_rsa.pub 4. Ensure that.ssh and.ssh/authorized_keys are owned by the user. For example: drwxr-xr-x 2 aspera_user_1 -rw-r--r-- 1 aspera_user_1 authorized_keys xgroup xgroup Mar 20 Mar ssh.ssh/ 5. Make sure the user has no password. If the system does not allow this, create a very large password. 6. Make sure the user's login shell is aspshell. For information on setting this, see Securing Your SSH Server. 7. Configure the user for token authorization To configure user authorization from the GUI, see Configuring Token Authorization from the GUI. To configure user authorization from aspera.conf, see Configuring Token Authorization in aspera.conf. Note: Instead of setting authorization for each user individually, you can set it for a group, or set it globally for all users. 8. Create a node user and associate it with the transfer user. The examples below use the Node API user nuser. # /opt/aspera/bin/asnodeadmin -au nuser -x aspera_user_1 -p nuser_passwd

289 Authentication and Authorization Test the node user: # curl -ki -u nuser:nuser_passwd Configuring Token Authorization from the GUI Requirements: You have created a transfer user on your server. You have set up the transfer user with an SSH public key as described in Setting Up Token Authorization. 1. Launch the application and click Configuration. 2. Click Users and choose a user to configure. Alternatively, click Groups and choose a group to configure, or click Global to configure options for all users. 3. In the right panel of the Server Configuration dialog, click Authorization. 4. Set token authorization for incoming and outgoing transfers. Select the override boxes for Incoming Transfers and Outgoing Transfers. Under Effective Value, select token from the dropdown menu. 5. Set the token encryption key. Select the override box for Token Encryption Key and enter the token encryption key. The encryption key should be a string of random characters (at least 20 recommended). 6. Click Apply to save the changes, or click OK to save the changes and close the dialog. Token Generation (Node API) A token authorizes content uploads to a destination or content downloads from a remote source. Token-based authorization is generally used instead of SSH authentication for FASP transfers initiated through IBM web applications, such as IBM Aspera Shares, Faspex, and Sharepoint, but can be used in place of SSH authentication for other types of Aspera products. When a user requests a transfer from Shares. Faspex, or Sharepoint in the web UI, an operational token is automatically generated using the Node API and is used to authorize the ascp session
290 Authentication and Authorization 290 between the client and the Shares, Faspex, or Sharepoint node, within constraints set in the command line and aspera.conf. Aspera recommends using the Node API tool to generate tokens, though they can be generated using the astokengen tool. Using the Node API tool enables greater flexibility and functionality because astokengen creates tokens constrained by the settings in aspera.conf. In practice, astokengen is most useful for decoding tokens during application development for debugging purposes. For more information on astokengen, see Token Generation (astokengen). For more information on using the Node API, request access to the Aspera Developer Network (ADN) from your Aspera account manager. Prerequisite: Setup for Token Authorization Before generating and using tokens, you must set up a transfer user for token authorization and associate the transfer user with a node username and password. For instructions, see Setting Up Token Authorization. Generating Tokens with Node API Calls Curl is used to call the API, and is freely available for download for all operating systems supported by Aspera from: To generate a token, you run a curl command to the /files/upload_setup or /files/download_setup endpoint (depending on what kind of token you want to generate). The request provides a JSON Object called the transfer_requests. The Node API output response, a transfer_specs JSON Object, includes a token, as well as a description of who is authorized to transfer using the token, what files can be transferred, and transfer properties. Note: When generating tokens with an IBM Aspera Shares server, the endpoints are /node_api/files/ upload_setup and /node_api/files/download_setup. Upload token General syntax: # curl -i -X POST -u node_username:node_user_password -d '{"transfer_requests" : [{"transfer_request" : { "paths" : [{}], "destination_root" : "/" } } ] }";' http(s)://node_server:node_port/files/ upload_setup This command specifies the following: -i Include the HTTP header in the output. -X POST Specify a POST request to the HTTP server, rather than the default GET request. (This option is not required when -d is used, but is included here for completeness). -u node_username:node_user_password Authenticate using the node username and node user password that are associated with the transfer user who has been configured for token authorization. -d Send the specified data payload to the HTTP server. The payload can be entered in the command line, as it is here, or stored in a file, as described below. http(s)://... The endpoint URL. For example, the following request allows the user, lion, who is associated with the node username, nodeuser, and node username password, nodepassword, to upload any files from the source to any location on the destination, serengeti.com: # curl -i -v -X POST -u nodeuser:nodepassword -d '{ "transfer_requests" : [ { "transfer_request" : { "paths" : [{}], "destination_root" : "/" } } ] }";'
291 Authentication and Authorization 291 The response output is the following, from which you can extract the token string ATV7_HtfhDaJwWfc6RkTwhkDUqjHeLQePiOHjIS254_LJ14_7VTA: HTTP/ OK Cache: no-cache Connection: close Content-Type: application/x-javascript { "transfer_specs" : [{ "transfer_spec" : { "paths" : [{}], "source_root" : "", "destination_root" : "/", "token" : "ATV7_HtfhDa-JwWfc6RkTwhkDUqjHeLQePiOHjIS254_LJ14_7VTA", "direction" : "send", "target_rate_cap_kbps" : , "cipher" : "none", "rate_policy_allowed" : "fair", "rate_policy" : "fair", "target_rate_kbps" : 45000, "min_rate_kbps" : 0, "remote_host" : "serengti.com", "remote_user" : "lion", "ssh_port" : 22, "fasp_port" : 33001, "http_fallback" : true, "http_fallback_port" : 8080 } }] } You can also specify the transfer request parameters in a file and refer to it in the curl command, which is particularly useful for transfer requests that list many items for source content and destination. For example, the transfer request file, upload_setup.json, could contain the following information for a file pair list: { } "transfer_requests" : [ { "transfer_request" : { "destination_root" : "/", "paths" : [ { "destination" : "/archive/monday/texts/first_thing", "source" : "/monday/first_thing.txt" }, { "destination" : "/archive/monday/texts/next_thing" "source" : "/monday/next_thing.txt", }, { "destination" : "/archive/monday/texts/last_thing", "source" : "/monday/last_thing.txt" } ] } } ] To use this file in the curl command, specify the path to the file in the -d option, as follows:
292 Authentication and Authorization 292 Download token The method for generating a download token is the same as for an upload token, except that you use the /files/ download_setup (or /node_api/files/download_setup in the case of Shares) endpoint. Using Tokens in the Command Line Once the token is generated, it can be used to authorize FASP transfers by setting the ASPERA_SCP_TOKEN environment variable or using the -W option for ascp and async sessions. Token Generation (astokengen) Overview The astokengen command line tool enables users to generate and decode tokens, but Aspera recommends using the Node API tool to do this as it provides more functionality. For instructions see Token Generation (Node API) and the Aspera Developer Network. The Node API response includes FASP transfer parameters and the token string, whereas astokengen generates only a specific type of token. In practice, astokengen is most useful for decoding tokens during application development for debugging purposes. Prerequisite: Setup for Token Authorization Before generating and using tokens, you must set up a transfer user for token authorization and associate the transfer user with a node username and password. For instructions, see Setting Up Token Authorization. Synax and Options # astokengen [options] The astokengen command takes the options described in the table below. Option (short form) Option (long form) Description -A --version Print version information. --mode=mode Direction of the transfer mode (send recv) --path=path Source path --dest=destination Destination path --user=user Generate the token for this user name. This name is embedded in the token and also used to retrieve further information from aspera.conf (user_value and token_life_seconds). --file-list=filename Specifies a file name that contains a list of sources for a download token. Each line of the file contains a single source and blank lines are ignored. For example: -p -u /monday/first_thing.txt /monday/next_thing.txt
293 Authentication and Authorization 293 Option (short form) Option (long form) Description /monday/last_thing.txt --file-pair-list=filename Specifies a file name that contains a multiplexed list of source and destination pairs for an upload or download token. Each pair of lines encodes one source and one destination and blank lines are ignored. For example /monday/first_thing.txt /archive/monday/texts/ first_thing /monday/next_thing.txt /archive/monday/texts/ next_thing /monday/last_thing.txt /archive/monday/texts/ last_thing -v token Verify token against user and path parameters. -t token Display the contents of the token. -k passphrase Passphrase to decrypt token. For use with -t. -b Assume user name and paths are encoded in base64. General Usage Examples Display the contents of the token: # astokengen -t token [options] Authorize uploads to a specific destination: # astokengen --mode=send [options] -u user --dest=path [-v token] Authorize uploads of one or more files as source/destination pairs to a specific destination: # astokengen --mode=send [options] -u user --file-pair-list=filename -dest=destination [-v token] Authorize downloads of one or more files or directories from a specific destination: # astokengen --mode=recv [options] -u user -p path [-p path ] [-v token]
294 Authentication and Authorization 294 Authorize downloads of files specified in a file list: # astokengen --mode=recv [options] -u user --file-list=filename [-v token] Authorize downloads of one or more files as source/destination pairs: # astokengen --mode=recv [options] -u user --file-pair-list=filename [v token] Usage Examples Description Example Common upload In a common upload, only the destination is encoded into the token. # astokengen --user=user --dest=path --mode=send Source paths and file lists (--path and --file-list) are not allowed and will cause astokengen to fail. Paired upload The destination is prepended to the destinations in the paired list file and they are encoded into the token. The destinations are in the odd numbered lines of the file (1, 3, 5, 7, and so on). # astokengen --user=user --dest=path --file-pair-list=filename --mode=send Source paths and file lists (--path and --file-list) are not allowed and will cause astokengen to fail. Common download The specified paths are encoded into the token. # astokengen --user=user --path=filepath1 --path=filepath2 -mode=recv # astokengen --user=user --file-list=filename --mode=recv In this case, --dest and --file-pair-list are illegal. Paired download The source files from the file pair list are encoded in the token. The sources are in the even numbered lines of the file (0, 2, 4, 6, 8, etc.). # astokengen --user=user --file-pair-list=filename --mode=recv In this case, --dest, --path and --file-list are illegal. Configuring Token Authorization in aspera.conf Requirements: You have created a transfer user on your server. You have set up the transfer user with an SSH public key as described in Setting Up Token Authorization. The examples below use a transfer user called aspera_user_1.
295 Authentication and Authorization Run the following command: # asconfigurator -x "set_user_data;user_name,aspera_user_1;authorization_transfer_in_value,token;authoriz Aspera recommends that the key be a random string of at least 20 characters. This command creates the following text in aspera.conf: <user> <name>aspera_user_1</name> <authorization> <transfer> <in> <value>token</value> </in> <out> <value>token</value> </out> </transfer> <token> <encryption_key>gj5o930t78m34ejme9dx</encryption_key> </token> </authorization> <file_system> </file_system> </user> You can also configure token-authorization settings in a <group> section to be applied to all users in the group or in the <default> section to apply them globally for all users. For instructions on how to run asconfigurator commands to do so, as well as to view other token configuration options, see User, Group and Default Configurations. 2. Optional: you can manually edit aspera.conf in a text editor with write permission. Open the file from the following location: /opt/aspera/etc/aspera.conf Add text as needed to configure token authorization for the user, group, or globally. Save your changes. Validate the aspera.conf file using the asuserdata utility: # /opt/aspera/bin/asuserdata -v Access Key Authentication Access key authentication provides an alternative to the security credentials of a node user or system user. Because an access key is restricted to its own storage (local or cloud), it allows access control and usage reporting to be segregated by storage. This offers significant benefits to multi-tenant service providers and enterprise installations with multiple departments. Access key authentication supports Aspera client products, such as Desktop Client, Pointto-Point Client, Enterprise Server, Connect, and Drive. It also supports Faspex, Shares, and Aspera Files. For details about using access key authentication with these products, see the documentation for these products. Node Access through SSH and HTTPS A node (a transfer server) is accessed over SSH or HTTPS: SSH services are best suited for access when all computers are part of the same administrative domain (in the same organization and with the same administrators).
296 Authentication and Authorization 296 HTTPS is best suited for services offered to arbitrary clients or the Internet at large. Access through SSH and HTTPS use various types of authentication: SSH services (ascp and async) SSH user and password or user and key Token - SSH authentication bypass using the Aspera web private key protected by requiring an authorization token (ATM). Access key - SSH authentication bypass using the Aspera web private key protected by requiring an access key and secret. HTTPS (Node API) Basic authentication using a node user and password. Basic authentication using an access key and secret. Note: When using access key authentication, the following constraints apply: Access keys cannot be used by users with docroots. If a docroot is configured (in aspera.conf), access key creation and use will fail. A restriction is required. No restriction results in failure. Although access keys can be created with no storage, using that access key with a transfer will result in failure. Creating and Testing Access Keys Set up a node user, associate it with a system user, and reload asperanoded by running the following commands. In the examples below, asp1 is the node user, aspera is the node user's password, and xfer is the system user. Running asnodeadmin requires root or admin permissions. # /opt/aspera/bin/asnodeadmin -a -u asp1 -p aspera -x xfer # /opt/aspera/bin/asnodeadmin --reload To create access keys, run curl commands as in the following examples. Curl is included in many Unix-based operating systems. To check if it is installed, type curl in the command line. If it is not installed, download it from the Curl website: To create an access key with local storage, run the following: # curl -ki -u asp1:aspera localhost:9092/access_keys where: Indicates the next argument is the data to send. The "@" identifies access_key-makelocal.json as a file containing the data, in this case, a JSON payload file. For an example of the text to include in access_key-make-local.json and examples of access key files for other types of storage, see below. -i -k Includes the HTTP header in the output. Allows curl to perform "insecure" SSL connections and transfers. -u 'asp1:aspera' Specifies the user name asp1 and password aspera to use for server authentication. Indicates where to store the access keys.
297 Authentication and Authorization 297 Similarly, to create an access key with cloud storage for Swift you specify a different JSON payload file: # curl -ki -u asp1:aspera localhost:9092/access_keys Examples of JSON payload files for various storage types: access_key-make-local.json { "id" : "dideuflcpg9iydsvxj0scq4moohnjtkvp5q2nrwjdgia", "secret" : "aspera", "storage" : { "type" : "local", "path" : "/home/asp1/data" } } access_key-make-aws.json { "id" : "AWSQ4VuvaYA9mMRf55NyNsiVGC-HHSBh0FTuqMH8aHsA", "secret" : "aspera", "storage" : { "type" : "aws_s3", "path" : "/", "endpoint" : "s3.amazonaws.com", "bucket" : "aspera-demo", "storage_class" : "STANDARD", "server_side_encryption" : null, "credentials" : { "access_key_id" : "AKI...KHQ", "secret_access_key" : "KScx...PHcm1" } } } access_key-make-azure-sas.json { "secret" : "aspera", "storage" : { "type" : "azure_sas", "path" : "/", "credentials" : { "shared_access_signature" : " temp?sv= &sr=c&sig=yfew...79uxe %3D&st= T07%3A00%3A00Z&se= T07%3A00%3A00Z&sp=rwdl" } } } access_key-make-azure.json { "secret" : "aspera", "storage" : { "type" : "azure", "container": "temp", "path" : "/",
298 Authentication and Authorization 298 "credentials" : { "storage_endpoint" : "blob.core.windows.net", "account" : "asperadev", "key" : "1XWGPGsn7...QObRmSQ==" } } } access_key-make-swift.json { "id" : "Yc6Q4VuvaYA9mMRf55NyNsiVGC-HHSBh0FTuqMH8aHsA", "secret" : "aspera", "storage" : { "type" : "softlayer_swift", "path" : "/", "container" : "wallball", "credentials" : { "authentication_endpoint" : " sjc01.objectstorage.service.networklayer.com/auth/v1.0", "username" : "IBMOS :IBM303446", "api_key" : "e0a d6706" } } } To view a list the access keys, run the following command: # curl -ki -u asp1:aspera The command returns output similar to the following. In the example below, the first access key listed is one created for local storage and the second is for swift storage, with the text copied from the access key file: HTTP/ OK Cache: no-cache Connection: close Content-Type: application/json; charset=utf-8 [ { "id" : "dideuflcpg9iydsvxj0scq4moohnjtkvp5q2nrwjdgia", "uri" : "file:////home/asp1/data", "file_id" : "1", "token_verification_key" : null, "license" : null, "storage" : { "type" : "local", "path" : "/home/asp1/data" } }, { "id" : "Yc6Q4VuvaYA9mMRf55NyNsiVGC-HHSBh0FTuqMH8aHsA", "uri" : "swift://sjc01.objectstorage.softlayer.net/wallball", "file_id" : "1", "token_verification_key" : null, "license" : null, "storage" : { "type" : "softlayer_swift", "path" : "/", "container" : "wallball",
299 Authentication and Authorization 299 "credentials" : { "authentication_endpoint" : " auth/v1.0", "username" : "IBMOS %3AIBM303446", "api_key" : "e0a8987b571cca4e475c8dd816c2d2db71b6d6e060f2a75ce23b1832c12d6706" } } } ] To test whether you can browse the storage for each key, run the following commands. To specify the user (-u) enter the access key ID. Testing the local storage: # curl -ki -u dideuflcpg9iydsvxj0scq4moohnjtkvp5q2nrwjdgia:aspera localhost:9092/files/1/files Testing the Swift storage: # curl -ki -u Yc6Q4VuvaYA9mMRf55NyNsiVGC-HHSBh0FTuqMH8aHsA:aspera localhost:9092/files/1/files Client-Server Authentication Using Basic Authentication with Access Key Basic authentication is used by Aspera Faspex and Aspera Shares. 1. On the server, create a system user xfer and configure the user for token authorization, as described in Setting Up Token Authorization. 2. Create an access key for the storage type, as described in Creating and Testing Access Keys above. 3. Obtain the id of the access key corresponding to the storage type by running the following command: # curl -ki -u asp1:aspera 4. Create a basic auth token by encoding the access_key_id:secret in base64. $ echo -n dideuflcpg9iydsvxj0scq4moohnjtkvp5q2nrwjdgia:aspera base64 The basic auth token looks similar to the following: ZGlEZXVGTGNwRzlJWWRzdnhqMFNDcTRtT29oTkpUS3ZwNVEyblJXakRnSUE6YXNwZXJh 5. Set the basic auth token as an environment variable by running the following command: # export ASPERA_SCP_TOKEN="Basic ZGlEZXVGTGNwRzlJWWRzdnhqMFNDcTRtT29oTkpUS3ZwNVEyblJXakRnSUE6YXNwZXJh" To upload a file using access keys and basic auth, use the following syntax: # ascp [--tags='{"aspera":{"node":{access_key":"access_key_id", "file_id":"value"}}}'] --mode=send --host= user=username i path/to/private_key_file -d filename directory Where the path to the private key file is the following: /opt/aspera/var/aspera_tokenauth_id_rsa
300 Authentication and Authorization 300 The directory can be / to indicate the top of the access key storage, or /directory to indicate a subdirectory. For example: # ascp --tags='{"aspera":{"node": {access_key":"dideuflcpg9iydsvxj0scq4moohnjtkvp5q2nrwjdgia", "file_id":"1"}}}' --mode=send --host= user=xfer -i /opt/aspera/ var/aspera_tokenauth_id_rsa -d testfile03 /tmp The tags are optional. The tag "file_id":"1" can be used to indicate the top of the access key storage. Client-Server Authentication Using Bearer Token and File IDs Bearer token authentication is a requirement for Aspera Files. Server setup: 1. Create a private/public key pair. $ openssl genpkey -algorithm RSA -out private_key.pem -pkeyopt rsa_keygen_bits:4096 $ openssl rsa -pubout -in private_key.pem -out public_key.pem These commands create the private key file private_key.pem and the public key file public_key.pem/ 2. Use the node user to create an access key, as described in Creating and Testing Access Keys above. This access key cannot be used by any other Aspera authentication system. 3. Obtain the id of the access key corresponding to the storage type by running the following command: $ curl -ki -u asp1:aspera 4. Set the public key as the 'token verification key' of the access key. "JSON encode" the public key text (convert it into a single line with new lines indicated by \r\n) and use it in the following command: $ curl -X PUT -ki -u dideuflcpg9iydsvxj0scq4moohnjtkvp5q2nrwjdgia -d '{"token_verification_key":"-----begin PUBLIC KEY-----\r \nmigfma0gcsqgsib3dqebaquaa4gnadcbiqkbgqdmlkm2xispwjj4nxbhua0m2zam\r \niog3jm3vemw6rhe6lutxm1kxrawih5pyd8ougoautzmw7mnl3cbebdzmc+cuqeks\r \nkfjrywczngqcrxc9v+xkk0yn8bzvmdmrsinmnq5tpfg3sz4kjcf9qmj\/tsr3rfns\r \nryar\/idootbgjggqkwidaqab\r\n-----end PUBLIC KEY-----"}' 5. Create a JSON file containing the bearer token payload and save it as bearer_token.json. { } "user_id": "luke@aspera.us", "scope": "node.dideuflcpg9iydsvxj0scq4moohnjtkvp5q2nrwjdgia:all", "expires_at": "" "group_ids": [], Ensure that the file does not end with a new line. If it does, truncate it to size - 1. For example, if the file is 154 lines with the new line, the command to remove the new line is as follows: $ truncate bearer_token.json --size Create a signature for the token. $ sudo openssl dgst -sha512 -sign private_key.pem bearer_token.json base64 > signature 7. Create the signed token. $ cat bearer_token.json > bearer_token.json.signed
301 Authentication and Authorization 301 $ echo "==SIGNATURE==" >> bearer_token.json.signed $ cat signature >> bearer_token.json.signed 8. Inspect the token: $ cat token-bearer-luke@aspera.us.json { "user_id": "luke@aspera.us", "scope": "node.dideuflcpg9iydsvxj0scq4moohnjtkvp5q2nrwjdgia:all", "expires_at": "" "group_ids": [], } ==SIGNATURE== YJixqw+5VjsGGIgOavoPdbhgr+1r9VGrKxBjAjV9mcMti0OJorbY7svIokz4 WLkszV5guz539nwcQCdiuISeGlBrJYMKfludCGP8MGxl8PaiZzJfzii6FWtm K+4BhXlMDN4JIK+cAPL/zkdMu71mO2n8XcPOfXQv9HkUO8NXxl0ue7fDYnX6 +eb4gekgk7latgfw2hbaybsykq8k7uiwowc2/7qzdxxclei70ojr7zhe3wsr FhR3yhfusz97XS5Zj2+nlfxE4hxw5sZrhQDqcp3vQwl26arMNI16vvuTZBY2 LUFY6f4mVmKmrz7hSGt1Gz9liO6jTImIYHmthzZ1TQ== 9. Construct the final bearer token: $ cat bearer_token.json.signed openssl zlib base64 -w0 > bearer_token.json.sig.z.b Create permissions for user ID (access ID) luke@aspera.us to the top level of the storage. $ curl -d '{"file_id":"1", "access_type":"user","access_id":"luke@aspera.us","access_level":"edit"}' \ -ki -u dideuflcpg9iydsvxj0scq4moohnjtkvp5q2nrwjdgia:aspera localhost:9092/permissions HTTP/ OK Cache: no-cache Connection: close Content-Type: application/json; charset=utf-8 { } "id" : "1", "file_id" : "1" To test the access key, run the following command to browse the top directory of the access key: # curl -i -u dideuflcpg9iydsvxj0scq4moohnjtkvp5q2nrwjdgia:aspera localhost:9092/files/1 To test the bearer token, run the following to browse the top directory of the access key: # curl -ki -H "Authorization: Bearer ejwvknmuolgard/5df/ pkhlftg7scmikzioesqxcqcbwmkdk/3t7n/fakzv7l7ib+7t7kye7064c3+m/yd+kxfhz7hf/ ILs+hk36SWqYpD9rUXP7baWfPbteSmDUWUwl69bVszYUhC6zjgKMt6xXF447fVtPYVl +W9Klybu0/xMOHxWB4YcfOPGDwFwMP9H4iWLBN/Ts4Nh8dvS706/fyH/ I15ejSDrnerb49YXwc7G0Fg4r8lIsJEfzHfM62tKkQWhL0WHNyMoebry5tqxoRXtBaettpiRt6vVyXwX +I342cXcVqLoIkGv5CASI8no +SoILb0LBzI8COrIkvArR3nIY9NA2FdQQRn1B8Yo1l5YmUxyA7pGgMhpr5sHF01UCNeKp74irWafha14TQvSI7dW PWuev1lCPDM1mkjm449Mm6kSRJnT3lgYGWuWArwgBCBuiXuWagHqn9rDtO0bG8/k/ loteoej1jr1cczzskapjvebpq +b8kltzcxpxteszg1iyd5mv16zbzotalqatbrqep4lsr0pr29vwe/ R4EnkgIWQJVpVz/KuIPvE/7gjG1om/QTCVuxIXR+tAgg+mm5b3LQU0s2W +/btuinqnlbqnqa2wufcfaej4wyp8m+h6rxw1oud6krly7imwrjcqltr +Uoj0ePh/JgnZc6L807YztmeM7J9nAzrps8C6wh2w9VkK6Eqa6mv6wvA70z/ QbsJDmXFtBh14A7og80JqsPGkKOOr4moX9KyoG54JTSwf3EBxw2FvtjwDTP54NvcE14VcA3o3eQLQ2RF758jGJ2j
302 Authentication and Authorization 302 +PxC/gc1nBpn" -H "X-Aspera-AccessKey: dideuflcpg9iydsvxj0scq4moohnjtkvp5q2nrwjdgia" files/1 Both of these tests should return a list of files and directories in the top directory. To do a simple upload using the bearer token, set the bearer token as an environment variable and run an ascp transfer specifying the access key: # export ASPERA_SCP_TOKEN="Bearer ejwvknmuolgard/5df/ pkhlftg7scmikzioesqxcqcbwmkdk/3t7n/fakzv7l7ib+7t7kye7064c3+m/yd+kxfhz7hf/ ILs+hk36SWqYpD9rUXP7baWfPbteSmDUWUwl69bVszYUhC6zjgKMt6xXF447fVtPYVl +W9Klybu0/xMOHxWB4YcfOPGDwFwMP9H4iWLBN/Ts4Nh8dvS706/fyH/ I15ejSDrnerb49YXwc7G0Fg4r8lIsJEfzHfM62tKkQWhL0WHNyMoebry5tqxoRXtBaettpiRt6vVyXwX +I342cXcVqLoIkGv5CASI8no +SoILb0LBzI8COrIkvArR3nIY9NA2FdQQRn1B8Yo1l5YmUxyA7pGgMhpr5sHF01UCNeKp74irWafha14TQvSI7dW PWuev1lCPDM1mkjm449Mm6kSRJnT3lgYGWuWArwgBCBuiXuWagHqn9rDtO0bG8/k/ loteoej1jr1cczzskapjvebpq +b8kltzcxpxteszg1iyd5mv16zbzotalqatbrqep4lsr0pr29vwe/ R4EnkgIWQJVpVz/KuIPvE/7gjG1om/QTCVuxIXR+tAgg+mm5b3LQU0s2W +/btuinqnlbqnqa2wufcfaej4wyp8m+h6rxw1oud6krly7imwrjcqltr +Uoj0ePh/JgnZc6L807YztmeM7J9nAzrps8C6wh2w9VkK6Eqa6mv6wvA70z/ QbsJDmXFtBh14A7og80JqsPGkKOOr4moX9KyoG54JTSwf3EBxw2FvtjwDTP54NvcE14VcA3o3eQLQ2RF758jGJ2j +PxC/gc1nBpn" # ascp --tags='{"aspera":{"node": {"access_key":"dideuflcpg9iydsvxj0scq4moohnjtkvp5q2nrwjdgia","file_id":"1"}}}' -mode=send --host=hostname --user=xfer -i /opt/aspera/var/ aspera_tokenauth_id_rsa -d testfile01 /
303 Asconfigurator Reference 303 Asconfigurator Reference The asconfigurator Utility The asconfigurator utility is a command-line tool for interacting with aspera.conf, the file that holds most configuration settings for your Aspera transfer server. asconfigurator comes bundled with your installation of Enterprise Server, Connect Server, and Point-to-Point Client. Why Use asconfigurator? Because aspera.conf is an XML file, users can configure their transfer server by editing the file directly. However, editing the file manually can be cumbersome and error-prone because correct syntax and structure are strictly enforced. The asconfigurator utility enables you to edit aspera.conf through commands and parses, validates and writes well-formed XML while also confirming that the values entered for parameters are valid. With asconfigurator, you can edit aspera.conf quickly and safely, with one or two commands. After Editing aspera.conf Whether you use asconfigurator or manually edit aspera.conf, the file must be re-read and certain services restarted in order for the changes to take effect. For detailed information, see the Administrator's Guide: Restarting Aspera Services for your Aspera transfer server. Syntax and Usage General Syntax # asconfigurator -x "command[;parameter,value;parameter,value]" The command is either a set command for setting a configuration or a delete command for removing a configuration. For any command you may enter one or more set of parameters and values separated by semicolons. Note: The user executing asconfigurator commands must meet the following requirements: Have write access to aspera.conf. Not be configured to use a shell that restricts command usage (aspshell does not allow the use of asconfigurator). Commands for Setting Parameter Values Command Description set_user_data Sets data in the user section. For parameters and values, see User, Group and Default Configurations. set_group_data Sets data in the group section. For parameters and values, see User, Group and Default Configurations. set_trunk_data Sets data in the trunk section, which contains Vlink settings. For parameters and values, see Trunk (Vlink) Configurations.
304 Asconfigurator Reference 304 Command Description set_central_server_data Sets data in the central server section, which contains Aspera Central and SOAP settings. For parameters and values, see Central Server Configurations. set_database_data Sets data in the database section, which contains settings for use with Aspera Console (earlier than 3.0). For parameters and values, see Database Configurations. set_server_data Sets data in the server section, which contains transfer server feature settings for use with the Node API. For parameters and values, see Server Configurations. set_http_server_data Sets data in the HTTP fallback server section. For parameters and values, see HTTP Server Configurations. set_client_data Sets data from the client section, which holds client transfer settings. For parameters and values, see Client Configurations. set_node_data Sets data in the default section, which holds the "global" node settings. For parameters and values, see User, Group and Default Configurations. Note: To reset a parameter to its default value, you can use a set command for the parameter with a value of AS_NULL. Commands for Deleting Configurations Delete commands can be used for removing a user, group or Vlink configuration. Command Description delete_user Deletes a user's configurations. delete_group Deletes a group's configurations. delete_trunk Deletes a Vlink's configurations. Modifying Files other than aspera.conf The general syntax above modifies the default aspera.conf. You can also run asconfigurator to modify an XML file of your choice instead of aspera.conf. The command below takes a path to a file to modify. If the file does not exist, it is created. # asconfigurator -x "command[;parameter,value;parameter,value]" /path/to/ file The command below takes paths to two files. The first file is used as a base, and the modifications are written to the second file. # asconfigurator -x "command[;parameter,value;parameter,value]" /path/to/ file /path/to/file1
305 Asconfigurator Reference 305 Using Fitness Rules Fitness rules allow you to apply configuration settings conditionally when specified rules are met. Fitness rules are added to aspera.conf configurations as attributes within XML tags, such as the following: <value fitness="peer_ip"( )>allow</value> In the example above, the parameter is set to allow if the peer IP address is Fitness Rule Syntax: # asconfigurator -x "command;parameter,value,fitness,fitness_rule(fitness_template)" Fitness Rule Example Description cookie() cookie(wilcard_template) The parameter value is applied if the cookie passed from the application matches the specified template. peer_ip() peer_ip(ip_address/netmask) The parameter value is applied if the IP address of the peer (the client) matches the specified IP address and optionally, its netmask. peer_domain() peer_domain(wilcard_template) The parameter value is applied if the domain of the peer (the client) matches the specified template. For example, to set a peer_ip fitness rule on the authorization_transfer_in_value configuration so that incoming transfers from are denied, run the following command: # asconfigurator -x "set_node_data;authorization_transfer_in_value,deny,fitness,peer_ip( )" Examples Below are some example commands and usage tips. Note: You can also see sample commands for nearly all configurations by running the following asuser command: # /opt/aspera/bin/asuserdata -+ Setting the docroot of your transfer user # asconfigurator -x "set_user_data;user_name,transferuser;absolute,/path/ to/docroot" Enabling HTTP Fallback using HTTPS on port # asconfigurator -x "set_http_server_data;enable_https,true" # asconfigurator -x "set_http_server_data;https_port,8444"
306 Asconfigurator Reference 306 Note: You can also chain two or more parameters to set within the same command. The two commands above can be combined as follows (separated by semi-colons): # asconfigurator -x "set_http_server_data;enable_https,true;https_port,8444" Setting the global inbound target transfer rate to 80Mb/s # asconfigurator -x "set_node_data;transfer_in_bandwidth_flow_target_rate_default,80000" Getting all the configurations set on the group aspera_group # /opt/aspera/bin/asuserdata -g aspera_group Creating and enabling a Vlink with an ID of 101 and a capacity of 100Mb/s # asconfigurator -x "set_trunk_data;id,101;trunk_on,true;trunk_capacity,100000" Allowing only encrypted transfers # asconfigurator -x "set_node_data;transfer_encryption_allowed_cipher,aes-128" Setting the hostname of the Aspera server to example.com # asconfigurator -x "set_server_data;server_name,example.com" Setting the global token life back to the default value of 24 hours (86400 seconds) Note: You can reset any setting to its default value by setting it to AS_NULL # asconfigurator -x "set_node_data;token_life_seconds,as_null" Reading Output The output for asconfigurator commands are structured and display feedback about the success or failure of each command. Set commands When successful, set commands print success to standard out: # asconfigurator -x "set_server_data;enable_http,true" success When unsuccessful, set commands print failure to standard out, and an explanation of why they failed: # asconfigurator -x "set_server_data;enable_http,true" failure Syntax Error: Syntax error. Valid values are "assert_current","server" or"option_mask", got "enable_htt"
307 Asconfigurator Reference 307 Reading aspera.conf configuration settings with asuserdata You can view the current configuration settings by section and all the possible parameters with their default values and corresponding asconfigurator syntax by running asuserdata. # /opt/aspera/bin/asuserdata [options] [commands] The asuserdata command must be run either from within the Aspera bin directory, or with the full path in front of it. Multiple command flags can be specified per call. The option flags modify the output of command flags that follow them (but not command flags that precede them). Command Flags Command Flag Description -u user Outputs configurations set in the user section for the specified user. -g group Outputs configurations set in the group section for the specified group. -d Outputs configurations set in the database section. -c Outputs configurations set in the central server section. -t Outputs configurations set in the HTTP server section. -a Outputs configurations set in all sections except the user and group section. -s Outputs the default specification for aspera.conf configurations. Similar to -+ but does not show asconfigurator commands. -+ Outputs the default specification for aspera.conf configurations and corresponding asconfigurator commands for each parameter. Option Flags Option Flag Description -x Formats output as XML. -b Formats output in human readable language. Note: To see all asuserdata command options, run asuserdata -h. User, Group and Default Configurations General Syntax This collection of commands configures settings for transfer authorization, bandwidth, and encryption. These settings can apply to particular users, users in particular groups, or globally to all users. The syntax of set commands for users, groups and global settings are: # asconfigurator -x "set_user_data;user_name,username;parameter,value" # asconfigurator -x "set_group_data;group_name,groupname;parameter,value" # asconfigurator -x "set_node_data;parameter,value" Setting or getting user/group data requires you to specify the username or group name as the first parameter of the asconfigurator command.
308 Asconfigurator Reference 308 Note: Not all available parameters are listed below, only the most commonly used. To view a complete list, run the following command: # /opt/aspera/bin/asuserdata -+ Transfer Authorizations absolute The docroot path of a user. Values: (String) authorization_transfer_in_value Incoming transfer authorization. The token value only allows transfers initiated with valid tokens. Values: allow (default), deny, token authorization_transfer_out_value Outgoing transfer authorization. The token value only allows transfers initiated with valid tokens. Values: allow (default), deny, token authorization_transfer_in_external_provider_url The URL of the external authorization provider for incoming transfers. Values: (String) authorization_transfer_out_external_provider_url The URL of the external authorization provider for outgoing transfers. Values: (String) authorization_transfer_in_external_provider_soap_action The SOAP action required by the external authorization provider for incoming transfers. Values: (String) authorization_transfer_out_external_provider_soap_action The SOAP action required by the external authorization provider for outgoing transfers. Values: (String) token_encryption_type The cipher used to generate encrypted authorization tokens. Values: aes-128 (default), aes-192, aes-256 token_encryption_key The secret passphrase used to generate encrypted authorization tokens. Use instead of token_encryption_keyfile. Values: (String) token_life_seconds The length of time a token is valid in seconds. The default value is seconds (24 hours). Values: (Number) Transfer Bandwidth Policies transfer_in_bandwidth_aggregate_trunk_id The ID of the Vlink to apply to incoming transfers. A value of 0 disables the Vlink. Values: (Number 0-255) transfer_out_bandwidth_aggregate_trunk_id
309 Asconfigurator Reference 309 The ID of the Vlink to apply to outgoing transfers. A value of 0 disables the Vlink. Values: (Number 0-255) transfer_in_bandwidth_flow_target_rate_cap The maximum value to which the target rate for incoming transfers can be set. Values: (Number) transfer_out_bandwidth_flow_target_rate_cap The maximum value to which the target rate for outgoing transfers can be set (in Kbps). Values: (Number) transfer_in_bandwidth_flow_target_rate_default The default value to which the target rate for incoming transfers is set (in Kbps). Values: (Number) transfer_out_bandwidth_flow_target_rate_default The default value to which the target rate for outgoing transfers is set (in Kbps). Values: (Number) transfer_in_bandwidth_flow_target_rate_lock A value of false allows users to adjust the transfer rate for incoming transfers. A value of true prevents users from adjusting the transfer rate for incoming transfers. Values: false (default), true transfer_out_bandwidth_flow_target_rate_lock A value of false allows users to adjust the transfer rate for outgoing transfers. A value of true prevents users from adjusting the transfer rate for outgoing transfers. Values: false (default), true transfer_in_bandwidth_flow_min_rate_cap The maximum value to which the minimum rate for incoming transfers can be set (in Kbps). Transfers cannot go slower than the minimum rate. Values: (Number) transfer_out_bandwidth_flow_min_rate_cap The maximum value to which the minimum rate for outgoing transfers can be set (in Kbps). Transfers cannot go slower than the minimum rate. Values: (Number) transfer_in_bandwidth_flow_min_rate_default The default value to which the minimum rate for incoming transfers is set (in Kbps). Transfers cannot go slower than the minimum rate. Values: (Number) transfer_out_bandwidth_flow_min_rate_default The default value to which the minimum rate for outgoing transfers is set (in Kbps). Transfers cannot go slower than the minimum rate. Values: (Number) transfer_in_bandwidth_flow_min_rate_lock A value of false allows users to adjust the minimum rate for incoming transfers. A value of true prevents users from adjusting the minimum rate for incoming transfers. Values: false (default), true transfer_out_bandwidth_flow_min_rate_lock
310 Asconfigurator Reference 310 A value of false allows users to adjust the minimum rate for outgoing transfers. A value of true prevents users from adjusting the minimum rate for outgoing transfers. Values: false (default), true transfer_in_bandwidth_flow_policy_default The default bandwidth policy for incoming transfers. The bandwidth policy determines how transfers adjust their rates according to network conditions. Values: fair (default), fixed, high, low transfer_out_bandwidth_flow_policy_default The default bandwidth policy for outgoing transfers. The bandwidth policy determines how transfers adjust their rates according to network conditions. Values: fair (default), fixed, high, low transfer_in_bandwidth_flow_policy_lock A value of false allows users to adjust the bandwidth policy for incoming transfers. A value of true prevents users from adjusting the bandwidth policy for incoming transfers. Values: false (default), true transfer_out_bandwidth_flow_policy_lock A value of false allows users to adjust the bandwidth policy for outgoing transfers. A value of true prevents users from adjusting the bandwidth policy for outgoing transfers. Values: false (default), true transfer_in_bandwidth_flow_policy_allowed The allowed bandwidth policies for incoming transfers. The chosen value and any policy less aggressive will be allowed. In order from most to least aggressive the policies are fixed, high, fair and low. Values: any (default), high, fair, low transfer_out_bandwidth_flow_policy_allowed The allowed bandwidth policies for outgoing transfers. The chosen value and any policy less aggressive will be allowed. In order from most to least aggressive the policies are fixed, high, fair and low. Values: any (default), high, fair, low Transfer Encryption transfer_encryption_allowed_cipher The type of transfer encryption accepted. When set to 'any' both encrypted and unencrypted transfers are allowed. Values: any (default), aes-128, aes-192, aes-256, none transfer_encryption_fips_mode Whether transfers should be encrypted with a FIPS certified encryption module. Values: false (default), true content_protection_required Whether transferred content should be left encrypted at the destination. Values: false (default), true content_protection_strong_pass_required Whether a strong passphrase is required for content protection (6 characters long, at least one letter, number and special symbol). Values: false (default), true
311 Asconfigurator Reference 311 Transfer File System Options resume_suffix The extension of files used to store metadata and enable resumption of partially completed transfers. Include a '.' in the suffix, such as:.aspera Values: (String), default.aspx preserve_attributes The file creation policy. When set to none the timestamps of source files are not preserved. When set to times the timestamps of source files are preserved at the destination. Values: use client setting (default), none, times overwrite Whether Aspera clients are allowed to overwrite existing files on the server. Values: allow (default), deny file_manifest A file manifest is a file containing a list of everything transferred in a given transfer session. When set to text file manifests are generated. Values: none (default), text, disable file_manifest_path The location (path) where file manifests are created. Values: (Absolute path) pre_calculate_job_size The policy of calculating total job size before a transfer. If set to any, the client configuration is followed. If set to no, job size calculation is disabled before transferring. Values: any (default), no, yes replace_illegal_chars Convert restricted Windows characters in file and directory names to a non-reserved character of your choice. Values: (Non-reserved character) file_filters Exclude and include files or directories with the specified pattern in the transfer. Each entry starts with a separator, preferably " ". Add multiple entries for more inclusion and exclusion patterns. To specify an exclusion, add '- ' (- and whitespace) at the beginning of the pattern, such as *2016*. To specify an inclusion, add '+ ' (+ and whitespace) at the beginning of the pattern, such as + *.jpg. Two symbols can be used in the setting of patterns: * (Asterisk) Represents zero to many characters in a string, for example, *.tmp matches.tmp and abcde.tmp.? (Question Mark) Represents one character, for example, t?p matches tmp but not temp. Specify multiple filters as a delimited list: + *.jpg *. Values: (String) partial_file_suffix Extension to be added to the names of files that are currently only partially transferred. Include a '.' in the suffix, such as:.aspera Values: (String) file_checksum
312 Asconfigurator Reference 312 Type of checksum to compute while reading a file. Checksums are used to verify that file contents on the destination match what was read on the destination. Values: any (default), md5, sha1, sha256, sha384, or sha512 async_enabled Whether async is enabled on the server. Values: true (default), false async_connection_timeout The time period async waits to establish a connection, in seconds. Values: (Number) async_session_timeout The time period async waits for an unresponsive session, in seconds. Values: (Number) Document Root Options absolute The absolute path of the document root (docroot), which is the area of the file system that is accessible by Aspera users. Values: (Absolute path) read_allowed Whether users are allowed to transfer files from the docroot (in other words, download from the docroot). Values: true (default), false write_allowed Whether users are allowed to transfer files to the docroot (in other words, upload to the docroot). Values: true (default), false dir_allowed Whether users are allowed to browse files in the docroot. Values: true (default), false file_restriction Restrict the files that are allowed for transfers. Restrictions are set as wildcard templates. The first character is a separator (preferably a " ") which can be used to set multiple restrictions. Restrictions are processed in order and according to the following rules: If a restriction starts with a "!", any files that match the rest of the wildcard template are rejected. If a restriction does not start with a "!", then any file that matches is allowed Any other files are rejected For example: /home/aspera/* home/janedoe/* Values: (Character separator)(wildcard template)[(character separator)(wildcard template)] Trunk (Vlink) Configurations General Syntax This collection of commands configures settings related to Vlinks, which are aggregate bandwidth caps applied to transfer sessions.
313 Asconfigurator Reference 313 The syntax for setting trunk configurations is the following : # asconfigurator -x "set_trunk_data;id,trunk_id;parameter,value" Setting or getting trunk data requires you to specify the ID number of the Vlink as the first parameter of the asconfigurator command. Note: Not all available parameters are listed below, only the most commonly used. To view a complete list, run the following command: # /opt/aspera/bin/asuserdata -+ Vlink Configurations trunk_id The ID of the Vlink. Values: (Number 1-255) trunk_on Whether the Vlink is enabled (true) or disabled (false). Values: true, false trunk_capacity The bandwidth capacity of the Vlink (in Kbps). Values: (Number) Central Server Configurations General Syntax This collection of commands configures settings related to Aspera Central, which is a service that manages transfer server SOAP features and historical transfer data. The syntax for setting central server parameters is the following: # asconfigurator -x "set_central_server_data;parameter,value" Note: Not all available parameters are listed below, only the most commonly used. To view a complete list, run the following command: # /opt/aspera/bin/asuserdata -+ Central Server Configurations address The network interface address on which the Aspera Central listens. The default enables the transfer server to accept transfer requests from the local computer. Setting the value to allows the transfer server to accept transfer requests on all network interfaces. Values: (Network interface address, default ) port The port on which the Aspera Central service listens. Values: (Number , default 40001) persistent_store
314 Asconfigurator Reference 314 Whether to store transfer history locally. This should be enabled if the transfer server will be used with Faspex or Shares. Values: enable (default), disable persistent_store_max_age The time in seconds to retain local transfer history data. Values: (Number, default 86400) persistent_store_on_error Whether the Central server should terminate (exit) when an error occurs while writing to the local transfer history database, or ignore the error. Values: ignore (default), exit compact_on_startup Whether to compact the local transfer history database on startup (note that this may take awhile). Values: ignore (default), exit files_per_session The number of file names to be recorded for any transfer session. For example, if the value is set to 50 the first 50 filenames will be recorded for any session. A setting of 0 logs all filenames. The session will still record the number of files transferred, and the number of files completed, failed or skipped. Values: (Number, default ) ignore_empty_files Whether to block the logging of zero byte files (true) or not (false). Values: true (default), false ignore_skipped_files Whether to block the logging of skipped files (true) or not (false). Values: true (default), false ignore_no_transfer_files Whether to block the logging of files that were not transferred because they already exist at the destination (true) or not (false). Values: true (default), false HTTP Server Configurations General Syntax This collection of commands configures settings related to the Aspera HTTP server, which enables the HTTP Fallback feature. The syntax for setting HTTP server parameters is the following : # asconfigurator -x "set_http_server_data;parameter,value" Note: Not all available parameters are listed below, only the most commonly used. To view a complete list, run the following command: # /opt/aspera/bin/asuserdata -+
315 Asconfigurator Reference 315 HTTP Server Configurations cert_file The absolute path to an SSL certificate file to use for HTTP Fallback. If left blank the default certificate that came with your transfer server installation will be used. Values: (Absolute path) key_file The absolute path to an SSL key file to use for HTTP Fallback. If left blank the default key file that came with your transfer server installation will be used. Values: (Absolute path) bind_address The network interface on which the HTTP Fallback server listens. The default value allows the HTTP Fallback server to accept transfer requests on all network interfaces. Values: (Network interface address, default ) restartable_transfers Whether interrupted transfers should resume at the point of interruption (true) or not (false). Values: true (default), false session_activity_timeout The amount of time in seconds that the HTTP Fallback server will wait before canceling a transfer session that can't communicate with the client. A value of 0 means the HTTP Fallback server will never timeout due to lack of communication from the client. Values: (Number, default 20]) http_port The port on which the HTTP server listens. Values: (Number , default 8080) https_port The port on which the HTTPS server listens. Values: (Number , default 8443) enable_http Whether HTTP Fallback is enabled for failed UDP transfers to continue over HTTP (true) or not (false). Values: true (default), false enable_https Whether HTTP Fallback is enabled for failed UDP transfers to continue over HTTPS (true) or not (false). Values: true (default), false Database Configurations General Syntax This collection of commands configures settings related to the MySQL database that stores transfer data (for use with Aspera Console before version 3.0). The syntax for setting database parameters is the following: # asconfigurator -x "set_database_data;parameter,value"
316 Asconfigurator Reference 316 Database Configurations server The IP address of the database server (or the IP address of the Aspera Console server). Values: (IP address, default ) port The port that the database server listens on. The default value for an Aspera Console installation is Values: (Number , default 4406) user The user login for the database server. Values: (String) password The password for the database server. Values: (String) database_name The name of the database used to store Aspera transfer data. Values: (String) threads The number of parallel connections used for database logging. Values: (Number, default 1) exit_on_database_error Whether all transfers are stopped on a database error (true) or not (false). Values: false (default), true session_progress Whether transfer status should be logged at a given interval (true) or not (false). Transfer status includes number of files transferred, bytes transferred, among other stats. Values: true (default), false session_progress_interval The frequency at which an Aspera node logs transfer session data, in seconds. Values: (Number , default 1) file_events Whether complete file paths and file names should be logged (true) or not (false). Performance may be impacted when setting this to true for transfers of thousands of files. Values: true (default), false file_progress Whether file status, such as bytes transferred, should be logged (true) or not (false). Values: true (default), false file_progress_interval The frequency with which an Aspera node logs file transfer data, in seconds. Values: (Number , default 1) files_per_session The number of file names to be recorded for any transfer session. For example, if the value is set to 50 the first 50 filenames will be recorded for any session. A setting of 0 logs all filenames. The
317 Asconfigurator Reference 317 session will still record the number of files transferred, and the number of files completed, failed or skipped. Values: (Number, default 0) file_progress_interval The frequency at which an Aspera node logs file transfer data, in seconds. Values: (Number , default 1) ignore_empty_files Whether to block the logging of zero byte files (true) or not (false). Values: false (default), true ignore_skipped_files Whether to block the logging of skipped files (true) or not (false). Values: false (default), true ignore_no_transfer_files Whether to block the logging of files that were not transferred because they already exist at the destination (true) or not (false). Values: false (default), true Server Configurations General Syntax This collection of commands configures settings related to transfer server features such as the Aspera Node API service (asperanoded), Aspera Watch Service, Aspera Watchfolders, and Aspera Proxy. The syntax for setting server parameters is the following: # asconfigurator -x "set_server_data;parameter,value" Note: Not all available parameters are listed below, only the most commonly used. To view a complete list, run the following command: # /opt/aspera/bin/asuserdata -+ Transfer Server server_name The hostname or IP address of this Aspera transfer server. Values: (String) transfers_multi_session_default The default value for the number of sessions in a multi-session transfer. Values: (Number, default 1) transfers_retry_duration The time duration during which transfer retries are attempted. Values: (Time value, default 20m) transfers_retry_all_failures Whether a transfer should be retried after all failures (true) or not (false). If set to false, transfers won't be retried for failured deemed unretryable, such as for permission failures.
318 Asconfigurator Reference 318 Values: false (default), true http_port The HTTP port on which the asperanoded service listens. Values: (Number , default 9091) https_port The HTTPS port on which the asperanoded service listens. Values: (Number , default 9092) enable_http Whether HTTP is enabled for asperanoded on the port configured for http_port (true) or not (false). Values: false (default), true enable_https Whether HTTPS is enabled for asperanoded on the port configured for https_port (true) or not (false). Values: true (default), false cert_file The full path of the SSL certificate file for asperanoded. Values: (Absolute file path) ssh_host_key_fingerprint The SSH key fingerprint used by Aspera clients to determine the server's authenticity. The client confirms a server's authenticity by comparing the server's fingerprint with the trusted fingerprint. Values: (String) ssh_host_key_path The path to the transfer server's public or private key file, from which the fingerprint is extracted automatically. Values: (Absolute file path) ssh_port The port to use for SSH authentication of transfer users. Values: (Number, default 33001) max_response entries The maximum number of items the Node API will return on calls. Values: (Number, default 1000) max_response time_sec The time limit in seconds before an unresponsive Node API response times out. Values: (Number, default 10) db_dir The path to the directory where the redis database file for the Node API is saved. Values: (Absolute path) db_port The port on which the redis database for the Node API listens. Values: (Number, default 31415) activity_logging
319 Asconfigurator Reference 319 Whether transfer logs should be queriable via the Node API (true) or not (false). Values: false (default), true watchd_enabled Whether the Watchfolder (asperawatchd) service is enabled (true) or not (false). Values: false (default), true ssl_ciphers The list of SSL encryption ciphers that the server will allow. Each cipher is separated by a colon (:). See the server documentation for the default list of ciphers. Values: (Colon-delimited list) ssl_protocol The minimum allowed SSL protocol. Higher security protocols are always allowed. tlsv1 (default), tlsv1.1, tlsv1.2 Aspera Proxy proxy_enabled Whether forward proxy is on (true) or off (false). Values: false (default), true proxy_authentication Whether to enable the authentication requirement for the forward proxy server (true) or not (false). Values: false (default), true proxy_bind_ip_address The IP address that the forward proxy server binds to (also the IP address that the client connects to) allows the proxy server to bind to all available interfaces. Values: (IP address, default ) proxy_bind_ip_netmask The netmask that the forward proxy server binds to (also the netmask that the client connects to). Values: (String) proxy_port_range_low The lower bound of the port range for the forward proxy. Values: (Number, default 5000]) proxy_port_range_high The upper bound of the port range for the forward proxy. Values: (Number, default 10000) proxy_cleanup_interval The interval in seconds at which the forward proxy server scans and cleans up expired sessions. Values: (Number, default 0) proxy_keepalive_internal The interval in seconds at which the ascp client sends keep-alive requests. This option is propogated to the client. Values: (Number, default 0) proxy_session_timeout The interval in seconds after which a session times out if no keep-alive updates have been received.
320 Asconfigurator Reference 320 Values: (Number, default 0) rproxy_rules_rule_proxy_port The reverse proxy server port that receives UDP traffic. Values: (Number, default 33001) rproxy_rules_rule_host The IP address and SSH port of the internal destination. If unspecified the default port is 22. Values: (IP address and port) rproxy_rules_rule_hosts The list of IP addresses and SSH ports for the load-balancing feature. The first character is a separator (preferably a " ") which can be used to set multiple hosts. For example: : : :33001 Values: (Character separator)(ip address)[(character separator)(ip address)] rproxy_rules_rule_squash_user The account name used for authenticating with the internal server. Values: (String) rproxy_rules_rule_key_file The path to the SSH private key for authenticating with the internal server. Values: (Absolute path) rproxy_rules_rule_udp_port_reuse Whether the reverse proxy should reuse the UDP port (true) or not (false). Setting this to false enables reverse proxy to create iptables rules that increment the UDP port number that clients connect to, and the internal server's UDP port to which transfers are routed to. Values: true (default), false rproxy_rules_rule_balancing The method for distributing transfers as part of the load balancing feature. Currently roundrobin is the only supported method. Values: round-robin (default) rproxy_enabled Whether reverse proxy is on (true) or off (false). Values: false (default), true rproxy_log_level The level of debug messages to log for reverse proxy. Values: 0 (default), 1, 2 rproxy_log_directory The reverse proxy server log file location. If no value is set, the proxy logs to syslog. Values: (Absolute path) Client Configurations General Syntax Guidelines This collection of commands configures settings related to client transfers, which are transfers you initiate with ascp on the command line or the GUI of your product.
321 Asconfigurator Reference 321 The syntax for setting client parameters is the following: # asconfigurator -x "set_client_data;parameter,value" Note: Not all available parameters are listed below, only the most commonly used. To view a complete list, run the following command: # /opt/aspera/bin/asuserdata -+ Parameters and Values transport_cipher The encryption cipher to use for transfers. Values: aes-128 (default), aes-192, aes-256, none ssl_ciphers The list of SSL encryption ciphers that the server will allow. Each cipher is separated by a colon (:). See the server documentation for the default list of ciphers. Values: (Colon-delimited list) ssl_protocol The minimum allowed SSL protocol. Higher security protocols are always allowed. Values: tlsv1 (default), tlsv1.1, tlsv1.2 default_ssh_key The path to the default SSH key that should be used in command line transfers. Values: (Absolute path)

322 Troubleshooting 322 Troubleshooting Using the Troubleshooter The built-in troubleshooter tool can identify potential problems with your Aspera software configuration that affect the ability of a remote client to connect to your server, as well as verify user account security configurations. 1. Launch the application. 2. Click Help > Troubleshoot. The troubleshooter starts automatically and generates a report in a popup window. Clients Can't Establish Connection The following diagram shows the troubleshooting procedure if clients can't establish a FASP transfer connection to your Enterprise Server. Follow the instructions to identify and resolve problems:

323 Troubleshooting Test SSH ports To verify the SSH connection port, on the client machine, open a Terminal or a Command Prompt, and use the telnet command to test it. For example, to test connection to a computer ( ) through a port (TCP/33001), use this command: # telnet If the client cannot establish connections to your Enterprise Server, verify the port number and the firewall configuration on your Enterprise Server machine. 2. Test UDP ports If you can establish an SSH connection but not a FASP file transfer, there might be a firewall blockage of FASP's UDP port. Please verify your UDP connection. 3. Verify SSH service status If there is no firewall blockage between the client and your Enterprise Server, on the client machine, try establishing a SSH connection in a Terminal or a Command Prompt: (Enterprise Server address: , TCP/33001) # ssh aspera_user_1@ p If the SSH service runs normally, the client should see a message prompting to continue the connection or for a password. However, if you see a "Connection Refused" message, which indicates that the SSH service isn't running, review your SSH service status. Ignore the "permission denied" message after entering the password, which is discussed in next steps. 4. Applied authentication method is enabled in SSH If you can establish a SSH connection, but it returns "permission denied" message, the SSH Server on your Enterprise Server may have password authentication disabled: Permission denied (publickey,keyboard-interactive). Open your SSH Server configuration file with a text editor: /etc/ssh/sshd_config To allow public key authentication, add or uncomment the PubkeyAuthentication yes. To allow password authentication, add or uncomment PasswordAuthentication yes. Here is a configuration example:...
324 Troubleshooting 324 PubkeyAuthentication yes PasswordAuthentication yes... To reload SSH service, execute the following command: OS Version RedHat Debian Instructions $ sudo service sshd restart $ sudo /etc/init.d/ssh restart 5. Verify that the user credentials are correct, and has sufficient access permissions to its docroot To make sure that the client can establish a SSH connection to your Enterprise Server, and has correct system user credentials, use this command on the client machine: (Connect Server address: , login: aspera_user_1/ aspera) $ ssh aspera_user_1@ p aspera_user_1@ 's password: Enter the user's password when prompted. If you see "Permission denied" message, you may have a wrong user credentials, or the user has docroot configured and doesn't have sufficient access permissions to access it. Refer to Setting Up Users or Setting Up Transfer Users (Terminal) for instructions about setting up the user account, and review the user's docroot directory's permissions. If you still encounter connection problems after going through these steps, contact Technical Support. Error: Session Timeout During Ascp Transfers If you attempt an ascp transfer over a network with high latency or to/from storage with slow read/write, you may receive a message similar to the following: ERR Failed to receive Close Session, read timed out (errno=110) timeout:120, rsize=0 To increase the timeout, follow these steps: 1. Run the following asconfigurator command: # asconfigurator -x "set_node_data;session_timeout_sec,time" where time is the desired time in seconds before timeout. This creates the following text in aspera.conf: <default> <session_timeout_sec>time</session_timeout_sec> </default> 2. Alternatively, manually edit aspera.conf. You can find the aspera.conf configuration file at: /opt/aspera/etc/aspera.conf
325 Troubleshooting 325 Logs Overwritten Before Transfer Completes The logs of long transfers of many (millions) of files may be overwritten before the session completes, potentially deleting useful troubleshooting information if an error or failure occurs. To avoid this problem, set the log size to a larger value (default is 10 MB). To set the log size (in units of MB), open the aspera.conf file in a text editor run with administrator privileges: /opt/aspera/etc/aspera.conf Add the following lines to the <default> section:... <default> <file_system>...</file_system> <logging> <log_size>size</log_size> </logging> </default>... Save your changes. Validate your changes after editing aspera.conf by running the following command: # /opt/aspera/bin/asuserdata -v Disabling SELinux SELinux (Security-Enhanced Linux), an access control implementation, can affect web UI access. To disable SELinux, do the following: 1. Open the SELinux configuration file: /etc/selinux/config 2. Locate the following line: SELINUX=enforcing 3. Change the value to disabled: SELINUX=disabled Save your changes. 4. On the next reboot, SELinux is permanently disabled. To dynamically disable it before the reboot, run the following command: # setenforce 0
326 Appendix 326 Appendix Restarting Aspera Services Aspera Central If Aspera Central is stopped, or if you have modified the <central_server> or <database> sections in aspera.conf, then you need to restart the service. Run the following command in a Terminal window to restart asperacentral: # /etc/init.d/asperacentral restart Aspera NodeD Restart Aspera NodeD if you have modified any setting in aspera.conf. Run the following commands to restart asperanoded: # /etc/init.d/asperanoded restart Aspera HTTPD Restart Aspera HTTPD if you have modified any setting in aspera.conf. Run the following commands to restart asperahttpd: # /etc/init.d/asperahttpd restart Testing and Optimizing Transfer Performance To verify that your system's FASP transfer is reaching the target rate and can use the maximum bandwidth capacity, prepare a client machine to connect to this server. For these tests, you can transfer an existing file or file set, or you can transfer uninitialized data in place of a source file, which you can have destroyed at the destination, eliminating the need to read from or write to disk and saving disk space. To send random data in place of a source file, run the following command: # ascp --mode=send --user=username --host=host_ip_address faux:///fname?fsize target_path where fname is the name assigned to the file on the destination and fsize is the number of bytes to send. fsize can be set with modifiers (k/k, m/m, g/g, t/t, p/p, or e/e) up to 9 EB. To send a file but not save the results to disk at the destination, run the following command: # ascp --mode=send --user=username --host=host_ip_address source_file1 faux:// To send random data and not save the results to disk, run the following command: # ascp --mode=send --user=username --host=host_ip_address faux:///fname?fsize faux:// For usage examples, see Ascp General Examples. Once you start a transfer from the command line, you can monitor it from the GUI. 1. Start a transfer with Fair transfer policy and compare the transfer rate to the target rate.


327 Appendix 327 On the client machine, open the user interface and start a transfer (either from the GUI or command line). Click Details to open the Transfer Monitor. To leave more network resources for other high-priority traffic, use the Fair policy and adjust the target rate and minimum rate by sliding the arrows or entering values. 2. Test the maximum bandwidth. Note: This test will typically occupy a majority of the network's bandwidth. Aspera recommends performing it on a dedicated file transfer line or during a time of very low network activity. Use Fixed policy for the maximum transfer speed. Start with a lower transfer rate and increase gradually toward the network bandwidth. To improve the transfer speed, you may also upgrade the related hardware components: Component Description Hard disk The I/O throughput, the disk bus architecture (e.g. RAID, IDE, SCSI, ATA, and Fiber Channel). Network I/O The interface card, the internal bus of the computer. CPU Overall CPU performance affects the transfer, especially when encryption is enabled. Log Files The application log file includes detailed transfer information and can be useful for review and support requests. You can redirect Aspera logging so that it is not recorded in the system log file and configure log rotation.


328 Appendix 328 Viewing Logs and Setting Log Preferences To view the log, from the GUI, click Tools > View Log. Note: To view logs from the command line in Linux, you must have a functional web-browser or other default application for opening HTML files. To set the logging level for transfers, open the My Preferences dialog by clicking Tools > Preferences or by clicking Preferences in the upper-right corner of the application window. The five logging levels to select from are: Off, Error, Warn, Info, and Debug. The system default is Info. Redirecting Aspera Logging to a Different Location On Linux systems, the application transfer logs are recorded in the system log file. Instead of mixing Aspera logging with system logging, you may want to redirect Aspera logging to a separate log file of your choice. RedHat, CentOS, and Debian On RedHat, CentOS, and Debian, the transfer logs are recorded in the following log file: /var/log/messages
Aspera Enterprise Server Admin Guide 3.7.3
 Aspera Enterprise Server Admin Guide 3.7.3 Linux Revision: 1220 Generated: 05/30/2018 12:47 Contents ii Contents Introduction... 7 Standard Installation...7 Requirements...7 Before Upgrading or Downgrading...8
Enterprise Server Admin Guide
 Enterprise Server Admin Guide Mac OS X Revision:1222 Generated:03/29/2019 12:00 Contents ii Contents Introduction... 6 Standard Installation...6 Requirements...6 Before Upgrading or Downgrading...7 Product
Aspera Enterprise Server Admin Guide 3.6.1
 Aspera Enterprise Server Admin Guide 3.6.1 Linux Revision: 3.6.1.126952 Generated: 06/20/2016 14:00 Contents 2 Contents Introduction... 5 Standard Installation...6 Requirements...6 Before Upgrading...6
IBM Aspera Point-to-Point Client 3.5.6
 IBM Aspera Point-to-Point Client 3.5.6 RedHat 6-7, CentOS 6-7, Fedora 16-20, Ubuntu 12-14, Debian 6-7, SLES 11-12 Revision: 3.5.6.109849 Generated: 08/01/2015 13:47 Contents 2 Contents Introduction...
Aspera Enterprise Server Admin Guide 3.7.3
 Aspera Enterprise Server Admin Guide 3.7.3 AIX Revision: 151192 Generated: 12/01/2017 15:34 Contents 2 Contents Introduction... 5 Standard Installation...6 Requirements...6 Before Upgrading or Downgrading...6
Aspera Connect Server Admin Guide 3.7.4
 Aspera Connect Server Admin Guide 3.7.4 Linux Revision: 149918 Generated: 11/01/2017 10:53 Contents 2 Contents Introduction... 8 What's New?...11 Get Started with an Aspera Transfer Server...13 Get Started
Aspera Point-to-Point Client Admin Guide 3.7.3
 Aspera Point-to-Point Client Admin Guide 3.7.3 Solaris Revision: 1220 Generated: 05/30/2018 12:32 Contents ii Contents Introduction... 5 Standard Installation...5 Requirements...5 Before Upgrading or Downgrading...6
Aspera Connect Server Admin Guide 3.6.0
 Aspera Connect Server Admin Guide 3.6.0 Windows Revision: 3.6.0.124980 Generated: 05/13/2016 19:23 Contents 2 Contents Introduction... 5 Standard Installation...6 Requirements...6 Before Upgrading...6
IBM Aspera Connect Server 3.5.4
 IBM Aspera Connect Server 3.5.4 RedHat 6 & 7, CentOS 6 & 7, Fedora 16-20, Ubuntu 12-14, Debian 6 & 7, SLES 11, 12 Revision: 3.5.4.99710 Generated: 02/04/2015 17:09 Contents 2 Contents Introduction... 5
Aspera Connect Windows XP, 2003, Vista, 2008, 7. Document Version: 1
 Aspera Connect 2.6.3 Windows XP, 2003, Vista, 2008, 7 Document Version: 1 2 Contents Contents Introduction... 3 Setting Up... 4 Upgrading from a Previous Version...4 Installation... 4 Set Up Network Environment...
IBM Aspera Application On Demand / Server On Demand (APOD / SOD) 3.7.3
 3.7.3") IBM Aspera Application On Demand / Server On Demand (APOD / SOD) 3.7.3 Amazon Web Services Revision: 3.7.3.147217 Generated: 08/23/2017 14:21 Contents 2 Contents Welcome to IBM Aspera Application Platform
IBM Aspera Application On Demand / Server On Demand (APOD / SOD) 3.7.3 Amazon Web Services Revision: 3.7.3.147217 Generated: 08/23/2017 14:21 Contents 2 Contents Welcome to IBM Aspera Application Platform
Aspera Connect Mac: OS X 10.6, 10.7, 10.8, Revision: Generated: 11/11/ :29
 Aspera Connect 3.5.2 Mac: OS X 10.6, 10.7, 10.8, 10.9. 10.10 Revision: 3.5.2.95905 Generated: 11/11/2014 17:29 Contents 2 Contents Introduction... 3 System Requirements... 4 Setting up Connect... 5 Part
Aspera Connect User Guide 3.7.0
 Aspera Connect User Guide 3.7.0 Mac OS X Revision: 3.7.0.138343 Generated: 01/19/2017 13:37 Contents 2 Contents Introduction... 3 System Requirements... 4 Setting Up Connect...5 Part 1: Installation...5
IBM Aspera Connect Server 3.5.6
 IBM Aspera Connect Server 3.5.6 Isilon IQ OneFS 7.0+ Revision: 3.5.6.112366 Generated: 10/01/2015 23:54 Contents 2 Contents Introduction... 4 Standard Installation...5 Requirements...5 Upgrade Existing
Aspera Connect User Guide
 Aspera Connect User Guide Mac OS X 10.4/10.5 Version 2.0 Chapter 1 Chapter 2 Introduction Setting Up 2.0 Upgrade from a Previous Version 2.1 Network Requirements 2.2 Installation 2.3 Preferences Chapter
IBM Aspera Connect User Guide 3.8.0
 IBM Aspera Connect User Guide 3.8.0 Windows Revision: 255 Generated: 06/11/2018 12:25 Contents Introduction... 3 Setting Up Connect...3 Installation...3 Network Environment...4 Basic Configuration... 7
VMware Identity Manager Connector Installation and Configuration (Legacy Mode)
") VMware Identity Manager Connector Installation and Configuration (Legacy Mode) VMware Identity Manager This document supports the version of each product listed and supports all subsequent versions until
VMware Identity Manager Connector Installation and Configuration (Legacy Mode) VMware Identity Manager This document supports the version of each product listed and supports all subsequent versions until
Aspera Connect User Guide 3.6.5
 Aspera Connect User Guide 3.6.5 Windows Revision: 3.6.5.119268 Generated: 02/05/2016 15:21 Contents 2 Contents Introduction... 3 System Requirements... 4 Setting Up Connect...5 Part 1: Installation...5
IBM Aspera Direct-to- Cloud Storage
 IBM Aspera Direct-to- Cloud Storage A technical whitepaper on the state-of-the art in high-speed transport direct-to-cloud storage and support for third-party cloud storage platforms Contents: 1 Overview
File Protection using rsync. User guide
 File Protection using rsync User guide Contents 1. Introduction... 2 Documentation... 2 Licensing... 2 Overview... 2 2. Rsync considerations... 3 3. Creating a File Protection backup using rsync... 4 4.
The Balabit s Privileged Session Management 5 F5 Azure Reference Guide
 The Balabit s Privileged Session Management 5 F5 Azure Reference Guide March 12, 2018 Abstract Administrator Guide for Balabit s Privileged Session Management (PSM) Copyright 1996-2018 Balabit, a One Identity
PCoIP Connection Manager for Amazon WorkSpaces
 PCoIP Connection Manager for Amazon WorkSpaces Version 1.0.7 Administrators' Guide TER1408002-1.0.7 Introduction Amazon WorkSpaces is a fully managed cloud-based desktop service that enables end users
Aspera Connect User Guide 3.7.4
 Aspera Connect User Guide 3.7.4 Windows Revision: 3.7.4.147599 Generated: 08/30/2017 18:35 Contents 2 Contents Introduction... 3 System Requirements... 4 Setting Up Connect...5 Part 1: Installation...5
Installing and Configuring VMware Identity Manager Connector (Windows) OCT 2018 VMware Identity Manager VMware Identity Manager 3.
 OCT 2018 VMware Identity Manager VMware Identity Manager 3.") Installing and Configuring VMware Identity Manager Connector 2018.8.1.0 (Windows) OCT 2018 VMware Identity Manager VMware Identity Manager 3.3 You can find the most up-to-date technical documentation on
Installing and Configuring VMware Identity Manager Connector 2018.8.1.0 (Windows) OCT 2018 VMware Identity Manager VMware Identity Manager 3.3 You can find the most up-to-date technical documentation on
KYOCERA Net Admin User Guide
 KYOCERA Net Admin User Guide Legal Notes Unauthorized reproduction of all or part of this guide is prohibited. The information in this guide is subject to change without notice. We cannot be held liable
Zmanda Cloud Backup FAQ
 Zmanda Cloud Backup 2.0.1 FAQ The first sections of this document cover general questions regarding features, cloud, and support; the last section lists error messages and what to do about them. Terminology
Workspace ONE UEM Certificate Authentication for EAS with ADCS. VMware Workspace ONE UEM 1902
 Workspace ONE UEM Certificate Authentication for EAS with ADCS VMware Workspace ONE UEM 1902 You can find the most up-to-date technical documentation on the VMware website at: https://docs.vmware.com/
SpaceShuttle User guide v3
 SpaceShuttle User guide v3 1.Get Started with SpaceShuttle p2 1.1 For Windows p2 How to download and install Aspera Connect p2 1.2 For Mac p4 How to download and install Aspera Connect p4 2. Accessing
DataMan. version 6.5.4
 DataMan version 6.5.4 Contents DataMan User Guide 1 Introduction 1 DataMan 1 Technical Specifications 1 Hardware Requirements 1 Software Requirements 2 Ports 2 DataMan Installation 2 Component Installation
Privileged Identity App Launcher and Session Recording
 Privileged Identity App Launcher and Session Recording 2018 Bomgar Corporation. All rights reserved worldwide. BOMGAR and the BOMGAR logo are trademarks of Bomgar Corporation; other trademarks shown are
BlackBerry Enterprise Server for Microsoft Office 365. Version: 1.0. Administration Guide
 BlackBerry Enterprise Server for Microsoft Office 365 Version: 1.0 Administration Guide Published: 2013-01-29 SWD-20130131125552322 Contents 1 Related resources... 18 2 About BlackBerry Enterprise Server
Configuration Guide. BlackBerry UEM. Version 12.9
 Configuration Guide BlackBerry UEM Version 12.9 Published: 2018-07-16 SWD-20180713083904821 Contents About this guide... 8 Getting started... 9 Configuring BlackBerry UEM for the first time...9 Configuration
Release Notes Release (December 4, 2017)... 4 Release (November 27, 2017)... 5 Release
... 4 Release (November 27, 2017)... 5 Release") Release Notes Release 2.1.4. 201712031143 (December 4, 2017)... 4 Release 2.1.4. 201711260843 (November 27, 2017)... 5 Release 2.1.4. 201711190811 (November 20, 2017)... 6 Release 2.1.4. 201711121228 (November
Release Notes Release 2.1.4. 201712031143 (December 4, 2017)... 4 Release 2.1.4. 201711260843 (November 27, 2017)... 5 Release 2.1.4. 201711190811 (November 20, 2017)... 6 Release 2.1.4. 201711121228 (November
IBM Aspera Direct-to-Cloud Storage
 IBM Aspera Direct-to-Cloud Storage A on the State-of-the Art in High Speed Transport Direct-to-Cloud Storage and Support for Third Party Cloud Storage Platforms Contents: 1 Overview 2 The problem 3 A fundamental
HP OO 10.x Network Architecture
 Technical white paper HP OO 10.x Network Architecture Table of Contents Overview 2 Advancing to a Scalable Model 2 The Old Model 2 The New Model 3 Configuring the New Model 4 Firewall Configuration 4 Worker
StreamSets Control Hub Installation Guide
 StreamSets Control Hub Installation Guide Version 3.2.1 2018, StreamSets, Inc. All rights reserved. Table of Contents 2 Table of Contents Chapter 1: What's New...1 What's New in 3.2.1... 2 What's New in
Dell Repository Manager Business Client Version 2.1 User s Guide
 Dell Repository Manager Business Client Version 2.1 User s Guide Notes, cautions, and warnings NOTE: A NOTE indicates important information that helps you make better use of your computer. CAUTION: A CAUTION
Configuration Guide. BlackBerry UEM Cloud
 Configuration Guide BlackBerry UEM Cloud Published: 2018-04-18 SWD-20180411125526296 Contents About this guide... 7 Getting started... 8 Configuring BlackBerry UEM Cloud for the first time... 8 Administrator
VIRTUAL GPU LICENSE SERVER VERSION , , AND 5.1.0
 VIRTUAL GPU LICENSE SERVER VERSION 2018.10, 2018.06, AND 5.1.0 DU-07754-001 _v7.0 through 7.2 March 2019 User Guide TABLE OF CONTENTS Chapter 1. Introduction to the NVIDIA vgpu Software License Server...
BlackBerry UEM Configuration Guide
 BlackBerry UEM Configuration Guide 12.9 2018-11-05Z 2 Contents Getting started... 7 Configuring BlackBerry UEM for the first time... 7 Configuration tasks for managing BlackBerry OS devices... 9 Administrator
Using the VMware vcenter Orchestrator Client. vrealize Orchestrator 5.5.1
 Using the VMware vcenter Orchestrator Client vrealize Orchestrator 5.5.1 You can find the most up-to-date technical documentation on the VMware website at: https://docs.vmware.com/ If you have comments
VMware Identity Manager Cloud Deployment. Modified on 01 OCT 2017 VMware Identity Manager
 VMware Identity Manager Cloud Deployment Modified on 01 OCT 2017 VMware Identity Manager You can find the most up-to-date technical documentation on the VMware Web site at: https://docs.vmware.com/ The
Veriato Recon / 360. Version 9.0.3
 Veriato Recon / 360 Version 9.0.3 1/3/2018 Upgrade Guide January 3, 2018 Table of Contents Before You Begin... 1 What's New... 1 How the System Works... 1 Upgrade Support... 6 Update Antivirus Exclusions...
Aspera Direct-to-Cloud Storage WHITE PAPER
 Transport Direct-to-Cloud Storage and Support for Third Party June 2017 WHITE PAPER TABLE OF CONTENTS OVERVIEW 3 1 - THE PROBLEM 3 2 - A FUNDAMENTAL SOLUTION - ASPERA DIRECT-TO-CLOUD TRANSPORT 5 3 - T
vcloud Director User's Guide
 vcloud Director 8.0 This document supports the version of each product listed and supports all subsequent versions until the document is replaced by a new edition. To check for more recent editions of
OPC UA Configuration Manager PTC Inc. All Rights Reserved.
 2017 PTC Inc. All Rights Reserved. 2 Table of Contents 1 Table of Contents 2 4 Overview 4 5 Project Properties - OPC UA 5 Server Endpoints 7 Trusted Clients 9 Discovery Servers 10 Trusted Servers 11 Instance
Configuring SAP Targets and Runtime Users
 CHAPTER 4 Before you can create or run processes in your SAP environment, you must create the targets on which the processes will run. Targets are used to define specific environments where activities,
NGFW Security Management Center
 NGFW Security Management Center Release Notes 6.4.4 Revision A Contents About this release on page 2 System requirements on page 2 Build version on page 3 Compatibility on page 5 New features on page 5
Storage Manager 2018 R1. Installation Guide
 Storage Manager 2018 R1 Installation Guide Notes, Cautions, and Warnings NOTE: A NOTE indicates important information that helps you make better use of your product. CAUTION: A CAUTION indicates either
EasyMorph Server Administrator Guide
 EasyMorph Server Administrator Guide Version 3.9.2 December, 24 th 2018 Table of Contents TABLE OF CONTENTS... 1 PREREQUISITES... 2 Memory requirements... 2 INSTALLATION... 2 License key... 3 SERVER SERVICE
Installing SmartSense on HDP
 1 Installing SmartSense on HDP Date of Publish: 2018-07-12 http://docs.hortonworks.com Contents SmartSense installation... 3 SmartSense system requirements... 3 Operating system, JDK, and browser requirements...3
BIG-IP Access Policy Manager : Portal Access. Version 13.0
 BIG-IP Access Policy Manager : Portal Access Version 13.0 Table of Contents Table of Contents Overview of Portal Access...7 Overview: What is portal access?...7 About portal access configuration elements...
IBM Hyper-Scale Manager as an Application Version 1.7. User Guide GC
 IBM Hyper-Scale Manager as an Application Version 1.7 User Guide GC27-5984-03 Note Before using this information and the product it supports, read the information in Notices on page 35. Management Tools
VMware Identity Manager Cloud Deployment. DEC 2017 VMware AirWatch 9.2 VMware Identity Manager
 VMware Identity Manager Cloud Deployment DEC 2017 VMware AirWatch 9.2 VMware Identity Manager You can find the most up-to-date technical documentation on the VMware website at: https://docs.vmware.com/
Link Platform Manual. Version 5.0 Release Jan 2017
 Version 5.0 Release 4.1.1 Jan 2017 Link Platform Manual Copyright 2017 NetLinkz. All Rights Reserved. No part of this publication may be reproduced, transmitted, transcribed, stored in a retrieval system,
Version Installation Guide. 1 Bocada Installation Guide
 Version 19.4 Installation Guide 1 Bocada Installation Guide Copyright 2019 Bocada LLC. All Rights Reserved. Bocada and BackupReport are registered trademarks of Bocada LLC. Vision, Prism, vpconnect, and
User Manual. SSV Remote Access Gateway. Web ConfigTool
 SSV Remote Access Gateway Web ConfigTool User Manual SSV Software Systems GmbH Dünenweg 5 D-30419 Hannover Phone: +49 (0)511/40 000-0 Fax: +49 (0)511/40 000-40 E-mail: sales@ssv-embedded.de Document Revision:
Configuration Manager
 CHAPTER 7 This chapter describes how to perform routine Cisco VXC Manager configuration management tasks using the Administrator Console. It provides information on managing the configuration settings
Scribe Insight Installation Guide. Version August 10, 2011
 Scribe Insight Installation Guide Version 7.0.2 August 10, 2011 www.scribesoft.com Important Notice No part of this publication may be reproduced, stored in a retrieval system, or transmitted in any form
Getting Started and System Guide. Version
 Version 1.0.29 2016 Waterford Technologies. All Rights Reserved. Information in this document is subject to change without notice. No part of this document may be reproduced or transmitted in any form
Configuration Guide. BlackBerry UEM. Version 12.7 Maintenance Release 2
 Configuration Guide BlackBerry UEM Version 12.7 Maintenance Release 2 Published: 2017-12-04 SWD-20171130134721747 Contents About this guide... 8 Getting started... 9 Configuring BlackBerry UEM for the
Bitnami Coppermine for Huawei Enterprise Cloud
 Bitnami Coppermine for Huawei Enterprise Cloud Description Coppermine is a multi-purpose, full-featured web picture gallery. It includes user management, private galleries, automatic thumbnail creation,
NGFW Security Management Center
 NGFW Security Management Center Release Notes 6.4.0 Revision B Contents About this release on page 2 System requirements on page 2 Build version on page 3 Compatibility on page 4 New features on page 5
The SSL device also supports the 64-bit Internet Explorer with new ActiveX loaders for Assessment, Abolishment, and the Access Client.
 WatchGuard SSL v3.2 Update 2 Release Notes Supported Devices SSL 100 and 560 WatchGuard SSL OS Build 452330 Revision Date 11 November 2014 Introduction WatchGuard is pleased to announce the release of
Remote Support 19.1 Web Rep Console
 Remote Support 19.1 Web Rep Console 2003-2019 BeyondTrust Corporation. All Rights Reserved. BEYONDTRUST, its logo, and JUMP are trademarks of BeyondTrust Corporation. Other trademarks are the property
APAR PO06620 Installation Instructions
 IBM Corporation APAR PO06620 Installation Instructions IBM Counter Fraud Management 1.5.0.5 IBM Counter Fraud Development 3-31-2017 Table of Contents 1 Fix readme... 1 2 Abstract... 1 3 Contents... 1 4
Dell Repository Manager Business Client Version 2.0 User s Guide
 Dell Repository Manager Business Client Version 2.0 User s Guide Notes, Cautions, and Warnings NOTE: A NOTE indicates important information that helps you make better use of your computer. CAUTION: A CAUTION
IBM Hyper-Scale Manager as an Application Version 1.8. User Guide IBM GC
 IBM Hyper-Scale Manager as an Application Version 1.8 User Guide IBM GC27-5984-04 Note Before using this information and the product it supports, read the information in Notices on page 37. Management
Copyright 2017 Softerra, Ltd. All rights reserved
 Copyright 2017 Softerra, Ltd. All rights reserved Contents Introduction Security Considerations Installation Configuration Uninstallation Automated Bulk Enrollment Troubleshooting Introduction Adaxes Self-Service
Cloud Computing /AWS Course Content
 Cloud Computing /AWS Course Content 1. Amazon VPC What is Amazon VPC? How to Get Started with Amazon VPC Create New VPC Launch an instance (Server) to use this VPC Security in Your VPC Networking in Your
HP Management Integration Framework 1.7
 HP Management Integration Framework 1.7 Administrator Guide Abstract This document describes the use of HP Management Integration Framework interfaces and is intended for administrators involved in the
BIG-IP Access Policy Manager : Portal Access. Version 12.1
 BIG-IP Access Policy Manager : Portal Access Version 12.1 Table of Contents Table of Contents Overview of Portal Access...7 Overview: What is portal access?...7 About portal access configuration elements...7
Apptix Online Backup by Mozy User Guide
 Apptix Online Backup by Mozy User Guide 1.10.1.2 Contents Chapter 1: Overview...5 Chapter 2: Installing Apptix Online Backup by Mozy...7 Downloading the Apptix Online Backup by Mozy Client...7 Installing
VII. Corente Services SSL Client
 VII. Corente Services SSL Client Corente Release 9.1 Manual 9.1.1 Copyright 2014, Oracle and/or its affiliates. All rights reserved. Table of Contents Preface... 5 I. Introduction... 6 Chapter 1. Requirements...
Setting up a Chaincoin Masternode
 Setting up a Chaincoin Masternode Introduction So you want to set up your own Chaincoin Masternode? You ve come to the right place! These instructions are correct as of April, 2017, and relate to version
Logging. About Logging. This chapter describes how to log system messages and use them for troubleshooting.
 This chapter describes how to log system messages and use them for troubleshooting. About, page 1 Guidelines for, page 7 Configure, page 8 Monitoring the Logs, page 26 History for, page 29 About System
CPM. Quick Start Guide V2.4.0
 CPM Quick Start Guide V2.4.0 1 Content 1 Introduction... 3 Launching the instance... 3 CloudFormation... 3 CPM Server Instance Connectivity... 3 2 CPM Server Instance Configuration... 4 CPM Server Configuration...
Legal Notes. Regarding Trademarks KYOCERA MITA Corporation
 Legal Notes Unauthorized reproduction of all or part of this guide is prohibited. The information in this guide is subject to change without notice. We cannot be held liable for any problems arising from
IBM XIV Storage System IBM Hyper-Scale Manager Installation as application Version 1.4. User Guide GC
 IBM XIV Storage System IBM Hyper-Scale Manager Installation as application Version 1.4 User Guide GC27-5984-00 Note Before using this information and the product it supports, read the information in Notices
Deploying VMware Identity Manager in the DMZ. JULY 2018 VMware Identity Manager 3.2
 Deploying VMware Identity Manager in the DMZ JULY 2018 VMware Identity Manager 3.2 You can find the most up-to-date technical documentation on the VMware website at: https://docs.vmware.com/ If you have
Bitnami ProcessMaker Community Edition for Huawei Enterprise Cloud
 Bitnami ProcessMaker Community Edition for Huawei Enterprise Cloud Description ProcessMaker is an easy-to-use, open source workflow automation and Business Process Management platform, designed so Business
Policy Manager for IBM WebSphere DataPower 7.2: Configuration Guide
 Policy Manager for IBM WebSphere DataPower 7.2: Configuration Guide Policy Manager for IBM WebSphere DataPower Configuration Guide SOAPMDP_Config_7.2.0 Copyright Copyright 2015 SOA Software, Inc. All rights
Installing Cisco MSE in a VMware Virtual Machine
 Installing Cisco MSE in a VMware Virtual Machine This chapter describes how to install and deploy a Cisco Mobility Services Engine (MSE) virtual appliance. Cisco MSE is a prebuilt software solution that
NGFW Security Management Center
 NGFW Security Management Center Release Notes 6.4.3 Revision A Contents About this release on page 2 System requirements on page 2 Build version on page 3 Compatibility on page 4 New features on page 5
GRS Enterprise Synchronization Tool
 GRS Enterprise Synchronization Tool Last Revised: Thursday, April 05, 2018 Page i TABLE OF CONTENTS Anchor End User Guide... Error! Bookmark not defined. Last Revised: Monday, March 12, 2018... 1 Table
Xcalar Installation Guide
 Xcalar Installation Guide Publication date: 2018-03-16 www.xcalar.com Copyright 2018 Xcalar, Inc. All rights reserved. Table of Contents Xcalar installation overview 5 Audience 5 Overview of the Xcalar
ForeScout Extended Module for Tenable Vulnerability Management
 ForeScout Extended Module for Tenable Vulnerability Management Version 2.7.1 Table of Contents About Tenable Vulnerability Management Module... 4 Compatible Tenable Vulnerability Products... 4 About Support
VMware AirWatch Content Gateway for Linux. VMware Workspace ONE UEM 1811 Unified Access Gateway
 VMware AirWatch Content Gateway for Linux VMware Workspace ONE UEM 1811 Unified Access Gateway You can find the most up-to-date technical documentation on the VMware website at: https://docs.vmware.com/
Using the VMware vrealize Orchestrator Client
 Using the VMware vrealize Orchestrator Client vrealize Orchestrator 7.0 This document supports the version of each product listed and supports all subsequent versions until the document is replaced by
ForeScout Extended Module for VMware AirWatch MDM
 ForeScout Extended Module for VMware AirWatch MDM Version 1.7.2 Table of Contents About the AirWatch MDM Integration... 4 Additional AirWatch Documentation... 4 About this Module... 4 How it Works... 5
Dell Storage Manager 2016 R3 Installation Guide
 Dell Storage Manager 2016 R3 Installation Guide Notes, Cautions, and Warnings NOTE: A NOTE indicates important information that helps you make better use of your product. CAUTION: A CAUTION indicates either
Cisco Threat Intelligence Director (TID)
") The topics in this chapter describe how to configure and use TID in the Firepower System. Overview, page 1 Using TID Sources to Ingest Feed Data, page 6 Using Access Control to Publish TID Data and Generate
The topics in this chapter describe how to configure and use TID in the Firepower System. Overview, page 1 Using TID Sources to Ingest Feed Data, page 6 Using Access Control to Publish TID Data and Generate
Bomgar Vault Server Installation Guide
 Bomgar Vault 17.2.1 Server Installation Guide 2017 Bomgar Corporation. All rights reserved worldwide. BOMGAR and the BOMGAR logo are trademarks of Bomgar Corporation; other trademarks shown are the property
BACKUP APP V7 CLOUUD FILE BACKUP & RESTORE GUIDE FOR WINDOWS
 V7 CLOUUD FILE BACKUP & RESTORE GUIDE FOR WINDOWS Table of Contents 1 Overview... 1 1.1 About This Document... 7 2 Preparing for Backup and Restore... 8 2.1 Hardware Requirement... 8 2.2 Software Requirement...
Managing External Identity Sources
 CHAPTER 5 The Cisco Identity Services Engine (Cisco ISE) integrates with external identity sources to validate credentials in user authentication functions, and to retrieve group information and other
vcloud Director User's Guide
 vcloud Director 5.6 This document supports the version of each product listed and supports all subsequent versions until the document is replaced by a new edition. To check for more recent editions of
Privileged Access Administrative Interface 17.1
 Privileged Access Administrative Interface 17.1 2017 Bomgar Corporation. All rights reserved worldwide. BOMGAR and the BOMGAR logo are trademarks of Bomgar Corporation; other trademarks shown are the property
USER GUIDE. CTERA Agent for Windows. June 2016 Version 5.5
 USER GUIDE CTERA Agent for Windows June 2016 Version 5.5 Copyright 2009-2016 CTERA Networks Ltd. All rights reserved. No part of this document may be reproduced in any form or by any means without written
User Guide. Version R94. English
 AuthAnvil User Guide Version R94 English March 8, 2017 Copyright Agreement The purchase and use of all Software and Services is subject to the Agreement as defined in Kaseya s Click-Accept EULATOS as updated
ZENworks Service Desk 8.0 Using ZENworks with ZENworks Service Desk. November 2018
 ZENworks Service Desk 8.0 Using ZENworks with ZENworks Service Desk November 2018 Legal Notices For information about legal notices, trademarks, disclaimers, warranties, export and other use restrictions,