Table of Contents. Concepts
|
|
|
- Amberlynn Hancock
- 6 years ago
- Views:
Transcription
1 Table of Contents Git Repositories Overview Learn about Git Quickstarts Create repo - Web Create repo - CLI Create repo - Visual Studio Create repo - IntelliJ Create repo - Xcode Create repo - Eclipse Import repo - Web Tutorials Commit, share, and sync your code Create a new repo Clone an existing repo Save work with commits Create work in branches Share code with push Update code with fetch and pull Review code with pull requests Apply changes with rebase Copy changes with cherry-pick Resolve merge conflicts Undo changes Ignore files Review history Samples VSTS Samples for.net Concepts
2 History in Git History simplification Branch organization Pull requests Review code with pull requests Squash merge pull requests Forks Authentication Understand dates in Git Understand names in Git Git preferences and settings Scale Manage large files How-to Guides Authenticate with SSH Authenticate with the Git Credential Manager Create a pull request status server Use Azure Functions to create custom branch policies Configure branch policy for an external service Drive Git development from a work item Import a repo from TFVC Manage repos Delete a repo Rename a repo Find a file Create a readme Git and TFVC repos Manage branches Manage your branches Create a new branch Delete a branch Restore a deleted branch
3 Require branch folders Lock a branch Branch policies Branch permissions Map TFVC actions to Git Set up continuous integration Reference Command reference Format comments with markdown Frequently asked questions History Commit history Commit details Resources What is Git? What is version control? Plan your migration to Git Migrate from TFVC to Git Git REST APIs Learn Git Git at Scale Marketplace extensions IDE integration and extension Visual Studio Visual Studio Code Eclipse IntelliJ IDEA
4 Use Git repositories to host and collaborate on your code using Visual Studio Team Services (VSTS) or Team Foundation Server (TFS). 5-Minute Quickstarts Get started by creating a repo, uploading your code, and inviting developers to work in the repo. You can use any one of these clients or IDEs: Web Visual Studio Command-line Xcode Eclipse IntelliJ Or, you can import an existing repo from GitHub, Bitbucket, GitLab, or other location to a new, empty repo. Step-by-Step Tutorials Learn the basics of working in Git with these tutorials which show tasks performed using Visual Studio or the command line. Clone an existing repo Save work with commits Create work in branches Share code with push Update code with fetch and pull Review code with pull requests Review history Concepts Authentication History in Git Branch organization Forks Reference Format comments with markdown Command reference Frequently asked questions Resources What is Git? What is version control? Plan your migration to Git Migrate from TFVC to Git Git at Scale Marketplace extensions

5 Git and VSTS 10/25/ min to read Edit Online VSTS TFS 2018 TFS 2017 TFS 2015 VS 2017 VS 2015 Host and manage your code in Git version control with VSTS and Team Foundation Server. Use version control to save your work and coordinate code changes across your team. Even if you're just a single developer, version control helps you stay organized as you fix bugs and develop new features. Version control keeps a history of your development so that you can review and even rollback to any version of your code with ease. New to Git? Learn more about how Git and VSTS can help your team ship great code. Get started Connect your favorite development environment to VSTS to access your repos and manage your work. VSTS IDE integrations are available for Visual Studio, Visual Studio Code, Eclipse, and IntelliJ. New to Git? Learn how to share code with Git and VSTS with getting started guides for Visual Studio, Eclipse, Xcode, IntelliJ, and the command line. Git tutorial Get up and running with Git and VSTS in just a few minutes with the VSTS Git quick start. The VSTS Git tutorial walks you through Git tasks like creating repos, working in branches, saving your work, and sharing your changes. Every task is presented step-by-step in Visual Studio or from the command line. Authenticate with your repos


6 You can authenticate with your VSTS Git repo from any platform using cross-platform credential managers or SSH public key authentication. If you have code ready to share in VSTS, our getting started guides take you through the steps to connect your development environment to a VSTS Git repo and share your code with your team. Get Started with Visual Studio Get Started with Xcode Get Started with Eclipse Get Started with IntelliJ Manage your repos Manage your repos and customize your team's workflow. Set up permissions to control access to your code and set up branch policies and continuous integration to prevent build breaks and catch bugs sooner. Create, delete, and rename repos. Set repo permissions and branch permissions Set up branch policies to protect key branches Set up continuous integration to catch bugs sooner.

7 Review code Review code with your team and make sure that changes build and pass tests before it's merged. Create a pull request Link work items to pull requests Set up branch policies Squash merge pull requests Git branch and pull request workflows
8 Create a new Git repo in your project 10/21/ min to read Edit Online VSTS TFS 2018 TFS 2017 TFS 2015 VSTS and TFS projects contain Git repositories, work items, builds, and releases. You can use Git repos in your projects to manage your source code as your project grows. This guide shows you how to create a Git repo using the web portal for either VSTS (VSTS - hosted on Azure) or Team Foundation Server (TFS - on-premises). Prerequisites A VSTS account. If you don t have one, you can sign up for one for free. Each account includes free, unlimited private Git repositories. Git command line tools: Install Git for Windows, which includes Git Credential Manager - Windows Install Git for macos and Linux. For information on Git credential managers for these platforms, see Install the Git Credential Manager - macos and Linux Create a repo using the web portal 1. Navigate to your project by browsing to account name>.visualstudio.com and selecting the name of your project. You can select it from the All projects list, or from the Recent projects list if you have accessed it recently. 2. In the Project area in the web portal, select Code, then select the drop-down next to the current repo name and choose New Repository.
9 3. In the Create a new repository dialog, verify that Git is the repo type and enter a name for your new repo. You can also choose to add a README and create a.gitignore for the type of code you plan to manage in the repo. A README contains information about the code in your repo, and a.gitignore file tells Git which types of files to ignore, such as temporary build files from your development environment. 4. When you're happy with the repo name and choices, select Create. A new empty Git repo is now created in your project. If you created an empty repo (no README or.gitignore), you'll see instructions on how to clone the repo to your computer or push code in an existing repo into the newly created one. In this example you created a README and a.gitignore, so you'll see an overview of the files in your repo, and you can clone the repo using the Clone link on the upper right of the page to get working with a local copy of the repo immediately. Clone the repo to your computer To work with a Git repo, you clone it to your computer. Cloning a repo creates a complete local copy of the repo for you to work with, and downloads all commits and branches in the repo and sets up a named relationship with the repo on the server. Use this relationship to interact with the existing repo, pushing and pulling changes to share code with your team.
10 1. Select Clone in the upper-right corner of the Code window and copy the Clone URL. 2. Open the Git command window (Git Bash on Git for Windows), navigate to the folder where you want the code from the repo stored on your computer, and run git clone followed by the path copied from the Clone URL in the previous step, as shown in the following example. git clone After running the previous command, Git downloads a copy of the code, including all commits and branches from the repo, into a new folder for you to work with. Keep this command window open, as you'll use it in the following steps. Work with the code In this step, we'll make a change to the files on your computer, commit the changes locally, push the commit up to the repo that is stored on the server, and view the changes there. 1. Browse to the folder on your computer where you cloned the repo and open the README.md file in your editor of choice. 2. Make some changes, for example add This is my first edit. to the file, and save and close the file. 3. In the Git command window, navigate to the contoso-demo directory by entering the following command: cd contoso-demo 4. Commit your changes by entering the following command in the Git command window: git commit -a -m "My first commit"


11 When using git commit, -a means to commit all changed files, and -m specifies a commit message. 5. Push your changes up to the Git repo on the server by entering the following command into the Git command window: git push 6. Switch back to the web portal and select History from the Code view to view your new commit. The new repo has two commits: the first commit where the README and.gitignore were added when the repo was created, and the commit you just made. 7. Switch to the Files tab and click on the README file to view your changes. Next steps New to Git repos? Learn more Learn more about using Git in the Git tutorial
12 Get started with Git from the command line 11/1/ min to read Edit Online VSTS TFS 2018 TFS 2017 TFS 2015 This guide show you how to share your code in a VSTS Git repo using the command line. The instructions below use the default bash shell used on Linux and macos, but the Git commands will work in any shell, including Git Bash from Git for Windows. Prerequisites A VSTS account. If you don t have one, you can sign up for one for free. Each account includes free, unlimited private Git repositories. Download and install Git Windows macos Linux and Unix Windows Download and install Git for Windows, which includes the Git Credential Manager to easily connect to VSTS. macos Use Homebrew to install and set up Git. brew install git Linux and Unix Use your distribution's package management system to download and install Git. For example, on Ubuntu: sudo apt-get install git Refer to the list of install commands for the most up to date instructions for your Linux distribution. Create your local repo Create a local Git repo for your code. If your code is already in a local Git repo, you can skip this step. 1. Navigate to the folder where your code is on the command line: cd /home/fabrikam/fiber 2. Create a Git repo on your machine to store your code. You will connect this repo to VSTS in the next step. git init. 3. Commit your code into the local Git repo.
13 git add --all git commit -m "first commit of my code" Create your VSTS repo 1. Create a new VSTS Git repo for your code. Copy the clone URL once you are done creating your repo. 2. Connect your local repo to the VSTS repo using the copied clone URL in the git remote command: git remote add origin Push your code Before pushing your code, set up authentication with credential managers or SSH before continuing. git push origin master Next steps New to Git repos? Learn more Learn more about using Git in the Git tutorial

14 Share your code with Visual Studio 2017 and VSTS Git 11/30/ min to read Edit Online VSTS TFS 2018 TFS 2017 TFS 2015 Share your Visual Studio solution in a new VSTS or Team Foundation Server Git repo. This article walks you through the steps to get a Visual Studio solution on your PC into a Git repo you can share with others. If you want to work with a Visual Studio solution hosted in an existing repo, see the Git tutorial. Prerequisites A VSTS account. If you don t have one, you can sign up for one for free. Each account includes free, unlimited private Git repositories. Create a local Git repo for your project Create a new local Git repo for your project by selecting on the status bar in the lower right hand corner of Visual Studio. This will create a new repo in the folder the solution is in and commit your code into that repo. You can also right-click your solution in Solution Explorer and choose Add Solution to Source Control. Once you have a local repo, select items in the status bar to quickly navigate between Git tasks in Team Explorer. shows the number of unpublished commits in your local branch. Selecting this opens the Synchronization view in Team Explorer. shows the number of uncommitted file changes. Selecting this opens the Changes view in Team Explorer. shows the current Git repo. Selecting this opens the Connect view in Team Explorer. shows your current Git branch. Selecting this displays a branch picker to quickly switch between Git branches or create new branches.


15 Publish your code to VSTS 1. Navigate to the Push view in Team Explorer by choosing the icon in the status bar. You can also select Sync from the Home view in Team Explorer. 2. In the Push view in Team Explorer, select the Publish Git Repo button under Push to Visual Studio Team Services. 3. Verify your and select your account in the Team Services Domain drop-down. 4. Enter your repository name and select Publish repository. This creates a new project in your account with the same name as the repository. To create the repo in an existing project, click Advanced next to Repository name and select a project. 5. Your code is now in a VSTS repo. You can view your code on the web by selecting See it on the web.

.")
16 Commit and push updates 1. As you write your code, your changes are automatically tracked by Visual Studio. You can commit changes to your local Git repository by selecting the pending changes icon from the status bar. 2. On the Changes view in Team Explorer, add a message describing your update and commit your changes. 3. Select the unpublished changes status bar icon (or select Sync from the Home view in Team Explorer). Select Push to update your code in VSTS/TFS.
17 Get changes from others Sync your local repo with changes from your team as they make updates. 1. From the Synchronization view in Team Explorer, fetch the commits that your team has made. Doubleclick a commit to view its file changes. 2. Select Sync to merge the fetched commits into your local repo and then push any unpublished changes to VSTS.
18 3. The changes from your team are now in your local repo and visible in Visual Studio. Frequently asked questions I don't see the Add to Source Control button in the status bar. How can I see what changes are in a commit before I pull it into my local branch? How do I associate my commits with work items? Can I use the Git command prompt with Visual Studio? I don't see the Add to Source Control button in the status bar. The button in the status bar was added in Visual Studio 2017 (it was Publish in Visual Studio 2015 Update 2 and later) and will only appear when you have Git as your source control provider. If your code is already in a Git repo, you won't see the Add to Source Control button in the status bar, but the status of the current branch in your local repo instead. If you are in a previous version of Visual Studio, create a local Git repo for your project by selecting the Create new Git repository option in the New Project window when you create a new project. You can create a local Git repo for an existing solution by right-clicking your project in the Solution Explorer and selecting Add Solution to Source Control. How can I see what changes are in a commit before I pull it into my local branch? To see what's changed in a commit, go to the Synchronization page in Team Explorer and right-click on the commit. Select View Commit Details. You can then right-click on any file modified by the commit and select Compare with Previous... to view the changes compared to the previous version of the file.


19 How do I associate my commits with work items? You can include work items in your commits through Related Work Items in the Changes page in Team Explorer. Work items can be included in commits by adding #ID into the commit message. For example, Fixing bug #23 in the reporting tools would link work item 23 to the commit. The work item is linked when the commit is pushed to VSTS. Can I use the Git command prompt with Visual Studio? Visual Studio's Team Explorer and the Git command line work great together. Changes to your repos made in either tool will be reflected in the other. Make sure to install the latest release of Git for Windows, which has tools to help you connect to your VSTS/TFS repos. See the VSTS Git tutorial and the command reference for additional help using Git from the command line. Next steps New to Git repos? Learn more Checkout more steps in the Git workflow
20 VSTS Plugin for IntelliJ IDEA and Android Studio 10/21/ min to read Edit Online VSTS TFS 2018 TFS 2017 TFS 2015 IntelliJ IDEA is an IDE produced by JetBrains. You can find out more about it at The VSTS Plugin for IntelliJ allows you to connect to your Git repositories on VSTS and Team Foundation Server (TFS) in a seamless and intuitive way. You can also use this plugin to import projects into VSTS or create pull requests in your VSTS/TFS Git repository. In this guide, we show you how to create a VSTS Git repo using the VSTS web portal, add some sample code, and then clone the repo and create pull requests all from within IntelliJ IDEA. Prerequisites To complete the steps in this guide you need: A VSTS account. If you don t have a VSTS account, you can sign up for one for free. Each account includes free, unlimited private Git repositories. IntelliJ IDEA installed on your machine. If you don't have it, get IntelliJ IDEA. The VSTS plugin for IntelliJ. See IntelliJ Plugin download page for installation instructions. This plugin is compatible with IntelliJ IDEA Ultimate and Community editions, Android Studio, RubyMine, WebStorm, PhpStorm, PyCharm, AppCode, MPS, 0xDBE, and CLion. Git command line tools. To install Git for Windows, including Git Credential Manager, see Install the Git Credential Manager - Windows. To install Git for macos and Linux, see Install the Git Credential Manager - macos and Linix. Create a repo 1. Navigate to your VSTS project by browsing to account name>.visualstudio.com and selecting the name of your project. You can select it from the All projects list, or from the Recent projects list if you have accessed it recently.
21 2. In the Project area in the web portal, select Code, then select the drop-down next to the current repo name and choose New Repository. 3. In the Create a new repository dialog, verify that Git is the repo type, enter DeepSpace for your new repo name, and click Create. Add sample code to your repo 1. Select Clone in the upper-right corner of the Code window and copy the Clone URL.
22 2. Open the Git command window (Git Bash on Git for Windows), navigate to the folder where you want the code from the repo stored on your computer, and run git clone followed by the path copied from the Clone URL in the previous step, as shown in the following example. git clone 3. Switch to the DeepSpace folder by running the following command. cd DeepSpace Keep this window open as you'll use it for subsequent steps. 4. Download the DeepSpace sample code and extract it to the local directory on your computer where you cloned the DeepSpace repo. 5. Switch back to your Git command window and run the following command, which commits the sample code files to your local repo. git add --all You may see some warnings stating the line feeds will be replaced with carriage return line feeds (i.e. Warning: LF will be replaced by CRLF). These warnings can be ignored. 6. Commit the files to the local repo by running the following command. git commit -m "Committing DeepSpace sample files" 7. Run the following command to push the commit of DeepSpace sample files up to your VSTS DeepSpace repo.

23 git push 8. Switch back to the VSTS web portal and refresh, and you can see the files that were added. Clone your repo in IntelliJ Now that we've got a VSTS repo with some sample code, let's take a look at how we can work with the code from IntelliJ IDEA. To clone your VSTS repo in IntelliJ is extremely simple. You don't even need to know the URL for the repo. 1. Open IntelliJ IDEA and select Check out from Version Control and then choose VSTS Git.

24 2. Next just sign in to VSTS When you click Sign in, you will be presented with the standard VSTS sign in UI. Once signed in, you should see the list of all repositories you have access to on VSTS. Choose the correct repo, DeepSpace, and click the Clone button. (You may also want to choose where on your hard drive the repo is cloned to by changing the Parent Directory.)


25 4. After the clone finishes, IntelliJ will ask you if you want to open the project. Click Yes and you should end up with the DeepSpace project opened in IntelliJ IDEA. Make some changes in IntelliJ 1. Start by making sure the project builds using Build > Make project. If you are prompted to add an SDK for
 b.")
26 the project, simply add the latest Java JDK installed on your machine. If you want to run the project now to see what it does, you can do the following: a. From the DeepSpace root folder in your git repo, run the command mvn jetty:run (this requires maven to be installed) b. From a browser, go to You should see stars and planets flying by! If you look closely, you may notice that Earth does not fly by. 2. In our DeepSpace example, there are some code sections that have been commented out. If you open the src/main/java/com.microsoft.tfs.demo/imageservice.java file in IntelliJ, you can see one of the sections. Let's fix this section of code locally. Typically, when working in a Git repo, you should create a branch for your work and commit to that branch. Create a branch through IntelliJ using the built-in VCS > Git > Branches window. When prompted, use the branch name fixbugs. Once we have a branch to make our changes in, we can uncomment the code and rebuild the project. If you follow the instructions above to run the program again, you should see the Earth fly by. 3. Now that our changes are built and tested, we can commit them locally using the VCS > Commit Changes menu. In the commit dialog, you will see a VSTS button above the commit message text box. Click on that button to view your list of work items assigned to you. Select the Add Missing Earth work item and click OK. You will see the commit message text box populate with the work item's type, number, and title. This will associate the work item to this commit for traceability in the future.

27 Note that this change is only done locally; it hasn't been changed in our VSTS repo yet. Create a pull request You can push your local branch to the server and create a pull request for your team to review. Our plugin helps you create the pull request based on your current context within IntelliJ. This saves you several steps and eliminates the need for you to switch to your browser to create the pull request. To accomplish this, simply select VCS > Git > Create Pull Request. This opens up the Create Pull Request dialog. This dialog provides a lot of information including the files that have changed and the commits that will be pushed. You can give the pull request a title and a description.

28 After you click Create Pull Request, you should receive a notification that the pull request was created. It also contains a link to the pull request in case you want to add specific reviewers or comments. Once the code reviews are done, you can merge the pull request into master. Check build status After you have merged your changes into master, you can check if your CI build has succeeded from within IntelliJ. In the bottom right corner, there is an icon that displays your build status to you. If you see a green checkmark, that means your build has succeeded. If you see a red X, then your build failed. If you see a gray question mark, your build was not found or your credentials may have expired. You can click on the icon for more options such as viewing build details, queuing a new build, and updating the status manually.

29 View Pull Requests and Work Items Under the Version Control menu, a Pull Request tab and Work Items tab exist to allow you to easily view the information you need without leaving the IDE. The Pull Request tab shows you the current pull requests created by you and assigned to you along with their status. The tab also gives you the ability to create and/or abandon pull requests. Under the Work Items tab, you can view the work items based on queries that you have created or use the default query to see work items that are assigned to you. You can also create a branch based off of a work item so that you can associate a work item with branch for future traceability purposes. Next Steps Check out the entire DeepSpace IntelliJ tutorial View the IntelliJ plugin FAQ
30 Share your code in Git using Xcode 10/21/ min to read Edit Online VSTS TFS 2018 TFS 2017 TFS 2015 This guide shows you how to share your Xcode projects in a VSTS Git repo. Prerequisites A VSTS account. If you don t have one, you can sign up for one for free. Each account includes free, unlimited private Git repositories. Create a local Git repo for your Xcode project Create a local Git repo for your code to manage your project in version control. New projects Existing projects If your project is already in a local Git repo, you can skip ahead to Create a new VSTS repo. New projects Create a local Git repo when you create a new project. Choose Create Git repository on My Mac when creating a new project. Existing projects Create a local Git repo for your existing projects not in version control by going to Source Control, Create Working Copy.... Select the projects to add to the local Git repo and select Create. Xcode creates a Git repo for your code and adds a commit with your project files. Create a new VSTS repo Create a new Git repo in VSTS for your Xcode project. If you have already created a repo for your Xcode project in VSTS, you can skip ahead to Push your project. 1. Browse to your Team Project in your VSTS account and select the drop-down next to the name of the current Git repo. Select New Repository..


31 2. Enter a name for your new Git repo and select Create. Your browser will navigate to your new empty Git repo for your Xcode project. Copy the clone URL to the clipboard so that you can use it in Xcode to connect to VSTS. NOTE If you want to use SSH to connect to your VSTS Git repo, Set up SSH credentials and use the SSH clone URL when adding the remote for your local Git repo. Push your project 1. Go to Source Control in Xcode and select Projectname -- master, then Configure Select Remotes, then select the icon and choose Add Remote...


32 3. In the Address field, paste the Git clone URL for your VSTS repo copied in the previous step. Select Add Remote, then select Done to finish creating the origin remote for your local Git repo. 4. Go to Source Control, Push..., enter the branchname on origin to push to, and select Push. 5. If prompted, enter your VSTS credentials. For Username, enter your VSTS username. For Password, enter a Personal Access Token created for your user in VSTS. Select OK. Xcode will push your project to your VSTS Git repo so you can share it with your team. Next steps Learn more about using Git in the Git tutorial


33 Share your code in Git using Eclipse 10/21/ min to read Edit Online VSTS TFS 2018 TFS 2017 TFS 2015 Share your Eclipse project with your team in a VSTS/TFS Git repo. If you don t have a VSTS account, you can sign up for one for free. Each account includes free, unlimited private Git repositories. Prerequisites A VSTS account. If you don t have one, you can sign up for one for free. Each account includes free, unlimited private Git repositories. Use Team Explorer Everywhere Team Explorer Everywhere is an open-source Eclipse plug-in to connect Eclipse to VSTS or Team Foundation Server. If you're working with VSTS/TFS and Eclipse, use this plugin to connect to your repos, builds, and work items. 1. Install the Team Explorer Everywhere plug-in. 2. Add the Team Explorer Everywhere view in Eclipse. Go to Window, Show View and select Other... Search for Team Explorer, select the Team Explorer view, and select OK. Connect to VSTS 1. In the Team Explorer Everywhere view, select Connect to VSTS or a Team Foundation Server. 2. If you know your VSTS or Team Foundation Server account URL, select the Servers... button under Connect to a Team Foundation Server or VSTS account to add your TFS server or account to the dropdown list. If you don't know your account information for VSTS, select Browse Visual Studio Services and


34 select Next. Either choice will prompt for your credentials before continuing further. 3. Select the team project where you will share your code from the Team Project Selection dialog and select Finish. Create a local Git repo for your Eclipse project Before you can push your project to VSTS, you need to add it to a local Git repo. NOTE If your code is already in a local Git repo, you can skip this step. 1. Right-click your project name in Project Explorer and select Team, Share Project... Select Git and select Next. 2. Select Create... from the Configure Git Repository window and choose a folder for your local Git repo. Select Finish. 3. Right-click your project in Project Explorer and select Team, Commit... Stage your changes by dragging your files to the Staged Changes field, enter a commit message, then select Commit.


35 Push your project to your VSTS/TFS repo 1. In Team Explorer Everywhere, select Git Repositories, then right-click the empty repo you want to push your Eclipse project to and select Copy Clone URL. If you don't have an empty Git repo created in VSTS/TFS yet, you can create one using these instructions. 2. In Package Explorer, right-click your project and Select Team, Push Branch.... Paste the clone URL from the clipboard into the URI field and select Next. Make sure Configure upstream for push and pull is selected in the next window and select Next.

36 3. Review the changes and select Finish in the Push Branch window. Your project code is now your VSTS Git repo. Troubleshooting What if the Git views for commit and push don't show up? You can download EGit to use Git with Eclipse. Next steps Learn more about using Git in the Git tutorial
37 Import a Git repo 1/5/ min to read Edit Online VSTS TFS 2018 TFS 2017 Update 1 This guide shows you how to import an existing Git repo from GitHub, Bitbucket, GitLab, or other location into a new or empty existing repo in your VSTS project. Prerequisites A VSTS account. If you don t have one, you can sign up for one for free. Each account includes free, unlimited private Git repositories. If you are using TFS, you must have TFS 2017 Update 1 or higher. For instructions on manually importing a Git repo using TFS 2017 RTM, see Manually import a repo. Import into a new repo From the repo drop-down, select Import repository. If the source repo is publicly available, just enter the clone URL of the source repository and a name for your new Git repository. If the source repository is private but can be accessed using basic authentication (username-password, personal access token, etc.), select Requires authorization and enter the your credentials.
38 Import into an existing empty repo On the Files page of the empty Git repository, select Import and enter the clone URL. You will need to provide credentials if the source repository requires authentication.

39 NOTE The import feature disables automated linking for work items mentioned in a commit comment since the work item IDs in the destination project might not be the same as ones in the source project. Automatic linking for work items mentioned in a commit can be re-enabled by navigating to Settings, Version Control, selecting your repository, and choosing Options. For more information on linking commits with work items, see How do I associate my commits with work items? Manually import a repo The import repo feature was introduced in TFS 2017 Update 1. If you are using TFS 2017 RTM, you can use the following steps to manually import a repo into TFS 2017 RTM. You can also follow these steps to manually import a repo into a VSTS repo by replacing TFS with VSTS in the following steps. 1. Clone the source repo to a temporary folder on your computer using the bare option, as shown in the following command line example, and then navigate to the repo's folder. Note that when cloning using the bare option, the folder name includes the.git suffix. In this example, is the source repo to be manually imported. git clone --bare cd old-contoso-repo.git 2. Create a target repo using TFS 2017 RTM, and make a note of the clone URL. In this example, is the URL for the new target repo. 3. Run the following command to copy the source repo to the target repo. git push --mirror 4. Delete the temporary folder by running the following commands.
40 cd.. rm -rf old-contoso-repo.git Frequently asked questions Although most of the time the import is successful, the following conditions can cause problems. What if my Source repository is behind two-factor authentication? What if my source repository does not support multi_ack? Can I import from previous versions of Team Foundation Server? Can I use MSA based credentials? Can I import from TFVC? What if my source repository is behind two-factor authentication? The import service uses REST APIs to validate and trigger import and cannot work directly with repositories that require two-factor authentication. Most Git hosting providers like GitHub and VSTS support personal tokens which can be supplied to the import service. What if my source repository does not support multi_ack? The import service uses the multi_ack capability of the Git protocol during the import. If the source repository does not provide this capability, the import service can fail to import from the given source. This failure can happen when creating import request or while import is in progress. Can I import from previous versions of Team Foundation Server? If the source Git repository is in a TFS version earlier than TFS 2017 RTM, then import will fail. This happens because of a contract mismatch between latest VSTS/TFS and pre-2017 RTM versions of TFS. Can I use MSA based credentials? Unfortunately, MSA (Microsoft Account, formerly Live ID) based credentials will not work. Import service relies on basic authentication to communicate with the source repository. If the username / password you are using are not basic auth then authentication will fail and import will fail. One way to check if the username / password you are using are basic auth or not is to try using Git to clone your repository using the below format git clone clone Url>> Can I import from TFVC? You can migrate code from an existing TFVC repository to a new Git repository within the same account. While migrating to Git has many benefits, it is an involved process for large TFVC repositories and teams. Centralized version control systems, like TFVC, behave different than Git in fundamental ways. The switch involves a lot more than learning new commands. It is a disruptive change that requires careful planning. For more information, see Import from TFVC to Git. Next steps New to Git repos? Learn more Learn more about using Git in the Git tutorial
41 VSTS Git tutorial 10/25/ min to read Edit Online VSTS TFS 2018 TFS 2017 TFS 2015 VS 2017 VS 2015 Use version control to save your work and coordinate code changes across your team. Even if you're just a single developer, version control helps you stay organized as you fix bugs and develop new features. Version control keeps a history of your development so that you can review and even rollback to any version of your code with ease. The steps in the following tutorials show how to perform common version controls tasks using the following version control workflow. Version control workflow Version control has a general workflow that most developers use when writing code and sharing it with the team. These steps are: 1. Get a local copy of code if they don't have one yet. 2. Make changes to code to fix bugs or add new features. 3. Once the code is ready, make it available for review by your team. 4. Once the code is reviewed, merge it into the team's shared codebase. Git has a version of this workflow using terminology and commands unique to Git. Throughout this tutorial you'll learn about repositories, branches, commits, and pull requests. These terms might sound familiar if you've used a version control system like Team Foundation Version Control or Subversion, but they behave differently in Git. Git workflow 1. Create a branch for the changes you plan to make and give it a name, such as fix-bug-3214 or cool-feature-x. 2. Commit changes to your branch. People often have multiple commits for a bug fix or feature. 3. Push your branch to the remote repository. 4. Create a pull request so other people can review your changes. To incorporate feedback, you might need to make more commits and push more changes. 5. Complete your pull request and resolve any merge conflicts from changes other people made after you created your branch. Use this workflow if you're new to Git. As your team gets more experienced and confident with Git, extend it to
42 suit your team's needs. Next steps Create a new Git repository Clone an existing Git repository
 or Team Foundation Server (TFS). Explore our full tutorial for more information on how to use Git from Visual Studio or the command line.")
43 Get Started with Git and VSTS 11/14/ min to read Edit Online VSTS TFS 2018 TFS 2017 TFS 2015 VS 2017 This guide covers the basics so you can get up and running using Git with code already in Visual Studio Team Services (VSTS) or Team Foundation Server (TFS). Explore our full tutorial for more information on how to use Git from Visual Studio or the command line. If you don't have your code in a VSTS or TFS Git repo, visit our Visual Studio or command line getting started articles to learn how to create a local repo for your code and push it to VSTS. Get your code To get a copy of the source code, you clone a VSTS Git repository. Cloning creates both a copy of the source code for you to work with and all the version control information so Git can manage the source code. If you don't have a Git repository yet, you can create one using your own code and continue with the steps in this article to commit and share your work. Visual Studio Command Line 1. In Team Explorer, open up the Connect page by selecting the Connect icon, and then choose Manage Connections, Connect to Project. 2. On the Connect to a Project dialog, select the repo you want to clone from the list and select Clone. If you don't see your repo listed, you can filter the list to find it or add a Team Foundation Server where the repo is hosted by selecting the Add TFS Server link.

44 3. Verify the location of the cloned repo on your PC and select Clone. Commit your work Git branches isolate your changes from other work being done in the project. The recommended Git workflow uses a new branch for every feature or fix you work on. You make commits in your local Git repository to save your changes on that branch. Visual Studio Command Line 1. In Team Explorer, select the Home icon and choose Branches.


45 2. Right click the master branch and choose New Local Branch From...


46 3. Choose a descriptive branch name for your work to remind you and others what kind of work is in the branch, and select Create Branch. 4. Make changes to your files in the cloned repo. From the Team Explorer Home view, you can open up Visual Studio solutions in the repo or browse the repo contents using the Show Folder View link. Git keeps track of changes made to your code both inside and outside of Visual Studio. 5. When you are satisfied with the changes, save them in Git using a commit. Open up the Changes view from Team Explorer by selecting the Home icon and choosing Changes. 6. Enter a message describing the commit, and select Commit All.

 Share your changes When you are ready to share your changes with the team, you can push those changes so that others can reach them.")
47 NOTE If you have multiple files and you don't want to commit them all, you can right-click each desired file and choose Stage. When you have staged all the files you would like to commit, click Commit Staged. (The Commit All button is replaced by Commit Staged when you manually stage your changes before the commit.) Share your changes When you are ready to share your changes with the team, you can push those changes so that others can reach them. You can only push changes after you add commits to a branch. Once you push the changes, you can create a pull request to let others know you'd like to have the changes reviewed and added to the master branch of the code.


48 Visual Studio Command Line 1. Open up the Synchronization view in Team Explorer by selecting the Home icon and choosing Sync. You can also navigate to the Synchronization view from the Changes view by choosing Sync immediately after making a commit. 2. Select Push to share your commit with the remote repository. If this is your first push to the repository you'll see the following message in place of the outgoing commits
49 list: The current branch does not track a remote branch. Push your changes to a new branch on the origin remote and set the upstream branch. Select Push to push your changes to a new branch on the remote repository and set the upstream branch. The next time you push changes you'll see the list of commits. 3. Create a pull request so that others can review your changes. Open Pull Requests in Team Explorer by selecting the Home icon and choosing Pull Requests. 4. From the Pull Requests view you can view pull requests opened by you, assigned to you, and you can create new pull requests. Select New Pull Request to open up a web browser where you can create the new pull request in the VSTS web portal. 5. Verify your branches (in this example we want to merge the commits from the ReadMeFix branch into the master branch), enter a title and optional description, specify any reviewers, optionally associate any work items, and select Create.
50 For more information on pull requests, see the pull request tutorial. Sync with others To get changes from others and keep your code up to date, you can pull commits made by others and merge them into your branch. Git is very good about merging multiple changes even in the same file, but sometimes you might have to resolve a merge conflict. It's a good idea to pull your branches regularly to keep them up to date with the changes from others. This makes sure that your feature branches from your main branch are using the latest version of the code. Visual Studio Command Line 1. Open up the Synchronization view in Team Explorer by selecting the Home icon and choosing Sync.

51 2. You can download the latest changes to the branch you are on using the Pull link. (There are two Pull links, one near the top and one in the Incoming Commits section. You can use either one as they both do the same thing.)
52 Create a new Git repo 10/21/ min to read Edit Online VSTS TFS 2018 TFS 2017 TFS 2015 VS 2017 VS 2015 Update 2 A Git repository, or repo, is a folder that you ve told Git to help you track file changes in. You can have any number of repos on your computer, each stored in their own folder. Each Git repo on your system is independent, so changes saved in one Git repo don t affect the contents of another. A Git repo contains every version of every file saved in the repo. Git saves these files very efficiently, so having a large number of versions doesn t mean that it uses a lot of disk space. Storing each version of your files helps Git merge code better and makes working with multiple versions of your code quick and easy. In this tutorial you learn how to: Create a new Git repo Video tutorial The following video explains what Git repos are, and shows you how to create them on your computer using Visual Studio 2015 Update 2. TIP Working from the command line? You can view our video overview using command line steps on Channel9. Create a new repo Manage any folder with source code or Visual Studio solution in Git by creating a repo for them. Later you can connect this Git repo to a remote Git repo to share your work with others. Visual Studio Command Line Create a repo Create a repo from a new solution Create a repo from an existing solution Create a repo in an empty folder


53 Connect a local repo to a remote From a new solution Create a new Git repo for your new Visual Studio solution by selecting Create new Git repository when creating the solution: From an existing solution To create a repo from an existing solution not in version control, select the Publish button in the bottom-right of the lower status bar. This creates a new Git repo in the same directory as your solution and opens up the Publish view in Team Explorer so you can push your code to VSTS or another remote Git repository. In an empty folder 1. Open the Connect view in Team Explorer by choosing Projects then Manage Connections from the context menu. 2. Under Local Git Repositories, select New and enter a folder where the repo will be created. This directory must be empty. 3. Select Create to create the repo. Connect a local repo to a remote To connect a local repository to a hosted remote Git repository to share your work, go the Settings page in Team Explorer. Select Repository Settings. Under Remotes, select Add.
54 Enter origin in the Name field and enter the clone URL for your repo in the Fetch field. Make sure that Push matches fetch is checked and select Save. Next steps Save work with commits
55 Clone an existing Git repo 1/3/ min to read Edit Online VSTS TFS 2018 TFS 2017 TFS 2015 VS 2017 VS 2015 Create a complete local copy of an existing Git repo by cloning it. Cloning a repo downloads all commits and branches in the repo and sets up a named relationship with the existing repo you cloned. Use this relationship to interact with the existing repo, pushing and pulling changes to share code with your team. NOTE By default, Git will assign the origin to the remote repo you clone from. Most users don't need more than one remote, so the tutorial uses origin in its steps. Learn more about setting up remotes to your Git repo. In this tutorial you learn how to: Get the clone URL to your repo Clone a repo Video tutorial TIP Working from the command line? You can view our video overview using command line steps on Channel9. Get the clone URL to your repo Before you can clone an existing repo, you'll need a URL that points to the existing repo. This URL represents the source of the repo you're going to copy during the clone. If you're using VSTS or Team Foundation Server 2017, you can find this clone URL in the web portal. When viewing your repo from the Code tab in the interface, select Clone in the upper right.


56 If you need to clone a GitHub repo, you'll need to get the clone URL from the Clone or download button while viewing the repo on the web in GitHub. Other Git providers have similar buttons in their user interface to get the clone URL. Copy this URL into the clipboard or store it in a place where you can find it easily. You can't clone a repo without a clone URL. Clone a repo Visual Studio Command Line Clone from VSTS / Team Foundation Server Clone from another Git provider Open a solution in Visual Studio from a cloned repo Clone from VSTS / Team Foundation Server 1. Open Team Explorer (go to View and select Team Explorer or use the Ctrl+, Ctrl+M hotkey sequence) and open the Connect view. Go to Projects, then Manage Connections if you don't see the Connect view. 2. Select Connect... under Hosted Service Providers. 3. Choose your team's account from the drop-down in the dialog that appears and select which Team Projects to connect to Team Explorer. Select Connect. 4. Clone the repository in one of the Team Projects by right-clicking the project and selecting Clone...


57 5. Enter the folder where Git will store the local repository in the Local Git Repositories section. 6. Select Clone to clone your repo. Clone from another Git provider If you are not using VSTS, you can still clone your repo in Team Explorer and work with your code in Visual Studio. 1. In Team Explorer, open the Connect view. 2. Select Clone under Local Git Repositories and enter the URL for your Git repo this will be provided by your team or Git hosting provider. 3. Select a folder where you want your cloned repo to be kept. 4. Select Clone to clone the repo. Open a solution in Visual Studio from a cloned repo Open a solution in a cloned repo in Visual Studio by right-clicking on the repository in the Team Explorer Connect view and selecting Open. You'll be taken to the Home view in Team Explorer. Double-click your project solution file in the Solutions area to open the solution in Solution Explorer.

58 Next steps Save work with commits

59 Save work with commits 10/21/ min to read Edit Online VSTS TFS 2018 TFS 2017 TFS 2015 VS 2017 VS 2015 Update 2 Git does not automatically snapshot your code as you make edits to files in your repo. You must tell Git exactly which changes you want to add to the next snapshot by staging those changes. After staging your changes, create a commit to save the snapshot to your repo. In this tutorial you learn: How Git tracks changes What's in a commit How to stage your changes How to create a commit How to update your last commit How Git tracks changes Git tracks file changes in your repo as you work, and separates the files in your repo into three categories: Unmodified files These files haven t changed since your last commit. Modified files These files have changes since your last commit, but you haven't yet staged for the next commit. Staged files These files have changes that will be added to the next commit. When you create a commit, only the staged changes and unchanged files are used for the snapshot. Changes to unstaged but modified files are kept, but the commit uses the unmodified version from the previous commit in its snapshot. Commits are created in your local Git repository, so you don't have to worry about your changes being perfect. Continue to create commits as you work, pushing your changes to then team when they are ready to share. Video overview
60 What's in a commit Commits include the following information: A snapshot of the files saved in the commit. Git snapshots the contents of all files in your repo at the time of the commit this makes switching versions very fast and helps Git merge changes. A reference to the parent commit(s). Commits with multiple parents occur when branches are merged together. A short and to the point message describing the changes in the commit. You enter this message when you create the commit. Git uses the references between commits along with the file snapshots to maintain a complete record of development in your repo. Learn more about Git history and how to review history to investigate changes made to your code. Stage your changes Git does not automatically add changed files to the snapshot when you create a commit. You must first stage your changes to let Git know which updates you want to add to the next commit. Staging lets you to selectively add files to a commit while excluding changes made in other files. Ignore temp files, logs, and other files that might change on your local machine but you don't want to add to version control. Visual Studio Command Line Visual Studio 2015 (Update 2) and 2017 Visual Studio keeps track of file changes to your project as you do your work. When you are ready to stage changes, open up the Changes view in Team Explorer. Stage individual file changes by right-clicking a file in the Change view and selecting Stage. Staging a change creates a Staged Changes section in Team Explorer. Only changes in the Staged Changes section are added to the next commit.

61 NOTE The Team Explorer Changes view had Included Files and Excluded Files sections before Visual Studio 2015 Update 2. The Changes view was updated in Visual Studio 2015 Update 2 for better compatibility with other Git tools. Stage multiple files or folders by selecting them then right-clicking and choosing Stage or by dragging and dropping files from the Changes list into the Staged Changes list. Ignore files by right-clicking and selecting Ignore this local item or Ignore this extension. This adds an entry to the the file to the.gitignore file in your local repo. If the ignored file was added to your repo in an earlier commit, ignoring the file will not remove it from the Changes list. See excluding and ignoring files section for more information on how to ignore files already tracked by Git. Create a commit Visual Studio Command Line Open the Changes view in Team Explorer. Enter a commit message describing your changes and select Commit Staged to create a new commit that includes the changes listed in the Staged Changes section.


62 Skip staging files if you just want to commit all changes listed by entering a commit message and selecting Commit All when you have no staged changes.

63 When you commit in Visual Studio you can push the commit and sync the branch with a remote repository. These options are available in the drop-down on the Commit button. Update your last commit Amend your last commit to correct small errors without making a new commit. WARNING Do not amend pushed commits. If you need to update pushed code, undo the changes with revert or create and push another commit. Visual Studio Command Line 1. Open the Changes view in Team Explorer and stage your updated changes. You can amend just the commit message by leaving the staged changes empty. 2. Enter the updated commit message and select Amend Previous Commit from the Actions dropdown. Next steps Create work in branches.
64 Create work in branches 12/21/ min to read Edit Online VSTS TFS 2018 TFS 2017 TFS 2015 VS 2017 VS 2015 Git branches aren't much more than a small reference that keeps an exact history of commits, so they are very cheap to create. Committing changes to a branch will not affect other branches, and you can share branches with others without having to merge the changes into the main project. Create new branches to isolate changes for a feature or a bug fix from your master branch and other work. Since the branches are lightweight, switching between branches is quick and easy. Git does not create multiple copies of your source when working with branches it uses the history information stored in commits to recreate the files on a branch when you start working on it. Your Git workflow should create and use branches for managing features and bugfixes. The rest of the Git workflow, such as sharing code and reviewing code with pull requests all work through branches. Isolating work in branches makes it very simple to change what you are working on by simply changing your current branch. In this tutorial you learn: How are Git branches created? How to to create a branch How to delete a branch How to use branches Video Overview How are Git branches created? Create branches using the branch command. Branch creates a reference in Git for the new branch and a pointer back to the parent commit so Git can keep a history of changes as you add commits to the branch. When you are working with a branch that someone else shared, Git keeps an upstream tracking relationship to associate the branch on the local repo with the corresponding branch on the remote repo. This makes it very simple to sync changes with others using push and pull.


65 In this image, a new branch is created from the main branch. Work continues on both branches and commits are added to both branches. Git always adds new commits to the current local branch. Check what branch you are working on before you commit so that you don't commit changes to the wrong branch. Swap between local branches using the checkout command. Git will change the files on your computer to match the latest commit on the checked out branch. When your work in the branch is ready to share with the rest of the team, you push the changes to update the remote branch. A common mistake is to make some changes and commit them, realize you are on an incorrect branch, then checkout to the correct branch. Your most recent changes will no longer be on the filesystem since each branch has its own version of code. Git will bring the state of the files back to the last commit on the branch you swapped into, not the previous branch where you made your changes. You'll need to either cherry-pick the commits from the branch or merge the changes into the correct branch. Create a branch Visual Studio Command Line Visual Studio 2015 & Open up Team Explorer and go to the Branches view. 2. Right-click the parent branch (usually master ) to base your changes and choose New Local Branch From Supply a branch name in the required field and click Create Branch. Visual Studio automatically performs a checkout to the newly created branch.

66 Delete a branch NOTE Deleting a branch in your local repo doesn't remove the branch on the remote. Visual Studio Command Line Visual Studio 2015 & Open up Team Explorer and go to the Branches view. 2. Locate the branch you want to delete. Make sure that you aren't checked out to that branch, as you can't delete the branch you are currently working in. 3. Right-click the branch name and select Delete. If you have unpublished changes, Visual Studio will ask and make sure you want to delete the branch so you don't possibly lose work. You can delete a remote branch using the same method - locate the tree for the remote in Team Explorer's Branches view (such as remotes/origin ), right-click and select Delete. Use branches to manage development Git keeps track of which branch you are working on and makes sure that when you checkout a branch your files match the most recent commit on the branch. Branches let you work with multiple versions of the source code in the same local Git repository at the same time. Tell Git which branch you want to work on with checkout, and Git takes care of setting the right file versions for that branch. You shouldn't need more than one repo on your system when you use branches to isolate your work. Set up your development environment one time after you clone, and then use Git branches to swap between feature work and bug fixing. Next steps Share code with push
67 Share code with push 10/21/ min to read Edit Online VSTS TFS 2018 TFS 2017 TFS 2015 VS 2017 VS 2015 Share changes made in commits and branches using the push command. Push your branches to the remote repository, where Git takes the commits and adds them to an existing branch on the remote or creates a new branch with the same commits as your local branch. Git makes sure that pushed changes are consistent with the remote branch so others can pull your commits and merge them into their own local copy of the branch. Pushed branches that have finished work are reviewed and merged into the main branch of the your repo through a pull request. In this tutorial you learn how to: Share your code with push Video overview Share your code with push Visual Studio Command Line In Team Explorer, open the Sync view. The view lists outgoing commits and will present you with one of two links to push them to your remote repo: Publish when there is not a branch on the remote repo associated with the current local branch. This will create a branch with the same name on the remote repo and push the commits to it. Later you will Push, not publish changes when using this branch since the relationship between the branch on the local branch and the remote repo exists. Push when there is a relationship between the local branch and the remote repo. Clicking this will push the commits to the remote branch.

68 Resolve merge conflicts before pushing If there are conflicts between your local commits on the commits on the remote branch, you must first resolve these conflicts before you can push your changes. You should pull the changes from others first, resolve the conflicts and commit the changes, then re-attempt the push. Next steps Review code with pull requests or update code with fetch and pull
69 Update code with fetch and pull 1/5/ min to read Edit Online VSTS TFS 2018 TFS 2017 TFS 2015 VS 2017 VS 2015 Update the code in your local repo with the changes from other members of your team using the following commands: fetch, which downloads the changes from your remote repo but does not apply them to your code. merge, which applies changes taken from fetch to a branch on your local repo. pull, which is a combined command that does a fetch and then a merge. In this tutorial you learn how to: Download changes with fetch Update branches with merge Fetch and merge with pull Update your local branch with the latest changes from master Video Overview If there is a merge conflict between a commit you haven't pushed yet and a commit you are merging or pulling, you'll need to resolve those conflicts before you finish updating your code. Download changes with fetch You download changes to your local branch from the remote through fetch. Fetch asks the remote repo for all commits and new branches that others have pushed but you don't have and downloads them into your repo, creating local branches as needed. Fetch does not merge any changes into your local branches, it only downloads the new commits for your review. Visual Studio Command Line Visual Studio uses the Sync view in Team Explorer to fetch changes. Changes downloaded by fetch are not
70 applied until you Pull or Sync the changes. 1. Open up the Synchronization view in Team Explorer by selecting the Home icon and choosing Sync. 2. Choose Fetch to update the incoming commits list. (There are two Fetch links, one near the top and one in the Incoming Commits section. You can use either one as they both do the same thing.) 3. You can review the results of the fetch operation in the incoming commits section.

71 Update branches with merge Apply changes downloaded through fetch using the merge command. Merge takes the commits retrieved from fetch and tries to add them to your local branch. The merge will keep the commit history of your local changes so that when you share your branch with push Git will know how others should merge your changes. The challenge with merge is when a commit taken from fetch conflicts with an existing unpushed commit on your branch. Git is generally very smart about resolving merge conflicts automatically, but sometimes you must resolve merge conflicts manually and complete the merge with a new merge commit. Visual Studio Command Line Team Explorer merges when you do a Pull or a Sync from the Changes view. Sync is a combined operation of pulling remote changes and then pushing local ones, synchronizing the commits on the local and remote branch. 1. Open up the Synchronization view in Team Explorer by selecting the Home icon and choosing Sync. 2. Choose Sync.


72 3. A confirmation message is displayed when the sync operation completes. Fetch and merge with pull Pull does a fetch and then a merge to download the commits and update your local branch in one command instead of two. Use pull to quickly bring your branch up to date with the remote when you aren't worried about reviewing the changes before merging them into your own branch. Visual Studio Command Line Open the Team Explorer and open the Sync view. Then click the Pull link under Incoming Commits to pull remote changes and merge them into your local branch. Pulling updates files in your open project, so make sure to commit your changes before pulling. 1. Open up the Synchronization view in Team Explorer by selecting the Home icon and choosing Sync.
 3. A confirmation message is displayed when the pull operation completes.")
73 2. Choose Pull to fetch remote changes and merge them into your local branch. (There are two Pull links, one near the top and one in the Incoming Commits section. You can use either one as they both do the same thing.) 3. A confirmation message is displayed when the pull operation completes. Update your branch with the latest changes from master When working in a branch, you may want to incorporate the latest changes from the master branch into your branch. There are two different approaches you can use to perform this: rebase or merge. Rebase takes the changes made in the commits in your current branch and replays them on the history of another branch. The commit history of your current branch will be rewritten so that it starts from the most recent commit in the target branch of the rebase. Merge merges the changes from the source branch to the target branch using a merge commit, which becomes part of the commit history. NOTE This article demonstrates the merge approach. For more information on rebase and guidance on which method is right for your scenario, see Apply changes with Rebase - When to rebase vs. merge and Rebase vs merge from the Pro Git book. Visual Studio Command Line To merge the latest changes from the master branch to your branch: 1. Open the Branches view in Team Explorer. Ensure your desired target branch is checked out, right-click the target branch, and choose Merge From.


74 2. Specify the desired Merge from branch, which is master in this example, and choose Merge.) If there are any merge conflicts you'll be notified at this stage. Resolve the merge commits before proceeding to the next step. 3. Enter a commit message and select Commit Staged.


75 4. When you are ready to push your local commits, including your new merge commit, to the remote server, choose Push from the Synchronization view. Next steps Share code with push Resolve merge conflicts

76 Create a pull request 11/1/ min to read Edit Online VSTS TFS 2018 TFS 2017 TFS 2015 VS 2017 VS 2015 Git's workflow uses branches to isolate work until you're ready to merge the changes into your default branch, such as master. The pull request is the collaborative process that lets the rest of the team discuss changes in a branch and agree to merge them once everyone approves. Use pull requests to get early feedback from others on work in progress, even if you're not ready to merge the changes into another branch. In this image, the purple branch is merged into the blue branch through a pull request. The changes are discussed by reviewers in the pull request before the code is merged. When you complete the pull request, there is a merge commit (seen here as the filled blue commit) where the changes in the purple branch are now merged in the blue branch. In this tutorial you learn how to: Create a pull request Complete a pull request Create a pull request To create a pull request in VSTS: 1. Push your local branch. 2. Create a pull request for the branch in VSTS. You can do this in the Code view on the web from either the Pull Requests tab or the Files tab.
77 You can also initiate a pull request from Visual Studio. Select the Pull Requests view when connected to your Team Project. From the Pull Requests view you can view pull requests opened by you, assigned to you, and you can create new pull requests. Select New Pull Request to open up a web browser where you can create the new pull request in the VSTS web portal for your current branch.
78 3. Create the pull request. You should give a clear title for the pull request that describes the changes in the branch. In the description field give a clear explanation of how the changes are implemented along with any resources that might help reviewers understand the changes. You can include VSTS work items and hyperlinks to allow others to have as much context as possible when reviewing your changes. Add any team member who you would like to review the changes. Who reviews the pull request? When you create the pull request, you can add others who need to review your changes. You can add users and groups to the pull request after it is created if the scope of the review needs to expand. You can also associate the pull request with a task in VSTS to let others working with the task know changes are ready for review. How does the code review work? Pull request reviewers will see the proposed updates to the branch in the form of file differences between the two branches. Reviewers can add comments on any of the changes and include notifications for other team members to answer a question or give other feedback. You can make changes and push commits to resolve issues brought up in the feedback and these changes are immediately reflected in the pull request.
79 If the changes need much more development to complete, you can abandon the pull request. You can later open up a new pull request to revisit the changes and link to the conversations that took place in the abandoned pull request. You can also open up a pull request on a very early version of your code to ask for feedback from others, even if the code isn't ready to merge yet. Once you get the team's feedback, you can keep the pull request open to continue the conversation or abandon the pull request until your code is ready to be shared again. Complete a pull request Complete your pull request after the reviewers approve of the changes by selecting Complete in the upper right of the pull request view. Complete: Complete the pull request now and merge the changes to the target branch. Set auto-complete: If you have branch policies, you can choose Set auto-complete to configure the pull request to close once all branch policies are met. Fore more information on auto-complete (and reasons why you might not see this option), see Complete automatically. Abandon: Choose Abandon to close the pull request without merging the changes. Enter the message used for the merge commit and update the pull request description as needed in the dialog that follows.
80 Check Complete linked work items after merging to complete any linked work items. Check Delete <branch name> after merging to delete the source branch from the pull request. Git retains the commit history in the master branch after the pull request is complete, so unless you plan on doing more work in the branch, it is safe to remove. Check Squash changes when merging to squash merge your pull request. Check Override branch policies and enable merge to force merge even if all branch policies haven't been satisfied. This option is only available if you have Exempt from policy enforcement permissions. What happens when a pull request is merged? You must resolve any merge conflicts between the pull request branch the target branch. Git adds a new commit (the merge commit) to the end of the master branch. This merge commit links the earlier history of both the master branch and the commits for the branch that was merged as part of the pull request. Next steps Resolve merge conflicts
81 Apply changes with rebase 11/14/ min to read Edit Online VSTS TFS 2018 TFS 2017 TFS 2015 VS 2017 VS 2015 One of the tradeoffs from the Git feature branch workflow is that you do not actively manage your version control history. Git creates this history as you save your code in your commits and merges changes back into the master branch with pull requests. This generated history can get complicated when you need to update a feature branch with changes from the main branch to catch up on work committed by others. Your commit history will diverge from the master branch at multiple points, making it hard to follow. Use rebase to address the problem of updating your branch with the latest changes from the main branch. Rebase takes the changes made in the commits in your current branch and replays them on the history of another branch. The commit history of your current branch will be rewritten so that it starts from the most recent commit in the target branch of the rebase. Rebasing your changes in your feature branch off the latest changes in the main branch lets you test your changes on the most recent version in the main branch while keeping a clean Git history. In this tutorial you learn how to: Force push to update your remote branch Squash local commits Video overview Use caution Rebasing is a powerful tool for catching up changes a main branch but you must be careful about its use. Some things to keep in mind before you rebase: 1. Never rebase commits that have been pushed and shared with others. The only exception to this rule is when you are certain no one on your team is using the commits or the branch you pushed. 2. Use rebase to catch up with the commits on the another branch as you work with a local feature branch. This is especially useful when working in long-running feature braches to check how your changes work with the latest updates on the master branch. 3. You can't update a published branch with a push after you've rebased the local branch. You'll need to force push the branch to rewrite the history of the remote branch to match the local history. Never force push branches in use by others.

82 During a rebase, Git attempts to reconcile the changes recorded in the commits on your branch and the changes in the commits in the target branch. Resolve any conflicts between the commits in the same way that you resolve merge conflicts. When to rebase vs. merge Using rebase instead of merging branches results in an easier to follow but less exact history of commits. Your team should agree under what circumstances you should rebase a branch. You should still always merge branches into the main branch through a pull request. A suggested approach is to allow rebasing local changes that you have made but haven't shared with others, but to merge once you are sharing changes with others. This avoids trouble with rewriting history while still letting you easily catch up with changes as you develop your code locally. Visual Studio Command Line In Team Explorer, go to the Branches view. Click Rebase. You'll see a prompt to rebase the changes from your current branch, and then a drop-down to specify which branch the changes in the current branch should be replayed on top of. If there is a conflict, resolve it just like you resolve merge conflicts in Visual Studio. Force push to update your remote branch WARNING Never force push a branch that others are working on. Only force push branches that you alone work with. After a successful rebase, your local branch will have a different history than your remote branch. You must force push your local branch to update your remote branch. > git push -f users/frank/myfixes Squash local commits Interactive rebase is not currently supported in Visual Studio, but you can use the following command line
83 steps to consolidate your commits. A special use of rebase is available to condense the changes made in a set of commits down to one single commit. This is useful to clean up commit histories before they are pushed to a remote branch. The benefits to the readability are significant, and since you never rebase shared code, you can summarize the changes easily. To consolidate commits, first decide about how many commits you'd like to squash into one. You don't have be exact as you'll get to pick out exactly which commits to squash when you run the command. If you had five commits to squash, then you'd make sure there are no unstaged changes and run: > git rebase -i HEAD~5 This will open up an editor where you will see something like: pick 7b43f3f Updated router.js pick 00859d9 Updated README.md pick 9d247f7 initial commits pick 7068b09 Updated README.md with build instructions You'll keep the first of the changes (leave it pick ), and then change pick to squash for the rest of the changes. Save and close the editor. Git will now attempt to condense the commits into a single commit. After the rebase completes, you will have a new editor window open up where Git asks you to give a commit message for the commit with the combined changes. You'll want to condense this down to one line of text (just like you would have for a normal commit) and save and quit the editor. VSTS and TFS users can squash merge their pull requests to consolidate commits added to the master branch. Next steps Copy changes with cherry-pick

84 Copy changes with cherry-pick 10/21/ min to read Edit Online VSTS TFS 2018 TFS 2017 TFS 2015 VS 2017 VS 2015 Update 2 Copy commits from one branch to another using cherry-pick. Unlike a merge or rebase, cherry-pick only brings the changes from the commits you select, instead of all the changes in a branch. Cherry-pick is a great way to tackle these common problems: Accidentally committing on the wrong branch. Cherry-pick the change(s) over to the correct branch and then reset the original branch to the previous commit. Pulling out a set of commits made in a feature branch so you merge them back to your master branch sooner. Porting in specific commits from the master branch without rebasing your branch. In this tutorial you learn how to: Cherry-pick a commit Cherry-pick a commit Visual Studio Command Line 1. Open up Team Explorer and checkout to the branch you want to cherry-pick changes into using the Branches view. 2. Right-click the branch containing the changes you want and select View History Right-click the commit you want to cherry-pick and select Cherry-pick. Visual Studio copies the changes made in that commit into a new one on your current branch. Repeat this process for each commit you need to bring over to your current branch. Next steps Resolve merge conflicts
85 Resolve merge conflicts 10/21/ min to read Edit Online VSTS TFS 2018 TFS 2017 TFS 2015 VS 2017 VS 2015 VS 2013 When you merge one branch into another, file changes from commits in one branch can conflict with the changes the other. Git attempts to resolve these changes by using the history in your repo to determine what the merged files should look like. When it isn't clear how to merge changes, Git halts the merge and tells you which files conflict. In this tutorial you learn how to: Understand merge conflicts Resolve merge conflicts Understand merge conflicts The following image shows a very basic example of how changes conflict in Git. Both the master and bugfix branch make updates to the same lines of source code. If you try to merge the bugfix branch into master, Git can't determine which changes to use in the merged version. You may want to keep the changes in the master branch, the bugfix branch, or some combination of the two. Resolve this conflict with a merge commit on the master branch that reconciles the conflicting changes between the two branches.

86 The most common merge conflict situation is when you pull updates from a remote branch to your local branch, for example from origin/bugfix into your local bugfix branch. Resolve these conflicts is the same waycreate a merge commit on your local branch reconciling the changes and complete the merge. What does Git do to prevent merge conflicts? Git keeps an entire history of all changes made in your repo. Git uses this history as well as the relationships between commits to see if it can order the changes and resolve the merge automatically. Conflicts only occur when it's not clear from your history how changes to the same lines in the same files should merge. Preventing merge conflicts Git is very good at automatically merging file changes in most circumstances, provided that the file contents don't change dramatically between commits. Consider rebasing branches before you open up a pull request if your branch is far behind your main branch. Rebased branches will merge into your main branch without conflicts. Resolve merge conflicts Visual Studio Command Line 1. You'll be informed of the merge conflict(s) when you pull changes or attempt to merge two branches. 2. The conflict notification appears. Click the Conflicts link to start resolve file conflicts. 3. This will bring up a list of files with conflicts. Selecting a file lets you accept the changes in the source branch you are merging from with the Take Source button or accept the changes in the branch you are merging into using Keep Target. You can manually merge changes by selecting Merge, then entering the changes directly into the


87 4. Use the checkboxes next to the lines modified to select between remote and local changes entirely, or edit the results directly in the Result editor under the Source and Target editor in the diff view. 5. When done making changes, click Accept Merge. Repeat this for all conflicting files. 6. Open the Changes view in Team Explorer and commit the changes to create the merge commit and resolve the conflict. Compare the conflicting commits as well as the differences between the common history with the options in Visual Studio's merge tool. Next steps Undo changes
88 Undo changes 10/24/ min to read Edit Online VSTS TFS 2018 TFS 2017 TFS 2015 VS 2017 VS 2015 When undoing changes in Git, first decide what type of changes you are looking to undo. These changes fall into three categories: Discard uncommitted changes to a file, bringing the file back to the version in the last commit. Reset your local branch to a previous commit. Revert changes pushed to a remote branch and shared with others. If you just need to make small updates such as to fix a typo or small problem introduced in your last commit, consider amending your previous commit or fixing the change in a new commit instead of any of these other steps. In this tutorial you learn how to: Discard uncommitted changes to a single file Revert changes in shared commits Reset a branch to a previous state Discard uncommitted changes to a single file Restore file contents back to a known good version, removing unwanted changes. WARNING These commands will overwrite your existing file changes. If you think you might want these changes later, consider stashing them instead. Visual Studio Command Line Visual Studio 2015 & Open up the Changes view in Team Explorer. 2. Under the Changes section, find the file that you want to restore to the previous version. If your change is staged, remove it from the Staged Changes section by right-clicking and selecting Unstage. 3. Right-click that file and select Undo Changes.


89 Revert changes in shared commits Use revert to undo the changes made in your commits pushed to shared branches. The revert command creates a new commit that undoes the changes on a previous commit. No history is rewritten in a revert, making it safe to use when working with others. Visual Studio Command Line Open up the Changes view in Team Explorer. Select Actions and choose View History from the drop-down. In the history window that appears, right-click the commit to undo and select Revert from the context menu. Reset a branch to a previous state Use reset to bring a branch in your local repository back to the contents of a previous commit. The most common use of the reset command is to simply discard all changed files since the last commit and return the files to the state they were in at the most recent commit.

90 WARNING Don't use reset on branches shared with others. Use revert instead. Visual Studio Command Line 1. Open up the Changes view in Team Explorer. 2. Select Actions and choose View History from the drop-down. 3. In the history window that appears, right-click the commit to reset the repo to and select Reset from the context menu. 4. Choose Reset and delete changes... A reset affects all files in the current branch on the repository, not just those in your current directory. Reset only discards changes that haven't been committed yet. Next steps Ignore files
91 Ignore file changes with Git 12/4/ min to read Edit Online VSTS TFS 2018 TFS 2017 TFS 2015 VS 2017 VS 2015 Not every file created or updated in your code should be committed to Git. Temporary files from your development environment, test outputs and logs are all examples of files that you create but are not part of your codebase. Customize which files Git tracks through the gitignore feature. In this tutorial you learn how to: Use gitignore to prevent tracking or files Ignore files only on your system Ignore files across all repos on your system Ignore changes to committed files Use gitignore to prevent tracking of files Create a.gitignore file in your Git repo to prevent Git from staging unwanted files. Share the.gitignore in the default branch in your repo, so you and your team can update it to change which files to ignore. Create a.gitignore Visual Studio Command Line Visual Studio automatically creates a.gitignore file in your repo when you create new repo for your project. Git applies a.gitignore to the folder and any child folders where it's located. We strongly recommended to place your.gitignore in the root folder of your repo to prevent confusion. Customize your.gitignore Modify your.gitignore to include files types, paths, and file patterns in your repo. Git starts ignoring these files as soon as the.gitignore is updated, but be sure to commit the changes if others on your team need the same set of ignored files. Visual Studio Command Line You can edit your.gitignore file for your repo by going to the Settings view in Team Explorer, then selecting Repository Settings. Select the Edit link under next to your.gitignore.

92 Each line in the.gitignore excludes a file or set of files matching a pattern. The full gitignore syntax is very flexible. Here are some examples of the most common entries: # ignore a single file mycode.class # ignore an entire directory /mydebugdir/ # ignore a file type *.json # add an exception (using!) to the preceding rule to track a specific file!package.json NOTE Windows users: All file paths in the.gitignore file use a forward slash separator and not a backslash. Ignore files only on your system Your.gitignore is shared across team members as a file committed and pushed to the Git repo. To exclude files only on your system without pushing the changes to the rest of your team, edit the.git/info/exclude file in your local repo. Changes to this file will not be shared with others and only apply to the files in that repo. The syntax for this file is the same as the one used in.gitignore. Ignore files across all repos on your system Set up a global.gitignore for use across all repos on your system using the command line git config tool: > git config core.excludesfile C:\Users\frank\.gitignore_global This is particularly useful for ignoring entire file types you don't want to ever commit, such as compiled binaries. Ignore changes to committed files
93 Temporarily ignore changes During development it's convenient to stop tracking file changes to a file committed into your git repo. This is very convenient when customizing settings or configuration files that are part of your project source for your own work environment. > git update-index --assume-unchanged <file> Resume tracking files with: > git update-index --no-assume-unchanged <file> Permanently ignore changes to a file If a file is already tracked by Git, adding that file to your.gitignore is not enough to ignore changes to the file. You also need to remove the information about the file from Git's index: These steps will not delete the file from your system. They just tell Git to ignore future updates to the file. 1. Add the file in your.gitignore. 2. Run the following: > git rm --cached <file> 3. Commit the removal of the file and the updated.gitignore to your repo. Next steps Review history
94 Review history 11/14/ min to read Edit Online VSTS TFS 2018 TFS 2017 TFS 2015 VS 2017 VS 2015 Git uses the parent reference information stored in each commit to manage a full history of your development. Review this commit history to find out when file changes were made and determine differences between versions of your code. Git's use of feature branches and merges through pull requests mean that the commit history of your development doesn't form a straight, chronological line. When you use history to compare versions, think in terms of file changes between two commits instead of file changes between two points in time. A recent change to a file in the master branch may have come from a commit created two weeks ago in a feature branch but was only merged yesterday. In this tutorial you learn how to: Compare files Retrieve files Compare branches Compare files Compare the changes between two versions of a file in your Git repo. Visual Studio Command Line 1. Right-click the file in Solution Explorer and choose View History... The history window will appear showing the commit ID, author, date, and description of all changes to the file in your local repo across all branches. 2. Find the latest commit for a branch by looking for its name on an arrow to the right of a commit. 3. View changes from the previous version of the file by right-clicking and choosing Compare with previous... View the changes between any two versions by selecting both commits, then right-clicking and select Compare The diff view shows lines removed from the older commit and added in the new one.


95 Retrieve files Retrieve a specific version of a file from your history, even if the file was deleted or renamed in the latest version of your code. Retrieving an older version of the file doesn't make any changes to your current branch. Create a new commit to bring the older version of the file into your branch. Visual Studio Command Line To retrieve a previous version of a file that exists in your Visual Studio project: 1. Right-click the file in Solution Explorer and select View History. The Visual Studio History view will appear, showing the commits in your repo that updated the file. You can filter the commits to find the exact commit with the file version you want to restore. Double click on the version to open it in Visual Studio. To retrieve a previous version of a file that was deleted in a previous commit: 1. Open the Changes view in Team Explorer and select View History from the Actions drop-down.


96 2. Right-click the commit containing the version of the file you want to restore and select View Commit Details. 3. Right click the file to restore in the Commit Details in Team Explorer and select Open.

97 NOTE The retrieved version of a file is not automatically saved to your project. To save the retrieved version to your project, select Save As... from the File menu. If you save the file in your current project, either as a new file or overwriting an existing one, you'll need to commit your changes to add the previous version to your local branch. Compare branches Review potential changes from a merge or rebase by comparing branches directly. You can compare both local and remote branches, which is useful when checking for potential merge conflicts or to see how the changes others have made will affect your work. Visual Studio Command Line Comparing branches can be done in the web portal, which you can access from the Team Explorer Home view in Visual Studio by choosing Web Portal.

98 Select Branches from the menu under Code. Locate your branch and select the... icon to view the branch options. Select Compare branches. Select the branch to compare to from the drop-downs at the top. The view will display all changes between the branches.
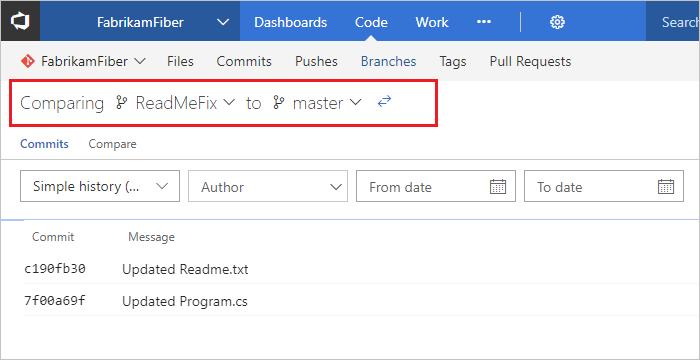
99
100 Understand Git history 9/12/ min to read Edit Online Git stores history as a graph of snapshots called commits of the entire repository. Each commit also contains a pointer to one or more previous commits. Commits can have multiple parents, creating a history that looks like a graph instead of a straight line. This difference in history is incredibly important and is the main reason users find Git confusing. Commit history basics Start with a simple history example: a repo with 3 linear commits. Commit A is the parent of commit B, and commit B is the parent of commit C. This history looks very similar to a CVCS. The arrow pointing to commit C is a branch. It's named master because that's the default name for the mainline branch in a Git repo. Branches are pointers to specific commits, which is why branching is so lightweight and easy in Git. A key difference in Git compared to CVCS is that I have my own full copy of the repo. I need to keep my local repository in sync with the remote repository by getting the latest commits from the remote repository. To do this, I'll pull the master branch with the following command: git pull origin master This merges all changes from the master branch in the remote repository, which Git names origin by default. This pull brought one new commit, and master in my local repo moves to that commit. Understand branch history Now I want to make a change to my code. It's common to have multiple active branches where you're working on different features in parallel. This is in stark contrast to CVCS where new branches are heavy and rarely created. The first step is to checkout to a new branch using the following command: git checkout -b cool-new-feature This is a shortcut combining two commands: git branch cool-new-feature to create the branch followed by git checkout cool-new-feature to begin working in the branch.
101 Two branches now point to the same commit. I'll make a few changes on the cool-new-feature branch in two new commits, E and F. My commits are reachable by the cool-new-feature branch since I made them in that branch. I'm done with my feature and want to merge it into master. To do that I'll use the following command: git merge cool-feature master The graph structure of history becomes visible when there's a merge. Git creates a new commit when I merged my branch into another branch. This is a merge commit. There aren't any changes included this merge commit since I didn't have conflicts. If I had conflicts, the merge commit would include the changes needed to resolve those conflicts. History in the real world Here is an example of Git history that more closely resembles code in active development on a team. There are three people who merge commits from their own branches into the master branch around the same time.

102 Now that you understand how branches and merges create the shape of the graph, this shouldn t be too scary!
103 How Git log history simplification works 9/12/ min to read Edit Online Git history simplification can be a confusing beast. 99% of the time you won't even know it exists, but every once in a while it will jump out of the dark corners of Git and bite you. In this article we'll explore what history simplification is and how it can cause confusion when looking at file history. Let's start with a common scenario: 1. You push a change to a file and then merge the change into master. 2. Some of your colleagues also merge their branches to master. 3. You come back some time later and notice your changes are missing. 4. Looking for the culprit, you go look at the file history and notice... your changes aren't even listed!? What is happening here is that Git commit history is a tree, and sometimes the chronological history is not the same as the actual file tree history. This is particularly true in cases where a merge commit reverts a file back to its original state. In that case, the default history view won't actually show you all changes, because technically the file didn't change. In the above scenario, Git realizes it can simplify the history and the "changes" you are most likely looking for are removed from the log. Unless you have run into it before, the result is often a lot of hair pulling and wondering Where the heck did my changes go? History Simplification: On by Default By default, running the log command on a file: git log file.txt will automatically simplify history, possibly hiding some commits from its output. You can read more details over at the git log man page. What makes this a tad more confusing is that history simplification does not occur if you just run git log (because you are looking at all changes there is nothing to simplify). In order to turn off history simplification, we need to use the command line switch --full-history. An Example of History Simplification This is all nice and theoretical, but let's create our own example of history simplification so we can see how it works First, let's look at a diagram of the history we are going to create:
104 As you can see, we are going to: 1. Create a file. 2. Add a line to that file in a branch (animals). 3. Add a different line to that file in another branch (fruit). 4. Merge branch animals back into master. 5. Merge branch fruit back into master, and choose the entire copy of the file from the fruit branch. 6. Check the history of the file. As you will see, Git is going to simplify the history for us. The key here is step 5 -- we ignored all changes from the animal branch. Git will notice that our file essentially did not change between step 1 and step 5, and so it will only show us two history entries. First we create the file and add it to our repo: > cd sample > git init > echo "some content" > test.txt > git add test.txt > git commit -m "Initial commit" Now we decide to append the text "donkeys" to the file in an animal branch: > git checkout -b animals > echo "donkeys" >> test.txt > git commit -am "We have added an animal" While we are experimenting, we decide maybe we want to go with fruit in our file instead, so we create a different branch and append the text "bananas" at the end of the file instead:
105 > git checkout master -b fruit > echo "bananas" >> test.txt > git commit -am "We have added a fruit" Feeling satisfied with our changes, we decide to merge our animal branch back into master: > git checkout master > git merge animals Now let's look at the log for our test.txt file: > git log test.txt commit 6b33d99b996c430a60c9552b79245d1aa Author: hross <robrodbe@microsoft.com> Date: Mon Feb 15 10:45: We have added an animal commit ccd9a54b055b184c7b6c16f2ece8067e51 Author: hross <robrodbe@microsoft.com> Date: Mon Feb 15 10:44: Initial commit So far so good, right? Nothing looks out of the ordinary in our log output. Now let's say we changed our minds and decided to merge our fruit branch: > git merge fruit Auto-merging test.txt CONFLICT (content): Merge conflict in test.txt Automatic merge failed; fix conflicts and then commit the result. Uh-oh, a merge conflict. After some consideration, we decide to use the entire test.txt file from our fruit branch. Typically you would use some kind of text editor or merge tool, but we'll just recreate the entire file, since it's only two lines: > echo "some content" > test.txt > echo "bananas" >> test.txt > git commit -am "Fixed merge conflict" Now let's take a look at the history for our test.txt file: > git log test.txt commit fdd4dfd816c4efebc5bdb240f49e934e299db581 Author: hross <robrodbe@microsoft.com> Date: Mon Feb 15 10:51: We have added a fruit commit ccd9a54b055b184c7b6c16f2ece8067e51 Author: hross <robrodbe@microsoft.com> Date: Mon Feb 15 10:44: Initial commit
106 Sure enough, we don't see any changes from our first experiment in the log, nor do we see our merge! Are they still there? Did Git eliminate the changes entirely? > git log --full-history test.txt As you can see, although it simplified the log without the full-history flag, Git has kept all of our changes: commit 5d0bb77a24e265dc154654fb3b5be331b53bf977 Merge: 6b33d99 fdd4dfd Author: hross Date: Mon Feb 15 10:59: Fixed merge conflict commit fdd4dfd816c4efebc5bdb240f49e934e299db581 Author: hross Date: Mon Feb 15 10:51: We have added a fruit commit 6b33d99b996c430a60c9552b79245d1aa Author: hross <robrodbe@microsoft.com> Date: Mon Feb 15 10:45: We have added an animal commit ccd9a54b055b184c7b6c16f2ece8067e51 Author: hross <robrodbe@microsoft.com> Date: Mon Feb 15 10:44: Initial commit Git History Simplification in a Nutshell Most of the time you will never notice history simplification. But when a merge conflict goes wrong and you want to know what happened, you may find yourself looking at the git log history and wondering where your changes went. Now, instead of panicking, you know that: History simplification for files is turned on by default The --full-history flag will give you a more comprehensive file history Bonus: VSTS has introduced a number of awesome history viewing options on the web. If you don't want to go slogging through the command line, you can pull up the file you wish to view history for in our explorer. You'll see a history filter where you can specify simple or non-simple history views:
107 Adopt a Git branching strategy 12/8/ min to read Edit Online Distributed version control systems like Git give individuals wide flexibility in how they use version control to share and manage code. Your team should find a balance between this flexibility and the need to collaborate and share code in a consistent manner. Team members publish, share, review, and iterate on code changes through Git branches shared with others. Adopt a branching strategy for your team so that you collaborate better and spend less time managing version control and more time developing code. Keep your branch strategy simple Keep your branch strategy simple by building your strategy from these three concepts: 1. Use feature branches for all new features and bug fixes. 2. Merge feature branches into the master branch using pull requests. 3. Keep a high quality, up-to-date master branch. A strategy that extends these concepts and avoids contradictions will result in a version control workflow for your team that is consistent and easy to follow. Use feature branches for your work Develop your features and fix bugs in feature branches (also known as topic branches) based off your master branch. Feature branches isolate work in progress from the completed work in the master branch. Git branches are inexpensive to create and maintain, so even small fixes and changes should have their own feature branch. Creating feature branches for all your changes makes reviewing history very simple. Look at the commits made in the branch and look at the pull request that merged the branch. Name your feature branches by convention Use a consistent naming convention for your feature branches to identify the work done in the branch. You can also include other information in the branch name, such as who created the branch. Some suggestions for naming your feature branches: users/username/description users/username/workitem bugfix/description features/feature-name features/feature-area/feature-name hotfix/description
108 NOTE For information on setting policies to enforce a branch naming strategy, see Require branch folders. Use feature flags to manage long-running branches Long-lived feature branches present problems when you need to build code on top of the branch before the work in the branch is finished. Merge unfinished features into the master branch so others can build off their work, but keep them hidden from your users and testers behind feature flags. Enable the flag in development to use the feature without the changes affecting anyone else. Once the feature is finished, you can remove the flags or use them to roll out the feature to select users and testers. Learn more about using feature flags in your code. Review and merge code with pull requests The review that takes place in a pull request is critical for improving code quality. Only merge branches through pull requests that pass your review process. Avoid merging branches to the master branch without a pull request. Reviews in pull requests take time to complete, so your team should agree on what's expected from pull request creators and reviewers. Distribute reviewer responsibilities to share ideas across your team and spread out knowledge of your codebase. Some suggestions for successful pull requests: Two reviewers is an optimal number based on research. If your team already has a code review process, bring pull requests into what you're already doing. Take care assigning the same reviewer(s) to a large number of pull requests. Pull requests work better when reviewer responsibilities are shared across the team. Provide enough detail in the description to quickly bring reviewers up to speed with your changes. Include a build or linked version of your changes running in a staged environment with your pull request so others can easily test the changes. Keep a high quality, up-to-date master branch The code in your master branch should pass tests, build cleanly, and always be up to date. Your master branch needs these qualities so that feature branches created by your team start from a known good version of code. Set up a branch policy for your master branch that: 1. Requires a pull request to merge code. This prevents direct pushes to the master branch and ensures discussion of proposed changes. 2. Automatically adds reviewers when a pull request is created. The added team members review the code and comment on the changes in the pull request. 3. Requires a successful build to complete a pull request. Code merged into the master branch should build cleanly. TIP The build definition for your pull requests should be quick to complete, so it doesn't interfere with the review process. Manage releases Use release branches to coordinate and stabilize changes in a release of your code. This branch is long-lived and isn't merged back into the master branch in a pull request, unlike the feature branches. Create as many release branches as you need, but keep in mind that each active release branch represents another version of the code
109 you'll need to support. Lock release branches when you're ready to stop supporting a particular release. Use release branches Create a release branch from the master branch as you get close to your release or other milestone, such as the end of a sprint. Give this branch a clear name associating it with the release, for example release/20. Create branches to fix bugs from the release branch and merge them back into the release branch in a pull request. Port changes back to the master branch Bring over changes made in your release branch into your master branch to prevent regression in your code. Port your changes from your release branch into a new feature branch to bring them back into the master branch. Use cherry-picking instead of merging so that you have exact control over which commits are ported back to the master branch. Merging the feature branch into the master branch can bring over release-specific changes you don't want in the master branch. Update the master branch with a change made in the release branch with these steps: 1. Create a new feature branch off the master branch to port the changes. 2. Cherry-pick the changes from the release branch to your new feature branch. 3. Merge the feature branch back into the master branch in a second pull request. This release branch workflow keeps the pillars of the basic workflow intact: feature branches, pull requests, and a strong master branch that always has the latest version of the code. Why not use tags for releases? Other branching workflows use Git tags to mark a specific commits as a release. Tags are useful for marking points in your history as important, but tags introduce extra steps in your workflow that aren't necessary if you are using branches for your releases. Tags are maintained and pushed separately from your commits. Team members can easily miss tagging a commit and then have to go back through the history afterwards to fix the tag. You can also forget the extra step to push the tag, leaving the next developer working from an older version of the code when supporting the release. The release branch strategy extends the basic feature branch workflow to handle releases. Your team doesn't have to adopt any new version control process other than the cherry-pick to port changes.
110 Manage deployments You can handle multiple deployments of your code in the same way you handle multiple releases. Create a clear naming convention (such as deploy/performance-test ) and treat the environment branches like release branches. Your team should agree on a process to update deployment branches with the code from your master branch. Cherrypick bugfixes in the deployment branch back to the master branch using the same steps as porting changes from a release branch. An exception to this recommendation is if you are using a form of continuous deployment. Use release management tools when working with continuous deployment to promote builds from your master branch to your deployment targets.
111 Get feedback with pull requests 11/1/ min to read Edit Online VSTS TFS 2018 TFS 2017 TFS 2015 VS 2017 VS 2015 Pull requests combine the review and merge of your code into a single collaborative process. Once you're done fixing a bug or new feature in a branch, create a new pull request. Add the members of the team to the pull request so they can review and vote on your changes. VSTS has a rich pull request experience that's easy to use and scales to your needs. Use pull requests to review works in progress and get early feedback on changes. There's no commitment to merge the changes as the owner can abandon the pull request at any time. Get your code reviewed The code review done in a pull request isn't just to find obvious bugs. That's what your tests are for. A good code review catches less obvious problems that could lead to costly issues later. Code reviews help protect your team from bad merges and broken builds that sap your team's productivity. The review catches these problems before the merge, protecting your important branches from unwanted changes. Cross-pollinate expertise and spread problem solving strategies by using a wide range of reviewers in your code reviews. Diffusing skills and knowledge makes your team stronger and more resilient. Give great feedback High quality reviews start with high quality feedback. The keys to great feedback in a pull request are: Have the right people review the pull request Make sure that reviewers know what the code does Give actionable, constructive feedback Reply to comments in a timely manner When assigning reviewers to your pull request, make sure you select the right set of reviewers. You want reviewers that will know how your code works, but try to also include developers working in other areas so they can share their ideas. Provide a clear description of your changes and provide a build of your code that has your fix or feature running in it. Reviewers should make an effort to provide feedback on changes they don't agree with. Identify the the issue and give a specific suggestions on what you would do differently. This feedback has clear intent and is easy for the owner of the pull request to understand. The pull request owner should reply to the comments, accepting the suggestion or explaining why the suggested change isn't ideal. Sometimes a suggestion is good, but the changes are outside the scope of the pull request. Take these suggestions and create new work items and feature branches separate from the pull request to make those changes. Protect branches with policies There are a few critical branches in your repo that the team relies on always being in good shape, such as your master branch. Require pull requests to make any changes on these branches. Developers pushing changes directly to the protected branches will have their pushes rejected. Add additional conditions to your pull requests to enforce a higher level of code quality in your key branches. A clean build of the merged code and approval from multiple reviewers are some extra requirements you can set to
112 protect your key branches.
113 Review code with pull requests 12/21/ min to read Edit Online VSTS TFS 2018 TFS 2017 TFS 2015 VS 2017 VS 2015 Create pull requests to review and merge code in a Git team project. Pull requests let your team review code and give feedback on changes before merging it into the master branch. Pull requests can come from either topic branches within the same repository or from a branch in a fork of the original repository. Reviewers can step through the proposed changes, leave comments, and vote to approve or reject the code. New to pull requests? Learn more about how to get feedback with Git pull requests. NOTE You can manage pull requests and other resources in VSTS and Team Foundation Server 2017 Update 2 or later from the command line with the VSTS CLI (Preview). Create a new pull request Create a new pull request from: Pushed feature branches to your Git repo The Development section in a linked work item The Pull Requests tab in the Code view on the web Team Explorer in Visual Studio After pushing a branch When you publish or update a feature branch in your VSTS Git repo, you get a prompt asking if would like to create a pull request in the Code view on the web. This prompt is displayed on the Pull Requests tab and the Files tab.

114 Select the Create a pull request link to go to a page where you can enter your pull request details and create the pull request. From a linked work item Create a pull request directly from a work item linked to the branch. 1. From the Backlogs or Queries tab in the Work view, open the work item with the linked branch. 2. In the Development area of the work item, there's a link to create a pull request under the branch name. Select the link to go to a page where you can enter your pull request details and create the pull request. From the Code view on the web Create pull requests from any branch from the Pull Request tab in the Code view on the web. Select New pull request in the upper right to go to a page where you can enter your pull request details and create the pull request. Pick the branch you wish to have reviewed and the branch you want to merge the changes into, such as the master branch. From Visual Studio Initiate pull requests directly from Visual Studio. 1. Connect to your Team Project from Visual Studio. 2. Open Team Explorer (select View, then Team Explorer or use the Ctrl+\, Ctrl+M hotkey) 3. Open Pull Requests in Team Explorer by selecting the Home icon and choosing Pull Requests.
115 4. From the Pull Requests view you can view pull requests opened by you, assigned to you, and you can create new pull requests. Select New Pull Request to open up a web browser where you can create the new pull request in the VSTS web portal. You can also initiate pull requests from Visual Studio from the Branches view in Team Explorer by rightclicking the branch name and selecting Create pull request while connected to your VSTS Project.

116 Add detail to your pull request Link work items and describe the changes in the branch to make it easier for others to see what problem you are trying to solve. Change the pull request title, add a detailed description, add reviewers, link work items, and make comments to explain your changes. When you're ready to create the pull request and have your changes reviewed, select Create.
117 Don't worry if you don't have all of the work items, reviewers, or details ready when you create your pull request - you can add them now when you create the pull request, and you can also add or update all of these items later after you create the pull request. Add and remove reviewers Add reviewers to your pull request. 1. Select the Overview tab in the pull request.


118 2. Select the add icon in the Reviewers area. 3. Enter the name of the user or group to add to the reviewer list for the pull request. If the user isn't a member of your Team Project, you'll need to add them. 4. As you enter a name or address, a list of matching users or groups appears. Select the user or group from the list to add them as a reviewer. Link work items Link work items to your pull request: 1. Select the Overview tab in the pull request.

119 2. Select the add icon in the Work Items area. 3. Enter the ID of the work item or search for work items with titles that match your text. Select the work item from the list that appears. Remove work item links by selecting the that appears when you hover over the work item. This only removes the link between a work item to a pull request; links created in the branch or from commits stay in the work item. Edit pull request title and description Update the title of a pull request by clicking the current title and updating the text. Choose the save icon to save changes or select undo to discard your changes. Edit the pull request description by selecting the edit link that appears when you hover over the existing description.

120 Keep these fields up to date so reviewers know what the changes in the pull request are trying to accomplish. Manage your pull requests Manage pull requests you own or are assigned to with the Pull Requests tab in the Code view on the web. Select Active to show all active pull requests for the current repo. Select Completed or Abandoned to bring up a history of closed pull requests. Review a pull request The Overview tab shows the current state of the pull request at a glance. Review the title, description, and discussion to get an understanding of the proposed changes and see issues brought up by other reviewers.


121 Browse code changes Select the Files tab to view the changes made to the source branch relative to the target branch of the pull request. Review previous versions of the code pushed to the source branch of the pull request from the All updates dropdown. A new version is added to the list in the drop-down and on the Updates tab every time the branch is updated in VSTS. The diff view updates as you select different changes, showing the differences between the files in the currently selected and previous version in the pull request. Catch up with a pull request after being away from it for awhile by stepping through changes made since your last review.


122 Browse a list of changes by push from the author using the Updates tab. You can select and view changes made in commits on the branch in the Commits tab.
. Leave feedback not tied to a specific code change by commenting in the Overview tab.")
123 Leave comments Add comments to the pull request to make suggestions, reply to previous comments, and point out problems with the proposed changes. Comment inline in the Files tab in your pull request by selecting the comment icon ( ). Leave feedback not tied to a specific code change by commenting in the Overview tab. Reply directly to the author or other reviewers by and reference work items using #workitemid in your comments. You can also reference other pull requests using!pullrequestid. Update comment status to let reviewers know what you are doing to address the concerns brought up in their review. New comments start in Active status and can be updated in the conversation using the Resolve and Reply & resolve buttons.

124 Additional options are available in the comment resolution drop-down. Active: Comment is still under review. Pending: The issue in this comment will be addressed, but isn't fixed yet. Resolved: The issue brought up in this comment has been fixed. Won't Fix: The suggestion in the comment is noted, but won't make changes in this pull request to address it. Closed: Discussion for this comment is closed. Vote on the changes Vote on the changes in a pull request by choosing an option from the button on the upper right. The default option is Approve, but you can select other options from the drop-down:

125 Approve: Agree with the proposed changes in the pull request as-is. Approve with suggestions: Agree with the pull request, but provide optional suggestions to improve the code. Wait for author: Do not approve the changes, and ask the author to review your comments. The author should let you know when you should re-review the code after they have addressed your concerns. Reject: The changes aren't acceptable. If you are voting this way, you should leave a comment in the pull request detailing why the changes were rejected. Reset feedback: Choose Reset feedback to remove your vote. The number of required approvals in a pull request can be set from the branch policy for the branch. Pull requests can be completed if the number of required approvals is met, even if other reviewers have rejected the changes. Votes in a pull request do not reset when new code is pushed to the branch - make sure you have notifications enabled if you want to review your vote as the code changes. Best practice: At least two reviewers should review and approve the changes in a significant pull request. Update code in response to feedback Update your code in response to comments by creating a new commit with the changes and pushing the updates to the branch in your VSTS repo. You can make quick updates to your branch directly from the Files tab in the Code view on the web. Complete the pull request Complete your pull request after the reviewers approve of the changes by selecting Complete in the upper right of the pull request view.
126 Complete: Complete the pull request now and merge the changes to the target branch. Set auto-complete: If you have branch policies, you can choose Set auto-complete to configure the pull request to close once all branch policies are met. Abandon: Choose Abandon to close the pull request without merging the changes. Enter the message used for the merge commit and update the pull request description as needed in the dialog that follows. Check Complete linked work items after merging to complete any linked work items. Check Delete <branch name> after merging to delete the source branch from the pull request. Check Squash changes when merging to squash merge your pull request. Check Override branch policies and enable merge to force merge even if all branch policies haven't been satisfied. This option is only available if you have Exempt from policy enforcement permissions. Linked work items are also updated showing the pull request completion.
127 Complete automatically Select Auto-complete from the Complete button drop-down to complete the pull request and merge the changes as soon as all branch policies are met. Auto-completion lets you skip having to come back to the pull request to complete it after the build finishes successfully and the reviewers approve the changes. When the conditions are satisfied for auto-complete, the pull request is completed and you are notified via . If there is a conflict or an error completing the pull request, you will get an notifying you of the issue so you can resolve it. Once auto-complete has been set, the pull request displays a banner confirming that the changes will be merged as soon as the policies are satisfied. Select Cancel auto-complete to turn off auto-complete and return the pull request to an active state. NOTE The Auto-complete option is available in VSTS and TFS 2017 and higher, and is only present when you have branch policies that must be satisfied before the pull request can be completed. If you don't see Auto-complete, it is because you don't have any branch policies. For more information, see Branch policies. Abandon your changes Abandon pull requests when you decide the work in the feature branch should not be merged by selecting Abandon from the drop-down on the Complete button. The abandoned pull request will still be viewable on the web and stays linked to work items. Reactivate an abandoned pull request at any time by selecting the pull request from the Abandoned tab in the Pull Request view and selecting Reactivate. Receiving notification of pull request updates Subscribe to alerts to get notified when changes are made to your pull requests. NOTE By default you are subscribed to several common pull request notifications. For a complete list of default notification subscriptions, see Out-of-the-box (OOB) or default subscriptions 1. Select the settings icon while you have your team project open to bring up the project administration page.

128 2. Select the Notifications tab to view your notification settings, and choose New subscription to subscribe to additional notifications. 3. To edit or unsubscribe from a notification, select... for the notification and choose View to edit the subscription, or Opt out to unsubscribe from the notification. Revert a pull request Undo the changes made in a pull request by opening the completed pull request and selecting Revert. When you revert a pull request in this way, you create a new branch with changes that will undo the pull request for an existing target branch in your repo. In the dialog that appears, pick the branch where you want to undo the pull request changes in the Target branch selector and the name of a new branch where the reverted changes will be created in the Topic branch name field, then select Revert. Select Create pull request to merge the newly created branch in a second pull request to
129 complete the revert. NOTE The branch created during this revert has a single commit that reverts the file changes in the pull request. The branch does not contain a reverted commit for each of the commits merged in the original pull request. Cherry-pick a pull request Copy changes made in a pull request to another branch in your repo by selecting Cherry-pick while viewing the completed pull request or selecting Cherry-pick from the... menu while viewing an active pull request. Cherrypicking a pull request in this way creates a new branch with the copied changes that you then merge into a target branch in a second pull request. In the dialog that appears, enter the branch you want to merge the copied changes into in the Target branch field and a new branch that will contain the copied changes in the Topic branch name field, then select Cherry-pick. If there are no conflicts between the target branch and the newly created topic branch, you can then select Create pull request to merge the topic branch into the target branch to complete the cherry-pick. Set a new default branch NOTE This step requires Edit Policies permissions on your Git repo. Configure your Git repo to use a different default branch to merge code into when your team creates new pull requests. This is useful when you want to use a branch other than master for new changes or need to change your main line of development in your repo. 1. Select the settings icon while you have your team project open to bring up the project administration page. 2. Select Version Control. 3. Select your Git repository. Your branches are displayed under your repo. 4. Select the... next to the branch you want to set as default, then select Set as default branch.
130
131 Squash merge pull requests 11/1/ min to read Edit Online VSTS TFS 2018 TFS 2017 TFS 2015 VS 2017 VS 2015 Pull requests and Git history When you complete a pull request in VSTS, you merge the topic branch into your default branch, usually master. This merge adds the commits of the topic branch to your main branch and creates a merge commit to reconcile any conflicts between the default and topic branch. The comments and discussion in the pull request give additional context for the changes made in the topic branch. The commit history on your master branch (or other default branch) does not follow a straight line because of the related topic branch history. As the project grows larger, the number of topic branches worked on at the same time increases, making the default branch history increasingly more difficult to follow. This default branch is an accurate representation of the history of each topic branch, but it is difficult to use to answer broader questions about your project's development. What is a squash merge? Squash merging is a merge option that allows you to condense the Git history of topic branches when you complete a pull request. Instead of each commit on the topic branch being added to the history of the default branch, a squash merge takes all the file changes and adds them to a single new commit on the default branch.
132 A simple way to think about this is that squash merge gives you just the file changes, and a regular merge gives you the file changes and the commit history. How is a squash merge helpful? Squash merging keeps your default branch histories clean and easy to follow without demanding any workflow changes on your team. Contributors to the topic branch work how they want in the topic branch, and the default branches keep a linear history through the use of squash merges. The commit history of a master branch updated with squash merges will have one commit for each merged branch. You can step through this history commit by commit to find out exactly when work was done. Considerations when squash merging Squash merging condenses the history of changes in your default branch, so it is important to work with your team to decide when you should squash merge and when you want to keep the full commit history of a topic branch. When squash merging, it's a good practice to delete the source branch. This prevents confusion as the topic branch itself does not have a commit merging it into the default branch. Completing pull requests with squash merge You can choose to squash merge when completing a pull request in VSTS. Choose Squash changes when merging on the Complete pull request dialog to squash merge the topic branch.
133
134 Forks 12/21/ min to read Edit Online VSTS TFS 2018 A fork is a complete copy of a repository, including all files, commits, and (optionally) branches. Forks are a great way to support an Inner Source workflow: you can create a fork to suggest changes to a project when you don't have permissions to write to the original project directly. Once you're ready to share those changes, it's easy to contribute them back using pull requests. What's in a fork A fork starts with all the contents of its upstream (original) repository. When you create a fork, you can choose whether to include all branches or limit to only the default branch. None of the permissions, policies, or build definitions are applied. The new fork acts as if someone cloned the original repository, then pushed to a new, empty repository. After a fork has been created, new files, folders, and branches are not shared between the repositories unless a PR carries them along. Sharing code between forks You can create PRs in either direction: from fork to upstream, or upstream to fork. The most common direction will be from fork to upstream. The destination repository's permissions, policies, builds, and work items will apply to the PR. Choosing between branches and forks For a very small team (2-5 developers), we recommend working in a single repo. Everyone should work in topic branches, and master should be protected with branch policies. As your team grows larger, you may find yourself outgrowing this arrangement and prefer to switch to a forking workflow. If your repository has a large number of casual or infrequent committers (similar to an open source project), we recommend the forking workflow. Typically only core contributors to your project have direct commit rights into your repository. You should ask collaborators from outside this core set of people to work from a fork of the repository. This will isolate their changes from yours until you've had a chance to vet the work. The forking workflow 1. Create a fork 2. Clone it locally 3. Make your changes locally and push them to a branch 4. Create and complete a PR to upstream 5. Sync your fork to the latest from upstream Create the fork Choose the Fork button (1), then choose the project where you want the fork to be created (2). Give your fork a name and choose the Fork button (3). You must have the Create Repository permission in your chosen project to create a fork. We recommend you create a dedicated project for forks where all contributors have the Create Repository permission.

135 If the repository contains a lot of topic branches, we recommend you fork only the default branch. On the other hand, for a newer repository which will primarily be used with forking, we recommend choosing all branches. Clone your fork locally Once your fork is ready, clone it using the command line or an IDE like Visual Studio. The fork will be your origin remote. For convenience, you'll want to add the upstream repository (where you forked from) as a remote named upstream. On the command line, you can type: git remote add upstream {upstream_url} Or, in Visual Studio, follow these steps: 1. Open the Settings page.


136 2. Choose Repository Settings. 3. Under Remotes, choose Add.

137 4. Add a new remote called upstream, using the Git clone URL of the repo you forked from. Make and push changes It's possible to work directly in master - after all, this fork is your personal copy of the repo. We recommend you still work in a topic branch, though. This allows you to maintain multiple, independent workstreams
138 simultaneously. Also, it reduces confusion later when you want to sync changes into your fork. Make and commit your changes as you normally would. When you're done with the changes, push them to origin (your fork). Create and complete a PR Open a pull request from your fork to the upstream. All the policies, required reviewers, and builds will be applied in the upstream repo. Once all policies are satisfied, the PR can be completed and the changes become a permanent part of the upstream repo. Important note: Anyone with the Read permission can open a PR to upstream. If a PR build definition is configured, the build will run against the code introduced in the fork. Sync your fork to latest When you've gotten your PR accepted into upstream, you'll want to make sure your fork reflects the latest state of the repo. We recommend rebasing on upstream 's master branch (assuming master is the main development branch). On the command line, run: git fetch upstream master git rebase upstream/master git push origin


139 Or, using Visual Studio, you can use the Synchronization page to fetch and rebase. 1. Open the Synchronization page in Team Explorer. 2. Fetch from upstream. 3. Open the Branches page in Team Explorer. Make sure master is checked out. 4. Rebase master onto upstream/master.

140 Now you're all set to start your next feature on a new topic branch. The forking workflow lets you isolate changes from the main repository until you're ready to integrate them. When you're ready, integrating code is as easy as completing a pull request.
141 Authentication overview 10/21/ min to read Edit Online VSTS TFS 2018 TFS 2017 TFS 2015 Update 3 Choose a method to securely login and access the code in your VSTS Git repo. Use these credentials with Git on the command line or from any Git client that supports HTTPS or SSH authentication. Limit the scope of access and revoke these credentials from the web when they are no longer needed. Using Visual Studio? Team Explorer handles authentication with VSTS repos for you. Authentication comparison AUTHENTICATION TYPE WHEN TO USE SECURE? EASE OF SETUP ADDITIONAL TOOLING REQUIRED Personal access tokens When you need an easy to configure credential or need configurable access controls Very secure (when using HTTPS) Easy Optional (Git credential managers) SSH When you already have SSH keys set up Very secure Intermediate Windows users will need the SSH tools included with Git for Windows Alternate credentials When you can't use personal access tokens or SSH Least secure Easy No Personal access tokens Personal access tokens let you create a password for use with the command line or other Git client without using your VSTS username and password directly. An expiration date is set on these tokens when they are created and you can restrict the scope of the data they can access in VSTS. Use personal access tokens to authenticate if you don't already have SSH keys set up on your system or if you need to restrict the permissions granted by the credential.


142 Learn more about personal access tokens Use credential managers to generate tokens Git credential managers are an optional tool that makes it easy to create personal access tokens when working with the Git and VSTS. Normally you'd need to log into the VSTS web portal, generate a token, then use the token as your password when connecting to VSTS. Personal access tokens are generated on demand when you have the credential manager installed. The credential manager creates the token in VSTS and saves it locally for use with the Git command line or other client. Current versions of Git for Windows include the Git credential manager as an optional feature during installation. SSH key authentication Key authentication with SSH works through a public and private key pair that you create on your computer. You associate the public key with your username from the web. VSTS will encrypt the data sent to you with that key when you work with Git. You decrypt the data on your computer with the private key, which is never shared or sent over the network. SSH is a great option if you've already got it set up on your system just add a public key to VSTS and clone your repos using SSH. If you don't have SSH set up on your computer, you should use personal access tokens and HTTPS instead-it's secure and easier to set up.
143 Learn more about setting up SSH with VSTS Alternate credentials Use of alternate credentials is not recommended. Create an alternate user name and password to access your Git repository using alternate credentials. Unlike personal access tokens, this login doesn't expire and can't be scoped to limit access to your VSTS data. Use alternate credentials as a last resort when you can't use personal access tokens or SSH keys.
144 How dates work in Git 1/5/ min to read Edit Online Git tracks two dates in commits: author date and commit date. In addition, VSTS and TFS track when a commit was first pushed to the server. Author date: when a commit was originally authored. Typically, when someone first ran git commit. Commit date: when a commit was applied to the branch. In many cases it is the same as the author date. Sometimes it differs: if a commit was amended, rebased, or applied by someone other than the author as part of a patch. In those cases, the date will be when the rebase happened or the patch was applied. Push date: when a commit was pushed to the remote repository in question. This date is specific to the remote version control system you are using, and won't be available in your local repository. When you run git log, by default you will see the author date. If you want to see commit date, you can use one of the many command line options, such as --pretty=fuller. Let's look at a brief example to see these concepts in practice. First we will create a normal commit: git init echo test > file.txt git add * git commit -m "A normal commit message" Now let's ammend our commit with a different message: echo again > file.txt git add * git commit --amend -m "An ammended commit" If we look at our regular log history we would see something like the following: git log commit f0ae25adeff21c9e21742ba22b7f3499 Author: Ross Brodbeck <robrodbe@microsoft.com> Date: Thu Feb 25 19:38: An amended commit Now let's view the same commit with the author date: git log --pretty=fuller commit f0ae25adeff21c9e21742ba22b7f3499 Author: Ross Brodbeck <robrodbe@microsoft.com> AuthorDate: Thu Feb 25 19:38: Commit: Ross Brodbeck <robrodbe@microsoft.com> CommitDate: Thu Feb 25 19:39: An amended commit Note the (slight) difference between the author date and commit date above. The author date is my original,
145 unedited, commit time. The commit date is the time at which I ran the --amend command. In fact, there are a lot of git log options to help you understand dates better. For example, passing the --date flag will allow you to determine how dates are displayed. This can be useful for normalizing time zones (git displays dates in their original time zone, by default) or changing the date display string. To learn more about the various formatting options, see the git log man page. Changing Git Dates When you're getting ready to commit your code, note that you have the ability to set both the author and commit dates. This isn't something you should do often. You can change the author date of a given commit by passing the --date flag to git commit. There are various articles regarding the formatting of this flag, but the gist is that it isn't well-documented. This StackOverflow question does a great job of explaining the acceptable date formats. You can also use the environment variables GIT_COMMITTER_DATE and GIT_AUTHOR_DATE to set the corresponding dates, as documented in the man page. If you need to go this route, use this Stack Overflow question as a starting point.
146 How names work in Git 10/18/ min to read Edit Online When you commit to your local repo, Git includes your name and address as part of the commit. This can sometimes lead to confusion. The name and on your commits may not match the identity you log in with on a Git host like VSTS. Further, you may have commits under several different names and addresses even though you were the author for each of them. Why are there multiple names for me in my repo? Have you searched your name in the History page and been surprised to see multiple, slightly different entries for yourself? You were probably left wondering how this happened and what you can do about it. The answer is simple: in different commits, your name was recorded differently. Maybe you have two different computers, one configured with your full name (e.g. Frances) and the other with the nickname you go by (e.g. Frank). Or maybe you have a home computer connected to your Microsoft Account (e.g. frances@outlook.com) and a work computer connected to your employer's Azure Active Directory (e.g. frances_t@fabrikam.com). It's even possible you changed your settings over time, so older commits have one name and newer commits have another. Where does Git get your name and ? Git stores your name and address in its config file. This file can be at the system level, global to your account on your computer, or local to a repository. If a name and aren't found in any of these places, Git will do its best to get this information from your operating system. Your details are included in the commit, marking you as the author of that commit. When you set up Git for the first time on a new machine, you may create a commit using Git's "best effort" information. Git will prompt you to set an explicit name and address, and the new settings will be used for subsequent commits. This is a frequent source of one author having multiple names. Where does VSTS get your name and ? Your details in VSTS come from your profile. Your profile was originally populated from details in your Microsoft Account or Azure Active Directory account, but you may change these details yourself. When you edit a file in the web or complete a PR, VSTS supplies your profile details as the author of the commit. This is another opportunity for your name or address to be specified differently. How do I change my information in Git and VSTS? In Git, you can run two commands to change your name and address: git config --global user.name "Frances Totten" git config --global user. "frances_t@fabrikam.com" In VSTS, you can update your profile by clicking your picture in the upper right corner and choosing My profile. How do I change the author displayed for past commits? If you've made a single change locally and it has the wrong author, you can amend that commit with new author information. Be sure to format it like this: Name < >.
147 git commit --amend --author="frances L. Totten In most other cases, it's best to keep the existing author information. To change an author name or , you must create a new commit. When you change a commit, all subsequent commits descended from that commit also must change.
148 Git preferences and settings 10/21/ min to read Edit Online VSTS TFS 2018 Git has a set of configuration files that define any non-default behavior that you specify. You can specify your name and address, your preferred diff and merge tools, command aliases, formatting, and much more. These files allow you to personalize and customize Git to optimize your workflow. Files and order of precedence There are four files which are used to set configuration options. These files are read from widest to most narrow scope with the last file taking precedence over previously read files. The files are read in the following order: 1. $(prefix)/etc/gitconfig : System-wide configuration file. 2. $XDG_CONFIG_HOME/git/config : Second user-specific configuration file. If $XDG_CONFIG_HOME is not set or is empty, $HOME/.config/git/config is used. Support for this file is not included in all versions, so for compatibility reasons, its use is not recommended. 3. ~/.gitconfig : User-specific configuration file, also known as the "global" configuration file. 4. $GIT_DIR/config : Repository-specific configuration file. For more information, see the Pro Git reference on configuration files. Configuring settings Visual Studio allows you to configure and check some of the most common Git configuration settings. Global Settings corresponds to the user-specific configuration file and Repository Settings corresponds to the repository-specific configuration file. For settings not exposed in Visual Studio, run the following in the command line to write a value to your configuration files: git config [--local --global --system] section.key value To learn more, check out the Pro Git chapter on customizing Git and the git-config documentation. Name and The name and that you provide will be used as the author information for any commit you author. Visual Studio Command Line 1. In Team Explorer, go to Settings.

149 2. To set your user name and at the global level, go to Global Settings; to set these at the repo level, go to Repository Settings. 3. Provide your user name and , then Update to save. Note that for Repository Settings, you'll first need to check Override global user name and settings. Prune remote branches during fetch (fetch.prune) Pruning removes remote-tracking branches that no longer exist on the remote and helps you keep your branches list clean and up to date. We recommend setting this option to True at the global level. Valid settings are: True (recommended) False Unset (default) Visual Studio Command Line Requires Visual Studio 2017 Update 5 and later. 1. In Team Explorer, go to Settings.
 Rebasing sets aside the changes made by commits in the current branch that are not in the upstream branch, resets the current branch to the upstream branch, then applies the changes that were")
150 2. Go to Global Settings and set Prune remote branches during fetch to True (recommended). Select Update to save. Rebase local branch when pulling (pull.rebase) Rebasing sets aside the changes made by commits in the current branch that are not in the upstream branch, resets the current branch to the upstream branch, then applies the changes that were set aside. Valid settings are: True: Rebase current branch on top of upstream branch after fetch. False: Merge the current branch into the upstream branch. Unset (default): Unless specified in other configuration files, merge the current branch into the upstream branch. Interactive: Rebase in interactive mode. Preserve: Rebase without flattening locally created merge commits. Visual Studio Command Line Requires Visual Studio 2017 Update 5 and later. 1. In Team Explorer, go to Settings.

151 2. Go to Global Settings to configure this option at the global level; go to Repository Settings to configure this option at the repo level. 3. Set Rebase local branch when pulling. Select Update to save. Note that it is not possible to configure pull.rebase to Interactive in Visual Studio. Visual Studio does not have interactive rebase support. To configure pull.rebase to use interactive mode, use the command line. Diff and Merge Tools Git will show diffs and merge conflicts in your preferred tools. If you do not have a diff or merge tool configured, you can configure Git to use Visual Studio in Global Settings and Repository Settings: Verifying configuration settings Visual Studio shows most of configuration settings in Global Settings and Repository Settings. For settings not exposed in Visual Studio, you can open and inspect your configuration files or use the following in the command line: git config --list
152 Manage and store large files in Git 10/21/ min to read Edit Online VSTS TFS 2018 TFS 2017 TFS 2015 Git is great at keeping the footprint of your source code small because the differences between versions are easily picked out and code is easily compressed. Large files that don't compress well and change entirely between versions (such as binaries) present problems when stored in your Git repos. Git's fast performance comes from its ability to address and switch to all versions of a file from its local storage. If you have large, undiffable files in your repo such as binaries, you will keep a full copy of that file in your repo every time you commit a change to the file. If many versions of these files exist in your repo, they will dramatically increase the time to checkout, branch, fetch, and clone your code. What kind of files should you store in Git? Source code-not dependencies As your team works with editors and tools to create and update files, you should put these files into Git so your team can enjoy the benefits of Git's workflow. Don't commit other types of files, such as DLLs, library files, and other dependencies that aren't created by your team but your code depends on into your repo. Deliver these files through package management to your systems. Package management bundles your dependencies and installs the files on your system when you deploy the package. Packages are versioned to ensure that code tested in one environment runs the same in another environment as long as they have the same installed packages. Don't commit outputs Don't commit the binaries, logs, tracing output or diagnostic data from your builds and tests. These are outputs from your code, not the source code itself. Share logs and trace information with your team through work item tracking tools or through team file sharing. Store small, infrequently updated binary sources in Git Binary source files that are infrequently updated will have relatively few versions committed, and will not take up very much space provided that their file size is small. Images for the web, icons, and other smaller art assets can fall into this category. It's better to store these files in Git with the rest of your source so your team can use consistent workflow. IMPORTANT Even small binaries can cause problems if updated often. One hundred changes to a 100KB binary file uses up as much storage as 10 changes to a 1MB binary, and due to the frequency of updates to the smaller binary will take slow down branching performance more often than the large binary. Don't commit large, frequently updated binary assets Git will manage one main version of a file and then store only the differences from that version in a process known as deltification. Deltification and file compression allow Git to store your entire code history in your local repo. Large binaries usually change entirely between versions and are often already compressed, making these files difficult for Git to manage since the difference between versions is very large. Git must store the entire contents of each version of the file and has difficulty saving space through deltification and compression. Storing the full file versions of these files causes repo size to increase over time, reducing branching performance, increasing the clone times, and expanding storage requirements.
153 Strategies for working with large binary source files Don't commit compressed archives of data. It's better to uncompress the files and commit the diffable sources, letting Git handle compressing the data in your repo. Avoid committing compiled code and other binary dependencies. Commit the source and build the dependencies, or use a package management solution to version and supply these files to your system. Store configuration and other structured data in diffable plain text formats, such as JSON. Use Git Large File Storage (LFS) When you have source files with large differences between versions and frequent updates, you can use Git LFS to manage these file types. Git LFS is an extension to Git which commits data describing the large files in a commit to your repo, and stores the binary file contents into separate remote storage. When you clone and switch branches in your repo, Git LFS downloads the correct version from that remote storage. Your local development tools will transparently work with the files as if they were commited directly to your repo. Benefits The benefit of Git LFS is that your team can use the familiar end to end Git workflow no matter what files your team creates. LFS files can be as big as you need them to be. Additionally, as of version 2.0, Git LFS supports file locking to help your team work on large, undiffable assets like videos, sounds, and game maps. Git LFS is is fully supported and free in VSTS. To use LFS with Visual Studio, you need at least Visual Studio 2015 Update 2. Just follow the instructions to install the client, set up LFS tracking for files on your local repo, and then push your changes to VSTS. Limitations Git LFS has some drawbacks that you should consider before adopting: 1. Every Git client used by your team must install the Git LFS client and understand its tracking configuration. 2. If the Git LFS client is not installed and configured correctly, you will not see the binary files committed through Git LFS when you clone your repo. Git will download the data describing the large file (which is what Git LFS commits to the repo) and not the actual binary file itself. Committing large binaries without the Git LFS client installed will push the binary to your repo. 3. Git cannot merge the changes from two different versions of a binary file even if both versions have a common parent. If two people are working on the same file at the same time, they must work together to reconcile their changes to avoid overwriting the other's work. Git LFS provides file locking to help. Users must still take care to always pull the latest copy of a binary asset before beginning work. 4. VSTS currently does not support using SSH in repos with Git LFS tracked files. File format The file written into your repo for a Git LFS tracked file will have a few lines with a key and value pair on each line: version oid a747cfbbef63fc0a3f5ffca332ae486ee7bf77c1d1b9b2de02e261ef97d085fe size NOTE The GitHub URL included for the version value only defines the LFS pointer file type, and is not a link to your binary file. Known issues Kerberos authentication If you use TFS, Git may be using the Kerberos protocol to authenticate. (This does not apply to VSTS, which uses a

154 different form of authentication.) LFS does not support Kerberos, so you will get errors which say "Your user name must be of the form DOMAIN\user". To get out of this state, you will need to remove the Kerberos credential and let Git pick up a new NTLM credential instead. 1. Open the Windows Credential Manager. On Windows 10, you can press Start and then type "Credential Manager". 2. Choose Windows Credentials. 3. Find your TFS URL in the credential list. 4. Choose Remove. 5. Return to your Git client (Visual Studio or the command line) and push your changes. When prompted for credentials, be sure to enter them in the form DOMAIN\username.
155 Use SSH key authentication 11/16/ min to read Edit Online VSTS TFS 2018 TFS 2017 TFS 2015 Update 3 Connect to your Git repos through SSH when you can't use the recommended Git Credential Managers or Personal Access Tokens to securely connect using HTTPS authentication. IMPORTANT SSH URLs have changed. Old SSH URLs will continue to work through December 1, If you have already set up SSH, you will need to update your remote URLs: Visit your repository on the web and select the Clone button in the upper right. Select SSH and copy the new SSH URL. In your Git client, run: git remote set-url <remote name, e.g. origin> <new SSH URL>. Alternatively, in Visual Studio, go to Repository Settings, and edit your remotes. NOTE As of Visual Studio 2017, SSH can be used to connect to Git repos. How SSH key authentication works SSH public key authentication works with a pair of generated encryption keys. The public key is shared and used to encrypt messages. The private key is kept safe and secure on your system and is used to read messages encrypted with the public key. Set up SSH key authentication The following steps cover configuration of SSH key authentication on the following platforms: Linux macos running at least Leopard (10.5) Windows systems running Git for Windows Configure SSH using the command line. bash is the common shell on Linux and macos and the Git for Windows installation adds a shortcut to Git Bash in the Start menu. Other shell environments will work, but are not covered in this article. Step 1: Create your SSH keys If you have already created SSH keys on your system, skip this step and go to configuring SSH keys. The commands here will let you create new default SSH keys, overwriting existing default keys. Before continuing, check your ~/.ssh folder (for example, /home/frank/.ssh or C:\Users\frank\.ssh) and look for the following files: id_rsa id_rsa.pub


156 If these files exist, then you have already created SSH keys. You can overwrite the keys with the following commands, or skip this step and go to configuring SSH keys to reuse these keys. Create your SSH keys with the ssh-keygen command from the bash prompt. This will create a 2048-bit RSA key for use with SSH. You can give a passphrase for your private key when prompted this provides another layer of security for your private key. If you give a passphrase be sure to configure the SSH agent to cache your passphrase so you don't have to enter it every time you connect. > ssh-keygen -C "frank@fabrikam.com" Generating public/private rsa key pair. Enter file in which to save the key (/home/frank/.ssh/id_rsa): /home/frank/.ssh/id_rsa Enter passphrase (empty for no passphrase): passphrase Enter same passphrase again: passphrase Your identification has been saved in /home/frank/.ssh/id_rsa. Your public key has been saved in /home/frank/.ssh/id_rsa.pub. This produces the two keys needed for SSH authentication: your private key ( id_rsa ) and the public key ( id_rsa.pub ). It is important to never share the contents of your private key. If the private key is compromised, attackers can use it to trick servers into thinking the connection is coming from you. Step 2: Add the public key to VSTS/TFS Associate the public key generated in the previous step with your user ID. 1. Open your security settings by browsing to the web portal and selecting your name in the upper right of the user interface. Select My security in the menu that appears. 2. Select SSH Public Keys, then select Add. 3. Copy the contents of the public key (for example, id_rsa.pub) that you generated into the Key Data field. Avoid adding whitespace or new lines into the Key Data field-they can cause VSTS to use an invalid public key.
157 4. Give the key a useful description (this will be displayed on the SSH public keys page for your profile) so that you can remember it later. Select Save to store the public key. Once saved, you cannot change the key. You can delete the key or create a new entry for another key. There are no restrictions on how many keys you can add to your user profile. Step 3: Clone the Git repository with SSH To connect with SSH from an existing cloned repo, see updating your remotes to SSH. 1. Copy the SSH clone URL from the web portal: 2. Run git clone from the command prompt. git clone ssh://fabrikops2@vs-ssh.visualstudio.com:22/defaultcollection/_ssh/fabrikamtools SSH will ask you to verify that the SSH fingerprint for the server you are connecting to. You should verify that the shown fingerprint matches the fingerprint on the SSH public keys page. SSH displays this fingerprint when it connects to an unknown host to protect you from man-in-the-middle attacks. Once you accept the host's fingerprint, SSH will not prompt you again unless the fingerprint changes.
158 git clone When you are asked if you want to continue connecting, type yes. Git will clone the repo and set up the origin remote to connect with SSH for future Git commands. Avoid trouble: Windows users will need to run a command to have Git reuse their SSH key passphrase. Questions and Troubleshooting How can I have Git remember the passphrase for my key on Windows? Run the following command included in Git for Windows to start up the ssh-agent process in Powershell or the Windows Command Prompt. ssh-agent will cache your passphrase so you don't have to provide it every time you connect to your repo. start-ssh-agent.cmd If you are using the Bash shell (including Git Bash), start ssh-agent with: eval `ssh-agent` I use PuTTY as my SSH client and generated my keys with PuTTYgen. Can I use these keys with VSTS? Yes. Load the private key with PuTTYgen, go to Conversions menu and select Export OpenSSH key. Save the private key file and then follow the steps to set up non-default keys. Copy you public key directly from the PuTTYgen window and paste into the Key Data field in your security settings. How can I verify that the public key I uploaded is the same key as I have locally? You can verify the fingerprint of the public key uploaded with the one displayed in your profile through the following ssh-keygen command run against your public key using the bash command line. You will need to change the path and the public key filename if you are not using the defaults. ssh-keygen -l -E md5 -f ~/.ssh/id_rsa.pub You can then compare the MD5 signature to the one in your profile. This is useful if you have connection problems or have concerns about incorrectly pasting in the public key into the Key Data field when adding the key to VSTS. How can I start using SSH in a repository where I am currently using HTTPS? You'll need to update the origin remote in Git to change over from a HTTPS to SSH URL. Once you have the SSH clone URL, run the following command: git remote set-url origin ssh://fabrikops2@vs-ssh.visualstudio.com:22/defaultcollection/_ssh/fabrikamtools You can now run any Git command that connects to origin. I'm using Git LFS with VSTS and I get errors when pulling files tracked by Git LFS. VSTS currently doesn't support LFS over SSH. Use HTTPS to connect to repos with Git LFS tracked files. How can I use a non default key location, i.e. not ~/.ssh/id_rsa and ~/.ssh/id_rsa.pub? To use keys created with ssh-keygen in a different place than the default, you do two things:
159 1. The keys must be in a folder that only you can read or edit. If the folder has wider permissions, SSH will not use the keys. 2. You must let SSH know the location of the keys. You make SSH aware of keys through the ssh-add command, providing the full path to the private key. ssh-add /home/frank/.ssh/id_frank.rsa On Windows, before running ssh-add, you will need to run the following command from included in Git for Windows: start-ssh-agent.cmd This command runs in both Powershell and the Command Prompt. If you are using Git Bash, the command you need to use is: eval `ssh-agent` You can find ssh-add as part of the Git for Windows distribution and also run it in any shell environment on Windows. On macos and Linux you also must have ssh-agent running before running ssh-add, but the command environment on these platforms usually takes care of starting ssh-agent for you.

160 Use Git Credential Managers to Authenticate to VSTS 11/1/ min to read Edit Online VSTS TFS 2018 TFS 2017 TFS 2015 VS 2017 VS 2015 Git Credential Managers simplify authentication with your VSTS/TFS Git repos. Credential Managers let you use the same credentials that you use for the VSTS/TFS web portal and support multi-factor authentication through Microsoft Account (MSA) or Azure Active Directory (AAD). In addition to supporting multi-factor authentication with VSTS, the credential managers also provide support two-factor authentication with GitHub repositories. VSTS provides IDE support for MSA and AAD authentication through Team Explorer in Visual Studio, IntelliJ and Android Studio with the VSTS Plugin for IntelliJ, and Eclipse (with the Team Explorer Everywhere plug-in). If your environment doesn't have an integration available, configure your IDE with a Personal Access Token or SSH to connect with your to your repos. Install the Git Credential Manager Windows Download and run the latest Git for Windows installer, which includes the Git Credential Manager for Windows. Make sure to leave the Git Credential Manager installation option enabled when prompted. macos and Linux Review the system and software requirements before installing the credential manager. On macos and Linux, there are several install options that use native package managers to install the credential manager. After installing the package for your platform, run the following command to configure Git to use the credential manager : > git-credential-manager install Using the Git Credential Manager
161 When you connect to a VSTS Git repository from your Git client for the first time, the credential manager prompts for your Microsoft Account or Azure Active Directory credentials. If your account has multi-factor authentication enabled, you are prompted to go through that experience as well. Once authenticated, the credential manager creates and caches a personal access token for future connections to the repo. Git commands that connect to this account won't prompt for user credentials until the token expires or is revoked through VSTS/TFS. Getting help You can open up and report issues with the Git Credential Manager for Windows on the project GitHub. Frequently Asked Questions for the Git Credential Manager for Windows are available in the online readme. Manual installation steps for the Windows Git Credential Manager and the macos and Linux Git Credential Manager are available. Use these steps to install the credential manager if the recommended steps above are not suitable for your environment. Learn more In addition to providing full source code, we've also documented how the credential manager integrates with Git. Refer to the MSDN blog posts on the macos and Linux Git Credential Manager and the Windows Credential Manager. There is also an article on the project GitHub with information on the low-level internals of the Git Credential Manager for Windows.
162 Create a pull request status server with Node.js 1/3/ min to read Edit Online VSTS TFS 2018 The pull request (PR) workflow provides developers with an opportunity to get feedback on their code from peers as well as from automated tools. 3rd party tools and services can participate in the PR workflow by using the PR Status API. This article guides you through the process of creating a status server to validate PRs in a VSTS Git repository. Prerequisites A VSTS account with a Git repo. If you don't have a VSTS account, sign up to upload and share code in free unlimited private Git repositories. Install VS Code or other code editor of your choice. The instructions in this guide use VS Code but the steps in other code editors are similar. Install Node.js To install Node.js, download the LTS release appropriate for your platform. The download contains an installer, which you can run to install the Node.js runtime on your local machine. When installing Node.js, be sure to keep the npm package manager portion of the install, which is selected by default. Create a basic web server using Express The steps in this section use Express, which is a lightweight web framework for Node.js that provides a number of HTTP utility methods that simplify creating a web server. This framework provides you with the basic functions needed to listen to PR events. 1. From the command line, create a new project folder for your web server. mkdir pr-server cd pr-server 2. Use the npm init command to create a new package.json file for the project. npm init Press Enter to accept the defaults for all of the options except the entry point. Change it to app.js entry point: (index.js) app.js 3. Install Express in the pr-server directory using the following command. This installs Express and saves it to the dependencies list. npm install express 4. Create a simple Express app to build upon for the PR status server. The following steps are based on the Express Hello world example. Open the project folder in VS Code by running the following command from
163 the pr-server folder. code. 5. Create a new file (Ctrl + N) and paste in the following sample code. const express = require('express') const app = express() app.get('/', function (req, res) { res.send('hello World!') }) app.listen(3000, function () { console.log('example app listening on port 3000!') }) 6. Save the file as app.js. 7. Run the basic web server using the following command: node app.js Verify the server is running by browsing to Listen for HTTP POST requests The web server is going to receive POST requests from VSTS, so you need to handle those requests in your server. 1. At the end of the app.js file, add the following code, and save the file. app.post('/', function (req, res) { res.send('received the POST') }) 2. Re-run your web server using the following command: node app.js Configure a service hook for PR events Service hooks are a VSTS feature that can alert external services when certain events occur. For this sample, you'll want to set up a service hook for PR events, so the status server can be notified. In order to receive the service hook notifications, you'll need to expose a port to the public internet. The ngrok utility is very useful for doing this in a development environment. 1. Download and unzip the appropriate ngrok release for your platform. 2. Use ngrok to start listening on the same port as your sample server - port Run the following command in a new command window. ngrok http 3000
164 Ngrok will create a public URL that forwards to localhost:3000. Note that URL as you will need it in the next step. It will look something like this: 3. Browse to your VSTS project, e.g. account>.visualstudio.com/<your project name> 4. From the navigation menu, hover over the gear and select Service Hooks. 5. If this is your first service hook, select + Create subscription. If you already have other service hooks configured, select the green plus (+) to create a new service hook subscription. 6. On the New Service Hooks Subscription dialog, select Web Hooks from the list of services, then select Next.
165 7. Select Pull request created from the list of event triggers, then select Next. 8. In the Action page, enter the URL from ngrok in the URL box. Select Test to send a test event to your server.
166 In the ngrok console window, you'll see an incoming POST that returned a 200 OK, indicating your server received the service hook event. HTTP Requests POST / 200 OK In the Test Notification window, select the Response tab to see the details of the response from your server. You should see a content length of 17 that matches the length of the string from your POST handler (i.e. "Received the POST").
167 9. Close the Test Notification window, and select Finish to create the service hook. Post status to PRs Now that your server can receive service hook events when new PRs are created,update it to post back status to the PR. 1. Service hook requests include a JSON payload describing the event. To help parse the JSON returned by the service hook, install the body-parser package. npm install body-parser 2. Update app.js to use body-parser for parsing application/json. var bodyparser = require('body-parser') app.use(bodyparser.json()); 3. To simplify making REST API call to VSTS, install the vso-node-api package. npm install vso-node-api 4. Update app.js to use the vso-node-api package, set up the details for a connection to your account, and get an instance of the Git API.
168 const vsts = require("vso-node-api"); const collectionurl = process.env.collectionurl; const token = process.env.token; var authhandler = vsts.getpersonalaccesstokenhandler(token); var connection = new vsts.webapi(collectionurl, authhandler); var vstsgit = connection.getgitapi(); 5. Create an environment variable for your collection URL, replacing <your account> with the name of your VSTS account. setx COLLECTIONURL " account>.visualstudio.com/defaultcollection" 6. Create a personal auth token (PAT) for your app to use, following these instructions: Authenticating with personal access tokens. You should create a new PAT for every service that you use to access your account, naming it appropriately. 7. Create an environment variable for your PAT. setx TOKEN "yourtokengoeshere" 8. Update the post() function to read the PR details from the service hook payload. You'll need these values in order to post back status. var repoid = req.body.resource.repository.id; var pullrequestid = req.body.resource.pullrequestid; var title = req.body.resource.title; 9. Build the status object to post on the PR. State is an enum of type GitStatusState. Use succeeded to indicate that the PR has passed the status check and is ready to merge. The description is a string value that will be displayed to the user in the Status section and activity feed in the PR details view. The targeturl is a URL that will be used to create a link for the description text in the Status section and activity feed. This is the place where users can go to get more information about the status, for example, a build report or test run. If no URL is specified, the description will appear as text with no link. The context name and genre are used to categorize the status and distinguish it from other services posting status. var prstatus = { "state": "succeeded", "description": "Ready for review", "targeturl": " "context": { "name": "wip-checker", "genre": "continuous-integration" } } 10. Instead of just blindly posting the succeeded status, inspect the PR title to see if the user has indicated if the
169 PR is a work in progress by adding WIP to the title. If so, change the status posted back to the PR. if (title.includes("wip")) { prstatus.state = "pending"; prstatus.description = "Work in progress" } 11. Finally, post the status using the createpullrequeststatus() method. It requires the status object, the repo ID, and the pull request ID. Output the response to the node console so you can see the result of the post. vstsgit.createpullrequeststatus(prstatus, repoid, pullrequestid).then( result => { console.log(result); }); 12. The resulting method should look something like this: app.post("/", function (req, res) { // Get the details about the PR from the service hook payload var repoid = req.body.resource.repository.id; var pullrequestid = req.body.resource.pullrequestid; var title = req.body.resource.title; // Build the status object that we want to post. // Assume that the PR is ready for review... var prstatus = { "state": "succeeded", "description": "Ready for review", "targeturl": " "context": { "name": "wip-checker", "genre": "continuous-integration" } } // Check the title to see if there is "WIP" in the title. if (title.includes("wip")) { // If so, change the status to pending and change the description. prstatus.state = "pending"; prstatus.description = "Work in progress" } // Post the status to the PR vstsgit.createpullrequeststatus(prstatus, repoid, pullrequestid).then( result => { console.log(result); }); res.send("received the POST"); }) 13. Save app.js and restart your node app. node app.js Create a new PR to test the status server Now that your server is running and listening for service hook notifications, create a pull request to test it out. 1. Start in the files view. Edit the readme.md file in your repo (or any other file if you don't have a readme.md).
170 2. Make an edit and commit the changes to the repo. 3. Be sure to commit the changes to a new branch so you can create a PR in the next step. 4. Select the Create a pull request link. 5. Add WIP in the title to test the functionality of the app. Select Create to create the PR.
171 6. Once the PR has been created, you will see the status section, with the Work in progress entry which links to the URL specfied in the payload. 7. Update the PR title and remove the WIP text and note that the status changes from Work in progress to Ready for review. Next Steps In this article, you learned the basics of how to create a service that listens for PR events via service hooks and can post status messages using the status API. For more information about the pull request status API see the REST API documentation. Configure a branch policy for an external service.
172 Use Azure Functions to create custom branch policies 12/12/ min to read Edit Online VSTS The pull request (PR) workflow provides developers with an opportunity to get feedback on their code from peers as well as from automated tools. 3rd party tools and services can participate in the PR workflow by using the PR Status API. This article guides you through the process of creating a custom branch policy using Azure Functions to validate PRs in a VSTS Git repository. With Azure Functions you don t have to worry about provisioning and maintaining servers, especially when your workload grows. Azure Functions provide a fully managed compute platform with high reliability and security. Prerequisites A VSTS account with a Git repo. If you don't have a VSTS account, sign up to upload and share code in free unlimited private Git repositories. Create a basic Azure function to listen to VSTS events Follow the create your first Azure function documentation to create a simple function. Modify the code in the sample to look like this:
173 #r "Newtonsoft.Json" using System; using System.Net; using System.Net.Http; using System.Net.Http.Headers; using System.Text; using Newtonsoft.Json; public static async Task<HttpResponseMessage> Run(HttpRequestMessage req, TraceWriter log) { try { log.info("service Hook Received."); // Get request body dynamic data = await req.content.readasasync<object>(); log.info("data Received: " + data.tostring()); // Get the pull request object from the service hooks payload dynamic jobject = JsonConvert.DeserializeObject(data.ToString()); // Get the pull request id int pullrequestid; if (!Int32.TryParse(jObject.resource.pullRequestId.ToString(), out pullrequestid)) { log.info("failed to parse the pull request id from the service hooks payload."); }; // Get the pull request title string pullrequesttitle = jobject.resource.title; log.info("service Hook Received for PR: " + pullrequestid + " " + pullrequesttitle); return req.createresponse(httpstatuscode.ok); } catch (Exception ex) { log.info(ex.tostring()); return req.createresponse(httpstatuscode.internalservererror); } } Configure a service hook for PR events Service hooks are a VSTS feature that can alert external services when certain events occur. For this sample, you'll want to set up a service hook for PR events, your azure function will be notified when a pull request changes. In order to receive POST requests from VSTS when pull requests change, you will need to provide the service hook with the Azure function URL. For this sample you will need to configure 2 service hooks. The first will be for the Pull request created and the second will be for the Pull request updated event. 1. Get the function URL from the Azure portal by clicking the Get function URL in your Azure function view and copy the URL.


174 2. Browse to your VSTS project, e.g. account>.visualstudio.com/<your project name> 3. From the navigation menu, hover over the gear and select Service Hooks. 4. If this is your first service hook, select + Create subscription.
175 If you already have other service hooks configured, select the green plus (+) to create a new service hook subscription. 5. On the New Service Hooks Subscription dialog, select Web Hooks from the list of services, then select Next. 6. Select Pull request created from the list of event triggers, then select Next.
176 7. In the Action page, enter the URL that you copied in step 1 in the URL box. Select Test to send a test event to your server.
177 In the Azure function log window, you'll see an incoming POST that returned a 200 OK, indicating your function received the service hook event. HTTP Requests POST / 200 OK In the Test Notification window, select the Response tab to see the details of the response from your server. You should see the response from your server.
178 8. Close the Test Notification window, and select Finish to create the service hook. Go through steps 2-8 again but this time configure the Pull request updated event. Create a pull request to verify your azure function is receiving notifications. Post status to PRs Now that your server can receive service hook events when new PRs are created, update it to post back status to the PR. You can use the JSON payload posted by the service hook in order to determine what status to set on your PR. Update the code of your Azure function to look like the following example. Make sure to update the code with your account name, project name, repository name and PAT token. In order to have permission to change PR status, the PAT requires vso.code_status scope, which you can grant by selecting the Code (status) scope on the Create a personal access token page. IMPORTANT This sample code stores the PAT in code to simplify the sample. It is recommended to store secrets in KeyVault and retrieve them from there. This sample inspects the PR title to see if the user has indicated if the PR is a work in progress by adding WIP to the title. If so, the sample code changes the status posted back to the PR. Replace the code in your Azure function with the following code to implement updating the status posted back to the PR. #r "Newtonsoft.Json" using System; using System.Net; using System.Net.Http; using System.Net.Http.Headers; using System.Text; using Newtonsoft.Json;
179 private static string accountname = "[Account Name]"; // Account name private static string projectname = "[Project Name]"; // Project name private static string repositoryname = "[Repo Name]"; // Repository name /* This is here just to simplify the sample, it is recommended to store secrets in KeyVault and retrieve them from there. */ private static string pat = "[PAT TOKEN]"; public static async Task<HttpResponseMessage> Run(HttpRequestMessage req, TraceWriter log) { try { log.info("service Hook Received."); // Get request body dynamic data = await req.content.readasasync<object>(); log.info("data Received: " + data.tostring()); // Get the pull request object from the service hooks payload dynamic jobject = JsonConvert.DeserializeObject(data.ToString()); // Get the pull request id int pullrequestid; if (!Int32.TryParse(jObject.resource.pullRequestId.ToString(), out pullrequestid)) { log.info("failed to parse the pull request id from the service hooks payload."); }; // Get the pull request title string pullrequesttitle = jobject.resource.title; log.info("service Hook Received for PR: " + pullrequestid + " " + pullrequesttitle); PostStatusOnPullRequest(pullRequestId, ComputeStatus(pullRequestTitle)); return req.createresponse(httpstatuscode.ok); } catch (Exception ex) { log.info(ex.tostring()); return req.createresponse(httpstatuscode.internalservererror); } } private static void PostStatusOnPullRequest(int pullrequestid, string status) { string Url = accountname, projectname, repositoryname, pullrequestid); using (HttpClient client = new HttpClient()) { client.defaultrequestheaders.accept.add(new MediaTypeWithQualityHeaderValue("application/json")); client.defaultrequestheaders.authorization = new AuthenticationHeaderValue("Basic", Convert.ToBase64String( ASCIIEncoding.ASCII.GetBytes( string.format("{0}:{1}", "", pat)))); var method = new HttpMethod("POST"); var request = new HttpRequestMessage(method, Url) { Content = new StringContent(status, Encoding.UTF8, "application/json") };
180 }; using (HttpResponseMessage response = client.sendasync(request).result) { response.ensuresuccessstatuscode(); } } } private static string ComputeStatus(string pullrequesttitle) { string state = "succeeded"; string description = "Ready for review"; if (pullrequesttitle.tolower().contains("wip")) { state = "pending"; description = "Work in progress"; } return JsonConvert.SerializeObject( new { State = state, Description = description, TargetUrl = " } Context = new { Name = "PullRequest-WIT-App", Genre = "pr-azure-function-ci" } }); Create a new PR to test the status server Now that your server is running and listening for service hook notifications, create a pull request to test it out. 1. Start in the files view. Edit the readme.md file in your repo (or any other file if you don't have a readme.md). 2. Make an edit and commit the changes to the repo. 3. Be sure to commit the changes to a new branch so you can create a PR in the next step.
181 4. Select the Create a pull request link. 5. Add WIP in the title to test the functionality of the app. Select Create to create the PR.
182 6. Once the PR has been created, you will see the status section, with the Work in progress entry which links to the URL specfied in the payload. 7. Update the PR title and remove the WIP text and note that the status changes from Work in progress to Ready for review. Next Steps In this article, you learned the basics of how to create a serverless Azure function that listens for PR events via service hooks and can post status messages using the status API. For more information about the pull request status API see the REST API documentation. Configure a branch policy for an external service.
183 Configure a branch policy for an external service 12/12/ min to read Edit Online VSTS Branch policies are a powerful feature to ensure high quality code in your repo by establishing requirements for all pull requests. External services can use the PR Status API to post detailed status to your PRs. The branch policy for external services brings the ability for those 3rd party services to participate in the PR workflow and establish policy requirements. This article guides you through the process of configuring a branch policy for a service that is posting PR status. For more information about PR status, see Create a pull request status server. Prerequisites A VSTS account with a Git repo. If you don't have a VSTS account, sign up to upload and share code in free unlimited private Git repositories. A service that posts status to PRs. See Create a pull request status server. Configure the branch policy 1. Navigate to Code > Branches and find the branch that you want to configure the policy on (typically master or develop ). From the context menu, select the Branch policies option. 2. Select Protect this branch then find the policy to Require approval from external services. Select Add service.

184 3. Select the service you want to create a policy for from the list. Authorized account is used to enforce that status from only the specified account will be counted towards the policy fulfillment. Policy requirement determines whether or not this policy is optional or required to complete pull requests into the branch. Status expiration is used to determine when a posted status is no longer valid. If the status posted is specific to the latest code (i.e. a build), use the option to expire when the source branch changes. Create a new pull request 1. Create a new pull request into the branch where the policy is defined. For more information, see Create a pull request. 2. After creating the PR, the new policy will appear in the Policies section of the PR details view. Initially, the policy will appear as not set until the external service has posted status.
185 When the service has posted status, the policy will update accordingly. Completion will be blocked until the policy approves the PR. When the policy criteria are met, and the service posts a succeeded status, the PR will be approved and completion will be unblocked. Summary In this article, you learned how to configure a branch policy for an external service.
186 Drive Git development from a work item 11/8/ min to read Edit Online VSTS TFS 2018 TFS 2017 NOTE Feature availability: The Development section appears in the work item web form for VSTS and TFS 2017 or later versions, configured with the new work item tracking experience. It supports both Git and TFVC version control repositories. Go here to learn how to add a Git repository for your existing team project. One of the ways your team can drive their development and stay in sync is to link your work items to the objects created during development, such as branches, commits, pull requests, and builds. You can begin that linking by creating a branch from one or more work items. Later, you can create pull requests, quickly open commits, and maintain a record of development operations performed to complete specific work. The Development section records all Git development processes that support completion of the work item. This section can show your team information needed to take the next development step and minimize navigational steps to accomplish common development tasks. It also supports traceability, providing visibility into all the branches, commits, pull requests, and builds related to the work item. From it, you can quickly access branches, pull requests, and commits which are linked to the work item. Also, you can initiate a pull request for a branch you've created or linked to from the work item.
187 Workflow process to create a branch and pull request Consider creating a new branch when there are no linked code artifacts. If there is a branch but no pull requests, consider creating a pull request. Here's a typical workflow sequence when working with a Git repository. 1. Start work on the work item by creating a branch. You can add a new Git branch from within the Development section or, from the form's Actions menu.
188 Name the branch and select the repository on which it's based. Branches you create are automatically linked to the work item. NOTE You can only create a branch once you've added files to the main branch, which is always named master. VSTS automatically adds a README file to the initial repo created with each new team project. 2. The system will open to the repository and branch that you just created.

189 You can edit a file within the web portal. Or, if you have extensive file edits or need to add files, then you'll need to work from Visual Studio or other supported IDE. You'll want to add a new local branch from the branch you just created. For details, see Update code with fetch and pull, Download changes with fetch. (While any code editing and committing process will work, we work best with an edition of Visual Studio.) 3. Add or modify files in the branch that you created. From Visual Studio or other supported IDE, commit and push changes from your local branch to the repository. If this is the first time pushing changes from a new branch, you'll need to publish the branch before pushing your changes. For more details, see Share code with push. 4. Create a pull request from the work item form. You create a pull request to merge the changes you made to a master branch and get your changes reviewed by other members of your team.
190 5. Your view will switch to the Code hub, Pull Requests page. Complete creating the pull request as shown.
191 NOTE Once you've created a pull request, you can't create a new pull request for the same branch until you complete the previous pull request. Check the box for Squash changes when merging and then complete the merge. 6. Upon completion, you should see a similar screen as follows.

192 7. Open the work item form or refresh the form, expand the Development section (click the icon), and you'll see the links that have been added to support the operations you just completed. Create a branch for several work items You can also add a new branch from the work item listed on the backlog or Kanban board without having to open the work item. Using multi-select, you can select several work items and create a new branch where they're all linked to the branch. For example, here we select the first five items to link to a new branch.

193 And, we specify the name of the branch.
194 Link to existing development and build objects All items listed under the Development section also appear under the initiated from the Development section are also logged under the Links tab. All development actions History tab. To link a work item to an existing object, click the Add links icon and then choose the link type. Link work items to support traceability. Remove a link If you want to remove a link, you can do so from the Development section by highlighting it first and then click the delete icon. Or, you can select it from the Links tab and click the remove link icon. Related notes Learn more about tracking work with work items and developing with Git from these resources: Add work items Git overview TFVC overview

195 Create your backlog NOTE To learn more or to customize the Development links control, see LinksControlOptions elements, Development links control. Keep in mind that the Development section only appears when using the web portal for VSTS and TFS 2017 or later versions. The work item tracking experience and forms that appear in Visual Studio will be missing several of the features that the web portal makes available. Associated work items in build With Git commits, any work items that have been linked to a commit will be listed under the Associated work items in the build summary page. Link types showing in the Development section Links shown in this section appear as a result of these actions: Creating a branch, commit, or pull request from the work item Specifying the work item ID during a commit, pull request, or other supported Git or TFVC operation Specifically linking the work item from the Development section or or other supported Git or TFVC operation. Links tab to a source code branch, build, Hovering over any entry listed under the Development section activates the hyperlink to the associated object. The link types you can add within the development section are Branch, Build, Changeset, Commit, Found in build, Integrated in build, Pull Request, and Versioned Item.

196 NOTE The link types, Found in build and Integrated in build are only available from VSTS and only work with the current build processes (not XAML builds).
197 Import repositories from TFVC to Git 10/21/ min to read Edit Online VSTS TFS 2018 TFS 2017 Update 2 You can migrate code from an existing TFVC repository to a new Git repository within the same account. While migrating to Git has many benefits, it is an involved process for large TFVC repositories and teams. Centralized version control systems, like TFVC, behave different than Git in fundamental ways. The switch involves a lot more than learning new commands. It is a disruptive change that requires careful planning. You need to think about: Revising tools and processes Removing binaries and executables Training your team We strongly recommend reading our whitepapers - Centralized version control to Git and TFVC to Git before starting the migration. The import experience is great for small simple TFVC repositories. It's also good for repositories that have already been "cleaned up" as outlined in the previous whitepapers. Those whitepapers also recommend other tools for more advanced TFVC repository configurations. Importing the repository From the repo drop-down, select Import repository. 1. Select TFVC from the Source type dropdown 2. Type the path to the repository / branch / folder that you want to import to the Git repository. For example, $/Fabrikam/FabrikamWebsite 3. If you want to migrate history from the TFVC repository, click Migrate history and select the number of days. You can migrate up to 180 days of history starting from the most recent changeset. A link to the TFVC repository is added in the commit message of the 1st changeset that is migrated to Git. This makes it easy to find older history when needed. 4. Give a name to the new Git repository and click Import. Depending on the size of the import, your Git repository would be ready in a few minutes.
198 IMPORTANT Due to the differences in how TFVC and Git store version control history, we recommend that you don't migrate your history. This is the approach that Microsoft took when it migrated Windows and other products from centralized version control to Git. Troubleshooting This experience is optimized for small, simple TFVC repositories or repositories that have been prepared for a migration. This means it has a few limitations. 1. It only migrates the contents of root or a branch. For example, if you have a TFVC project at $/Fabrikam which has 1 branch and 1 folder under it, a path to import $/Fabrikam would import the folder while $/Fabrikam/<branch> would only import the branch. 2. The imported repository and associated history (if imported) cannot exceed 1GB in size. 3. You can import up to 180 days of history. If any of the above is a blocker for your import, we recommend you try external tools like Git-TFS for importing and reading our whitepapers - Centralized version control to Git and TFVC to Git

199 Delete a Git repo from your team project 10/21/ min to read Edit Online VSTS TFS 2018 TFS 2017 TFS 2015 Remove unused Git repos from your team project when they are no longer needed. TIP Consider renaming the repo and locking its default branch instead of removing it. The commit history of the repo will be lost when it is deleted. IMPORTANT You cannot remove a repo if it is the only Git repo in the Team Project. If you need to delete the only Git repo in a Team Project, create a new Git repo first, then delete the repo. You must have Delete Repository permissions to delete a repo from a team project. Delete a Git repo from the web 1. Select the settings icon in the web to bring up the team project administration page. 2. Select Version Control. 3. Select the Git repository to remove from the list shown and select the... next to the name. Choose Delete Repository 4. Confirm the deletion of the repository by typing the repo's name and selecting Delete.

200 Rename a Git repository in your team project 10/21/ min to read Edit Online VSTS TFS 2018 TFS 2017 VS 2017 VS 2015 You can rename a Git repository in a team project from your web browser. After you rename the repo, each member of your team will have to take a few steps to re-enable their dev machines to connect to the repo on the server. NOTE The steps in this article refer to VSTS and TFS 2017 and higher. For TFS 2015, see Rename a Git repository in TFS Rename the repo in VSTS or TFS 1. Open the team project administration page while working in your team project on the web. 2. Select Version Control. 3. Hover over the repo you want to rename under Git repositories on the left and select... Select Rename repository... from the menu. 4. Enter a new repo name in the Repository name field in the dialog, then select Rename This step requires Rename Repository permissions on your Git repo. Update the Git remotes on your dev machines Git uses remote references to fetch and push changes between your local copy of a repository and the remote version stored on the server. After a Git repository or team project has been renamed, your remote references need to updated. This is due to the fact that the remote repository URL contains the team project and the repository name. Each member of your team must update their local Git repos to continue connecting from their dev machines to the repo in the team project. The instructions below show how to update the remotes for the Fabrikam Mobile repo that was renamed to Fabrikam. Get the new URL for the repo Copy the repository clone URL to your clipboard. Update your remote in Visual Studio 2015 or 2017


201 1. Connect to the repo. 2. Open the project settings. 3. Open the repo settings. 4. Edit the fetch and push remote references and paste the URL that you copied from the remote repo. Update your remote in older versions of Visual Studio from the command prompt If you use an older version of Visual Studio or work with Git from the command prompt:


202 1. Open the Git command prompt. 2. Go to the local repository and update the remote to the URL you copied from the remote repo. git remote set-url origin {URL_you_copied_from_the_remote_repo} Refresh Team Explorer 1. Refresh Team Explorer. 2. Team Explorer now shows the updated repo name. Q&A Q: Can I rename my repo again? Can I re-use an old repo name? A: Yes Q: What if I named my remote something other than the default origin? A: If you are using: Visual Studio 2015, then edit the remote with the name you used. An older version of Visual Studio or the command prompt, then run this command: git remote set-url {remote_name} {URL_you_copied_from_the_remote_repo}

203 Find a file or folder in your Git repository 10/21/ min to read Edit Online VSTS TFS 2018 TFS 2017 Quickly find and navigate to a file or folder in your Git repository using the path control in the Code hub. Usage While browsing your Git repository, start typing in the path control box to search for the file or folder you are looking for. The interface lists the results starting from your current folder followed by matching items from across the repo. Hotkey navigation Launch the Find a File experience from the keyboard with the t shortcut from the Files or History tabs in the Code hub. Use the up and down arrows to cycle through the results, and click or press Enter to open a result. Press Esc to close the Find a File experience.
204 Create a README for your repo 10/21/ min to read Edit Online VSTS TFS 2018 TFS 2017 TFS 2015 Your Git repo should have a readme file so that viewers know what your code does and how they can get started using it. Your readme should speak to the following audiences: Users that just want to run your code Developers that want to build and test your code. Developers are also users. Contributors that want to submit changes to your code. Contributors are both developers and users. Write your readme in Markdown instead of plain text. Markdown makes it easy to format text, include images, and link as needed to additional documentation from your readme. Here are some great readmes that use this format and speak to all three audiences, for reference and inspiration: ASP.NET Core Visual Studio Code Chakra Core Create an intro Start your readme off with a short explanation describing your project. Add a screenshot or animated GIF in your intro if your project has a user interface. If your code relies on or another application or library, make sure to state those dependencies in the intro or right below it. Apps and tools that run only on specific platforms should have the supported operating system versions noted in this section of the readme. Help your users get started Guide users through getting your code up and running on their own system in the next section of your readme. Stay focused on the essential steps to get started with your code. Link to the required versions of any prerequisite software so users can get to them easily. If you have complex setup steps, document those outside your readme and link to them. Point out where to get the latest release of your code. A binary installer or instructions on using your code through packaging tools is best. If your project is a library or an interface to an API, put a code snippet showing basic usage and show sample output for the code in that snippet. Provide build steps for developers Use the next section of your readme to show developers how to build your code from a fresh clone of the repo and run any included tests. Give details about the tools needed to build the code and document the steps to configure them to get a clean build. Break out dense or complex build instructions into a separate page in your documentation and link to it if needed. Provide the commands to run any test cases provided with the source code after the build is successful. Developers lean on these test cases to ensure that they don't break your code as they make changes. Good test cases also serve as samples developers can use to build their own test cases when adding new functionality. Help users contribute
205 The last section of your readme helps users and developers get involved to report problems and suggest ideas to make your code better. Users should be linked to channels where they can open up bugs, request features, or get help using your code. Developers need to know what rules they need to follow to contribute changes, such as coding/testing guidelines and pull request requirements. If you require a contributor agreement to accept pull requests or enforce a community code of conduct, this process should be linked to or documented in this section. State what license the code is released under and link to the full text of the license.
206 Use Git and TFVC repos in the same team project 10/21/ min to read Edit Online VSTS TFS 2018 TFS 2017 TFS 2015 Update 1 In Team Foundation Server 2015 Update 1, a project administrator can add a Git repo to a team project created with Team Foundation Version Control (TFVC). You can also add a TFVC repo to a team project created with Git. This allows you to adopt a new version control system while preserving all the data in your team project. Enable access to the new repo type Because permissions are applied at project creation time by a process template, there will be a small amount of work to correct permissions for a new repo type. Add Git repos to a Team Foundation Version Control team project If your TFVC team project was created prior to TFS 2015 Update 1, a project administrator will need to apply some project-level permissions once the first Git repo is created. Go to the Version Control administration page and select the "Git repositories" node in the tree. To set up the same group permissions as any of our default process templates (Agile, Scrum, CMMI), add the following TFS groups and permissions: 1. [ProjectName]\Readers Allow: Read Not set: All others 2. [ProjectName]\Contributors Allow: Branch creation, Contribute, Note management, Read, Tag creation Not set: All others 3. [ProjectName]\Build Administrators Allow: Branch creation, Contribute, Note management, Read, Tag creation Not set: All others If your TFVC project was created after TFS 2015 Update 1, these permissions have already been applied for you, and no action is necessary except creating the repository. Add a Team Foundation Version Control repo to a Git team project The project administrator will need to apply some project folder-level permissions when the team project folder is created. Go to the Version Control administration page and select the "$/ProjectName" node in the tree. To set up the same groups as any of our default process templates (Agile, Scrum, CMMI), add the following TFS groups and permissions: 1. [ProjectName]\Readers Allow: Read Not set: All others 2. [ProjectName]\Contributors Allow: Check in, Check out, Label, Lock, Merge, Read Not set: All others 3. [ProjectName]\Build Administrators Allow: Check in, Check out, Label, Lock, Merge, Read Not set: All others
207 Team Projects with multiple repo types in Visual Studio To see both types of repos in Visual Studio, you need Visual Studio 2015 Update 1. Older versions of Visual Studio, including 2015 RTM, will only see the type of repo created with the team project. For example, if the team project was created with Git you will only see Git repos when you connect from Visual Studio 2015 RTM or earlier. Team Projects with multiple repo types in Team Explorer Everywhere To see both types of repos in Eclipse, you need the Team Explorer Everywhere Plugin for Eclipse Older versions of the plugin will only see the type of repo created with the team project. For example, if the team project was created with Git you will only see Git repos when you connect with Team Explorer Everywhere or earlier.


208 Manage branches 11/29/ min to read Edit Online VSTS TFS 2018 TFS 2017 Manage the work in your team's VSTS Git repo from the Branches view on the web. Customize the view to track the branches you care most about so you can stay on top of changes made by your team. View your repo's branches by selecting Branches while viewing your repo on the web. Organize your branches The default Mine tab on the branches page shows branches you've created, pushed changes to, or set as a favorite, along with the default branch for the repo, such as master. The All tab lists all branches in the repo, and the Stale tab lists branches in the repo that haven't had any commits in three months or longer. If you don't see the branch you're looking for and you think it might have been deleted, see Restore a deleted branch. Filter the listed branches in any of the branch views by entering a specific name or pattern in the Search all branches box in the upper right. If your team uses a forward slash separator in your branch names, you'll see a collapsible tree view for those branches.
209 TIP Using a naming convention for your branches is highly recommended. For suggestions on how to name your branches, see Adopt a Git branching strategy. Add favorite branches Add branches from the All view to the Mine view by selecting the star icon to favorite the branch. Mark multiple branches as favorites by selecting the star icon on the tree view next to a folder on the tree. Remove favorites by toggling the star off or by selecting the... to the right of the star to open the branch context menu, then selecting Remove from my favorites. Review updates to your branches Each branch name has the name of the last contributor to the branch and a link to the latest commit on the branch. Select the date or time of the last commit to review the updates to the branch. The branch view also shows the number of commits the branch is ahead of and behind the branch labeled Compare. Use this information to quickly check how far a branch has diverged from another. If the branch has a pull request open, you can see its pull request ID. Select the pull request to open it up so you can review the details. Change the compare branch The ahead and behind numbers listed for each branch are in comparison with the branch currently labeled Compare on the Branches page. Update your compare branch to see how far ahead or behind your branches shown on the page are to another branch in your repo: 1. Select the... next to the branch you want to set as the baseline for comparison. 2. Select Set as compare branch. The Compare label will move to this branch and the other branches on the page will have the number of commits
210 ahead/behind updated to reflect the new comparison. View branch history Review the files in a branch or history by selecting the... icon next to the branch name and choosing View files or View history. View files opens up the Files view on the web so you can browse the files based on the most recent commit on the branch. View history shows each commit in the branch history. Select a commit from this history to see the file changes made in that commit. Change your default branch Change the default branch used to merge code into when your team creates new pull requests. This is useful when you want to use a branch other than master for the main line of development in your repo. 1. Select the settings icon while you have your team project open to bring up the project administration page. 2. Select Version Control. 3. Select your Git repository. Your branches are displayed under your repo. 4. Select the... next to the branch you want to set as default, then select Set as default branch.
211
212 Create a new Git branch 10/21/ min to read Edit Online VSTS TFS 2018 TFS 2017 TIP Need help creating a new Git branch in your local repo from Visual Studio or the command line? Visit the Git tutorial. IMPORTANT Users of previous TFS releases will not have the Branches tab in the Code view. Create a new branch in TFS from the Code view by selecting the drop-down next to the branch name and then selecting New branch. Create a new branch from the web 1. From your Team Project, select the Code view. Make sure you're working with the right repo, then select Branches. 2. Select the New branch button in the upper right corner of the page. 3. In the Create a branch dialog, enter a name for your new branch, select a branch to base the work off of, and associate any work items. 4. Select Create branch.
213 TIP You will need to fetch the branch before you can see it and swap to it in your local repo.

214 Delete a Git branch from the web portal 10/21/ min to read Edit Online VSTS TFS 2018 TFS 2017 IMPORTANT This topic covers deleting a Git branch via the web in VSTS and TFS. If you need to delete a Git branch in your own repo from Visual Studio or the command line, follow these steps in the VSTS Git tutorial. 1. Open your repo on the web and select the Branches view. 2. Locate your branch on the branches page. If you don't see it, select All to view all branches and filter the branches using the Search all branches box in the upper right. 3. Select the trashcan icon next to the branch you want to delete.


215 Restore a deleted Git branch from the web portal 11/3/ min to read Edit Online VSTS TFS 2018 IMPORTANT This topic covers restoring a deleted Git branch via the web in VSTS and TFS If you need to restore a Git branch in your own repo from Visual Studio or the command line, push your branch from your local repo to VSTS to restore it. 1. Open your repo on the web and select the Branches view. 2. Search for the exact branch name using the Search all branches box in the upper right. 3. Click the link to Search for exact match in deleted branches. If there is a deleted branch that matches your search, you will be able to see which commit it pointed to when it was deleted, who deleted it, and when it was deleted. 4. To restore the branch, select the... icon next to the branch name and then select Restore branch from the menu. The branch will be recreated at the last commit to which it pointed. Note that branch policies and permissions will not be restored. If you've re-used the same branch name for different commits, you may not see all the commits you're expecting when you restore the deleted branch. In that case, navigate to the Pushes page of the restored branch to see the entire history of the branch.


216 You can navigate to a specific commit, then select New branch from the... icon. From there, you can use a pull request, cherry-pick, or merge to get the commits back into the desired branch.
217 Require branches to be created in folders 12/8/ min to read Edit Online VSTS TFS 2018 When you have many people collaborating in a repository, the number and names of branches can quickly get out of control. Hierarchical branch folders is an effective way to tame the chaos. VSTS, TFS, and Visual Studio treat / as a folder separator and will automatically collapse folders by default. This way, you don't have to wade through every single branch to find the one you're looking for. You don't have to rely on everyone to get it right, either. VSTS and TFS can enforce the correct use of branch folders. Planning Decide on the folder structure you want to allow. As an example, we'll set our repository to enforce the following rules: Only master can exist at the repository root. All users will be allowed to create branches under the features/ and users/ folders. Administrators will be able to create branches under the releases/ folder. NOTE For more examples and information about branch naming strategies, see Adopt a Git branching strategy. Preparation You will need the Team Foundation version control command ( tf.exe ) on your computer. Run a Visual Studio Developer Command Prompt (in Windows, choose Start, choose Visual Studio, then choose the the Developer Command Prompt). You will need the URL of your account or collection, the name of the project, and the name of the repository. For this example, we'll use FabrikamProject, and FabrikamRepo. Enforce permissions Run the following commands in the Developer Command Prompt. Each command is preceded with an explanation of what it's doing. If you don't have a personal access token cached (for example by signing in to the VSTS web portal) you'll be prompted to login. First, block the Create Branch permission at the repository root for the project's contributors. tf git permission /deny:createbranch /group:[fabrikamproject]\contributors /collection: /teamproject:fabrikamproject /repository:fabrikamrepo Then, allow contributors to create branches under features and users. tf git permission /allow:createbranch /group:[fabrikamproject]\contributors /collection: /teamproject:fabrikamproject /repository:fabrikamrepo /branch:features tf git permission /allow:createbranch /group:[fabrikamproject]\contributors /collection: /teamproject:fabrikamproject /repository:fabrikamrepo /branch:users
![Allow administrators to create branches under releases. tf git permission /allow:createbranch /group:"[fabrikamproject]\project Administrators" /collection:https://fabrikam-fiber.visualstudio.](/docs-images/74/69621835/images/218-0.jpg "com/ /teamproject:fabrikamproject /repository:fabrikamrepo /branch:releases Finally, allow administrators to create a branch called master (in case it ever gets deleted accidentally).")
218 Allow administrators to create branches under releases. tf git permission /allow:createbranch /group:"[fabrikamproject]\project Administrators" /collection: /teamproject:fabrikamproject /repository:fabrikamrepo /branch:releases Finally, allow administrators to create a branch called master (in case it ever gets deleted accidentally). tf git permission /allow:createbranch /group:"[fabrikamproject]\project Administrators" /collection: /teamproject:fabrikamproject /repository:fabrikamrepo /branch:master NOTE You can access help for these commands from the command line by running tf git /? and tf git permission /?. Rename old branches Web Portal Command Line 1. Navigate to the Branches page. 2. Locate your existing branch. If you don't see it, you may need to look on the All tab. 3. Choose its context menu (the... button) and choose New branch. 4. Type the new name of the branch, for example users/frank/readme-fix. Choose Create branch.
219 5. Choose the red trashcan icon next to the old branch name to delete it. NOTE Any custom permissions or branch policies you had set up will not be migrated.
220 Lock a branch 10/21/ min to read Edit Online VSTS TFS 2018 TFS 2017 TFS 2015 Prevent updates to a Git branch by locking the branch. Locking a branch prevents other users from changing the existing commit history. Locking also blocks any new commits from being added to the branch by others. Locking limitations Locking is ideal for preventing new changes that might conflict with an important merge or to place a branch into a read-only state. Use branch policies and pull requests instead of locking if you just want to ensure that changes in a branch are reviewed before they are merged. Locking does not prevent cloning of a repo or fetching updates made in the branch into your local repo. Share with your team the reason for the locking of the branch and make sure your team knows what to do to work with the branch after it is unlocked. Only the user who locked the branch or a user with Remove Others' Locks permissions for the branch can remove the lock. Lock a branch using the Branches view 1. Open the Branches view while viewing your repo on the web. 2. Locate your branch on the Branches view. You can search for your branch using the Search all branches box in the upper right. 3. Lock the branch by selecting the... icon next to the branch name and then selecting Lock from the menu. A lock icon will appear next to the branch name. Unlock a locked branch by selecting Unlock from the same menu.
221
222 Improve code quality with branch policies 11/20/ min to read Edit Online VSTS TFS 2018 TFS 2017 TFS 2015 Branch policies help teams protect their important branches of development. Policies enforce your team's code quality and change management standards. Configure branch policies 1. Open the Branches view in the Code area on the web portal while viewing your repo. 2. Locate your branch in the view. You can browse the list or you can search for your branch using the Search all branches box in the upper right. 3. Open the context menu for the branch by selecting the... icon. Select Branch policies from the context menu. 4. Configure your desired policies in the Policies tab. See the following sections in this article for
223 descriptions for each policy type. Once your policies are configured, select Save changes to apply your new policy configuration. NOTE After you set up a branch policy, you cannot directly push changes to the branch. Changes to the branch are only made through pull requests. Require a minimum number of reviewers Code reviews are a best practice for most software development projects. To require teams to review their changes before completing a pull request, check Require a minimum number of reviewers. The basic policy requires that a certain number of reviewers approve the code with no rejections.
224 The owner cannot approve their own changes if Allow users to approve their own changes is not selected. If any reviewer rejects the changes, the pull request cannot be completed unless the Allow completion even if some reviewers vote "Waiting" or "Reject" is selected. To reset code reviewer votes when new changes are pushed to the source branch, check Reset code reviewer votes when there are new changes. When the required number of reviewers approve the pull request, it can be completed. NOTE If you don't expect any problems with your changes and you want your pull request to complete once all policies are met, you can set the pull request to automatically complete. Check for linked work items Require associations between pull requests and a work item to ensure that changes to your branch have work item management tracking. Linking work items provides additional context for your changes and ensures that updates go through your work item tracking process. Check for comment resolution Configure a comment resolution policy for your branch by selecting Check for comment resolution.
225 For more information on working with pull request comments, see Pull requests - leave comments. Enforce a merge strategy Maintain a consistent branch history by enforcing a merge strategy when a pull request is completed. Select Enforce a merge strategy and pick an option to require that pull requests merge using that strategy. No fast-forward merge - This merges the commit history of the source branch when the pull request closes and creates a merge commit in the target branch. Squash merge - Complete all pull requests with a squash merge, creating a single commit in the target branch with the changes from the source branch. Learn more about squash merging and how it affects your branch history. Build validation Set a policy requiring changes in a pull request to build successfully with the protected branch before the pull request can be completed. Even if you're using continuous integration (CI) on your development branches to catch problems early, build policies reduce build breaks and keep your tests results passing. When a build validation policy is enabled, a new build is queued when a new pull request is created or when changes are pushed to an existing pull request targeting this branch. The build policy then evaluates the results of the build to determine whether the pull request can be completed. IMPORTANT Before specifying a build validation policy, you must have a build definition. If you don't have one, see Create a build definition and choose the type of build that matches your project type. Choose Add build policy and configure the desired options in the Add build policy window.
226 Select the build definition from the Build definition drop-down. Choose the type of Trigger - either Automatic (whenever the source branch is updated) or Manual. Configure the Policy requirement. If set to Required, builds must complete successfully in order to complete pull requests. Choose Optional to provide a notification of the build failure but still allow pull requests to complete. Set a build expiration to make sure that updates to your protected branch don't break changes in open pull requests. Immediately when branch name is updated: This option sets the build policy status in a pull request to failed when the protected branch is updated. You must requeue a build to refresh the build status. This setting ensures that the changes in pull requests build successfully even as the protected branch changes. This option is best for teams that have important branches with a lower volume of changes. Teams working in busy development branches may find it disruptive to wait for a build to complete every time the protected branch is updated. After n hours if branch name has been updated: This option expires the current policy status when the protected branch updates if the passing build is older than the threshold entered. This option is a compromise between always requiring a build when the protected branch updates and never requiring one. This choice is excellent for reducing the number of builds when your protected branch has frequent updates. Never: Updates to the protected branch do not change the policy status. This reduces the number of builds for your branch, but can cause problems when closing pull requests that haven't been updated recently. Choose an optional Display name for this build policy which used used to identify the policy on the Branch policies page. If you don't specify a display name, the build definition name is used. When the owner pushes changes that build successfully, the policy status is updated. If you have an
227 Immediately when branch name is updated or After n hours if branch name has been updated build policy chosen, the policy status updates when the protected branch is updated if the most recent build is no longer valid. Require approval from external services External services can use the PR Status API to post detailed status to your PRs. The branch policy for external services brings the ability for those 3rd party services to participate in the PR workflow and establish policy requirements. For instructions on configuring this policy, see Configure a branch policy for an external service. Automatically include code reviewers Designate reviewers for specific directories and files in your repo. These reviewers are automatically added to pull requests that change files along those paths.
228 If you select Required next to a path entry, then the pull request cannot be completed until: Every user added as a reviewer for the path approves the changes. At least one person in every group added to the path approves the changes. Select Optional if you want to add reviewers automatically, but not require their approval to complete the pull request. When the required reviewers approve the code, you can complete the pull request. Bypass branch policies In some cases, you need to bypass policy requirements so you can push changes to the branch directly. For these situations, grant the Exempt from policy enforcement permission to a user or group. You can scope this permission to an entire project, a repo, or a single branch. Manage this permission along the with other Git permissions.
229 IMPORTANT Users with Exempt from policy enforcement permission set to allow can complete pull requests even if the branch policy is not satisfied. Use caution when granting this permission, especially at the repo and team project level. Q & A Q: When are the conditions set in branch policies checked? Branch policies are re-evaluated on the server as changes are pushed and reviewers vote. If there is a build triggered by the policy, the build status is set to waiting until the build completes. Q: What type of wildcard characters are supported when configuring required code reviewers? Single asterisks ( * ) are supported, and will match any number of characters, including both forward-slashes ( / ) and back-slashes ( \ ). Question marks (? ) will match any single character. Examples: *.sql will match all files with the.sql extension /ConsoleApplication/* will match all files under the folder named ConsoleApplication /.gitattributes will match the.gitattributes file in the root of the repo */.gitignore will match any.gitignore file in the repo Q: Are the required code reviewer paths case-sensitive? No, branch policies are not case-sensitive at this time. Q: Can I use XAML build definitions in branch policies? You cannot use XAML build definitions in branch policies. Q: How can I configure multiple users as required reviewers, but only require that one of them approve? You can add the users to a group, and then add the group as a reviewer. Any member of the group can then approve on behalf of the group to meet the policy requirement.
230 Q: I have the exempt from policy permission set, why am I still seeing policy failures in the pull request status? Even for users that are exempt from policy enforcement, the configured policies are still evaluated when changes are added to a pull request. For exempt users, policy status is advisory only and will not block completion of the pull request. Q: Where can I get more information on advanced policy configurations? Check out the REST API documentation for more details.
231 Set branch permissions 10/21/ min to read Edit Online VSTS TFS 2018 TFS 2017 Update 1 Overview Set up permissions to control who can read and update the code in a branch on your Git repo. You can set permissions for individual users and groups, and inherit and override permissions as needed from your repo permissions. Use the branches view to configure security 1. Open the Branches view while viewing your repo on the web. 2. Locate the branch on the Branches view. You can search for your branch using the Search all branches box in the upper right. 3. Open the context menu by selecting the... icon next to the branch name. Select Branch security from the menu. Add users or groups Avoid trouble: You can only add permissions for users and groups already in your Team Project. Add new users and groups to your Team Project before setting branch permissions. Add users or groups to your branch permissions by selecting Add, then choosing Add user or Add VSTS group. Enter the display name or their Microsoft Account, then select Save Changes.
232 Remove users or groups Remove permissions for a user or group by selecting the user or VSTS group, then selecting Remove. The user or group will still exist in your Team Project and this change will not affect other permissions for the user or group. Set permissions Control branch permission settings from the branch permission view. Users and groups with permissions set at the repo level will inherit those permissions by default. NOTE These permissions have changed in TFS 2017 Update 1 and VSTS. If you are using an earlier version of TFS, see the previous list of permissions. PERMISSION DESCRIPTION CONTRIBUTE Users with this permission can push new commits to the branch and lock the branch. EDIT POLICIES Can edit branch policies. EXEMPT FROM POLICY ENFORCEMENT Users with this permission are exempt from the branch policy set for the branch. FORCE PUSH (REWRITE HISTORY AND DELETE BRANCHES) Can force push to a branch, which can rewrite history. This permission is also required to delete a branch. MANAGE PERMISSIONS Can set permissions for the branch. REMOVE OTHERS' LOCKS Can remove locks set on branches by other users.

233 Map TFVC actions to Git 9/13/ min to read Edit Online Do you plan to adopt Git, are familiar with TFVC actions, and wondering how they map to Git? Both are powerful and mature source control systems, but mapping common actions you have grown accustomed to in the one to the other can be a confusing experience. We will not delve deep into the Git commands, as they are well documented in the product documentation, but show examples to help you make the right decisions, while moving through a typical create -> clone -> branch -> change -> commit -> push workflow. Start at the beginning by creating a new repo Each Team project can host TFVC and Git repositories in the same team project, creating one TFVC, and one or more Git repositories. Once the repo is created, you are presented with step-by-step instructions to quickly get started. Click on the `Create a ReadMe file' at the end of the instruction page, to give the repo context and to create some history. Create a workspace and get latest When connecting to a TFVC repo for the first time, you typically create a workspace and get the latest code. so, how do you get started in Git?
234 Similar to a workspace in TFVC you clone the Git repository to a folder on your machine. Cloning will download all of the contents and history of the repository, to your local machine. Once you have the cloned repo nearly all operations are performed locally, allowing you to work disconnected from the server, giving you a speed and performance advantage, and a full backup of the centralized repository. Command Line Visual Studio git clone You only need to clone once per repo, but like TFVC workspaces, you can have multiple clones to isolate inprogress work. However, branching is typically a better way to isolate changes. Create a branch With Git you are always working in a branch and by default in the "master" branch. You are recommended to create multiple local branches, a process that takes seconds and allows you to seamlessly context switch between branches and work in isolation. Unlike TFVC branches, which are paths scoped, Git branches are repository scoped. They are lightweight, can be local only, or shared with others when you are ready to share your changes. Consider branching if you need to work in isolation, need to suspend your work, focus on new features, or if you are planning to conduct a Git pull request. As a TFVC user, repeat a few times: Branching is recommended! Git branching is inexpensive, fast, and powerful! Git encourages you to use local branches. Publish local branches to your centralized repository as needed. Always verify your branch context before making changes. Name the branch using a common convention such as users/alias/branchname for example: users/doris/newfeature Create and switch to a local topic branch, named francis/demo-feature. It is good practice to run a git status first, to verify that you are on the right branch to start with. Command Line Visual Studio git checkout -b francis/demo-feature

235 Make a change by adding files Similar to the TFVC experience, new files in the working folder are not automatically part of the repository. You stage your new files with the git add command, which is synonymous to performing an add Items to Folder operation in TFVC. Here's a sample project to try adding files to your repo. Command Line Visual Studio git add <file> or git add --all Using the pre-baked sample, you will have thirteen new files that have been included and staged in the local repository. View pending changes Wondering what changes are now sitting in your working environment? As before, the Git status command or the Changes view in the Visual Studio IDE will show changes in your working tree. Command Line Visual Studio git status
, then you push to send those changes with the server.")
236 Checkin changes and commit locally In TFVC you share your changes with a Check In, which sends your pending changes to the server. In Git, the process is a bit different. First, you commit to the local repository, creating a commit object (like a changeset), then you push to send those changes with the server. You commit the changes to your local repository using git commit, which feels like doing a Checkin Pending Changes in TFVC. A key difference is that the git commit commits your changes to the local, not the remote repository. Command Line Visual Studio git commit Checkin changes with the server/remote repo First you need to publish your local francis/demo-feature branch to the remote server, which includes all committed changes. Command Line Visual Studio git push --set-upstream origin francis/demo-feature To synchronize further updates in your local with the remote repository, you need to push your changes using git push. The recommended practise using the git command or the Visual Studio IDE is to: fetch to download content and preview incoming changes from others. pull to download and then merge changes from others. push to share your local changes. View history To see the commit you just created you can review the local history. Command Line Visual Studio For a compact history, use:

237 git log --oneline For a detailed, view, use: git log As shown above, git log lists the author, , date written and the commit SHA-1 checksum. As a TFVC user you may want to use the --stat option to include more information, such as file name and change statistics. You can also view the history of the centralized repository using the VSTS web portal. In the VSTS web portal, choose CODE > History or CODE > Explorer > History At this point you have successfully explored the create -> clone -> branch -> change -> commit -> push workflow, based on common TVFC actions. You also have the option of issuing a pull request, to publish and stage your changes on the server/remote repo at this point. Other actions Switch branches When working with Git you do not change branches by switching to separate folders and locations on your machine. You simply change the context by doing a checkout, making the entire working directory match the selected branch or commit. Fast and simple! Command line git checkout <branch> If you forgot what branches you have in your local repository, use git branch to list the default and known branches.
238 Keep in mind which branch you are working on! When you work with multiple branches in Git, you switch branches in place in the same working directory. Switching between branches is a very fast operation, and making sure you are on the right branch at all times is just good practice. Get latest version There are lots of reasons to want to get updates. For example, when coming back from a well deserved vacation, or needing to switch context to another project, you need to refresh your development machine with the latest version of the codebase. Command line git pull or git fetch followed by git merge FETCH_HEAD Always get the latest version and resolve merge conflicts locally. Undo local changes There may be a valid reason to revert all revisions you made in your local repository and reset your working environment to the latest version from the remote repository. Command line git reset --hard HEAD followed by git pull origin followed by git clean -xdf The scenario is anonymous to doing a Get > Latest Version with the Overwrite writeable files that are not checked out and Overwrite all files if the local version matches the specified version options in TFVC. Alternatively you can manually delete your local repo after making a validated copy off course and then clone the repository again. This is by no means the end of actions and options available to Git users. Here are some useful reference sites for further reading: Git commands covered herein, refer to git documentation Think like (a) Git, a Guide for the Perplexed. How to undo (almost) anything with Git, by Joshua Wehner

239 Q&A What about sync? "Does the Visual Studio IDE Commit and Sync not magically do all this?", you may be asking yourself. With magic comes responsibility! Many users dislike the sync as it can sometimes mess up your local history and add a merge commit on top of your current commit. Once you are in a bad state, you have to revert to the command line as there is currently no reset support in the IDE. Authors: Jesse Houwing, Martin Hinshelwood, Mike Fourie, and Willy Schaub (c) 2015 Microsoft Corporation. All rights reserved. This document is provided "as-is." Information and views expressed in this document, including URL and other Internet Web site references, may change without notice. You bear the risk of using it. This document does not provide you with any legal rights to any intellectual property in any Microsoft product. You may copy and use this document for your internal, reference purposes.
240 Build definition triggers 12/19/ min to read Edit Online VSTS TFS 2018 TFS 2017 TFS 2015 Previous versions (XAML builds) On the Triggers tab you specify the events that will trigger the build. You can use the same build definition for both CI and scheduled builds. Continuous integration (CI) Select this trigger if you want the build to run whenever someone checks in code. Batch changes Select this check box if you have a lot of team members uploading changes often and you want to reduce the number of builds you are running. If you select this option, when a build is running, the system waits until the build is completed and then queues another build of all changes that have not yet been built. If you are using batched changes, you can also specify a maximum number of concurrent builds per branch. You can batch changes when your code is in Git in the team project or on GitHub. This option is not available if your code is in a remote Git repo or in Subversion. Git filters If your repository is Git then you can specify the branches where you want to trigger builds. You can use wildcard characters. Path filters in VSTS and Team Foundation Services (TFS) If your Git repo is in VSTS or TFS, you can also specify path filters to reduce the set of files that you want to trigger a build. Tips: If you don't set path filters, then the root folder of the repo is implicitly included by default. When you add an explicit path filter, the implicit include of the root folder is removed. So make sure to explicitly include all folders that your build needs. If you exclude a path, you cannot also include it unless you qualify it to a deeper folder. For example if you exclude /tools then you could include /tools/trigger-runs-on-these The order of path filters doesn't matter. Example For example, you want your build to be triggered by changes in master and most, but not all, of your feature branches. You also don't want builds to be triggered by changes to files in the tools folder. VSTS
241 TFS and older versions TFVC Include Select the version control paths you want to include and exclude. In most cases, you should make sure that these filters are consistent with your TFVC mappings on the Repository tab. CI trigger for a remote Git repo or Subversion
242 You can also select the CI trigger if your code is in a remote Git repo or Subversion. In this case we poll for changes at a regular interval. For this to work, VSTS or your Team Foundation Server must be able to resolve the network address of the service or server where your code is stored. For example if there's a firewall blocking the connection, then the CI trigger won't work. Scheduled Select the days and times when you want to run the build. If your repository is Git, GitHub, or External Git, then you can also specify branches to include and exclude. You can use wildcards. Example: Nightly build of Git repo in multiple time zones VSTS TFS and older versions
243 Example: Nightly build with different frequencies VSTS TFS and older versions

244 TFVC gated check-in If your code is in a Team Foundation version control (TFVC) repo, use gated check-in to protect against breaking changes. By default Use workspace mappings for filters is selected. Builds are triggered whenever a change is checked in under a path specified in your mappings in the source repository settings. Otherwise, you can clear this check box and specify the paths in the trigger. How it affects your developers When a developers try to check-in, they are prompted to build their changes. The system then creates a shelveset and builds it. For details on the gated check-in experience, see Check in to a folder that is controlled by a gated check-in build process. Option to run CI builds By default, CI builds are not run after the gated check-in process is complete and the changes are checked in. However, if you do want CI builds to run after a gated check-in, select the Run CI triggers for committed changes check box. When you do this, the build process does not add ***NO_CI*** to the changeset description. As a result, CI builds that are affected by the check-in are run. A few other things to know Make sure the folders you include in your trigger are also included in your mappings on the Repository tab. You can run gated builds on either a hosted agent or a private agent. Q&A
245 How do I protect my Git codebase from build breaks? If your code is in a Git repo on VSTS or Team Foundation Server, you can create a branch policy that runs your build. See Improve code quality with branch policies. This option is not available for GitHub repos. My build didn't run. What happened? If your build is in VSTS, then at least one of your users must sign in regularly for CI and scheduled builds to run. Your VSTS account goes dormant five minutes after the last user signed out. After that, each of your build definitions will run one more time. For example, while your account is dormant: A nightly build of code in your VSTS account will run only one night until someone signs in again. CI builds of an external Git repo will stop running until someone signs in again. Can I chain builds so that one build triggers another? Not yet. See User Voice: Provide build configuration dependencies in TFS Build. Do I need an agent? You need at least one agent to run your build or release. Get an agent. I can't select a default agent queue and I can't queue my build or release. How do I fix this? See queues. I use Team Foundation Server on-premises and I don't see some of these features. Why not? Some of these features are available only on VSTS and not yet available on-premises. Some features are available on-premises if you have upgraded to the latest version of TFS.

246 Git command reference 10/21/ min to read Edit Online VSTS TFS 2018 TFS 2017 TFS 2015 VS 2017 VS 2015 Update 2 Overview Visual Studio's Team Explorer lets you perform most common Git tasks you'll need for your day to day work right from Visual Studio. Open Team Explorer through the View menu in Visual Studio, or with the Ctrl+, Ctrl+M hotkey. Team Explorer and the Git command line work great together. When you make updates and perform commands through one interface, you'll see those changes reflected in the other. Git Installation instructions are available if you don't have Git installed on your computer. TIP Windows users: If you aren't using Visual Studio, installing Git for Windows will set up the Git credential manager for Windows. The credential manager makes it easy to authenticate with your VSTS repos. While in Visual Studio, open a command prompt in your repo from Team Explorer s Connect view. Right-click on your local repo and select Open Command Prompt IMPORTANT Some commands require having specific Git permissions in VSTS to complete. Repos HOW DO I? GIT COMMAND LINE VISUAL STUDIO Create a repo in a new folder git init foldername Select the Connect button ( ) in Team Explorer to open the Connect view, then select New under Local Git repositories Create a repo with code in an existing folder git init foldername git add --all git commit -m "Initial commit" Create the repo from the command line, then open Team Explorer's Connect view and select Add under Local Git repositories
247 HOW DO I? GIT COMMAND LINE VISUAL STUDIO Create a repo from an existing Visual Studio solution git init foldername cd foldername git add --all git commit -m "Initial commit" Open the solution and select Publish ( ) from the status bar in the lower right. Create a new repo in your Team Project Not applicable From the web, select Code, then select the drop-down next to the current repo name and choose New Repository... Clone a repo into a local folder git clone URL foldername Select Clone under Local Git repositories in Team Explorer's Connect view Clone a repo in your Team Project git clone URL foldername Open the Connect view in Team Explorer and right click the Git repo in your Team Project under the account name. Select Clone... Add an existing repo to Visual Studio Not applicable Open the solution file in Visual Studio (this will automatically add the repo to Team Explorer) or select Add under Local Git repositories in the Connect view Delete the Git repo and history, but keep the current version of the files Delete the hidden.git folder created at the root of the repo Delete the hidden.git folder created at the root of the repo from Windows Explorer or the command line Delete a local repo and all files Delete the folder containing your repo from your computer's filesystem Close any open solutions using files in the repo, then delete the folder containing your repo from your computer's filesystem. Delete a repo in your Team Project Not applicable Select the settings icon ( ) in VSTS/TFS, then select the Version Control tab. Find the Git repository to delete and select the... next to the name. Choose Delete Repository from the options. Add a remote git remote add name url Open the repository using the Connect view in Team Explorer, then open the Settings view in Team Explorer. Select Repository Settings, and select Add under Remotes Update a remote git remote set-url name url Open the repository using the Connect view in Team Explorer, then open the Settings view in Team Explorer. Select Repository Settings, and select Edit under Remotes Learn more: Create a new repo VSTS Git tutorial Clone an existing repo VSTS Git tutorial Share your code in Git with the command line Share your code in Git with Visual Studio 2015
248 Share your code in Git with Visual Studio 2013 Create a new repo in your Team Project Delete a repo in your Team Project Branches HOW DO I? GIT COMMAND LINE VISUAL STUDIO Create a new branch git branch branchname Open the Branches view in Team Explorer, then right-click a branch and choose New Local Branch From... Swap to a different branch git checkout branchname Open the Branches view in Team Explorer, then double click a local branch. Alternatively, click the current branch name from the status bar and select a different branch. Create and switch to a new branch git checkout -b branchname Open the Branches view in Team Explorer, then right-click a branch and choose New Local Branch From... Delete a local branch git branch -d branchname Open the Branches view in Team Explorer, then right-click the branch and select Delete. You must be checked out to a different branch than the one you want to delete. Delete a remote branch git push origin --delete branchname Open the Branches view in Team Explorer, expand the remote that has the branch you want to delete. Rightclick the remote and select Delete Branch from Remote Lock a branch, preventing updates to it Set a default branch in your VSTS/TFS repo Set a compare branch for pull requests in your VSTS/TFS repo Learn more: From the web, select the Branches tab while viewing your repo. Select the... next to the branch you want to lock and choose Lock. Unlock the branch with Unlock Select the settings icon on the web ( ), then select the Version Control tab. Select your Git repository, then select the... next to the branch name and choose Set as default branch From the web, select the Branches tab while viewing your repo. Select the... next to the branch you want to lock and choose Compare branch Same as command line Same as command line Same as command line Create and manage your work in branches VSTS Git tutorial Managing your Git branches in VSTS/TFS Delete a Git branch on your VSTS/TFS repo Lock and unlock a VSTS/TFS branch
249 Commits HOW DO I? GIT COMMAND VISUAL STUDIO Create a new commit git commit -m "message" Open the Changes view in Team Explorer. Stage changes by rightclicking on the modified files and selecting Stage. Enter a commit message and select Commit Staged. Amend the last commit with staged changes git commit --amend -m "Updated message" Open the Changes view in Team Explorer, stage your changes, then select Amend Previous Commit from the Actions drop-down. Stage all file changes git add --all Open the Changes view in Team Explorer. Select the + icon in the Changes list to stage all changes for the next commit. Stage a specific file change git add filename Open the Changes view in Team Explorer. Stage changes by rightclicking on the changed file and selecting Stage. Review unstaged changes git status --untracked Open the Changes view in Team Explorer. Unstaged changes are listed under Changes section. Delete a file Move a file git rm filename git commit -m "Deleted filename" git mv filename git commit -m "Moved filename" Delete the file through Solution Explorer, the command line, or any other means. Right-click the deleted file in Team Explorer's Changes view and select Stage. Select Commit Staged to commit the deletion. Move a file from one location to another in your repo through Solution Explorer, the command line, or any other means. Right-click the moved file in Team Explorer's Changes view and select Stage. Select Commit Staged to commit the move. Tag a commit git tag -a tagname -m "description" Open the Changes view in Team Explorer, then choose View history..." from the Action drop-down. Locate the commit in thie History view, then rightclick and select Create Tag Learn more: Save your work with commits VSTS Git tutorial Compare files and versions
250 HOW DO I? GIT COMMAND VISUAL STUDIO Compare the current contents of a singile file and the contents in the last commit Compare your current version with a branch Compare changes between two branches Learn more: git diff HEAD filename git diff branchname git diff branchname1 branchname2 Right-click on the change in the Changes view in Team Explorer and select Compare with unmodified. Right-click on a file in Solution Explorer and select View History..., then select both on the latest commit on your current branch and the latest commit on the remote branch. Right-click and select Compare Right-click on a file in Solution Explorer and select View History..., then select the most recent commits for both branches. Right-click and select Compare Compare versions and review history VSTS Git tutorial Sync changes HOW DO I? GIT COMMAND VISUAL STUDIO Download new branches and commits from a remote repo, but do not merge them into your local branches Merge updates from a remote repo into your local repo git fetch git pull remote branchname Open the Sync view from Team Explorer and select Fetch. While working on the branch in your local repo, open the Sync view in Team Explorer, then select Pull. Publish a local branch to a remote repo git push -u remote branchname Open the Sync view in Team Explorer and select Publish under Outgoing Commits. Synchronize your local branch with a remote branch, pushing your local changes and pulling remote ones Force push a branch, rewriting the remote branch history with the history of your current branch Learn more: git pull remote branchname git push -u remote branchname git push --force -u origin remote_branchname Open the Sync view in Team Explorer. Select Sync. Use command line Share code with push VSTS Git tutorial Update your code with fetch and pull VSTS Git tutorial Resolve merge conflicts VSTS Git tutorial Merge and rebase
251 HOW DO I? GIT COMMAND VISUAL STUDIO Merge a branch into the current branch git merge branchname In the Team Explorer Branches view, right-click the branch you want to merge and select Merge From... Verify the options set and select Merge. Merge a remote branch into the current branch git pull origin branchname In the Team Explorer Branches view, right-click the remote branch you want to merge and select Merge From... Verify the options set and select Merge. Rebase your current branch onto the history of another branch git rebase branchname In the Team Explorer Branches view, right-click the branch you want to rebase your current branch changes onto and select Rebase Onto.." Do an interactive rebase of the last n commits git rebase -i HEAD~n (Linux and macos) git rebase -i "HEAD^n" (Windows) Use command line Cherry-pick a commit into the current branch git cherry-pick commitid Open the Changes view in Team Explorer, then choose View history..." from the Action drop-down. Locate the commit in thie History view, then rightclick and select Cherry-pick Learn more: Resolve merge conflicts VSTS Git tutorial Catch up and replay changes with rebase VSTS Git tutorial Copy changes with cherry-pick VSTS Git tutorial Undo WARNING If you are not an experienced Git user, exercise caution when using the reset command. Learn more HOW DO I? GIT COMMAND VISUAL STUDIO Revert all changes and roll back to the most recent commit git reset --hard HEAD Open the Changes view in Team Explorer. Select Actions and choose **View History from the drop-down. Right-click the commit where the branch is currently located and select Reset and Delete changes... Revert staging of files, but keep file changes git reset --mixed HEAD Open the Changes view in Team Explorer. Select Actions and choose **View History from the drop-down. Right-click the commit where the branch is currently located and select Reset and Keep changes...
252 HOW DO I? GIT COMMAND VISUAL STUDIO Delete untracked files git clean -f In the Changes view in Team Explorer, right-click the files to remve under Changes marked with [add] and select Delete. Reset your local branch to the most recent commit on a remote branch Revert a commit pushed to a remote repository Learn more: git reset --hard remote/branchname (for example, git reset --hard origin/master) git revert commitid Right-click the branch from Team Explorer's Branches view and select Reset and Delete changes... Open the Changes view in Team Explorer. Select Actions and choose **View History from the drop-down. Right-click the commit to revert and select Revert. Undo changes and commits VSTS Git tutorial
253 Syntax guidance for Markdown files, widgets, wikis, and pull request comments 12/21/ min to read Edit Online VSTS TFS 2018 TFS 2017 TFS 2015 Having the right guidance at the right time is critical to success. To support your team or contributors to your project, use markdown to add rich formatting, tables, and images to your project pages, readme files, dashboards, and pull request comments. You can provide guidance to your team in these places using markdown: Project vision page or Welcome pages Team project wiki Readme files Pull request comments Add Markdown to a dashboard In this topic you'll find some basic Markdown syntax guidance. You can use both common Markdown conventions and GitHub-flavored extensions. Headers Structure your comments using headers. Headers segment longer comments, making them easier to read. Start a line with a hash character # to set a heading. Organize your remarks with subheadings by starting a line with additional hash characters, for example ####. Up to six levels of headings are supported. Example: # This is an H1 header ## This is an H2 header ### This is an H3 header #### This is an H4 header ##### This is an H5 header Result: Paragraphs and line breaks Make your text easier to read by breaking it up with paragraphs or line breaks.

254 In pull request comments, press Enter to insert a line break and begin text on a new line. In a Markdown file or widget, enter two spaces prior to the line break to begin a new paragraph, or enter two line breaks consecutively to begin a new paragraph. Example - pull request comment: Add lines between your text with the Enter key. This spaces your text better and makes it easier to read. Result: Add lines between your text with the return key This spaces your text better and makes it easier to read. Example - markdown file or widget: Add two spaces prior to the end of the line.(space, space) This adds space in between paragraphs. Result: Add two spaces prior to the end of the line. This adds space in between paragraphs. Quotes Quote previous comments or text to set context for your comment or text. Quote single lines of text be putting a > before the text. Use multiple > characters to nest quoted text. Quote blocks of lines of text by using the same level of > across multiple lines. Example: > Single line quote >> Nested quote >> multiple line >> quote Result: Horizontal rules Add a horizontal rule by adding a new line that's just a series of dashes ---. There must be a blank line above the line containing the ---. Example: above ---- below
255 Result: above below Lists Organize related items with lists. You can add ordered lists with numbers, or unordered lists with just bullets. Ordered lists start with a number followed by a period for each list item. Unordered lists start with a -. Begin each list item on a new line. Example: 1. First item. 2. Second item. 3. Third item. Result: 1. First item. 2. Second item. 3. Third item. Example: - Item 1 - Item 2 - Item 3 Result: Item 1 Item 2 Item 3 Links In pull request comments and wiki, HTTP and HTTPS URLs are automatically formatted as links. Also, within pull requests, you can link to work items by typing the # key and a work item ID, and then choosing the work item from the list. In markdown files and widgets, you can set text hyperlinks for your URL using the standard markdown link syntax: [Link Text](Link URL) When linking to another Markdown page in the same Git or TFVC repository, the link target can be a relative path or an absolute path in the repository. Supported links for Welcome pages: Relative path: [text to display](./target.md) Absolute path in Git: [text to display](/folder/target.md) Absolute path in TFVC: [text to display]($/project/folder/target.md)
256 URL: [text to display]( Supported links for Markdown widget: URL: [text to display]( Supported links for Wiki: Absolute path of Wiki pages: [text to display](/parent-page/child-page) URL: [text to display]( NOTE Links to documents on file shares using file:// are not supported on VSTS or TFS and later versions. This restriction has been implemented for security purposes. For information on how to specify relative links from a Welcome page or Markdown widget, see Source control relative links. Example: [C# language reference]( Result: C# language reference Source control relative links Links to source control files are interpreted differently depending on whether you specify them in a Welcome page or a Markdown widget. The system interprets relative links as follows: Welcome page: relative to the root of the source control repository in which the welcome page exists Markdown widget: relative to the team project collection URL base. For example: WELCOME PAGE /BuildTemplates/AzureContinuousDeploy.11.xaml./page-2.md MARKDOWN WIDGET EQUIVALENT /DefaultCollection/Fabrikam Fiber/_versionControl#path=$/Tfvc Welcome/BuildTemplates/AzureContinuousDeploy.11.xaml /DefaultCollection/Fabrikam Fiber/_versionControl#path=$/Tfvc Welcome/page-2.md Anchor links Within Markdown files, anchor IDs are assigned to all headings when rendered as HTML. The ID is the heading text, with the spaces replaced by dashes (-) and all lower case. Example: ###Link to a heading in the page Result: The syntax for an anchor link to a section...
 The ID is all lower case, and the link is case sensitive, so be sure to use lower case, even though the heading itself uses upper case.](/docs-images/74/69621835/images/257-0.jpg "You can also reference headings within another Markdown file: [text to display](./target.")
257 [Link to a heading in the page](#link-to-a-heading-in-the-page) The ID is all lower case, and the link is case sensitive, so be sure to use lower case, even though the heading itself uses upper case. You can also reference headings within another Markdown file: [text to display](./target.md#heading id) In wiki, you can also reference heading in another page: [text to display](/page-name#section-name) Images Add images and animated GIFs to your pull request comments, markdown files, or wiki pages to highlight issues or just to liven the discussion. Use the following syntax to add an image: The text in the brackets describes the image being linked and the URL points to the image location. Example: Absolute path in Git:
258 Absolute path in TFVC: Resize image: NOTE Feature availability: The syntax to support image resizing is only supported in pull requests and the Wiki. Tables Organize structured data with tables. Tables are especially useful for describing function parameters, object methods, and other data that has a clear name to description mapping. Place each table row on its own line Separate table cells using the pipe character The first two lines of a table set the column headers and the alignment of elements in the table Use colons ( : ) when dividing the header and body of tables to specify column alignment (left, center, right) Make sure to end each row with a CR or LF. Example: Heading 1 Heading 2 Heading : : : Cell A1 Cell A2 Cell A3 Cell B1 Cell B2 Cell B3 Result: HEADING 1 HEADING 2 HEADING 3 Cell A1 Cell A2 Cell A3 Cell B1 Cell B2 Cell B3 Checklist or task list Use [ ] or [x] to support checklists. You need to precede the checklist with either -<space> or 1.<space> (any numeral). Example: - [ ] A - [ ] B - [ ] C - [x] A - [x] B - [x] C Result:
259 Emphasis (bold, italics, strikethrough) You can emphasize text by applying bold, italics, or strikethrough to characters: To apply italics: surround the text with an asterisk * or underscore _ To apply bold: surround the text with double asterisks **. To apply strikethrough: surround the text with double tilde characters ~~. Combine these elements to apply multiple emphasis to text. Example: Use _emphasis_ in comments to express **strong** opinions and point out ~~corrections~~ **_Bold, italizied text_** **~~Bold, strike-through text~~** Result: Use emphasis in comments to express strong opinions and point out corrections Bold, italizied text Bold, strike-through text Code highlighting Highlight suggested code segments using code highlight blocks. To indicate a span of code, wrap it with three backtick quotes ( ``` ) on a new line at both the start and end of the block. Example: ``` $ sudo npm install vsoagent-installer -g ``` Result: $ sudo npm install vsoagent-installer -g Within a markdown file, text with four spaces at the beginning of the line automatically converts to a code block. Set a language identifier for the code block to enable syntax highlighting for any of the supported languages. ``` language code ```
260 Additional examples: ``` js const count = records.length; ``` const count = records.length; ``` csharp Console.WriteLine("Hello, World!"); ``` Console.WriteLine("Hello, World!"); Emoji In pull request comments and wiki pages, you can use emojis to add character and react to comments in the request. Type in what you're feeling surrounded by : characters to get a matching emoji in your text. The full set of emojis are supported. Example: :smile: :angry: Result: Special characters SYNTAX EXAMPLE/NOTES
261 To insert one of the following characters, prefix with a backslash: \ backslash ` backtick _ underscore {} curly braces [] square brackets () parentheses # hash mark + plus sign - minus sign (hyphen). dot! exclamation mark Some examples on inserting special characters Enter \\ to get \ Enter \_ to get _ Enter \# to get # Enter \( to get ( Enter \. to get. Enter \! to get! Attachments In pull request comments and wiki pages, you can attach files to illustrate your point or to give more detailed reasoning behind your suggestions. To attach a file, drag and drop it into the comment field or wiki page edit experience. You can also select the paper-clip icon in the upper-right of the comment box or the format pane in wiki page. If you have an image in your clipboard, you can paste it from the clipboard into the comment box or wiki page and it will render directly into your comment or wiki page. Attachments support the following file formats: Images: PNG (.png), GIF (.gif), JPEG (both.jpeg and.jpg) Documents: Word (.docx), Excel (.xlsx and.csv), and Powerpoint (.pptx), text files (.txt), and PDFs (.pdf) Compressed files: ZIP (.zip) and GZIP (.gz) Video files: MOV (.mov), MP4 (.mp4) Attaching non-image files creates a link to the file in your comment. Update the description text between the brackets to change the text displayed in the link. Attached image files render directly into your comment or wiki pages. Once you save or update a comment or wiki page with an attachment, you can see the attached image(s) and can select links to download attached files. HTML Tags In wiki pages, you can also create rich content using HTML tags. Example - Embedded video
262 <video src="<path of the video file>" width=400 controls> </video> Result: Example - Rich text format <p>this text needs to <del>strikethrough</del> <ins>since it is redundant</ins>!</p> <p><tt>this text is teletype text.</tt></p> <font color="blue">colored text</font> <center>this text will be center-aligned.</center> <p>this text contains <sup>superscript</sup> text.</p> <p>this text contains <sub>subscript</sub> text.</p> <p>the project status is <span style="color:green;font-weight:bold">green</span> even though the bug count / developer may be in <span style="color:red;font-weight:bold">red.</span> - Capability of span <p><small>disclaimer: Wiki also supports showing small text</small></p> <p><big>bigger text</big></p> Result: This text needs to strikethrough since it is redundant! This text is teletype text. Colored text This text contains This text contains Related notes superscript text. text. subscript This text will be center-aligned. The project status is GREEN even though the bug count / developer may be in red. - Capability of span Disclaimer: Wiki also supports showing small text Bigger text Project vision page or Welcome pages Readme files Pull requests Markdown widget Dashboards Widget catalog Wiki
263 Frequently Asked Git Questions 10/21/ min to read Edit Online VSTS TFS 2018 TFS 2017 TFS 2015 VS 2017 VS 2015 Is there an easy way to get a remote branch downloaded into my local repository? As long as you have an origin repository configured (which happens automatically via git clone ), when you checkout a branch that doesn't exist locally Git will see if there is a remote branch with the same name. If there is, Git will create a local branch with a reference to the remote branch of that name. Then you can git pull to download the commits and have Git catch up on the branch history locally. How can I find out which branch I am working in? git branch with no arguments shows the local branches and highlights the one you are checked out on. In Visual Studio, the status bar also displays the current branch when you are working with a project stored in a local Git repository. When should you make Git commits? This is up to you and your team. An accepted practice is to make separate commits for logically separate changes. Think of commits as entries in a logbook-whenever you've made a change that's worth noting, record it in a commit. A popular option is to allow everyone to commit locally as much as they want, but before they push the local commits, they squash them first through rebasing. This gives users a lot of personal flexibility to make frequent commits while keeping the commit history streamlined. If every branch retains its full commit history even when merged into master, doesn't that make the commit history of master hard to follow over time? Large projects with many commits and a range of contributors can result in commit histories for the master branch that represent the development history of the topic branches merged into master more than the development history of the overall project. Git provides a facility for condensing commits on branches through squashing commits and rebasing. Squashing commits makes the commit history on a branch less verbose and makes for a simpler commit history on the master branch once merged. How can I find out who made a specific change to a file in my Git repository? The git blame command can quickly track down who made a particular change to a file. From your local repository, you can run git blame with the -L parameter specifying which lines of interest. Blame produces formatted output showing the commit that last updated the line as well as the name of the person who made the commit. > git blame foo.js -L 20,+40 # show the blame output for the next forty lines starting at line d1108 (Francis Totten :54: ) line 20 of the code 215d1108 (Francis Totten :54: ) line 21 of the code 215d1108 (Francis Totten :54: ) line 22 of the code Blame does the searching through the commit history for you. You can also go back through the a file's history in VSTS as well for a different approach to determining who made a change and when. Go into the Code Explorer for your repository and branch in VSTS, then click on the file of interest. VSTS will show a complete commit history for that file on the current branch. I've made changes to some files and now I can't checkout to a different branch or rebase my work. Checking out to a different branch in Git will affect the state of files on your filesystem as Git uses the commit history to make sure you are working with the files that represent the state of your branch. If you attempt to change branches while you have uncommitted changes, those changes would be overwritten during the checkout.
264 Git doesn't want you to accidentally lose your changes, so it prevents the checkout from happening. You can resolve this by: Abandoning the changes and return to the most recent commit. See undoing changes in Git for instructions on how to roll back to the most recent commit. Committing the changes. See saving your work in Git with commits. Stashing your current work, saving the changes for later and cleaning up the workspace to the last commit. I've done some work but need to swap to something else. How can I save my work for later without committing the changes? The problem with these options is that sometimes you want to keep the changes, but not commit them because they are not at a point where you are comfortable doing so. Git provides a compact way of doing this using stash. Stash takes the current staged and unstaged changes in your branch and saves the work, then returns your branch back to the state of the last commit. You can change to the other branch, do your work, then when you return to this branch run stash apply to restore the changes. > git stash Saved working directory and index state WIP on feature1: be26067 updated endpoint docs HEAD is now at be26067 Once you run git stash apply the most recently stashed changes will be applied to your current branch. If there is a conflict applying the stashed changes, stash will restore the changes for the files that do not conflict and create conflict markers in the files that do conflict for you to resolve. You should merge the changes manually in this case. Once you are done with the stash, delete it with git stash drop. This will remove the last set of stashed changes. A final note about stash is that you can have mulitple stashes, but doing so requires more manual manipulation as you have to explicitly apply and drop stashes. You can read more about this from in the Git Stash documentation. How can I change the default editor that is used when working with Git command line tools? By default, command line Git will use a command-line editor when asking for commit messages, performing rebases, and other work that requires additional information to complete. The default editor is configured using git config : > git config core.editor _path_to_editor options_to_editor_ Note that Git For Windows makes it very easy to set notepad as the editor: > git config core.editor notepad Which will configure Windows' Notepad to edit Git information as needed and properly pass through the text from Git to Notepad. You can also specify > git config format.commitmessagecolumns 72 To keep the text columns in the commit messages to the preferred 72 and line wrap after hitting that character limit on a line. How can I change the username and displayed in my commits? Git puts a user name and address information inside each commit, and VSTS uses this information when viewing commits and when working with pull requests. If you are working on the command line, you can update the name and information displayed using the git config command:
265 > git config --global user. > git config --global user.name "Francis Totten" Note that the --global option will set the and name included in commits for all Git repositories on this system. If you want to change the settings for a single repository, you must change to the directory where the Git repository is located and run the above commands without the --global flag. You can also change the name and settings from Visual Studio. In Team Explorer, choose Settings and under Git, click the Global Settings or Repository Settings link.


266 Commit history 10/21/ min to read Edit Online VSTS TFS 2018 TFS 2017 Update 1 Commit history view The commit history view shows you the history of all the commits for a particular branch in a repository. By default, all results are shown in reverse chronological order. For each commit, you can view the following key elements: Author details - You can view the author and committer of each commit along with the associated time. Complete commit message - If the commit message is too long, you can click on the down-arrow to expand the commit message to view the entire commit message. Copy commit SHA - You can copy the 40 character commit SHA by clicking on the Copy full SHA to clipboard button. You can click on a commit ID or commit message to open the commit details page. Build and PR information - You can view the pull request that brought this commit to the branch selected on the page, and view the build status of the current commit.


267 You can select a repository from the repository picker to view the history of a particular repository. You can select a particular branch or tag from the branch picker to view associated history. You can further filter the results by selecting a particular file from the code explorer. You can also find a file or folder to view its history. In the following example, when you type "get", you see results of all files and folders in the repository that contain the word src.
268 History result filtering You can filter the results using the following advanced filtering modes: simple history, first parent, full history, and full history with simplified merges. For more information, see advanced git history options. You can also filter commits by authors. You will see authors of most recent commits in the author filter drop down. In case you are not able to find an author in the drop down, then you can type the author name or address and search for all commits by that author. In case you want to view commits that were authored between any two dates, you can use the From date and To date filter to scope down the list of commits. Commit search You can also search for a commit using its Commit ID. You can search for all commits starting with a commit ID. If you enter the 40 character Commit ID then you will be redirected directly to the commit details page.
269 Commit for file renames In case a file or folder is renamed, you will see all commits until the file or folder got renamed. You will also see a link suggesting Show rename history. When you click on Show rename history you can view all the commits of the file or folder before the rename.
270 Commit details 10/21/ min to read Edit Online VSTS TFS 2018 TFS 2017 Update 1 Commit details view The commit details view provides information regarding all the changes made as part of a commit. You can view additional metadata associated with the commit and also perform certain actions to revert or cherry pick the commit. What information do you see on the commit details page? Commit ID and commit message - You can view the commit Id and commit message of the commit. You also have the option to copy the commit Id or commit message by clicking on the Copy buttons. Author details - You can also view the author, committer, and pusher details in the author drop-down. Click on the Pushed on link to access the associated push details Associated pull requests - Once you navigate from the commit history to the commit details, the context of the branch from the commit history page is retained. In the following example you can see that commit #33 brought this commit to the master branch. You can also view all the associated pull requests for this commit, which are all the pull requests that brought this commit to one branch or another.


271 Associated work items - You can also view all the work items associated with this commit in the work items dropdown. Build status - You can also review the build status associated with the commit. What actions can you perform? You can perform the following actions on the commit details page. Search in branches and tags - Click the Search in branches button to search a commit in a particular branch or tags. You can view whether a particular branch or a tag includes this commit or not. Cherry pick - Click on Cherry-pick to cherry pick a commit and port the changes to another branch.


272 Revert - Click on Revert to revert the changes of a commit. A topic branch is created with the reverted changes and then you will be prompted to create a pull request to the target branch. New branch - Click on New branch to create a new branch from a commit.


273 What are the changes included in the commit? The source explorer allows you to select a file or a folder to view changes associated with a commit. Diff to parent - Click on Diff on parent1 in the Source Explorer pane to view the difference between the current commit and its parent commit. The file explorer view provides all the capabilities that we get in the file explorer view i.e. you can browse files in a side by side or inline diff view use the navigation keys to browse the next set of changes preview the files compare file diff for previous commits
Sample Spark Web-App. Overview. Prerequisites
 Sample Spark Web-App Overview Follow along with these instructions using the sample Guessing Game project provided to you. This guide will walk you through setting up your workspace, compiling and running
Git version control with Eclipse (EGit) Tutorial
 Tutorial") Git version control with Eclipse (EGit) Tutorial 출처 : Lars Vogel http://www.vogella.com/tutorials/eclipsegit/article.html Lars Vogel Version 3.6 Copyright 2009, 2010, 2011, 2012, 2013, 2014 Lars Vogel
Git version control with Eclipse (EGit) Tutorial 출처 : Lars Vogel http://www.vogella.com/tutorials/eclipsegit/article.html Lars Vogel Version 3.6 Copyright 2009, 2010, 2011, 2012, 2013, 2014 Lars Vogel
Introduction to Git and GitHub for Writers Workbook February 23, 2019 Peter Gruenbaum
 Introduction to Git and GitHub for Writers Workbook February 23, 2019 Peter Gruenbaum Table of Contents Preparation... 3 Exercise 1: Create a repository. Use the command line.... 4 Create a repository...
Tips on how to set up a GitHub account:
 Tips on how to set up a GitHub account: 1. Go to the website https://github.com/, you will see the following page: Figure 1: The GitHub main webpage (before you create an account and sign in) Then choose
USER GUIDE. MADCAP FLARE 2017 r3. Source Control: Git
 USER GUIDE MADCAP FLARE 2017 r3 Source Control: Git Copyright 2018 MadCap Software. All rights reserved. Information in this document is subject to change without notice. The software described in this
 CSE 332: Data Structures and Parallelism Autumn 2017 Setting Up Your CSE 332 Environment In this document, we will provide information for setting up Eclipse for CSE 332. The first s ection covers using
Using GitHub to Share with SparkFun a
 Using GitHub to Share with SparkFun a learn.sparkfun.com tutorial Available online at: http://sfe.io/t52 Contents Introduction Gitting Started Forking a Repository Committing, Pushing and Pulling Syncing
Hands-On Lab. Getting Started with Git using Team Foundation Server Lab version: Last updated: 12/30/2013
 Hands-On Lab Getting Started with Git using Team Foundation Server 2013 Lab version: 12.0.21005.1 Last updated: 12/30/2013 CONTENTS OVERVIEW... 3 EXERCISE 1: GETTING STARTED WITH GIT... 3 EXERCISE 2: GIT
What is git? Distributed Version Control System (VCS); Created by Linus Torvalds, to help with Linux development;
; Created by Linus Torvalds, to help with Linux development;") What is git? Distributed Version Control System (VCS); Created by Linus Torvalds, to help with Linux development; Why should I use a VCS? Repositories Types of repositories: Private - only you and the
What is git? Distributed Version Control System (VCS); Created by Linus Torvalds, to help with Linux development; Why should I use a VCS? Repositories Types of repositories: Private - only you and the
CSE 332: Data Structures and Parallelism Winter 2019 Setting Up Your CSE 332 Environment
 CSE 332: Data Structures and Parallelism Winter 2019 Setting Up Your CSE 332 Environment This document guides you through setting up Eclipse for CSE 332. The first section covers using gitlab to access
Tutorial 2 GitHub Tutorial
 TCSS 360: Software Development Institute of Technology and Quality Assurance Techniques University of Washington Tacoma Winter 2017 http://faculty.washington.edu/wlloyd/courses/tcss360 Tutorial 2 GitHub
Topics covered. Introduction to Git Git workflows Git key concepts Hands on session Branching models. Git 2
 Git Git 1 Topics covered Introduction to Git Git workflows Git key concepts Hands on session Branching models Git 2 Introduction to Git Git 3 Version control systems The source files of a project changes
Object Oriented Programming. Week 1 Part 2 Git and egit
 Object Oriented Programming Part 2 Git and egit Lecture Review of Git Local Repository Remote Repository Using Git from Eclipse Review of Git 3 What is Git? Software Configuration Management (SCM) Supports
What is version control? (discuss) Who has used version control? Favorite VCS? Uses of version control (read)
 Who has used version control? Favorite VCS? Uses of version control (read)") 1 For the remainder of the class today, I want to introduce you to a topic we will spend one or two more classes discussing and that is source code control or version control. What is version control?
1 For the remainder of the class today, I want to introduce you to a topic we will spend one or two more classes discussing and that is source code control or version control. What is version control?
Intro to Github. Jessica Young
 Intro to Github Jessica Young jyoung22@nd.edu GitHub Basics 1. Installing GitHub and Git 2. Connecting Git and GitHub 3. Why use Git? Installing GitHub If you haven t already, create an account on GitHub
Windows. Everywhere else
 Git version control Enable native scrolling Git is a tool to manage sourcecode Never lose your coding progress again An empty folder 1/30 Windows Go to your programs overview and start Git Bash Everywhere
Index. Chaminda Chandrasekara 2017 C. Chandrasekara, Beginning Build and Release Management with TFS 2017 and VSTS, DOI /
 Index A Agent platforms, 10 system and user capabilities, 10 Agent pool add user, 12 assign permissions, 55 56 default pool, 8 hosted Linux pool, 8 hosted pool, 7 set up assign administrator role, 45 auto-provision
Software Development I
 6.148 Software Development I Two things How to write code for web apps. How to collaborate and keep track of your work. A text editor A text editor A text editor Anything that you re used to using Even
Git. CSCI 5828: Foundations of Software Engineering Lecture 02a 08/27/2015
 Git CSCI 5828: Foundations of Software Engineering Lecture 02a 08/27/2015 1 Lecture Goals Present a brief introduction to git You will need to know git to work on your presentations this semester 2 Git
git commit --amend git rebase <base> git reflog git checkout -b Create and check out a new branch named <branch>. Drop the -b
 Git Cheat Sheet Git Basics Rewriting Git History git init Create empty Git repo in specified directory. Run with no arguments to initialize the current directory as a git repository. git commit
TDDC88 Lab 4 Software Configuration Management
 TDDC88 Lab 4 Software Configuration Management Introduction "Version control is to programmers what the safety net is to a trapeze artist. Knowing the net is there to catch them if they fall, aerialists
USER GUIDE MADCAP LINGO Source Control: Git
 USER GUIDE MADCAP LINGO 10.1 Source Control: Git Copyright 2018 MadCap Software. All rights reserved. Information in this document is subject to change without notice. The software described in this document
Getting the Source Code
 Getting the Source Code The CORD source code is available from our Gerrit system at gerrit.opencord.org. Setting up a Gerrit account and ssh access will also enable you to submit your own changes to CORD
USING GIT FOR AUTOMATION AND COLLABORATION JUSTIN ELLIOTT - MATT HANSEN PENN STATE UNIVERSITY
 USING GIT FOR AUTOMATION AND COLLABORATION JUSTIN ELLIOTT - MATT HANSEN PENN STATE UNIVERSITY AGENDA Version control overview Introduction and basics of Git Advanced Git features Collaboration Automation
Revision control. INF5750/ Lecture 2 (Part I)
") Revision control INF5750/9750 - Lecture 2 (Part I) Problem area Software projects with multiple developers need to coordinate and synchronize the source code Approaches to version control Work on same
Revision control INF5750/9750 - Lecture 2 (Part I) Problem area Software projects with multiple developers need to coordinate and synchronize the source code Approaches to version control Work on same
EGit/Gerrit Hands-on training #1: Installation and Configuration
 EGit/Gerrit Hands-on training #1: Installation and Configuration Introduction To use git from Eclipse you need the EGit plug-in. With EGit you do nearly all of your gitrelated tasks. But for certain operations
GUIDE TO MAKE A REAL CONTRIBUTION TO AN OPEN SOURCE PROJECT 1. 1
 GUIDE TO MAKE A REAL CONTRIBUTION TO AN OPEN SOURCE PROJECT 1. 1 WHO AM I? @tushar_rishav GSoC'16 student contributing to coala - a static code analysis tool, under Python So ware Foundation. A senior
Git: Distributed Version Control
 Git: Distributed Version Control Computer Science and Engineering College of Engineering The Ohio State University Lecture 3 Demo Prep: Empty (but initialized) repo Linear development: Create, edit, rename,
Git for Newbies. ComMouse Dongyue Studio
 Git for Newbies ComMouse Dongyue Studio 2018.4.25 Contents What is Git? Git Quick Start Git Branch Git Workflow Git in Practice What is Git? What is Git? A Version Control System (VCS) An Open-sourced
Creating a Patch. Created by Carl Heymann on 2010 Sep 14 1
 Created by on 2010 Sep 14 1 1. Starting a Patch To create a patch, and get it through the review process and into a main branch of a project, you can follow the following steps: Clone the project if you
2 Initialize a git repository on your machine, add a README file, commit and push
 BioHPC Git Training Demo Script First, ensure that git is installed on your machine, and you have configured an ssh key. See the main slides for instructions. To follow this demo script open a terminal
Getting the files for the first time...2. Making Changes, Commiting them and Pull Requests:...5. Update your repository from the upstream master...
 Table of Contents Getting the files for the first time...2 Making Changes, Commiting them and Pull Requests:...5 Update your repository from the upstream master...8 Making a new branch (for leads, do this
Source Control: Subversion
 USER GUIDE MADCAP FLARE 2018 Source Control: Subversion Copyright 2018 MadCap Software. All rights reserved. Information in this document is subject to change without notice. The software described in
Participant Handbook
 Participant Handbook Table of Contents 1. Create a Mobile application using the Azure App Services (Mobile App). a. Introduction to Mobile App, documentation and learning materials. b. Steps for creating
Git better. Collaborative project management using Git and GitHub. Matteo Sostero March 13, Sant Anna School of Advanced Studies
 Git better Collaborative project management using Git and GitHub Matteo Sostero March 13, 2018 Sant Anna School of Advanced Studies Let s Git it done! These slides are a brief primer to Git, and how it
RSARTE Git Integration
 RSARTE Git Integration Anders Ek IBM INTRODUCTION...3 EGIT BRIEF OVERVIEW...3 GETTING STARTED...6 ECLIPSE PROJECTS AND GIT REPOSITORIES...6 ACCESSING A REMOTE GIT REPOSITORY...7 IMPORTING AN EXISTING REPOSITORY...8
Working with GIT. Florido Paganelli Lund University MNXB Florido Paganelli MNXB Working with git 1/47
 Working with GIT MNXB01 2017 Florido Paganelli Lund University florido.paganelli@hep.lu.se Florido Paganelli MNXB01-2017 - Working with git 1/47 Required Software Git - a free and open source distributed
Source Control: Perforce
 USER GUIDE MADCAP FLARE 2018 Source Control: Perforce Copyright 2018 MadCap Software. All rights reserved. Information in this document is subject to change without notice. The software described in this
G E T T I N G S TA R T E D W I T H G I T
 G E T T I N G S TA R T E D W I T H G I T A A R O N H O O V E R & B R A D M I N C H J A N U A R Y 2 2, 2 0 1 8 1 Why use a version control system? Much of this document was blatantly cribbed from Allen
Git: Distributed Version Control
 Git: Distributed Version Control Computer Science and Engineering College of Engineering The Ohio State University Lecture 3 What Does "D" Stand For? Distributed version control Multiple people, distributed
Lab 01 How to Survive & Introduction to Git. Web Programming DataLab, CS, NTHU
 Lab 01 How to Survive & Introduction to Git Web Programming DataLab, CS, NTHU Notice These slides will focus on how to submit you code by using Git command line You can also use other Git GUI tool or built-in
Azure Developer Immersion Getting Started
 Azure Developer Immersion Getting Started In this walkthrough, you will get connected to Microsoft Azure and Visual Studio Team Services. You will also get the code and supporting files you need onto your
Git. Charles J. Geyer School of Statistics University of Minnesota. Stat 8054 Lecture Notes
 Git Charles J. Geyer School of Statistics University of Minnesota Stat 8054 Lecture Notes 1 Before Anything Else Tell git who you are. git config --global user.name "Charles J. Geyer" git config --global
RSARTE Git Integration
 RSARTE Git Integration Anders Ek IBM RSARTE GIT INTEGRATION...1 INTRODUCTION...3 EGIT BRIEF OVERVIEW...3 GETTING STARTED...9 ECLIPSE PROJECTS AND GIT REPOSITORIES...9 ACCESSING A REMOTE GIT REPOSITORY...9
Common Git Commands. Git Crash Course. Teon Banek April 7, Teon Banek (TakeLab) Common Git Commands TakeLab 1 / 18
 Common Git Commands TakeLab 1 / 18") Common Git Commands Git Crash Course Teon Banek theongugl@gmail.com April 7, 2016 Teon Banek (TakeLab) Common Git Commands TakeLab 1 / 18 Outline 1 Introduction About Git Setup 2 Basic Usage Trees Branches
Common Git Commands Git Crash Course Teon Banek theongugl@gmail.com April 7, 2016 Teon Banek (TakeLab) Common Git Commands TakeLab 1 / 18 Outline 1 Introduction About Git Setup 2 Basic Usage Trees Branches
Version Control: Gitting Started
 ting Started Cai Li October 2014 What is Version Control? Version control is a system that records changes to a file or set of files over time so that you can recall specific versions later. Local Version
How to version control like a pro: a roadmap to your reproducible & collaborative research
 How to version control like a pro: a roadmap to your reproducible & collaborative research The material in this tutorial is inspired by & adapted from the Software Carpentry lesson on version control &
Version Control System GIT
 Version Control System GIT Version Contol System Version (revision) control systems are software that help you track changes you make in your code over time. As you edit to your code, you tell the version
Index. Alias syntax, 31 Author and commit attributes, 334
 Index A Alias syntax, 31 Author and commit attributes, 334 B Bare repository, 19 Binary conflict creating conflicting changes, 218 during merging, 219 during rebasing, 221 Branches backup, 140 clone-with-branches
Software Revision Control for MASS. Git Installation / Configuration / Use
 Software Revision Control for MASS Git Installation / Configuration / Use Matthew Sell, CSSE Student MASS Research Participant, February 2014 Overview Download / execute installer Initial configuration
Chapter 5. Version Control: Git
 Chapter 5 Version Control: Git The Replication Crisis continues to heat up discussion across social science. Hence principled researchers want to make their work easy to replicate and reputable journals
SwanSim - A Guide to Git / SourceTree / GitLab for Windows
 SwanSim - A Guide to Git / SourceTree / GitLab for Windows Dr Jason W. Jones College of Engineering, Swansea University September 2017 Contents 1 Introduction... 2 2 Obtaining the Software... 3 2.1 Software
Github/Git Primer. Tyler Hague
 Github/Git Primer Tyler Hague Why Use Github? Github keeps all of our code up to date in one place Github tracks changes so we can see what is being worked on Github has issue tracking for keeping up with
About SJTUG. SJTU *nix User Group SJTU Joyful Techie User Group
 About SJTUG SJTU *nix User Group SJTU Joyful Techie User Group Homepage - https://sjtug.org/ SJTUG Mirrors - https://mirrors.sjtug.sjtu.edu.cn/ GitHub - https://github.com/sjtug Git Basic Tutorial Zhou
Version Control. Second level Third level Fourth level Fifth level. - Software Development Project. January 17, 2018
 Version Control Click to edit Master EECS text 2311 styles - Software Development Project Second level Third level Fourth level Fifth level January 17, 2018 1 But first, Screen Readers The software you
End User Manual. December 2014 V1.0
 End User Manual December 2014 V1.0 Contents Getting Started... 4 How to Log into the Web Portal... 5 How to Manage Account Settings... 6 The Web Portal... 8 How to Upload Files in the Web Portal... 9 How
Technology Background Development environment, Skeleton and Libraries
 Technology Background Development environment, Skeleton and Libraries Christian Kroiß (based on slides by Dr. Andreas Schroeder) 18.04.2013 Christian Kroiß Outline Lecture 1 I. Eclipse II. Redmine, Jenkins,
Tools for the programming mid-semester projects
 Contents GIT Quickstart 2 Teamwork 14 StyleCop Quickstart 14 Usage in VS2015 15 Usage in older VS versions 15 DoxyGen Quickstart 17 XML documentations 18 Doxygen 18 Please keep in mind that the remaining
213/513/613 Linux/Git Bootcamp. Cyrus, Eugene, Minji, Niko
 213/513/613 Linux/Git Bootcamp Cyrus, Eugene, Minji, Niko Outline 1. SSH, bash, and navigating Linux 2. Using VIM 3. Setting up VS Code 4. Git SSH 1. On macos/linux: $ ssh ANDREW-ID@shark.ics.cs.cmu.edu
Version Control with Git ME 461 Fall 2018
 Version Control with Git ME 461 Fall 2018 0. Contents Introduction Definitions Repository Remote Repository Local Repository Clone Commit Branch Pushing Pulling Create a Repository Clone a Repository Commit
Git. Presenter: Haotao (Eric) Lai Contact:
 Lai Contact:") Git Presenter: Haotao (Eric) Lai Contact: haotao.lai@gmail.com 1 Acknowledge images with white background is from the following link: http://marklodato.github.io/visual-git-guide/index-en.html images with
Git Presenter: Haotao (Eric) Lai Contact: haotao.lai@gmail.com 1 Acknowledge images with white background is from the following link: http://marklodato.github.io/visual-git-guide/index-en.html images with
Improving Your Life With Git
 Improving Your Life With Git Lizzie Lundgren elundgren@seas.harvard.edu Graduate Student Forum 26 April 2018 Scenarios to Avoid My code was deleted from 90-day retention! Crap, I can t remember what I
GitHub Classroom. Click Sign up in to top right of the page, and the following dialog is displayed.
 GitHub Classroom This semester we will be using private repositories in GitHub Classroom to store student source code. To use GitHub Classroom, you must have a GitHub account. This note lists all the steps
Working in Teams CS 520 Theory and Practice of Software Engineering Fall 2018
 Working in Teams CS 520 Theory and Practice of Software Engineering Fall 2018 Version Control September 18, 2018 Thursday (September 20) First in-class exercise On using git (today is a prelude with useful
Version control. with git and GitHub. Karl Broman. Biostatistics & Medical Informatics, UW Madison
 Version control with git and GitHub Karl Broman Biostatistics & Medical Informatics, UW Madison kbroman.org github.com/kbroman @kwbroman Course web: kbroman.org/tools4rr Slides prepared with Sam Younkin
Alfresco Content Services 5.2. Getting Started Guide
 Alfresco Content Services 5.2 Getting Started Guide Contents Contents Getting started with Alfresco Share... 3 Signing in...3 Personalizing Alfresco Share... 4 Setting up your dashboard... 4 Updating your
DSS User Guide. End User Guide. - i -
 DSS User Guide End User Guide - i - DSS User Guide Table of Contents End User Guide... 1 Table of Contents... 2 Part 1: Getting Started... 1 How to Log in to the Web Portal... 1 How to Manage Account Settings...
Software Project (Lecture 4): Git & Github
: Git & Github") Software Project (Lecture 4): Git & Github Wouter Swierstra, Atze Dijkstra Feb 2016 Wouter Swierstra, Atze Dijkstra Software Project (Lecture 4): Git & Github Feb 2016 1 / 45 Wouter Swierstra, Atze Dijkstra
Software Project (Lecture 4): Git & Github Wouter Swierstra, Atze Dijkstra Feb 2016 Wouter Swierstra, Atze Dijkstra Software Project (Lecture 4): Git & Github Feb 2016 1 / 45 Wouter Swierstra, Atze Dijkstra
About the Tutorial. Audience. Prerequisites. Copyright & Disclaimer. Gerrit
 Gerrit About the Tutorial Gerrit is a web-based code review tool, which is integrated with Git and built on top of Git version control system (helps developers to work together and maintain the history
Lab Exercise Git: A distributed version control system
 Lunds tekniska högskola Datavetenskap, Nov 21, 2016 EDAF45 Programvaruutveckling i grupp projekt Labb 2 (Git): Labbhandledning Checked on Git versions: 2.7.4 Lab Exercise Git: A distributed version control
From Commits to Collaboration: A Git Tutorial for Social Scientists
 From Commits to Collaboration: A Git Tutorial for Social Scientists Paul Sangrey, University of Pennsylvania December 12, 2017 The Replication Crisis continues to heat up discussion across social science.
Git AN INTRODUCTION. Introduction to Git as a version control system: concepts, main features and practical aspects.
 Git AN INTRODUCTION Introduction to Git as a version control system: concepts, main features and practical aspects. How do you share and save data? I m working solo and I only have one computer What I
GIT. A free and open source distributed version control system. User Guide. January, Department of Computer Science and Engineering
 GIT A free and open source distributed version control system User Guide January, 2018 Department of Computer Science and Engineering Indian Institute of Technology, Kharagpur Table of Contents What is
Lab 1 1 Due Wed., 2 Sept. 2015
 Lab 1 1 Due Wed., 2 Sept. 2015 CMPSC 112 Introduction to Computer Science II (Fall 2015) Prof. John Wenskovitch http://cs.allegheny.edu/~jwenskovitch/teaching/cmpsc112 Lab 1 - Version Control with Git
Git Setup Help using GitKraken (CSE 154)
") Git Setup Help using GitKraken (CSE 154) Introduction: Git enables keeping track of different versions of files as we keep editing them. To make sure we understand git properly, here are some terms you
Git Setup Help using GitKraken (CSE 154) Introduction: Git enables keeping track of different versions of files as we keep editing them. To make sure we understand git properly, here are some terms you
Using SourceTree on the Development Server
 Using SourceTree on the Development Server This content has been modified to exclude client information. Such omissions include the client name and details of the client s infrastructure, such as domain
History...: Displays a window of Gitk, a standard commit viewer for Git.
 Git Services Wakanda includes Git features that will help you manage the evolution of your solutions and files. These features are designed to share code as well as to handle multi developer projects and
A short tutorial on Git. Servesh Muralidharan 4 March 2014
 A short tutorial on Git Servesh Muralidharan 4 March 2014 This Tutorial What is Source Control Distributed source control with Git Git in Assignment 5 Using Gitlab Using git in Eclipse More about Assignment
FROM VSTS TO AZURE DEVOPS
 #DOH18 FROM VSTS TO AZURE DEVOPS People. Process. Products. Gaetano Paternò @tanopaterno info@gaetanopaterno.it 2 VSTS #DOH18 3 Azure DevOps Azure Boards (ex Work) Deliver value to your users faster using
Revision Control. An Introduction Using Git 1/15
 Revision Control An Introduction Using Git 1/15 Overview 1. What is revision control? 2. 30,000 foot view 3. Software - git and gitk 4. Setting up your own repository on onyx 2/15 What is version control?
2/9/2013 LAB OUTLINE INTRODUCTION TO VCS WHY VERSION CONTROL SYSTEM(VCS)? II SENG 371 SOFTWARE EVOLUTION VERSION CONTROL SYSTEMS
? II SENG 371 SOFTWARE EVOLUTION VERSION CONTROL SYSTEMS") SENG 371 SOFTWARE EVOLUTION LAB OUTLINE Introduction to Version Control Systems VERSION CONTROL SYSTEMS Subversion Git and Github 1 Prepared by Pratik Jain 2 INTRODUCTION TO VCS A version control system
SENG 371 SOFTWARE EVOLUTION LAB OUTLINE Introduction to Version Control Systems VERSION CONTROL SYSTEMS Subversion Git and Github 1 Prepared by Pratik Jain 2 INTRODUCTION TO VCS A version control system
KTH Royal Institute of Technology SEMINAR 2-29 March Simone Stefani -
 KTH Royal Institute of Technology SEMINAR 2-29 March 2017 Simone Stefani - sstefani@kth.se WHAT IS THIS SEMINAR ABOUT Branching Merging and rebasing Git team workflows Pull requests and forks WHAT IS THIS
Review Version Control Concepts
 Review Version Control Concepts SWEN-261 Introduction to Software Engineering Department of Software Engineering Rochester Institute of Technology Managing change is a constant aspect of software development.
CSE 391 Lecture 9. Version control with Git
 CSE 391 Lecture 9 Version control with Git slides created by Ruth Anderson & Marty Stepp, images from http://git-scm.com/book/en/ http://www.cs.washington.edu/391/ 1 Problems Working Alone Ever done one
Version Control with GIT
 Version Control with GIT Benjamin Roth CIS LMU München Benjamin Roth (CIS LMU München) Version Control with GIT 1 / 30 Version Control Version control [...] is the management of changes to documents, computer
 USPAS Simulation of Beam and Plasma Systems Steven M. Lund, Jean-Luc Vay, Remi Lehe, Daniel Winklehner and David L. Bruhwiler Lecture: Software Version Control Instructor: David L. Bruhwiler Contributors:
Online Remote Repositories
 Online Remote Repositories GitHub and Bitbucket centralized Git repositories for dissemination and collaboration Barry Grant bjgrant@umich.edu http://thegrantlab.org Recap: Client-Server vs Distributed
Git AN INTRODUCTION. Introduction to Git as a version control system: concepts, main features and practical aspects.
 Git AN INTRODUCTION Introduction to Git as a version control system: concepts, main features and practical aspects. How do you share and save data? I m working solo and I only have one computer What I
How to set up SQL Source Control The short guide for evaluators
 GUIDE How to set up SQL Source Control The short guide for evaluators 1 Contents Introduction Team Foundation Server & Subversion setup Git setup Setup without a source control system Making your first
GIT FOR SYSTEM ADMINS JUSTIN ELLIOTT PENN STATE UNIVERSITY
 GIT FOR SYSTEM ADMINS JUSTIN ELLIOTT PENN STATE UNIVERSITY 1 WHAT IS VERSION CONTROL? Management of changes to documents like source code, scripts, text files Provides the ability to check documents in
FAQ Q: Where/in which branch do I create new code/modify existing code? A: Q: How do I commit new changes? A:
 FAQ Q: Where/in which branch do I create new code/modify existing code? A: We strongly recommend only modifying the source code within the local master branch: Git Repository View Woped repository Branches
Version Control. Second level Third level Fourth level Fifth level. - Software Development Project. January 11, 2017
 Version Control Click to edit Master EECS text 2311 styles - Software Development Project Second level Third level Fourth level Fifth level January 11, 2017 1 Scenario 1 You finished the assignment at
LPF Training Handbook!
 LPF Training Handbook M Hewitson 2014-04-25 1. Introduction 1 2. Software setup 1 Accessing the relevant software repositories 2 Getting the software 3 Installing LTPDA 3 Installation of Extension modules
Source control with Subversion A user perspective
 http://svnbook.red-bean.com/ Source control with Subversion A user perspective Aaron Ponti What is Subversion? } It is a free and open-source version control system } It manages files and directories,
AccuBridge for IntelliJ IDEA. User s Guide. Version March 2011
 AccuBridge for IntelliJ IDEA User s Guide Version 2011.1 March 2011 Revised 25-March-2011 Copyright AccuRev, Inc. 1995 2011 ALL RIGHTS RESERVED This product incorporates technology that may be covered
E, F. deleteall command, 352 directory structure, 350 export_data method, 353 inline_data method, 353 print_export method, 351 target directory, 351
 Index A Access control list (ACL), 299 Ancestry references, 184 Attributes, 288 binary files, 289 export-ignore, 294 export-subst, 294 keyword expansion, 291 merge strategies, 294 Authorized_keys file,
! #Running this command from the top directory of your project will add all your changes."! $ git add."
 ********************************* ********************************* ** ** ** Git Toolkit ** ** ** ********************************* ********************************* +++++++++++++++++++++++++++++++++++++++++++++++++++++++++++++++++++++++++++++++++++++++++++++++
Introduction to Git and Github Repositories
 Introduction to Git and Github Repositories Benjamin Audren École Polytechnique Fédérale de Lausanne 29/10/2014 Benjamin Audren (EPFL) CLASS/MP MP runs 29/10/2014 1 / 16 Version Control survey Survey Who
Source Control Guide: Microsoft Team Foundation Server
 MadCap Software Source Control Guide: Microsoft Team Foundation Server Lingo 10.1 Copyright 2017 MadCap Software. All rights reserved. Information in this document is subject to change without notice.
The Old World. Have you ever had to collaborate on a project by
 What the Git? The Old World Have you ever had to collaborate on a project by Shuttling a USB drive back and forth Using Dropbox E-mailing your document around Have you ever accidentally deleted someone