Sun VirtualBox Installation Tutorial
|
|
|
- Drusilla Perkins
- 6 years ago
- Views:
Transcription
1 Sun VirtualBox Installation Tutorial Installing Linux Mint 5 LTS Guest OS By Dennis Berry Welcome to the world of virtualization and Linux. This tutorial is intended to help users who are new to the world of virtualization and Linux Operating Systems to install and configure the Sun VirtualBox application and then install Linux Mint 5 as a guest operating system using the VirtualBox application s Graphical User Interface (GUI). System Requirements for this Tutorial: (Other systems are similar) Windows XP or Vista operating system using NTFS File System (FAT file system limits contiguous file size to about 4 Gigabytes; see Hard Drive Space Requirements) 1.5 Gigabytes of RAM (recommended minimum system memory) At least 20 Gigabytes of free Hard Drive Space (Minimum 8 Gigabytes required for virtual hard drive) To get started, you will need to download the installation files for VirtualBox (Windows users select x86/amd64): HTUhttp:// Next, download the installation files for Linux Mint 5.0 LTS (Long Term Support) from: HTUhttp:// The direct link to the Linux Mint 5 LTS image file as of this writing is: HTUhttp://ftp.heanet.ie/pub/linuxmint.com/stable/5/LinuxMint-5-r1.isoUTH Once you have downloaded the files, you can begin the installation process by creating a restore point in system restore. This is advisable in case the installation causes errors. I have been using VirtualBox for over a year as of this writing and have not had any system instability issues because of it. The first step is to launch the installation file by clicking (or doubleclicking) on the executable file. Click the Next button object. 1


2 Accept the license agreement and select Next : Accept the default install settings by selecting Next : 2


3 Choose your shortcut preferences and select Next : The VirtualBox installer will warn you that it must reset your network connections during installation. Select Yes : 3

4 Accept the install settings by selecting Install : During the installation process you may see notification boxes like this example: 4


5 Select the Continue Anyway button object to continue the installation process. Once the installation has completed, you should see the following window. The option to start VirtualBox should be check by default. With the Start Sun VirtualBox after installation option checked, select Finish : Fill in the registration information and select Register : 5
. To begin, we will configure a guest operating system.")
 as the guest operating system.")
6 If the VirtualBox GUI does not load, go to the Start menu> All Programs> Sun VirtualBox> VirtualBox to launch the application. This is the VirtualBox Graphical User Interface (GUI). To begin, we will configure a guest operating system. The operating system you have installed the VirtualBox application on is considered the host operating system. For this tutorial, we will be installing Linux Mint 5.0 LTS (Long Term Support) as the guest operating system. At the upper left hand corner select the New button object. This will launch the New Virtual Machine Wizard! 6

7 Select the Next button object. The first step in the process is to name the guest operating system and identify the operating system type. As seen in the screenshot, I usually name the guest operating system LM5. Use the drop-down arrow on the right of Operating System: to select Linux and identify the Version: as Ubuntu (Linux Mint is a Ubuntu derivative). Once these settings are correct, select the Next button object. 7

8 The next step is to choose how much of your system memory to allocate to the virtual machine guest operating system. I do not recommend using VirtualBox on a Windows host unless the host has at least 1.5 gigabytes of RAM. Although the base memory allocation defaults to 384 MB as shown in the screenshot, I recommend allocating 512 megabytes of system RAM to the guest. I find it easiest to select the box on the right of the slider bar with my mouse cursor and use my number keys to enter 512 in the MB box. Once the Base Memory Size is set to 512 MB, select the Next button object. The next step is to create a Virtual Hard Disk. The screenshot shows the default VirtualBox Settings as of this writing. Leave the settings at their default settings and select the Next button object. 8

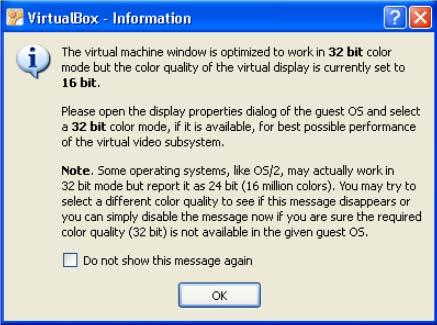
9 The Create New Virtual Disk Wizard window will open. Select the Next button object. The default setting for Hard Disk Storage Type is Dynamically expanding storage. I recommend accepting the default setting. Otherwise, you can choose a fixed amount of disk space to allocate to the guest operating system. When I choose this option, I generally allocate gigs of fixed disk space. To accept the default settings, select the Next button object. 9


10 Next, the Virtual Disk Name and Location window will load. The name should default to LM5 and the disk size should default to 8.00 GB as shown in the screenshot. To accept the defaults, select the Next button object. 10


11 A summary window will load. Select the Finish button object to complete the Virtual Disk configuration. A progress bar will display as the virtual hard drive is being created. GUI. When this process completes, you should be returned to the VirtualBox 11


12 Please note that the LM5 virtual machine is listed in available machines and the Settings and Start button objects are available. At this point, move your mouse pointer over the Settings button object in the upper left corner and select the Settings button object. This should open the Settings window. 12

13 Select the System link in the left pane to confirm the memory Base Memory: setting and view the Boot Order: If the Base Memory: is set to 512 MB as shown in the screenshot, proceed to the next step. Select the Display link in the left pane. Click in the Video Memory box and set it to 64 MB as shown. Once again, I find it easiest to click in the box to the right of the slider and then use my number keys to enter the setting. Also, on most hardware configurations, it is OK to place a check in the Enable 3D Acceleration checkbox as shown in the screenshot. 13


14 Next, in the left hand pane, select the CD/DVD-ROM object. The window should change to display the CD/DVD ROM setting window. Use your mouse pointer to place a check mark in the Mount CD/DVD Drive check box and then select the radio button next to ISO Image File. Select the browse folder button object at the right of the blank text field to 14


15 open the Virtual Media Manager. Select the Add button object and browse to the location of the Linux Mint 5.0 LTS ISO file, then select it. Once this is completed, activate the Select button object. Once this is complete, select the OK button object. This will close the Setting window and return you to the VirtualBox GUI. Some of your settings may be different than the screenshot. This is because I 15
16 chose custom settings during my install process. Select the Start button object in the upper left corner of the VirtualBox GUI. A splash screen will display momentarily and the virtual machine will initialize. The default boot order for VirtualBox is Floppy, CD/DVD-ROM, Hard Disk. By pointing the mount point of the CD/DVD Drive to the Linux Mint 5 LTS ISO Image File, the virtual machine will boot up to the live cd of Linux Mint 5. The virtual machine will load and you will probably see the following display. This informs the user that the keyboard is now captured by the virtual machine and can be released by pushing the right Ctrl button to the far right of the space bar on the keyboard. You can disable this reminder from displaying every time you launch the virtual machine by using your mouse to place a check in the Do not show box. Select the OK button object when ready. 16

17 Next, one of the following notification boxes will display. 17

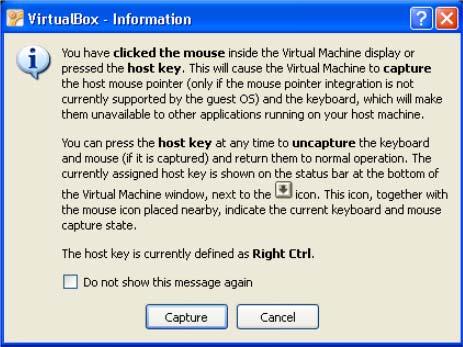
18 Please read through these information boxes. The video bit depth message can be disregarded. It is safe to place a check in the Do not display check box and then select the OK button object. The mouse information box details the capture of the mouse function by the guest operation system and informs the user of the procedure of releasing the mouse function which is the same as the keyboard release, pressing the right Ctrl button to the far right of the space bar on the keyboard. This information box can also be disabled. To continue, select the Capture button object. During the loading process, you will probably see a GNOME error box. This error is common during a virtualization install and is safe to ignore. Select the Close button object. When the Linux Mint live cd has completed loading, you will see the Linux Mint 5 desktop in the virtual machine window. Along the left edge of the desktop window you will notice an icon titled Install. Move your mouse cursor over the Install icon and double-click. This will start the install process of the Linux Mint operating system to the virtual disk. 18


19 Once the install files have been copied, the Install Welcome screen will display. 19

20 To select the English default setting, select the Forward button object. Otherwise, select the language of your choice before selecting the Forward button object. The next step is to select the location time zone. I recommend using the drop down arrow to the right of the Selected City box to select a city that is in your time zone. For Central US Time Zone, I use Chicago as the City setting. Once your city is set, select the Forward button object. The next step is to select the Keyboard layout for your install. To select the default USA setting, select the Forward button object. 20


21 The next step is to prepare the disk space for the operating system installation. I recommend accepting the default settings. To use the default settings, select the Forward button object. Linux Mint requires a username and password to sign on to the operating system. Use the keyboard to enter a username and password for your Linux Mint installation. All other text fields can remain at default. 21


22 Congratulations, you are at the install configuration summary page. Select the Install button object to confirm the installation settings. An install progress bar will display as the install progresses. 22
23 Once the installation is complete, you will be prompted to Restart. Select the Restart button object. During the restart process, you will be prompted to remove the CD from the CD Drive. Ignore this and press the Enter button on your keyboard to complete the restart process. Once the virtual machine has shut down and you see the start up splash display again, white text will begin to display within the virtual machine window as the application prepares to start. Move your mouse to the upper right corner of the window and select the red X to close the window. It may be necessary to press the right-hand Ctrl button on your keyboard to release the mouse from the virtual machine in order to do this. The Close Virtual Machine box will display. Select the Power off the machine radio button and select OK. This step is necessary because the virtual machine is still being instructed to start from the live cd iso image. 23

24 This should return you to the VirtualBox GUI window. If not, go to the Start menu> All Programs> Sun VirtualBox> VirtualBox to launch the application. Once again, select the Settings button object in the upper left corner of the VirtualBox GUI to open the settings window. Select the CD/DVD-ROM link in the left pane to display the CD/DVD settings window. Select the radio button next to the Host CD/DVD Drive selection as shown and select OK to close the window and return to the VirtualBox main window. 24

25 Once you have returned to the VirtualBox GUI window, select the Start button object in the upper left corner to start the virtual machine. The Linux Mint 5 boot screen will display and time out. 25

26 Once the loading process has completed, you will be prompted to enter the username and password you chose during the installation process. Once you have successfully logged-in to your session, you will be prompted to complete your installation preferences. Select the Forward button object. 26
27 Next, you will be prompted to choose to activate the Root Password. I recommend leaving this option unchecked and selecting the Forward button object. 27
28 Next, you will be prompted to activate the Fortunes in terminal feature. I personally do not activate this feature. Once you have selected your preference select the Forward button object. 28
29 Once these settings are completed, a summary box will display. Select the Apply button object. 29

30 Select the Close button object to complete the preferences settings process. At this point the Linux Mint 5 desktop will be displayed. 30
31 Next, we are going to install the Guest Additions to add additional functionality to your virtual machine installation. Press the right hand Ctrl button on your keyboard to release the keyboard and mouse from the virtual machine. Move the mouse cursor to the upper left menu in the virtual machine window and select the Devices menu option. The drop-down menu populates. Move your cursor over the last option in the list Install Guest Additions and select it. 31

32 The guest additions file will be mounted and displayed on your Linux desktop and a box will open with the option to run the software. Select the Run button object to install the software. 32

33 At this point, you will be prompted for you administrator password. Enter the password you chose when you selected your username and password during the installation process and select the OK button object. 33

34 A text box will open on the Linux Mint 5 Desktop that will display the installation progress. If any errors appear during the installation process, they can be safely ignored. Once the installation is complete, you will be prompted to press the Enter key on your keyboard to complete the installation. Next, right-click on the Guest Additions mount point icon on the Linux Mint 5 desktop and select the Eject option. 34

35 You should now be at the Linux Mint 5 desktop. Move your mouse to the lower left hand corner or the desktop and left-click on Elyssa to launch the Linux Mint 5 start menu. Select the Quit link to open the Quit options box. 35

36 Next, select the Shut Down option. Linux Mint 5 will initiate the shutdown sequence and the Linux Mint 5 window will close. At this point, we are going to repeat the steps to point the Linux Mint 5 guest operating system to the hardware CD/DVD drive. You should return to the VirtualBox GUI window. If not, go to the Start menu> All Programs> Sun VirtualBox> VirtualBox to launch the application. Once again, select the Settings button object in the upper left corner of the VirtualBox GUI to open 36
37 the settings window. Select the CD/DVD-ROM link in the left pane to display the CD/DVD settings window. Select the radio button next to the Host CD/DVD Drive selection as shown and select OK to close the window and return to the VirtualBox main window. Next, let s create a shared folder in the host file system. Open Windows Explorer to you re My Documents folder and left-click in the right window pane. Select New > Folder and name it LM5. 37


38 This screenshot shows the shared folder I created during my installation. Once the shared folder has been created, load or select the VirtualBox GUI and select the Settings button object in the upper left hand corner. In the left pane of the Settings window, select the Shared Folders link. The Shared Folders window will display. 38


39 Left click the green folder with the green plus sign along the right upper edge of the Shared Folders window. This will open the Add Share window. Click the drop-down arrow to the right of the Folder Path: box and then select Other. Use the Browse For Folder box to navigate to the location where you created the LM5 shared folder, select it, and then select the OK button object. 39


40 The Add Share box will display your settings as shown in the screenshot. Be sure to leave the Read-only checkbox unchecked. Once this is complete, select OK in the Add Share box and in the Settings window. Once you have returned to the VirtualBox GUI window, select the Start button object in the upper left corner to start the virtual machine. 40

41 During the start sequence, you will see this notification box indicating that mouse pointer integration is supported and turned on. This is a feature of adding the Guest Additions to the virtual machine. Read the notification; place a check in the Do not show... checkbox if you do not wish to see the notification again, and select the OK button object. Once the virtual machine has loaded and you have signed in using your username and password, left-click on Elyssa to launch the Linux Mint 5 start menu. Select the Terminal command. 41


42 In the terminal type the text at the prompt as shown in the screenshot: When you have completed the text entry, press the Enter button on your keyboard. You will be prompted to enter your password. This is the password you chose when you created your username and password for your installation. Enter the password only and press the Enter button on your keyboard. At the prompt, type the text as shown in the screenshot and once again press the Enter button on your keyboard. You will not be prompted again for your password now that you have entered it in this session of the Terminal: We are now ready to end this session of Terminal. Left-click the X in the upper right hand corner of the Terminal window. This will close the Terminal window and return you to the Linux Mint desktop. Along the upper left edge of the desktop, double-click on the Computer icon. This will open the 42


43 computer File Browser. In the right hand pane, double-click on the Filesystem icon. In the File System window right pane, double-click on the mnt folder. In the right pane, double-click on the share folder. 43
44 In the right hand pane, move your mouse cursor over the LM5 folder, hold down both the right and left mouse buttons, and drag the folder out of the browser window onto the desktop and release the mouse buttons. From the contextual box, choose the Link Here option. 44


45 A new icon will appear on your desktop labeled Link to LM5 with a Locked icon. This is your desktop link to your shared folder. Close the File Browser window and left click and drag the link icon under the Home link icon. This is a snapshot of my Linux Mint 5.0 LTS guest on my Windows XP Pro desktop. 45

46 I have renamed my Home folder by right clicking on the folder icon and selecting Rename from the contextual menu. I erased the username prefix and left the Home text of the title. I also went to the start menu, selected the Internet link from the middle applications list and left-clicked and held the Firefox Web Browser icon and dragged it out of the start menu and onto my desktop to create a shortcut on my desktop. As you can see, I shortened the link name to Firefox by right clicking on the icon and choosing Rename. I suggest, for convenience sake, create an addition link to your shared folder by double clicking on the Home folder icon on the Linux Mint 5 desktop, which will open your Home File Browser. Right click on the Link to LM5 icon on the desktop and select Copy from the contextual menu. Then, in the File Browser window s right pane, right click and select the Paste command from the contextual menu. 46


47 Your Home File Browser should now display a link to your shared folder: Next, let s mount the shared folder to allow the exchange of files between the host and the guest operating systems. Open the start menu and select the Terminal command. At the command prompt, type the text as shown in the screenshot and press the Enter button on your keyboard. 47

48 Once again, you will be prompted to enter your password. Type your password at the prompt and then press enter on your keyboard. Select the X in the Terminal window to close the window. Double click on the Link to LM5 icon and the lock portion of the icon will disappear and be replaced by an arrow. This indicates that the folder is mounted and active. You can now view any files that are in the LM5 folder on your host and add files to the folder that would be accessible from your host. The last bit of business I will cover in this tutorial has to do with updating the Linux Mint 5 installation. You may notice a small icon along the bottom right edge of the Linux Mint 5 desktop. This is the update icon and is displayed as one of three different states as far as I know. In the screenshot, it is displaying as a lock that is unlocked. This indicates that there are updates that are available. As seen in the screenshot, there are currently 104 updates that are detected and available. Left click on the icon and a password prompt box will open. Type your password and then press the Enter button on your keyboard. This will open the mintupdate window: 48


49 Select the Install Updates button object to proceed with the update process. The update process will begin by downloading files to be installed. Once the files have been downloaded, the update process will begin. During the update process, you may see a number of Replace configuration file notification boxes. Select the Replace button object each time this occurs. 49


50 Once the update is complete, select the Close button object. Once the initial update is completed, I recommend you reboot the virtual machine so that all of the updates can take effect. Once this is completed and you are back at the Linux Mint 5 desktop, left click on the update icon along the lower right edge of the Linux Mint desktop that looks like a lock. Once you have entered your password and the mintupdate window opens, select the Preferences button object. 50


51 When the Preferences window opens, select the Auto-Refresh tab. I usually change the 5 minutes default setting to either 20 minutes or 1 hour. Once you have changed the Auto-Refresh interval, select the Apply button object. Once again, there are additional updates that are available for installation. Select the Install Updates button object to start the update process. During the update process, you may see a window that displays a warning about the packages to be installed. The system default settings will prevent some updates from being installed. I recommend you accept the default settings and select the Apply button object without making any changes. 51


52 Once all the updates are applied and the installation is current, the icon will change to appear locked with a check mark. The only other mintupdate icon I have ever seen displayed is a lock that is broken in half. This is usually an indication that the Linux Mint operating system needs to be restarted to allow previous updates to be applied. In closing, I invite you to explore the world of virtual machines and I hope you enjoy your Linux Mint experience. If you have any comments, corrections, omissions or questions about this tutorial, please me at: bootlegmultimedia@yahoo.com Sincere Regards, Dennis Berry Please visit bootlegmultimedia.com for a sample of Reality Check Adventure Training. 52
The Python Mini-Degree Development Environment Guide
 The Python Mini-Degree Development Environment Guide By Zenva Welcome! We are happy to welcome you to the premiere Python development program available on the web The Python Mini-Degree by Zenva. This
Installation Guide: VirtualBox, Windows 10, and Microsoft Visio (Mac OS)
") (434) 924-7988, RRH 219 helpdesk@comm.virginia.edu Installation Guide: VirtualBox, Windows 10, and Microsoft Visio (Mac OS) Prerequisites: Verify that your installation of OS X and Safari have the most
(434) 924-7988, RRH 219 helpdesk@comm.virginia.edu Installation Guide: VirtualBox, Windows 10, and Microsoft Visio (Mac OS) Prerequisites: Verify that your installation of OS X and Safari have the most
This is Lab Worksheet 7 - not an Assignment
 This is Lab Worksheet 7 - not an Assignment This Lab Worksheet contains some practical examples that will prepare you to complete your Assignments. You do not have to hand in this Lab Worksheet. Make sure
Installation of the DigitalSystemsVM virtual machine
 Installation of the DigitalSystemsVM virtual machine Notice This document explains how to install the DigitalSystemsVM virtual machine on a computer with Windows 7 SP1. If questions or problems relating
This is Lab Worksheet/Installation 7
 This is Lab Worksheet/Installation 7 This Lab Worksheet/Installation contains essential installation work needed for your upcoming Assignments. You do not have to hand in this Lab Worksheet, but there
Your Own Virtual Playground. CS 1585 :: Doug McGeehan
 Your Own Virtual Playground CS 1585 :: Doug McGeehan Overview Follow these steps on your personal laptop or home PC. 1. 2. 3. 4. 5. Open this URL in your browser: http://tiny.cc/dsl-vm Download and Install
The Ip address / Name value should be: srvvcenter-cis
 CIS133 Installation Lab #1 - DESKTOP CLIENT OpenSUSE Install. Before beginning the installation, create a virtual machine in which you will install the operating system. 1) Open the VMware vsphere Client.
WINDOWS 64-BIT INSTALLATION NOTES VMWARE PLAYER Micro Planner X-Pert V3.5.1 Digital Download Edition
 WINDOWS 64-BIT INSTALLATION NOTES VMWARE PLAYER Micro Planner X-Pert V3.5.1 Digital Download Edition THIS DOCUMENT CONTAINS IMPORTANT INFORMATION REGARDING THE INSTALLATION AND USE OF THIS SOFTWARE. IF
Operating Systems Lab 1. Class topic: Installation of the operating system. Install Ubuntu on Oracle VirtualBox
 Operating Systems Lab 1 Class topic: Installation of the operating system. Install Ubuntu on Oracle VirtualBox Oracle VirtualBox is a cross-platform virtualization application. It installs on your existing
IT Essentials v6.0 Windows 10 Software Labs
 IT Essentials v6.0 Windows 10 Software Labs 5.2.1.7 Install Windows 10... 1 5.2.1.10 Check for Updates in Windows 10... 10 5.2.4.7 Create a Partition in Windows 10... 16 6.1.1.5 Task Manager in Windows
CIS 231 Windows 10 Install Lab # 3
 CIS 231 Windows 10 Install Lab # 3 1) To avoid certain problems later in the lab, use Chrome as your browser: open this url: https://vweb.bristolcc.edu 2) Here again, to avoid certain problems later in
Send the Ctrl-Alt-Delete key sequence to the Guest OS one of two ways: Key sequence: Ctlr-Alt-Ins Menu Sequence: VM / Guest / Send Ctrl-Alt-Delete
 CIS 231 Windows 2008 Server Install Lab #1 (Virtual Machines) Keys to Remember when using the vsphere client. Send the Ctrl-Alt-Delete key sequence to the Guest OS one of two ways: Key sequence: Ctlr-Alt-Ins
Creating A Virtual Machine for Microcosm
 [by Mark Anderson, WebSci Group, WAIS Lab, Southampton University (mwra1g13@soton.ac.uk)] This article describes creating a Windows XP Virtual Machine (VM) to run the early hypertext application Microcosm
CIS 231 Windows 7 Install Lab #2
 CIS 231 Windows 7 Install Lab #2 1) To avoid certain problems later in the lab, use Chrome as your browser: open this url: https://vweb.bristolcc.edu 2) Here again, to avoid certain problems later in the
FireFox. CIS 231 Windows 2012 R2 Server Install Lab #1
 CIS 231 Windows 2012 R2 Server Install Lab #1 1) Use either Chrome or Firefox to access the VMware vsphere web Client. https://vweb.bristolcc.edu CHROME At the your connection is not private message, click
Steps to install Xubuntu on a Virtual Machine
 Steps to install Xubuntu on a Virtual Machine A virtual machine (VM) is an operating system OS, a self-contained operating environment that behaves as if it is a separate computer. The end user has the
How to install the software of ZNS8022
 How to install the software of ZNS8022 1. Please connect ZNS8022 to your PC after finished assembly. 2. Insert Installation CD to your CD-ROM drive and initiate the auto-run program. The wizard will run
XD10004: How to Install VMware ESX Server 3.5 on VMware Workstation 6.5 as a VM
 white paper XD10004: How to Install VMware ESX Server 3.5 on VMware Workstation 6.5 as a VM VI in a Box - the portable virtual infrastructure Title: How to Install VMware ESX Server 3.5 on VMware Workstation
Building a 64-bit CentOS 7 Workstation using Oracle Virtual Box
 Building a 64-bit CentOS 7 Workstation using Oracle Virtual Box jthomas Enterprises, 2016 Building a CentOS 7 Workstation using Oracle VirtualBox 1 Section 1 Before You Begin This section details the environment
Windows Me Navigating
 LAB PROCEDURE 11 Windows Me Navigating OBJECTIVES 1. Explore the Start menu. 2. Start an application. 3. Multi-task between applications. 4. Moving folders and files around. 5. Use Control Panel settings.
1) Use either Chrome of Firefox to access the VMware vsphere web Client. https://vweb.bristolcc.edu. FireFox
 Use either Chrome of Firefox to access the VMware vsphere web Client. https://vweb.bristolcc.edu. FireFox") CIS 231 Windows 7 Install Lab #2 1) Use either Chrome of Firefox to access the VMware vsphere web Client. https://vweb.bristolcc.edu CHROME At the your connection is not private message, click Advanced
CIS 231 Windows 7 Install Lab #2 1) Use either Chrome of Firefox to access the VMware vsphere web Client. https://vweb.bristolcc.edu CHROME At the your connection is not private message, click Advanced
3 INSTALLING WINDOWS XP PROFESSIONAL
 INSTALLING WINDOWS XP PROFESSIONAL.1 Preparing for installation Objectives.1.1 Windows XP Professional Hardware Requirements.1.2 Hardware Compatibility List (HCL) check.1. Hard Disk Partition.1.4 Required
CIS 231 Windows 2012 R2 Server Install Lab #1
 CIS 231 Windows 2012 R2 Server Install Lab #1 1) To avoid certain problems later in the lab, use Chrome as your browser: open this url: https://vweb.bristolcc.edu 2) Here again, to avoid certain problems
The Ip address / Name value should be: srvvcenter-cis
 CIS133 Installation Lab #1 - DESKTOP CLIENT OpenSUSE Install. Before beginning the installation, create a virtual machine in which you will install the operating system. 1) Open the VMware vsphere Client.
IT 341 Introduction to System Administration Project I Installing Ubuntu Server on a Virtual Machine
 IT 341 Introduction to System Administration Project I Installing Ubuntu Server on a Virtual Machine Here we create a new virtual machine and install Ubuntu 16.04 LTS Server on it. In this instance, we
WA2592 Applied Data Science and Big Data Analytics. Classroom Setup Guide. Web Age Solutions Inc. Copyright Web Age Solutions Inc.
 WA2592 Applied Data Science and Big Data Analytics Classroom Setup Guide Web Age Solutions Inc. Copyright Web Age Solutions Inc. 1 Table of Contents Part 1 - Class Setup...3 Part 2 - Minimum Software Requirements
Getting Started. Document Overview. What is Power Save Mac? Installing Power Save Mac. Using the Power Save Mac Preference Pane
 Document Overview This document provides step-by-step instructions for installing Power Save Mac on a single segment Local Area Network. Following these instructions will allow you to have Power Save Mac
Installation and Setup Guide
 Installation and Setup Guide to Diana SUNDE VDI Cloud Computing Terminal Contents 1 Host PC (or Server) hardware Configuration Requirements...3 2 Installation of vpoint version 1.1.0.10...3 2.1 Installation
Parallel Programming
 Parallel Programming Installing Ubuntu Virtual Machine within VirtualBox Author B. Wilkinson - Modification date Januray 3, 2016 These instructions assume you have already installed VirtualBox (See separate
FireFox. CIS 231 Windows 10 Install Lab # 3. 1) Use either Chrome of Firefox to access the VMware vsphere web Client.
 Use either Chrome of Firefox to access the VMware vsphere web Client.") CIS 231 Windows 10 Install Lab # 3 1) Use either Chrome of Firefox to access the VMware vsphere web Client. https://vweb.bristolcc.edu CHROME At the your connection is not private message, click Advanced
CIS 231 Windows 10 Install Lab # 3 1) Use either Chrome of Firefox to access the VMware vsphere web Client. https://vweb.bristolcc.edu CHROME At the your connection is not private message, click Advanced
FileZilla FTP Instructions. FileZilla FTP Instructions
 FileZilla FTP Instructions 1 EMS FileZilla FTP Instructions 1, FileZilla Installation 2, Opening FileZilla 3, FileZilla Settings 4, Downloading Your Website 5, Uploading Your Website 6, More Help EMS Internet
to arrive at the system information display. In MacOS X use the menus
 The Math/CS 466/666 Linux Image in VirtualBox This document explains how to install the Math/CS 466/666 Linux image onto VirtualBox to obtain a programming environment on your personal computer or laptop
IRONKEY D300S SECURE USB 3.0 FLASH DRIVE
 IRONKEY D300S SECURE USB 3.0 FLASH DRIVE User Guide Document No. 48000130-001.A01 D300S Page 1 of 27 Table of Contents About This Manual... 3 System Requirements...3 Recommendations...3 Setup (Windows
You can use the WinSCP program to load or copy (FTP) files from your computer onto the Codd server.
 files from your computer onto the Codd server.") CODD SERVER ACCESS INSTRUCTIONS OVERVIEW Codd (codd.franklin.edu) is a server that is used for many Computer Science (COMP) courses. To access the Franklin University Linux Server called Codd, an SSH connection
CODD SERVER ACCESS INSTRUCTIONS OVERVIEW Codd (codd.franklin.edu) is a server that is used for many Computer Science (COMP) courses. To access the Franklin University Linux Server called Codd, an SSH connection
IBM NetBAY Virtual Console Software. Installer and User Guide
 IBM NetBAY Virtual Console Software Installer and User Guide INSTRUCTIONS This symbol is intended to alert the user to the presence of important operating and maintenance (servicing) instructions in the
Lab: Advanced Installation of Windows XP. Introduction
 12.2.2 Lab: Advanced Installation of Windows XP Introduction Print and complete this lab. In this lab, you will install a Windows XP operating system by using an answer file for automation. You will customize
WA2393 Data Science for Solution Architects. Classroom Setup Guide. Web Age Solutions Inc. Copyright Web Age Solutions Inc. 1
 WA2393 Data Science for Solution Architects Classroom Setup Guide Web Age Solutions Inc. Copyright Web Age Solutions Inc. 1 Table of Contents Part 1 - Class Setup...3 Part 2 - Minimum Software Requirements
1) Use either Chrome of Firefox to access the VMware vsphere web Client.
 Use either Chrome of Firefox to access the VMware vsphere web Client.") CIS133 Installation Lab #1 Web Client OpenSUSE Install. 1) Use either Chrome of Firefox to access the VMware vsphere web Client. https://vweb.bristolcc.edu CHROME FireFox At the your connection is not
CIS133 Installation Lab #1 Web Client OpenSUSE Install. 1) Use either Chrome of Firefox to access the VMware vsphere web Client. https://vweb.bristolcc.edu CHROME FireFox At the your connection is not
Installation of the DigitalSystemsVM virtual machine
 Installation of the DigitalSystemsVM virtual machine Notice This document explains how to install the DigitalSystemsVM virtual machine on a computer with Linux Ubuntu 16.04 LTS. If questions or problems
Ubuntu Supplement to X350 & X550 User s Guide NComputing X350 & X550 vspace Software for Linux on Ubuntu 8.04
 Ubuntu Supplement to X350 & X550 User s Guide NComputing X350 & X550 vspace Software for Linux on Ubuntu 8.04 Prepared by: NComputing TID 110.118-2c Revision 1.2 Updated: December 02, 2009 Copyright NComputing
Starting the KVM Console
 Starting the KVM Console This chapter includes the following sections: KVM Console, page 1 Starting the KVM Console from a Server, page 5 Starting the KVM Console from a Service Profiles, page 5 Starting
Installing the Operating System or Hypervisor
 If you purchased E-Series Server or NCE Option 1 (E-Series Server or NCE without a preinstalled operating system or hypervisor), you must install an operating system or hypervisor. This chapter includes
Contents. Getting Started...1. Managing Your Drives...9. Backing Up & Restoring Folders Synchronizing Folders...52
 Contents Getting Started.....................................................1 Installing the Software...........................................1 Using the Maxtor System Tray Icon................................6
IBM NetBAY Virtual Console Software. Installer and User Guide
 IBM NetBAY Virtual Console Software Installer and User Guide INSTRUCTIONS This symbol is intended to alert the user to the presence of important operating and maintenance (servicing) instructions in the
Optional Lab: Customize Settings in Windows Vista
 12.2.4 Optional Lab: Customize Settings in Windows Vista Introduction Print and complete this lab. This lab is comprised of five parts. This lab is designed to be completed in multiple lab sessions. Part
Applied ICT Skills MS Windows
 Applied ICT Skills MS Windows Lesson 1 - How to install an operating system into computer? Windows 7 is perhaps the best Microsoft operating system and is very easy to install compared to other windows.
Lesson 1: Preparing for Installation
 2-2 Chapter 2 Installing Windows XP Professional Lesson 1: Preparing for Installation When you install Windows XP Professional, the Windows XP Professional Setup program allows you to specify how to install
Nextiva Drive The Setup Process Mobility & Storage Option
 Nextiva Drive The Setup Process The Setup Process Adding Users 1. Login to your account and click on the Account icon at the top of the page (this is only visible to the administrator). 2. Click Create
Web Console Setup & User Guide. Version 7.1
 Web Console Setup & User Guide Version 7.1 1 Contents Page Number Chapter 1 - Installation and Access 3 Server Setup Client Setup Windows Client Setup Mac Client Setup Linux Client Setup Interoperation
Optional Lab. Identifying the Requirements. Configuring Windows 7 with virtualization. Installing Windows Server 2008 on a virtual machine
 Optional Lab Appendix D As you go through Microsoft Windows Networking Essentials for the 98-366 exam, you may want to get your hands on Windows Server 2008 and dig a little deeper. That makes sense. While
Installation of Lubuntu Linux, Koha, DSpace and other software using LibLiveCD
 Installation of Lubuntu Linux, Koha, DSpace and other software using LibLiveCD NOTE: Before performing the below tasks, please ensure you have one basic disk partition (with no data) or some free space
DSS User Guide. End User Guide. - i -
 DSS User Guide End User Guide - i - DSS User Guide Table of Contents End User Guide... 1 Table of Contents... 2 Part 1: Getting Started... 1 How to Log in to the Web Portal... 1 How to Manage Account Settings...
For additional information, please consult the Read-Me and Help documentation or contact Electro-Voice or Dynacord technical support.
 Quick Start Guide Hello, and welcome to IRIS-Net software. We want you to get the most from your IRIS-Net projects and encourage you to explore the additional Read-Me and Help documentation provided with
VIRTUALIZATION MANAGER ENTERPRISE EDITION GETTING STARTED GUIDE. Product: Virtual Iron Virtualization Manager Version: 4.2
 VIRTUALIZATION MANAGER ENTERPRISE EDITION GETTING STARTED GUIDE This manual provides a quick introduction to Virtual Iron software, and explains how to use Virtual Iron Virtualization Manager to configure
VIRTUALIZATION MANAGER SINGLE SERVER EDITION GETTING STARTED GUIDE
 VIRTUALIZATION MANAGER SINGLE SERVER EDITION GETTING STARTED GUIDE This manual provides a quick introduction to Virtual Iron software, and explains how to install and use Virtual Iron Single Server Edition
FaxFinder Fax Servers
 FaxFinder Fax Servers Models: FF130 FF230 FF430 FF830 Client User Guide FaxFinder Client User Guide Fax Client Software for FaxFinder Series PN S000460B, Version B Copyright This publication may not be
USB to VGA/DVI Adapter User s Manual
 USB to VGA/DVI Adapter User s Manual 1 Contents 1. Contents...2 2. Introduction...3 3. Installation Guide...3 PC requirements...3 Installing the USB to VGA/DVI software on Windows Vista...4 Hardware first
Enter your Appserv username and password to sign in to the Website
 Appserv Desktop Access Logging on from a Windows 10 Device Step 1. To sign in to the Appserv Desktop Access website, either enter the following address into the Microsoft Edge browser address bar, or click
VI-CENTER EXTENDED ENTERPRISE EDITION GETTING STARTED GUIDE. Version: 4.5
 VI-CENTER EXTENDED ENTERPRISE EDITION GETTING STARTED GUIDE This manual provides a quick introduction to Virtual Iron software, and explains how to use Virtual Iron VI-Center to configure and manage virtual
VIRTUAL MACHINES. By Seth Lemanek
 VIRTUAL MACHINES By Seth Lemanek WHAT IS A VIRTUAL MACHINE? Software meant to emulate hardware for the purpose of hosting bare metal software like Operating Systems Used for creating virtual environments
Configuring Virtual Blades
 CHAPTER 14 This chapter describes how to configure virtual blades, which are computer emulators that reside in a WAE or WAVE device. A virtual blade allows you to allocate WAE system resources for use
Installation and Setup Guide
 Installation and Setup Guide to Diana SUNDE VDI Cloud Computing Terminal 1 1 Hardware Configuration of Host PC (Server)----------------------------------------------------3 2 The Installation of vpoint
Windows Password Reset 6.0 User Guide
 page 1 of 11 Contents Contents...1 Introduction...2 Instructions on This Manual...3 System Requirements...4 How to Use Windows Password Reset 6.0...5 i. Remove the Password...5 ii. Burning Your CD/DVD
L AB: W I N D O W S 7 V I R T U A L I Z A T I O N
 Revision Date: 5/31/2013 Time 1.0 Hours O V E R V IEW In this lab, you will set up a Virtual PC Environment that you can configure at home to complete the lab activities in this course. L AB ACTIVIT IES
Setting Up a Linux Operating System
 Name: Setting Up a Linux Operating System We will be using the Linux operating system for most of our practical work in this class. Knoppix is a live CD distribution of Linux, based on the Debian distribution.
RocIT Defender User s Guide ViSoS TM Virtual System on a Stick
 RocIT Defender User s Guide ViSoS TM Virtual System on a Stick Table of Contents 1. Introduction 3 1.1. Minimum System Requirements 3 1.2. Drive Specifications 4 2. Startup Procedure 4 2.1. Configure computer
Preparation of a Cluster Node with Ubuntu
 Preparation of a Cluster Node with Ubuntu Although newer versions of Hadoop work on computers with Windows OS, I decided to use a Linux based system because of the proved stability of Hadoop on the Linux.
How to Install ESX 4.0 on Workstation as a VM
 white paper How to Install ESX 4.0 on Workstation 6.5.2 as a VM Title: How to Install ESX 4.0 on Workstation 6.5.2 as a VM Author(s): Xtravirt (Paul Buckle) Target Audience: Technical - Novice Current
FreeBSD Installation ISOC/AfNOG
 FreeBSD Installation ISOC/AfNOG Michuki Mwangi (Original materials by Hervey Allen NSRC) 1 READ THE INSTRUCTIONS These slides contain explicit instruc2ons to allow you to successfully install FreeBSD and
ModeChanger
 35020808-02 2015.11 ModeChanger ModeChanger is a software utility that can switch the drive between normal mode and encrypted mode. Operating in encrypted mode will help protect your data. While the drive
About the XenClient Enterprise Solution
 About the XenClient Enterprise Solution About the XenClient Enterprise Solution About the XenClient Enterprise Solution XenClient Enterprise is a distributed desktop virtualization solution that makes
Getting Started with ESX Server 3i Installable Update 2 and later for ESX Server 3i version 3.5 Installable and VirtualCenter 2.5
 Getting Started with ESX Server 3i Installable Update 2 and later for ESX Server 3i version 3.5 Installable and VirtualCenter 2.5 Getting Started with ESX Server 3i Installable Revision: 20090313 Item:
Windows NT Server Printer Driver Upgrade Instructions
 Windows NT Server Printer Driver Upgrade Instructions The steps detailed below describe the most reliable method to upgrade printer driver versions after v1.6.0227a on a Windows NT 4.0 Server that is shared
College of Pharmacy Windows 10
 College of Pharmacy Windows 10 Windows 10 is the version of Microsoft s flagship operating system that follows Windows 8; the OS was released in July 2015. Windows 10 is designed to address common criticisms
Lab #5 Guide: Installing Ubuntu as a Virtual Machine
 Lab #5 Guide: Installing Ubuntu as a Virtual Machine CTEC1863/2018F Operating Systems Mike Boldin Tools, Materials and Equipment Oracle VirtualBox software official site: https://www.virtualbox.org/wiki/downloads
Upgrading your QuickBooks Company File Once per file only
 Username: «User» License: «License_Number» Product: «Product_Number» This document walks you through upgrading your QuickBooks company file. If your file has already been upgraded, you may skip below to
Transport Gateway Installation / Registration / Configuration
 CHAPTER 4 Transport Gateway Installation / Registration / Configuration This chapter covers the following areas: Transport Gateway requirements. Security Considerations When Using a Transport Gateway.
Multi-NVR Manager. Quick Start Configuration Usage
 Multi-NVR Manager Quick Start Configuration Usage 2014. All rights are reserved. No portion of this document may be reproduced without permission. All trademarks and brand names mentioned in this publication
USER MANUAL. Infoshare Web Conferencing
 USER MANUAL Infoshare Web Conferencing Table of Contents Contents Table of Contents... 1 What is Infoshare?... 3 Infoshare Control Panel and Key Functions... 3 1. Launching Infoshare... 4 2. Meeting Types...
2. INSTALLATION OF SUSE
 2. INSTALLATION OF SUSE 2.1. PREINSTALLATION STEPS 2.1.1. Overview Installing any kind of operating system is a big move and can come as something of a shock to our PC. However, SUSE Linux makes this complicated
Reset the Admin Password with the ExtraHop Rescue CD
 Reset the Admin Password with the ExtraHop Rescue CD Published: 2018-01-19 This guide explains how to reset the administration password on physical and virtual ExtraHop appliances with the ExtraHop Rescue
Get VirtualBox. VirtualBox/Ubuntu Setup. Go to and select Downloads.
 Get VirtualBox Go to www.virtualbox.org and select Downloads. 1 Download the current release of VirtualBox for the OS on which you will install VirtualBox. In these notes, that's Windows 7. Download the
SUPERTRAK EX8300, EX8350 RAID 6 UPGRADE & PRIMER
 SUPERTRAK EX8300, EX8350 RAID 6 UPGRADE & PRIMER Version 1.1 2005 Promise Technology, Inc. All rights reserved. SuperTrak EX8300, EX8350 RAID 6 Upgrade & Primer Copyright 2005 Promise Technology, Inc.
Power IQ DCIM Monitoring Evaluation Copy A Step-By-Step Guide
 1 Power IQ DCIM Monitoring Evaluation Copy A -By- by Thank you for downloading this free evaluation copy of Sunbird s Power IQ DCIM monitoring software which supports up to five devices! Power IQ allows
Parallels Desktop for Mac
 Parallels Software International, Inc. Parallels Desktop for Mac Getting Started Guide (c) 2005-2006 2 Contents Introduction 4 Key Terms and Technologies...5 Supported Guest Operating Systems...7 Installing
Production Installation and Configuration. Openfiler NSA
 Production Installation and Configuration Openfiler NSA Table of Content 1. INTRODUCTION... 3 1.1. PURPOSE OF DOCUMENT... 3 1.2. INTENDED AUDIENCE... 3 1.3. SCOPE OF THIS GUIDE... 3 2. OPENFILER INSTALLATION...
DUAL OS INSTALLATION
 Ex.No:15 Date: DUAL OS INSTALLATION Aim: To install and configure Ubuntu OS alongside Windows as installing dual OS. PROCEDURE: 1. Backup your Windows partition To open the Dell Backup and Recovery software
EasiShare Desktop User Guide
 Copyright 2016 by Inspire-Tech Pte Ltd. All rights reserved. All trademarks or registered trademarks mentioned in this document are properties of their respective owners. No part of this document may be
Getting Started with Vision 6. Version 6.8
 Getting Started with Vision 6 Version 6.8 Notice Copyright 2008, GenevaLogic, Inc. All rights reserved. Document Date: September 8, 2008 Document Version: 6.8 The content in this document represents the
Comodo Online Storage Software Version 2.0
 Comodo Online Storage Software Version 2.0 Guide Version 2.0.101211 Comodo Security Solutions 525 Washington Blvd. Jersey City, NJ 07310 Table of Contents 1. Introduction... 4 1.1.System Requirements...
DriveWare. User s Guide DriveBrowser
 DriveWare User s Guide DriveBrowser DriveBrowser User s Guide Code: 3AUA0000024806 EN EFFECTIVE: 31.12.2008 SUPERCEDES 31.01.2008 2008 ABB Oy. All rights reserved. 5 Table of contents Table of contents...
8 MANAGING SHARED FOLDERS & DATA
 MANAGING SHARED FOLDERS & DATA STORAGE.1 Introduction to Windows XP File Structure.1.1 File.1.2 Folder.1.3 Drives.2 Windows XP files and folders Sharing.2.1 Simple File Sharing.2.2 Levels of access to
CAMPAGNE. Fundraising software solutions
 CAMPAGNE a s s o c i a t e s Fundraising software solutions Copyright 2002, Campagne Associates, Ltd. All rights reserved Information in this manual is subject to change without notice and does not represent
IT 341 Introduction to System Administration Project I Installing Ubuntu Server on an Virtual Machine
 IT 341 Introduction to System Administration Project I Installing Ubuntu Server on an Virtual Machine Here we create a new virtual machine and install Ubuntu 12.04 LTS Server on it. In this instance, we
Lab 3-1 Lab Installing Kofax Capture 10
 In the following lab instructions, you re going to install and license Kofax Capture, turn on User Tracking, review the product documentation, and prepare your system for the lab exercises in this course.
IT 341 Introduction to System Administration Project I Installing Ubuntu Server on an Virtual Machine
 IT 341 Introduction to System Administration Project I Installing Ubuntu Server on an Virtual Machine Here we create a new virtual machine and install Ubuntu 16.04 LTS Server on it. In this instance, we
1) Installing Bluetooth software for Windows (A) Place installation CD into PC and setup should launch automatically.
 Installing Bluetooth software for Windows (A) Place installation CD into PC and setup should launch automatically.") 1) Installing Bluetooth software for Windows (A) Place installation CD into PC and setup should launch automatically. If setup does not launch, use Windows Explorer to navigate to the appropriate CD- ROM
1) Installing Bluetooth software for Windows (A) Place installation CD into PC and setup should launch automatically. If setup does not launch, use Windows Explorer to navigate to the appropriate CD- ROM
Work Smart: Windows 7 New Features
 About Windows 7 New Features The Windows 7 operating system offers several new features to help you work faster and more efficiently, and enable you to access the files, folders, programs, and applications
Windows XP. A Quick Tour of Windows XP Features
 Windows XP A Quick Tour of Windows XP Features Windows XP Windows XP is an operating system, which comes in several versions: Home, Media, Professional. The Windows XP computer uses a graphics-based operating
Microsoft Windows 10. Quick Reference. Watsonia Publishing 47 Greenaway Street Bulleen VIC 3105 Australia
 Watsonia Publishing 47 Greenaway Street Bulleen VIC 3105 Australia www.watsoniapublishing.com info@watsoniapublishing.com Quick Reference Course Code: INF1440 Table of Contents Chapter 1: Starting With