LEMUR -C TICKET PRINTERS Operator s Manual
|
|
|
- Elijah Grant
- 6 years ago
- Views:
Transcription

1 LEMUR -C TICKET PRINTERS Operator s Manual RevA:
2 Table of Contents Page FCC Notice & Warranty Information Introduction Unpacking the printer Important Safety Information Installation Ticket Load Procedure Standard Interface Pinouts Thermal Paper Theory & Specifications Maintenance and Adjustments Paper Guide and Print Head Assembly Cut or Tear SQ Opto Load SQ opto Thermal Print Head Thermal Print Head Replacement Platen Cut SQ Opto Mounted on the Cutter Assembly Ticket Width Adjustment Cutter Assembly General Cleaning Logic Board Logic Board (Removal) Logic Board (Installation) Spare Parts List Troubleshooting Guide 22 Appendix A - VERTICAL PRINTER INSTALLATION 24 Appendix B - ETHERNET PARAMETERS 25 Appendix C WINDOWS USB DRIVER INSTALLATION GUIDE 26 Appendix D MAC DRIVER INSTALLATION GUIDE 40 Appendix E INTERFACE TESTING A LEMUR 45 Appendix F DOWNLOADING SOFTWARE COMMANDS 50 Appendix G ADHESIVE MEIDA 51 Appendix H CONFIGURE WI-FI CONNECTION 52 Appendix I SERVICE PLANS 55 Appendix J TECHNICAL SUPPORT 56 1
3 FCC NOTICE NOTE: The equipment has been tested and found to comply with the limits for a class A digital device, pursuant to part 15 of the FCC rules. These limits are designed to provide reasonable protection against harmful interference when the equipment is operated in a commercial environment. This equipment generates, uses, and can radiate radio frequency energy and, if not installed and used in accordance with the instruction manual, may cause harmful interference to radio communications. Operation of this equipment in a residential area is likely to cause harmful interference in which case the user will be required to correct the interference at the user s expense. Operation is subject to the following two conditions: 1. This device may not cause harmful interference, and 2. This device must accept any interference received, including interference that may cause undesired operation. NOTE: This unit was tested with shielded cables on the peripheral devices. Shielded cables must be used with the unit to insure compliance. WARRANTY INFORMATION BOCA warrants the equipment manufactured and sold by it to be free from defects in material and workmanship under normal use and service for a specified period of time. Parts damaged by negligence or misuse (bad ticket stock, improper operating conditions, etc.) are excluded from this warranty. Warranties for printers are 1 year from date of shipment. (NOTE: The print head is a consumable part and is warranted for 90 days.) Spare parts carry a 90 day warranty. Tickets are warranted, under proper storage conditions, for a period of 3 years. All warranty work is to be performed either by BOCA or by an authorized BOCA service center. Shipping charges to the repair center are the customer's responsibility. BOCA will pay for the equipment's return via ground service. Please go to the link below if you have any reported issues with your new BOCA printer. Equipment damaged in shipping should be reported immediately both to BOCA and to the shipper. EXTENDED WARRANTY PLAN - BOCA offers extended warranty plans for all printer models. These plans cover all parts and labor. All labor is to be performed at the BOCA facility. Equipment damaged by misuse or negligence, including damage to print heads caused by defective ticket stock, is excluded from this extended warranty. The customer, at its option, may request BOCA to ship individual parts to expedite simple repair procedures. In certain cases where the customer is unable to wait for the normal repair cycle, BOCA will ship an exchange printer within one business day after notification by the customer. All freight charges are the responsibility of the customer. Click here to return to > Table of Contents 2


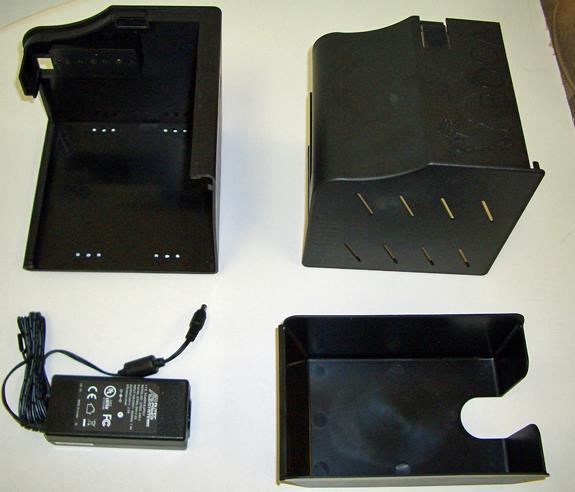
4 1.0 Introduction The Lemur-C printer is a direct thermal ticket printer that may be purchased with optional integrated cutting mechanism. This manual will provide the user with general information regarding printer set-up, configuration and troubleshooting. Please read the important safety information section before installation is conducted. Review the programming guide for additional details. 2.0 Unpacking the Printer The printer is shipped in a ruggedized container. Please save packing material for future use. Remove the printer and accessories from the box and inspect for obvious damage. If damage is noticed, please report it immediately to BOCA. cathy@bocasystems.com Tel: (561) Fax: (561) The following items should be in the box: a) Ticket Printer b) 24VDC power supply c) AC cord b) Hopper (if applicable) d) Interface cable (optional) e) Mounting Plate (optional) Shown with optional hopper Click here to return to > Table of Contents 3
5 3.0 Important Safety Information WARNING: The appearance of this symbol indicates the proximity of an exposed high voltage area. Please follow all directions carefully for your personal safety. You must read the following safety information carefully before working on the printer. As a safety precaution, all service to the printer should be done by qualified persons with power off and the AC cord unplugged from the printer. Following any procedure requiring the removal of covers and/or doors, please verify that they have been properly attached and fastened prior to operating the printer. WARNING: "Provide an earthing connection before the mains plug is connected to the mains. And, when disconnecting the earthing connection, be sure to disconnect after pulling out the mains plug from the mains." WARNING: Power Cord Set: This must be approved for the country where it is used: U.S.A. and Canada The cord set must be UL-approved and CSA certified. The minimum specification for the flexible cord is: No. 18 AWG Type SV or SJ 3-conductor The cord set must have a rated current capacity of at least 10A. The attachment plug must be an earth-grounding type with a NEMA 5-15P (15A, 125V) or NEMA 6-15P (15A, 250V) configuration. United Kingdom only The supply plug must comply with BS1363 (3-pin 13 amp) and be fitted with a 5A fuse which complies with BS1362. The mains cord must be <HAR> or <BASEC> marked and be of type H03VVF3GO.75 (minimum). Europe only: The supply plug must comply with CEE 7/7 ( SCHUKO ). The mains cord must be <HAR> or <BASEC> marked and be of type H03VVF3GO.75 (minimum). Denmark: The supply plug must comply with section D1, standard DK2-1a or DK2-5a. Switzerland: The supply plug must comply with SEV/ASE WARNING: The appliance coupler (the connector to the unit and not the wall plug) must have a configuration for mating with an EN60320/IEC320 appliance inlet. WARNING: The socket outlet must be near to the unit and easily accessible. WARNING: France and Peru only: This unit cannot be powered from IT supplies. If your supplies are of IT type, this unit must be powered by 230V (2P+T) via an isolation transformer ratio 1:1, with the secondary connection point labelled Neutral, connected directly to earth (ground). WARNING: RJ-45 Ports. These are shielded RJ-45 data sockets. They cannot be used as standard traditional telephone sockets, or to connect the unit to a traditional PBX or public telephone network. Only connect RJ-45 data connectors. Either shielded or unshielded data cables with shielded or unshielded jacks can be connected to these data sockets. Click here to return to > Table of Contents 4


6 4.0 Installation The Lemur-C was designed to be mounted either on a desktop or shelf (horizontal model) or optional vertically in a counter top (see Appendix A for installation of vertical printers). Prior to site preparation and installation, the printer should be powered up and run in the self-test mode. Lay the printer flat on a counter top. Attach the AC cord into the 24VDC power supply and plug the other end into the round DC in port of the printer. Install ticket hopper (if applicable) to catch the tickets. Lemur printer without a cutter won t have a ticket hopper. Turn power on. If the printer has an optional cutter then you will hear the cutter motor cycle. Wait six seconds after power up. Begin loading tickets through the entrance slot with a smooth motion until the printer automatically positions the ticket. See section 5.0 Ticket Load Procedure. NOTE: You want to make sure that the black timing mark is in the correct location before loading the tickets into the paper path. See for black mark layout specs. After the ticket is automatically positioned (the green READY led will be illuminated), press the center TEST button located on the control panel to print a test ticket. The next page shows sample self test ticket printouts. Verify that the printer properly works with your system by issuing a ticket through your computer system. You may also use out customer based program to test the printer independently of your ticketing system (see Appendix E) You may now install the printer in its permanent location. Adequate room should be provided behind the printer for the smooth feeding of ticket stock. Please do not prevent the ticket hopper (horizontal models) from operating by touching tickets during the printing cycle. Lemur cover removal The cover may be removed by depressing the cover lock tab that is located on top of the cover. Slide the cover off. 5


7 Above sample was printed on a 2 x 5.5 concert size ticket. Above sample was printed on a 3.25 x 2 cinema size ticket. Your printout may vary depending on printer configuration and ticket stock used. Click here to return to > Table of Contents 6
.")
.")
8 5.0 Ticket Load Procedure 1. Turn the printer on and wait five seconds. The red CHECK PAPER led will be illuminated. If your printer has a cutter they you will hear it cycle during this time. 2. Begin loading the tickets through the entrance slot with a smooth motion until the ticket stock comes to a stop (at this point the stock is between the thermal head and platen). Keep pressure against the stock and the printer will automatically feed the ticket stock. If you have any ticket load issues then make sure the paper guild slider bar is properly adjusted (see Ticket Width Adjustment ). Load your stock towards this side and below this metal plate The black timing mark on the back of your ticket stock should pass over this side facing down towards the opto Adjustable (ADJW) Two typical ticket formats and feed directions are shown below. The black timing mark must be facing the opto sensor. When loading 5.50 long ticket stock the black timing mark should be towards the rear of the ticket (the last part that goes into the printer). When loading 2.0 long cinema ticket stock the black timing mark should be furthest away from to the leading edge of the ticket (the first part that goes into the printer). Click here to return to > Table of Contents 7
 is a standard RJ45 Ethernet cable connection. WI-FI (Optional) is compatible with 802.11b/g Wi-Fi router and supports security settings WEP/WPA/WPA-2.")
9 6.0 Standard Interface Pinouts RJ12 Serial Connection +5VDC TYPICAL DB9 to RJ12 PIN CONNECTIONS 9 pin host BOCA RJ Transmit 3 3 Receive 5 4 GND 6 1 RDY 8 6 CTS USB USB 2.0 compliant devices. ETHERNET (Optional) is a standard RJ45 Ethernet cable connection. WI-FI (Optional) is compatible with b/g Wi-Fi router and supports security settings WEP/WPA/WPA-2. BLUETOOTH (Optional) may be ordered as Classic or Low Energy (LE). CASH DRAWER PORT (Optional) may be ordered with RJ12 serial port modified to operate a cash drawer. DC IN USB Ethernet (Optional) RJ12 serial Click here to return to > Table of Contents 8
10 7.0 Thermal Paper - Theory & Specification Refer to the BOCA Systems website at THERMAL TICKETS section for the most current paper specifications. The print head s life expectancy is composed of both a mechanical and an electrical component. Both of these factors are strongly influenced by the quality of the thermal paper used. MECHANICAL The print head has a theoretical rating of 60 kilometers. This number is based upon the assumption that the head will be used with a good quality, top coated thermal paper. Uncoated and poorly top coated thermal papers are abrasive to the print head and have been found to wear through the head after less than one kilometer. Other factors which may contribute to premature mechanical wear are the use of non-thermal inks and stray metallic particles stuck in ticket perforations. Certain inks colors such as opaque white (which contains titanium dioxide) are also highly abrasive. Unfortunately, there are no available devices for quantitatively measuring the abrasiveness of a given ticket. Fortunately, we have developed a slightly subjective, but effective method of weeding out overly abrasive ticket stock. ELECTRICAL Each heat element, dot, on the print head has a theoretical life expectancy of 100 million activations. This is based on the assumption that each activation will cause the dot temperature to approach the dot s maximum recommended temperature. Running at lower temperatures will increase the theoretical life expectancy, while slight temperature increases will seriously (exponentially) degrade the head life. The thermal paper can affect the electrical head life in two ways. Insensitive, slow papers will typically encourage the user to increase the voltage to darken the printed image. This will directly increase the head temperature resulting in reduced head life. Additionally, the higher temperatures will frequently cause the ink to peel off the ticket and deposit onto the print head. The ink debris will disrupt the normal transfer of heat from the head to the paper. This further increases the head temperature above the desired level. The use of non-thermal inks and/or non-top coated papers also will cause the ink to release and deposit on the print head. SPECIFICATION Based upon the above technical information, BOCA has always tried to encourage our customers to use the proper thermal papers to maximize the life of their print heads. BOCA provides an extensive series of papers which meet the above criteria for low abrasion and high sensitivity. We have also tested and approved a number of Ricoh thermal papers which meet our criteria. While we have not had the opportunity to test other manufacturers thermal papers, we feel confident that other papers manufactured with the above goals in mind should be acceptable for use in our printers. The following list of papers have been approved by BOCA. 200 dpi usage BOCA T4, T5, T7, LCS and SKI and 300 dpi usage BOCA HS7, M7, HS5, M10, SKI14 Please note that the 300 dpi papers may be used on 200 dpi printers. In fact, doing so will allow the user to decrease the head energy thereby increasing the electrical life of the head. DO NOT use 300 dpi heads with 200 dpi paper. Click here to return to > Table of Contents 9

11 8.0 Maintenance and Adjustments Your ticket printer is solidly constructed and has been designed for high volume use. It requires minimal care to provide maximum service. WARNING: The appearance of this symbol indicates the proximity of an exposed high voltage area. Please follow all directions carefully for your personal safety. You must read the following safety information carefully before working on the printer. This section provides an overview of printer maintenance, including part alignments, adjustment and replacement. For discussion purposes, the printer consists of three major modules or assemblies: Paper guide and print head assembly Cutter assembly Logic board assembly As a safety precaution, all service to the printer should be done by qualified persons with power off and the AC cord unplugged from the printer. Following any procedure requiring the removal of covers and/or doors, please verify that they have been properly attached and fastened prior to operating the printer. 8.1 Paper Guide and Print Head Assembly The principal function of this assembly is to guide the ticket stock to the thermal print head where thermal printing takes place. Additionally, this assembly houses the drive platen and ticket positioning sensors. If necessary, the total assembly may be removed from the unit. All replacements and adjustments of the components on this assembly may be done without removing the total assembly. The most common adjustments and replacements regarding this assembly follow: Click here to return to > Table of Contents 10

12 8.1.1 Cut or Tear SQ Opto There is one optical sensor (opto) mounted on an adjustable plastic bracket. The opto controls the cut or tear position. Removal or adjustment of the opto should be done without removing the bracket from the paper guide. The opto position is factory set and adjustment should normally not be necessary. OPTO EYE Note: Before making any opto adjustments make sure your ticket stock was manufactured to proper ticket specifications. To adjust the cut or tear position, physically adjust the opto mounting bracket forward or backwards to achieve the desired cut or tear location. On a Lemur with auto cut the cut position should be a 1/16-1/8 away from the ticket perforation. On a Lemur without auto cut the ticket perforation should line up with the edge of the cabinet or top plate. If you are not able to get the desired cut position, make sure your ticket stock was manufactured to proper specifications. Once a year the opto eye should be blown off with air. This interval will vary depending upon the environment and the quality of the ticket stock. Click here to return to > Table of Contents 11

13 8.1.2 Load SQ Opto The load SQ opto is responsible for letting the printer know when it has paper stock loaded in the printer. Once a year the opto eye should be blown off with air. This interval will vary depending upon the environment and the quality of the ticket stock. OPTO EYE Click here to return to > Table of Contents 12


14 8.1.3 Thermal Print Head The print head should be cleaned periodically to prevent debris from building up on the print element. The required cleaning interval varies greatly depending on the quality of the ticket stock and the amount of dust entering the print area. Excessive dirt builds up on the print head will result in reduced quality. Continuing to run the print head in a dirty condition will reduce its life expectancy, as it is unable to diffuse its heat properly. The follow needs to be done with the printer powered off and unplugged from the AC source. The thermal print head can be removed for cleaning or replacement, as follows: 1. Make sure power is off and the AC cord is disconnected from the printer. 2. DO NOT UNPLUG CABLE FROM PRINT HEAD. 3. Lift up on the cam lock assembly (located above the head mounting plate) to remove pressure from the thermal head. Position the cam lock lever as far forward as possible. Cam Lock Lever Head mtg. Plate 4. Lift up on the head mounting plate/thermal head to remove. 5. Clean the thermal print head surface (the side that makes contact with the paper) with isopropyl alcohol. Clean This Surface 6. Install the head mounting plate/thermal head by reversing the above procedures. Click here to return to > Table of Contents 13


15 8.1.4 Thermal Print Head Replacement The below review how to replace the thermal print head in your printer, if needed. The follow needs to be done with the printer powered off and unplugged from the AC source. 1. Remove the print head mounting plate from the printer as shown in section Thermal Print Head. 2. Once the head plate has been removed; loosen the two Philip head screws until the thermal print head disengages from the head plate. Take care not to lose lock and flat washers. 3. Gently unplug the cable from the old print head and plug it into the new print head. If your print head has two cables then this should be done one cable at a time so not to mix them up. The cables are keyed (see examples below). The keyed position must be lined up while plugging the cable into the print head. You should not have to use excessive force to do this Hole Dimple 4. Install the print head back onto the print head mounting plate. 5. Install the head mounting plate/ thermal head back into the printer. Click here to return to > Table of Contents 14
 1. Make sure power is off and the AC cord is disconnected from the printer 2.")
16 8.1.5 Platen (Rubber Driver Roller) The Platen (rubber drive roller) should be cleaned once a year to prevent paper dust from building up on the roller. (NOTE: The platen may require more frequent cleaning in dusty environments or when using inferior ticket stock.) 1. Make sure power is off and the AC cord is disconnected from the printer 2. Unlock the cam lock lever and remove head mounting block/ plate. (Refer to section Thermal Print Head). 3. Apply a small amount of Isopropyl alcohol onto a paper towel to clean the rubber roller. 4. Clean only the part of the rubber roller where the ticket stock makes contact with. 5. Rotate the rubber roller clockwise a little and repeat step 4; continue in the same manner for one full revolution of the rubber roller. 6. Install the head mounting block/ plate and lock the cam lock lever back in place. Printer in now ready for normal operation. Platen (Color of platen may vary from above photo) Click here to return to > Table of Contents 15
. The opto detects the black timing mark on the back of the ticket stock.")
17 8.1.6 Cut SQ Opto Mounted on the Cutter Assembly Your printer may have been configured with the cut optical sensor (opto) mounted on the cutter assembly. The serial number tag will show CUT - # under Separation (# = a value of 1 5). The opto detects the black timing mark on the back of the ticket stock. This sensor will need to be cleaned around every 10,000 tickets to ensure reliable operation of the printer. The following needs to be done with the printer powered off and unplugged from the AC source. 1. Unlock the cam lock lever and remove head mounting block/ plate. (Refer to section Thermal Print Head). 2. With canned air, blow off the area just below the metal guide (see yellow arrow). (location and color of platen may vary from above photo) 3. Install the head mounting plate and lock the cam lock lever back in place. Printer is now ready for normal operation. To adjust the cut position, the CUT1 Count value may be changed by sending a software command to the printer (See Appendix F). The cut position should be 1/16-1/8 away from the ticket perforation. Click here to return to > Table of Contents 16

18 Ticket Stock Ticket Width Adjustment To adjust the paper path for use with a different ticket width, adjust the slider bar to the fully open position. Insert your ticket stock into the paper guide. Adjust the slider bar down to the proper ticket width, making sure the bar is not too tight against the ticket. The ticket should move freely in the paper guide. Slider Bar, NOTE: stock must go under the slider bar. Load your stock towards this side and below this metal plate The slider bar would be located here for 3.25 ticket width Click here to return to > Table of Contents 17

19 8.2 Cutter Assembly The optional BOCA cutter system is a fully integrated cutter knife mechanism powered by a stepper motor. The cutter requires no adjustments and is rated for approximately 750,000 cuts. Please be aware of the following: Wait five seconds before feeding ticket stock into the printer after power up. During this time the cutter knife will move up and down. If ticket stock is fed into the printer before five seconds, a ticket jam could occur. The cutter area should be blown out with air periodically to prevent debris from building up inside the cutter area. The required cleaning interval varies greatly depending on the quality of the ticket stock and the amount of paper dust entering the cutter area. If the printer will be used with ticket stock that has a thickness greater than.008 then the cutter speed needs to be changed to SLOW. Please contact BOCA for documentation to make this change. If the cutter speed is not changed to SLOW, then the printer will not work reliably with said stock. Boca Cutter Click here to return to > Table of Contents 18

20 9.0 General Cleaning The interior of the printer should be cleaned whenever there is a visible accumulation of dust. Use a small vacuum for cleaning. Be careful not to jar any of the printer s parts loose Logic Board The printed circuit boards used in this product have been manufactured using surface mount technology. These printed circuit boards cannot be effectively repaired in the field and should be returned to the manufacturer if repair is required. Warning: ALL SERVICE SHOULD BE DONE WITH POWER OFF AND THE DC POWER SUPPLY UNPLUGGED FROM THE PRINTER Logic Board (Removal) 1. Gain access to the logic board. This is normally done by removing the electronics cover or rear access panel. a. Remove 4 Philip head screws that are located on the bottom of the printer. 2. Side the print module assembly out. 3. Denote where all the cables are plugged into the logic board. 4. Unplug connectors connected to the main logic board. 5. Remove the three Philip head screws that secure the logic board onto the print module. 6. Remove board Logic Board (Installation) 1. Installed the logic board into the printer. 2. Install the three Philip head screws that hold the logic board onto the print module and tighten. 3. Attach connectors going to the main logic board. 4. Install the print module back into the enclosure. Take care to make sure the wires are not being pinched. Click here to return to > Table of Contents 19

 No mounting plates 14 SQ OPTO Opto Detector cut or tear 15 LC46-E Main Logic Board (Ethernet option) 15* LC46 Main Logic Board (Standard) 16 423192")
21 11.0 Spare Parts List # Part Number Description C-1 Upper Rail Only (cutter) 1* C-NC Upper Rail Only (non-cutter) W Slider bar assembly for ADJW P Take Out Head Cam Lock Head Mounting Plate 2C LC-200 Platen complete for 200dpi 6 SQ LOAD Opto Detector Ticket load 7 200C3 Print Head for Lemur-R & 2C printers only 8 P Drive Belt, 98T (for 200dpi) C Mounting plate, BC5 cutter Stepper Motor with 20T pulley C Upper exit deflector only (Lemur-C) 11A C-C Upper exit deflector with brush (Lemur-C) W Anti-Static Brush Cutter Assembly (BC5) No mounting plates 14 SQ OPTO Opto Detector cut or tear 15 LC46-E Main Logic Board (Ethernet option) 15* LC46 Main Logic Board (Standard) Ground Strap Cable, Print Head 2C DC Harness, cutter 18* NC DC Harness, no cutter C Base C Cover Power Supply 24VDC x6 Hopper, (4 x 6 ) Plastic * P Cable, AC cord 110VAC (US) * Cable, AC cord 220VAC (European) * Cable, AC cord 220VAC (UK) * Cable, AC cord 220VAC (Australia) * Cable, AC cord 220VAC (European) * Cable External, serial DB9 TO RJ12 * Cable External, serial DB25 to RJ12 * Cable External, USB * x6 Hopper, (4 x 6 ) Plastic * Mylar only, Vlemur * Rubber Feet * C-P Top Plate, vertical Lemur (8.70 x 9.64 ) Plastic cabinet Lemur * Customer dependent and not shown in photos


22 11A
23 12.0 Troubleshooting Guide This is a simplified troubleshooting guide listing some of the typical problems. It is not intended to provide technical details or repair methods, but can serve as a guide to fault isolation in the field. As a safety precaution, all service to the printer should be done by qualified persons with power off and the AC cord unplugged from the printer. Following any procedure requiring the removal of covers and/or doors, please verify that they have been properly attached and fastened prior to operating the printer. If you need additional help, please visit the link below 1. NO OPERATION, LED S DON T LIGHT UP UPON POWER UP a. Power the printer off and wait 30 seconds then power it back on. b. Check the power cord for proper installation at both ends. c. Check that there is power at the AC outlet. d. Swap out power pack. e. Contact your system provider or BOCA for further assistance. 2. POWER IS ON BUT NO OPERATION a. Make sure the stock is being loaded properly into the printer. Consult section 5.0 Ticket Load Procedure. b. Clean the SQ load opto. Consult section Load SQ Opto b. If cutter knife (if so equipped) does not go up and down after power up, See # 6. c. With the printer powered off, unplug the thermal head and turn on the printer. If printer works then replace the thermal head. d. Contact your system provider or BOCA for further assistance. 3. POWER IS ON BUT TICKET WILL NOT LOAD a. See # 2 b. Make sure the print head/cam lock assembly is fully locked in the closed position. Consult section Thermal Print Head. c. Check that the ticket stock is being loaded correctly. Consult Installation section. d. Contact your system provider or BOCA for further assistance. 4. ERRATIC CUT POSITION a. Check for defective ticket stock. Is the black mark unevenly spaced apart or light in color? Is the ticket too wide for the paper path? b. Make sure the paper guild slider bar is properly adjusted (see Ticket Width Adjustment ). c. Clean off opto eyes (see Cut or Tear SQ Opto ) with air. If printer has opto eye mounting on cutter assembly then see section d. Check that the platen is clean. Consult section Platen (Rubber Drive Roller). e. Replace ticket cut opto. f. Contact your system provider or BOCA for further assistance. 5. ERRACTIC PRINT POSITION a. See # 4 6. CUTTER KNIFE DOES NOT MOVE (if equipped) a. Check for blockage in the cutter area. c. Default printer settings. With the printer powered off hold down the TEST button and then power up the printer. Keep the TEST button held down for ten seconds and release. c. Contact your system provider or BOCA for further assistance. 7. POOR PRINT OUT (light print out) a. Try a different stack of ticket stock. b. Make sure the print head/cam lock assembly if fully locked in the closed position. c. Clean print head. Consult section Thermal Print Head. d. Adjust print intensity setting via software command. (see Appendix F) e. Replace thermal head. f. Contact your system provider or BOCA for further assistance. 22
24 8. POOR PRINT OUT (white voids in print out) a. Clean print head. Consult section Thermal Print Head. b. Replace thermal head. Consult section Thermal Print Head Replacement. c. Contact your system provider or BOCA for further assistance. 9. NO PRINT OUT a. Try a different stack of ticket stock. b. Check head cable for electrical connection at both ends c. Check to make sure head cable is plugged in properly into the thermal head. d. Replace the thermal head. Consult section Thermal Print Head Replacement. e. Contact your system provider or BOCA for further assistance. 10. PRINTER SKIPS TICKETS WHILE PRINTING a. Check position and quality of black mark on the ticket stock. b. Make sure the paper guild slider bar is properly adjusted (see Ticket Width Adjustment ). c. Clean off opto eye (see Cut or Tear SQ Opto) with air. d. Check that the platen is clean. Consult Platen (Rubber Drive Roller section. e. Replace ticket cut opto. f. Contact your system provider or BOCA for further assistance. 11. PRINTER SKIPS TICKETS AND DIES a. See # TICKET JAM ENTERING THE CUTTER AREA a. Make sure the entrance to the cutter area is not blocked. b Make sure the paper guild slider bar is properly adjusted (see Ticket Width Adjustment ). b. Contact your system provider or BOCA for further assistance. 13. WI-FI WILL NOT CONNECT a. Make sure you are connecting to Wi-Fi router that supports b devices. The router also needs to support 1 and 2 MBps data rates. b On initial setup have the printer as close as possible to the Wi-Fi router. b Check to make sure you have the correct security values for the Wi-Fi router you are trying to connect to. b. If you have multiple routers change the channel setting to 1, 6 or 11. Multiple routers using the same channel will cause connection and drop single issues. Click here to return to > Table of Contents 23
25 APPENDIX A - VERTICAL PRINTER INSTALLATION Prepare the counter top by cutting a rectangular hole in accordance with the dimensions specified for your printer model. NOTE: The table or counter top must be able to support at least four times the weight of the printer. TOP VIEW COUNTER CUTOUT c m c m c m Edge mounting plate cm CUTOUT IN COUNTER Printer s top plate c m SIDE VIEW cm This space needs to be a minimum of 12 (30.48cm) from the top of a full stack of tickets. Tickets Attach the top plate to the printer using only the supplied mounting hardware. Insert the printer with the top plate attached into the countertop cutout. Attach the power cord and the interface cable to the printer. Turn the power switch to the ON position. The printer is now ready for ticket stock to be loaded. Click here to return to > Table of Contents 24

26 APPENDIX B ETHERNET PARAMETERS General Each Boca Ethernet Printer is assigned a unique MAC address based in part on the printer's serial number. All Boca printers are factory configured in DHCP enabled mode. (Exceptions may be made by special request.) If the printer is unable to get a dynamic IP address from the customer's network in the allotted time period (about one minute), it will default to the address. You can select a different fixed IP address either via a Web Browser (see below) or the printer s control panel if your printer has an optional LCD display. ETHERNET Quick Installation Guide Connect the printer to your network (the IP address will be automatically assigned by your DHCP server) Load tickets into the printer Wait one minute to allow assignment of IP address Print a test ticket to identify the printer's IP address Ping the printer Open your web browser and type the printer s IP address to review its configuration page (see below image). If you are going to set a static IP address then you will need to change the ETHERNET setting to YES. If you experience any problems, please refer to the Ethernet section of our FGL Programming Guide. Click here to return to > Table of Contents 25

27 APPENDIX C WINDOWS USB DRIVER INSTALLATION GUIDE Do not connect the printer to your computer s USB port until advised to. Please contact your software provider to confirm if the use of our driver is required for their ticketing software. We recommend that the print driver is installed by either your system administrator or IT support staff. These print drivers are intended to be installed on Windows PC platforms X86, AMD64 or IA64. This includes Windows 7, 8.1, 10 and Server 2012 R2. To properly install the Boca Systems printer drivers, version , follow the steps outlined below. If you currently have another version of a BOCA print driver installed, start at step #1 to uninstall it first. If this is the first time installing the BOCA driver onto the host computer then start at step #4. On the host computer you are installing the drivers on you will want to make sure you have the following: Administrate privileges as most Windows systems require this do download drivers. Access to the internet as the host computer will need to gain access to the Microsoft website to download the necessary drivers. 1. Turn off the BOCA printer. 2. Go to the Devices and Printers window. In the below image there is one BOCA driver currently installed via its default name. 3. Right click on the driver icon and then click on Remove Devices. You will be prompted with Are You Sure, select Yes. If there is more than one BOCA print driver icon then repeat this step until all are removed. 26


28 4. Click on the link below to download the zip file to your host computer. You will be prompted if you want to Open, Save or Save as. Click on Save as and save the file to your hard drive. You will need to denote what file folder you saved the file to Go to the file folder you saved the zip file to and right click on bocaprinterdrivers.zip. Click on Extract All It will ask you to select a Destination and Extract Files, click on the Extract button. 6. The file folder that was extracted will automatically pop up. Double click on the BocaPrintDrivers folder to open it up. Right click on boca.bat and click on Run as administrator. 7. You will see two DOS command windows open. The first will be looking for an older version of ddkfglmon.dll file to delete so it may be replaced with new ones once the complete install process is done. The spooler will be stopped while the file is being deleted and will restart. If the PC does not have this file, a message will be displayed File not found. This is nothing to worry about as said file did not reside on the PC. 27


29 8. The second DOS command window will open to install the printer files as shown below. Notice the message Driver Package added successfully. This is how it is displayed on a 64 bit Windows PC. Press Enter key to close DOS command windows. On a 32 bit Windows PC it will look more like the below. Click the Next button and Finish button when prompted to complete the install of the driver package onto the PC. NOTE: IF INSTALLING ON WINDOWS 8 OR 10 GO TO PAGE 34. The below steps are for Windows 7 operating system only. 1. Connect the USB cable to the host computer and power on the printer. If you are connecting to the printer via Ethernet or Wi-Fi then skip to step # Depending on your system, a notice box similar to the following picture should appear. Click on the Click here for status. This will enable to see the status of the driver software installation. 3. The correct USB Printing Support and drivers will automatically install. The image below is of a 200dpi driver being installed on a Windows 7 system. The driver name will vary due to the printer s DPI and logic board level. Go to Page
30 STEPS 4 THROUGH 15 ARE FOR ETHERNET OR WI-FI CONNECTION ONLY 4. The self-test ticket that is printed when the printer s TEST button is pressed will show the IP address that the printer has. 5. Open up the Devices and Printer Menu. 6. Click on Add a Printer. When Add Printer Wizard show up, click on the Next button. Click on Add a local printer. 7. When the printer port menu comes up. Click on Create a new port: choose Standard TCP/IP Port. Click on the Next button. 8. Type in the IP address that is shown on the self-test ticket in the Hostname or IP address: field. When typing in the address don t include the leading zeroes (If IP= then type in ). You also have the option of typing in a specific Port name or leave as the IP address. Click on the Next button. The below screen may be seen (no action is needed). It may take a few minutes for the system to move on to the next screen. This will vary depending on system and Network speeds. 29
. Click on the Next button. 11. When the version driver menu comes up click on the Next button. 12.")
31 9. When the Additional Port information menu comes up click on the Next button. 10. When the Install print driver menu comes up: Under Manufacturer select Boca. Under Printers select Boca BIDI FGL 26/46 200DPI (latest version). Click on the Next button. 11. When the version driver menu comes up click on the Next button. 12. When the printer name menu comes up you may keep the default name or type in a different name. We recommend you keep the default name. Click on the Next button. Your driver name will vary from what is shown in the above image 30
32 13. When the Printer Sharing menu comes up you may choose to share this printer or not. Click on the Next button. 14. On the last menu you have the option to choose if you want to make the BOCA your default printer. Do not click on Print a test page. Click on the Finish button. Your driver name will vary from what is shown in the above image 15. The next page reviews how to print a windows test page to confirm the driver is communicating with the printer. 31


33 Windows 7 Test Page The following will guide you through doing a Windows test page to confirm the driver is communicating with the printer. You will want to make sure the printer has stock loaded and is able to print a self-test ticket when the TEST button is pressed. The printing of this ticket confirms that the printer is working properly mechanically. If the printer is not able to print a self-test ticket, then consult the 4.0 Installation section of the user manual ( ). 1. Go to the Devices and Printers page. 2. When the Devices and Printers page comes up, right-click on the BOCA driver that is being used. When the drop down window pops up, left click on Printer properties. Your selection of driver will vary from what is shown in the below images. 3. Once the driver s properties menu comes up click on the Print Test Page button. Your drive properties will vary from what is shown in the below. 32


34 4. The printer should proceed with printing out a Windows Test page. The printing of this ticket confirms the print driver is communicating with the printer. Below are some samples printouts for reference only and your test page may look different. Above is from a 200DPI FGL printer with 2 x 5.5 stock Above is from a 300DPI FGL printer with 3.25 x 6.5 stock If you were not able to install the BOCA print driver using the above steps, please take a screenshot of the printers and drivers dialog and attach it to the support form located at 33


35 Windows 8 and 10 Install Guide Do not connect the printer to your computer s USB port until advised to. 1. Connect the USB cable to the host computer and power on the printer. If you are connecting to the printer via Ethernet or Wi-Fi then skip to step # Depending on your system, a notice box similar to the below picture may appear. Click on the Click here for status (for Windows 7) or the icon (for Windows 8 or 10). This will enable to see the status of the driver software installation. Click on this 3. The correct USB Printing Support and drivers will automatically install. The image below is of a 300dpi driver being installed. The driver name may vary due to the printer s DPI and logic board level. Go to page 38 to print a Windows test page. STEPS 4 THROUGH 13 ARE FOR ETHRENT OR WI-FI CONNECTION ONLY. 4. The self-test ticket that is printed when the printer s TEST button is pressed will show the IP address that the printer has. 5. Below is one of many ways to get to the devices and printers menu. 1- Right-click the bottom corner of the Start screen. 2- Click All apps icon. 3 Click Control Panel. 6. When the Control Panel menu comes up, click on View devices and printers located under Hardware and Sound. 34

. It may take a few minutes for the system to move on to the next screen.")
36 7. Open up the Devices and Printer Menu. Click on Add a Printer to run the install wizard. Click on The Printer I want isn t listed. When the find a printer by other option menu comes up. Click on Add a printer using a TCP/IP address or hostname, click on the Next button 8. Type in the IP address that is shown on the self-test ticket in the Hostname or IP address: field. When typing in the address don t include the leading zeroes (If IP= then type in ). You also have the option of typing in a specific Port name or leave as the IP address. Uncheck the Query the printer and. Box, click on the Next button. 9. The below screen will be displayed (no action is needed). It may take a few minutes for the system to move on to the next screen. This will vary depending on system and Network speeds. 10. The host computer will move forward with detecting the IP address. Once detected the below menu will come up. Select standard network card and click next. 35

37 11. When the Install the print driver menu comes up select Boca under and the appropriate driver for your printer. Once done click on the next button. 12. When the below menu comes up click on next. 13. When the below menu comes up click on next. Your name may vary from what is shown below. 14. At this menu screen you have the option to share or not share the printer. Click on the next button. 36

38 15. On the last page click on the Print a test page button and a windows test page should be printed by the printer. This indicates the driver is communicating with the printer. Click on the Close button and then the Finish button. Page 39 shows typical printout. Your driver name may vary from what is shown above 37

39 Windows 8 or 10 Test Page The following will guide you through doing a Windows test page to confirm the driver is communicating with the printer. You will want to make sure the printer has stock loaded and is able to print a self-test ticket when the TEST button is pressed. The printing of this ticket confirms that the printer is working properly mechanically. If the printer is not able to print a self-test ticket, then consult the 4.0 Installation section of the user manual ( ). 16. Below is one of many ways to get to the devices and printers menu. 1- Right-click the bottom corner of the Start screen. 2- Click All apps icon. 3 Click Control Panel. 17. When the Control Panel menu comes up, click on View devices and printers located under Hardware and Sound. 18. When the Devices and Printers page comes up, right-click on the BOCA driver that is being used. When the drop down window pops up, click on Printer properties. Your selection of driver will vary from what is shown in the below images. 38


40 19. Once the driver s properties menu comes up click on the Print Test Page button. Your drive properties may vary from what is shown in the below images. 20. The printer should proceed with printing out a Windows Test page. The printing of this ticket confirms the print driver is communicating with the printer. Below are some samples printouts for reference only and your test page may look different. Above is from a 200DPI FGL printer with 2 x 5.5 stock Above is from a 300DPI FGL printer with 3.25 x 6.5 stock If you were not able to install the BOCA print driver using the above steps, please take a screenshot of the printers and drivers dialog and attach it to the support form located at Click here to return to > Table of Contents 39

41 APPENDIX D MAC DRIVER INSTALLATION GUIDE Do not connect the printer to your computer s USB port until step #13 Please contact your software provider to confirm if the use of our driver is required for their ticketing software. We recommend that the print driver is installed by either your system administrator or IT support staff. If you previously connected the printer or tried to install the print driver, take a screenshot of the printers and drivers dialog and attach it to the support form located at NOTE: You must have full Administrative Privileges in order to download and install drivers. 1. The BOCA MAC print drivers are designed only for FGL protocol printers. They will not work with PCL protocol printers. The self-test ticket that is printed when the TEST button is pressed will indicate the printer s protocol. FGL = FGL protocol and HP = PCL protocol 2. Click on the link below MAC drive link. boca_driver (mountain lion compatible) boca_driver (maverick, yosemite & higher versions) 3. Click on the below ICON when it shows up on your taskbar. Then click on boca_mountainlion.pkg (is mountain lion link was chosen or Boca Printer Drivers Signed.pkg (if mavericks link was chosen).. 4. Click on the Continue button. 5. Click on the Continue button. 40


42 6. Click on Continue button. 7. Click on Agree button. 8. Click on Install button. 9. If your system is administrator password protected then the below dialog box will appear. Enter in the appropriate Name and Password, click on OK button. 10. Click on the Close button. 11. Click on the System Preferences icon that is located on your taskbar. 41
, go to the next step. 14.")


43 12. Click on Print & Scan icon. + BUTTON 13. Connect the USB cable to the host computer; power on the printer; and go to step 20. If you are not connecting to the printer via a USB cable but via an IP address (Ethernet or Wi-Fi), go to the next step. 14. The IP address of the printer is found on the self-test ticket that is printed when the TEST button is pressed. 15. Click on the + button in the Printer & Scan menu that was shown in step #11 to manually add a printer. 16. When the add printer menu comes up, do the following. a. Click on the IP icon. b. Address: type in the IP address that is shown on the self-test ticket. c. Protocol: choose HP Jetdirect-Socket d. Name: you may keep the default name or change it. e. Use: choose Select Printer Software. f. In the Printer Software menu type boca in the search area. g. Choose the driver that matches your printer. The serial number tag will indicate Software (42, 44 or 46) and DPI (200, 300 or 600). h. Click on the OK button A B C F G D E H 17. Click on Add icon. Your IP address will be different than what is show in the above image. 18. The below box will show up while the driver is being installed, no action is needed. Your IP address will be different than what is show in the above image. 42


44 19. Under Output Quality: choose Supercell. Click on the OK button. The driver will finish installing, Go to step 20. Your IP address will be different than what is show in the above image. 20. The correct print driver would have automatically installed if connected via a USB cable. If manually installed, the name entered in step 16 will show up. The image below is of a 200dpi driver. The driver name will vary due to the printer s DPI and software level. Boca driver icon Your selection of drivers may vary from what is shown in above image The following will guide you through doing a Windows test page to confirm the driver is communicating with the printer. You will want to make sure the printer has stock loaded and is able to print a self-test ticket when the TEST button is pressed. The printing of this ticket confirms that the printer is working properly mechanically. If the printer is not able to print a self-test ticket, then consult the 4.0 Installation section of the user manual ( ). 21. Double Click on the BOCA print driver icon to open up the print queue. On the very top of the desktop screen clink on the Printer and then click on Print Test Page. Once the driver s properties menu comes up click on the Print Test Page button. Print Queue Your driver type may vary from what is shown in above image 22. The below box may show up on your screen prior to the printing of the Test page. The printing of this ticket confirms the print driver is communicating with the printer. Your driver type may vary from what is shown in above image 43

45 Below are some samples printouts for reference only and your test page may look different. Above is from a 200DPI FGL printer with 2 x 5.5 stock Above is from a 300DPI FGL printer with 3.25 x 6.5 stock If you were not able to install the BOCA print driver using the above steps, please take a screenshot of the printers and drivers dialog and attach it to the support form located at Click here to return to > Table of Contents 44
 and print drivers too.")

46 APPENDIX E INTERFACE TESTING A LEMUR-C Boca Systems, Inc. has developed a Windows based program that allows customers to communicate from a host computer to the printer over any interface (parallel, serial, USB, Ethernet) and print drivers too. The below program link is found on our website under the TECH SUPPORT/ REPAIRS section. For Apple/ Mac based systems see APPLE/ MAC BASED SYSTEM. WINDOWS BASED SYSTEM FOR WINDOWS 7, 8 AND WINDOWS 10 SYSTEM THE FOLLOWING WILL NEED TO BE DONE. Right click on the Boca Configure icon on your desk top. Then click on Properties. Click on the Compatibility tab. Click on the Run this program in compatibility mode for box so it is checked off. Set the compatibility for Windows XP (Service Pack 3). Click on the OK button. The following steps will guide you through using this program once it has been installed on your host computer. 1. Hook the BOCA printer to the host computer that you have the Configure program loaded onto. Make sure that the printer has stock loaded and is ready to go. A printer is ready to print when it is able to print out a self-test ticket by depressing the TEST button. If you are not able to get a self-test ticket then see section Installation to make sure you have the printer properly setup. 2. On your Window s desktop click on the Boca Configure icon. When the program opens for the first time it will ask you to update the program. Proceed with updating the program to level or higher. 3. Once the program is running, click on the Select A Printer drop-down arrow and you have two choices: Printer Interface - if you are connecting through a Parallel, Serial, Ethernet or USB-HID mode (go to step# 4) Print Driver - if you re connecting via a print driver (go to step # 6). 4. PRINTER INTERFACE: You will need to choose the interface connection that you have the BOCA printer hooked up to then click the OK button. Please note that USB-HID mode is only for a printer that is configured for USB HID mode. If you are connecting via the Ethernet port or Wi-Fi then in the IP Address box type in the printer s current IP address. The printer s current IP address is printed on the self-test ticket (when the test button is pressed). When typing in the address don t include the leading zeros (If IP= then type in ). Click on the Connect button. 45


47 5. Once connected the Printer State will show Printer Ready. Go to step #9. 6. PRINT DRIVER: You will need to select the FGL Driver mode you want (default is Spool-Uni). If you are not sure then leave in the default mode. If your ticketing application is not designed for this configuration then please go to PAGE 47 to see more detailed information on driver settings modes. The drivers will permanently stay in the selected mode. You may use this program to change the driver mode setting. 7. Choose the driver you are using for the BOCA printer. Once the driver is chosen click the OK button. Your selection of drivers will vary from what is shown in above image 8. Once connected the Printer State will show Printer Ready. 9. Click on the yellow FGL Test Ticket button. 10. Once the Test Ticket selection box comes up, click on the OK button to print out a ticket. 11. You may also print more than one ticket by changing the number of tickets you want to printer. 12. See page 49 for sample printout. Click on the HELP button at any time to open up the help window. 46
48 Boca Systems FGL Printer Driver Modes There are adjustments that can be made to driver options available to accommodate the various ticketing systems. As described below, there are three modes in which the Boca Systems FGL printer drivers will operate. 1. Spool-Uni Unidirectional mode: BIDI support is OFF and Spooler is ON. The printer monitor is turned off so no status is returned from the printer to the application. In this mode the current bidirectional drivers (version ) will operate just as the version standard drivers released in In this mode a printer can be set up as a shared network and be reached from web applications. This is the default mode the configure and test program will come up in. 2. Direct-BiDi Bidirectional Direct mode: BIDI support is ON and Spooler is OFF. This mode is used by ticketing systems that want to read all status generated by the FGL printer. With constant monitoring of the status, a ticketing system can always know the state of the printer before sending the next ticket. In this mode a printer can be used local to the PC only. 3. Spool-BiDi Bidirectional Spool mode: BIDI support is ON and Spooler is ON. This is the default mode for the newest Boca Systems drivers come up in if no changes are made. In this mode the spooler is used to write to the printer. This mode is required for applications that use a print monitor. A printer/port monitor is used to read status back from the printer and maintain some of the operating systems variables contained within the PRINTER_INFO_2 & PRINTER_INFO_6 structures. Ticketing systems can now read these variables to see when the printer is Ready, Jammed, Out of stock or Offline. In this mode a printer can be set up as a shared network printer and reached from web applications. 47

 customer program is used with print drivers or USB connection. You may download load the program that fits your needs.")
49 APPLE/ MAC BASED SYSTEM Boca Systems, Inc. has developed two programs that allow customer to the printer. One operates over USB/HID & Ethernet interfaces and the other if a print driver is used. The below programs are found on our website under the TECH SUPPORT/ REPAIRS section. For Mac use without printer driver ( customer program is used with USB/HID & Ethernet interfaces. For Mac use with printer drivers ( customer program is used with print drivers or USB connection. You may download load the program that fits your needs. To use these programs, you will need to download the zip file to your Apple/Mac based host computer. The following steps will guide you through using these programs once they have been installed on your host computer. 1. Hook the BOCA printer to the host computer that you have the Customer program loaded onto. Make sure that the printer has stock loaded and it ready to go. A printer is ready to print when it is able to print out a self test ticket by depressing the TEST button. If you are not able to get a self test ticket, refer to the user s manual to make sure you have the printer properly setup. 2. Go to your download folder and you will see the customer program you chose. Click on this folder to expand it to see all the files. 3. You will need to click on the appropriate application file to run the program. customer_mac for the USB/HID & Ethernet based program. cust_driver_mac for the print driver based. Proceed to step #5 4. Once the Customer MAC Test Tool is running, click on the Select Printer Interface drop-down arrow. You will want to choose the interface connection that you have the BOCA printer hooked up to then go to step #6. If you are connecting via the Ethernet port then in the IP Address box type in the printer s current IP address. The printer s current IP address is printed on the self-test ticket (when the test button is pressed). When tying in the address don t include the leading zeros (If IP= then type in ). Click on the Connect button. The Message section will indicate that connection has been made. Go to step #6 5. Once the Customer USB Drivers program is running, click on the Pick A Printer button. You will want to choose the driver you re using for the BOCA printer. Your selection of drivers will vary from what is shown in above image 48


50 6. Now click on the Select Printer Operation drop-down arrow and chose Print a FGL Test Ticket. Driver program Without Driver program 7. You may also print more than one ticket by changing the number of tickets you want to printer. See next page for sample printouts. Above sample FGL ticket was printed on a 2 x 5.5 (concert) size ticket. Your sample printout may vary due to ticket width and length. Click here to return to > Table of Contents 49
 or our customer program for MAC (see APPLE/ MAC BASED SYSTEM).")
51 APPENDIX F DOWNLOADING SOFTWARE COMMANDS Menu setting changes may be done by utilizing the software commands listed below. This is done using our configure and test program for Windows (see Appendix E ) or our customer program for MAC (see APPLE/ MAC BASED SYSTEM). If needed, the printer may be defaulted back to it s originally factory settings as follows. With the printer powered off hold down the TEST button and then power up the printer. Keep the TEST button held down for 10 seconds and release (the printer will reset at this time). Once you have your interface or driver selected then clicks on the Send Text button. For the MAC customer program under the Select Printer Operation choose Send Text Commands. Once the Text Data box comes up you type the text command in the Data input box. Then click on the OK button and the text data will be sent to the printer. You may click on the HELP button at any time to open up the help window. The CONFIGURATION TEST TICKET SUPPLEMENT section of the FGL programming guide shows all of the commands necessary to access the operator control panel functions. For a printer that has the cut opto located on the cutter assembly only (See section 8.1.6, the below software command changes the cut position. The # value range is from (0 to 35) and the printer will reset up receipt of the command. A value of 16 is the default value. <caa#> Darkness of printout may be adjusted, either by changing the print intensity or print speed setting. The command only needs to be sent to the printer once and the printer will reset upon receipt of said command. PRINT INTENSITY COMMAND - <pi#> This command sets the print intensity setting for the printer. The values can range as shown below: 1 light intensity 2 medium light intensity 3 normal intensity (default value) 4 medium dark intensity 5 short head life (should not be used) PRINT SPEED COMMAND - <ps#> This command sets the printing speed of the ticket. The values can range from 0-7. The slowest speed is 7. The slower the speed the darker the printing. A value of 3 is the default value. Click here to return to > Table of Contents 50
52 APPENDIX G ADHESIVE MEDIA When using the adhesive media in your BOCA printer the below setting changes need to be made to prevent premature peeling of the adhesive media. RIBBON mode - When a printer is first powered up it will auto measure the length of the ticket stock. This is normally done by feeding out one ticket and retracing it back in. With adhesive label there is a possibility of the label prematurely peeling or adhesive getting onto the print head during this process. Setting the print is RIBBON mode causes the printer to feed out a ticket to measure it but does not retract is back in. SKI mode - On the first ticket to be printed of a transaction, the printer will back the ticket up all the way to the leading edge of the ticket stock before it starts printing. When adhesive ticket stock is used there is a possibility of glue be pushed out onto the print head or platen. If enough adhesive gets onto the platen (rubber roller) then there is a possibly of the adhesive stock to wrap around the roller. Setting the printer to SKI mode will prevent the printer from backing up all the way to the leading edge of the ticket. When a printer is set for SKI mode you are not able to print on the fist.50 of the ticket. You may use the BOCA configure and test program to send the below software command to the printer to configure it for RIBBON and SKI mode (see Appendix F). This command string only needs to be sent once and the printer will reset upon receipt of it. <bce><rib><sme><bcd> If you need to print on the fist.50 of your adhesive media then you may set the printer just for RIBBON mode by sending the below command. By not having the printer is SKI mode will increase the risk of possible premature peeling of the media and glue build up. <rib> Click here to return to > Table of Contents 51
, it will first be necessary to setup the printer with information and security settings that match the settings of the IEEE 802.")

. The printing of a ticket via this program will confirm it is communicating with the printer.")
53 APPENDIX H CONFIGURE WI-FI CONNECTION To use the wireless capabilities of a printer equipped with the optional b wireless interface (Wi- Fi), it will first be necessary to setup the printer with information and security settings that match the settings of the IEEE b compatible wireless server/router you are connecting to. Printer purchased after April-2014 is able to support IEEE g compatible wireless server/router. Our Wi-Fi printer is designed to work with a wireless router. To initially configure the wireless settings it will be necessary to connect to the printer via the Parallel, RJ12, USB or Ethernet (if so equipped) interface using a Windows or MAC based system. This is done using our Configure and Test program for Windows or Customer program for MAC (see Appendix E). The printing of a ticket via this program will confirm it is communicating with the printer. To use the wireless capabilities in FGL 26/46 model printers equipped with a wireless interface, it will first be necessary to setup the printer with information and security settings that match the wireless settings of the local wireless server/router. To configure the printer with the correct security settings, it is necessary to acquire these settings directly from the wireless server/router or see your network administrator. Also to initially configure the wireless settings it will be required to temporarily connect a cable between the printer and the host computer. We recommend that the Wi-Fi be configured by either your system administrator or IT support staff. The below steps walk you through the Wi-Fi setup in the Infrastructure mode. The Wi-Fi router must be configured to support an IEEE b Wi-Fi device. Printers manufactured after April 2014 are able to support an IEEE g Wi-Fi device. 1. The printer will need to be connected to the host computer via a cable (parallel, serial, USB or optional Ethernet if your printer has it. For initial install the printer must be as close as possible to the Wi-Fi router itself. This will ensure maximum single strength. Once you have confirmed the Wi-Fi is operational, the printer may be moved to its desired location. 2. You will want to confirm you are able to print a ticket using our Configure and Test program for Windows or Customer program for MAC (see Appendix E). The printing of a ticket via this program will confirm it is communicating with the printer. 3. Click on the Setup Wi-Fi button. 4. When the Configure Printer Wi-Fi and Security menu comes up you have a few choices. a. Wireless Mode Infrastructure (using a Wi-Fi network router) or Ad Hoc (peer to peer). b. Disable Wireless You would choose this if you wanted to disable the Wi-Fi Enable with Static IP This would be for networks that require a static IP address. Enable with DHCP IP - Automatically attempts to get an IP address from Local Server (this is the most common one and the one we will be using for the rest of the steps). 52


54 5. You will need to enter the SSID value. The Service Set Identifier is a 1 to 32 byte string. This normally would be the name of the Wi-Fi router you are connection to. 6. Security Mode: you will need to choose the security mode that is appropriate for your WiFi router. Disable Allows the user to communicate through the wireless network without any security encryption involved. WPA Go to Step 7 WPA2 Go to Step 7 WEP Go to Step 8 7. WPA and WPA2 Personal Security Mode Allows the user to communicate through the network using WPA or WPA2 Personal wireless encryption. When this security encryption mode is chosen it will be required to enter the WPA Shared Key for the local wireless network. Some networks also enforce the use of an optional key value. The optional prompt field is provided for those networks. Finally click on OK to have these values transmitted to the printer (through the cable). The printer will reset and upon re-initialization it will establish wireless communication with the local network. The handshaking involved in establishing wireless communication can take up to 30 seconds. Go to step #9. 53

55 8. WEP Security Mode Allows the user to communicate through the network using WEP wireless encryption. With WEP one can select 64 bit or 128 bit encryption. When the security encryption mode is chosen it will be required to enter the Pass Phrase for the local wireless network. Some networks also enforce the use of a default transmit key. If needed select one, else leave it set to 1. Next the four security key values will have to be entered to match those of the local network. Finally click on OK to have these values transmitted to the printer (through the cable). The printer will reset and upon re-initialization it will establish wireless communication with the local network. The handshaking involved in establishing wireless communication can take up to 30 seconds. Go to step #9. 9. The printer will reset. Depending on your operating system, this rest may happen less than 60 seconds or as long as 5 minutes. Upon re-initialization it will establish wireless communication with the local network. Depending on your network, a connection can be established in less than 60 seconds or as long as 5 minutes. If it fails then see item #13 on the Troubleshooting Guide. 10. Press the TEST button to print out a self-test ticket. This ticket will show the IP address that was acquired by the printer. You may use the configuration and test program to test this interface connection. You would run the program like you are connecting to an Ethernet printer and enter in the IP address that is shown on the self-test ticket. Please go to the link below if you need assistance in configuring your Wi-Fi connection. If your printer has an options Ethernet port then this port will be disable while the printer is in Wi-Fi mode. The printer is not able to run both Ethernet and Wi-Fi at the same time. If you need to go back to using the Ethernet port then the Wi-Fi needs to be disable. This may be done by repeating the above procedure but at step # 4 choosing Disable Wireless. Click here to return to > Table of Contents 54
LEMUR -Z KIOSK PRINTERS Operator s Manual
 LEMUR -Z KIOSK PRINTERS Operator s Manual Rev. A 11.01.16 Table of Contents Page FCC Notice & Warranty Information 2 1.0 Unpacking the printer Introduction 3 2.0 Introduction 4 3.0 Important Safety Information
LEMUR TICKET PRINTERS Operator s Manual
 LEMUR TICKET PRINTERS Operator s Manual Lemur Lemur-S Lemur-2 Lemur-K Lemur-2K Lemur-R RevB: 10.20.17 Table of Contents Page FCC Notice & Warranty Information 2 1.0 Introduction 3 2.0 Unpacking the printer
Lemur-Z, Lemur-X Manual
 Lemur-Z, Lemur-X Manual Lemur-Z/Lemur-X Kiosk Ticket Printers Operator s Manual Rev: 10.11.17 www.tls-bocasystems.com Table of Contents Page FCC Notice & Warranty Information 2 1.0 Unpacking the printer
LEMUR-MF TICKET PRINTERS Operator s Manual
 LEMUR-MF TICKET PRINTERS Operator s Manual RevA: 09.16.14 Table of Contents Page FCC Notice & Warranty Information 2 1.0 Introduction 3 2.0 Unpacking the printer 3 3.0 Important Safety Information 4 4.0
Do not connect the printer to your computer s USB port until advised to.
 1065 South Rogers Circle Boca Raton, FL 33487 Phone (561) 998-9600 Fax (561) 998-9609 Windows Driver Installation Guide Do not connect the printer to your computer s USB port until advised to. Please contact
Micro Ghost Ticket Printer Users Manual
 Micro Ghost Ticket Printer Users Manual BOCA SYSTEMS, INC. 1996 Boca Systems, Inc. All rights reserved. Under the copyright laws, this manual may not be copied, in whole or in part, without the written
Lemur Spare Parts List
 Effective January, 206 Item Part Number # Lemur Spare Parts List Description 422557-25 Cable Ribbon, Thermal Head 2 42088Z- Enclosure, Lemur 3 423552-L Cutter Assembly (BC3) all model Lemurs except Lemur-R
Under the copyright laws, this manual may not be copied, in whole or in part, without the written consent of BOCA.
 Users Manual BOCA SYSTEMS, INC. 1996 Boca Systems, Inc. All rights reserved. Under the copyright laws, this manual may not be copied, in whole or in part, without the written consent of BOCA. Every effort
FSP 42/44/46 Flight Strip Printer
 FSP 42/44/46 Flight Strip Printer Technical Manual Revision D: 04.18.08 BOCA SYSTEMS, INC. 2008 Boca Systems, Inc. All rights reserved. Under the copyright laws, this manual may not be copied, in whole
Lemur Spare Parts List
 Lemur Spare Parts List Effective January, 208 Item # Part Number Description 422557-25 Cable Ribbon, Thermal Head (for 2003, 3003, 2004 & 3004 print heads only) A 42400 Cable, Thermal Head (for 200C3 print
Do not connect the printer to your computer s USB port until step #10
 1065 South Rogers Circle Boca Raton, FL 33487 Phone (561) 998-9600 Fax (561) 998-9609 Windows Driver Installation Guide Do not connect the printer to your computer s USB port until step #10 Please contact
FLIGHT STRIP PRINTER
 MODEL FSP 41-300 FLIGHT STRIP PRINTER Maintenance and Users Manual 08.27.98 Follow best commercial established practices while operating and maintaining the Flight Strip Printer. This includes, but it
FSP 42 Flight Strip Printer
 FSP 42 Flight Strip Printer Technical Manual Revision C: 08.16.01 BOCA SYSTEMS, INC. 2001 Boca Systems, Inc. All rights reserved. Under the copyright laws, this manual may not be copied, in whole or in
Removal and Installation8
 8 Screw Types 8-4 Top Cover Assembly 8-5 Left Hand Cover 8-6 Right Hand Cover 8-10 Front Panel Assembly 8-14 Left Rear Cover 8-15 Right Rear Cover 8-16 Extension Cover (60" Model only) 8-17 Media Lever
Table of Contents. Unpacking and Inspection Setup Loading the Media Mount the Printer on the Wall... 16
 WPL25/WHC25 Table of Contents Unpacking and Inspection... 1 Setup... 5 Loading the Media... 6 Mount the Printer on the Wall... 16 LED and Button Functions... 17 Troubleshooting... 18 Unpacking and Inspection
Do not connect the printer to your computer s USB port until step #10
 1065 South Rogers Circle Boca Raton, FL 33487 Phone (561) 998-9600 Fax (561) 998-9609 Windows Driver Installation Guide Do not connect the printer to your computer s USB port until step #10 Please contact
PNP415/417 POP 'N PLUG WITH CUSTOM TABLETOP SURFACE USER'S GUIDE
 PNP415 PNP417 with tabletop cutout installed. MANUAL PART NUMBER: 400-0427-002 PNP415/417 POP 'N PLUG WITH CUSTOM TABLETOP SURFACE USER'S GUIDE TABLE OF CONTENTS Page PRECAUTIONS / SAFETY WARNINGS... 2
SERIES 4600 Ethernet Visual-Pager Display INSTALLATION and SPECIFICATION GUIDE. Manual No. D Revision Date: 08/2016 Control: 1.
 SERIES 4600 Ethernet Visual-Pager Display INSTALLATION and SPECIFICATION GUIDE Manual No. D4600-7010 Revision Date: 08/2016 Control: 1.0 Microframe Corporation 604 South 12th Street Local: 918-258-4839
Cutter Option Installation Instructions
 This kit includes the parts and documentation necessary to install the cutter option on the Zebra XiII, XiIII, and XiIIIPlus-Series printers. NOTE: The Cutter Option is not available for the 96XiIII. Adding
TT230SM THERMAL TRANSFER PRINTER USER S MANUAL
 TT230SM THERMAL TRANSFER PRINTER USER S MANUAL Operations Overview Unpacking and Inspection This printer has been specially packaged to withstand damage during shipping. Please carefully inspect the packaging
MVPplus Quick Reference Guide
 MVPplus Quick Reference Guide Use this guide to operate your printer on a daily basis. For more detailed information, refer to the User Guide. Contents External View...........................................................
Copyright 2013 Esselte Leitz GmbH & Co. KG. All rights reserved.
 Copyright 2013 Esselte Leitz GmbH & Co. KG. All rights reserved. Mac, ipad, AirPrint, and OS X are trademarks of Apple Inc., registered in the U.S. and other countries. Google and Google Cloud Print are
Setting up an Intermec PM43 printer with InterDriver version M-0 or newer
 Setting up an Intermec PM43 printer with InterDriver version 7.3.5 M-0 or newer Setting up a bar code printer with 7.3.5 M-0 Intermec drivers or newer 1 INITIAL PRINTER CONFIGURATION When the printer is
USB Port Hub HO
 USB 2.0 7-Port Hub INSTRUCTION MANUAL HO97916 www.jascoproducts.com Table of Contents I. INTRODUCTION 3 II. OVERVIEW 4 III. SAFETY INSTRUCTIONS 5 IV. POWER MODE SETTING 6 V. HUB STAND ASSEMBLY 7 VI. HARDWARE
imac Intel 21.5" EMC 2389 Stand Replacement
 imac Intel 21.5" EMC 2389 Stand Replacement Replace a broken or cosmetically unappealing stand on the imac 2389 21.5 Written By: Aaron Cooke ifixit CC BY-NC-SA www.ifixit.com Page 1 of 30 INTRODUCTION
Networking the printer
 Networking the printer General networking Networking overview A network is a collection of devices such as computers, printers, Ethernet hubs, wireless access points, and routers connected together for
Windows Driver Installation Guide
 Windows Driver Installation Guide Do not connect the printer to your computer s USB port until step #10 Please contact your software provider to confirm if the use of our driver is required for their ticketing
Replacing the Power Supply
 APPENDIX B This appendix includes information on how to replace the power supply for the Cisco AS550XM universal gateway and contains the following sections: Safety Recommendations, page B-1 Required Tools
Secured Series: Hub Plus Kit Single Door Controller Package Installation Manual
 Secured Series: Hub Plus Kit Single Door Controller Package Installation Manual This package is designed to simplify the connections to our Secured Series Hub Plus Controller. This will translate into
Installation Job Aid for VSP 4850GTS
 Installation Job Aid for VSP 4850GTS Notices Release 6.1.0.0 NN46251-308 Issue 02.01 November 2017 Notice paragraphs alert you about issues that require your attention. The following paragraphs describe
CANADIAN D.O.C. WARNING
 Each product and program carries a respective written warranty, the only warranty on which the customer can rely. Avery Dennison Corp. reserves the right to make changes in the product, the programs, and
Installation Job Aid for Ethernet Routing Switch 3600 Series
 Installation Job Aid for Ethernet Routing Switch 3600 Series Notices NN47213-303 Issue 03.01 November 2017 Notice paragraphs alert you about issues that require your attention. Following are descriptions
Industrial 5-Port Fast Ethernet Switches with SFP Slot and optional 4 PoE PSE Ports. Basic Model: KSD-541 PoE Model: KSD-541-P. Installation Guide
 Industrial 5-Port Fast Ethernet Switches with SFP Slot and optional 4 PoE PSE Ports Basic Model: KSD-541 PoE Model: KSD-541-P Installation Guide DOC.080104-1- (C) 2008 KTI Networks Inc. All rights reserved.
APES-14 HD-6500 & HD-7000 Version Operator s Training Manual
 APES-14 HD-6500 & HD-7000 Version Operator s Training Manual Issue A1 09/03 PDI Part # 900600 Performance Design Inc. 2350 East Braniff St. Boise Idaho 83716 This manual contains very important safety
Written By: Walter Galan
 imac Intel 21.5" EMC 2428 CPU Replacement Replace the CPU in your imac Intel 21.5" EMC 2428. Written By: Walter Galan ifixit CC BY-NC-SA www.ifixit.com Page 1 of 33 INTRODUCTION Use this guide to upgrade
Junos WebApp Secure 5.0 Hardware Guide
 Junos WebApp Secure 5.0 Hardware Guide Junos WebApp Secure 5.0 Hardware Guide This document contains a specification for the MWS1000 hardware appliance, as well as instructions for installation into a
Nexa PX700IIS Thermal Receipt Printer. User Manual. P a g e 1
 Nexa PX700IIS Thermal Receipt Printer User Manual P a g e 1 Table of Contents Safety Notice... 3 Available Functions... 3 Main Features... 4 Technical Specifications... 4 Unpacking the Printer... 5 Connection
Diamond Cabinet Slant Top Users Manual Revision 1.0
 Diamond Cabinet Slant Top Users Manual Revision 1.0 1 Table of Contents 1.1 Sections 1 Table of Contents...2 1.1 Sections...2 1.2 List of Figures...3 1.3 List of Tables...3 2 Revision History...5 3 Overview...6
BS 181 SINGLE CHANNEL POWER SUPPLY USER MANUAL
 BS 181 SINGLE CHANNEL POWER SUPPLY USER MANUAL Issue 2011 ASL Intercom BV DESIGNED & MANUFACTURED BY: ASL Intercom B.V. Zonnebaan 42 3542 EG Utrecht The Netherlands Tel: +31 (0)30 2411901 Fax: +31 (0)30
SPECIAL APPLICATION MANUAL PART NUMBER: TNP121UL. Tilt N Plug Jr. Table Top Interconnect Box USER'S GUIDE
 MANUAL PART NUMBER: 400-0429-001 TNP121UL Tilt N Plug Jr. Table Top Interconnect Box USER'S GUIDE INTRODUCTION Your purchase of the UL Listed TNP121UL, Tilt N Plug Jr. Interconnect Box is greatly appreciated.
OWC Mercury Helios 2 ASSEMBLY MANUAL & USER GUIDE
 OWC Mercury Helios 2 ASSEMBLY MANUAL & USER GUIDE TABLE OF CONTENTS 1. INTRODUCTION...1 1.1 MINIMUM SYSTEM REQUIREMENTS 1.1.1 Apple Mac Requirements 1.1.2 PC Requirements 1.1.3 Supported PCIe Cards 1.2
User's Guide QL-700. ENG ver.a.
 User's Guide QL-700 Be sure to read and understand this guide before using the machine. We recommend that you keep this guide nearby for future reference. www.brother.com ENG ver.a Thank you for purchasing
Table of Contents List of Equipment General Information Safety Precautions Device Installation...
 Table of Contents Table of Contents.... List of Equipment... 3. General Information... 4 3. Safety Precautions... 6 3. Device Installation... 7 6. Device Operation... 0 7. Statement of Limited Warranty...
High Intensity Invisible IR Digital Scouting Camera
 High Intensity Invisible IR Digital Scouting Camera User s Manual Model # KP10B8-7 Includes Camera Unit 2 - Bungee Cords User Manual page 1 Features RESOLUTION MAX: 10 MP FLASH FLASH RANGE SENSOR SENSOR
Please read this guide before using the printer
 PD-450/450W/480/480W User Guide Please read this guide before using the printer Safety Precautions Safety Precautions Denotes the possibility of serious injury or death Use only recommended power sources.
Product names mentioned in this manual may be trademarks or registered trademarks of those products.
 FCC Statement The FCC (Federal Communications Commission) restricts the amount of radio frequency emission and radiation coming from computer equipment. The equipment introduced in this manual has been
DOT MATRIX PRINTER SP6000 SERIES
 DOT MATRIX PRINTER SP6000 SERIES Hardware Manual < Approval: CEL > Trademark acknowledgments SP6000 : Star Micronics Co., Ltd. Notice All rights reserved. Reproduction of any part of this manual in any
MONARCH 9416 XL QUICK REFERENCE
 MONARCH 9416 XL QUICK REFERENCE This Quick Reference contains ribbon loading, supply loading, and general care, maintenance, and troubleshooting procedures for the 9416 XL Thermal Direct and 9416 XL Thermal
CNK600 Cable-Nook Interconnect Box
 CNK600 Cable-Nook Interconnect Box Welcome! We greatly appreciate your purchase of the CNK600 Cable-Nook Interconnect Box. We are sure you will find it reliable and simple to use. Superior performance
Smartphone Photo Printer
 Smartphone Photo Printer Safety Precautions Safety Precautions Denotes the possibility of serious injury or death Please keep you away at least 20cm distance from printer when printing. Use only recommended
Perle MCR200 Installation Guide
 Perle MCR200 Installation Guide P/N 5500322-10 Introduction The Perle MCR200 Chassis is a 2 slot chassis able to accommodate up to 2 Perle Media Converter modules or 1 Media Converter Module and an MCR-MGT
Mercury Helios ASSEMBLY MANUAL & USER GUIDE
 Mercury Helios ASSEMBLY MANUAL & USER GUIDE TABLE OF CONTENTS INTRODUCTION...1 1.1 MINIMUM SYSTEM REQUIREMENTS 1.1.1 Apple Mac Requirements 1.1.2 PC Requirements 1.1.3 Supported PCIe Cards NOTE: Boot Camp
Dell Inspiron XPS and Inspiron 9100 Service Manual
 Dell Inspiron XPS and Inspiron 9100 Service Manual Dell Inspiron XPS and Inspiron 9100 Service Manual Before You Begin Memory Module, Mini PCI Card, and Devices System Components Subwoofer Bluetooth Card
High Power over Ethernet Midspans PD Port Model PD Port Model
 Data and Power on a Single Line High Power over Ethernet Midspans PD-8006-6 Port Model PD-8012-12 Port Model User Guide Notice The information contained herein is believed to be accurate and reliable at
Bluetooth Ceiling Fan Control with App Owner's Manual
 READ AND SAVE THESE INSTRUCTIONS 0 Model Number RCBT00 Bluetooth Ceiling Fan Control with App Owner's Manual -Speed Hand Held Transmitter Single Light Supplied with Receiver Includes Light Dimming Selection
Broadband Automatic Disconnect Switch. User Manual
 Reset/Test Primary/ Primary Broadband Automatic Disconnect Switch User Manual Local Power Remote Pwer Local 63V Fault Secondary Select Secondary 220V Normal 990-1929 09/2004 Introduction Introduction
Installation Manual. Model: HILU Ultra HD Interactive Flat Panel Display
 Installation Manual Model: HILU750 '' Ultra HD Interactive Flat Panel Display QUICK SETUP GUIDE For further information, see the User Manual. Please contact HITACHI directly if you have questions on the
High Intensity Invisible IR Digital Scouting Camera
 High Intensity Invisible IR Digital Scouting Camera User s Manual Model # TR8B1-7 Includes Camera Unit 2 - Bungee Cords User Manual page 1 Features RESOLUTION MAX: 8 MP FLASH FLASH RANGE SENSOR SENSOR
User Manual. 1U LCD Keyboard Drawer. KwikDraw - A Series. Manual. IT and Instrumentation for industry. - With KVM options - 15", 17, 19 screen size
 User Manual 1U LCD Keyboard Drawer KwikDraw - A Series - With KVM options - 15", 17, 19 screen size 1.1 Important Safeguards Please read all of these instructions carefully before you use the device. Save
Installation Job Aid for VSP 4450GTX-HT- PWR+
 Installation Job Aid for VSP 4450GTX-HT- PWR+ Notices Release 6.1.0.0 NN46251-305 Issue 02.01 November 2017 Notice paragraphs alert you about issues that require your attention. The following paragraphs
Monarch 9414 Printer. TC9414EM 7/99 Rev. AB 1999 Monarch Marking Systems, Inc. All rights reserved.
 Monarch 9414 Printer TC9414EM 7/99 Rev. AB 1999 Monarch Marking Systems, Inc. All rights reserved. Each product and program carries a respective written warranty, the only warranty on which the customer
MC 11 EB-2 Power supply cabinet with external bus, AC version
 MC 11 EB-2 Power supply cabinet with external bus, AC version USER/MAINTENANCE MANUAL 1 SLOT 0 SLOT 1 SLOT 2 SLOT 3 SLOT 4 SLOT 5 SLOT 6 SLOT 7 SLOT 8 SLOT 9 SLOT 10 SLOT 11 EB-2 (a) MC11 (b) (c) Figures
Unpack the package contents and verify that you have the following: Model PA301 Network Card Telephone cable (10 ft) Resource CD
 Resource CD") Start Here Instructions in this guide are for users of Windows 95 and Windows 98 who are installing the Model PA301 Network Card. For instructions on installing and verifying the Windows network driver,
Start Here Instructions in this guide are for users of Windows 95 and Windows 98 who are installing the Model PA301 Network Card. For instructions on installing and verifying the Windows network driver,
Installation Manual for D1800 Series High Power PoE Midspan Power Supply
 Installation Manual for D1800 Series High Power PoE Midspan Power Supply Dycon Power Solutions Ltd Tel: +44 (0)1443 471 900 Unit A - Cwm Cynon Business Park Mountain Ash CF45 4ER - UK www.dyconpower.com
Bluetooth Shielding Instructions
 Mac mini 2012 Bluetooth Shielding Instructions 1 INTRODUCTION 1.1 STATIC PRECAUTIONS 1.2 TOOLS REQUIRED 2 DISASSEMBLY 3 SHIELDING 4 FAQ 4.1 FAQ 5 CUSTOMER SERVICE 5.1 Before Contacting Customer Service
USER GUIDE. AXIS T8120 Midspan 15 W 1-port ENGLISH
 USER GUIDE AXIS T8120 Midspan 15 W 1-port ENGLISH Legal Considerations Video and audio surveillance can be prohibited by laws that vary from country to country. Check the laws in your local region before
AURA SSD FOR MAC PRO. Installation Guide
 AURA SSD FOR MAC PRO Installation Guide CONTENTS Introduction... 1 1.1 System Requirements 1.2 Package Contents 1.3 About This Manual Installation... 2 2.1 Preparing the Mac Pro 2.2 Installing the Aura
Mercury Elite Pro mini ASSEMBLY MANUAL & USER GUIDE
 Mercury Elite Pro mini ASSEMBLY MANUAL & USER GUIDE TABLE OF CONTENTS 1. INTRODUCTION... 1 1.1 MINIMUM SYSTEM REQUIREMENTS 1.1.1 Mac Requirements 1.1.2 PC Requirements 1.2 PACKAGE CONTENTS 1.3 ABOUT THIS
THERMAL PRINTER PR-TB4
 THERMAL PRINTER PR-TB4 Hardware Manual Federal Communications Commission Radio Frequency Interference Statement This device complies with Part 15 of the FCC Rules. Operation is subject to the following
PCI Serial Card 2 Port RS-422/RS-485 PCI Serial Card with Terminal Block Connectors PCI2S422TB Instruction Manual Actual product may vary from photo
 PCI Serial Card 2 Port RS-422/RS-485 PCI Serial Card with Terminal Block Connectors PCI2S422TB Actual product may vary from photo FCC Compliance Statement This equipment has been tested and found to comply
Safety and Maintenance You can use your Tablet PC under a wide range of environmental conditions. However, to ensure long use and continued high
 EVG7 DL46 Getting Started Congratulations on your purchase of a Tablet PC. The Tablet PC is a fully functional PC with built-in LAN, and wireless connectivity. With your Tablet PC you will be able to organize
TABLE OF CONTENTS INTRODUCTION...1 DEVICE SETUP...4 SUPPORT RESOURCES...9
 TABLE OF CONTENTS INTRODUCTION...1 1.1 Minimum System Requirements 1.2 Package Contents 1.3 About This Manual 1.4 Rear View 1.4.1 Rear Features 1.5 Usage Notes DEVICE SETUP...4 2.1 Quick Start 2.2 Assembly
Quick Installation Guide Direct and Transfer Thermal Printer
 Quick Installation Guide Direct and Transfer Thermal Printer Overview The enclosed printer is currently comprised of two models: 203dpi (dots per inch) model 300dpi (dots per inch) model Unpacking 1. Remove
User Manual. N Series 1U LCD Keyboard Drawer 17", 19" screen size. Models NRKD-KVM-17 / 19 Series. Models NRKDS-KVM-17 / 19 Series
 User Manual N Series 1U LCD Keyboard Drawer 17", 19" screen size Models NRKD-KVM-17 / 19 Series - With KVM options Models NRKDS-KVM-17 / 19 Series - With KVM Options - 1U 17", 19" screen size - Designed
Dell XPS 14z Owner s Manual
 Dell XPS 14z Owner s Manual Computer model: L412z Regulatory model: P24G series Regulatory type: P24G001 Notes, Cautions, and Warnings NOTE: A NOTE indicates important information that helps you make better
NANOPTIX HEAVY DUTY KIOSK REGULAR CUTTER PRINTER Thermal Print Mechanism Replacement
 NANOPTIX HEAVY DUTY KIOSK REGULAR CUTTER PRINTER Thermal Print Mechanism Replacement First Edition: December 2005 Last Revision: December 2005 Document # 103518-00 Legal Notices Disclaimer Information
OPERATOR MANUAL. OSD2053P SERIES MICRO 10/100Base-T to 100Base-X MEDIA CONVERTER. WITH PoE SOURCE
 OPERATOR MANUAL OSD2053P SERIES MICRO 10/100Base-T to 100Base-X MEDIA CONVERTER WITH PoE SOURCE INDEX 1 1 TECHNICAL SUMMARY... 4 1.1 BRIEF DESCRIPTION... 4 1.1.1 OVERVIEW... 4 1.1.2 APPLICATIONS... 4
Removing and Replacing Parts
 Removing and Replacing Parts Preparing to Work Inside the Computer Recommended Tools Screw Identification System Components Hard Drive Fixed Optical Drive Media Bay Devices Memory Modules Mini PCI Card
FCC COMPLIANCE STATEMENT FOR AMERICAN USERS
 FCC COMPLIANCE STATEMENT FOR AMERICAN USERS This equipment has been tested and found to comply with the limits for a CLASS A digital device, pursuant to Part 15 of the FCC Rules. These limits are designed
AX3000 Platine Terminal Ethernet TCP/IP
 AX3000 Platine Terminal Ethernet TCP/IP Model 80 Installation Guide January 2012 - Ref: I80E0922-2 Model AX3000/M80 Type EA The reproduction of this material, in part or whole, is strictly prohibited.
CNK200 Cable-Nook Interconnect Box
 CNK200 Cable-Nook Interconnect Box Welcome! We greatly appreciate your purchase of the CNK200 Cable-Nook Interconnect Box. We are sure you will find it reliable and simple to use. Superior performance
Assembly Manual & User Guide
 Assembly Manual & User Guide TABLE OF CONTENTS 1. INTRODUCTION... 1 1.1 MINIMUM SYSTEM REQUIREMENTS 1.1.1 Apple Mac Requirements 1.1.2 PC Requirements 1.2 PACKAGE CONTENTS 1.3 ABOUT THIS MANUAL 1.4 FRONT
Now with Picture Memory
 Intrasonic Technology, Inc. Color Video Door Phone / Intercom Installer s Manual Model No.V304KIT-R Now with Picture Memory Please read this manual carefully before the products are installed.technical
Thank you for selecting UTC RETAIL s innovative Model 1170 Point of Sale solution!
 1170 POS SYSTEM 1170 INSTALLATION GUIDE Thank you for selecting UTC RETAIL s innovative Model 1170 Point of Sale solution! This Installation Guide will help you efficiently install the 1170 POS. The document
User Guide. DOCSIS 3.0 High Speed Cable Modem TC7650 REV
 User Guide DOCSIS 3.0 High Speed Cable Modem TC7650 REV1.1.0 1910011895 Contents About This Guide..................................................... 1 Chapter 1. Get to Know Your Modem................................
Omnitron Systems Technology, Inc. 1. iconverter. 19-Module Managed Power Chassis User s Manual
 Omnitron Systems Technology, Inc. 1 iconverter 19-Module Managed Power Chassis User s Manual 27 Mauchly, #201, Irvine, CA 92618 Phone: (949) 250-6510; Fax: (949) 250-6514 2 Omnitron Systems Technology,
DATA DOUBLER. Apple Mac mini (2009)
") DATA DOUBLER Apple Mac mini (2009) TABLE OF CONTENTS Introduction... 1 1.1 Hardware Compatibility 1.1.1 Host Computer Compatibility 1.1.2 Drive Compatibility 1.2 Package Contents 1.3 About This Manual
DATA DOUBLER Apple Mac mini (2009) TABLE OF CONTENTS Introduction... 1 1.1 Hardware Compatibility 1.1.1 Host Computer Compatibility 1.1.2 Drive Compatibility 1.2 Package Contents 1.3 About This Manual
TM-SERIES TABLE MOUNTING BRACKETS USER S GUIDE
 MODEL TM1278 FOR THE UNITED STATES SHOWN ABOVE MANUAL PART NUMBER: 400-0061-003 PRODUCT REVISION: 0 TM-SERIES TABLE USER S GUIDE INTRODUCTION TABLE OF CONTENTS Thank you for purchasing the TM-Series Mounting
Encoder Firmware V User s Manual. Outdoor PTZ Camera Hardware Manual KCM /05/09.
 Encoder Firmware V4.06.09 User s Manual Outdoor PTZ Camera Hardware Manual KCM-8211 2013/05/09 1 Table of Contents Precautions... 3 Introduction... 4 List of Models... 4 Package Contents... 5 Safety Instructions...
RJ-2030/2050/2140/2150
 LBF85700 Unpacking Your Printer Check that the package contains the following before using your printer: RJ-030/050/40/50 Quick Setup Guide English Printer Rechargeable Li-ion Battery Belt Clip Thank you
DoorEye Camera MDOOREC101012E
 DoorEye Camera MDOOREC101012E 1 Package Contents What is included: 2.8 TFT LCD monitor, Outdoor camera, Bracket, Connector, Installation stud, Wrench, Lithium battery, Screws x 4, Theft deterent stickers
Startup Guide C01
 Startup Guide 4012988-00 C01 Startup Guide English Where to Find Information........................ 2 Safety Instructions.............................. 4 Important Safety Instructions...........................
USB Raven Port USB 3.1, 200m Multimode Fiber Point-to-Point Extender System User Guide
 USB 3-2-1 Raven 3124 4-Port USB 3.1, 200m Multimode Fiber Point-to-Point Extender System User Guide Thank you for purchasing the USB 3-2-1 Raven 3124. Please read this guide thoroughly. This document applies
ASTRO UW-1C and RW-1C LABEL PRINTER UNWINDER & WINDER
 ASTRO UW-1C and RW-1C LABEL PRINTER UNWINDER & WINDER OPERATOR MANUAL ASTRO MACHINE CORP. 630 Lively Blvd. Elk Grove Village, IL 60007 Phone: (847) 364-6363 Fax: (847) 364-9898 www.astromachine.com SAFETY
TD2100 Electric Gummed Tape Dispenser Owner s Manual
 TD2100 Electric Gummed Tape Dispenser Owner s Manual Marsh Shipping Supply Co. LLC 926 McDonough Lake Road Collinsville, IL 62234 www.msscllc.com Customer Service Phone: (618)-343-1006 Fax: (618)-343-1016
Gateway Profile 4 service guide
 Gateway Profile 4 service guide Customizing Troubleshooting Contents Replacing Components in Your Gateway Profile 4.................. 1 About this guide.....................................................
Basketball Shot Clock Set LX2180 Manual
 Basketball Shot Clock Set LX2180 Manual 72 Industrial Boulevard Wrightsville, GA 31096 Phone: (800) 445-7843 Fax: (800) 864-0212 www.electro-mech.com LX2180 Revision 5 February 8, 2013 Table of Contents
DP-222Q Color Video Door Phone Manual
 DP-222Q Color Video Door Phone Manual * has 6 LEDs for nighttime operation Remotely and securely talk to visitors and unlock doors, gates, etc. from the Easily connect an secondary * Simple 2-wire connection
itech Training Courses iphone 5S LCD Assembly Replacement Guide
 itech Training Courses iphone 5S LCD Assembly Replacement Guide 2014 icracked, Inc. All rights reserved. ios, all Apple product names, and Apple logos are trademark property of Apple, Inc. The content
Getting started. JetScan 150. Currency scanner. User guide
 Getting started JetScan 150 Currency scanner User guide 1 Safety information, power specifications High voltage inside. Risk of electric shock. Turn power OFF and unplug power cord from machine before