Hardware Basics for Front Projection SMART Board Interactive Whiteboards
|
|
|
- Debra Farmer
- 6 years ago
- Views:
Transcription
1

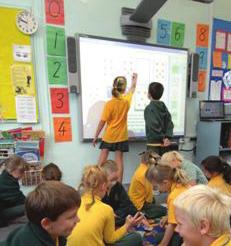
2 Hardware Basics for Front Projection SMART Board Interactive Whiteboards The SMART Board interactive whiteboard is touch sensitive and operates as part of a system that includes a computer and a projector. The computer sends an image of an application to the projector. The projector casts the image onto the interactive whiteboard. The interactive whiteboard acts as both the monitor and input device, allowing you to control any application by touching the screen. It may help you to think of your interactive whiteboard the same way you think of your mouse or keyboard it is an input device that enables you to control applications on your computer. Setup instructions depend on the model of SMART Board interactive whiteboard. Specific instructions on how to setup your SMART Board can be found at support/product/index.asp. The SMART Pen Tray The SMART Pen Tray consists of four color-coded slots for pens and one slot for the eraser. Each slot has an optical sensor to identify when the pens and eraser have been picked up. You can write with the pen or with your finger, as long as the pen slot is empty. The technology in the pen tray is smart enough to know which tool was removed from its slot most recently. If you remove the eraser from its slot while you are still holding a pen, the pen tray will assume you want to erase. The lights above the tool slots indicate which tool was removed last. TIP: If someone accidentally takes a pen or the eraser home, simply cover the optical sensor with a pen lid or a sticky note to continue using your interactive whiteboard until the tool is returned. 2

3 The Pen-Tray Buttons The pen tray has at least two pen-tray buttons. One button is used to launch the On-Screen Keyboard. The second button is used to make your next touch on the interactive whiteboard a right-click. Some interactive whiteboards have a third button; this button is used to quickly access the Help Center. Pen tray buttons Pen tray buttons The Pens The SMART Board interactive whiteboard comes with four Whisper-tip pens (black, red, green and blue) and one eraser. Although you do not need to use the pens to write on you interactive whiteboard, the pens do make writing more intuitive. Pick up a pen from the pen tray and write on the SMART Board. To erase your digital ink, remove the eraser from the pen tray and move it in a smooth motion over your notes. Your notes will disappear. TIP: To clear a large area of digital ink, draw a circle around the area you want to erase with the eraser and tap once inside that area. All handwritten notes inside that circle will disappear. The Ready Light The Ready Light indicates the status of your interactive whiteboard. Depending on the model of the SMART Board interactive whiteboard you are using, the Ready Light is located either on the right side of the pen tray or the lower-right of the frame bezel. Ready Light on right side of pen tray Ready Light on lower-right of frame bezel If the Ready Light is a solid green, your system is functioning properly. If the Ready Light is flashing or is a color other than green for an extended period of time, you should check the User s Guide that came with your SMART Board interactive whiteboard for guidance on troubleshooting. NOTE: After you turn on your computer, the Ready Light will be red while the SMART Board interactive whiteboard and the computer are establishing communication SMART Technologies ULC. All rights reserved. SMART Board, Whisper-tip and the SMART logo are trademarks of SMART Technologies Inc. All other third-party product and company names may be tradmarks of their respective owners. Printed in Canada 03/

4 SMART Board Interactive Whiteboard Basics This Quick Reference Guide provides an overview of the information you need to begin using a SMART Board interactive whiteboard. Before you begin, make sure the appropriate SMART Board software has been loaded on your computer. For more information, refer to your SMART Board User s Guide. Starting the SMART Board Interactive Whiteboard 1 Ensure the interactive whiteboard and projector are connected to the computer. 2 Turn on the projector, then the computer. The interactive whiteboard draws power from the computer and will be activated automatically. The Ready Light, indicating the status of your interactive whiteboard, will be red while the SMART Board and the computer are establishing communication. NOTE: Depending on the model of the SMART Board interactive whiteboard you are using, the Ready Light is either located on the right side of the SMART Pen Tray or the lower-right of the frame bezel. Ready Light on right side of pen tray Ready Light on lowerright of frame bezel 3 Log on, if required, using the computer keyboard. When the Ready Light on the pen tray turns green, the computer and the interactive whiteboard have established communication. The SMART Board is now touch sensitive, and you can open any application available on the connected computer. Orienting the SMART Board Interactive Whiteboard You should orient your interactive whiteboard when setting it up, or if either the projector or interactive whiteboard has been moved since you last used it. 1 Press and hold the Keyboard and the Right Mouse button simultaneously until the Orientation screen appears. Pen tray buttons Pen tray buttons 2 Begin the orientation process at the upper left corner of the Orientation screen. Press your finger or pen firmly on the center of each cross in the order indicated by the white, diamond-shaped graphic. Orientation screen 4


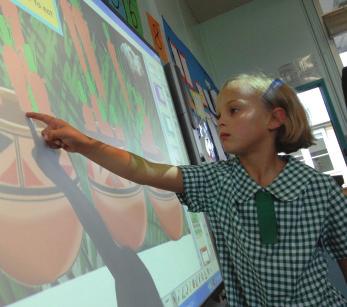
5 Your Finger Is Your Mouse A press on a SMART Board interactive whiteboard is the same as a left-click with a mouse. To open an application such as an Internet browser, double-press the application icon with your finger. Writing and Erasing Notes To write over your desktop image or application, pick up a pen from the pen tray and write on the interactive whiteboard. To write in a different color, pick up a different-colored pen. The color recognition comes from the optical sensors in the pen-tray slots and not from the pens themselves. Pick up the eraser from the pen tray and move it in a smooth motion over your notes to erase them. NOTE: The interactive whiteboard only recognizes the last tool removed from the pen tray. For example, if you already have a pen in your hand when you pick up the eraser, the interactive whiteboard will assume you want to erase, regardless of whether you touch the board with a pen or an eraser. To avoid confusion, return each tool to its proper slot when you have finished using it. Saving Your Notes You can easily save the notes you have written on your interactive whiteboard for future reference. 1 Pick up a pen from the pen tray. The Digital Ink Layer border will appear on your screen. To save what you write on the board when this layer is in place, press the Capture writing button in the top right hand corner of the border. An image of the screen including your writing will be saved in a new Notebook file.. NOTE: If the Digital Ink Layer border does not appear when you pick up a pen, you may be working in an Ink Aware application (e.g., Microsoft Word). If the application is Ink Aware, buttons will be available in the application s own toolbar for capturing writing. Digital Ink Layer border Clear writing Capture writing Close Digital Ink Layer 2 If you wish to capture a specific area of your screen, press the SMART Board icon located in the Windows Notification Area at the bottom right of your screen, and choose Other SMART Tools > Screen Capture Toolbar... from the menu to launch the Screen Capture toolbar Area Capture button 3 To save a selected area of your notes, press the Area Capture button on the Screen Capture toolbar. Press the interactive whiteboard and, without releasing pressure, drag the selection box using your finger to outline the area you want to capture. NOTE: The Screen Capture button in Ink Aware applications will capture an image of your entire screen. 4 Notebook software will open automatically, and your capture will be saved to a new Notebook page. 5 Select the unsaved Notebook file from the taskbar to view your captured image in Notebook software. Select File > Save to save your notes for future reference SMART Technologies Inc. All rights reserved. SMART Board, Notebook and the SMART logo are trademarks of SMART Technologies Inc. All other third-party product and company names may be tradmarks of their respective owners. Printed in Canada 03/


6 Using Microsoft Office Applications with SMART software When software is Ink Aware, you can write and draw directly into an active file. When you save an Ink Aware application file, your notes and drawings will be visible the next time you open it. Microsoft Word, Excel and PowerPoint software are the most commonly used Ink Aware applications. Microsoft Word and Excel software When using Microsoft Word or Excel software with your interactive whiteboard, you will notice four new buttons. They may be integrated with the current toolbar or separated as a floating toolbar. Example: Pressing the Insert Drawing as Text button Before you press the button, the image is not part of the file. Press the button and the image becomes part of the Microsoft Excel software file. After pressing the Insert as Text button, your writing will appear in the selected cell as text. 6
7 PowerPoint software When you are presenting a slide show with PowerPoint software on a SMART brand product, you can save your notes as images and save screen captures to Notebook software, just as you can when using Microsoft Word or Excel software. Use the Slide Show toolbar to access the Ink Aware features of PowerPoint software. The Slide Show toolbar appears automatically when you run a PowerPoint slide show. Slide Show toolbar Go to the previous slide of your presentation Open the Command Menu Go to the next slide of your presentation TIP: You can advance to your next PowerPoint slide by pressing twice on your SMART brand product, ensuring your second press is to the right of the first. To go to the previous slide, make the second press to the left of the first. The Command menu Press the center button on the Slide Show toolbar to launch the Command menu. The Command menu features the following options. Select Capture to Notebook Insert Drawing as Image Clear Drawing Add Blank Slide PowerPoint Commands Settings SMART Floating Tools End Show Use this tool to capture an image of the current slide to Notebook software save your notes directly into your PowerPoint software presentation delete your notes from the page add an additional slide to your presentation launch the PowerPoint Commands submenu launch the Settings submenu launch the Floating Tools toolbar end the Slide Show 2008 SMART Technologies ULC. All rights reserved. Notebook and the SMART logo are trademarks of SMART Technologies ULC. Microsoft, PowerPoint and Excel are registered trademarks of Microsoft corporation in the U.S. and other countries. All other third-party products and company names may be trademarks of their respective owners. Printed in Canada 03/
8 The Floating Tools toolbar The features you use most are literally at your fingertips with the Floating Tools toolbar. If it is not already on your screen, you can launch the Floating Tools by selecting the SMART Board icon located in Windows Notification Area at the bottom right of your screen, and choosing Show Floating Tools from the menu. Button What the button does Stop using other tools and return the cursor to mouse mode Write or draw in digital ink, and select the ink color Highlight an area of the screen with translucent ink for emphasis, and select the ink color Hide/Reveal toolbar Move toolbar Erase digital ink, and select the size of the eraser Draw a line, and select the format of the line Draw a pre-formed shape, and select the shape Floating Tools toolbar (default settings) Make your next press on the interactive whiteboard a right-click Launch the on-screen keyboard Launch Notebook software Undo your previous action. Open the Customize Floating Tools menu to personalize toolbar functions 2008 SMART Technologies ULC. All rights reserved. SMART Board, Notebook and the SMART logo are trademarks of SMART Technologies ULC. 03/2008 8

9 Customizing Floating Tools Press the Customize button in the Floating Tools toolbar to choose from a variety of toolbar buttons. You can choose as many buttons as you like to fully customize Floating Tools with the buttons you need. To add a button to the Floating Tools drag and drop the icon onto the toolbar. To remove a button, ensure the Customize button has been pressed, and drag the button off the Floating Tools toolbar. To return the toolbar to its original configuration press the Restore Defaults button. When you are finished customizing the toolbar press the Done button SMART Technologies ULC. All rights reserved. SMART Board, Notebook and the SMART logo are trademarks of SMART Technologies ULC. Printed in Canada 03/

10 The buttons that have side menus can be further customized. Right click on the side menu. The Properties dialog box will appear where you can change the settings for the tool. You can save the new settings so they become the default for that tool by clicking the Save Tool Settings button at the bottom of the dialog box after you ve set the parameters above. side menu Properties dialog box Example of Pen tool s Properties dialog box 2008 SMART Technologies ULC. All rights reserved. SMART Board, Notebook and the SMART logo are trademarks of SMART Technologies ULC. Printed in Canada 03/
11 Notebook software Version 10 Toolbars Notebook software toolbar The Notebook software toolbar gives you access to a number of tools to help you work with your Notebook file. By default, the toolbar appears at the top of the Notebook page. When you are working at the SMART Board interactive whiteboard and you prefer to sit, or are working with young students, it may be more convenient to move the toolbar to the bottom of the page. To do this, press the double-ended, vertical arrow on the far right of the toolbar. Toggle move toolbar Display the previous Notebook page Display the next Notebook page Insert a blank page directly after the active Notebook page Open an existing Notebook file Save your Notebook file Paste Undo the last action you performed Redo the action you last performed Delete any selected object Show or Hide the Screen Shade on the current Notebook page Open Full Screen view Toggle dual page mode Launch the Screen Capture toolbar Activate SMART Document Camera Insert Question Create a table 11
12 Select any object on the page with your mouse Write or draw on the Notebook page with the pen tool Write or draw on the Notebook page with the creative pen tool Erase digital ink on the Notebook page Draw a line Create a shape Draw a perfect shape (e.g., circle, square, rectangle, etc.) Write or draw with the Magic Pen tool in disappearing ink, zoom and spotlight Fill an object or shape Create a text-entry box for typing Launch the Properties side tab Move the toolbar to the bottom of the Notebook page Adjust volume Instant conferencing Full Screen Toolbar The Full Screen toolbar allows you to work with your Notebook file while in full screen mode. Display the previous Notebook page Display a menu of more options, for example the Screen Shade, shapes or pen options Display the next Notebook page Exit full screen 2008 SMART Technologies ULC. All rights reserved. Notebook and the SMART logo are trademarks of SMART Technologies ULC. All other third-party products and company names may be trademarks of their respective owners. Printed in Canada 04/

13 Side Tabs There are four tabs on the side of the Notebook interface (shown below on the right-hand side of the work area). Click the double-ended horizontal arrow to move the tabs from one side of the work area to the other. Page Sorter tab Page thumbnail Gallery tab Attachments tab Properites tab Work area Move tabs to the other side of the work area Auto-hide check box You can hide the side tabs from view when you have finished working with them by checking the Auto-hide check box. Click the double-ended, horizontal arrow to move these four tabs from one side of the page to the other. The tabs below are shown on the left-hand side of the work area. 13


14 Working with Notebook Software Gallery Collections What is the Notebook Software Gallery? The Notebook software Gallery helps you quickly develop and deliver lesson activities and presentations in rich graphic detail. Thousands of high-resolution images, audio, video, Macromedia Flash and entire Notebook files are organized into searchable collections that allow you to create attractive, reusable content. Show the onscreen keyboard Enter a keyword into the search field to quickly find related Gallery items Press the Search button to initiate search Press to return to previous search results works like an Internet browser s back button Show additional Gallery actions Press the Gallery tab to open the Gallery Select a folder to display its contents in the search results area Search results area Drag the thumbnail image to the work area 14


15 Searching for Gallery Content There are two ways to find Gallery content. You can browse through the Gallery collections and select a folder, or you can enter a keyword into the search field, as you would when using an Internet search engine. If you were building a mathematics lesson activity about shapes, for example, you may decide to browse by topic for all Gallery items relating to Shapes, Space and Measure. However, if you were looking for a specific shape in the middle of class, you may want to type the keyword triangle into the search field to save time. To look for Gallery items using the search field 1 Press once inside the search field 2 Type a keyword related to the type of object(s) you are looking for 3 Press the Search button to display your results TIP: Press the icon to the left of the search field to use the On-Screen Keyboard to type your keyword. Using Online Resources Select Online Resources to access a list of Internet links to lesson activities, curriculum standards, classroom resources or additional Gallery content. Instead of interrupting the flow of your presentation by leaving Notebook software, you can seamlessly launch a Web page with supporting content at the same time you deliver your material. NOTE: You will require an active Internet connection and a Web browser to use Online Resources SMART Technologies ULC. All rights reserved. SMART Board, Notebook and the SMART Technologies ULC. All other third-party product and company names may be tradmarks of their respective owners. Printed in Australia 03/

16 Viewing Search Results Search results are graphically displayed as thumbnail images that match your search criteria. These thumbnail images, or Gallery items, are organized into four content types: Related Folders, Pictures and Backgrounds, Interactive and Multimedia, and Notebook Files and Pages. If you search for the keyword triangle for example, Related Folders will display all Gallery items associated with the keyword, providing you with additional content to help supplement learning activities. Double-press a folder thumbnail to view its contents. The thumbnails displayed in Pictures and Backgrounds include clip art and photographs. Drag an item to the work area to use as part of a lesson or to modify its properties. Interactive and Multimedia contains three types of content: Flash files, video files and objects with attached sounds. Items from this section of the Gallery are used to add rich media content to a lesson or presentation and engage reluctant learners with multimedia elements. Additional content can be found in Notebook Files and Pages. Notebook file thumbnails are recognized by the coil binding on the left of the thumbnail image. Drag the thumbnail image to the work area to add a page or series of pages, such as a complete lesson activity, to your existing content. Notebook files will be inserted directly after the active Notebook page. Notebook page thumbnails are identified by the folded edge in the topright corner. Drag the thumbnail image to the work area to create a new page with a background for students to write over, such as an exercise in identifying shapes. 16

17 Collecting and Sharing Content with Notebook Software Screen captures, images and files from other applications, such as Macromedia Flash, can be brought into Notebook software to help create engaging lesson activities and presentations. Save your completed file in Notebook file format to share with others in your workplace. You can also share your valuable content by exporting your Notebook file to HTML, PDF, PowerPoint (PPT) or as a series of images (e.g., JPEG, GIF, etc.) in case your colleagues don t have Notebook software installed. Using the Capture Toolbar Use the Capture toolbar to capture a selected area of your screen, a window or a full screen of content directly into Notebook software. Your computer does not need to be attached to a SMART Board interactive whiteboard to use the Capture toolbar, but SMART software must be installed. To collect content using the Capture toolbar, do the following: 1 Open Notebook software Capture toolbar and Camera icon 2 Select View > Screen Capture Toolbar on the Notebook software menu to open the Capture toolbar, or click on the camera icon 3 Navigate to the screen you want to capture, such as a Web page. The Capture toolbar will remain open over any active application or Web browser. There are four ways to capture content: Button Use this button to Button Use this button to Capture a rectangular area Capture the entire screen of the screen Capture a particular window on the screen Capture a freehand area of the screen 4 The captured image will appear on a page in your Notebook file Using the Insert Menu You have accumulated numerous pieces of content over the last several years of teaching. Now it s time to incorporate some of this material into your Notebook lesson activities. In particular, there s an image you want to use to enhance a specific learning opportunity in the classroom. 1 Open Notebook software 2 Select Insert > Picture File on the Notebook software menu to launch the Insert Picture File dialog box 3 Browse to the file s location and select it. Click Open to insert the picture into your Notebook file 17


18 Using Notebook Print Capture Notebook print capture allows you to add multi-page files from other applications like Microsoft Word and PowerPoint, or even a long Web page, to a Notebook file. In other words, print capture is similar to printing to paper; one printed page is equal to one Notebook page. 1 Open a file you want to capture into Notebook software 2 Select File > Print from the application s main menu. The Print dialog box will appear. Select SMART Notebook Print Capture from your list of available printers 3 Press Print to capture the page as an image to a Notebook file. Notebook software will launch automatically if it s not open TIP: Occasionally, the image may appear blurry in your Notebook file. Select View > Zoom > 100% from the Notebook menu to clearly view the captured image in the Notebook work area. Saving in SMART Notebook File Format Save your current Notebook file for future reference or to share the file with others using Notebook software. 1 Select File > Save from the Notebook menu or select File > Save As to save revisions as a new Notebook file. Your original Notebook file will not be changed 2 The Save As dialog box will appear 3 Browse to the location where you want to save your Notebook file 4 Type a name of your file in the File name text field, then click Save 2008 SMART Technologies ULC. All rights reserved. SMART Board, Notebook and the SMART logo are trademarks of SMART Technologies ULC. All other third-party product and company names may be trademarks of their respective owners. 18

19 SMART Tools The SMART Tools menu provides quick access to the functions that help you operate the SMART Board interactive whiteboard more effectively. In addition to basic functions such as the On-Screen Keyboard and Floating Tools, you will also find multimedia tools that allow you to create and present dynamic content. Accessing SMART Tools Press the SMART Board icon in the Windows Notification Area at the bottom right of your screen. The SMART Tools menu will appear. If the SMART Board icon is not visible, select Start > Programs > SMART Board Software > SMART Tools. The SMART Board icon will appear in the bottom right of your screen. Using SMART Tools The chart below outlines each of the options available on the SMART Tools menu. The touch sensitivity of your interactive whiteboard allows you to operate each of these tools with your finger. Windows Notification Area SMART Tools menu Selecting Opens Use this tool to Notebook software Recorder Video Player Save notes written on your interactive whiteboard or at your computer as a series of pages. Search for objects stored in the Gallery, such as images, video and Macromedia Flash content. Export your Notebook file to HTML, PDF, PowerPoint (PPT) and image types such as JPEG, GIF, PNG and BMP. Record all actions that take place on your interactive whiteboard, such as training or workflow processes. Add audio with a microphone, control recording quality and video format and share your recording with colleagues. Write or draw over video during a presentation and capture a single video frame into Notebook software. Use SMART Video Player to play video files located on your computer or view content from a camera, VCR, CD-ROM or DVD. O n-screen Keyboard Type or edit text in any application without leaving the interactive whiteboard SMART Technologies ULC. All rights reserved. SMART Board, Notebook, Bridgit and the SMART logo are trademarks of SMART Technologies ULC. All other third-party product and company names may be tradmarks of their respective owners. Printed in Canada 03/


20 Selecting Opens Use this tool to Floating Tools Quickly access the pen, highlighter, eraser and other frequently used tools. Take screen captures, undo or redo an action on your interactive whiteboard and customize the Floating Tools toolbar. Instant Conferencing Other SMART Tools > Screen Shade Join or create a data conference over the Internet. Detailed information for using Bridgit is available at trainingmaterials.asp. Gradually reveal information to create suspense or hide text and graphics by dragging the shade left or right, up or down. Other SMART Tools > Spotlight Focus the attention of your audience to a specific part of the screen. Change the shape of your spotlight, set the transparency level of the shaded area or exit the spotlight view. Other SMART Tools > Magnifier Enlarge small text or images, such as a cell in a Microsoft Excel spreadsheet to make them easier to see. Two windows will appear; the smaller window is used to select the area you would like to magnify, and the larger window displays the magnified view SMART Technologies ULC. All rights reserved. SMART Board, Notebook, Bridgit and the SMART logo are trademarks of SMART Technologies ULC. All other third-party product and company names may be tradmarks of their respective owners. Printed in Canada 03/


21 Selecting Opens Use this tool to Other SMART Tools > Calculator Use this tool to access the Windows on screen calculator. Other SMART Tools > Pointer Use the Pointer to direct audience attention to an important piece of information on the screen. Other SMART Tools > Screen Capture Toolbar Enhance your lesson activity by capturing a selected area, window or a full screen grab from your desktop. The captured image will automatically appear as a page in your Notebook file. Control Panel Configure a variety of software and hardware options: adjust SMART Board Settings; orient your SMART Board; personalize the pen tray; connect to a new SMART Board; check for software upgrades; access the Help Center and manage Ink Aware applications, languages and wireless connections. Orient Use this tool whiteboard. to orient your SMART Board interactive When the projector or interactive whiteboard moves location, you should orient the SMART Board. This will tell the computer where the image of the desktop is being displayed on the surface of the interactive whiteboard SMART Technologies ULC. All rights reserved. SMART Board, Notebook, Bridgit and the SMART logo are trademarks of SMART Technologies ULC. All other third-party product and company names may be tradmarks of their respective owners. Printed in Canada 03/

22 SMART Board Welcome Center for the Microsoft Windows Operating System Welcome Center is a compact, movable toolbar that contains your most frequently used SMART Board features and applications. You can also configure this toolbar to include any third-party software. Opening the Welcome Center To open the Welcome Center, press the SMART Board icon in the Windows Notification Area at the bottom right of your screen, and select Welcome to Notebook... from the menu. The Welcome Center provides several tabs, each with options to launch commonly used applications and tools. Tabs Action options Select to have Welcome Center launched automatically when Notebook is started Quick Start This tab provides options designed to get you up and running quickly, with the most frequently used actions at your fingertips. You can create a new Notebook file, open a previously created file, start a conference, change languages, orient your SMART Board, and access the Control Panel to configure a variety of software and hardware options SMART Technologies Inc. SMART Board, Notebook, Bridgit and the SMART logo are trademarks of SMART Technologies Inc. All rights reserved. All other third-party product and company names may be trademarks of their respective owners. 03/

23 Tools The Tools tab provides direct access to each of the functions that help you operate the SMART Board interactive whiteboard more effectively. In addition to basic functions such as the On-Screen Keyboard and Floating Tools, you will also find multimedia tools that allow you to create and present dynamic content. Teacher s Hub Your single destination for all the resources you need to get started. Use the Teacher's Hub to help you seamlessly integrate your SMART Board interactive whiteboard into your classroom. 1 Training - Online training sessions, Printable materials, Two-Minute Tutorials, Training events, Learning path for teachers 2 Curriculum resources - SMART-created lesson activities, Create your own lesson activities, Notebook interactive viewer, Lesson Activity Toolkit 3 Professional development - ED Compass newsletter, Bulletin board, Case studies, Showcase schools Help/Support The Help/Support tab provides access to a wide array of support sources, from self-directed troubleshooting to one-on-one help from an expert.. You will also find your software version information here SMART Technologies Inc. SMART Board, Notebook, Bridgit and the SMART logo are trademarks of SMART Technologies Inc. All rights reserved. All other third-party product and company names may be trademarks of their respective owners. 03/


24 Additional Resources Free Training Materials Free Lesson Activities Free Training Videos Free SMART Board Software Free Online Training - See Calendar for current schedule Other Training Options Contact Us training@electroboard.com.au (02)
SMART Board Interactive Whiteboard Basics
 SMART Board Interactive Whiteboard Basics This Quick Reference Guide provides an overview of the information you need to begin using a SMART Board interactive whiteboard. Before you begin, make sure the
SMART Board Training Packet. Notebook Software 10.0
 SMART Board Training Packet Notebook Software 10.0 Bob Mallory SMART Certified Trainer Bob.Mallory@avispl.com Brian Leeser SMART Certified Trainer Brian.Leeser@avispl.com Chris de Treville Chris.deTreville@avispl.com
SMART Board Quick Reference
 The Ready Light Your SMART Board interactive whiteboard includes a Ready Light that indicates the status of your interactive whiteboard. Color of Ready Light Not lit Solid green Flashing green Solid red
SMART AirLiner Slate. Giving you the freedom to teach from anywhere in the classroom and even more options to make digital content interactive.
 SMART AirLiner Slate Giving you the freedom to teach from anywhere in the classroom and even more options to make digital content interactive. Olathe District Schools Instructional Technology Department
If you require assistance please contact the IT Centre at ext or
 Using the SMART Board in the Dean s Conference Room In this booklet you will find information on how to use the SMART board in the Dean s conference room at Ivey. Basic requirements: Laptop computer with
Fundamentals. Training Kit. Presentation Products, Inc. 632 W 28th St, 7th fl New York, NY f presentationproducts.
 Fundamentals Training Kit Presentation Products, Inc. 632 W 28th St, 7th fl New York, NY 10001 212.736.6350 f 212.736.6353 presentationproducts.com Table of Contents Getting Started How Does the SMART
Fundamentals. Training Kit. Presentation Products, Inc. 632 W 28th St, 7th fl New York, NY f presentationproducts.
 Fundamentals Training Kit Presentation Products, Inc. 632 W 28th St, 7th fl New York, NY 10001 212.736.6350 f 212.736.6353 presentationproducts.com How Does the SMART Board Interactive Whiteboard Work?
Lesson Planning and Delivery with Notebook Software
 Lesson Planning and Delivery with Notebook Software Before you start Before you begin your lesson, ensure that your computer is turned on and the SMART Board interactive whiteboard is connected and oriented.
Business Products Quick Reference Bundle
 Business Products Quick Reference Bundle TABLE OF CONTENTS Section 1 Getting Started with Your SMART Board 800 Series Interactive Whiteboard 4 Subsection 1.1 Turning On Your Interactive Whiteboard 4 Subsection
Using the Mac Instructor Station
 Using the Mac Instructor Station Instructor Station Handouts Index Page 1 Getting Started Page 2 Using the Touch Screen Page 3 Connecting your Peripherals Page 4 Using the Blu ray DVD player Page 5 Using
Interactive Whiteboard Learner Workbook
 Interactive Whiteboard Learner Workbook Bringing people and ideas together. TM 1207 11th Avenue SW, Suite 300, Calgary, AB, T3C 0M5 CANADA Toll-free 1.888.42.SMART, ext. 8536 Fax 403.228.2500 e-mail: training@smarttech.com
INTERACTIVE WHITEBOARDS: SMART Board Overview
 INTERACTIVE WHITEBOARDS: SMART Board Overview SMART Notebook Basic 2 SMART Board Equipment The SMART interactive whiteboard uses several main components. They include: THE BOARD The SMART Board has a touch-
Was this document helpful? smarttech.com/docfeedback/ SMART Ink 5.2 USER S GUIDE
 Was this document helpful? smarttech.com/docfeedback/171190 SMART Ink 5.2 USER S GUIDE Trademark notice SMART Ink, SMART Notebook, SMART Meeting Pro, Pen ID, smarttech, the SMART logo and all SMART taglines
Notebook collaborative learning software 10. Extraordinary made simple
 Notebook collaborative learning software 10 Extraordinary made simple Create extraordinary moments in the classroom Award-winning Notebook software is setting the worldwide standard for creating, teaching
SmartBoard & Smart Notebook Software
 SmartBoard & Smart Notebook Software A SMART Board is an interactive whiteboard that is connected to a computer, touch sensitive display acting as both a monitor and input device. SMART Notebook software
SMART Meeting Pro 4.2 personal license USER S GUIDE
 smarttech.com/docfeedback/170973 SMART Meeting Pro 4.2 personal license USER S GUIDE Product registration If you register your SMART product, we ll notify you of new features and software upgrades. Register
Interactive White Board
 Interactive White Board Handout: Level 1 elearning Department 16 Contents 1) Introduction to Interactive White Board... 3 1.1 Interactive White Board (IWB)... 3 1.2 HARDWARE used in IWB... 3 1.3 Operating
SMART Meeting Pro PE 4.1 software
 Help us make this document better smarttech.com/feedback/170973 SMART Meeting Pro PE 4.1 software USER S GUIDE Product registration If you register your SMART product, we ll notify you of new features
Introduction. Download. SMARTBoard
 Page 1 of 21 SMARTBoard Introduction Interactive whiteboards are an excellent way to involve students in classroom learning by providing the look and feel of a regular whiteboard with computer-based technology
USING SMART NOTEBOOK SOFTWARE
 USING SMART NOTEBOOK SOFTWARE THE NOTEBOOK INTERFACE The Notebook interface is easy to use and many functions (such as inserting pictures, saving files etc.) will be famillar as they are simillar to those
Welcome To Smartboard Technology. What Will You Learn In This PPT.?
 Welcome To Smartboard Technology A Quick Fondy Tech Tutorial The Basics Of How To Get Started Using The Smartboard/Whiteboard What Will You Learn In This PPT.? This ppt. will focus on 6 basic areas of
Left-click the Smart icon from the task pane ( ) and choose Orient.
 and choose Orient.") Orient Board Hold down the keyboard and mouse button on the smart board. Left-click the Smart icon from the task pane ( ) and choose Orient. Check for updates Click Smart icon from the task pane or go
Orient Board Hold down the keyboard and mouse button on the smart board. Left-click the Smart icon from the task pane ( ) and choose Orient. Check for updates Click Smart icon from the task pane or go
OnPoint s Guide to MimioStudio 9
 1 OnPoint s Guide to MimioStudio 9 Getting started with MimioStudio 9 Mimio Studio 9 Notebook Overview.... 2 MimioStudio 9 Notebook...... 3 MimioStudio 9 ActivityWizard.. 4 MimioStudio 9 Tools Overview......
EASY INTERACTIVE WHITEBOARD
 EASY INTERACTIVE WHITEBOARD CONNECT COMPUTER/TURN ON PROJECTOR LAPTOP For the projectors in the labs, a computer is connected. These instructions are for you to connect a laptop computer to the projector.
Help us make this document better smarttech.com/docfeedback/ SMART Ink 3.1 USER S GUIDE FOR WINDOWS OPERATING SYSTEMS
 Help us make this document better smarttech.com/docfeedback/170830 SMART Ink 3.1 USER S GUIDE F WINDOWS OPERATING SYSTEMS Trademark notice SMART Ink, SMART Notebook, SMART Meeting Pro, Pen ID, smarttech,
This guide will help you with many of the basics of operation for your Epson 485wi BrightLink Projector with interactive functionality.
 This guide will help you with many of the basics of operation for your Epson 485wi BrightLink Projector with interactive functionality. If you need further assistance with questions, you can refer to the
Part 1: Basics. Page Sorter:
 Part 1: Basics Page Sorter: The Page Sorter displays all the pages in an open file as thumbnails and automatically updates as you add content. The page sorter can do the following. Display Pages Create
Bridgit Conferencing Software User s Guide. Version 3.0
 Bridgit Conferencing Software User s Guide Version 3.0 ii Table Of Contents Introducing Bridgit Conferencing Software... 1 System Requirements... 1 Getting Bridgit Conferencing Software... 2 The Bridgit
SMARTBOARD TRAINING HANDBOOK
 SMARTBOARD TRAINING HANDBOOK Created by Nicki Callahan Library Media Specialist, RLMS Computer Resource Teacher, FWMS Image from: Teacher Training Online, http://teacheronlinetraining.com/images/smartboard1.gif
USING POWERPOINT IN THE CLASSROOM LESSON 1 POWERPOINT BASICS
 USING POWERPOINT IN THE CLASSROOM LESSON 1 POWERPOINT BASICS Objectives Start PowerPoint. Open an existing presentation. Save a presentation. Navigate through a presentation, and use the menus and toolbars.
SMART Meeting Pro 4.1 software
 Help us make this document better smarttech.com/feedback/170897 SMART Meeting Pro 4.1 software USER S GUIDE Product registration If you register your SMART product, we ll notify you of new features and
BrightLink Welcome Kit
 BrightLink Welcome Kit Welcome to BrightLink! This kit has everything you need to get started with BrightLink. Here s how: 1 First, follow the steps on the Start Here card to get up and running. 2 Install
Migration Guide. Notebook to ActivInspire
 Migration Guide Notebook to ActivInspire 1 DESKTOP ICON Once your software has been installed, you will notice an ActivInspire icon on your desktop. DASHBOARD The Welcome Center is now called your ActivInspire
CLEAR TOOL... 7 BASIC NAVIGATION... 7 PAGE SORTER... 7
 Interwrite Workspace WHAT IS WORKSPACE?...2 INSTALLATION...2 SETUP...2 CONNECTING DEVICES... 2 NAMING DEVICES... 3 CALIBRATING DEVICES... 3 THE PEN...3 INTERACTIVE MODE...4 THE TOOLBAR...4 MOVING THE TOOLBAR...
BrightLink Welcome Kit
 BrightLink Welcome Kit Welcome to BrightLink! This kit has everything you need to get started with BrightLink. Here s how: 1 First, follow the steps on the Start Here card to get up and running. 2 Install
SMART Meeting Pro 4.2 room license USER S GUIDE
 smarttech.com/docfeedback/170897 SMART Meeting Pro 4.2 room license USER S GUIDE Product registration If you register your SMART product, we ll notify you of new features and software upgrades. Register
Creating Notebook Files. Notebook 10 Collaborative Learning Software for Windows Operating Systems
 Creating Notebook Files Notebook 10 Collaborative Learning Software for Windows Operating Systems Trademark Notice SMART Board, Notebook, Sympodium, Senteo, Bridgit, smarttech and the SMART logo are trademarks
Welcome & Introduction
 Welcome & Introduction Welcome to ebeam Interactive Suite 3. Overview ebeam Interactive Suite 3 allows you to create lessons with provided resources and enhances curriculum delivery with dynamic annotation
SMARTBOARD TRAINING HANDBOOK
 SMARTBOARD TRAINING HANDBOOK Created by Nicki Callahan Library Media Specialist, RLMS Computer Resource Teacher, FWMS Image from: Teacher Training Online, http://teacheronlinetraining.com/images/smartboard1.gif
SmartBoard and Notebook Part 2
 SmartBoard and Notebook Part 2 The SmartBoard is an Interactive Whiteboard that allows you to touch the board and interact with the computer using your finger as the mouse. 4/2009 Floating Tools Control
The MimioTeach package contains the following items: 1 MimioTeach bar 5 Mounting plates. 2 USB power adapter 6 MimioStudio DVD
 Chapter 3 MimioTeach What's Included Using MimioTeach with a projector, you can deliver lessons and presentations directly from your whiteboard. Using MimioStudio Interactive mode, you control the movement
Interwrite Workspace v. 8.7 Intermediate Technology Integration Center
 Interwrite Workspace v. 8.7 Intermediate The Toolbar... 2 Moving the Toolbar... 2 Resizing the Toolbar... 2 Toolbar Settings... 2 Enable the K-6 Toolbar... 2 Enable Properties with Right Click... 2 Customized
Creating SMART Notebook Files. Notebook 10 Collaborative Learning Software for Linux operating systems
 Creating SMART Notebook Files Notebook 10 Collaborative Learning Software for Linux operating systems Trademark Notice SMART Board, Sympodium, smarttech and the SMART logo are trademarks or registered
MimioClassroom User Guide
 MimioClassroom User Guide for Windows gkpglobalsolutions.com Mimio LLC. All rights reserved. Revised 10/21/2010. No part of this document or the software may be reproduced or transmitted in any form or
Interactive Devices. EPSON Interactive whiteboard
 Interactive Devices EPSON Interactive whiteboard The Interactive Whiteboard is the white projection surface under the projector labelled Main (ilecture). On this surface you will be able to write over
Put it to work for you How can it help your organization? That depends on what you do.
 Factsheet Productivity tools go beyond desks To be productive, groups need to use networks, files and websites no matter where they are. Put this information at your group s fingertips with the SM ART
SMART Board Notebook Software, Version 10
 SMART Board Notebook Software, Version 10 Interactive Whiteboard is the generic name for SMART Board, Mimio, etc. SMART Board Notebook is an application that comes with SMART Board and works on the Mimio
SMART Notebook software 10 for Windows and Mac computers
 PLEASE THINK BEFORE YOU PRINT Release notes SMART Notebook software 10 for Windows and Mac computers About these release notes These release notes document changes in SMART Notebook 10 collaborative learning
Using the Interactive Whiteboard
 Using the Interactive Whiteboard GUIDE v1.2.1 User Services IT Services User Services IT Services University of Malta Msida MSD 2080 Malta Email: support.itservices@um.edu.mt Web: Tel: +356 2340 4113 Last
smart_presentation.notebook January 04, 2013 SMARTboard Overview Jan. 4, 2013 Presented by Linda Joiner Agenda Dec 17 8:11 AM Dec 14 8:41 AM
 SMARTboard Overview Jan. 4, 2013 Presented by Linda Joiner Agenda SMART Notebook Software Basics How to Save and Export Magic Pen Magic Tunnel Effect Magnifying Glass Collecting and Sharing Content Page
Tutorial.notebook. February 10, 2016
 Feb 10 2:03 PM Feb 10 2:10 PM Feb 10 2:20 PM Feb 10 2:25 PM Feb 10 2:49 PM Feb 10 2:58 PM 1 Feb 10 3:03 PM Feb 10 3:04 PM Feb 10 3:09 PM Feb 10 3:12 PM Feb 10 3:16 PM Feb 10 3:20 PM 2 Feb 10 3:26 PM Feb
Standard Toolbar. Main Toolbar. Page Sorter. Action Toolbar
 TEAMBOARD DRAW This is an annotation software that can be used with the interactive pen to write or draw on the projection surface. This software also provides advanced tools for saving and editing annotations
WORKSPACE PC FOR NEW USERS
 WorkSpace PC for New Users 1 WORKSPACE PC FOR NEW USERS Before Class Charging the MobiView The MobiView should arrive partially charged and ready to be installed. Turning Technologies recommends that MobiView
Interwrite Workspace v. 8.9 Intermediate Technology Integration Center
 Interwrite Workspace v. 8.9 Intermediate The Toolbar... 2 Moving the Toolbar... 2 Resizing the Toolbar... 2 Toolbar Settings... 2 Enable the Primary Toolbar... 2 Enable Properties with Right Click... 2
SMART Notebook family of products
 Product comparison family of products The following table compares the different products in the family: Basics Platform Windows and Mac computers See the 11.2 release notes (smarttech.com/kb/ 170494)
Interwrite Workspace v. 8.9 Beginning
 Interwrite Workspace v. 8.9 Beginning What is Workspace?... 2 Getting Started... 2 Charging the Interwrite Mobi... 2 Charging the Interactive Pens for the Interactive Whiteboard... 2 Installation of Software...
ENGAGING SOLUTIONS MOBI and Workspace Beginners Manual
 ENGAGING SOLUTIONS MOBI and Workspace Beginners Manual MOBI VIEW Your local sales team: Merianne Wininger Kristen Rush Joe Musgrave Kim Brewer 832.524.6487 support@iclick2engage.com www.iclick2engage.com
UNIVERSITY OF SHEFFIELD SYMPODIUM USER GUIDE (2011)
") UNIVERSITY OF SHEFFIELD SYMPODIUM USER GUIDE (2011) Index Overview... 1 Switching On... 2 Using Pen Tool Buttons... 3 Using Sympodium Pen as a Mouse... 3 Using Sympodium Pen to Write... 4 Using Floating
UNIVERSITY OF SHEFFIELD SYMPODIUM USER GUIDE (2011) Index Overview... 1 Switching On... 2 Using Pen Tool Buttons... 3 Using Sympodium Pen as a Mouse... 3 Using Sympodium Pen to Write... 4 Using Floating
Corel Grafigo User Guide The contents of this user guide and the associated Corel Grafigo software are the property of Corel Corporation and its
 Corel Grafigo User Guide The contents of this user guide and the associated Corel Grafigo software are the property of Corel Corporation and its respective licensors, and are protected by copyright. For
MINT Interactive User s Guide
 MINT Interactive User s Guide MINT Interactive is very powerful board software including rich functions and gallery software, which are very useful for lecture environment. It will be continuously upgraded
On the Web sun.com/aboutsun/comm_invest STAROFFICE 8 DRAW
 STAROFFICE 8 DRAW Graphics They say a picture is worth a thousand words. Pictures are often used along with our words for good reason. They help communicate our thoughts. They give extra information that
Microsoft PowerPoint 2007 Tutorial
 Microsoft PowerPoint 2007 Tutorial Prepared By:- Mohammad Murtaza Khan I. T. Expert Sindh Judicial Academy Contents Getting Started... 5 Presentations... 5 Microsoft Office Button... 5 Ribbon... 6 Quick
Rev. A 02/02/2016 Downers Grove Public Library Page 1 of 50
 Objectives... 3 PowerPoint 2016 Screen Overview... 4 File Tab on the Ribbon... 5 Use Tell Me for Interactive Help... 6 Accessing Documents and Templates... 7 Searching for Templates... 8 Printing... 9
Magic-E-Board. User Manual
 Magic-E-Board Magic-E-Board Magic-E-Board...2 1) Included Parts and Optional Accessories...4 1.1) Package Checklist...4 1.2) Optional Accessories...4 2) Magic-E-Board Software Installation...5 3) Magic-E-Board
POWERPOINT BASICS: MICROSOFT OFFICE 2010
 POWERPOINT BASICS: MICROSOFT OFFICE 2010 GETTING STARTED PAGE 02 Prerequisites What You Will Learn USING MICROSOFT POWERPOINT PAGE 03 Microsoft PowerPoint Components SIMPLE TASKS IN MICROSOFT POWERPOINT
Overview Guide NEW. Improved Toolbar. Lockable Objects. Transparent Objects. Improved Gallery. Multimedia Support.
 Overview Guide NEW Improved Toolbar Lockable Objects Transparent Objects Improved Gallery Multimedia Support Import Documents mimio Toll Free Support: 877.846.3721 email: training@mimio.com Overview There
SMART CLASSROOM TRAINING MANUAL
 SMART CLASSROOM TRAINING MANUAL SMART CLASSROOM TRAINING MANUAL Center for Instructional Technology Table of Contents LCD Touch Panel Using the Touch Screen...3 How to use the Computer and Laptop Options...4
Getting Started with. PowerPoint 2010
 Getting Started with 13 PowerPoint 2010 You can use PowerPoint to create presentations for almost any occasion, such as a business meeting, government forum, school project or lecture, church function,
Vision Pointer Tools
 Vision Pointer Tools Pointer Tools - Uses Pointer Tools can be used in a variety of ways: during a Vision Demo to annotate on the master station s screen during a Remote Control session to annotate on
Using the SMARTBoard to Differentiate Instruction
 Using the SMARTBoard to Differentiate Instruction The following best practices tips and tools to support differentiated instructional practices was created based on SMART notebook version v.11.3.857. Best
SMART Notebook Training
 Learner Workbook SMART Notebook Training Beginner session Trainer Information Name Phone E-mail Getting started...1 Using SMART Notebook software for the first time... 2 Finding tools in SMART Notebook
Microsoft PowerPoint 2013 Beginning
 Microsoft PowerPoint 2013 Beginning PowerPoint Presentations on the Web... 2 Starting PowerPoint... 2 Opening a Presentation... 2 File Tab... 3 Quick Access Toolbar... 3 The Ribbon... 4 Keyboard Shortcuts...
Microsoft PowerPoint Tutorial
 Microsoft PowerPoint Tutorial Contents Starting MS PowerPoint... 1 The MS PowerPoint Window... 2 Title Bar...2 Office Button...3 Saving Your Work... 3 For the first time... 3 While you work... 3 Backing
Workspace Level 1 Training Workbook
 Intermediate Toolbar The default setting for the Workspace toolbar is the Intermediate toolbar shown below. There are also basic, advanced, and customized toolbars. Minimize Toolbar Workspace menu Mouse
Intermediate/Advanced. Faculty Development Workshop FSE Faculty retreat April 18, 2012
 Intermediate/Advanced Faculty Development Workshop FSE Faculty retreat April 18, 2012 Remote Desktop Sharing Quick Reference Guide for Moderators The Moderator or a Participant may request control of another
Polycom VisualBoard Technology Application
 [Type the document title] User s Guide Polycom VisualBoard Technology Application Document Version 2.0 July 2013 3725-65174-002/A Polycom Document Title 1 Trademark Information POLYCOM and the names and
Shell Education #50672 Interactive Whiteboard Activities: Mathematics 1
 Shell Education #50672 Interactive Whiteboard Activities: Mathematics 1 Table of Contents Introduction......................................4 Overview.......................................4 Getting Started..................................4
Introducing Activstudio
 Introducing Activstudio Version 3 COPYRIGHT INFORMATION Introducing Activstudio Version 3 Copyright 2007 Promethean Limited. All rights reserved. If this guide is distributed with Activstudio software,
Press Input to open the on screen input menu. Then tap on any input to select it.
 Power LED Remote IR Sensor PC Home Screen USB Ports Not Used Power Input Exit Home Settings Vol. - Vol. + Screen Press Input to open the on screen input menu. Then tap on any input to select it. Page #:
INSERVICE DAY - 11/11/11 TECHNOLOGY
 INSERVICE DAY - 11/11/11 TECHNOLOGY Converting PowerPoints into Movies (examples using imovie& Windows MovieMaker) (More detailed tutorials with pictures can be found at http://www.whsd.net/olc/teacher.aspx?s=1452).
Lesson 1 New Presentation
 Powerpoint Lesson 1 New Presentation 1. When PowerPoint first opens, there are four choices on how to create a new presentation. You can select AutoContent wizard, Template, Blank presentation or Open
EasyMeeting Application Software Instructions
 EasyMeeting Application Software Instructions Contents 1.Introduction to the software... 1 2.Installation instructions... 2 2.1 Running Environment... 2 2.2 To install EasyMeeting... 2 3.Use description...
Toolbar. Actions Panel. Plug-Ins Panel. Tools Panel
 Toolbar The Toolbar enables user to select and work with a variety of tools. The buttons on the toolbar are organized in panels: Actions Panel Buttons provide user to make changes to.notebook files Plug-Ins
1. The PowerPoint Window
 1. The PowerPoint Window PowerPoint is a presentation software package. With PowerPoint, you can easily create slide shows. Trainers and other presenters use slide shows to illustrate their presentations.
This guide will show you how to create a basic multi-media PowerPoint presentation containing text, graphics, charts, and audio/video elements.
 This guide will show you how to create a basic multi-media PowerPoint presentation containing text, graphics, charts, and audio/video elements. Before starting the steps outlined in this guide, it is recommended
Contents Microsoft PowerPoint Lesson 1: The PowerPoint Window...2 The Quick Access Toolbar...3 The Title Bar...3 Rulers...
 Contents Microsoft PowerPoint 2007...2 Lesson 1: The PowerPoint Window...2 The Quick Access Toolbar...3 The Title Bar...3 Rulers...3 Slides, Placeholders, and Notes...4 Status Bar, Tabs, View Buttons,
Customizing FlipCharts Promethean Module 2 (ActivInspire)
") Customizing FlipCharts Promethean Module 2 (ActivInspire) Section 1: Browsers The browsers (located on the left side of the flipchart) are menus for various functions. To view the browsers, click Main
Customizing FlipCharts Promethean Module 2 (ActivInspire) Section 1: Browsers The browsers (located on the left side of the flipchart) are menus for various functions. To view the browsers, click Main
SMART Ink 1.5. Mac OS X operating system software. Scan the following QR code to view the SMART Ink Help on your smart phone or other mobile device.
 SMART Ink 1.5 Mac OS X operating system software User s guide Scan the following QR code to view the SMART Ink Help on your smart phone or other mobile device. Trademark notice SMART Ink, SMART Notebook,
11.1 Create Speaker Notes Print a Presentation Package a Presentation PowerPoint Tips... 44
 Contents 1 Getting Started... 1 1.1 Presentations... 1 1.2 Microsoft Office Button... 1 1.3 Ribbon... 2 1.4 Mini Toolbar... 2 1.5 Navigation... 3 1.6 Slide Views... 4 2 Customize PowerPoint... 5 2.1 Popular...
Downloaded from
 Chapter 4 Advance features of MS PowerPoint Inside this chapter : Inserting different objects (i.e. images, Word Arts, audio & video etc.), Transitions in slide, Custom Animation with text. PowerPoint
WorkSpace for Java. User Guide 6.3
 WorkSpace for Java User Guide 6.3 WorkSpace for Java 2 TABLE OF CONTENTS ABOUT WORKSPACE 4 Technical Requirements 4 Getting Started 6 Downloading and Installing WorkSpace for Mac 6 Downloading and Installing
Lab 2. Task 1 : Learning basic tasks with PowerPoint. Estimated time
 Lab 2 Task 1 : Learning basic tasks with PowerPoint Objective : To familiarize with basic tasks in PowerPoint : 1. Create a presentation 2. Find and apply a template 3. Insert a new slide 4. Format text
PowerPoint Spring 2002
 PowerPoint 2000 Spring 2002 Table of Contents I. INTRODUCTION... 1 II. GETTING STARTED... 1 A. Opening PowerPoint... 1 B. The Mouse Pointer... 1 C. Working with Text... 2 1. Windows Control Buttons...
Power Point. Created with the Freeware Edition of HelpNDoc: Single source CHM, PDF, DOC and HTML Help creation
 Power Point Introduction PowerPoint is a presentation software package. With PowerPoint, you can easily create slide shows. Trainers and other presenters use slide shows to illustrate their presentations.
Basics of ēno board setup and usage
 Basics of ēno board setup and usage Contents Preparing to use ēno... 2 Add batteries... 2 Power on and off the stylus... 2 To install the Bluetooth adapter:... 2 To Pair the Bluetooth adapter with the
User Manual v 1.2. TB Comenius Office
 User Manual v 1.2 November 2013 TB Comenius Office DISTRIBUTORE PER L'ITALIA: VIA CALABRIA, 15-20090 SEGRATE (MI) T. 02 87166000, 06 92938446 - F. 02 87153173 E. info@agmultivision.it W. www.agmultivision.it
Slides & Presentations
 Section 2 Slides & Presentations ECDL Section 2 Slides & Presentations By the end of this section you should be able to: Understand and Use Different Views Understand Slide Show Basics Save, Close and
Getting Started. Microsoft QUICK Source 7
 Microsoft QUICK Windows Source 7 Getting Started The Windows 7 Desktop u v w x u Icon links to a program, file, or folder that is stored on the desktop. v Shortcut Icon links to a program, file, or folder
ECB Digital - Click 3 (4th Grade)
") ECB Digital - Click 3 (4th Grade) There are several ways to navigate around the Whiteboard Digital Books: 1 Go to a chosen unit or feature by clicking on a button on the main menu. 2 Go to a specific page
ECB Digital - Click 3 (4th Grade) There are several ways to navigate around the Whiteboard Digital Books: 1 Go to a chosen unit or feature by clicking on a button on the main menu. 2 Go to a specific page
Application of Skills: Microsoft PowerPoint 2013 Tutorial
 Application of Skills: Microsoft PowerPoint 2013 Tutorial Throughout this tutorial, you will progress through a series of steps to create a presentation about yourself. You will continue to add to this