The Intelligent Surveillance Solution. NVRmini 2. User Manual. Ver
|
|
|
- Franklin Bond
- 6 years ago
- Views:
Transcription

1 The Intelligent Surveillance Solution NVRmini 2 User Manual Ver
2 Table of Contents 1. Installation Installation Process LED Status Definitions Settings Camera Setup Add Cameras by Camera Search Add Cameras Manually Modify Camera Information Modify Camera Parameters Set up Lens Settings View Camera Status View Camera Status Details Recording & Event Setup Recording Mode Setup Recording Schedule / Event Setup Camera Events and Responding Actions Setup I/O Box Input and Responding Action Setup System Events and Responding Actions Setup Push Notification SMTP Server Setup Add Event Contacts Set up FTP Server RAID & File Settings Create a RAID Volume View RAID Volume Status View Disk Drive Information Modify RAID Volume Delete a RAID Volume Format Modify the My Network Places Protocol Settings Modify the FTP Protocol Settings Auto Backup Set up Backup Schedule Network Setup View Network Status Network Settings Auto Port-Forwarding
3 2.5.4 Network Service Setup CMS Service Setup Management View the List of Users Create New Users Modify User Information Change a User s Password Delete Users Online License Activation Offline License Activation Online License Transfer Offline License Transfer View the Event Log Save Unit Configuration Load Unit Configuration / Default Settings System View System Information Smart Fan Control Buzzer Configuration UPS Setup Upgrade the System Upgrade Notification System Date and Time Setup Restart the Unit Auto Reboot Shut down the Unit POS Introduction System Introduction Hardware Installation SCB-C31A Software Installation SCB-C31A Connection via TCP Client Software Setup Activate POS License NVR POS Setting Insert POS Setting Delete POS Device Configure POS Setting
4 3.3 Tag Filter Add New Tag Filter Edit Tag Filter Delete Tag Filter Import/Export Tag Filter POS Display Font Live View Remote Live Viewer Playback Playback System POS Transaction Data Search Search POS Transaction Data through Playback Search POS Transaction Data through Playback System Playback Video with POS Data Select Period by POS Search Select Period by Data & Time through Playback Select Period by Data & Time through Playback System Backup Video with POS Data Backup through browser Backup through Playback System Backup through Backup System I/O Introduction System Introduction HW Installation Software Installation SCB-C Software Installation SCB-C24/26/ Software Setup Add I/O Box Modify I/O Box Information I/O Pin Setting Relative Configuration and Application Record on Input Trigger Input and Responding Actions I/O Control Panel in Live View Live view
5 5.1 Internet Explorer Live View Control Panel Live View Setting General Setting Stream Profile Setting OSD (On-screen display) Setting Monitor Display Setting Notification Set up Joystick Control Remote Live Viewer Application Remote Live Viewer Application Control Panel Unit Connection Setting General Setting Camera Group Setting Delete/ Rename Camera Groups Stream Profile Setting OSD (On-screen display) Setting Monitor Display Setting Notification Set up Joystick Control Set up Remote Live Viewer E-Map Internet Explorer E-Map Control Panel Add Map Edit Map Delete Map Add/Rotate Device Indicator Delete Device Indicator Layout Adjustment Relative Configuration and Application Remote Live Viewer Application E-Map Control Panel Playback Internet Explorer Playback Control Panel Search the Recorded Video Play the Recorded Video
6 7.1.4 Intelligent Search Recorded Video Enhancement Save a Video Save an Image Print an Image Backup the Recorded Video Remote Playback System Application Playback System Application Control Panel Set up Unit Connections Search the Recorded Video Play the Recorded Video Intelligent Search Recorded Video Enhancement Save a Video Save an Image Print an Image Backup the Recorded Video Backup and Delete Records The Backup System Application Backup the Recorded Video through Windows Explorer Backup the Recorded Video through FTP Playback the Backup Records With Playback Application Without Playback Application Delete the Recorded Video With Backup Application Verification Tool Execute Verification Tool Verify Image / Video External Storage Create a Volume on DAS Create an External Storage Log out Troubleshooting Replace a Failed Disk Drive Respond to a Critical RAID Volume Respond to a File System Error RAID Volume Restore the Default Administrator s Password
7 12.5 Restore All Default Configuration Install ActiveX Cannot Log in to the Unit with Internet Explorer Appendix RAID System Introduction to RAID RAID 0 Stripe RAID 1 Mirror RAID 5 Block Striping with Distributed Parity RAID 10 Mirror / Stripe Choosing a RAID Level Appendix Camera Integration Camera Support List
8 GNU General Public License This product includes copyrighted third-party software licensed under the terms of the GNU General Public License. Please see the GNU General Public License (GPL) for the exact terms and conditions of this license at The GPL source code incorporated into the product is available for free download at our web site Subject to GPL, you may re-use, re-distribute and modify the GPL source code. Note that with respect solely to the GPL Software, no warranty is provided. We do not offer direct support for the distribution. 7

9 1. Installation 1.1 Installation Process Step 1: Unpack the Unit This package contains the following items: The unit Quick Start Guide Screws for disk drives Key Power cord Warranty card 19V DC power transformer CD with Install Wizard, Backup, Live View, Playback, Verification Tool and Offline Tool application, user manual, and quick start guide The electronic components within the unit can be damaged by Electrostatic Discharge (ESD). Please take precautions at all times when handling the unit or its sub-assemblies. To configure the unit, you must install the software onto a desktop/ laptop running Windows XP-SP3 32bit, Windows 7 32/64bit, Windows 8 32/64bit. 2 bay unit front/rear view LED Power Status System Status USB Status DISK 1 Status DISK 2 Status Ethernet Activity HDD Tray Reset USB Connection RJ45 Network Connection Lock Cooling Fan Power Connection 8

10 4 bay unit front/rear view LED System Status ; esata Status Ethernet 1 & 2 Activity DISK 1 & 2 Status DISK 3 & 4 Status Reset esata Conn. 1& 2 USB Conn. Power Status Lock RJ45 Network Conn. 1 & 2 HDD Tray Cooling Fan Power Connection Step 2: Install Hard Drives Refer to compatibility list and install HDDs. For optimal performance consideration, install disks with the same model and storage capacity. The available RAID level depends on the amount of disks installed. 1. Open the lid on the front of the unit enclosure. 2. Pull a HDD tray from the enclosure. See the front view figure. 3. Carefully lock the disks into the HDD tray with screws. 4 screws for each disk. Put the HDD tray back once you finished. Step 3: Connect to the Network 1. Attach one end of the network cable to the RJ45 network connection. See the rear view figure. 2. Attach the other end of the network cable to your Ethernet hub or switch. If there are multiple networks at your facility, note the network to which you connect the unit. You will need this information during the setup process. Please also enable the DHCP function within the network, as the unit will retrieve an IP address through DHCP by default. Step 4: Connect the Power 1. Attach the power cord from the power source to the power adapter. 9

11 2. Connect the power adapter to the back of the unit enclosure. See the rear view figure. 3. On the front of the unit, press the power button. See the front view figure. It takes about a minute for the unit to fully power up. Once it is powered up: The System Status LED turns blue. See the front view figure. The buzzer beeps one time. Step 5: Install the Software 1. Insert the CD into your CDROM. 2. Double-click Setup.exe to begin installation. 3. Follow the instruction of Setup.exe, and click the Finish button to close the installer. Step 6: Set up the Unit The software Installation Wizard performs the setup procedures on the unit. After the procedure, you can begin using it. 1. Go to Start > NUUO NVRmini 2 > NUUO Install Wizard. 2. This program will show the default language setting and initiation mode. 3. Choose your preferred language and initiation mode, and then click the button. 10


12 Express Mode: you don t need to set up the network settings, Date/Time and RAID level. Advanced Mode: configure all settings manually: network, license, camera, Date/Time, upgrade notification, and RAID level Add license function is supported in v and later version. 4. The Installation Wizard program starts searching for all the units on the internet currently. Choose one of them, and then click the button. 5. Type in the password, and then click the OK button. The default Administrator password is admin. 6. Name this server and select the network type, and then click the button. 11


13 Obtain network settings automatically from external DHCP server: apply all settings which are automatically generated by the DHCP server, such as IP, subnet mask, gateway, and DNS. Configure network settings manually: configure the preferred settings one by one. 7. Activate camera license to have more channel capacity, and click the button. 8. Add cameras for this server. There are two ways of adding cameras, 12


14 selecting the searched cameras and manually configuring the cameras. Click the button after completing camera list. 13


15 9. Set up the time zone, date, and time, and adjust daylight saving changes if needed. Once daylight saving function is enabled, the time change will activate automatically every year based on the recurrence you set. Click the button. 10. Check Enable Upgrade Notification box if you want to receive notification when there is a newer FW version. Click the button. 14


16 11. Follow the following instruction and select the RAID type you want to create. Click the button. For 2 bay unit, only RAID 0 and 1 are available. 12. Review your settings. If the settings are correct, click the Finish button to exit the settings procedure and activate the system. 15

17 Once the FINISH button is clicked, the unit will start working. In order to ensure the stability of the unit, never pull any disks out when the system is running. 1.2 LED Status Definitions Function Power Status System Status HDD Status esata Status Ethernet Status LED Status Power-on: blue Power-off: dark Healthy: blue Reset admin password: blue with blinking Unhealthy or abnormal temperature status or RAID volume status abnormal: orange Reset to default setting: orange with blinking Off: dark Healthy: blue Failed: orange No disk: dark Rebuilding: orange with blinking Healthy: blue No disk: dark Linking: blue Accessing: blue with blinking No linking: dark 16

18 2. Settings After setting up the unit, log in to the system by entering its IP address in the browser (Internet Explorer 8 and later). When connecting, choose your language, enter the username and password, and then begin using this system. There are five main functions of this unit: settings, live view, playback, help, and logout. They will be shown on the top of the page. Current firmware version and free storage capacity are shown above the function list. 2.1 Camera Setup Add Cameras by Camera Search The function enables user to automatically search and add cameras in the same network. There are two search mechanisms, one is UPnP, another is camera search tool. Before searching UPnP cameras, make sure that the cameras possess UPnP function. Refer to camera support list. 1. Open Internet Explorer and log in to the unit. 2. Click IP Camera/ Camera Settings. 3. Click the Camera Search tab. 17


19 4. Click the Search button. 5. The system will list all the currently available cameras. The inserted cameras are shown in blue. Click the icon to add a camera into your camera list. 6. After clicking the icon, the camera setting page will pop up. Click the item to which you want to add a camera. 7. Insert the camera name, username, and password. To have better compatibility between camera and system, please make sure the privilege of camera credential is admin-level. 8. Click the Add button to add it. 18


20 9. After clicking the Add button, the updated camera list will be displayed in the Camera Setting tab Add Cameras Manually 1. Open Internet Explorer and log in to the unit. 2. Click IP Camera / Camera Settings. 3. Click the Camera Settings tab, and the camera list will be displayed on the bottom of the page. 4. Click on the camera list for the channel you want to add and enter the camera s information. Camera name: The name of the camera. Address: The IP address. Port: The transmission port. Administrator Name: Login username. Password: Login password. Video Channel: Select the number of analog cameras supported by one video server or select the number of IP cameras possessing multiple 19
21 lens/channels. Protocol: Data transmission protocol. Vendor: Camera vendor name. Model: Camera model name. To have better compatibility between camera and system, please make sure the privilege of camera credential is admin-level. 5. Click the Save button. Save: Save the information of this camera. Reset: Return to the latest saved settings of the selected camera. Clear: Set all the settings to default value. Auto Detection: After inserting IP address, port, username, and password, click this button to automatically detect other camera information, including Channel, Protocol, Vendor, and Model Modify Camera Information 1. Open Internet Explorer, Windows Chrome or Mac Safari and log in to the unit. 2. Click IP Camera / Camera Settings. 3. Click the Camera Settings tab. 4. Click the camera which you want to modify. 5. Modify the information of this camera. 6. Click the Save button. 7. Use the same method to replace a camera if needed Modify Camera Parameters Stream profile is designed for mobile client and lower fps live stream display. Without stream profile integration, users cannot watch live video on mobile client nor select lower fps stream on live view. Further, for performance consideration, we fix the resolution and frame rate for each brand/series. Refer to camera support list. 1. Open Internet Explorer and log in to the unit. 2. Click IP Camera / Camera Parameters. 3. Click the Camera Parameter tab. 4. Click the camera which you want to modify on the camera list. 20

22 5. Modify the information of this camera. 6. Click the Save button. Camera Name: The name of the camera. Multi-stream Settings: Enable/Disable camera multi-stream. Stream: Support up to three streams. Video Format: Choose the type of format which this camera supports. Frame rate: Select the frame rate of the camera. Resolution: Select the resolution of the camera. Quality/Bit Rate: Select the image quality of the camera. Audio: Check the Enable Audio option to view and enable audio recording Set up Lens Settings 1. Open Internet Explorer, Windows Chrome or Mac Safari and log in to the unit. 2. Click IP Camera / Camera Parameters. 3. Click the Lens Settings tab. 4. Click the camera which you want to modify in the camera list. 5. Modify the information of this camera. 6. Click the Save button. 21

23 Camera Name: The name of the camera. Lens Type: There are three types of lens currently, Generic Dewarp, ImmerVision and Vivotek (FE8171V). Generic Dewarp is a general method, which done by software technique, and it s suitable for most fisheye cameras. You are not allowed to select type so far, type depends on camera model. Lens: Enable or disable lens function. Camera Position: Select the position of the camera. If users enable the lens while lens is not installed correctly or not even installed, a warning message will pop up as a notification if users are trying to operate lens on liveview page View Camera Status 1. Open Internet Explorer, Windows Chrome or Mac Safari and log in to the unit. 2. Click IP Camera / Camera Status. 22

24 Connection Status: The status of the connection. Click the Connect or Disconnect button to change the connection status. Status Icon Connection Status Connected Connection Status Disconnected Connection Status Connecting Connection Button Connected: Normal Connected: Over Connection Button Disconnected: Normal Disconnected: Over Rec. Status: The set recording schedule of this camera in this time. Status Icon Recording Status No Recording Recording Status Always Recording Recording Recording Status Always Recording Stopped Recording Status Schedule Recording Recording 23

25 Recording Status Schedule Recording Stopped Frame Rate: The frame rate of this camera. Bit Rate: The transmission bit rate of this camera. Estimated Remaining Recording Time: Estimated remaining recording time is dividing the current free capacity by dynamic total bit rate View Camera Status Details 1. Open Internet Explorer, Windows Chrome or Mac Safari and log in to the unit. 2. Click IP Camera / Details Stream 1: The bit rate of stream 2 Stream 2: The bit rate of stream 3 Stream 3: The bit rate of stream 3 Total Bit Rate: The total bit rate of the camera If your total bit rate becomes red, it means that the loading of the system is too heavy. 2.2 Recording & Event Setup Recording Mode Setup 1. Open Internet Explorer, Windows Chrome or Mac Safari and log in to the unit. 2. Click Recording & Event / Recording settings. 3. Click the Recording Mode tab. 24
26 4. If selecting Always Record, the chosen cameras will begin to record immediately. No Recording: Turn off the recording. Record by Schedule: Recording by schedule. Always Record: Permanently turn on the chosen cameras. Automatic Recycle: Check the Enable option and select the timing of automatic recycle works. We strongly suggest recycling the disk(s) when the storage space is less than 10%. (default: 10%) Keep Video: Set a period during which the recorded video clips will be kept intact. (max: 365) The privilege of automatically recycle is higher than keep video if you select both Recording Schedule / Event Setup Instead of Always Record, you can begin the recording by setting the Recording Schedule. 1. Open Internet Explorer, Windows Chrome or Mac Safari and log in to the unit. 2. Click Recording & Event / Recording Settings. 3. Click the Recording Schedule tab. 4. Check the Day or Week mode. Day: Schedule the recording to turn the recorder on and off at the same time every day according to your setting. Week: Schedule the recording for each day of the week differently. 25


; copy")
27 5. Click the schedule of the camera which needs to be modified. 6. Click the column at the bottom of the page. Insert: Insert new schedules. Delete: Delete the selected schedule. Configure: Modify the schedule and recording mode settings. Copy: Copy current Day Schedule to other channel(s); copy current Week Schedule to other day(s) of a week or to other channel(s). 26


28 7. The default setting of the camera s recording schedule is from 00:00 to 24:00. If you want to modify the time slot, click the Configure button to modify the default settings first. 8. Choose the recording mode. Always Record: Always record. Record on Event: Record when events triggered. The event can be triggered by Motion or Digital input. When setting the event Motion, please first ensure that the motion detection function of the camera has been enabled. 9. If you want to add another new schedule, click the Insert button to add a new one. 27

29 10. Click the Save button. When changing the motion detection settings of a camera, make sure to disconnect your unit and that camera first. Once you have finished, re-connecting them will update the settings in your unit. When setting an event, Motion or Digital input can be triggered from other cameras. This means that if the system detects motion or digital input from other cameras or I/O Box, the camera will begin recording. There is another way to set the schedule. If you want to change the recording time length, drag the end of the time bar from 24:00 back to the length you wish, and then drag the beginning of the time bar to the point at which you would like it to commence recording. (You may also click the Insert button to add new schedules.) 28

30 2.2.3 Camera Events and Responding Actions Setup 1. Open Internet Explorer, Windows Chrome or Mac Safari and log in to the unit. 2. Click Recording & Event / Event & Action Management. 3. Choose the camera, and then select one of the events. The event list depends on camera its own ability. 29


31 Connect lost: When a connection between the camera and this unit is lost, the system will trigger an action. Motion from Camera: When video motion is detected, the camera triggers an action. Recurrent Event : When Recurrent event is trigger, the camera send a snapshot to FTP. Input: Any external input can trigger an action. When setting the event Motion from Camera, make sure to set up the camera s motion detection function first. Besides, event log will be recorded only if event is selected on this page. 4. Click the Configure button to enable the event and select the active period. Always Active: The selected event is always active. Active only in the following period: The selected event is only active in the designated time, which able to cover two days e.g. from 18:00 to 09:00. I/O Type: Check one of the options of I/O type. N/O means normal open, 30
32 while N/C means normal close. 5. Click the Add button to set up the responding actions of this event. Output: When an event occurs, the system will send an output signal to other connected devices. When an event occurs, the system will send notifications and a snapshot. Make sure to add an address first. CMS: When an event occurs, the system will send out a signal and a snapshot to CMS. CMS will highlight this event. Push Notification: When an event occurs, the system will send instant message to the registered mobile clients as a notification. Mobile users can check the recording videos on mobile client to watch what just happened. Refer to Push Notification. E-map popup: When an event occurs, the system will pop up E-map with an event indicator to show users the location of the scene clearly. Snapshot to FTP: When an event occurs, the system will upload snapshots to assigned FTP server. Refer to camera support list. 6. Click the action, and then click the Configure button to modify the details of that action if necessary. 7. Click the Save button. After selecting camera events, the event information will display on the screen when it s triggered. 31
33 2.2.4 I/O Box Input and Responding Action Setup 1. Open Internet Explorer, Windows Chrome or Mac Safari and log in to the unit. 2. Click Recording & Event / Event & Action Management. 3. Click the Event & Action tab. 4. Select an input of I/O Box from list. 5. Click the Add button to set up the responding actions of this event. 6. Click the action, and then click the Configure button to modify the details of that action if necessary. Output: When an event occurs, the system will send an output signal to other connected devices. When an event occurs, the system will send notifications. Make sure to add an address first. CMS: When an event occurs, the system will send out a signal to CMS. CMS will highlight this event. Push Notification: When an event occurs, the system will send instant message to the registered mobile clients as a notification. Mobile users can check the recording videos on mobile client to watch what just happened. Refer to Push Notification. E-map popup: When an event occurs, the system will pop up E-map with an event indicator to show users the location of the scene clearly. Show on Camera: When an event occurs, the system will show an alert message on selected camera(s) of screen. 32

34 7. Click the Save button System Events and Responding Actions Setup 1. Open Internet Explorer, Windows Chrome or Mac Safari and log in to the unit. 2. Click Recording & Event / Event & Action Management. 3. Click the Event & Action tab. 4. Click System to unfold the list of system events, and then select one of the five events. Abnormal disk status: When there is no enough disk space for recording or when disk is abnormal for accessing, the system will trigger an action. Daily system report: Enable users to know the system information, HDD usage, and Disk status everyday through without accessing to the unit to check. Unable to access FTP: The action will be triggered when the connection between the unit and FTP server is lost. Backup unfinished: If there is any file which the system didn t complete the backup process, the file(s) name will be listed and send out 33

.")
35 through after finishing the last file of this backup schedule. Power-on notification: Record the time as power was turning on. Auto power-off notification: If overheat was happened, users will be notified that power is auto off via Click the Add button to set up the responding actions of this event. Follow the steps in the previous section. 6. Click the Save button. and Push Notification are the only two actions to the event Daily system report, Unable to access FTP, Backup unfinished, Power-on notification and Auto power-off notification (overheat). In addition to select a contact, remember to insert the time of sending daily system report Push Notification 1. Open Internet Explorer, Windows Chrome or Mac Safari and log in to the unit. 2. Click Recording & Event / Event & Action Management. 3. Click the Event & Action tab. 4. Add Push Notification as a responding action for an event. Configure the rearm interval and assign user(s). 34
 For example, you set up push notification as the responding action for motion detection.")

36 Frequency Rearm interval: The minimum interval of notifications as the event occurs. (default: 10, max: 300) For example, you set up push notification as the responding action for motion detection. When motion detected, it may trigger several alarms. In this case, you may not want to receive several push notifications frequently, then you can define the suitable rearm interval. User List: All user accounts in this unit. 5. Click the Save button. 6. Sign in the unit on NUUO mobile client with the user account assigned with push notification service. 35

37 7. When an event occurs, the user will get the push notification instantly. The user can click the View icon to watch the recording videos. If the user password is changed, please sign in with the new password to start the service again. If users don t want to receive notifications anymore, users can turn off this feature on NUUO mobile client. There is one possibility of de-registering failed, that is, users have ever logged in to the mobile client by typing both LAN IP and WAN IP of the NVR, but only do de-registering on one side. If users don t want to send notifications to certain user account, users can de-select the user account in Event & Action Management page. User account won t be exported as saving configuration, which implies the user list of push notification won t be saved as well SMTP Server Setup 1. Open Internet Explorer, Windows Chrome or Mac Safari and log in to the unit. 2. Click Recording & Event / Click the SMTP Server tab. 36

38 Server Address: SMTP (Simple Mail Transport Protocol) server IP address. Port: SMTP port. Sender: Sender information. Subject: The subject of the mail. Body: content. SMTP Authentication: Before sending out an , enter the username and password for SMTP authentication. Username Password 4. Click the Send Test Mail button and the system will send a test mail to the sender. Check it after testing. 5. Click the Save button Add Event Contacts 1. Open Internet Explorer, Windows Chrome or Mac Safari and log in to the unit. 2. Click Recording & Event / Click the Contacts tab. 37

39 Add Contact: Add this new contact into the contact list. Reset: Return to the latest saved settings of the contact list. Save: Save this time modification of the contact list. 4. Insert the name of a new contact. 5. Insert the address of this new contact. 6. Click the Add Contactor button. 7. Click the Save button to save this modification of the contact list Set up FTP Server 1. Open Internet Explorer, Windows Chrome or Mac Safari and log in to the unit. 2. Click Recording & Event / FTP Settings. 3. Set up the FTP server and create a folder for backup files. The folder format is FolderName, FolderName/SubFolderName, and so on. For example: NVR 4. After setting up all the information, click the Test FTP button and the system will create a folder to FTP. Check it after testing. In this case, the route of the tested file will be: ftp://nuuo.dnsalias.com/ NVR/NVRsolo_ComputerName 38
40 5. Click the Save button. Make sure the FTP account with privileges of administrator who is able to upload, rewrite, delete files, and create new folder. Besides, make sure the FTP server has enough space for auto backup. To avoid the failure of auto backup, please check the normality of FTP server regularly (e.g., enough space for video, system conditions.) 2.3 RAID & File Settings Create a RAID Volume In this system, the term RAID volume refers to one or more disk drives working together as a RAID logical drive. You must create a RAID volume before starting to record. 1. Open Internet Explorer, Windows Chrome or Mac Safari and log in to the unit. 2. Click RAID & File System / RAID Management. 3. Click the Create tab. 39
 box, and click the Yes, create it button. 8.")
41 4. Choose the RAID level you prefer for your disk array. 5. Check boxes of disks and click the >> button to assign disk drives for this volume. 6. Click the Create button. 7. A confirmation dialog pops up. Check the Yes, I want to create volume with those disk(s) box, and click the Yes, create it button. 8. Creating RAID volume takes a while, depending on the size of disks and the RAID level you choose. You can start recording during RAID creation. 40
42 The RAID Volume will be functional on another unit if all disks of this volume are moved to the unit. After setting RAID level, you are not allowed to change neither the RAID level nor the number of disks containing in this volume. Separate embedded disk(s) and external disk (DAS) from two groups, which implies there is no way to create a single volume with both embedded and external disks inside. To reduce the possibility of having problems to access public folder via My Network Places, before creating new disk volume or modifying volume, please delete the invalid volume if any. If you choose Express Mode when using the Installation Wizard, the disk(s) will be set to RAID 1 (2 bay) or RAID 5 (4 bay) automatically unless the number of disks is not enough for this RAID level View RAID Volume Status RAID status refers to the disk drives on your unit and how they are arranged into a RAID volume. 1. Open Internet Explorer, Windows Chrome or Mac Safari and log in to the unit. 2. Click RAID & File System / RAID Management. 3. Click the RAID Status tab to view the status of your RAID Volume. 41

43 RAID Name: Name of your RAID, automatically assigned when it was created. RAID Level: RAID 0, 1, 5, or 10, specified when it was created. RAID Status: Functional is normal. Critical means there are some problems on RAID volume, but the recording status is normal. Offline means that no volume is found, so recording is stopped and you cannot access your data either. File system error means that RAID volume is existed but unmounted, so recording is stopped and you cannot access your data either. Capacity: Total, free, used data capacity of the RAID volume. Update Time: The time of volume created/updated. Devices: Total number of disks and the number of active, failed, spare disks. Format Progress: The status of RAID format Recovery Progress: The status of RAID recovery View Disk Drive Information 1. Open Internet Explorer, Windows Chrome or Mac Safari and log in to the unit. 2. Click RAID & File System / RAID Management. 3. Click the RAID Status tab. 4. Click on a disk directly to view the information. 42
: Delivers the status of drive health by SMART self-test.")
44 Vendor: Delivers the manufacturer of the disk. Model: Delivers the model number of the disk. Capacity: Total, free, used data capacity of the disk. Firmware: Delivers the firmware version of the disk. Serial No.: Delivers the serial number of the disk. RAID Status: Delivers the status of the RAID that the disk belongs to. Drive Health (SMART): Delivers the status of drive health by SMART self-test. The results will show as follows. Click on the icon to view the detail SMART test report. Icon Status Details Good The disk is healthy and able to work normally. Warning The disk is damaged. Recommend you to change the disk as soon as possible. Abnormal The disk is damaged seriously and it may cause the system errors. Strongly recommend you to stop recording and change the disk immediately. Temperature: Delivers the temperature of the disk. Previous Test Time: Delivers the previous SMART self-test time. SMART Status Check: Run SMART test to update the Drive Health result. The test divides into 2 modes, Short Test and Extended Test. Both of the test modes may affect the recording performance. You may need to stop recording to run the test. 5. Enable and click on Test button to run SMART test. 43

45 SMART test may affect the recording performance. You may need to stop recording to run the test. Click on Stop Test to terminate SMART test. 6. Click on Drive Health (SMART) to view the details. 7. Click on OK button to exit. To make sure all the information of hard disk and RAID volume are correct, 8bay RAID model are not allowed to query status, create, modify, delete, format RAID volume when the front panel is opened Modify RAID Volume This function is designed for replacing a broken hard drive with a new one, 44
46 instead of modifying RAID level. In the condition of critical RAID status, it s a warning to show that one of disks of this RAID volume may be damaged. Even though it s no impact on the recording function, you d better to replace a new disk to make sure the volume with data protection mechanism. This function is not applied to RAID 0, since there is no data protection mechanism by its nature. In case of any unexpected damage, we recommend users to unplug running HDD by this method, which can be viewed as security hard drive remove. 1. Open Internet Explorer, Windows Chrome or Mac Safari and log in to the unit. 2. Click RAID & File System / RAID Management. 3. Click the Modify tab. 4. Click on the volume you want to modify. The information of this volume will be displayed under the Modify Volume section. 45


47 5. After removing the damaged disk. Add a free disk to replace the damaged, and click the Modify button. 6. A confirmation dialog pops up. Check the Yes, I want to modify this volume box, and click the Yes, modify it button. 7. Modifying RAID volume takes a while, depending on the size of disks you choose. Recording won t be stopped during the modification, and the data of this RAID volume is fully accessible. 46


48 2.3.5 Delete a RAID Volume 1. Open Internet Explorer, Windows Chrome or Mac Safari and log in to the unit. 2. Click RAID & File System / RAID Management. 3. Click the Delete tab. 4. Click the option button beside the RAID Volume you want to delete. 5. Click the Delete button. 6. A confirmation dialog pops up. Check the Yes, I want to delete this volume box, and click the Yes, delete it button. 47
49 7. System will restart automatically after RAID volume is deleted When you delete a RAID Volume, all the folders in the RAID volume and all the data saved in the folders will be deleted. Backup any important data before deleting a RAID Volume Format Neither pressing reset button nor loading default setting, the data of RAID volume won t be deleted, which implies that format is the only way to clean the RAID information from disks. 1. Open Internet Explorer, Windows Chrome or Mac Safari and log in to the unit. 2. Click RAID & File System / RAID Management. 3. Click the Format tab. 4. Click the option button beside the RAID Volume you want to format. 5. Click the Format button. 6. A confirmation dialog pops up. Check the Yes, I want to format this volume box, and click the Yes, format it button. 7. System will restart automatically after volume format is complete Modify the My Network Places Protocol Settings 48
50 There are another two ways to access the recorded data in the unit: through Workgroup or through FTP. 1. Open Internet Explorer, Windows Chrome or Mac Safari and log in to the unit. 2. Click RAID & File System / Protocol Control. 3. Click the Windows tab. 4. Check and enter the unit s information. 5. Click the OK button. Services: Enable to let users access this unit through Windows Explorer. (default: disable) Server Name: The name of this unit, which is set in the Setup tab of the Network Setup function. Server Description: The name which will be displayed in Windows Explorer. Domain or Workgroup Name: The name of this unit s workgroup Modify the FTP Protocol Settings 1. Open Internet Explorer, Windows Chrome or Mac Safari and log in to the unit. 2. Click RAID & File System / Protocol Control. 3. Click the FTP Sharing tab. 4. Check and enter the settings of this unit. 5. Click the OK button. 49

51 Services: Whether users can access this unit through FTP or not. Command Port: The port for commands between a server and a client. Passive Ports: The data transmission port of passive mode. 2.4 Auto Backup This feature enables you to automatically backup the recorded video of the previous date to FTP site. There are two steps to enable the function, one is Set up Backup Schedule, another is Set up Backup Server Set up Backup Schedule 1. Open Internet Explorer, Windows Chrome or Mac Safari and log in to the unit. 2. Click RAID & File System / Auto Backup Management. 3. Click the Backup Schedule tab. 4. Set up backup schedule, select the backup channels, and check the Enable option to enable Auto Backup. Auto Backup: Check the Enable option to enable this function. 50
 to backup. 5.")
52 Daily Backup Time: The daily scheduled time to start backup process. Video Start Time: The start time of recorded video of the previous date. Video End Time: The end time of recorded video of the previous date. Camera: Select the channel(s) to backup. 5. Current Event Settings shows the condition of the events of auto backup enable or disable. Follow the steps of System Events and Responding Actions Setup to configure the event & action. The system backups recorded video files one by one. If the connection between the unit and FTP server is normal, but some problems of FTP causes the system unable to write files on FTP, the system would try each file three times before starting to backup the next file. If the connection is lost, the system would wait for the connection, so no file would be skipped. 2.5 Network Setup View Network Status 1. Open Internet Explorer, Windows Chrome or Mac Safari and log in to the unit. 2. Click Network Setup / Network Setup. 3. Click the Information tab to view the unit s network information Network Settings 1. Open Internet Explorer, Windows Chrome or Mac Safari and log in to the unit. 2. Click Network Setup / Network Setup. 3. Click the Setup tab to set up the network settings of your unit. 51
: The selection is for 4bay unit to choose which LAN is connected to the internet, which implies that there is no longer to fix the Internet access to LAN 1 for sending mails,")
53 Server Name: Name your unit. Because of the internal data modifications required, it takes a few seconds to change the name of your unit. Log in again after configuration activated. Internet Interface (WAN): The selection is for 4bay unit to choose which LAN is connected to the internet, which implies that there is no longer to fix the Internet access to LAN 1 for sending mails, activating license online, receiving auto upgrade notification, etc. Internet Protocol: Choose to obtain an IP address from external DHCP server automatically, or configure the IP address manually. IP Address: IP address of this unit. Subnet Mask: Subnet mask address. Default Gateway IP Address: Gateway IP address. Primary DNS: Primary DNS (Domain Name System) address. Secondary DNS: Secondary DNS address. There are two Giga LANs in 4bay unit. We recommend using them under the scenario of two subnets, one is for cameras/devices, and the other is for remote access. If you deploy two LANs on the same subnet, it s likely to make parts of camera disconnected as either one of LAN is disconnected. 52
54 4. Click the DDNS Setup tab to enable Dynamic Domain Name Server function, allowing you to connect unit with dynamic IP address Auto Port-Forwarding This function is designed for saving time in port configuration on router if users want to access the unit (in LAN) from WAN. Once enabling UPnP Service on router, users can do port-forwarding for setting page (default: 80), liveview (default: 5150), playback (default: 5160), and CMS (default: 5170) automatically. 1. Open Internet Explorer, Windows Chrome or Mac Safari and log in to the unit. 2. Click Network Setup / Network Setup. 3. Click the UPnP Port Forwarding tab. 4. Click the Search button, and the searched routers will be listed. 5. Select the searched router, and all UPnP ports configured on this router will show under the UPnP Port Forwarding List. 53


55 6. After selecting one of searched routers, click the icon to set up port-forwarding to this router automatically. You will find ports of setting, liveview, playback and CMS are listed. For security reason, the privilege of UPnP port-forwarding is LOWER than port-forwarding configured on router. Therefore, if the ports have been used on router, we are unable to know before finding out access failure. UPnP port-forwarding is for temporarily use only. Most of UPnP router will clean up all UPnP ports after router reboots. Furthermore, for some routers, if the port you want to add has already been used for other devices in the same way (UPnP port forwarding), this enable action will cover over the settings Network Service Setup 1. Open Internet Explorer, Windows Chrome or Mac Safari and log in to the 54
 Playback Server Port: Playback transmission port.")
56 unit. 2. Click Network Setup / Network Service. 3. Click the Web Service tab 4. Set up a port for this unit and click the Save button. 5. Click the Live View & Playback Service tab. Live Streaming Server Port: Live streaming transmission port. Maximum Connections: Maximum connections from remote access. (Max: 64) Playback Server Port: Playback transmission port. Maximum Users: The number of users who can access playback functions at the same time. (Max: 8) Log Access: Check to record playback access information on NVR Log page, including access time, playback video channels, and time frame. 55
57 Allowed/ Blocked List Allowed List: Only IP addresses from the allowed list are allowed to log in. Blocked List: IP addresses from the blocked list will be unable to log in. When setting Maximum Connections in Live Streaming Server settings, 1 connection means that one user connects to one camera. If the maximum connections value is set to 16, and each user connects to 4 cameras, the allowed connections per user will become 4, rather than CMS Service Setup 1. Open Internet Explorer, Windows Chrome or Mac Safari and log in to the unit. 2. Click Network Setup / Network Service. 3. Click the CMS Service tab. CMS Server: Check the Enable option to enable CMS service. Port: the port number through which the CMS connects to this unit. Maximum Connections: The maximum number of allowed CMS connections. 2.6 Management View the List of Users 1. Open Internet Explorer, Windows Chrome or Mac Safari and login the unit. 2. Click Management/ User Management. 3. Click the Create New Users tab. 4. The list will be displayed on the bottom of the page. 56


58 2.6.2 Create New Users 1. Open Internet Explorer, Windows Chrome or Mac Safari and login the unit. 2. Click Management/ User Management. 3. Click the Create New Users tab. 4. Insert the username of this new user. 5. Insert the password of this new user. 6. Choose the group of this user. Power user: Power user can do all the settings except the Network Settings, RAID Settings, and Management function. User: User just can change his/her password and do the live view and playback functions. Guest user: User can do live view and playback function only. 7. Select the live view cameras which this user can access. 8. Select the playback channels which this user can access. 9. Manage the privileges for each user to decide whether this user can control PTZ, backup, delete recorded data, etc. 10. Check whether this user can browse log or not. 11. Click the Create New User button to finish it. 57

59 The Administrator will be the only user who can use all of the functions. There is a default administrator account in the system, and you cannot create neither another Administrator account, nor another username named admin Modify User Information 1. Open Internet Explorer, Windows Chrome or Mac Safari and log in to the unit. 2. Click Management / User Management. 3. Click the Modify Users tab. 4. Click one of the users in the User List on the bottom of this page. 5. Change the group of this user. 6. Select the live view cameras which this user can access. 7. Select the playback channels which this user can access. 8. Manage the privileges for each user to decide whether this user can control PTZ, backup, delete recorded data, etc. 9. Click the Modify User button to finish it Change a User s Password 1. Open Internet Explorer, Windows Chrome or Mac Safari and log in to the unit. 2. Click Management / User Management. 3. Click the Change Password tab. 58

60 4. Choose the user. 5. Enter a new password. 6. Enter this new password again. 7. Click the OK button Delete Users Except for the administrator, you can delete any users with the following steps. 1. Open Internet Explorer, Windows Chrome or Mac Safari and log in to the unit. 2. Click Management / User Management. 3. Click the Modify Users tab. 4. Click the Delete icon of the user you want to delete. 5. In the confirmation box, click the OK button Online License Activation There are two types of license currently, camera license for 2/8ch-device and POS license for all series. With the camera license upgrade, the 2ch-device will possess up to 4ch capacity, while 8ch-device will possess up to 16ch capacity. With the POS license upgrade, users can use POS function. There are two ways to activate license, online and offline. 59
61 1. Open Internet Explorer, Windows Chrome or Mac Safari and log in to the unit. 2. Click Management / License Management. 3. Input serial number under the section of Online Activation, and click the Activate button. 4. The license will be updated in License List if activated successfully Offline License Activation If the device is set up in Intranet (Local LAN) without Internet connection, there is another way to activate license. 1. Open Internet Explorer, Windows Chrome or Mac Safari and log in to the unit. 2. Click Management / License Management. 60


62 3. Click the Export button under the section of Offline Activation to export the information of this unit. 4. Download dialog pops up. Save the request file and take it to other PC which is connected to the Internet. Furthermore, the PC should be installed OffLineTool.exe which can be found from NVRmini 2 toolkit. 5. Execute the OffLineTool.exe in that PC with Internet connection, and select the request file offline.req. 61


63 6. Input the serial number, click the Activate button, and save the.dll file offline_license.dll. 7. Import the license file to the unit. 8. The license will be updated in License List if activated successfully Online License Transfer There are two ways to transfer license, online and offline. 1. Open Internet Explorer, Windows Chrome or Mac Safari and log in to the unit. 2. Click Management / License Management / Transfer. 62
64 3. Select the license you want to transfer from the License List below, and click the Transfer button. 4. The license will be removed from License List if transferred successfully Offline License Transfer If the device is set up in Intranet (Local LAN) without Internet connection, there is another way to transfer license. 1. Open Internet Explorer, Windows Chrome or Mac Safari and log in to the unit. 2. Click Management / License Management / Transfer. 3. Select the license you want to transfer from the License List below, and click the Export button. 4. Download dialog pops up. Save the request file. The license will be removed from License List temporarily, but the transfer process is not finished yet. 63

65 5. Take it to other PC which is connected to the Internet. Furthermore, the PC should be installed OffLineTool.exe which can be found from NVRmini 2 toolkit. 6. Execute the OffLineTool.exe in that PC with Internet connection, and select the request file offline.req. 7. The license you are going to transfer is listed. Click the Transfer button to finish the transfer process View the Event Log 1. Open Internet Explorer, Windows Chrome or Mac Safari and log in to the unit. 2. Click Management / Log System to find the event list of your unit. 64

66 There are four kinds of event which will be listed on this page. System Log: The log information of the operations to your unit, such user access information, as reboot or shut down. NVR Event Log: The log information of the Event & Action Management, such as motion detection or camera connection lost. Export and Backup Log: The log information of the track of video data exported and backup. The NVR Event Log will be recorded only if event is selected on Event & Action Management page. As for user access information, please go to Network Service to check Log Access box to enable this function. You may click on Log page (Internet Explorer only). to view the event playback in a separated page at NVR Event Save Unit Configuration Save configuration can let you save the settings of this unit. These settings can be applied to other units, which will let you set other units more easily. 1. Open Internet Explorer, Windows Chrome or Mac Safari and log in to the unit. 2. Click Management / Save / Load Configuration. 3. Click the Save Configuration tab. 65


67 4. Check the box of E-Map Settings or POS Settings if you want to keep the configuration. 5. Click the OK button. 6. The configuration file will be generated into the chosen folder. User account won t be exported as saving configuration, which implies the user list of push notification won t be saved as well Load Unit Configuration / Default Settings Load configuration can let you apply another unit s settings to the current unit; Load Default Settings will revert all of the unit s settings back to the default factory settings. 1. Click Management / Save / Load Configuration. 2. Click the Load Configuration tab. 3. Follow the direction to Load Default Settings or Load Configuration. 66
68 For the former, uncheck the box of Network Settings to keep the IP address; for the latter, check the box of E-Map Settings or POS Settings if you want to restore the configuration. 4. Click the Load button. 5. A confirmation dialog pops up. Click the OK button to begin to load the settings into your unit. If there is POS database existed in the unit, loading configuration with different POS application config is likely to make the original POS data unsearchable. If the saved configuration is without E-map or POS settings, selecting loading configuration with E-map/POS settings will lead you get the default. The original E- map/pos settings (if any) are covered and untraceable. User account and privilege will be kept even if loading default settings, while camera settings, recording schedule, event & action settings, setting and server settings won t be. RAID information will always be kept whether loading default settings or loading configuration. User account won t be exported as saving configuration, which implies the user list of push notification won t be saved as well. 2.7 System View System Information 1. Open Internet Explorer, Windows Chrome or Mac Safari and log in to the unit. 2. Click System / System Information. 67
69 The system information includes the following items. Operating System: Embedded Linux NVR Version: NVR system version Device Pack Version: Camera package version CPU: CPU model number CPU Loading: The approx. CPU loading of this unit MAC Address: MAC address of this unit CPU Temperature System Fan Speed Locate: Click to trigger the buzzer to let you know where the unit is Smart Fan Control 1. Open Internet Explorer, Windows Chrome or Mac Safari and log in to the unit. 2. Click System / System Settings. 3. Click the Fan Control tab. 4. Check the Enable or Disable option. 5. Click the OK button Buzzer Configuration There is a buzzer in the unit. When the unit finishes booting or when a problem is detected, this buzzer will sound. This buzzer is enabled by default. You can disable/enable this buzzer with the following steps. (We recommend that this buzzer should be enabled.) 1. Open Internet Explorer, Windows Chrome or Mac Safari and log in to the unit. 2. Click System / Settings. 3. Click the Buzzer tab. 68
 battery power and when to shut down, after power failure. 1.")
70 4. Check the Enable or Disable option. 5. Click the OK button UPS Setup This feature enables you to tell your unit how long to run on APC Uninterruptable Power Supply (UPS) battery power and when to shut down, after power failure. 1. Attach the APC UPS to one of the unit s USB ports. 2. Open Internet Explorer, Windows Chrome or Mac Safari and log in to the unit. 3. Click System / Settings. 4. Click the APU UPS tab. 5. Check one of the options: Disable: Run until the UPS battery is depleted System shutdown as power of the UPS remains %: Run until the UPS battery remains this percentage. System shutdown as power of the UPS remains min.: Run until the UPS battery remains the certain period of time. 69
71 6. Fill in the specific value if you choose the last two options. 7. Click the OK button Upgrade the System 1. Open Internet Explorer, Windows Chrome or Mac Safari and log in to the unit. 2. Click System / Upgrade. 3. Click the Firmware Upgrade tab. 4. Browse the FW for upgrading and click the OK button. 5. A confirmation dialog pops up. Click the OK button to start upgrade process. 6. After upgrade, the system will restart. You need to re-access the unit again after this. To make sure the future function expansion and upgrading quality, from version v1.6.1, users are only allowed to update system as RAID volume created. What s more, there must be at least 300MB free space of this volume. Please do not power off the server while system upgrading Upgrade Notification Enable this function to allow us to notify you automatically when there are firmware updates (Recommended). This will help keep your system up to date. The updater will also collect info from your system that will be used for future system improvements. 1. Open Internet Explorer, Windows Chrome or Mac Safari and log in to the unit. 2. Click System / Upgrade. 70

72 3. Click the Upgrade Notification tab. 4. Check the option if you agree to be bound by the agreement. 5. Click the OK button System Date and Time Setup 1. Open Internet Explorer, Windows Chrome or Mac Safari and log in to the unit. 2. Click System / Date/Time. 71

73 3. Choose the time zone. 4. Configure the year, month, day and time manually, or enable NTP server to synchronize time automatically. When NTP server enabled, the date/time settings will be grayed out. 5. For NTP setup, choose to synchronize every month, every week, or every day at the exact hour. 6. Check the Adjust clock for daylight saving changes option and select the time change of daylight saving time in your location. Choose the start time and end time of recurrence. 7. Click the OK button to restart system to activate the changes. Please note system will restart right after synchronization, meaning there will be no video recorded during this period. Please choose the update interval carefully. Clicking the Update Now button will save the settings automatically before restarting system Restart the Unit 1. Open Internet Explorer, Windows Chrome or Mac Safari and log in to the unit. 72
74 2. Click System / Reboot/Shut down. 3. Check the Reboot option. 4. Click the OK button. 5. A confirmation dialog pops up. Click the OK button to reboot the unit. The restart procedure runs automatically. When the unit is fully online: The System Status LED turns blue. The buzzer beeps one time (if the buzzer is enabled). During system restart, none of your files will be accessible from your desktops/laptops Auto Reboot 1. Under System / Reboot/Shutdown 2. Click on Auto Reboot tab 3. Click and Enable Auto Reboot 4. Select from Every Month, Every Week, Every day, and select up to the hour on to restart the system on that day. Recording will stop during reboot, with estimated time of 3 minutes. Remote live viewer will disconnect for a while when system reboots. 73
75 Shut down the Unit The only time you need to shut down the unit is to replace the disk drive cooling fan or the power supply. During and after the shutdown, none of your files will be accessible from your desktops/laptops. There are two ways to shut down the unit. Shut down by Software 1. Open Internet Explorer, Windows Chrome or Mac Safari and log in to the unit. 2. Click System / Reboot / Shut down. 3. Check the Shut down option. 4. Click the OK button. 5. A confirmation dialog pops up. Click the OK button to shut down the unit. Direct Shutdown 1. Open the lid of the unit. 2. Press and hold the power button for 2 seconds and release your hands when the buzzer is beeping once. 3. System will begin the shut down process, which takes about 30 seconds to few minutes depends on number of recording channels and other factors. If the system is crashed and stocked, you can press the power button and hold it for 10 seconds to force to cut off the power directly. We don t recommend to do it if the system work properly. 74
76 3. POS 3.1 Introduction System Introduction NUUO POS, a Point of Sales Systems based on NUUO NVR/DVR/NVDR/NVRmini/NVRmini 2, provides financial transaction s surveillance solution in one central system. The architecture is as below; POS transaction data flows to NVRmini/NVRmini 2 by Ethernet. Each Cash Register with an external receipt printer is connected by DB9 cable. The transaction information delivered in R232 format can be converted to Ethernet through SCB-C31A POS data capture converter. Definition of Terms Terms Definition POS Original Original data from POS. Usually with a lot of Data symbols and no line feed. POS Filtered result by user-defined tag-filter. Transaction Product Specification NUUO POS Box SCB-C31A Input RS232 Output Ethernet DC In DC +10V to +15V Power consumption 500 ma Operating Temperature -20 to 65 75
77 Operating Humidity 0-90 % Non-Condensing Baud Rate 110 bps to kbps Data Bits 5, 6, 7 or 8 Stop Bits 1, 1.5 or 2 Parity None, Even, Odd, Mark, Space Flow Control None, RTX/CTS, XON/XOFF, DTR/DSR Hardware Installation SCB-C31A To connect Cash Register, Printer, and SCB-C31A POS data capture converter together, please follow below steps: Step 1: Please refer the user manual to setup Cash Register and printer. Step 2: Using a Y-shape DB-9 cable, one DB-9 female connect to POS system and one DB-9 male connect to the receipt printer Y-shape (provided by Printer vendor). Step 3: Using another DB-9 female connect to SCB-C31A POS Data Capture R232/Ethernet converter with Null modem. There are two kinds of serial cable: Straight pass-through and Null-Modem. The connection between SCB-C31 POS Data capture box and Y-cable must be null modem (in package). Step 4: Check the system switch of the SCB-C31A is switched to OFF-OFF position. Step 5: Connect SCB-C31A with power source. Step 6: Connect SCB-C31A with internet port by RJ45 LAN cable. Cash register F Y-cable Null Modem SCB-C31A Ethernet Printer M F F M Provided by printer 76

78 The LED Indicators: LINK LED: Ethernet cable connection and data active. RUN LED: System is ready (Blinking). Serial 1: Transiting/Receiving Indicator Software Installation SCB-C31A Step 1: Use IE-browser to setup SCB-C31A, the default IP address is Step 2: Setup IP address and password in Server page, and click the Save button. Each time you switch the page of the web, please click Save at first. If you leave this page without saving, all changes will be ignored. 77

79 Step 3: Setup Password if needed. Password is only using to activate a security feature on the serial server. Once a password is entered it will be required to access the menu and make change of configuration when access. Please write down the Serial number and MAC address, these two parameters are necessary when user forget your password. Step 4: Setup according to your POS or Cash Register. Usually all devices are default setting, you can reserve your time to pass this step. Step 5: Please restart/reset the box after changing configurations to active setup. To reset the unit manually apply power, insert a small plastic tool, and press lightly depressing reset located between the switch. Hold for 3 seconds and release. The Link and Run light will go out and turn back on. The SCB-C31A will revert to the last setting. Every time you change the configuration of SCB-C31, please check above setting, especially maximum connection and Remote IP address to avoid connection fail Connection via TCP Client If the cash register possess network, please install system according to following diagram and purchase a POS license to activate this function. 78

80 NVRmini Software Setup Activate POS License If you are not the SCB-C31 user, you need to activate POS license before starting the following settings, please refer to License Activation for details NVR POS Setting 1. Open Internet Explorer, Windows Chrome or Mac Safari and log in to the unit. 2. Click POS & I/O / POS Settings. 3. Click the Settings tab to set POS application. 79

81 Data Source: List of all the data sources. Insert: Click to insert POS and do the POS settings. See Insert POS Setting for details. Delete: Click to remove the selected POS from the list. See Delete POS Device for details. Configure: Click to configure the selected POS and modify the POS settings. See Configure POS Setting for details. POS info: The setting information of the selected POS on this window. Name: Name of the POS data source. IP: IP of the POS data source. Serial Box: The serial box data source used. Tag Filter: Tag type to filter the data from POS. See Tag Filter for details. Associated Cameras: List of all the associated cameras of the selected POS. 4. Click the OK button to finalize the modification Insert POS Setting 1. Click Insert button to open the POS Setting window. 2. Set up basic data source, including Name, Model, IP address, and Port. There are three types of models. 80

82 SCB-C31: The device possesses one POS license, and should be equipped with the cash register not working as TCP server. SCB-C31A: The difference from SCB-C31 is not possessing one POS license, so user should activate POS license. TCP Client: Cash register possesses with network, so no need to have SCB-C31A as a converter. POS license is needed. 3. After setting, click Test Connection to test POS device connection. 4. Set up Miscellaneous options, including Record POS Transaction and Display on Video Preview. Record POS Transaction: Select this checkbox to record POS transaction data. Users are allowed to search the POS data. Display on Video Preview: Select this checkbox to display POS transaction overlay on associated camera live video. Two types of transaction data display time: Name: Name of the POS data source. Always: Keep transaction data on video until receiving next transaction date. Last for seconds: Each transaction data only lasts on video for seconds after receiving the last data of transaction. 81
83 5. Select Tag Filter. See Tag Filter for details. 6. Select the camera of Associated Cameras to display POS transaction data overlay on live video. 7. Set up display area for each camera video in Display Region Definition. Default: The default display area is in the upper left corner of video image. User Define: Enable User Define, and define display area by dragging rectangle 8. Click the OK button to save Delete POS Device 1. Choose POS device. 2. Click Delete button to remove this POS device from the system Configure POS Setting 1. Choose POS device. 2. Click Configure button to open the POS Setting window. 3. Refer to Insert POS Setting to modify configuration. 3.3 Tag Filter The original transaction data from POS system is hard to read. Users can define filters to make the POS strings meaningful. The system also provides a simple default tag filter to filter out same common EPSON commands, users can base on this default tag filter to edit their customized filters Add New Tag Filter 1. Click Insert button or choose a device and click Configure button to open the POS Setting window. 2. Click New to open tag filter window. General: Name of Tag Filter and Connect button. Original Data: Original transaction data from POS device. Filtered Data: Filtered data after definition. Filter Functions: Tool used for defining filter type. Filter List: List of all filters. Data Tools: Clear/import/export buttons to clear/import/export the 82

84 original and filtered data. Filter Tools: Upper/down buttons to arrange the priority of each filter; remove button to remove the filter from list. 3. Enter name of this tag filter. 4. Click Connect button to capture POS transaction data from POS device. The original transaction data will be shown on the left window. If you don t want the data keep importing when editing filter, click Disconnect button to stop connecting. 5. Data Tools Clear: Remove data from Original Data window and Filtered Data window. Import: Reload exported binary data. Export: Capture and export original binary data. 6. Start to edit tag filters. Click and drag to select text from Original Data window, and then use the below six buttons to define filters. The filtered transaction data will be shown on the right window. 83
 users want. The replaced text will be shown on the right window.")

85 Omit: Neglect the selected text which is meaningless or not important. The text will disappear on the right window. Substitute: Use another word(s) to replace the selected text. The system will pop up a substitution panel for replacing word(s) users want. The replaced text will be shown on the right window. Add New Line: Define the selected text as the symbol for changing to new line. The result will be shown on the right window. Start: Define the selected text as the symbol for transaction beginning. The filtered data will be separated line as below. Cash Register Opened: Define the selected text as the symbol for opening cash register. The filtered data will be shown the <Cash Drawer Open> mark as below. 84


86 End: Define the selected text as the symbol for transaction ending. The filtered data will be separated line as below. 7. Filter Tools Up: Move a tag filter up; the upper filter will be operated earlier. Down: Move a tag filter down; the lower filter will be operated later. Delete: Remove a filter from this tag filter list. 8. Click the OK button to save Edit Tag Filter 1. Select Tag Filter name from drop-down menu. 2. Click Edit button. 3. Configure the Tag Filter window. 4. Click the OK button to save Delete Tag Filter 85

87 1. Select Tag Filter name from drop-down menu. 2. Click Delete button to delete it Import/Export Tag Filter 1. Click Import/Export button and select Import/Export URL. 2. Click Open/Save to Import/Export Tag Filter. 3. After importing tag filters, users can simply select tag filter from drop-down menu without editing new tag filter. 3.4 POS Display Font The system allows users to set up the fonts of POS transaction data on live view video and playback video Live View 1. Open Internet Explorer, Windows Chrome or Mac Safari and log in to the unit. 2. Click the Live View. 3. Click the General Setting button to open Live View Setting window. 4. Select the font, font size, font color and background for the POS transaction data overlaid the video. 86

88 5. Click the OK button to save Remote Live Viewer 1. Startup > NUUO NVRmini 2 > Remote Live Viewer 2. Click the General Setting button to open Live View Setting window. 3. Select the font, font size, font color and background for the POS transaction data overlaid the video. 87

89 4. Click the OK button to save Playback 1. Open Internet Explorer, Windows Chrome or Mac Safari and log in to the unit. 2. Click the Playback button. 3. Click the Setting button to open Setting window. 4. Select the font, font size, font color and background for the POS transaction data overlaid the video. Also, select the type of transaction data display time. 88

90 3.4.4 Playback System 1. Startup > NUUO NVRmini 2 > Playback System 2. Click the Setting button to open Setting window. 3. Select the font, font size, font color and background for the POS transaction data overlaid the video. Also, select the type of transaction data display time. 89

91 3.5 POS Transaction Data Search POS Search tool is used to search key word of all transaction data Search POS Transaction Data through Playback 1. Open Internet Explorer, Windows Chrome or Mac Safari and log in to the unit. 2. Click the Playback button. 3. Click the Open Record button to open Data Time Search Dialog window. 90


92 4. Click the POS Search button to open POS Search Dialog window. 5. Select a POS device(s) from the POS list. 6. Set up Start Time and End Time in Data Time Period section. 7. Enter the keyword you want to search. 8. Click the Search button, the results will be shown in Transaction table. 9. Select an item from Transaction table, the transaction detail will be shown in the table of lower right corner, and the recorded video of associated camera will be shown in the upper right corner. 10. Select the checkbox of Search within result, and enter a keyword, you can search the data within the results Search POS Transaction Data through Playback System 91


93 1. Startup > NUUO NVRmini 2 > Playback System. 2. Click the Open Record button to open Data Time Search Dialog window. 3. Click the Remote Server Site icon on the top of the window to select the server users want to access. 4. Follow the step 4 through 10 of Search POS Transaction Data by Playback to search the data. 3.6 Playback Video with POS Data Enable POS overlay in Setting window to view recorded video with POS transaction data (Refer to POS Display Font). If the option is enabled, the system will auto display transaction data when playing recorded video. There are two modes to select video period Select Period by POS Search 1. Refer to POS Transaction Data Search. 2. Select the transaction data from the result list, and click OK. 3. The period you select from POS search results will be selected automatically. 4. Click OK to playback videos. 92
94 3.6.2 Select Period by Data & Time through Playback 1. Open Internet Explorer, Windows Chrome or Mac Safari and log in to the unit. 2. Click the Playback button. 3. Click the Open Record button to open Data Time Search Dialog window. 4. Highlight the video clip you want to review by left-clicking and dragging the time period. You may also utilize the Start Time and End Time in Date Time Period section after choosing cameras. 5. Click OK to playback videos Select Period by Data & Time through Playback System 1. Startup > NUUO NVRmini 2 > Playback System. 2. Click the Open Record button to open Data Time Search Dialog window. 3. Click the Remote Server Site icon on the top of the window to select the server users want to access. 4. Highlight the video clip you want to review by left-clicking and dragging the time period. You may also utilize the Start Time and End Time in Date Time Period section after choosing cameras. 5. Click OK to playback videos. 3.7 Backup Video with POS Data There are three ways to backup video with POS transaction data Backup through browser 1. Open Internet Explorer, Windows Chrome or Mac Safari and log in to the unit. 2. Click the Open Record button to select data. 3. Click the Backup button. 93
95 4. Check the Backup POS Transaction option. 5. Set the Start Time and End Time you want to backup. 6. Select the cameras you want to backup. 7. Select the directory you want to save the backup data. 8. Click the Backup button. 9. The system will then begin backup process automatically Backup through Playback System 1. Startup > NUUO NVRmini 2 > Playback System. 2. Click the Open Record button to select data. 3. Click the Backup button. 4. Check the Backup POS Transaction option. 5. Set the Start Time and End Time you want to backup. 6. Select the cameras you want to backup. 7. Select the directory you want to save the backup data. 8. Click the Backup button Backup through Backup System 94
96 Please refer to step 1 to 14 of the content of Backup and Delete Records, and check the Backup POS Transaction option. 95

97 4. I/O 4.1 Introduction System Introduction NUUO provides remote I/O solution for NVRmini/NVRmini 2 by connecting SCB-C31 with NUUO I/O Box SCB-C24/26/28. Refer to the below architecture, I/O device is connected directly with I/O Box, and input/output signal delivered in RS485 format are converted to Ethernet through SCB-C31. NVRmini/NVRmini 2 can use the signals to do more sophisticated setup, such as starting recording when input triggered, triggering output as an event happened, and much more HW Installation SCB-C24/26/28 must work with SCB-C31 (Ethernet-RS485 converter). Further, the C31 Box cannot be used for POS and converter at the same time, and one C31 Box can be paired with one NVR unit only. Please follow the steps below to configure the devices. Step 1: Check the system switch of SCB-C31 is switched to OFF-OFF position. Step 2: Connect SCB-C31 with power source. Step 3: Connect SCB-C31 with internet by RJ45 LAN cable. Step 4: Connect I/O Box with power source. Step 5: Connect SCB-C31 and I/O Box with cable, positive connection (TX+/D+ and DATA+) and negative connection (TX-/D- and DATA-). Take SCB-C31 with I/O Box SCB-C24 for example as below. 96

98 RS485 RJ-45 RS485 Reset Switch Power Multiple I/O Boxes can be connected to a single SCB-C31. However, series connection of I/O boxes is forbidden. Furthermore, the default ID for each I/O Box is the same. Please follow the direction to setup I/O Box one by one Software Installation SCB-C31 Step 1: Open Internet Explorer to setup SCB-C31. The default IP address is Step 2: Setup IP address and port. 1. Static IP Address 97

99 2. Server Listening Port: The default port is 4000, which is not the port for setting page, but for signal transmission. Step 3: Click the Apply button to activate configuration. Due to the stability of data transmission, one SCB-C31 can be paired with one NVR unit only Software Installation SCB-C24/26/28 The default ID of I/O Box is identical. To avoid the conflict between Boxes, please connect only one Box with SCB-C31 and execute the setup application to change the ID from the default value (1). 1. Execute IOConfig.exe, type in the IP address and port of SCB-C31, and click the Scan button. 98

100 IOConfig.exe starts scanning the ID from 0 to 255, and it may take around a minute to finish scan. 2. When the I/O Box is discovered, click on the item and change the ID from the New Address field. Click the Update device button to activate the settings. 3. Scan again to make sure the configuration is validated. In this case, we changed the ID to 10, so we can modify the number of Starting address to 10 to save the searching time. 99

101 4. Refer to the HW Installation section to connect other I/O Box and repeat the steps 1 through 3 above to configure more I/O Boxes. 4.2 Software Setup Add I/O Box 1. Open Internet Explorer, Windows Chrome or Mac Safari and log in to the unit. 2. Click POS & I/O / I/O Settings / I/O Box Settings. 3. Enter the information of I/O box. Device No: The unique ID system distributes in sequence automatically. Device Name: The name of the I/O box. Device Type: The types of I/O box, including SCB-C24, SCB-C26, and SCB-C28. IP Address: The IP Address of SCB-C

102 Port: The transmission port of SCB-C31. ID: The ID of the I/O box. 4. Click the Create button, and the information will be updated in I/O Box List. 5. Repeat steps 3 and 4 to add more I/O boxes in the list. 6. Click the Save button to activate the settings. Meanwhile, system will distribute an unique ID to each device Modify I/O Box Information 1. Open Internet Explorer, Windows Chrome or Mac Safari and log in to the unit. 2. Click POS & I/O / I/O Settings / I/O Box Settings. 3. Click the I/O box which you want to modify from the list. 4. Modify the information of this I/O box, and click the Modify button. 5. Click the Save button to activate the settings I/O Pin Setting 1. Open Internet Explorer, Windows Chrome or Mac Safari and log in to the unit. 2. Click POS & I/O / I/O Settings / I/O Pin Settings. 3. All input and output pins are shown in this page, including the ones from cameras and I/O boxes. Check the box to enable a pin (defaulted), and type a name in the field for each I/O pin. 101
103 4. For input pin, you can select an associated camera for it, which will be the communication media for server and client. (e.g. when an input was triggered and pushed a notification to mobile, users can playback the videos of its associated camera.) 5. For output pin, you can configure its duration time to control how long output acts after it s triggered. The duration range is 3 sec~60 sec. N/A stands for unlimited. 6. Click the Save button. If the box of I/O pin is unchecked, this pin won t be shown on relative application pages. In other words, you cannot do any setting/operation with this pin. See details in next section. 4.3 Relative Configuration and Application Record on Input Trigger Refer to Recording Schedule / Event Setup Input and Responding Actions Refer to I/O Box Input and Responding Action Setup I/O Control Panel in Live View Refer to Live View Control Panel. 102
104 5. Live view There are two ways to execute the live view function: with Internet Explorer, Windows Chrome or Mac Safari or with the Remote Live Viewer application. 5.1 Internet Explorer Live View Control Panel Log In/ Log Out (Live view service) Camera List Set Preset Point / Go to Preset Point Zoom out / Zoom in PTZ Camera Control Focus Far / Auto Focus / Focus Near Play / Stop / Drop Information Display Window Start Menu Playback Live View Setting PTZ Camera Control: You may control the camera view by using the PTZ camera control panel to adjust the camera s view. This is only available with cameras that support the PTZ function. Set Preset Point / Go to Preset Point: Adjust the camera view and click the button to set up this view as preset point. Repeat the process to add more preset points. Click the button to see the preset view. Zoom: Click the + or button to zoom in or zoom out the view. Play / Stop / Drop: Select a camera / video and click this button to play/stop/disconnect a particular channel. Information Display Window: Display video information including 103
105 server name, video current status, and bit rate for a selected channel. Start Menu > E-Map: Upload map and drag camera or I/O on it to track device location and alarm status with instant response when an event occurred. See details in the chapter of E-Map. Start Menu > I/O Control Panel: Utilize I/O device function remotely. User can remotely adjust the Output Pins by turning it on or off. Click to turn on/off the Output pins Playback: View playback video remotely. Auto Scan: Activate auto scan to rotate the channels on the display screen. For instance, you may select to show only 4-split screen on the liveview, while connecting 16 channels to the system. With auto scan function, you are able to see all 16 channels by turns. Layout: Click to change the multiple-split layout. Auto Scan Full Screen Layout: NxN You can right click on the camera screen to enable the following function. 104
106 Enable Move: Adjust the current view of camera which supports PT function by dragging the button on the display screen. Enable Digital PTZ: Click the + or button to zoom in or zoom out the view. The lower right square flashing on the video grid indicates the correspondent view of the camera. Fisheye Lens Setting: Select the mode of lens. There are four modes for Generic Dewarp, including Original, Rectilinear mode, Quad mode and Dual-view panorama mode; four modes for ImmerVision, including Original, PTZ mode, Quad mode and Perimeter mode; and other four modes for Vivotek Fish Eye, including Original, Rectilinear mode, Full-view panorama mode, Dual-view panorama mode. Type of modes depends on lens location. Stream Profile: Select the stream profiles, original, low, minimum. Enable Audio: Enable audio on active channel(s). Snapshot: Select the snapshot function to capture a specific video image immediately. Toggle Fullscreen: Select it to view cameras with full screen. Press Esc or right click un-select full screen to go back to the original view. Also, right click on camera list to duplicate and connect/disconnect designate cameras, and do other functions. Duplicate Camera: Select the duplicate camera function to create multiple views. The duplicated camera will be shown with green indicator as the right picture. Combine this function with digital PTZ, users are allowed to enlarge different spots and view them in different channels without failing to record the whole view. Connect / Disconnect: Click to connect or disconnect the designate camera. Login / Logout Server: Click to login or logout. 105
 from the camera list on the right and then drag it to where you wish the image to be displayed.")
107 Connect All / Disconnect All: Click to connect or disconnect all cameras Live View Setting 1. Open Internet Explorer, Windows Chrome or Mac Safari and log in to the unit. 2. Set the cameras. 3. Click the Live View button on the top of the page. 4. Select a camera(s) from the camera list on the right and then drag it to where you wish the image to be displayed. When running Internet Explorer, do not use the function Open in New Window. Using this function may cause Internet Explorer, Windows Chrome or Mac Safari to become unstable General Setting 1. Open Internet Explorer and log in to the unit. 2. Click the Live View button on the top of the page. 3. Click the General Setting button. 4. Click the General tab. 106

108 5. Check the Enable audio on active channel option to enable audio streaming on active channel. This function synchronizes with right click on camera to enable audio. 6. Check Synchronize video frames to avoid the tearing problem occurring in video display while increasing the CPU loading. 7. Click the OK button Stream Profile Setting Select the preferred stream type of each camera as default live view profile. 1. Open Internet Explorer, Windows Chrome or Mac Safari and log in to the unit. 2. Click the Live View button on the top of the page. 3. Click the General Setting button. 4. Click the Camera tab. 107


109 5. Adjust the stream profile of every camera with stream profile enabled in the setting page. 6. Click a camera and select its stream profile, and click the Copy to button to apply this profile to other channels. 7. Click the OK button OSD (On-screen display) Setting 1. Open Internet Explorer, Windows Chrome or Mac Safari and log in to the unit. 2. Click the Live View button on the top of the page. 3. Click the General Setting button. 4. Click the OSD tab. 108
110 5. Check the Enable camera OSD option. 6. Set the foreground and background settings of the OSD. 7. Select which kinds of information will be displayed on the screen. 8. Click the Apply button to preview the result. 9. Click the Default button to back to the default settings if necessary. 10. Click the OK button Monitor Display Setting 1. Open Internet Explorer, Windows Chrome or Mac Safari and log in to the unit. 2. Click the Live View button on the top of the page. 3. Click the General Setting button. 4. Click the Monitor Display tab. Layout Auto Scan 5. Select Primary channel which will always be on the screen when activating auto scan; while select Secondary channel which has second priority when activating auto scan. Enter the time interval for auto scan. 6. Select the screen division of NxN type. 7. Click the OK button Notification 1. Open Internet Explorer, Windows Chrome or Mac Safari and log in to the unit. 2. Click the Live View button on the top of the page. 109

111 3. Click the General Setting button. 4. Click the Notification tab. 5. Check Show recording status to show the crystal ball with recording status on monitor display. 6. Check Show camera event to display the words of detected camera event on the correspondent screen. 7. Check the Enable playing sound on event option. Select sound file, default sound or user defined sound (.wav), and define the cycle. 8. Check Popup system event to pop up system event message dialog as a warning when a system event occurred. 9. Click the OK button. The playing sound function only activates on event, which means you have to setup camera motion, camera I/O and I/O Box I/O as an event. Refer to Event & Action Management to do the setting Set up Joystick Control 1. Open Internet Explorer, Windows Chrome or Mac Safari and log in to the unit. 2. Click the Live View button on the top of the page. 3. Click the General Setting button. 4. Click the Joystick tab. 110

112 Function: You can choose the function from the drop-down menu for the button of the joystick. Parameter: Choose the preset point from the drop-down menu. Default: Click to back to default setting. Import: Click to import the settings. Export: Click to export the settings. 5. Click the OK button. 111
113 5.2 Remote Live Viewer Application Remote Live Viewer Application Control Panel Log In/ Log Out (Server / Group) Server and Camera List Set Preset Point / Go to Preset Point Zoom out / Zoom in PTZ Camera Control Exit Minimize Focus Far / Auto Focus / Focus Near Play / Stop / Drop Information Display Window Start Monitor Playback Live View Setting PTZ Camera Control: You may control the camera view by using the PTZ camera control panel to adjust the camera s view. This is only available with cameras that support the PTZ function. Set Preset Point / Go to Preset Point: Adjust the camera view and click the button to set up this view as preset point. Repeat the process to add more preset points. Click the button to see the preset view. Zoom: Click the + or button to zoom in or zoom out the view. Minimize: Minimize the Remote Live Viewer window. Exit: Shut down the application. Play / Stop / Drop: Select a camera/ video and click this button to play/stop/disconnect a particular channel. Information Display Window: Display video information including server name, video current status, and bit rate for a selected channel. Start Monitor > Monitor: Select Open Monitor to append monitor to view more live videos on multiple monitors. 112

114 Start Monitor > E-Map: Upload map and drag camera or I/O on it to track device location and alarm status with instant response when an event occurred. See details in the chapter of E-Map. Start Monitor > I/O Control Panel: Utilize I/O device function remotely. User can remotely adjust the Output Pins by turning it on or off. Click to turn on/off the Output pins Playback: View playback video remotely. Auto Scan: Activate auto scan to rotate the channels on the display screen. For instance, you may select to show only 4-split screen on the liveview, while connecting 16 channels to the system. With auto scan function, you are able to see all 16 channels by turns. Layout: Click to change the multiple-split layout. Auto Scan Full Screen Layout for wide screen Layout: NxN You can right click on the camera screen to enable the following function. 113
115 Enable Move: Adjust the current view of camera which supports PT function by dragging the button on the display screen. Enable Digital PTZ: Click the + or button to zoom in or zoom out the view. The lower right square flashing on the video grid indicates the correspondent view of the camera. Fisheye Lens Setting: Select the mode of lens. There are four modes for Generic Dewarp, including Original, Rectilinear mode, Quad mode and Dual-view panorama mode; four modes for ImmerVision, including Original, PTZ mode, Quad mode and Perimeter mode; and other four modes for Vivotek Fish Eye, including Original, Rectilinear mode, Full-view panorama mode, Dual-view panorama mode. Type of modes depends on lens location. Stream Profile: Select the stream profiles, original, low, minimum. Enable Audio: Enable audio on active channel(s). Snapshot: Select the snapshot function to capture a specific video image immediately. Toggle Fullscreen: Select it to view cameras with full screen. Press Esc or right click un-select full screen to go back to the original view. Also, right click on camera list to duplicate and connect/disconnect designate cameras, and do other functions. Duplicate Camera: Select the duplicate camera function to create multiple views. The duplicated camera will be shown with green indicator as the right picture. Combine this function with digital PTZ, users are allowed to enlarge different spots and view them in different channels without failing to record the whole view. Connect / Disconnect: Click to connect or disconnect the designate camera. Login / Logout Server: Click to login or logout. Connect All / Disconnect All: Click to connect or disconnect all 114

116 cameras Unit Connection Setting 1. Startup > NUUO NVRmini 2 > Remote Live Viewer. 2. Click the General Setting button. 3. Click the Server tab. 4. Insert the unit name. 5. Insert the IP address. 6. Modify the port if necessary. 115
117 7. Insert the user name. 8. Insert the password. 9. Check the Save Password / Auto login option. 10. Click the Test Server button to test the connection between the local application and the remote unit. 11. Click the Add button to add this unit into your remote server list. 12. Click the OK button General Setting 1. Startup > NUUO NVRmini 2 > Remote Live Viewer. 2. Click the General Setting button. 3. Click the General tab. 116
 to run LiveView. 7. Click the OK button. 5.2.")
118 4. Check the Enable audio on active channel option to enable audio streaming on active channel. This function synchronizes with right click on camera to enable audio. 5. Check Synchronize video frames to avoid the tearing problem occurring in video display while increasing the CPU loading. 6. Select monitor(s) to run LiveView. 7. Click the OK button Camera Group Setting You can put different cameras into the same group. 1. Startup > NUUO NVRmini 2 > Remote Live Viewer. 2. Click the General Setting button. 3. Click the Group tab. 117
 that you would like to add into this group and then click the <-- button. 8. Repeat step 6 to establish the group. 9. Repeat steps 3 through 7 to establish other groups. 10.")
119 4. Log in to all the servers that contain the camera(s) you would like to put into the group(s). 5. Click the Insert button to create a new group. 6. Name this group. 7. Highlight the camera(s) that you would like to add into this group and then click the <-- button. 8. Repeat step 6 to establish the group. 9. Repeat steps 3 through 7 to establish other groups. 10. Click the OK button Delete/ Rename Camera Groups 1. Startup > NUUO NVRmini 2 > Remote Live Viewer. 2. Click the General Setting button. 3. Click the Group tab. 4. Click the group which you want to modify. 5. Click the Delete or Rename button to remove or rename that group. 6. Repeat steps 3 and 4 to modify other groups. 7. Click the OK button Stream Profile Setting Select the preferred stream type of each camera as default live view profile. 1. Startup > NUUO NVRmini 2 > Remote Live Viewer. 2. Click the General Setting button. 3. Click the Camera tab. 118
 Setting 1.")
120 4. Adjust the stream profile of every camera with stream profile enabled in the setting page. 5. Click a camera and select its stream profile, and click the Copy to button to apply this profile to other channels. 6. Click the OK button OSD (On-screen display) Setting 1. Startup > NUUO NVRmini 2 > Remote Live Viewer. 2. Click the General Setting button. 3. Click the OSD tab. 4. Check the Enable camera OSD option. 5. Set the foreground and background settings of the OSD. 6. Select which kinds of information will be displayed on the screen. 7. Click the Apply button to preview the result. 8. Click the Default button to back to the default settings if necessary. 9. Click the OK button Monitor Display Setting 1. Startup > NUUO NVRmini 2 > Remote Live Viewer. 2. Click the General Setting button. 3. Click the Monitor Display tab. 119

121 Layout Auto Scan 4. Select appointed server group to activate auto scan. 5. Select Primary channel which will always be on the screen when activating auto scan; while select Secondary channel which has second priority when activating auto scan. Enter the time interval for auto scan. 6. Select the screen division of NxN type. 7. Click the OK button Notification 1. Startup > NUUO NVRmini 2 > Remote Live Viewer. 2. Click the General Setting button. 3. Click the Notification tab. 120
122 4. Check Show recording status to show the crystal ball with recording status on monitor display. 5. Check Show camera event to display the words of detected camera event on the correspondent screen. 6. Check the Enable playing sound on event option. Select sound file, default sound or user defined sound (.wav), and define the cycle. 7. Check Popup system event to pop up system event message dialog as a warning when a system event occurred. 8. Click the OK button. The playing sound function only activates on event, which means you have to setup camera motion, camera I/O and I/O Box I/O as an event. Refer to Event & Action Management to do the setting Set up Joystick Control 1. Startup > NUUO NVRmini 2 > Remote Live Viewer. 2. Click the General Setting button. 3. Click the Joystick tab. Function: You can choose the function from the drop-down menu for the button of the joystick. 121
123 Parameter: Choose the preset point from the drop-down menu. Default: Click to back to default setting. Import: Click to import the settings. Export: Click to export the settings. 4. Click the OK button Set up Remote Live Viewer 1. Startup > NUUO NVRmini 2 > Remote Live Viewer. 2. Click the unit you wish to access in your remote server list. 3. Click the LOG IN button to access your unit. 4. Select a camera(s) from the camera list on the right and then drag it to where you wish the image to be displayed. 122
124 6. E-Map There are two ways to execute the live view function: by Internet Explorer, Windows Chrome or Mac Safari or by Remote Live Viewer application. With E-map, user can easily track the device location and alarm status with instant response when an event occurs. The arrows and lightening icon on E-map represent cameras and I/O devices. These icons will turn red as being triggered by alarms. There are two modes in E-map application, Edit Mode and Browse Mode. Edit Mode: The function buttons on the bottom of this E-map dialog will be active. Users can add/edit/delete maps and indicators of devices. Browse Mode: Users are not allowed to do any configuration but check the map hierarchies and device list to see indicators and related information. 6.1 Internet Explorer 1. Open Internet Explorer and log in to the unit. 2. Click the Live View button on the top of the page. 3. Click the Start Menu button and select Open E-Map E-Map Control Panel Edit Mode / Browse Mode Switch Button Device and Map Tree List E-Map Picture Preview Window and Information Map: Select a map you want to show on E-map Window. Camera: Select the camera to see preview video or mark indicator on 123

125 E-map. Digital Input: Select it to highlight the device with green ring on map and show status on Information Window. If the Digital Input is from IP camera, the preview window will display live video of the camera. Digital Output: Select it to highlight the device with green ring on map and show status on Information Window. If the Digital Output is from IP camera, the preview window will display live video of the camera. Map Indicator: Clicking the indicator will lead to the next map layer. If you want to move to the upper layer, select it by mouse directly or click icon on the map. Camera Indicator: The indicator of cameras dragged from Device and Map Tree List to show preview video and related information. When event occurs, the color of indicator will turn red. Digital I/O Indicator: The indicator of I/O devices dragged from Device and Map Tree List to show related information. When event occurs, the color of indicator will turn red. Information Window: The window shows the related information of each indicator. Map: Show map name. Camera: Show camera name and connecting status. Digital Input: Show Digital Input name and status (0 or 1). Digital Output: Show Digital Output name and status (0 or 1) Add Map 1. Make sure being in Edit Mode and all devices are inserted and connected. 2. Right click on the Map icon in Device and Map Tree List to obtain the option menu to add map, or just click the Add Map button to configure. 3. Select a map file and insert a name. Click the OK button, and then the map you added appears in the Device and Map Tree List. 4. The map indicator appears on the upper left of map. Drag it to the position you want on appointed map. 124
126 5. Repeat steps 2 through 4 to add more maps. 6. Click the Upload button to activate all the settings. The maximum file size of each map is 500KB. There are 10 layers of map, and the map capacity of each layer is Edit Map 1. Make sure being in Edit Mode and all devices are inserted and connected. 2. Right click on the Map icon in Device and Map Tree List to obtain the option menu to edit map, or just click the Edit Map button to configure. 3. Repeat step 2 to edit more maps. 4. Click the Upload button to activate all the settings Delete Map 1. Make sure being in Edit Mode and all devices are inserted and connected. 2. Right click on the Map icon in Device and Map Tree List to obtain the option menu to delete map, or just click the Delete button. 3. Repeat step 2 to delete more map. 4. Click the Upload button to activate all the settings Add/Rotate Device Indicator 1. Make sure being in Edit Mode and all devices are inserted and connected. 2. Select the map which you want to add device indicator on. 3. Select a device from list and directly drag it to the desired location on the map. 4. Select a camera indicator and right click on the indicator or click the Rotate button to adjust the direction of camera indicator if needed. 5. Repeat steps 2 and 4 to add more indicators on. 6. Click the Upload button to activate all the settings Delete Device Indicator 1. Make sure being in Edit Mode and all devices are inserted and connected. 2. Select the indicator and right click on the indicator or click the Delete button. 3. Repeat step 2 to delete more indicators. 4. Click the Upload button to activate all the settings. 125
127 6.1.7 Layout Adjustment Adjust the Layout Adjust the Layout: Click the triangular indicator to hide the Device and Map Tree List / Preview and Information Window on right and left side of the window. Click the indicator again to back to the default. Maximize the Map: Click the icon on the upper right to get the full screen display of E-map Relative Configuration and Application When an event occurs, related E-map pops up to indicate the location of this event. Please check the Notification function for details. 126

128 6.2 Remote Live Viewer Application 1. Startup > NUUO NVRmini 2 > Remote Live Viewer. 2. Click the Start Monitor button and select Open E-Map E-Map Control Panel Server List Edit Mode / Browse Mode Switch Button Device and Map Tree List E-Map Picture Preview Window and Information Server List: Select a server to display the E-map of the server. The E-Map function of Remote Live Viewer is quite similar with the one in Internet Explorer, so you can refer to the section of Internet Explorer for the details. 127

129 7. Playback There are two ways to execute the playback function: with Internet Explorer or with the Playback System application. 7.1 Internet Explorer Playback Control Panel Browse Mode Search Mode Screen Division Open Record General Setting Enhancement / Post Processing Tool Save Image Backup Export Video / Audio Print Information Display Window Audio Volume Control Play / Pause / Stop Previous/Next Interval Step Backward/Forward Frame(s) Cue Speed Zoom Information Display Window: Displays video date and time, cue-in / cue-out point times, and speed. Audio Volume Control: Adjust the sound level. Screen Division: Allocate the sub-screen display by clicking on the desired layout icon. To switch to single camera display, double click a particular sub-screen. Double click the screen again to regain previous screen division layout. Browse Mode: Play the recorded video when in Search Mode. 128
130 Open Record: Click the Open Record button to access the Date-Time Panel and select the video records which you want to review. General Setting Record Display Calendar View: view the Record Display Window as a calendar. List Control: view the Record Display Window as a list control. Play Play when open: check this option to set the system to start playing the video clip every time a record is withdrawn. Auto-skip when recording in motion-only mode: check this option to set up the system to automatically skip to the points where there were motions recorded. Next interval: set the interval with which the video goes forward when you click the Next button on the control panel. Previous interval: set the interval with which the video goes backward when you click the Previous button on the control panel. Capture Image Save in clipboard: the image will be saved in the clipboard and can be pasted to other application software. Manually save the image file: you can manually select where you want to save the image, name the saved file, and choose the format you want to save the image. Automatically save the image file: by presetting a path/url and the image format, the system will automatically save the image accordingly when you click the Save Image button on the control panel. You can right click on the camera screen to enable the following function. Toggle Fullscreen: Select it to view cameras with full screen. Press Esc or right click un-select full screen to go back to the original view. Enable ImmerVision PTZ: Adjust PTZ in PTZ mode. ImmerVision Lens Setting: Select the mode of lens, original, PTZ mode, Quad mode and Perimeter mode. Enable Vivotek Fish Eye PTZ: Adjust PTZ in PTZ mode. Vivotek Fish Eye Setting: Select the mode of lens, Original, Rectilinear 129
131 mode, Full-view panorama mode, Dual-view panorama mode. Type of modes depends on lens location Search the Recorded Video Refresh POS Search Previous/ Next Recording Date Video Preview Record Display Window Date Time Period Time Table Recording Types : refresh the Record Display Window. or : go to previous or next recording date. Record Display Window: Display the available recorded video records. Date Time Period: Select the start and end time points that indicate the time period you would like to view after choosing cameras. Video Preview: Check the Enable Preview option to view the selected video. Time Table (preset recording schedule): Click the icon to select all channels; click the icon to deselect all channels. Finally, use the scale bar to modify the scale of the time table. Recording Types: Red line in bold represents always record. Blue line in bold represents record on event. Red thin line represents recording data. Black thin line represents that there are multiple video clips within the same period due to system time change (e.g. daylight saving time) Show Recording Schedule: Show the period of recording schedule in the time table. 130

132 Show Event Log: Show the time of event detection in the time table. Color of event type can be defined by preference. 1. From the Record Display Window at the top left of the Date Time Panel, select the date you want to search the record from. The red lines shown on the time table indicate available recorded video records. 2. Use color bars to differentiate recording types from each other. This will help you select video clips. 3. Highlight the video clip you want to review by left-clicking and dragging the time period. You may also utilize the Start Time and End Time in Date Time Period Section after choosing camera. In addition, modify the scale of the time table with the or icon on the bottom left. 4. If there are multiple videos of the time period you select, the following dialog may popup to guide you to select one to play. 5. Check the Enable Preview option to get the preview of the video you select. 6. Click the camera name to increase or decrease cameras you want to playback. 7. Click the OK button. The Record Display Window can be shown in (a) calendar view or (b) list control view. To modify the settings of the record display window, click the General Setting button at the right of the page. 131

133 7.1.3 Play the Recorded Video 1. Be sure that you have set the schedule / recording event first. 2. Open Internet Explorer, Windows Chrome or Mac Safari and log in to the unit. 3. Click the Playback button on the top of the page. 4. Click the Open Record button. 5. The Record Display Window will show the information of the available video clips. Select the date you want to search the record from. 6. Highlight the video records that you want to review. 7. Click the OK button Intelligent Search After opening the recorded video, click the Search Mode button to obtain the Intelligent Search Tool panel. You can search for unusual events during the recording period. There are 5 types of unusual events: General Motion, Foreign Object, Missing Object, Focus Lost, and Camera Occlusion. General Motion: Detect all movements in the defined area. 1. Define detection zone by dragging to draw a detection zone. You may define more than one zone by repeating this step. 2. Modify the sensitivity setting by changing the slider control. Moving toward the right will increase the sensitivity level, which means a relatively small movement will trigger the alarm. 3. Set the interval. Moving toward right will increase time interval so that the alarm will only be triggered when the movement lasts longer. 4. Check the Stop when found option. If unchecked, the search tool will list all the events it found, instead of stopping at the moment the event found. 5. Click the Search button. Foreign Object: Alarm is set on when any additional object appears in the defined area on the screen. 132

134 1. Define detection zone by dragging to draw a detection zone. 2. Modify the sensitivity setting. 3. Set the Interval. 4. Check the Stop when found option. If unchecked, the search tool will list all the events it found, instead of stopping at the moment the event found. 5. Click the Search button. Missing Object: Alarm is set on when the selected object is removed from the defined area on the screen. 1. Define detection object by dragging to draw a detection zone. 2. Modify the sensitivity setting. 3. Set the Interval. 4. Check the Stop when found option. If unchecked, the search tool will list all the events it found, instead of stopping at the moment the event found. 5. Click the Search button. Focus Lost: System will inform you when the camera(s) lose its focus. Camera Occlusion: Alarms when the camera is blocked Recorded Video Enhancement 1. Open Internet Explorer and log in to the unit. 2. Click the Playback button on the top of the page. 3. Click the Open Record button. 4. The Record Display Window will show the information of the available video clips. Select the date you want to search the record from. 5. Highlight the video clip you want to review, and then click the OK button. 6. Click the Enhancement button. 7. Check the General Setting. Apply active channel: The settings will only be applied to the selected channel. Apply all channels: The settings will be applied to those currently shown on the screen. 8. Set the Filter Setting. Visibility: Check the option and adjust the gamma 133
135 value of the image to enhance the image and make it cleaner. Sharpen: Check the option to activate the function. Move the slider control to the right to sharpen the image, to the left to soften it. Brightness: Check the option to activate the function. Move the slider control to the right to make the image brighter. Contrast: Check the option to activate the function. Move the slider control to the right to increase contrast. Grey Scale: Check the option to show the record in gray-scale mode so the image displays in black and white. 9. Click the OK button. Stop: Stop the enhancement function and close the enhancement tool. (The system will automatically back to the default settings.) Default: Back to the default settings, however, the enhancement tool still works. OK: Apply the modifications of the settings Save a Video 1. Open Internet Explorer and log in to the unit. 2. Click the Playback button on the top of the page. 3. Click the Open Record button. 4. The Record Display Window will show the information of the available video clips. Select the date you want to search the record from. 5. Highlight the video clip you want to review, and then click the OK button. 6. Choose the camera display that you want to save as a video clip. 7. Set up the cue in and cue out points; the cue in and cue out time will be shown on the information window. Cue In Cue Out 8. Click the Save Video button. 134

136 9. Choose the folder where you want to save the file. 10. Insert the file name and click the Save button. 11. Choose the export format. 12. Choose the use profile. 13. Check to export the recorded video with Audio, OSD and POS Transaction. 14. Click the OK button. We recommend that you export to the.asf format when saving video. In exporting to the.avi format, the frame rate will be increased when playing in the video player, causing the video to run faster than normal Save an Image 1. Open Internet Explorer and log in to the unit. 2. Click the Playback button on the top of the page. 3. Click the Open Record button. 4. The Record Display Window will show the information of the available video clips. Select the date you want to search the record from. 5. Highlight the video clip you want to review, and then click the OK button. 6. Choose the camera display that you want to save pictures. 7. Click the Save Image button when the image you want is shown on the screen. 8. Choose the folder where you want to save the file at. 9. Choose the folder and the image format (BMP or JPEG) you prefer. 10. Insert the file name. 11. Click the Save button. 135

137 You may skip step 3 by presetting the folder where you want to save the images and the format you want to save them in Print an Image Print the current image of the video you choose. 1. Open Internet Explorer and log in to the unit. 2. Click the Playback button on the top of the page. 3. Click the Open Record button. 4. The Record Display Window will show the information of the available video clips. Select the date you want to search the record from. 5. Highlight the video clip you want to review, and then click the OK button. 6. Choose the camera display from which you want to print pictures. 7. Click the Print button when the image you want is shown on the screen. 8. Set print settings. Print Content: Print the image from currently selected channel or all the channels shown on the screen. Page Setting Print in original size: Check to have the image print in original size. Fit the page: Check to have the image fit the page. Align Image: Top, center, or bottom 9. Click the Print button. 136

138 7.1.9 Backup the Recorded Video Different from Save Video, the Backup function will save all the recorded videos which belong to the time slot you set, instead of the clips. 1. Open Internet Explorer and log in to the unit. 2. Click the Open Record button to select data. 3. Click the Backup button. 4. Set the Start Time and End Time you want to backup. 5. Select the cameras you want to backup. 6. Select the directory you want to save the backup data. 7. Click the Backup button. 8. The system will then begin backup process automatically. 137
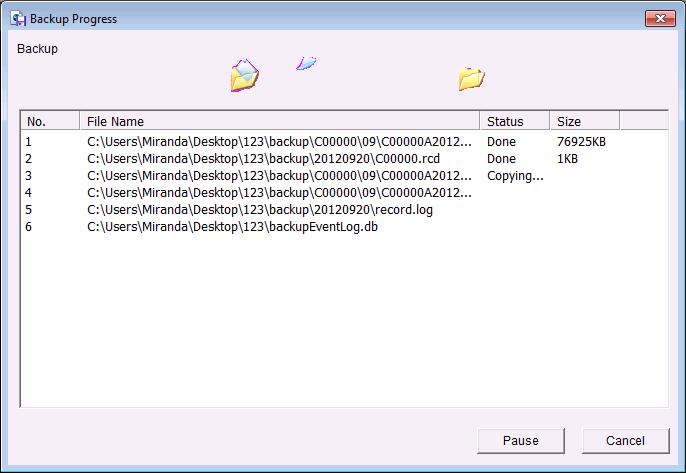
139 138

 Cue Speed Zoom 7.2.")
140 7.2 Remote Playback System Application Playback System Application Control Panel The Playback System control panel is similar to the playback panel in Internet Explorer. Check Playback Control Panel for more details about those buttons. Browse Mode Search Mode Screen Division Open Record General Setting Enhancement / Post Processing Tool Save Image Backup Export Video / Audio Print Log Viewer Minimize Exit Information Display Window Audio Volume Control Play / Pause / Stop Previous/Next Interval Step Backward/Forward Frame(s) Cue Speed Zoom Set up Unit Connections Before using the Playback System application, you need to set a connection to your unit first. 1. Startup > NUUO NVRmini 2 > Playback System. 2. Click the General Setting button. 3. Click the Server tab. 139


141 4. Insert the name of your unit. 5. Insert the IP address of that unit. 6. Modify the port if necessary. 7. Insert the user name. 8. Insert the password. 9. Check the Save Password option. 10. Click the Test Server button to test the connection between the local application and the remote unit. 11. Click the Add button to add this unit into the remote server list. 12. Click the OK button Search the Recorded Video Remote Playback Site Management 140
142 1. Startup > NUUO NVRmini 2 > Playback System. 2. Click the Open Record button. 3. Click the icon on the top of the Date-Time Panel to obtain the Remote Playback Site Management dialog, and then select the server you want to access. 4. Highlight the records you want to view in the Time Table. 5. Set the Date Time Period. The search process in the Playback System application is similar to that of Internet Explorer. Check Search the Recorded Video for more details about the setting process Play the Recorded Video 1. Be sure that you have set up the recording schedule / response first. 2. Startup > NUUO NVRmini 2 > Playback System. 3. Click the General Setting button and the Server tab to set connections to your unit. See Set up Unit Connections for more details. 4. Click the Open Record button. 5. The Record Display Window will show the information of the available video clips. Select the date you want to search the record from. Check Search the Recorded Video for more details. 6. Highlight the video records that you want to review. 7. Select the start and end points in Date Time Period to adjust the time slot. 8. Click the OK button Intelligent Search 1. Startup > NUUO NVRmini 2 > Playback System. 2. Click the Open Record button. 3. The Record Display Window will show the information of the available video clips. Select the date you want to search the record from. Check Search the Recorded Video for more details. 4. Highlight the video records that you want to review. 5. Choose the camera display for which you want to implement smart search. 6. Click the Search Mode button to open the Intelligent Search Tool panel. 7. Set up unusual events here to detect abnormalities occurring during the 141
143 recoding period. Check Intelligent Search for more details. 8. The searched events will be listed. Click to find that event. There are 5 types of unusual events: General Motion, Foreign Object, Missing Object, Focus Lost, and Camera Occlusion. General Motion: Detect all movements in the defined area. Foreign Object: Alarm when any additional object appears in the defined area on the screen. Missing Object: Alarm when the selected object is removed from the defined area on the screen. Focus Lost: System will inform you when the camera(s) lose focus. Camera Occlusion: Alarm when the camera is blocked. The intelligent search in the Playback System application is similar to that of Internet Explorer Recorded Video Enhancement 1. Startup > NUUO NVRmini 2 > Playback System. 2. Click the Open Record button. 3. The Record Display Window will show the information of the available video clips. Select the date you want to search the record from. Check Search the Recorded Video for more details. 4. Highlight the video records that you want to review. 5. Choose the camera display that you want to implement video enhancement. 6. Click the Enhancement button. 7. Check the General Setting. Apply active channel: The settings will only be applied to the selected channel. Apply all channels: The settings will be applied to those currently shown on the screen. 8. Set the Filter Setting. Visibility: Check the option and adjust the gamma value of the image to enhance the image and make it cleaner. Sharpen: Check the option to activate the function. Move the slider 142
144 control to the right to sharpen the image, to the left to soften it. Brightness: Check the option to activate the function. Move the slider control to the right to make the image brighter. Contrast: Check the option to activate the function. Move the slider control to the right to increase contrast. Grey Scale: Check the option to show the record in gray-scale mode so the image displays in black and white. 9. Click the OK button. Stop: Stop the enhancement function and close the enhancement tool. (The system will automatically revert back to the default settings.) Default: Back to the default settings, however, the enhancement tool still works. OK: Apply the modifications of the settings Save a Video 1. Startup > NUUO NVRmini 2 > Playback System. 2. Click the Open Record button. 3. The Record Display Window will show the information of the available video clips. Select the date from which you want to search the record. Check Search the Recorded Video for more details. 4. Highlight the video records that you want to review. 5. Choose the camera display that you want to save as a video clip. 6. Set up the cue in and cue out points; the cue in and cue out time will show on the information window. Cue In Cue Out 7. Click the Save Video button. 8. Choose the folder where you want to save the file. 9. Insert the file name and click the Save button. 10. Choose the export format. 11. Choose the use profile. 12. Check the Export Audio option. 13. Click the OK button. 143
145 7.2.8 Save an Image 1. Startup > NUUO NVRmini 2 > Playback System. 2. Click the Open Record button. 3. The Record Display Window will show the information of the available video clips. Select the date from which you want to search the record. Check Search the Recorded Video for more details. 4. Highlight the video records that you want to review. 5. Choose the camera display from which you want to save pictures. 6. Click the Save Image button when the image you want is shown on the screen. 7. Choose the folder where you want to save the file at. 8. Choose the format of image (BMP or JPEG) you prefer. 9. Insert the file name. 10. Click the Save button. You may skip step 7 by presetting a folder where you want to save the images and a format which you want to save the images in Print an Image Print the current image of the video you choose. 1. Startup > NUUO NVRmini 2 > Playback System. 2. Click the Open Record button. 3. The Record Display Window will show the information of the available video clips. Select the date you want to search the record from. Check Search the Recorded Video for more details. 4. Highlight the video records that you want to review. 5. Choose the camera display that you want to print pictures. 6. Click the Print button. 7. Set the print settings. Print Content: Print the image from currently selected channel or all the channels shown on the screen. Page Setting Print in original size: Select to have the image print in original size. Fit the page: Select to have the image fit the page. Align Image: Top, center, or bottom 144
146 Backup the Recorded Video Different from Save Video, the Backup function will save all the recorded videos which belong to the time slot you set, instead of the clips. 1. Startup > NUUO NVRmini 2 > Playback System. 2. Click the Open Record button to select data. 3. Click the Backup button. 4. Set the Start Time and End Time you want to backup. 5. Select the cameras you want to backup. 6. Select the directory you want to save the backup data. 7. Click the Backup button. 145
147 8. Backup and Delete Records 8.1 The Backup System Application In addition to the ways mentioned in the previous chapters, you can apply the application to backup your files. 1. Startup > NUUO NVRmini 2 > Backup System. 2. Click the Remote Server Site button to set up remote server. 3. Insert the name of your unit. 4. Insert the IP address of that unit. 5. Modify the port if necessary. 146
148 6. Insert the user name. 7. Insert the password. 8. Check the Save Password option. 9. Click the Test Server button to test the connection between the local application and the remote unit. 10. Click the Add button to add this unit into the remote server list. 11. Click the OK button. 12. Click the button next to Remote Server Site button, and select one of servers you added. 13. Click the New Period button to select the record date. 14. Set the Start Time and End Time you want to backup. (or highlight the video records which you want to backup) 15. Select the cameras you want to backup. 16. Click the OK button. 17. Select the time slot which you want to backup. 147

149 18. Click the Backup button. 19. Select the way and directory you want to save the backup data. 20. Check the Include Playback application option, which will add Playback application into the backup folder. 21. Click the OK button. 8.2 Backup the Recorded Video through Windows Explorer 1. Find your unit through Windows Explorer (insert \\ plus the IP address of your unit) 2. Open the public folder. 3. Insert the name and password of the administrator. 4. Select the volume and open the VIDEODATA folder. 148
150 5. Copy the date folder which you want to backup to your desktop / laptop. 8.3 Backup the Recorded Video through FTP 1. Find your unit through Windows Explorer (insert ftp:// plus the IP address of your unit) 2. Insert the name and password of the administrator. 3. Select the volume and open the VIDEODATA folder. 4. Copy the date folder which you want to backup to your desktop / laptop. 8.4 Playback the Backup Records With Playback Application 1. Use the Backup System application to backup your records. 2. Check the Include Playback application option, which will add the Playback application into the backup folder. 3. Open that folder. 4. Double-click the Playback application icon. 5. Select the recorded data to play back Without Playback Application 1. Use the Playback function to backup your records. 2. Put your backup folder into the program folder of NVRmini 2. (Default directory is C:\Program Files\NUUO\NVRmini2.) 3. Startup > NUUO NVRmini 2 > Playback System. 4. Click the Open Record button. 5. Select the recorded data to play back. 8.5 Delete the Recorded Video With Backup Application 1. Startup > NUUO NVRmini 2 > Backup System. 149
151 2. Click the Remote Server Site button to set up remote server. 3. Insert the name of your unit. 4. Insert the IP address of that unit. 5. Modify the port if necessary. 6. Insert the user name. 7. Insert the password. 8. Check the Save Password option. 9. Click the Test Server button to test the connection between the local application and the remote unit. 10. Click the Add button to add this unit into the remote server list. 11. Click the OK button. 12. Click the button next to Remote Server Site button, and select one of servers you added. 150
152 13. Click the New Period button to select the record date. 14. Set the Start Time and End Time. (or highlight the video records which you want to delete) 15. Select the cameras you want to delete the records. 16. Click the OK button. 17. Select the time slot which you want to delete. 151
153 18. Click the Delete button. 19. Confirm the check dialog. 152
 is added to each recorded video frame to ensure its authenticity.")
154 9. Verification Tool The Verification Tool verifies whether the data created by the system has been tampered with. It s the process by which a digital watermark (a digital signature) is added to each recorded video frame to ensure its authenticity. There are three types of data could be verified by Verification Tool: 1. File in (.dat) (.264) format will be displayed as. 2. File in (.avi) (.asf) format will be displayed as. 3. File in (.bmp) (.jpg) format will be displayed as. 9.1 Execute Verification Tool 1. Startup > NUUO NVRmini 2 > Verification Tool. 2. Verification Tool Overview Add File Add Folder Remove File Select All Video Preview Play Pause Stop Add File: Insert the single file to list for verification. Add Folder: Choose the folder with multiple files to list for verification. Remove File: Remove indicated file(s) from list. Select All: Select all files in list for verification. Choose the file type first before selecting files. Only (.dat) (.264) (.avi) (.asf) (.bmp) (.jpg) are available to open. 153
155 Video Preview: Preview designate file in verification list. Select the buttons below to play, pause, and stop the video file. 9.2 Verify Image / Video 1. Select single or multiple files for verification. 2. Click the Verify button to start verification. 3. The verification result will show on watermark column. If a file was tampered with, it will show ; if a file passed verification, it will show. Watermark Verification report 4. The verification report will indicate the information related to the verification. 154

156 10. External Storage Total recording space of 4 bay unit can be expanded largely by connecting DAS through esata port. Follow the directions to enlarge your recording space Create a Volume on DAS The current compatible DAS is AXUS FiT Series. We don t guarantee the quality of other DAS models. Please refer to the manual of AXUS FiT Series to create a single volume on DAS. We are unable to create a volume on external storage in NVR setting page, so do NOT skip this step before connecting to NVR device Create an External Storage 1. Log in to the unit. 2. Click RAID & File System / RAID Management. 3. You will find External SATA Disk displayed in Disk List. 4. Click on the esata disk directly to check the disk drive information. 155
157 Refer to the section of Create a RAID Volume to create a volume for it. 156
158 11. Log out Click the Logout button on the top of the page to log out of the system. If there is no action in 10 minutes, the system will log out automatically to avoid unauthorized access. 157
159 12. Troubleshooting 12.1 Replace a Failed Disk Drive If a disk drive fails, the Disk Status LED becomes orange. If the disk drive belongs to a RAID Volume, the Volume goes Critical or Offline, depending on RAID level. See Check RAID Volume Status for details. Replace the failed disk drive with a new disk drive of the same or slightly greater capacity. You do not have to power down the unit. Refer to Modify RAID Volume to remove the failed disk and replace it with a new one Respond to a Critical RAID Volume How the unit responding to a Critical RAID Volume depends on the RAID level of your Volume: For RAID 1, 5, and 10 volumes, you must replace the failed disk drive with a new one. The RAID Volume will begin rebuilding itself when you install the new disk drive. See Replace a Failed Disk Drive for details. RAID 0 volumes go offline after a disk drive failure. A RAID 0 Volume cannot be recovery. All data of the volume is lost Respond to a File System Error RAID Volume When encountering file system error, you are unable to keep the data anymore. It s likely due to abnormal usage and disk damage. In this case, if you want to keep recording, we suggest replacing new disks, or try the following methods. 1. Format this volume, and check if the status becomes functional. If yes, you can start recording. If it doesn t, try the second method. 2. Delete this volume, and create volume again to see if the status is functional Restore the Default Administrator s Password If you forget the password, and want to reset the Administrator s password to the default password: admin, follow the following steps. 1. Verify that the system is fully booted. 2. Insert your reset tool into the reset button hole on the back of the device. 158

160 3. Press and hold the reset button for 8 seconds, release your hands until the buzzer beeps one time and the System Status LED flashes in blue. 4. System will restart and the Administrator s password is now reset to admin Restore All Default Configuration If you want to restore all configurations to default setting, follow the following steps. 1. Verify that the system is fully booted. 2. Insert your reset tool into the reset button hole on the back of the device. 3. Press and hold the reset button for 14 seconds, release your hands until the buzzer beeps twice and the System Status LED flashes in orange. 4. System will restart and all settings are reset to default. RAID volume and data within the volume won t be reset to default. Refer to Format for the details Install ActiveX If you cannot see the complete page of the system when using Internet Explorer, it may be because the ActiveX installation process is not completed. 1. Open Internet Explorer and log in to the unit. 2. Click the Live view / Playback button on the top right. 3. The browser will ask whether to install ActiveX. 159
161 4. Click the upper bar to begin the installation process. 5. Click the Install button to complete the process Cannot Log in to the Unit with Internet Explorer 1. Check the settings of your antivirus software. 2. Change to appropriate settings or turn off this antivirus software. Please visit NUUO wiki for more information

162 Appendix RAID System Introduction to RAID RAID (Redundant Array of Independent Disks) allows multiple disk drives to be combined together into a RAID Volume. You will create a RAID Volume on your unit when you perform the setup procedure. The benefits of a RAID can include: Higher data transfer rates for increased server performance Increased overall storage capacity for a single Volume Data redundancy/fault tolerance for ensuring continuous system operation in the event of a disk drive failure Different RAID levels use different organizational models and have varying benefits. The following outline breaks down the properties for each RAID level supported on this unit: RAID 0 Stripe When a RAID Volume is striped, the read and write blocks of data are interleaved between the sectors of multiple disk drives. Performance is increased, since the workload is balanced between drives or members that form the RAID Volume. Identical drives are recommended for performance as well as data storage efficiency. The RAID Volume s data capacity equals the capacity of the smallest disk drive times the number of disk drives. For example, one 100 GB and three 120 GB drives will form a 400 GB (4 x 100 GB) RAID Volume instead of 460 GB. 161

163 If disk drives of different capacities are used, there will also be unused capacity on the larger drives. Because RAID 0 does not offer Fault Tolerance, meaning that you cannot recover your data after a disk drive failure, we do not recommend a RAID 0 Volume for your unit. RAID 0 Volumes on this unit consist of one or more disk drives. RAID 1 Mirror When a RAID Volume is mirrored, identical data is written to a pair of disk drives, while reads are performed in parallel. The reads are performed using elevator seek and load balancing techniques where the workload is distributed in the most efficient manner. Whichever drive is not busy and is positioned closer to the data will be accessed first. With RAID 1, if one disk drive fails or has errors, the other mirrored disk drive continues to function. This is called Fault Tolerance. Moreover, if a spare disk drive is present, the spare drive will be used as the replacement drive and data will begin to be mirrored to it from the remaining good drive. The RAID Volume s data capacity equals the smaller disk drive. For example, a 100 GB disk drive and a 120 GB disk drive have a combined capacity of 100 GB in a mirrored RAID Volume. If disk drives of different capacities are used, there will also be unused capacity on the larger drive. 162

164 RAID 1 Volumes on this unit consist of two disk drives. If you want a mirrored RAID Volume with more than two disk drives, see RAID 10 Mirror / Stripe for details. RAID 5 Block Striping with Distributed Parity RAID 5 organizes block data and parity data across the disk drives. Generally, RAID level 5 tends to exhibit lower random write performance due to the heavy workload of parity recalculation for each I/O. RAID 5 works well for file, database, application and web servers. The capacity of a RAID 5 Volume equals the smallest disk drive times the number of disk drives, minus one. Hence, a RAID 5 Volume with four 100 GB disk drives will have a capacity of 300 GB. A RAID Volume with two 120 GB disk drives and one 100 GB disk drive will have a capacity of 200 GB. RAID 5 is generally considered to be the most versatile RAID level. RAID 5 requires a minimum of three disk drives. RAID 10 Mirror / Stripe Mirror/Stripe combines both of the RAID 0 and RAID 1 types. RAID 10 can increase performance by reading and writing data in parallel while protecting data with duplication. At least four disk drives are needed for RAID 10 to be installed. With a four-disk-drive RAID Volume, one drive pair is mirrored together then striped over a second drive pair. 163

165 The data capacity RAID 10 Volume equals the capacity of the smallest disk drive times the number of disk drives, divided by two. In some cases, RAID 10 offers double fault tolerance, depending on which disk drives fail. RAID 10 Volumes on this unit consist of four disk drives. Because all of the available disk drives are used for the RAID Volume, you cannot set up a spare drive with RAID 10. Choosing a RAID Level There are several issues to consider when choosing the RAID level. The following summarizes some advantages, disadvantages and applications for each choice. RAID 0 Advantage Implements a striped disk RAID Volume, the data is broken down into blocks and each block is written to a separate disk drive I/O performance is greatly 164 Disadvantage Not a true RAID because it is not fault tolerant The failure of just one drive will result in all data in a RAID Volume
The Intelligent Surveillance Solution. NVRmini 2. User Manual. Ver
 The Intelligent Surveillance Solution NVRmini 2 User Manual Ver. 1.7.5.131119.00 Table of Contents 1. Installation... 8 1.1 Installation Process... 8 1.2 LED Status Definitions... 16 2. Settings... 17
The Intelligent Surveillance Solution NVR. User Manual. Ver
 The Intelligent Surveillance Solution NVR User Manual Ver. 2.0.0.140325.00 Table of Contents 1. Installation... 8 1.1 Installation Process... 8 1.2 LED Status Definitions... 16 2. Settings... 17 2.1 Camera
The Intelligent Surveillance Solution NAS NVRmini
 The Intelligent Surveillance Solution NAS NVRmini User Manual Table of Contents 1. Installation... 8 1.1 Installation Process... 8 1.2 LED Status Definitions... 17 2. Settings... 18 2.1 Camera Setup...
User Manual (Remote)
") The Intelligent Surveillance Solution NVRsolo User Manual (Remote) Ver. 1.0.0.130118.00 Table of Contents 1. Installation... 7 1.1 Installation Process... 7 2. Settings... 19 2.1 Camera Setup... 19 2.1.1
The Intelligent Surveillance Solution NVRsolo User Manual (Remote) Ver. 1.0.0.130118.00 Table of Contents 1. Installation... 7 1.1 Installation Process... 7 2. Settings... 19 2.1 Camera Setup... 19 2.1.1
The Intelligent Surveillance Solution. Titan NVR. Server User Manual. Ver
 The Intelligent Surveillance Solution Titan NVR Server User Manual Ver. 1.0.0.110921.00 Table of Contents 1. Installation... 4 1.1 Installation Process... 4 1.2 LED Status Definitions... 12 2. Settings...
User Manual (Remote)
") The Intelligent Surveillance Solution NVRsolo User Manual (Remote) Ver. 1.1.0.130710.00 Table of Contents 1. Installation... 8 1.1 Installation Process... 8 2. Settings... 25 2.1 Camera Setup... 25 2.1.1
The Intelligent Surveillance Solution NVRsolo User Manual (Remote) Ver. 1.1.0.130710.00 Table of Contents 1. Installation... 8 1.1 Installation Process... 8 2. Settings... 25 2.1 Camera Setup... 25 2.1.1
User Manual (Remote)
") The Intelligent Surveillance Solution NVRsolo User Manual (Remote) Ver. 2.1.5.150205.00 Table of Contents 1. Installation... 8 1.1 Installation Process... 8 2. Settings... 26 2.1 Camera Setup... 26 2.1.1
The Intelligent Surveillance Solution NVRsolo User Manual (Remote) Ver. 2.1.5.150205.00 Table of Contents 1. Installation... 8 1.1 Installation Process... 8 2. Settings... 26 2.1 Camera Setup... 26 2.1.1
The Intelligent Surveillance Solution NAS NVRmini
 The Intelligent Surveillance Solution NAS NVRmini User Manual Table of Contents 1. Installation... 7 1.1 Installation Process... 7 1.2 LED Status Definitions... 15 2. Settings... 16 2.1 Camera Setup...
User Manual (Remote)
") The Intelligent Surveillance Solution NVC User Manual (Remote) Ver. 3.0 Table of Contents 1. Installation... 8 1.1 Installation Process... 8 2. Settings... 18 2.1 Camera Setup... 18 2.1.1 Add Cameras by
The Intelligent Surveillance Solution NVC User Manual (Remote) Ver. 3.0 Table of Contents 1. Installation... 8 1.1 Installation Process... 8 2. Settings... 18 2.1 Camera Setup... 18 2.1.1 Add Cameras by
The Intelligent Surveillance Solution. NVRsolo. User Manual (Local) Ver
 Ver") The Intelligent Surveillance Solution NVRsolo User Manual (Local) Ver. 1.0.0.130221.00 Table of Contents 1 Introduction... 4 2 Tour the Unit... 5 2.1 Front View... 5 2.2 Rear View... 6 3 Set up the Unit...
The Intelligent Surveillance Solution NVRsolo User Manual (Local) Ver. 1.0.0.130221.00 Table of Contents 1 Introduction... 4 2 Tour the Unit... 5 2.1 Front View... 5 2.2 Rear View... 6 3 Set up the Unit...
Quick Start Guide 4/8/16-CH DVR.
 Quick Start Guide 4/8/16-CH DVR 1. Install Hard Drive &DVD Writer 1.1 Install Hard Drive Notice: 1. Support two SATA hard drives. Please use the hard drive the manufacturers recommend specially for security
Wireless Network Video Recorder
 LD2R/LD2R500 Wireless Network Video Recorder User Guide Version 1.0 PREFACE Thank you for purchasing the Wireless Network Video Recorder, an IP based device that installed on your network, which can be
Version /26/2013. User Manual. 2-Bay Professional Network Video Recorder (NVR) DNR-322L
 DNR-322L") Version 2.0 11/26/2013 User Manual 2-Bay Professional Network Video Recorder (NVR) DNR-322L Table of Contents Manual Overview D-Link reserves the right to revise this publication and to make changes in
Version 2.0 11/26/2013 User Manual 2-Bay Professional Network Video Recorder (NVR) DNR-322L Table of Contents Manual Overview D-Link reserves the right to revise this publication and to make changes in
The Intelligent Surveillance Solution. NVRsolo. User Manual (Local) Ver
 Ver") The Intelligent Surveillance Solution NVRsolo User Manual (Local) Ver. 2.1.0.140925.00 Table of Contents 1 Introduction... 4 2 Tour the Unit... 5 2.1 Front View (1 Bay/2 Bay Unit)... 5 2.2 Rear View (1
The Intelligent Surveillance Solution NVRsolo User Manual (Local) Ver. 2.1.0.140925.00 Table of Contents 1 Introduction... 4 2 Tour the Unit... 5 2.1 Front View (1 Bay/2 Bay Unit)... 5 2.2 Rear View (1
Quick Start Guide 4/8/16/24-Ch DVR
 Quick Start Guide 4/8/16/24-Ch DVR 1.1 Install Hard Drive 4/8/16/24-CH DVR Quick Start Guide Notice: 1.4/3/16-ch DVR supports one SATA hard drive. 24-ch DVR supports three SATA hard drives. Please use
Metadata Plugins Access Control, License Plate Recognition and Point of Sale Solutions
 Metadata Plugins Access Control, License Plate Recognition and Point of Sale Solutions Hardware & Software Installation User Manual Ver. 4.1.0.130220.00 Table of Contents TABLE OF CONTENTS TABLE OF CONTENTS...
NVR-0316 User s Manual 1 NVR User s Manual. Version 1.0.0
 NVR-0316 User s Manual 1 NVR-0316 User s Manual Version 1.0.0 2 NVR-0316 User s Manual Table of Contents Hardware... 4 Overview... 4 LED & Buttons Definitions... 4 Connect to the NVR... 5 Use NVR Search
The Point of Sales Solution
 The Point of Sales Solution Hardware & Software Installation user s manual Ver. 99.264.8613.001 Table of Contents TABLE OF CONTENTS TABLE OF CONTENTS...1 SYSTEM INTRODUCTION...2 Definition of Terms...2
Quick Start Guide 4/8-CH DVR
 Quick Start Guide 4/8-CH DVR 1 1. Install Hard Drive &DVD Writer 1.1 Install Hard Drive Notice: 1. this series support one SATA hard drives. Please use the hard drive the manufacturers recommend specially
2 Bay 3.5 HDD SATA NAS Media Server Setting...20 Bonjour...21 TorrentFlux Maintenance...25 Disk Utility...25 RAID Setting...
 Table of contents 1. Overview of the 2 Bay NAS...3 1.1 Introduction...3 1.2 System Requirement...3 1.3 Hardware Installation...3 1.4 Setup the client PC and 2 Bay NAS...3 1.4.1 Setup network configuration
HooToo IP Camera User Manual(part two)
") HooToo Inc. HooToo IP Camera User Manual(part two) For Model: HT-IP210P Published by SunvalleyTek Group 2014/9/14 Content 1. IPCamClient (windows software)...3 Set up...3 CAM... 13 Local Setting... 13
HooToo Inc. HooToo IP Camera User Manual(part two) For Model: HT-IP210P Published by SunvalleyTek Group 2014/9/14 Content 1. IPCamClient (windows software)...3 Set up...3 CAM... 13 Local Setting... 13
Central Management Software. Cam Viewer 3 Lite. User Manual
 Central Management Software Cam Viewer 3 Lite User Manual Version 1.0.0 Table of Contents 1. System Requirement...4 2. Software Installation...5 3. Configuration Wizard...9 3.1 Channel...10 3.1.1 Adding
PD-SATA USB/LAN Network Attached Storage Enclosure for 3.5 SATA Hard Drives
 Network Attached Storage Enclosure for 3.5 SATA Hard Drives User Manual & Installation Guide March 16, 2008 - v1.0 Table of Contents 1 INTRODUCTION...1 1.1 ICON KEY...1 1.2 THE...1 1.3 PACKAGE CONTENTS...1
Quick Start Guide 4/8/16-Ch DVR
 Quick Start Guide 4/8/16-Ch DVR 1 1. Install Hard Drive &DVD Writer 1.1Install Hard Drive Notice: 1.This series support one SATA hard drive. Please use the hard drive the manufacturers recommend specially
Quick Start Guide 4/8/16-Ch DVR
 Quick Start Guide 4/8/16-Ch DVR 1 1. Install Hard Drive &DVD Writer 1.1Install Hard Drive Notice: 1. Support two SATA hard drives. Please use the hard drive the manufacturers recommend specially for security
HD NVR User Manual. High-Definition Network Video Recorder. Model : HD NVR 1 st Edition : 13 Nov nd Edition : 28 Dec Thank You!
 High-Definition Network Video Recorder HD NVR User Manual The picture & functions & supplied items might differ according to the specification and model. Contents of this user manual are protected under
Pro7400H1 Hybrid DVR User Manual
 Pro7400H1 Hybrid DVR User Manual User Information Admin User Name: Admin Password: IP Address: System Name: Table Of Contents 1. Menu Operation... 4 1.1 Main Menu... 4 2. Start Up/Shutdown System... 5
NVRmini 2 Release Note
 Release 1.7.6 (2014/01/07) FW NVR 01.07.0006.0002 Camera Package DP v2.19 02.19.0000.0028 Application Install Wizard 1.7.5 Remote Live Viewer 1.7.5 Playback System 1.7.5 Backup System 1.7.5 Verification
SLS-ENVR2016 Network Video Recorder V2.2.2 Quick Setup Guide
 SLS-ENVR2016 Network Video Recorder V2.2.2 Quick Setup Guide The SLS-ENVR2016 series NVR is an intelligent and compact appliance that provides a network interface to monitor, record and playback video
GV-Recording Server. User's Manual V RSV13-A-EN
 GV-Recording Server User's Manual V1.3.0.0 RSV13-A-EN 2016 GeoVision, Inc. All rights reserved. Under the copyright laws, this manual may not be copied, in whole or in part, without the written consent
960P and 1080P HD Video Security DVR System User Manual
 960P and 1080P HD Video Security DVR System User Manual www.tigersecu.com Copyright 2017 TIGERSECU, Inc Contents Contents... 1 Important Information...3 Installation Guide....4 Chapter 1. Start-up Wizard...6
Pro71600N3 NVR User Manual
 Pro71600N3 NVR User Manual User Information Admin User Name: Admin Password: IP Address: System Name: Table Of Contents 1. Menu Operation...4 1.1 Main Menu...4 2. Start & Shutdown System...5 2.1 Start
ESV16 User s Manual 1. 16CH Network Video Recorder with Local Display. Version 1.0.0
 ESV16 User s Manual 1 ESV16 User s Manual 16CH Network Video Recorder with Local Display Version 1.0.0 2 ESV16 User s Manual Table of Contents System Overview... 5 Front View... 5 Rear View... 5 LED Status...
Hardware Specification... 3 Parts and Functions Quick Install / Start Main Console... 14
 Hardware Specification... 3 Parts and Functions... 5 R-09A / R-16A Package check list:... 5 R-36A Package check list:... 7 Quick Install / Start... 10 1. Main Console... 14 1.1 System Information:... 15
NUBIX H.264 DVR Setup Guide
 Package Content NUBIX H.264 DVR Setup Guide Inspect the packaging carton. Make sure the NUBIX H.264 DVR is properly delivered. Remove all items from the box and make sure the box contains the following
XL-NAS-400SA. User s Guide
 XL-NAS-400SA User s Guide Table of Contents Chapter 1 Hardware devices 1.1 1.2 1.3 Accessories and XL-NAS-400SA at a glance LCD message and light indicators Hardware installation Chapter 2 Initial setup
64-Ch Windows-based NVR. with 8-Bay Hard Disks NVR-E6480. Quick Installation Guide
 64-Ch Windows-based NVR with 8-Bay Hard Disks NVR-E6480 Quick Installation Guide Table of Contents Before You Start... 3 Package Contents... 4 1. Hardware Introductions... 5 1.1 Physical Details... 5 1.2
960H H.264 DVR Setup Guide
 Package Content 960H H.264 DVR Setup Guide Inspect the packaging carton. Make sure the 960H H.264 DVR is properly delivered. Remove all items from the box and make sure the box contains the following items.
Zavio Standalone NVR. User Manual (Local) Model NQ2040 / NQ2080 / NQ2160
 Model NQ2040 / NQ2080 / NQ2160") Zavio Standalone NVR User Manual (Local) Model NQ2040 / NQ2080 / NQ2160 Table of Contents 1 Introduction...5 2 Tour the Unit...6 2.1 Front View...6 2.2 Rear View...6 2.3 I/O Terminal Block Circuit & Pin
Zavio Standalone NVR User Manual (Local) Model NQ2040 / NQ2080 / NQ2160 Table of Contents 1 Introduction...5 2 Tour the Unit...6 2.1 Front View...6 2.2 Rear View...6 2.3 I/O Terminal Block Circuit & Pin
Pro7804N1 NVR User Manual
 Pro7804N1 NVR User Manual Pro7804N1 User Manual BW R6.indd 1 User Information Admin User Name: Admin Password: IP Address: System Name: Table Of Contents 1. Menu Operation...4 1.1 Main Menu...4 2. Start
NVR User Manual. NVR User Manual For further help, please visit
 NVR User Manual NVR User Manual For further help, please visit www.zmodo.com Introduction This product series is a 4 channel embedded NVR with pentaplex functionality: the product will perform video audio
NVMS1000. User Manual
 NVMS1000 User Manual Contents 1 Software Introduction... 1 1.1 Summary... 1 1.2 Operation Environment... 1 1.3 Install and Uninstall... 2 1.3.1 Install the Software... 2 1.3.2 Uninstall the Software...
LOREX CLIENT 3.0 SOFTWARE MANUAL IRMS Integrated Remote Management Software
 LOREX CLIENT 3.0 SOFTWARE MANUAL IRMS Integrated Remote Management Software Instruction Manual English Version 2.0 Copyright 2007 Lorex Technology Inc. www.lorexcctv.com Table of Contents Overview... -
One Bay SATA/IDE Turbo NAS User Manual
 One Bay SATA/IDE Turbo NAS User Manual Revision: v0117 Date: 2009/07/23 For firmware version v1.17 Table of Contents 1. Introduction... 3 1.1. Key Features... 3 1.2. Network Environment... 3 2. Hardware
VMS-A1 Client Software. User Manual
 VMS-A1 Client Software User Manual Contents Contents... 2 Chapter1. Overview... 4 1.1 Description... 4 1.2 Features & Functions... 4 Chapter2. Update Info... 6 Chapter3. Starting VMS-A1... 7 3.1 Installing
IP Camera user manual
 IP Camera user manual Product name:high definition IP Camera Document version:4.2 Editions suit for 1080P IP Camera Precautions Search and Login...1 Device searching...2 Install plugin...3 A. Real-time
GV-IP Decoder Box Plus User s Manual
 GV-IP Decoder Box Plus User s Manual Before attempting to connect or operate this product, please read these instructions carefully and save this manual for future use. DBPV10-UM-A 2015 GeoVision, Inc.
SAMSUNG ALL-IN-ONE SECURITY SYSTEM
 Quick Start Guide KIT MODEL SDH-B74041/SDH-B74081 DVR MODEL SDR-B74301 SAMSUNG ALL-IN-ONE SECURITY SYSTEM Thank you for purchasing the Samsung DVR Security System. Follow the simple steps in this guide
LevelOne FNS bay/1usb Soho NAS. User s Manual
 LevelOne FNS-1000 1- bay/1usb Soho NAS User s Manual Table of Contents Introduction... 2 The FNS-1000 NAS Server... 2 FNS-1000 Features... 2 Package Contents... 2 System Requirements... 2 Disclaimer...
Chapter 1 Features FEATURES
 Chapter 1 Features Operation Playback, recording and network transmission simultaneously Real time full screen or quad screen display 2X digital zoom and Picture-in-picture display Easy operations by shuttle
ND CH Standalone Desktop NVR. H CH 1xHDD HDMI VIVOCloud ONVIF. Key Features
 ND8312 8-CH Standalone Desktop NVR H.264 8-CH 1xHDD HDMI VIVOCloud ONVIF VIVOTEK s ND8312 is a H.264 8-CH Linux-based standalone NVR that supports a single 3.5" HDD up to 6TB. The ND8312 supports remote
ND9322P ND9424P. H CH/16-CH Embedded Plug & Play NVR
 ND9322P ND9424P H.265 8-CH/16-CH Embedded Plug & Play NVR H.265/H.264 4K Display 8/16 x PoE Port RAID 0, 1 Fisheye Dewarp Trend Micro IoT Security VIVOCloud VIVOTEK s ND9322P/ND9424P is a new generation
CCTV42 System2 DVR Quick Start Guide 4/8/16-Ch DVR
 CCTV42 System2 DVR Quick Start Guide 4/8/16-Ch DVR If you have purchased a DVR / Hard drive package from us then we will have already installed the hard drive(s) and configured the basic settings on your
HD IP CAMERA USER GUIDE
 HD IP CAMERA USER GUIDE Support US: support@onwote.com EU: eusupport@onwote.com AU: ausupport@onwote.com Feature Lists 7x24 hours online live HD video preview Remote access via multiple web browsers(ie/firefox,
TENVIS Technology Co., Ltd. User Manual. For H.264 Cameras. Version 1.0.0
 TENVIS Technology Co., Ltd User Manual For H.264 Cameras Version 1.0.0 Catalogue Basic Operation... 3 Hardware Installation... 3 Search Camera... 3 For Internet Explorer... 6 Playback Record Files... 9
NVMS User Manual
 NVMS-1000 User Manual Contents 1 Software Introduction...1 1.1 Summary... 1 1.2 Operation Environment... 1 1.3 Install and Uninstall... 2 1.3.1 Install the Software... 2 1.3.2 Uninstall the Software...
Quick Start Guide. GV-Video Server
 Quick Start Guide GV-Video Server Thank you for purchasing GV-Video Server. This guide is designed to assist the new user in getting immediate results from the GV-Video Server. For advanced information
SKY l SYS DVR USER S MANUAL TABLE OF CONTENTS. Skydreamers Systems DVR Page 1
 TABLE OF CONTENTS Main System Application (Control) SERVER Startup Screen 6 Login/Logout/Shutdown 7 Control Screen 7 Setup 7 System Power Management 8 Auto Switching Interval 8 E-map 8 TV-Out 8 On-screen
GETTING STARTED GUIDE. Cisco Small Business. NSS2000 Series Network Storage System
 GETTING STARTED GUIDE Cisco Small Business NSS2000 Series Network Storage System 2008 Cisco Systems, Inc. All rights reserved. OL-17953-01 Contents Chapter 1: Introduction 1 Benefits 1 About this Guide
Installation Instructions Fig. 3 Side View. No. Label Operation
 One-Camera IP Video Server In G Out G D+ D- Installation Instructions 1507280 Part Number: CM2002 - One-Camera IP Video Server CM2002 IP Video Server Features In G Out G D+ D- DO G DI G Out In Video In
How to setup Failover in Linux NVR
 How to setup Failover in Linux NVR Application Note Version 1.0 1 Preface This application note instructs you on how to set up the failover function and identify the failover function's status. We strongly
FlexWATCH Smart NVR 2.0
 FlexWATCH Smart NVR 2.0 Copyright Information Copyright 2016 Seyeon Tech Co., Ltd. All rights reserved. Use of this product and manual is subject to license. Information in this document is subject to
NUUO NVRsolo Specification
 NUUO NVRsolo Specification NUUO NVRsolo System Diagram Main Features Linux embedded safer solution against PC crashes and virus attacks One-click setup for more than 100 brands of IP cameras eznuuo free
NVR Champ Specification
 NVR Champ Specification NVR Champ System Diagram Main Features Linux embedded safer solution against PC crashes and virus attacks One-click setup for more than 100 brands of IP cameras findnvr free from
CoreNVR 9/16. User s Manual
 CoreNVR 9/16 User s Manual Copyright and Disclaimer Copyright & Disclaimer No part of this publication may be reproduced in any form or by any means, whether electronic, mechanical, photocopying, or recording
NETWORK VIDEO RECORDER 1080p RESOLUTION 10/100/1000 Mbps
 NETWORK VIDEO RECORDER 1080p RESOLUTION 10/100/1000 Mbps 4-CHANNEL/8-CHANNEL/ 16-CHANNEL User Manual DN-16111 DN-16112 DN16113 2 NVR04,08,16 User s Manual Table of Contents Hardware... 4 Overview... 4
Quick Installation Guide
 Quick Installation Guide GNR-310 64-Channel 6-Bay RAID Tower Standalone NVR BEFORE YOU START Thank you for purchasing ACTi Standalone Network Video Recorder. This guide contains all the information you
Decoder Firmware B1D-220-V AC User s Manual Decoder Firmware B1D-220-V AC User s Manual
 Decoder Firmware B1D-220-V3.03.07-AC User s Manual i Table of Contents INTRODUCTION 1 1.1 Minimum system requirements 1 1.2 Preparation before setup 2 1.2.1 Setup your PC network 2 1.3 Configuring the
IP Solution Intelligent Surveillance Solution
 IP Solution Intelligent Surveillance Solution user s manual Table of Contents TABLE OF CONTENTS TABLE OF CONTENTS...1 SYSTEM REQUIREMENT...5 INSTALLATION...6 QUICK START...10 1. MAIN CONSOLE...14 1.1 Start...16
JustConnect 16-Channel PoE Network Video Recorder
 Product Highlights Concurrent Viewing Record and view real-time video streams from up to 16 cameras on a local network or remotely over the Internet Easy Setup and Configuration Embedded software enables
EMS 2.0. Light Version 1.1V. Supported Device: EVL, EV2, Hydra NVR
 EMS 2.0 Light Version 1.1V Supported Device: EVL, EV2, Hydra NVR Tale of Contents I. SYSTEM REQUIREMENT 3 II. INSTALLING...4 III. EXECUTING EMS 2.0.. 6 IV. FEATURES.7 1. EMS 2.0 Overview... 7 1. Online/Offline
9-Channel Network Video Recorder
 9-Channel Network Video Recorder Copyright 9-Channel Network Video Recorder Copyright 2014 by PLANET Technology Corp. All rights reserved. No part of this publication may be reproduced, transmitted, transcribed,
VioStor-201V Network Video Recorder
 VioStor-201V Network Video Recorder User Manual Version: 1.2.0 Copyright 2007. QNAP Systems, Inc. All Rights Reserved 1 FOREWORD Thank you for choosing QNAP products! This user manual provides detailed
XIPLED Software User s Manual. For Firmware release V3.5.0.*
 XIPLED1080-36 Software User s Manual For Firmware release V3.5.0.* Product name: XIPLED1080-36 Release Date: 2014/10/02 Manual Revision: V02 Feature XIPLED1080-36 Live View All Series Camera/Video/Audio
LOREX CLIENT Remote Agent Software
 LOREX CLIENT Remote Agent Software Instruction Manual English Version 1.0 MODEL: L500 Series www.lorexcctv.com Copyright 2006 LOREX Technology Inc. Table of Contents Table of Contents About the Lorex Client...
Quick Installation Guide
 Quick Installation Guide INR-440 200-Channel 12-Bay RAID Rackmount Standalone NVR with Redundant Power Supply BEFORE YOU START Thank you for purchasing ACTi Standalone Network Video Recorder. This guide
Table of Contents. Table of Contents
 Table of Contents Product Overview... 1 Introduction... 1 Before you Begin... 2 System Requirements... 2 Package Contents... 3 Features... 4 Checking the Hardware Requirements... 6 Setting Up in Just a
GRAND IP VIDEO SERVER PRO. User s Manual INDEX
 INDEX GRAND IP VIDEO SERVER PRO Video & Audio Transmission/ iphone Web Browser Support User s Manual ISSUE:Mar 16, 2010 1. Package Contents.... 1 2. Introduction.... 1 3. System Requirements...... 1 4.
Mainconsole. Release Note v7.0.0 (2017/2/16) Release Version v Enhancement. Note: Supported Device Pack. Device Pack v5.5
 Release Version v Enhancement. Note: Supported Device Pack. Device Pack v5.5") Release Version v7.0.0 Upgrade and Failover to 64 bit version Support Windows 10 Support 4K2K resolution monitor Support historical logs of remote access Support silent install when install Add Remote
Release Version v7.0.0 Upgrade and Failover to 64 bit version Support Windows 10 Support 4K2K resolution monitor Support historical logs of remote access Support silent install when install Add Remote
Network Video Recorder User Manual
 Network Video Recorder User Manual Model: FN3104H / FN3109H Version: 1.6.1 Table of Contents Table of Contents...I Security Warning... III Preface...IV Important Safety Instructions... V 1 Overview...
Mainconsole. Release Note v7.2.0 (2017/12/25) Release Version v New Features. Enhancement. Bugs Fixed. Supported Device Pack. Device Pack v5.
 Release Version v New Features. Enhancement. Bugs Fixed. Supported Device Pack. Device Pack v5.") Release Version v7.2.0 New Features LiveView support export/import server list LiveView support export/import server group list LiveView add Set Default Profile Setting function Upgrade storage group error
Release Version v7.2.0 New Features LiveView support export/import server list LiveView support export/import server group list LiveView add Set Default Profile Setting function Upgrade storage group error
Network Video Recorder Quick Operation Guide
 Network Video Recorder Quick Operation Guide UD.6L0202B1351A01 TABLE OF CONTENTS NVR Pre-Installation... 2 NVR Installation... 2 Hard Disk Installation... 2 Front Panels... 6 DS-9500NI-ST/RT Front Panel...
System Overview... 5 Front View... 5 Rear View... 6 Illustration... 6 LED Definition... 7
 2 ANVR204 User Manual Table of Contents System Overview... 5 Front View... 5 Rear View... 6 Illustration... 6 LED Definition... 7 Installation... 7 HDD Installation... 7 Connect to the NVR... 16 Use Device
Network Video Recorder Quick Start Guide
 Network Video Recorder Quick Start Guide Contents Important Safeguards and Warnings... 2 1. Hardware Installation and Connection...2 1.1. Before You Start... 3 1.2. HDD Installation... 3 2. Interface Instruction...4
DIGIEVER DS-4216 Pro+ NVR
 DIGIEVER DS-4216 Pro+ NVR DGN-16189 DS-4216 Pro+ DIGIEVER NVR, a true PC-less and 4-bay standalone NVR, provides a complete network surveillance system with local display and remote browser monitoring
1. NVR Connection Diagram Wizard Setup Access System Using Mobile Device Access System Using PC Client Software 5
 1 1. NVR Connection Diagram 2 2. Wizard Setup 3 3. Access System Using Mobile Device 4 4. Access System Using PC Client Software 5 5. Access System Using Internet Explorer 8 6. Recording Setup 9 Motion
Setup Configuration Technical Guides
 Setup Configuration Technical Guides 2015. All rights are reserved. No portion of this document may be reproduced without permission. All trademarks and brand names mentioned in this publication are property
QRT-502. IE Operation Manual
 QRT-502 IE Operation Manual Contents 1. Home.. 2 2. Replay.... 5 3. Media.... 6 3-1. Video.... 6 3-2. Audio.... 7 3-3. Image.... 8 3-4. OSD.... 9 3-5. PTZ (Not supported in QRT-501) 4. Parameters.... 10
SMR2000/5000 Installation SOP. Surveon Technical Support Team Revision 1.0
 1 SMR2000/5000 Installation SOP Surveon Technical Support Team Revision 1.0 2 Revision History Version Description 1.0 Initial document 3 Requirements for installing Surveon Megapixel Solutions Requirement
PROMISE ARRAY MANAGEMENT ( PAM) FOR FastTrak S150 TX2plus, S150 TX4 and TX4000. User Manual. Version 1.3
 FOR FastTrak S150 TX2plus, S150 TX4 and TX4000. User Manual. Version 1.3") PROMISE ARRAY MANAGEMENT ( PAM) FOR FastTrak S150 TX2plus, S150 TX4 and TX4000 User Manual Version 1.3 Promise Array Management Copyright 2003 Promise Technology, Inc. All Rights Reserved. Copyright by
PROMISE ARRAY MANAGEMENT ( PAM) FOR FastTrak S150 TX2plus, S150 TX4 and TX4000 User Manual Version 1.3 Promise Array Management Copyright 2003 Promise Technology, Inc. All Rights Reserved. Copyright by
ALL-IN-ONE SECURITY SYSTEM
 DO NOT OPEN CAUTION : TO REDUCE THE RISK OF ELECTRICAL SHOCK DO NOT OPEN COVERS. NO USER SERVICEABLE PARTS INSIDE. REFER SERVICING TO QUALIFIED SERVICE PERSONNEL. WARNING : TO PREVENT FIRE OR SHOCK HAZARD.
the easy-to-use NAS-Solution NAS Series Network Hard Disk Drive Array Operation Manual
 the easy-to-use NAS-Solution NAS Series Network Hard Disk Drive Array Operation Manual Foreword About this manual The purpose of this manual is to assist users to understand the easyraid family of Network
Table Of Contents Chapter 1 Configuring Main System System Configuration Start/Stop Monitoring Playing Back Video Files System Log
 Table Of Contents Chapter 1 Configuring Main System 1 System Configuration 3 Configuring Global Recording Parameters 4 Adjusting Individual Camera 10 Setting Up Day-Night Recording Mode 14 Geo Mpeg4 (ASP)
32-Channel Network Video Recorder Series NVR-3210/NVR-3250/NVR-3280
 32-Channel Network Video Recorder Series Copyright Copyright 2015 by PLANET Technology Corp. All rights reserved. No part of this publication may be reproduced, transmitted, transcribed, stored in a retrieval
InPro Camera SpecoView
 InPro Camera SpecoView Speco Technologies 200 New Hwy Amityville NY 11701 TEL: 1-800-645-5516 Http://www. specotech.com INPRO CAMERA SPECOVIEW... 1 INTRODUCTION... 4 INSTALL SPECOVIEW PROGRAM... 5 STARTUP
LevelOne FNS-7000A. 4-bay Tower NAS w/2 Gigabit Ethernet. User`s Manual
 LevelOne FNS-7000A 4-bay Tower NAS w/2 Gigabit Ethernet User`s Manual CUSTOMER SERVICE For the contact details of customer service and technical support, please refer to the registration card. LIMITED
Mainconsole. Release Note v7.5.2 (2018/06/12) Release Version v7.5.2
 Release Version v7.5.2") Release Version v7.5.2 Mainconsole fail to save recording schedule change after restart. Mainconsole crash issue HH2 version channel OSD display issue Device Pack v18.6 1 / 21 Release Version v7.5.0 New
Release Version v7.5.2 Mainconsole fail to save recording schedule change after restart. Mainconsole crash issue HH2 version channel OSD display issue Device Pack v18.6 1 / 21 Release Version v7.5.0 New
PROMISE ARRAY MANAGEMENT ( PAM) USER MANUAL
 USER MANUAL") PROMISE ARRAY MANAGEMENT ( PAM) USER MANUAL Copyright 2002, Promise Technology, Inc. Copyright by Promise Technology, Inc. (Promise Technology). No part of this manual may be reproduced or transmitted
PROMISE ARRAY MANAGEMENT ( PAM) USER MANUAL Copyright 2002, Promise Technology, Inc. Copyright by Promise Technology, Inc. (Promise Technology). No part of this manual may be reproduced or transmitted
IPC Online Operation Manual
 IPC Online Operation Manual 1 Overview An IP camera (hereinafter referred to as IPC) is a new product integrating network video technologies into a traditional camera. The IPC can realize simpler monitoring
Video Management Software
 Video Management Software User Manual Web: europesecurity.eu Mail: info@europesecurity.eu Tel.: 0541 352 952 User s Manual 2 Contents CHAPTER : XMS CENTRAL USER MANUAL 1 PC REQUIREMENT 3 2 INSTALL 3 3