Building the Perfect Backtrack 4 USB Thumb Drive
|
|
|
- Emory Norman
- 6 years ago
- Views:
Transcription
1 Building the Perfect Backtrack 4 USB Thumb Drive This how-to will show you a method for building a USB thumb drive with the following features: Persistent Changes Files saved and changes made will be kept across reboots Nessus and NessusClient installed Everybody needs Nessus Encryption configured (Note: This is not whole drive encryption) We will also tweak a few things and make some interesting changes Table of contents: Tools and Supplies Partition the USB thumbdrive Make a bootable Backtrack 4 USB thumbdrive Persistent Changes Install Nessus Configure Encryption Tweak a few things Tools and Supplies 1 A USB thumbdrive minimum capacity 4GB 2 A Backtrack 3 CDROM, Backtrack 4 DVD or an additional USB thumbdrive (minimum 2GB) Used to partition the thumbdrive 3 Optional: UNetbootin A tool to transfer an iso image to a USB drive Let s get started! Let s grab a copy of the Backtrack 4 Pre Release ISO Description: DVD Image Name:: bt4-pre-finaliso Size: 1390 MB MD5: b0485da6194d75b30cda282ceb Download: Click here Now that we have the goods in hand, we can get to cooking This tutorial is based on booting Backtrack 4 first This means that you need some form of bootable Backtrack 4 media This can be a virtual machine, DVD, or USB drive Use your favorite method of creating a DVD or USB drive or you can use UNetBootin to create the thumb drive Below is a screenshot of using UnetBootin to install Backtrack 4 on a USB drive

2 It is a simple as selecting the image we want to write to the USB drive, the drive to write it to, and then clicking the OK button Warning: Make sure you pick the correct destination drive You don t want to shoot yourself in the foot Partition the USB thumbdrive The first step is to boot up Backtrack 4 With the release of Backtrack 4 Final, a 4 GB drive is required if we are going to enable persistence For Backtrack 3 and Backtrack 4 Beta, we could get away with a 2GB drive We will also need to figure out which drive is our target drive The following command will show the drives available and you can determine from that which is the new USB drive: dmesg egrep hd\ sd We need to partition and format the drive as follows: 1 The first partition needs to be a primary partition of at least 15 GB and set to type vfat Also remember to make this partition active when you are creating it Otherwise you might have some boot problems 2 The second Partition can be the rest of the thumb drive Below are the steps to take to get the drive partitioned and formatted These steps are taken from this video on Offensive Security website A # blah blah indicates a comment and is not part of the command and user typed commands are bolded One note, we will need to delete any existing partitions on the drive fdisk /dev/sda # use the appropriate drive letter for your system # delete existing partitions There may be more than one Command (m for help): d Partition number (1-4): 1 # create the first partition Command (m for help): n Command action e extended
3 p primary partition (1-4) p Partition number (1-4): 1 First cylinder (1-522, default 1): <enter> Using default value 1 Last cylinder, +cylinders or +size{k,m,g} (1-522, default 522): +1500M #create the second partition Command (m for help): n Command action e extended p primary partition (1-4) p Partition number (1-4): 2 First cylinder ( , default 193): <enter> Using default value 193 Last cylinder, +cylinders or +size{k,m,g} ( , default 522): <enter> Using default value 522 # Setting the partition type for the first partition to vfat/fat32 Command (m for help): t Partition number (1-4): 1 Hex code (type L to list codes): b Changed system type of partition 1 to b (W95 FAT32) # Setting the partition type for the second partition to Linux Command (m for help): t Partition number (1-4): 2 Hex code (type L to list codes): 83 # Setting the first partition active Command (m for help): a Partition number (1-4): 1 Command (m for help): w # now it is time to format the partitions mkfsvfat /dev/sdb1 mkfsext3 -b L casper-rw /dev/sdb2 Two things to notice above in the format commands; 1) we are using ext3 instead of ext2 and 2) you must include the - L casper-rw portion of the command Being able to use ext3 is great because of journaling The -L casper-rw option helps us get around the problem we had where we had to enter the partition name in order to get persistence working As you will see, that is no longer necessary WooHoo! So go ahead and partition and format the drive according the layout above Make it a bootable Backtrack 4 USB thumb drive In the previous version of this how-to, we used UNetBootin to copy the ISO to the thumb drive and make it bootable That required us to boot back to windows and then back again to Backtrack We are changing to doing everything from Backtrack now These steps are also taken from the Offensive Security video mentioned above The steps are basically: 1 Mount the first partition 2 Copy the Backtrack files to it 3 Install grub
4 Following are the commands to execute Again, # denote comments and user typed commands are in bolded # mount the first partition, sda1 in my case mkdir /mnt/sda1 mount /dev/sda1 /mnt/sda1 # copy the files, you will need to find where the ISO is mounted on your system cd /mnt/sda1 rsync -r /media/cdrom0/* # install grub grub-install --no-floppy --root-directory=/mnt/sda1 /dev/sda That s it We now have a bootable Backtrack 4 USB thumb drive Now on to setting up persistent changes Persistent Changes This is done much differently and more easily than it was in Backtrack 4 Beta or Backtrack 3 First of all, for basic persistence, we don t have to do anything at all There is already a menu option that takes care of it for us Unfortunately, it is only for console mode so we need to make a couple changes We want to do the following things: 1 Change the default boot selection to persistent 2 Set the resolution for our gui To do so, do the following Again, # comment user typed blah blah cd /mnt/sda1/boot/grub vi menulst # change the default line below to default 4 and append vga=0 317 (that s a zero) to the line to set the resolution to :wq # By default, boot the first entry default 4 Start Persistent Live CD /boot/vmlinuz BOOT=casper boot=casper persistent rw quiet vga=0 317 /boot/gz Here is my entire menulst file for reference # By default, boot the first entry default 4 # Boot automatically after 30 secs timeout 30 splashimage=/boot/grub/bt4xpmgz Start BackTrack FrameBuffer ( ) /boot/vmlinuz BOOT=casper boot=casper nopersistent rw quiet vga=0 317 /boot/gz
5 Start BackTrack FrameBuffer ( ) /boot/vmlinuz BOOT=casper boot=casper nopersistent rw quiet vga=0 314 /boot/800gz root chainloader +1 Start BackTrack Forensics (no swap) /boot/vmlinuz BOOT=casper boot=casper nopersistent rw vga=0 317 /boot/frgz Start BackTrack in Safe Graphical Mode /boot/vmlinuz BOOT=casper boot=casper xforcevesa rw quiet /boot/gz Start Persistent Live CD /boot/vmlinuz BOOT=casper boot=casper persistent rw quiet vga=0 317 /boot/gz Start BackTrack in Text Mode /boot/vmlinuz BOOT=casper boot=casper nopersistent textonly rw quiet /boot/gz Start BackTrack Graphical Mode from RAM /boot/vmlinuz BOOT=casper boot=casper toram nopersistent rw quiet /boot/gz Memory Test /boot/memtest86+bin Boot the First Hard Disk (hd0) Reboot and either select Start Persistent Live CD or just wait since we set it to auto-boot to persistent mode To test it, create a file and reboot again If your file is still there, everything is golden Install Nessus Now that our changes are saved from boot to boot, we can install things and they won t disappear on us Download the Ubuntu Nessus and NessusClient packages from nessusorg The 32-bit 810 version worked fine for me Again, with Backtrack 4 things are little easier To install the Nessus server, simply execute the following command to install the package dpkg --install Nessus-402-ubuntu810_i386deb Things used to be a little bit more complicated for the client, but with the release of the pre-final version, it is just as easy as installing as the server dpkg --install NessusClient-402-ubuntu810_i386deb Finally it s time to configure Nessus Execute each of the following and follow the prompts My entries are below for fun #create server certificate /opt/nessus/sbin/nessus-mkcert This script will now ask you the relevant information to create the SSL certificate of Nessus Note that this information will *NOT* be sent to anybody (everything stays local), but anyone with the ability to connect to your Nessus daemon will be able to retrieve this information
6 CA certificate life time in days [1460]:<enter> Server certificate life time in days [365]: <enter> Your country (two letter code) [FR]:US Your state or province name [none]:confused Your location (eg town) [Paris]:Somewhere In Time Your organization [Nessus Users United]:<enter> Congratulations Your server certificate was properly created # add user /opt/nessus/sbin/nessus-adduser Login :Me Authentication (pass/cert) : [pass]<enter> Login password : Login password (again) : Do you want this user to be a Nessus admin user? (can upload plugins, etc ) (y/n) [n]:y User rules - nessusd has a rules system which allows you to restrict the hosts that Me has the right to test For instance, you may want him to be able to scan his own host only Please see the nessus-adduser manual for the rules syntax Enter the rules for this user, and enter a BLANK LINE once you are done : (the user can have an empty rules set) Login : Me Password : *********** This user will have admin privileges within the Nessus server Rules : Is that ok? (y/n) [y]y User added We want to disable Nessus starting at boot We are going to do some things a little later than require that Nessus not be running at boot /usr/sbin/update-rcd -f nessusd remove This command does not remove the Nessus start scripts It only removes the links that cause Nessus to start at boot time The next thing we need to do is register our installation so we can get the plugin feed You need to go here and request a key That is a link to the free feed for home use Use appropriately Once you have your key Execute the following to update your plugins Please note that there are two dashes before register in the nessus-fetch line below They can display as one sometimes /opt/nessus/bin/nessus-fetch --register [your feed code here] When that is done, and it is going to take a few minutes, you are ready to start the server and client Be aware that with version 40, while the command to start returns quickly, the actual starting of the service may take a minute or two In many cases, I have actually had to reboot before Nessus started working You can use netstat -na to check that the server is listening on port 1241 /etc/initd/nessusd start /opt/nessus/bin/nessusclient Woohoo, time to find those vulnerabilities

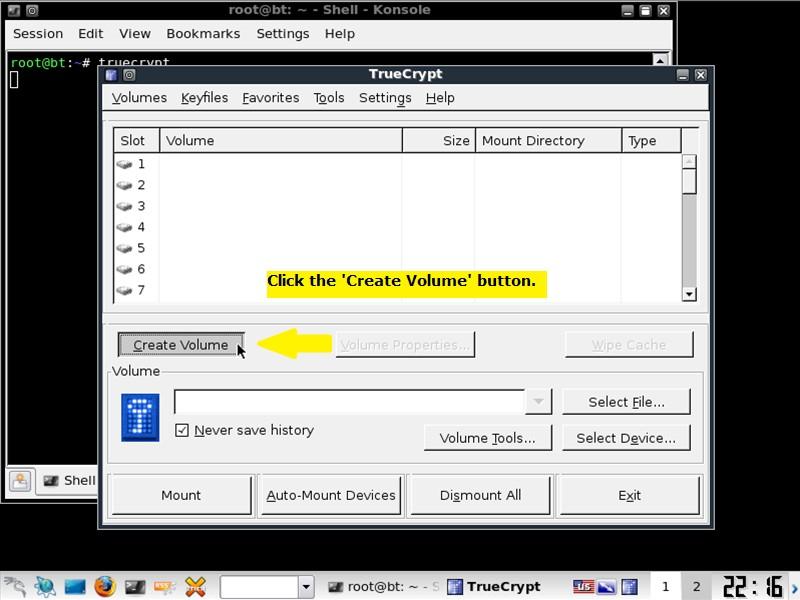
7 Configure Encryption Since we are using this tool to poke at peoples networks and systems, with permission of course, it is very important that the information we find be protected To do this, we are going to setup an encrypted volume that will eventually become our home directory This can be done with the gui or via command line We will be using the gui because we need to be able to format the volume with ext3 and, as yet, I have not been able to figure out how to do that via the command line on linux Click on the images to see a larger version
8
9
10
11

12 You will get a message that the volume was successful created Click on the OK button, then exit the Truecrypt gui, both the Create Volume windows and the main windows We want to be back at the command prompt at this point If you want to test the your filesystem, execute the following, note the -k is two single quotes, not a double quote: truecrypt -t -k --protect-hidden=no /my_secret_stuff /media/truecrypt1 mount cd /media/truecrypt1 df This will show that the volume is mounted and the amount of disk space you have left Our next step is to have this volume mounted when we log in We do this by editing the root user s profile file Add the truecrypt command above to root s profile so it looks like this: # ~/profile: executed by Bourne-compatible login shells if [ "$BASH" ]; then if [ -f ~/bashrc ]; then ~/bashrc fi fi truecrypt -t -k '' --protect-hidden=no /my_secret_stuff /media/truecrypt1 mesg n The next time you reboot you will be asked for the password for the volume and it will be mounted for you Now it is time to tweak a few tings Tweak a few things The first thing we are going to do is go ahead and configure networking to start at boot time It s convenient and easy to disable if we need to All we have to do is execute the following command
13 /usr/sbin/update-rcd networking defaults Next thing we want to do is make sure all our tools and the system itself is up-to-date First execute the following: apt-get update This is update the software repository information Next, execute the this command: apt-get upgrade The system will determine if there is anything that needs to be updated and then prompt you to continue Individual packages can be updated by including the package name after upgrade This next bit is interesting and I was surprised it worked We are going to reset the root user s home directory during the login process to the mounted truecrypt volume This will ensure that anything written to the home directory will be encrypted The following commands will set this up for us: cd /media/truecrypt1 rsync -r links /root/ # add the bold lines below vi /root/profile # ~/profile: executed by Bourne-compatible login shells if [ "$BASH" ]; then if [ -f ~/bashrc ]; then ~/bashrc fi fi truecrypt -t -k '' --protect-hidden=no /my_secret_stuff /media/truecrypt1 export HOME=/media/truecrypt1 export HISTFILE=/media/truecrypt1/bash_history cd :wq mesg n The next time you reboot, when you are finally in the system, your home directory will be /media/truecrypt1 There is one last thing we want to do We want to change nessus to log to the encrypted volume This is very easy The file that controls this is /opt/nessus/etc/nessus/nessusdconf We need to create a place for the log files to go So execute the following cd /media/truecrypt1 mkdir -p nessus/logs Once you have done that, edit the /opt/nessus/etc/nessus/nessusdconf file and change this: # Log file : logfile = /opt/nessus/var/nessus/logs/nessusdmessages # Shall we log every details of the attack? (disk intensive) log_whole_attack = no
14 # Dump file for debugging output dumpfile = /opt/nessus/var/nessus/logs/nessusddump to this: # Log file : logfile = /media/truecrypt1/nessus/logs/nessusdmessages # Shall we log every details of the attack? (disk intensive) log_whole_attack = no # Dump file for debugging output dumpfile = /media/truecrypt1/nessus/logs/nessusddump That s it You are all done now Go forth and have fun Please let me know of any corrections or changes that should be made You can leave a comment or send me a note at kriggins@infosecramblingscom Kevin Riggins, CISSP, CCNA Website: Twitter: kriggins LinkedIn: Backtrack 4 USB/Persistent Changes/Nessus by Kevin Riggins is licensed under a Creative Commons Attribution- Share Alike 30 United States License
CompTIA Linux+ Guide to Linux Certification Fourth Edition. Chapter 2 Linux Installation and Usage
 CompTIA Linux+ Guide to Linux Certification Fourth Edition Chapter 2 Linux Installation and Usage Objectives Prepare for and install Fedora Linux using good practices Outline the structure of the Linux
Build your own NAS with OpenMediaVault
 Build your own NAS with OpenMediaVault Installation Minimum Requirements i486 or amd64 platform 1 GiB RAM 2 GiB HDD/DOM/CF/USB Thumb Drive used as OpenMediaVault system drive. Flash Drives without static
Linux+ Guide to Linux Certification, Third Edition. Chapter 2 Linux Installation and Usage
 Linux+ Guide to Linux Certification, Third Edition Chapter 2 Linux Installation and Usage Objectives Install Red Hat Fedora Linux using good practices Outline the structure of the Linux interface Enter
This is Worksheet and Assignment 12. Disks, Partitions, and File Systems
 This is Worksheet and Assignment 12 This is a combined Worksheet and Assignment.. Quizzes and tests may refer to work done in this Worksheet and Assignment; save your answers. You will use a checking program
How to securely isolate Damn Vulnerable Linux with VirtualBox
 How to securely isolate Damn Vulnerable Linux with VirtualBox Motivation I have this vision of going through and testing software inside of a closed lab that allows me to understand exploits and vulnerabilities
Lab E2: bypassing authentication and resetting passwords
 Lab E2: bypassing authentication and resetting passwords TTM4175 September 7, 2015 The purpose of this lab is to learn about techniques for bypassing the authentication and access control of Windows and
CST8207: GNU/Linux Operating Systems I Lab Nine Disks, Partitions, and File Systems Part 2. Disks, Partitions, and File Systems - Part 2 of 2
 Student Name: Lab Section: Disks, Partitions, and File Systems - Part 2 of 2 1 Due Date - Upload to Blackboard by 8:30am Monday April 9, 2012 Submit the completed lab to Blackboard following the Rules
Linux Manually Mount External Hard Drive Ntfs-3g Could Not
 Linux Manually Mount External Hard Drive Ntfs-3g Could Not Manually mounting the drives does not work. Installing the ntfs-3g driver also did not work (I was using this to write to the NTFS drives until
CST8207: GNU/Linux Operating Systems I Lab Ten Boot Process and GRUB. Boot Process and GRUB
 Student Name: Lab Section: Boot Process and GRUB 1 Due Date - Upload to Blackboard by 8:30am Monday April 16, 2012 Submit the completed lab to Blackboard following the Rules for submitting Online Labs
DUAL OS INSTALLATION
 Ex.No:15 Date: DUAL OS INSTALLATION Aim: To install and configure Ubuntu OS alongside Windows as installing dual OS. PROCEDURE: 1. Backup your Windows partition To open the Dell Backup and Recovery software
This is Lab Worksheet 13 - not an Assignment. Boot Process and GRUB
 This is Lab Worksheet 13 - not an Assignment This Lab Worksheet contains some practical examples that will prepare you to complete your Assignments. You do not have to hand in this Lab Worksheet. Make
Linux Manually Mount External Hard Drive Ntfs 3g Could Not
 Linux Manually Mount External Hard Drive Ntfs 3g Could Not Per-user mounting does not require root access, it's just automating the so if your computer changes the same command could mount a different
Chapter 6. Linux File System
 Chapter 6 Linux File System 1 File System File System management how to store informations on storage devices The Hierarchical Structure Types of file Common File system Tasks 2 The Hierarchical Structure
How to Back-Up a fit-pc2 Using Only a USB Stick (and some creative partitioning)
") This process allows you to back up your fit-pc2 workstation (or any USB-bootable computer) so you can quickly and easily restore your computer to its original state in the event of a hard drive failure,
This process allows you to back up your fit-pc2 workstation (or any USB-bootable computer) so you can quickly and easily restore your computer to its original state in the event of a hard drive failure,
How to Dual-Boot OS X and Ubuntu
 How to Dual-Boot OS X and Ubuntu Nailen Matschke - nailen@caltech.edu 10/3/2015 What you need: 1. A USB drive with at least 2 GB of space, that you don t mind wiping 2. A copy of Ubuntu (available here),
Installation of Fedora 12 with CD
 Prepared by investech.wordpress.com Installation of Fedora 12 with Net Install CD Version 1.0 investech.wordpress.com 07-12-09 This document is produced under Creative Common License (Attribution No Derivatives).
Manually Mount Usb Flash Drive Ubuntu Server Command Line
 Manually Mount Usb Flash Drive Ubuntu Server Command Line 4 answers, How to access a usb flash drive from the terminal? (How can I mount a flash drive manually?) sudo mount -t ntfs-3g /dev/sdb1 /media/external.
Format Hard Drive After Install Ubuntu From Usb
 Format Hard Drive After Install Ubuntu From Usb is it possible to format and partition the new hdd (external to my laptop, and connected to my laptop via sata-usb adapter), and install Ubuntu on the new
Partitioning and Formatting Reference Guide
 Partitioning and Formatting Reference Guide This guide provides simple guidelines for the initial setup of your hard disk drive using the most common methods and utilities available within the following
Partitioning and Formatting Guide
 Partitioning and Formatting Guide Version 1.2 Date 05-15-2006 Partitioning and Formatting Guide This guide is designed to explain how to setup your drive with the correct partition and format for your
Guideline for the installation of C-MOR Video Surveillance Virtual Machine on VMware ESX Server
 This guideline illustrates the installation of the C-MOR Video Surveillance Virtual Machine on VMware ESX Server. This manual applies to C-MOR version 4 with 64 bit operating system. First download the
SANS Institute - Operations Essentials. Operating System Installation Guidelines. Windows XP Professional Installation. Creating Boot Disks
 SANS Institute - Operations Essentials Operating System Installation Guidelines The following document guides you step-by-step through the process of creating a dualboot system. Even if you do not use
Getting Started with Linux
 Getting Started with Linux For those with experience using Microsoft Windows there will be many familiar ways of operating in a Linux environment. There are also a few key differences. The main differences
Ubuntu installation alongside windows 8/8.1 and 10
 Ubuntu installation alongside windows 8/8.1 and 10 Important safety precautions in windows - Before starting the installation process NOTE:1. If you are already using Windows OS in your computer, take
Ubuntu - How to Create Software RAID 1 in Ubuntu Linux - Tutorial
 Published on http://www.itswapshop.com (http://www.itswapshop.com) Home > Ubuntu - How to Create Software RAID 1 in 12.04 Ubuntu Linux - Tutorial Ubuntu - How to Create Software RAID 1 in 12.04 Ubuntu
Some Ubuntu Practice...
 Some Ubuntu Practice... SANOG 10 August 29 New Delhi, India 1. Get used to using sudo 2. Create an inst account 3. Learn how to install software 4. Install gcc and make 5. Learn how to control services
As this method focuses on working with LVM, we will first confirm that our partition type is actually Linux LVM by running the below command.
 How to Increase the size of a Linux LVM by adding a new disk This post will cover how to increase the disk space for a VMware virtual machine running Linux that is using logical volume manager (LVM). First
Installation of Lubuntu Linux, Koha, DSpace and other software using LibLiveCD
 Installation of Lubuntu Linux, Koha, DSpace and other software using LibLiveCD NOTE: Before performing the below tasks, please ensure you have one basic disk partition (with no data) or some free space
Install and setup TrueCrypt
 Install and setup TrueCrypt Install and setup TrueCrypt This guide is for organisations and individuals who wish to use TrueCrypt to secure their computer(s) and/or portable USB drives. It explains how
Virtuozzo 6. Installation Guide. July 19, Copyright Parallels IP Holdings GmbH and its affiliates. All rights reserved.
 Virtuozzo 6 Installation Guide July 19, 2016 Copyright 1999-2016 Parallels IP Holdings GmbH and its affiliates. All rights reserved. Parallels IP Holdings GmbH Vordergasse 59 8200 Schaffhausen Switzerland
Ubuntu installation alongside windows 8/8.1 and 10
 Ubuntu installation alongside windows 8/8.1 and 10 Important safety precautions in windows - Before starting the installation process NOTE:1. If you are already using Windows OS in your computer, take
Using grub to Boot various Operating Systems
 Operating Systems and Systems Integration Using grub to Boot various Operating Systems Contents 1 Aim 2 2 What You Will Do 2 3 Background 2 3.1 Installing grub in MBR from a floppy, and from the OS........
Installing the Operating System or Hypervisor
 If you purchased E-Series Server or NCE Option 1 (E-Series Server or NCE without a preinstalled operating system or hypervisor), you must install an operating system or hypervisor. This chapter includes
KON-BOOT For Windows Guide
 KON-BOOT For Windows Guide http://thelead82.com http://www.kon-boot.com General notes PLEASE KEEP YOUR ANTIVIRUS DISABLED WHILE EXTRACTING / BURNING / INSTALLING KON-BOOT Table of contents General notes...
by sudodus alias nio-wiklund at launchpad mkusb - quick start manual
 mkusb version 11 quick start manual by sudodus alias nio-wiklund at launchpad 1 Overview Page 3 Prepare. install, run mkusb Page 8 Help text and more details Page 11 Slideshow Page 12 Standard installation
Zephyr Kernel Installation & Setup Manual
 Zephyr Kernel Installation & Setup Manual Zephyr kernel is a small footprint Single address space OS, i.e, it combines application specific code with a custom kernel to create a monolithic image that gets
Once your USB drive is formatted for the FAT32 file system it can be mounted and tested on the GESBC To do this, use the following command:
 GESBC-9302 Development With a USB Drive Paul H. Muller - Documatrix www.documatrix-usa.com ulx@linuxmail.org Disclaimer: The programs and procedures described here have been tested and are thought to be
Post Ubuntu Install Exercises
 Post Ubuntu Install Exercises PacNOG 3 June 18 Rarotonga, Cook Islands 1. Get used to using sudo 2. Create an ainst account 3. Learn how to install software 4. Install gcc and make 5. Learn how to control
Getting Started. System Requirements. Installation
 Getting Started NexentaOS is an OpenSolaris distribution for your x86/x64 desktop, laptop, or server - with a fast and easy-to-install regular releases and a selection of tightly-integrated excellent applications.
Lab #5 Guide: Installing Ubuntu as a Virtual Machine
 Lab #5 Guide: Installing Ubuntu as a Virtual Machine CTEC1863/2018F Operating Systems Mike Boldin Tools, Materials and Equipment Oracle VirtualBox software official site: https://www.virtualbox.org/wiki/downloads
Windows Method Using Linux Live CD and Gparted
 Contents 1 Formatting and Partitioning USB Storage for DD-WRT 2 Windows Method Using Linux Live CD and Gparted 2.1 Linux Command Line Method 3 Formatting the /opt, /jffs and Data Partitions, and preparing
Dell EMC Repository Manager Version 3.1. Troubleshooting Guide
 Dell EMC Repository Manager Version 3.1 Troubleshooting Guide Notes, cautions, and warnings NOTE: A NOTE indicates important information that helps you make better use of your product. CAUTION: A CAUTION
Exam Actual. Higher Quality. Better Service! QUESTION & ANSWER
 Higher Quality Better Service! Exam Actual QUESTION & ANSWER Accurate study guides, High passing rate! Exam Actual provides update free of charge in one year! http://www.examactual.com Exam : 050-710 Title
Project 3: An Introduction to File Systems. COP 4610 / CGS 5765 Principles of Operating Systems
 Project 3: An Introduction to File Systems COP 4610 / CGS 5765 Principles of Operating Systems Introduction Project 3 learning objectives File system design and implementation File system testing Data
Nested Home Lab Setting up Shared Storage
 Nested Home Lab Setting up Shared Storage Andy Fox VCI VCAP-DCA VCP3 VCP4 Over the years teaching vsphere, several peers, colleagues and students have asked me how I setup shared storage in my nested test
Sun VirtualBox Installation Tutorial
 Sun VirtualBox Installation Tutorial Installing Linux Mint 5 LTS Guest OS By Dennis Berry Welcome to the world of virtualization and Linux. This tutorial is intended to help users who are new to the world
TinyNet. Creating Virtual Machines
 TinyNet Creating Virtual Machines VirtualBox is a little funny about its configuration files, so we need a separate utility to run VirtualBox using non-standard locations for our virtual machines (VMs)
Upgrading Prime Optical
 CHAPTER 6 You cannot perform a full upgrade from an earlier Cisco Transport Manager (CTM) or Prime Optical release. This section describes how to use the Cisco Prime Optical 9.8 Data Migrator wizard to
Getting Started with Pentaho and Cloudera QuickStart VM
 Getting Started with Pentaho and Cloudera QuickStart VM This page intentionally left blank. Contents Overview... 1 Before You Begin... 1 Prerequisites... 1 Use Case: Development Sandbox for Pentaho and
ELASTIX HIGH AVAILABILITY (HA) MODULE
 MODULE") ELASTIX HIGH AVAILABILITY (HA) MODULE Authors: Alfio Muñoz, Alberto Santos Version: 1.1 Date: March 28, 2016 2016 PaloSanto Solutions All rights reserved. This documentation is public and its intellectual
ELASTIX HIGH AVAILABILITY (HA) MODULE Authors: Alfio Muñoz, Alberto Santos Version: 1.1 Date: March 28, 2016 2016 PaloSanto Solutions All rights reserved. This documentation is public and its intellectual
Virtual CD TS 1 Introduction... 3
 Table of Contents Table of Contents Virtual CD TS 1 Introduction... 3 Document Conventions...... 4 What Virtual CD TS Can Do for You...... 5 New Features in Version 10...... 6 Virtual CD TS Licensing......
NetApp Data Ontap Simulator Cookbook
 Hernán J. Larrea NetApp Data Ontap Simulator Cookbook HOW TO BUILD YOUR OWN VIRTUAL, ALL FUNCTIONAL STORAGE SIMULATOR, WITH UBUNTU OS AND ISCSI FEATURES. CONTENT Introduction... 3 Concepts... 3 Ingredients...
Installation Guide for Beginners
 Page 1 of 25 Installation Guide for Beginners Manjaro 0.8.2 The Manjaro Development Team Core Team Roland Singer - Project Leader, Designer, Developer, Web Developer, Packager Guillaume Benoit - Server
Manual Unetbootin Windows 7 Iso To Usb Stick Installieren
 Manual Unetbootin Windows 7 Iso To Usb Stick Installieren Rufus is a utility that helps format and create bootable USB flash drives, such as USB fast as UNetbootin, Universal USB Installer or Windows 7
3 INSTALLING WINDOWS XP PROFESSIONAL
 INSTALLING WINDOWS XP PROFESSIONAL.1 Preparing for installation Objectives.1.1 Windows XP Professional Hardware Requirements.1.2 Hardware Compatibility List (HCL) check.1. Hard Disk Partition.1.4 Required
Partitioning a disk prior to Linux Installation
 Partitioning a disk prior to Linux Installation by Andy Pepperdine This paper will describe how to partition a disk how you want it before you install Linux. The partitioning process may be initiated either
Simulation Manager Configuration Guide
 Cornell University College of Veterinary Medicine Student Training Simulation Project Simulation Manager Configuration Guide 2018-Oct-1 Version 1.9 Prepared by: I-Town Design David Weiner 117 Burleigh
Why You Should Not Use Arch
 Why You Should Not Use Arch A new users guide to highly personalized, low maintenance operating system. Artur Frącek CC BY-NC-ND 4.0 1 Intro Arch is a very good Linux distribution so it is not a surprise
Installing caos with Cinch on Floppy Disk
 Installing caos with Cinch on Floppy Disk Troy Andrew Johnson May 21, 2004 Abstract cinch is the caos Linux (http://www.caosity.org/) installer. Prerequisites What you need: two floppy disks (at least)
The Ip address / Name value should be: srvvcenter-cis
 CIS133 Installation Lab #1 - DESKTOP CLIENT OpenSUSE Install. Before beginning the installation, create a virtual machine in which you will install the operating system. 1) Open the VMware vsphere Client.
Manually Mount Usb Flash Drive Ubuntu Server 12.04
 Manually Mount Usb Flash Drive Ubuntu Server 12.04 USB storage devices have the enormous advantage that for the most part they By default, disk drives do not auto-mount in Ubuntu Server Edition. Sometimes,
Controller Installation
 The following describes the controller installation process. Installing the Controller, page 1 Controller Deployment, page 2 Controller Virtual Hard Disk Storage, page 4 Custom Controller Web UI Certificates,
Disks, Filesystems, Booting Todd Kelley CST8177 Todd Kelley 1
 Disks, Filesystems, Booting Todd Kelley kelleyt@algonquincollege.com CST8177 Todd Kelley 1 sudo and PATH (environment) disks partitioning formatting file systems: mkfs command checking file system integrity:
Nessus 3.0 Installation Guide September 28, 2006 (Revision 24)
") Nessus 3.0 Installation Guide September 28, 2006 (Revision 24) The newest version of this document is available at the following URL: http://www.nessus.org/documentation/nessus_3.0_installation_guide.pdf
Nessus 3.0 Installation Guide September 28, 2006 (Revision 24) The newest version of this document is available at the following URL: http://www.nessus.org/documentation/nessus_3.0_installation_guide.pdf
Format Hard Drive After Install Ubuntu From Usb To Blank
 Format Hard Drive After Install Ubuntu From Usb To Blank If your hard disk doesn't show up, try formatting to FAT32. Also UNetbootin allows you to create bootable Live USB drives for Ubuntu, Fedora, and
(Ubuntu 10.04), the installation command is slightly different.
, the installation command is slightly different.") Grub Manual Install Ubuntu 10.04 Without 1st option : get a disk including Boot-Repair, 2nd option : install Boot-Repair in Ubuntu or when you can't boot Windows after installing Ubuntu, or when GRUB is
Grub Manual Install Ubuntu 10.04 Without 1st option : get a disk including Boot-Repair, 2nd option : install Boot-Repair in Ubuntu or when you can't boot Windows after installing Ubuntu, or when GRUB is
Manual File System Check Linux Command Line
 Manual File System Check Linux Command Line The traditional Unix environment is a CLI (command line interface), where you To move around the file system you will use cd. Nearly every command and application
Installing FreePBX Official Distro
 Installing FreePBX 10.13.66 Official Distro Follow these instructions for the easiest, totally automated FreePBX installation! 1. Download the ISO file from http://www.freepbx.org/downloads. 2. Convert
The Ip address / Name value should be: srvvcenter-cis
 CIS133 Installation Lab #1 - DESKTOP CLIENT OpenSUSE Install. Before beginning the installation, create a virtual machine in which you will install the operating system. 1) Open the VMware vsphere Client.
Recovering GRUB: Dual Boot Problems and Solutions
 Recovering GRUB: Dual Boot Problems and Solutions Published by the Open Source Software Lab at Microsoft. October 2007. Special thanks to Chris Travers, Contributing Author to the Open Source Software
Windows Password Reset 6.0 User Guide
 page 1 of 11 Contents Contents...1 Introduction...2 Instructions on This Manual...3 System Requirements...4 How to Use Windows Password Reset 6.0...5 i. Remove the Password...5 ii. Burning Your CD/DVD
Format Hard Drive After Install Ubuntu From Usb External
 Format Hard Drive After Install Ubuntu From Usb External Will the files on my external hard drive be deleted when I use it on Ubuntu (since I It will allow you to select your manually created partition
Quick Installation Guide for RHV/Ovirt
 Quick Installation Guide for RHV/Ovirt 2017 Chengdu Vinchin Technology Co. Ltd. All rights reserved. CONTENTS 1. Create New Virtual Machine...2 2. Install Backup Server ( as master)...5 3. Install Backup
INSTALLATION. Security of Information and Communication Systems
 Security of Information and Communication Systems INSTALLATION Table of contents 1.Introduction...2 2.Installation...3 2.1.Hardware requirement...3 2.2.Installation of the system...3 2.3.Installation of
Mac Os X Manually Mounted Usb Drive Read Only
 Mac Os X Manually Mounted Usb Drive Read Only I sometimes need to mount USB drives that are NTFS formatted and write to them. for people who would still want to see the missing partition in read only mode.zone/hackintoshdownloads/download/506-free-ntfs-driver-for-mac-os-x/.
DXi6900-S Software Installation and Upgrade Guide
 DXi6900-S Software Installation and Upgrade Guide This document contains the following topics: Introduction 2 Checking for Software Upgrades 2 Contacting Quantum 3 Performing a Fresh Software Installation
Grub Manual Install Ubuntu Without >>>CLICK HERE<<<
 Grub Manual Install Ubuntu 10.04 Without 1st option : get a disk including Boot-Repair, 2nd option : install Boot-Repair in Ubuntu or when you can't boot Windows after installing Ubuntu, or when GRUB is
SAP HANA Restore Guide (for A2040c SLES) 22 nd of April 2016 NEC SAP Global Competence Center
 22 nd of April 2016 NEC SAP Global Competence Center") SAP HANA Restore Guide (for A2040c SLES) 22 nd of April 2016 NEC SAP Global Competence Center 1. Introduction 1.1. Purpose This manual describes a restore procedure of a HANA system from a full backup
SAP HANA Restore Guide (for A2040c SLES) 22 nd of April 2016 NEC SAP Global Competence Center 1. Introduction 1.1. Purpose This manual describes a restore procedure of a HANA system from a full backup
Setting Up a Linux Operating System
 Name: Setting Up a Linux Operating System We will be using the Linux operating system for most of our practical work in this class. Knoppix is a live CD distribution of Linux, based on the Debian distribution.
Operating Systems Linux 1-2 Measurements Background material
 Operating Systems Linux 1-2 Measurements Background material Introduction The Linux measurements were designed to allow you to have an impression about the administration of Linux severs along with providing
LiveCD Customization. Creating your own Linux distribution
 LiveCD Customization Creating your own Linux distribution Background. Do you think that the Ubuntu/Arch/Debian/Fedora default programs and settings are wrong? You can take a base system and customize it
Manually Mount Usb Flash Drive Linux Command Line Redhat
 Manually Mount Usb Flash Drive Linux Command Line Redhat How to Format USB in Linux using Command Line. This article will help you to format USB Flash drive in Ubuntu systems via Command line. So first
Guide to Linux+, Fourth Edition Chapter 2 Solutions
 Guide to Linux+, Fourth Edition Chapter 2 Solutions Review Questions 1. What is the default shell in Linux called? a. SH b. BSH c. CSH d. BASH Answer: d 2. What equivalent to the man command generally
Vulnerability Assessment using Nessus
 Vulnerability Assessment using Nessus What you need Computer with VirtualBox. You can use any host OS you like, and if you prefer to use some other virtual machine software like VMware or Xen, that s fine
Flash Drive Won T Mount Windows 7 Won't Recognize
 Flash Drive Won T Mount Windows 7 Won't Recognize So after inserting the flash drive, if I go to Start _ Computer, I won't see anything there for Windows 7 Professional doesn't mount my usb flash drive
How To Resize ext3 Partitions Without Losing Data
 By Falko Timme Published: 2007-01-07 17:12 How To Resize ext3 Partitions Without Losing Data Version 1.0 Author: Falko Timme Last edited 12/31/2006 This article is about
Cdboot Cannot Boot From Cd Error Code 5 Windows 7
 Cdboot Cannot Boot From Cd Error Code 5 Windows 7 I can boot normal with the same cd on Windows 7 64Bit. DVD-R, DVD-RW, DVD R, DVD RW, DVD-R DL, DVD R DL br / Config Manager Error Code Device. If it does
Critical Analysis and last hour guide for RHCSA/RHCE Enterprise 7
 Critical Analysis and last hour guide for RHCSA/RHCE Enterprise 7 Disclaimer: I haven t gone through RHCSA/RHCE EL 7. I am preparing for upgrade of my RHCE certificate from RHCE EL4 to RHCE EL7. I don
Manually Mount External Hard Drive Windows 7 Install
 Manually Mount External Hard Drive Windows 7 Install This article explains how to physically connect, disconnect, and install a WD external drive to a computer running Windows 8/7/Vista/XP or Mac OSX 10.4.x.
Different ways to use Kon-Boot
 Robert Alaniz 28 July 2014 Different ways to use Kon-Boot This project consists of different ways of using Kon-Boot to bypass authentication on a windows machine. Kon-Boot is a toll that can bypass the
How To Configure Grub In Windows 7 Ftp Server At Home
 How To Configure Grub In Windows 7 Ftp Server At Home Part 8: Installing FTP Server and Mapping FTP Directories in Zentyal PDC. Part 9: Install 6 GB for / Partition ext4, 1 GB for swap area, 3.7 GB for
Disk Imaging with Knoppix
 Introduction This document explains how to use the CD-ROM bootable version of Linux, named Knoppix, to make and restore images of computer hard drives. Knoppix makes a very good system recovery tool for
Chapter 6. Boot time configuration. Chapter 6 Boot time configuration
 Chapter 6. Boot time configuration Chapter 6 Boot time configuration Last revised: 20/6/2004 Chapter 6 Outline In this chapter we will learn about: How the system boots How to configure the boot loaders
Actual4Test. Actual4test - actual test exam dumps-pass for IT exams
 Actual4Test http://www.actual4test.com Actual4test - actual test exam dumps-pass for IT exams Exam : 101-350 Title : LPI Level 1 Exam 101, Junior Level Linux Certification, Part 1 of 2 Vendor : Lpi Version
Chapter 02 Linux Installation and Usage
 Chapter 02 Linux Installation and Usage TRUEFALSE 1. A swap partition contains a filesystem. 2. When a user interacts with his computer, he interacts directly with the kernel of the computer's operating
JetFlash User s Manual
 JetFlash User s Manual ( Version 1.0 ) Table of Contents INTRODUCTION...1 PACKAGE CONTENTS...1 FEATURES...1 SYSTEM REQUIREMENTS...1 DRIVER INSTALLATION...2 DRIVER INSTALLATION FOR WINDOWS 98SE...2 DRIVER
ABOUT ZEPCAM SOFTWARE INSTALLATION MANAGEMENT AND BACKUPS. Description What is it Installation requirement Server requirement
 1 ABOUT ZEPCAM SOFTWARE Description What is it Installation requirement Server requirement INSTALLATION Create a bootable USB Networking Disk partitioning Bootloader configuration Setup Registration Administrator
-: Ronak Patel (Gozariya) :Windows XP installation
 :Windows XP installation") -: Ronak Patel (Gozariya) :Windows XP installation Insert your Windows XP installation CD-ROM and power-on/restart your system: It will show the PC-BIOS startup message, like: memory test, memory installed
-: Ronak Patel (Gozariya) :Windows XP installation Insert your Windows XP installation CD-ROM and power-on/restart your system: It will show the PC-BIOS startup message, like: memory test, memory installed
CST Algonquin College 2
 Partitions Lab due dates: Labs are due as specified usually on Page1 of the Lab document Lab due dates are expressed as: 10 min before the end of the lab period during a certain week There is a grace period
Getting Started with BeagleBoard xm
 Getting Started with BeagleBoard xm by Getting Started with BeagleBoard-xM 1. Beagleboard-xM BeagleBoard.org ก Texas Instruments DM3730 1 GHz ก ARM Cortex-A8 (DSP) (PowerVR) (RAM) 512 MB Serial Port, USB