Network Camera User Manual
|
|
|
- Sabrina Pope
- 6 years ago
- Views:
Transcription

1 Network Camera User Manual Version:V

2 Statement Thank you for purchasing our product. If there are any questions or requests, please do not hesitate to contact the dealer. This manual applies to network fisheye camera. This manual may contain several technical incorrect places or printing errors, and the content is subject to change without notice. The updates will be added to the new version of this manual. We will readily improve or update the products or procedures described in the manual. Please pay your attention to exceptions below: 1 Should any reasons below cause the product destroyed or service stop, we will assume no responsibility for your or third party s personal injury and property loss: 1 No installation or use according to instruction strictly. 2For sake of state-building maintenance or public interest. 3 Cases of force majeure. 4 Your personal or third party reasons. (Include no limitation use of third party s products, software or components) 2 Our company has never guaranteed the products for improper or illegal purposes and uses. This product cannot be used as medical & safety devices or other applications that will cause danger or injury. And loss or responsibility caused by above uses, you must bear it by yourself. 3 With correct installation and use, this product can detect the illegal intrusion, but it can not avoid accidents and personal injury or property damage due to these accidents. Please be on the alert in your daily life, reinforce your safety awareness. 4 Our company assume no responsibility for any indirect or occasional or special or punitive damages, request, property damage or any loss of data or file. Within the max scope of law allowed, our company s compensation is no more than the products amount you paid. Safety Instruction This manual is intended to ensure that user can use the product properly without danger or any property loss. Please read it carefully and take care of it for further reference. Precaution measures are divided into warnings and cautions,as below: Warnings: Neglecting any of the warnings may cause death or serious injury. Cautions: Neglecting any of the cautions may cause injury or equipment damage. Warning Electrical safety regulations of the nation and the region must be strictly followed during installation or use. 1. Please use the matched power adapter from standard company. 2. Do not connect multiple IPCs with one single power adapter (Overload for adapter may lead to over-heat or fire hazard. 3. Shut down the power while connecting or dismounting the device. Do not operate with power on. 4. The device should be firmly fixed when installed onto the wall or beneath the ceiling. 5. Shut down the power and unplug the power cable immediately when there is smoke, odor or noise rising from the IPC. Then contact the dealer or service center. 6. Please contact the local dealer or latest service center when IPC works abnormally. Do not attempt to disassemble or modify the device yourself. (We shall shoulder no responsibility for problems caused by unauthorized repair or maintenance. Cautions 1. Make sure the power supply voltage is correct before using the camera. 2. Do not drop the camera or subject it to physical shock. 3. Do not touch sensor modules with fingers. If cleaning is necessary, use a clean cloth with a bit of ethanol and wipe it gently. If the camera will not be used for an extended period of time, put on the lens cap to protect 2
3 the sensor from dirt. 4. Do not aim the camera lens at the strong light such as sun or incandescent lamp. The strong light can cause fatal damage to the camera. 5. The sensor may be burned out by a laser beam, so when any laser equipment is being used, make sure that the surface of the sensor not be exposed to the laser beam. 6. Do not place the camera in extremely hot, cold temperatures (the operating temperature should be between -30 C ~ 60 C), dusty or damp environment, and do not expose it to high electromagnetic radiation. 7. To avoid heat accumulation, good ventilation is required for a proper operating environment. 8. Keep the camera away from water and any liquid. 9. While shipping, the camera should be packed in its original packing. 10. Improper use or replacement of the battery may result in hazard of explosion. Please use the manufacturer recommended battery type. 3
4 Table of Contents STATEMENT... 2 PLEASE PAY YOUR ATTENTION TO EXCEPTIONS BELOW:... 2 SAFETY INSTRUCTION... 2 INTRODUCTION SYSTEM REQUIREMENT NETWORK CONNECTION SETTING THE NETWORK CAMERA OVER THE LAN Wiring over the LAN Detecting and Changing the IP Address SETTING THE NETWORK CAMERA OVER THE WAN Static IP Connection Dynamic IP Connection ACCESS TO THE NETWORK CAMERA BY CLIENT SOFTWARE ACCESS TO THE NETWORK CAMERA BY WEB CLIENT PREPARATION BEFORE INSTALL INSTALL THE HSWEBPLUGIN.EXE CONTROLS INTERFACE OPERATIONS AND USAGE: LOGIN Live preview Video Preview Camera settings PTZ, zoom, cruise Playback NETWORK CAMERA CONFIGURATION Local Configuration System System Configuration Scheduled Reboot Log Search Security SD Card Network Basic Setup Advance Setup Video Video Audio Image Image OSD Events Motion Detection Privacy Video Tampering Exception APP CLIENT Download and install App Add device Preview
5 6. FREQUENTLY ASKED QUESTIONS WHY CAN NOT ACCESS THE CAMERA BY IE WHY CAN NOT ACCESS THE CAMERA AFTER UPDATE? WHY CANNOT SHOW THE WHOLE INTERFACE?
6 Introduction This manual describes in detail fisheye camera network connection, settings and web client and app client download, installation and interface operation. 1. System Requirement Operating System: Microsoft Windows XP SP1 and above version / Vista / Win7 / Win 8 / Win 10 / Server 2003 / Server bits CPU: Intel Pentium IV 3.0 GHz or higher RAM: 1G or higher Display: resolution or higher Web Browser: Internet Explorer 8 and above version, Safari 5.02 and above version, Mozilla Firefox 3.5 and above version and Google Chrome 4.5 and below version. 2. Network Connection Before you start: If you want to set the network camera via a LAN (Local Area Network), please refer to Section 2.1 Setting the Network Camera over the LAN. If you want to set the network camera via a WAN (Wide Area Network), please refer to Section 2.2 Setting the Network Camera over the WAN Setting the Network Camera over the LAN Purpose: To view and configure the camera via a LAN, you need to connect the network camera in the same sub net with your computer, and install the IPC Search or VMS software to search and change the IP of the network camera Wiring over the LAN The following figures show the two ways of cable connection of a network camera and a computer: Purpose: To test the network camera, you can directly connect the network camera to the computer with a network cable as below: Set network camera over the LAN via a switch or a router as below: 6

7 Detecting and Changing the IP Address You need the IP address to visit the network camera. Steps: 1. To get the IP address, you can choose either of the following methods: Use IPC Search, a software tool which can automatically detect the online network cameras in the LAN and list the device information including IP address, sub net mask, port number, device serial number, device version, etc.as below. Use the VMS client software to list the online devices. Please refer to the user manual of VMS client software for detailed information. 2. Change the IP address and sub net mask to the same sub net as that of your computer. 3. Enter the IP address of network camera in the address field of the web browser to view the live video. Note: The default IP address is and the port number is 80. The default user name is admin, and password is admin. And you are highly recommended change the initial password after your first login. For accessing the network camera from different sub nets, please set the gateway for the network camera after you logged in. For detailed information, please refer to Section Configuring TCP/IP Settings Setting the Network Camera over the WAN Purpose: This section explains how to connect the network camera to the WAN with a static IP or a dynamic IP. 7
8 Static IP Connection Before you start: Please apply a static IP from an ISP (Internet Service Provider). With the static IP address, you can connect the network camera via a router or connect it to the WAN directly. Connecting the network camera via a router Steps: (1) Connect the network camera to the router. (2) Assign a LAN IP address, the sub net mask and the gateway. Refer to Section Detecting and Changing the IP Address for detailed IP address configuration of the camera. (3) Save the static IP in the router. (4) Set port mapping, e.g., 80, 8000, and 554 ports. The steps for port mapping vary according to the different routers. Please call the router manufacturer for assistance with port mapping. (5) Visit the network camera through a web browser or the client software over the internet. Connecting the network camera with static IP directly You can also save the static IP in the camera and directly connect it to the internet without using a router. Refer to Section Detecting and Changing the IP Address for detailed IP address configuration of the camera Dynamic IP Connection Before you start: Please apply a dynamic IP from an ISP. With the dynamic IP address, you can connect the network camera to a modem or a router. Connecting the network camera via a router Steps: (1) Connect the network camera to the router. (2) In the camera, assign a LAN IP address, the sub net mask and the gateway. Refer to Section Detecting and Changing the IP Address for detailed LAN configuration. (3) In the router, set the PPPoE user name, password and confirm the password. (4) Set port mapping. E.g. 80, 8000, and 554 ports. The steps for port mapping vary depending on different routers. Please call the router manufacturer for assistance with port mapping. (5) Apply a domain name from a domain name provider. (6) Configure the DDNS settings in the setting interface of the router. (7) Visit the camera via the applied domain name. Note: The obtained IP address is dynamically assigned via PPPoE, so the IP address always changes after rebooting the camera. To solve the inconvenience of the dynamic IP, you need to get a domain name from the DDNS provider (E.g. DynDns.com). Please follow the steps below for normal domain name resolution and 8
9 private domain name resolution to solve the problem. Normal Domain Name Resolution Steps: (1) Apply a domain name from a domain name provider. (2) Configure the DDNS settings in the DDNS Settings interface of the network camera. Refer to Section Configuring DDNS Settings for detailed configuration. (3) Visit the camera via the applied domain name. Private Domain Name Resolution Steps: (1) Install and run the IP Server software in a computer with a static IP. (2) Access the network camera through the LAN with a web browser or the client software. (3) Enable DDNS and select IP Server as the protocol type.refertosection5.3.4 Configuring DDNS Settings for detailed configuration. 3. Access to the Network Camera by Client Software The product CD contains the VMS client software. You can view the live video and manage the camera with the software. Follow the installation prompts to install the software. The control panel and live view interface of VMS client software are shown as bellow. 9

10 Note: For detailed information about the software, please refer to the user manual of the VMS Client Software. 10

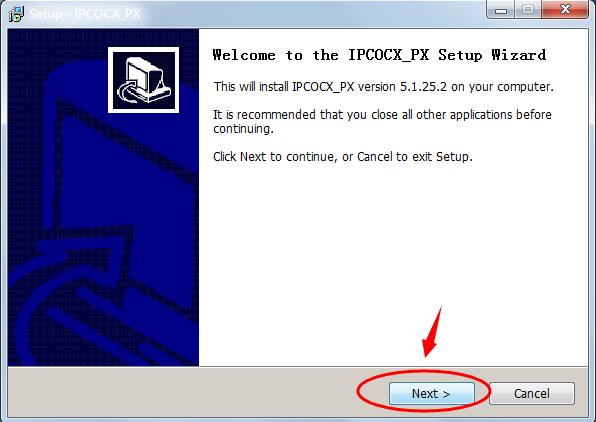
11 4. Access to the Network Camera by Web Client 4.1. Preparation Before Install In ensuring the IPC and the current user's computer after completion of all the hardware connection and power equipment normal, open the computer, run ping the IP address of the IPC (Note: the IP address of the IPC in LAN must be unique). Such as IPC IP for , run ping If there is a response to the IPC as shown in the figure below, said the network connection is normal, you can download the plug-in Install the HsWebplugin.exe Controls Please open the IE browser and input the IP address of IPC in the address bar.(for the first time to use the default address is: you will be prompted to download information. As shown below: 11

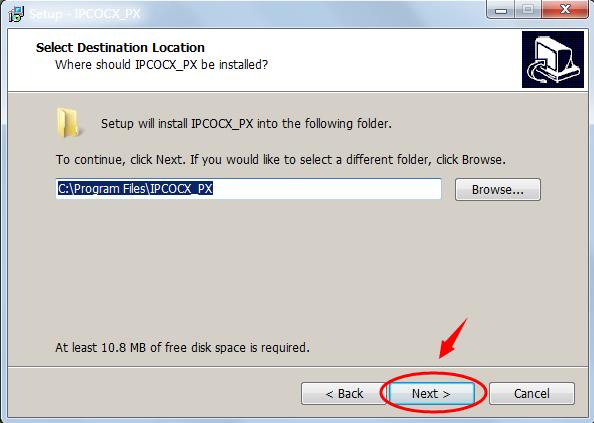
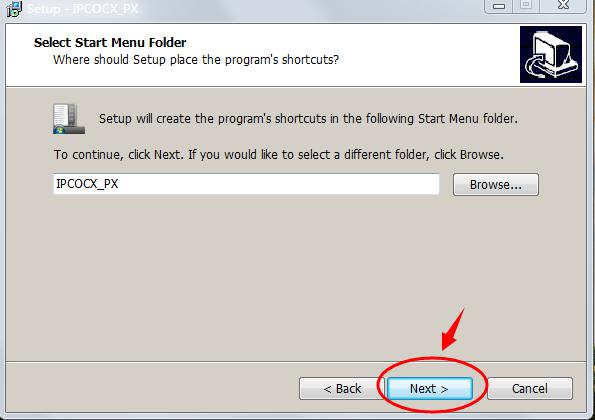
12 Click shown below: click "Run". to download, and you can choose "Run" or save directly the installation. As Will pop up the Setup Wizard after click "Run",as shown below: 12
13 13


14 Click "Finish" and login page again, enter the login interface as shown below: 14


15 Note: If the system prompt "installation failure", please uncheck the "cancel protection mode" in the setting safety of "Internet options" and enter the "custom level" ActiveX control Settings as shown below, and reinstall HsWebplugin.exe after save settings Interface operations and Usage: Login Login for the first time must input account:"admin"and password:"admin"on the login interface as below. 15

16 Live preview Video Preview switching window size In the real-time preview interface on the top left of the preview ratio option, click "4: 3", "16: 9", "X1", "full screen" to switch the video preview scale. switching option In the upper left of the real-time preview interface, there is a stream switching option. Click "Main Stream", "Sub Stream" and "Triple Stream" to switch preview video stream. Capturing Pictures Manually In the live view interface, click on the toolbar to capture the live pictures. The captured image will be saved as JPEG file in your computer. The saving paths of the captured pictures and clips can be set on the Configuration > Local Configuration page. Recording Pictures Manually In the live view interface, click to record the live view. The recorded file will be saved as avi file in your computer. The saving paths of the recorded can be set on 16
17 the Configuration > Local Configuration page. In the live view window as follow Figure, click / on the toolbar to start/stop the live view of the camera. The preview interface operation buttons are shown in the following table. Icon Description / Start/Stop live view. The window size is 4:3. The window size is 16:9. Self-adaptive window size. Manually capture the picture. / Manually start/stop recording. / Open/close talk back / Turn on/off Sound Camera settings PTZ, zoom, cruise In the live view interface, you can use the PTZ control buttons to realize pan/tilt/zoom control of the camera. 17
 in the live view window The PTZ interface operation buttons are shown in the following table.")
18 PTZ control On the live view page, click to show the PTZ control panel or click to hide it. 1 PTZ direction control Click the direction buttons to control the pan/tilt movements. There are 8 direction arrows ( when you click in the relative positions. ) in the live view window The PTZ interface operation buttons are shown in the following table. Icon Description Auto Scan Zoom in/out Adjust speed of pan/tilt movements 2 Setting a Preset (1) In the PTZ control panel, select a preset number from the preset list. 18
 Click to finish the setting of the current preset. (4) You can click to delete the preset. Note: You can configure up to 128 presets.")
19 (2) Use the PTZ control buttons to move the lens to the desired position. Pan the camera to the right or left. Tilt the camera up or down. Zoom in or out. (3) Click to finish the setting of the current preset. (4) You can click to delete the preset. Note: You can configure up to 128 presets. 3 Calling a Preset This feature enables the camera to point to a specified preset scene manually when an event takes place. For the defined preset, you can call it at any time to the desired preset scene. In the PTZ control panel, select a defined preset from the list and click to call the preset. 4 Setting / Calling a Cruise Note: No less than 2 presets have to be configured before you set a cruise. Steps: 19
 Click OK to save the first preset. (5) Follow the steps above to add the other presets. (6) Click to save a cruise. (7) Click to start the cruise, and click to stop it.")
20 (1) Click to enter the cruise configuration interface. (2) Select a path No., and click to add the configured presets. (3) Select the preset, and input the cruise duration and cruise speed. (4) Click OK to save the first preset. (5) Follow the steps above to add the other presets. (6) Click to save a cruise. (7) Click to start the cruise, and click to stop it. (8) (Optional) Click to delete a cruise. Note: Normal camera no PTZ, zoom, cruise settings interface, please take the camera physical specific functions shall prevail Playback In the main interface, click into the video palyback interface. 20


21 Here you can query the video files in the SD card according to the recording type (Normal Record, Alarm Record) and recording time, playback, screenshot, clip and download to the video file. Note:No SD card storage video camera and no video playback settings interface, please take the camera physical specific functions shall prevail Network Camera Configuration Local Configuration Click into the parameter configuration screen, where you can manually choose image format, and set the storage path for you record video files log export files as well as capture files. As shown below: 21
22 Record File Settings Set the saving path of the recorded video files. Valid for the record files you recorded with the web browser. Save record files to Set the saving path for the manually recorded video files. Save downloaded files to Set the saving path for the downloaded video files in playback mode. Picture and Clip Settings Set the saving paths of the captured pictures and clipped video files. Valid for the pictures you captured with the web browser. Save capture files in live view to Set the saving path of the manually captured pictures in live view mode. Save capture files when playback to Set the saving path of the captured pictures in playback mode. Save clips to Set the saving path of the clipped video files in playback mode. Picture and Clip Settings Set the saving paths of the captured pictures and clipped video files. Valid for the pictures you captured with the web browser. Save capture files in live view to Set the saving path of the manually captured pictures in live view mode Anmelden Export Set the saving paths of the exported log Log export save path Set the saving path of the exported log Note: You can click Browse to change the directory for saving the clips and pictures System Click into the system configuration interface System Configuration 1 Device Information 22


23 Here you can see the basic information of the current device. Device Name The name of the current IPC. Firmware Version The current version of the IPC. Software Version The current HsWebplugin.exe control version of the IPC. WEB Version The current page version of the IPC. Number of Channels The current channels of the IPC, the default is 1. 2 Time Setting Click Time Setting into the set the time interface. NTP The IPC time will synchronization with network, and you can change the different time zones. (This feature requires that IPC network environment can connect to the Internet.) Click on the "Save" 23


24 after completing the settings. Set Manually Setting the IPC's date and time manually. Click on the "Save" after completing the settings. Synchronize with computer time The IPC will synchronize with the computer time and date that your connect currently. Click on the "Save" after completing the settings. NVR prohibit modification IPC time The IPC time will be not affected by the backend storage devices (such as NVR and XVR, etc.) after check this option. The IPC's time will be running according to the user settings. 3 DST Click DST into the daylight saving time setting interface. To enable daylight saving time here, set the start time, end time, and offset time for Daylight Saving Time. 4 Maintenance Click Maintenance into the setup interface. Reboot System The IPC will restart again automatically after clicking "Reboot System". Restore Factory Settings The IPC will restore to factory default parameters automatically after clicking this option.(camera IP and other network parameters will not be restored to the factory, other settings will be restored to factory defaults.please operate this function carefully). Firmware Clicking to add upgrade file package, and upgrading the IPC 24


25 program. (Please careful operation, the error of upgrade file will cause equipment system operate abnormally). 5 Fisheye Parameters Click Fisheye Parameters into the fisheye parameter setting interface. Here you can set stream mode and mount type, select stream mode different camera output corresponding to the different stream Scheduled Reboot Click into the scheduled reboot interface. It can be set "cycle" and "time" from the pull down menu, such as setting "every day to restart in 1:00 am", click to save. The IPC will be restarting every day at 1:00 am Log Search Click into the log search interface. 25


26 Search It can find running record of IPC from the start time to end time. Clear Clicking clear button to empty all logging. Anmelden Export Save the contents of the current log to the location you specified in txt format Security Click into the user management interface. Here you can click Edit to modify the original account password, and click Add User to create / delete an administrator account, create / delete operator account, or create / delete user account, a total of 10 accounts can be created. The system administrator account is prohibited to delete SD Card Click into the SD card management interface. 26


27 Here you can view the SD card detected in the camera, and SD card format. Click Rec Setup into the recording setting interface. Here you can open the SD card video, set the SD card recording schedule and recording mode. Note: No SD card video recording function of the camera No SD card management interface, please take the camera physical specific functions shall prevail Network Click into the network setting interface. 27


28 Basic Setup 1 TCP/IP The IPC is connected to the router that have opened the DHCP function, check the DHCP option, and the IPC can be get automatically IP address Net mask Default Gateway and DNS Don't check the DHCP, you can manually modify the IP address Net mask Default Gateway and DNS for IPC. 2 Port Click "port" into the port settings interface, can manually modify the IPC's HTTP, RTSP and other port numbers Advance Setup Click into the advance network setting interface. 1 DDNS 28
. 2 FTP Click FTP into the FTP setting interface. FTP Server Fill in the FTP server address. Port Fill in the FTP server port number.")

29 Open the DDNS (Dynamic Domain Name Server), click the link to register DDNS service account. Fill in the account name and password that you registered. Then you can access your IPC through DDNS. (Note: IPC must be connected to the Internet). 2 FTP Click FTP into the FTP setting interface. FTP Server Fill in the FTP server address. Port Fill in the FTP server port number. User Name Fill in the FTP server username. Password Fill in the FTP server password. Confirm Password Fill in the FTP server password. File Upload Automatically creates a folder that you named in the FTP storage path. Auto Cover When enabled, the oldest FTP server will be overwritten automatically when the FTP server is full. Upload Via FTP In the drop-down menu, select FTP file format, JPEG image format and AVI video for selection. Click on the "Save" after completing the settings. 3 SMTP Click SMTP into the SMTP setting interface. 29

30 Sender Sender Fill out the full address of the sender mailbox. SMTP Server Fill in your server address. Port Fill in your server port. Upload Via SMTP In the drop-down menu, select SMTP file format, JPEG image format, AVI video and message for selection. Click on the "Save" after completing the settings. Alarm Duration Set the sending interval. My Server Requires Authentication When enabled, the server and user are authenticated to ensure that the data is sent to the correct client and server. User Name Fill out the send mailbox user name. Password Fill out the send mailbox password. Confirm Password Fill out the send mailbox password. Receiver Fill in the full address of your inbox, here up to 3 inboxes, click on the completion of the completion of the "test" to ensure that all the correctness of the input information and network connectivity of the camera. 4 P2P Click P2P into P2P configuration interface. 30
. 5 Cloud Click Cloud into the cloud setting interface.")

31 This function is mainly used mobile client for remote monitoring. Currently, the FreeIP PRO client we offer has Android version and ios version. Users can be added to the appropriate mobile client by scanning the QR code. (Remote monitoring requirements IPC connected to the Internet). 5 Cloud Click Cloud into the cloud setting interface. Cloud Storage Type Select the cloud storage type, Dropbox or Google in the drop-down menu. Web Depending on the type of cloud storage selection play a cloud url, login web site registered account according to clew clouds. Auth Code Login cloud web, the verification code will display on the cloud storage interface, than copy it in the space. Fill in the verification code, click on the "Bind" after the success. "User name", "Total Capacity" and "Used Capacity" that information will be automatically displayed. 6 Other Click Other into the video and audio setting interface. 31


32 Here, the video password authentication is enabled. All the devices connected to the camera through the ONVIF protocol must be connected to the camera. 7 Wifi Click Wifi into the video and audio setting interface. Here you can configure the camera to connect the WiFi to the camera, click Scan to search for a nearby WiFi connection, select the camera you want to connect to WiFi, enter the WiFi password, turn DHCP on or not, and click Save. Note: Normal camera no Wifi setting interface, please take the camera physical specific functions shall prevail Video Click into the video and audio setting interface. 32
 Framerate Set the frame rate of the current output video of the device.( Note: Frame rate is too low will cause the video caton) Bit Rate Support 64-12000kbps.")
33 Video Device Name Setting your camera name. Stream Type Here Single/Third available. Codec Choose coding and resolution.( Note: The coding scheme is based on the actual scheme type.) Framerate Set the frame rate of the current output video of the device.( Note: Frame rate is too low will cause the video caton) Bit Rate Support kbps. The higher the bit rates the better video quality, but it occupy the greater network bandwidth and the greater the pressure transmission. Variable (fixed) code rate Switch the code rate output mode in the drop-down menu, fixed rate and variable rate. I Frame Interval IPC acquisition keyframe interval, can be set 1-5s. Note: The supported video encoding may be different according to the different platform Audio Click into the audio configuration interface. 33


34 Open the audio, pull bar to set the input volume (range range optional). Click Save to complete the setting Image Click into the image configuration interface Image Brightness/Contrast/Saturation/Sharpness You can input the value manually to set brightness, contrast, saturation, sharpness. These parameters shall be set according to the actual environment. The scope of valid values is from 0 to 255, you can drag the slider to set, and the default value is
35 IRcut Select the day/night switch mode, and configure the IR switching time from this option. Exposure Settings It have automatic mode and manual mode, the manual mode when the click, "Gain Control" is active, valid values are (0-255) and the default value is 128. At the same time can set the speed of the electronic shutter.click Save to complete the setting. White Balance It have automatic mode and manual mode, the manual mode when the click, "Red gain" and "green gain", "Blue Gain" is active, valid values are (0-255) and the default value is 128. Click Save to complete the setting. Image Enhancement It have flicker control and sensor linear WDR setting. Flicker Control: Indoor PAL, Indoor NTSC and outdoor are selectable. The flash mode is selected according to the camera installation environment and the flicker standard; normally 50 Hz for PAL standard and 60 Hz for NTSC Standard. WDR: Wide Dynamic Range can be used when there is a high contrast of the bright area and the 35

36 dark area of the scene OSD Click into the overlay setting interface. Overlay Setting It allows you to set the Date Format, OSD Position, OSD Text and mirror, and will be displayed in the preview screen Events Motion Detection Click into the motion detection setting interface. 36


37 Select All Motion detection range to monitor all of the area, which Consists of 396(22*18) small squares. Of course you can choose a combination of several small squares among them as motion detecting area. Clear All Clearing all the motion detecting area that selected currently. Sensitivity Can be selected 0 to 10, and the higher the value, the greater the sensitivity. Click Arming Schedule into the arming time setting interface. Here, set the motion detection alarm period, add, delete, edit. (1) Click and drag the mouse on the time axis to edit the arming schedule. 37
 After you set the arming schedule, you can copy the schedule to other days (Optional). (5) Click Save to save the settings. Click Linkage Method into the linkage mode setting interface.")

38 (2) Choose the day you want to set the arming schedule. (3) Click to set the time period for the arming schedule. (4) After you set the arming schedule, you can copy the schedule to other days (Optional). (5) Click Save to save the settings. Click Linkage Method into the linkage mode setting interface.. Open the "General linkage", "upload Via SMTP", "upload Via FTP", "upload Via Cloud" function, when the device motion detection alarm, the linkage corresponding way to inform the user Privacy Click Privacy into the privacy setting interface. Pressing the left mouse button and drag to select area in the region. Region 1 Region 2 Region 3 bellow will show the corresponding coordinates, width, and height of the region.if you want to delete a region, click on the corresponding Delete button. Click on the Save after completing the setting. 38

39 Video Tampering Click Video Tampering into the video occlusion interface. Open the "block alarm", draws the occlusion area, set the sensitivity. Click Save when the settings are complete. Clear All Clearing all the occlusion area that selected currently. Click Arming Schedule into the arming time setting interface. Set the time period for occlusion alarm, add, delete, edit. Click on the Save after completing. Click Linkage Method into the linkage mode setting interface 39
40 Open the "General linkage", "upload Via SMTP", "upload Via FTP" function, when the device occlusion alarm, the linkage corresponding way to inform the user Exception Click Exception into the abnormal alarm setting interface. Set the "Cable Disconnection" and "IP Address Conflict" alarms here, and set the alarm output mode. Click on the Save after completing the settings. 5. App client 5.1. Download and install App Download and install FreeIP PRO on your smart phone. Please scan the following QR codes to 40


, and log in the account.")
41 download the App, or you can download from the following websites: Android App: ios App : Android APP ios APP 5.2. Add device Add a device to the device list to manage. Steps: (1) Open the FreeIP PRO you install on the smart phone (New users please register an account), and log in the account. (2) Enter the sliding menu, Click Device to add the device. 41

 Scan the QR code on the gift box or on the")
 Enter the device s user name and password, and")

42 (3) In the device management interface, Click Add Device or + on the right of Device Management to enter the adding devices interface. (4) Scan the QR code on the gift box or on the website to add the device. (5) Enter the device s user name and password, and then click Submit 5.3. Preview Preview the real time stream of the fisheye camera. Steps: (1) Enter the sliding menu, Click Preview to preview. 42


43 (2) Click + (3) In My device, please choose the device you want to preview, then click Preview (4) You can select different preview windows in the preview interface, different modes as below. Phone full-screen preview as follows: In the preview interface in addition to switch preview mode, you do video, capture, set the sound and other operations. 43
44 6. Frequently Asked Questions 6.1. Why can not access the camera by IE? Answer: There maybe 4 reasons, Details are as follows: a.the network unreasonable? Solution: First you can connect network by PC, check the network cable if it is good. And check the network between the camera and the PC is good. b.the IP address of the camera is occupied by other device or PC? Solution: You can connect the camera with your PC directly, and modify the IP address or use the IP search tool. c.the camera maybe in other network segment? Solution: Check the IP address and net mask Why can not access the camera after update? Answer: Clean browser cache. Steps: open IE, click Tools and select Internet Options, then you can see Temporary Internet files and click Delete Files, it will prompt a dialog you need to check Delete all offline content and click OK. Also you can click Start and select Run then enter cmd, enter arp -d in Command Prompt interface. Re-access the camera Why cannot show the whole interface? Answer: Close some options of IE. Steps: Open IE, click View and select Toolbar, close the Favorites bar, Status bar and Command bar. 44
Network HD camera user manual V LONGSE V Version:V Note. for short the full network HD cameras 1
 IPCOCX_PX User Manual Version:V5.1.25.5 V5.1.25.5 for short the full network HD cameras 1 Catalog Safety Instruction......3 Introduction... 5 1 Install The IPCOCX_PX Controls......5 1.1 Preparation Before
Network Camera. User Manual. Version:
 Network Camera User Manual Version:8.1.24.5 Statement Thank you for purchasing our product. If there are any questions or requests, please do not hesitate to contact the dealer. This manual applies to
Camera A14 and A34 Dome Camera
 Camera A14 and A34 Dome Camera Quick Start Guide Thank you for purchasing our product. If there are any questions, or requests, please do not hesitate to contact the dealer. About This Manual: This manual
Camera. Network Bullet Camera. Quick Operation Guide
 Camera Network Bullet Camera Quick Operation Guide 1 Thank you for purchasing our product. If there are any questions, or requests, please do not hesitate to contact the dealer. About This Document This
Network Dome Camera. Quick Start Guide
 Network Dome Camera Quick Start Guide 1 Thank you for purchasing our product. If there are any questions, or requests, please do not hesitate to contact the dealer. About This Document This manual may
HD IPCameras User's Mannual
 Thank you for purchasing our products, if you have any questions or need, please feel free to contact us. This manual applies to IPC-XXX series of network cameras. This manual may contain technical inaccuracies
CAMERAS IP START SERIES
 CAMERAS IP START SERIES Contents 1. Login Interface... 3 2. Preview... 4 2.1 Open/Close Preview... 5 2.2 Full-screen Preview... 5 2.3 Electronic Zoom-in... 5 2.3 PTZ Control... 6 3. File Management...
Network Camera. User Manual
 Network Camera User Manual Thank you for purchasing our product. If there are any questions, or requests, please do not hesitate to contact the dealer. This manual applies to Network Camera. This manual
Network Camera. User Manual V3.2.0
 Network Camera User Manual V3.2.0 Network Camera User Manual 1 This manual applies to the following camera models: CAM-IPM-D3-VP CAM-IPM-2D3-VP CAM-IPM-03D-21VP CAM-IPM-2D-29P-VP CAM-IPM-3D-29P-VP CAM-IPM-13D-29VPC
Camera. Network Fisheye Camera. Quick Operation Guide
 Camera Network Fisheye Camera Quick Operation Guide 1 Thank you for purchasing our product. If there are any questions, or requests, please do not hesitate to contact the dealer. About This Document This
1. Introduction Overview Product Information... 3
 1. Introduction... 3 1.1 Overview... 3 1.2 Product Information... 3 2. Device Connection... 3 2.1 Connection Diagram... 3 2.2 Wi-Fi Setting... 4 2.2.1 Set up WiFi by Mobile Phone... 4 2.2.2 WPS/QSS One
Camera. Network Bullet Camera. Quick Operation Guide
 Camera Network Bullet Camera Quick Operation Guide 1 Thank you for purchasing our product. If there are any questions, or requests, please do not hesitate to contact the dealer. About This Document This
Pro71600N3 NVR User Manual
 Pro71600N3 NVR User Manual User Information Admin User Name: Admin Password: IP Address: System Name: Table Of Contents 1. Menu Operation...4 1.1 Main Menu...4 2. Start & Shutdown System...5 2.1 Start
A-55 Quick Start Guide Quick Start Guide. Camera
 A-55 Quick Start Guide Quick Start Guide Camera 1 Thank you for purchasing our product. If there are any questions, or requests, please do not hesitate to contact the dealer. About This Document This manual
Pro7804N1 NVR User Manual
 Pro7804N1 NVR User Manual Pro7804N1 User Manual BW R6.indd 1 User Information Admin User Name: Admin Password: IP Address: System Name: Table Of Contents 1. Menu Operation...4 1.1 Main Menu...4 2. Start
Network Cube Camera Installation Manual
 Network Cube Camera Installation Manual V3.0.0 Hangzhou Hikvision Digital Technology Co., Ltd. http://www.hikvision.com 2010-04 Thank you for purchasing our product. If there are any questions, or requests,
IP Camera user manual
 IP Camera user manual Product name:high definition IP Camera Document version:4.2 Editions suit for 1080P IP Camera Precautions Search and Login...1 Device searching...2 Install plugin...3 A. Real-time
Dear users, the configuration for this camera is professional, so please read the user manual carefully before using the camera V5.
 Dear users, the configuration for this camera is professional, so please read the user manual carefully before using the camera. IP Camera (629W) User manual 2014-03 V5.1 Statement If the user manual can
Network Dome Camera Quick Start Guide
 Thank you for purchasing our product. If there are any questions, or requests, please do not hesitate to contact us. About This Document This manual may contain several technical incorrect places or printing
IP Camera User Manual
 Statement IP Camera User Manual If the user manual cannot help you to solve the problem, please call our technology center about the solutions. We will update the content for the new functions without
IP Mini PTZ CAMERA USER GUIDE
 IP Mini PTZ CAMERA USER GUIDE TYPE A: To switch the mount style, remove the two screws on the pan bottom and rotate 180 degree to remount. This Mini PTZ cylinder camera can support both wall mount and
IP WEB User Manual V2.0
 IP WEB User Manual V2.0 Please read carefully before installing or contacting your supplier. The information contained at the time of printing is correct, but is subject to change without notice. This
IR Network Speed Dome
 IR Network Speed Dome Quick Guide Thank you for purchasing our product. If there are any questions, or requests, please do not hesitate to contact the dealer. This manual applies to IR High-Definition
Network Fisheye Camera User Manual
 User Manual of Network Fisheye Camera Network Fisheye Camera User Manual 1 Thank you for purchasing our product. If there are any questions, or requests, please do not hesitate to contact the dealer. This
QRT-502. IE Operation Manual
 QRT-502 IE Operation Manual Contents 1. Home.. 2 2. Replay.... 5 3. Media.... 6 3-1. Video.... 6 3-2. Audio.... 7 3-3. Image.... 8 3-4. OSD.... 9 3-5. PTZ (Not supported in QRT-501) 4. Parameters.... 10
HIP2P Network Video Camera Client Terminal User Manual
 HIP2P Network Video Camera Client Terminal User Manual Document version:5.1 Page 1 of 34 } Preface Thank you for using our company's products. The network video camera client terminal is used to implement
Pro7400H1 Hybrid DVR User Manual
 Pro7400H1 Hybrid DVR User Manual User Information Admin User Name: Admin Password: IP Address: System Name: Table Of Contents 1. Menu Operation... 4 1.1 Main Menu... 4 2. Start Up/Shutdown System... 5
License Plate Recognition (LPR) Camera Installation Manual
 Camera Installation Manual") License Plate Recognition (LPR) Camera Installation Manual 0 Hikvision LPR Camera Installation Manual About this Manual This Manual is applicable to Hikvision LPR Network Camera. This manual may contain
License Plate Recognition (LPR) Camera Installation Manual 0 Hikvision LPR Camera Installation Manual About this Manual This Manual is applicable to Hikvision LPR Network Camera. This manual may contain
A-44-IR V2/A-54 V2 Quick Start Guide
 A-44-IR V2/A-54 V2 Quick Start Guide 1 A-44/A-54 V2 Quick Start Guide Thank you for purchasing our product. If there are any questions, or requests, please do not hesitate to contact the dealer. About
IPC Online Operation Manual
 IPC Online Operation Manual 1 Overview An IP camera (hereinafter referred to as IPC) is a new product integrating network video technologies into a traditional camera. The IPC can realize simpler monitoring
Camera. Network Dome Camera. Quick Operation Guide UD.6L0201B1228A01
 Camera Network Dome Camera Quick Operation Guide UD.6L0201B1228A01 1 Thank you for purchasing our product. If there are any questions, or requests, please do not hesitate to contact the dealer. About This
Advidia A-15 & A-35 Installation Manual
 Advidia A-15 & A-35 Installation Manual Thank you for purchasing our product. If there are any questions, or requests, please do not hesitate to contact the dealer. This manual may contain inaccuracies
Operation Guide. ismartviewplus V1.0.2 (For windows) July, 2017 Rev1.0
 July, 2017 Rev1.0") Operation Guide ismartviewplus V1.0.2 (For windows) July, 2017 Rev1.0 Statement If the user manual doesn t help you to resolve the problem, please contact us via our website for technical support. Notice
Operation Guide ismartviewplus V1.0.2 (For windows) July, 2017 Rev1.0 Statement If the user manual doesn t help you to resolve the problem, please contact us via our website for technical support. Notice
TENVIS Technology Co., Ltd. User Manual. For H.264 Cameras. Version 1.0.0
 TENVIS Technology Co., Ltd User Manual For H.264 Cameras Version 1.0.0 Catalogue Basic Operation... 3 Hardware Installation... 3 Search Camera... 3 For Internet Explorer... 6 Playback Record Files... 9
PROVISION-ISR. User Manual. All S Series IP Cameras I1-390IPS36 DI-390IPS36 I1-330IPS36 DI-330IPS36. All rights reserved Provision-ISR
 (v4.0.2) PROVISION-ISR All S Series IP Cameras I1-390IPS36 DI-390IPS36 I1-330IPS36 DI-330IPS36 User Manual All rights reserved Provision-ISR Notes on Safety Please refer to the technical specs to choose
IE user manual V IE User manual V1.1.1
 IE user manual V1.1.1 IE User manual V1.1.1 IE user manual V1.1.1 CONTENT 1 NETWORK SETUP... 4 1.1 NETWORK STATUS... 4 1.2 ETHERNET SETUP... 7 1.3 WIFI SETUP... 7 1.4 ADSL SETUP... 8 1.5 DDNS SETUP...
JOVISION. Home Security IP Camera. Quick Start Guide
 JOVISION Home Security IP Camera Quick Start Guide Statement Thank you for choosing Jovision, this user manual is intended for users of HD Wireless IP Camera. It includes instructions on how to use the
Network Turret Camera. Quick Operation Guide
 Network Turret Camera Quick Operation Guide 1 Thank you for purchasing our product. If there are any questions, or requests, please do not hesitate to contact the dealer. About This Manual The Manual includes
VMS-A1 Client Software. User Manual
 VMS-A1 Client Software User Manual Contents Contents... 2 Chapter1. Overview... 4 1.1 Description... 4 1.2 Features & Functions... 4 Chapter2. Update Info... 6 Chapter3. Starting VMS-A1... 7 3.1 Installing
IP CAMERA User Manual 695h, 755h, 795h
 IP CAMERA User Manual 695h, 755h, 795h 1 Contents Chapter 1 - Login... 4 Chapter 2 - Main Interface... 6 2.1 Main Interface Display Status... 6 2.2 Operation of Live View Interface... 6 Chapter 3 - Setting
HooToo IP Camera User Manual(part two)
") HooToo Inc. HooToo IP Camera User Manual(part two) For Model: HT-IP210P Published by SunvalleyTek Group 2014/9/14 Content 1. IPCamClient (windows software)...3 Set up...3 CAM... 13 Local Setting... 13
HooToo Inc. HooToo IP Camera User Manual(part two) For Model: HT-IP210P Published by SunvalleyTek Group 2014/9/14 Content 1. IPCamClient (windows software)...3 Set up...3 CAM... 13 Local Setting... 13
NVMS-7000 Client Software User Manual Version 1.03
 NVMS-7000 Client Software User Manual Version 1.03 Contents Chapter 1. Overview... 3 1.1 Description... 3 1.2 Running Environment... 3 Chapter 2. Starting NVMS-7000... 4 2.1 User Registration... 4 2.2
TURBO HD D7T Series Dome Camera
 TURBO HD D7T Series Dome Camera User Manual UD02018B User Manual Thank you for purchasing our product. If there are any questions, or requests, do not hesitate to contact the dealer. This manual applies
Network Camera User Manual
 Network Camera User Manual V3.0.0 Hangzhou Hikvision Digital Technology Co., Ltd. http://www.hikvision.com 1 Thank you for purchasing our product. If there are any questions, or requests, please do not
Camera. Network Box Camera. Quick Operation Guide UD.6L0201B1320A01
 Camera Network Box Camera Quick Operation Guide UD.6L0201B1320A01 1 Thank you for purchasing our product. If there are any questions, or requests, please do not hesitate to contact the dealer. About This
Network Cameras NVC-BM1 NVC-DF1 NVC-DT1 NVC-DM1. User Manual
 Network Cameras NVC-BM1 NVC-DF1 NVC-DT1 NVC-DM1 User Manual V1.0 0 For further information, including full user and installation manual, and technical support please visit: www.hills.com.au/videosecurity
RM Series IP Cameras. Configuration manual. WiFi IP Cameras CONFIGURATION MANUAL RM SERIES - IP CAMERAS WIFI. How to configure camera options
 Page: 1 RM Series IP Cameras WiFi IP Cameras Configuration manual How to configure camera options Page: 2 Contents of this handbook The range of RM series cameras is a range of IP cameras for network connection
NVMS User Manual
 NVMS-1000 User Manual Contents 1 Software Introduction...1 1.1 Summary... 1 1.2 Operation Environment... 1 1.3 Install and Uninstall... 2 1.3.1 Install the Software... 2 1.3.2 Uninstall the Software...
NVR Equipment WEB Operation Guide ISSUE V1.1 DATE
 NVR Equipment WEB Operation Guide ISSUE V1.1 DATE 2018-05-15 About This Document About This Document Purpose This document describes how to use the web management system for NVR and the cameras managed
NVMS1000. User Manual
 NVMS1000 User Manual Contents 1 Software Introduction... 1 1.1 Summary... 1 1.2 Operation Environment... 1 1.3 Install and Uninstall... 2 1.3.1 Install the Software... 2 1.3.2 Uninstall the Software...
A-300 Speed Dome. Quick Start Guide
 A-300 Speed Dome Quick Start Guide Thank you for purchasing our product. If there are any questions, or requests, please do not hesitate to contact the company you purchased the unit from. This manual
QRT-501 IE Operation Manual
 QRT-501 IE Operation Manual Contents Log In...5 Main Screen...6 Task Bar...7 Right Panel Control...8 Configure the Camera Settings...9 Device Basic Information... 10 View the Device Information...10 Change
NVMS User Manual. Version 2.1.0
 NVMS-1000 User Manual Version 2.1.0 Contents 1 Software Introduction... 1 1.1 Summary... 1 1.2 Operation Environment... 1 1.3 Install and Uninstall... 2 1.3.1 Install the Software... 2 1.3.2 Uninstall
Camera. Network Bullet Camera. Quick Operation Guide
 Camera Network Bullet Camera Quick Operation Guide 1 Thank you for purchasing our product. If there are any questions, or requests, please do not hesitate to contact the dealer. About This Manual The Manual
A64 Dome Camera. Quick Start Guide
 A64 Dome Camera Quick Start Guide 1 Thank you for purchasing our product. If there are any questions, or requests, please do not hesitate to contact the dealer. About This Document This manual applies
User Manual for Arcdyn Longbow 1080p & HD+
 User Manual for Arcdyn Longbow 1080p & HD+ Network Dome Camera Quick Operation Guide Regulatory Information FCC Information FCC compliance: This equipment has been tested and found to comply with the limits
KEZ-c2TR28V12XIR HD-TVI 1080p Varifocal IP66 Super Beam IR True WDR Turret Cameras with OSD, CVBS Output and UTC Control
 KEZ-c2TR28V12XIR HD-TVI 1080p Varifocal IP66 Super Beam IR True WDR Turret Cameras with OSD, CVBS Output and UTC Control Quick Operation Guide Thank you for selecting this KT&C Omni EZHD Series product.
NVMS1000. User Manual
 NVMS1000 User Manual Contents 1 Software Introduction... 1 1.1 Summary... 1 1.2 Operation Environment... 1 1.3 Install and Uninstall... 2 1.3.1 Install the Software... 2 1.3.2 Uninstall the Software...
A-47 IR Network Mini Dome Camera. Quick Operation Guide
 A-47 IR Network Mini Dome Camera Quick Operation Guide Thank you for purchasing the Advidia A-47 IR mini dome camera. If there are any questions, or requests, please do not hesitate to contact the dealer.
Video Surveillance Management Software NVClient V5 User Manual
 Video Surveillance Management Software NVClient V5 User Manual Version: V5.0 Update Date: 2013-12-12 Welcome Thanks for using the Company's digital video surveillance management software. Please read this
XIPLED Software User s Manual. For Firmware release V3.5.0.*
 XIPLED1080-36 Software User s Manual For Firmware release V3.5.0.* Product name: XIPLED1080-36 Release Date: 2014/10/02 Manual Revision: V02 Feature XIPLED1080-36 Live View All Series Camera/Video/Audio
HD IP CAMERA USER GUIDE
 HD IP CAMERA USER GUIDE Support US: support@onwote.com EU: eusupport@onwote.com AU: ausupport@onwote.com Feature Lists 7x24 hours online live HD video preview Remote access via multiple web browsers(ie/firefox,
NVMS User Manual
 NVMS-1000 User Manual Contents 1 Software Introduction...1 1.1 Summary... 1 1.2 Operation Environment... 1 1.3 Install and Uninstall... 2 1.3.1 Install the Software... 2 1.3.2 Uninstall the Software...
Contents. Introduction Overview Range of Application Product Description Operation Environment...
 Contents Introduction... 3 1. Overview... 4 1.1 Range of Application... 4 1.2 Product Description... 4 1.3 Operation Environment... 5 2. Device Connection... 5 3. Device Operation Instructions... 6 3.1
Network Video Recorder Quick Start Guide
 Network Video Recorder Quick Start Guide Contents Important Safeguards and Warnings... 2 1. Hardware Installation and Connection...2 1.1. Before You Start... 3 1.2. HDD Installation... 3 2. Interface Instruction...4
TURBO HD TVI Bullet & Turret Camera
 TURBO HD TVI Bullet & Turret Camera User Manual UD03589B User Manual Thank you for purchasing our product. If there are any questions, or requests, do not hesitate to contact the dealer. This manual applies
KEZ-c1TR28V12XIR HD-TVI 720p Low Light Varifocal IP66 EXIR Turret Cameras with OSD, CVBS Test Output and UTC Control
 KEZ-c1TR28V12XIR HD-TVI 720p Low Light Varifocal IP66 EXIR Turret Cameras with OSD, CVBS Test Output and UTC Control Quick Operation Guide Thank you for selecting this KT&C Omni EZHD Series product. For
A-45 Quick Setup Guide
 www.advidia.com A-45 Quick Setup Guide Table of Contents A. Physical Camera Description... 3 B. Installation... 5 C. Search and Modify IP... 8 D. Preview via Web Browser...11 E. Web Interface Configuration...14
NETWORK BULLET CAMERA Quick Start Guide
 NETWORK BULLET CAMERA Quick Start Guide Quick Start Guide About this Manual This Manual is applicable to Network Bullet Camera. The Manual includes instructions for using and managing the product. Pictures,
Manual Version: V1.00. Video Decoder User Manual
 Manual Version: V1.00 Video Decoder User Manual Thank you for purchasing our product. If there are any questions, or requests, please do not hesitate to contact the dealer. Copyright Copyright 2016 Zhejiang
Cam. Network Dome Camera. Quick Start Guide
 Cam Network Dome Camera Quick Start Guide 1 About this Manual This Manual is applicable to DS-I111 DS-I221 Network Camera. The Manual includes instructions for using and managing the product. Pictures,
Dear users, the configuration for this camera is professional, so please read the user manual carefully before using the camera V4.
 Dear users, the configuration for this camera is professional, so please read the user manual carefully before using the camera. IP Camera (B series) User manual 2012-12 V4.19 Statement If the user manual
HD Pan Tilt IP Camera
 IP Camera User Guide Version 1.0.0.1 HD Pan Tilt IP Camera Page 1 Content 1. Hardware installation... 4 1.1 Hardware connection... 4 1.2 Network connection...5 1.3 WPS setting...5 2. ipad, iphone App introduction...5
Manual Version: V1.01. Video Management Server Client Software User Manual
 Manual Version: V1.01 Video Management Server Client Software User Manual Thank you for purchasing our product. If there are any questions, or requests, please do not hesitate to contact the dealer. Notice
Network Box Camera Installation Manual
 Network Box Camera Installation Manual V3.0.0 Hangzhou Hikvision Digital Technology Co., Ltd. http://www.hikvision.com 2010-04 Thank you for purchasing our product. If there are any questions, or requests,
Manual Version: V1.15. Video Management Software Guard Station User Manual
 Manual Version: V1.15 Video Management Software Guard Station User Manual Thank you for purchasing our product. If there are any questions, or requests, please do not hesitate to contact the dealer. Disclaimer
Smart XVR Kits. Quick Start Guide. Related tools and documents of products, please download from
 Smart XVR Kits Quick Start Guide Related tools and documents of products, please download from www.herospeed.net. Stetement Thank you for purchasing our products, if you have any questions or requires,
Fixed Network Camera User Manual
 Fixed Network Camera User Manual GC-IL-Series GC-ID-Series Sales@GovComm.us 305-937-2000 3830 SW 30 Avenue, Ft. Lauderdale, Florida 33312 GovComm, Inc. 2018 Thank you for purchasing GovComm s network ITS
Cisco WVC210 Wireless-G Pan Tilt Zoom (PTZ) Internet Video Camera: 2-Way Audio Cisco Small Business Video Surveillance Cameras
 Internet Video Camera: 2-Way Audio Cisco Small Business Video Surveillance Cameras") Cisco WVC210 Wireless-G Pan Tilt Zoom (PTZ) Internet Video Camera: 2-Way Audio Cisco Small Business Video Surveillance Cameras High-Quality, Flexible, Remote-Controlled Wireless Video Solution for Your
Cisco WVC210 Wireless-G Pan Tilt Zoom (PTZ) Internet Video Camera: 2-Way Audio Cisco Small Business Video Surveillance Cameras High-Quality, Flexible, Remote-Controlled Wireless Video Solution for Your
Dual-Lens People Counting Camera
 Dual-Lens People Counting Camera 0 User Manual UD12330B User Manual COPYRIGHT 2018 Hangzhou Hikvision Digital Technology Co., Ltd. ALL RIGHTS RESERVED. Any and all information, including, among others,
SunEyes V Series IP Camera P2P CMS user manual
 SunEyes V Series IP Camera P2P CMS user manual Version: 2.0 Date: July. 2015 This document is applicable to all series devices in our company. Page 1 ON page 40 foreword The HiP2P client of IP Camera is
Network Fisheye Camera. User Manual
 Network Fisheye Camera User Manual About this Manual This Manual is applicable to Network Fisheye Camera. The Manual includes instructions for using and managing the product. Pictures, charts, images and
CAMERAS WI-FI IP 100 SERIES. Please read this manual thoroughly before use and keep it for future reference
 CAMERAS WI-FI IP 100 SERIES Please read this manual thoroughly before use and keep it for future reference Contents 1. Login Interface... 1 2. Live view... 2 2.1 Full-screen Preview... 2 2.2 Electronic
User Manual of Network Camera. Network Camera. User Manual UD.6L0201D1919A01
 User Manual of Network Camera Network Camera User Manual UD.6L0201D1919A01 1 Table of Contents Chapter 1 System Requirement... 10 Chapter 2 Network Connection... 11 2.1 Setting the Network Camera over
Video surveillance kit PNI House WiFi 400
 Video surveillance kit PNI House WiFi 400 NVR and 4 wireless cameras USER MANUAL NVR menu (Android / ios) app Software HCMS (Windows) IP CAMERA: NVR: 1 2 3 4 5 1 2 3 4 5 6 1 - Antenna 1 - Antenna connector
User Manual Signature Series Network Cameras
 User Manual Signature Series Network Cameras Manual Version: V2.03 Thank you for purchasing our product. If there are any questions, or requests, please do not hesitate to contact the dealer. Trademark
User manual for IPC. IP Camera. User Manual For more information, please visit our website
 IP Camera User Manual 1-26 Content Important Safety Instructions... 4 Notice and Warning... 4 1. Requirements...4 1.1 Power Requirements... 4 1.2 Usage Environment Requirements...4 1.3 Operation and Maintaining
KNC-p3BR4IR KNC-p3BR6IR KNC-p3BR12IR 3 Megapixel Plug & Play Capable IP66 IR Mini IP Bullet Cameras
 KNC-p3BR4IR KNC-p3BR6IR KNC-p3BR12IR 3 Megapixel Plug & Play Capable IP66 IR Mini IP Bullet Cameras Quick Operation Guide 1 Thank you for selecting this KT&C Omni IP Series product. For additional information
User Manual for HD IP Camera of IPC121-Ei7N-X100 Series
 KEDACOM User Manual for HD IP Camera of IPC121-Ei7N-X100 Series Version 02 Trademark Kedacom and are trademarks of Suzhou Keda Technology Co., Ltd. in China and various other countries. All other trademarks
Quick Guide. Document Version: V1.0. Release Date: 2015/1. Intelligent HD IP Camera Quick Guide
 Intelligent HD IP Camera Quick Guide Document Version: V1.0 Release Date: 2015/1 Intelligent HD IP Camera Quick Guide 1/14 1. Packing list Please check whether the camera is intact and accessories are
Quick Operation Guide
 KNC-p3DR3IR KNC-p3DR4IR KNC-p3DR6IR KNC-p3DR12IR 3 Megapixel Plug & Play Capable 3-Axis IP66 IR Mini IP Dome Cameras with SD Quick Operation Guide KNC-p3DR_IR IP 3-Axis Mini Dome Camera with SD Quick Operation
NS15WG 1080P Web App User Manual
 NS15WG 1080P Web App User Manual Table of Contents 1. Getting Started... 4 Download the Web App...4 2. Web App Top Menu... 5 Live Video...6 Video Playback...6 Settings...6 3. Device Configuration... 6
Thermal+Optical Bi-spectrum Network Speed Dome Quick Start Guide
 Thermal+Optical Bi-spectrum Network Speed Dome Quick Start Guide UD.6L0201B2060A01 Thank you for purchasing our product. If there are any questions, or requests, please do not hesitate to contact the dealer.
USER MANUAL. Mac Version
 USER MANUAL Mac Version Contents 1 Software Introduction... 1 1.1 Summary... 1 1.2 Install and Uninstall... 1 1.2.1 Install the Software... 1 2 Login Software... 3 2.1 Login... 3 2.2 Control Panel Instruction...
HD Pan Tilt IP Camera
 IP Camera User Guide Version 1.0.0.1 HD Pan Tilt IP Camera NIP-09L2J NIP-16L2J NIP-22L2J NIP-21L2J Page 1 Content 1. Hardware installation... 4 1.1 Hardware connection... 4 1.2 Network connection...5 1.3
HLong Asia Industrial
 SDI DVR Stand alone digital video recorder HLong Asia Industrial Thank you for using the company's products! This manual describes only the host functions basic operation. Product design and specification
Cisco WVC210 Wireless-G Pan Tilt Zoom (PTZ) Internet Video Camera: 2-Way Audio Cisco Small Business Video Surveillance Cameras
 Internet Video Camera: 2-Way Audio Cisco Small Business Video Surveillance Cameras") Cisco WVC210 Wireless-G Pan Tilt Zoom (PTZ) Internet Video Camera: 2-Way Audio Cisco Small Business Video Surveillance Cameras High-Quality, Flexible, Remote-Controlled Wireless Video Solution for Your
Cisco WVC210 Wireless-G Pan Tilt Zoom (PTZ) Internet Video Camera: 2-Way Audio Cisco Small Business Video Surveillance Cameras High-Quality, Flexible, Remote-Controlled Wireless Video Solution for Your
User Manual of P2P IP Cameras
 Updated on 20 August, 2013 User Manual of P2P IP Cameras This user manual applies to all the P2P IP Cameras as follows IPA Series: Home Pan-tilt IP Cameras IPB Series: Outdoor Waterproof IP Cameras IPC
IR Network Speed Dome. User Manual
 IR Network Speed Dome User Manual User Manual of IR Network Speed Dome 1 Thank you for purchasing our product. If there are any questions, or requests, please do not hesitate to contact the dealer. This
Table of Contents: Recorder Web View User Manual. Introduction. 1. Accessing Via Web Browser 2. Installing the plug Live View 1.
 Recorder Web View User Manual Table of Contents: Introduction 1. Accessing Via Web Browser 2. Installing the plug Live View 1. View Page Introduction 2. PTZ Playback 1. Playback Picture 1. Picture Parameters