2009 Davis Instruments Corp. All rights reserved. Information in this document is subject to change without notice.
|
|
|
- Oscar Ray
- 6 years ago
- Views:
Transcription

1
2 FCC Part 15 Class B Registration Warning This equipment has been tested and found to comply with the limits for a Class B digital device, pursuant to Part 15 of the FCC Rules. These limits are designed to provide reasonable protection against harmful interference in a residential installation. This equipment generates, uses and can radiate radio frequency energy and, if not installed and used in accordance with the instructions, may cause harmful interference to radio communications. However, there is no guarantee that interference will not occur in a particular installation. If this equipment does cause harmful interference to radio or television reception, which can be determined by turning the equipment on and off, the user is encouraged to try to correct the interference by one or more of the following measures: Reorient or relocate the receiving antenna Increase the separation between the equipment and receiver Connect the equipment into an outlet on a circuit different from that to which the receiver is connected Consult the dealer or an experienced radio/tv technician for help. Changes or modifications not expressly approved in writing by Davis Instruments may void the user s authority to operate this equipment. EC EMC Compliance This product complies with the essential protection requirements of the EC EMC Directive 89/336/EC. Product Number: 7862 Part Number: WeatherLink for Weather Monitor II, Weather Wizard III, and Perception II Rev. C September 29, 2009 WeatherLink, Weather Monitor II, Weather Wizard III, and Perception II are trademarks of Davis Instruments Corp. Hayes is a registered trademark of Hayes Microcomputer Products, Inc. Windows is a trademark of Microsoft Corporation Davis Instruments Corp. All rights reserved. Information in this document is subject to change without notice Diablo Avenue, Hayward, CA U.S.A Fax: info@davisnet.com
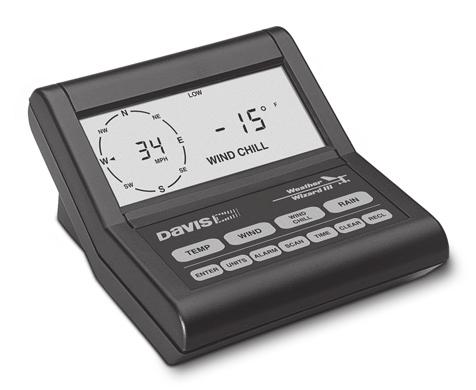
3 Welcome to WeatherLink! Welcome to Davis Instruments WeatherLink for Windows. WeatherLink s data logger and software connects a personal computer to your Davis weather station, allowing you to store, view, plot, analyze, export, and print your weather data. The following Davis Instruments weather stations are supported: Weather Monitor II, Weather Wizard III, and Perception II. Contents of Package Before continuing, please make sure your WeatherLink package contains the following listed items: Data Logger for Monitor, Wizard and Perception 9-pin (DB-9) PC COM Port Adapter (black) Use the 9-pin adapter to connect the data logger to a 9-pin serial port. Note: If you need a 25-pin adapter, contact Davis Instruments Technical Support at Loopback Connector The loopback connector is a short piece of cable with a phone plug at one end and a red plastic cap at the other. WeatherLink Software CD ROM Optional Accessories The following optional accessories, designed for use with WeatherLink, are available from your dealer or may be ordered directly from Davis. Telephone Modem Adapter (# 7870) For transmission of data from the data logger using a modem. Standard 4-Conductor Extension Cable (# 7876) For more flexibility in the placement of your console. Add one 40' (12 m) extension cable to extend the distance between your station and the computer (48' (14.4 m) maximum). USB-to-Serial Cable (# 8434) For computers with no serial port. Allows you to convert the console s serial connection to a USB interface. Hardware Installation You can either install WeatherLink to create a local connection between your computer and weather station, or you can install WeatherLink to use a modem connection to a remote weather station. Requirements and installation for each type of connection differ, and are explained separately below. 1
4 Software Installation Local Connection Hardware Requirements The following additional hardware is required for a local connection: Computer running Windows 2000, XP, or Vista and requires 5 MB of free disk space. Note: The.NET framework is required to run WeatherLink 5.8 or later. It is installed as part of the software installation if it is not already on your computer. The amount of disk space necessary depends on the archive interval. Database files containing data stored at a 30 minute archive interval require approximately 132K of disk space per month of data. The file size changes in a linear fashion depending on the archive interval. For example, data stored at a 1 minute interval requires approximately 3.9 MB per month while the data stored at a 2 hour interval requires approximately 33 KB per month. Windows-Compatible Display VGA minimum. SVGA or High (16- bit) Color recommended. One free serial port or USB Port with USB-to-Serial cable. Remote Modem Connection Hardware Requirements In addition to the provided hardware and the computer equipment listed above, the following hardware is required for a remote modem connection. One external modem to connect to the data logger at the remote site. One internal or external modem connected to your computer Modems must be Hayes Compatible and able to send data at 1200 or 2400 baud rate. Telephone Modem Adapter The Telephone Modem Adapter is specially wired to provide the connection between the data logger and the modem. Use a # 7870 adapter. Note: See the Application Note entitled Setting up a Remote Modem Connection located on the Weather Support section of the Davis website: Software Installation Follow the steps below to install the WeatherLink software. 1. Place the WeatherLink software CD in your CD ROM drive. The install program should start automatically. If the install program does not start, select Run from the Start menu, type D:\SETUP (or the correct letter for your CD ROM drive), and click OK to begin the installation. 2


5 Software Installation A series of dialog boxes display, prompting you to complete the WeatherLink installation. The WeatherLink Setup for.net Framework dialog box may display. WeatherLink 5.8 requires the Microsoft.NET Framework 2.0 to operate. If your computer does not have it installed, the above dialog box displays. 2. Click Accept to install the necessary components. The License Agreement dialog box displays. 3

6 Local Connection Installation 3. Review the license agreement, click I agree and click Next. The Choose Destination Location dialog box displays. C:\WeatherLink\ 4. Select the default location to install WeatherLink or find another location by clicking Browse. Note: If you are upgrading your software from a previous version, click Browse to search for the directory or folder of the previous version of WeatherLink. This verifies that you have a previous version of WeatherLink installed and allows you to use those available database files. 5. Click Next once you have selected a location. The Confirm Installation dialog box displays. 6. Click Next to start the installation. The Installing WeatherLink dialog box displays the installation progress. The Installation Successful dialog box displays once the software installation has been completed. 7. Click OK. WeatherLink has been installed successfully. Local Connection Installation The instructions below explain how to connect your Weather Monitor II, Weather Wizard III, or Perception II weather station directly to your computer. 4
7 Local Connection Installation Typical Local Connection for Original Weather Stations 1. Make a note of the barometric pressure, total rainfall, and (if applicable) calibration numbers. You must remove power from the weather station console to install the data logger. Removing power will cause these stored weather values to be erased. Use WeatherLink to reenter these values after restoring power to the console. 2. Remove the mounting base from the console. 3. Remove all power from the console by removing the power adapter and battery backup. Failure to remove power before installing the data logger may cause damage to the data logger and/or console. 4. A small switch near the data logger cables controls the baud rate. The default setting is 2400 baud. If you need to run at 1200 baud, change the setting before connecting the data logger to the console. 5. Connect the short data logger cable to the cable jack marked WeatherLink on the bottom of your weather station console. 6. Restore power to the console by reattaching the power adapter and listen for the console to emit beeps. The console should beep three times. The third beep, which should occur within 30 seconds, indicates that the data logger is operating correctly. After hearing the three beeps, re-install the battery backup. 5
8 Remote Connection Installation 7. Place the data logger inside the mounting base. 8. Reattach the mounting base to the weather station. As you do so, guide all the cables through the slots on the mounting base. 9. Locate a free serial port on the back of your computer and connect the black DB9 adapter to the port or use the USB-to-Serial cable to connect to a free USB Port. Placing Data Logger Inside Base 10. Connect the long data logger cable to the DB9 adapter connector. The cable connecting the data logger to the computer is 8' (2.4 m) long. If you need to place the station console more than 8' from the computer, use the 40' (12 m) 4-conductor extension cable (# ). Note: Do not attempt to use more than 40 of extension cable, or the data logger may have difficulty communicating with the computer. Do not attempt to use 4-conductor telephone cable because telephone cable will not work with the connection. Remote Connection Installation You can connect your computer to a remote weather station using a modem. This involves using the data logger to connect the weather station console to a modem at the remote site. Your computer can then use a modem to communicate to the remote weather station via a phone line. At Your Computer: 1. If you don t have a modem, install and set up an internal or external modem according to the instructions supplied by the manufacturer. 2. Connect the modem to the phone line. At Your Weather Station Console: 1. Make a note of the barometric pressure, total rainfall, and (if applicable) calibration numbers. You must remove power from the weather station to install the WeatherLink data logger, which will cause these values to be erased. Use WeatherLink to reenter these values after restoring power to the station. 2. Place the external modem in a location where it can connect to both the data logger and the phone jack. Do not turn the modem on at this time. 3. Remove the mounting base from the weather station. 4. Remove all power from the weather station by removing the power adapter and battery backup. 6
9 Remote Connection Installation Failure to remove power before installing the data logger may cause damage to the data logger and/or station. Typical Remote Installation for Original Weather Stations 5. A small switch on the data logger near the cables controls the baud rate. The default setting is 2400 baud. If you need to run at 1200 baud, change the setting before connecting the data logger to the console. 6. Connect the short data logger cable to the cable jack marked Weather- Link on the bottom of your weather station console. 7. Connect the blue Telephone Modem Adapter to the external modem. The Telephone Modem Adapter (#7870) is required to use the data logger with a modem. A standard DB25 connector with a gender changer will not work. 8. Connect the long data logger cable to the Telephone Modem Adapter. 9. Turn the modem on. 10. Restore power to the weather station console by reattaching the power adapter and listen for the console to emit beeps. The console should beep three times. The third beep, which should occur within 30 seconds, indicates that the data logger is operating correctly. After hearing the three beeps, re-install the battery backup. 7

10 Remote Modem Connection Notes 11. Place the data logger inside the mounting base. 12. Reattach the mounting base to the weather station. As you do so, guide all the cables through the slots on the mounting base. Placing Data Logger Inside Base Remote Modem Connection Notes When accessing a remote modem connection, WeatherLink automatically dials the station and console whenever an action has been performed in the software that requires it to talk to the station. While connected to a remote station, an On-Line icon displays in the tool bar. This icon indicates that WeatherLink has established a connection with the remote console and weather station. To disconnect the phone connection, select the On-Line icon from the tool bar or select Hang Up from the File menu. Toolbar with On-Line Icon By default, WeatherLink disconnects from the modem after one minute without any communication with the station. Use the Communications Port dialog box in the Setup menu of WeatherLink to change this default value. (See the WeatherLink Online Help for more information.) Note: WeatherLink does not hang up the phone line if the bulletin, summary, or other windows receiving real-time data from the console are active. 8
11 Running the Software Software Setup It is easy to set up WeatherLink on your computer once the connection to your console has been configured. Walk through the following procedures to setup and configure your WeatherLink software and the connection to your console. Running the Software To run the software, double-click the WeatherLink icon. If no stations have been assigned in the program directory, the software prompts you to add a station (see below for details). If this is a software upgrade and if there is more than one station in the program directory when the application opens, the last station that was displayed is automatically opened. Station Setup Each station connected to the computer must have its own station within the software. The software creates a database for the station and other stationspecific information, and requires the necessary communication settings (communication type, etc.) be provided. Adding a Station 1. Select New Station from the File menu. The New Station dialog box displays. 2. Type the desired station name (up to 40 characters/spaces) into the Station Name text box. The software uses the first eight characters of the station name (not counting spaces or punctuation marks) as the name of the directory where it saves this station s database and configuration files. The first eight characters of each station name must, therefore, be unique. 3. Click OK to save the new station or click Cancel to exit without saving. The software saves the new station, creates a directory and a configuration file for the station, and prompts you to enter the walk-through procedure. About the Walkthrough The software includes a station setup walkthrough that steps you through the weather station configuration procedures. After adding a new station, the Walkthrough dialog box automatically displays. By selecting Yes, the walkthrough begins. By selecting No, the Walkthrough is cancelled. You can set up and configure your station by separately selecting all of the necessary setup options from the Setup menu. A Walkthrough option is included in the Setup menu that allows you to access the Walkthrough at any time. Note: When necessary, the software automatically dials a phone modem station. 9
12 Communication Port Settings By selecting the Walkthrough process, the software displays a series of dialog boxes. At each step in the Walkthrough process, confirmation boxes are provided to perform or skip the next step in the Walkthrough. To continue, select OK. To skip this step and move to the next step, select Skip. To cancel the entire walkthrough process, select Cancel. Note: Please refer to the WeatherLink Online Help for more information about the complete Walkthrough process. Communication Port Settings WeatherLink contains a dialog box for configuring the communication settings for your serial or modem configuration. Use the Communications Port dialog box to select the communications type and to test communication between the computer and the station. 1. Select Communications Port from the Setup menu or use the Walkthrough to display the dialog box. 10

13 The Communications Port dialog box displays. Communication Port Settings 2. Select Serial from the communications field. 3. Select the rate at which weather station connects to the computer from the Baud Rate drop-down list box. Select from either the 1200 or 2400 Baud Rate. 4. Select the communications port that connects the data logger to the computer from the Com Port drop-down list box or click Auto-Detect to to find and select the correct COM port being used for your serial port connection. 5. Click Test to verify communication. 6. Click OK to save the Communications Port settings. 11

14 Database Conversion You can also use the Loopback button (as opposed to the Test button) in the Communications Port dialog box to test and find the correct serial port connection. If a communications problem exists, it determines whether the serial port or the data logger is not communicating properly. The loopback function also detects and reports the presence of any modems. Use the loopback connector (the short cable with a phone jack on one end and a red plastic tip on the other) supplied with a WeatherLink serial port connection package. 1. If necessary, disconnect the cable between your console and the adapter connected to the COM port. 2. Insert the loopback connector into the adapter. 3. Select Communications Port from the Setup menu. The Communications Port dialog box displays. 4. Click Loopback. Loopback connector The software searches all standard ports and displays the COM port number where the loopback connector is located. The correct COM port is automatically selected in the Communications Port dialog box. If the loopback connector is not found on any COM port, your serial port may not be working. See Communications Problems on page 14 for more information. Updating Previous Versions Starting with Version 5.4, WeatherLink stores additional sensor data in the weather database. Data files from earlier releases do not contain the additional data and should be converted before use by the latest version of WeatherLink. The following procedure explains how to convert older WeatherLink data files for use with WeatherLink 5.4 and later versions. Database Conversion If you have an existing weather database from WeatherLink 3 or 4 or earlier, there are two ways to convert those files for use with versions of WeatherLink 5.4 or later. 12
15 Troubleshooting Guide Convert a WeatherLink Station (for 5.4 or later) This method converts all the data files in an existing WeatherLink station directory and retains the previously entered station configuration data. 1. Install the new version of WeatherLink in a new program folder. 2. Copy the station folder from the previous WeatherLink program folder to a WeatherLink 5.4 or later program folder. 3. Use the Open Station command in the File Menu to open the copied station folder. WeatherLink automatically detects that the station was created by a previous version of the software and asks to convert the data and station. 4. Click OK to convert the station configuration, including weather database files. WeatherLink automatically creates a backup copy of the old files and then converts them for use by versions of WeatherLink 5.4 or later. Import Database Files The Import Database Files menu option allows you to select individual files or groups of files to be converted for use by WeatherLink 5.4 or later. Note: WeatherLink does not import database files created by versions of WeatherLink 5.4 or later using the Import Database File option. The Import Database Files option imports only database files created by WeatherLink versions 3 or 4 or earlier. 1. Open WeatherLink 5.4 or later and select Import Database Files from the File menu. The Browse dialog box displays. 2. Select the data files you want to import. Select one file or multiple files in the same folder. 3. Click Open to convert the selected files. These files are put into a subdirectory called Converted Database Files. 4. Copy the converted files to your station directory. 5. Reopen the station in WeatherLink to view the converted files. Troubleshooting Guide The following section answers some of the most commonly asked questions about WeatherLink. Please consult this guide and WeatherLink Online Help before contacting Technical Support (see page 17). 13
16 Troubleshooting Guide Communications Problems Why can't the WeatherLink software communicate with the data logger and station? If you are having trouble establishing communication between the weather station and WeatherLink, start by checking the weather station's own diagnostics. Remove all power to the weather station and then restart it by restoring power with the power adapter (with the data logger still attached). Leave the battery backup unplugged. You should hear three beeps, each of which occurs when the weather station passes one of its diagnostic tests. Each beep follows the previous after about one second. The first beep tells you the processor is running. The second beep will be for the display and the third beep for the data logger (if installed). If you do not hear one or more of these beeps, contact Davis Instruments. (You ll only hear two beeps if you don t have the data logger installed.) After hearing three beeps, plug in the backup battery. If you hear all three beeps, See Communication Port Settings on page 10 for instructions on checking your standard serial ports. If this identifies a serial port other than the one you selected in station setup, try connecting to the data logger again. Make sure you are using the black serial port adapter supplied with WeatherLink # Check the switch setting on the data logger. It will be set to either 1200 or 2400 Baud. If you still cannot connect or if the loopback test identifies the serial port you already have selected, eliminate the following possibilities. You have a hardware device conflict. Check the device manager tab in the Windows system properties dialog box to ensure that Windows recognizes your COM port. Consult your computer s documentation to see how to access the system properties dialog box. Your serial port uses a non-standard device name. WeatherLink recognizes serial ports named COM1 through COM18 only. Your serial port is defective. The loopback connector or the WeatherLink adapter plug is bad. If you have questions on how to proceed, contact your PC vendor or PC technical support. 14
17 Troubleshooting Guide Program Problems The barometer graph on the Bulletin does not fill in completely. When you first load the bulletin, the barometer graph will only fill in completely when you have data in your database for the last six hours. Make sure of the following: There is data in your database for the span of the barometer graph. The time and date of the stored barometer data is correct in your database. The time and date on the PC is correct. The time and date on the weather station are correct. No wind direction reading (or dashes instead of a reading) appears in my database. Be aware that if there is no wind speed when the direction is being sampled, wind direction is not recorded. During intervals with no wind speed, no direction will be recorded. Note: Since high wind speed is sampled more often, it is possible to have a high wind speed but no wind speed. My archive memory is empty and I know it should not be. What can I do? First try using the Set Archive Interval command in the Setup menu to clear the archive memory and see if this corrects the problem. You will lose any undownloaded data in your archive memory, but all your calibration numbers and alarm settings will remain intact. If this doesn t work, restart your weather station by removing the AC power adapter and the backup battery and then reconnecting them. All data which has not been downloaded will be lost. You will also have to reset all console settings such as the barometer, calibration numbers, and alarm settings. After successfully downloading, the data does not appear in my database. Where is it? The most likely possibility in this case is that the time and date on your weather station are incorrect. This usually happens if there is a power outage and you don t reset the time and date afterwards. In this case the data was written into the wrong time and month. Correctly set the time and date on your weather station and all future data should download correctly. It is also possible, if you have multiple stations, that you downloaded data into the wrong station s database. Make sure the desired station is open before downloading. 15
18 Troubleshooting Guide When viewing data, dashes appear in place of a value for functions other than wind direction. Why? If no data was recorded by a sensor (for example, the sensor was disconnected or radio interference blocked reception) or if bad data was recorded for a sensor (for example, the sensor was malfunctioning), the software dashes out the entry rather than showing invalid data. You can use the record editor to correct these entries. The data I want to see, such as humidity (Monitor) is missing completely or is grayed-out. Why? All optional sensors must be enabled in the Station Configuration Setup dialog box before the data will be displayed in WeatherLink. If you are not seeing data from a sensor that is installed in your weather station, be sure check the Station Configuration in the Setup Menu and make sure the sensor has been selected. 16
19 Contacting Davis Technical Support Contacting Davis Technical Support If you have questions about the software, or encounter problems installing or using the software, please contact Davis Technical Support. Most questions can be answered on the phone. Note: Sorry, we are unable to accept collect calls. Phone Support: (510) Monday Friday, 7:00 a.m. 5:30 p.m. Pacific Time. (510) Technical Support Fax Support: Technical Support . General . Davis Instruments website. Includes Weather support information. 17

20 Tool bar Icons Open Station Bulletin Window Plot Window Yearly Rainfall Alarm Indication Online (Hang Up) View Help Download Strip Chart Window Database Window This Month s NOAA Summary Print Window Exit Program Hot Keys Main Program Window Ctrl-A Set Alarms Ctrl-B View Bulletin Ctrl-C Station Configuration Ctrl-G Degree-Days Report Ctrl-H Hang Up Ctrl-I Communications Port Settings Ctrl-J Automatic Download Ctrl-K Walkthrough Ctrl-L Download Ctrl-O Open Station Ctrl-P Print Active Window Ctrl-Q Open Plot Window Ctrl-R Yearly Rain Report Ctrl-S Open Strip Charts Ctrl-T Set Time Ctrl-U Select Units Ctrl-V View Download Log Ctrl-W..... Browse Database Ctrl-X Auto Fax Settings Ctrl-Y View Summary Ctrl-Z Close Window F Context-Sensitive Help F Sunrise/Sunset Report F NOAA This Month F NOAA This Year Strip Chart Window ESC Halt Redraw Ctrl-M..... Make Default Ctrl-P Print Strip Chart F Context-Sensitive Help F Zoom In F Zoom Out Plot Window ESC Halt Redraw Ctrl-D Choose Date Ctrl-M..... Make Default Ctrl-P Print Plot F Context-Sensitive Help F Zoom In F Zoom Out F Overlay Plots F Last Year Plot Database Window Ctrl-D Choose Date Ctrl-N Add Note Ctrl-P Print Records Enter Edit Record Delete..... Delete Record F Context-Sensitive Help Yearly Rainfall Window Enter Edit Year Delete..... Delete Year
WeatherLink. Getting Started Guide. Vantage Pro TM. For. Product #6510
 WeatherLink For Vantage Pro TM Product #6510 Getting Started Guide This equipment has been tested and found to comply with the limits for a Class B digital device, pursuant to Part 15 of the FCC Rules.
for Vantage Stations Vue Davis Instruments, 3465 Diablo Avenue, Hayward, CA U.S.A
 for Vantage Stations Vue Davis Instruments, 3465 Diablo Avenue, Hayward, CA 94545-2778 U.S.A. 510-732-9229 www.davisnet.com Some datalogger models may include code based on version 4.2.0 of the FreeRTOS
2007 Davis Instruments Corp. All rights reserved. Information in this document is subject to change without notice.
 Some datalogger models may include code based on version 4.2.0 of the FreeRTOS operating system. Complete FreeRTOS source code may be downloaded from http://www.freertos.org. In addition, some datalogger
Bluetooth Micro Dongle User s Guide. Rating: 5V DC 80mA Made in China
 Bluetooth Micro Dongle User s Guide Rating: 5V DC 80mA Made in China Introduction Package Contents USB Bluetooth adapter x 1 Installation CD x 1 (includes Bluetooth software and User s Guide) User s Guide
Vantage Connect Retrofit Kit
 Vantage Connect Retrofit Kit For Vantage Pro2, Vantage Pro2 Plus, R Vantage Vue and Weather Envoy Product number 6626 Davis Instruments, 3465 Diablo Avenue, Hayward, CA 94545-2778 U.S.A. 510-732-9229 www.davisnet.com
2.1 Operating System : Microsoft Widows 98/ME/NT/2000/XP. 3.1 Unplug the Modular Plug from the telephone and plug it in one of the Dual Modular Jack.
 PC Recorder User s Manual 1. About PC Recorder The PC Recorder is a system which enables users to record the phone conversation to the PC and to search and play back the recorded contents later when needed
DriveRight. Fleet Management Software. Getting Started Guide. CarChip. DriveRight. Drivers. Vehicles. Product #8186
 DriveRight Fleet Management Software Getting Started Guide CarChip DriveRight Drivers Vehicles Product #8186 DriveRight Fleet Management Software Getting Started Guide; P/N 8186 Davis Instruments Part
Single Port Serial PC Card User Manual
 Single Port Serial PC Card User Manual FCC COMPLIANCE STATEMENTS This equipment has been tested and found to comply with the limits for a Class B digital device, pursuant to Part 15 of the FCC Rules.
DriveRight. Fleet Management Software v 3.5. Getting Started Guide. CarChips. DriveRights. Drivers. Vehicles. Product #8186
 DriveRight Fleet Management Software v 3.5 Getting Started Guide CarChips DriveRights Drivers Vehicles Product #8186 Product Number: 8186 Davis Instruments Part Number: 7395.313 Rev. D (3/9/06) DriveRight
DriveRight. Fleet Management Software. Getting Started Guide. CarChip. DriveRight. Drivers. Vehicles. Product #8186
 DriveRight Fleet Management Software Getting Started Guide CarChip DriveRight Drivers Vehicles Product #8186 Table of Contents DriveRight FMS Features...1 Package Contents...2 System Requirements...2
USB to Serial Converter User s Guide
 USB to Serial Converter User s Guide Important Note! In order to minimize possible installation problems and/or resource conflicts: Read Me First! About This User s Guide This User s Guide is designed
Installation Guide AHA -1530P/1532P. Plug and Play AT-to-SCSI Host Adapter with SCSISelect Utility
 R Installation Guide AHA -1530P/1532P Plug and Play AT-to-SCSI Host Adapter with SCSISelect Utility Note: Read the AHA-1530P/1532P Getting Started guide first when you are ready to install your AHA-1530P/1532P
DICKSON WiZARD Wireless Monitoring Solutions STOP
 DICKSON WiZARD Wireless Monitoring Solutions STOP You have just purchased a precision data logger system To ensure proper installation of the WiZARD Wireless System, please read this manual in its entirety
Chicony Standard Bluetooth Keyboard Users Manual. Model No.: KT-1063
 Chicony Standard Bluetooth Keyboard Users Manual Model No.: KT-1063 Issue: Jan. 03, 2011 Scope Getting Start Thank you for choosing this ultrathin keyboard with Bluetooth technology to ensure no hinder
IEEE 1394 PC-Card Interface Adapter
 IEEE 1394 PC-Card Interface Adapter Rev. A02 Congratulations on your purchase of the Lava IEEE 1394 Interface Adapter. The Lava IEEE 1394 Interface Adapter is a PC bus card for connecting high-performance
Installation Guide AHA-1540CP/1542CP. ISA-to-SCSI Plug and Play High-Performance Bus Master Host Adapter with SCSISelect Utility
 R Installation Guide AHA-1540CP/1542CP ISA-to-SCSI Plug and Play High-Performance Bus Master Host Adapter with SCSISelect Utility 1 Introduction This Installation Guide explains how to install and configure
Digital Voice Recorder & Pen
 Digital Voice Recorder & Pen Model : MQ-71/MQ-72 Made in Korea Owner s Manual Thank you for purchasing this product. Before use, read this manual and understand its functions for appropriate use. After
Installation Guide AHA Micro Channel-to-SCSI Host Adapter
 R Installation Guide AHA-1640 Micro Channel-to-SCSI Host Adapter 1 Installation Checklist Be sure to complete these steps when you install your AHA -1640 Micro Channel -to SCSI host adapter. Check each
Imation Lock. Password Protection Software USER GUIDE. v1.1. (Mode 8)
") Imation Lock Password Protection Software USER GUIDE v1.1 (Mode 8) Table of Contents 1. Introduction to the Imation Lock Security Software....2 2. Before You Get Started...2 3. Features....2 4. Public
Imation Lock Password Protection Software USER GUIDE v1.1 (Mode 8) Table of Contents 1. Introduction to the Imation Lock Security Software....2 2. Before You Get Started...2 3. Features....2 4. Public
Components. Tools for Setup. Installation Outline
 VANTAGE PRO AND VANTAGE PRO PLUS Fan-Aspirated ISS Retrofit Kit Installation Instructions Estimated Time Required: 60 Minutes These instructions describe how to install the Vantage Pro Fan-Aspirated Integrated
Hardware Installation 1. Install two AA batteries in the mouse. Pairing Process in Vista and Windows XP SP2
 Hardware Installation 1. Install two AA batteries in the mouse. Pairing Process in Vista and Windows XP SP2 1. Open the Windows control panel, then select Bluetooth devices. 2. Click Add.. 3. Select My
Unpack the package contents and verify that you have the following: Model PA301 Network Card Telephone cable (10 ft) Resource CD
 Resource CD") Start Here Instructions in this guide are for users of Windows 95 and Windows 98 who are installing the Model PA301 Network Card. For instructions on installing and verifying the Windows network driver,
Start Here Instructions in this guide are for users of Windows 95 and Windows 98 who are installing the Model PA301 Network Card. For instructions on installing and verifying the Windows network driver,
PCMCIA Interface CD-ROM Drive. CD Station. User s Manual
 PCMCIA Interface CD-ROM Drive CD Station User s Manual FCC COMPLIANCE STATEMENTS This equipment has been tested and found to comply with the limits for a Class B digital device, pursuant to Part 15 of
Digital Photo Album Operation Manual
 Digital Photo Album Operation Manual English Instruction Manual... E-1 French Instruction Manual.. F-1 Spanish Instruction Manual. S-1 German Instruction Manual..G-1 Introduction... E-2 Product Overview...
Instruction Guide. 2 Channel Ultra ATA/100 PCI Card PCI2IDE100. The Professionals Source For Hard-to-Find Computer Parts. Revised: December 5, 2002
 IDE CARD 2 Channel Ultra ATA/100 PCI Card PCI2IDE100 Instruction Guide * Actual product may vary from photo Revised: December 5, 2002 The Professionals Source For Hard-to-Find Computer Parts 7 FCC COMPLIANCE
AHA-3980/3980W AHA-3985/3985W
 Quick Reference: Hardware Installation AHA-3980/3980W AHA-3985/3985W MultiChannel PCI-to-SCSI RAID Adapters R This guide explains how to install the AHA -398x RAID adapters: the AHA-3980, AHA-3980W, AHA-3985,
CDU-680DORA Mobile Broadband USB Modem+Disk TM
 CDU-680DORA Mobile Broadband USB Modem+Disk TM Quick Installation Guide 2007 Franklin Wireless, Corp. All rights reserved. No reproduction in whole or in part without prior written approval. Regulatory
1.0. User s Guide & Manual. MDC Bluetooth + 56K Modem
 1.0 MDC Bluetooth + 56K Modem User s Guide & Manual Portable of module Federal Communication Commission Interference Statement This equipment has been tested and found to comply with the limits for a Class
CS-231. User Manual. Copyright ATEN International Co., Ltd. Manual Part No. PAPE G Printing Date: 11/2006
 User Manual CS-231 Read this guide thoroughly and follow the installation and operation procedures carefully in order to prevent any damage to the units and/or any devices that connect to them. This package
APC-100. IEEE g Wireless USB Adapter. User s Guide v1.0
 APC-100 IEEE 802.11g Wireless USB Adapter User s Guide v1.0 FCC Certifications Federal Communication Commission Interference Statement This equipment has been tested and found to comply with the limits
Installation Guide. DVI Net ShareStation GDIP201 PART NO. M1048
 Installation Guide DVI Net ShareStation 1 GDIP201 PART NO. M1048 2 Table of Contents Package Contents 4 Hardware Installation 5 USB Server software installation - XP 10 DisplayLink software installation
SuperBus 2000 Phone Interface/Voice Module Installation Instructions
 SuperBus 2000 Module Installation Instructions Product summary The SuperBus 2000 (PIV) Module provides phone and voice functions for the Concord, Concord 4, and Concord Express (v4) panels. The PIV module
DVI KVM Switch user manual Model
 DVI KVM Switch user manual Model 156066 INT-156066-UM-0808-01 introduction Thank you for purchasing the INTELLINET NETWORK SOLUTIONS DVI KVM Switch, Model 156066. This convenient device lets you control
AIRNET 54Mb b/g High Power USB Adapter. User s Manual
 AIRNET 54Mb 802.11b/g High Power USB Adapter User s Manual FCC Certifications Federal Communication Commission Interference Statement This equipment has been tested and found to comply with the limits
SMART Response LE. Quick Start Guide. Safety and compliance information...2. Compliance...2. About SMART Response...3. What s in the box?...
 SMART Response LE Quick Start Guide Safety and compliance information...2 Compliance...2 About SMART Response...3 What s in the box?...3 Installing the clicker batteries...4 Environmental considerations
3G Cell Modem Upgrade
 3G Cell Modem Upgrade For BaseStation 1000 Irrigation Controllers in Pedestal Enclosures October 7, 2014 Customer Service 1-866-294-5847 Baseline Inc. www.baselinesystems.com Phone 208-323-1634 FAX 208-323-1834
! Hardware: USB-Serial adapter, USB type A to type B cable. Software: USB-Serial driver on CD-ROM
 Congratulations on your purchase of the USB-Serial adapter. This device provides a simple and easy way to connect Universal Serial Bus (USB) and Serial port interface. With the advantage of USB port, users
Model WT1 Wireless Tablet Interface
 Model WT1 Wireless Tablet Interface User Manual Model WT1 Wireless Tablet Interface Thank you for purchasing the Califone Model WT1 Wireless Tablet Interface. We encourage you to visit our website www.
User Manual. Copyright Thursby Software Systems, Inc. February 2015 Revision 4
 PKard Reader User Manual Copyright 2012-2015 Thursby Software Systems, Inc. February 2015 Revision 4 Description PKard Reader (app) is a mobile web browser that enables smart card authentication. PKard
Targus Memory Stick Reader for Notebook Computers
 Targus Memory Stick Reader for Notebook Computers Targus Memory Stick Reader Introduction Thank you for purchasing the Targus Memory Stick Reader (TMS Reader). Lightweight and ultra-portable, the TMS Reader
SET UP 2. Unboxing 2. Attaching clip 2. Attaching pendant 2. Pairing with the app 2. Available functionality 3. Function Elements 3
 SENSTONE MANUAL SET UP 2 Unboxing 2 Attaching clip 2 Attaching pendant 2 Pairing with the app 2 USING SENSTONE 3 Available functionality 3 Function Elements 3 Technical characteristics 3 Taking a note
LevelOne BLH-1000 Bluetooth Headset User s Manual
 LevelOne BLH-1000 Bluetooth Headset User s Manual - 1 - Introduction Introduction to Bluetooth Wireless Technology Bluetooth is a short- range wireless communication technology. It allows wireless connections
USER S MANUAL USB TO Serial Adapter
 USER S MANUAL USB TO Serial Adapter 1. Introduction Congratulations on your purchase of the USB-Serial adapter. This device provides a simple and easy way to connect Universal Serial Bus (USB) and Serial
ATRx Biometric Package Contents: Minimum System Requirements: INSTALLATION GUIDE BIOMETRIC HANDPUNCH TECHNOLOGY
 ATRx Biometric 1000 BIOMETRIC HANDPUNCH TECHNOLOGY Thank you for purchasing ATRx Biometric 1000. This installation guide will help you learn how to connect the handpunch reader, enable biometrics in the
TF-3239DL 10/100Mbps PCI Network Adapter
 Rev: 1.1.0 1910010553 COPYRIGHT & TRADEMARKS Specifications are subject to change without notice. is a registered trademark of TP-LINK TECHNOLOGIES CO., LTD. Other brands and product names are trademarks
User Guide. Version 2.
 User Guide Version 2 www.rmepad.com RM epad TM User Guide Please read all instructions carefully before using Please retain these instructions for future reference RM epad TM contains replaceable, rechargeable
3465 Diablo Avenue, Hayward, CA U.S.A Fax:
 DriveRight Fleet Management Software Version 3.5 User s Manual Rev D (January 30, 2006) Product Number: 8186 Davis Instruments Part Number: 7395.194 Davis Instruments Corp. 2006. All rights reserved. This
User's Guide. diskette drive. Rev. 6/1/97 Copyright 1997 Micro Solutions, Inc.
 diskette drive User's Guide Rev. 6/1/97 Copyright 1997 Micro Solutions, Inc. Micro Solutions, Inc., provides this manual as is, without warranty of any kind, either express or implied. Micro Solutions,
RocketRAID 2760A. 6Gb/s SAS/SATA Host Adapter. Quick Instal l ation Guide v1.1
 RocketRAID 2760A 6Gb/s SAS/SATA Host Adapter Quick Instal l ation Guide v1.1 Contents HighPoint RocketRAID 2760A PCI-Express 2.0 x16... 3 Hardware Installation... 4 Kit Contents... 4 Installing the RR2760A
100BASE-TX/10-B REX-CB81U. User Guide. November 1998 First Edition
 100BASE-TX/10-B ASE-TX/10-BASE-T Network CardBus PC Card REX-CB81U User Guide November 1998 First Edition REX-CB81U User Guide CONTENTS FCC Statement 1 1. Introduction 3 1-1. Features 3 1-2. Trademarks
WebRamp M3 Quick Start. for Windows and Macintosh
 WebRamp M3 Quick Start for Windows and Macintosh Copyright 1997 Ramp Networks, Inc. All rights reserved. This publication, as well as the software described in it, is furnished under license and may only
RocketU 1022C Host Controller
 RocketU 1022C Host Controller Quick Installation Guide V1.0 Jan. 21, 2013 1 Table of Contents HighPoint RocketU 1022C... 3 Kit Contents... 3 Board Layout... 4 Installing the RocketU Series Host Adapter...
ACCESS SYSTEM Test System 2000 Release Notes
 ACCESS SYSTEM 2000 Test System 2000 Release Notes Part Number 883-502215-001-A November 1994 Important Notice VERILINK CORPORATION DISTRIBUTES THIS REFERENCE AS IS WITHOUT WARRANTY OF ANY KIND, EITHER
Shadow Tracker TM Premier Base
 Quick Start Users Guide Shadow Tracker TM Premier Base TM Advanced Tracking Technologies, Inc. 2003 ATTI All rights reserved Copyright 2003, Advanced Tracking Technologies, Inc. All rights reserved. No
EN Series / EXN. Telephone Entry & Access Control System. Quick Start Guide (EN-2A4) ( EXN )
 ( EXN )") EN Series / EXN Telephone Entry & Access Control System (EN-2A4) ( EXN ) Quick Start Guide (P/N: EN-2A4 / EN-2M4, EN-2A7 / EN-2M7, EN-2A10 / EN-2M10, and EXN) NOTE: This Quick start guide is applicable
EN Series / EXN Telephone Entry & Access Control System (EN-2A4) ( EXN ) Quick Start Guide (P/N: EN-2A4 / EN-2M4, EN-2A7 / EN-2M7, EN-2A10 / EN-2M10, and EXN) NOTE: This Quick start guide is applicable
IEEE g Wireless PC Card. User s Guide
 IEEE 802.11g Wireless PC Card User s Guide FCC Certifications Federal Communication Commission Interference Statement This equipment has been tested and found to comply with the limits for a Class B digital
AVA AT-to-SCSI Host Adapter. Installation Guide
 R AVA-1505 AT-to-SCSI Host Adapter Installation Guide 1 Getting Started This guide tells you how to install and configure the AVA -1505 AT -to-scsi host adapter. Installation instructions are given in
USB KVM Switch USER MANUAL CS62US / CS64US
 USB KVM Switch USER MANUAL CS62US / CS64US EMC Information FEDERAL COMMUNICATIONS COMMISSION INTERFERENCE STATEMENT: This equipment has been tested and found to comply with the limits for a Class B digital
USB Wireless Network Adapter User s Manual
 USB Wireless Network Adapter User s Manual Rev 0.9 Regulatory compliance FCC Warning This equipment has been tested and found to comply with the limits for a Class B digital device, pursuant to part 15
USB Hub-Audio Series. January 1999 A
 Series January 1999 A15-0157-110 FCC COMPLIANCE STATEMENT: This device complies with part 15 of the FCC Rules. Operation is subject to the following two conditions: (1) This device may not cause harmful
3.5 inch Hard Drive Enclosure. Model #: HDE350U. User s Manual
 3.5 inch Hard Drive Enclosure Model #: HDE350U User s Manual 2 Rev. 060811 User s Record: To provide quality customer service and technical support, it is suggested that you keep the following information
3.5 inch Hard Drive Enclosure. User s Manual
 3.5 inch Hard Drive Enclosure Model #: HDE355U User s Manual Rev. 060811 User s Record: To provide quality customer service and technical support, it is suggested that you keep the following information
WLAN a+b+g mini-pci Module
 WLAN a+b+g mini-pci Module User Manual Model: EM-500AG Version: 1.0 Feb 2003 Copyright Statement No part of this publication may be reproduced, stored in a retrieval system, or transmitted in any form
InnoMedia ipbx-400. Quick Install Guide.
 InnoMedia ipbx-400 Quick Install Guide www.innomedia.com Table of Contents Introduction 2 Package Contents 2 Installation 3 Wall-Mounting Instructions 5 Troubleshooting 6 Appendix A. LED Status Summary
Low Profile PCI I/O Quick Installation Guide
 Low Profile PCI I/O Quick Installation Guide Introducing the Low Profile PCI I/O The Low Profile PCI I/O conforms to the new PCI card form factor standard made for space constrained system designs. Since
DockingStation28May03.qxd 5/28/2003 9:12 PM Page 1 READ FIRST!
 DockingStation28May03.qxd 5/28/2003 9:12 PM Page 1 Portable Universal Docking Station User s Manual Your life just got simpler READ FIRST! Tired of reconnecting all your desktop tools every time you return
Port PCI Quick Installation Guide
 1394 3-Port PCI Quick Installation Guide Introducing the 1394 3-Port PCI The 1394 3-Port PCI is designed to connect DV camcorders, hard disk drives, scanners, printers and other 1394 audio/video devices
HomePlug Ethernet Bridge
 HomePlug Ethernet Bridge User Manual English LINDY No. 25120 www.lindy.com LINDY ELECTRONICS LIMITED & LINDY-ELEKTRONIK GMBH - SECOND EDITION (Feb 2004) Introduction Thank you for purchasing a LINDY HomePlug
IC+ 56k External Data Fax Voice Modem IP568x User s Guide
 IC + 56k External Data Fax Voice Modem IP568x FCC Requirements This equipment complies with Part 68 of the FCC Rules. On the bottom of this equipment is a label that contains, among other information,
Contents. 120 x 200 mm 5 Februar 2010
 120 x 200 mm 5 Februar 2010 Contents Safety instructions... 2 Safety and installation... 2 Cabling... 3 Electromagnetic compatibility/ Conformity... 3 FCC Compliance Statement... 4 Cleaning... 5 Disposal...
ThinkPad Bluetooth Laser Mouse User Manual
 ThinkPad Bluetooth Laser Mouse User Manual About this manual Thank you for your purchase of this Bluetooth mouse set. This topics covered in this manual are listed as following. (This mouse will be sold
Rocket 272x 6Gb/s SAS/SATA Host Adapter Quick Installation Guide
 Rocket 272x 6Gb/s SAS/SATA Host Adapter Quick Installation Guide v1.1 1 Contents HighPoint Rocket 272x...3 Hardware Installation...4 Installing the Rocket 272x Adapter...3 Using the Rocket 272x BIOS...4
" " Key: short press for a player on, long press the volume down. " " Key: short press play / pause / resume play, Short press to answer or end calls
 Dear Customer: Welcome to use the company's digital products, please carefully read the instructions before using the device to normal operational use. Box Contents In the box, you will find: 1. Headphone
4ARGUSÖ0ORT 2EPLICATOR 53%23Ö'5)$% -AKINGÖ9OURÖ-OBILEÖ,IFEÖ%ASIERË
$% -AKINGÖ9OURÖ-OBILEÖ,IFEÖ%ASIERË") 4ARGUSÖ0ORT 2EPLICATOR -AKINGÖ9OURÖ-OBILEÖ,IFEÖ%ASIERË 6ISITÖOURÖ7EBÖSITEÖATÖWWWTARGUSCOM &EATURESÖANDÖSPECIFICATIONSÖAREÖSUBJECTÖTOÖCHANGEÖWITHOUTÖNOTICE ÖÖÖ4ARGUSÖ'ROUPÖ)NTERNATIONALÖANDÖ4ARGUSÖ)NC!
4ARGUSÖ0ORT 2EPLICATOR -AKINGÖ9OURÖ-OBILEÖ,IFEÖ%ASIERË 6ISITÖOURÖ7EBÖSITEÖATÖWWWTARGUSCOM &EATURESÖANDÖSPECIFICATIONSÖAREÖSUBJECTÖTOÖCHANGEÖWITHOUTÖNOTICE ÖÖÖ4ARGUSÖ'ROUPÖ)NTERNATIONALÖANDÖ4ARGUSÖ)NC!
IRONKEY H80 USER GUIDE
 IRONKEY H80 USER GUIDE Contents Introducing IronKey H80 2 Minimum System Requirements 2 Device accessories 2 Imation Documentation 3 Getting Started 4 Plugging in the device 4 Personalizing a device 4
Addonics Technologies. ExDrive. User Guide. Revision 2.7
 Addonics Technologies ExDrive User Guide Revision 2.7 Table of Contents I. Introduction FCC Warning Statement 3 Welcome 4 Hardware Requirement 4 Operating System Requirement 4 Introduction 5 Package Contents
Micro Bluetooth 2.1 EDR Adapter
 Micro Bluetooth 2.1 EDR Adapter User Guide Rocketfish Micro Bluetooth 2.1 EDR Adapter Contents Introduction... 2 Features... 3 Windows Vista or Windows 7... 4 Windows XP or Windows 2000...18 Uninstalling
Cyber PCI I/O Quick Installation Guide
 Cyber PCI I/O Quick Installation Guide Introducing the Cyber PCI I/O The Cyber PCI I/O high-speed serial and parallel I/O card family provides a complete solution for serial and parallel device connections.
User s guide for Xtenda TM
 User s guide for Xtenda TM (X300 Series) Copyright by Ncomputing Co. Ltd. 2004. - Illegal copying of this software, hardware and this documentation is prohibited by law. All other brand- and product names
Digital Keychain 1.4 LCD
 Digital Keychain 1.4 LCD Model #: 1-4DPF200 User s Manual PID # 161302-109241 Rev. 070731 All brand name and trademarks are the property of their respective owners USER S RECORD: To provide quality customer
Rocket Dual esata 6Gb/s For Mac
 Rocket Dual esata 6Gb/s For Mac QUICK INSTALLATION GUIDE What is esata? esata stands for External Serial Advanced Technology Attachment. esata provides the fastest data transfer of up to 6Gb/s (600MB/s)
Micro Bluetooth 2.1 EDR Adapter
 Micro Bluetooth 2.1 EDR Adapter RF-MRBTAD User Guide Before using your new product, please read these instructions to prevent any damage. Rocketfish RF-MRBTAD Micro Bluetooth 2.1 EDR Adapter Contents Introduction...
SyncBraille User Manual HIMS Co., Ltd.
 SyncBraille User Manual HIMS Co., Ltd. 139-9, Gajung-dong, Yuseong-gu Daejeon, Korea 305-350 Tel : 042-864-4460 Fax : 042-864-4462 E-mail : hims@himsintl.com http://www.himsintl.com List 1. User guide...
54M Wireless LAN CardBus Card
 54M Wireless LAN CardBus Card User s Manual Ver.2.0 Federal Communication Commission Interference Statement This equipment has been tested and found to comply with the limits for a Class B digital device,
Instructions for PREMISE PRO Digital Surveillance Camera
 Important Battery lnformation - Only use Alkaline or Lithium batteries. We recommend the use of Energizer batteries. - Do not mix old and new batteries. Always replace ALL the batteries at the same time.
DATALOCKER H100 ENCRYPTED HARD DRIVE. User Guide
 DATALOCKER H100 ENCRYPTED HARD DRIVE User Guide CONTENTS Introducing DataLocker H100 Minimum System Requirements Device accessories DataLocker Documentation Getting Started Plugging in the device Personalizing
Wireless 2.4GHz Keyboard & Mouse Combo USER GUIDE
 Wireless 2.4GHz Keyboard & Mouse Combo USER GUIDE Visit our Website at www.targus.com Features and specifications subject to change without notice. 2008 Targus Group International, Inc. and Targus, Inc.
InnoMedia ESBC B. Quick Install Guide. 1
 InnoMedia ESBC 9380-4B Quick Install Guide www.innomedia.com 1 Table of Contents Introduction 3 Package Contents 3 CAUTION 3 Installation 4 Wall-Mounting Instructions 6 Troubleshooting 7 Appendix A. LED
ACT-IR210L IrDA Motherboard Adapter. User s Manual
 48511 Warm Springs Blvd., Suite 206, Fremont, CA 94539 Tel: (510) 490-8024 Fax: (510) 623-7268 Web: http://www.actisys.com, E-mail: irda-info@actisys.com ACT-IR210L IrDA Motherboard Adapter Feb. 14, 2006
USER GUIDE. FOR THE T600 Tag Tester. DOCUMENT No. A , Rev. E1 Issued Date: January 19, 2009
 MARK IV INDUSTRIES CORP I.V.H.S. DIVISION 6020 AMBLER DRIVE MISSISSAUGA, ONTARIO L4W 2P1 PHONE: (905) 624-3025 FAX: (905) 624-4572 ISO9001 Certificate No. 002002 USER GUIDE FOR THE T600 Tag Tester DOCUMENT
Personal MiniDisc System
 3-866-600-11(1) Personal MiniDisc System Operating Instructions Owner's Record The model number and the serial number are located on the right side. Record the serial number in the space provided below.
USB USB Data Transfer
 DECEMBER 2000 IC149A-R2 USB USB Data Transfer USB to USB Data Transfer CUSTOMER SUPPORT INFORMATION Order toll-free in the U.S. 24 hours, 7 A.M. Monday to midnight Friday: 877-877-BBOX FREE technical support,
QUICK SETUP GUIDE PROFESSIONAL REMOTE MONITORING WEATHER STATION. Model No. V22-WRTH DC:
 QUICK SETUP GUIDE PROFESSIONAL REMOTE MONITORING WEATHER STATION Model No. V22-WRTH DC: 101017 INTRODUCING Connecting You to Your Home Anytime, Anywhere. TAKE YOUR STATION TO THE NEXT LEVEL! ON-THE-GO
Stereo Bluetooth Headset Manual (AVANCA D1) FCC ID: 2AGLYAVANCAD1
 FCC ID: 2AGLYAVANCAD1") Stereo Bluetooth Headset Manual (AVANCA D1) FCC ID: 2AGLYAVANCAD1 Basic Specifications Size: 31 28 9mm Weight: 17.2g(Net Weight) Charging port: Micro USB Keys: 5 (MFB button, volume+ button, volume- button,
Stereo Bluetooth Headset Manual (AVANCA D1) FCC ID: 2AGLYAVANCAD1 Basic Specifications Size: 31 28 9mm Weight: 17.2g(Net Weight) Charging port: Micro USB Keys: 5 (MFB button, volume+ button, volume- button,
USER GUIDE WIRELESS USB SUPERBOOSTER EXTENDER. Model:
 USER GUIDE WIRELESS USB SUPERBOOSTER EXTENDER Model: 29597 1 TABLE OF CONTENTS Introduction...2 Features...3 System Requirements...4 Package Contents...5 Device Overview Wireless USB Host Adapter...6 Wireless
RocketU 114xE Host Controller
 RocketU 114xE Host Controller Quick Installation Guide V1.00 Jul. 30, 2013 1 Table of Contents HighPoint RocketU 1144E... 3 Kit Contents... 3 Board Layout... 4 Installing the RocketU Series Host Adapter...
LPWWS Smart Wi-Fi Wall Station
 Manufactured by: GTO Access Systems, LLC (844) 256-3130 www.gtoaccess.com LPWWS Smart Wi-Fi Wall Station Programming / Installation Instructions This Wall Station allows operation of the light and door
free internet receiver Quick Start Guide
 free internet receiver Quick Start Guide Table of Contents Included With Your WebGrabber... 3 Compatibility & Features... 4 Installing WebGrabber Software... 5 Windows Installation... 6 Mac Installation...
User Manual Bluetooth USB Dongle
 User Manual Bluetooth USB Dongle BTDG-40S 1. What s in the box? 1 2. General guidance 1 3. How to use with Native Windows 10 PC Plug and play 1 3.1) Windows own Bluetooth driver Auto installation 1 3.2)
Installation Guide AMM-1525M/1510M/525M. SCSI Audio Host Adapters and Sound Cards
 R Installation Guide AMM-1525M/1510M/525M SCSI Audio Host Adapters and Sound Cards 1 Getting Started This document provides the basic information needed to quickly configure and install the Adaptec AMM