HEMA Navigator Ezi-Ozi User Guide
|
|
|
- Eleanor Bailey
- 6 years ago
- Views:
Transcription
1 HEMA Navigator Ezi-Ozi User Guide
2
3 Table of Contents HEMA Navigator Ezi-Ozi User Guide... 1 Introduction... 2 Starting OziExplorer... 2 Screen Layout... 3 Acquiring a GPS Satellite Fix... 4 Standard Program Toolbar... 5 Page Selection... 5 Page Back button... 6 GPS OFF / ON button... 6 Exiting OziExplorer... 7 Map Overlay information / buttons... 7 Page Selection... 8 Main Toolbar button... 8 Object Dragging button... 9 Detailed Map button... 9 Show Full Map button Zoom 100% button Screen Brightness buttons Waypoint Auto Properties button Route Waypoint Auto Properties button About button Close Window button Pages and their Functions MAP VIEW Page MAPS page Maps page toolbar NAME SEARCH button Opening a map OPEN MAP button FIND MAPS button MAP INFO button D MODE button COURSE UP button MAP VIEW button iii
4 MAP SCALE button INDEX MAPS button Waypoints Waypoints Adding Waypoints Waypoints page Waypoint toolbar Waypoint Nav page Tracks Tracks Tracks page Track toolbar Area Estimator page Routes Routes ROUTES page Route Create toolbar Route Nav toolbar ROUTE NAV page ALTITUDE Page METERS page STATISTICS page PROFILES page Settings Page SETTINGS page General Settings Map & Data Paths Settings Map Image Paths Settings GPS Config settings Moving Map settings Tracks Settings Units settings Waypoints Settings Route Navigation iv
5 Table of Contents Speed Monitor Load Layout Display Pages Help Appendices Appendices Appendix 1 - About OziExplorer map files Appendix 2 - Altitude Readings in Vehicle GPS units Appendix 3 - Changing OziExplorer interface On Screen Keyboard (or Input Panel) v
6
7 1
 which has slightly more functionality than the mobile version.")
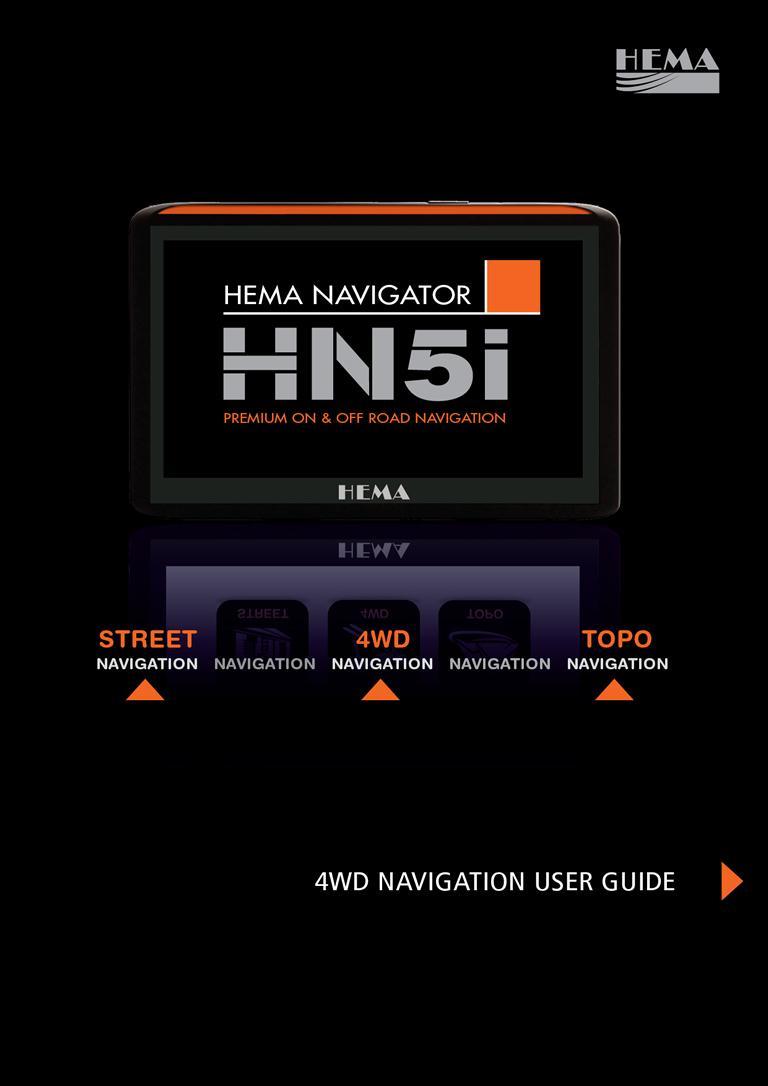
8 Introduction OziExplorerCE is a mobile version of OziExplorer designed to run on mobile devices such as the HEMA NAVIGATOR 5i. A PC version of OziExplorer is also available (for Windows PCs only) which has slightly more functionality than the mobile version. There is also a custom version of OziExplorer for Windows PCs called HEMA Explorer. This software is available for existing HEMA NAVIGATOR 5 customers, and allows easy transfer of waypoints, tracks, and routes between the HEMA NAVIGATOR 5 and the PC. This software is available on the HEMA NAVIGATOR website ( under the Support section. The OziExplorer software operates in a different fashion to that installed on a typical street only vehicle GPS unit. OziExplorer can be described as moving-map software using raster maps. Typical street navigation systems and/or software are turn-by-turn systems utilising vector graphics. A key difference between the two systems is that vector based systems are scalable. i.e. As you zoom into the map, it is redrawn at the new scale, whereas the raster system simply magnifies the map image as you zoom in. Another side effect of this is that the raster map has fixed colours (set when the map image is created), whereas the vector based map can be recoloured during drawing of the map, so often vector based software will give you the option of multiple colour choices for your maps. Starting OziExplorer To begin 4WD Navigation, select the 4WD button from the Main Menu. The OziExplorer application is used primarily for off-road navigation. OziExplorer will display a splash screen with status messages appearing in the lower left of the screen during startup, as shown below 2
, For example, operations relating to waypoints are all together in one")

9 Please note that the interface used for OziExplorer on the HEMA NAVIGATOR HN5i has been customised using the OziExplorer Screen Designer software. The new interface layout is known as HEMA EziOzi. It is designed to make OziExplorer easier to use on the NAVIGATOR by grouping related functions together on screens (or pages), For example, operations relating to waypoints are all together in one place on the Waypoints page. Screen Layout This is a typical screen layout within the OziExplorer program. All pages have some standard features, such as: Page Title, located in the upper-left of the screen Standard Toolbar located along the right-hand border of the page. See the section on the Standard Program Toolbar for a complete description. Pages may also have a Page Specific Toolbar located along the lower edge of the page. 3

10 The Page Specific Toolbar will contain buttons which perform functions related directly to the page that they are on. Acquiring a GPS Satellite Fix In order for the NAVIGATOR to find your current location, it requires a GPS satellite fix. To acquire a GPS fix, it is important that you are in an area open to the sky, (not inside an enclosed building) and away from tall buildings and trees. The initial fix may take anywhere from 2 to 5 minutes. The length of time to obtain a fix will be reduced the next time the navigation software is started in a similar location. When OziExplorer starts, the STATUS page will appear, and remain until a satellite fix is obtained. The STATUS page displays the GPS status and the number of currently visible satellites and their relative signal strengths. Once a fix is acquired, OziExplorer will switch to the MAP VIEW page showing your location plotted on the most recently used map. It is then possible to select a more or less detailed map as required. The information displayed on the STATUS page includes: Num Sats - The Number of satellites currently visible by the GPS receiver HDOP - An indicator of the positional accuracy of the GPS receiver. GPS Status Indicator (ON / OFF) Signal strength indicators of individual numbered satellites Total / Free internal storage capacity Total / Free SD Card storage capacity Log of NMEA output direct from GPS receiver Basic sky map showing relative positions of individual numbered satellites 4

 which you can access. These pages provide specific views and /or functions while using OziExplorer.")
11 Standard Program Toolbar The standard toolbar appears on every page within OziExplorer on your NAVIGATOR. The functions contained on the toolbar are described in the following sections. Click the links to jump to the section describing that function. Page Selection Adding Waypoints Page Back function Show/Hide Main Toolbar Settings Toggle GPS Suspend Exit OziExplorer Page Selection Within OziExplorer, there are multiple screens (referred to as pages) which you can access. These pages provide specific views and /or functions while using OziExplorer. Every page has the standard toolbar located on the right-hand side of the screen, but each page will have a page-specific toolbar located at the bottom of the screen. 5
12 Tapping the Select Page button on the right-hand toolbar will pop up the Select Page window. The currently selected page is indicated by a red border on the current page on the Select Page window. Page Back button The Page Back button allows you to quickly return to the previous page you were on. ie. if you were on the Waypoints page, then changed to the Routes page, then to the Settings page, you could quickly return to the Waypoints page by tapping the Page Back button twice. The Page Back function will remember up to 9 (nine) pages. GPS OFF / ON button The GPS OFF / ON button will toggle the suspension of GPS tracking. There are times in OziExplorer where it is necessary to suspend tracking your current position. Here are some reasons why it might be required to suspend GPS tracking temporarily: 1. You are in location A, but wish to open a map file for another location entirely, i.e. you are in Cape York, but wish to open a map showing the Kimberley region. 2. You have used the Name Search function to locate a particular place, and wish to show it on the map. OziExplorer will not jump you to the named location you found without first suspending GPS tracking. 6


13 Exiting OziExplorer The Exit button is accessible from all pages within OziExplorer. It is located at the bottom of the Standard Program Toolbar. Tapping the Exit button will prompt for confirmation before exiting the program. Map Overlay information / buttons In addition to the standard tool bar on the right-hand side of the screen, the following information and buttons are accessible on all pages containing the map display panel. Speed Indicator Page Name Vehicle Position / Cursor Indicator 7
14 Current GPS Coordinates Scale + button (go to next higher scale map) Current Magnification Level Scale - button (go to next lower scale map) Zoom + button - Increase magnification level Zoom - button - Decrease magnification level Current Map Name Page Selection Within OziExplorer, there are multiple screens (referred to as pages) which you can access. These pages provide specific views and /or functions while using OziExplorer. Every page has the standard toolbar located on the right-hand side of the screen, but each page will have a page-specific toolbar located at the bottom of the screen. Tapping the Select Page button on the right-hand toolbar will pop up the Select Page window. The currently selected page is indicated by a red border on the current page on the Select Page window. Main Toolbar button Tapping the Main Toolbar button will display the Main Toolbar window. 8
 Each function is described in the following sections.")
15 The Main Toolbar is designed to allow quick access to some commonly used functions within OziExplorer. The button is located on the standard toolbar located at the right-hand side of all pages. The Main Toolbar window looks like this: Active items are shown indented (or pressed in ) Each function is described in the following sections. You can click the buttons on the image above to jump to the relevant section. Object Dragging button This option is OFF by default The Object Dragging button activates Object Drag mode. This allows you to drag objects such as waypoints around the display. Normally (when object dragging mode is switched OFF), tapping and dragging on an object such as a waypoint does nothing. That is; dragging the stylus around on a map will drag the map around. Detailed Map button This option is OFF by default. The Detailed Map button switches on automatic searching for the most detailed map. Be aware that this is not always what you might expect, as OziExplorer might not always load what you expect to be the most detailed map for a specific area. This button performs the same function as the Load Detailed Map option in the Moving Map section of the OziExplorer Settings. 9
16 Show Full Map button The Show Full Map button will instantly shrink the currently loaded map so that it fits vertically within the map display. It is a quick way to get an overview of the currently selected map in its entirety. The scale which the map is set to will vary according to the absolute dimensions of the map itself. Zoom 100% button The Zoom 100% button will instantly set the current map to 100% zoom. It is a quick way to zoom your map back to a readable form after using the Show Full Map function. Screen Brightness buttons The Brightness buttons allow you to modify the brightness of the OziExplorer display. This can be useful when driving at night. Waypoint Auto Properties button This option is ON by default. The WP Auto Props button will switch on the Waypoint Auto Properties feature. When this feature is active, it means that OziExplorer will automatically open the Waypoint Properties window whenever a waypoint is created. 10

17 The WP Auto Props button provides the same function as the Auto Show Waypoint Properties button on the Waypoints Toolbar. Route Waypoint Auto Properties button This option is ON by default. The Route WP Auto Props button will switch on the Route Waypoint Auto Properties feature. When this feature is active, it means that OziExplorer will automatically open the Route Waypoint Properties window whenever a route waypoint is created. About button The About button will open a popup window showing the version number of the OziExplorer software currently installed on the NAVIGATOR. Note that the version number is also displayed in the upper-left part of the Settings window. Close Window button The Close Window button will close the Main Toolbar window. You can also tap the X in the upper-right corner of the Main Toolbar window to close it. 11
18 Pages and their Functions Tap the headings to jump to that topic in this User Guide Map View The main view within OziExplorer which gives the largest amount of screen real estate to the display of the currently selected map. Maps Similar to Map View page, but has a toolbar allowing access to functions related to Maps. Waypoints Similar to Map View page, but has a toolbar allowing access to functions related to Waypoints Waypoint Nav Similar to Map View page, but has information about the next Waypoint at the bottom of the screen for use during Waypoint navigation Tracks Similar to Map View page, but has a toolbar allowing access to functions related to Tracks. Area Estimator Displays map, but will also show the area in Hectares of the Track Tail and Track 1. Routes Similar to Map View page, but has a toolbar allowing access to functions related to Routes. Route Nav Similar to Map View page, but has information about the next Waypoint at the bottom of the screen for use during Route navigation. Altitude Similar to Map View page, but has a number of altitude related parameters at the bottom of the screen. Meters Displays include a trip meter, multiple odometers, and altitude information. Statistics Displays some additional parameters related to Time, Speed and Acceleration Profiles Displays graphs showing Speed and Altitude over time Status Displays the current status of the GPS and satellites, along with information on internal and SD card storage usage 12

19 Settings Contains icons and functions allowing the customisation of OziExplorer MAP VIEW Page The Map View page is designed to give you the largest map view of the pages within OziExplorer. This page has no additional toolbars, or other items to obscure your view of the current map. To change to the Map View page, tap the Map View button window on the Select Page MAPS page The Maps page is designed to group all the functions you require related to maps on the same page. 13
20 To change to the Maps page, tap the Maps button on the Select Page window The image below shows the MAPS page, with the Maps Page specific toolbar located along the bottom of the screen. Maps page toolbar The Maps page toolbar allows you to access functions related to map operations within OziExplorer. Each function is described in the following sections. You can click the buttons on the image above to jump to the relevant section. NAME SEARCH button 14


21 The NAME SEARCH button allows you to locate places contained within the supplied names database ( hema australia.names ). When you tap this button, the Name Search window will pop up. The Name Search window initially looks a bit daunting, but after a read of this manual, and a bit of practice, it is quite easy to use. Search Entry box Code Selector dropdown list KB button - toggles on screen keyboard Scrollbar - allows you to move up and down the list of search results Search Results panel Below, each of the controls on this window are explained. The white area at the top-left of the Name Search window is the Search Entry box, and is where you enter what it is you are searching for. Any number of characters can be entered into this field. To enter text this field, tap inside the box, then tap the KB button Search window titlebar. This will open the on screen keyboard. on the Name 15

22 The Code Selector dropdown list allows you to increase the speed of the search by specifying a category to search in. i.e. You might type AYERS in the search field, then change the Code Selector to Mountain/Peak/Hill When you search, you will only find names which are Mountain s, Peaks, or Hills, which have a name matching AYERS. The search results panel shows the complete list of known names, or the results of any searching / filtering done on the name list. The list can be scrolled up and down using the scroll bar to the right of the panel. The WP button will create a waypoint at the location of the item currently selected in the search results panel. To select an item in the search results panel, simply tap the required item. The waypoint name will be automatically set to the first 6 characters of the selected item. The GT (GoTo) button will start navigation to the item selected in the search results panel. The Load button allows you to load an alternate names file. This function is generally not used on the Navigator, as the default names file is used. 16

23 If third-party map packages are purchased for use on the Navigator, they may come supplied with their own names database file, which can be copied to the Navigator for use with that product. The Window Rollup button will roll up the Name Search window to allow you to view more of the map visible underneath. Tapping the button again rolls the window back down. The L Checkbox (which is switched ON by default), forces the searching / filtering function to be performed on the left-most text in the Search Entry box. i.e. If you have the L option on, and you search for the word Mile, it will match things such as Mile Creek Mile End Mileeyarra Hill If you switch off the L option, and search for Mile, you might instead find things such as 92 Mile Creek Big Seven Mile Creek Camomile Creek The M checkbox (which is OFF by default) will restrict your searching / filtering operations to items which are located on the currently displayed map 17


24 The F (Filter) button, tells the Name Search window to actually perform the search. The search function is called filtering because what you are actually doing is filtering, or limiting the display of the names database to the entries which match your specifications. Once you have selected your options using the other controls on the Name Search window, you tap the F button to perform your search. While the search is being performed, the Name Search window will appear as shown here: Number of matches out of total searched % of search performed Stop button - allows you to interrupt the search function Search Results pane - shows names matched so far The Map button displays the position on a map of the item currently selected in the search results panel. Double-tapping an item in the search results panel will perform the same function. Note that if the currently selected item in the search results panel is NOT on the currently displayed map, the active Map File Paths (as set in the OziExplorer configuration) will be searched for a map to display which DOES contain the selected item. Notes about the Name Search function It is not possible to apply new filter conditions to a current filter; once a filter operation is complete, any new filter selections will turn off the current filter before applying the new filter selections. The Name Search window will automatically roll up when an option is tapped where it is necessary to improve the view of the underlying map. 18


25 TIP Certain third party OziExplorer format map products may come with their own predefined names database files. The databases supplied usually contain entries which are related to that specific map set. These can be loaded for use with the map sets using the Load button on the Name Search window. The Find button allows you to find installed maps which contain the currently selected item in the Search Results pane. 1. Tap the required item in the search results pane 2. Tap the Find button OziExplorer will display a list of maps which contain the name you selected Opening a map 19

26 NOTE When GPS tracking is switched on, OziExplorer will always try to show your position on a map. If you want to manually open a map for a location OTHER than your current location, it is necessary to suspend GPS tracking by tapping the GPS OFF/ON button on the right-hand toolbar. For example, if you are in Brisbane, and you wish to open the Cape York map, suspend GPS tracking before opening the Cape York map. If you do not suspend GPS tracking first, when you open the map for the other location, OziExplorer will open the map, but then re-display the original map showing your position. This can lead to the belief that the other map will not open. The message GPS Tracking Suspended will appear at the bottom of the map panel when the GPS OFF/ON button is used to turn GPS Tracking off. The message obscures the current map name, but disappears when GPS Tracking is turned back on. OPEN MAP button Map files may be opened by tapping the Open Map button on the bottom toolbar from the Maps page The Open Map File window will appear. Browse to the required map by navigating the directory/file structure with the stylus until the required map is found. 20


27 Double-tap the required folder to open Selected map file name Tap-and-drag to scroll up and down the list of map file names Double-tap to open the selected map file, or single-tap the filename and then tap the OK button to load the desired map FIND MAPS button 21


28 When you tap the FIND MAPS button, OziExplorer scans the configured Map File Paths, and displays the Maps Found window. This window shows the names of indexed maps which cover the current cursor position. MAP INFO button The MAP INFO button will pop up the Map Information window. This window shows some technical details about the current map. 3D MODE button When this option is active, a green indicator lights on the button. 22
29 When this option is turned on, the top of the map is rotated down using a true perspective view and provides for more map view ahead. Note the following points in relation to the use of 3D Mode: This is just a display feature; the map cannot be dragged etc. in this mode. 3D mode is only displayed when the GPS is connected and tracking is enabled. If the GPS tracking is turned off, the view mode switches back to 2D mode. It switches back to 3D when GPS Tracking is re-enabled. OziExplorer must also have Course Up Mode enabled. Switching OFF Course Up Mode instantly switches off 3D mode. The Zoom Level must be set to 70% or higher. COURSE UP button When this option is active, a green indicator lights on the button. When this option is turned on, and GPS tracking is currently on, the displayed map will rotate so that the direction of travel will be within roughly 45 degrees of vertical. The map is only rotated in 90 degree increments to keep performance reasonable on mobile devices. NOTE Due to the fact that raster maps are an image of a map, rotating a map results in the entire image rotating, including text etc. MAP VIEW button When this option is active, a green indicator lights on the button. 23

30 This option will alternately show / hide the Map View window. The Map View window shows the currently loaded map in its entirety. The section of the map which is currently displayed is highlighted with a small red box. Tapping on the map within the Map View window will jump the main map view to that location (therefore it is a quick way to move around the currently loaded map). The location currently displayed by the main map view is shown in the Map View window as a red box. NOTE You can only tap away from your current position on the Map View window by suspending GPS tracking. Use the Plus and Minus buttons to change the Map View window size. You cannot make the Map View window taller than the screen size allows. Use the Show / Hide Objects button to alternately show and hide objects in the Map View window (such as Waypoints, Tracks and Routes) MAP SCALE button When this option is active, a green indicator lights on the button. This button will alternately show and hide the Map Scale Indicator The Map Scale Indicator itself can be moved around the screen, and placed where it is most convenient (i.e. Where it doesn t obscure other information you wish to view on screen). 24
31 To move the Map Scale Indicator, tap-and-drag while holding down the stylus on the screen. INDEX MAPS button The INDEX MAPS button will force OziExplorer to re-index the maps. If the contents of the Map File Paths have changed (i.e. You have added some new maps) OziExplorer will generally automatically initiate a re-index of the map folders specified in the configuration, but it is occasionally necessary to force a manual reindex. Waypoints Waypoints A Waypoint is a co-ordinate representing a significant (to you) location on a map. Waypoints can be used to signify anything from course deviations, points of interest or anything else of personal significance to the user. Waypoints can also be linked together to create a Route. When waypoints are part of a Route, they are known as Route Waypoints. OziExplorer stores all waypoints in a file (called cewaypoints.wpb) on the internal memory of your NAVIGATOR. It is possible to delete individual waypoints, or delete ALL waypoints from within this file, but it is not possible to delete the file itself completely from within OziExplorer. To delete the actual waypoint file, you need to directly delete the file with your NAVIGATOR connected to your PC with the USB cable. Similarly, when you export waypoints, they are copied from the internal waypoint file to a separate.wpt file in the OziExplorer Data folder on the SD card. Once these files are on the SD card, it is not possible to completely delete them from within OziExplorer. This must be done directly on the SD card using a card reader connected to your PC. Waypoints which are visible on a map can be modified using the waypoint pop-up menu. Access the waypoint pop-up menu by tapping on the waypoint, and holding the stylus down for a short period. The pop-up menu will then appear. 25

32 Tap-and-hold the stylus on the desired waypoint to access the waypoint pop-up menu. From the menu, you can perform the following actions: 1. Close menu - closes the tap-and-hold popup menu without performing any actions 2. Edit Wp - Allows you to Edit the waypoint properties 3. Delete Wp - Deletes the selected waypoint 4. GoTo Wp - Starts Navigating to the selected waypoint 5. Add to Route - Convert the selected waypoint to a Route Waypoint, and add it to the current route if you have a route loaded. This function will create a new route if there is no route currently loaded. Adding Waypoints A waypoint can be added at ANY time while on a page displaying a map in OziExplorer. Tap the Add Waypoint button on the right-hand tool bar, and a waypoint will be created at the current cursor location. NOTE This button is only active when on a page containing a map. When you are on a page which contains no map display, the button changes to inactive mode, and will NOT create a waypoint when tapped. 26

33 The image above shows a group of waypoints Add Waypoint button. which have been added using the Note in this example that the SHOW NAMES option is currently switched OFF, so no waypoint names are visible. Waypoints page You can perform most Waypoint related functions by going to the Waypoints page, using the Page Select menu button. The Waypoints page toolbar is located along the bottom of the screen. To change to the Waypoints page, tap the Waypoints button window on the Select Page 27

34 Waypoints Page toolbar The Waypoints page toolbar allows access to functions related to waypoints within OziExplorer. Each function is described in the following sections. You can click the buttons on the image above to jump to the relevant section. SHOW WPs button When this option is active, a green indicator lights on the button. Tapping the Show WPs button will alternately show or hide waypoints overlaid on the current map. Note that any waypoints in the Waypoint List are not removed by hiding them. This function merely removes them temporarily from view to help keep the map display clear and easy to read. SHOW NAMES button When this option is active, a green indicator lights on the button. Tapping the SHOW NAMES button will alternately show or hide the Waypoint Names associated with waypoints overlaid on the current map. 28

35 Every waypoint has a name field associated with it. Obviously, if there are a large number of waypoints displayed, the display can get cluttered. This is a way of minimising display cluttering by only showing the waypoint symbols themselves. WP LIST button Tapping the WP LIST button will open the Waypoints window. The Waypoint List allows you to Locate a waypoint on a map Display information about the waypoint (description, position etc.) Delete a waypoint Edit waypoint properties Navigate to a specified waypoint When you first see the waypoint list, If any waypoints are present, the waypoints are sorted in name order. The waypoint list can contain up to waypoints. Other buttons on the Waypoint List window The Window Rollup button will roll up the Waypoint List window to allow you to view more of the current map visible underneath. Tapping the button again rolls the window back down. This is an example of how the Waypoint List window looks when rolled up. 29

36 The Sort button toggles the waypoint list between being sorted in waypoint name order or distance order. This is an example of what the Waypoint List window looks like when sorted into distance order. The Map button will locate the selected waypoint on a map. If the waypoint is NOT positioned within the boundaries of the current map, OziExplorer will load a map which can be used to display the selected waypoint. First, highlight the waypoint in the Waypoint List window that you wish to locate by tapping it once. Then, when you tap the Map button, the Waypoint List window will roll up, and the map will jump to the location of the waypoint, which will be shown centred on the screen. GPS Tracking will be suspended when OziExplorer jumps to the waypoint location. Tapping the GPS ON/OFF button will restart GPS tracking. The GoTo button will start navigating to the selected waypoint. First tap the waypoint in the Waypoint List window that you wish to navigate to, and then tap the Goto button. When you close the Waypoint List window, you will see a straight line drawn between your current location and that of the selected waypoint. 30


37 The Edit button allows you to modify properties of an individual waypoint. 1. Tap once on the required waypoint to select it 2. Tap the Edit button Waypoint Properties window The Waypoint Properties window will open, allowing you to modify the following waypoint properties: Name Symbol Colour Description Edit Position button Proximity Distance The proximity warning alarm is used to signal your arrival at or near a waypoint. By default OziExplorer activates the Check Proximity configuration setting. 31


38 This setting will cause an alarm to be triggered when you are within the specified distance of a waypoint (specified in metres). This distance can be specified for each individual waypoint using the Waypoint Properties window. In the example below, we have specified that we wish to trigger an audible alarm when we are within 20 metres of the waypoint called END STEEP. Individual waypoint properties can be modified by tapping on the required field and using the on screen keyboard to enter the required data. Tapping the Edit Position button allows you to modify the actual location data of the selected waypoint using the Edit Position window. You can modify the following properties: Position Format Latitude Longitude The Delete button allows you to remove individual waypoints from within the Waypoints list window. 32
39 1. Highlight the required waypoint in the Waypoint list window by tapping it once. 2. Tap the Delete button. The selected waypoint will be marked as deleted. NOTE If you accidently mark the wrong waypoint, you can undo the deletion by tapping the Delete button again BEFORE you close the Waypoint List window by tapping the OK button After closing the Waypoint List window using the OK button, any waypoints which are marked as deleted will be permanently removed from the Waypoint List. If you close the Waypoint List window using the X button, any waypoints marked for deletion will NOT be deleted. The Save button will export the selected individual waypoint into a file. You can then do things such as copy your exported waypoint to a PC, and it to a friend etc. 1. Highlight the required waypoint in the Waypoint list window by tapping it once. 2. Tap the Save button, you will see the Export Waypoint File window as shown below. 33

40 By default, the filename will be "Wp" followed by the current date and time. You can give the file your own name using the on screen keyboard. The Path will contain the default setting for Data File Path as specified in the OziExplorer Settings. By default, this is the OziExplorer Data folder on the SD card. WP SET LIST button Tapping the WP SET LIST button will open the Waypoint Sets window. Multiple waypoint files containing sets of waypoints can be imported for overlaying on the map. The number of sets is not limited; however, there is a limit to the total number of waypoints which can be loaded. The waypoint list can contain up to waypoints. Other buttons on the Waypoint Sets window 34

41 With the Export button, you can export an individual Waypoint Set to a file. When you tap this button, you will see the Export Waypoint File window as shown below By default, the file name will be WpSet followed by the current date and time. You can give the file your own name using the on screen keyboard button. If you wish, you can tap on an already existing file in the file list in the bottom section of this window. If you tap on a preexisting file, you will be prompted to determine how to handle this operation. Your choices consist of Overwrite Append Cancel This option will overwrite the preexisting file with your new data. This means that any data which was previously stored in this file will be completely overwritten, and therefore lost. This option will append or add your newly saved data to the data already in the selected file. 35
42 This option will cancel the current save operation. Therefore, if you change your mind about overwriting or appending to a preexisting file, use the Cancel button to go back and choose a new file name. The Delete button will delete the selected Waypoint Set from the set list. Waypoints which are in the selected waypoint set will be removed from display on the map. The List button will display the list of waypoints contained within the selected Waypoint Set. Note that the Waypoint List window which is displayed using this option is identical to the standard Waypoint List window, and the buttons etc. perform the exact same functions. See Waypoint List window for details of those functions The Import button allows you to choose a previously exported waypoint file (containing one or more waypoints) to import into a set. The Waypoint Set will inherit the same name as the file you choose to import, so it is a wise move to give your exported waypoint files a sensible name, which clearly identifies the contents (i.e. Cape-York-WPs) To perform the import, you can one of the following: 1. Highlight the filename which you wish to import by tapping it, then tap the OK button on the window title bar 2. Double-tap on the selected filename The Alert button will set a global proximity alert when any of the waypoints in the currently selected set are approached. When you tap the Alert button, a popup menu will appear which allows you to choose the alert proximity distance, or remove an existing alert. 36


43 If you change your mind, simply tap the Close Menu item. DELETE ALL Waypoints button Tapping the DELETE ALL button will delete all waypoints from the internal waypoints file in OziExplorer. It will not remove the waypoint file completely; it will simply clear the file. When you use this option you will be prompted to confirm that you do, indeed, wish to delete all your waypoints. Be sure that this is what you want to do BEFORE tapping the Yes button to confirm the deletion If you change your mind, simply tap the No button to cancel the waypoint deletion. See the Waypoints introductory text for some more information on OziExplorer Waypoints IMPORT WPs button The IMPORT WPs button allows you to choose a previously exported waypoint file (containing one or more waypoints) to import into the current waypoint list. 37
44 To perform the import, you can do one of the following: 1. Highlight the filename which you wish to import by tapping it, then tap the OK button on the window title bar 2. Double-tap on the selected filename IMPORTANT NOTE Repeatedly importing the same waypoint file will add the waypoints contained within the waypoint file multiple times. EXPORT WPs button The EXPORT WPs button allows you to export ALL of the waypoints in your current Waypoint List to an external file. 38
45 By default, the filename will be "Wp" followed by the current date and time. You can give the file your own name using the on screen keyboard. The Path will contain the default setting for Data File Path as specified in the OziExplorer Settings. By default, this is the OziExplorer Data folder on the SD card. STOP NAV button The STOP NAV button cancels the current navigation, if you are currently navigating to a Waypoint or a Route Waypoint. Waypoint toolbar The Waypoint Toolbar can be accessed using the TOOLBAR button from the Waypoints page. The Waypoint toolbar is a standard OziExplorer toolbar, and some of the functions are replicated on the Waypoints page toolbar. Each function is described in the following sections. You can click the buttons on the image above to jump to the relevant section. Add Waypoints button The Add Waypoints button allows you to add new waypoints. This function is similar to using the Add Waypoint button on the standard toolbar. The main difference between the two buttons is that the Add Waypoint button on the standard toolbar will create one waypoint at the current cursor position, whereas this button switches to Adding Waypoints mode, and will create a waypoint each time you tap the screen while activated. This makes it useful for adding multiple waypoints in a single session. 39
46 Delete Waypoints button The Delete Waypoints button will remove all visible waypoints and also delete them from the waypoint file. The Delete Waypoints button provides the same function as the DELETE ALL button on the Waypoints Page Toolbar. WARNING Using this function will remove your waypoints from the waypoints file permanently, so be sure you wish to do this before using this function. Any waypoints which have been exported are not cleared by this function. Show Waypoint List button The Waypoint List button provides the same function as the WP LIST button on the Waypoints Page Toolbar. Load Waypoint File button The Load Waypoint File button provides the same function as the Import WPs button on the Waypoints Page Toolbar. Save Waypoint File button The Save Waypoint File button provides the same function as the Export WPs button on the Waypoints Page Toolbar. Show / Hide Waypoint Names button 40
47 The Show / Hide Waypoint Names button provides the same function as the SHOW NAMES button on the Waypoints Page Toolbar. Auto Show Waypoint Properties button The Auto Show Waypoint Properties button provides the same function as the WP Auto Props button on the Main Toolbar. Close Toolbar button The Close Toolbar button will close the Waypoint Toolbar. Waypoint Nav page The purpose of the Waypoint Nav page is to give you some basic information related to the next waypoint during navigation. To change to the Waypoint Nav page, tap the Waypoint Nav button Select Page window on the When you are NOT currently navigating to a waypoint (either a standalone Waypoint OR a Route Waypoint), the Waypoint Nav page will look as shown below. Note that there is no information displayed except your current heading, which is available regardless of whether you are currently navigating or not. 41

 Waypoint bearing - That is the direction in degrees you need to head in to get to the")
48 As soon as you start navigating to a waypoint, information about the waypoint is displayed in the appropriate fields on the Waypoint Nav page. The information displayed is: Waypoint we are currently navigating to Nav Line - This is the direction you need to head in to get to the waypoint from your current position. Name of the next waypoint Distance to that waypoint ( as the crow flies ) Waypoint bearing - That is the direction in degrees you need to head in to get to the waypoint from your current position Current heading If you wish to stop navigating to the current waypoint, tap the STOP NAV button on the Waypoints page toolbar. 42
49 Tracks Tracks There are two forms of track logging in OziExplorer. 1. Track Logging 2. Track Tail Logging Track Logging OziExplorer will record your travels whenever the track log option is on. Track Logging can be turned On or Off using the LOG ON button on the Tracks page. Logging is on by default. When logging is on, OziExplorer stores a record of your path into the cetrack.plt file. This file is stored on the internal memory of the NAVIGATOR, in the HNOZI\Data folder. Settings in the Track Logging section of the Settings page control how often a track point is created. OziExplorer creates a track point each time one of the following events occurs: The specified Log Distance as configured in the settings is exceeded The Heading changes by more than 7.5 degrees The speed changes by 5 KPH or 15% whichever is the greater While logging is on, the recorded data is continually written to the cetrack.plt file. Thus, this file can become very large. You can clear this file at any time using the Delete Log function. If you wish to retain the data for later analysis or display, you can take a copy of the current log data using the Copy Log function prior to deleting the current log. The Copy Log function will by default export your log data to the OziExplorer Data folder on the SD card in the NAVIGATOR. At some later point, you can reload your saved track data into one of the 5 available track slots for editing or display. See the section on Load Track File for more information. You can also configure OziExplorer to automatically save or export your track log on a daily, weekly or monthly basis. See the section on Track Logging Settings for more information. Track Tail Logging As the logged track data grows in size, it becomes cumbersome to display in its entirety. The logged track may contain many thousands of track points. There is a 43
50 threshold above which performance of moving map mode would suffer as the software tries to plot so much data in a responsive manner. This is where the Track Tail comes in. The Track Tail can store a maximum of 999 track points. The actual number you wish to display can be changed in the Track Tail Settings. The Track Tail will only ever display the LAST X number of track points, depending on your configuration. Once the maximum number of Track Tail points is reached, the oldest (tail) points are removed to allow newer ones to be added to the head of the Track Tail. Therefore the Track Tail will only ever be as long as the configuration allows. Remember that the tail is independent of the actual track log. Your track data will always be logged to the cetrack.plt file while logging mode is turned on, regardless of the settings etc. of the tail. Tracks page In OziExplorer, a track (sometimes referred to as a bread-crumb, or trail) is a sequential series of points which OziExplorer has recorded to allow you to see where you have been, and to retrace a previous path taken during travel. Tracks can be quickly plotted and shared, to aid navigation through unfamiliar territory without creating waypoints or routes. A Track will not, however, provide any distance or positioning details or audible cues for navigating between points. It is merely a line which you can follow. To create or edit a track in OziExplorer, open the Track toolbar from the Tracks page. Switch to the Tracks page, using the Tracks button on the Select Page window 44
51 Tracks page toolbar The Tracks page toolbar allows you to access functions related to track operations within OziExplorer Each function is described in the following sections. You can click the buttons on the image above to jump to the relevant section. LOG ON button When this option is active, a green indicator lights on the button. This option is switched ON by default When the LOG ON option is switched on, the path which your vehicle takes (and thus the path which your NAVIGATOR takes) will be stored in a file called cetrack.plt. This file is stored internally on your NAVIGATOR by OziExplorer. The Track Log file is automatically created when this option is switched on, and is continually appended to while the GPS is in moving map mode. After you perform a Delete Log, OziExplorer will create a new (empty) track log file for you when this option is first switched on. SHOW TRACKS button 45
52 When this option is active, a green indicator lights on the button. This option is switched ON by default. When the SHOW TRACKS option is switched on and off, OziExplorer will alternately show or hide tracks overlaid on the map display. COPY LOG button The COPY LOG button copies the internal track log file (cetrack.plt) to an external file. By default the file will be saved in the "OziExplorer Data" folder on the SD card. The file will have a default name of the date and time of the save operation. The name can be customised using the on screen keyboard while saving. DELETE LOG button The DELETE LOG button clears the Track Log file (cetrack.plt). A new track log file will be created automatically when track logging resumes (i.e. When the LOG ON option is switched on, and the GPS starts moving) IMPORT TAIL button The IMPORT TAIL button loads a previously saved/exported track log file into the track tail NOTE Due to the fact that the Track Tail can only store 1000 track points, only the last 1000 points of the loaded track file will be displayed as the track tail. EXPORT TAIL button 46
53 The EXPORT TAIL button saves the internal track tail log (cetracktail.trb) to an external file. By default the file will be saved in the "OziExplorer Data" folder on the SD card. The file will have a default name of the date and time of the save operation. The name can be customised using the on-screen keyboard while saving. NOTE The track tail will only contain the last 1000 track points. If you want to save a complete track log history of your trip, you should ensure the LOG ON option is switched ON, and then use the COPY LOG function to save the complete track log. CLEAR TAIL button The CLEAR TAIL button clears the currently loaded and displayed track tail. This operation does NOT affect the track data stored in the internal track log data file (cetrack.plt). TOOLBAR button The TOOLBAR button will toggle the popup of the Track Toolbar in the upper-right portion of the screen. This standard OziExplorer toolbar provides access to functions related to tracks. The buttons / functions provided by the Track toolbar are described in this section of this user guide. Track toolbar The TOOLBAR button alternately displays and hides the Tracks Toolbar. The toolbar is a standard OziExplorer toolbar. Functions available on the Track Toolbar are described in the following sections. 47

54 Track Selector button OziExplorer can have up to FIVE separate tracks loaded at any one time. Tapping the Track Selector button cycles through each track numbered 1-5 (ONE to FIVE). When you choose one of the other functions from the Track Toolbar, these functions operate on the currently selected track, as per the indicator on the Track Selector button. i.e. If the track indicator shows track 2 as being active, that means that functions such as adding track points, or deleting the track, operate on track 2. When looking at the Track Selector button, you will see that the numeric indicator on the button will be WHITE if there is track data loaded in that track slot, or DARK BLUE if there is no track data loaded in that track slot, so it is easy to tell whether a particular track slot has data loaded in it. The image below shows THREE tracks currently displayed, and the current track selected is track TWO. As well as the indicator showing which track is currently selected, the track itself shows it is selected by displaying each point on that track, whereas the unselected track(s) show simple lines. Indicator on Track toolbar showing Track 2 as currently selected. The track loaded into slot 2 is highlighted when the corresponding indicator is selected. When the track is in this state, it can be edited using the other functionality on the toolbar. You can do things such as add track points, or insert new track points. Add Track Points button Choose a track to modify using the Track Selector button. 48

55 1. Tap the Add Track Point button to enter Adding Track Points mode. 2. Tap the screen where you would like to add points to create the track. The track is created as you add points. Track in the process of editing Add Track Point button selected Message indicating that you are in Adding Track Points mode You can de-activate Adding Track Points mode by tapping the Add Track Point button again. Insert Track Points button You can insert additional points into an already existing track. The image below shows a track log with four points 49

56 Existing track with four points Tap to select the Insert Track Point button on the toolbar. This will put you into Inserting Track Points mode. You can then tap the screen to insert a new track point between two adjacent existing track points. Depending upon the position of the new track point along the track, the lines connecting the points will be redrawn to include the new point. Existing track with new track point inserted You can de-activate Inserting Track Points mode by tapping the Insert Track Point button again. Clear Track button 50

57 Whichever track is currently loaded in the indicated slot will be cleared from the map when the Clear Track button on the track toolbar is tapped. TIP Track files which have been exported / saved to the OziExplorer Data folder on the SD card cannot be deleted using this function. All it does is remove that track data from the map display. i.e. You could have a saved or exported track file on your SD card, activate slot 3, load the selected track log, view it overlaid on the map, then clear it, and the displayed track log will be removed from view, leaving the saved track log file as it was on the SD card. Track List button Remember that OziExplorer can have up to FIVE tracks loaded at any given time. Tapping the Track List button will display the Track List window as shown below. This window will show any tracks which are loaded into slots 1 to 5. If you only have a track loaded into slot 1, you will only see data visible for slot 1. The image above shows tracks loaded into all five slots. The data displayed for each track is Num - The Track slot number (1 5) Points - The number of track points in the track loaded in that slot Distance - The length of the track (displayed in the units set in the Settings > Units configuration section) Description - A text description added when the track was created or saved. This can be edited at any time. By default, the description contains the creation date and time of the track 51
58 Other buttons on the Tracks List window The Map button will display the track data in the selected track slot overlaid on a map. Tap the required track slot, then tap the Map button. NOTE This function will only work when GPS Tracking is suspended. The Clear button will remove the track data in the selected track slot. Tap the required track slot, then tap the Clear button. This function does not delete a saved track on the SD card, it merely removes the data from the selected slot. This button performs the same function as the Clear Track button on the Track toolbar. The Load button will allow you to load a previously saved track into the selected track slot. Tap the required track slot, then tap the Load button. This button performs the same function as the Load Track File button on the Track toolbar. The Save button will allow you to save the track data in the selected track slot to an external file. Tap the required track slot, then tap the Save button. This button performs the same function as the Save Track File button on the Track toolbar. Load Track File button Tapping the Load Track File button on the tracks toolbar brings up the Load Track File window. This window allows you to load or open a previously saved or exported track file. 52

59 Remember that OziExplorer can have up to FIVE tracks loaded at any given time. Whichever track slot is currently active on the toolbar will be the track slot which contains the track data loaded via the Load Track File window. Note that the Load Track File window will default to showing files which are contained in the OziExplorer Data folder on the Navigator s SD card. To load a track, do either of the following: 1. Double-tap on the name of the track file you wish to load 2. Single-tap on the name of the track file, and then tap on the OK button on the window titlebar. Save Track File button Tapping the Save Track button on the Track toolbar brings up the Save Track File window. 53

60 This window allows you to save the track data in the current track slot to an external file. This file will by default be saved to the OziExplorer Data folder on the SD card. The file will be assigned a default name by OziExplorer in the form of Track YYYY-MM-DD HH-MM-SS.plt Where YYYY-MM-DD HH-MM-SS is the data and time of the save operation. Remember that OziExplorer can have up to FIVE tracks loaded at any given time. Whichever track slot is currently active on the toolbar will be the track slot which contains the track data saved via the Save Track File window. To save a track, do either of the following: 1. Tap the OK button on the window titlebar to save the track file with the default name assigned by OziExplorer. 2. Tap and drag from right to left over the name to highlight it, and then use the on screen keyboard to give the file a custom name. Remember, to bring up the on screen keyboard, tap the KB button on the window titlebar. Then tap the OK button to save the file with your custom name. 3. Double-tap on an existing file name to save over the top of that file. Be aware that this will overwrite the existing contents of the specified file. Close Track Toolbar button Tap the Close Toolbar button to close the toolbar once you have finished using it. Area Estimator page 54

61 The Area Estimator page uses built-in OziExplorer functions to provide an estimation of the area covered by the current track tail, and / or the area covered by the track loaded into slot 1 of the 5 possible track slots. For example if you wanted the approximate area of a field, you could clear your track tail, and then drive around the perimeter of the field. To change to the Area Estimator page, tap the Area Estimator button Select Page window on the IMPORTANT NOTE Due to the way that OziExplorer calculates areas, you need to be careful about the path taken to map out your area. OziExplorer will have no problem calculating the area of a field which is roughly rectangular in shape, but it will not be able to calculate an area for a large figure of eight for example. Routes Routes In OziExplorer, a route is a sequential serial of points (called Route Waypoints) which have been previously created, which allow you to follow a set course. There are two types of route files which OziExplorer on the NAVIGATOR can use:.rt2 55

62 .rte A route file which has the.rt2 file extension is one which has been created with OziExplorerCE (which is the version installed on your NAVIGATOR). This type of route file only contains one route. A route file which has the.rte file extension is one which has been created with the OziExplorer PC version. This type of route file can contain more than one route. If you load this type of route file with the OziExplorer version installed on your Navigator, it will ask which of the routes contained within the route file you wish to load. If you save a route you previously loaded from a multi-route.rte file, OziExplorer will only save the individual route as a.rt2 file. When following a route, you can follow it in forward or reverse direction. In OziExplorerCE (the mobile version installed on the NAVIGATOR), you can only have 1 (one) route loaded at any one time. The full version of OziExplorer on a Windows PC can have up to 20 routes loaded at once. ROUTES page The ROUTES page groups together route related functions on one page. Switch to the Routes page, using the Routes button on the Select Page window Shown here is a view of the Routes page, showing the Routes page toolbar at the bottom. 56
63 Routes page toolbar The Routes page toolbar contains a collection of buttons allowing access to features related to routes on your Navigator. Each function is described in the following sections. You can click the buttons on the image above to jump to the relevant section. LOAD ROUTE button The LOAD ROUTE button will load a previously saved route file. The route file you are loading could have been created in OziExplorerCE (the version installed on your Navigator), OziExplorer PC version, or transferred from a friend or relative s NAVIGATOR. You can only ever have one route file loaded at a time in OziExplorer on your NAVIGATOR. When you tap this button you will see the Load Route window, where you can choose the route file you wish to load SAVE ROUTE button 57

64 The SAVE ROUTE button will save the currently active route. The route could have just been created, or it could be a route which was previously loaded and subsequently modified. When you tap this button, OziExplorer will display the Save Route File window, where you can choose the filename you wish to save to, using the on screen keyboard to name your file. CLEAR ROUTE button The CLEAR ROUTE button will clear the currently active route from the map. OziExplorer will prompt you to confirm this action. If you do not wish to clear the route, simply tap the NO button on the prompt to cancel the operation. If the route you are clearing is a newly created or modified route, and has not yet been saved, OziExplorer will display an additional prompt warning you of this. If you clear a route which has not yet been saved, then the route is gone forever. 58

65 NOTE Clearing the route simply removes the currently loaded route from the display. This does not remove the route file if it has already been exported / saved. SHOW ROUTE button When this option is active, a green indicator lights on the button. This option is switched ON by default. When the SHOW ROUTE option is switched on, it will display the currently loaded route overlaid on the map display. You can switch this option of as an aid to temporarily de-clutter the map display, without clearing the current route. START NAV button The START NAV button will commence route navigation using the currently loaded route. A navigation line will be drawn from your current position (or the cursor position if GPS Tracking is currently suspended) to the FIRST route waypoint within the route. START REV NAV button The START REV NAV button will commence route navigation of the currently loaded route in the reverse direction. i.e. The waypoints which make up the route are followed in reverse order. 59
66 This can be used for a return trip along the same route. If you wish to return following a different path, you would need to create a new route, OR load the original route, reverse the order of its waypoints, save it as a new route, then edit the route waypoints to match your requirements. (See the section on editing routes later in this chapter) A navigation line will be drawn from your current position (or the cursor position if GPS Tracking is currently suspended) to the LAST route waypoint within the route. STOP NAV button The STOP NAV button will cancel the current navigation operation. When the current navigation is cancelled (stopped), the navigation line will be removed from the map display. If you stop following a route, this does not mean that the route is unloaded or deleted. CREATE TOOLBAR button The CREATE TOOLBAR button will toggle the popup of the Route Create Toolbar in the upper-right portion of the screen. This standard OziExplorer toolbar provides access to functions related to creating routes. The buttons / functions provided by the Route Create toolbar are described in this section of this user guide. NAV TOOLBAR button The NAV TOOLBAR button will toggle the popup of the Route Navigate Toolbar in the upper-right portion of the screen. This standard OziExplorer toolbar provides access to functions related to navigating using routes. The buttons / functions provided by the Route Create toolbar are described in this section of this user guide. 60
67 Route Create toolbar The CREATE TOOLBAR button will toggle the popup of the Route Create Toolbar in the upper-right portion of the screen. Each function is described in the following sections. You can click the buttons on the image above to jump to the relevant section. Add Route Waypoint button When active, a route waypoint will be added to the end of the route at the position on the map where you tap. Insert Route Waypoint button When active, a route waypoint will be inserted between two waypoints or at the start or end of the route depending on a best choice algorithm, depending on where you tap on the map. Delete Route button Whichever route is currently loaded will be cleared from the map when the Delete Route button on the track toolbar is tapped. TIP Route files which have been exported / saved to the OziExplorer Data folder on the SD card cannot be deleted using this function. All it does is remove the current route data from the map display. i.e. You could have a saved or exported route file on your SD card, load the selected route file, view it overlaid on the map, then clear it, and the displayed route will be removed from view, leaving the saved route file as it was on the SD card. 61

68 Route Properties button Tapping the Route Properties button will pop up the Route Properties window. This window will show some details of the currently loaded route. It also allows modification of certain parameters pertaining to the route. The Route Properties window typically looks like this: The information shown includes List of Route Waypoints which make up the route Route Name A number of option buttons which perform actions on the route as detailed in the following sections Rev button The Rev button will instantly reverse the order of the Route Waypoints which make up your route Silent button Selecting an individual route waypoint (tap to highlight), then tap this button. This will stop OziExplorer playing an audible alert when the waypoint proximity is approached. 62


69 Wp button The Wp button allows you to add a standard waypoint from your Waypoint List into the current route as a route waypoint. You need to select a route waypoint first, and when the waypoint from the standard waypoint list is added it will be added AFTER the selected route waypoint. Of course, any waypoints can be moved up and down the list using the UP and DOWN buttons (see further down this section) Edit button The Edit button allows you to make changes to the selected route waypoint. The only property of the route waypoint which you can change here is the name of the route waypoint. You can also tap the Edit Position button to open the Edit Position window. The Edit Position window allow you to modify the position information which was previously set for this route waypoint. You can modify the following attributes: Position Format 63
70 Latitude Longitude To modify data, simply tap in the required field, and use the on screen keyboard (toggled on and off using the KB button) to enter your data. Delete button The Delete button allows you to remove a route waypoint from within the list on the Route Properties window. 1. Highlight the route waypoint in the list of route waypoints that you wish to delete by tapping it once. 2. Tap the Delete button, the selected route waypoint will be marked as Deleted. NOTE If you accidently mark the wrong route waypoint, you can undo the deletion by doing the following: 1. Make sure the route waypoint is currently selected 2. Tap the Delete button again while the route waypoint is selected This must be done BEFORE you close the Route Properties window by tapping the OK button. This will remove the Deleted flag on the selected Route Waypoint. After closing the Route Properties window via the OK button, any route waypoints which you have marked as Deleted will be permanently removed from the Route. If you close the Route Properties window by tapping the X button, any route waypoints marked for deletion will NOT be deleted. 64
71 Up and Down buttons The Up and Down buttons allow you to reorder the route waypoints in the current route. First, highlight the route waypoint in the list of route waypoints that you wish to move. Then, when you tap the Up or Down button, the selected route waypoint will move up or down in the list. Load Route button Tapping the Load Route button will open the Load Route File window. This window allows you to load or open a previously saved route file. The function performed using this button is exactly the same as that called by tapping the LOAD ROUTE button on the Routes Page toolbar. Save Route button Tapping the Save Route button will open the Save Route (rt2) File window. The function performed using this button is exactly the same as that called by tapping the SAVE ROUTE button on the Routes Page toolbar. 65
72 Show / Hide Route Waypoint Names button When a route is displayed overlaid on a map in OziExplorer, the route has multiple text labels displayed along with it. Adjacent to the first route waypoint, the route name will be displayed. Next to each route waypoint, the route waypoint name will be displayed. This button will toggle the route waypoint names on and off. This can be useful if there are a lot of route waypoints in close proximity to one another, and you wish to de-clutter the display by temporarily hiding the names. Close Toolbar button Tap this button to close the Route Create Toolbar Route Nav toolbar The Route Nav Toolbar can be accessed using the NAV TOOLBAR button from the Routes page. The Route Nav toolbar is a standard OziExplorer toolbar, and some of the functions are replicated on the Routes page toolbar. Each function is described in the following sections. You can click the buttons on the image above to jump to the relevant section. Next Waypoint button The Next Waypoint button will skip forward to the next waypoint while navigating (following) a route. 66
73 Previous Waypoint button The Previous Waypoint button will skip backwards to the previous waypoint while navigating along a route. Start Route Forward button The Start Route Forward button will commence route navigation using the currently loaded route in a forward direction (i.e. FIRST to LAST route waypoint). A navigation line will be drawn from your current position (or the cursor position if GPS Tracking is currently suspended) to the FIRST route waypoint within the currently loaded route. This button performs the same function as the START NAV button on the Routes page toolbar. Start Route Reverse button The Start Route Reverse button will commence route navigation using the currently loaded route in a reverse direction (i.e. LAST to FIRST route waypoint). A navigation line will be drawn from your current position (or the cursor position if GPS Tracking is currently suspended) to the LAST route waypoint within the currently loaded route. This button performs the same function as the START REV NAV button on the Routes page toolbar. Stop Nav button The Stop Nav button will stop all current navigation operations. The active navigation line will be turned off. This button performs the same function as the STOP NAV button on the Routes page toolbar. 67
74 Show Hide Nav Arrow button The Show Hide Nav Arrow button toggles the display of the navigation arrow at the top left of the map screen. NOTE The display of the Nav Arrow is more useful in a marine or aviation environment, and has limited function during vehicle navigation. It is NOT possible to change the location of the Nav Arrow. It will obscure the speedometer at the top left of the map screen when active. Load Route button Tapping the Load Route button will open the Load Route window. You can load or open a previously saved route file using this function. This button performs the same function as the LOAD ROUTE button on the Routes page toolbar. Close Toolbar button Tap the Close Toolbar button to close the Route Nav Toolbar ROUTE NAV page The Route Nav page is designed to show you information pertaining to the current Route during navigation 68

75 Change to the Route Nav page by tapping the Route Nav button Page window on the Select If you are NOT currently navigating to a Waypoint OR a Route Waypoint, the ROUTE NAV page will show the current map, but the fields at the bottom of the page will be empty. As you are not navigating along a route, there is no information for the page to display. Current Route - Shows the name of the route you currently have loaded. Dist Remain - Shows the total distance remaining on your route Next WP - Shows the name of the next route waypoint along the current route Dist to WP - Shows the distance remaining before you reach the next waypoint along the current route Once you load a route file, the information fields at the bottom of the page are loaded with the data as described above. 69
76 NOTE If you load a Waypoint (as opposed to a Route), and begin navigating to that waypoint, the information pertaining to your waypoint is also shown here. This is similar to the Waypoint Nav page. The only field which will NOT be displayed in this case is the Current Route. Likewise, if you are currently navigating along a route, and you switch to the Waypoint Nav page, you will see information pertaining to the next Route Waypoint on that page. ALTITUDE Page The Altitude page shows the map, but has additional altitude related parameters displayed at the bottom of the map panel. Change to the Altitude page by tapping the Altitude button window on the Select Page 70


77 Current Altitude: Shows the current altitude Climb Rate: Shows the current climb rate in units per minute Maximum Altitude: Shows the maximum altitude reached since the last reset of the Max Altitude parameter on the Meters Page Current Heading See Appendix 2 - Altitude Readings in Vehicle GPS Units for additional information on altitude readings. METERS page The Meters page has a number of data displays containing information gathered during moving map operations. Fields with a Start / Stop button can be started or stopped (paused) whenever desired 71
78 Fields with a Reset button can be cleared back to their initial value (zero) The following data is displayed on the Meters page: Trip Meter Odometer - Distance since last reset Timer (run time) - Accumulated time since last reset. Paused time does not add to the accumulated time Average Speed - Average speed (distance divided by time) since last reset Odometer 1 Distance since last reset Odometer 2 Distance since last reset Odometer 3 Distance since last reset NOTE Odometers 1, 2 & 3 and the Odometer within the Trip meter are completely independent of one another; effectively giving you 4 odometers for use. Altitude Current Average Minimum Maximum See Appendix 2 - Altitude Readings in Vehicle GPS Units for additional information on altitude readings. STATISTICS page The Statistics page shows a number of data fields gathered during moving map operations. NOTE Time displays are dependent on the time zone set in the system settings 72

79 Fields with a Reset button can be cleared back to their initial value (zero) Time Sunrise Shows sunrise time at current location Sunset Shows sunset time at current location Current Shows current date and time Speed Current Average Maximum Acceleration Current Minimum Maximum Shows current speed while moving Shows average speed recorded while moving (This is separate to the Trip Meter section on the Meters page) Shows maximum speed recorded while moving Shows current acceleration while moving Shows the minimum acceleration recorded while moving Shows the maximum acceleration recorded while moving 73

80 PROFILES page The Profiles page shows two graphs, which indicate your speed over time, and altitude over time. This page is purely for information purposes. To change to the Profiles page, tap the Profiles button on the Select Page window See Appendix 2 - Altitude Readings in Vehicle GPS Units for additional information on altitude readings. Settings Page SETTINGS page Tapping the Settings button on the right-hand toolbar on any page will switch to the Settings page. From here, you can make changes to the OziExplorer configuration to modify the way that OziExplorer functions. 74

81 General Settings Operation tab Position Format How you want the geographic position displayed on the status line and in other lists. Deg.Min and UTM are the two most commonly used formats in Australia. Display Datum It is highly recommended to leave this option at the default setting of WGS 84 The datum used for position display and editing. This can be different to the datum of the loaded map. Load Last Map It is recommended to leave this option switched ON If this option is selected, the last map used will be loaded the next time OziExplorer is started. Load Wp File It is recommended to leave this option switched ON 75
 will be automatically loaded when OziExplorer starts up Load Last Route If this option is selected, the last route used will be loaded the next time OziExplorer is started.")
82 If this option is ON (ticked), then the waypoint file (cewaypoints.wpb) will be automatically loaded when OziExplorer starts up Load Last Route If this option is selected, the last route used will be loaded the next time OziExplorer is started. Load Track Tail If this option is ON (ticked), the last track tail will be loaded automatically when OziExplorer starts up. Map tab Kinetic Scrolling Activates kinetic scrolling of the map when dragging with the stylus. Smooth Zoom If selected, bilinear filtering is used for smoothing. Zoom Levels If selected, zoom levels of 90%, 80%, 75%, 70%, 60%, 50% and 40% are created dynamically (ie. These zoom levels do not have to be included within the ozfx3 map file in use) If the 75% and 50% zoom data is included in the ozfx3 map file in use, these will be used in preference to zoom data created dynamically. Other tab 76

83 Auto Start GPS Communication with the internal GPS unit will be started automatically when OziExplorer starts up. Auto Set Time The PDA time is set from the NMEA data coming from the internal GPS Auto Screen Control It is recommended to leave this option switched OFF When this option is activated, the Screen Control feature is automatically activated when GPS communication starts. No Shutdown Stops the device from shutting down (or suspending) when running on battery power and communicating with the GPS. This options causes OziExplorer to send a keystroke every 30 seconds which makes the Navigator operating system think it is being used. This does not stop the screen from auto dimming; this must be configured in the NAVIGATOR system configuration. Show Pixel x,y This option causes OziExplorer to display the pixel x/y location on the current map image when the stylus is pressed and released before the popup menu is displayed. Auto Index Maps It is recommended to leave this option switched ON When this option is activated, maps which are added to folders under the Map File Paths will be indexed automatically. If the option is switched off, it is important that the map index is kept up to date manually (using the Index Maps function), otherwise maps which are not in the map index will not be found during moving-map operations. System tab 77


84 System Font It is recommended to leave this option at the default setting Specifies the system font used within OziExplorer. Time Zone It is recommended to leave this option at the default setting Specifies which time zone you are located in. The time offset can be specified manually, or if the default setting of Windows Settings is used, the system time zone as configured in the Navigator system configuration is used. Map Name Font Size This option specifies the size of the font used to display the map name at the bottom of the map. If this option is set to ZERO (0), this disables the display of the map name on the map panel. Map & Data Paths Settings Map File Paths (6 Max) Up to SIX paths can be specified here to define where OziExplorer should find maps. The first path specified here is used when the Open Map File function is used. 78

85 All paths specified here which are marked ACTIVE (ticked) will be searched for maps. Searching is recursive, which means that any sub-folders of the specified folder will also be searched. It is recommended to leave these paths at the default setting If you wish to add extra maps to OziExplorer, it is recommended that you create a new subfolder under the SD Card OziExplorer Maps folder in which to put your additional maps. This way, the maps will be automatically indexed and found by OziExplorer without any further configuration being necessary. If you wish to change one of the six paths specified, tap the Get Path button adjacent to the desired path When you tap this button, you will see the Get Path window, where you can browse for the folder you wish to add. Active As you tap on the folder tree, your selection is displayed in the Path field at the top of this window. Ticking the Active option next to a particular path marks that path as active. Active paths are searched for maps when using the Find Maps function, or when when maps are automatically changed during Moving Map operations. Data File Path It is recommended to leave this option at the default setting The Path (directory / folder) where OziExplorer stores data files. This option specifies where OziExplorer will store exported data files (waypoints, tracks, routes, etc.). Also, any files which OziExplorer automatically saves are always placed in this folder. If no folder is specified here, files are stored at the top directory level, also known as the root level folder (\). By default OziExplorer saves / exports and loads data from the SD card OziExplorer Data folder. 79


86 Map Image Paths Settings It is recommended to leave these paths at the default setting These settings specify the path(s) where map image files are stored. These folders are checked when a map image is required. The link within the.map file to the corresponding map image is ignored in this case. Normally, the map images (.ozfx) files are stored alongside the corresponding.map file in the OziExplorer Maps folder, so the settings here are largely redundant. If you wish to modify the setting, tap the Get Path button and browse to the folders you wish to specify. GPS Config settings It is recommended to leave ALL of these settings at the default values Port Settings tab The options shown on this dialogue window allow configuration of various parameters related to the connection with the internal GPS within the NAVIGATOR. There is no 80

87 need to modify any of these settings, and doing so can stop OziExplorer from gaining a satellite fix. Other tab Use Chk Sum The checksum contained in the NMEA data sentence from your GPS will be checked if this option is ON. If the checksum is not correct, then OziExplorer assumes the data is incorrect, and discards the sentence. Check Valid If this option is ON, the valid flag contained in the NMEA data sentence received from the internal GPS will be checked, and if the status is not valid, the data will be discarded. Say Fix Info This option will make a spoken announcement when the GPS fix status changes. Auto Satellite View This option will cause OziExplorer to display the GPS Status page while getting a satellite fix. Once a fix is gained, OziExplorer will return to the current screen. Connect tab 81

 ReConnect GPS if Connection Lost If this option is selected, the internal GPS will be reconnected if the connection is")
88 It is recommended to leave these settings at the defaults Close GPS Port on PDA Off If this option is selected, the internal GPS port will be closed when the NAVIGATOR is turned off. ReOpen GPS Port on PDA On If this option is selected, the internal GPS port will be re-opened when the Navigator is turned on (if it was on when the NAVIGATOR was put into sleep mode) ReConnect GPS if Connection Lost If this option is selected, the internal GPS will be reconnected if the connection is lost during use. Moving Map settings Operations tab Screen Update It is recommended to leave this setting at the default value of 2 (TWO) 82
 will make OziExplorer update the screen for every second NMEA sentence received from the GPS. Look Ahead This option sets the look ahead distance while in moving map mode.")
89 This setting determines how often the screen is updated. A setting of 1 (ONE) will make OziExplorer update the screen every time an NMEA sentence is received from the GPS. A setting of 2 (TWO) will make OziExplorer update the screen for every second NMEA sentence received from the GPS. Look Ahead This option sets the look ahead distance while in moving map mode. This is how much space is between the position pointer and the top of the screen. This setting can be set to 0 (ZERO) when look ahead is not required for a particular activity (such as hiking). NOTE This setting does not apply to Course Up and/or 3D perspective modes. These use a fixed look ahead position which is about ¾ of the way from the top of the screen. Mode Sets the mode of operation to either Air Marine Land This option changes the terminology used within OziExplorer, and the style and method of direction prompting when navigating along a route. Obviously for general use in a vehicle, the default Land setting is the best choice. Pointer tab Pointer Style This option defines the style of pointer used to indicate your position on the map. By default this is a RED ARROW WITH BLACK OUTLINE. Choose from the predefined pointer styles using the drop-down menu. Pointer Colour 83
, the default ARROW pointer will be filled with the selected colour, if it is switched OFF, the arrow pointer OUTLINE will be the selected colour.")
90 Defines the colour of the pointer used. Pointer Size Defines the size of the pointer on screen. Solid Pointer If this option is switched ON (ticked), the default ARROW pointer will be filled with the selected colour, if it is switched OFF, the arrow pointer OUTLINE will be the selected colour. Detailed Map tab It is recommended to leave these settings at the default values Load Detailed Map If this option is ON, a more detailed map (higher scale) will be searched for at the specified interval when running in moving map mode. If a better map is found, it will be loaded automatically. Be aware that this option may not always produce the result you expect, due to the nature of the image files which make up the map. Generally speaking, it is better to leave this option switched off. Interval Specify the interval in seconds in which to search for a more detailed map, if that option is switched on. Tracks Settings Track Tail 84
 then this entry is in meters, otherwise it is in feet. This should be set to a reasonably high distance, perhaps about 500M (1500ft).")
91 Track Tail Log Dist This option specifies the maximum distance before a track tail point is logged. If you have specified units as Kilometres (in Settings > Units) then this entry is in meters, otherwise it is in feet. This should be set to a reasonably high distance, perhaps about 500M (1500ft). Setting this distance too low will cause too many track points to be collected and slow performance. Automatic track point collection is also used for the track tail log using the same filter as above. Track Tail Length This is the length (number of track points) of the track logged to memory which is displayed on screen behind the position marker. This has no effect on the track points which are logged to disk when the Log Track to File option is turned on. A track point is stored every time the Track Distance between points is exceeded and stored in a circular buffer, a maximum of 1000 points is kept in memory so the Track Tail cannot be set above this value. The track is then drawn on the screen each time the GPS position is processed. If you set this value too high there may not be enough time to draw the track on the screen before the next position update is received. If this happens, position updates will be lost. Keep the track tail as short as you need. The track tail is only used when in moving map mode; otherwise the full track tail log (max 1000 points) is displayed. NOTE Track Tail logging in OziExplorerCE will mark a track point every X metres according to the Track Tail Log Dist setting. So the apparent maximum length of the Track Tail as per the default configuration is 999 points X 250 metres apart. This gives a maximum Track Tail length of approximately 250 kilometres. However, that length is the maximum possible if the vehicle is travelling in a straight line. OziExplorer will mark a track point under the following conditions: The specified Log Distance is exceeded The Heading changes by more than 7.5 degrees 85
 of the track tail displayed on the map.")
92 The Speed changes by 5 Kph or 15% whichever is the greater Therefore the maximum length of the track tail as displayed by OziExplorerCE may well be quite a bit less than the theoretical maximum. Track Color This option specifies the colour of the track tail displayed on the map. Track Width Select the width (or thickness) of the track tail displayed on the map. For performance reasons do not make it too wide, a width of 2 is optimal. Track Logging File Log Dist (File Log Distance) This option specifies the maximum distance before a track point is logged to disk. If you have specified units as Kilometres (in Settings > Units) then this entry is in meters, otherwise it is in feet. If set to zero the track is not logged. This should be set to a reasonably high distance, perhaps about 500M (1500ft). Setting this distance too low will cause too many track points to be collected. New Track Log File This option will cause the automatic export of your current track log data to a file in the OziExplorer Data on the SD card in the NAVIGATOR. The automatic export can be done on a the following schedules: Daily Weekly Monthly 86


93 Track Logging can be turned On or Off using the LOG ON button on the Track page Track1 & 2, 3 & 4, and 5 settings The remaining tabs in the Settings > Tracks dialogue window 1 & 2 3 & 4 5 all allow you to configure the individual colour and width of the five tracks which OziExplorer allows you to have loaded. Units settings 87

94 Speed Choice of Kph Kilometres per hour Mph Miles per hour Knots (Marine unit of speed) Distance Choice of Kilometres Miles Nautical Miles / metres Nautical Miles / feet Altitude Choose one of Metres Feet Degrees Choose one of True Magnetic Waypoints Settings 88


95 Create Colour Specifies the default colour used for newly created waypoints. Note that the colour of individual waypoints can be modified at any time via the Waypoint Properties window. Symbol Font Size Specifies the size of the symbol used to mark a waypoint. Specifies the size of the font used to display the waypoint name adjacent to the waypoint symbol Check Proximity This option turns on the proximity check feature for all waypoints. This means that when waypoints are created, the proximity check option is enabled for the created waypoint by default. Route Display tab These options define the display properties of Routes. Symbol 89

96 Defines the symbol size for the Route Waypoints which make up the route Font Size Defines the size of the font used for the names of the Route and the Route Waypoints Line Width Defines the width of the lines used to join the Route Waypoints within the route Route Line Colour Defines the colour used to draw the lines making up the route Route Wp Colour Defines the colour of the Route Waypoints within the route Route Text Colour Defines the colour used for the names displayed adjacent to Route Waypoints and the Route itself Proximity tab Auto Prompt Automatically prompts on entering the route proximity. An image will be displayed and a sound played providing an indication of the direction to be taken. Proximity The distance from the route waypoint the auto prompt will be activated. (The proximity is a circular zone around the route waypoint.) Sound Repeat The number of repeats of the sound prompt. Say Distance The distance from the route waypoint will be voiced. Check Wp Passed 90

97 The proximity will be activated if the waypoint is passed without the proximity being entered. For example, a boat may pass a waypoint without actually entering the proximity for that waypoint. If selected, this option will make sure the proximity is triggered. Options tab Use Auto Zoom The map zoom will be changed to the Zoom value set below when a Route waypoint proximity is entered. Zoom Value Specify the Zoom value the map changes to when the Route waypoint proximity is entered. The map zoom will change back to the normal setting when the waypoint is reached. Example - you can set the map to a zoom of say 50% for normal travel so you can see more of the map and specify a zoom value of 100% (or any other value) when the proximity is entered so the turn you need to make is more visible. Navigation 91


98 Draw Nav Line Activate the display of the navigation line, which is a line shown from your current position to your "GoTo" position. Line Width The width of the navigation line drawn. Line Colour 1 The colour used to fill the navigation line. Line Colour 2 The colour used for the outline (border) of the navigation line. Speed Monitor Min Speed An audio alert is played when the speed goes below the specified minimum speed. The sound will not play again until you go above the set speed and then below the minimum speed again. Set Speed An audio alert is played when your speed goes above the specified set speed. 92
. If you do so, you will hear alerts sounding every time your vehicle accelerates or decelerates.")
99 Max Speed Active An audio alert is played when your speed goes above the specified maximum speed. The individual speed alerts can be activated independently by ticking the adjacent Active check boxes. WARNING Do NOT activate these speed monitors and leave the settings at 0 (zero). If you do so, you will hear alerts sounding every time your vehicle accelerates or decelerates. Load Layout The Load Layout button on the Settings page is used to load a page file for OziExplorer which defines the user interface for the program. Tapping the Load Layout button calls the Select Page File window, where you can select a page file to load into OziExplorer. Included with the NAVIGATOR are three layouts: 1. Hema Navigator 1 2. HEMA-EziOzi 3. HEMA-EziOzi-UTMDisplay See Appendix 3 - Changing the OziExplorer interface for more information on changing the OziExplorer interface using page files. Display Pages 93


100 The Select Pages button on the Settings page opens the Display Pages window. The Display Pages window allows you to customise which of the available pages you wish to see during operation of OziExplorer. Items which have a TICK adjacent to them are switched ON. When you remove (untick) any of the pages listed here, it no longer appears when you open the Select Page window via the Select Page button on the Standard Toolbar. Of course, you can turn any inactive pages back on by placing a tick in the adjacent checkbox. Help When you tap the Help button on the Settings page, OziExplorer will load the built in help file and display it on screen. Please note that the built-in help is the standard OziExplorerCE help file. It describes the standard OziExplorer interface and functions. Hopefully, this document will provide all the detailed help you might need to use OziExplorer on the NAVIGATOR. Appendices Appendices 94
101 A number of appendices have been added here to explain some of the topics in more detail. Appendix 1 - About OziExplorer map files A map in OziExplorer is an image file which has been calibrated (or georeferenced) so that OziExplorer can use any pixel position on the map to determine the true geographic position. When a map image file is calibrated in the PC version of OziExplorer, a corresponding.map file is created which contains the calibration information and a link to the image file containing the map. A.map file contains the following information related to the map A link to the map image file The datum of the map The map projection used for the map The Calibration (georeferencing) information for the map NOTE Map calibration and creation of the corresponding.map file can only be performed using the PC (full) version of OziExplorer. When using maps on the NAVIGATOR version of OziExplorer, the program opens the.map file (eg. World.map) of the required map, so it can access: The name of the corresponding map image file, which it then opens The map datum and projection The calibration information, which allows OziExplorer to calculate the factors necessary to convert the maps image pixel coordinates to geographical coordinates. Therefore, a "map" in OziExplorer on the NAVIGATOR actually consists of TWO files 1. The.map file which contains the information discussed above. 2. The actual map image file Before image files can be used as maps in OziExplorer, they must be in one of the supported formats (.ozf2,.ozf3,.ecw,.jpg,.png or.bmp). Any map images in other formats must be converted to the OziExplorer ozfx3 format using the Img2Ozf program. This program is available from the OziExplorer website. ( How map image files are located When a.map file is opened in OziExplorer, the program attempts to find the corresponding map image file the following way 1. The map image file name is read from the.map file and the path and file extension is removed 95
102 2. The.ozf2,.ozfx3,.ecw,.jpg,.png, and.bmp extensions are added to the file name to search for maps in any of these formats 3. The Image file Path 1 and Image File Path 2 as set in the OziExplorer configuration are searched. If not found 1. The folder where the.map file was loaded from is searched. 2. If not found, then the name of the map file name is used for the image file name and the above search process is repeated. If the image file which matches the.map file is still not found, the message Image File Not Found will be displayed. Map Indexing To make searching for map files faster, map files are indexed and the indexes are stored in the System Files folder underneath the main OziExplorer folder on the internal memory of the NAVIGATOR. The index files are created the first time a map search is initiated. The time it takes to create the indexes will vary according to the number of map files in each of the active Map File Paths defined in the OziExplorer configuration. Indexes are used to find maps when Looking for a map during moving map operation if the "Load Detailed Map option is turned on. When Find Maps At Cursor function is used When More Detailed Map function is used When Less Detailed Map function is used Appendix 2 - Altitude Readings in Vehicle GPS units There are two major factors involved in elevation and GPS. Firstly, what do you mean by elevation? And secondly, is a GPS derived elevation as good as a GPS derived horizontal position? 1. GPS primarily indicates a surface (horizontal) position based on a mathematical model representing the earth's near-spherical surface. Height or elevation is a different kettle of fish. GPS can give a distance from the centre of the earth, and then by using the radius of the surface model (see above), give you an elevation from the surface model. Let's call this the mathematical elevation. Then you have to ask, does this represent a height above sea level? The answer is no. It may do so in places, but only by accident. There are tables of the differences around the world, between the mathematical elevation and sea level elevation. [The spherical (more accurately ellipsoidal) models for GPS and sea level are called the spheroid, and the geoid, respectively]. These tables are the result of observations taken over the last few centuries, by surveyors, space scientists and geologists. Geologists get involved in these observations, because anomalies in gravity 96
103 strengths often indicate mineralogy. And gravity strengths relate to the behaviour of level determination on the earth's surface. 2. Because the position solution found by GPS is a mathematical one, and the ranging from the satellites is in the order of kilometres, there is an error bias in the direction of the earth s centre. This is due to intersecting lines that may not quite meet. This of course is the elevation solution. So if we have an error of 10 metres in the horizontal position, the error in the elevation will be more like metres. Your small standard GPS unit usually displays elevation, but you must accept it knowing the above limitations. I can say that it is reasonably sensible. Around the coast of Australia, it will be somewhere around zero, give or take 50 metres. In Toowoomba, it will be about 600 metres. Elsewhere in the world, it may show greater or lesser discrepancy. Some other reading on altitude can be found here: Appendix 3 - Changing OziExplorer interface We think the HEMA EziOzi interface will make OziExplorer easier for you to use. If, however, you prefer the standard OziExplorer interface, it is possible to change the interface back to the standard layout. The interface layout of OziExplorer is defined in what is called a page file. You can load any page file of your choosing. The NAVIGATOR comes with two page files onboard: 1. HEMA-EziOzi (the new HEMA EziOzi interface) 2. HEMA-EziOzi-UTMDisplay (New HEMA EziOzi interface, with the addition of UTM Grid 100 display) 3. Hema Navigator 1 (the standard OziExplorer interface) To change the layout, follow these steps Tap the Select Page button to open the Select Page window, then tap the Settings button 97


104 Tap the Show/Hide Menubar button This will reveal the bottom menubar OziExplorer interface which is a feature of the standard 98


105 NOTE Revealing the bottom menubar will "squeeze" the interface up. This is normal behaviour. Tap the LOAD LAYOUT button Select required page file Tap the OK button after selecting the required page file. In this example, we are loading the Hema Navigator 1 page file. The selected page file then loads, and the display changes to that defined by the page file, as shown below: 99


106 On Screen Keyboard (or Input Panel) Entry of alpha-numeric characters within data fields in OziExplorer is done using the on screen keyboard or input panel. The input panel can be toggled on and off by repeatedly tapping the KB button When the button is tapped, the on-screen keyboard will appear as shown below 100
HN7 Navigator OziExplorer User Guide
 HN7 Navigator OziExplorer User Guide Table of Contents Introduction... 1 Starting OziExplorer... 2 Screen Layout... 3 Acquiring a GPS Satellite Fix... 4 Standard Program Toolbar... 6 Page Selection...
gsfgdsgsf GPS Navigation User Guide
 gsfgdsgsf TM GPS Navigation User Guide CONTENTS NAVIGATION Selecting on or off road modes... 3 STREET NAVIGATION Getting started with street navigation... 4 Navigating to an address... 4 Using the on screen
Manual -HP EDITION- TomTom Navigator -HP Edition- User Guide
 Manual -HP EDITION- TomTom Navigator -HP Edition- User Guide Copyright 1996-2004 TomTom B.V., The Netherlands. TomTom is a trademark of TomTom BV. Data copyright 2004 Tele Atlas N.V., The Netherlands.
User Guide. Rev Dot Origin Ltd.
 User Guide Introduction to the EasyTac File Explorer...1 Using EasyTac to read drivers' cards with a card reader...2 Using EasyTac to read VU files from a download device...3 Using EasyTac to download
SatGuide Symbian User Manual. SatGuide Symbian OS USER MANUAL
 SatGuide Symbian User Manual SatGuide Symbian OS USER MANUAL CONTENTS 1 - INTRODUCTION...1 WHAT IS SATGUIDE?...1 SATGUIDE FEATURES...1 2 - SMART PRACTICES WHILE DRIVING...2 DRIVE SAFE, CALL SMART SM...2
Working with PDF s. To open a recent file on the Start screen, double click on the file name.
 Working with PDF s Acrobat DC Start Screen (Home Tab) When Acrobat opens, the Acrobat Start screen (Home Tab) populates displaying a list of recently opened files. The search feature on the top of the
XnView Image Viewer. a ZOOMERS guide
 XnView Image Viewer a ZOOMERS guide Introduction...2 Browser Mode... 5 Image View Mode...14 Printing... 22 Image Editing...26 Configuration... 34 Note that this guide is for XnView version 1.8. The current
Precautions Very important information. Please read this section carefully before using this product.
 Precautions Very important information. Please read this section carefully before using this product. This product is intended to provide turn-by-turn instructions to safely guide you to your desired destination.
Hema Explorer app (v3) User Guide - Android
 User Guide - Android") Hema Explorer app (v3) User Guide - Android Table of Contents Introduction... 1 Overview... 1 About this User Guide... 1 GPS on Android devices... 1 A note about the Android interface... 2 Getting to
Hema Explorer app (v3) User Guide - Android Table of Contents Introduction... 1 Overview... 1 About this User Guide... 1 GPS on Android devices... 1 A note about the Android interface... 2 Getting to
Ctrack Online User Guide
 Fleetstar Online A Guide to Winter Maintenance Reporting v1.1 Ctrack Online User Guide Title: Ctrack Online Quickstart Guide Date: 18/07/2013 Version: 1.0 Table of Contents 1. Ctrack Online Introduction...
With ClaroIdeas you can quickly and easily create idea maps using a combination of words, symbols and pictures.
 Welcome to ClaroIdeas ClaroIdeas is a fresh tool to support the creation and editing of concept maps or idea maps using visual and audio components. It has been specifically developed to support people
NVX226 Navigation System. User s Manual
 NVX226 Navigation System User s Manual 1287693 Contents Getting started-------------------------------------------------------------------------------------- 1 Charging the battery -------------------------------------------------------------------------------
MEDALLION INSTRUMENTATION SYSTEMS VIPER CHART PLOTTING OPERATORS MANUAL
 MEDALLION INSTRUMENTATION SYSTEMS VIPER CHART PLOTTING OPERATORS MANUAL TABLE OF CONTENTS Map Screen... 3 Squash Pad... 4 Navigation Menu Map View... 5 Orient View... 6 Select Course... 7 Creating a New
OziExplorer on the HEMA Navigator. User Guide
 OziExplorer on the HEMA Navigator User Guide HEMA Navigator Documentation OziExplorer User Guide Page intentionally left blank 2 of 71 OziExplorer User Guide HEMAA Navigator Documentatio on 1 Ozi Explorer
QUICK START GUIDE. SOLO Forest
 QUICK START GUIDE SOLO Forest Software Installation 1. For PC installation, run the.msi file. 2. For Mobile device installation, copy the.cab file onto the device 3. Run the.cab file Starting the Program
XnView 1.9. a ZOOMERS guide. Introduction...2 Browser Mode... 5 Image View Mode...15 Printing Image Editing...28 Configuration...
 XnView 1.9 a ZOOMERS guide Introduction...2 Browser Mode... 5 Image View Mode...15 Printing... 22 Image Editing...28 Configuration... 36 Written by Chorlton Workshop for hsbp Introduction This is a guide
MEDALLION INSTRUMENTATION SYSTEMS MasterCraft Viper system
 MEDALLION INSTRUMENTATION SYSTEMS 2010 MasterCraft Viper system MEDALLION INSTRUMENTATION SYSTEMS VIPER CHART PLOTTING OPERATORS MANUAL MAP SCREEN This manual will attempt to familiarize the
Quick Start Guide - Contents. Opening Word Locating Big Lottery Fund Templates The Word 2013 Screen... 3
 Quick Start Guide - Contents Opening Word... 1 Locating Big Lottery Fund Templates... 2 The Word 2013 Screen... 3 Things You Might Be Looking For... 4 What s New On The Ribbon... 5 The Quick Access Toolbar...
Odyssey Quick Start Guide. Version:
 Odyssey Quick Start Guide Version: 2009.3 2 Odyssey Quick Start Guide Copyright About Version: 2009.3 Doc. Date: 20 February 2009 Copyright Copyright 2006-2009. All rights reserved. No part of this publication
Full Search Map Tab. This map is the result of selecting the Map tab within Full Search.
 Full Search Map Tab This map is the result of selecting the Map tab within Full Search. This map can be used when defining your parameters starting from a Full Search. Once you have entered your desired
OziExplorer Training and Help Manual for Use with Soil Resource Stewardship Monitoring Checklist: Cutblock-Level
 OziExplorer Training and Help Manual for Use with Soil Resource Stewardship Monitoring Checklist: Cutblock-Level Stéphane Dubé, Soil Scientist MOFR Northern Interior Forest Region May 2009 Version 2 Starting
User Manual JRV9000. Navigation software for the JRV9000. English April 2016, ver. 1.0
 User Manual JRV9000 Navigation software for the JRV9000 English April 2016, ver. 1.0 Table of contents 1 Getting started... 5 1.1 Initial set-up... 5 1.2 Screen controls... 6 1.2.1 Using the buttons and
GPS USER MANUAL November 2015
 GPS USER MANUAL November 2015 Contents Introduction... 2 Standard Operating Procedure for using GPS navigation... 2 Tablet... 2 Hardware and buttons... 2 Home screen... 3 Using the SYGIC Navigation Software...
Introduction to Solo Forest
 Introduction to Solo Forest Project Settings Collecting Data Office Procedures - Exporting Shapefiles - Syncing with the PC - Transferring files Opening Solo Forest To open Solo Forest, select Start >
Press the Plus + key to zoom in. Press the Minus - key to zoom out. Scroll the mouse wheel away from you to zoom in; towards you to zoom out.
 Navigate Around the Map Interactive maps provide many choices for displaying information, searching for more details, and moving around the map. Most navigation uses the mouse, but at times you may also
Odyssey Mobile User's Guides. Version: 3.0
 Odyssey Mobile User's Guides Version: 3.0 Last Update: 22-June-2006 2 Odyssey Mobile User s Guide Copyright About Odyssey Mobile Version: 3.0 Documentation Date: 22-June-2006 Copyright Copyright 2005-2006.
Funasset Limited Foundry House Foundry Road Taunton Somerset TA1 1JJ. Tel: +44 (0) Fax: +44 (0) mailmarkup.com funasset.
 Fax: +44 (0) mailmarkup.com funasset.") Funasset Limited Foundry House Foundry Road Taunton Somerset TA1 1JJ Tel: +44 (0)1823 365864 Fax: +44 (0)1823 277266 mailmarkup.com funasset.com Copyright 2012 Funasset Limited. All rights reserved. Products
Funasset Limited Foundry House Foundry Road Taunton Somerset TA1 1JJ Tel: +44 (0)1823 365864 Fax: +44 (0)1823 277266 mailmarkup.com funasset.com Copyright 2012 Funasset Limited. All rights reserved. Products
IntraMaps End User Manual
 IntraMaps End User Manual For IntraMaps Version 8 Date: 6 th July 2014 Contents Introduction... 4 What is IntraMaps?... 4 Application... 5 Main Toolbar... 6 View... 7 Original View:... 7 Pan:... 7 Zoom
Full Search Map Tab Overview
 FlexMLS Map Server Full Search Map Tab Overview The Full Search Map tab is a need to know module. It is accessible when you use Full Search under Search in the Main Menu tree of FlexMLS. This map can
Outlook: Web Access. Outlook: Web Access AIS Vienna
 Outlook: Web Access AIS Vienna Table of Contents Introduction to OWA...1 Log On... 1 OWA Workspace... 2 Hiding/Displaying the Reading Pane... 3 Collapsing/Expanding the Outlook Bar... 4 Log Off... 5 Sending
HBS Training - IT Solutions. PlanWeb. Intermediate
 HBS Training - IT Solutions PlanWeb Intermediate CONTENTS Logging on to the system...3 The PlanWeb Window...5 The Tool Bar...6 The Status Bar...6 The Map Window...6 The Information Window...7 Changing
Outlook Web Access. In the next step, enter your address and password to gain access to your Outlook Web Access account.
 Outlook Web Access To access your mail, open Internet Explorer and type in the address http://www.scs.sk.ca/exchange as seen below. (Other browsers will work but there is some loss of functionality) In
Propel PRO User Guide
 Propel PRO User Guide Propel PRO Version 3.2.0a Page 1 Welcome to the latest version of Propel PRO which offers fast performance and easy navigation. Please refer to this user guide for common features
Using Syracuse Community Geography s MapSyracuse
 Using Syracuse Community Geography s MapSyracuse MapSyracuse allows the user to create custom maps with the data provided by Syracuse Community Geography. Starting with the basic template provided, you
DataPro Quick Start Guide
 DataPro Quick Start Guide Introduction The DataPro application provides the user with the ability to download and analyze data acquired using the ULTRA-LITE PRO range of Auto Meter products. Please see
HBS Training - IT Solutions. PlanWeb. Introduction
 HBS Training - IT Solutions PlanWeb Introduction CONTENTS Logging on to the system...3 The PlanWeb Window...5 The Tool Bar...6 The Status Bar...6 The Map Window...6 The Information Window...7 Changing
U N I V E R S I T Y O F K E N T U C K Y. efacts 2-click Interactive Building Information Map ~ Help Guide ~ Revised January 20, 2016
 U N I V E R S I T Y O F K E N T U C K Y efacts 2-click Interactive Building Information Map ~ Help Guide ~ Revised January 20, 2016 Contents BUILDING SEARCH... 3 A. FIND A CAMPUS LOCATION... 3 GRAPHICAL
User manual PLUS S320
 User manual PLUS S320 PLUS S320 Introduction Congratulations on buying the Sapphire Plus Portable Navigator and Fixed Speed Camera location system. This user manual aims to provide you with installation
USER GUIDE. Created by MyCRM Ltd. emap. User Guide
 USER GUIDE Created by MyCRM Ltd emap User Guide MyCRM Ltd 1/1/2014 2 About This Guide This guide is intended for CRM users who wish to understand how to use emap and get the most out of its advanced location
User Guide. FTR Reporter For more information, visit
 FTR Reporter 5.7.1 For more information, visit www.fortherecord.com TABLE OF CONTENTS INTRODUCTION... 5 Overview... 5 About This Document... 5 GETTING STARTED... 6 Installation... 6 Starting Reporter...
ANWB Connect Using the Web Portal Contents
 ANWB Connect Using the Web Portal Contents Login... 2 Forgot Username... 2 Forgot Password... 3 Account Settings... 5 User Settings... 5 Edit or Delete Account Email Address... 9 Change Username... 10
GPS Nothing comes close to a Cobra. Owner s Manual ENGLISH
 Owner s Manual GPS 1080 GLOBAL POSITIONING SYSTEM RECEIVER Nothing comes close to a Cobra Printed in China Part No. 480-146-P ENGLISH IMPORTANT INFORMATION Cautions and Warnings Caution: The user is responsible
Bike-O-Meter User Manual
 Bike-O-Meter User Manual For ios 7 Version 1 Date 2014-03-09 1 Thank you for purchasing the Bike-O-Meter App from Cellimagine LLC. Bike-O-Meter is truly a versatile app that can be used as a pedometer,
Version 9 User Guide for. Developed for Omnitracs
 Version 9 User Guide for Developed for Omnitracs Table of Contents Welcome to CoPilot Truck 4 Driving Screen 4 Driving Menu 5 GO TO MENU: Single Destination Navigation 6 Address 6 My Places 7 Points of
ENVI Tutorial: Introduction to ENVI
 ENVI Tutorial: Introduction to ENVI Table of Contents OVERVIEW OF THIS TUTORIAL...1 GETTING STARTED WITH ENVI...1 Starting ENVI...1 Starting ENVI on Windows Machines...1 Starting ENVI in UNIX...1 Starting
GPS NAVIGATION SYSTEM NAV USER MANUAL
 GPS NAVIGATION SYSTEM NAV USER MANUAL ENGLISH Thank you for choosing the the Zenec Device as your navigator. Start using your device right away. This document is the detailed description of the navigation
MICROSOFT WORD 2010 BASICS
 MICROSOFT WORD 2010 BASICS Word 2010 is a word processing program that allows you to create various types of documents such as letters, papers, flyers, and faxes. The Ribbon contains all of the commands
NEBRASKA811 IMAP MANUAL AN INSTRUCTIONAL GUIDE TO VIEWING AND MAPPING DISTRICT POLYGONS ONLINE OCTOBER
 NEBRASKA811 IMAP MANUAL AN INSTRUCTIONAL GUIDE TO VIEWING AND MAPPING DISTRICT POLYGONS ONLINE 2013 OCTOBER 30 2013 TABLE OF CONTENTS Introduction 1 IMAP at-a-glance 2 Logging In 3 Understanding The Components
B. HDS-5m & HDS-7m. GPS Mapping Receiver. Operations Guide
 988-0176-02B HDS-5m & HDS-7m GPS Mapping Receiver Operations Guide Software updates for your unit. Occassionally check the Lowrance website for free software upgrades for your unit. Go to www.lowrance.com
Intelligent Security & Fire Ltd
 Copyright 2007-2009 Cortex Global Table of contents: Introduction... 3 1. Login... 3 1.1 Advanced login options... 4 2. Preview... 5 2.1 Main menu... 6 2.2 Camera list... 6 2.3 Main display... 6 2.4 Maps...
Help Guide Rev
 Help Guide Rev. 1.0 07152014 Home Page The home page displays your vehicle(s) on a satellite map. The information box, showing vehicle information will already be opened. The information box displays your
Advanced ICE Hema 4WD Nav User Manual
 Advanced ICE Hema 4WD Nav User Manual Table of Contents Safety Notes 1 Backing Up Your Data 2 4WD Nav 4 Getting to know OziExplorer 6 Map Overlay Information & Buttons 8 Standard Toolbar 10 Acquiring a
COPYRIGHTED MATERIAL. Making Excel More Efficient
 Making Excel More Efficient If you find yourself spending a major part of your day working with Excel, you can make those chores go faster and so make your overall work life more productive by making Excel
User guide. DRIVE 10s Sygic, a.s. All rights reserved.
 User guide DRIVE 10s 2014 Sygic, a.s. All rights reserved. ... 1 I. Getting Started... 1 The Navigation Screen... 1 Entering an Address... 2 Turn by Turn Navigation... 6 Acquiring GPS Position... 7 II.
ENVI Classic Tutorial: Introduction to ENVI Classic 2
 ENVI Classic Tutorial: Introduction to ENVI Classic Introduction to ENVI Classic 2 Files Used in This Tutorial 2 Getting Started with ENVI Classic 3 Loading a Gray Scale Image 3 ENVI Classic File Formats
simplugins Panel Builder
 simplugins Panel Builder ADD-ON MFD GPS BajuSoftware, LLC Page 1 of 38 Version 1.4 April, 2015 Table of Contents Introduction... 3 Technical Requirements... 5 Installation Procedure... 6 Running the GPS
Bucknell University Digital Collections. LUNA Insight User Guide February 2006
 Bucknell University Digital Collections LUNA Insight User Guide February 2006 User Guide - Table of Contents Topic Page Number Installing Insight. 2-4 Connecting to Insight 5 Opening Collections. 6 Main
Stream Map USA Manual
 1. INTRODUCTION When Stream Map USA is launched, a map of North America opens showing your current location and a colored area highlighting the states covered. Stream Map USA Manual This manual is designed
MerlinX Extension. For Adobe Creative Cloud Applications. MerlinOne Inc. 17 Whitney Road Quincy, MA T (617)
") MerlinX Extension For Adobe Creative Cloud Applications 17 Whitney Road Quincy, MA 02169 T (617) 328-6645 http://www.merlinone.com Table of Contents Table of Contents 1 Introduction 3 Installing the Extension
MerlinX Extension For Adobe Creative Cloud Applications 17 Whitney Road Quincy, MA 02169 T (617) 328-6645 http://www.merlinone.com Table of Contents Table of Contents 1 Introduction 3 Installing the Extension
Organizing Design Data
 Organizing Design Data Module Overview This module explains how to use the data in different files for reference purposes. Module Prerequisites Knowledge of MicroStation s interface Some knowledge about
Tetra4D Reviewer. Version 5.1. User Guide. Details on how to use Tetra4D Reviewer.
 Tetra4D Reviewer Version 5.1 User Guide Details on how to use Tetra4D Reviewer. ii Contents Chapter 1: Work area... 7 Looking at the work area... 7 Toolbars and toolbar presets... 8 About toolbars and
CITO2 Installation & User Instructions
 CITO2 Installation & User Instructions DD 56107 Stoneridge Electronics Ltd 1. Installation...4 1.1. System Requirements...4 1.2. Installing CITO2...4 1.3. Uninstalling CITO2...4 2. Starting and closing
FREEDOM-Pad Installation and Operation
 FREEDOM-Pad Installation and Operation Quick Start Steps for installing FREEDOM-Pad Page 2 Desktop Install Overview Page 2 Mobile Device Installation Overview Page 2 Activating the Battery Page 2 Resetting
When using the navigation software for the first time, an initial setup process starts automatically. Do as follows:
 Getting started When using the navigation software for the first time, an initial setup process starts automatically. Do as follows: Select the program language. If your preferred language does not appear
User Manual Alpine Navigation
 User Manual Alpine Navigation Navigation software for the Alpine INE-W960/INE-W960S/INE-NAV-60 US English January 2015, ver. 1.0 Thank you for choosing the Alpine unit as your navigator. Start using your
OziExplorer Training and Help Manual for Use with Soil Resource Stewardship Monitoring Checklist: Cutblock-Level
 for Use with Soil Resource Stewardship Monitoring Checklist: Cutblock-Level Stéphane Dubé, Soil Scientist MOFR Northern Interior Forest Region May 2009 Version 2 Starting up This section will describe
Navigation System... 1 Radio Frequently Asked Questions Troubleshooting MAIN TABLE OF CONTENTS
 Navigation System... 1 Radio... 41 Frequently Asked Questions... 53 Troubleshooting... 56 MAIN TABLE OF CONTENTS i NAVIGATION SYSTEM TABLE OF CONTENTS Safety Guidelines... 1 System Introduction... 3 System
COMPUTER DESCRIPTION...
 Conventions used in this document: Keyboard keys that must be pressed will be shown as Enter or Ctrl. Controls to be activated with the mouse will be shown as Start button > Settings > System > About.
IMAP MANUAL UTILITY NOTIFICATION CENTER AN INSTRUCTIONAL GUIDE TO VIEWING AND MAPPING DISTRICT POLYGONS ONLINE.
 UTILITY NOTIFICATION CENTER IMAP MANUAL AN INSTRUCTIONAL GUIDE TO VIEWING AND MAPPING DISTRICT POLYGONS ONLINE 2013 LAST UPDATE: JUNE 2013 TABLE OF CONTENTS Introduction 1 IMAP at-a-glance 2 Logging In
Easy Windows Working with Disks, Folders, - and Files
 Easy Windows 98-3 - Working with Disks, Folders, - and Files Page 1 of 11 Easy Windows 98-3 - Working with Disks, Folders, - and Files Task 1: Opening Folders Folders contain files, programs, or other
English. Smart V3. for Palm OS 5. User Manual
 English Smart V3 for Palm OS 5 User Manual Smart V 3.0 User Manual for Palm OS 5 Contents 1. Introduction...5 2. Installing Smart...6 3. Smart Desktop...7 4. Installing Maps Using Smart Desktop...8 5.
OUTLOOK TIPS AND TRICKS GINI COURTER, M.B.A., TRIAD CONSULTING
 1 OUTLOOK TIPS AND TRICKS GINI COURTER, M.B.A., TRIAD CONSULTING DISPLAYING THE ADVANCED TOOLBAR (2007) The Advanced toolbar isn t advanced; it s just the commands that they couldn t fit on the Standard
OpenForms360 Validation User Guide Notable Solutions Inc.
 OpenForms360 Validation User Guide 2011 Notable Solutions Inc. 1 T A B L E O F C O N T EN T S Introduction...5 What is OpenForms360 Validation?... 5 Using OpenForms360 Validation... 5 Features at a glance...
V2.0. GPS Navigator. GPS Navigation Suite for: BlackBerry Devices (touch screen) User s Guide
 User s Guide") GPS Navigator V2.0 GPS Navigation Suite for: BlackBerry Devices (touch screen) User s Guide Copyright 2011 TeleNav, Inc. All rights reserved. GPS Navigator is a trademark and TeleNav is a registered trademark
GPS Navigator V2.0 GPS Navigation Suite for: BlackBerry Devices (touch screen) User s Guide Copyright 2011 TeleNav, Inc. All rights reserved. GPS Navigator is a trademark and TeleNav is a registered trademark
Hook2 Series. Operator Manual. 5 HDI, 5 TS, 7X GPS TS, 7 HDI, 7 TS, 9 TS, 9 HDI, and 12 TS ENGLISH
 Hook2 Series Operator Manual 5 HDI, 5 TS, 7X GPS TS, 7 HDI, 7 TS, 9 TS, 9 HDI, and 12 TS ENGLISH www.lowrance.com Preface Disclaimer As Navico is continuously improving this product, we retain the right
Copyright 2015 Integrated Environmental Solutions Limited. All rights reserved.
 Tabular Room Data User Guide IES Virtual Environment Copyright 2015 Integrated Environmental Solutions Limited. All rights reserved. No part of the manual is to be copied or reproduced in any form without
Tutorial 01 Quick Start Tutorial
 Tutorial 01 Quick Start Tutorial Homogeneous single material slope No water pressure (dry) Circular slip surface search (Grid Search) Intro to multi scenario modeling Introduction Model This quick start
Edge App User Guide V 4.5
 Edge App User Guide V 4.5 Table of Contents Introduction... 4 Trial Version... 4 Logging In... 5 1. Home... 7 2. View Notes... 8 2.1. View Notes List & Tab View... 8 2.2. View Notes Map View... 17 3. View
PRIME/ESSENTIAL NAVIGATION USER MANUAL
 PRIME/ESSENTIAL NAVIGATION USER MANUAL EN Table of contents 1 Warnings and safety information... 5 2 Getting started... 6 2.1 Initial set-up... 6 2.2 Screen controls... 7 2.2.1 Using the buttons and other
1. Download and install the Firefox Web browser if needed. 2. Open Firefox, go to zotero.org and click the big red Download button.
 Get Started with Zotero A free, open-source alternative to products such as RefWorks and EndNote, Zotero captures reference data from many sources, and lets you organize your citations and export bibliographies
2005 Buick Rendezvous Navigation System M
 2005 Buick Rendezvous Navigation System M Overview... 1-1 Overview... 1-2 Features and Controls... 2-1 Features and Controls... 2-2 Navigation Audio System... 3-1 Navigation Audio System... 3-2 Index...1
Pub Mapping GPS and Multimedia Player Quick Start Guide
 Pub. 988-0160-461 Mapping GPS and Multimedia Player Quick Start Guide 1 Power Cable The Lowrance XOG GPS operates on an internal rechargeable battery. Battery charge is probably low at time of purchase.
User Manual Alpine Navigation
 User Manual Alpine Navigation Navigation software for the Alpine INE-W970BT UK English January 2013, ver. 1.0 Thank you for choosing the Alpine unit as your navigator. Start using your device right away.
INTRODUCTION TO MIFLEET. June Support Information Robert Richey
 June 2016 Support Information fleetsales@mifleet.us fleetsupport@mifleet.us Robert Richey rrichey@dcsbusiness.com Table of Contents Basics... 3 Terms... 3 Tool tips... 3 Menu buttons... 3 Access Tab (Permissions)...
OUTLOOK 2007 BASICS. In this session you will: FOCUS
 In OUTLOOK 2007 BASICS FOCUS WPL_O70 Outlook 2007 is a time and information management program that helps you to manage your day-to-day tasks and information quickly and effectively. This chapter covers
VANGUARD LOAD TAP CHANGER ANALYZER (LTCA) VERSION 2.xx SOFTWARE MANUAL. LTCA-10, LTCA-40, WRM-10P, WRM-40, TRM-20, TRM-40, TRM-203, and TRM-403
 VERSION 2.xx SOFTWARE MANUAL. LTCA-10, LTCA-40, WRM-10P, WRM-40, TRM-20, TRM-40, TRM-203, and TRM-403") VANGUARD LOAD TAP CHANGER ANALYZER (LTCA) VERSION 2.xx SOFTWARE MANUAL For Use with Vanguard s LTCA-10, LTCA-40, WRM-10P, WRM-40, TRM-20, TRM-40, TRM-203, and TRM-403 Load Tap Changer Analyzers and Winding
VANGUARD LOAD TAP CHANGER ANALYZER (LTCA) VERSION 2.xx SOFTWARE MANUAL For Use with Vanguard s LTCA-10, LTCA-40, WRM-10P, WRM-40, TRM-20, TRM-40, TRM-203, and TRM-403 Load Tap Changer Analyzers and Winding
Oracle General Navigation Overview
 Oracle 11.5.9 General Navigation Overview 1 Logging On to Oracle Applications You may access Oracle, by logging onto the ATC Applications Login System Status page located at www.atc.caltech.edu/support/index.php
SAS Mobile BI 8.1 for Windows 10: Help
 SAS Mobile BI 8.1 for Windows 10: Help Welcome Getting Started How Do I Use the App? Check out the new features. View the videos: SAS Mobile BI for Windows playlist on YouTube Use JAWS software? See the
Bombardier Business Aircraft Customer Services. Technical Publications. SmartPubs Viewer 3.0 User Guide. Updated January 2013 [2013]
![Bombardier Business Aircraft Customer Services. Technical Publications. SmartPubs Viewer 3.0 User Guide. Updated January 2013 [2013]](/thumbs/90/103657167.jpg "Bombardier Business Aircraft Customer Services. Technical Publications. SmartPubs Viewer 3.0 User Guide. Updated January 2013 [2013]") Bombardier Business Aircraft Customer Services Technical Publications SmartPubs Viewer 3.0 User Guide Updated January 2013 [2013] Table of Contents Application Views... 5 Collection View... 5 Manual View...
Bombardier Business Aircraft Customer Services Technical Publications SmartPubs Viewer 3.0 User Guide Updated January 2013 [2013] Table of Contents Application Views... 5 Collection View... 5 Manual View...
GIS DATA SUBMISSION USER GUIDE. Innovation and Networks Executive Agency
 Innovation and Networks Executive Agency GIS DATA SUBMISSION USER GUIDE Innovation and Networks Executive Agency (INEA) W910 Chaussée de Wavre 910 B-1049 Brussels, Belgium Tel: +32 (0)2 29 95252 Fax: +32
Welcome! Table of contents:
 Table of contents: Welcome!... 1 User interface... 2 Working with menus... 2 Working with toolbars... 4 Navigating between slides... 4 Entering text... 5 Selecting text and objects... 6 Spell checking...
Introducing Gupta Report Builder
 Business Reporting Chapter 1 Introducing Gupta Report Builder You can use Report Builder to design reports. This chapter describes: Our approach to building reports. Some of the reports you can build.
PowerPoint Essentials 1
 PowerPoint Essentials 1 LESSON SKILL MATRIX Skill Exam Objective Objective Number Working with an Existing Presentation Change views of a presentation. Insert text on a slide. 1.5.2 2.1.1 SOFTWARE ORIENTATION
Welcome To Autotrak Alert + Help Menu
 Welcome To Autotrak Alert + Help Menu Dear Valued Customer welcome to Alert+. In this document you will find an easy to follow break down of the Alert+ website and examples to help you along the way. Please
MyTrainingPlan. PocketPC User s Guide
 MyTrainingPlan PocketPC User s Guide January 2005 This document applies for MyTrainingPlan 2.03 and subsequent versions. Copyright 2001-2005, Exposé Corp. All rights reserved. Table of Contents 1 Introduction...
User Guide Android App. Get the most out of the MapItFast app on your Android device with this user guide.
 User Guide Android App Get the most out of the MapItFast app on your Android device with this user guide. Last Updated: January 2017 Disclaimer The use of GPS devices, tablets and smartphones with MapItFast
Navigating and Managing Files and Folders in Windows XP
 Part 1 Navigating and Managing Files and Folders in Windows XP In the first part of this book, you ll become familiar with the Windows XP Home Edition interface and learn how to view and manage files,
Sedao Ltd. Content User Manual. User Manual to cover all basic functions of Content Manager version 1.5.4
 Sedao Ltd Content User Manual User Manual to cover all basic functions of Content Manager version 1.5.4 Contents Introduction... 2 Installing Sedao content manager... 2 Starting Sedao Content Manager...
Tabular Building Template Manager (BTM)
") Tabular Building Template Manager (BTM) User Guide IES Vi rtual Environment Copyright 2015 Integrated Environmental Solutions Limited. All rights reserved. No part of the manual is to be copied or reproduced
Tabular Building Template Manager (BTM) User Guide IES Vi rtual Environment Copyright 2015 Integrated Environmental Solutions Limited. All rights reserved. No part of the manual is to be copied or reproduced
DragNet (Fixed WiMAX) d Manual version 1.1
 d Manual version 1.1") DragNet (Fixed WiMAX) 802.16d Manual version 1.1 Projector User Manual Installation...... 2 Quick Start... 2 Create a Projection...... 3 Getting a Quick Projection........ 6 Procedure for Creating a BVS
DragNet (Fixed WiMAX) 802.16d Manual version 1.1 Projector User Manual Installation...... 2 Quick Start... 2 Create a Projection...... 3 Getting a Quick Projection........ 6 Procedure for Creating a BVS