iii Product Name User Guide
|
|
|
- Sherilyn Adams
- 5 years ago
- Views:
Transcription

1 BC
2 Copyright 2015 Sanford, L.P. All rights reserved. Rev. 10/2/17 No part of this document or the software may be reproduced or transmitted in any form or by any means or translated into another language without the prior written consent of Sanford, L.P. Sans is a DejaVu font. The DejaVu fonts are based on Vera fonts copyright by Bitstream, Inc. Glyphs in the DejaVu fonts imported from Arev fonts are copyright by Tavmjong Bah. All Rights Reserved. Trademarks DYMO and XTL are trademarks or registered trademarks in the US and other countries. All other trademarks are the property of their respective holders. Legal Notices The PDF-417 barcode software program is distributed under the Mozilla Public License v2.1 ("MPL"). The QR code barcode software program and the Qt application framework software program, provided by The Qt Company, are each distributed under the Lesser General Public License v2.1 or greater ("LGPLv2.1"). The label maker software contains components that are distributed under the BSD license. For copies of each of licenses mentioned above, or information on how to obtain the relevant source code, visit: To request copies of corresponding source or object code licensed by one of the foregoing licenses, send a money order or check for USD $10 to: DYMO License Request Newell Rubbermaid 6655 Peachtree Dunwoody Road Atlanta, GA USA Please indicate the licensed software and the license stated above in your request.
3 iii Product Name
4 Contents 1 About Your New Label Maker 1 Registering Your Label Maker 1 What s New 2 Getting to Know Your Label Maker 2 Connecting the Power 2 Charging the Battery 3 Removing and Replacing the Battery 4 About Labels 4 Inserting the Label Cartridge 4 Removing the Label Cartridge 5 Selecting a Label Cartridge 5 Removing the Label Backing 6 Using Your Label Maker 6 Keypad 9 Touch Screen Display 10 Status Bar 10 Home Screen 11 Action Bar 11 Label Editor 12 Using the Touch Screen 12 Navigating Labels 14 Using the Label Applications 14 Setting Default Label Properties 15 Quick Label 15 General Label 16 Patch Panel Label 17 Flag Label 17 Laminated Cable Wrap Label 18 Cable Wrap Label 19 Heat-Shrink Tube Label Block Label 20 Horizontal Breaker Label 21 Vertical Breaker Label 22 Terminal Block Label 22 Asset Tracking Label 23 Distribution Panel Label 24 Materials Management Label 24 Pipe Marking Label 25 Arc Flash Label 25 Safety Label 26 Changing Label Applications 27 Editing and Formatting Text on Labels 27 Editing Text 27 Changing the Text Size 28 Changing the Text Style 28 Changing the Text Color 28 Rotating the Text iv XTL 500
5 29 Aligning the Text 29 Inserting Punctuation 29 Inserting Symbols 29 Inserting International Characters 30 Creating a Vertical Label 31 Working with Objects on a Label 31 Inserting a Text Box 31 Inserting an Image 32 Inserting a Barcode 33 Inserting a Shape 33 Manipulating Objects 33 Selecting an Object 33 Resizing an Object 34 Moving an Object 34 Positioning an Object 34 Aligning Objects 34 Arranging Objects 35 Copying an Object 35 Deleting an Object 35 Creating a Series of Labels 37 Using the Library 37 Saving Labels 37 Opening Saved Labels 37 Deleting Saved Labels 38 Using Favorites 39 Changing the Settings 39 Changing the Language 39 Changing the Units of Measure 39 Changing the Screen Brightness 40 Changing the Auto Shut-off Time 40 Changing the Recall Data Setting 40 Setting the Print Options 41 Print Range 41 Number of Copies 41 Collate 42 Mirror 42 Cut Labels 42 Feed 43 Setting the Default Barcode 43 Restoring the Label Application Default Settings 43 Restoring Factory Default Settings 44 Connecting the Label Maker to your Computer 44 Downloading and Installing DYMO ID Software 44 Connecting the Label Maker to your Computer 45 About DYMO ID Software 45 Transferring Files 45 Updating the Label Maker Software 47 Caring for the Label Maker 47 Cleaning the Label Maker v XTL 500
6 47 Cleaning the Print Head 48 Cleaning the Cutter Blade 48 Cleaning the Sensors 49 Troubleshooting 51 Images and Symbols 51 ISO 52 GHS 53 WHMIS 53 Electrical 53 Pro AV 54 Arrows 54 Symbols 55 Documentation Feedback 55 Environmental Information 56 Safety Precautions for Lithium Polymer Battery vi XTL 500
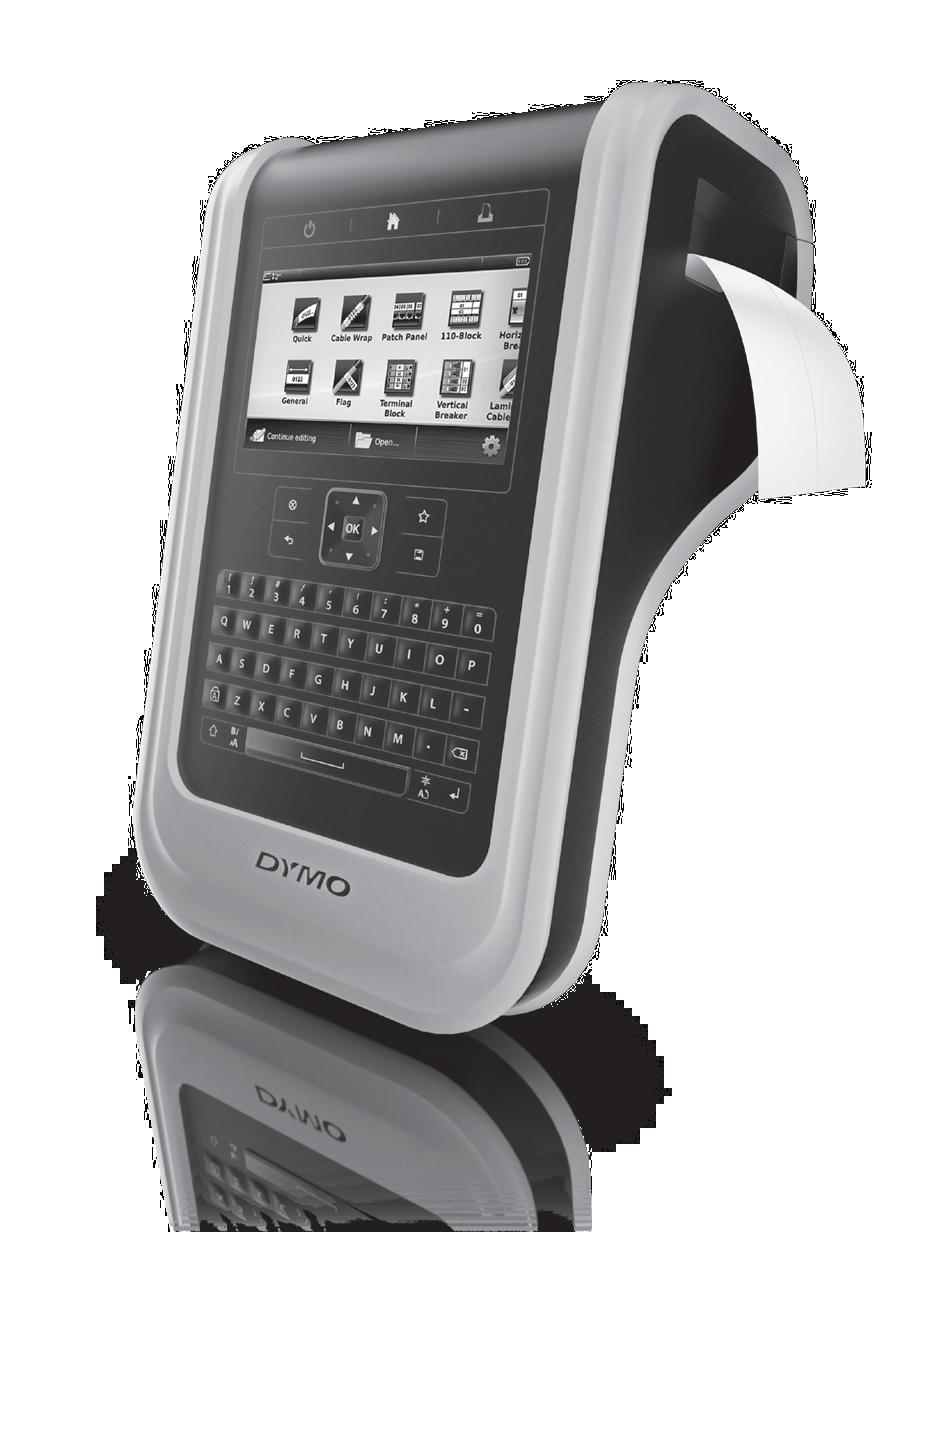
7 About Your New Label Maker With the DYMO XTL 500 electronic label maker, you can design and print multiple label types, including barcode labels, panel labels, and heat shrink tubes. The label maker uses DYMO XTL label cartridges in label widths of 1/4, 3/8, 1/2, 3/4, 1, 1 1/2, or 2 (6 mm, 9 mm, 12 mm, 19 mm, or 24 mm, 41 mm, or 54 mm). Labels are available in a full range of temperature, chemical, and UVresistant materials, including continuous tape and pre-sized labels. Visit for information on obtaining labels and accessories for your label maker. Registering Your Label Maker Visit to register your label maker online. During the registration process you will need the serial number, which is located under the label compartment cover. Register your label maker to receive these benefits: Notification of software upgrades by Special offers and new product announcements What s New See Updating the Label Maker Software on page 45. Version 1.1 Resize a QR code to automatically fit the selected label size. Choose the number of times the text is repeated on the label with the improved Cable Wrap label application. 1 XTL 500
 6 Label compartment 3 Touch screen display 7 Battery compartment")


8 Getting to Know Your Label Maker Become familiar with the parts of your label maker Figure 1 1 Power and USB connectors 5 Label compartment cover release 2 On/Off (Cancel printing) 6 Label compartment 3 Touch screen display 7 Battery compartment 4 Label exit slot Connecting the Power The label maker is powered by a rechargeable, lithium-polymer (LiPo) battery. The battery installed in your label maker ships partially charged. For best results, fully charge the battery before using the label maker for the first time. See Power Status on page 10 for information about visually determining the battery charging status. Charging the Battery Fully charging a discharged battery will take approximately three and a half hours. You can continue to work as long as the power adapter is connected. Make sure to read the LiPo Safety Precautions found on page 56. To charge the battery 1 On the left side of the label maker, gently lift and turn the connector cover to expose the power connector. See Figure 2. Lift and turn Figure 2 2 XTL 500


9 2 Plug the power cord into the power adapter. See Figure 3. 3 Plug the barrel end of the power adapter into the power connector. Power connector Power adapter Power cord 4 Plug the power cord into a power outlet. The power status will show charging in the upper right corner of the label maker s display. Figure 3 Removing and Replacing the Battery The LiPo battery is designed to provide years of service. In the unlikely situation that you need to replace the battery, a replacement battery can be ordered from Make sure the power adapter and USB cable are disconnected before handling the LiPo battery. To remove the battery 1 Press and hold for approximately five seconds to turn the power completely off. 2 Disconnect the power adapter and USB cable. 3 Using a #1 Phillips head screwdriver, loosen the screw holding the battery cover in place. See Figure 4. The screw is attached to the battery cover. Do not remove the screw completely from the cover. 4 Lift off the cover. 5 Pinch the sides of the battery connector to release and gently pull up to disconnect the battery. See Figure 5. 6 Remove the battery. 7 Insert the new battery and gently press the connector into place. 8 Replace the cover over the battery compartment. Pinch and pull up Figure 4 Figure 5 3 XTL 500
.")


10 9 Tighten the screw only until the battery cover is secure. Make sure to read the LiPo Safety Precautions found on page 56. About Labels The label maker uses DYMO XTL label cartridges in label widths of 1/4, 3/8, 1/2, 3/4, 1, 1 1/2, or 2 (6 mm, 9 mm, 12 mm, 19 mm, or 24 mm, 41 mm, or 54 mm). Labels are available as continuous tape or pre-sized labels for specific applications. The label cartridge that is inserted in the label maker determines the type of labels you can create and print. For example, if you have a 1 continuous label cartridge inserted, you will not be able to create a heat-shrink tube or laminated cable wrap label. See Using the Label Applications on page 14 for information about the types of labels you can use with each label application. Visit for information on obtaining labels for your label maker. Inserting the Label Cartridge A sensitive electronic chip is embedded in the side of each label cartridge. This chip contains information that is read by the label maker and DYMO ID software. This chip must be kept clean to function properly. Do not touch the electronic chip in the side of the cartridge; oils from your hand may prevent the chip from working properly. See Figure 6. To insert the label cartridge 1 Press the label compartment release and lift the cover. See Figure 7. 2 Make sure the tape and ribbon are taut across the mouth of the label cartridge and that the tape passes between the label guides. See Figure 6. To tighten the ribbon, turn the ribbon rewind spool in the direction indicated by the arrow on the cartridge. 3 Insert the cartridge and press firmly until the cartridge clicks into place. 4 Close the label compartment cover. Removing the Label Cartridge Ribbon rewind Do not touch! Label guides Figure 6 Press to release cover Figure 7 You can design labels without a label cartridge inserted in the label maker. Just remember to insert a compatible label cartridge before attempting to print. See Using the Label Applications on page XTL 500


11 To remove the label cartridge 1 Press the label compartment release and lift the cover. See Figure 7. 2 Remove the label cartridge. You can now create labels using any of the label applications. When you start a new label, you will be asked to select a label cartridge to use. Selecting a Label Cartridge You can design any type of label when the label compartment is empty. Each time you select a label application, you are asked to select the properties for your new label. To select a label cartridge 1 Remove the label cartridge from the label maker. You are warned that the label compartment is empty. 2 Select a label application from the Home screen. You are asked to select a label cartridge. The labels available for you to choose from are filtered to show only those label cartridges appropriate for the label application you selected. 3 Do one of the following: Enter the part number of the label cartridge you wish to use. Scroll through the list of labels and select a specific label. Select Enter cartridge properties. You are asked to select the properties for the label you wish to create. Removing the Label Backing DYMO XTL continuous labels have an easy-to-peel split back for easy removal of the label backing. Does not apply to heat-shrink tubing or pre-sized labels. To remove the continuous label backing 1 Locate the split on the label backing. 2 Gently pinch the label lengthwise, folding toward the printed side of the label. The label backing will separate. 3 Carefully peel away the backing from the label. To remove pre-sized labels from the backing Gently lift the corner of the label and peel the label from the backing. Remove split backing Continuous labels Figure 8 Peel label from backing Pre-sized labels Figure 9 5 XTL 500
 7 Backspace/Delete 13 Caps lock 2 Home 8 Return 14 Navigation 3 Print/Print options 9 Rotate/Align 15 Back 4 Touch screen display")
12 Using Your Label Maker Become familiar with the features and function keys on your label maker On/Off (Cancel printing) 7 Backspace/Delete 13 Caps lock 2 Home 8 Return 14 Navigation 3 Print/Print options 9 Rotate/Align 15 Back 4 Touch screen display 10 Space bar 16 New label/clear 5 Favorites 11 Text size/text style 17 OK 6 Save 12 Shift Keypad In addition to the alphanumeric keys, a number of function keys give you quick access to the features of your label maker. Power Figure 10 The key turns the power on and off. Pressing also cancels printing. To conserve power, the screen dims after thirty seconds of inactivity and the label maker enters standby mode after three minutes of inactivity. After approximately ten more minutes of inactivity, the label maker automatically shuts off. You can change the amount of time the label maker remains in standby mode before automatically shutting off. See Changing the Auto Shut-off Time on page 6 XTL 500
13 40. To turn power on Press To turn on the display when in standby mode Press any key once. To turn power completely off Press and hold. for five seconds. When the label maker is turned off, the current label and settings are remembered so you can continue working the next time the label maker is turned on. If the battery is removed and the power adapter is disconnected, the label and settings you are currently editing will be lost. Home The key returns you to the Home screen at any time. See Home Screen on page 10 for more information about the Home screen. Print The key prints the currently displayed label. To print immediately Press To set print options Press and hold To cancel printing Press once. for several seconds. once while label maker is printing. Shift The key when used with another key selects the function or symbol printed above that key. + a letter Inserts an uppercase letter. Inserts a lowercase letter if Caps Lock is turned on. + a number Inserts the symbol over the selected number. + Opens the Style tool. See Changing the Text Style on page Opens the Align tool. See Aligning the Text on page 29. The key is also used with the navigation keys to select text in a text box. See Navigation Keys on page 9. Clear The key clears a label of all text and formatting or, if in a list screen, removes the selected item. 7 on label edit screen Deletes all text and formating leaving a single blank label. in a list screen Deletes a saved label. Also deletes a template or an image added by you. Included images or templates cannot be deleted. XTL 500
14 Save The key saves the labels you are currently editing. See Saving Labels on page 37. Favorites The key opens the list of labels and images that you previously assigned to Favorites. Selecting a favorite label Opens that label file in the appropriate label editor. Selecting a favorite image Back Inserts the image into the label being edited at the current cursor postion. The key cancels an action or exits from a menu without making a selection. Press on a label edit screen Undoes the last edit to the label. Press on a wizard screen Moves back one page of the wizard. Press in a list or menu Moves up one level in the list or menu. Caps Lock The key toggles capitalization on and off. Caps lock turned on Caps lock turned off All letters that you enter are capitalized. The appears in the status bar. All letters entered appear in lowercase. indicator Backspace The key deletes the character to the left of the cursor. When an object is selected, deletes the object. OK The key makes a selection, such as choosing a label application, a label file, an image, a list item, or a setting. 8 XTL 500

15 Navigation Keys For most tasks you can use the touch screen to interact with the label maker. However, you can also use the navigation keys as follows: In a text box or moves the cursor one character to the left or right. or moves the cursor up or down one line. Pressing in any corner of the navigation key will move the cursor to the beginning or end of the current line. In a multi-cell label such as patch panel When a text box, image, barcode. or shape is selected + or selects characters beginning at the cursor position to the right or left. + or selects characters beginning at the cursor position to the same position in the line above or below. + a corner of the navigation key selects characters beginning at the cursor position to the beginning or end of the text box. or moves the cursor one cell to the left or right. At the end of the label, moves the cursor to the next label. Resizes or moves the selected object in small increments in the direction of the navigation key. Pressing with a navigation key resizes or moves the object in larger increments. In menus and lists Use the navigation keys along with to select an item. Touch Screen Display The touch screen display is divided into three areas: Status bar Label edit area Action bar 9 XTL 500
16 Status Bar The status bar contains a number of indicators that show label information, label type, Caps lock, USB connection, and power status. Current label type and width in label maker Label type selected Caps lock indicator USB connection status Power status Power Status The power status is shown at the top right of the display and shows the current battery status. Level of battery charge remaining. Connected to power adapter and charging. Bars will move from left to right while charging is in progress. Very low battery charge remaining; you may not be able to print. Battery completely discharged or missing. Home Screen The Home screen contains all the label editor applications. This is where you will start creating labels for your specific application. Current label type and width in the label maker Label type selected Caps lock indicator USB connection status Power status Select a label type Continue editing the current label Open a saved label Change the settings When you press the key while editing a label, the Home screen is displayed; however, your current editing session remains active in the background. To return to editing the label, select Continue editing. If you select a new label application and the label currently being edited is not yet saved, you are prompted to save the label. When you press the key while in a menu or settings screen, any settings or other actions that have not been saved or confirmed are lost. 10 XTL 500


17 The Home screen contains the following three actions: Continue editing Return to the label you were editing before pressing. Open a saved label file Settings Open a previously saved label file. Change the label maker settings. Action Bar The Action bar below each screen contains actions that are specific to your current task. For example, the Home screen contains the following actions: Tap an icon to select that action. Label Editor Continue editing the current label Open a saved label Go to Settings Each label application contains a custom editor for the type of label you are creating. At the bottom of the label editor are feature buttons which are enabled when that feature is available based on your label type and content. Current label/number of labels Label length Add text formatting Set label properties View full screen Insert text box, barcode, image, symbol, or shape Create a series of labels Go to next label Undo/ Redo Zoom in on label Properties Insert Serialize Change the properties for the label. Available for all label types where properties can be customized. See the properties available for each label type in Using the Label Applications on page 14. Add a text box, a barcode, an image, a symbol, or a shape on the label. The objects available depend on the label type selected. See Working with Objects on a Label on page 31. Automatically fill panel labels, or automatically create a series of single labels. See Creating a Series of Labels on page XTL 500

18 Go to View a series of labels, one at a time. Only available when the current file contains more than one label. Also used to locate label errors. Undo or redo the previous action. Zoom in or out on the label being edited. Select Auto zoom to automatically resize the label to fit the display. Show the label in full screen mode. Using the Touch Screen For most functions, you interact with the label maker using the touch screen. You can use your fingers or a plastic stylus with a rounded tip to tap, double-tap, pinch, and swipe objects on the touch screen. Do not press on the touch screen with a hard, sharp, or pointed object. Double-tap to select a word Drag to select more or less text Drag the handles to resize objects Tap Double-tap Drag Swipe To select an action or object. To move the cursor within text. To select an object which can then be moved or resized. To select a word, edit a barcode, change a shape or image object. To select more or less text in a text object. To move selected text or an object. To scroll through menus, lists, and wizard steps. To display additional label applications or labels that are off the screen. Navigating Labels When a label file contain more than one label, you can view each label. You can also locate and fix labels with errors before printing. To view labels 1 In the label editor, tap Go to. 2 Tap Labels. 3 Tap + or - to select the label you wish to view. The label appears in the editor. 4 Tap Done when finished. To find errors 1 In the label editor, tap Go to. 2 Tap Errors. 3 Tap + or - to select the label with the error you wish to fix. The label appears in the editor. 4 Tap Done when finished. 12 XTL 500
19 13 XTL 500
20 Using the Label Applications The label maker includes a number of label applications that make it easy to create a label for your specific job. Label applications appropriate for the currently inserted label cartridge appear to the left of those label applications that are not compatible. A caution symbol appears when a label application and the current label cartridge are not a match. The following label applications are available for your specific labeling job and are described in detail in this section: Quick Cable Wrap Patch Panel 110-Block Laminated Cable Wrap Terminal Block Pipe Marking Arc Flash Safety General Flag Distribution Panel Horizontal Breaker Heat-shrink Tube You can create and save labels for applications that are not compatible with the currently inserted label cartridge by removing the cartridge and leaving the label compartment empty. However, make sure the correct label cartridge is inserted before attempting to print. This section describes each label application and the label properties you can change to customize your label. Setting Default Label Properties Vertical Breaker Asset Tracking Materials Management Most label editors contain a wizard which steps you through the properties that must be set each time you create a label. For labels you use frequently, you can avoid stepping through the wizard by setting default properties for that label type. To set default label properties 1 While in a label editor, tap. 2 Tap a property and change the setting as appropriate. 3 Tap Set as default on the bottom of the property screen. 4 Tap Set as default again to confirm. Next time you select that label application, you will not have to set properties to get started. You can change the properties for an individual label at any time by selecting. You can always clear any default label properties you set for a label application. See Restoring the Label Application Default Settings on page XTL 500
21 Quick Label The Quick Label is a simple, text-only label. No properties need to be set to get started. As you add or delete text, the length of the label will change automatically to fit the text. One text object is already included on the label by default. Barcodes, images, and shapes cannot be added, and you cannot create multiple labels using serialization. All text formatting can be applied to this label. Text formatting applies to all text on the label. To apply text formatting to only some of the text, create a general label. Quick labels can be printed on any type of continuous labels. The label properties you can set are: Label outline Yes - Show label outline. No - Hide label outline. (Default) Leader/trailer match Yes - Blank space is equal at the beginning and end of the label. (Default) No - No blank space added at the end of the label. To create a quick label 1 From the Home screen, tap Quick. 2 Add text and formatting. General Label The General Label editor has no special formatting or templates associated with it. To create a custom design, you can add text, images, shapes, or a barcode. See Working with Objects on a Label on page 31 for more information. By default, one text object is available in the center of the label. This type of label allows text box, barcode, image, and shape objects. Text size and style apply to the currently selected text. If no text is selected, the size and style apply to all the text in the text box. Use serialization to automatically create a series of labels. See Creating a Series of Labels on page 35. General labels can be printed on both continuous and pre-sized labels. The label properties you can set are: Label orientation Label length Label outline Leader/trailer match Landscape (Default) Portrait Changing the label orientation removes any content on the label, creating a new blank label. Minimum: 1 (25.4 mm) This property is only available for continuous label cartridges. You cannot change the label length when a pre-sized label is selected. Yes - Show label outline. No - Hide label outline. (Default) Yes - Blank space is equal at the beginning and end of the label. (Default) No - No blank space is added at the end of the label. This property is only available for continuous label cartridges. 15 XTL 500
22 To create a general label 1 From the Home screen, tap General. 2 Follow the steps to configure your label. 3 Add text and formatting. Patch Panel Label The Patch Panel editor allows you to quickly create a label that can be applied to datacom and electrical panels. Each label can contain up to 99 ports and you can divide the ports into equal groups. One text object is already added for each port. Barcodes, images, and shapes cannot be added to a patch panel label. Text size and style apply to all ports on the label and to all labels in the file. When Auto fit text is selected for font size, the text in each port is automatically resized to fit that port. So you may see differences in text size for each port. Use serialization to automatically populate the ports. When all the ports are filled on the current label, a new label is created. See Creating a Series of Labels on page 35. Patch panel labels can be printed on any type of continuous labels. The label properties you can set are: Port numbers Label setup Dimensions Separator lines Label outline You create a patch panel label by using a pre-designed template or by entering the label properties manually. See Transferring Files on page 45 for information about transferring the latest templates from your computer. To use a patch panel template 1 From the Home screen, tap Patch Panel. 2 Tap Apply template. 3 Select the template you wish to use. 4 Add text and formatting. Number of ports - maximum of 99 ports In groups of - Number of ports available per group is determined by the number of ports selected so that each group is equal. Continuous - Print groups of ports as one continuous label. Separate - Print each group of ports as a separate label. (Default) Center to center distance - Distance from the center of one port to the center of the next port. Minimum: 5/32 (3.8 mm) Maximum: 20 (508 mm) Group clearance - Distance between groups of ports when one continuous label is selected. Minimum: 1/64 (0.4 mm) Maximum: 20 (508 mm) Yes - Print a separator line between each port. (Default) No - Don t print a separator line between each port. Yes - Show label outline. No - Hide label outline. (Default) 16 XTL 500
23 To create a patch panel label manually 1 From the Home screen, tap Patch Panel. 2 Follow the steps to configure your label. 3 Add text and formatting. Flag Label The flag label is one of several cable management specific labels. The flag label consists of two matching segments that when wrapped around a cable form a flag allowing the user to see the same data from both sides. One text box is automatically added to the label. You can add additional text box, image, shape, or barcode objects to a flag label. Text size and style apply to the currently selected text. If no text is selected, the size and style apply to all the text in the text box. Use serialization to automatically create a series of labels. See Creating a Series of Labels on page 35. Flag labels can be printed on any type of continuous labels. A vertical dashed line will be printed in the center of the wrap part of the label to help you easily center the label on the cable. The label properties you can set are: Cable type and diameter Flag length Cable type: CAT 5/6, COAX, AWG: 4/0-2/0, AWG: 0-2, AWG: 3-5, AWG: 6+, or Custom Diameter: Available when Custom is selected for Cable type. Minimum: 5/32 (4 mm) Maximum: 2 (50.8 mm) Minimum: 7/16 (11.1 mm) Maximum: 10 (254 mm) Label outline Yes - Show label outline. No - Hide label outline. (Default) To create a flag label 1 From the Home screen, tap Flag. 2 Do one of the following: Select the cable type. Tap Custom and then select the cable diameter. 3 Follow the steps to configure your label. 4 Add text and formatting. Laminated Cable Wrap Label The laminated cable wrap label is one of several cable management specific labels. This label contains two segments: a segment for the label content and an adhesive-backed, transparent segment that wraps around the cable covering the printed content for durability. One text box is automatically added to the label. You can add additional text box, image, shape, or barcode objects to a laminated cable wrap label. 17 XTL 500
24 Text size and style apply to the currently selected text. If no text is selected, the size and style apply to all the text in the text box. Laminated cable wrap labels can only be printed using pre-sized Laminated Wire/ Cable Wrap label cartridges. Use serialization to automatically create a series of labels. See Creating a Series of Labels on page 35. Laminated cable wrap label properties are based on the label cartridge selected and cannot be changed. To create a laminated cable wrap label 1 From the Home screen, tap Laminated Cable Wrap. The editor displays a new blank label based on the label cartridge inserted. If no label cartridge is inserted, you are asked to select a label cartridge. 2 Add text and formatting. Cable Wrap Label The cable wrap label is one of several cable management specific labels. The content of the cable wrap label is repeated several times vertically so that it can be viewed from any angle when the label is wrapped around the cable. One text box is automatically added to the label. Additional text box, barcode, image, and shape objects cannot be added to a cable wrap label. Text size and style apply to the text on the label. Use serialization to automatically create a series of labels. See Creating a Series of Labels on page 35. Cable wrap labels can be printed on any type of continuous labels. The label properties you can set are: Cable type and diameter Text repeat To create a cable wrap label 1 From the Home screen, tap Cable Wrap. 2 Do one of the following: Select the cable type. Tap Custom and then select the cable diameter. 3 Follow the steps to configure your label. 4 Add text and formatting. Cable type: CAT 5/6, COAX, AWG: 4/0-2/0, AWG: 0-2, AWG: 3-5, AWG: 6+, or Custom Diameter - Available when Custom is selected for Cable type. Minimum: 5/32 (4 mm) Maximum: 2 (50.8 mm) Auto repeat (default) - Number of repeats is determined by label size. Minimum 4 repeats. User selected: Minimum: 1; Maximum: XTL 500
25 Heat-Shrink Tube Label The heat-shrink tube label is one of several cable management specific labels. Heat-shrink tube labels can be printed on any continuous or pre-sized Heat-Shrink Tube labels. One text object is automatically added to the label. You can add additional text box, barcode, image, or shape objects to heat-shrink tube labels. Text size and style apply to the currently selected text. If no text is selected, the size and style apply to all the text in the text box. Use serialization to automatically create a series of labels. See Creating a Series of Labels on page 35. The following table should help in choosing the correct label width for your application. Heat-shrink tube size Minimum cable diameter The label properties you can set are: Maximum cable diameter Minimum AWG Maximum AWG 1/4 (6 mm) 0.05 (1.24 mm) 0.14 (3.5 mm) /2 (12 mm) 0.12 (3 mm) 0.28 (7.2 mm) (24 mm) 0.22 (5.5 mm) 0.57 (14.50 mm) 3 4/0+ 2 (54 mm) 0.46 (11.5 mm) 1.27 (32.3 mm) 3 4/0+ 2 1/8 (54 mm) 0.46 (11.5 mm) 1.27 (32.3 mm) 3 4/0+ Label orientation Label length Landscape (Default) Portrait Changing the label orientation removes any content on the label, creating a new blank label. Minimum: 1 1/4 (31.75 mm) Default: 2 (50.8 mm) Label outline Leader/trailer match Yes - Show label outline. No - Hide label outline. (Default) Yes - Blank space is equal at the beginning and end of the label. (Default) No - No blank space added at the end of the label. This property is only available when using continuous label cartridges. To create a heat-shrink tube label 1 From the Home screen, tap Heat-Shrink Tube. 2 Follow the steps to configure your label. 3 Add text and formatting. 110-Block Label The 110-block label is one of several datacom specific labels. You enter data into one of three pre-defined block formats depending on the block type you select. One text object is automatically added for each block. Additional text box, barcode, image, and shape objects cannot be added to 110-block labels. 19 XTL 500
26 Text size and style apply to all blocks on the label and all labels in the file. When Auto fit text is selected for font size, the text is automatically resized to fit that block. So you may see differences in text size for each block. Use serialization to automatically populate the blocks. When all the blocks are filled on the current label, a new label is created. See Creating a Series of Labels on page block labels can be printed on any type of continuous labels. The label properties you can set are: Block type Separator lines Label outline To create a 110-block label 1 From the Home screen, tap 110-Block. 2 Select a block type. 3 Add text for each block. 4 Add formatting as desired. Horizontal Breaker Label C4-4 pair - Data grade C4-4 pair - Voice grade C5-5 pair - Voice grade Yes - Print a separator line between each block. No - Don t print a separator line between each block. (Default) Yes - Show label outline. No - Hide label outline. (Default) The horizontal breaker label is one of two types of labels for use on a breaker box. See Vertical Breaker Label on page 21. One text object is automatically added for each breaker. Additional text box, barcode, image, and shape objects cannot be added to horizontal breaker labels. Text size and style apply to all breakers on the label and all labels in the file. When Auto fit text is selected for font size, the text is automatically resized to fit that breaker. So you may see differences in text size for each breaker. Use serialization to automatically populate the breakers. When all the breakers are filled on the current label, a new label is created. See Creating a Series of Labels on page 35. Horizontal breaker labels can be printed on any type of continuous labels. 20 XTL 500
27 The label properties you can set are: Breaker dimensions Number of breakers - Maximum: 99 breakers Breaker width - Minimum: 1/4 (6.35 mm); Maximum: 5 (126.9 mm) Breaker multipliers Multiplier for each breaker. Maximum: 4 Can be manually entered in 0.5 increments, such as 2.5, 3.5 and so on. Label outline Yes - Show label outline. No - Hide label outline. (Default) Separator lines Leader/trailer match Yes - Print a separator line between each breaker. (Default) No - Don t print a separator line between each breaker. Yes - Blank space is equal at the beginning and end of the label. (Default) No - No blank space is added at the end of the label. To create a horizontal breaker label 1 From the Home screen, tap Horizontal Breaker. 2 Follow the steps to configure your label. 3 Add text for each breaker. 4 Add formatting as desired. Vertical Breaker Label The vertical breaker label is one of two types of labels for use on a breaker box. See Horizontal Breaker Label on page 20. One text object is automatically added for each breaker. Additional text box, barcode, image, and shape objects cannot be added to vertical breaker labels. Text size and style apply to all breakers on the label and all labels in the file. When Auto fit text is selected for font size, the text is automatically resized to fit that breaker. So you may see differences in text size for each breaker. Use serialization to automatically populate the breakers. When all the breakers are filled on the current label, a new label is created. See Creating a Series of Labels on page 35. Vertical breaker labels can be printed on any type of continuous labels. The label properties you can set are: Breaker dimensions Number of breakers - Maximum: 99 breakers Breaker height - Minimum: 1/4 (6.35 mm); Maximum: 5 (126.9 mm) Breaker poles Number of poles for each breaker. Maximum: 3 Label outline Yes - Show label outline. No - Hide label outline. (Default) Separator lines Leader/trailer match Yes - Print a separator line between each breaker. (Default) No - Don t print a separator line between each breaker. Yes - Blank space is equal at the beginning and end of the label. (Default) No - No blank space is added at the end of the label. To create a vertical breaker label 1 From the Home screen, tap Vertical Breaker. 21 XTL 500
28 2 Follow the steps to configure your label. 3 Add text for each breaker. 4 Add formatting as desired. Terminal Block Label Terminal block labels are created by specifying the orientation (portrait or landscape), the number of blocks, and the block height. One text object is automatically added for each block. Additional text box, barcode, image, and shape objects cannot be added to terminal block labels. Text size and style apply to all blocks on the label and all labels in the file. When Auto fit text is selected for font size, the text is automatically resized to fit that block. So you may see differences in text size for each block. Use serialization to automatically populate the blocks. When all the blocks are filled on the current label, a new label is created. See Creating a Series of Labels on page 35. Terminal block labels can be printed on any type of continuous labels. The label properties you can set are: Label orientation Portrait (Default) Landscape Terminal block dimensions Label outline Changing the label orientation removes any content on the label, creating a new blank label. Number of blocks. Maximum: 99 blocks Block height. Minimum: 5/32 (3.8 mm); Maximum: 20 (508 mm) Yes - Show label outline. No - Hide label outline. (Default) Separator lines Leader/trailer match Yes - Print a separator line between each block. (Default) No - Don t print a separator line between each block. Yes - Blank space is equal at the beginning and end of the label. No - No blank space is added at the end of the label. (Default) To create a terminal block label 1 From the Home screen, tap Terminal Block. 2 Follow the steps to configure your label. 3 Add text for each block. 4 Add formatting as desired. Asset Tracking Label Asset tracking labels are created using pre-designed templates. The list of available templates is based on the label cartridge you have selected. See Transferring Files on page 45 for information about transferring the latest templates from your computer. You can edit any text, barcode, image, or shape objects on the label, but you cannot edit the templates to add or delete objects. 22 XTL 500
29 Text size and style apply to the currently selected text. If no text is selected, the size and style apply to all the text in the text box. Use serialization to automatically create a series of labels. See Creating a Series of Labels on page 35. Asset tracking labels can be printed on any type of continuous or pre-sized labels. The label properties you can set are: Label length Label outline Minimum: 1 (25.4 mm) This property is only available for continuous label cartridges. You cannot change the label length if a pre-sized label is selected. Yes - Show label outline. No - Hide label outline. (Default) Leader/trailer match Yes - Blank space is equal at the beginning and end of the label. No - No blank space is added at the end of the label. (Default) Available only when a continuous label cartridge is selected. To create an asset tracking label 1 From the Home screen, tap Asset Tracking. 2 Select the template you would like to use. 3 Add text and formatting. Distribution Panel Label Distribution panel labels are created by specifying the number of connectors and the center to center distance between each connector. One text object is automatically added for each connector. Additional text box, barcode, image, and shape objects cannot be added to distribution panel labels. Text size and style apply to all connectors on the label and all labels in the file. When Auto fit text is selected for font size, the text is automatically resized to fit that connector. So you may see differences in text size for each connector. Use serialization to automatically populate the connectors. When all the connectors are filled on the current label, a new label is created. See Creating a Series of Labels on page 35. Distribution panel labels can be printed on any type of continuous labels. The label properties you can set are: Panel dimensions Label outline Number of connectors. Maximum: 99 connectors Center to center distance - Distance from the center of one connector to the center of the next connector. Minimum: 5/32 (3.8 mm) Maximum: 20 (508 mm) Yes - Show label outline. No - Hide label outline. (Default) Separator lines Yes - Print a separator line between each connector. (Default) No - Don t print a separator line between each connector. To create a distribution panel label 1 From the Home screen, tap Distribution Panel. 2 Follow the steps to configure your label. 23 XTL 500
30 3 Add text for each connector. 4 Add formatting as desired. Materials Management Label Materials management labels are created using pre-designed templates. The list of available templates is based on the label cartridge you have selected. See Transferring Files on page 45 for information about transferring the latest templates from your computer. You can add or edit any text, barcode, image, or shape objects on the label but you cannot edit the template to add or delete objects. Text size and style apply to the currently selected text. If no text is selected, the size and style apply to all the text in the text box. Use serialization to automatically create a series of labels. See Creating a Series of Labels on page 35. Materials management labels can only be printed on 3/4 (19 mm) and wider continuous or pre-sized labels. The label properties you can set are: Label outline Yes - Show label outline. No - Hide label outline. (Default) Leader/trailer match Yes - Blank space is equal at the beginning and end of the label. No - No blank space is added at the end of the label. (Default) Available only when a continuous label cartridge is selected. To create a materials management label 1 From the Home screen, tap. 2 Select the template you would like to use. 3 Add text and formatting. Pipe Marking Label Pipe marking labels are created using pre-defined layouts, and can be printed on any type of continuous labels. Text size and style apply to the currently selected text. If no text is selected, the size and style apply to all the text in the text box. One text object is automatically added for each connector. Additional text box, barcode, image, and shape objects cannot be added to pipe marking labels. Serialization cannot be used with pipe marking labels. 24 XTL 500
31 The label properties you can set are: Label setup ASME A ASME A ASME A ASME A Other 01 Other 02 Flow direction Left - Arrow placed to the left of the text. Right - Arrow placed to the right of the text. Both - Arrows placed on both sides of the text. Pipe diameter Minimum: 3/4 (19 mm) (default) Maximum: 10 (254 mm) To create a pipe marking label 1 From the Home screen, tap Pipe Marking. 2 Follow the steps to configure your label. 3 Add text and formatting. Arc Flash Label Arc flash labels are created using pre-designed templates. The list of available templates is based on the label cartridge you have selected. See Transferring Files on page 45 for information about transferring the latest templates from your computer. Text size and style apply to the currently selected text. If no text is selected, the size and style apply to all the text in the text box. You can add text box, barcode, image, or shape objects to the label. Use serialization to automatically create a series of labels. See Creating a Series of Labels on page 35. Because arc flash labels are printed on pre-defined templates, no properties can be set. To create an arc flash label 1 From the Home screen, tap Arc Flash. 2 Select the template you would like to use. 3 Add text and formatting. Safety Label Safety labels are created using pre-designed templates. The list of available templates is based on the label cartridge you have selected. See Transferring Files on page 45 for information about transferring the latest templates from your computer. Text size and style apply to the currently selected text. If no text is selected, the size and style apply to all the text in the text box. You can add text box, barcode, image, or shape objects to the label. 25 XTL 500
32 Use serialization to automatically create a series of labels. See Creating a Series of Labels on page 35. Because safety labels are printed on pre-defined templates, no properties can be set. To create an safety label 1 From the Home screen, tap Safety. 2 Select the template you would like to use. 3 Add text and formatting. Changing Label Applications After creating labels in one label application, you can change to a different label application. In some cases you will be asked if you want to reuse the data from the previous application. For some label applications, you may wish to create more than one type of label using the same data. For example, you create a 24 port patch panel label and you also want 24 cable wrap labels to place on the cables. The data recall feature allows you to switch label applications and recall the data to the new application. See Changing the Recall Data Setting on page 40 to change the default setting. Data recall is not available for label applications. To change the label application 1 Press Home. 2 Tap the new label application. If data recall is available for that application, a Recall data dialog box displays. 3 Select one of the following: Recall once - Recall data from the previous label this one time only. You will continue to be asked each time data recall is available. Always recall - Always recall data from the previous label. From now on data will always be recalled to the new label when possible. Not this time - Don t recall data this one time. You will continue to be asked each time data recall is available. Never recall - You will never be asked to recall data. 4 Tap Continue. The new label application is populated with the recalled data. 26 XTL 500

33 Editing and Formatting Text on Labels You can format text in a text box from the touch screen or using the keypad. The instructions in this section give both options when applicable. This section describes the following: Changing text size and style Rotating and aligning the text Inserting punctuation, symbols, and special characters Creating a vertical label Editing Text The number of lines of text that you can insert on a label depends on the size of the text and the width of the label. If the text is too large or you add too many lines, you will see a warning icon and receive an error message when you try to print. You can move the cursor position and select one or more characters in a text box using the touch screen or the keypad. See Navigation Keys on page 9 for information about moving the cursor and selecting text using the keypad. To edit text in a text box Tap once in a text box and add text using the keypad. Press to add a new line. Tap to display the Formatting tool bar. You can also apply text formats from the Properties list. Changing the Text Size You can select the font size for the text or you can have the text automatically sized to fit the available space on the label. See each label type in Using the Label Applications on page 14 for how changes to the text size are applied to that type of label. To change the text size 1 Select some text. To apply the size to all the text, select the text box. 2 Tap and. Or, on the keypad, press. The Font Size tool appears. 3 Select a font size from the list or tap Auto fit text. You can also enter a size directly in the Font size box. 27 XTL 500
34 Changing the Text Style You can add bold, italic, and underline to your text. You can also add a box around all the text in the selected text box. See Using the Label Applications on page 14 for how changes to the text style are applied to each type of label. To change the text style. 1 Select some text. To apply the style to all the text, select the text box. 2 Tap and. Or, on the keypad, press +. The Text Style tool appears. 3 Tap one or more styles. Changing the Text Color You can change the text color on the label from the foreground color to the background color. This can be useful when layering objects. For example, if you add a rectangular shape object and want to place contrasting text on top of the rectangle. To change the color 1 Select a text box. 2 Tap and. Foreground Background The Text Color tool appears. 3 Tap the color for the selected text. Rotating the Text The text on your label can appear horizontally or vertically. You can also rotate the text in 90 degree increments. To rotate the text 1 Select a text box. 2 Tap and. Or, on the keypad, press. The Text Orientation tool appears. 3 Select an orientation and/or a rotation. To create a vertical label, see Creating a Vertical Label on page XTL 500
35 Aligning the Text The text on your label can be aligned left, center, or right, vertically and horizontally. Align left Align center Align right Align top Align middle Align bottom To align the text 1 Select a text box. 2 Tap and. Or, on the keypad, press +. The Text Alignment tool appears. 3 Tap an alignment. Inserting Punctuation Punctuation characters can be inserted on your label. Once inserted, the character is treated the same as any other text. Refer to Symbols on page 54 for the complete list of punctuation characters available. To insert a punctuation 1 Press + any numeric key. The Symbols tool appears. 2 Tap a character to insert that character on the label. The currently selected character is inserted at the cursor position and the Symbols tool disappears after a few seconds. Inserting Symbols Fractions and other symbols can be inserted on your label. Once inserted, the symbol becomes a character and is treated the same as text. You can apply bold and underline to most symbols. Refer to Symbols on page 54 for the complete list of symbols available. To insert a symbol 1 From the edit screen, tap. 2 Tap Symbol and a category. 3 Tap the desired symbol to add it to the label at the cursor position. Symbols can also be inserted from the Symbols tool as described in Inserting Punctuation above. Inserting International Characters The label maker supports the extended Latin character set. Similar to using a mobile phone, holding down a letter key will display all the variations of that letter. 29 XTL 500
36 The order in which the variations appear depends on the language you have selected. For example, if French is selected as the language and you hold down the letter a, you will see à á â ã ä å and so on through all the variations available. To insert a character 1 Press and hold an alphanumeric key. The Diacritical tool appears and the selected character is added to the label at the cursor position. 2 Tap a character to insert that character on the label. The symbol is inserted and the Diacritical tool disappears after a few seconds. Creating a Vertical Label You can create a vertical label with the text in a horizontal or vertical orientation. The instructions in this section are for a general label type. To create a vertical label 1 From the Home screen, tap General. 2 Select Portrait as the label orientation. 3 Select the label length. 4 Add your text and formatting. 5 Tap and. The Text Orientation tool appears. 6 Tap to change the text to a vertical orientation. Vertical text on a portrait label 30 XTL 500
37 Working with Objects on a Label Depending on the label type, you can add one or more text box, image, barcode, or shape objects to customize your label. See Using the Label Applications on page 14 for a description of which objects can be used on each label type. Some label types have pre-designed templates with objects already in place. You only need to add your content. When you start a new label using a pre-designed template, you can add or edit objects on that label, but you cannot change the original template. Inserting a Text Box Most labels include at least one text box by default. Depending on the label type, you can add additional text boxes. See the description for each label type in Using the Label Applications on page 14 to determine whether you can add additional text boxes to that label. You cannot add a second text box until you have entered text in the first text box. To insert a text box 1 Tap Insert and select Text. 2 Move or resize the text box as desired. 3 Add text and formatting. Inserting an Image You can add one or more images to some types of labels. See the description for each label type in Using the Label Applications on page 14 to determine whether you can add images to that label.. A number of standard images are built into your label maker. You can also transfer images from your computer to the label maker for use on your labels. The image categories are: Warning Mandatory Prohibit Fire and Exit First aid GHS WHMIS Electrical ProAV Arrows See Images and Symbols on page 51 for the complete list of images included. A Custom category is added to the category list when you have transferred custom images from your computer to the label maker. You can mark images you use frequently as Favorites for easy access. See Using Favorites on page 38 for more information. To insert an image 1 From the edit screen, tap. 2 Select Image and then a category. 31 XTL 500
38 3 Tap the image you want to insert. 4 Move or resize the image as desired. To change the image 1 Tap an image and press. The image categories list appears. 2 Select a new image. Inserting a Barcode The label maker can generate the following types of barcodes. Code 128 Codabar EAN 8 Code 39 EAN 13 UPC A Code 39 w/mod 43 PDF 417 QR This assumes that you already understand the differences between barcode types and have a plan in place to incorporate barcodes into your organization. If you need to learn more about barcodes, many excellent how-to books are available at local libraries and book stores. Code 128 is the default barcode type. You can choose another type as your default barcode. See Setting the Default Barcode on page 43. You can add a barcode to the following label types: general, flag, heat-shrink tube, and laminated cable wrap. If a barcode already exists on a template, the barcode can be edited. By default the barcode text appears below the barcode. You can choose to show the text above the barcode or hide the text. Showing barcode text is not available for PDF 417 and QR codes. QR codes can contain the following information: Text only Phone number SMS text message Web page URL To add a barcode 1 From the edit screen, tap and then tap Barcode. 2 Select the barcode type. 3 Optionally, select the Show barcode text check box to show or hide the text. 4 Enter the barcode data and tap Done. 5 Move or resize the barcode as desired. To change the barcode text position 1 Tap to select the barcode and press. 2 Make sure the Show text check box is selected. 3 Tap one of the following: Text above barcode Text below barcode 32 XTL 500
39 To edit a barcode 1 Tap to select the barcode and press. 2 Select the property you wish to change. 3 Change the settings. 4 When finished editing the barcode, select Done. Inserting a Shape You can add shapes to your label. Layering shapes with text or images can produce highly customized designs. See Arranging Objects on page 34 for an example. To add a shape 1 From the edit screen, tap and then tap Shape. 2 Tap a shape to add to the label. 3 Move and resize the shape as desired. To change a shape 1 Tap to select a shape on the label and press. 2 Tap a different shape. Manipulating Objects You use the touch screen to select, resize, move, copy, align, arrange, position, and delete objects. Selecting an Object A blue border appears around the object when an object is selected. If the label contains more than one object, you can use the Object Selection tool to move the focus to each object on the label. To select an object Tap once on any object. The object is selected and the object selection tool appears. If objects are small or layered, tap or in the Object Selection tool to select the object you want. To select more than one object, press and select the additional objects. Resizing an Object You can resize an object by dragging or by using the navigation keys. Resizing a text box will only change the text size if you have selected Auto fit text. Resizing a barcode object will not change the barcode size. To resize an object 1 Select the object. 2 Do one of the following: Resize handle 33 XTL 500

40 Drag one of the resize handles on the sides of the object. Press to resize the object in the direction of the arrows. Press + to resize the object in larger increments. If the object is too small to resize, tap to first zoom in on the label. Moving an Object You can move an object by dragging the object or using the navigation keys. When you reach the edge of the editable area of the label, red bars appear. For positioning an object relative to the edge of the label, see Positioning an Object on page 34. To move an object 1 Select the object. 2 Do one of the following: Drag the object to a new location. Press to move the object in the direction of the arrows. Press + to move the object in larger increments. Positioning an Object You can position an object relative to the edge of the label. To position an object 1 Tap and hold in the center of an object. The Object manipulation menu appears. 2 Tap. The Position overlay appears. 3 Tap a position option. Aligning Objects When you have multiple objects selected, you can align the objects on the label vertically and horizontally. To align objects 1 Press and tap multiple objects. 2 Tap and hold in the center of one of the objects. The Object manipulation menu appears. 3 Tap. The Alignment overlay appears. 4 Tap an alignment option. You can select additional objects while the Alignment tool is displayed. Arranging Objects You can place an object in front of or behind other objects. 34 XTL 500
41 To arrange objects 1 Press and tap multiple objects. 2 Tap and hold in the center of one of the objects. The Object manipulation menu appears. 3 Tap. The Arrangement overlay appears. 4 Tap an arrangement option. You can select additional objects while the Arrangement tool is displayed. Copying an Object You can copy and paste an object on the same label. To copy an object 1 Tap and hold in the center of an object. The Object manipulation menu appears. 2 Tap to expand the menu. 3 Tap. The object is copied to the clipboard. 4 Tap and hold on the location where you want to paste the copy of the object and tap. A copy of the object is pasted onto the label. Deleting an Object On some label types, you cannot delete all the objects. To delete an object Select the object and press. Creating a Series of Labels You can quickly create a series of labels using the serialization feature. To create a series, you: Select the characters to serialize. Set the increment: the value to increase for each increment in the series. Set the count: the number of times to increment the series which creates new cells or labels depending on the type of label you are creating. You can use serialization to: Auto-fill multi-cell labels such as patch panel, breaker, distribution panel, 110- block, or terminal block labels. The cells are filled by each increment in the series. If necessary, additional cells are created. Create a series of labels by incrementing the data. A new label is created for each increment in the series. To start serialization, the cursor must be in a text box that can be serialized or a barcode must be selected. 35 XTL 500
 Serialization creates new labels or, as in the case of a patch panel label, fills the existing cells on the label and, if necessary, creates new labels.")
42 You can select up to five characters for serialization. And, you can choose to create the series sequentially. (A1, A2, A3, B1, B2, B3...) Serialization creates new labels or, as in the case of a patch panel label, fills the existing cells on the label and, if necessary, creates new labels. You can view the series as you add and change the values. To create a series 1 From the edit screen, select. The Serialization tool appears. 2 Drag the handles or press the and to select the character to serialize. Press + and, or while dragging the handles to expand the selection to more than one character. 3 Select values for Increment by and Count. 4 To serialize multiple characters at the same time, select Next character and repeat steps 2 and 3. 5 To serialize sequentially, select the Serialize sequentially check box. 6 Select Done when finished. When serialization is complete, the cursor is positioned at the end of the new series. 36 XTL 500
43 Using the Library You can save your labels to the label maker s memory so that you can print them later or use them as a template for future labels of the same type. You can also transfer saved labels from the label maker to your computer. See Transferring Files on page 45. Saving Labels When you save labels, all content and formatting are saved, and you give the label file a unique name. The label cartridge information is also saved with the label. The following characters cannot be used in file names: > : / \? * To save labels 1 From the label edit screen, press. 2 Enter a name and tap Save. If the memory is full, you are asked to delete some saved labels before you can save a new label. Opening Saved Labels Label cartridge information is saved with the label file. If the label cartridge currently in the label maker is not a match for the label information saved with the label, a message appears asking if you want to change the label cartridge selection. To open a saved label 1 From the Home screen, tap. 2 Select the label file you want to open. Deleting Saved Labels You can free memory space by deleting labels you no longer need. To delete saved labels 1 From the Home screen, tap. 2 Select the label you want to delete and press. 3 Tap Delete to confirm. 37 XTL 500
44 Using Favorites A quick way to access saved labels and images you use frequently is to assign them to Favorites. To add an image to Favorites 1 From the edit screen, tap and select Image. 2 Navigate to the desired image and tap in the upper corner of the image. The is highlighted. To add a saved label to Favorites 1 From the Home screen, tap. 2 Locate the desired label file and tap next to the file name. The is highlighted. To use a Favorite label or image 1 While editing a label, press and select Labels or Images. 2 Tap the item you want to use. To remove a Favorite 1 Press and select Labels or Images. 2 Locate the item you want to delete. 3 Tap Remove from favorites. The next to the item is no longer highlighted. 38 XTL 500
45 Changing the Settings You can change the following settings: Changing the Language Changing the Units of Measure Changing the Screen Brightness Changing the Auto Shut-off Time Changing the Recall Data Setting Setting the Print Options Setting the Default Barcode All settings remain in effect until you change them again. You can also restore certain factory settings: Restoring the Label Application Default Settings Restoring Factory Default Settings Changing the Language Changing the language setting only affects the text and menus in the display. To change the language 1 From the Home screen, tap and select Language. 2 Select a language and tap Done. The language is changed immediately. Changing the Units of Measure You can choose to work in millimeters or inches. The default unit of measure is inches. To change the units of measure 1 From the Home screen, tap and select Units of measure. 2 Select the Inches or mm and tap Done. Changing the Screen Brightness You can change the brightness of the screen to accommodate different lighting situations. To change the brightness 1 From the Home screen, tap and select Screen brightness. 2 Drag the slider left or right to select the brightness level you desire and tap Done. 39 XTL 500
46 Changing the Auto Shut-off Time To conserve power, the screen will dim after thirty seconds of inactivity and the label maker will enter standby mode after three minutes of inactivity. After ten more minutes of inactivity, the label maker automatically shuts off. You can change the amount of time the label maker remains in standby mode before automatically shutting off. Although not recommended, you can also set auto shut-off to Never. To change the auto shut-off time 1 From the Home screen, tap and select Auto shut-off. 2 Select the number of minutes until the power is automatically turned off and tap Done. Changing the Recall Data Setting When you switch label applications, data from the previous label can sometimes be used on the new label. Recalling data applies to text-only labels. When data recall is possible and the recall data setting is turned on, you are given several recall options: Recall once - Recall data from the previous label this one time only. You will continue to be asked each time data recall is available. Always recall - Always recall data from the previous label. From now on data will always be recalled to the new label when possible. Not this time - Don t recall data this one time. You will continue to be asked each time data recall is available. Never recall - You will never be asked to recall data. When you choose Always recall or Never recall, you can reverse this setting. To change data recall 1 From the Home screen, select and tap Recall data. 2 Select Yes or No, and then tap Done. Setting the Print Options Several print options are available for printing your labels. You can change the options each time you print or you can save the options you use most often as default settings. The options you can set are: Print Range Number of Copies Collate Mirror Cut Labels Feed You can change these print options in two ways: At the time you print labels: the options apply to that one print job. 40 XTL 500
47 As defaults through the Settings menu: the options will apply to all future print jobs. If you set defaults, you will still be able to change the print options individually for a specific label when needed. To change the default print options 1 From the Home screen, tap and then Print options. 2 Make your desired changes to the print options. 3 Tap Done when finished. These settings will be the default settings every time you print. To change these settings for an individual print job, press and hold the print options menu. Print Range to display While working with multiple labels, you can choose to print all labels, the current label, or a range of labels. This setting is not saved with your label file. To set the print range 1 Press and hold to display the print options menu. 2 Select Print range. 3 Select the range you wish to print. 4 Tap Done and then press. Number of Copies You can print up to 99 copies of the same label at one time. This setting is not saved with your label file. To set the number of copies to print 1 Press and hold to display the print options menu. 2 Select Copies. 3 Select the number of copies to print. 4 Tap Done and then press. When printing is finished, the number of copies to print returns to the value set as the default. Collate When printing multiple copies of a group of labels, by default the labels are printed collated. You can choose not to collate the labels, if desired. If you choose to have the labels print normally, all the copies of the first label are printed before the next label starts printing. The following example shows three copies of a group of three labels printed with and without collation. 41 XTL 500
48 XTL 500 Collated A101 A102 A103 A101 A102 A103 A101 A102 A103 Not collated A101 A101 A101 A102 A102 A102 A103 A103 A103 This setting is saved with your label file. To turn off collation 1 Press and hold to display the print options menu. 2 Select Collate and then select No. 3 Tap Done and then press. Mirror The mirror option allows you to print the contents of your label backwards, from right to left, as you would see the contents of your label in a mirror. This setting is not saved with your label file. To print from right to left 1 Press and hold to display the print options menu. 2 Select Mirror and then select Mirror content. 3 Tap Done and then press. Cut Labels When printing multiple copies, the label maker cuts each label as it prints. You can change this setting so that the label maker prints all labels continuously and automatically cuts once after printing is complete. A label separator cut mark is printed between each label to show where each label should be manually cut. To choose when to cut multiple labels 1 Press and hold to display the print options menu. 2 Select Cut labels. 3 Select one of the following: All labels Each label (default) 4 Tap Done and then press. Since the XTL 500 label maker does not have a manual cutter, the Print options screen contains a Cut label button at the bottom of the screen that you can use to cut a label manually at any time. This feature can be useful to cut unwanted label material at the beginning of a new label cartridge. Feed You may need to feed additional label material before you cut a label or feed a label that does not advance from the label exit slot properly. To feed the label 1 Press and hold to display the print options menu. 42 XTL 500
49 2 Tap Feed to advance the label by 1/4 (6 mm). Setting the Default Barcode The default barcode type will be inserted automatically each time you insert a barcode on a label. The factory default barcode type is Code 128. To change the default barcode 1 From the Home screen, tap. 2 Select Default settings and then Default barcode. 3 Select the barcode type to be used as the default and then tap Done. Restoring the Label Application Default Settings From within each label editor you can choose to set the current properties as the custom default properties for that label type. When custom default properties are set, you avoid having to step through the label application wizard each time you create that type of label. See Setting Default Label Properties on page 14. You use this setting to remove the custom default label properties you previously set for a label application. To restore the label application default properties 1 From the Home screen, tap and select Default settings. 2 Select Default label properties and then select the label application you want to reset. To restore all label application default properties, tap Reset all label application properties. 3 At the confirmation screen, tap Reset all to confirm. You will now have to set the properties each time you create a label for this label type. Restoring Factory Default Settings You can remove any custom settings you made and restore the label maker to the factory default settings. Restoring does not remove your saved labels, favorites, or transferred files. To change the restore the factory default settings 1 From the Home screen, tap and then select Restore factory settings. 2 At the confirmation screen, tap Reset to confirm. 43 XTL 500

50 Connecting the Label Maker to your Computer The label maker can be used as a standalone label maker or you can print labels directly from your computer using the latest version of DYMO ID software. Using DYMO ID software is the recommended method for producing a highvolume of labels. Downloading and Installing DYMO ID Software Do not connect the label maker to your computer until after the software installation is complete. To install the software 1 Download the latest version of DYMO ID software from the DYMO Web site at support.dymo.com. 2 Follow the instructions in the installer. Connecting the Label Maker to your Computer The label maker connects to your computer using the USB connection located on the left side of the label maker. Do not connect the label maker to your computer until after the software installation is complete. To connect the label maker to your computer 1 Lift the connector cover on the left side of the label maker and turn to expose the connectors. 2 Plug the USB cable into the USB connector on the label maker and into an available USB port on your computer. The label maker display will show Connected to PC and you will not be able to use the label maker keypad. Each time you connect the label maker to the computer, DYMO ID software will automatically start. You can now print directly from DYMO ID software or transfer labels to the label maker for printing later. 44 XTL 500

51 About DYMO ID Software The following figure shows some of the major features available with DYMO ID software. Select a label maker Select a label cartridge Show or hide the Home screen Open a saved label Select a label application Print a label Continue editing the current label Manage labels, images, and templates on your computer and your label maker For complete details on using the software, refer to the online Help or the DYMO ID. From the Help menu in DYMO ID software, you can view the following: DYMO ID Help DYMO ID Transferring Files You can transfer label files and images to and from your label maker through DYMO ID software. You can also download and transfer the latest templates to the label maker. Refer to the DYMO ID software online Help or user guide for complete information on transferring files. Updating the Label Maker Software Periodically, updates will become available for the label maker or the label templates. When the label maker is connected to your computer, you will be notified from within DYMO ID software when an update is available. You complete these updates from within the software. You will only be automatically notified of a label maker update when the label maker is connected to your computer. To manually check for label maker updates 1 From within DYMO ID software, select About > Label makers from the DYMO ID menu. 2 Select your connected label maker. 45 XTL 500
52 3 If an update is available, follow the instructions when prompted by the software. 4 When update is complete, turn the power off and then on again. Press and hold for at least five seconds to make sure the power is completely off and not just in standby mode. Refer to the DYMO ID software online Help or user guide for information about label maker software or template updates. 46 XTL 500


53 Caring for the Label Maker Your label maker is designed to give you long and trouble-free service, while requiring only occasional maintenance. Clean your label maker from time to time to keep it Cleaning tool working properly. A cleaning tool is located inside the label compartment cover. The tool has two pads, a felt pad for cleaning the print head and a sponge pad for cleaning the sensors. See Figure 11. Cleaning the Label Maker Clean the keypad, display, and outside of the label maker using a soft damp cloth. Do not put water or any other liquid directly on the display or keypad. Clean the inside of the label compartment using a small, soft brush or cotton swab to wipe away stray particles. Cleaning the Print Head To keep printing clear and crisp labels, occasionally clean the print head. Use the cleaning tool that came with your label maker. The print head is very delicate, so use care when cleaning. To clean the print head 1 Press the label compartment release and lift the cover. 2 Remove the label cartridge. 3 Remove the cleaning tool from inside the label compartment cover. See Figure Gently wipe the felt side of the tool across the print head. See Figure Replace the cleaning tool, insert the label cartridge, and close the cover. Print head Figure 11 Cleaning tool Figure XTL 500


54 Cleaning the Cutter Blade Clean the cutter blade each time you replace the label cartridge. To clean the cutter blade 1 Press the label compartment release and lift the cover. 2 Remove the label cartridge. 3 Pinch the release lever on the outside of the cutter blade and pull the cutter blade straight up to remove. See Figure Place the cutter blade on a flat surface with the blade side facing up. See Figure Use a cotton swab and alcohol to clean both sides of the blade. The cutter blade is extremely sharp. Use caution when cleaning. 6 After cleaning the blade, insert the cutter mechanism back into the label maker and press into place. Cleaning the Sensors Cutter blades Pinch and pull up Figure 13 Figure 14 Several sensors inside the label compartment need periodic cleaning to remove dust and other particles that may have accumulated. To clean the sensors 1 Press the label compartment Sensors release and lift the cover. 2 Remove the label cartridge. 3 Remove the cleaning tool from inside the label compartment Figure 15 cover. 4 Use the sponge end of the cleaning tool to gently wipe the sensors using an up and down motion (not side to side). See Figure 15 for sensor locations. 48 XTL 500
55 Troubleshooting Review the following if you encounter a problem with your label maker. Problem/Error Message Poor print quality Labels wrapped around roller in label exit slot Labels running low Label cartridge empty Poor cutter performance Solution Attach the power adapter to the label maker to recharge the battery. See Charging the Battery on page 2. Clean the print head. See Cleaning the Print Head on page 47. Ensure the label cartridge is inserted properly. Replace the label cartridge. Do not attempt to disassemble the label maker. Contact DYMO Customer Care for instructions ( You are about to run out of labels. Replace the label cartridge. Printing will resume from the last complete label printed. Clean the cutter blade. See Cleaning the Cutter Blade on page 48. Label maker does not turn on Press and hold key for at least five seconds. Ensure the power adapter is connected to a working wall outlet. Attach the power adapter to the label maker to recharge the battery. See Charging the Battery on page 2. Cover is open Label cartridge is missing Label cartridge not recognized Label application - cartridge mismatch The label cartridge cover is open. Close the label cartridge cover to continue printing. No label cartridge is detected in the label maker. Insert a label cartridge. If label cartridge is inserted, see Label cartridge not recognized. Make sure that the label cartridge is compatible with the label maker and is inserted correctly. Make sure the contacts in the label maker and the electronic chip on the label cartridge are free of dirt. See Cleaning the Sensors on page 48. If necessary, clean the electronic chip on the side of the label cartridge with a small amount of alcohol on a cotton swab. This error can occur for several reasons: The label cartridge in the label maker is not appropriate for the label application you are trying to use. The label you are trying to print cannot be printed on this label cartridge. The label cartridge in the label maker does not match the label you are trying to print. In this case, you can continue printing but the results may not match the label you see in the label editor. 49 XTL 500
56 Problem/Error Message Solution No cutter present The cutter mechanism in the label maker is missing. Make sure the cutter mechanism is inserted properly. See the Cleaning the Cutter Blade on page 48 for instructions on removing and replacing the cutter mechanism. Cutter jam The cutter blade is not operating properly. Clean the cutter blade. Click Continue in the error message dialog box to clear the error condition. See the Cleaning the Cutter Blade on page 48 for instructions on removing and replacing the cutter mechanism. Label jam The labels are not feeding properly in the label maker. Feed the label manually. See Feed on page 42. Remove and reinsert the label cartridge. Label maker overheated The label maker has overheated. Wait for a few moments until the label maker cools down to resume printing. Invalid file A label or image file cannot be read. Delete the file and transfer the file from your computer again. See Transferring Files on page 45 for more information. Error An error message with no explanation means a problem with the label maker has been detected but no further information can be supplied. Turn the label maker off and then on again. If this does not solve the problem, contact Customer Support at support.dymo.com. If you need further assistance, visit the Support section of the DYMO Web site at support.dymo.com. 50 XTL 500


57 Images and Symbols Every effort has been made to provide a complete and accurate set of identification symbols for your convenience. Many of the symbols included are subject to strict Global regulations. Prior to using these symbols, make sure the symbol, in combination with the color and terminology used, meet all regulatory requirements as appropriate. DYMO assumes no liability to any party for any incidental or consequential loss or damage caused by using the data content integrated into this device. The marks integrated into this device can be subject to periodic revision without notice. The following tables show the symbols available by category. The source for the symbols is shown for each symbol set where applicable. ISO ISO symbols are reproduced with the permission of the International Organization for Standardization, ISO. The corresponding standard can be obtained from any ISO member and from the Web site of the ISO Central Secretariat at the following address: Copyright remains with ISO. Warning Mandatory 51 XTL 500


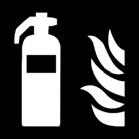

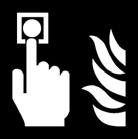


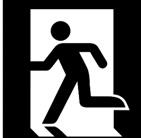


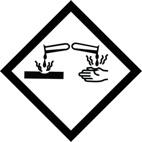
58 Prohibit Fire and Exit First Aid GHS 52 XTL 500


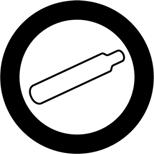


59 WHMIS The Hazard Symbols of WHMIS, Health Canada, Reproduced with the permission of the Minister of Public Works and Government Services Canada, Electrical Pro AV 53 XTL 500
60 Arrows Symbols 54 XTL 500

61 Documentation Feedback We are constantly working to produce the highest quality documentation for our products. We welcome your feedback. Send us your comments or suggestions about our user guides. Please include the following information with your feedback: Product name, model number, and page number Brief description of instructions that are inaccurate or unclear, areas where more detail is needed, and so on We also welcome your suggestions about additional topics you would like to see covered in the documentation. Send messages to: Please keep in mind that this address is only for documentation feedback. If you have a technical question, please contact Customer Support. Environmental Information The equipment that you have bought requires the extraction and use of natural resources for its production. It may contain substances that are hazardous to health and the environment. In order to avoid the dissemination of those substances in our environment, and to diminish the pressure on natural resources, we encourage you to use the appropriate take-back systems. These systems will reuse or recycle most of the materials of your end-of-life equipment in an environmentally sound way. The crossed-bin symbol marked on your device indicates you should use these systems. If you need more information on the collection, reuse, and recycling of this product, please contact your local or regional waste administration. You can also contact DYMO for more information on the environmental performance of our products. 55 XTL 500
of the Minister of Public Works and Government Services Canada, 2012.
 DYMO ID User Guide Copyright 2015 Sanford, L.P. All rights reserved. Revised: 11/10/2017 No part of this document or the software may be reproduced or transmitted in any form or by any means or translated
DYMO ID User Guide BC
 DYMO ID User Guide BC Copyright 2015 Sanford, L.P. All rights reserved. Revised: 4/28/2015 No part of this document or the software may be reproduced or transmitted in any form or by any means or translated
Quick Start Guide. LabelManager 420P. High-Performance Portable Label Maker with PC or Mac Connection
 Quick Start Guide LabelManager 420P High-Performance Portable Label Maker with PC or Mac Connection Insert % Shift Quick Start Make sure you have all the items shown in Figure 1. (Labels included in the
Quick Reference Guide. LabelManager 280
 Quick Reference Guide LabelManager 280 Copyright 2012 Sanford, L.P. All rights reserved. No part of this document or the software may be reproduced or transmitted in any form or by any means or translated
COLORPOP! User Guide
 COLORPOP! User Guide Copyright 2018 Newell Rubbermaid Europe, LLC. All rights reserved. Rev. 6/18 No part of this document may be reproduced or transmitted in any form or by any means or translated into
LabelManager 210D. User Guide. The easy-to-use label maker for your desktop.
 LabelManager 210D The easy-to-use label maker for your desktop User Guide www.dymo.com LM210D_manual_US_cover1.indd 1 7/9/2007 9:30:03 AM Contents About Your New Label Maker... 5 Product Registration...5
Figure 1 LabelMANAGER 450 Electronic Labelmaker
 USB Connector AC Power Connector LCD Display Tape Exit www.dymo.com Font Style/Size Font/Fixed Length Box/Align Symbols Power Cutter Memory Language Preview/Insert Tab CAPS Language Memory Preview Symbols
User Guide
 www.labelcity.com/rhino User Guide LCD Display Label Exit Cutter Key Power Key Print/Copies Key Navigation Key Delete/Clear Key Symbol Hot Keys Language Key Size Key CAPS Key Style Key Function/Shift Key
Quick Start Guide. LabelWriter
 Quick Start Guide LabelWriter 450 Duo Copyright 2010 Sanford, L.P. All rights reserved. Revised 12/10. No part of this document or the software may be reproduced or transmitted in any form or by any means,
Electronic Labelmaker
 LM150 WEUdef.qxd 23-09-2003 16:07 Pagina 1 150 Electronic Labelmaker User Guide Etiqueteuse Electronique Guide D Utilisation Elektronische Labelmaker Gebruikershandleiding Elektronisches Beschriftungsgerät
Contents. M220P-UK_WEU.indd :13:12
 Contents About Your New Label Maker...5 Product Registration... 5 Getting Started...5 Connecting the Power... 5 Inserting the Batteries... 5 Connecting the Optional Power Adapter... 6 Inserting the Tape
Professional Labelmaker User Guide
 TM Professional Labelmaker User Guide US NZ AUS w Label Exit Align/Underline Box Cutter LCD Display Power Style Fixed Length/Font Memory/Extra Numeric Keys Print Ok Cancel Navigation Clear/Delete Alpha
User Guide
 LetraTag User Guide www.dymo.com LTRazor_cover.indd 1 13-01-2006 14:40:24 LetraTag User Guide Label Exit Extra Power Insert Cancel Memory Save Memory Recall LCD Display Cutter Print Settings OK Navigation
Professional Labelmaker User Guide
 Professional Labelmaker User Guide US NZ AUS w USB Connector AC Power Connector Auto-cutter LCD Display Label cassette door release www.dymo.com Label Exit Font Size/Style Font/Fixed Length Underline-Box/Align
LabelManager 120P Basic label maker with easy-to-use smart keys
 LabelManager 120P Basic label maker with easy-to-use smart keys User Guide www.dymo.com LM120P_Cover_US.indd 1 8/22/2007 10:18:32 AM Contents About Your New Label Maker...5 Product Registration...5 Getting
SIMPLIFIES THE MOST COMPLEX LABELING.
 Industrial Labeling Solution SIMPLIFIES THE MOST COMPLEX LABELING. WE BET YOU VE NEVER EXPERIENCED INDUSTRIAL LABELING THIS SIMPLE. Jobsite tested and packed with features, the DYMO XTL 300 and XTL 500
User Guide DYMO Label TM v.8
 User Guide DYMO Label TM v.8 Copyright Trademarks 2012-2015 Sanford, L.P. All rights reserved. Revised 9/6/2016. No part of this document or the software may be reproduced or transmitted in any form or
E550W INTRODUCTION EDITING A LABEL LABEL PRINTING USING THE FILE MEMORY USING P-TOUCH SOFTWARE NETWORK RESETTING & MAINTENANCE TROUBLESHOOTING
 E0W In order to use your P-touch safely, read the included Quick Setup Guide first. Read this guide before you start using your P-touch. Keep this guide in a handy place for future reference. Please visit
ELECTRONIC LABELING SYSTEM. E110 English. User s Guide
 ELECTRONIC LABELING SYSTEM E110 English User s Guide GETTING STARTED ELECTRONIC LABELING SYSTEM Thank you for purchasing a Brother P-touch labeling system! Use your new Brother P-touch labeling system
Contents. LM450D_manual_UK_WEU.indd :22:53
 2 Contents About Your New Label Maker... 5 Warranty Registration... 5 Getting Started... 5 Connecting the Power... 5 Connecting the Power Adapter... 5 Inserting the Batteries... 5 Inserting the Tape Cassette...
uline.com OVERVIEW OF CONTROLS
 π H-5135 1-800-295-5510 uline.com BROTHER P-TOUCH D400AD DESKTOP PRINTER OVERVIEW OF CONTROLS LCD DISPLAY AND KEYBOARD 1 3 2 4 5 6 12 CONTROL PANEL PARTS 7 # DESCRIPTION # DESCRIPTION 1 Caps Mode 20 Clear
DYMO LetraTag 100-H. Figure 1. Label Exit. LCD Display. Settings Power Insert Cancel. Cutter Button Print Format OK Navigation Num Lock CAPs
 DYMO LetraTag 100-H Label Exit Settings Power Insert Cancel Memory Save Memory Recall LCD Display Cutter Button Print Format OK Navigation Num Lock CAPs Clear Space Bar Backspace Figure 1 2 About Your
ELECTRONIC LABELING SYSTEM. H110 English. User s Guide
 ELECTRONIC LABELING SYSTEM H110 English User s Guide 1 GETTING STARTED Power Supply and Tape Cassette ELECTRONIC LABELING SYSTEM With your new Brother P-touch label maker, you can create a wide variety
LabelManager 150 User Guide
 LabelManager 150 User Guide www.dymo.com LabelManager 150 User Guide AC Power Connector Tape Exit LCD Display Cutter Button On/Off Button Style Key Frame/Align Key Font/Fixed Length Key Extra Key Numeric
LabelWorks LW-600P User's Guide
 LabelWorks LW-600P User's Guide Contents LabelWorks LW-600P User's Guide... 7 Introduction to Your LabelWorks Printer... 8 Product Box Contents... 8 Notations Used in the Documentation... 9 Label Printer
Electronic Labelmaker User Guide
 1, 2..N TM Language Symbols Preview Insert Electronic Labelmaker User Guide US NZ AUS w Power Connector USB Connector Label Exit Cutter LCD Display Power Symbols Language Fixed Length/Style Font Align/Box
2007 Sanford, L.P. All rights reserved. DYMO and LabelWriter are registered trademarks of Sanford, L.P. All other trademarks are the property of
 Quick Start Guide 2007 Sanford, L.P. All rights reserved. DYMO and LabelWriter are registered trademarks of Sanford, L.P. All other trademarks are the property of their respective holders. Switching Adapter
LabelManager Wireless PnP USER GUIDE
 LabelManager Wireless PnP USER GUIDE dymo.com Copyright 2013 Newell Rubbermaid Europe LLC. All rights reserved. No part of this document or the software may be reproduced or transmitted in any form or
LabelPoint 350 User Guide
 LabelPoint 350 User Guide www.dymo.com LabelPoint 350 User Guide Power Connector USB Connector Label Exit Cutter LCD Display Power Symbols Language Fixed Length/Style Font Align/Box Underline Memory/Settings
SIMPLIFIES THE MOST COMPLEX LABELING.
 Industrial Labeling Solution SIMPLIFIES THE MOST COMPLEX LABELING. WE BET YOU VE NEVER EXPERIENCED INDUSTRIAL LABELING THIS SIMPLE. Jobsite tested and packed with features, the DYMO XTL 300 and XTL 500
Copyright. Trademarks
 BC Copyright 2017 Newell Rubbermaid Europe LLC. All rights reserved. Revised 8/29/17 No part of this document or the software may be reproduced or transmitted in any form or by any means or translated
Word 2013 Quick Start Guide
 Getting Started File Tab: Click to access actions like Print, Save As, and Word Options. Ribbon: Logically organize actions onto Tabs, Groups, and Buttons to facilitate finding commands. Active Document
Industrial Labelling Solution. SIMPLIFIES THE MOST COMPLEX LABELLING. This product guide contains RS Stock Numbers
 Industrial Labelling Solution SIMPLIFIES THE MOST COMPLEX LABELLING. This product guide contains RS Stock Numbers WE BET YOU VE NEVER EXPERIENCED INDUSTRIAL LABELLING THIS SIMPLE. Jobsite tested and packed
Industrial Labelprinter
 WRAP FLAG 1 FLAG 2 FIXED TBLOCK VERT CAPS BFONT STYLE BOX ULINE BCODE PRINT CLEAR VERT BOX/UL CARD ID ALIGN ERASE BCODE LANG SAVE SAVE GRAPHIC 219 Industrial Labelprinter Instructions for Use www.dymo.com
DYMO DYMO. Power Supply
 1 1 Introduction The Dymo LabelPoint 200 enables you to create a wide variety of high quality self-adhesive labels of up to 90 characters. The LabelPoint uses 6mm ( 1 / 4"), 9mm ( 3 / 8") or 12mm ( 1 /
Lenovo Miix User Guide. Read the safety notices and important tips in the included manuals before using your computer.
 Lenovo Miix 2 11 User Guide Read the safety notices and important tips in the included manuals before using your computer. Notes Before using the product, be sure to read Lenovo Safety and General Information
Microsoft Office Word. Help. Opening a Document. Converting from Older Versions
 Microsoft Office 2007 - Word Help Click on the Microsoft Office Word Help button in the top right corner. Type the desired word in the search box and then press the Enter key. Choose the desired topic
GM_horizontal QUICK START GUIDE GM_horizontal_ vertical stacked offset 4-color process identity Version 4.10
 QUICK START GUIDE BEGIN HERE Machine Set Up 1. Tighten the ribbon. 4. Connect the adapter. 2. Open the cover. Check the manual for using AA batteries or Sanyo enloop rechargeable batteries. See Manual
button Double-click any tab on the Ribbon to minimize it. To expand, click the Expand the Ribbon button
 PROCEDURES LESSON 1: CREATING WD DOCUMENTS WITH HEADERS AND FOOTERS Starting Word 1 Click the Start button 2 Click All Programs 3 Click the Microsoft Office folder icon 4 Click Microsoft Word 2010 1 Click
Microsoft Word Important Notice
 Microsoft Word 2013 Important Notice All candidates who follow an ICDL/ECDL course must have an official ICDL/ECDL Registration Number (which is proof of your Profile Number with ICDL/ECDL and will track
Word 2010 Beginning. Technology Integration Center
 Word 2010 Beginning File Tab... 2 Quick Access Toolbar... 2 The Ribbon... 3 Help... 3 Opening a Document... 3 Documents from Older Versions... 4 Document Views... 4 Navigating the Document... 5 Moving
Life-like on screen print preview and colour display shows exactly how labels will look when applied to cables, pipes, panels and more
 54 mm PC-Connected Touch Screen Industrial Label Maker Life-like on screen print preview and colour display shows exactly how labels will look when applied to cables, pipes, panels and more Built-in label
Learn more about Pages, Keynote & Numbers
 Learn more about Pages, Keynote & Numbers HCPS Instructional Technology May 2012 Adapted from Apple Help Guides CHAPTER ONE: PAGES Part 1: Get to Know Pages Opening and Creating Documents Opening a Pages
Table of Contents. Introduction 2 1. Intelligent Remote Control 2 2. Charging the Remote Control 3
 Table of Contents Introduction 2 1. Intelligent Remote Control 2 2. Charging the Remote Control 3 Getting Started 6 1. Activating the Remote Control 6 2. Selecting a Device 7 3. Operating a Device 8 4.
QUICK REFERENCE. Using the Battery
 QUICK REFERENCE This Quick Reference contains supply loading information and general care and maintenance procedures for the Monarch Sierra Sport4 9493 printer. For more detailed information, refer to
Lesson 4 - Creating a Text Document Using WordPad
 Lesson 4 - Creating a Text Document Using WordPad OBJECTIVES: To learn the basics of word processing programs and to create a document in WordPad from Microsoft Windows. A word processing program is the
DOWNLOAD PDF DELL VENUE 8 PRO 5830 MANUAL
 Chapter 1 : Dell Tablet Venue 8 Pro () Accessories - Adapter, Laptop Bag, Lid, External Hard Drive Dell Get user or pdf manual for your Dell Venue Pro. Search. Sign In. My Account. Place orders quickly
Introduction to Microsoft Excel 2010
 Introduction to Microsoft Excel 2010 THE BASICS PAGE 02! What is Microsoft Excel?! Important Microsoft Excel Terms! Opening Microsoft Excel 2010! The Title Bar! Page View, Zoom, and Sheets MENUS...PAGE
CLEAR TOOL... 7 BASIC NAVIGATION... 7 PAGE SORTER... 7
 Interwrite Workspace WHAT IS WORKSPACE?...2 INSTALLATION...2 SETUP...2 CONNECTING DEVICES... 2 NAMING DEVICES... 3 CALIBRATING DEVICES... 3 THE PEN...3 INTERACTIVE MODE...4 THE TOOLBAR...4 MOVING THE TOOLBAR...
Quick Start Guide. 1. Unpacking your LabelWriter Printer. Follow these steps to install the LabelWriter printer and print your first label.
 Quick Start Guide Copyright 2009 Sanford, L.P. All rights reserved. Revised 4/09. No part of this document or the software may be reproduced or transmitted in any form or by any means or translated into
Introduction to Microsoft Word 2010
 Introduction to Microsoft Word 2010 THE BASICS PAGE 02! What is Microsoft Word?! Opening Microsoft Word! The Title Bar! Page View and Zoom MENUS...PAGE 03! Quick Access Toolbar! The Ribbon! File Tab! Home
Table of Contents. Taking a First Look 2 Intelligent Remote Control 2 Before You Start 4
 Table of Contents Taking a First Look 2 Intelligent Remote Control 2 Before You Start 4 Getting Started 6 Activating the Remote Control 6 Defining the Brands of Your Devices 7 Working with the Home Panel
The first time you open Word
 Microsoft Word 2010 The first time you open Word When you open Word, you see two things, or main parts: The ribbon, which sits above the document, and includes a set of buttons and commands that you use
LEITZ ICON ONE MACHINE FOR YOUR LABELLING NEEDS
 LEITZ ICON ONE MACHINE FOR YOUR LABELLING NEEDS E ASY MULTIFUNCTIONAL VERSATILE MOBILE SMART FAST www.leitz.com/icon Introducing the Leitz Icon One machine for all your labelling needs Leitz has a long
Word 2013 Beginning. Technology Integration Center
 Word 2013 Beginning Getting Started... 2 Quick Access Toolbar... 3 The Ribbon... 3 Help... 4 Compatibility Mode... 4 Document Views... 4 Navigating the Document... 5 Moving Around in the Document... 5
User s Guide M95. User s Guide. English. Version 0 UK ENG
 User s Guide M95 M95 User s Guide English Version 0 UK ENG Installing the Power Supply and Tape Cassette Using the Optional AC Adapter Installing the Power Supply and Tape Cassette 1 Cassette 2 cover Cutter
WEEK NO. 12 MICROSOFT EXCEL 2007
 WEEK NO. 12 MICROSOFT EXCEL 2007 LESSONS OVERVIEW: GOODBYE CALCULATORS, HELLO SPREADSHEET! 1. The Excel Environment 2. Starting A Workbook 3. Modifying Columns, Rows, & Cells 4. Working with Worksheets
SMART Meeting Pro 4.2 personal license USER S GUIDE
 smarttech.com/docfeedback/170973 SMART Meeting Pro 4.2 personal license USER S GUIDE Product registration If you register your SMART product, we ll notify you of new features and software upgrades. Register
User s Guide English
 User s Guide English www.brother.com. Safety Precautions WARNING Follow these guidelines to avoid the risk of fire, burns, injury, electric shocks, rupture, overheating, abnormal odours or smoke. printer
IMPRESS Scan Setting up an Intermec printer with InterDriver version 7.21 or newer. Setting up a bar code printer with Intermec drivers or newer
 Setting up a bar code printer with 7.1.3 Intermec drivers or newer 0 INSTALL PRINTER DRIVERS InterDriver 7.1.3 (this may require Administrator rights within Windows) PLEASE NOTE: If you have an older version
English. Quick Guide
 English Quick Guide Specification Product Overview Button and Indicator light Unpacking Accessory Checklist Important Safety Notes Extruder module installation Accessory installation XYZware operation
ProntoPro Intelligent Remote Control. User Guide
 ProntoPro Intelligent Remote Control User Guide Table of Content Taking a First Look... 3 Intelligent Remote Control... 3 Before You Start... 5 Getting Started... 7 Activating the Remote Control... 7 Defining
DRAFT. Table of Contents About this manual... ix About CuteSITE Builder... ix. Getting Started... 1
 DRAFT Table of Contents About this manual... ix About CuteSITE Builder... ix Getting Started... 1 Setting up... 1 System Requirements... 1 To install CuteSITE Builder... 1 To register CuteSITE Builder...
Lenovo V110. User Guide. Read the safety notices and important tips in the included manuals before using your computer.
 Lenovo V110 V110-17IKB V110-17ISK User Guide Read the safety notices and important tips in the included manuals before using your computer. Notes Before using the product, be sure to read Lenovo Safety
Lenovo ideapad 110. User Guide. ideapad IKB. Read the safety notices and important tips in the included manuals before using your computer.
 Lenovo ideapad 110 ideapad 110-17IKB User Guide Read the safety notices and important tips in the included manuals before using your computer. Notes Before using the product, be sure to read Lenovo Safety
Software User's Guide
 Software User's Guide The contents of this guide and the specifications of this product are subject to change without notice. Brother reserves the right to make changes without notice in the specifications
DYMO DYMO. Creating your first label You will no doubt be anxious to see what your new LabelManager LM200 can do. Before we go on to
 1 1 Introduction The Dymo LabelManager LM200 enables you to create a wide variety of high quality self-adhesive labels of up to 90 characters. The LabelManager uses 6mm ( 1 / 4"), 9mm ( 3 / 8"), 12mm (
Excel Select a template category in the Office.com Templates section. 5. Click the Download button.
 Microsoft QUICK Excel 2010 Source Getting Started The Excel Window u v w z Creating a New Blank Workbook 2. Select New in the left pane. 3. Select the Blank workbook template in the Available Templates
Introduction. Introduction
 Tutorial Introduction Introduction The tutorial is divided into multiple lessons. Each lesson stands on its own and does not require you to build on existing lessons. The lessons provide step-by-step instructions
Microsoft Word 2010 Basics
 1 Starting Word 2010 with XP Click the Start Button, All Programs, Microsoft Office, Microsoft Word 2010 Starting Word 2010 with 07 Click the Microsoft Office Button with the Windows flag logo Start Button,
Introduction. Introduction
 Tutorial Introduction Introduction The tutorial is divided into multiple lessons. Each lesson stands on its own and does not require you to build on existing lessons. The lessons provide step-by-step instructions
Setting up an Intermec PM43 printer with InterDriver version M-0 or newer
 Setting up an Intermec PM43 printer with InterDriver version 7.3.5 M-0 or newer Setting up a bar code printer with 7.3.5 M-0 Intermec drivers or newer 1 INITIAL PRINTER CONFIGURATION When the printer is
Using apps You interact with ipad using your fingers to tap, double-tap, swipe, and pinch objects on the touchscreen.
 Basics 3 Using apps You interact with ipad using your fingers to tap, double-tap, swipe, and pinch objects on the touchscreen. Opening and switching between apps To go to the Home screen, press the Home
Label Printer QL-810W/820NWB. Quick Setup Guide (English)
") Label Printer QL-810W/820NWB Quick Setup Guide (English) Label Printer QL-810W/820NWB Printed in China D00RPG001 Quick Setup Guide (English) Available Manuals Product Safety Guide This guide provides safety
Label Printer QL-810W/820NWB Quick Setup Guide (English) Label Printer QL-810W/820NWB Printed in China D00RPG001 Quick Setup Guide (English) Available Manuals Product Safety Guide This guide provides safety
Quick Start Guide. January EAZ0081L02A Rev. A
 Quick Start Guide January 2014 EAZ0081L02A Rev. A Trademarks Snap-on and Vantage Ultra are trademarks of Snap-on Incorporated. All other marks are trademarks or registered trademarks of their respective
What can Word 2013 do?
 Mary Ann Wallner What can Word 2013 do? Provide the right tool for: Every aspect of document creation Desktop publishing Web publishing 2 Windows 7: Click Start Choose Microsoft Office > Microsoft Word
Pronto. User Guide. User Guide
 Pronto EN 1 Pronto Copyright 2005 Royal Philips Electronics, Interleuvenlaan 72-74, 3000 Leuven (Belgium) Remark: All rights are reserved. Reproduction in whole or in part is prohibited without prior consent
Sending image(s) to report Click Send Snapshot on any screen in Dolphin3D and choose the Send to Report option
 to report Click Send Snapshot on any screen in Dolphin3D and choose the Send to Report option") Dolphin 3D Reports Sending image(s) to report Click Send Snapshot on any screen in Dolphin3D and choose the Send to Report option Creating a report step by step 1. Generate the desired images in Dolphin3D
Dolphin 3D Reports Sending image(s) to report Click Send Snapshot on any screen in Dolphin3D and choose the Send to Report option Creating a report step by step 1. Generate the desired images in Dolphin3D
Microsoft Excel 2010 Basic
 Microsoft Excel 2010 Basic Introduction to MS Excel 2010 Microsoft Excel 2010 is a spreadsheet software in the new Microsoft 2010 Office Suite. Excel allows you to store, manipulate and analyze data in
Using SymPrint to Make Overlays, Templates & More...
 Welcome to SymPrint SymPrint is an easy-to-use tool for creating communication overlays, worksheets, classroom activities and more using a modern toolbar and common-sense interface modeled after the programs
Title bar: The top most bar in Word window that usually displays the document and software names.
 1 MICROSOFT WORD Table of Contents LINC ONE Hiding Standard toolbar, Formatting toolbar, and Status bar: To hide the Standard toolbar, click View Toolbars on the Menu bar. Check off Standard. To hide the
Microsoft Word 2010 Lesson Plan
 Microsoft Word 2010 Lesson Plan Objective: This class is a brief introduction to Word 2010. It consists of 2 one and one-half hour sessions. By the end of this class you should be able to create a simple
Lenovo IdeaPad Flex 10
 Lenovo IdeaPad Flex 10 User Guide Read the safety notices and important tips in the included manuals before using your computer. Notes Before using the product, be sure to read Lenovo Safety and General
LCD MONITOR TOUCH PANEL DRIVER 2 OPERATION MANUAL. for Mac. Version 2.2
 LCD MONITOR TOUCH PANEL DRIVER 2 OPERATION MANUAL for Mac Version 2.2 Contents Introduction...3 Setting up the Computer...4 Install...4 How to configure settings...5 Touch Panel Settings...7 Touch Operation
MICROSOFT WORD 2010 Quick Reference Guide
 MICROSOFT WORD 2010 Quick Reference Guide Word Processing What is Word Processing? How is Word 2010 different from previous versions? Using a computer program, such as Microsoft Word, to create and edit
User s Guide QL Version 01 ENG
 User s Guide QL-1100 Read the Product Safety Guide first, then read the Quick Setup Guide for the correct setup procedure. After reading this guide, keep it in a safe place for quick reference. Version
Labels and Envelopes in Word 2013
 Labels and Envelopes in Word 2013 Labels... 2 Labels - A Blank Page... 2 Selecting the Label Type... 2 Creating the Label Document... 2 Labels - A Page of the Same... 3 Printing to a Specific Label on
Lenovo YOGA 500. User Guide. Read the safety notices and important tips in the included manuals before using your computer.
 Lenovo YOGA 500 YOGA 500-14ISK User Guide YOGA 500-15ISK Read the safety notices and important tips in the included manuals before using your computer. Notes Before using the product, be sure to read Lenovo
CF3000 Dealer Diagnostic Tool Instruction Manual
 CF3000 Dealer Diagnostic Tool Instruction Manual Table of Contents: About the CF3000......3 Important Precautions......4 Components....5 Charging the CF3000......7 Licensing the CF3000.......8 Updating
Test & Inspection. FOCIS Flex. Fiber Optic Connector Inspection System Quick Reference Guide. or (800) , (603)
 , (603)") Test & Inspection FOCIS Flex Fiber Optic Connector Inspection System Quick Reference Guide www.aflglobal.com or (800) 321-5298, (603) 528-7780 Controls, Display, Interfaces Controls 1 Power key - 2 Image
Test & Inspection FOCIS Flex Fiber Optic Connector Inspection System Quick Reference Guide www.aflglobal.com or (800) 321-5298, (603) 528-7780 Controls, Display, Interfaces Controls 1 Power key - 2 Image
EXCEL BASICS: MICROSOFT OFFICE 2007
 EXCEL BASICS: MICROSOFT OFFICE 2007 GETTING STARTED PAGE 02 Prerequisites What You Will Learn USING MICROSOFT EXCEL PAGE 03 Opening Microsoft Excel Microsoft Excel Features Keyboard Review Pointer Shapes
Lenovo TAB A User Guide V1.0. Please read the safety precautions and important notes in the supplied manual before use.
 Lenovo TAB A10-70 User Guide V1.0 Please read the safety precautions and important notes in the supplied manual before use. Chapter 01 Lenovo TAB A10-70 Overview 1-1 Appearance 1-2 Buttons 1-3 Turning
Revision 1.0.0, 5/30/14
 6465 South 3000 East Suite 104 Holladay, Utah 84121 801-268-3088 phone 801-268-2772 fax www.centurysoftware.com Sales@centurysoftware.com Revision 1.0.0, 5/30/14 Table of Contents User s Guide... 1 Gestures...
E850TKW Quick Setup Guide English
 Printed in China D00H300 eneral Description Front E50TKW Quick Setup uide English Thank you for purchasing the P-touch model E50TKW. Your new E50TKW is an intuitive, easy to operate and feature-rich labeller
CONTENTS INTRODUCTION... 2 GENERAL DESCRIPTION...
 CONTENTS INTRODUCTION... 2 GENERAL DESCRIPTION... 4 General View... 4 Turn the Device On/Off... 5 Navigate the Device... 6 Set the Target Language... 9 Address to a Male or Female... 10 Pronounce a Phrase
Installing the Printer Software
 4 Printing Your First Page Attaching the Paper Support 7 1 Checking the Printer 6 2 Plugging in the Printer 3 Installing the Ink Cartridges 5 Installing the Printer Software Connecting the Printer 4012581-00
Software User's Guide
 Software User's Guide The contents of this guide and the specifications of this product are subject to change without notice. Brother reserves the right to make changes without notice in the specifications
LBP-810 Laser Printer
 LBP-810 Laser Printer Getting Started Guide IMPORTANT: Read this manual carefully before using your printer. Save this manual for future reference. Copyright Copyright 2001 Canon Inc. All information in
Lenovo ideapad D330-10IGM
 Lenovo ideapad D330-10IGM User Guide Read the safety notices and important tips in the included manuals before using your computer. Notes Before using the product, be sure to read Lenovo Safety and General
Microsoft PowerPoint 2007 Beginning
 Microsoft PowerPoint 2007 Beginning Educational Technology Center PowerPoint Presentations on the Web... 2 Starting PowerPoint... 2 Opening a Presentation... 2 Microsoft Office Button... 3 Quick Access