Maxtor Product Warranty
|
|
|
- Anabel Houston
- 5 years ago
- Views:
Transcription
1
2 Maxtor Product Warranty Maxtor s warranty obligations are limited to the terms set forth: Maxtor warrants only to the original consumer purchaser that new Maxtor products will be free from defects in material and workmanship for 1 year from the date of original purchase. For a replacement product, the warranty on the replacement device is the remainder of the warranty on the original device or 90 days, whichever is longer. If you discover a defect, Maxtor will, at its option, repair or replace the product at no charge to you, provided you return it during the warranty period, with transportation charges prepaid, to Maxtor in Ireland, Singapore or the USA. Products must be properly packaged in Maxtor packaging or Maxtor approved packaging to obtain warranty service. Before returning a Maxtor product, please contact Maxtor at: (in Europe) or MAXTOR (in U.S.) to obtain a Return Material Authorization (RMA) number. A copy of the receipt or a bill of sale bearing the appropriate Maxtor serial number and model number may be required for warranty service. The warranty applies only to the Maxtor products that can be identified by the Maxtor trademark, trade name, serial number or logo affixed to them. Maxtor does not warrant any product that is not manufactured by, for or with permission from Maxtor. This warranty is not applicable to: Abnormal wear and tear; Abuse, unreasonable use, mistreatment, or neglect; Damage caused during installation of the Product; Damage caused by the equipment or system with which the product is used; Damage caused by modification or repair not made or authorized by Maxtor; Product whose Maxtor Serial Number has been removed or defaced; Damage caused by liquids in the product case; Damage to the products interface or power connectors; Damage caused by use of non-maxtor packaging; Damage caused by improper or improperly used packaging; Products that are determined to be stolen. THIS WARRANTY AND REMEDIES SET FORTH ABOVE ARE EXCLUSIVE AND IN LIEU OF ALL OTHERS, WHETHER ORAL OR WRITTEN, EXPRESSED OR IMPLIED. MAXTOR SPECIFICALLY DISCLAIMS ANY AND ALL IMPLIED WARRANTIES, INCLUDING, WITHOUT LIMITATION, WARRANTIES OF MERCHANTABILITY AND FITNESS FOR A PARTICULAR PURPOSE AND AGAINST INFRINGEMENT. Additionally, Maxtor does not warrant that the installation software for Macintosh OS and Windows OS will meet your requirements nor the performance or results that the operation of the program will be uninterrupted or error free. No Maxtor dealer, agent or employee is authorized to make any modification, extension or addition to this warranty. MAXTOR IS NOT RESPONSIBLE FOR SPECIAL, INCIDENTAL, INDIRECT OR CONSEQUENTIAL DAMAGES RESULTING FROM ANY BREACH OF WARRANTY, OR UNDER ANY OTHER LEGAL THEORY, INCLUDING BUT NOT LIMITED TO LOSS OF DATA, LOSS OF PROFITS, DOWNTIME, GOODWILL, DAMAGE OR REPLACEMENT OF EQUIPMENT AND PROPERTY, AND ANY COSTS OF RECOVERING, PROGRAMMING OR REPRODUCING ANY PROGRAM OR DATA STORED IN OR USED WITH MAXTOR DISK DRIVES OR MAXTOR PRODUCTS CONTAINING MAXTOR DISK DRIVES or any software product distributed therewith. Some states/jurisdictions do not allow the exclusion or limitation of incidental or consequential damages or exclusions of implied warranties, so the above limitations or exclusions may not apply to you. This warranty gives you specific legal rights, and you may also have other rights that vary from jurisdiction to jurisdiction. Changes are periodically made to the information herein which will be incorporated in revised editions of the publication. Maxtor may make changes or improvements in the product(s) described in this publication at any time and without notice. This product tested to comply with FCC standards for home or office use.
3 Contents 1 Introduction Maxtor Personal Storage 5000 Components System Requirements Handling Precautions About this Guide Where to Go for Help Installing the Drive Step 1. Installing the Software Step 2. Connecting the Drive Step 3. Setting Up the Maxtor OneTouch Feature Formatting Your Drive Installing Drivers Only Using Your Drive Using Retrospect Express Restoring Files Changing Your Maxtor OneTouch Settings Adding Maxtor OneTouch Advance Features Connecting and Disconnecting the Drive Moving Data Between Two Systems Installing Applications on Your Drive Editing Video Playing Games Storing Audio Using Power Management Using Large Capacity Drives with Windows Using Security Lock Troubleshooting and FAQs Glossary Index Maxtor Product Warranty inside front cover
4 intentionally blank page
5 1 Introduction 1 Thank you for selecting a Maxtor product.your Maxtor Personal Storage 5000 product is an external hard drive that allows you to add storage to your computer to hold and organize your documents, videos, music, photos, graphics, and more. You can also use your new drive to make copies of critical files as a part of your overall backup solution. By using the Maxtor OneTouch feature, your drive can create and store a copy of your important files with a touch of a button. Whether you use the drive for additional storage, to create a copy of your files, or both, this guide will get you up and running and provide helpful tips for using your drive. The Maxtor Personal Storage 5000 drive has the following features: Large capacity Maxtor OneTouch feature, the easy way to make a backup copy of your files Plug and Play installation High-speed performance USB 1.1 and 2.0 FireWire /1394/i.LINK (available with 5000DV and 5000XT) Stacks and stands upright to fit on your desk Expandable so you can connect up to 62 drives via FireWire (5000DV and 5000XT models) or 129 USB 2.0 drives with USB 2.0 hubs Hot-swappable to move the drive between computers Compatible with security locking cables, including those offered by Kensington Introduction 1
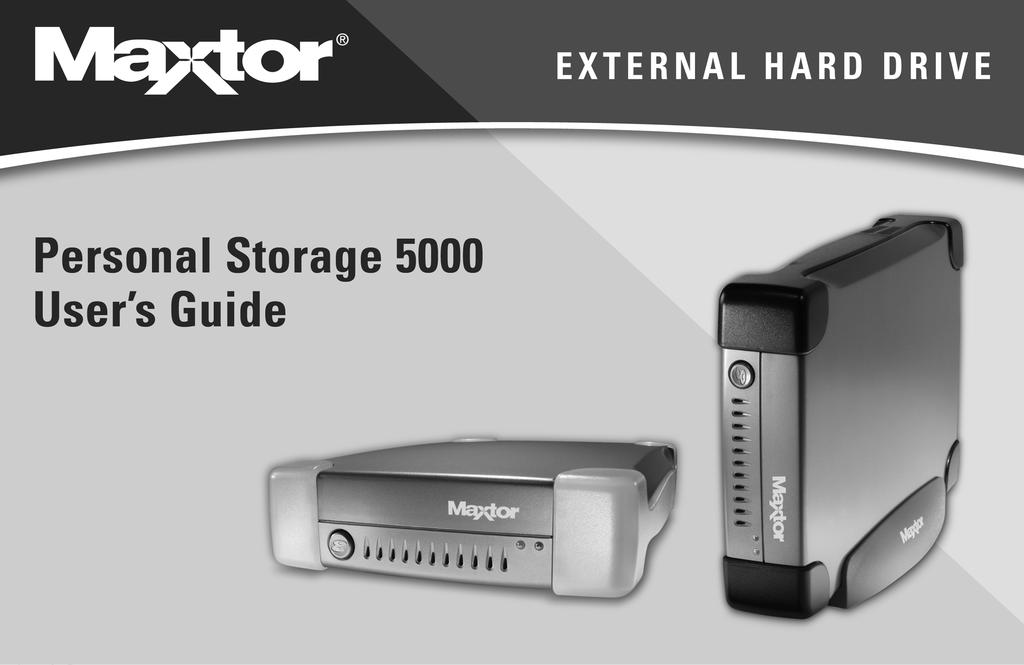
6 1 Personal Storage 5000 Components Before installing your new drive, review the features shown in Figure 1. Included in this Kit The Maxtor Personal Storage 5000 drive comes complete with the components shown in Figure 2. Familiarize yourself with each of these items prior to installation. Front Back Maxtor OneTouch Button Status Lights Green - Power Amber - Activity USB Port FireWire Ports (5000DV, 5000XT only) Security Locking Slot Power Connector Maxtor Personal Storage 5000 External Hard Drive User s Guide Figure 1. Personal Storage 5000 Features FireWire Cable (5000DV, 5000XT only) Power Adapter USB Cable Installation CD Vertical Stand Figure 2. Included in this Kit 2 Introduction
7 System Requirements The following are the minimum system requirements. W Windows System Requirements Pentium II-class equivalent processor or later Windows 98SE, Me, 2000, or XP CD-ROM drive 32 MB RAM or more as required by Windows Available FireWire/1394/i.LINK (OHCI-compliant) or USB 1.1 or 2.0 port (only for 5000DV, 5000XT) Available USB 1.1 or 2.0 port (5000LE) Internet connection (for system updates) For faster operation, upgrade from USB 1.1 to high-speed USB 2.0 with a Maxtor USB 2.0 PCI Card for Windows or add a FireWire port to your PC with Maxtor s 1394/FireWire PCI Card. Both are available at in North America. M Macintosh System Requirements imac, Power Macintosh G3 (Blue and White), or later model Mac OS 9.1 or higher or Mac OS X version or higher CD-ROM drive 32 MB RAM or more as required by Mac OS Available FireWire/1394/i.LINK (OHCI-compliant) or USB 1.1 or 2.0 port (only for 5000DV, 5000XT) Available USB 1.1 or 2.0 port (5000LE) Internet connection (for system updates) Handling Precautions Handle your drive with care! Follow the precautions listed here or damage to the drive may result and your warranty may become void. Review the Maxtor Product Warranty on the inside front cover for more information. The following precautions can prevent loss of data: Do not bump, jar, or drop the drive. Do not stack drives more than three high. Do not set the drive on its side without using the vertical stand as it may fall over and cause damage. Do not remove any cables or power cords without properly disconnecting the drive through the operating system. Do not set any liquids or drinks on the drive. Liquids will damage the internal electronics. Do not attempt to open the drive s case. This will void your warranty. 1 Introduction 3
8 1 About this Guide The following symbols and conventions are used in this guide: Bold Italics W M " Used for menu, command, and keyboard selections you make and screens you will see. Used for emphasis and to identify new terms, which may also be defined in the Glossary. Information or instructions relating specifically to systems running Windows. Information or instructions relating specifically to Macintosh systems. Helpful information about a particular topic. Important information to prevent problems and ensure that you are successful in using the drive. Critical information to help prevent loss of your data or damage to your computer system. Where to Go for Help For additional help with your drive, its installation and the software, contact one of the following: Maxtor Support Maxtor provides a comprehensive product support section on its web site, including the latest drivers, user guides, and the Knowledge Base at (answers to common questions and problems). On the Web: Check the Maxtor support web site under Contact Us for additional support phone numbers outside the USA. For technical support in Asia Pacific regions, please to ApacTech_Assistance@Maxtor.com If you do not have Internet access, you can call: MAXTOR (in the United States) (Outside the continental United States) Dantz Support Contact Dantz Development Corporation for help with Retrospect Express software, backup copies made with Maxtor OneTouch, or restoring files. Dantz provides free telephone support for the first 30 days and a comprehensive support section on its web site, including the latest software downloads, Knowledge Base (answers to common questions and problems), hardware compatibility and contact information. On the Web: Select the link labeled Support & Hardware. Check the Dantz web site for additional support phone numbers outside the USA. If you do not have Internet access, you can call: (in the United States) (Outside the continental United States) 4 Introduction
9 2 Installing the Drive This chapter describes how to install the Maxtor Personal Storage 5000 drive, the Dantz Retrospect Express backup software, and activate the Maxtor OneTouch button. Install the software and hardware in the order presented in this chapter to ensure a successful installation process. Do not connect the drive to your computer until you have installed the software. Follow these steps to install your drive Step 1. Install the software. If you do not wish to install the Retrospect Express software at this time, you can install just the Maxtor drivers. For instructions, see Installing Drivers Only on page 17. Step 2. Connect the drive to your computer. Reformat the drive, if appropriate for your system. Step 3. Set up the Maxtor OneTouch button. Step 1. Installing the Software W Installing the software on a Windows system " Windows 2000 and XP: If you get an error message regarding Administrator priviledges, refer to Administrator Privilege for Windows on page With your computer running, insert the Maxtor Installation CD into your CD-ROM drive. 2. From the menu that appears, select the option to Install storage drivers and Retrospect Express. You may be asked to restart your computer to continue the installation, select restart if prompted to do so. 3. A Welcome screen appears, click Next. 4. The Retrospect License Agreement appears. Review the agreement and click the I Accept button, then click Next to continue. 5. The next screen prompts you for customer information. Enter the requested information and click Next to continue. 2 Installing the Drive 5
10 2 6. The Setup Type screen is displayed. If you wish to select the folder to install the Retrospect software, select the Custom option on this screen. To continue, click Next. 7. The Ready to Install screen appears. If you re ready to install the Retrospect software, click Install to begin installing the software on your system. Windows XP only: A Windows Alert appears with the message: The software you are installing has not passed Windows logo testing. This is normal. Click Continue Anyway. 8. After the software is installed on your system, a message is displayed InstallShield Wizard completed signifying that your installation was successful. a. Click the Finish button. b. Click Exit from the remaining menu screen. c. Remove the Maxtor Install CD from your computer. Make sure that you have exited Retrospect Express and the Installation CD menu at this point. The software may ask you to restart your system at this time, select restart to continue setting up your drive. Now proceed to Step 2. Connecting the Drive on page 7. M Installing the software on a Macintosh computer 1. With your computer running, insert the Maxtor Installation CD into your CD-ROM drive. 2. Open the CD s icon and double click on the Install Retrospect Express icon. For Mac OS X, you will need to provide your Administrator password in order to install the necessary files. 3. The Retrospect Express introduction screen appears, click Continue. 4. The Retrospect license agreement is presented, click Accept to continue. 5. On this screen, you may select an installation option and select the folder you wish to store this software on. Click Install to continue. 6. After the software is installed on your system, a message is displayed confirming that your installation was successful. The software will ask you to restart your system at this time. Restart to continue setting up your drive. 6 Installing the Drive
11 Step 2. Connecting the Drive Once the registration process is complete, you are ready to connect the drive to your computer. Do not connect the drive to your computer until you have installed the software. (Disregard for Installing Drivers Only.) The drive will not operate with more than one computer at a time. M Maxtor does not support using the drive as a start-up disk for the Macintosh. The Maxtor Personal Storage 5000LE connects to your computer using the USB interface. The 5000DV and 5000XT can connect with either the USB or FireWire interface. Check your computer to determine which interface is available. Connecting the Power 1. Unpack the drive, cables, and power adapter, and save the packing materials. 2. Plug the four-pin male connector from the power adapter with the flat side facing up into the drive s power connector. 3. Plug the three-pin female connector on the power cord into the power adapter. Figure 3. Connecting the Power 4. Plug the male electrical plug from the power adapter into your power source. " In North America, additional Maxtor power adapters can be purchased from 5. Determine whether you have USB or FireWire ports available on your system. If you are connecting your drive with FireWire, proceed to Connecting with the FireWire Cable on page 9. 2 Installing the Drive 7
12 2 Connecting with the USB Cable Do not plug a USB cable into the drive when a FireWire cable is already connected to the drive. This drive will only operate on one interface at a time. The Maxtor Personal Storage 5000 drive is also compatible with computers equipped with built-in USB 1.1 ports. To achieve high-speed USB 2.0 data transfer rates, a USB 2.0 port or USB 2.0 Adapter Card for Windows is required. For more information about the USB interface, go to and select the link to the USB FAQ section. To connect the USB cable 1. Plug the larger end of the USB cable into any available USB port on your computer. This USB logo may help you identify a USB port. 2. Plug the smaller end of the USB cable into the USB connection on the drive. USB Port Figure 4. Connecting to the USB Port Allow up to 2 minutes for your computer to recognize the drive. W Windows XP: To install your drive, using the USB interface, follow these steps: 1. Attach the drive to your computer and the power adapter as instructed in this section. When you connect your drive to a Windows XP system a window may appear with the message Local Disk (X:) This disk or device contains more than one type of content. What do you want Windows to do? You can disregard this window and close it. 2. Remove and re-insert the Maxtor Install CD back into your computer. 3. From the menu that appears, select the option to Install Storage Drivers and Retrospect Express. 4. A Welcome screen appears, click Next. 5. The Program Maintenance screen appears. Select the Repair option, click Next. 6. The Ready to Repair the Program screen appears, click Install. 7. A Windows Alert appears with the message: The software you are installing has not passed Windows logo testing. This is normal. Click Continue Anyway. 8. The InstallShield Wizard completed screen appears, signifying that your installation was successful. Remove the Maxtor Install CD from your computer and click the Finish button. 8 Installing the Drive
13 W M All Windows: Your new drive appears in the same way as your other drives with the name New Volume and a drive letter assigned by the operating system. The assigned letter will vary depending upon the number of other storage devices connected to your computer. If you re running Windows 2000 or XP, Maxtor suggests reformatting your drive for best performance and operation. If you plan to connect this drive to a computer running Windows 98 or ME, you will need to keep the drive in its original format. Further information is provided in Formatting Your Drive on page 14. Now proceed to Step 3. Setting Up the Maxtor OneTouch Feature on page 11. It may take several minutes to mount the drive on your Macintosh. Mac OS 9: Maxtor requires that you re-format your drive with the Mac OS Extended format (also called HFS Plus) for proper operation with Retrospect Express software and the OneTouch button. Further information is provided in Formatting Your Drive on page 14. Your new drive appears on your desktop with the name untitled. If you receive a message: This disk is unreadable by this computer. Do you want to initialize the disk?, refer to the section titled: My computer reports the drive is unreadable (Mac OS 9) on page 30. Mac OS X: An Alert box will appear saying the drive is unreadable. See To format the drive for Mac OS X on page 16. Now proceed to Step 3. Setting Up the Maxtor OneTouch Feature on page 11. Connecting with the FireWire Cable This section describes how to connect your Personal Storage 5000DV and 5000XT drive using the FireWire cable. For more information about the FireWire interface, go to Windows 98SE: make sure you have first installed the Windows 98SE 1394 Storage Supplement. See I want to install the Windows 98SE Storage Supplement on page 31 W for more information. Do not plug a FireWire cable into the drive when a USB cable is already connected to the drive. This drive will only operate on one interface at a time. You can use both FireWire connectors at the same time to connect several FireWire devices to your computer in a daisychain. For example, you can connect one FireWire cable to your computer and the second FireWire cable to another FireWire-compatible device, such as a camcorder or an external CD-R recorder. To connect the FireWire cable 1. Plug one end of the FireWire cable into any available FireWire port on your computer. " Laptop Users Many laptop computers, and most camcorders, have a smaller 4-pin FireWire port requiring a special 4-pin to 6-pin FireWire cable (not included). This cable is available at most computer stores or at in North America. 2 Installing the Drive 9
14 2 2. Plug the other end of the FireWire cable into either of the FireWire ports on the back of the drive. W FireWire Ports Figure 5. Connecting to a FireWire port Allow up to 2 minutes for your computer to recognize the drive. For Windows 98 and FireWire only A window titled Version Conflict will appear three (3) times. Click Yes to keep the current file each time. For Windows XP and FireWire only When you attach the drive to your computer for the first time using the FireWire interface, the Windows Hardware Wizard will appear. Click Next to automatically install the correct driver. The Completing the Found Hardware Wizard screen appears with the message that it has finished installing software. Click Finish. " When you connect your drive to a Windows XP system a window may appear with the message Local Disk (X:) This disk or device contains more than one type of content. What do you want Windows to do? You can disregard this window and close it. All Windows: Your new drive appears in the same way as W your other drives with the name New Volume and a drive letter assigned by the operating system. The assigned letter will vary depending upon the number of other storage devices connected to your computer. If you re running Windows 2000 or XP, Maxtor suggests re-formatting your drive for best performance and operation. If you plan to connect this drive to a computer running Windows 98 or ME, you will need to keep the drive in its original format. Further information is provided in Formatting Your Drive on page 14. Now proceed to Step 3. Setting Up the Maxtor OneTouch Feature on page Installing the Drive
15 M Mac OS 9: Maxtor requires that you re-format your drive with the Mac OS Extended format (also called HFS Plus) for proper operation with Retrospect Express software and the OneTouch button. Further information is provided in Formatting Your Drive on page 14. Mac OS 9: Your new drive appears on your desktop with the name untitled. If you receive a message: This disk is unreadable by this computer. Do you want to initialize the disk?, refer to the section titled: My computer reports the drive is unreadable (Mac OS 9) on page 30. Mac OS X: An Alert box will appear saying the drive is unreadable. See To format the drive for Mac OS X on page 16 page. Step 3. Setting Up the Maxtor OneTouch Feature Once the drive is recognized by your computer, you can set up the Maxtor OneTouch feature to automatically make a backup copy of your selected files each time you press the button. Windows XP: you may see an alert box regarding a requirement for administrator privileges. Proceed with W your installation. For further information, refer to Administrator Privilege for Windows on page 32. To set up the Maxtor OneTouch button feature 1. Push the button on the front of your drive. M Proceed to #2 W The Retrospect License Code screen appears. A license code is automatically entered for you, do not change this code. Click OK to proceed. The next screen will ask you to personalize your copy. Enter your name and a company name if appropriate. Click OK to continue. A confirmation box will appear. If your entries are correct, click OK. 2. You are now asked to register Retrospect Express, click Register Now. The Retrospect Express Registration screen appears. 2 Installing the Drive 11

16 2 3. Complete the registration information requested, then click to your information or click Print to print the information. 1 " "W By registering your new drive, you will have the option of receiving product updates, special offers, and important information about other data storage solutions from Maxtor. From the pull-down File menu, select Exit to quit Retrospect. Push the button again on the front of your drive. 4. At the Welcome screen, click Next. 1. Your registration information is collected and maintained according to the Dantz and Maxtor privacy policies located on their respective web sites. If you choose to the information, make sure you are connected to the Internet. If you choose to print the information, you can fax the form to Dantz Corporation at W M 5. The Step 1 screen appears, select the drive to copy files from and click Next. 6. The Step 2 screen is displayed. Choose the type of files to copy and click Next. Just Documents copies only documents you have created, including your favorite files, bookmarks, and cookies. This selection is ideal for most users. Applications and Documents copies application files in addition to documents. This selection allows you to restore an application file if it has become damaged. Refer to the 12 Installing the Drive
17 Retrospect User s Guide for instructions on how to make a complete system backup copy. " This selection does not copy your operating system, registry (Windows) files, or Internet cache files. 7. The Step 3 screen is displayed. Select the Maxtor Personal Storage 5000 drive or other drive on your computer as the location to store the copy of your files. Click Next. " The setup wizard will not let you select the same drive to be both the source and destination for your files. The source and destination drives must be different. 8. The Congratulations... now ready screen appears. To complete the Maxtor OneTouch setup, click Finish. Select Exit (Windows) or Quit (Mac) from the pull down File menu, to quit Retrospect Express. You are now ready to use the Maxtor OneTouch feature. Just touch the button on the front panel of your drive and Retrospect Express will automatically make a backup copy of your files. It s that easy! How to use the Maxtor OneTouch button Each time you touch the button, Retrospect Express makes a copy of the folders and files on your source drive exactly as they exist at that time. The OneTouch button may not function when Retrospect Express is already running. To correct the problem, from the File pull-down menu in Retrospect, select the Exit (Windows) or Quit (Macintosh) option. After Retrospect Express has stopped running, the Maxtor OneTouch button will operate. " Only the current versions of your files are saved. Backup copies made with the default Maxtor OneTouch feature does not keep earlier versions of files you have deleted since the last time you pressed the Maxtor OneTouch button. Any files that are currently open are not saved, so close any files you wish copied. You may customize Retrospect Express to create backup copies of your files which will include revisions made on a daily basis. Your hardware and software installation is now complete. See Using Your Drive on page 19 for information on using your drive for common applications and on using Retrospect Express to make copies of your important files and restore copied files. 2 Installing the Drive 13
18 2 Formatting Your Drive Optional for Windows 98/2000/Me/XP Your Maxtor Personal Storage 5000 drive was formatted at the factory with the Windows FAT32 file system. This file system is compatible with Mac OS 9 and recent versions of the Windows operating system. W The FAT32 file system limits any file to a maximum size of 4 GB. If you are running Windows 98 or Me, consider upgrading to Windows 2000 or XP to take advantage of the NTFS file system. If you are running either the Windows 2000 or XP operating system, consider reformatting your drive to the NTFS file system. The NTFS file system provides several advantages, including support for very large files. See Formatting Your Drive with NTFS on page 14. If you plan to share data between two Windows systems, review Moving Data Between Two Systems on page 22. M We require that you format your drive to the Mac OS Extended format (also called HFS Plus) once it is installed on your Macintosh computer. See Formatting Your Drive for Mac OS on page 15. " You new drive will display a drive capacity that is slightly less than the capacity stated on the box. This is normal. For a complete explanation, see page 29 of Troubleshooting and FAQs. W Formatting Your Drive with NTFS This section describes how to format your drive with the NTFS file system for Windows 2000 or XP. Formatting the drive destroys all data contained on that drive. Make a backup copy of all your data before formatting your drive. To format the drive for NTFS 1. Select Start Settings Control Panel. 2. Double-click Administrative Tools. 3. Double-click Computer Management. 4. Double-click Disk Management (located under the Storage icon). " To format into two or more logical partitions, use the partitioning feature in the Disk Management utility. For more information, press F1 to access Help and enter partition in the keyword field. 5. Right-click on the icon for your new drive in the window that appears. FAT32 should be listed in the column labeled File System. 6. Select Format from the menu. 7. Select NTFS in the File System field. 8. Click OK when you are ready to format your drive. Formatting time varies based on your system speed, the interface used, and the drive s capacity. 14 Installing the Drive
 menu, select Control Panels Extensions Manager.")

19 M Formatting Your Drive for Mac OS Formatting the drive destroys all data contained on that drive. Make a backup copy of all your data before formatting. To format the drive for Mac OS 9 1. Plug the drive into the Macintosh computer using either the FireWire or USB cable. The drive icon appears on your desktop. 2. Disable the File Exchange control panel. a. From the Apple (apple) menu, select Control Panels Extensions Manager. b. From the list that appears, clear the check box next to the File Exchange control panel. c. Click Restart. As the computer restarts, a message appears saying the drive is unreadable and asks you to initialize the drive. 3. Enter a name for the drive in the Name field. 4. Select Mac OS Extended from the Format pop-up menu and click Initialize. You will receive an Alert: Initializing will erase all information on your drive. Click Continue. The new drive appears on your desktop as a Macintosh drive with the name you assigned. To confirm the drive is formatted properly, select the drive and then select File Get Info General Information. The drive format should read Mac OS Extended. 5. Enable the File Exchange control panel. a. From the Apple menu, select Control Panels Extensions Manager. b. Select the check box next to the File Exchange control panel. c. Under Special (top menu bar), click Restart. 2 Installing the Drive 15


20 2 To format the drive for Mac OS X 1. Plug your drive into the Macintosh using either the FireWire or USB interface. 2. An alert box appears saying the new drive is unreadable and asks you to initialize the drive. 5. Select the Erase tab at the top of the window. 3. Click Initialize. If you see another message, click OK. The Disk Utility menu appears. 4. Select your new drive from the list on the left. Make sure you select your new drive. This utility will erase all data on a drive. A description of the drive appears in the window. 6. Select Mac OS Extended from the Volume Format drop-down list. 7. Enter a name for your drive in the Name field. 8. Select the check box next to Install Mac OS 9 Drivers. This will allow your disk to be recognized if you start your system in Mac OS Click Erase to continue. An alert dialog appears to confirm the Erase process. 10. Click Erase to start the formatting process. After a few minutes, your drive will be formatted with the Mac OS Extended format. You can now begin using your new drive. If you wish to partition the drive into two or more volumes, you can select the Partition tab in the Disk Utility program and follow the instructions. 16 Installing the Drive
21 Installing Drivers Only This section describes how to install your new drive without installing Retrospect Express software. " The Maxtor OneTouch button feature will not function if you choose to install under this option. Locate your operating system and the interface you plan to use in the following table and follow the corresponding installation procedure in this section. OS USB FireWire Windows 98SE Install A Install B Windows Me Install C Install F Windows 2000 Install C Install D Windows XP Install C Install E Mac OS 9 and X Install C Install C Install A 1. Install your drive as described in Step 2. Connecting the Drive on page 7. When you connect the drive to your computer, the Add New Hardware wizard appears, click Next. 2. Select the option to Search for a Driver, click Next. 3. Insert the Maxtor Install CD into your computer s CD-ROM drive 4. Select the option to Specify a location and click the Browse button. 5. A new window appears called Browse for Folder. Double click on the Maxtor CD icon in this window showing the drives and folders on your system. Open the folder titled Drivers located on the Maxtor Install CD and select the USB folder inside this folder. Click the OK button at the bottom of this window. Now click the Next button on the Add New Hardware Wizard screen. 6. Your system will search the CD for the proper driver. To install this driver, click Next. 7. After a few moments your system will finish the driver installation, click Finish. Your drive is now ready to use. Install B 1. Install Microsoft s 1394 Storage Supplement as described in I want to install the Windows 98SE Storage Supplement on page Install your drive as described in Step 2. Connecting the Drive on page 7. Your drive is now ready to use. Install C 1. Install your drive as described in Step 2. Connecting the Drive on page 7. Your drive is now ready to use. 2 Installing the Drive 17
22 2 Install D 1. Install your drive as described in Step 2. Connecting the Drive on page 7. When you connect the drive to your computer, the Add New Hardware wizard appears, click Next. 2. The Install Hardware Device Drivers screen appears. Select the option to search for a driver, click Next. 3. The Locate Driver Files screen appears. Clear all options and click Next. You are asked if you want to disable this device. This option is referring to the Maxtor OneTouch feature. Select the Disable Device option and click Next or Finish. 4. Finish the driver install. Your drive is now ready to use. When using the unplug/eject icon on the taskbar, a reference to the Maxtor 1394 Storage Front Panel will appear under hardware devices. You can ignore this reference when you disconnect your drive from the Windows operating system. Install E 1. Install your drive as described in Step 2. Connecting the Drive on page 7. When you connect the drive to your computer, the Add New Hardware wizard appears. 2. Select the option to Install software automatically and click Next. You may see a message Connect and search for the software on the Internet. Select No, do not connect to the Internet now. Then click Next. The next screen will tell you it cannot install the hardware. 3. Select the Don t prompt again option and click Finish. 4. Disregard the warning message that appears. 5. If a window appears Help & Support Center, disregard this screen and close the window. Your drive is now ready to use. Install F 1. Install your drive as described in Step 2. Connecting the Drive on page 7. When you connect the drive to your computer, the Add New Hardware wizard appears. Select the option Automatic search. 2. Insert the Maxtor Install CD into your computer s CD-ROM drive. 3. The wizard will locate the proper driver. Click Finish. Your drive is now ready to use. To Install Retrospect at a Later Time If you wish to install a complete copy of Retrospect Express software and the Maxtor OneTouch feature at a later time, you can do so by following the original installation instructions provided in this guide Steps 1 3 on pages Installing the Drive
23 3 Using Your Drive Once installed, you can use your new Maxtor Personal Storage 5000 drive in the same way you use the other drives on your computer. Some of the basic ways you can use your new drive are: Move or copy files or folders from your other drives, CD- ROMs, or other storage devices. Within virtually any application, save files to and open files from the new drive. Store video files, games, spreadsheets, and other commonly used files. Store copies of important files from your desktop or laptop computer. This chapter offers additional suggestions on how to use your new drive. Using Retrospect Express Your Maxtor Personal Storage 5000 drive includes a full copy of the Dantz Retrospect Express software. The Retrospect Express software includes many powerful and convenient features. In addition to enabling the Maxtor OneTouch feature, you can: Automatically make copies of your most important files. Make copies of your data onto other popular storage devices, including CD-R, DVD-R, and selected tape drives. Recover lost work easily restore a single file or the contents of an entire drive in one easy step. Save time and minimize storage space needs by copying only new and changed files using IncrementalPLUS technology. If you installed your drive with the Maxtor OneTouch feature, the Retrospect Express software is already installed. A complete electronic guide to this software is located on your Maxtor Installation CD. Retrospect Express backup files may be limited to 4GB. Refer to My Retrospect backup files seem to be limited to 4GB on page 32 of the Troubleshooting and FAQs 3 Using Your Drive 19
24 3 W M section for an explanation of this problem and a suggested solution. To access the electronic guide: 1. Insert the Maxtor Installation CD into your CD-ROM drive. 2. If you already have Adobe s Acrobat Reader installed on your system, skip to Step From the install wizard, select the Install Adobe Acrobat Reader Software option and follow the instructions. 4. Select the Dantz Retrospect Express User s Guide option and follow the instructions. To access the electronic guide: 1. Insert the Maxtor Installation CD into your CD- ROM drive. 2. This electronic guide requires the Acrobat Reader from Adobe. If you do not have Acrobat installed on your system, a free copy is available at: 3. Open the Retrospect Express User s Guide file located on your Maxtor CD-ROM with the Acrobat software. Restoring Files It is easy to restore files that have been backed up using the Maxtor OneTouch feature. To restore files 1. Select the drive containing the copy of your files. 2. Open the Retrospect Backup folder and then the folder that contains your backup copy. W M The folder named Backup copy of Drive X, where X is the drive letter assigned by Windows. The folder named Backup copy of your_disk_name (Only the first 9 characters of this name will be used). 3. Drag the file or group of files you wish to restore to the desired folder as you would to move or copy any other file. If you are not sure where the files you want to restore are located, use your operating system s Find or Search command to search the drive containing the backup data. 20 Using Your Drive
25 Changing Your Maxtor OneTouch Settings 1. Start the Retrospect Express software. 2. Click on the Automate tab and click the Scripts button. 3. Select the Maxtor OneTouch script. a. W Click the x delete button in the Scripts dialog box. Pull down the Scripts menu at the top of the screen M and select the Forget option. Click OK to confirm. b. Push the button on the front of the drive. c. The Maxtor OneTouch setup wizard will start and you can proceed as described in Step 3. Setting Up the Maxtor OneTouch Feature on page 11. Adding Maxtor OneTouch Advance Features You can customize the Maxtor OneTouch feature with Retrospect Express advanced features. To learn more about these advanced features, refer to the electronic Retrospect Express User s Guide included on the Maxtor Installation CD. 1. Start the Retrospect Express software. 2. Click on the Automate tab and click the Scripts button. 3. Select the Maxtor OneTouch script. 4. Click on the Edit button. For further details about Retrospect s script options, refer to the Retrospect Express Guide located on the Installation CD. Connecting and Disconnecting the Drive The FireWire and USB interfaces allow you to hot swap your new Maxtor Personal Storage 5000 drive; that is, connect and disconnect the drive while the computer and your drive are running. Removing the drive from your computer without disconnecting it properly through the operating system can result in lost or damaged files. W To disconnect the drive from a Windows system 1. Click the Windows Unplug or Eject Hardware icon in your system icon tray located at the bottom right corner of your desktop. Unplug or Eject Hardware icon A list of device choices appears. 2. Select the Maxtor drive. The system displays a message saying that you can safely remove the drive. Your system may not allow you to disconnect the drive. In this case, you may need to close all open applications and documents or shut down your system completely to disconnect the drive safely. 3 Using Your Drive 21
26 3 M To disconnect the drive from a Macintosh 1. From the desktop, drag the drive icon to the Trash. The drive disappears from the desktop. 2. Disconnect your drive from the computer. To connect the drive to a Windows system or Macintosh computer 1. Make sure the drive is getting power and the green power light is on. Connecting your computer to a drive that is not powered on can cause your computer to behave erratically or freeze. 2. Insert either the FireWire or USB cable into the drive and your computer. After a moment, the computer will recognize that your drive is connected and the drive icon will appear in the My Computer window or on your Macintosh desktop. Moving Data Between Two Systems Your Maxtor Personal Storage 5000 drive provides a great tool for moving large amounts of data between two systems. This section presents a few tips to remember. W Moving Data between Two Windows Computers Your drive is formatted with the FAT32 file system and is supported under four Windows operating system versions: 98SE, Me, 2000, and XP. Windows 98SE and Me use the FAT32 file system. Windows 2000 and XP support both the FAT32 and NTFS file systems. If you leave the drive in the FAT32 format, you can move files between any of these four Windows operating systems. However, the FAT32 format limits any file to a maximum size of 4 GB. If you choose to reformat to the NTFS file system, you cannot use the drive to move files to or from a computer running Windows 98SE or Me. 22 Using Your Drive
27 Installing Applications on Your Drive You may install and run applications from your Maxtor Personal Storage 5000 drive like any other drive on your system. If you connect the drive to your system using a USB 1.1 interface, the data transfer rate is approximately 1 MB per second. Because of this, installing applications on a drive using the USB 1.1 interface is not recommended. However, you can store the data for many applications and then access the data over a USB 1.1 interface. Most Windows-based and some Macintosh-based applications installed on your drive will only run on the computer where the application was installed. If you move your drive to any other computer, the application may no longer function. Once the drive is reconnected to the computer where the application was originally installed, the application will function properly. W Important Note for Windows 98SE and Me: The Windows operating system expects applications to remain at the same drive letter location at all times. When your drive is removed from the system and plugged back in at a later time, Windows 98SE and Me operating systems may assign the drive a different drive letter. This can happen when another storage device is added to or removed from your computer while the drive is not connected to your system. If Windows has assigned a different letter to your drive than it had previously, any applications installed on the drive may no longer operate properly. Editing Video Using a computer to capture and edit video recorded with a digital camcorder is quickly becoming popular. Digital video files are typically very large, using about 13 GB per hour of video content. Maxtor recommends connecting your drive using the FireWire interface for best results when working with video. W The FAT32 file system limits any single file, including a digital video file, to a maximum size of 4 GB. If you are running the Windows 98 or Me operating system, you should consider upgrading to Windows 2000 or XP to take advantage of the NTFS file system s larger allowable file size and many other features. If you are running either the Windows 2000 or XP operating system with a video editing application, you should consider re-formatting your drive to the NTFS file system. See Formatting Your Drive with NTFS on page 14 for instructions. Reformatting the drive will destroy any data stored on that drive. 3 Using Your Drive 23
28 3 Playing Games CD-ROM-based games typically run faster when they are installed on a hard drive rather than running them from the CD. You can use your Maxtor Personal Storage 5000 drive to store and play CD-ROM games. See Installing Applications on Your Drive on page 23 for more information. To install a CD-ROM game 1. Start the install program on your game CD. 2. Select Maximum Install (if supported), if you are asked how to install the game on your system. This option installs most or all of the game s software onto your drive. 3. When asked for the location to install the software, specify an existing folder or create a new folder on your drive. " Due to limited transfer rates of USB 1.1, Maxtor does not recommend running games from drives connected through USB 1.1. Storing Audio Using your computer as an audio jukebox is a very popular application. This allows you to store and play thousands of your favorite songs. You can also create and manage an audio library on your Maxtor Personal Storage 5000 drive. A popular web site to learn more about these audio applications is at To use your drive to store your audio library, you need to specify a folder on the drive as the default location for audio files in your audio jukebox software. 24 Using Your Drive
29 Using Power Management This feature is only supported using the FireWire interface. To minimize the power consumption of your drive while your computer is on, you can take advantage of the power management feature supported on the FireWire interface and Windows 2000, XP, and Mac OS. Table 1 shows where to find the power management feature in each operating system version. OS Table 1: Accessing the Power Management Feature Windows XP Windows 2000 Do the following: Select Start Settings Control Panel. Select Power Options. When your computer is powered off, you can choose to do one of the following: Leave the drive plugged in all the time. The device is designed to run with the power on at all times. Plug the drive s power supply into a power strip with an on/ off switch so you can turn your drive s power off to further conserve power. Make sure you remove the drive from your computer through the operating system before you disconnect it or turn off the drive s power. Shutting off the drive s power while your computer is running can cause the loss or corruption of data. 3 Windows Me Windows 98SE Mac OS X Mac OS 9 Power management of external hard drives not supported. From the Apple Menu, select System Preferences Energy Saver. Power management of external hard drives not supported. The power management feature sets the drive to automatically use less power after a predetermined period of time of inactivity. This is sometimes referred to as spin down since the drive s internal mechanical disks stop spinning. When the drive is in the spin down mode, the green power light will remain on and the amber activity light will be off. Using Your Drive 25
30 Using Large Capacity Drives with Windows W When using Windows with drives that have capacities higher than 64 GB, there are special considerations. Table 2 gives some information about how the Windows file systems and certain Table 2: Considerations for drive capacities greater than 64 GB Microsoft utilities behave when used on drives with capacities greater than 64 GB. 3 FAT32 and NTFS FDISK and FORMAT Defrag and ScanDisk Windows 98SE Windows Me Windows 2000, XP FAT32 operates properly with partition 320 GB Two known bugs, see Notes 1 and 2 Limited to partitions < 127 GB, see Note 3 FAT32 operates properly with partition 320 GB One known bug, see Note 1 Operates properly with partition up to 320 GB FAT32 and NTFS operate properly with partitions 320 GB NTFS operates properly with partitions 320 GB, FAT32 cannot format partitions > 32 GB Operates properly with partitions 320 GB Note 1: On disks larger than 64 GB running Windows 98SE, both FDISK and FORMAT function properly, but will display an incorrect disk size on the screen. A similar problem can occur with Windows Me at larger disk sizes (starting above 80 GB). Further information is available on Microsoft s Web site at Search their Support Knowledge Base for articles Q and Q Note 2: FDISK may not run properly after an external drive has been disconnected and reconnected. Rebooting the computer before running FDISK is recommended. Note 3: Neither ScanDisk nor Defrag will operate on drive partitions larger than 127 GB. Further information is available on Microsoft s Web site at Search their Support Knowledge Base for article Q Third party utilities can be used to replace the functionality of the ScanDisk and Defrag utilities. Using Security Lock Your new drive includes a security locking slot on the back of the drive. Refer to Figure 1 on page 2 for the exact location of the slot. The security locking slot is compatible with most security locking cables, including those offered by Kensington. 26 Using Your Drive
FIREWIRE DRIVE Maxtor OneTouch Macintosh User s Guide
 FIREWIRE DRIVE Maxtor OneTouch Macintosh User s Guide P/N: 20241400 Warranty Maxtor s warranty obligations are limited to the terms set forth: Maxtor warrants only to the original consumer purchaser that
MAXTOR ONETOUCH III FIREWIRE 400/USB 2.0. User s Guide
 MAXTOR ONETOUCH III FIREWIRE 400/USB 2.0 User s Guide MAXTOR ONETOUCH III USER S GUIDE Contents Windows Installation Introduction................................................. 1 About this Guide............................................
MAXTOR ONETOUCH III MINI EDITION. User s Guide
 MAXTOR ONETOUCH III MINI EDITION User s Guide MAXTOR ONETOUCH III MINI EDITION USER S GUIDE Contents Windows Installation Introduction.................................................... 1 About this Guide...............................................
Peerless Drive System User's Manual
 Peerless Drive System User's Manual Copyright 2001 Iomega Corporation Iomega, the stylized "i" logo, Peerless, and the Peerless brand block are either registered trademarks or trademarks of Iomega Corporation
DataPort 350 & 525 USB 2.0 and FireWire Enclosure User s Guide (800)
") DataPort 350 & 525 USB 2.0 and FireWire Enclosure User s Guide WWW.CRUINC.COM (800) 260-9800 TABLE OF CONTENTS PAGE Package Contents 1 Features and Requirements 2 Installation 6 Trouble Shooting 16 Technical
DataPort 350 & 525 USB 2.0 and FireWire Enclosure User s Guide WWW.CRUINC.COM (800) 260-9800 TABLE OF CONTENTS PAGE Package Contents 1 Features and Requirements 2 Installation 6 Trouble Shooting 16 Technical
CellSync Manager. User Manual F8V7D006-SS F8V7D008-SS. Get online and synchronize anywhere. Web Access. Phone Book Manager
 CellSync Manager Get online and synchronize anywhere Web Access Phone Book Manager User Manual F8V7D006-SS F8V7D008-SS TABLE OF CONTENTS Introduction...2 Interactive Phone Menu...3 LG 5350 CellSync Software
Windows 2000 and Windows XP Installation
 Quick Start Guide MAXTOR ONETOUCH III FIREWIRE 400/USB 2.0 Software di installazione,installationsprogram, Software de instalación, Installatiesoftware, Asennusohjelma, Software de Instalação Includes:
USB VideoBus for Macintosh User Guide
 P73261/F5U206-MAC/US/man.qxd 1/7/00 5:23 PM Page 1 USB VideoBus for Macintosh User Guide P73261 F5U206-MAC P73261/F5U206-MAC/US/man.qxd 1/7/00 5:23 PM Page 2 P73261/F5U206-MAC/US/man.qxd 1/7/00 5:23 PM
DataPort 250 USB 2.0 Enclosure User s Guide (800)
") DataPort 250 USB 2.0 Enclosure User s Guide WWW.CRU-DATAPORT.COM (800) 260-9800 TABLE OF CONTENTS PAGE Package Contents 1 Features and Requirements 2 Installation 4 Trouble Shooting 13 Technical Support
DataPort 250 USB 2.0 Enclosure User s Guide WWW.CRU-DATAPORT.COM (800) 260-9800 TABLE OF CONTENTS PAGE Package Contents 1 Features and Requirements 2 Installation 4 Trouble Shooting 13 Technical Support
EXTERNAL HARD DRIVE. connect. USB2.0FireWirePCMac
 EXTERNAL HARD DRIVE connect welcome contents Your new Seagate external hard drive is a state-of-the-art unit: solid, safe, quiet, cool, versatile and portable, ready to go from one location to another
ImageMate 12-in-1 Reader/Writer User Guide
 ImageMate 12-in-1 Reader/Writer User Guide Model Number SDDR-89 Product Description The Multi-Function Hi-Speed USB 2.0 Reader/Writer CompactFlash Type I/II, SD TM, minisd TM, MultiMediaCard TM, RS-MMC
Hi-Speed USB 2.0 DVD Creator Capture video from your camcorder, PC camera, and VCRs
 Belkin Corporation 501 West Walnut Street Compton CA 90220 USA Tel: 310.898.1100 Fax: 310.898.1111 Hi-Speed USB 2.0 DVD Creator Capture video from your camcorder, PC camera, and VCRs Belkin Components,
QuickStart Installation Guide
 QuickStart Installation Guide For AcomData External Hard Drives: USB 2.0 Drives USB 2.0 & FireWire Combo Drives USB 2.0 & FireWire 800 Combo Drives Windows & Mac Please retain this guide for future reference.
G-RAID 2 Installation Guide
 G-RAID 2 Installation Guide TABLE OF CONTENTS 1. INTRODUCTION 2. SAFETY PRECAUTIONS 3. SYSTEM REQUIREMENTS 4. WHAT S IN THE BOX 5. G-RAID2 OVERVIEW 6. INSTALLING G-RAID2 7. INITIALIZING G-RAID2 7.1 Mac
Introduction. Tools required: This type of box contains general notes or tips for all systems
 User Manual Introduction Thank you for purchasing the Newer Technology ministack NAS! This guide will walk you through the setup process step by step and get you up and running with your new storage device
Instruction Guide. Low-Profile 2-port IEEE 1394 FireWire PCI Card with Video Editing Software PCI1394_2LP
 FIREWIRE CARD Low-Profile 2-port IEEE 1394 FireWire PCI Card with Video Editing Software PCI1394_2LP Instruction Guide * Actual product may vary from photo The Professionals Source For Hard-to-Find Computer
Install Manual. P2 Software ENGLISH M0509AT5091 -FJ VQT2G26-4
 Install Manual P2 Software M0509AT5091 -FJ ENGLISH VQT2G26-4 Contents Operating Precautions When Using Windows 1. Before Installing................................................... 3 2. Precautions in
SOFTWARE INSTALLATION AND USB CONNECTION GUIDE
 SOFTWARE INSTALLATION AND USB CONNECTION GUIDE ENGLISH LYT1197-001A COPYRIGHT 2003 VICTOR COMPANY OF JAPAN, LTD. M4D1 DSC Printed in Malaysia 1003-FO-ID-PJ This document explains the basic information
M9 - NDAS. User Manual. External Storage Enclosure for 3.5 IDE Hard Drives. (English) v1.4
 v1.4") M9 - NDAS External Storage Enclosure for 3.5 IDE Hard Drives User Manual (English) v1.4 EN Table of Contents CHAPTER 1 - INTRODUCTION - 1 - CHAPTER 4 - NDAS SETUP - 7 - ICON KEY - 1 - DRIVER INSTALLATION
M9 - NDAS External Storage Enclosure for 3.5 IDE Hard Drives User Manual (English) v1.4 EN Table of Contents CHAPTER 1 - INTRODUCTION - 1 - CHAPTER 4 - NDAS SETUP - 7 - ICON KEY - 1 - DRIVER INSTALLATION
DAT Optic Inc Universal FireWire Enclosure User s Manual Rev 1.0
 DAT Optic Inc Universal FireWire Enclosure User s Manual Rev 1.0 Universal FireWire Enclosure- User s Manual Page 01 Contents INTRODUCTION... Major Features... Package Contents... Universal FireWire Enclosure
Contents. Getting Started...1. Managing Your Drives...9. Backing Up & Restoring Folders Synchronizing Folders...52
 Contents Getting Started.....................................................1 Installing the Software...........................................1 Using the Maxtor System Tray Icon................................6
USER S MANUAL. For 2.5 and 3.5 Models
 USER S MANUAL For 2.5 and 3.5 Models FCC COMPLIANCE STATEMENTS This equipment has been tested and found to comply with the limits for a Class B digital device, pursuant to Part 15 of the FCC Rules. These
HP Pocket Media Drive User s Guide. book title
 HP Pocket Media Drive User s Guide book title The only warranties for HP products and services are set forth in the express warranty statements accompanying such products and services. Nothing herein should
Pleiades - NDAS. User Manual. External Storage Enclosure for 3.5 IDE Hard Drives. v1.2
 Pleiades - NDAS External Storage Enclosure for 3.5 IDE Hard Drives User Manual v1.2 EN Table of Contents CHAPTER 1 - INTRODUCTION - 1 - CHAPTER 4 - NDAS SETUP - 8 - ICON KEY - 1 - DRIVER INSTALLATION ON
StoreJet 35 Ultra User s Manual
 StoreJet 35 Ultra User s Manual (Ver1.0) 1 Table of Contents Introduction...3 Package Contents...3 Features...4 System Requirements...5 Safety Precautions...5 General Use...5 Setup...5 Backing Up Data...5
HDD external enclosure for data-storage mobility with LAN sharing LAN MAC. USER Manual
 HDD external enclosure for data-storage mobility with LAN sharing LAN MAC USER Manual English AKASA Company notices The information contained in this document is subject to change without notice. All rights
USER S MANUAL. QS2 USB2.0 QS2 USB2.0/eSATA Combo and QS2 USB2.0/eSATA/Firewire Combo Models
 USER S MANUAL QS2 USB2.0 QS2 USB2.0/eSATA Combo and QS2 USB2.0/eSATA/Firewire Combo Models FCC COMPLIANCE STATEMENTS This equipment has been tested and found to comply with the limits for a Class B digital
Transport Pro FireWire and USB Portable Hard Drive
 Transport Pro FireWire and USB Portable Hard Drive User s Guide http://www.mcetech.com Contents Introduction... 1 Preparing to Use the Transport Pro Drive in FireWire Mode... 1 Mac OS 9.1 and up... 1 Mac
USER MANUAL TOUGH DRIVE EXTERNAL MOBILE HARD DRIVE / 2.5" / USB 2.0. Rev. 848
 USER MANUAL TOUGH DRIVE EXTERNAL MOBILE HARD DRIVE / 2.5" / USB 2.0 Win & Mac Rev. 848 Freecom ToughDrive Dear user! Thank you for choosing the Freecom ToughDrive as an external hard drive. For optimal
Introduction.. 2. Chapter 1: Assembling External Storage Device. 3. Chapter 2: Connecting External Storage Device... 4
 1 Table of Contents Pg Introduction.. 2 Chapter 1: Assembling External Storage Device. 3 Chapter 2: Connecting External Storage Device.... 4 Chapter 3: Initializing & Formatting Hard Drive. 5 Preformatted
READ FIRST! User Manual _PktMedaCntr 2/4/05 9:47 AM Page 1
 33216_PktMedaCntr 2/4/05 9:47 AM Page 1 READ FIRST! Pocket Media Center User Manual Card Reader Side High Speed USB 2.0 Hub Side Please read this short manual to learn valuable information about the proper
USB to Serial Converter User s Guide
 USB to Serial Converter User s Guide Important Note! In order to minimize possible installation problems and/or resource conflicts: Read Me First! About This User s Guide This User s Guide is designed
Serial ATA PCI RAID Quick Installation Guide
 Serial ATA PCI RAID Quick Installation Guide Introducing the Serial ATA PCI RAID The Serial ATA PCI RAID is an ultra high-speed two channel Serial ATA controller board for use in Pentium-class computers.
Freshman - USB. Storage Enclosure for 2.5 IDE or SATA Hard Drives. User Manual
 Storage Enclosure for 2.5 IDE or SATA Hard Drives User Manual v1.0 June 29, 2007 EN Table of Contents CHAPTER 1 - INTRODUCTION 1 ICON KEY 1 THE FRESHMAN USB 1 OTHER AVAILABLE INTERFACES 1 SYSTEM REQUIREMENTS
AUA DuoConnect for Notebooks. Installation Guide
 R AUA-1411 DuoConnect for Notebooks Installation Guide In this Booklet What s in the Kit 2 System Requirements 3 Installation Overview 4 Step 1: Installing the Adaptec USB CardBus Plug-in 4 Step 2: Inserting
Targus Memory Stick Reader for Notebook Computers
 Targus Memory Stick Reader for Notebook Computers Targus Memory Stick Reader Introduction Thank you for purchasing the Targus Memory Stick Reader (TMS Reader). Lightweight and ultra-portable, the TMS Reader
Getting Started. Here's how to get started using your Zip 250 drive: 1. Unpack the Zip 250 drive and accessories.
 Getting Started IMPORTANT! Before installing or using your Zip 250 drive, read and follow the USB guidelines to ensure reliable performance of your USB devices. Here's how to get started using your Zip
Hi-Speed USB Port Hub Connect up to 4 Hi-Speed USB 2.0 or 1.1 devices
 P74386ea_F5U234ea_uk 08-09-2003 11:13 Page 1 En Hi-Speed USB 2.0 4-Port Hub Connect up to 4 Hi-Speed USB 2.0 or 1.1 devices Fr De Nl Es It User Manual F5U234ea P74386ea_F5U234ea_uk 08-09-2003 11:13 Page
RTX100-FS USER S MANUAL. Revised September 14, 2009
 RTX100-FS USER S MANUAL Revised September 14, 2009 Thank you for purchasing WiebeTech s RTX100-FS. RTX100-FS features WiebeTech s TrayFree bay and quadruple connection compatibility in a small form factor.
Taurus - USB. User Manual. Dual-Bay Storage Enclosure for 3.5 Serial ATA Hard Drives. (English)
") Dual-Bay Storage Enclosure for 3.5 Serial ATA Hard Drives User Manual (English) v1.0 June 21, 2007 EN Table of Contents CHAPTER 1 - INTRODUCTION 1 CHAPTER 3 - SYSTEM SET UP 6 ICON KEY 1 THE TAURUS USB
Dual-Bay Storage Enclosure for 3.5 Serial ATA Hard Drives User Manual (English) v1.0 June 21, 2007 EN Table of Contents CHAPTER 1 - INTRODUCTION 1 CHAPTER 3 - SYSTEM SET UP 6 ICON KEY 1 THE TAURUS USB
5.25 Bay Multi-Port Panel with a 6-in-1 Flash Card Reader/Writer
 USB 2.0 FLASH CARD READER 5.25 Bay Multi-Port Panel with a 6-in-1 Flash Card Reader/Writer 525FCREAD 525FCREADBK Instruction Guide * Actual product may vary from photo * 525FCREADBK shown The Professionals
GETTING STARTED 3 DEVICE DRIVER INSTALLATION 6 USING YOUR FLIP2DISK 10 TROUBLESHOOTING 12 CONTACT DETAILS 20
 A M A C O M F L I P 2 D I S K U S E R M A N U A L C O N T E N T S GETTING STARTED 3 Unpacking The Flip2disk 3 Handling The Flip2disk Drive 3 Connecting / Disconnecting Interface Cables On The Flip2disk
FireWire 800+Hi-Speed USB Combo Quick Installation Guide
 FireWire 800+Hi-Speed USB Combo Quick Installation Guide Introducing the FireWire 800+Hi-Speed USB Combo The FireWire 800 + Hi-Speed USB Combo features the latest technology in FireWire 800 and USB 2.0.
Multimedia Keyboard User Manual
 P73611-F8E206-MM-man.qxd 8/27/01 10:25 AM Page 1 Multimedia Keyboard User Manual P73611 F8E206-MM P73611-F8E206-MM-man.qxd 8/27/01 10:25 AM Page 2 P73611-F8E206-MM-man.qxd 8/27/01 10:25 AM Page 1 About
Port PCI Quick Installation Guide
 1394 3-Port PCI Quick Installation Guide Introducing the 1394 3-Port PCI The 1394 3-Port PCI is designed to connect DV camcorders, hard disk drives, scanners, printers and other 1394 audio/video devices
USER MANUAL MOBILE HARD DRIVES DESKTOP HARD DRIVES. Rev. 103
 USER MANUAL MOBILE HARD DRIVES DESKTOP HARD DRIVES Rev. 103 Dear user! Thank you for selecting the Freecom Mobile Hard Drive / Desktop Hard Drive as your external data storage device. For optimal use and
FIVE-BAY RAID SYSTEM FOR 3.5 SATA HARD-DISK DRIVES
 DRD-501 FIVE-BAY RAID SYSTEM FOR 3.5 SATA HARD-DISK DRIVES USER MANUAL Thank you for choosing Xcellon. The Xcellon DRD-501 Five-Bay RAID System is a convenient solution for large-data storage needs, housing
CAUTION: Before installing the Windows or Macintosh operating system, see our knowledge base answer ID 1485 for precautionary procedures.
 Quick Start Guide Getting Started Kit Contents USB external drive USB cable AC adapter Quick Install Guide USB External Drive AC Adapter USB Cable Quick Install Guide Compatibility CAUTION: Before installing
USB Read/Write Memory Adapter MAUSB-300 REFERENCE MANUAL
 USB Read/Write Memory Adapter MAUSB-300 REFERENCE MANUAL Introduction Thank you for purchasing our product. The MAUSB-300 USB Read/Write Memory Adapter (hereinafter referred to as the adapter ) is designed
Owner s s Manual. SATA A II Aluminum Hot-Swap Systems. Macintosh, Windows, Linux 2 BAY 4 BAY 4 BAY. Rack 8 BAY. Rack
 Owner s s Manual SATA A II Aluminum Hot-Swap Systems 2 BAY 4 BAY 4 BAY Rack 8 BAY Rack Macintosh, Windows, Linux SATA (Serial ATA) Hot-Swap Drive System / Case Kit Table of Contents User Guide Page How
Veritas System Recovery 18 Management Solution Administrator's Guide
 Veritas System Recovery 18 Management Solution Administrator's Guide Documentation version: 18 Legal Notice Copyright 2018 Veritas Technologies LLC. All rights reserved. Veritas and the Veritas Logo are
TotalShredder USB. User s Guide
 TotalShredder USB User s Guide Copyright Notice No part of this publication may be copied, transmitted, stored in a retrieval system or translated into any language in any form or by any means without
Freecom. Classic Hard Drive SL. Rev. 408
 Rev. 408 Freecom Classic Hard Drive SL www.freecom.com Freecom Classic Hard Drive SL Dear user! Thank you for choosing the Freecom Classic Hard Drive SL external hard drive. For optimal use and performance
Aegis Padlock SSD. User Guide. Remember to save your PIN in a safe place. If lost or forgotten, there is no way to access the drive.
 Aegis Padlock SSD User Guide Remember to save your PIN in a safe place. If lost or forgotten, there is no way to access the drive. If you are having difficulty please refer to the complete user s manual
Notebook Network Card
 Notebook Network Card Connect your PC to a network or broadband modem network F5D5020 Table of Contents Introduction.........................................1 Installing the Hardware.................................2
3.5 SATA Drive Enclosure
 3.5 SATA Drive Enclosure 3.5 esata / USB 2.0 SATA Drive Enclosure SAT3510U2E Instruction Manual Actual product may vary from photo FCC Compliance Statement This equipment has been tested and found to comply
Belkin Corporation 501 West Walnut Street Compton, CA, 90220, USA fax Belkin Ltd. Express Business Park, Shipton Way
 Belkin Corporation 501 West Walnut Street Compton, CA, 90220, USA 310-898-1100 310-898-1111 fax Belkin Ltd. Express Business Park, Shipton Way Rushden, NN10 6GL, United Kingdom +44 (0) 1933 35 2000 +44
Contents. 1 Drobo 5C Online User Guide Before You Begin Product Features at a Glance Checking Box Contents...
 Drobo 5C User Guide Contents 1 Drobo 5C Online User Guide... 6 1.1 Before You Begin... 7 1.1.1 Product Features at a Glance... 8 1.1.2 Checking Box Contents... 10 1.1.3 Checking System Requirements...
G DRIVE with Thunderbolt
 USER MANUAL G DRIVE Portable Thunderbolt and USB 3.0 Drive g-technology.com Table of Contents Table of Contents Safety & General Use Safety Precautions... 4 Backup Your Data... 5 About Your G-DRIVE mobile
Hi-Speed USB Pocket Hub User Manual
 Hi-Speed USB Pocket Hub User Manual P74081-A F5U217 TABLE OF CONTENTS Introduction.........................................1 Features...........................................2 Technical Specifications................................3
FireWire PCI Adapter Quick Installation Guide
 Introduction The FireWire PCI Adapter is designed to add FireWire (1394a) interface to your PC or Mac computer for easy connection to DV camcorders, hard disk drives (self-powered), scanners, printers,
Software Installation Guide
 Software Installation Guide Xanté Corporation 2800 Dauphin St., Suite 100 Mobile, AL 36606-2400 P.O. Box 16526, Mobile, AL 36616-0526 Phone: 800-926-8839, 251-473-6502 Fax: 251-473-6503 Web Site: www.xante.com
Addonics T E C H N O L O G I E S
 Addonics T E C H N O L O G I E S Zebra Drive Enclosure For Following Models: ZESACS ZUSCSU ZUSCSF User Guide FCC Warning Statement This equipment has been tested and found to comply with the limits for
USB Server User Manual
 1 Copyright Notice Copyright Incorporated 2009. All rights reserved. Disclaimer Incorporated shall not be liable for technical or editorial errors or omissions contained herein; nor for incidental or consequential
Taurus S2. User Manual. Dual-Bay Storage Enclosure for 3.5 Serial ATA Hard Drives. (English )
") Dual-Bay Storage Enclosure for 3.5 Serial ATA Hard Drives User Manual (English ) v1.1 April 23, 2008 EN Table of Contents CHAPTER 1 - INTRODUCTION 1 CHAPTER 3 - SYSTEM SET UP 7 ICON KEY 1 THE TAURUS S2
Dual-Bay Storage Enclosure for 3.5 Serial ATA Hard Drives User Manual (English ) v1.1 April 23, 2008 EN Table of Contents CHAPTER 1 - INTRODUCTION 1 CHAPTER 3 - SYSTEM SET UP 7 ICON KEY 1 THE TAURUS S2
(1) DirectCD. Software Operating Instructions MVC-CD200/CD Sony Corporation
 DirectCD. Software Operating Instructions MVC-CD200/CD Sony Corporation") 3-067-952-12(1) DirectCD Software Operating Instructions MVC-CD200/CD300 2001 Sony Corporation Notice for users Program Copyright 1999 Adaptec, Inc. All rights reserved./ Documentation 2001 Sony Corporation
3-067-952-12(1) DirectCD Software Operating Instructions MVC-CD200/CD300 2001 Sony Corporation Notice for users Program Copyright 1999 Adaptec, Inc. All rights reserved./ Documentation 2001 Sony Corporation
The MantaRay. User Manual. & Installation Guide. External Storage Enclosure for 3.5 Hard Drives
 The MantaRay External Storage Enclosure for 3.5 Hard Drives User Manual & Installation Guide Copyright 2000-2003 by Macpower Peripherals Ltd. - www.macpower.com.tw Table of Contents TABLE OF CONTENTS -
Owner s manual for Windows and Mac OS X
 Owner s manual for Windows and Mac OS X 1 Important Safety Instructions WARNING: Listening to audio at high volumes over headphones can cause hearing damage. Please be careful to limit the volume level
esata II 2-Port ExpressCard Quick Installation Guide
 esata II 2-Port ExpressCard Quick Installation Guide Introducing the esata II 2-Port ExpressCard The esata II 2-Port ExpressCard is an ultra high-speed dual channel Serial ATA Generation 2 controller.
READ ME FIRST. Windows NT. *DSL Equipment Installation Guide: Efficient Networks 5260
 READ ME FIRST Windows NT *DSL Equipment Installation Guide: Efficient Networks 5260 *Digital Subscriber Line Part Number: 5260NT02A Version 1.2-A. Table of Contents Follow Steps 1 through 8 to complete
DP SATA 6Gb/s PCIe i/e Quick Installation Guide
 DP SATA 6Gb/s PCIe i/e Quick Installation Guide Introducing the SATA 6Gb/s PCIe i/e The DP SATA 6Gb/s PCIe i/e adds 2 SATA 6Gb/s & a PATA connectors to PCIe-equipped computers. Features and Benefits Dual
Introduction...1. Getting Started...2. System Requirements Product Part Identification Installation Guide...4
 Table of Contents Introduction...1 Getting Started...2 System Requirements... 2 Product Part Identification... 3 Installation Guide...4 Hard Drive Duplication Steps... 4 Using Dubbler Dock for Mac... 5
SC-01 Data Logger Management Program Operator s Manual
 SC-01 Data Logger Management Program Operator s Manual Part Number: 71-0138RK Revision: P1 Released: 9/12/07 www.rkiinstruments.com Warranty RKI Instruments, Inc., warrants gas alarm equipment sold by
ClassicMouse User Manual
 P73096-F8E201-US-man-qxd 3/9/00 8:14 AM Page 1 ClassicMouse User Manual P73096 F8E201 F8E201-BLK P73096-F8E201-US-man-qxd 3/9/00 8:14 AM Page 2 P73096-F8E201-US-man-qxd 3/9/00 8:14 AM Page 1 1. Introduction
READ ME FIRST Windows 95/98/Me/2000
 READ ME FIRST Windows 95/98/Me/2000 *DSL Equipment Installation Guide: Efficient Networks 5260 *Digital Subscriber Line Part Number: 52609x02 Version 1.2-A Table of Contents Follow Steps 1 through 8 to
Kanguru FlashBlu II User Guide
 Kanguru FlashBlu II User Guide Copyright 2014, All Rights Reserved Model no: ALK Notices and Information NOTICES AND INFORMATION Please be aware of the following points before using your Kanguru FlashBlu
Instruction Guide. 4-Port IEEE 1394 FireWire Card With Digital Video Editing Kit PCI1394_4. The Professionals Source For Hard-to-Find Computer Parts
 FIREWIRE CARD 4-Port IEEE 1394 FireWire Card With Digital Video Editing Kit PCI1394_4 Instruction Guide Revised: July 26, 2002 The Professionals Source For Hard-to-Find Computer Parts 7 FCC COMPLIANCE
PortaGig 800 Quickstart
 PortaGig 800 Quickstart Pocket-sized, bus-powered FireWire 800 and USB 2.0 portable Hard Drive 610027-1.02 PortaGig 800 Quickstart.pdf May 28, 2008 Proprietary Notice and Disclaimer Unless noted otherwise,
FireWire Hi-Speed USB Combo Quick Installation Guide
 FireWire 800 + Hi-Speed USB Combo Quick Installation Guide Introducing the FireWire 800 + Hi-Speed USB Combo The FireWire 800 + Hi-Speed USB Combo features the latest technology in FireWire 800 and USB
English. TI.GRAPH LINK é 2 FOR THE MACINTOSH CONDENSED GUIDEBOOK
 English TI.GRAPH LINK é 2 FOR THE MACINTOSH CONDENSED GUIDEBOOK Note: This guidebook applies to the TI graphing calculators and accessories described on page 3. Graphic screens in this guidebook were captured
FireWire 800 ExpressCard Quick Installation Guide
 FireWire 800 ExpressCard Quick Installation Guide Introducing the FireWire 800 ExpressCard The FireWire 800 ExpressCard adds FireWire 800 (1394b) interface to your ExpressCard equipped computer. Features
USB 3.0 external hard drives for use inside Evolution Series compatible docks and cases or as stand alone storage devices.
 USB 3.0 external hard drives for use inside Evolution Series compatible docks and cases or as stand alone storage devices. Product Manual Table of Contents Welcome to the Evolution Series: G-DRIVE ev RaW
Owner s s Manual. SATA A II LCD Hot-Swap Systems. Macintosh, Windows, Linux EXTERNAL SYSTEM INTERNAL 5.25 SYSTEM DUAL EXTERNAL SYSTEM
 Owner s s Manual SATA A II LCD Hot-Swap Systems EXTERNAL SYSTEM INTERNAL 5.25 SYSTEM DUAL EXTERNAL SYSTEM Macintosh, Windows, Linux SATA (Serial ATA) Hot-Swap Drive System / Case Kit Table of Contents
Drobo 5D3 User Guide
 Drobo 5D3 User Guide 1 Drobo 5D3 User Guide... 6 2 Before You Begin... 7 2.1 Product Features at a Glance... 7 2.2 Checking Box Contents... 8 2.3 Checking System Requirements... 9 2.3.1 Operating Systems
Owner s s Manual. G5 SATA Double Drive Internal Mounting Kit. Apple Macintosh G5. Add 2 SATA drives to the G5
 Owner s s Manual Add 2 SATA drives to the G5 G5 SATA Double Drive Internal Mounting Kit Apple Macintosh G5 SATA (Serial ATA) 2 Internal Drive System Table of Contents User Guide Page How SATA (Serial ATA)
Mac User Manual x Software. For Mac OS X 10.4.x (Tiger) and 10.5.x (Leopard)
 and 10.5.x (Leopard)") Mac User Manual - 1.8.x Software For Mac OS X 10.4.x (Tiger) and 10.5.x (Leopard) Powered by Technology Software Release Statement User Manual for Mac OS X 10.4.x and 10.5.x Software Version 1.8.x, released
Mac User Manual - 1.8.x Software For Mac OS X 10.4.x (Tiger) and 10.5.x (Leopard) Powered by Technology Software Release Statement User Manual for Mac OS X 10.4.x and 10.5.x Software Version 1.8.x, released
Instruction Guide. 2 Channel Ultra ATA/100 PCI Card PCI2IDE100. The Professionals Source For Hard-to-Find Computer Parts. Revised: December 5, 2002
 IDE CARD 2 Channel Ultra ATA/100 PCI Card PCI2IDE100 Instruction Guide * Actual product may vary from photo Revised: December 5, 2002 The Professionals Source For Hard-to-Find Computer Parts 7 FCC COMPLIANCE
FireWire 800 ExpressCard Adapter DX-ECFW USER GUIDE
 FireWire 800 ExpressCard Adapter DX-ECFW USER GUIDE 2 Contents FireWire 800 ExpressCard Adapter Contents Introduction...2 Product features...3 Important safety instructions...4 System requirements...4
How To Use This Manual. Icons Used In This Manual. How To Use This Manual. LaCie Big Disk User s Manual. In the toolbar:
 How To Use This Manual How To Use This Manual In the toolbar: Previous Page / Next Page Go to Previous View / Go to Next View Go to Contents Page / Go to Precautions Page On the page: Click on the text
READ FIRST! Bluetooth USB Adapter 2.0 Manual. Included in This Package Bluetooth USB Adapter CD-ROM with Bluetooth software and manual
 33348_BlueToothUSB.qxd 7/21/05 6:57 PM Page 1 Bluetooth USB Adapter 2.0 Manual Included in This Package Bluetooth USB Adapter CD-ROM with Bluetooth software and manual System Requirements Hardware Requirements
The BuzzBox User Manual Revised June 2006
 The BuzzBox User Manual Revised June 2006 FCC Regulations Compliance (for USA) This equipment has been tested and found to comply with the limits for Class B digital device pursuant to Part 15 of FCC Rules.
The IceCube. User Manual. & Installation Guide. External Storage Enclosure for 3.5 Hard Drives
 The IceCube External Storage Enclosure for 3.5 Hard Drives User Manual & Installation Guide Copyright 2000-2003 by Macpower Peripherals Ltd. - www.macpower.com.tw Table of Contents TABLE OF CONTENTS -
Serial ATA PCI RAID Quick Installation Guide
 Serial ATA PCI RAID Quick Installation Guide Introducing the Serial ATA PCI RAID The Serial ATA PCI RAID is an ultra high-speed two channel Serial ATA controller board for use in Pentium-class computers.
USB Memory Drive CD with Application Software and Drivers for Windows 98SE. 32 MB, > 64 MB recommended. min. 2x (for probable installation)
") User Manual USB Memory Drive Content: Included with USB Memory Drive...1 System Requirements...1 Warranty...2 Making Copies of This Manual...2 Notes on this Manual...3 Data Security...3 Operational Safety...3
User Manual USB Memory Drive Content: Included with USB Memory Drive...1 System Requirements...1 Warranty...2 Making Copies of This Manual...2 Notes on this Manual...3 Data Security...3 Operational Safety...3
M9-LAN. User Manual. & Installation Guide. Network Drive for 3.5 IDE HDD. v1.1
 M9-LAN Network Drive for 3.5 IDE HDD User Manual & Installation Guide v1.1 Table of Contents CHAPTER 1 - INTRODUCTION - 1 - CHAPTER 4 LAN DISK SETUP - 10 - ICON KEY - 1 - NETWORK INSTALLATION ON A PC -
User Manual. Americas: Europe: DriveStation External Hard Drive HD-WHU3R1 HD-QHU3R5
 DriveStation External Hard Drive HD-WHU3R1 HD-QHU3R5 User Manual Americas: www.buffaloamericas.com Europe: www.buffalo-technology.com 35020424-02 2016.01 Contents Overview...3 Diagrams...3 Power On/Off...4
Taurus Super-S Combo
 Dual-Bay Storage Enclosure for 3.5 Serial ATA Hard Drives User Manual May 11, 2009 - v1.1 EN Table of Contents CHAPTER 1 - INTRODUCTION 1 CHAPTER 3 - SYSTEM SET UP 7 ICON KEY 1 THE TAURUS SUPER-S COMBO
Laser Beam Printer. Network Guide. IMPORTANT: Read this manual carefully before using your printer. Save this manual for future reference.
 Laser Beam Printer Network Guide IMPORTANT: Read this manual carefully before using your printer. Save this manual for future reference. ENG Network Guide How This Manual Is Organized Chapter 1 Before
DP FireWire Port PCIe Quick Installation Guide
 DP FireWire 800 3-Port PCIe Quick Installation Guide Introducing the DP FireWire 800 3-Port PCIe The DP FireWire 800 3-Port PCIe is designed to add FireWire 800 (1394b) and 1394a (6-pin) interfaces to
Studio Manager. for / Installation Guide. Keep This Manual For Future Reference.
 Studio Manager for / Installation Guide Keep This Manual For Future Reference. E i Important Information Exclusion of Certain Liability Trademarks Copyright Manufacturer, importer, or dealer shall not