Ekran System v.6.1 Deployment Guide
|
|
|
- Clare Stephens
- 5 years ago
- Views:
Transcription

1 Ekran System v.6.1 Deployment Guide
2 Table of Contents About... 6 System Requirements... 7 Program Structure Deployment Process Server and Database About Database Types Comparison High Availability Mode About Standard and High Availability Modes Comparison Installing/Uninstalling/Updating the Server Installing the Server Backing up Ekran Master Certificate Deleting Ekran Master Certificate Importing Ekran Master Certificate Installing the Server in the Cloud Adding Server Executable to Windows Firewall Using an External/Cloud-Based Server Computer Updating the Server Uninstalling the Server Moving Binary Data to Shared or Local Folder Validating Monitoring Data About Validating Monitoring Data Using Hash Codes Signing Monitoring Data with Certificate Management Tool About Management Tool Installation Prerequisites Prerequisites Overview Turning on Internet Information Service (IIS) Turning on IIS for Windows 8 and Windows Turning on IIS for Windows Server 2008 R Turning on IIS for Windows Server
3 Installing.NET Framework Configuring Internet Information Service (IIS) Using Certificates Generating Self-Signed Certificate Exporting Self-Signed Certificate Importing Trusted Certificate Adding Certificate to Trusted Root Certification Authorities Setting HTTPS Binding for a Default Web-Site Installing/Uninstalling/Updating the Management Tool Installing the Management Tool Adjusting Computer for Remote Access Updating Management Tool Uninstalling Management Tool Opening Management Tool Licensing General Licensing Information About Serial Keys About Update & Support Period Viewing License State Activating Serial Keys Online Adding Activated Serial Keys Offline Deactivating Serial Keys Client License Management Windows Clients About Monitoring via Windows Clients Installing Windows Clients About Setting up Environment for Remote Installation Windows Client Installation Prerequisites Disabling Simple File Sharing in Windows XP Disabling Sharing Wizard in Windows 8.1, Windows 8 and Windows Checking System Services Setting up Windows Vista, Windows XP, Windows Server 2003 Firewall Setting up Firewall for Windows 10, Windows 8.1, Windows 8, Windows 7, Windows Server 2012, Windows Server
4 Installing Windows Clients Remotely via the Management Tool About Selecting Computers Remote Windows Client Installation Process Remote Installation from an Existing.INI File Installing Windows Clients Locally About Windows Client Installation Package Generating Windows Client Installation Package Installing Windows Clients Locally with Custom Monitoring Parameters Downloading Windows Client Installation File (.exe) Installing Windows Clients Locally without.ini File Installation via Third Party Software Installing Windows Client on Amazon WorkSpace Cloning a Virtual Machine with Installed Client Unassigning License on Virtual Machine Shutdown Golden Image Mode for the Server Unassigning License via the Script on the Client Side Updating Windows Clients About Windows Client Status after Server Update Updating Windows Clients Automatically Updating Windows Client Manually Reconnecting Windows Clients to Another Server Uninstalling Windows Clients About Client Uninstallation Key Uninstalling Windows Clients Remotely Uninstalling Windows Clients Locally Viewing Windows Clients macos Clients About Monitoring via macos Clients Installing macos Client About Downloading macos Client Installation File
5 Installing macos Clients Uninstalling macos Clients About Uninstalling macos Clients Remotely Uninstalling macos Clients Locally Viewing macos Clients Linux Clients About Monitoring via Linux Clients Installing Linux Client About Downloading Linux Client Installation File Installing Linux Clients Uninstalling Linux Clients Viewing Linux Clients Tray Notifications Application About Installing/Uninstalling the Tray Notifications Application Installing the Tray Notifications Application Uninstalling the Tray Notifications Application Troubleshooting Quick Access to Log Files Database/Server Database/Server Related Issues Database/Server Related Error Messages Management Tool Management Tool Related Issues Management Tool Error Messages Windows Client Checking that the Client Is Installed Clients Installation/Uninstallation Issues and Error Messages Linux Client Checking the State of the Linux Client Restarting Linux Client
6 About Welcome to Ekran System! Ekran System is an application that allows you to record the activity of the target computers with installed Clients and to view the screen captures from these computers in the form of video. This guide will help you in managing Ekran System components (installing, uninstalling, updating, etc.) and controlling their interaction. 6
7 System Requirements Ekran System claims different system requirements for each of its components. Make sure your hardware and software meet the following system requirements to avoid possible component malfunctions. Ekran System Server requirements: 2 GHz or higher CPU 4 GB or more RAM Enterprise-level Ethernet card Minimum 1 Gbit/s network adapter Windows Server 2016, Windows Server 2012, and Windows Server 2008 R2 (x64 platform) Universal C Runtime and Visual C++ Runtime (starting with Ekran System 5.5). Both can be installed via the Microsoft Visual C Redistributable: NOTE: The Universal C Runtime needs to be initially installed via update KB : Framework or higher NOTE: If the Server and the Management Tool are to be installed on the same computer, make sure you turn on the Internet Information Service before the installation of.net Framework [When using MS SQL Database]: Full edition of MS SQL Server 2008R2 SP1 or higher. Standard license or higher is required. NOTE: If you want to deploy the Ekran System in the High Availability mode, enabled Message Queueing and configured NLB cluster are required. Please refer to the High Availability Deployment Guide for more information. Management Tool requirements: 2 GHz or higher CPU 4 GB or more RAM 100 Mbit/s network adapter Windows 10, Windows 8.1, Windows 8, Windows 7 (any edition except Home); [recommended] Windows Server 2016, Windows Server 2012, and Windows Server 2008 R2 (starting from SP1 version). Both x86 and x64 platforms are supported..net Framework or higher IIS 7.5 or higher with enabled ASP.NET 3.5 and 4.5 support (4.6 for Windows Server 2016) [For accessing the Management Tool locally or remotely] One of the following browsers: 7
8 Google Chrome 37 or higher Mozilla Firefox 32 or higher Internet Explorer 10 or higher Safari S6 and Safari S5 Opera 15 or higher NOTE: The Management Tool might be opened in other browsers, but its compatibility with other browsers is not guaranteed. Windows Client requirements: 1 GHz or higher CPU 512 MB or more RAM 100 Mbit/s network adapter Windows 10, Windows 8.1, Windows 8, Windows 7, Windows Vista, Windows XP SP3; Windows Server 2016, Windows Server 2012, Windows Server 2008, and Windows Server 2003 SP1. Both x86 and x64 platforms are supported. NOTE: Due to the new SHA-256 code signing, on Windows 7 SP1 and Windows Server 2008 R2 SP1, the Microsoft Security Advisory update needs to be installed: Citrix XenDesktop; Citrix XenApp; Citrix XenDesktop/XenApp with Citrix Provisioning Services (PVS). It is recommended to have not less than 500MB of free space on the disk where the Client is installed to save data during the offline session. macos Client requirements: 2.26GHz Intel Core 2 Duo or higher CPU 2GB RAM 100 Mbit/s network adapter macos 10.9 and later It is recommended to have not less than 500MB of free space on the disk where the Client is installed to save data during the offline session. Linux Client requirements: 1 GHz or higher CPU 512 MB or more RAM 100 Mbit/s network adapter It is recommended to have not less than 500MB of free space on the disk where the Client is installed to save data during the offline session. Linux Kernel and higher 8
9 Distributor Base OS Versions Supported Debian Debian Ubuntu Linux Mint 8.0, , 15.0, 14.0, xx - 13 opensuse Suse Linux Enterprise Server 11(SP2, SP3, SP4), 12(SP1, SP2, SP3) RedHat RedHat CentOS Oracle Linux 7.0, x, 6.x 7.x Sun Microsystems Solaris 10.0 NOTE: When the Client is installed to the terminal server, hardware requirements depend on the number of active user sessions and may increase drastically. For example, hardware requirements for the Client deployed on the terminal server hosting 10 active user sessions will be as follows: Intel Core i3 or similar AMD CPU 2048 MB RAM 9
10 Program Structure Ekran System is an application specially designed to control user activity remotely. Ekran System includes the following components: Ekran System Server (further referred to as Server): It is the main part of the Ekran System used for storing the screenshots and associated information received from the Clients. The work of the Server can be started or stopped via Server Tray. Ekran System Management Tool (further referred to as Management Tool): It is a central administrative unit that allows you to control and manage Clients, Users, USB Monitoring Rules, Alerts, Server database, and Serial Keys. You can have access to the Management Tool from any computer in the network without having to install it on this computer. Ekran System Session Viewer provides a usable interface for quick review of the monitored data received from the Ekran System Clients. Ekran System Windows Clients (further referred to as Windows Clients): Being hosted on the remote computers, Windows Clients create screenshots with the defined frequency and send them to the Server along with metadata information such as user name, host name, activity time, active window titles, application names, URL addresses, clipboard text data, keystrokes, etc. Managing the remote Windows Clients configuration and settings is performed via the Management Tool. Ekran System macos Clients (further referred to as macos Clients): Being hosted on the remote computers, macos Clients create screenshots with the defined frequency and send them to the Server along with metadata information such as user name, host name, activity time, active window titles, application names, URL addresses, etc. Managing the remote macos Clients configuration and settings is performed via the Management Tool. Ekran System Linux/Unix Clients (further referred to as Linux Clients): Being hosted on the remote computers, Linux Clients capture input/output terminal data (including all executed commands) and send this interactive data to the Server. Ekran System Tray Notifications application (further referred to as Tray Notifications application): This application allows receiving notifications on alert events on Clients. 10
11 11
12 Deployment Process The Ekran System installation consists of several steps: 1. Installing the Server: To deploy the system, first of all you need to install the Server. The Server is used to store and process all records sent by the Clients hosted on the remote computers. During the Server installation you can select the type of the database and define administrator credentials. NOTE: You can deploy the Ekran System in the High Availability mode, which allows you to work with multiple Server instances in the Network Load Balancer cluster. This would provide a high level of operational performance, which allows minimizing downtime and service interruptions. Please refer to the High Availability Deployment Guide for more information. 2. Completing Management Tool installation prerequisites: To install and run the Management Tool, you need to turn on the Internet Information Service on your computer, add the selfsigned or trusted certificate to the Trusted Root Certification Authorities and set HTTPS binding for a default web site (or any other IIS site). 3. Installing the Management Tool: The Management Tool is used to manage Users, Clients, Alerts, and Database, as well as to view the monitored data received from Clients. Connection with the Server is required for the Management Tool to operate. 4. Activating serial keys (adding activated serial keys): To be able to receive data from the Clients, you need to license the Clients by activating purchased serial keys. You can also activate an Enterprise serial key to get an access to the enterprise features of the Ekran System during the unlimited period of time. 5. Installing Clients: Installing Windows Clients: The Windows Clients are usually installed remotely via the Management Tool. A Windows Client can be installed on any computer in the network. Please note that several conditions have to be met for successful remote Client installation. Installing macos Clients: The macos Clients are installed locally. Installing Linux Clients: The Linux Clients are installed locally. 6. Installing the Tray Notifications application: The Tray Notifications application can be installed on any computer and as long as there is connection to the Server; the Tray Notifications application displays notifications on all alert events received from Clients. For more information, see the Tray Notifications application help file. After installing all the system components, Ekran System is considered deployed and all its features become available. 12
13 Server and Database About The Server is the main component of the system, which provides interaction between other components. The Server stores all monitored data, user accounts, and system settings in the database. Database Types Comparison When installing the Server, you can choose between the two types of databases (MS SQL database and Firebird database). These databases have the following differences: Feature MS SQL Database Firebird Database General Commercial/open-source Free Requires additional software installation Scalability Remote access to database Commercial database from Microsoft (has a limited free version) NOTE: Using MS SQL Express does not guarantee the stable work of the Server. (a separate database engine that can be deployed on a separate server) Open source product (an embedded database that runs inside of the Ekran System server process and cannot be moved to another server) Clustering support Network drives support Performance Processing speed High Low 13
14 Feature MS SQL Database Firebird Database Efficient caching algorithms Index statistics update Automatic Manual Memory/process usage A separate process, more efficient memory usage, quotas can be applied Uses memory and CPU as a part of the Ekran System server process Additional features o Maintenance tasks can be executed by the engine independently o Complex execution plans optimizations Requires additional software installation Safety and security Security High. Keystroke encryption is supported Safety o Database corruption is unlikely o Flexible backup logic o Replications o Сan be managed via Microsoft native tools o Support scheduled maintenance: reindexing, shrinking etc. Low. Keystroke encryption is not supported o Database corruption is possible o Manual backup with service stopping o No replications o Shadow file copying is not supported o Only automatic database maintenance supported High Availability Mode About The High Availability mode allows you to configure and deploy Ekran System in such a way that it can work with multiple Server instances in the Network Load Balancer cluster. This would allow balancing the load of data sent to the servers by Ekran Clients and ensure data integrity in case any of the instances goes offline for any number of reasons. Additionally, Ekran System 14
15 deployed in the High Availability mode includes a special License Server, which manages Client licenses in the whole system. NOTE: The High Availability mode is available only if you have an activated Enterprise serial key. Standard and High Availability Modes Comparison The Standard and High Availability modes have the following differences: Feature Standard Mode High Availability Mode Serial key types One of the following serial keys: Permanent Trial Update and support Enterprise serial key and one of the following keys: Permanent Trial Update and support Database type Firebird or MS SQL MS SQL Number of Servers One Multiple System requirements Additional Ekran System components Standard system requirements. None Standard system requirements, enabled Message Queueing, and configured NLB cluster. License Server Additional Software None NLB cluster NOTE: We recommend using Windows NLB. We cannot guarantee the High Availability Mode to function with other load balancers correctly. Component connection Recommended for Physical IP address Average number of Client computers. Logical IP address Large number of Client computers. 15

16 Installing/Uninstalling/Updating the Server Installing the Server To install the Server, do the following: 1. Run the EkranSystem_Components.exe installation file. 2. Click Next on the Welcome page. 3. Carefully read the terms of the End-User License Agreement and click I Agree. 4. On the Choose Components page, do one of the following and click Next: In the drop-down list, select Ekran System Server. Select Ekran System Server in the box. 5. On the Choose Install Location page, enter the installation path or click Browse to navigate to the Server installation folder. Click Next. 16


17 6. On the Database Type page, select the type of database you want to use for storing data. Click Next. See the Database Types Comparison chapter, to see the difference and choose the proper type of the database. 7. If you have selected MS SQL Server, on the MS SQL Server Database Configuration page, define the connection parameters and then click Next. Define the MS SQL Server instance name, which is the instance name assigned to the TCP/IP port. Define the Database name for the database. Define the User name and Password of a user account via which the connection to the Server will be established. NOTE: You have to define either the SA credentials or the credentials of the user with the dbcreator permission. 17


18 8. If you have selected Firebird database, on the Database Location page, enter the database path or click Browse to navigate to the database installation folder. Click Next. 9. If you already have a database created during the usage of previous program versions, you will be offered to re-use it. If you want to use the existing database, click Yes. In other case, click No and the new database will be created. NOTE: If you click No, the existing database will be deleted. 18


19 10. On the Administrator password page, define the password for the administrator (the default user of Ekran System with login admin and full permissions). Click Next. 11. On the Ekran System Client Uninstallation Key page, enter the key that will be used during the Client local uninstallation and click Next. By default, the Uninstallation key is allowed. You will be able to change this key via the Management Tool any time later. 12. Click Install. 13. The process of installation starts. Its progress is displayed on the Installing page. 14. After the end of the installation process, click Finish to exit the wizard. 15. If you are installing the Server for the first time, back up EkranMasterCertificate. The backed up certificate might be required for Server recovery or during updates. 16. If you already have a backed up master certificate and re-using the database, delete the master certificate and import the backed up one instead of it. 17. In Windows Firewall, you must allow the Server executable to accept TCP connections via ports 9447 and 9449 (for the connection between the Server and the Clients), 19

20 22713 (for the connection between the Server and the Management Tool). These rules will be added to Windows Firewall automatically, if Windows Firewall is enabled during the Server installation. Backing up Ekran Master Certificate To back up Ekran Master Certificate, do the following: 1. On the Ekran Server computer with the certificate you want to back up, press Windows+R, type mmc in the Run text box and press Enter. 2. In the opened User Account Control window, click Yes. 3. In the Console window, select File > Add/Remove Snap-in. 4. In the Add or Remove Snap-ins window, select Certificates and click Add. 20

21 5. In the Certificates Snap-in window, select the Computer account option and click Next. 6. In the Select Computer window, select the Local computer option and click Finish. 21


22 7. In the Add or Remove Snap-ins window, click OK. 8. In the Certificates (Local computer) tree-view, select Personal > Certificates. 9. Select EkranMasterCertificate and in its context menu select All Tasks > Export. 10. The Certificate Export Wizard opens. 11. On the Certificate Export Wizard Welcome page, click Next. 12. On the Export Private Key page, select the Yes, export the private key option and click Next. 13. On the Export File Format page, select the following options : Personal Information Exchange Include all certificates in the certification path if possible Export all extended properties 14. Click Next. 22

23 15. On the Security page, select the Password option and enter the password in the Password and the Confirm password fields. Click Next. NOTE: Make sure that you remember the password since you will need it when restoring the certificate or transferring it to another server. 16. On the File to Export page, specify the location to store the certificate and the certificate name manually or click Browse, and click Next. 17. On the Completing the Certificate Export Wizard page, click Finish. NOTE: You will need the certificate for reinstalling the Server, moving it to another computer, or creating the High Availability cluster. 23
24 Deleting Ekran Master Certificate To delete Ekran Master Certificate, do the following: 1. On the Ekran Server computer, press Windows+R, type mmc in the Run text box and press Enter. 2. In the opened User Account Control window, click Yes. 3. In the Console window, select File > Add/Remove Snap-in. 4. In the Add or Remove Snap-ins window, select Certificates and click Add. 5. In the Certificates Snap-in window, select the Computer account option and click Next. 6. In the Select Computer window, select the Local computer option and click Finish. 7. In the Add or Remove Snap-ins window, click OK. 8. In the Certificates (Local computer) tree-view, select Personal > Certificates. 9. Select EkranMasterCertificate and in its context menu select Delete. 10. Click Yes in the confirmation message. Importing Ekran Master Certificate To import Ekran Master Certificate, do the following: 1. On the Ekran Server computer, press Windows+R, type mmc in the Run text box and press Enter. 2. In the opened User Account Control window, click Yes. 3. In the Console window, select File > Add/Remove Snap-in. 4. In the Add or Remove Snap-ins window, select Certificates and click Add. 5. In the Certificates Snap-in window, select the Computer account option and click Next. 6. In the Select Computer window, select the Local computer option and click Finish. 7. In the Add or Remove Snap-ins window, click OK. 8. In the Certificates (Local computer) tree-view, select Personal > Certificates. 9. In the Console window, select Actions > All Tasks > Import. 10. The Certificate Import Wizard opens. 11. On the Certificate Import Wizard Welcome page, click Next. 12. On the File to Import page, click Browse and select the file with the backed up certificate. Click Next. 13. On the Private key protection page, enter the password and click Next. 14. On the Certificate Store page, select the Place all certificates in the following folder option, click Browse, and select the Personal node. Click Next. 15. On the Completing the Certificate Export Wizard page, click Finish. 24
, and 22713 (for the connection")
25 Installing the Server in the Cloud To install the server in the cloud, do the following: 1. In the cloud, install the Server in a usual way. 2. In the cloud management console, allow the Server executable to accept TCP connections via ports 9447 and 9449 (for the connection between the Server and the Clients), and (for the connection between the Server and the Management Tool). NOTE: It is recommended to install the Server and Management Tool on the same computer. Adding Server Executable to Windows Firewall Please note that Windows Firewall will be adjusted automatically, if it is enabled during the Server installation. If you use any other Firewall, it should be adjusted as well. To add the Server executable to the Windows Firewall, do the following: 1. In the Control Panel, select System and Security > Windows Firewall. 2. In the Windows Firewall window, click Advanced settings. 3. In the Windows Firewall with Advanced Security window, right-click Inbound Rules and select New rule. 25

26 4. The New Inbound Rule Wizard opens. 5. On the Rule Type page, select Program and click Next. 6. On the Program page, select This program path, then click Browse and navigate to the Server executable. The default path is "C:\Program Files\Ekran System\Ekran System\Server\EkranServer.exe ". Click Next. 7. On the Action page, select Allow the connection and then click Next. 26

27 8. On the Profile page, select the profile of the network used for connecting remote computers and the Server. Click Next. 9. On the Name page, define the Name of the rule. Click Finish. 10. The rule is created for the Server application. By default, the rule allows any connections via all ports. 11. To define the protocol and ports, double-click the created rule. The Ekran Properties window opens. 27
 o 22713 (for the connection between the Server and the Management Tool) 13.")
28 12. In the Protocols and Ports tab, do the following: In the Protocol Type list, select TCP. In the Local port list, select Specific Ports. Type the following port numbers in the box below: o 9447 and 9449 (for the connection between the Server and the Clients) o (for the connection between the Server and the Management Tool) 13. Click Apply to save changes. Click OK. 14. Close the Windows Firewall window. Using an External/Cloud-Based Server Computer If your Server is not in the same network as Clients or the Management Tool, do the following: 1. Make sure your Server has a unique external IP address. 2. Specify this address when installing the Management Tool and installing the Client. 28
29 Updating the Server The updating of the Server is performed via the installation file of a newer version. During an update you may select to update the existing database to a newer version or simply reinstall it. To update the Server, do the following: 1. Run the EkranSystem_Components.exe installation file. 2. On the Welcome page, click Next. 3. On the Already Installed page, select Update/Add/Remove components and click Next. 4. On the Choose Components page, select Ekran System Server and click Next. 5. On the Database Update page, if you want to keep the existing database, select Update database to a new version, otherwise select Reinstall the database. Click Next. NOTE: To change the type of a database, you need to reinstall the whole system. 6. On the Administrator password page, define the password for the administrator (the default user of Ekran System with login admin and full permissions). Click Next. 7. The update process starts. 8. After the end of the update process, click Finish to exit the wizard. 9. If you are updating Server from version lower than 5.5, back up EkranMasterCertificate. 10. If you are updating Server from version 5.5 and higher, make sure that the master certificate is correct. If necessary import it from the backed up copy. 29

30 Uninstalling the Server The Server uninstallation is an irreversible operation, during which the database is removed without any user confirmations. NOTE: Before uninstalling the Server, make sure you have uninstalled all the Clients from the remote computers. If you don't uninstall the Clients, they will remain installed on the remote computers and collect the data locally. It will be impossible to remove them in a common way. To uninstall the Server from the local computer, do the following: 1. Run the EkranSystem_Components.exe installation file or click Uninstall/Change on the Ekran System application in the Programs and Features window of the Windows Control Panel. 2. The setup wizard opens. 3. Click Next on the Welcome page. 4. On the Already Installed page, select Uninstall and click Next. 5. On the Uninstall Ekran System page, click Uninstall. 30


31 6. If you want to delete the database, click Yes in the confirmation message. In other case, click No and you will be able to use the saved database during the next installation of the program. 7. Wait for the uninstallation process to complete. Moving Binary Data to Shared or Local Folder If necessary, you can store binary data received from Clients in the shared or local folder on your computer. This might be necessary for storing large amounts of data. This feature has the following limitations: Shared Folders on mapped and mounted disks cannot be used for storing binary data. After you select to store binary data in the shared folder instead of MS SQL database, the already existing screenshots will no longer be displayed (only metadata will be available for them). The newly received screenshots will be displayed. To move binary data to the shared folder, do the following: 1. Stop the Server by clicking Stop in the context menu of the Server icon in the notification area or find the EkranServer service in the Task Manager and click Stop. 31

32 2. For the Firebird database, do the following (for the MS SQL database, skip this step): Open the Windows Registry Editor. In the Registry Editor window, select the HKEY_LOCAL_MACHINE\SOFTWARE\EkranSystem key. Find the Database value and check where the Database files are located on your computer. Move the Cache folder with binary file to a new location. 3. In the Registry Editor window, click Edit > New > String value and add a new value: Value type: String Value name: StorageDirectory Value data: Shared Folder location as \\<computer IP>\<folder path> or \\<computer name>\<folder path> 4. To access binary data in the shared folder on a different computer from your Server, it is recommended to do the following: Open Computer Management. In the Computer Management window, open Services and Applications > Services. In the Services pane, find the EkranServer service and select Properties in the context menu. In the EkranServer Properties window navigate to the Log On tab. In the Log On tab, select the This account option, specify the credentials for the EkranServer service to start under, and click Apply. Make sure the user with the specified credentials has administrator permissions on your Server computer and full access to the shared folder on the different computer. Restart the service. 32
33 5. Start the EkranServer service to continue working with the program. Validating Monitoring Data About If necessary, you can enable the validation of monitoring data of Windows Clients, which allows checking that data integrity in the database has not been altered. It can be enabled for both Firebird and MS SQL databases. Two types of monitoring data validation are available: Calculating hash codes for monitoring data: in this case, the hash codes will be calculated for each screenshot and metadata record received from Windows Clients. Signing monitoring data with certificate: in this case, each screenshot and metadata record received from Windows Clients will be signed with the trusted certificate. NOTE: If both types of validation are enabled, only signing monitoring data with certificate will be used. After validation of monitoring data is enabled or validation type is changed, all previously recorded sessions of Windows Clients will be considered as invalid. With enabled validation of the monitoring data, the integrity of monitoring data within a Windows Client session is checked on the session opening via the Session Player. If some screenshots or metadata records have been deleted or modified, the warning message Session data is not valid! will be displayed in the Session Player. NOTE: When the validation of monitoring data is enabled, the CPU usage will rise while viewing the Client sessions in the Session Player. NOTE: After the enabling validation of monitoring data, for existing sessions, that were not viewed before, screenshots will not be shown. Validating Monitoring Data Using Hash Codes To enable calculating of hash codes for monitoring data, do the following: 1. Stop the Server by clicking Stop in the context menu of the Server icon in the notification area or find the EkranServer service in the Task Manager and click Stop. 2. Open the Windows Registry Editor. 3. In the Registry Editor window, select the HKEY_LOCAL_MACHINE\SOFTWARE\EkranSystem key. 4. Select Edit > New > DWORD (32-bit) Value and define the following: Value name: SignMonitoredData Value data: 1 5. Start the EkranServer service to continue working with the program. 33
34 Signing Monitoring Data with Certificate To enable signing of monitoring data with certificate, you have to do the following on the Ekran Server computer: Step 1. Import the trusted purchased certificate or the self-signed one. Step 2. Create a special string value in the Windows Registry. Step 1. Importing Trusted Certificate 1. On the Ekran Server computer, press Windows+R, type mmc in the Run text box and press Enter. 2. In the opened User Account Control window, click Yes. 3. In the Console window, select File > Add/Remove Snap-in. 4. In the Add or Remove Snap-ins window, select Certificates and click Add. 5. In the Certificates Snap-in window, select the Computer account option and click Next. 34
 tree-view, find the Personal node. 9.")

35 6. In the Select Computer window, select the Local computer: (the computer this console is running on) option and click Finish. 7. In the Add or Remove Snap-ins window, click OK. 8. In the Certificates (Local computer) tree-view, find the Personal node. 9. In the context menu of the Personal node, select All Tasks > Import. 10. The Certificate Import Wizard opens. 11. On the Certificate Import Wizard Welcome page, click Next. 12. On the File to Import page, specify the location and name of the certificate to be imported manually or click Browse, and then click Next. 35
36 13. If required, on the Private key protection page, enter the password for the private key and then click Next. 14. On the Certificate Store page, click Next. 15. On the last page of the Certificate Import Wizard, click Finish, and then click OK in the confirmation message. 16. Select Certificates (Local Computer) > Personal > Certificate and double-click the imported certificate. 36

37 17. In the Certificate window, select Details > Thumbprint and then copy the Thumbprint value. Step 2. Enabling Monitoring Data Signing with Certificate 1. Stop the Server by clicking Stop in the context menu of the Server icon in the notification area or find the EkranServer service in the Task Manager and click Stop. 2. Open the Windows Registry Editor. 3. In the Registry Editor window, select the HKEY_LOCAL_MACHINE\SOFTWARE\EkranSystem key. 4. Select Edit > New > String Value > and add a new value: Value name: SignMonitoredDataCert Value data: <copied Thumbprint value of the imported certificate (without spaces)> 5. Start the EkranServer service to continue working with the program. Management Tool About The Management Tool is the component for managing the whole system and viewing monitored data received from Clients. It can be installed on any computer, but a network connection to the Server is required for the Management Tool to operate. There can be several 37
38 computers with the installed Management Tool in the system. The work with the Management Tool is performed via your browser. Management Tool Installation Prerequisites Prerequisites Overview The following prerequisites are necessary for successful installation of the Management Tool. For Windows 7, it is important that you follow these steps in correct order. To be able to install the Management Tool, you need to: 1. Turn on the Internet Information Service. 2. Install.NET Framework. 3. Configure the Internet Information Service. 4. Generate a self-signed certificate or import a purchased SSL certificate issued for the computer, on which the Management Tool will be installed. 5. Add the certificate to the Trusted Root Certification Authorities on the computer, on which the Management Tool will be installed. Otherwise a certificate error will be displayed in your browser when opening the Management Tool. 6. Set HTTPS binding for a default web site (or any other IIS site). NOTE: If you already have a certificate generated for the computer on which the Management Tool will be installed, you can skip certificate generation step and use an existing certificate. Turning on Internet Information Service (IIS) Turning on IIS for Windows 8 and Windows 7 To turn on the Internet Information Service for Windows 8 and Windows 7, do the following: 1. Select Control Panel > Programs and Features (Program uninstallation). 38


39 2. Click the Turn Windows features on or off navigation link. 3. The Windows Features window opens. 4. In the features tree-view, select the Internet Information Services option. 5. Click OK. Turning on IIS for Windows Server 2008 R2 To turn on the Internet Information Service for Windows Server 2008 R2, do the following: 1. In the Start menu, select All Programs > Administrative Tools > Server Manager. 2. In the navigation pane, select Roles, and then click Add Roles. 39
, click Next, and then go to the Role Services page to start configuring Web Server (IIS).")

40 3. The Add Roles Wizard opens. 4. On the Before You Begin page, click Next. 5. On the Server Roles page, select Web Server (IIS), click Next, and then go to the Role Services page to start configuring Web Server (IIS). Turning on IIS for Windows Server 2012 The Internet Information Service can be turned on using the Windows PowerShell or Windows Server 2012 Server Manager. To turn on the Internet Information Service for Windows Server 2012 using Windows PowerShell, do the following: 1. In the Start menu, select Windows PowerShell. 2. Enter the following command and click Enter: Install-WindowsFeature -Name Web-Server, Web-Mgmt-Tools 40


41 To turn on the Internet Information Service for Windows Server 2012 using Server Manager, do the following: 1. In the Start menu, select Server Manager. 2. In the navigation pane, select Dashboard, then click Manage > Add roles and features. 3. The Add Roles and Features Wizard opens. 4. On the Before You Begin page, click Next. 5. On the Installation type page, select Role-based or feature-based installation, and then click Next. 6. On the Server Selection page, select Select a server from the server pool, select your server from the Server Pool list, and then click Next. 41
, click")

42 7. On the Server Roles page, select Web Server (IIS), click Next and then click Add Features to start configuring Web Server (IIS). 42

 for Windows Server 20")
43 Installing.NET Framework Windows 10 and Windows Server 2016 usually have.net Framework 4.6 installed. If you are using Windows 8.1, Windows 8, Windows 7, Windows Server 2012, Windows Server 2008, or if there is no.net Framework on other Windows versions, you can download it from the Microsoft official and run the installation file on your computer. Alternatively, on Windows Server 2012, you can install.net Framework using Windows PowerShell. To install.net Framework and configure Internet Information Service (IIS) for Windows Server 2012 using Windows PowerShell, do the following: 1. In the Start menu, select Windows PowerShell. 2. Enter the following command and click Enter: Install-WindowsFeature - NET-Framework-Core, NET-Framework-45-ASPNET, Web- Asp-Net45, Web-ISAPI-Ext, Web-ISAPI-Filter Configuring Internet Information Service (IIS) Windows 10 Make sure that all the following options are selected in the Windows Features window and then click OK:.NET Framework 3.5 and.net Framework 4.6 Advanced Services; Internet Information Services > Web Management Tools > IIS Management Console; Internet Information Services > World Wide Web Services > Application Development Features > ASP.NET 3.5 and ASP.NET 4.6; Internet Information Services > World Wide Web Services > Common HTTP Features > Static Content. 43


44 Windows 8 Make sure that all the following options are selected in the Windows Features window and then click OK:.NET Framework 3.5 and.net Framework 4.5 Advanced Services; Internet Information Services > Web Management Tools > IIS Management Console; Internet Information Services > World Wide Web Services > Application Development Features > ASP.NET 3.5 and ASP.NET 4.5; Internet Information Services > World Wide Web Services > Common HTTP Features > Static Content. Windows 7 Make sure that all the following options are selected in the Windows Features window and then click OK: Internet Information Services > Web Management Tools > IIS Management Console; Internet Information Services > World Wide Web Services > Application Development Features > ASP.NET; Internet Information Services > World Wide Web Services > Common HTTP Features > Static Content. 44
 option is selected and then click Next. 2.")
.")

45 Windows Server In the Add Roles and Features Wizard window, on the Server Roles page, make sure that the Web Server (IIS) option is selected and then click Next. 2. On the Features page, make sure that the following options are selected:.net Framework 3.5 Features >.NET Framework 3.5.NET Framework 4.6 Features >.NET Framework 4.6 and ASP.NET Click Next. 4. On the Web Server Role IIS page, click Next. 5. On the Role Services page, select the ASP.NET 4.6 option (under Application Development). 6. Click Next and then click Add Features. 7. On the Role Services page, make sure that the following options are selected: Application Development >.NET Extensibility 4.6 ASP.NET 4.6 ISAPI Extensions ISAPI Filters 8. Click Next and then click Install. 9. After the end of installation, click Close. Windows Server In the Add Roles and Features Wizard window, on the Server Roles page, make sure that the Web Server (IIS) option is selected and then click Next. 45
 > ASP.NET 4.5. 3. Click Next. 4. On the Web Server Role IIS page, click Next. 5.")


46 2. On the Features page, make sure that the following options are selected:.net Framework 3.5 Features (Installed) >.NET Framework 3.5;.NET Framework 4.5 (Installed) > ASP.NET Click Next. 4. On the Web Server Role IIS page, click Next. 5. On the Role Services page, select the ASP.NET 4.5 option (under Application Development). 6. Click Next and then click Add Features. 7. On the Role Services page, make sure that the following options are selected: Application Development >.NET Extensibility 4.5 > ASP > NET 4.5 > ISAPI Extensions > ISAPI Filters. 8. Click Next and then click Install. 9. After the end of installation, click Close. Windows Server In the Add Roles Wizard window, on the Role Services page, make sure that the following options are selected: Common HTTP Features > Static Content; Application Development > ASP.NET. 46

47 2. Click Next and then click Add Required Role Services. 3. On the Role Services page, make sure that the following options are selected: Management Tools > IIS Management Console. 4. Click Next and then click Install. 5. After the end of installation, click Close. Using Certificates Generating Self-Signed Certificate To generate a self-signed certificate on the machine, on which you will install the Management Tool, do the following: 1. Open the Internet Information Service Manager: For Windows 8 or Windows 7: Open Computer > Manage > Services and Applications > Internet Information Services (IIS) Manager. For Windows Server 2012 or Windows Server 2008: Press Windows+R, enter inetmgr in the Run window and then press Enter. NOTE: Using the inetmgr command is a common way of opening the Internet Information Service Manager for any version of the Windows operating system. 2. Click the main node in the Connections tree-view and then double-click the Server Certificates item under the IIS category. 47

48 3. The Server Certificates pane opens. 4. On the Actions pane (to the right), click Create Self-Signed Certificate. 5. The Create Self-Signed Certificate window opens. 6. Enter the name for a certificate in the Specify a friendly name for the certificate box and select Personal in the Select a certificate store for the new certificate drop-down list. Click OK. 48

49 7. The certificate is created. Exporting Self-Signed Certificate To export self-signed certificate, do the following: 1. In the Internet Information Service Manager, on the Server Certificates pane, select the generated certificate and click Export on the Actions pane or in the certificate right-click menu. 2. In the Export Certificate window, define the location and password for the certificate. Click OK. 49


50 3. The certificate is exported and can be added to the Trusted Root Certification Authorities. Importing Trusted Certificate To import a purchased certificate issued for the computer, do the following: 1. Open the Internet Information Service Manager: For Windows 8 or Windows 7: Open Computer > Manage > Services and Applications > Internet Information Services (IIS) Manager. For Windows Server 2012 or Windows Server 2008: Press Windows+R, enter inetmgr in the Run window and then press Enter. NOTE: Using the inetmgr command is a common way of opening the Internet Information Service Manager for any version of the Windows operating system. 2. Click the main node in the Connections tree-view and then double-click the Server Certificates item under the IIS category. 3. The Server Certificates pane opens. 4. On the Actions pane (to the right), click Import. 50
 Manager.")

51 5. In the Import Certificate window, click the Browse button to browse for the file of the purchased certificate and enter its password in the Password field. 6. Click OK. 7. The certificate is imported and displayed on the Server Certificates pane of the Internet Information Services (IIS) Manager. Adding Certificate to Trusted Root Certification Authorities Before adding the self-signed certificate to the Trusted Root Certification Authorities, it should be exported. For purchased certificates that were issued for your computer this procedure is not needed. To add the certificate to the Trusted Root Certification Authorities, do the following: 1. Press Windows+R, type mmc in the Run text box and press Enter. 2. In the opened User Account Control window, click Yes. 3. In the Console window, select File > Add/Remove Snap-in. 51


 and")
52 4. In the opened Add or Remove Snap-ins window, select Certificates > Add. 5. In the opened Certificates snap-in window, select Computer account and click Next. 6. In the opened Select Computer window, select Local computer: (the computer this console is running on) and click Finish. 7. In the Add or Remove Snap-ins window, click OK. 52
 node. 9.")


53 8. In the Console window, expand the Certificates (Local computer) node. 9. In the Certificates (Local computer) tree-view, find the Trusted Root Certification Authorities node. 10. In the right-click menu of the Trusted Root Certification Authorities node, select All Tasks > Import. 11. The Certificate Import Wizard opens. 53

54 12. On the Certificate Import Wizard Welcome page, click Next. 13. On the File to Import page, click Browse to find the certificate to be imported and then click Next. 14. On the Private key protection page, enter the certificate password and then click Next. 54


55 15. On the Certificate Store page, click Next. 16. On the last page of the Certificate Import Wizard, click Finish. 17. In the confirmation message, click OK. 55


56 18. The certificate is imported and is displayed in the Console window in the Certificates node. Please note that the Issued To field contains the name of the computer, on which the Management Tool will be installed in the format that will be used when opening the Management Tool. 19. Close the Console window. 56
 Manager.")

57 Setting HTTPS Binding for a Default Web-Site To set HTTPS binding for a default web-site, do the following: 1. Open the Internet Information Service Manager: For Windows 8 or Windows 7: Open Computer > Manage > Services and Applications > Internet Information Services (IIS) Manager. For Windows Server 2012 or Windows Server 2008: Press Windows+R, enter inetmgr in the Run window and then press Enter. NOTE: Using the inetmgr command is a common way of opening the Internet Information Service Manager for any version of the Windows operating system. 2. Expand the node with the name of the target computer in the central pane. 3. Expand the Sites node. 4. Select the Default Web Site. NOTE: If there is no such site in the Internet Information Services (IIS) Manager of your computer, you can select any other site (the name of the site does not matter). 5. Click the Bindings navigation link on the right. 6. The Site Bindings window opens. 57


58 7. If there is no binding of HTTPS type in the Site Bindings window, click Add. 8. The Edit Site Binding window opens. 9. In the Type box, select https. 10. Next to the SSL certificate drop-down list, click Select. 11. The Select Certificate window opens, where the list of existing certificates is displayed. 12. In the Select Certificate window, select the certificate generated for the Management Tool and then click OK. 13. In the Add Site Binding window, click OK. 14. In the Site Bindings window, click Close. 15. Now the Internet Information Service is fully adjusted and you can start installing the Management Tool. Installing/Uninstalling/Updating the Management Tool Installing the Management Tool To install the Management Tool, do the following: 1. Run the EkranSystem_ManagementTool.exe installation file. 58


59 2. On the Welcome page, click Next. 3. Carefully read the terms of the End-User License Agreement and click I Agree. 4. On the Connection Settings page, do the following and then click Next: In the Server address box, enter the name or IP address of the computer on which the Server is installed. In the URL address field enter the folder where the Management Tool will be located within IIS. This URL will be used when opening the Management Tool. 5. On the Choose Install Location page, enter the destination folder in the corresponding field or click Browse and in the Browse For Folder window, define the destination folder. Click Install. 6. The process of installation starts. Its progress is displayed on the Installing page. 7. After the end of the installation process, click Close to exit the wizard. 8. The Management Tool is displayed as an application of a default web site or any other site with https connection in the Internet Information Services (IIS) Manager. 59

60 9. Now you can open the Management Tool via your browser from the same computer or a remote one. Adjusting Computer for Remote Access If you want to open the Management Tool from the computer different from the one where the Management Tool is installed, you need to adjust Firewall settings to be able to access this computer. If the users access Management Tool only from computers where it is installed, there is no need to configure Firewall. To adjust Firewall on the computer where the Management Tool is installed, do the following: 1. In the Control Panel, select System and Security > Windows Firewall. 2. In the Windows Firewall window, click Advanced settings. 3. In the Windows Firewall with Advanced Security window, right click Inbound Rules and select New rule. 4. The New Inbound Rule Wizard opens. 5. On the Rule Type page, select Predefined and then select Secure World Wide Web Services (HTTPS) in the list. Click Next. 60

 check box.")
61 6. On the Predefined Rules page, select the World Wide Web Services (HTTPS Traffic-In) check box. Click Next. 61


62 7. On the Action page, select Allow the connection. Click Finish. 8. The new inbound rule for Firewall is created. Updating Management Tool To update the Management Tool, do the following: 1. Run the Management Tool installation file (EkranSystem_ManagementTool.exe) of a newer version. 2. On the The program is already installed page, select Update and then click Next. 3. Follow the installation instructions. 4. The Management Tool will be updated to the new version. 62
63 Uninstalling Management Tool To uninstall the Management Tool, do the following: 1. Open the Programs and Features window of the Windows Control Panel. 2. In the Programs and Features window, find the Ekran System Management Tool application. 3. In the right-click menu of the application, select Uninstall. 4. The setup wizard opens and starts the uninstallation process. 5. When the process is completed, click Close, to exit the setup wizard. 6. The Management Tool is uninstalled and removed from the Internet Information Service (IIS). Opening Management Tool To open the Management Tool, do the following: 1. Open the browser and enter of the computer or IP on which the Management Tool is installed>/<url address that has been specified during the Management Tool installation> in the address line. For example, NOTE: If the certificate is not added to the Trusted Root Certification Authorities or the name of the computer entered in the browser address doesn t match the subject (Issued To field) of the certificate, your browser will display a certificate error when opening the Management Tool. 2. The Management Tool opens. 3. Enter the credentials of the existing user, added to the system: For an internal user, enter login and password, defined during user creation. For a Windows user, enter the login in the form <domain name>\<user name> and Windows authentication password. Please note, if the Active Directory user group has been added to the system, the users belonging to it can login using their Windows credentials. 4. The Management Tool Home page opens. Please note, the Management Tool may take a while to launch on first connection, since IIS is not used constantly and its processes are stopped and restarted on the connection. If you encounter any problems when opening the Management tool, see the Troubleshooting chapter. 63
64 Licensing General Licensing Information To start receiving information from the Clients, you have to assign licenses to them. Five types of licenses are available: License OS Required additional configuration Number of recorded concurrent sessions Workstation Agent Infrastructure Server Agent Windows desktop OS, macos Terminal Server Agent Windows Server installed Remote Desktop Services/Terminal Services or Citrix Server or Published App Server unlimited Cloud Server Agent deployed on Microsoft Azure or Amazon Web Services 2 Linux/UNIX Server Agent Linux, Oracle Solaris, IBM AIX - unlimited NOTE: Licenses of the workstation type cannot be assigned to a computer with Server OS. Each Client can have only one license assigned. During the first connection to the Server, the license corresponding to the Client computer operating system is automatically assigned to a Client. If the license has not been automatically assigned, then you will have to assign the license to the Client manually. About Serial Keys When you log into the Management Tool for the first time, you can request a trial serial key which allows you to use 3 Workstation Client licenses, 3 Linux/UNIX Server Client licenses, and 1 Terminal Server Client license for 30 days. The trial serial key will be sent to the address you specify in the request form. 64
65 To use the system permanently and with a greater number of licenses, you have to license it with purchased serial keys on a computer with the installed Server. NOTE: After activation of any serial key, the embedded trial key expires. Five types of serial keys are available: Permanent serial keys: These keys allow you to use licenses they contain during the unlimited period of time. Trial serial keys: These keys allow you to use the licenses they contain during 30 days (may vary) from activation and update the product during this period. Update and Support serial keys: These keys allow you to extend your update and support period. Enterprise serial keys: These keys allow you to get an access to the enterprise features of the Ekran System during the unlimited period of time. Trial enterprise keys: These keys allow you to get access to the enterprise features of the Ekran System for 30 days (may vary) from activation and update the product during this period. Each permanent, trial, and update and support serial key contains the following data: Update & support period Licenses for the Clients The enterprise serial key does not contain any Client licenses and is active during the unlimited period of time. This key grants you an access to such valuable features of the Ekran System as Database Archiving, Advanced SIEM Integration, One-time Password, and High-Availability, Multi-Tenant Mode and Privileged User Accounts and Session Management. Once you have purchased serial keys, you can either activate serial keys online or add activated serial keys if you have no Internet connection on a computer with the installed Server. Contact your vendor for information on purchasing serial keys. You need to belong to the Administrators user group of the built-in default tenant to activate serial keys. Please note, after the activation, serial keys are bound to a specific computer and cannot be used on another computer. About Update & Support Period An Update & support period is a period that defines what updates can be applied to your copy of the product. Updates are defined by their release date. After the update & support period expires, you can still assign licenses to Clients, but you will be unable to update the System to versions released after the update & support period expiration date. The update & support period end date is defined during the serial key activation (either via the Management Tool or on the vendor s site). It is calculated using a serial key with the longest update & support period period. 65
66 Example: If you activate two keys, one with a 30 days update & support period period and one with a 12 months update & support period period, simultaneously, the update & support period end date will be set to 12 months from the activation date. When a new serial key is being activated, the update & support period period is prolonged accordingly. Please note, if the current update & support period period is longer than the one of a key being activated, current update & support period period does not change. For example, if you activate a key with 12 months update & support period period after a key with 30 days update & support period period, the update & support period end date will be set to 12 months since the activation date. But if you activate a key with 30 days update & support period period after a key with 12 months update & support period period, the update & support period end date will not change. If your update & support period expires, you can purchase a special serial key, which does not contain any licenses, but extends your update & support period period, or you can activate any other serial key. Viewing License State You can view the information on serial keys you have activated or added and license details on the Serial Key Management page in the Management Tool. To view the license state, open the Management Tool and click Serial Key Management navigation link on the left. The following information is displayed on the Serial Key Management page: Update & support period end date: The update & support period end date is calculated basing on dates of serial keys activation and their subscription periods. Workstation/Terminal Server/Infrastructure Server/Cloud Server/Jump Box Server/Linux/UNIX Server Client licenses used: The number of licenses of the corresponding type used out of total number, which is summed up from all activated serial keys. Not licensed Clients: The number of installed Clients with no licenses assigned. Enterprise key: Displays whether the target Server computer has an activated enterprise serial key. The following information is displayed in the Serial Keys Management grid: o Serial key o Activation date o Type: Enterprise/Permanent/Update and Support/Trial/Trial Enterprise o State: activated/deactivated/expired o Details: expiration/deactivation date, type and number of licenses 66

67 Activating Serial Keys Online To activate purchased serial keys online, do the following: 1. Make sure you have an active Internet connection on the computer with the installed Server. 2. Log in to the Management Tool as a user of the Administrators user group. 3. Click the Serial Key Management navigation link on the left. 4. On the Serial Keys tab, click Activate keys online. 5. In the Serial Key Activation window, enter serial keys to be activated separating them with semicolons or paragraphs and click Activate. 6. The activated keys will appear on the Serial Key Management page. 7. The number of available licenses and the update & support period end date change. Adding Activated Serial Keys Offline If you have no Internet connection on a computer on which the serial keys are to be activated, you can activate them on the license site and then add the activated serial keys offline. For more information, send an to info@ekransystem.com NOTE: Update and Support serial keys cannot be activated offline. 67
68 To activate serial keys offline on the license site, do the following: 1. On the computer with the installed Server, start the UniqueIdentifierGenerator.exe file, which you can download at exe 2. The Unique Identifier Generator window opens. 3. Click Generate to generate a unique identifier for your computer. 4. When a unique identifier for your computer is generated, it will appear in a text box under the Unique Identifier group of options. 5. Copy the unique identifier from the text box to a text file on a removable drive. 6. Go to the license site. 7. Enter the generated unique identifier in the Unique Identifier box. 8. Copy and paste the purchased serial keys to the Serial Keys box separating them with paragraphs or spaces. 9. Enter the CAPTCHA text in a text box near the CAPTCHA image. 10. Click Activate. 11. The activatedkeys.txt file will be generated. Save the file on a removable drive. 12. Copy the file to the computer on which you will open the Management Tool. NOTE: Please do not edit the generated file activatedkeys.txt. To add activated serial keys in offline mode, do the following: 1. Log in to the Management Tool as a user of the Administrators user group. 2. Click the Serial Key Management navigation link on the left. 3. On the Serial Keys tab, click Add activated keys. 4. On the Activated Serial Key Adding page, click Choose File and navigate to the activatedkeys.txt file with activated serial keys. 5. Click Add. 6. The newly added serial keys appear on the Serial Key Management page. 7. The number of available licenses and the update & support period end date change. 8. If there are both licensed and unlicensed Clients in your network and you want to license the rest of Clients with a purchased key, you will have to assign the license to the remaining unlicensed Clients manually. Deactivating Serial Keys If for some reason you decide to discontinue using Ekran System, you can deactivate serial keys. To deactivate a serial key, do the following: 68
69 1. Make sure you have an active Internet connection on the computer with the installed Server. 2. Log in to the Management Tool as a user of the Administrators user group. 3. Click the Serial Key Management navigation link on the left. 4. On the Serial Keys tab, select a serial key to be deactivated and click Deactivate selected. NOTE: Expired serial keys can t be deactivated. 5. In the confirmation message, click Deactivate. 6. The deactivated serial key is marked as Deactivated in the State column of the Serial Key Management page. 7. The number of available licenses and the update & support period end date change. Client License Management The Client license management is performed in the Management Tool by the user with the administrative Client installation and management and License management permissions. You can assign a license to a Client or unassign it manually any time. The license can be assigned to an offline Client and it will be applied after the Client is online. If the Client is uninstalled, its license becomes free and can be assigned to another Client. NOTE: When a trial serial key expires, the corresponding number of licenses is automatically unassigned from Clients. Information about the number of used and free licenses of each type is displayed on the License Management page in the Management Tool. To assign the license to one Client, do the following: 1. Log in to the Management Tool as a user with the administrative Client installation and management permission. 2. Click the Client Management navigation link on the left. 3. On the Clients page, select the needed Client from the list and then click Edit Client 4. On the Editing Client page, on the Properties tab, in the License box, select the type of license you want to assign to the Client. 5. Click Finish. 6. The license is assigned to the Client. To manage the licenses for several Clients, do the following: 1. Log in to the Management Tool as a user with the administrative Client installation and management permission. 2. Сlick the Client Management navigation link on the left. 3. On the Clients page, click Manage Licenses. 69

70 4. On the License Management page, select the Clients, to which the licenses should be assigned. To find a specific Client, enter its name in the Contains box and click Apply Filters. 5. When the Clients are selected, click one of the following: Assign recommended license: Assigns licenses to the selected Clients, automatically defining the type of license basing on the operating system of the Client computers. If the corresponding type of license is missing, a license of a higher type can be assigned. Assign license of specific type: Assigns selected licenses of a specific type to the selected Clients. Unassign license: Removes licenses from the selected Clients. NOTE: To change the Client license type, you do not need to unassign the current license. This will be done automatically. 70
71 Windows Clients About Windows Client is a program that can be installed on the target computers to monitor the activity of their users. The monitored data is sent by the Windows Client to the Server and can be viewed in the Management Tool. Depending upon their permissions, a user can install/uninstall Clients remotely, manage their configuration, and manage Client groups. Monitoring via Windows Clients The Windows Clients work as follows: Each Windows Client starts automatically on computer start. A licensed Windows Client monitors both local and remote sessions, depending on the license type: - Workstation Client license (one local/remote session) - Infrastructure/Cloud Server Client licenses (up to two concurrent sessions) - Terminal Server Client license (several concurrent sessions) Every time the computer is restarted, the Windows Client starts recording user activity in a new session. The maximum duration of one session can be 24 hours. At 00:00 all live sessions are terminated. After their termination (their status changes from live to finished), new live sessions automatically start. If a user works with several monitors, the Windows Client creates screenshots from all of them. The Windows Client sends its monitoring results to the Server. On the Client side, the monitoring data is compressed before sending it to the Server. To disable the data compression on the Client side, in the Windows Registry Editor, select the HKEY_LOCAL_MACHINE\SOFTWARE\EkranSystem\Client key and add a new value: o Value type: DWORD o Value name: Compression o Value data: 0 If there is no connection with the Server, the Client stores the monitored data locally and automatically sends it to the Server when the connection is restored. The data is stored in the TempWrite.dat file in the Client installation folder. The Client can stop writing data to an offline cache in one of the following cases: o The amount of data stored offline reaches the limit at which the Client must stop writing to offline cache: This limit is defined during remote Client installation or during generation of Client installation package. o There is 500 MB of free space on the hard drive left. This parameter can be defined during remote Client installation or generation of Client installation package. The default value is 500 MB. 71
72 By default, the Windows Client records user activity as follows: o Typing: every 10 seconds. o Mouse clicking: every 3 seconds. o Active window changing: every 3 seconds. To change the frequency of user activity recording, in the Windows Registry Editor, select the HKEY_LOCAL_MACHINE\SOFTWARE\EkranSystem\Client key and modify a value data: 1. Typing o Value name: SmartScrTimer 2. Mouse clicking o Value name: SmartScrTimerMouse User activity recording triggers usually influence each other, though the average frequency of user activity recording is higher. Installing Windows Clients About During the system deployment, remote installation of the Windows Clients is used. Remote installation of the Clients is performed via the Management Tool. To ensure successful remote installation of the Windows Clients, you have to set up the network environment beforehand. If your computers belong to a workgroup but not a domain, you need to know the administrator account credentials for each remote computer. Otherwise knowing the domain administrator credentials is enough. The Windows Clients can also be installed locally via the installation package generated in the Management Tool. Thus you can distribute the installation package of the Client with predefined settings among the network computers and install it. This kind of installation is useful when you experience difficulties with installing the Clients remotely via the Management Tool, or the computers in your network are part of a workgroup and do not have the same administrative account for each computer. Setting up Environment for Remote Installation Windows Client Installation Prerequisites The majority of Windows Client installation/uninstallation issues are caused by incorrect system or network settings. The following conditions have to be met for successful Windows Client installation: The remote computer has to be online and accessible via network. Shared folders have to be accessible on the remote computer. Simple file sharing (Sharing Wizard) has to be disabled if the computer is in a workgroup (for domain computers this requirement can be skipped). 72
73 You need to know the domain administrator or local administrator account credentials for the remote computer. The Server and the Remote Procedure Call (RPC) system services have to be running on the remote computer. Windows Vista and Windows XP Firewall has to be properly set up on the remote computer during the Clients remote installation. In Windows 8, Windows 7, Windows Server 2012 and Windows Server 2008 Firewall, inbound connections have to be allowed in the Remote Service Management (RPC) rule for the remote computers and the File and Printer Sharing option has to be enabled (in this case it is not necessary to disable Windows Firewall). Due to the new SHA-256 code signing, on Windows 7 SP1 and Windows Server 2008 R2 SP1, the Microsoft Security Advisory update needs to be installed: In Windows Firewall on the Server side, allow the Server executable to accept TCP connections via ports 9447 and 9449(for the connection between the Server and the Clients). NOTE: These rules will be added to Windows Firewall automatically, if Windows Firewall is enabled during the Server installation. Make sure the conditions mentioned above are met to avoid possible problems with Client remote installation. Disabling Simple File Sharing in Windows XP To disable simple file sharing in Windows XP, do the following: 1. Open My Computer. 2. Select Tools > Folder Options in the menu. 3. In the Folder Options window, select the View tab. 73

74 4. Clear the Use simple file sharing check box. 5. Click Apply and OK to close the window. Disabling Sharing Wizard in Windows 8.1, Windows 8 and Windows 7 To disable the Sharing wizard in Windows 8.1, Windows 8, and Windows 7, do the following: 1. Open the Folder options window: For Windows 8.1/Windows 8: Open the Control Panel and then select Appearance and Personalization. For Windows 7: Open Computer and then select Organize > Folder and search options. 2. In the Folder Options window, select the View tab. 74

75 3. Clear the Use Sharing Wizard check box. 4. Click Apply and OK to close the window. Checking System Services To check that the Server and Remote Procedure Call (RPC) system services are running: 1. Right click Computer and select Manage. The Computer Management window opens. 2. Expand the Services and Applications node and select Services. To quickly access Windows Services, press Windows+R, type services.msc in the Run text box and press Enter. 3. Find the Server service and the Remote Procedure Call (RPC) service in the list of services. Make sure both services are running (their status is displayed as Started). 75

76 4. If one or both services are not running, start them manually. To start the service, right-click it and select Start from the context menu. The selected service is started. Setting up Windows Vista, Windows XP, Windows Server 2003 Firewall It is not necessary to disable the Firewall in Windows Vista, Windows XP, and Windows Server For successful remote installation of the Clients, you have to enable the File and Printer Sharing option. To set up Windows Vista, Windows XP, and Windows Server 2003 Firewall, do the following: 1. Select Start > Control Panel > Windows Firewall. 76


77 2. In the Windows Firewall window, select the Exceptions tab. 3. On the Exceptions tab, select the File and Printer Sharing check box. 4. Click Ok. 77

, do the following: 1. Select Control Panel > System and Security > Windows Firewall. 2.")
78 Setting up Firewall for Windows 10, Windows 8.1, Windows 8, Windows 7, Windows Server 2012, Windows Server 2008 It is not necessary to disable the Firewall in Windows 8.1, Windows 8, Windows 7, Windows Server 2012, and Windows Server For successful remote installation of the Clients, you have to allow inbound connections in the Remote Service Management (RPC) rule for the remote computers and enable the File and Printer Sharing option. To enable inbound connections for the Remote Management Service (RPC), do the following: 1. Select Control Panel > System and Security > Windows Firewall. 2. In the Windows Firewall window, click Advanced settings. 3. In the Windows Firewall with Advanced Security window, click Inbound Rules and then double-click the Remote Service Management (RPC) rule in the rules list. 4. The Remote Service Management (RPC) Properties window opens. 78


79 5. In the General tab, select Enabled under General and click Allow the connection under Action. 6. In the Advanced tab, under Profiles, select the profile of the network used for connecting remote computers and the Server. 79


80 7. Click Apply and then OK to save the settings and close the Properties window. 8. Close the Windows Firewall window. To enable the File and Printer Sharing option, do the following: 1. Select Control Panel > System and Security > Windows Firewall. 2. In the Windows Firewall window, click Allow an app or feature through Windows Firewall. 3. In the opened Allowed apps window, click Change settings. 4. Select the File and Printer Sharing option and then click OK. 80

81 Installing Windows Clients Remotely via the Management Tool About You can install the Windows Clients remotely via the Management Tool. This way of installation is very convenient if all computers in your network have the same domain administrator credentials. Remote Windows Client Installation is performed by a user who has the Client installation and management permission in two steps: 1. Selecting computers on which Clients will be installed. 2. Defining installation parameters and installing the Clients. Selecting Computers To select the computers for Client installation, do the following: 1. Log in to the Management Tool as a user with the Client installation and management permission. 2. Click the Client Management navigation link to the left. 3. On the Clients page, click Install Clients. 4. The Computers without Clients page opens. On this page, you can see the computers, for which the previous installations failed. 5. Select how you would like to search for computers where the Windows Clients will be installed: To select computers from the list of all computers in your network, click Deploy via network scan. To select computers by IP range (IPv4 or IPv6 addresses), click Deploy via IP range. To select computers by their names, click Deploy on specific computers. 6. In the Choose search results window: Click Start new search to look for computers with defined parameters. 81


82 Click Previous search results to choose the computers found in the previous search. If you have not performed any searches yet, this button will be absent. 7. If you have selected the Deploy via IP range option, the Computers Scan page opens. In the From Address and To Address boxes, enter the IP range (either IPv4 or IPv6), for which the network should be scanned. To find only one computer, enter the same IP address in both boxes. Click Scan. 8. If you have selected the Deploy on specific computers option, the Adding Computers page opens. Enter the names of computers on which Windows Clients must be installed in the box Name and click Scan. Use semicolon to separate computer names. Please note that you should enter the full name of the computer. 9. The scanning process starts. The list of found computers will be updated automatically. If it is not updated, click Refresh. To stop the scanning process, click Stop. 10. When the scanning process finishes, select check boxes next to the computers that you want to install the Clients on. Click Next. 11. The selected computers are added to the list on the Computers without Clients page. 82


83 12. If you want to remove some computers from this list, click Remove from list next to the selected computer. Remote Windows Client Installation Process When all computers for Windows Сlient installation are selected, you are ready to start installation. Please make sure that all selected computers are correctly adjusted. To install the Windows Clients remotely, do the following: 1. On the Computers without Clients page, click Install. 2. On the Client Configuration page, define the name/ip of the Server, to which the Windows Clients will be connecting, and define the Client configuration for the Clients you are installing. Click Next. NOTE: The Server IP address has to be static for Clients to connect to it successfully. Unique external IP addresses should be used for cloud-based Servers. You can add several names and IP addresses separated with comma or semicolon. 3. On the Installation credentials page, enter the credentials of a user with administrator permissions on the target computers for Client installation and then click Next. If the computers are in a domain, enter the domain name and domain administrator account credentials. If the computers are in workgroup, enter the credentials of a local administrator for target computers. If you leave the Domain box empty, the entered credentials will be used as the credentials of a local user of a target computer and the Client will be installed under the <target PC name>\<user name> account. NOTE: All workgroup computers must have the same administrator account credentials. Otherwise use installation via installation package method to deploy the Clients. 83

84 4. The installation process starts. The progress of installation will be updated automatically on the Client installation page. If it is not updated, click Refresh. NOTE: If the connection with the Server fails, the Client will be not installed. 5. After the end of the installation, the installed Clients will appear on the Clients page in All Clients group. If the installation of some Clients fails, these computers will remain in the Computers without Clients list and you can click Retry to start the installation again. Remote Installation from an Existing.INI File If you already have an.ini file with defined settings generated in the Management Tool and saved to your computer, you can use it for installing the Windows Clients. To install the Windows Clients remotely, using an existing.ini file do the following: 1. On the Computers without Clients page, click Install using existing.ini file. 2. On the INI file selection page, click Choose file to select the.ini file that will be used for configuration of new Clients. Please note, if any parameter except RemoteHost is absent or not valid, its value will be set to default. The RemoteHost parameter is ignored, in this type of installation. The Client will connect to the Server to which the Management Tool is connected. 3. Once the.ini file is chosen, click Next and continue the installation the same way as when installing the Clients remotely in a common way. Installing Windows Clients Locally About You can install the Windows Clients locally using the Client installation file generated in the Management Tool. You have two options for downloading the Client installation file from the Management Tool: Generate the installation package and set the Windows Client configuration during generation. 84
85 Use Client installation file (.exe) to install the Client with default parameters. NOTE: Due to the new SHA-256 code signing, on Windows 7 SP1 and Windows Server 2008 R2 SP1, the Microsoft Security Advisory update needs to be installed: Windows Client Installation Package The installation package consists of 2 components: A signed EkranSystemClient.exe installation file. An EkranSystemClient.ini text configuration file that contains the Windows Client installation parameters defining the Server, to which the Client will connect, and client configuration. The table below lists all the Windows Client installation parameters. If any parameter except RemoteHost is absent or not valid, its value will be set to default. Parameter Description Default Value Server name/ip RemoteHost A name or IP address of the computer on which the Server is installed. This parameter might contain several names and IP addresses separated with comma or semicolon. NOTE: The Server IP address has to be static for Clients to connect to it successfully. Unique external IP addresses should be used for cloudbased Servers. No Frequency settings for user activity recording EnableActivity EnableWndNmChang es EnableKBandMouse Recording user activity and creating screenshots when an active window is changed. If the value is 1, the option is enabled, if the value is 0 disabled. Recording user activity and creating screenshots when a window name is changed. If the value is 1, the option is enabled, if the value is 0 disabled. Recording user activity and creating screenshots on clicking and a key pressing. If the value is 1, the option is enabled, if the value is 0 disabled. Enabled Enabled Enabled 85
86 Parameter Description Default Value EnableTimer Timer Screenshot settings Recording user activity and creating screenshots with a certain time interval. If the value is 1, the option is enabled, if the value is 0 disabled. Time interval of user activity recording and screenshot creation in seconds. This period can t be less than 30 seconds. This parameter is needed if the EnableTimer parameter is set. Disabled 30 EnableScreenshotCre ation EnableCaptureActive WindowOnly Creating screenshots along with recording user activity. If the value is 1, the option is enabled, if the value is 0 disabled. Screenshots and recorded metadata will contain information on active window only. If the value is 1, the option is enabled, if the value is 0 disabled. Enabled Disabled ColorDepth A colour scheme used for screenshots saving. 7 4 bits (Grayscale), 8 8 bits, bits. 7(4 bits (Grayscale)) Monitoring parameters EnableClipboardMon MonitorUSBStorage EnableSystemIdleDet ect EnableIdleForceTime out Logging of copy and paste operations. If the value is 1, the option is enabled, if the value is 0 disabled. Monitoring plugged in USB-based storage devices. If the value is 1, the option is enabled, if the value is 0 disabled. The system idle event detection. If the value is 1, the system idle event detection is enabled, if the value is 0 disabled. Registering idle event when user is inactive. If the value is 1, the forced idle event timeout is enabled, if the value is 0- disabled. Disabled Enabled Enabled Enabled 86
87 Parameter Description Default Value IdleForceTimeout Time interval when user is inactive. This period can t be less than 5 minutes. By default, it is set to 15 minutes. 15 Keystroke monitoring parameters EnableKeystrokes StartSessionOnKeyw ord Keywords KeystrokeFiltering KeystrokeFilteringAp pnames Logging of a keystroke. If the value is 1, the option is enabled, if the value is 0 disabled. Starting monitoring on detecting a suspicious keyword in the keystrokes. If the value is 1, the option is enabled, if the value is 0 disabled. A list of keywords, which being typed trigger the session start, separated with comma (e.g., drugs, medicine). Keywords are combined with OR logic; the LIKE operator is applied to the typed keywords (if drug is written, then drugstore will trigger the session start). Keystroke filtering during monitoring. If the value is disabled, the keystroke filtering is disabled and all applications are monitored. If the value is include, the keystroke filtering is enabled in the Include mode, and only applications listed in KeystrokeFilteringAppNames or KeystrokeFilteringAppTitles are monitored. If the value is exclude, the keystroke filtering is enabled in the Exclude mode, and only applications not listed in KeystrokeFilteringAppNames or KeystrokeFilteringAppTitles are monitored. The list of application names separated with comma (e.g., word.exe, skype.exe). Names are combined with OR logic; the LIKE operator is applied to names (e.g., if word.exe is written then winword.exe will be monitored). Enabled Disabled Empty Disabled Empty 87
88 Parameter Description Default Value KeystrokeFilteringAp ptitles The list of application titles separated with comma (e.g., Facebook, Google). Names are combined with OR logic; the LIKE operator is applied to titles (if Facebook is written, then Facebook-Messages will be monitored). Empty Log files MonLogging LogPath URL Monitoring URLMonitoring MonitorTopDomain Application Filtering Creation of monitoring logs on the Client computer. 0 - monitoring logs creation is disabled, 1 - monitoring text log will be created in the LogPath location. The path to the monitoring logs location. Using environment variables (%appdata%, %temp%, etc.) is allowed. Monitoring of URL addresses. If the value is 1, the option is enabled, if the value is 0 disabled. Monitoring of top and second-level domain names. If the value is 1, the option is enabled, if the value is 0 disabled. NOTE: This parameter works only if URLMonitoring=1. Disabled C:\ProgramDat a\ekran System\MonLo gs Enabled Enabled FilterState Application filtering during monitoring. If the value is disabled, the application filtering is disabled and all applications are monitored. If the value is include, the application filtering is enabled in the Include mode, and only applications listed in FilterAppName or FilterAppTitle are monitored. If the value is exclude, the application filtering is enabled in the Exclude mode, and only applications not listed in FilterAppName or FilterAppTitle are monitored. Disabled 88
89 Parameter Description Default Value FilterAppName FilterAppTitle User Filtering The list of application names separated with comma (e.g., word.exe, skype.exe). Names are combined with OR logic; the LIKE operator is applied to names (e.g., if word.exe is written then winword.exe will be monitored). The list of application titles separated with comma (e.g., Facebook, Google). Names are combined with OR logic; the LIKE operator is applied to titles (if Facebook is written, then Facebook-Messages will be monitored). Empty Empty UserFilterState UserFilterNames Additional options User filtering during monitoring. If the value is disabled, activity of all users is monitored. If the value is include, the user filtering is enabled in the Include mode, and only activity of users listed in UserFilterNames is monitored. If the value is exclude, the application filtering is enabled in the Exclude mode, and only activity of users not listed in UserFilterNames is monitored. The list of user names separated with a semicolon (e.g., work\jane;work\john). Names are combined with OR logic. Using asterisk (*) as name/domain mask is allowed (e.g., *\administrator or *\admin*). Disabled Empty EnableProtectedMod e UpdateAutomatically DisplayClientIcon The mode of Client work. If the value is 1, the protected mode is enabled, if the value is 0 disabled. The Client update mode. If the value is 1, the automatic Client update is enabled, if the value is 0 disabled and the Client requires manual update. The Client tray icon displaying. If the value is 1, the Client tray icon is displayed, if the value is 0 hidden. Disabled Enabled Disabled 89
90 Parameter Description Default Value JumpServerMode The Jump Server mode. If the value is 1, the Jump Server mode is enabled, if the value is 0 disabled. Disabled Monitoring Time Filtering MonitorTimeFilterSta te MonitoringDays MonitoringHours IP Filtering Filtering the time of recording user activity. If the value is disabled, the user activity is recorded twenty-four seven. If the value is include, the user activity is recorded only on days defined in MonitoringDays and only during hours defined in MonitoringHours. If the value is exclude, the user activity is not recorded on days defined in MonitoringDays and during hours defined in MonitoringHours. The days of the week during which the Client will or will not record users' activity. The days of the week are combined by OR logic. The hours during which the Client will or will not record users' activity. Disabled Mon, Tue, Wed, Thu, Fri 8:00 18:00 IPFilterState IP filtering during monitoring. If the value is disabled, remote sessions from all IP addresses are monitored. If the value is includepublic, the IP filtering is enabled in the Include mode, and only remote sessions from public IP addresses listed in IPFilterAddresses are monitored. If the value is excludepublic, the IP filtering is enabled in the Exclude mode, and only remote sessions from public IP addresses not listed in IPFilterAddresses are monitored. If the value is includeprivate, the IP filtering is enabled in the Include mode, and only remote sessions from private IP addresses listed in IPFilterAddresses are monitored. If the value is excludeprivate, the IP filtering is enabled in the Exclude mode, and only remote sessions from private IP addresses not listed in IPFilterAddresses are monitored. Disabled 90
91 Parameter Description Default Value IPFilterValue Authentication Options The list of IP addresses separated with a comma (e.g., , ). IP addresses are combined with OR logic. Using asterisk (*) as a mask is allowed (e.g., *.*). Empty NotificationMessage EnableNotificationCo mment RequireTicketNumbe r The message that is displayed on user login to the system. Additional option that requires the user to comment on the additional message displayed on login to the system. If the value is 1, the option is enabled, if the value is 0 disabled. Additional option that requires the user to enter a valid ticket number of an integrated ticketing system to start working with the Client computer. If the value is 1, the option is enabled, if the value is 0 disabled. Disabled Disabled Disabled Two-Factor and Secondary Authentication EnableForcedAuth EnableOneTimePass word EnableTwoFactorAut h Advanced Options Additional identification of users that log in to the Client computer with server operation system. If the value is 1, the option is enabled, if the value is 0 disabled. Additional option that allows the user to request a one-time password to get a temporary access. If the value is 1, the option is enabled, if the value is 0 disabled. The option that requires the user to enter a timebased one-time password to log in. If the value is 1, the option is enabled, if the value is 0 disabled. Disabled Disabled Disabled 91
92 Parameter Description Default Value InstallDir The path to the Client installation folder. Using environment variables (%appdata%, %temp%, etc.) is allowed. %ProgramFiles %\Ekran System\Ekran System LocalCacheLimit Size of the Client offline data cache in MB. 500 TenantKey A unique identifier used by Clients to detect the tenant they belong to. <Key value> Generating Windows Client Installation Package To generate an installation package, do the following: 1. Log in to the Management Tool as a user with the Client installation and management permission. 2. Click the Client Management navigation link on the left. 3. On the Clients page, click Install Clients. 4. On the Computers without Clients page, click Download installation file. 5. On the Installation File Download page, click Generate Client installation package (*.ini + *.exe). 6. On the Generate Installation Package page, define the name/ip of the Server, to which the Clients will connect, and define the client configuration to be applied to the Client and then click Next. NOTE: The Server IP address has to be static for Clients to connect to it successfully. Unique external IP addresses should be used for cloud-based Servers. 7. The installation package is successfully created and downloaded to your computer. The download settings depend upon the settings of your browser. Installing Windows Clients Locally with Custom Monitoring Parameters To install the Windows Client locally using the installation package, do the following: 1. Copy the package (the EkranSystemClient.exe installation file and the EkranSystemClient.ini file) to the target computer. 2. Start the EkranSystemClient.exe installation file under the administrator account on the target computer. 92
 To download the file for Windows Client installation, do the following: 1. Log in to the Management Tool as a user with the Client installation and management permission. 2.")
93 3. After the package is deployed, the name of the required computer appears on the Client Management page in the Management Tool. Downloading Windows Client Installation File (.exe) To download the file for Windows Client installation, do the following: 1. Log in to the Management Tool as a user with the Client installation and management permission. 2. Click the Client Management navigation link to the left. 3. On the Clients page, click Install Clients. 4. On the Computers without Clients page, click Download installation file. 5. On the Installation File Download page, click Download default Client Installation (*.exe). 6. File downloading starts. The download settings depend upon the settings of your browser. Installing Windows Clients Locally without.ini File This type of installation allows you to install the Windows Clients with default configuration. This way you will need only an EkranSystemClient.exe file for Client installation. The EkranSystemClient.ini file with default parameters will be generated automatically. To install the Windows Client locally using the installation package on the target computer: 1. Copy the downloaded EkranSystemClient.exe file to the target computer and do one of the following: Start the EkranSystemClient.exe installation file under the administrator account on the target computer and then in the opened window, enter the name or IP address of the computer, on which the Server is installed and after that click Install. In the Command Prompt (cmd.exe) started under administrator, enter EkranSystemClient.exe /ServerName=<Server Name>. NOTE. If there is no connection with the server, installation will failed and error message will be displayed. 2. After the package is deployed, the installed Client appears in the list on the Client Management page in the Management Tool. 93
94 Installation via Third Party Software If you want to install the Windows Client via a third-party tool (e.g. via System Center Configuration Manager, Active Directory, etc.), download the Client installation file and use the following command: EkranSystemClient.exe /ServerName=<Server Name>. The Client will be installed with a default configuration. Installing Windows Client on Amazon WorkSpace To install the Windows Client on Amazon Workspaces, do the following: 1. Download the Client installation file. 2. Connect to the Amazon WorkSpace and run the Client installation file (.exe). 3. Open the Windows Registry Editor and select the following key: HKEY_LOCAL_MACHINE\SOFTWARE\EkranSystem\Client 4. Select the AgentGUID value and click Delete in the context menu. 5. In the opened confirmation message, click Yes. NOTE: You will not be able to edit the registry values in the Protected Mode. 6. In the Amazon WorkSpaces management console, do the following: Create an image of the Amazon WorkSpace with installed Windows Client. Create a bundle from the newly created image. Create new Amazon WorkSpaces from the newly created bundle. 7. All new Amazon WorkSpaces created from the bundle will automatically connect to the Ekran Server. NOTE: Make sure that Ekran Server is allowed to accept TCP connections via 9447 and 9449 ports for connection between Ekran Server and Ekran Clients. Cloning a Virtual Machine with Installed Client Each Windows Client has its own unique ID, which it receives when it connects to the Server. When you prepare a virtual machine, which is to be monitored, for cloning, you need to remove the Client ID to ensure the proper Client connection to Server. To remove the Client ID, do the following: 1. Make sure the Client is offline (does not have any connection with the Server). 2. Open the Windows Registry Editor. 3. In the Registry Editor window, select the following key: HKEY_LOCAL_MACHINE\SOFTWARE\EkranSystem\Client 4. Select the AgentGUID value and click Delete in the context menu. 5. In the opened confirmation message, click Yes. NOTE: You will not be able to edit the registry values in the Protected Mode. 94
95 Each new Client with a new AgentGUID will be displayed as a separate instance in the Management Tool. To avoid displaying multiple Clients, you can run the script below to use the virtual machine name as AgentGUID. The script must be run on each system start. taskkill /f /im ekran* reg delete HKLM\SOFTWARE\EkranSystem\Client /v AgentGUID /f reg delete /v PreviousState /f del "c:\program Files\Ekran System\Ekran System\Client\OfflinePool.dat" /q reg add HKLM\SOFTWARE\EkranSystem\Client /v AgentGUID /t REG_SZ /d %COMPUTERNAME% /f net start EkranClient Unassigning License on Virtual Machine Shutdown If Ekran Windows Client is used on virtual machines, in some cases the master image might be used multiple times. To prevent wasting Client licenses when this occurs, you can either configure the Client license to be unassigned on the virtual machine shutdown or enable the Golden Image mode for the Server. Golden Image Mode for the Server If the Golden Image mode is enabled for Ekran System Server, then the Server will automatically unassign a license from the Client when it becomes offline. To enable Golden Image mode for the Server, do the following: 1. Stop the Server by clicking Stop in the context menu of the Server icon in the notification area or find the EkranServer service in the Task Manager and click Stop. 2. Open the Windows Registry Editor. 3. In the Registry Editor window, select the HKEY_LOCAL_MACHINE\SOFTWARE\EkranSystem key. 4. Select Edit > New > DWORD (32-bit) Value and define the following: Value name: GoldenImageMode Value data: 1 5. Start the EkranServer service to continue working with the program. Unassigning License via the Script on the Client Side Before configuring a virtual machine image, you have to create a cmd file (for example, uninstall_client.cmd) containing the following command-line command: start /wait <path to EkranClient.exe> -uninstwl <uninstallation key> For example (default installation parameters used): 95
96 start /wait C:\Progra~1\EkranS~1\EkranS~1\Client\EkranClient.exe -uninstwl allowed To configure the image of the virtual machine with the Client for the license to be unassigned on shutdown: 1. Start your virtual machine image. 2. Configure the system and install the necessary software. 3. Install Ekran Client (via remote installation or locally) with the Protected Mode option disabled. 4. Open the Windows Registry Editor. 5. In the Registry Editor window, select the following key: HKEY_LOCAL_MACHINE\SOFTWARE\EkranSystem\Client 6. Select the AgentGUID value and click Delete in the context menu. 7. In the opened confirmation message, click Yes. 8. Copy uninstall_client.cmd to the target folder on your virtual machine. 9. Run the Command Prompt (cmd.exe) as administrator. 10. Enter the gpedit command. 11. In the Local Group Policy Editor window, select Computer Configuration -> Windows Settings -> Scripts (Startup/Shutdown) -> Shutdown 12. In the Shutdown Properties window, click Add and select the uninstall_client.cmd file. 13. Click OK. 14. Create the master snapshot (gold image). 15. From now on, whenever you start the virtual machine using this image, the Client is going to connect to the Server as a new Client and get a license assigned to it. Whenever the virtual machine is shutdown, the license is going to be unassigned from the Client. NOTE: If you need the license to be unassigned on Logoff, you have to edit the Logoff script in a similar way in the Local Group Policy Editor (User Configuration -> Windows Settings -> Scripts (Logon/Logoff) -> Logoff -> Properties). Updating Windows Clients About Ekran System offers two update options for Windows Clients: - automatic update - update of selected Clients via the Management Tool The automatic Client update is performed when a Windows Client connects to the Server of a newer version. It is recommended to use the automatic Client update. If you want to control the update of target Client machines yourself, you can disable the automatic update on the required Clients and update them via the Management Tool. After the Windows Client is updated, you will still be able to access the monitored data received before its update. NOTE: Windows Clients of very old versions might not be able to update. In this case, you need to re-install the Clients. 96
97 Windows Client Status after Server Update If the Update Client automatically option is enabled for the Windows Client, it is updated automatically when it connects to the Server of a newer version. If the Update Client automatically option is disabled for the Windows Client and it requires manual update, it is displayed with the icon in the grid on the Clients page. Such Clients store the monitoring data locally. They restart sending monitoring data to the Server after update. Updating Windows Clients Automatically To update a Windows Client automatically, do the following: 1. Log in to the Management Tool as a user that has the Client configuration management permission. 2. Click the Client Management navigation link to the left. 3. On the Clients page, select the Client that needs to be updated automatically and click Edit Client. 4. On the Editing Client page, on the Properties tab, select the Update Client automatically option. 5. Click Finish. 6. The Client will be updated automatically when it connects to the Server of a newer version. Updating Windows Client Manually To update a selected Windows Client via the Management Tool, do the following: 1. Log in to the Management Tool as a user that has the Client configuration management permission. 2. Click the Client Management navigation link to the left. 3. On the Clients page, select the Client that needs to be updated and click Edit Client. 4. On the Editing Client page, on the Properties tab, clear the Update Client automatically option. 5. Click Finish to save the changes. 6. Update the Server. 7. Log in to the Management Tool as a user that has the Client configuration management permission. 8. Click the Client Management navigation link to the left. 9. On the Clients page, select the Client that needs to be updated and click Edit Client. 10. On the Editing Client page, on the Properties tab, click Update. 11. On its next connection to the Server, the Client will be updated to a newer version. 97
98 Reconnecting Windows Clients to Another Server If you want to reconnect the Windows Clients to another Server, start the remote installation from that Server. The Clients will be reconnected. Please note that this way of reconnection can be used only for the Clients that work in the nonprotected mode. If your Clients work in the protected mode, first disable the protected mode and then reconnect the Clients. Uninstalling Windows Clients About Windows Clients can be uninstalled locally or remotely. It is possible to uninstall the Windows Client locally only with the help of the Uninstallation key. After uninstallation, the Client stops sending its data to the Server, but its data is not deleted from the Server and the Client is displayed in the Management Tool. The Client status in the Management Tool becomes offline after uninstallation. To delete the Client from the Server (with all its captured data) and from the Management Tool, follow the steps described in the Deleting the Client section. Client Uninstallation Key During the Server installation it is possible to define the Client Uninstallation key. By default, this key is allowed. The Client Uninstallation key is used during the local Client uninstallation. The user is able to view or change the Client Uninstallation key in the Management Tool. If you change the Uninstallation key, the Client will receive it after connection to the Server. If the Client has not connected to the Server yet, then its Uninstallation key is allowed. If the Client has not connected to the Server after the Uninstallation key has been changed, the Client has to be uninstalled with the help of an old Uninstallation key. To change the uninstallation key, do the following: 1. Log in to the Management Tool as a user with the Client uninstallation permission. 2. Click the Client Management navigation link to the left. 3. On the Clients page, click Edit Uninstallation Key. 4. On the Custom Uninstall Key page, enter the new uninstallation key in the New Key field. 5. Re-enter the new uninstallation key in the Confirm Key field and then click Save. 6. The uninstallation key is changed. 98
99 Uninstalling Windows Clients Remotely To uninstall a Windows Client, do the following: 1. Log in to the Management Tool as a user that has the Client uninstallation permission. 2. Click the Client Management navigation link to the left. 3. On the Clients page, select the Client you want to uninstall and click Edit Client. 4. On the Editing Client page on the Properties tab, click Uninstall Client. NOTE: This option is not displayed if the Client is already uninstalled or you don t have the Client uninstallation permission for it. 5. In the confirmation message, click Uninstall. 6. The Client is uninstalled. To uninstall several Windows Clients, do the following: 1. Log in to the Management Tool as a user with the Client uninstallation permission. 2. Click the Client Management navigation link to the left. 3. On the Clients page, select Uninstall Clients. 4. On the Client Uninstallation page, click Add Clients to list. 5. The page with the Clients for which you have the Client uninstallation permission opens. 6. Select the Clients that you want to uninstall and click Next. To find a specific Client, enter its name or a part of its name in the Contains box and click Apply Filters. 7. Make sure you have added all necessary Clients to the uninstallation list and click Uninstall. 8. The selected Clients are uninstalled. Uninstalling Windows Clients Locally It is possible to uninstall the Windows Client locally only with the help of the Uninstallation key that is defined during the Server installation or in the Management Tool. To uninstall the Windows Client locally, do the following: 1. Run the Command Prompt (cmd.exe) as administrator. 2. In the Command Prompt, go to the Client installation folder. By default, it is located here: C:\Program Files\Ekran System\Ekran System\ 3. Enter the following command: UninstallClient.exe /key=<uninstallation key> /silent=true 4. Press Enter. 5. The Client is successfully uninstalled. NOTE: If you do not add the /silent=true parameter to the uninstallation command, the confirmation message for uninstalling the Client will be displayed on the Client computer. 99
100 Viewing Windows Clients Windows Clients are displayed in groups on the Client Management page. If the user has an administrative Client installation and management permission, he/she will see all Clients. In other case, the user will see only those Clients for which they have at least one Client permission. The Client list contains the following information: Client name Status Type Domain IPv4 IPv6 Description Please note, if there are several network cards on the Client computer, only those IPv4 and IPv6 addresses used by Windows Clients will be displayed in the Management Tool. You can filter Windows Clients in the following ways: To sort Clients by the type of operating system, click the Type column header. To find Windows Clients only, select the Hide Linux Clients and Hide macos Clients options and click Apply Filters. To find Clients by their host name or description, enter the name/description or a part of it in the Contains box and click Apply Filters. To hide offline/online/uninstalled/licensed Clients, select the corresponding option in the Filtering pane and click Apply Filters. On the Client Management page you have the following options: Add Client Group, Install Clients, Manage Licenses, Edit Uninstallation Key, Uninstall Clients, Delete Clients, Edit Client Configuration, and Edit Client Groups. The number of available options depends upon permissions. 100
101 macos Clients About macos Client is a program that can be installed on the target computers to monitor the activity of their users. The monitored data is sent to the Server and can be viewed via the Session Viewer in the Management Tool. Monitoring via macos Clients The macos Clients work as follows: Each macos Client starts automatically on computer start. A macos Client with a Workstation Client license monitors either one local or remote session. Every time the computer is restarted, the macos Client starts recording user activity in a new session. The maximum duration of one session can be 24 hours. At 00:00 all live sessions are terminated. After their termination (their status changes from Live to Finished), new live sessions automatically start. The session status becomes Finished whenever: the computer is turned off, the user is logged out, or the macos Client is disconnected from the Server. Whenever the macos Client reconnects to the Server, the session status changes from Finished back to Live. If a user works with several monitors, the macos Client creates screenshots from all of them. If there is no connection with the Server, the Client stores the monitored data locally (default folder is /Library/Application Support/Ekran) and automatically sends it to the Server when the connection is restored. It is recommended to have not less than 500MB of free space on the disk where the Client is installed to save data during the offline session. The frequency of user activity recording of the macos Client is the following: o If the user is typing the text, the user activity is recorded every 10 seconds. o If the user clicks a mouse, the user activity is recorded every 3 seconds. o If the user changes an active window, the user activity is recorded every 3 seconds. User activity recording triggers usually influence each other, though the average frequency of user activity recording is higher. 101
102 Installing macos Client About You can install the macos Clients locally using the Client installation file generated in the Management Tool. Downloading macos Client Installation File To download the file for macos Client installation, do the following: 1. Log in to the Management Tool as a user with the Client installation and management permission. 2. Click the Client Management navigation link to the left. 3. On the Clients page, click Install Clients. 4. On the Computers without Clients page, click Download installation file. 5. On the Installation File Download page, click Download macos x64 Client Installation (.tar.gz). 6. File downloading starts. The download settings depend upon the settings of your browser. Installing macos Clients This type of installation allows you to install the macos Clients locally using the downloaded EkranSystemmacOSClientx64.tar.gz package. To install the macos Client on the target computer with a macos operating system from the command line: 1. Make sure that there is only one user logged in to the computer. 2. Copy the installation package to any folder. 3. Run the Terminal. 4. Navigate to the folder with the installation package by entering the following command: cd path/to/folder 5. Unpack the installation package using the following command: tar xvfz <installation package name> 6. Navigate to the unpacked EkranClient folder using the following command: cd EkranClient The EkranClient folder contains the install.sh script used to install the Client. 7. Run the macos Client installation script specifying the Server name or Server IP address and the port used for connection to the Server (9447 is recommended):./install.sh <server_name/ip> <server_port>. 8. After the end of the installation, macos Client will appear in the list on the Clients page in the Management Tool. 102
103 Uninstalling macos Clients About macos Clients can be uninstalled locally or remotely. After uninstallation, the Client stops sending its data to the Server, but its data is not deleted from the Server and the Client is displayed in the Management Tool. The Client status in the Management Tool becomes offline after uninstallation. To delete the Client from the Server (with all its captured data) and from the Management Tool, follow the steps described in the Deleting the Client section. Uninstalling macos Clients Remotely To uninstall a macos Client, do the following: 1. Log in to the Management Tool as a user that has the Client uninstallation permission. 2. Click the Client Management navigation link to the left. 3. On the Clients page, select the Client you want to uninstall and click Edit Client. 4. On the Editing Client page on the Properties tab, click Uninstall Client. NOTE: This option is not displayed if the Client is already uninstalled or you do not have the Client uninstallation permission for it. 5. In the confirmation message, click Uninstall. 6. The Client is uninstalled. To uninstall several macos Clients, do the following: 1. Log in to the Management Tool as a user with the Client uninstallation permission. 2. Click the Client Management navigation link to the left. 3. On the Clients page, select Uninstall Clients. 4. On the Client Uninstallation page, click Add Clients to list. 5. The page with the Clients for which you have the Client uninstallation permission opens. 6. Select the Clients that you want to uninstall and click Next. To find a specific Client, enter its name or a part of its name in the Contains box and click Apply Filters. 7. Make sure you have added all necessary Clients to the uninstallation list and click Uninstall. 8. The selected Clients are uninstalled. 103
104 Uninstalling macos Clients Locally To uninstall the macos Client from the command line, do the following: 1. Run the Terminal. 2. Do one of the following: Navigate to the folder with the macos Client by entering the command: sudo cd /Library/Application\ Support/Ekran/EkranAgent. Or The EkranAgent folder contains the uninstall.sh script used to uninstall the Client. Run the uninstallation script by entering the following command: sudo./uninstall.sh and press Enter. Run the uninstallation script by entering the following command: sudo /Library/Application\ Support/Ekran/EkranAgent/uninstall.sh and press Enter. 3. Enter the password of the superuser. 4. macos Client is successfully uninstalled. Viewing macos Clients The macos Clients are displayed in the Management Tool in the Clients list along with the Windows and Linux Clients. If the users have an administrative Client installation and management permission, they will see all Clients. In other case, the users will see only those Clients for which they have at least one Client permission. The Client list contains the following information: Client name Status Type IPv4 IPv6 Description The Domain column is empty for macos Clients. Please note, if there are several network cards on the Client computer, only the IPv4 and IPv6 addresses used by macos Client will be displayed in the Management Tool. You can filter macos Clients in the following ways: To sort Clients by the type of operating system, click the Type column header. To find macos Clients only, select Hide Windows Clients and Hide Linux Clients and click Apply Filters. To find Clients by their host name or description, enter the name/description or a part of it in the Contains box and click Apply Filters. To hide offline/online/uninstalled/licensed Clients, select the corresponding option in the Filtering pane and click Apply Filters. 104
105 Linux Clients About The Linux Client is a program that can be installed on the target computers to monitor the activity of their users in the terminal. The monitored data is sent by the Linux Client to the Server and can be viewed via the Session Viewer in the Management Tool. Monitoring via Linux Clients The Linux Client monitors the following actions: 1. User actions (input commands and responses from the terminal) 2. System calls in: SSH (local and remote) Telnet (local and remote) Local terminal sessions 3. Commands being executed in the running script. A Client with a Linux/UNIX Server Client license can monitor multiple sessions simultaneously, both remote and local. A new monitoring session is created each time the terminal is opened. There is no time limitation for a Linux Client session. The session status becomes Finished whenever the terminal is closed or the Linux Client is disconnected from the Server. Whenever the Linux Client reconnects to the Server, the session status changes from Finished back to Live. Even if the license is unassigned from the Linux Client or the Linux Client process is killed, monitoring of started sessions continues until the terminal is closed. Installing Linux Client About You can install the Linux Clients locally from the command line using the EkranSystemLinuxClient.tar.gz package, respectively: EkranSystemLinuxClientx64.tar.gz for the 64-bit system EkranSystemLinuxClientx86.tar.gz for the 32-bit system Downloading Linux Client Installation File To download the file for Linux Client installation, do the following: 1. Log in to the Management Tool as a user with the Client installation and management permission. 2. Click the Client Management navigation link to the left. 105
106 3. On the Clients page, click Install Clients. 4. On the Computers without Clients page, click Download installation file. 5. On the Installation File Download page, click Download Linux x86 Client Installation (.tar.gz) or Download Linux x64 Client Installation (.tar.gz). 6. File downloading starts. The download settings depend upon the settings of your browser. Installing Linux Clients This type of installation allows you to install the Linux Clients locally from the command line using the downloaded EkranSystemLinuxClient.tar.gz package. To install the Linux Client on the target computer with a Linux operating system from the command line: 1. Copy the installation package to any folder. Make sure you use the correct installation package (x64 or x86). 2. Run the command-line terminal. 3. Navigate to the folder with the installation package by entering the following command: $ cd path/to/folder 4. Unpack the installation package using the following command: $ tar xvfz <installation package name> 5. Go to the unpacked EkranClient folder using the following command: $ cd EkranClient 106
107 The EkranClient folder contains the install.sh script used to install the Client. 6. Run the Linux Client installation script specifying the Server name or Server IP address and the port used for connection to the Server (9447 is recommended): $ sudo./install.sh <server_name/ip> <server_port>. 7. After the Client is installed, it starts monitoring the new terminal sessions. If you want to monitor the older terminal sessions, restart them. 8. The installed Linux Client appears in the list on the Client Management page in the Management Tool. Uninstalling Linux Clients To uninstall the Linux Client from the command line, do the following: 1. Run the command line terminal. 2. Navigate to the folder with the Linux Client by entering the command: $ cd /opt/.ekran 3. The.Ekran folder contains the uninstall.sh script used to uninstall the Client. 4. Run the uninstallation script by entering the following command: $ sudo./uninstall.sh and press Enter. 5. Enter the password of the superuser. 6. Linux Client is successfully uninstalled. Viewing Linux Clients The Linux Clients are displayed in the Management Tool in the Clients list along with the Windows Clients. If the user has an administrative Client installation and management permission, they will see all Clients. In other case, the user will see only those Clients for which they have at least one Client permission. The Client list contains the following information: Client name Status Type IPv4 IPv6 Description 107
108 The Domain column is empty for Linux Clients. Please note, if there are several network cards on the Client computer, only the IPv4 and IPv6 addresses used by Linux Clients will be displayed in the Management Tool. You can filter Linux Clients in the following ways: To sort Clients by the type of operating system, click the Type column header. To find Linux Clients only, select Hide Windows Clients and Hide macos Clients and click Apply Filters. To find Clients by their host name or description, enter the name/description or a part of it in the Contains box and click Apply Filters. To hide offline/online/uninstalled/licensed Clients, select the corresponding option in the Filtering pane and click Apply Filters. 108
 on the target computers with operating system on which Clients are installed and allow")
109 Tray Notifications Application About The Ekran System Tray Notifications is a component to the Ekran System application that allows you to receive notifications on alert events on Clients. Alerts are instances that notify the investigator of a specific activity (potentially harmful/forbidden actions) on the target computers with operating system on which Clients are installed and allow the investigator to respond to such activity quickly without performing searches. The application is completely independent and can be used for receiving alert notifications on any computer. Installing/Uninstalling the Tray Notifications Application Installing the Tray Notifications Application To install the Tray Notifications application, do the following: 1. Run the TrayNotifications_<version>.msi installation file. 2. Click Next on the Welcome page. 3. Carefully read the terms of the End-User License Agreement and select I Accept the terms in the License Agreement check box and click Next. 4. On the Destination Folder page, enter the installation path for deploying. Click Next. 5. Click Install to confirm the installation. 6. The installation process starts. 7. After the end of the installation process, click Finish to exit the wizard. 109

110 Uninstalling the Tray Notifications Application To uninstall the Tray Notifications application, do the following: 1. Run the TrayNotifications_<version>.msi installation file. 2. The setup wizard opens. 3. Click Next on the Welcome page. 4. On the Change, repair, or remove installation page, select Remove. 5. Click Remove to confirm removing. 6. Wait for the uninstallation process to complete. 110
111 Troubleshooting Quick Access to Log Files Log files contain information that might be useful for administrator for detecting problems in the system if any. You can either analyse the log files yourself to get more information on what is happening in your system or send them to the Support team to help them in detecting the source of problems in your system. To download the Management Tool log file, click the Health Monitoring navigation link to the left, click next to the System state tab and select Download MT log file in the menu. In the Save As window, browse to the location, where the log file should be saved, and click Save. The log file will be downloaded to your computer. To download the Server log file, click the Health Monitoring navigation link to the left, click next to the System state tab and select Download Server log file. In the Save As window, browse to the location, where the log file should be saved, and click Save. The log file will be downloaded to your computer. Please note that every time the Server restarts, a new log file is created. The latter log file can be downloaded via Management Tool, other log files can be viewed in C:\Program Files\Ekran System\Ekran System\ServerLogs. Database/Server Database/Server Related Issues Issue I cannot start the Server from the Server tray. There are too many records in the database. I have defined a new database, what happened to the old one? Cause/Solution To start the Server, the Server tray service must be started under the administrator account. Use the automatic or manual database cleanup feature to remove the old records from the database. To do this, in the Management Tool, click the Database Management navigation link and define the cleanup settings on the corresponding tabs. The old database remains in place and is not changed. 111
112 Issue I need to transfer the data from an old database to a new one/i want to change the type of the database without losing data. I have transferred the SQL database to another computer. Cause/Solution Unfortunately, the data cannot be transferred from one database to another. Unfortunately, you can t relocate the SQL database to another computer. Though you can move it to another location on the same PC with SQL means. I have changed the location of the Firebird database. I have installed a new version of the Server and I want to use the old database. I have used the database cleanup feature, but the size of the database didn t change. I have accidentally removed the database from the MS SQL Server. To redefine the location of the Firebird database, move it to another location and change the corresponding values in the Windows Registry Editor. See Moving the Server Database chapter in the user manual for more details. If you have updated the Server, your old database will remain. If you have reinstalled the Server, you need to use a new database. The cleanup feature only removes data from the database, but doesn t change the size reserved by it. To reduce the size of the database, click Shrink database on the Database Options tab on the Database Management page of the Management Tool. You need to define a new database. To do this, you need to reinstall the Server. I cannot shrink the database: the Shrink database button is absent in the Management Tool on the Database Options tab. Make sure you use the MS SQL Server database. The shrinking cannot be performed if the cleanup procedure is in progress. My anti-virus blocks the Server uninstallation/update. Due to the uninstaller specifics some anti-viruses might detect it as a false positive during virus scan. In this case, it is recommended to disable your antivirus during Server uninstallation/update. 112
113 Database/Server Related Error Messages The following table provides the list of error messages related to databases and the Server and their causes and possible solutions. These messages may appear in the Management Tool, from the Server tray service, or during the installation of the Server. Message If you get the following message in the Management Tool: "Connection with MS SQL database is lost. Please check that the database is accessible and try again." Cause/Solution The Server has lost the connection to the MS SQL Server. Please make sure that the MS SQL Server is running and it is online and accessible. To check that the MS SQL Server computer is accessible, enter the following command in the Windows command line: ping <name of the MS SQL Server computer> The connection to the MS SQL Server is blocked by the Firewall. Try disabling the Firewall on the MS SQL Server side. If you get the following message when trying to restart the Server service: Not enough permissions to restart the Server. If you get the following error while trying to clean up the database: Error occurred while clearing the database. Please try again. If you get the following message from the Server tray service: "The Server connection with the database has been lost. Click to view logs." You can restart the Server service only under the administrator account. The program encountered an unexpected error while trying to clear the database. Try clearing the database again. Make sure the Server service is running. There was a problem with connection to the database. Please make sure that the computer on which the database is installed is online and accessible. To check that the computer is accessible, enter the following command in the Windows command line: ping <name of the computer with installed database> If the problem still appears, please, send us logs (the Server Service file), which you can find in the Server sub-folder of the Ekran System installation folder. The Server has lost the connection to the database. Please make sure that the computer on which the database is installed is online and accessible. To check that the computer is 113
114 Message Cause/Solution accessible, enter the following command in the Windows command line: ping <name of the computer with installed database> If the problem comes up again, please, send us logs (the Server Service file), which you can find in the Server sub-folder of the Ekran System installation folder. If you get one of the following messages while trying to perform an action with database: "An error occurred when shrinking database. Please try again." "Error occurred while retrieving database info. Please try again." The program encountered an unexpected error while trying to perform an action with database. Please try performing the action again. There was a problem with connection to the database. Please make sure that the computer on which the database is installed is online and accessible. To check that the computer is accessible, enter the following command in the Windows command line: ping <name of the computer with installed database> If the problem still appears, please, send us logs (the Server Service file), which you can find in the Server sub-folder of the Ekran System installation folder. 114
115 Management Tool Management Tool Related Issues Issue HTTP 500 Internal Server error is displayed when I try to connect to the Management Tool. The license management function is unavailable and I cannot assign licenses to Clients. I have no Internet connection on the Cause/Solution For Windows 7, follow these instructions: 1. Make sure that all the following check boxes are selected in the Windows Features window: Net Framework 3.5> Windows Communication Foundation HTTP Activation and Windows Communication Foundation non-http Activation. 2. Run the Command Prompt (cmd.exe) as administrator: Enter cd %windir%\microsoft.net\framework\v4.0.xxxx x\aspnet_regiis.exe iru (for 32 bit machine) or %windir%\microsoft.net\framework64\v4.0.x xxxx\aspnet_regiis.exe iru (for 64 bit machine). Example: C:\Windows\Microsoft.NET\Framework64\v \aspnet_regiis.exe iru 3. Press Enter. For Windows 10, 8.0 or 8.1, make sure that all the following options are selected in the Windows Features window: Net Framework 3.5> Windows Communication Foundation HTTP Activation and Windows Communication Foundation non-http Activation. Make sure you have the administrative Client installation and management and License management permissions. In the Single-tenant mode, if you have this permission, but the license management function is still unavailable, then your copy of the program is not licensed. Please purchase serial keys and activate them online or activate them on your vendor s license site and add them offline. In the Multi-tenant mode, if you are a user of a not default tenant, contact your technician to make sure you have the granted licenses. You can activate the serial on the license site of your 115
116 Issue computer with the installed Server and cannot activate serial keys. I have reinstalled/updated the Server and now there are no activated serial keys in it. The list of the domain computers is empty during the Client installation. The list of the domain computers is not complete during the Client installation. The target computer is out of the domain. I have assigned a Terminal Server Client license instead of a Workstation Client license to the Client or I have assigned a license to the wrong Client. There are some Clients that I did not install. Cause/Solution vendor and then add activated keys on the computer with the installed Server. If you activated serial keys online, after you reinstall or update the Server, activated serial keys will be automatically synchronized. For this purpose, you need to have an active Internet connection during the first start of the Server. If you used an offline activation (added activated serial keys), you need to add them in the Management Tool again. This problem can be caused by network or Windows issues (e.g. your computer cannot connect to the local network). If there are no network problems, try searching for computers via the Add computers by IP option. To install Clients in such a way, on the Computers without Clients page click Add computers by IP. Ekran System obtains the list of domain computers using standard Windows methods, which do not always provide the full list of computers. If DNS settings of your computer network allow, you can: Search for computers using the Add computers by IP option. To install Clients in such a way, on the Computers without Clients page, click Add computers by IP. Create an installation package and install a Client locally on the target computer. To generate an installation package, on the Computers without Clients page, click Download installation file and then select the type of the installation file you want to download. When the installation file is downloaded to your computer, you can start the installation process. Any license can be unassigned from a Client anytime. These may be old Clients that were installed earlier. You can uninstall them remotely via the Management Tool or locally on the Client computer. 116
117 Issue I do not receive notifications, although the parameters are correct. Some of the Management Tool functions are unavailable. I do not want to provide the user with access to all Clients. I forgot the password of the internal user. I forgot the password of the tenant admin. The user is able to perform actions that are supposed to be prohibited for him/her (e.g. the user sees the Clients that he/she doesn t have a permission for). I haven t received any reports or alert notifications by . Cause/Solution Make sure you do not use Microsoft Exchange Server 2010, which is not supported. Make sure that you have the corresponding permissions for these functions. By defining the Client permissions for the user in the Management Tool, you can define which Clients the user will have the access to. Contact the administrator and ask him to change the password. If the tenant admin is registered via , please contact your technician and ask to resend an with a new password. If the tenant admin is a domain user, contact your system administrator. Check the groups which the user belongs to. He/she might have inherited some new permissions from these groups. Check the Spam folder. Management Tool Error Messages The following table provides the list of error messages that you may see while working in the Management Tool and their causes and possible solutions. Message If you get the following message when trying to connect to the Management Tool: Server is unavailable. Please contact administrator. If you get the following message when trying to connect to the Management Tool: Wrong password or username. Cause/Solution The program encountered an unexpected error while trying to perform an action. Please refresh the Management Tool. Please make sure that the Server is running. Please restart the Server and try again. If the problem comes up again, please contact the support. Please make sure that your login and the password are correct. If you are logging in as a Windows user, don t forget to write <domain name>\<login>. 117

118 Windows Client Checking that the Client Is Installed If the Client is successfully installed, it will appear on the Clients page of the Management Tool in the Data View pane. If there is no Client in the Management Tool, you have to check whether the Client has been installed. You can check if the Client is installed on the investigated computer in one of the following ways: The EkranService.exe process is running. The EkranClient and EkranController services are started. There is a <system disk>:\program Files\Ekran System\Ekran System\Client\ folder with executable files. 118
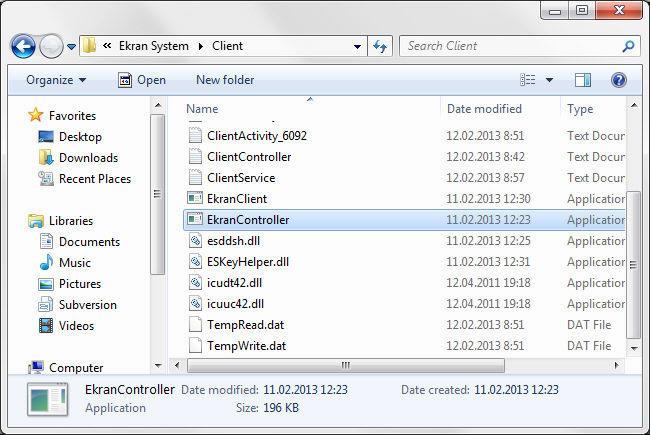
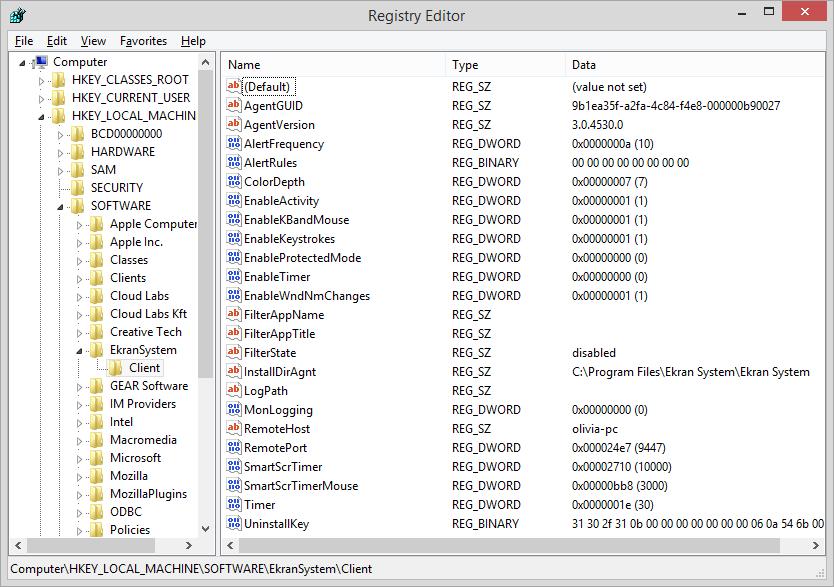
119 The HKEY_LOCAL_MACHINE\SOFTWARE\EkranSystem\Client key has the following values: 119
120 Clients Installation/Uninstallation Issues and Error Messages The common reasons of issues with remote installation or uninstallation of Clients are the inadequate network configuration or system settings. If you are sure that a user has administrative rights on the Client computer, please check whether all of the conditions for successful installation are met. Remote Installation Error Messages During remote Client installation you can get the following error messages: The user doesn t have enough permission on the remote host. The network name cannot be found. Client machine must be rebooted before agent installation. The host is unavailable now or turned off. Try again later. Solving Remote Installation Issues If you receive the following error message during the remote Client installation: The User doesn t have enough permission on the remote host, as a rule, such issue may be caused by the following reasons: There is no access to network shares. DNS service is unavailable. UAC is enabled (Windows 10/8/7/Vista). Errors in Active Directory. Issues with the Service Principle Name for the domain. Two computers have the same computer name. Issue: There is No Access to Network Shares For successful remote installation, Ekran System needs to access the administrative shares on the target computers. At first, please check that you have access to administrative shares and if there is no access, enable it. How to Check: To check the administrative shares availability, do the following: 1. Open Windows Explorer. 2. In the address bar type \\<target_computer_ip/name>\admin$ and press Enter. 120
. Enter and execute the ping <target_computer_name or IP> command. Check the following: 1.")
121 3. When the Enter Network Password window opens, enter administrator credentials and click OK. 4. If the login credentials are accepted, the system folder opens (by default, C:\Windows). If you get an error after performing step 2, try the following: Open the Command Prompt (cmd.exe). Enter and execute the ping <target_computer_name or IP> command. Check the following: 1. If you do not get ping replies, network may be down. Check the network connection and try again. 2. If the network is up, but you do not get the ping reply, check the firewall on the remote computer. Disable the firewall on the target remote computer. If you are receiving ping replies, but the administrative share is still unavailable, check that the Sharing Wizard or the Simple file sharing are disabled. If you are receiving ping replies and the sharing options are good, but you still cannot access the administrative shares, check that the Server system service is running on the remote computer. If you get a login error after performing step 3, try the following: Make sure that the credentials you enter are correct. You have to enter the credentials of a domain administrator or a local administrator account on the remote computer. Verify that the account password is not empty. Accounts with empty passwords cannot be used for remote connection. 121
Ekran System v.5.5 Deployment Guide
 Ekran System v.5.5 Deployment Guide Table of Contents About... 6 System Requirements... 7 Program Structure... 10 Deployment Process... 12 Server and Database... 13 About... 13 Database Types Comparison...
Ekran System v.5.2 Deployment Guide
 Ekran System v.5.2 Deployment Guide Table of Contents About... 6 System Requirements... 7 Program Structure... 9 Deployment Process... 10 Server and Database... 11 About... 11 Database Types Comparison...
Ekran System v.5.5 Getting Started
 Ekran System v.5.5 Getting Started Table of Contents About... 4 System Requirements... 5 Program Structure... 8 Getting Started... 10 Server and Database... 11 Installing the Server... 11 Database Types
Ekran System v.5.1 Help File
 Ekran System v.5.1 Help File Table of Contents About... 13 What s New... 14 System Requirements... 16 Program Structure... 18 Getting Started... 19 Deployment Process... 19 Working with Application...
Ekran System v.6.3 Help File
 Ekran System v.6.3 Help File Table of Contents About... 17 System Requirements... 18 Program Structure... 21 Getting Started... 23 Deployment Process... 23 Working with Application... 24 Server and Database...
Ekran System System Requirements and Performance Numbers
 Ekran System System Requirements and Performance Numbers Table of Contents System Requirements... 3 Performance Numbers... 6 Database Statistics... 8 2 System Requirements Ekran System claims different
Ekran System High Availability Deployment Guide
 Ekran System High Availability Deployment Guide Table of Contents About... 3 System Requirements... 4 Program Structure... 5 Deployment Process... 6 About... 6 Prerequisites... 6 General Prerequisites...
Bomgar Vault Server Installation Guide
 Bomgar Vault 17.2.1 Server Installation Guide 2017 Bomgar Corporation. All rights reserved worldwide. BOMGAR and the BOMGAR logo are trademarks of Bomgar Corporation; other trademarks shown are the property
Version Installation Guide. 1 Bocada Installation Guide
 Version 19.4 Installation Guide 1 Bocada Installation Guide Copyright 2019 Bocada LLC. All Rights Reserved. Bocada and BackupReport are registered trademarks of Bocada LLC. Vision, Prism, vpconnect, and
Automation Anywhere Enterprise 10 LTS
 Automation Anywhere Enterprise 10 LTS Document Version: 1.3 Installation Guide Date of Publication: 15 th November, 2016 Update(s) to this document edition: Table of Contents 1. Client Prerequisites Processor
Installation on Windows Server 2008
 USER GUIDE MADCAP PULSE 4 Installation on Windows Server 2008 Copyright 2018 MadCap Software. All rights reserved. Information in this document is subject to change without notice. The software described
Accops HyWorks v3.0. Installation Guide
 Accops HyWorks v3.0 Installation Guide Last Update: 4/25/2017 2017 Accops Technologies Pvt. Ltd. All rights reserved. The information contained in this document represents the current view of Propalms
Installation Guide. Mobile Print for Business version 1.0. July 2014 Issue 1.0
 Installation Guide Mobile Print for Business version 1.0 July 2014 Issue 1.0 Fuji Xerox Australia 101 Waterloo Road North Ryde NSW 2113 For technical queries please contact the Fuji Xerox Australia Customer
Installation Guide for Pulse on Windows Server 2012
 USER GUIDE MADCAP PULSE 4 Installation Guide for Pulse on Windows Server 2012 Copyright 2018 MadCap Software. All rights reserved. Information in this document is subject to change without notice. The
Installing and Configuring VMware Identity Manager Connector (Windows) OCT 2018 VMware Identity Manager VMware Identity Manager 3.
 OCT 2018 VMware Identity Manager VMware Identity Manager 3.") Installing and Configuring VMware Identity Manager Connector 2018.8.1.0 (Windows) OCT 2018 VMware Identity Manager VMware Identity Manager 3.3 You can find the most up-to-date technical documentation on
Installing and Configuring VMware Identity Manager Connector 2018.8.1.0 (Windows) OCT 2018 VMware Identity Manager VMware Identity Manager 3.3 You can find the most up-to-date technical documentation on
KYOCERA Device Manager Installation and Upgrade Guide
 KYOCERA Device Manager Installation and Upgrade Guide Legal Notes Unauthorized reproduction of all or part of this guide is prohibited. The information in this guide is subject to change without notice.
PageScope Enterprise Suite Ver. 3.1 Installation Guide
 PageScope Enterprise Suite Ver. 3.1 Installation Guide Enterprise Suite Contents 1 Summary 1.1 Introduction...1-1 1.1.1 About Device Manager...1-1 Basic functions... 1-1 1.1. Add-on (extension) applications...1-1.1.3
NBC-IG Installation Guide. Version 7.2
 Installation Guide Version 7.2 2017 Nuance Business Connect 7.2 Installation Guide Document Revision History Revision Date August 8, 2017 Revision List Updated supported SQL Server versions June 14, 2017
KYOCERA Device Manager Installation and Upgrade Guide
 KYOCERA Device Manager Installation and Upgrade Guide Legal Notes Unauthorized reproduction of all or part of this guide is prohibited. The information in this guide is subject to change without notice.
Ekran System v.6.1 Troubleshooting
 Ekran System v.6.1 Troubleshooting Quick Access to Log Files Table of Contents Quick Access to Log Files... 3 Database/Server... 4 Database/Server Related Issues... 4 Database/Server Related Error Messages...
Storage Manager 2018 R1. Installation Guide
 Storage Manager 2018 R1 Installation Guide Notes, Cautions, and Warnings NOTE: A NOTE indicates important information that helps you make better use of your product. CAUTION: A CAUTION indicates either
Installation Guide. EventTracker Enterprise. Install Guide Centre Park Drive Publication Date: Aug 03, U.S. Toll Free:
 EventTracker Enterprise Install Guide 8815 Centre Park Drive Publication Date: Aug 03, 2010 Columbia MD 21045 U.S. Toll Free: 877.333.1433 Abstract The purpose of this document is to help users install
PERFORMING A CUSTOM INSTALLATION
 PERFORMING A CUSTOM INSTALLATION OF OBSERVEIT ObserveIT Performing a Custom Installation of ObserveIT 1 of 46 TABLE OF CONTENTS TABLE OF CONTENTS... 2 OVERVIEW... 4 DOCUMENT VERSIONS... 4 PRODUCT VERSION...
VMware Horizon JMP Server Installation and Setup Guide. 13 DEC 2018 VMware Horizon 7 7.7
 VMware Horizon JMP Server Installation and Setup Guide 13 DEC 2018 VMware Horizon 7 7.7 You can find the most up-to-date technical documentation on the VMware website at: https://docs.vmware.com/ If you
OnCommand Unified Manager Installation and Setup Guide for Use with Core Package 5.2 and Host Package 1.3
 IBM System Storage N series OnCommand Unified Manager Installation and Setup Guide for Use with Core Package 5.2 and Host Package 1.3 GA32-1020-03 Table of Contents 3 Contents Preface... 10 Supported
SC-T35/SC-T45/SC-T46/SC-T47 ViewSonic Device Manager User Guide
 SC-T35/SC-T45/SC-T46/SC-T47 ViewSonic Device Manager User Guide Copyright and Trademark Statements 2014 ViewSonic Computer Corp. All rights reserved. This document contains proprietary information that
Accops HyWorks v2.5. HyWorks Controller Installation Guide. Last Update: 4/18/2016
 Accops HyWorks v2.5 Last Update: 4/18/2016 2016 Propalms Technologies Pvt. Ltd. All rights reserved. The information contained in this document represents the current view of Propalms Technologies Pvt.
 Trend Micro Incorporated reserves the right to make changes to this document and to the products described herein without notice. Before installing and using the product, please review the readme files,
Privileged Identity App Launcher and Session Recording
 Privileged Identity App Launcher and Session Recording 2018 Bomgar Corporation. All rights reserved worldwide. BOMGAR and the BOMGAR logo are trademarks of Bomgar Corporation; other trademarks shown are
Workstation Configuration Guide
 Workstation Configuration Guide August 13, 2018 Version 9.6.134.78 For the most recent version of this document, visit our documentation website. Table of Contents 1 Workstation configuration 4 1.1 Considerations
Microsoft Windows Servers 2012 & 2016 Families
 Version 8 Installation Guide Microsoft Windows Servers 2012 & 2016 Families 2301 Armstrong St, Suite 2111, Livermore CA, 94551 Tel: 925.371.3000 Fax: 925.371.3001 http://www.imanami.com Installation Guide
Installing and Configuring vcenter Multi-Hypervisor Manager
 Installing and Configuring vcenter Multi-Hypervisor Manager vcenter Server 5.1 vcenter Multi-Hypervisor Manager 1.1.2 This document supports the version of each product listed and supports all subsequent
VMware Horizon JMP Server Installation and Setup Guide. Modified on 19 JUN 2018 VMware Horizon 7 7.5
 VMware Horizon JMP Server Installation and Setup Guide Modified on 19 JUN 2018 VMware Horizon 7 7.5 You can find the most up-to-date technical documentation on the VMware website at: https://docs.vmware.com/
VMware App Volumes Installation Guide. VMware App Volumes 2.13
 VMware App Volumes Installation Guide VMware App Volumes 2.13 You can find the most up-to-date technical documentation on the VMware website at: https://docs.vmware.com/ If you have comments about this
 Trend Micro Incorporated reserves the right to make changes to this document and to the products described herein without notice. Before installing and using the product, please review the readme files,
 Trend Micro Incorporated reserves the right to make changes to this document and to the products described herein without notice. Before installing and using the product, please review the readme files,
NeuralStar Installation Guide
 NeuralStar Installation Guide Version 9.8 Release 3 May 2012 1st Edition Preface Software License Agreement Software is defined as the Kratos Technology & Training Solutions, Inc. computer programs with
Upgrading an ObserveIT One-Click Installation
 Upgrading an ObserveIT One-Click Installation This document was written for ObserveIT Enterprise version 7.6.1. This document uses screenshots and procedures written for Windows Server 2012 R2 and SQL
Ekran System v Program Overview
 Ekran System v. 6.2 Program Overview Contents About the Program Login Ekran Server & Management Tool Notifying Users about Being Database Management Monitored Licensing User Blocking Client Installation
Deployment and User Guide Installing and Configuring WhatsUp Gold Failover Manager
 Deployment and User Guide Installing and Configuring WhatsUp Gold Failover Manager This guide provides information about installing and configuring WhatsUp Gold Failover Manager. Contents CHAPTER 1 Using
SOA Software Intermediary for Microsoft : Install Guide
 SOA Software Intermediary for Microsoft : Install Guide SOA Software Intermediary for Microsoft Install Guide SOAIM_60 August 2013 Copyright Copyright 2013 SOA Software, Inc. All rights reserved. Trademarks
VMware AirWatch Cloud Connector Guide ACC Installation and Integration
 VMware AirWatch Cloud Connector Guide ACC Installation and Integration Workspace ONE UEM v1810 Have documentation feedback? Submit a Documentation Feedback support ticket using the Support Wizard on support.air-watch.com.
Workstation Configuration
 Workstation Configuration December 12, 2017 - Version 9.4 - - - - - - - - - - - - - - - - - - - - - - - - - - - - - - - - - - - - - - - - - - - - - - - - - - - - - - - - - - - - - - - - - - - - - - - -
Performing an ObserveIT Upgrade Using the Interactive Installer
 Performing an ObserveIT Upgrade Using the Interactive Installer ABOUT THIS DOCUMENT This document contains detailed procedures and instructions on how to upgrade ObserveIT by using the interactive "One
Backup App V7. Quick Start Guide for Windows
 Backup App V7 Quick Start Guide for Windows Revision History Date Descriptions Type of modification 30 Jun 2016 First Draft New 25 Nov 2016 Added Restore Options to Ch 8 Restoring Data; Combined Technical
CaliberRDM. Installation Guide
 CaliberRDM Installation Guide Borland Software Corporation 4 Hutton Centre Dr., Suite 900 Santa Ana, CA 92707 Copyright 2010 Micro Focus (IP) Limited. All Rights Reserved. CaliberRDM contains derivative
VMware Identity Manager Connector Installation and Configuration (Legacy Mode)
") VMware Identity Manager Connector Installation and Configuration (Legacy Mode) VMware Identity Manager This document supports the version of each product listed and supports all subsequent versions until
VMware Identity Manager Connector Installation and Configuration (Legacy Mode) VMware Identity Manager This document supports the version of each product listed and supports all subsequent versions until
Acronis Backup & Recovery 11.5
 Acronis Backup & Recovery 11.5 Installation Guide Applies to the following editions: Update 2 Advanced Server Server for Windows Virtual Edition Server for Linux Advanced Server SBS Edition Workstation
Release Date March 10, Adeptia Inc. 443 North Clark Ave, Suite 350 Chicago, IL 60610, USA Phone: (312)
") Adeptia Server 4.9 Installation Guide Version 1.2 Release Date March 10, 2009 Adeptia Inc. 443 North Clark Ave, Suite 350 Chicago, IL 60610, USA Phone: (312) 229-1727 Copyright Copyright 2000-2008 Adeptia,
Adeptia Server 4.9 Installation Guide Version 1.2 Release Date March 10, 2009 Adeptia Inc. 443 North Clark Ave, Suite 350 Chicago, IL 60610, USA Phone: (312) 229-1727 Copyright Copyright 2000-2008 Adeptia,
VMware Workspace ONE UEM VMware AirWatch Cloud Connector
 VMware AirWatch Cloud Connector VMware Workspace ONE UEM 1811 You can find the most up-to-date technical documentation on the VMware website at: https://docs.vmware.com/ If you have comments about this
SnapCenter Software 4.0 Installation and Setup Guide
 SnapCenter Software 4.0 Installation and Setup Guide March 2018 215-12926_C0 doccomments@netapp.com Table of Contents 3 Contents Deciding whether to read the SnapCenter Installation and Setup Guide...
Hands-On Lab. Windows Azure Virtual Machine Roles. Lab version: Last updated: 12/14/2010. Page 1
 Hands-On Lab Windows Azure Virtual Machine Roles Lab version: 2.0.0 Last updated: 12/14/2010 Page 1 CONTENTS OVERVIEW... 3 EXERCISE 1: CREATING AND DEPLOYING A VIRTUAL MACHINE ROLE IN WINDOWS AZURE...
Workstation Configuration
 Workstation Configuration December 15, 2017 - Version 9.3 - - - - - - - - - - - - - - - - - - - - - - - - - - - - - - - - - - - - - - - - - - - - - - - - - - - - - - - - - - - - - - - - - - - - - - - -
LifeSize Control Installation Guide
 LifeSize Control Installation Guide January 2009 Copyright Notice 2005-2009 LifeSize Communications Inc, and its licensors. All rights reserved. LifeSize Communications has made every effort to ensure
KYOCERA Net Admin Installation Guide
 KYOCERA Net Admin Guide Legal Notes Unauthorized reproduction of all or part of this guide is prohibited. The information in this guide is subject to change without notice. We cannot be held liable for
Raptor University. Installing Raptor v Instructor: RAPTOR TECHNOLOGIES, LLC
 Raptor University Installing Raptor v6.1.5 Instructor: RAPTOR TECHNOLOGIES, LLC This presentation includes the following information: System Prerequisites Access Raptor Support Center Install All Components
SolidWorks Enterprise PDM Installation Guide
 SolidWorks Enterprise PDM Installation Guide Contents Legal Notices...vi 1 SolidWorks Enterprise PDM Installation Guide...7 2 Installation Overview...8 Required Installation Components...8 Optional Installation
AvePoint RevIM Installation and Configuration Guide. Issued May AvePoint RevIM Installation and Configuration Guide
 AvePoint RevIM 3.2.1 Installation and Configuration Guide Issued May 2017 1 Table of Contents What s New in This Guide... 4 About AvePoint RevIM... 5 Installation Requirements... 6 Hardware Requirements...
Deltek Time & Expense with Employee Self Service Version New Installation for Microsoft SQL Sever
 Deltek Time & Expense with Employee Self Service Version 9.0.1 New Installation for Microsoft SQL Sever July 31, 2013 While Deltek has attempted to verify that the information in this document is accurate
Kernel for Exchange Server. Installation and Configuration Guide
 Kernel for Exchange Server Installation and Configuration Guide Table of Contents Table of Contents... 2 1. Introduction... 3 2. Requirements and Prerequisites... 3 2.1 Basic System Requirements... 3 2.2
User Manual. Admin Report Kit for IIS 7 (ARKIIS)
") User Manual Admin Report Kit for IIS 7 (ARKIIS) Table of Contents 1 Admin Report Kit for IIS 7... 1 1.1 About ARKIIS... 1 1.2 Who can Use ARKIIS?... 1 1.3 System requirements... 2 1.4 Technical Support...
User Manual Admin Report Kit for IIS 7 (ARKIIS) Table of Contents 1 Admin Report Kit for IIS 7... 1 1.1 About ARKIIS... 1 1.2 Who can Use ARKIIS?... 1 1.3 System requirements... 2 1.4 Technical Support...
Installation Guide Install Guide Centre Park Drive Publication Date: Feb 11, 2010
 EventTracker Install Guide 8815 Centre Park Drive Publication Date: Feb 11, 2010 Columbia MD 21045 U.S. Toll Free: 877.333.1433 Abstract The purpose of this document is to help users install and configure
Patch Manager INSTALLATION GUIDE. Version Last Updated: September 25, 2017
 INSTALLATION GUIDE Patch Manager Version 2.1.5 Last Updated: September 25, 2017 Retrieve the latest version from: https://support.solarwinds.com/success_center/patch_manager/patch_manager_documentation
BCPro Installation Instructions Code No. LIT Software Release 3.0 Issued September 2017
 Code No. LIT-12011910 Software Release 3.0 Issued September 2017 Welcome...2 Summary of Changes...2 Related Documentation...2 Installation Overview...2 Prerequisite Software Checklist for Installation
Configuration Guide. Installation and. BlackBerry Enterprise Server for Novell GroupWise. Version: 5.0 Service Pack: 4
 BlackBerry Enterprise Server for Novell GroupWise Version: 5.0 Service Pack: 4 Installation and Configuration Guide Published: 2014-01-14 SWD-20140114171550404 Contents 1 Overview: BlackBerry Enterprise
Deployment guide for Duet Enterprise for Microsoft SharePoint and SAP Server 2.0
 Deployment guide for Duet Enterprise for Microsoft SharePoint and SAP Server 2.0 Microsoft Corporation Published: October 2012 Author: Microsoft Office System and Servers Team (itspdocs@microsoft.com)
AT&T Core Mobility Integrated Dispatch Console User Guide. Installation Guide. AT&T Integrated Dispatch Console 3.0
 Installation Guide AT&T Integrated Dispatch Console 3.0 October 2016 Table of Content 1. Introduction... 3 1.1. Purpose and Scope... 3 1.2. Terms and Definitions... 3 1.3. About this Manual... 5 1.4. What
ElasterStack 3.2 User Administration Guide - Advanced Zone
 ElasterStack 3.2 User Administration Guide - Advanced Zone With Advance Zone Configuration TCloud Computing Inc. 6/22/2012 Copyright 2012 by TCloud Computing, Inc. All rights reserved. This document is
Senstar Symphony. 7.2 Installation Guide
 Senstar Symphony 7.2 Installation Guide Contents Contents Introduction... 3 Symphony Server...3 Symphony Client... 3 Xnet... 3... 4 Symphony Server requirements...4 Symphony Client requirements...4 Symphony
Covene Cohesion Server Installation Guide A Modular Platform for Pexip Infinity Management October 25, 2016 Version 3.3 Revision 1.
 Covene Cohesion Server Installation Guide A Modular Platform for Pexip Infinity Management October 25, 2016 Version 3.3 Revision 1.0 Table of Contents 1. Overview... 3 2. Upgrading an Existing Installation...
GoldMine Connect Installation Guide
 GoldMine Connect Installation Guide For GoldMine Web Release 2018.1 November 2017 490 N McCarthy Bld., Suite 100 Milpitas, CA 95035 USA TEL: 800.776.7889 www.goldmine.com Copyright Notice This document
Microsoft Dynamics GP Web Client Installation and Administration Guide For Service Pack 1
 Microsoft Dynamics GP 2013 Web Client Installation and Administration Guide For Service Pack 1 Copyright Copyright 2013 Microsoft. All rights reserved. Limitation of liability This document is provided
LABEL ARCHIVE Administrator s Guide
 LABEL ARCHIVE Administrator s Guide DOC-LAS2015_25/05/2015 The information in this manual is not binding and may be modified without prior notice. Supply of the software described in this manual is subject
Installation and Setup Guide
 SnapCenter Software 4.1 Installation and Setup Guide December 2018 215-13401_C0 doccomments@netapp.com Updated for 4.1.1 Table of Contents 3 Contents Deciding whether to read the SnapCenter installation
M i c r o s o f t S Q L S e r v e r I n s t a l l a t i o n G u i d e for A D S S S e r v e r
 M i c r o s o f t S Q L S e r v e r I n s t a l l a t i o n G u i d e for A D S S S e r v e r A S C E R T I A LTD S E P T E M B E R 2 0 1 8 D o c u m e n t V e r s i o n - 5.9. 0. 1 Ascertia Limited. All
Application Launcher & Session Recording
 Installation and Configuration Guide Application Launcher & Session Recording 5.5.3.0 Copyright 2003 2017 Lieberman Software Corporation. All rights reserved. The software contains proprietary information
Getting Started with. Management Portal. Version
 Getting Started with Management Portal Version 10.1.0.0 Copyright RES Software Development B.V. All rights reserved. Commercial Computer Software documentation/data Restricted Rights. RES and RES ONE are
Raptor University. Installing Raptor v Instructor: RAPTOR TECHNOLOGIES, LLC
 Raptor University Installing Raptor v6.1.6 Instructor: RAPTOR TECHNOLOGIES, LLC This presentation includes the following information: System Prerequisites Access Raptor Support Center Install All Components
scconnect v1.x ADMINISTRATION, INSTALLATION, AND USER GUIDE
 scconnect v1.x ADMINISTRATION, INSTALLATION, AND USER GUIDE GlobalSCAPE, Inc. (GSB) Address: 4500 Lockhill-Selma Road, Suite 150 San Antonio, TX (USA) 78249 Sales: (210) 308-8267 Sales (Toll Free): (800)
MYOB Advanced Business
 MYOB Advanced Business On-Premise Installation Last Updated: 24 November 2014 Contents Introduction 1 Pre-Requisites 1 Web Browsers... 1 Server Hardware and Software... 1 Database Hardware and Software...
Installation and Deployment Guide for HEAT Service Management
 Installation and Deployment Guide for HEAT Service Management Supported Deployment Configurations The section briefly describes the deployment configurations that are supported by the HEAT Service Management
Veriato Recon / 360. Version 9.0.3
 Veriato Recon / 360 Version 9.0.3 1/3/2018 Upgrade Guide January 3, 2018 Table of Contents Before You Begin... 1 What's New... 1 How the System Works... 1 Upgrade Support... 6 Update Antivirus Exclusions...
VMware Horizon FLEX Client User Guide
 Horizon FLEX 1.10 This document supports the version of each product listed and supports all subsequent versions until the document is replaced by a new edition. To check for more recent editions of this
VMware vfabric Data Director Installation Guide
 VMware vfabric Data Director Installation Guide vfabric Data Director 2.5 This document supports the version of each product listed and supports all subsequent versions until the document is replaced by
Workstation Configuration
 Workstation Configuration September 22, 2015 - Version 9 & 9.1 - - - - - - - - - - - - - - - - - - - - - - - - - - - - - - - - - - - - - - - - - - - - - - - - - - - - - - - - - - - - - - - - - - - - -
PRODUCT DOCUMENTATION. Backup & Replication v5.0. User Guide.
 PRODUCT DOCUMENTATION User Guide Backup & Replication v5.0 www.nakivo.com Table of Contents Solution Architecture... 4 Deployment...11 System Requirements... 12 Deployment Scenarios... 15 Installing NAKIVO
Sage 200c Professional. System Requirements and Prerequisites
 Sage 200c Professional System Requirements and Prerequisites Copyright statement Sage (UK) Limited, 2017. All rights reserved. If this documentation includes advice or information relating to any matter
Sage 200c Professional. System Requirements and Prerequisites
 Sage 200c Professional System Requirements and Prerequisites Copyright statement Sage (UK) Limited, 2017. All rights reserved. If this documentation includes advice or information relating to any matter
Installation Manual. Fleet Maintenance Software. Version 6.4
 Fleet Maintenance Software Installation Manual Version 6.4 6 Terri Lane, Suite 700 Burlington, NJ 08016 (609) 747-8800 Fax (609) 747-8801 Dossier@dossiersystemsinc.com www.dossiersystemsinc.com Copyright
REVISED 1 AUGUST REVIEWER'S GUIDE FOR VMWARE APP VOLUMES VMware App Volumes and later
 REVISED 1 AUGUST 2018 REVIEWER'S GUIDE FOR VMWARE APP VOLUMES VMware App Volumes 2.13.1 and later Table of Contents Introduction Audience What You Will Learn Navigating This Document for App Volumes Use
REVISED 1 AUGUST QUICK-START TUTORIAL FOR VMWARE APP VOLUMES VMware App Volumes and later
 REVISED 1 AUGUST 2018 QUICK-START TUTORIAL FOR VMWARE APP VOLUMES VMware App Volumes 2.13.1 and later Table of Contents Introduction Audience What You Will Learn Navigating This Document for App Volumes
INSTALLATION AND SET UP GUIDE
 INSTALLATION AND SET UP GUIDE This guide will help IT administrators to install and set up NVivo Server. It provides step by step instructions for installing the software, configuring user permissions
Hypertext Transfer Protocol Over Secure Sockets Layer (HTTPS)
") Hypertext Transfer Protocol Over Secure Sockets Layer (HTTPS) This chapter provides information about Hypertext Transfer Protocol over Secure Sockets Layer. HTTPS, page 1 HTTPS for Cisco Unified IP Phone
Hypertext Transfer Protocol Over Secure Sockets Layer (HTTPS) This chapter provides information about Hypertext Transfer Protocol over Secure Sockets Layer. HTTPS, page 1 HTTPS for Cisco Unified IP Phone
KeyNexus Hyper-V Deployment Guide
 v1.0 09/2018 . Copyright Notice Copyright 2018 KeyNexus Inc. All rights reserved. Information in this document is subject to change without notice. The software described in this document is furnished
EventTracker v8.2. Install Guide for EventTracker Log Manager. EventTracker 8815 Centre Park Drive Columbia MD
 EventTracker v8.2 Install Guide for EventTracker Log Manager Publication Date: Jun. 10, 2016 EventTracker 8815 Centre Park Drive Columbia MD 21045 www.eventtracker.com Abstract This guide will help the
 Trend Micro Incorporated reserves the right to make changes to this document and to the product described herein without notice. Before installing and using the product, review the readme files, release
Workstation Configuration
 Workstation Configuration Version 8.2 May 2, 2014 For the most recent version of this document, visit our documentation website. Table of Contents 1 Workstation configuration 3 1.1 Custom level Internet
Dell EMC Ready System for VDI on XC Series
 Dell EMC Ready System for VDI on XC Series Citrix XenDesktop for Dell EMC XC Series Hyperconverged Appliance March 2018 H16969 Deployment Guide Abstract This deployment guide provides instructions for
Axon Commander Installation Guide
 Axon Commander Installation Guide Axon Commander Version 4.14 Release Date: July, 2018 Document Revision: A Apple, ios, and Safari are trademarks of Apple, Inc. registered in the US and other countries.
VI-CENTER EXTENDED ENTERPRISE EDITION GETTING STARTED GUIDE. Version: 4.5
 VI-CENTER EXTENDED ENTERPRISE EDITION GETTING STARTED GUIDE This manual provides a quick introduction to Virtual Iron software, and explains how to use Virtual Iron VI-Center to configure and manage virtual