The Disney Project in AS3
|
|
|
- Arnold Lawrence
- 5 years ago
- Views:
Transcription


1 The Disney Project in AS3

. If a stop action is inserted in a Scene, the movie will not continue to the next Scene.")
2 Intro: Save the Disney Kit Download the Disney Kit.fla from the website. It has all the graphics that you ll need in the Library. Double-click to open it in Flash. Immediately, File > Save as and save a copy in your Digital Tools folder. PART A: Scenes in Flash Scenes are used to break down a movie into smaller, more manageable sections. It helps keep the movie organized. Each scene has its own timeline. Like a movie script, these scenes can be considered acts in the movie. Scenes play in the order they are listed the Scene panel and can be rearranged (just drag and drop). If a stop action is inserted in a Scene, the movie will not continue to the next Scene. For this movie, we will have two scenes: Scene 1 and Scene 2. Open the Scenes panel (Shift+F2 or click Window > Scene). Insert a second scene by pressing the plus sign and name it Scene 2. When all is said and done, your Scene panel should match the one above left. Open Scene 1 (just click on it) and pay attention to where the name of the Scene is. To change the background color (which, incidentally, applies to ALL Scenes), be sure the arrow tool is selected and click the Background color swatch in the Property panel (Property Inspector). Select the darkest blue you can find. Also in the Property Inspector, set the size for your movie. The default is 550x400. It is probably a good idea to bump that up to 640x480 for most movies (or bigger). Disney Project (Basic) Page 2

 and type PRESENTING Click the arrow tool and then click back on the words you just typed.")
3 PART B: Text in Flash Text boxes have three different types static, dynamic, and input. For this tutorial, we will only be using static text. That means it is plain old text. Be sure your Property Inspector says static as the type or the text box will not work properly. For this movie, our introductory Scene is going to be something simple--words fading in and flying out. So, let s get started! Click the Text Tool. In the Property Inspector, set your text type to static, font to Berlin Sans FB (or similar font), size 37, white, and italic. Click in the middle of the Stage (the big area in the middle of the screen) and type PRESENTING Click the arrow tool and then click back on the words you just typed. They should get a blue box around them. Now, let s center this puppy. Bring up the Align panel (Window > Align). Be sure that the button under To Stage is clicked. Then click the horizontal and vertical alignment buttons. Disney Project (Basic) Page 3

. Any change made to the original symbol will be updated in your movie. You can use a symbol multiple times.")
. You have one item on that layer (presenting).")
4 BIG RULE: In order to apply animation in Flash (called tweening), the object must be a symbol. There are three types of symbols graphics, movie clips, and buttons. For this text portion of the lesson, we will convert the text to graphic symbols. To convert to a symbol, be sure the text is selected with the arrow tool, click Insert, Convert to Symbol (or press F8). Then, give it a name, set behavior to Graphic, and press OK. Let s name this Presenting. When you create a symbol, it is stored in the library (F11). Any change made to the original symbol will be updated in your movie. You can use a symbol multiple times. (notice in the right side picture that there is a little circular target thingie in the middle this indicates that the text has indeed been converted to a symbol) Now, let s talk Timeline. At the bottom of your screen is the Flash Timeline. It starts with one layer (Layer 1). You have one item on that layer (presenting). You can rename a layer by double clicking its name, typing in a new name, and pressing enter. Rename the layer as presenting. LESSON: Notice on the timeline that you have a black dot in frame 1. That black dot is a keyframe. Keyframes are frames that have something in them. What s in it? Well, the presenting symbol, that s what! If it had an empty circle in it, that would be a blank keyframe (ready for you to put something in it). If it has an empty square in it, that is a frame. Frames are just continuation of keyframes (they are just staying up there for all to continue to see). We are going to make the text move now (yippee!). To do that, we need a keyframe that gives us the starting line and a keyframe that gives us the finished location. So, click on the Timeline in frame 10. Right click that frame and insert a keyframe (F6). A black dot should appear. That keyframe is our finished location (with text centered nicely). So, let s go back to keyframe 1. We want to change the text here so it is invisible if we want it to fade in. Since we made it a symbol, this is easy. Using the arrow tool, single click the text to select it (be sure you are in frame 1). In the Property Inspector, make a change under Color set it to Alpha. Then, drag the slider down to zero. Disney Project (Basic) Page 4
, you will see the words are completely transparent for the first nine frames, but when frame 10 hits, BAM, words.")
 and the ease (I set mine to -100, which means it starts slower and speeds up at the end). Now, scrub the timeline and see it in action.")
5 The words should disappear, but the blue box should still be there indicating that you haven t messed anything up... you just changed its alpha (transparency value). If you scrub (fancy word for moving the playhead across the timeline), you will see the words are completely transparent for the first nine frames, but when frame 10 hits, BAM, words. We want them to fade in, so make the following change click in frame 5 on the timeline (really, any frame between the start and end one is fine). Then, in the Property Inspector, set Tween to Motion. You can also set the rotation (I set mine to 1 CW clockwise) and the ease (I set mine to -100, which means it starts slower and speeds up at the end). Now, scrub the timeline and see it in action. You can also press Enter up there and watch it play. SAVE YOUR WORK!! (File, Save As, save as Disney) Now, test the movie to see what we have so far (Control, Enter). Notice that the movie just loops and loops. It blinks when it gets to the Scene we haven t created yet. Looping is the default in Flash. (click the LOWER X to close the preview window) Create a new layer by clicking the leftmost plus sign under the timeline. Name it ME. Just so we don t mess up what we have so far, LOCK the presenting layer (click the dot under the padlock). APPLY: Apply what you just learned. Click in Frame 1 of the name layer. Create a second text symbol (graphic) called name_txt that says Your Name s Disney Project. Align center. Take your newly made text symbol. Click, pause, click and drag the keyframe dot in frame 1 to frame 10. You will see your text overlapping each other, so don t panic. Insert a keyframe (F6) in 20 on the name layer. Then, click back in frame 10 and drag the text off the top of the stage. Then, right click between frames 10 and 20 and Create Motion Tween. Next, let s make it stay up there a little bit and then fade out. Insert a keyframe in 30 and 40. Click the text symbol while in frame 40 and change the alpha to 0%. Insert a motion tween between 30 and 40. Lock this layer. Disney Project (Basic) Page 5

6 Now, unlock the presenting layer. Insert a keyframe in 20 and scoot the text up so it will be above the other text. Insert a motion tween between 10 and 20. Then, insert a keyframe at 30 and 40. Click the text symbol while in frame 40 and change the alpha to 0%. Insert a motion tween between 30 and 40. Your timeline should look like this: Lock the layer, Save, and Test the Movie. END SCENE 1 (INTRO) PART C: Drawing in Flash Flash has drawing tools like many graphics programs. You can use shapes, draw freehand, and create polygons. These are all vector graphics. Before we get started, switch to our second Scene (click the correct one in the Scene panel Window, Scene). You ll know you re in the right place if the timeline turns to Layer 1 (don t worry all your other stuff is tucked safely away in the intro scene). Instead of working at the main timeline, let s create a symbol first and then drag the completed symbol to the stage. For this exercise, we are going to create a castle. Rename Layer 1 to be castle. Let s draw our flags. Click Insert, New Symbol. Make a graphic symbol named flag. For precision when drawing, turn on the grid (View, Grid, Show Grid). Use the pen tool with a black stroke for the triangle (click to set the points and be sure to double click and close the polygon) and draw the following as big as you want you can always resize: (if you wish to temporarily change the background color while drawing, that s fine) Disney Project (Basic) Page 6

. Click the fill bucket, pick your color in the Property Inspector, and then click in the shape.")

7 If your symbol is not centered roughly on the crosshairs, you will want to draw a box around the completed flag (using the black arrow) and align it. NOTE: Use the line tool to draw the stem of the flag. See how the arrow has an L beside it when pointing to the corner? You can click and extend the point or adjust it when that appears. Try it! A curvy line by the pointer (when pointing to shapes that are NOT selected) will curve the line. Next, fill in the flag with the appropriate color (blue). Click the fill bucket, pick your color in the Property Inspector, and then click in the shape. In the event it will not fill, access the special fill tools at the left of the screen. You might need to close gaps. This means you are editing a symbol and are inside the symbol After your flag is finished, click out of the symbol to return to the main scene. The flag should disappear (that s okay it s in the Library). You can no longer edit the flag without getting inside the symbol (double clicking it in the Library). Disney Project (Basic) Page 7
 to create a new graphic symbol called tower1 (Insert, New Symbol). Draw the items as shown at right.")


8 Since it appears we are building Legos here, let s make some more building blocks for our castle. Use the rectangle tool and the pen tool (for the triangle) to create a new graphic symbol called tower1 (Insert, New Symbol). Draw the items as shown at right. Use a purple fill for the balcony and top and a light blue for the tower. Next, using the black arrow tool, delete the unneeded lines in the balconies by clicking each one and pressing delete on the keyboard. Now, let s assemble the tower. We have to be careful about this because Flash is quirky about Legos I mean, shapes. To select a part, double click it. A single click will select the fill and not the stroke. That s bad. Also, be careful not to lay shapes on top of each other. They delete each other and that s bad, too. To prevent that, we could have created each part on a different layer. Or, we could convert each little part into its own little symbol. Let s do the latter. With the black arrow tool, double click the rectangle part, press F8 to convert to a symbol, and name it tallpart. Now, it s a symbol (in a symbol, mind you!). Do the same for the balcony part. Don t do the triangle topper yet, though. We re going to curve the bottom of it first. Click totally off of the triangle (in the open space). Then, point your mouse to the bottom side and get a curvy indicator. Click and drag. Then, double click the triangle thing and convert it to a symbol called topper. Now, all three parts are symbols (in the tower symbol). Zoom out. As you assemble the tower, if something is in the wrong order (layering-wise), click the piece and click Modify, Arrange to reorder. To size something up or down, click the piece and then click the free Draw the long (bottom layer, if you will) rectangles first; if you put the smaller rectangles on top and deselect them and try to move them, they will mess things up. Undo if you mess up; don t try to fix it. the library!): transform tool and resize. To obtain another piece (Lego), press F11 and drag it from the Library. Assemble your pieces as follows (don t forget your flag from Disney Project (Basic) Page 8

.")
: Double-click the bottom half of the oval.")
9 Then, return to the main scene and Save. There should be nothing on the timeline in this scene because we created the symbols in their own windows and stored them in their library. Now, let s make the big castle. Create a new symbol (graphic) called castle. We are going to use two layers. Add a second layer and lock Layer 1 (you can rename the layers if you want). On Layer 2, we are going to create the middle of the castle using a rectangle. Then, draw an oval and use the line tool to bisect it in the middle (this will be used to make our door): Double-click the bottom half of the oval. Press delete. Delete the extra black line. It should look like this--. Then, make the door whatever color you want, double click it, and drag it into place. Next, drag two towers out of your library and place them beside what you just drew. Then, delete the top line. Disney Project (Basic) Page 9
 Use Free Transform to resize the castle if it is too big; Use shift to maintain ratio.")
 to the stage (where we named the layer castle.. Position at the bottom left.")

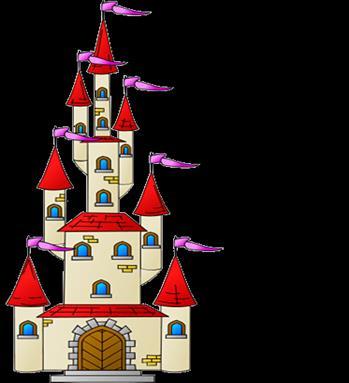
10 Now, lock Layer 2. On Layer 1, add your towers and build the higher part. Use the free transform tool as needed. When finished, return to the main scene. Here s my castle (DisneyWorld, here I come!) Use Free Transform to resize the castle if it is too big; Use shift to maintain ratio. You may want to use the arrow keys instead of the mouse for more precise positioning. Drag the castle out of the Library (F11) to the stage (where we named the layer castle.. Position at the bottom left. You might want to change your background color back to a midnight blue at this point. Or you can wait...up to you. Lock the castle layer and add another layer called tinkerbell. PART D: Movie Clips and Custom Cursor Flash has the ability to customize the cursor. This part will show you how! Next, let s do something fun. What s DisneyWorld without Tinkerbell? We are going to use a Tinkerbell icon for a cursor. Create a new layer, and call it Tinkerbell. Disney Project (Basic) Page 10
 onto the stage and just stick her in the corner someplace.")
.")
11 Click on the tinkerbell layer. We want to make Tink our cursor. To do that, she has to be a movie clip. So, let s create a new one. Modify > Symbol (or F8)and select movie clip as the type. Name it tink. In the editing window, Drag her (tink, the movie clip) onto the stage and just stick her in the corner someplace. Name this Symbol "tcursor" in the instance box of the Property Inspector. Select the first Frame of your tinkerbell layer. Go to Action panel (If your Actionscript panel is not open, Press "F9"). With Frame1 of your layer selected, type the below script in your action panel (just copy/paste the red text). /* Custom Mouse Cursor Replaces the default mouse cursor with the specified symbol instance. */ stage.addchild(tcursor); tcursor.mouseenabled = false; tcursor.addeventlistener(event.enter_frame, fl_custommousecursor); function fl_custommousecursor(event:event) { tcursor.x = stage.mousex; tcursor.y = stage.mousey; } Mouse.hide(); //To restore the default mouse pointer, uncomment the following lines: //tcursor.removeeventlistener(event.enter_frame, fl_custommousecursor); //stage.removechild(tcursor); //Mouse.show(); Let s create (temporarily) a stop to this so we can see Tinkerbell in action. Disney Project (Basic) Page 11
; or, while the Actions Panel is open, click the Code Snippets (top right), ActionScript > Actions > Stop a Movie Clip and it will insert a stop action for you.")

12 Insert a stop action in that layer so that the scene won t just play for one frame and then restart. Open your actions panel while in frame 1 of the new layer. Type Stop(); or, while the Actions Panel is open, click the Code Snippets (top right), ActionScript > Actions > Stop a Movie Clip and it will insert a stop action for you. Change your background color to a midnight blue if you haven t already. Save and Test Movie. Now, let s get to the fireworks (literally!).lock all layers and create a new layer called fireworks1. We are going to use the firework symbols in your Library. Back at the farm, click and drag firework_red.gif out into the firework1 layer. If you Test Scene, you ll see the firework do its damage, but it s just not quite right. We don t see the firework launch and it just plays over and over not realistic. And we want to be real! So, we are going to create a stick that launches into the air. Delete the firework off the stage. Create a new graphic symbol (stick). Just take the pencil and make an orange slash. Return to the scene, zoom in, and drag stick out to the stage on the fireworks1 layer. Place it at the bottom of the screen at the right someplace. Insert a frame at 20 on all layers (click the frame, right click, Insert Frame). Then, insert a keyframe in 20 on the fireworks1 layer. In keyframe 20, move your stick up there to the sky. Insert a keyframe in 21, drag your firework gif from the Library out to the top of the stick and delete the stick. NOTE: Animated gifs import lots of bitmaps; you might wish to hide them in a folder in the Library Now, we want to make the stick actually move. Click between frame 1 and 20 someplace on that layer and insert a motion tween (Right click, Create Motion Tween). Then, insert a frame in all layers in frame 50. If you Test Scene right now, you ll find nothing happens. That s because we have a stop action in there. So, on the stop layer, click pause and click and drag the first frame down to 50 th frame. The little A should move. If you Test Scene right now, it works but your firework loops. That s because it is a movie clip and movie clips always loop, even with a stop action in the movie. However, we can put a stop action INSIDE the movie clip so it will stop. Disney Project (Basic) Page 12
; With the black arrow, double click the firework on the stage (the dot).")

13 Double click the firework on the stage (the red dot). Right click in the next empty frame, insert a blank keyframe, and then insert a stop action in the Actions panel Stop(); With the black arrow, double click the firework on the stage (the dot). Right click in the next empty frame, insert a blank keyframe, and then insert a stop action in the Actions panel (F9). Your timeline should look like that INSIDE the fireworks movie clip. Notice that all those black keyframes are basically frame-by-frame animation from the imported gif. Return to the Scene. Now, Test the Movie and see how it looks! SUGGESTION: You may find your stick is too small or big. If so, double click and fix it and then return to the main timeline. Any changes made will be forever changed in the Library, too. If you were doing this in a class with more time, I would suggest repetition at this point. Have students create a second firework that starts someplace later in the timeline on a new layer. Make it a different color, even. EXTENSION: One good thing about Flash is that you can copy things. So, if you have time, try copying the fireworks1 layer. Highlight all the frames on that layer, right click and select Copy Frames. Create a new layer, click in the first frame, right click and select Paste Frames. Then, click/pause, click and drag the keyframes (black dots) so they are staggered more. Disney Project (Basic) Page 13


14 Be sure to click in the second of the two dots in a row and move your firework to some other location. You can even click on the firework, go to the Property Inspector, and select Color and change the tint to another color! If you end up with any extra frames at the end (I did ), highlight those frames, right click, and Remove Frames. For more fun, obtain a Mickey Mouse gif and add it on a new layer to your scene. (see back page for instructions on how to animate him!) Disney Project (Basic) Page 14

. 6.")

15 PART E: Replay Button Want to start a movie over again? How about making a button?! Flash has built in buttons that save you time and hassle. We ll use a premade button to make this part go fast. 1. Lock all your layers. 2. Create a new layer called replay. 3. Insert a keyframe in frame 50 on that layer. 4. Pull replay_btn onto the stage 5. Size down the button for your page (Edit > Free Transform). 6. Now, click on your button and in the Property Inspector, give it the instance name but. 7. Now, we need to add some Actionscript to make the button work. Access the Actions panel (f9) and press Code Snippets (top right). Under Timeline Navigation, choose the bottom one. Disney Project (Basic) Page 15
16 8. This puts in a bunch of code for you (yay for Code Snippets and not having to type all that script!). You do have to edit the code to tell it to go to your starting scene (intro): 9. Alternatively, you could copy/paste this code: /* Stop at This Frame The Flash timeline will stop/pause at the frame where you insert this code. Can also be used to stop/pause the timeline of movieclips. */ stop(); /* Click to Go to Scene and Play Clicking on the specified symbol instance plays the movie from the specified scene and frame. Instructions: 1. Replace "Scene 3" with the name of the scene you would like play. 2. Replace 1 with the frame number you would like the movie to play from in the specified scene. */ but.addeventlistener(mouseevent.click, fl_clicktogotoscene); function fl_clicktogotoscene(event:mouseevent):void { MovieClip(this.root).gotoAndPlay(1, "intro"); } Disney Project (Basic) Page 16
 3.")

17 10. One more thing if you Test Movie, you ll see Tinkerbell goes behind the button. That s because she is on a lower layer. Drag her layer to the top of the layer list and Test Movie again. Animated Mickey Instructions 1. Locate the patriotic Mickey Mouse in your Library. 2. Create a Mickey layer. Drag Mickey_up from the Library onto that layer. (To be safe, lock all others layers) 3. Convert him to a movie clip symbol. While he is still selected (after tracing) press F8. Use the settings below: 4. Double click Mickey_up so we can get inside his movie clip. Rename his one and only layer kick. On his timeline, insert a keyframe at On frame 4, swap Mickey-Up for Mickey-Down 6. Now, he should be animated. Return to the main scene and Test Movie to see him in action! You could make a new layer inside his movie clip and perform other actions, too, such as tipping his hate, blinking his eye, etc. Fun, fun! Disney Project (Basic) Page 17
Using Flash Animation Basics
 Using Flash Contents Using Flash... 1 Animation Basics... 1 Exercise 1. Creating a Symbol... 2 Exercise 2. Working with Layers... 4 Exercise 3. Using the Timeline... 6 Exercise 4. Previewing an animation...
In this lesson, you ll learn how to:
 LESSON 5: ADVANCED DRAWING TECHNIQUES OBJECTIVES In this lesson, you ll learn how to: apply gradient fills modify graphics by smoothing, straightening, and optimizing understand the difference between
The Macromedia Flash Workspace
 Activity 5.1 Worksheet The Macromedia Flash Workspace Student Name: Date: Identify the Stage, workspace, Timeline, layers, panels, Tools panel, and Property inspector. The Macromedia Flash Workspace 5-35
GETTING AROUND STAGE:
 ASM FLASH INTRO FLASH CS3 is a 2D software that is used extensively for Internet animation. Its icon appears as a red square with a stylized Fl on it. It requires patience, because (like most computer
FLASH ANIMATION TUTORIAL
 FLASH ANIMATION TUTORIAL This tutorial will show you how to make a simple flash animation using basic graphic elements and sounds. It will also work as the display page for your Bullet Movie soundtrack
-Remember to always hit Command + S every time you make a change to your project going forward.
 -Open Animate -Under Create New - Select ActionScript 3.0 -Choose Classic as the Design type located in the upper right corner -Animate workspace shows a toolbar, timeline, stage, and window tabs -From
Animatron Tutorial. Ronald Bourret
 Animatron Tutorial Ronald Bourret http://www.rpbourret.com Table of Contents License... 2 Lesson 1: Getting Started... 3 1.1 Creating an Animatron account... 3 1.2 Animatron screen... 3 Lesson 2: Drawing...
Adobe Flash CS4 Part 1: Introduction to Flash
 CALIFORNIA STATE UNIVERSITY, LOS ANGELES INFORMATION TECHNOLOGY SERVICES Adobe Flash CS4 Part 1: Introduction to Flash Fall 2010, Version 1.0 Table of Contents Introduction...3 Downloading the Data Files...3
How to draw and create shapes
 Adobe Flash Professional Guide How to draw and create shapes You can add artwork to your Adobe Flash Professional documents in two ways: You can import images or draw original artwork in Flash by using
Part 1: Basics. Page Sorter:
 Part 1: Basics Page Sorter: The Page Sorter displays all the pages in an open file as thumbnails and automatically updates as you add content. The page sorter can do the following. Display Pages Create
Animating the Page IN THIS CHAPTER. Timelines and Frames
 e r ch02.fm Page 41 Friday, September 17, 1999 10:45 AM c h a p t 2 Animating the Page IN THIS CHAPTER Timelines and Frames Movement Tweening Shape Tweening Fading Recap Advanced Projects You have totally
Adobe Flash CS3 Reference Flash CS3 Application Window
 Adobe Flash CS3 Reference Flash CS3 Application Window When you load up Flash CS3 and choose to create a new Flash document, the application window should look something like the screenshot below. Layers
Making ecards Can Be Fun!
 Making ecards Can Be Fun! A Macromedia Flash Tutorial By Mike Travis For ETEC 664 University of Hawaii Graduate Program in Educational Technology April 4, 2005 The Goal The goal of this project is to create
animation, and what interface elements the Flash editor contains to help you create and control your animation.
 e r ch02.fm Page 43 Wednesday, November 15, 2000 8:52 AM c h a p t 2 Animating the Page IN THIS CHAPTER Timelines and Frames Movement Tweening Shape Tweening Fading Recap Advanced Projects You have totally
Name: Date: Multimedia Graphics and Web Publishing Mr. Dietzler. Flash Topics TWEENING AND MOTION GUIDES
 Name: Date: Multimedia Graphics and Web Publishing Mr. Dietzler Flash Topics TWEENING AND MOTION GUIDES TWEENING: Motion Tweening: The most basic type of tweening is Motion Tweening in which you specify
Adobe Flash CS4 Part 3: Animation
 CALIFORNIA STATE UNIVERSITY, LOS ANGELES INFORMATION TECHNOLOGY SERVICES Adobe Flash CS4 Part 3: Animation Fall 2010, Version 1.0 Table of Contents Introduction...2 Downloading the Data Files...2 Understanding
Basics of Flash Animation
 Basics of Flash Animation The Stage is where you do your main design work The timeline is where you animate your objects by setting keyframes The library is where you store all your assets things you use
Advanced Special Effects
 Adobe Illustrator Advanced Special Effects AI exercise preview exercise overview The object is to create a poster with a unified color scheme by compositing artwork drawn in Illustrator with various effects
AO3. 1. Load Flash. 2. Under Create New click on Flash document a blank screen should appear:
 AO3 This is where you use Flash to create your own Pizzalicious advert. Follow the instructions below to create a basic advert however, you ll need to change this to fit your own design! 1. Load Flash
Flash offers a way to simplify your work, using symbols. A symbol can be
 Chapter 7 Heavy Symbolism In This Chapter Exploring types of symbols Making symbols Creating instances Flash offers a way to simplify your work, using symbols. A symbol can be any object or combination
Recipes4Success. Draw and Animate a Rocket Ship. Frames 5 - Drawing Tools
 Recipes4Success You can use the drawing tools and path animation tools in Frames to create illustrated cartoons. In this Recipe, you will draw and animate a rocket ship. 2012. All Rights Reserved. This
Creating Vector Shapes Week 2 Assignment 1. Illustrator Defaults
 Illustrator Defaults Before we begin, we are going to make sure that all of us are using the same settings within our application. For this class, we will always want to make sure that our application
Introduction to Flash - Creating a Motion Tween
 Introduction to Flash - Creating a Motion Tween This tutorial will show you how to create basic motion with Flash, referred to as a motion tween. Download the files to see working examples or start by
1. Multimedia authoring is the process of creating a multimedia production:
 Chapter 8 1. Multimedia authoring is the process of creating a multimedia production: Creating/assembling/sequencing media elements Adding interactivity Testing (Alpha/Beta) Packaging Distributing to end
Introduction to Multimedia. Adobe Animate CC. Lab Manual
 Introduction to Multimedia Adobe Animate CC Lab Manual 2017-18 Semester 1 Table of Contents A. Introduction p. 1 About Animate Understanding the Workspace of Animate B. Getting Started with Animate....
Sample Hands-On-Training Chapter Review Copy Only Contact Information Notice of Rights Notice of Liability Trademarks
 Sample Hands-On-Training Chapter Review Copy Only Copyright 2000-2003 by lynda.com, Inc. All Rights Reserved. Reproduction and Distribution Strictly Prohibited. This electronically distributed Hands-On-Training
Multimedia Creation. for Kids
 Multimedia Creation for Kids 1 Lesson 1: Setting Up Your Project In this lesson you will be storyboarding your entire project. It is important to know exactly where you are going with your project before
2Understanding the. Interface. The Document Window 13. If you are new to Flash 8, don t skip this chapter. Although you might be
 2Understanding the Interface The Document Window 13 The Timeline 14 The Layer Controls 15 If you are new to Flash 8, don t skip this chapter. Although you might be tempted to jump right in with the hands-on
Creative Effects with Illustrator
 ADOBE ILLUSTRATOR Creative Effects with Illustrator PREVIEW OVERVIEW The object is to create a poster with a unified color scheme by compositing artwork drawn in Illustrator with various effects and photographs.
In this lesson you are going to create a drawing program similar to Windows Paint. 1. Start with a new project and remove the default cat sprite.
 Drawing Program In this lesson you are going to create a drawing program similar to Windows Paint. 1. Start with a new project and remove the default cat sprite. 2. Create a new sprite. 3. The new sprite
COMP : Practical 6 Buttons and First Script Instructions
 COMP126-2006: Practical 6 Buttons and First Script Instructions In Flash, we are able to create movies. However, the Flash idea of movie is not quite the usual one. A normal movie is (technically) a series
The Fundamentals. Document Basics
 3 The Fundamentals Opening a Program... 3 Similarities in All Programs... 3 It's On Now What?...4 Making things easier to see.. 4 Adjusting Text Size.....4 My Computer. 4 Control Panel... 5 Accessibility
2 SELECTING AND ALIGNING
 2 SELECTING AND ALIGNING Lesson overview In this lesson, you ll learn how to do the following: Differentiate between the various selection tools and employ different selection techniques. Recognize Smart
Adobe Flash CS4 Part 4: Interactivity
 CALIFORNIA STATE UNIVERSITY, LOS ANGELES INFORMATION TECHNOLOGY SERVICES Adobe Flash CS4 Part 4: Interactivity Fall 2010, Version 1.0 Table of Contents Introduction... 2 Downloading the Data Files... 2
Save your project files in a folder called: 3_flash_tweens. Tweens in Flash :: Introduction
 INF1070: Hypermedia Tools 1 Assignment 3: Tween Animation in Flash Save your project files in a folder called: 3_flash_tweens Tweens in Flash :: Introduction Now that you ve learned to draw in Flash, it
ENGL 323: Writing for New Media Repurposing Content for the Web Part Two
 ENGL 323: Writing for New Media Repurposing Content for the Web Part Two Dr. Michael Little michaellittle@kings.edu Hafey-Marian 418 x5917 Using Color to Establish Visual Hierarchies Color is useful in
Creative Effects with Illustrator
 ADOBE ILLUSTRATOR PREVIEW Creative Effects with Illustrator AI OVERVIEW The object is to create a poster with a unified color scheme by compositing artwork drawn in Illustrator with various effects and
The playhead, shown as a vertical red beam, passes each frame when a movie plays back, much like movie fi lm passing in front of a projector bulb.
 The project: AIRPLANE I will show you a completed version of this project.. Introducing keyframes and the Timeline One of the most important panels in the Flash workspace is the Timeline, which is where
Content provided in partnership with Macromedia Press, from the book Macromedia Flash MX: Training from the Source by Chrissy Reyà Ã
 8VLQJV\PEROVDQGWKHOLEUDU\ Content provided in partnership with Macromedia Press, from the book Macromedia Flash MX: Training from the Source by Chrissy Reyà à In this sample chapter, you ll learn to use
Premiere Pro Desktop Layout (NeaseTV 2015 Layout)
") Premiere Pro 2015 1. Contextually Sensitive Windows - Must be on the correct window in order to do some tasks 2. Contextually Sensitive Menus 3. 1 zillion ways to do something. No 2 people will do everything
Premiere Pro 2015 1. Contextually Sensitive Windows - Must be on the correct window in order to do some tasks 2. Contextually Sensitive Menus 3. 1 zillion ways to do something. No 2 people will do everything
Edge Television Advertisement. -Open the 3 images of TV characters and the network logo in Photoshop. Your images must be high resolution images!
 -Open the 3 images of TV characters and the network logo in Photoshop. Your images must be high resolution images! -Use Layer Styles to add a White Stroke of 5 pixels to each image you cut out. This will
Animation is the illusion of motion created by the consecutive display of images of static elements. In film and video
 Class: Name: Class Number: Date: Computer Animation Basis A. What is Animation? Animation is the illusion of motion created by the consecutive display of images of static elements. In film and video production,
Sample Hands-On-Training Chapter Review Copy Only Contact Information Notice of Rights Notice of Liability Trademarks
 Sample Hands-On-Training Chapter Review Copy Only Copyright 2000-2003 by lynda.com, Inc. All Rights Reserved. Reproduction and Distribution Strictly Prohibited. This electronically distributed Hands-On-Training
This lesson introduces Blender, covering the tools and concepts necessary to set up a minimal scene in virtual 3D space.
 3D Modeling with Blender: 01. Blender Basics Overview This lesson introduces Blender, covering the tools and concepts necessary to set up a minimal scene in virtual 3D space. Concepts Covered Blender s
A QUICK TOUR OF ADOBE ILLUSTRATOR CC (2018 RELEASE)
") A QUICK TOUR OF ADOBE ILLUSTRATOR CC (2018 RELEASE) Lesson overview In this interactive demonstration of Adobe Illustrator CC (2018 release), you ll get an overview of the main features of the application.
A QUICK TOUR OF ADOBE ILLUSTRATOR CC (2018 RELEASE) Lesson overview In this interactive demonstration of Adobe Illustrator CC (2018 release), you ll get an overview of the main features of the application.
FLASH CS6 DIRECTIONS TO GET YOU STARTED!
 FLASH CS6 DIRECTIONS TO GET YOU STARTED! SYMBOL A symbol is a reusable image, animation or button. You will see a plus sign + in the object once it s been converted to a symbol. Insert>Convert to symbol
The Timeline records the actions in each Frame. It also allows multiple independent images and actions through Layers.
 Using Flash to Create Animated Environments Objectives: Understand the capabilities of Flash Gain a general overview of features and tools Understand layers, text, graphics, animation and buttons Import
ORGANIZING YOUR ARTWORK WITH LAYERS
 9 ORGANIZING YOUR ARTWORK WITH LAYERS Lesson overview In this lesson, you ll learn how to do the following: Work with the Layers panel. Create, rearrange, and lock layers and sublayers. Move objects between
Creating Digital Illustrations for Your Research Workshop III Basic Illustration Demo
 Creating Digital Illustrations for Your Research Workshop III Basic Illustration Demo Final Figure Size exclusion chromatography (SEC) is used primarily for the analysis of large molecules such as proteins
On the Web sun.com/aboutsun/comm_invest STAROFFICE 8 DRAW
 STAROFFICE 8 DRAW Graphics They say a picture is worth a thousand words. Pictures are often used along with our words for good reason. They help communicate our thoughts. They give extra information that
Flash Domain 4: Building Rich Media Elements Using Flash CS5
 Flash Domain 4: Building Rich Media Elements Using Flash CS5 Adobe Creative Suite 5 ACA Certification Preparation: Featuring Dreamweaver, Flash, and Photoshop 1 Objectives Make rich media content development
Basic Operation of Flash MX Professional 2004
 Basic Operation of Flash MX Professional 2004 (Main Tutorial) This Tutorial provides you Basic Operation for Flash MX Professional 2004. After this training, you will be able to create simple animation.
How to create an animated face
 Adobe Flash CS4 Activity 5.1 guide How to create an animated face This activity walks you step by step through the process of creating a simple animation by using Adobe Flash CS4. You use drawing tools
Valuable points from Lesson 6 Adobe Flash CS5 Professional Classroom in a Book
 Valuable points from Lesson 6 Adobe Flash CS5 Professional Classroom in a Book You are expected to understand and know how to use/do each of these tasks in Flash CS5, unless otherwise noted below. If you
CREATING AN ILLUSTRATION WITH THE DRAWING TOOLS
 6 CREATING AN ILLUSTRATION WITH THE DRAWING TOOLS Lesson overview In this lesson, you ll learn how to do the following: Understand paths and anchor points. Draw curved and straight lines with the Pen tool.
EDITING AND COMBINING SHAPES AND PATHS
 4 EDITING AND COMBINING SHAPES AND PATHS Lesson overview In this lesson, you ll learn how to do the following: Cut with the Scissors tool. Join paths. Work with the Knife tool. Outline strokes. Work with
EDITING SHAPES. Lesson overview
 3 CREATING AND EDITING SHAPES Lesson overview In this lesson, you ll learn how to do the following: Create a document with multiple artboards. Use tools and commands to create basic shapes. Work with drawing
Introduction To Inkscape Creating Custom Graphics For Websites, Displays & Lessons
 Introduction To Inkscape Creating Custom Graphics For Websites, Displays & Lessons The Inkscape Program Inkscape is a free, but very powerful vector graphics program. Available for all computer formats
12 Duplicate Clips and Virtual Clips
 12 Duplicate Clips and Virtual Clips Duplicate clips and virtual clips are two powerful tools for assembling a video program in Premiere. Duplicate clips can be useful for splitting clips into a number
Function Grapher Demystified Step 1
 Function Grapher Demystified Step 1 MathDL Flash Forum Learning Center Functions Grapher Demystified by Barbara Kaskosz and Doug Ensley In our MathDL Flash Forum article "Flash Tools for Developers: Function
Lesson 4: Add ActionScript to Your Movie
 Page 1 of 7 CNET tech sites: Price comparisons Product reviews Tech news Downloads Site map Lesson 4: Add ActionScript to Your Movie Home Your Courses Your Profile Logout FAQ Contact Us About In this lesson,
11 EDITING VIDEO. Lesson overview
 11 EDITING VIDEO Lesson overview In this lesson, you ll learn how to do the following: Create a video timeline in Photoshop. Add media to a video group in the Timeline panel. Add motion to still images.
Shape Tweening. Shape tweening requirements:
 Shape Tweening Shape Tweening Shape tweening requirements: Vector-based objects No grouped objects No bitmaps No symbols No type, type must be broken apart into a shape Keyframes concept from traditional
In this lesson you will learn how to:
 LESSON 5: CREATING BUTTON STATES OBJECTIVES In this lesson you will learn how to: use FreeHand layers to create navigation buttons export layers from FreeHand to Flash create and edit symbols and instances
Sample Hands-On-Training Chapter Review Copy Only Contact Information Notice of Rights Notice of Liability Trademarks
 Sample Hands-On-Training Chapter Review Copy Only Copyright 2000-2003 by lynda.com, Inc. All Rights Reserved. Reproduction and Distribution Strictly Prohibited. This electronically distributed Hands-On-Training
PART ONE. Getting Started
 PART ONE Getting Started Before you can create games, you must learn to program, but before you can program in Flash ActionScript, you must learn to use the Flash authoring tool. ActionScript is built
Photoshop Fundamentals
 Lesson 3 Photoshop Fundamentals Photoshop Fundamentals How to Navigate your Document Zooming in and out To zoom in and out on your Photoshop document, hold down the Command key (Ctrl on Win) and press
Adobe Illustrator CS5 Part 2: Vector Graphic Effects
 CALIFORNIA STATE UNIVERSITY, LOS ANGELES INFORMATION TECHNOLOGY SERVICES Adobe Illustrator CS5 Part 2: Vector Graphic Effects Summer 2011, Version 1.0 Table of Contents Introduction...2 Downloading the
Let s Make a Front Panel using FrontCAD
 Let s Make a Front Panel using FrontCAD By Jim Patchell FrontCad is meant to be a simple, easy to use CAD program for creating front panel designs and artwork. It is a free, open source program, with the
Drawing shapes and lines
 Fine F Fi i Handmade H d d Ch Chocolates l Hours Mon Sat 10am 6pm In this demonstration of Adobe Illustrator CS6, you will be introduced to new and exciting application features, like gradients on a stroke
Adobe Flash CS4 Part 2: Working with Symbols
 CALIFORNIA STATE UNIVERSITY, LOS ANGELES INFORMATION TECHNOLOGY SERVICES Adobe Flash CS4 Part 2: Working with Symbols Fall 2010, Version 1.0 Table of Contents Introduction...2 Downloading the Data Files...2
Adding Objects Creating Shapes Adding. Text Printing and Exporting Getting Started Creating a. Creating Shapes Adding Text Printing and Exporting
 Getting Started Creating a Workspace Pages, Masters and Guides Adding Objects Creating Shapes Adding Text Printing and Exporting Getting Started Creating a Workspace Pages, Masters and Guides Adding Objects
Working with Symbols and Instances
 Chapter 3 Working with Symbols and Instances Learning Objectives After completing this chapter, you will be able to: Create new symbols Edit the symbols and instances Create and edit button symbols Import
BASICS OF MOTIONSTUDIO
 EXPERIMENT NO: 1 BASICS OF MOTIONSTUDIO User Interface MotionStudio combines draw, paint and animation in one easy easy-to-use program gram to save time and make work easy. Main Window Main Window is the
Adobe Animate Basics
 Adobe Animate Basics What is Adobe Animate? Adobe Animate, formerly known as Adobe Flash, is a multimedia authoring and computer animation program. Animate can be used to design vector graphics and animation,
chapter 1. Create symbols and instances 2. Work with Libraries 3. Create buttons 4. Assign actions to frames and buttons AND INTERACTIVITY
 1-4283-1963-8_03_Rev3.qxd 6/27/07 9:04 PM Page 1 chapter 3 WORKING WITH SYMBOLS AND INTERACTIVITY ADOBE FLASH CS3 1. Create symbols and instances 2. Work with Libraries 3. Create buttons 4. Assign actions
4 TRANSFORMING OBJECTS
 4 TRANSFORMING OBJECTS Lesson overview In this lesson, you ll learn how to do the following: Add, edit, rename, and reorder artboards in an existing document. Navigate artboards. Select individual objects,
Center for Faculty Development and Support Creating Powerful and Accessible Presentation
 Creating Powerful and Accessible Presentation PowerPoint 2007 Windows Tutorial Contents Create a New Document... 3 Navigate in the Normal View (default view)... 3 Input and Manipulate Text in a Slide...
and 150 in the height text box, and then click OK. Flash automatically inserts the px (for pixel) after the number.
 after the number.") 4. In the Document Properties dialog box, enter 700 in the width text box and 150 in the height text box, and then click OK. Flash automatically inserts the px (for pixel) after the number. The Document
4. In the Document Properties dialog box, enter 700 in the width text box and 150 in the height text box, and then click OK. Flash automatically inserts the px (for pixel) after the number. The Document
Adobe Flash Course Syllabus
 Adobe Flash Course Syllabus A Quick Flash Demo Introducing the Flash Interface Adding Elements to the Stage Duplicating Library Items Introducing Keyframes, the Transform Tool & Tweening Creating Animations
FrontPage 98 Quick Guide. Copyright 2000 Peter Pappas. edteck press All rights reserved.
 Master web design skills with Microsoft FrontPage 98. This step-by-step guide uses over 40 full color close-up screen shots to clearly explain the fast and easy way to design a web site. Use edteck s QuickGuide
Recipes4Success. Animate Plant Growth. Share 4 - Animation
 Recipes4Success In this Recipe, you will create an animated science diagram of plant growth. You will learn how to add images, draw shapes, use the animation options, preview, and publish your project.
Adobe illustrator Introduction
 Adobe illustrator Introduction This document was prepared by Luke Easterbrook 2013 1 Summary This document is an introduction to using adobe illustrator for scientific illustration. The document is a filleable
Photoshop tutorial: Final Product in Photoshop:
 Disclaimer: There are many, many ways to approach web design. This tutorial is neither the most cutting-edge nor most efficient. Instead, this tutorial is set-up to show you as many functions in Photoshop
Session 7 MS Word. Graphics. Inserting Clipart, and Graphics Modify graphics Position graphics
 Session 7 MS Word Graphics Inserting Clipart, and Graphics Modify graphics Position graphics Table of Contents Session 7 Working with Graphics... 1 The Toolbar... 1 Drawing Toolbar... 1 Picture Toolbar...
3Using and Writing. Functions. Understanding Functions 41. In this chapter, I ll explain what functions are and how to use them.
 3Using and Writing Functions Understanding Functions 41 Using Methods 42 Writing Custom Functions 46 Understanding Modular Functions 49 Making a Function Modular 50 Making a Function Return a Value 59
FLASH 5 PART II USER MANUAL
 Multimedia Module FLASH 5 PART II USER MANUAL For information and permission to use these training modules, please contact: Limell Lawson - limell@u.arizona.edu - 520.621.6576 or Joe Brabant - jbrabant@u.arizona.edu
Clip Art and Graphics. Inserting Clip Art. Inserting Other Graphics. Creating Your Own Shapes. Formatting the Shape
 1 of 1 Clip Art and Graphics Inserting Clip Art Click where you want the picture to go (you can change its position later.) From the Insert tab, find the Illustrations Area and click on the Clip Art button
Animation: Step Animation. You will use a Adobe Animate to create animated vector graphics with full screen navigation interfaces.
 Animation: Step Animation You will use a Adobe Animate to create animated vector graphics with full screen navigation interfaces. Renée Cole 2018 1. Make an ANIMATION folder in your Tech Folder 2. Watch
DOING MORE WITH WORD: MICROSOFT OFFICE 2013
 DOING MORE WITH WORD: MICROSOFT OFFICE 2013 GETTING STARTED PAGE 02 Prerequisites What You Will Learn USING MICROSOFT WORD PAGE 03 Viewing Toolbars Adding and Removing Buttons MORE TASKS IN MICROSOFT WORD
Drawing Tools. Drawing a Rectangle
 Chapter Microsoft Word provides extensive DRAWING TOOLS that allow you to enhance the appearance of your documents. You can use these tools to assist in the creation of detailed publications, newsletters,
REMEMBER TO BRING YOUR MEMORY STICK TO EVERY LAB!
 CS 1033 Multimedia and Communications Lab 07: Introduction to Animation using Photoshop REMEMBER TO BRING YOUR MEMORY STICK TO EVERY LAB! LAB #7 - Exercise 1 Objectives: Upon completion of Exercise 1 you
Lesson 1 New Presentation
 Powerpoint Lesson 1 New Presentation 1. When PowerPoint first opens, there are four choices on how to create a new presentation. You can select AutoContent wizard, Template, Blank presentation or Open
HYPERSTUDIO TOOLS. THE GRAPHIC TOOL Use this tool to select graphics to edit. SPRAY PAINT CAN Scatter lots of tiny dots with this tool.
 THE BROWSE TOOL Us it to go through the stack and click on buttons THE BUTTON TOOL Use this tool to select buttons to edit.. RECTANGLE TOOL This tool lets you capture a rectangular area to copy, cut, move,
Working with Graphics and Text
 Chapter 2 Working with Graphics and Text Learning Objectives After completing this chapter, you will be able to: Create vector graphics using drawing tools Modify the shape and size of the selected objects
SNOWFLAKES PHOTO BORDER - PHOTOSHOP CS6 / CC
 Photo Effects: Snowflakes Photo Border (Photoshop CS6 / CC) SNOWFLAKES PHOTO BORDER - PHOTOSHOP CS6 / CC In this Photoshop tutorial, we ll learn how to create a simple and fun snowflakes photo border,
Adobe Illustrator. Always NAME your project file. It should be specific to you and the project you are working on.
 Adobe Illustrator This packet will serve as a basic introduction to Adobe Illustrator and some of the tools it has to offer. It is recommended that anyone looking to become more familiar with the program
COMP : Practical 1 Getting to know Flash
 What is Flash? COMP126-2006: Practical 1 Getting to know Flash Macromedia Flash is system that allows creation, communication and play of animated and interactive computer graphics. Its main application
Using PowerPoint to Create an Interactive Multimedia Portfolio Ben Johnson
 Using PowerPoint to Create an Interactive Multimedia Portfolio Ben Johnson www.psd.k12.co.us/staff/benj Getting Started 1. Launch PowerPoint from the start button. Select the Design Template radio button.
2 Solutions Chapter 3. Chapter 3: Practice Example 1
 1 Solutions This section includes the step by step solutions for the practice exercise for the following chapters and sections: Chapter 3 Chapter 4 Chapter 5 Chapter 11: Rainbow Springs sample test Final