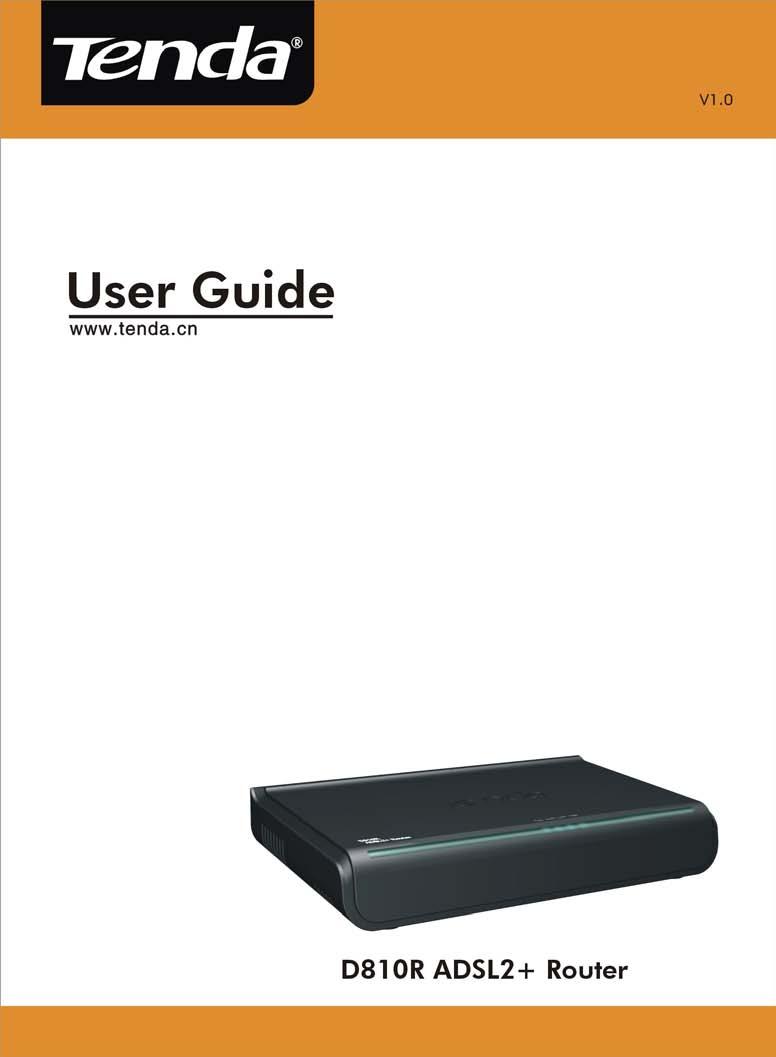
D810R ADSL2+ Router User Guide
|
|
|
- Gilbert Singleton
- 5 years ago
- Views:
Transcription
1
2 Copyright Statement is the registered trademark of Shenzhen Tenda Technology Co., Ltd. Other trademark or trade name mentioned herein are the trademark or registered trademark of the company. Copyright of the whole product as integration, including its accessories and software, belongs to Shenzhen Tenda Technology Co., Ltd. Without the permission of Shenzhen Tenda Technology Co., Ltd, individual or party is not allowed to copy, plagiarize, imitate or translate it into other languages. All the photos and product specifications mentioned in this manual are for references only, as the upgrading of software and hardware, there will be changes. And if there are changes, Tenda is not responsible for informing in advance. If you want to know more about our products information, please visit our website at
3 PTC General Warning 1 The grant of a Telepermit for any item of terminal equipment indicates only that Telecom has accepted that the item complies with minimum conditions for connection to its network. It indicates no endorsement of the product by Telecom, nor does it provide any sort of warranty. Above all, it provides no assurance that any item will work correctly in all respects with another item of Telepermitted equipment of a different make or model, nor does it imply that any product is compatible with all of Telecom's network services. CONTENTS
4 CHAPTER 1 OVERVIEW Product Introduction Product Features Supporting Protocol Data Encapsulation... 3 CHAPTER 2 HARDWARE INSTALLATION ADSL Router Connection USB Installation... 4 CHAPTER 3 BEFORE WEB MANAGEMENT CONFIGURATION Network Configuration of Your Computer Verifying the Connection Logging in to the Router... 9 CHAPTER 4 QUICK INSTALLATION GUIDE Configure the PPPoE Configure the PPPoA... 13
5 4.3 Configure the MER Configure the IPoA CHAPTER 5 CONFIGURATION DESCRIPTION Device Information Advanced Settings WAN LAN NAT Security Routing DNS DSL DHCP System Tool Settings System Log Internet Time Access Control Software Update... 81
6 5.4.6 Save/Reboot CHAPTER 6 APPENDIX Appendix 1: Troubleshooting Appendix 2: FAQ CHAPTER 7 WALL-MOUNTING PLACEMENT... 85
7 Chapter 1 Overview 1.1 Product Introduction D810R ADSL2+ Router complies with ADSL, ADSL2 and ADSL2+ standards. Supporting up to 24Mbps downstream rate and 1Mbps upstream rate, it supports multiple network protocols and provides NAT Router and Bridge functions. In addition, the intelligent software, Setup Wizard, can assist you to access the Internet fast and easily. Powerful and exquisite, it is the best choice for SOHO and small enterprise users to share the Internet. 1
8 1.2 Product Features Provides up to 24Mbps downstream rate and 1Mbps upstream rate Supports DHCP, NAT, IGMP, ICMP, ARP One 10/100M Auto-Negotiation RJ-45 Ethernet port for network adapter, Hub and switch connectivity One RJ-11 port and Voice Splitter included One USB port support for connecting PC s USB port Provides Web-based management and firmware upgrade Complies with ADSL, ADSL2 and ADSL2+ standards Provides NAT Router and Bridge functions Compatible with all mainstream DSLAM (CO) Provides PPPOE, PPPOA, CLIP protocols Supports firewall and hacker attack prevention Supports Internet Multimedia Provides static and dynamic routes Up to 6.5km (telephone line) transmission distance Setup Wizard support for fast and easy configurations 2
9 1.3 Supporting Protocol Supports full-rate ADSL2+ standard ANSI T Issue 2 ITU-T G (G. dmt) ITU-T G (G. Lite) ITU-T G ITU-T G Data Encapsulation Supports RFC 1483 Bridge, RFC 1483 Router Supports Classical IP over ATM (RFC 1577) Supports PPP over ATM(RFC 2364) Supports PPP over Ethernet (RFC 2516) 3
10 Chapter 2 Hardware Installation 2.1 ADSL Router Connection 1. Connect one end of the telephone line to the LINE port of the D810R and the other end to the MODEM port of the voice splitter. 2. Connect the power adapter to the PWR port of the D810R. 3. Use an Ethernet cable to connect the LAN port with the NIC of your computer. 2.2 USB Installation To connect the device to the USB interface of the computer, please follow the steps below: 1. Connect to the USB port of the D810R through a USB cable. 2. Connect the other end of the cable to the computer s USB port. 3. Set up the USB driver provided by the CD-ROM. 4


11 Chapter 3 Before Web Management Configuration 3.1 Network Configuration of Your Computer 1.On the desktop of your computer, right-click My Network Places, and then select Properties in the shortcut menu. 2. In the window that appears, right-click Local Area Connection, and then select "Properties. 5

.")
12 3.In the pop-up dialog box, check Internet Protocol (TCP/IP) and then click Properties. 4. In the window that appears, select Obtain an IP address automatically (O) or Use the following IP address (S). 1) When Obtain an IP address automatically (O) is selected, the window is as shown in the right figure. 6

13 2) Use the following IP address : IP address: XXX (XXX ranges 2 ~ 254) Subnet mask: Default gateway: DNS server: Enter the local DNS server address (for this address, you can consult your ISP) or the router s default gateway as the DNS server. At the end of the setting, click OK to submit the settings. And then click OK in the Local Area Connection Properties window. 7


14 3.2 Verifying the Connection 1.Select Start Programs Accessories Comm and Prompt. According to the format shown in the right figure, enter Ping and press Enter. If the system gives the result shown in the right figure, the connection between your computer and the router is OK. 8

 and")
. 3.")
15 3.3 Logging in to the Router 1.Open the web browser, and enter in the address field, and then press Enter. 2.In the pop-up login window, enter the user name ( admin ) and password ( admin ), and click OK (both user name and password are admin by default). 3.If the user name and password entered are correct, the browser displays the administrator window shown right. 9

16 Chapter 4 Quick Installation Guide In the Wizard page, Select the required your Country and Area from the drop-down lists. If you can not find your country and city in these lists, you can consult your ISP and manually enter the VPI and VCI values of your area. After that, click Next. 10
17 4.1 Configure the PPPoE 1. Select PPP over Ethernet (PPPoE). Click Next. 2. Enter the PPP user name and password provided by the ISP. If the ISP also provides the PPPoE service name, you can enter the corresponding value; otherwise, keep this field null. Use the default values for other options. For their more settings, refer to the detailed description in the Advanced Settings. 11

18 3.Click Next and check to enable the WAN service (enabled by default). 4.Click Next to display the window shown the summary of your settings. 5.Click Save/Reboot to activate your settings. The system automatically establishes connection in a few minutes. 12

19 4.2 Configure the PPPoA 1.Select PPP over ATM (PPPoA). Click Next. 2. Enter the PPP user name and password provided by the ISP. If the ISP also provides the PPPoA service name, you can enter the corresponding value; otherwise, keep this field null. Use the default values for other options. For their more settings, refer to the detailed description in the Advanced Settings. 13

20 3. Click Next and check to enable the WAN service (enabled by default). 4. Click Next to display the window shown the summary of your settings. 5. Click Save/Reboot to activate your settings. The system automatically establishes connection in a few minutes. 14
21 4.3 Configure the MER 1. Select MAC Encapsulation Routing (MER). Click Next. 2. If your ISP provides the IP address, you should enter the corresponding values in WAN IP Address and WAN Subnet Mask. 15

22 3. If your ISP provides the dynamic IP address, you should select Obtain an IP address automatically. 4. Click Next. In the case of multiple computers share the Internet access service, it is recommended to enable NAT and firewall. 16

23 5. Click Next to display the window shown the summary of your settings. 6. Click Save/Reboot to activate your settings. The system automatically establishes connection in a few minutes. 17
. Click Next. 2.")

24 4.4 Configure the IPoA 1. Select IP over ATM (IPoA). Click Next. 2. Enter the fixed IP address and subnet mask in corresponding fields. 3. Click Next. It is recommended to enable the NAT and firewall. 18

25 4. Click Next to display the window shown the summary of your settings. 5. Click Save/Reboot to activate your settings. The system automatically establishes connection in a few minutes. 19
 The device information covers: a. Board ID b. Software version c. Boot version d. LAN MAC address e. WAN MAC address f. Running time g.")
26 Chapter 5 Configuration Description 5.1Device Information 1) Click Running Status and Summary to display the Device Info and DSL Info window. 2) The device information covers: a. Board ID b. Software version c. Boot version d. LAN MAC address e. WAN MAC address f. Running time g. System time 20

27 3) The DSL information covers: a. Upstream link rate b. Downstream link rate c. LAN IP address d. Default gateway: In the pure bridge mode, there is no gateway; in other modes such as PPPoE and PPPoA, the gateway address is the IP address of the upstream device. e. Primary DNS server: In the PPPoA/PPPoE mode, the DNS address is obtained from the upstream device; in the pure bridge mode, it is not required to set the DNS address; in other modes, you can manually enter the DNS address. f. Secondary DNS server 21
28 4) Click WAN in left menu to display the window shown in the right figure. From the table, you can know the general information on WAN. 5) Click Route to display the window shown in the right figure, displaying the default information. 22
 VPI (Virtual Path Identifier): Virtual path between two points in the ATM network.")
29 5.2 Advanced Settings WAN Click WAN. If the WAN information has been set, you can edit or modify it in this window. Caution: After modifying/ adding new information, you need to reboot the device to activate the setting. 1) VPI (Virtual Path Identifier): Virtual path between two points in the ATM network. Its value ranges 0 ~ ) VCI (Virtual Channel Identifier): Virtual channel between two points in the ATM network. Its value ranges 32 ~ (1 ~ 31 are reserved for the well-known protocols). 23
30 3) Service category: Selecting one from five available service categories. 4) Enable Quality of Service (QoS): check to enable it. 24
31 PPPoA mode 1) Select PPP over ATM (PPPoA). Encapsulation Mode: VC/MUX LLC/ENCAPSULATION Once you select one mode, the system automatically changes the encapsulation mode into the one matching your setting. Therefore, it is recommended to keep the default setting unchanged. 25
32 2) Click Next to display the window shown in the right figure. a. Authentication Method: AUTO/PAP/CHAP/MSCHA P. Usually, AUTO is selected. b. Dial on demand: If you check this option, you need to manually enter the timeout time. If no flow is detected when the timeout time is up, the device will disconnect the network connection automatically. And when a flow is detected, the device automatically makes dial-up connection again. If you disable this option, the device is always in online status until device power-off, connection failure or other failures occur. 26
33 C. PPP IP extension: When the integrated gateway is connected with a computer, the IP address obtained through the upstream link is directly allocated to this computer connecting with the device. After the PPP IP extension is enabled, you can enable the advanced DMZ. At this time, you need to enter your DMZ host and subnet mask. d. Use Static IP Address: After this option is checked, the device uses this IP address as the WAN IP address and does not need to obtain it through the upstream link. e. Retry PPP password on authentication error f. Enable PPP debugging mode. 27

34 3) Click Next to display the window shown in the right figure. a. Enable IGMP Multicast: IGMP agent. For example, to enable the IPTV in the PPPoE mode, you need to check this option. b. Enabled WAN Service: Checked by default. It is recommended to keep this default setting, unless you do not need to activate your WAN. 28

35 4) Click Next to display the window shown in the right figure. This window shows the general information set. 5) Click Save/Reboot to activate your settings. 29
36 PPPoE mode 1) Select PPP over Ethernet (PPPoE). Encapsulation Mode: VC/MUX LLC/SNAP-BRIDGING Once you select one mode, the system automatically changes the encapsulation mode into the one matching your setting. Therefore, it is recommended to keep the default setting unchanged. 30

37 2) Click Next to display the window shown in the right figure. a. Authentication Method: AUTO/PAP/CHAP/MSC HAP. Usually, AUTO is selected. b. Dial on demand: If you check this option, you need to manually enter the timeout time. If no flow is detected when the timeout time is up, the device will disconnect the network connection automatically. And when a flow is detected, the device automatically makes dial-up connection again. If you disable this 31
38 option, the device is always in online status until device power-off, connection failure or other failures occur. c. PPP IP extension: When the device is connected with a computer, the IP address obtained through the upstream link is directly allocated to this computer connecting with the device. After the PPP IP extension is enabled, you can enable the advanced DMZ. At this time, you need to enter your DMZ host and subnet mask. d. Use Static IP Address: After this option is checked, the device 32
39 uses this IP address as the WAB IP address and does not need to obtain it through the upstream link. e. Retry PPP password on authentication error f. Enable PPP debugging mode. 33
40 3. Click Next to display the window shown in the right figure. a. Enable IGMP Multicast: IGMP agent. For example, to enable the IPTV in the PPPoE mode, you need to check this option. b. Enabled WAN Service: Checked by default. It is recommended to keep this default setting, unless you do not need to activate your WAN. 34

41 4. Click Next to display the window shown in the right figure. This window lists your settings. 5. Click Save/Reboot to activate your settings. 35
42 MER mode 1) Select MAC Encapsulation Routing(MER). Encapsulation Mode: VC/MUX LLC/SNAP-BRIDGING Once you select one mode, the system automatically changes the encapsulation mode into the one matching your setting. Therefore, it is recommended to keep the default setting unchanged. 36
43 2) Click Next to display the window shown in the right figure. a. Obtain an IP address automatically: If your device automatically obtains the IP address, the IP address and other parameters will be from your ISP automatically. b. Use the following IP address: To manually specify an address, you need to check this option and enter your static IP address and subnet mask. c. Obtain default gateway automatically: If this option is checked, the device 37
44 automatically obtains the default gateway address from the upstream device. 3) Use the following default gateway: To manually enter a gateway, check this option. a. Use IP Address: After checking Use the following default gateway, you can enter a value here. b. Use WAN Interface: For the broadband access device, you need to enter the IP address of the downstream link interface. 4) Obtain DNS server address automatically: 38
45 If this option is checked, the device automatically obtains the DNS address. 5) Use the following DNS server address: To manually enter a DNS address, check this option. a. Primary DNS server: Enter the primary DNS server. b. Secondary DNS server: Enter the secondary DNS server. 6) Click Next. a. Enable IGMP Multicast: IGMP agent. For example, to enable the IPTV in the PPPoE mode, you need to check this option. b. Enable WAN Service: 39
 Click Next to display the window shown in the right figure. This window lists your settings. 6.")
46 Checked by default. It is recommended to keep this default setting, unless you do not need to activate your WAN. 7) Click Next to display the window shown in the right figure. This window lists your settings. 6. Click Save/Reboot to activate your settings. 40
47 IPoA mode 1) Select IP over ATM (IPoA). Encapsulation Mode: VC/MUX LLC/SNAP-ROUTING Once you select a mode, the system automatically changes the encapsulation mode into the one matching your setting. Therefore, it is recommended to keep the default setting unchanged. 41
48 2) Click Next to display the window shown in the right figure. a. WAN IP Address: Enter the IP address provided by your ISP. b. WAN Subnet Mask: Enter the subnet mask provided by your ISP. c. Use the following default gateway: You can check this option. d. Use IP Address: Enter the IP address provided by your ISP. e. Use WAN Interface: For the broadband access device, you need to enter the IP address of the downstream link interface. 3) Use the following DNS server address: 42
49 You can check this option. a. Primary DNS server b. Secondary DNS server Caution: In the IPoA mode, DHCP is not supported, so you need to manually enter the WAN IP address, subnet mask, default gateway, DNS server and other settings. 43
50 4) Click Next. a. Enable NAT: NAT enables multiple computers in your LAN to use the same WAN IP address for Internet access. It is recommended to check this option. b. Enable Firewall It is recommended to check this option to avoid some attacks. c. Enable IGMP Multicast: IGMP agent. For example, to enable the IPTV in the PPPoE mode, you need to check this option. d. Enable WAN Service: Checked by default. It is recommended to keep this default setting, unless you do not need to activate your WAN. 44
51 e. Click Next to display the window shown in the right figure. This window lists your settings. g. Click Save/Reboot to activate your settings. 45

52 Bridging mode 1) Select Bridging. Encapsulation Mode: VC/MUX LLC/SNAP-BRIDGING Once you select a mode, the system automatically changes the encapsulation mode into the one matching your setting. Therefore, it is recommended to keep the default setting unchanged. 2) Enable Bridge Service: To select the bridge mode, you need to check this option. By default, this option is checked. 46
53 3) Click Next to display the window shown in the right figure. This window lists your settings. 4) Click Save/Reboot to activate your settings. 47

54 5.2.2 LAN 1). IP Address: IP address used by the router to connect to the LAN. This option is set to upon device delivery. You can change it as required. Caution: After changing this IP address, you need to use the new IP address to access the Web management window upon next login to the router. In addition, you must set the default gateway in each computer in your LAN to this IP address, to ensure normal Internet access. 2). Subnet Mask: Setting 48
55 your subnet mask. 3). Enable IGMP Snooping: Used in the bridge mode. 4). Standard Mode 5). Blocking Mode 6). Configure the second IP Address and Subnet Mask for LAN interface. Click Save/Reboot. 49
56 5.2.3 NAT Virtual Server 1) Click NAT Virtual Server to display the window shown in the right figure. Here, you can add or delete your virtual server settings. By default, the external networks cannot access the IP address of your internal network. However, if you need such access by the external networks (for example, you need to set up the server or support some special applications), you should enable this function to allow the access by external networks. 50

57 2) Click Add to display the window shown in the right figure. a. Select a Service: Selecting the service to be enabled. b. Custom Server: Manually entering the server name. c. Server IP Address: LAN IP address for the server. Caution: After a service is selected, the system automatically opens the corresponding port. After you manually enter a customized service, you need to manually enter the port to be opened. 51
58 d. Click Save/Apply to display the service added, as shown in the right figure Port Triggering 1) Click Port Triggering to display the window shown in the right figure. Here, you can add or delete your port triggering service settings. For some special applications, you need to enable some application ports. Through the port triggering, you can enable the automatic opening of the ports required by applications. 52


59 2) Click Add to display the window shown in the right figure. a. Select an application: Selecting the name of the service to be enabled. b. Custom application: Manually entering the service name. Caution: After a service is selected, the system automatically sets the corresponding port. After you manually enter a customized service, you need to manually enter the port to be triggered. 3) Click Save/Apply to display the service added, as shown in the right figure. 53


60 DMZ Host 1. Click DMZ Host to display the window shown in the right figure. 2. DMZ Host IP Address: Entering the LAN IP address for the DMZ host. Caution: Opening DMZ means to open all ports. In this case, your computer is totally exposed to the public network. Be cautions to use this function. Click Save/Apply to activate the settings. 54
61 UPNP 1) Click UPNP to display the window shown in the right figure. Enable UPnP: Check to Enable the UPnP (Universal Plug and Play) function. UPnP is a kind of architecture of common network connection between the computer and intelligent devices/instruments. It is especially common in the family application. Based on the Internet standards and technologies (such as TCP/IP, HTTP and XML), UPnP enables automatic connection and cooperation between such devices, thus to make more people can 55
62 access the network (especially the family network). Click Save/Apply to activate the settings Security IP Filtering 1) Click Security IP Filtering to display the window shown in the right figure. By default, all outgoing traffic is allowed. However, you can set IP filtering to restrict external network access by some computers in the internal network. 56

63 2) Click Add to display the window shown in the right figure. a. Filter Name: Setting the filtering name to facilitate identification. b. Protocol: Selecting one from four available protocols: TCP/UDP; TCP; UDP; ICMP. c. Source IP address: Entering the internal network IP address to be filtered. d. Source Subnet Mask: Entering the subnet mask corresponding to the internal network IP address to be filtered. e. Source Port: Entering the port number of the internal network IP 57
64 address to be filtered. f. Destination IP address: Entering the external network IP address to be filtered. g. Destination Subnet Mask: Entering the subnet mask corresponding to the external network IP address to be filtered. h. Destination Port: Entering the port number of the external network IP address to be filtered. Based on the above settings, you can add your filtering rules. You can select your WAN interface. However, it is recommended to keep the default setting unchanged. 58
65 3) Click Save/Apply. 4) Click Incoming to display the window shown in the right figure. By default, all incoming traffic is restricted. However, you can set IP filtering to allow internal network access by some external computers. 59

66 5) Click Add to display the window shown in the right figure. a. Filter Name: Setting the filtering name to facilitate identification. b. Protocol: Selecting one from four available protocols: TCP/UDP; TCP; UDP; ICMP. c. Source IP address: Entering the external network IP address to be filtered. d. Source Subnet Mask: Entering the subnet mask corresponding to the external network IP address to be filtered. e. Source Port: Entering the port number of the external network IP address to be filtered. 60
67 f. Destination IP address: Entering the internal network IP address to be filtered. h. Destination Subnet Mask: Entering the subnet mask corresponding to the internal network IP address to be filtered. i. Destination Port: Entering the port number of the internal network IP address to be filtered. Based on the above settings, you can add your filtering rules. You can select your WAN interface. However, it is recommended to keep the default setting unchanged. 61
 Click Time of Day Restriction to display the")
 Click Add to display the Here, you can set a specific period to")
68 5) Click Save/Apply Parent Control 1) Click Time of Day Restriction to display the window shown in the right figure. 2) Click Add to display the window shown in the right figure. Here, you can set a specific period to restrict Internet access of a MAC address. 62
69 3) Click Save/Apply. 63

70 5.2.5 Routing Default Gateway 1) Click Routing Default Gateway to display the window shown in the right figure. Enable Automatic Assigned Default Gateway: You can check/uncheck this option. If you uncheck this option, you need to manually enter the default gateway address and WAN service. It is recommended to keep the default setting unchanged. 2) Click Save/Apply. 64


71 Static Routing 1) Click Static Route to display the window shown in the right figure. Here, you can add/ delete the items of the static route. 1) Click Add to display the window shown in the right figure. Destination Network Address: Entering the network or host for static route. Subnet Mask: Entering the subnet mask corresponding to the network or host for static route. Use Gateway IP Address: Entering the gateway address to be 65
 Click DNS Server to display the window shown in the right figure. 2) Enable Automatic Assigned DNS: After checking it, the DNS settings are activated.")
72 passed by the static route. Use Interface: Selecting the interface corresponding to your connection mode. Click Save/Apply DNS DNS Server 1) Click DNS Server to display the window shown in the right figure. 2) Enable Automatic Assigned DNS: After checking it, the DNS settings are activated. And the DHCP server of the router allocates the added DNS address to the client submitting the 66
73 request. 3) Primary DNS server: Entering the DNS address provided by the ISP. 4) Secondary DNS server: If your ISP provides two DNS addresses, you can enter the other address here. 67

74 Dynamic DNS 1) Click Dynamic DNS to display the window shown in the right figure. Here, you can add/ delete the dynamic DNS settings. Dynamic DNS can make your applied domain name correspond to your IP address, so that the other users only need to remember your domain name for accessing your server. 68
75 2) Click Add to display the window shown in the right figure. D-DNS provider: Selecting a specific provider of dynamic DNS. Hostname: Domain name applied by you. Interface: Selecting one from two available interface modes. Username: Your user name registered on the website of the dynamic DNS provider. Password: Password corresponding to your user name registered on the website of the dynamic DNS provider. 69
76 3) Click Save/Apply. 70
77 5.2.7 DSL Click DSL to display the window shown in the right figure. Here, you can enable a service as required. By default, the system checks the status of G.dmt, G.lite, T1.413, ADSL2, ADSL2+, AnnexL, Inner pair and Bitswap. The device can automa- tically negotiate with the upstream device. 71

78 5.3 DHCP i. Click DHCP Server to display the window shown in the right figure. 1. You can click Disable DHCP Server or Enable DHCP Server. 2. Start IP Address: Start address of the DHCP server IP pool 3. End IP Address: End address of the DHCP server IP pool 4. Leased Time: Validity period of the IP address obtained. Click Save. Click DHCP Client List to view the list of the clients with allocated DHCP service. 72

79 5.4 System Tool Settings 1. Click Backup to display the window shown in the right figure. Here, you can back up the current settings of the router. 2.Click Update to display the window shown in the right figure. Here, you can restore the router settings from the backup file. 73
80 3. Click Restore Default to display the window shown in the right figure. Click Restore Default Settings to restore the default settings before device delivery. Caution: After restoring the default settings, you need to reboot the router to activate this modification. 74

81 5.4.2 System Log 1. Click System Log to display the window shown in the right figure. 2. Click View System Log to display the window shown in the right figure. 75
82 3. Click Configure System Log to display the window shown in the right figure. (1) Log: Enable; Disable (2) Log Level: Selecting the required level, Debugging by default. (3) Display Level: Error by default. (4) Mode: Local by default. If you select Remote or Local/Remote, the system transmits the log UDP packets to your log server. Click Save/Apply. 76

83 5.4.3 Internet Time 1. Click Internet Time to display the window shown in the right figure. If you enable this function, the system can automatically obtain the time when accessing the Internet. 77

84 5.4.4 Access Control Service (1) Click Access Control to display the window shown in the right figure. You can enable or disable FTP/HTTP/ICMP/SNMP /SSH/TELNET/TFTP. (2) Click Save/Apply to activate the settings 78

 Click Add to display the window shown in the right figure.")
85 IP address (1) Click IP Address to display the window shown in the right figure. Here, you can add/delete items. Access Control Mode: Enable; Disable. When you enable it, the IP address allowed can access the management page. (2) Click Add to display the window shown in the right figure. You can enter an IP address, which is allowed by the system for access- ing the management page. Click Save/Apply to activate the settings. 79

86 Password (1) Click Password to display the window shown in the right figure. Here, you can modify the password for logging in to the Management page. Enter the former login password, and then the new login password. If the former login password is correctly entered, you can click Save/Apply to successfully modify the login password. Caution: For the sake of security, we highly recommend you to change the initial user name and password. (2) Click Save/Apply to activate the modification. 80

87 5.4.5 Software Update 1.Click Update Software to display the window shown in the right figure. Click Browse to select your update file, and then click Update Software Save/Reboot 1. Click Save/Reboot to display the window shown in the right figure. Rebooting device can activate the changed settings. However, the ADSL connection is automatically interrupted before the reboot. 81
88 Chapter 6 Appendix Appendix 1: Troubleshooting Trouble Case Power Indicator Off ADSL Off LAN Off Troubleshooting Check if the power adapter is Connected properly. Check if the power adapter is matched. Check if the ADSL cable connection is OK. Make sure the telephone line is OK you re your phone. Check the phone line cabling is right. Check the Ethernet cable is OK. Make sure the PC s NIC indicator is ON. Make sure the NIC works normally. 82
89 Can t access the Internet Make sure the above troubles are clear. Make sure the dial-up connection is established and set up. Make sure the user name and password are right. If the dial-up is OK, please make sure the IE proxy server is configured properly. Please try opening multiple web pages 83
90 Appendix 2: FAQ Q: What are VPI, VCI? A: VPI (Virtual Path Identifier) and VCI (Virtual Channel Identifier) are to identify ATM terminal (ADSL) for DSLAM, usually provided the local ISP. Q: What related parameters are required from your ISP? A: For dial user, Connection protocol, User name, Password, Value of VPI/VCI, Encapsulation mode and so on. Q: The firmware upgrade fails and I can t enter the Web-based management interface? A: Contact the technical engineer for support or after-sales service engineer. Note: please download the upgrade packets from the Tenda website. Q: Have completed all configurations, but can t dial through computer? A: 1) Check the indicator of ADSL, it should be working in normally. 2) Check the accuracy of parameter of value of 84
91 VPI/VCI, Encapsulation mode and so on. 3) Make sure the dial-up connection is established. 4) You can check whether your ADSL Modem succeeds in connection through PING command. Chapter 7 Wall-Mounting Placement The Router has two wall-mount slots on its bottom panel. The distance between the slots is 121 mm (4.76 inches ). Two screws are needed to mount the Router. Follow these instructions : 85
92 1. Determine where you want to mount the Router. Make sure that the wall you use is smooth,flat,dry,and sturdy. Also make sure the location is within reach of an electrical outlet. 2. Drill two holes into the wall. Make sure the holes are 121mm (4.76inches )apart. 3. Insert a screw into each hole and leave 3mm (0.12inches ) of its head exposed. 4. Maneuver the Router so the wall-mount slots line up with the two screw. 5. Place the wall-mount slots over the screws and slide the router down until the screws fit snugly into the wall-mount slots. Distributed by: Electus Distribution Pty Ltd 320 Victoria Road Rydalmere, NSW 2116 Australia Tel: Fax:
DSL-X11. One Port ADSL Modem Router. User Manual
 DSL-X11 One Port ADSL Modem Router User Manual Contents 1 Introduction... 1 1.1 Features... 1 1.2 ADSL Standard Supports... 1 1.3 Encapsulation Supports... 1 1.4 System Requirements... 2 1.5 LED Status
ADSL User Manual. Wireless-N BROADBAND ROUTER : Introduction
 ADSL User Manual 1 : Introduction The ADSL is a communication terminal, which integrates ADSL access, broadband SOHO router, WLAN and VoIP service. This device can provide high data transmission, downstream
OV504R6. Quick Start Guide
 OV504R6 Quick Start Guide 1 Overview The router is a highly ADSL2/2+ Integrated Access Device and can support ADSL link with downstream up to 24 Mbps and upstream up to 1 Mbps. It is designed to provide
Atrie DB108-E ADSL MODEM. User Manual V1.1
 Atrie DB108-E ADSL MODEM User Manual V1.1 CONTENTS 1.OVERVIEW...4 1.1 ABOUT ADSL...4 1.2 ABOUT ADSL2/2+...4 1.3 FEATURES...4 2 SPECIFICATION...5 2.1 INTERFACE INTRODUCTION...5 2.1.1 Indicator and Interface...5
Content 1 OVERVIEW HARDWARE DESCRIPTION HARDWARE INSTALLATION PC CONFIGURATION GUIDE... 5 WEB-BASED MANAGEMENT GUIDE...
 Content 1 OVERVIEW...1 1.1FEATURES...1 1.2 PACKETCONTENTS...3 1.3 SYSTEM REQUIREMENTS... 1.4 FACTORY DEFAULTS...4 1.5 WARNINGS AND CAUTIONS...4 2 HARDWARE DESCRIPTION... 6 3 HARDWARE INSTALLATION...8 4
OV303R6. User Manual
 OV303R6 User Manual Contents 1 Safety Precautions... 1 2 2 Overview... 2.1 Application... 2 2.2 Features... 2 2.3 Standards Compatibility and Compliance... 3 3 Hardware Description and Hardware Installation...
Table of Contents. D-Link DSL-2540U User Manual 1
 Table of Contents D-Link DSL-2540U User Manual 1 Table of Contents PACKAGE CONTENTS...3 SYSTEM REQUIREMENTS...3 FEATURES...4 HARDWARE OVERVIEW...6 Connections...6 LEDs...7 INSTALLATION...8 BEFORE YOU BEGIN...8
Copyright Statement. Disclaimer. Technical Support
 Copyright Statement 2015 Shenzhen Tenda Technology Co., Ltd. All rights reserved. Tenda is a registered trademark legally held by Shenzhen Tenda Technology Co., Ltd. Other brand and product names mentioned
CHAPTER 7 ADVANCED ADMINISTRATION PC
 ii Table of Contents CHAPTER 1 INTRODUCTION... 1 Broadband ADSL Router Features... 1 Package Contents... 3 Physical Details... 4 CHAPTER 2 INSTALLATION... 6 Requirements... 6 Procedure... 6 CHAPTER 3 SETUP...
Table of Contents. General Information... 4 Package Contents... 4 Important Safety Instructions... 4 Front Panel View... 5 Rear Panel View...
 Table of Contents General Information... 4 Package Contents... 4 Important Safety Instructions... 4 Front Panel View... 5 Rear Panel View... 6 Installing the Modem... 7 Installation Diagram... 9 Configuring
Table of Contents. D-Link DSL-526B User Manual 1
 1 : Table of Contents PACKAGE CONTENTS... 2 SYSTEM REQUIREMENTS... 2 FEATURES... 3 HARDWARE OVERVIEW... 4 Connections... 4 LEDs... 5 INSTALLATION... 6 BEFORE YOU BEGIN... 6 INSTALLATION NOTES... 7
ADSL Modem. User Guide AM300. Model No. WIRED
 WIRED User Guide Model No. AM300 Copyright and Trademarks Specifications are subject to change without notice. Linksys is a registered trademark or trademark of Cisco Systems, Inc. and/or its affiliates
Wireless Modem Router
 i Wireless Modem Router Copyright Statement is the registered trademark of Shenzhen Tenda Technology Co., Ltd. All the products and product names mentioned herein are the trademarks or registered trademarks
FOUR-PORT ADSL ROUTER. KD319EUI ADSL Router User Manual
 FOUR-PORT KD319EUI ADSL Router User Manual NOTICE This document contains proprietary information protected by copyright, and this Manual and all the accompanying hardware, software, and documentation are
LevelOne FBR User s Manual. 1W, 4L 10/100 Mbps ADSL Router. Ver
 LevelOne FBR-1416 1W, 4L 10/100 Mbps ADSL Router User s Manual Ver 1.00-0510 Table of Contents CHAPTER 1 INTRODUCTION... 1 FBR-1416 Features... 1 Package Contents... 3 Physical Details... 3 CHAPTER 2
FOUR-PORT ADSL ROUTER. KD319MUI ADSL Router User Manual
 FOUR-PORT ADSL ROUTER KD319MUI ADSL Router User Manual NOTICE This document contains proprietary information protected by copyright, and this Manual and all the accompanying hardware, software, and documentation
Gnet BB005x ADSL modem/router *Configuration and Installation Guide*
 Gnet BB005x ADSL modem/router *Configuration and Installation Guide* TABLE OF CONTENTS Chapter 1: Introduction...3 General...3 Features Overview...3 About this manual...3 Chapter 2: General Connectivity...5
A Division of Cisco Systems, Inc. ADSL Modem. User Guide WIRED AM200. Model No.
 A Division of Cisco Systems, Inc. WIRED User Guide Model No. AM200 Copyright and Trademarks Specifications are subject to change without notice. Linksys is a registered trademark or trademark of Cisco
COPYRIGHT. Edimax Technology Co., Ltd. Add: No. 3, Wu-Chuan 3 rd Rd., Wu-Ku Industrial Park, New Taipei City, Taiwan.
 COPYRIGHT Copyright Edimax Technology Co., Ltd. all rights reserved. No part of this publication may be reproduced, transmitted, transcribed, stored in a retrieval system, or translated into any language
FOUR-PORT ADSL ROUTER. KD319RI ADSL Router User Manual
 FOUR-PORT ADSL ROUTER KD319RI ADSL Router User Manual NOTICE This document contains proprietary information protected by copyright, and this Manual and all the accompanying hardware, software, and documentation
User s Guide. Creative Broadband Blaster DSL Router 8015U
 User s Guide Creative Broadband Blaster DSL Router 8015U Information in this document is subject to change without notice and does not represent a commitment on the part of Creative Technology Ltd. The
Table of Contents. D-Link DSL-2750U User Manual 1
 Table of Contents D-Link DSL-2750U User Manual 1 Table of Contents Table of Contents TABLE OF CONTENTS... 2 PACKAGE CONTENTS... 4 SYSTEM REQUIREMENTS... 4 FEATURES... 5 HARDWARE OVERVIEW... 7 Connections...
Table of Contents. D-Link DSL-2730U User Manual 1
 Table of Contents D-Link DSL-2730U User Manual 1 Table of Contents PACKAGE CONTENTS... 4 SYSTEM REQUIREMENTS... 4 FEATURES... 5 HARDWARE OVERVIEW... 7 Connections... 7 LEDs... 8 INSTALLATION... 9 BEFORE
COPYRIGHT & TRADEMARKS
 Rev:1.0.1 COPYRIGHT & TRADEMARKS Specifications are subject to change without notice. is a registered trademark of TP-LINK Technologies Co., Ltd. Other brands and product names are trademarks or registered
RX3041. User's Manual
 RX3041 User's Manual Table of Contents 1 Introduction... 2 1.1 Features and Benefits... 3 1.2 Package Contents... 3 1.3 Finding Your Way Around... 4 1.4 System Requirements... 6 1.5 Installation Instruction...
KD216 VDSL Router User Manual
 KD216 VDSL Router NOTICE This document contains proprietary information protected by copyright, and this Manual and all the accompanying hardware, software, and documentation are copyrighted. All rights
User Guide. 300Mbps Wireless N USB ADSL2+ Modem Router TD-W8968 REV
 User Guide 300Mbps Wireless N USB ADSL2+ Modem Router TD-W8968 REV 5.1.0 1910011943 CONTENTS About This Guide... 1 Chapter 1. Product Overview... 2 1.1 Overview of the Modem Router... 2 1.2 Product Appearance...
User Manual. VDSL2 Router with 11n WiFi. Model:DV2211
 Model:DV2211 User Manual VDSL2 Router with 11n WiFi Model:DV2211 V33 User Manual 1 Model:DV2211 TABLE OF CONTENTS... 1 Device Installation... 4 Power on Router... 4 Factory Reset Button... 5 Network Connections...
CT-5372E Wireless Multi-DSL Router User s Manual
 CT-5372E Wireless Multi-DSL Router User s Manual Version A1.0, December 06, 2006 261074-002 Warning Before servicing or disassembling this equipment, always disconnect all power and telephone lines from
Quick Installation Guide DSL-2540U. ADSL Annex B/Ethernet Router with Built-in Switch
 ADSL Annex B/Ethernet Router with Built-in Switch BEFORE YOU BEGIN Delivery Package Router Power adapter DC 12V/0.5A RJ-11 telephone cable Ethernet cable (CAT 5E) Splitter CD-ROM with User Manual and (brochure).
UT-300R2 ADSL2/2+Modem USER GUIDE
 UT-300R2 ADSL2/2+Modem USER GUIDE UTStarcom, Inc. Copyright 2004 UTStarcom, Inc. All rights reserved. No part of this documentation may be reproduced in any form or by any means or used to make any derivative
Broadband High-Speed DSL Modem User Manual
 Broadband High-Speed DSL Modem User Manual Model DM200 September 2017 202-11621-03 350 E. Plumeria Drive San Jose, CA 95134 USA Support Thank you for purchasing this NETGEAR product. You can visit www.netgear.com/support
User Manual VER: 1.0
 OV604VB VER: 1.0 Contents 1 Safety Precautions... 1 2 Overview... 2 2.1 Application... 2 2.2 Features... 2 2.3 Standards Compatibility and Compliance... 3 3 Hardware Description and Installation... 5 3.1
LKR Port Broadband Router. User's Manual. Revision C
 LKR-604 4-Port Broadband Router User's Manual Revision C 1 Contents 1 Introduction... 4 1.1 Features... 4 1.2 Package Contents... 4 1.3 Finding Your Way Around... 5 1.3.1 Front Panel... 5 1.3.2 Rear Panel
BiPAC ADSL USB Modem. User s Manual
 BiPAC 7001 ADSL USB Modem User s Manual Chapter 1... 1 1.1 Introducing the BiPAC 7001... 1 1.2 Features of the BiPAC 7001... 1 1.3 Installing Billion ADSL USB Modem... 2 Chapter 2... 3 2.1 Important note
NWAR3600 ADSL 11n Gateway. User s Manual. Version 0.1
 NWAR3600 ADSL 11n Gateway User s Manual Version 0.1 Copyright 2008 Table of Contents 1. INTRODUCTION... 4 1.1 FEATURES... 4 1.2 SYSTEM REQUIREMENTS... 4 2. INSTALLATION... 5 FRONT PANEL... 5 REAR PANEL...
ADSL2+ 4-Port Modem Router Quick Setup Guide RTA1335
 ADSL2+ 4-Port Modem Router Quick Setup Guide RTA1335 Important This Guide is intended to get you started quickly. We have made the factory default setting of this router suitable for New Zealand 1. All
Hurricane 9000P. User's Manual. Version port ADSL Modem/Router
 Hurricane 9000P 4-port ADSL Modem/Router User's Manual Version 1.0 1 Contents Section One: Introduction... 4 1.1 System Requirements... 4 1.2 Features Summary... 4 Section Two: Connect the Modem/Router...
I-Storm USB ADSL modem A01-AU1
 I-Storm USB ADSL modem A01-AU1 Manual for Linux and Mac OS 9/X A01-AU1_ME01 SOMMARIO Chapter 1...1 1.1 I-Storm USB ADSL Modem Features...1 1.2 Package Contents...1 1.3 The Front LEDs...2 1.4 Information
Atrie DB108-WL WIRELESS ADSL MODEM USER MANUAL
 Atrie DB108-WL WIRELESS ADSL MODEM USER MANUAL (V3.0) CONTENTS 1 OVERVIEW...2 1.1 ABOUT ADSL...2 1.2 DEVICE INTRODUCTION...2 1.3 PROTOCOLS...3 1.4 FEATURES...3 2 INSTALLATION AND CONFIGURATION...4 2.1
IP806GA/GB Wireless ADSL Router
 IP806GA/GB Wireless ADSL Router 802.11g/802.11b Wireless Access Point ADSL Modem NAT Router 4-Port Switching Hub User's Guide Table of Contents CHAPTER 1 INTRODUCTION... 1 Wireless ADSL Router Features...
SR630n. User Manual VER: 1.0
 SR630n VER: 1.0 Contents 1 Safety Precautions... 1 2 Overview... 2 2.1 Application... 2 2.2 Features... 3 2.3 Standards Compatibility and Compliance... 4 3 Hardware Description and Installation... 5 3.1
DG-BG1000. ADSL2+ Ethernet Broadband Router. User Manual
 DG-BG1000 ADSL2+ Ethernet Broadband Router User Manual V1.1 2012-12-12 As our product undergoes continuous development the specifications are subject to change without prior notice INDEX 1 Introduction...4
300Mbps Wireless N VDSL2 Modem Router. User Guide
 300Mbps Wireless N VDSL2 Modem Router User Guide 1 Copyright Statement 2017 Shenzhen Tenda Technology Co., Ltd. All rights reserved. is a registered trademark legally held by Shenzhen Tenda Technology
TD-W8950ND 150Mbps Wireless Lite N ADSL2+ Modem Router
 TD-W8950ND 150Mbps Wireless Lite N ADSL2+ Modem Router Rev: 1.0.0 1910010316 COPYRIGHT & TRADEMARKS Specifications are subject to change without notice. is a registered trademark of TP-LINK TECHNOLOGIES
Web Interface User s Guide. ADSL Ethernet & USB Combo Router
 Web Interface User s Guide ADSL Ethernet & USB Combo Router 1. Introduction... 3 1.1 Features... 3 2. Your gateway at a glance... 5 2.1 Ports and buttons... 5 2.2 LED description... 5 3. Installing your
I-Fly Wireless Router ADSL
 I-Fly Wireless Router ADSL Manual (V1.00) COPYRIGHT The Atlantis Land logo is a registered trademark of Atlants Land SpA. All other names mentioned mat be trademarks or registered trademarks of their
Multi-Homing Broadband Router. User Manual
 Multi-Homing Broadband Router User Manual 1 Introduction... 4 Features... 4 Minimum Requirements... 4 Package Content... 4 Note... 4 Get to know the Broadband Router... 5 Back Panel... 5 Front Panel...
Please use only wired network connections to configure the Router.
 Note Please use only wired network connections to configure the Router. Power down all of your network devices, including your computer(s) and the Modem Router. If you currently use a modem, disconnect
User Guide TL-R470T+/TL-R480T REV9.0.2
 User Guide TL-R470T+/TL-R480T+ 1910012468 REV9.0.2 September 2018 CONTENTS About This Guide Intended Readers... 1 Conventions... 1 More Information... 1 Accessing the Router Overview... 3 Web Interface
LevelOne. User Manual. 11g Wireless ADSL2+ Modem Router WBR Ver. 1.0
 LevelOne User Manual WBR-3601 11g Wireless ADSL2+ Modem Router Ver. 1.0 Table of Contents Product Overview... 3 Product Description... 3 Specification... 4 LED Meaning... 6 Back Panel Connectors... 7 Factory
NexusLink 5631E. User s Manual. Wireless ADSL2+ Bonded Router for Annex B. Version C2.0, February 1,
 NexusLink 5631E Wireless ADSL2+ Bonded Router for Annex B User s Manual Version C2.0, February 1, 2008 261076-004 Warning Before servicing or disassembling this equipment, always disconnect all power and
ALL500VDSL2. WLAN N VDSL Router. User s Manual
 ALL500VDSL2 WLAN N VDSL Router User s Manual NOTICE This document contains proprietary information protected by copyright, and this Manual and all the accompanying hardware, software, and documentation
OV804WVA. User Manual
 OV804WVA User Manual VER: 1.0 OvisLink (Canada) INC User Manual Contents 1 Safety Precautions... 1 2 Overview... 2 2.1 Application... 2 2.2 Features... 3 2.3 Standards Compatibility and Compliance... 4
DSL/CABLE ROUTER with PRINT SERVER
 USER S MANUAL DSL/CABLE ROUTER with PRINT SERVER MODEL No:SP888BP http://www.micronet.info 1 Content Table CHAPTER 0:INTRODUCTION... 4 FEATURES... 4 MINIMUM REQUIREMENTS... 4 PACKAGE CONTENT... 4 GET TO
Broadband Router. User s Manual
 Broadband Router User s Manual 1 Introduction... 4 Features... 4 Minimum Requirements... 4 Package Content... 4 Note... 4 Get to know the Broadband Router... 5 Back Panel... 5 Front Panel... 6 Setup Diagram...7
NWAR3650 User Manual
 NWAR3650 User Manual Contents 1 Introduction... 1 1.1 Application... 1 1.2 Environment Requirements... 1 1.3 System Requirements... 2 1.4 Safety Cautions... 2 1.5 LED Status Description... 2 1.5.1 Front
ZXV10 W300 Wireless ADSL Router. Quick Installation Manual ZTE CORPORATION
 ZXV10 W300 Wireless ADSL Router Quick Installation Manual ZTE CORPORATION 1 ZXV10 W300 Wireless ADSL Router Quick Installation Manual Manual version 20060810-R1.0 Product version Copyright 2005 ZTE CORPORATION
Table of Contents. DSL-504T User s Manual. Table of Contents. Table of Contents...2. Package Contents...4. Installation Overview...
 Table of Contents Table of Contents Table of Contents...2 Package Contents...4 Installation Overview...5 Installation Requirements...6 Information you will need from your ADSL service provider...8 Information
Federal Communication Commission Interference Statement
 Federal Communication Commission Interference Statement This equipment has been tested and found to comply with the limits for a Class B digital device, pursuant to Part 15 of the FCC Rules. These limits
N150 WiFi DSL Modem Router Essentials Edition. N300 WiFi DSL Modem Router Essentials Edition
 N150 WiFi DSL Modem Router Essentials Edition Model D500 N300 WiFi DSL Modem Router Essentials Edition Model D1500 User Manual May 2018 202-11390-02 350 East Plumeria Drive San Jose, CA 95134 USA Support
M404 ADSL/2/2+ Single Port Ethernet Modem
 M404 ADSL/2/2+ Single Port Ethernet Modem M405 ADSL/2/2+ Single Port Ethernet/USB Modem User s Manual Table of Contents 1. INTRODUCTION...4 1.1 FEATURES...4 1.2 SYSTEM REQUIREMENTS...4 2. INSTALLATION...5
4 PORTS + WIRELESS ADSL2+ Router DB120-WL. User Manual V 1.1
 4 PORTS + WIRELESS ADSL2+ Router DB120-WL User Manual V 1.1 CONTENTS 1.OVERVIEW...3 1.1 ABOUT ADSL...3 1.2 ABOUT ADSL2/2+...3 1.3 FEATURES...3 2 SPECIFICATION...4 2.1 INTERFACE INTRODUCTION...4 2.1.1 INDICATOR
Broadband Router DC-202. User's Guide
 Broadband Router DC-202 User's Guide Table of Contents CHAPTER 1 INTRODUCTION... 1 Broadband Router Features... 1 Package Contents... 3 Physical Details...3 CHAPTER 2 INSTALLATION... 5 Requirements...
Broadband Router. with 2 Phone Ports WIRED. Installation and Troubleshooting Guide RT31P2. A Division of Cisco Systems, Inc. Model No.
 A Division of Cisco Systems, Inc. Broadband Router with 2 Phone Ports WIRED Installation and Troubleshooting Guide Model No. RT31P2 Copyright and Trademarks Specifications are subject to change without
DSL-2640B. D-Link. User Manual. Wireless ADSL2/2+ 4-port Ethernet Router (for ToT) RECYCLABLE 2007/06/25. Building Networks for People
 RECYCLABLE 2007/06/25. Building Networks for People") D-Link DSL-2640B Wireless ADSL2/2+ 4-port Ethernet Router (for ToT) User Manual Building Networks for People RECYCLABLE 2007/06/25 Table of Contents GENERAL INFORMATION... 3 Package Contents... 3 Important
D-Link DSL-2640B Wireless ADSL2/2+ 4-port Ethernet Router (for ToT) User Manual Building Networks for People RECYCLABLE 2007/06/25 Table of Contents GENERAL INFORMATION... 3 Package Contents... 3 Important
User Guide. Linksys X-Series. Wireless Router with ADSL2+ Modem
 User Guide Linksys X-Series Wireless Router with ADSL2+ Modem Contents Contents Product Overview X1000..................................... 1 Top 1 Back 1 Wall-mounting placement 2 X3500.....................................
User Manual. WLAN ADSL2+ Router
 User Manual WLAN ADSL2+ Router INDEX 1.0 About This Manual... 1 1.1 Document Objectives... 1 1.2 Product Overview... 1 1.3 Product Description... 1 2.0 Specification... 2 2.1 LED Meaning... 3 2.2 Back
AR-7211A V2 / AR-7211B V2
 AR-7211A V2 / AR-7211B V2 User Manual 10-2012 / v1.0 1 COPYRIGHT Copyright Edimax Technology Co., Ltd. all rights reserved. No part of this publication may be reproduced, transmitted, transcribed, stored
ADSL X4 U S E R S G U I D E
 ADSL X4 U S E R S G U I D E NOTICE This document contains proprietary information protected by copyright, and this Manual and all the accompanying hardware, software, and documentation are copyrighted.
CT-5361 Wireless ADSL2+ Router User s Manual
 CT-5361 Wireless ADSL2+ Router User s Manual Version A2.1, April 16, 2007 261056-030 Warning Before servicing or disassembling this equipment, always disconnect all power and telephone lines from the device.
KW5226 Wireless VDSL Router User Manual
 KW5226 Wireless VDSL Router NOTICE This document contains proprietary information protected by copyright, and this Manual and all the accompanying hardware, software, and documentation are copyrighted.
User Manual. ADSL2+ Combo Router
 User Manual ADSL2+ Combo Router INDEX 1.0 About This Manual...1 1.1 Document Objectives...1 1.2 Product Overview...1 1.3 Product Description...1 2.0 Specification...2 2.1 LED Meaning...3 2.2 Back Panel
BiPAC 7202 / 7202GR2. (802.11g) ADSL2+ Router. User s Manual
 ADSL2+ Router. User s Manual") BiPAC 7202 / 7202GR2 (802.11g) ADSL2+ Router User s Manual Chapter 1... 1 1.1 Introducing the BiPAC 7202 Series... 1 1.2 Features... 3 1.3 Applications of the BiPAC 7202 Series... 6 Chapter 2... 7 2.1
BiPAC 7202 / 7202GR2 (802.11g) ADSL2+ Router User s Manual Chapter 1... 1 1.1 Introducing the BiPAC 7202 Series... 1 1.2 Features... 3 1.3 Applications of the BiPAC 7202 Series... 6 Chapter 2... 7 2.1
BIPAC-741 GE V2.0 ADSL Firewall Router with 4-port 10/100M switch
 BIPAC-741 GE V2.0 ADSL Firewall Router with 4-port 10/100M switch User s Manual Table of Contents CHAPTER 1... 1 INTRODUCTION... 1 1.1 An Overview of BIPAC-741 GE V2.0... 1 1.2 Package Contents... 2 1.3
ADSL modem DC-214/216
 ADSL modem DC-214/216 full manual Please, visit www.sitecom.com for support, drivers and manualsi 1. INTRODUCTION... 3 1.2 Package Contents... 3 1.3 The DC214/216ADSL Modem Features... 3 1.4 PHYSICAL DETAILS...
Starswitch. Web Interface User s Guide. ES1050 : ADSL 2/2+ Ready 4 Port Ethernet Router. Version 1.0
 Starswitch Web Interface User s Guide ES1050 : ADSL 2/2+ Ready 4 Port Ethernet Router Version 1.0 - 2-1. Introduction..........................................................................................................................................
Phone Adapter with Router
 Voice User Guide Model No. SPA2102 Copyright and Trademarks Specifications are subject to change without notice. Linksys is a registered trademark or trademark of Cisco Systems, Inc. and/or its affiliates
TD-8817B ADSL2/2+ Ethernet/USB Router
 TD-8817B ADSL2/2+ Ethernet/USB Router Rev: 1.0.2 1910010019 COPYRIGHT & TRADEMARKS Specifications are subject to change without notice. is a registered trademark of TP-LINK TECHNOLOGIES CO., LTD. Other
Configuration Guide TL-ER5120/TL-ER6020/TL-ER REV3.0.0
 Configuration Guide TL-ER5120/TL-ER6020/TL-ER6120 1910012186 REV3.0.0 June 2017 CONTENTS About This Guide Intended Readers... 1 Conventions... 1 More Information... 1 Viewing Status Information... 2 System
DSL-G624T. Wireless ADSL Router. If any of the above items is missing, please contact your reseller. This product can be set up using any
 This product can be set up using any current web browser, i.e., Internet Explorer 6x or Netscape Navigator 7x. DSL-G624T Wireless ADSL Router Before You Begin 1. If you purchased this Router to share your
UIP1869V User Interface Guide
 UIP1869V User Interface Guide (Firmware version 0.1.8 and later) Table of Contents Opening the UIP1869V's Configuration Utility... 3 Connecting to Your Broadband Modem... 5 Setting up with DHCP... 5 Updating
DG-BG4011N. 150Mbps Wireless ADSL Router. User Manual
 DG-BG4011N 150Mbps Wireless ADSL Router User Manual V1.1 2011-12-13 As our product undergoes continuous development the specifications are subject to change without prior notice Contents 1 Overview...4
Dynalink RTA020 ADSL Router Quick Set Up Guide
 Important Dynalink RTA020 ADSL Router Quick Set Up Guide This Guide is intended to get you started quickly. We have pre-configured the router for the Telecom ADSL network. All you need is to follow through
Quick Installation Guide DSL-2650U/NRU. 3G/ADSL/Ethernet Router with Wi-Fi and Built-in Switch
 DSL-2650U/NRU 3G/ADSL/Ethernet Router with Wi-Fi and Built-in Switch BEFORE YOU BEGIN Delivery Package Router DSL-2650U/NRU Power adapter RJ-11 telephone cable Straight-through Ethernet cable (CAT 5E)
DSL-G804V Wireless ADSL Router User s Guide
 DSL-G804V Wireless ADSL Router User s Guide (March 2005) ii TABLE OF CONTENTS About This User s Guide... v Before You Start... v Installation Requirements... v INTRODUCTION... 1 Router Description and
LevelOne WBR User s Manual. 11g Wireless ADSL VPN Router. Ver
 LevelOne WBR-3407 11g Wireless ADSL VPN Router User s Manual Ver 1.00-0510 Table of Contents CHAPTER 1 INTRODUCTION... 1 Wireless ADSL Router Features... 1 Package Contents... 5 Physical Details... 6 CHAPTER
VG422R. User s Manual. Rev , 5
 VG422R User s Manual Rev 1.0 2003, 5 CONGRATULATIONS ON YOUR PURCHASE OF VG422R... 1 THIS PACKAGE CONTAINS... 1 CONFIRM THAT YOU MEET INSTALLATION REQUIREMENTS... 1 1. INSTALLATION GUIDE... 2 1.1. HARDWARE
4-Port Broadband user manual Model
 4-Port Broadband Router user manual Model 524537 INT-524537-UM-0309-02 introduction Thank you for purchasing the INTELLINET NETWORK SOLUTIONS 4-Port Broadband Router, Model 524537. Combining a router,
KW5813 ADSL Wireless N Router User Manual. User Manual
 KW5813 ADSL Wireless N Router NOTICE This document contains proprietary information protected by copyright, and this Manual and all the accompanying hardware, software, and documentation are copyrighted.
Contents. 2
 Contents Introduction... 4 Do I need a Micro filter?... 5 Package Contents... 6 Quick Start... 7 Step 1 - Hardware Installation... 8 Step 2 - Modem Configuration... 9 Step 3 - Computer Hardware Configuration...
G.SHDSL Bridge Router GRT-101/GRT-401/GRT-402
 G.SHDSL Bridge Router GRT-101/GRT-401/GRT-402 Quick Installation Guide Table of Contents Chapter 1 Before Starting Up... 3 Chapter 2 Quick Installation... 4 2.1 Bridge Mode... 4 2.2 Routing Mode for PPPoA
Quick Installation Guide DSL-2650U. 3G/ADSL/Ethernet Router with Wi-Fi and Built-in Switch
 DSL-2650U 3G/ADSL/Ethernet Router with Wi-Fi and Built-in Switch BEFORE YOU BEGIN Delivery Package Router DSL-2650U Power adapter DC 12V/1A RJ-11 telephone cable Ethernet cable (CAT 5E) Splitter (brochure).
ADSL Gateway QUICK INSTALLATION
 QUICK INSTALLATION ADSL Gateway There are two ways to set up the Gateway, run the Setup CD-ROM or use this Quick Installation. Linksys strongly recommends that you run the Setup CD-ROM. Run the Setup CD-ROM
LevelOne FBR-1405TX. User s Manual. 1-PORT BROADBAND ROUTER W/4 LAN Port
 LevelOne FBR-1405TX 1-PORT BROADBAND ROUTER W/4 LAN Port User s Manual 1 Introduction... 4 Features... 4 Minimum Requirements...4 Package Content... 4 Note...4 Get to know the Broadband Router... 5 Back
TD-8816 ADSL2/2+ Ethernet Router
 ADSL2/2+ Ethernet Router Rev:1.0.2 1910010149 COPYRIGHT & TRADEMARKS Specifications are subject to change without notice. is a registered trademark of TP-LINK TECHNOLOGIES CO., LTD. Other brands and product
CT-5364A. User Manual n ADSL2+ Router. Version A2.0, May 17,
 CT-5364A 802.11n ADSL2+ Router User Manual Version A2.0, May 17, 2010 261091-007 Preface This manual provides information related to the installation and operation of this device. The individual reading
Broadband Router User s Manual. Broadband Router User s Manual
 Broadband Router User s Manual Table of Contents 1 Introduction... 1 1.1 Features... 1 1.2 Package Contents... 2 1.3 LEDs & Connectors of Broadband Router... 2 1.4 System Requirements... 2 1.5 Installation
Manual for AK-ADSL EVA-KIT-ADSL. ADSL-Modul. AK Nord EDV- Vertriebsges. mbh Stormstrasse 8 D Itzehoe Germany
 Manual for AK-ADSL EVA-KIT-ADSL ADSL-Modul AK Nord EDV- Vertriebsges. mbh Stormstrasse 8 D-25524 Itzehoe Germany Phone: +49 (0) 4821 8040350 Fax: +49 (0) 4821 4083024 AK-DinRail - ADSL AK-RailPort - ADSL
TD-8616 ADSL2/2+ Ethernet Modem
 TD-8616 ADSL2/2+ Ethernet Modem Rev: 1.0.1 1910010001 COPYRIGHT & TRADEMARKS Specifications are subject to change without notice. is a registered trademark of TP-LINK TECHNOLOGIES CO., LTD. Other brands