Getting Started Manual for CODIBOT
|
|
|
- Gwendolyn Gilbert
- 5 years ago
- Views:
Transcription
1 a


2 Getting Started Manual for CODIBOT Step 1: Open the Box. Step 2: Inside the box you will find the Pre-Assembled body of CODIBOT along with the Add-On packs, Connecting Wires, Nuts & Bolts. Take out the Main body along with the Connecting Wires. Step 3: Our first task will be to make CODI run, we will be testing its FEET. We have to connect the ARDUINO with the H- Bridge.


: ENA to Pin 5")
3 Start making connections according to the diagrams given below. You don t have to worry about connecting the H- Bridge and motors, they are already connected just focus on Arduino and H-Bridge. Make the following connections between H-Bridge & Arduino (Refer to the Diagram above): ENA to Pin 5 IN1 to Pin 6 IN2 to Pin 7 IN3 to Pin 8 IN4 to Pin 9 ENB to Pin 10


4 Once Connected it should look something like this: Step 4: Our next step is to tinker with CODI s BRAIN so that we can teach him to run, to do that we will have to download the program called ARDUINO from the link provided as well as the graphical plug-in called ARDUBLOCK that will help us in coding CODI s Brain. ARDUINO LINK: ARDUBLOCK LINK: Step 5: Once the installation is complete, start ARDUINO, go to the Tools panel and select ArduBlock from the dropdown menu. Also connect ARDUINO with your computer using the blue USB cable provided in the box. Like this: This is ARDUINO:


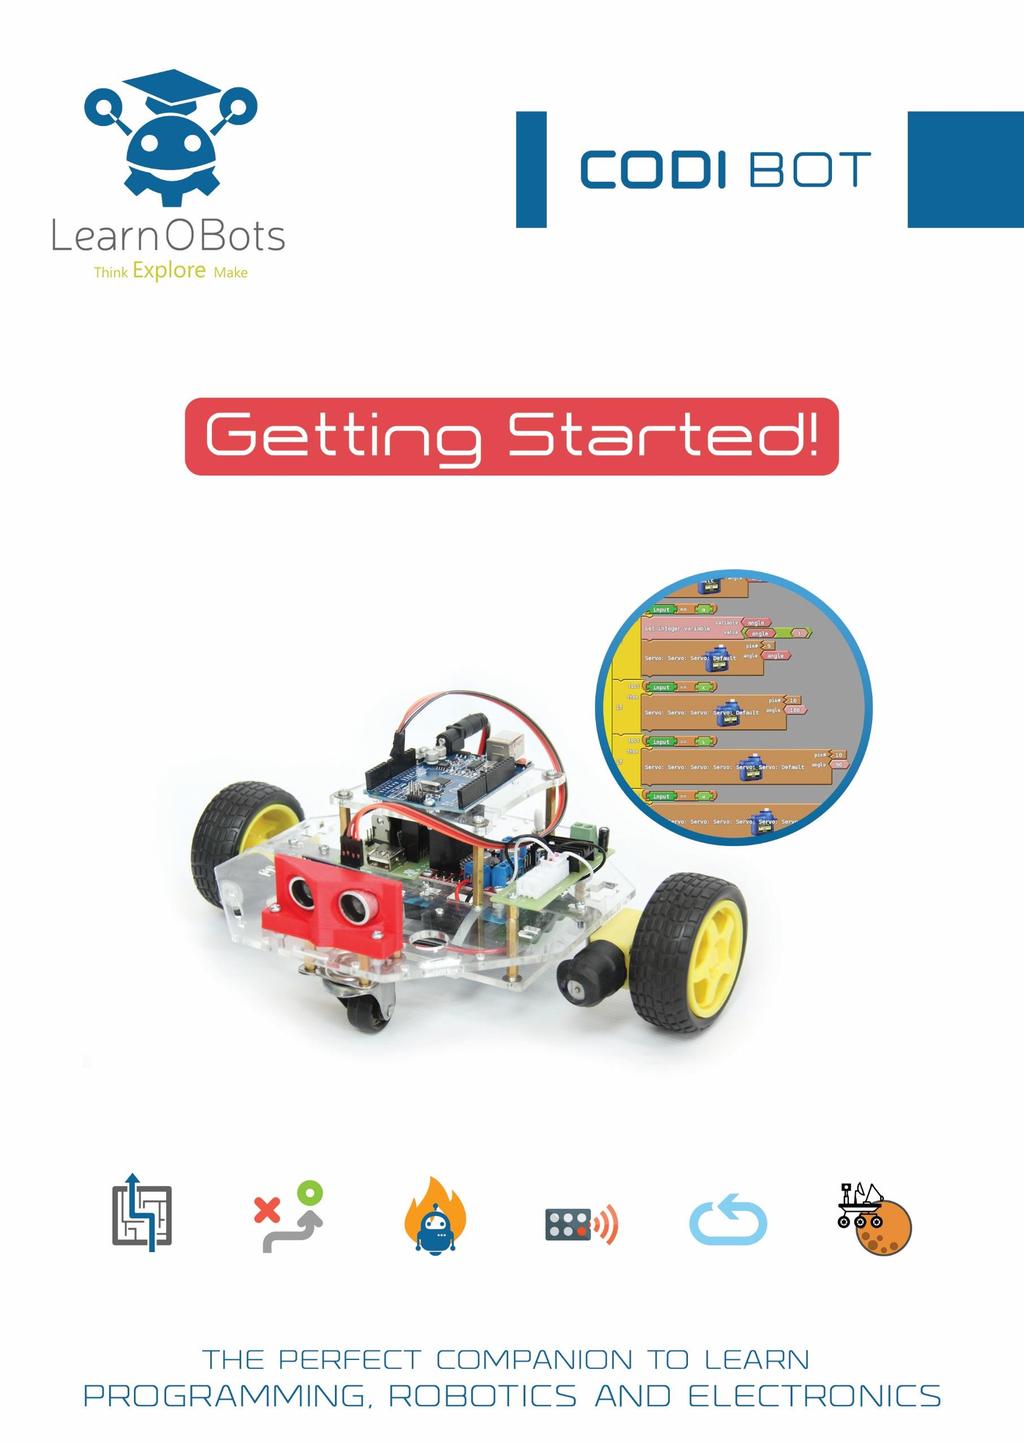
5 This is ArduBLOCK: 1. Click on Yellow Control Panel on the left side, it will open up a menu. Select the do loop panel, drag and drop it on the Big grey screen. 2. Now click on the Dark Blue Pin Panel and drag & drop the Set Digital Pin Panel on the grey screen and match it up with the do loop panel from before, the two panels will snap to each other.

 and set the pin number to 6. 5.")


6 3. Repeat Step B, again & again such that four Set Digital Pin panels are stacked on top of each other. 4. Go to the first (top most) Set Digital Pin Panel, click on the light pink box beside the # sign (Pin Number) and set the pin number to Go the second Set Digital Pin Panel and set the pin number to Go to the third Set Digital Pin Panel and set the pin number to Go to the fourth Set Digital Pin Panel and set the pin number to You know what we just did? We connected the CODI s Brain with its FEET, HOW COOL IS THAT? Now, on to the next step my young pupils. 9. Now we have to tell CODI how fast to run, to do that go to the Pins panel, drag & drop the Set Analog Pin panel under the other panels.


7 10. Repeat the above step and put another Set Analog Pin panel the same way as before. 11. Set the pin number # of the Set Analog Pin to 5 and of the other one to Almost there, In the above steps we defined the pin numbers, now we are going to set the values of the pins. 13. Go to the First panel, click on the small triangle on purple button, it will give you two options HIGH or LOW, select HIGH. 14. For second panel select LOW, for third select HIGH, for fourth select LOW. 15. The last two pins i.e. the Set Analog Pins have values 255, no need to change that. 16. Now click on the Upload to Arduino button, make sure your CODIBOT is connected to your computer and the CODI s Power Button is set to OFF. The Arduino will light up none the less.

8 17. The Arduino Screen will show the upload status of the code to the CODI s BRAIN (notice the green bar). Once the upload is complete, turn ON the power button and watch magic happen. The CODI s tires will start to forward. At this point you can disconnect CODI from computer and let it run free. 18. Here is a table that has multiple configurations and their outcomes. Go on try them out! Pin Value Set Digital Pin # 6 HIGH LOW HIGH LOW HIGH LOW Set Digital Pin # 7 LOW HIGH LOW HIGH HIGH LOW Set Digital Pin # 8 HIGH LOW LOW HIGH HIGH LOW Set Digital Pin # 9 LOW HIGH HIGH LOW HIGH LOW Outcome CODI will FORWARDS CODI will BACKWARDS CODI will LEFT CODI will RIGHT CODI won t CODI won t 19. The robot will like this. 20. CONGRATULATIONS! You have completed the first step to becoming a TECH WIZARD, give yourself a pat on the back, grab a glass of Rooh-Afzah and once finally rested, take over the world with Robots. 21. Stay tuned! For next activity. This is just the beginning of all the fun. :)

9 Battery Instructions: On a full charge, the battery lasts for one hour. It will take 2 to 3 hours to fully charge the battery. Do not over charge the battery, it will result in damage to the battery and might decrease its life and capacity. Handle with care. Charging Socket
TA0139 USER MANUAL ARDUINO 2 WHEEL DRIVE WIRELESS BLUETOOTH ROBOT KIT
 TA0139 USER MANUAL ARDUINO 2 WHEEL DRIVE WIRELESS BLUETOOTH ROBOT KIT I Contents Overview TA0139... 1 Getting started: Arduino 2 Wheel Drive Wireless Bluetooth Robot Kit using Arduino UNO... 1 2.1. What
Code&Drive First steps
 Code&Drive First steps Now that you have built the Code & Drive, you can set the Build&Code 4in1 board using any of the following software: Arduino IDE, Bitbloq or a visual programming software by blocks
The Arduino IDE. & ArduBlock
 Systems of Technology - Robotics: Section 3 The Arduino IDE & ArduBlock Instructions/Build Plans v2.0 Team Members: 1. 3. 2. 4. Introduction 1. Locate/Open: The Arduino IDE & Ardublock - Video Tutorial.
Discover Robotics & Programming CURRICULUM SAMPLE
 OOUTLINE 5 POINTS FOR EDP Yellow Level Overview Robotics incorporates mechanical engineering, electrical engineering and computer science - all of which deal with the design, construction, operation and
Controlling the Robotic Arm using the BBC micro:bit
 Controlling the Robotic Arm using the BBC micro:bit You need to plug the BBC micro:bit into a computer using a USB cable or sync to it using Bluetooth after downloading the correct app from your app store.
Robotics Adventure Book Scouter manual STEM 1
 Robotics Robotics Adventure Book Scouter Manual Robotics Adventure Book Scouter manual STEM 1 A word with our Scouters: This activity is designed around a space exploration theme. Your Scouts will learn
Module 2, Add on lesson Introduction to the NXT and Mindstorms software. Student. 45 minutes
 Module 2, Add on lesson Introduction to the NXT and Mindstorms software Student 45 minutes Purpose of this lesson Write a basic program using LEGO Mindstorms Download and run programs on the NXT Materials
INTRODUCING THE CODEBIT!
 GETTING STARTED Downloading the littlebits Code Kit app STEP 1 Download and open the littlebits Code Kit app at littlebits.com/code-kit-app STEP 2 Click the pink open blank canvas button to start writing
Don t Steal My BBC micro:bit Alarm!
 Description This is a simple tutorial demonstrating how to use the output pins on the BBC micro:bit and use the built in accelerometer to control a buzzer when the BBC micro:bit is moved. Learn how to:
Objectives: Learn how to input and output analogue values Be able to see what the Arduino is thinking by sending numbers to the screen
 Objectives: Learn how to input and output analogue values Be able to see what the Arduino is thinking by sending numbers to the screen By the end of this session: You will know how to write a program to
Driver Installation. Getting Started for Windows user (Setting up your Robot)
") Getting Started for Windows user (Setting up your Robot) Get the drivers and download the software to make your robots go! Programmer Driver Arduino Software IDE Ringo & Wink Software Libraries Driver
Getting Started for Windows user (Setting up your Robot) Get the drivers and download the software to make your robots go! Programmer Driver Arduino Software IDE Ringo & Wink Software Libraries Driver
Lab 2.2 Ohm s Law and Introduction to Arduinos
 Lab 2.2 Ohm s Law and Introduction to Arduinos Objectives: Get experience using an Arduino Learn to use a multimeter to measure Potential units of volts (V) Current units of amps (A) Resistance units of
Halloween Pumpkinusing. Wednesday, October 17, 12
 Halloween Pumpkinusing Blink LED 1 What you will need: 1 MSP-EXP430G2 1 3 x 2 Breadboard 3 560 Ohm Resistors 3 LED s (in Red Color Range) 3 Male to female jumper wires 1 Double AA BatteryPack 2 AA Batteries
Itty Bitty City Code Companion IDE Arduino
 Itty Bitty City Code Companion IDE Arduino 1 WELCOME! What the Itty Bitty City Code Companion brings to you! The Itty Bitty City Code Companion gives even more opportunity to enjoy Itty Bitty City at a
Itty Bitty City Code Companion Scratch Microduino Inc. - All Rights Reserved 1
 Itty Bitty City Code Companion Scratch 3.0 2018. Microduino Inc. - All Rights Reserved 1 WELCOME! What the Itty Bitty City Code Companion brings to you! The Itty Bitty City Code Companion gives even more
Assembly Instructions
 Assembly Instructions MKG_NA_Instructions_H-line_V13_20160203 But also... for choosing Thank you, Table of Contents GREY YELLOW PINK GREEN PURPLE DARK GREEN LIGHT BLUE ORANGE BLUE Identification of the
GSV-1A4 M12/2 M12/2. Highlights
 GSV-1A4 M12/2 M12/2 Highlights Input sensitivity: 2mV/V; 4mV/V, 2 mv/v, 1mV/V, 0.5mV/V configurable via jumpers Output signals ±10V AND 12mA+-8mA on 15 pin Sub-D Integrated half and quarter bridge completion
ROBOTLINKING THE POWER SUPPLY LEARNING KIT TUTORIAL
 ROBOTLINKING THE POWER SUPPLY LEARNING KIT TUTORIAL 1 Preface About RobotLinking RobotLinking is a technology company focused on 3D Printer, Raspberry Pi and Arduino open source community development.
Rover 5. Explorer kit
 Rover 5 Explorer kit The explorer kit provides the perfect interface between your Rover 5 chassis and your micro-controller with all the hardware you need so you can start programming right away. PCB Features:
ACS-1805 Introduction to Programming (with App Inventor)
") ACS-1805 Introduction to Programming (with App Inventor) Chapter 2 9/6/2018 1 HelloPurr The counterpart of the Hello World the typical very first program in the traditional programming Instead of displaying
ACS-1805 Introduction to Programming (with App Inventor) Chapter 2 9/6/2018 1 HelloPurr The counterpart of the Hello World the typical very first program in the traditional programming Instead of displaying
Module 2, Add on lesson Introduction to the NXT and Mindstorms software. Teacher. 45 minutes
 Module 2, Add on lesson Introduction to the NXT and Mindstorms software Teacher 45 minutes Purpose of this lesson Write a basic program using LEGO Mindstorms Download and run programs on the NXT Materials
Module 003: Introduction to the Arduino/RedBoard
 Name/NetID: Points: /5 Module 003: Introduction to the Arduino/RedBoard Module Outline In this module you will be introduced to the microcontroller board included in your kit. You bought either An Arduino
TA0297 WEMOS D1 R2 WIFI ARDUINO DEVELOPMENT BOARD ESP8266
 TA0297 WEMOS D1 R2 WIFI ARDUINO DEVELOPMENT BOARD ESP8266 Contents 1. Overview TA0297... 3 2. Getting started:... 3 2.1. What is WeMos D1 R2 Wifi Arduino Development Board?... 3 2.2. What is IDUINO UNO?...
Create Turtles with Python
 Create Turtles with Python BY PATRICIA FOSTER / PROGRAMMING / OCTOBER 2017 ISSUE Create turtles with Python, the programming language. Turtles make great pets. They re small, slow, and clean. Plus, who
ICS 61 Game Systems and Design Introduction to Scratch
 ICS 61, Winter, 2015 Introduction to Scratch p. 1 ICS 61 Game Systems and Design Introduction to Scratch 1. Make sure your computer has a browser open at the address http://scratch.mit.edu/projects/editor/.
HUB-ee BMD-S Arduino Proto Shield V1.0
 HUB-ee BMD-S Arduino Proto Shield V1.0 User guide and assembly instructions Document Version 1.0 Introduction 2 Schematic 3 Quick user guide 4 Assembly 5 1) DIP Switches 5 2) Micro-MaTch Connector Headers
Docking station. Technical Documentation
 Docking station Technical Documentation Version 1.1 Release date: 01.09.2015 Table of contents 1 Introduction...3 2 Layout and dimensions...4 3 What s included in the box...4 4 Connecting devices...5 4.1
This is the Arduino Uno: This is the Arduino motor shield: Digital pins (0-13) Ground Rail
 Ground Rail") Reacting to Sensors In this tutorial we will be going over how to program the Arduino to react to sensors. By the end of this workshop you will have an understanding of how to use sensors with the Arduino
Reacting to Sensors In this tutorial we will be going over how to program the Arduino to react to sensors. By the end of this workshop you will have an understanding of how to use sensors with the Arduino
RCX Tutorial. Commands Sensor Watchers Stack Controllers My Commands
 RCX Tutorial Commands Sensor Watchers Stack Controllers My Commands The following is a list of commands available to you for programming the robot (See advanced below) On Turns motors (connected to ports
Getting Started Guide
 Getting Started Guide 1860 38th St. Boulder, CO 80301 www.modrobotics.com 1. Make Your First Robot The Dimbot Uses a clear Flashlight Action block, black Distance Sense block, and a blueish-gray Battery
THE COMPLETE ALL IN ONE ROBOT 360 NANO BOT
 THE COMPLETE ALL IN ONE ROBOT 360 NANO BOT LINE FOLLOWER FIVE LINE SENSORS FOR SCANNING WHITE OR BLACK LINE OBSTACLE AVOIDER TWO OBSTACLE SENSORS CAN DETECT OBSTACLES AND MEASURE DISTANCE BLUETOOTH CONTROL
Prototyping & Engineering Electronics Kits Basic Kit Guide
 Prototyping & Engineering Electronics Kits Basic Kit Guide odysseyboard.com Please refer to www.odysseyboard.com for a PDF updated version of this guide. Guide version 1.0, February, 2018. Copyright Odyssey
Categories. Archive. Meta. POSTS NEWS HARDWARE APPLICATIONS DOWNLOADS FORUM LINKS ABOUT
 Page 1 of 10 POSTS NEWS HARDWARE APPLICATIONS DOWNLOADS FORUM LINKS ABOUT Categories Posts (2) Archive July 2013 About the TOS-100 The TOS-100 is an Arduino compatible Shield capable of driving one stepper
EyesBot Driver RobotShop App Assembly and Use
 EyesBot Driver RobotShop App Assembly and Use Upsoni Hardware Specification 1 Getting Ready... 1 1.1 Parts... 1 1.2 Tools... 2 2 EyesBot Driver App... 3 2.1 Startup screen... 3 2.2 Preferences screen...
Build the Machine Science XBoard, with a programmable microcontroller.
 Build the Machine Science XBoard, with a programmable microcontroller. Site: icode Course: Machine Science Guides Book: Assembling the XBoard Printed by: Guest User Date: Monday, May 24, 2010, 10:46 AM
Self Sustaining Arduino
 Description This document is a tutorial for creating a self sustaining Arduino board, by harnessing solar energy. It would be incorporated with a rechargeable 9V battery. What makes this unique is that
Assembly instructions
 Assembly instructions MKG_ENG_Instructions_H-line_V16_20170731 But also... for choosing Thank you Table of Contents GREY YELLOW PINK GREEN PURPLE DARK GREEN LIGHT BLUE ORANGE BROWN BLUE Identification
BBC micro:bit Cool Colours!
 Description This is a simple tutorial demonstrating how to use an analogue input with the BBC micro:bit. The BBC micro:bit is able to read analogue voltages from sensors like Light Dependent Resistors
<Table of content> <Parts and description> <Circuit board Guide> <Pins> <Basics of Coding> <Intro to Arduino> <Intro> <Downloading Arduino IDO>
 http://www.arduino.cc/
Motors & Wheels. Wheels can be attached to the KIBO s motors to make them spin. The motors can be attached to the KIBO robot to make it move!
 Motors & Wheels + Wheels can be attached to the KIBO s motors to make them spin. = The motors can be attached to the KIBO robot to make it move! + KIBO s motors can be attached in 2 ways to make KIBO move
SPIRIT. Phase 5 Analog Board Computer and Electronics Engineering
 SPIRIT Phase 5 Analog Board Computer and Electronics Engineering In this exercise you will assemble the analog controller board and interface it to your TekBot. Print out the schematic, silkscreen and
ARDUINO MINI 05 Code: A000087
 ARDUINO MINI 05 Code: A000087 The Arduino Mini is a very compact version of the Arduino Nano without an on board USB to Serial connection The Arduino Mini 05 is a small microcontroller board originally
Experiment 4.A. Speed and Position Control. ECEN 2270 Electronics Design Laboratory 1
 .A Speed and Position Control Electronics Design Laboratory 1 Procedures 4.A.0 4.A.1 4.A.2 4.A.3 4.A.4 Turn in your Pre-Lab before doing anything else Speed controller for second wheel Test Arduino Connect
Web Site: Forums: forums.parallax.com Sales: Technical:
 Web Site: www.parallax.com Forums: forums.parallax.com Sales: sales@parallax.com Technical: support@parallax.com Office: (916) 624-8333 Fax: (916) 624-8003 Sales: (888) 512-1024 Tech Support: (888) 997-8267
Goal: We want to build an autonomous vehicle (robot)
") Goal: We want to build an autonomous vehicle (robot) This means it will have to think for itself, its going to need a brain Our robot s brain will be a tiny computer called a microcontroller Specifically
Goal: We want to build an autonomous vehicle (robot) This means it will have to think for itself, its going to need a brain Our robot s brain will be a tiny computer called a microcontroller Specifically
HPA OnePort Flashing Instructions for MED9 ECU. NOTE: Windows 8, 8.1, and 10 users will need to follow these instructions before proceeding:
 HPA OnePort Flashing Instructions for MED9 ECU Congratulations on your purchase of the HPA OnePort flashing device. This compact OBD II dongle gives you the power to flash HPA software tunes to your ECU
Weighing News From Sartorius. Introducing the New Sartorius Combics 2 Indicator with IS High Resolution Platform.
 Introducing the New Sartorius Combics 2 Indicator with IS High Resolution Platform. - Do you require high-resolution weighing with a 4-20 ma output? - Do you require dual platform capability? - Do you
Physics 120/220. Microcontrollers Extras. Prof. Anyes Taffard
 Physics 120/220 Microcontrollers Extras Prof. Anyes Taffard Introduction 2 There are an infinite amount of applications for the Arduino. Lots of interfaces that can be controlled with it. Extension boards
Adafruit Powerboost 1000C
 Adafruit Powerboost 1000C Created by lady ada Last updated on 2017-03-10 08:56:30 PM UTC Guide Contents Guide Contents Overview Pinouts Power Pins Control Pins LEDs Battery and USB connection Assembly
Using Functions in Alice
 Using Functions in Alice Step 1: Understanding Functions 1. Download the starting world that goes along with this tutorial. We will be using functions. A function in Alice is basically a question about
Module 3B: Arduino as Power Supply
 Name/NetID: Teammate/NetID: Module 3B: Laboratory Outline As you work on through the labs during the semester and some of the modules you may want to continue experimenting at home. Luckily the microprocessor
Digital Pins and Constants
 Lesson Lesson : Digital Pins and Constants Digital Pins and Constants The Big Idea: This lesson is the first step toward learning to connect the Arduino to its surrounding world. You will connect lights
University of Hull Department of Computer Science C4DI Interfacing with Arduinos
 Introduction Welcome to our Arduino hardware sessions. University of Hull Department of Computer Science C4DI Interfacing with Arduinos Vsn. 1.0 Rob Miles 2014 Please follow the instructions carefully.
ANATOMY OF A BIT TM how you can tell top from bottom. four on the floor!
 BUBBLE BOT BASICS 1 Learn BITSNAP ANATOMY OF A BIT TM how you can tell top from bottom. TOP BOTTOM BIT FEET 2 which COLOR-CODED BY FUNCTION Bits TM are grouped into four different categories, are color-coded.
Building an Arduino-powered underwater ROV
 Building an Arduino-powered underwater ROV An ROV offers an entirely different way to use Arduino to explore a new world. This project is a bit different in two ways. First, there is quite a bit of mechanical
AWS DeepRacer Getting Started Guide
 AWS DeepRacer Getting Started Guide 1 Getting Started Guide Contents What s in the box Assemble your car Get connected Test drive Autonomous model management 2 What s in the box 1 2 6 8 9 5 11 10 4 7 3
Sensor Melody Light Robot
 Assembly Instructions is a registered trademark of Artec Co., Ltd. in multiple countries including Japan, South Korea, Canada, and the USA. Components Studuino Unit Battery Box USB Cable Sound Sensor Sound
Adafruit PowerBoost Charger
 Adafruit PowerBoost 500 + Charger Created by lady ada Last updated on 2015-10-21 12:44:24 PM EDT Guide Contents Guide Contents Overview Pinouts Power Pins Control Pins LEDs Battery and USB connection On/Off
Parrot MULTICOMM For Mitsubishi steering wheel
 Parrot MULTICOMM For Mitsubishi steering wheel - 1 - Parrot MULTICOMM is a unit able to control Parrot H/F kits with the car s steering wheel commands working with ANALOG STEERING WHEEL COMMANDS with OEM
This lesson introduces Blender, covering the tools and concepts necessary to set up a minimal scene in virtual 3D space.
 3D Modeling with Blender: 01. Blender Basics Overview This lesson introduces Blender, covering the tools and concepts necessary to set up a minimal scene in virtual 3D space. Concepts Covered Blender s
RedBoard Hookup Guide
 Page 1 of 11 RedBoard Hookup Guide CONTRIBUTORS: JIMB0 Introduction The Redboard is an Arduino-compatible development platform that enables quick-and-easy project prototyping. It can interact with real-world
HPA OnePort Flashing Instructions for MED17 ECU. NOTE: Windows 8, 8.1, and 10 users will need to follow these instructions before proceeding:
 HPA OnePort Flashing Instructions for MED17 ECU Congratulations on your purchase of the HPA OnePort flashing device. This compact OBD II dongle gives you the power to flash HPA software tunes to your ECU
Assembly Instructions
 Assembly Instructions MKG_NA-ENG_Instructions_H-line_V16_20170731 But also... for choosing Thank you, Table of Contents GREY YELLOW PINK GREEN PURPLE DARK GREEN LIGHT BLUE ORANGE BLUE Identification of
Blinking an LED 1 PARTS: Circuit 2 LED. Wire. 330Ω Resistor
 Circuit PIN 3 RedBoard Blinking an LED LED (Light-Emitting Diode) Resistor (33 ohm) (Orange-Orange-Brown) LEDs (light-emitting diodes) are small, powerful lights that are used in many different applications.
Programmable timer PICAXE programming editor guide Page 1 of 13
 Programmable timer PICAXE programming editor guide Page 1 of 13 This programming guide is for use with: A programmable timer board. PICAXE programming editor software. When the software starts a menu is
uarm Slider User Manual V1.0.0
 uarm Slider User Manual V1.0.0 Part Lists Hardware 1. Slider * 1 2. LCD * 1 3. Seeed Grove Sensor Cable * 3 4. Slider Motor 8PIN Cable * 1 5. uarm 30P Bottom Expansion Plate * 1 6. Target Object(Red Cube,Green
OrbBasic Lesson 1 Goto and Variables: Student Guide
 OrbBasic Lesson 1 Goto and Variables: Student Guide Sphero MacroLab is a really cool app to give the Sphero commands, but it s limited in what it can do. You give it a list of commands and it starts at
Phi-connect for Arduino (connector board V1.9)
") Phi-connect for Arduino (connector board V1.9) Last reviewed on 3/29/2012 John Liu 1. Introduction... 2 2. Main features... 2 3. Parts list... 3 4. How to use... 4 5. Improving your Arduino experience
Phi-connect for Arduino (connector board V1.9) Last reviewed on 3/29/2012 John Liu 1. Introduction... 2 2. Main features... 2 3. Parts list... 3 4. How to use... 4 5. Improving your Arduino experience
Train the Trainer Resources Hex Files Here - https://goo.gl/mqovrv
 Finding you way around a micro:bit Topic 1 Hello World These resources can be found at https://faradaysecondary.theiet.org/umbraco/surface/download/downloadfile/3910 and /assets/documents/microbitcommunityposter.pdf
CAMARA Computer Guide Setup
 Computer Guide Setup Chapter 1. Before You Start Chapter 2. Unpacking Chapter 3. Assembly Chapter 4. Power Problems Chapter 5. Switch On Chapter 6. Login Chapter 7. Logout Chapter 8. System Shutdown CAMARA
ASDA-B2 Servo System Quick Start Guide
 ASDA-B2 Servo System Quick Start Guide This guide is intended as a quick start guide. On our website you can find also the full manual for the DELTA ASDA-B2 AC servo system, use this when getting into
Cretile ProLogic is a programmable module. Cretile ProLogic can be programmed with the help of ArduBlocks* or by writing C/C++ code.
 Cretile ProLogic is a programmable module. Cretile ProLogic can be programmed with the help of ArduBlocks* or by writing C/C++ code. With ArduBlocks you can program Cretile ProLogic without having to write
AlphaBot2 robot building kit for Arduino
 AlphaBot2 robot building kit for Arduino SKU 110060864 Description This AlphaBot2 robot kit is designed to use with an Arduino compatible board UNO PLUS. It features rich common robot functions including
Inspiring Creative Fun Ysbrydoledig Creadigol Hwyl. Microbots Workbook
 Inspiring Creative Fun Ysbrydoledig Creadigol Hwyl Microbots Workbook Challenge 3 Nations competing against one another on the Moon! Each racing PICAXE robots to sample lunar rocks and follow a given course.
To check for updates and new device support please see
 S2Bot App QuickStart Introduction S2Bot is available in two variants App or Native Executable. To check for updates and new device support please see http://www.picaxe.com/s2bot Robots currently supported
OrbBasic 1: Student Guide
 OrbBasic 1: Student Guide Sphero MacroLab is a really cool app to give the Sphero commands, but it s limited in what it can do. You give it a list of commands and it starts at the top and goes to the bottom,
Homework 13: User Manual
 Homework 13: User Manual Team Code Name: Infrarat Group No. 14 User Manual Outline: Brief (marketing-style) product description Product illustration annotated with callouts for each control/display Product
1/Build a Mintronics: MintDuino
 1/Build a Mintronics: The is perfect for anyone interested in learning (or teaching) the fundamentals of how micro controllers work. It will have you building your own micro controller from scratch on
Installation Instructions for: Channel Thermocouple Amplifier
 Installation Instructions for: 30-2204 4 Channel Thermocouple Amplifier The Advanced Engine Management (AEM) 4 channel thermocouple amplifier revolutionizes temperature measurements by providing laboratory
Parrot MULTICOMM For FORD steering wheel
 Parrot MULTICOMM For FORD steering wheel - 1 - Parrot MULTICOMM is a unit able to control Parrot H/F kits with the car s steering wheel commands working with ANALOG STEERING WHEEL COMMANDS with OEM headunit
Thank you for purchasing the RGB Multi-MCU base and driver board from SuperTech-IT and TheLEDCube.com
 CONGRATULATIONS Thank you for purchasing the RGB Multi-MCU base and driver board from SuperTech-IT and TheLEDCube.com In this document, MCU means Microcontroller such as the PIC32, ATmega328P, prototype
Interactive Tourist Map
 Adobe Edge Animate Tutorial Mouse Events Interactive Tourist Map Lesson 1 Set up your project This lesson aims to teach you how to: Import images Set up the stage Place and size images Draw shapes Make
Using a Stepper Motor Like a Servo Controlled by a Potentiometer (G Payne 2017)
") Overview: Using a Stepper Motor Like a Servo Controlled by a Potentiometer (G Payne 2017) Stepper Motors can be accurately controlled by digital pulses. They are typically geared. In this demonstration,
Overview: Using a Stepper Motor Like a Servo Controlled by a Potentiometer (G Payne 2017) Stepper Motors can be accurately controlled by digital pulses. They are typically geared. In this demonstration,
Polygons and Angles: Student Guide
 Polygons and Angles: Student Guide You are going to be using a Sphero to figure out what angle you need the Sphero to move at so that it can draw shapes with straight lines (also called polygons). The
Beetle SKU:DFR0282. Contents. Introduction
 Beetle SKU:DFR0282 From Robot Wiki Beetle Contents 1 Introduction 2 Specification 3 PinOut 4 Tutorial o 4.1 Power o 4.2 Programming o 4.3 Example Code 5 Trouble shooting Introduction The Beetle is a minimalized
Synthophone MIDI sax
 1 Synthophone MIDI sax Wireless MIDI system - User Guide Introduction The wireless MIDI system is an add-on device for use with the Synthophone MIDI sax. The angled MIDI plug connects to the MIDI socket
Arduino Panel Meter Clock. By Russ Hughes
 Arduino Panel Meter Clock By Russ Hughes (russ@owt.com) OVERVIEW My father has been a lifelong Ham Radio Operator with a fondness for almost anything with a panel meter. After seeing the Trinket Powered
StenBOT Robot Kit. Stensat Group LLC, Copyright 2018
 StenBOT Robot Kit 1 Stensat Group LLC, Copyright 2018 Legal Stuff Stensat Group LLC assumes no responsibility and/or liability for the use of the kit and documentation. There is a 90 day warranty for the
ANATOMY OF A BIT TM how you can tell top from bottom. four on the floor!
 NIGHT LIGHT BASICS 1 Learn BITSNAP ANATOMY OF A BIT TM how you can tell top from bottom. TOP BOTTOM BIT FEET 2 which COLOR-CODED BY FUNCTION Bits TM are grouped into four different categories, are color-coded.
IDUINO for maker s life. User Manual. For IDUINO development Board.
 User Manual For IDUINO development Board 1.Overview 1.1 what is Arduino? Arduino is an open-source prototyping platform based on easy-to-use hardware and software. Arduino boards are able to read inputs
Arduino Robots Robot Kit Parts List
 Arduino Robots Robot Kit Parts List (1) Metal Chassis (2) Push Button Activators (2) Servo Motors w/ Cross Wheels (2) IR Receivers (1) Control Board (1) Piezo Speaker (1) Dual-Sided Screwdriver (1) Cotter
Note. The above image and many others are courtesy of - this is a wonderful resource for designing circuits.
 Robotics and Electronics Unit 2. Arduino Objectives. Students will understand the basic characteristics of an Arduino Uno microcontroller. understand the basic structure of an Arduino program. know how
FOOTBALLER ROBOT KIT C-9893
 FOOTBALLER ROBOT KIT C-9893 NOTE: This kit is recommended for children aged 14 years, always accompanied by an adult www.cebekit.com - info@cebekit.com Contents Multi-Channel I/R Remote Control Box: 1.
Cheap Control Systems. Cheap Six Channel (C6C) Servo Controller Version 2.3 OVERVIEW
 Servo Controller Version 2.3 OVERVIEW") Cheap Control Systems Cheap Six Channel (C6C) Servo Controller Version 2.3 The Cheap Six Channel (C6C) Servo Controller is a low cost embedded controller that allows the Sony Playstation 2 (PS2) game pad
Cheap Control Systems Cheap Six Channel (C6C) Servo Controller Version 2.3 The Cheap Six Channel (C6C) Servo Controller is a low cost embedded controller that allows the Sony Playstation 2 (PS2) game pad
How to use the Zduino LEE Module with the Trainer Board
 How to use the Zduino LEE Module with the Trainer Board Note: If you are going to use the Arduino/Zduino module for this distance training workshop, please download the Arduino software: 1. Connections
How-To #3: Make and Use a Motor Controller Shield
 How-To #3: Make and Use a Motor Controller Shield The Arduino single-board computer can be used to control servos and motors. But sometimes more current is required than the Arduino can provide, either
Arduino 05: Digital I/O. Jeffrey A. Meunier University of Connecticut
 Arduino 05: Digital I/O Jeffrey A. Meunier jeffm@engr.uconn.edu University of Connecticut About: How to use this document I designed this tutorial to be tall and narrow so that you can read it on one side
INTRODUCTION TO LABVIEW
 INTRODUCTION TO LABVIEW 2nd Year Microprocessors Laboratory 2012-2013 INTRODUCTION For the first afternoon in the lab you will learn to program using LabVIEW. This handout is designed to give you an introduction
Installation Instructions Toyota Sienna WITH NO SPARE TIRE SBTO ALU
 Installation Instructions 2011+ Toyota Sienna WITH NO SPARE TIRE SBTO-795-73-03ALU Grille Guards Attention: 1. Please read the installation instructions prior to installing. When you do install it s always
Communicating with the BOE-BOT
 ME 1030 Name: Due date: Introduction to Mechanical Engineering BOE BOT Collected Assignment #1 Communicating with the BOE-BOT Reading Assignment: 1. Refer to the following sections in the BOE BOT Textbook