Ink Cartridge and Print Head Maintenance Manual
|
|
|
- Lester Grant
- 6 years ago
- Views:
Transcription

1 Ink Cartridge and Print Head Maintenance Manual Hewlett Packard D135/145/155/175 CP1160/Color Copier 610 And other printers with similar cartridge design.
2 Contents Page Disclaimer Before You Begin Accessing Ink System Removing Ink Cartridges Refilling Ink Cartridges Override Ink Level HP D Series Override Ink Level HP CP1160 Removing Printheads Printhead Cleaning Clogged Printhead Repair HP D Series Toolbox 3 Color Primer Page 4 Color Primer Page Results 2

3 Disclaimer This manual was formulated and written after years of personal experience owning HP D Series and HP 610 Color Copiers, with all known accessories. This manual is not supported by HP and methods herein may void HP warranty. Please refer any HP product under warranty to an authorized HP repair center. This manual is intended for informational purposes only. We claim no responsibility for any type of damage(s) as a result of using the instruction in this manual. If you chose to use the methods described herein, you are agreeing to do so at your own risk and hold the author harmless. This manual is copyrighted by Trade Star Services, Inc., and may not be copied, distributed, or resold in any way under penalty of law. 3


4 Before You Begin Before you begin you should prepare an area to work. Refilling ink cartridges and working on printheads will release ink. Caution should be taken to protect surrounding surfaces and to keep ink off your skin. Old towels, rags, paper towels, and latex gloves should be used. Ink will stain all surfaces and is very difficult to get off your skin. Use a bottle of Windex for final cleanup. 4


5 Accessing Ink System To access the ink system you must open the front cover of the unit. There are no latches to release. Simply lift up on the door located above the paper tray. The door should open easily and lock into the open position. Once opened the ink system will center itself. Once the ink system is accessible, unplug the power to the unit. 5


6 Removing Ink Cartridges Black and color cartridges are located as shown in separate compartments. Push the release tab and lift gently to remove the cartridges. The inkwell system and contacts will be visible with the cartridges removed. 6
 with the aluminum tape provided. 3.Fill the syringe with 10 ml. of black ink or 5 ml. of color ink. Push needle through the label into the sponge of the correct filling hole.")


7 HP Cartridge #14 Refill Instructions for Black and Color cartridges. Instructions 1. Put the cartridge on some paper towels in an area where you can tolerate a spill. 2. Seal the outlet hole(s) with the aluminum tape provided. 3.Fill the syringe with 10 ml. of black ink or 5 ml. of color ink. Push needle through the label into the sponge of the correct filling hole. On the color cartridge the inks from left to right are, CYAN - MAGENTA - YELLOW (You can double check the ink colors by looking at the outlet ports before putting on the tape) 4. Very S-L-O-W-L-Y inject ink into the sponge until the cartridge is full. A little ink might come out of the top when full, so cover up the other two holes while filling one. 5. When finished, seal the Filling Hole(s) made in the top label with tape. If the holes are not sealed properly the cartridge will leak. 6. Important - Next, remove the Tape from all exit port(s). 7. Replace the cartridge and run 1-3 cleaning cycles as per printer instructions. Or print the primer pages. If necessary leave cartridge in printer for up to 24 hours. 8) Check your printer's user manual about resetting the ink levels back to full. If your printer does not have this option of resetting the cartridge then you will need to deactivate the ink level monitor. If you don't do this, once the cartridge reads empty (even though you refilled it) the printer will refuse to print. An alternate method of refilling if you are careful would be to leave the cartridge in the printer and to top off the colors (or black) very S-L-O-W-L-Y. Be sure to seal the filling hole(s) with tape after refilling. Theory The ink in this cartridge is retained because the cartridge has an internal sponge. For best results, never leave your HP printer without an installed cartridge -- even an empty one -- for more than an hour or so, because the ink -- the original or our refill ink -- will begin to gel to the consistency of honey, which will require multiple cleaning routines to clear. If the cartridge does not print the most likely problem is that you have an air bubble in the exit tube of your cartridge. Remember that the absence of ink is the same as an air bubble. What is happening is that a small air bubble expands under the vacuum of printing to form a large air bubble, which blocks the flow of ink to the printhead. This problem usually occurs after printing 1 or 2 good pages. To clear the problem, you may wish to let the printer sit without printing for several minutes, while tapping on the top of the cartridge. This may get the air bubble to move to the top of the cartridge. It may not. Another idea is to remove the cartridge and try again. Also, try putting a single drop of ink directly into the cartridge outlet port. But be very careful not to spill the ink! A Refill Kit should include Ink plus the following: One 10cc Syringe for Black Three 10cc Syringes for Color. Aluminum Tape 7
8 Overriding the ink level gauge in the HP D135 / D155 using the HP14 cartridge Overriding the ink level gauge disables the printer s ink level tracking feature. Caution! If you use the override sequence described below, you will disable the ink level gauge for your ink cartridge. If you choose to continue printing with an ink cartridge that has had its ink level gauge disabled, you may not know when the cartridge is running low or empty. The ink level gauge automatically resets when a different ink cartridge is installed in the printer. Overriding the ink level gauge does not affect ink cartridge expiration dates. The printer cannot use an expired ink cartridge. Follow these steps to override the ink level gauge: If you installed a black ink cartridge 1. Press and at the same time, then release. 2. On the keyboard, press in a fast sequence, 7, 8, When the prompt appears asking if you want to override the ink level gauge, press 1 for Yes, or 2 for No. If you installed a tri-color ink cartridge Press and at the same time, then release. 3. On the keyboard, press in a fast sequence, 4, 5, When the prompt appears asking if you want to override the ink level gauge, press 1 for Yes, or 2 for No. Always install an ink cartridge before performing an ink lever gauge override. To restore Factory Defaults: You can restore the original factory settings to what they were when you purchased your HP OfficeJet. Choosing to restore you factory defaults restores all settings, except copy settings, speed-dial entries, date, and fax header information. You can perform this process from the front panel only Press Menu Press 7, then 5. This selects the Status and Maintenance menu, then selects the Restore Factory Defaults option. The factory default settings are restored. 8

9 Overriding the ink level gauge in the HP CP1160 using the HP14 cartridge Overriding the ink level gauge disables the printer s ink level tracking feature. Caution! If you use the override sequence described below, you will disable the ink level gauge for your ink cartridge. If you choose to continue printing with an ink cartridge that has had its ink level gauge disabled, you may not know when the cartridge is running low or empty. The ink level gauge automatically resets when a different ink cartridge is installed in the printer. Overriding the ink level gauge does not affect ink cartridge expiration dates. The printer cannot use an expired ink cartridge. Follow these steps to override the ink level gauge: If you installed a black ink cartridge 1. Press and hold down the Power button. 2. While holding down the Power button: Press the Cancel button twelve times Press the Resume button once. 3. Release the Power button. If you installed a tri-color ink cartridge Press and hold down the Power button. 3. While holding down the Power button: Press the Cancel button twelve times Press the Resume button three times. 5. Release the Power button Always install an ink cartridge before performing an ink lever gauge override. To restore Factory Settings 9


10 Removing Printheads Release the tension bar between the ink cartridges and the printheads located underneath. Release the locking tabs and pull towards you to release the mechanism. Once opened, the printheads will be accessible for removal. 10


11 Removing Printheads Lift the tab on the front of the printhead to remove. Pull straight up on the tab to release the printhead. You will feel it unlock from the carriage. Gently remove the prinhead from the carriage for service. 11


12 Printhead Cleaning Printhead cleaning is recommended before replacing your printheads. If you are experiencing streaking or no color when printing, this may help elevate the problem. This is for simple cleaning only. If this method does not work, then see Clogged Printhead Repair. These methods work on all 4 printheads. Place a paper towel in the bottom of a bowl and cover the bottom with warm water. Place the bottom of the printhead in the water for several minutes. Dry completely and test the printhead. If more extensive cleaning is needed, place printhead in a bowl of warm water. Soak entire printhead in water for several minutes. Small amounts of ink will seep out of the printhead. 12


13 Printhead Cleaning Remove the printhead from the water after several minutes. Dry the printhead completely with paper towels. Clean and wipe all areas of the printhead. Do not worry about touching the contacts. 13


14 Printhead Cleaning Lightly tap the top of the printhead on a small pad of paper towels. HP!4 s have a spring release at the top for ink flow. Wipe the contacts on the side of the cartridge until they are clean and dry. Smear the bottom the printhead across paper towels to clean access from the ink dispenser. Some dripping may occur. Repeat until dripping stops and contacts are clean and dry. Let stand a few minutes then replace printhead in printer and test. 14


15 Clogged Printhead Repair Clogged printhead repair should be performed if lesser methods are unsuccessful. WARNING: You will need an ink refill kit to perform this repair. Considerable ink will seep out of the printhead during this repair. Use latex gloves to protect your skin from ink stains. These methods work on all 4 printheads. First, remove the round piece from the printhead. Pry gently in several places with a small flat screwdriver. Unseat the piece from the top of the printhead as shown to the right. Once loose, the piece should slide easily off the printhead. 15


16 Clogged Printhead Repair Use the screwdriver to release the top of the printhead. There is a small channel at the top of the printhead where these pieces fit together. Be very careful not to break the printhead. Pry gently in several places all around the top of the printhead. Place the screwdriver in front where the round piece was and pry to make the final separation 16


17 Clogged Printhead Repair Once the top of the printhead is loose, gently pry the top piece apart from the tank. Be careful not to break the square rubber seal between the two pieces Now the top is free, the two pieces should pull apart easily. 17


18 Clogged Printhead Repair Separate the pieces completely, and place in a bowl of warm water. Soak all pieces of the printhead in warm water for several minutes. You will see a considerable amount of ink in the water as it is softened, and flows from the printhead pieces. 18


19 Clogged Printhead Repair CAUTION: This step will leak a great deal of ink!! It is recommended to be performed in and old sink or tub. Ink is water soluble but will stain surrounding surfaces if allowed to dry. There is a small sponge in the bottom of the printhead. In order to completely clean it, the tank should be rinsed thoroughly after soaking. Run warm water in the open top of the tank. MUCH INK will run out during rinsing. It may take several minutes to clear. Completely clean and rinse all 4 pieces: round piece, top, tank, and seal. Pat dry all pieces and lay out for reassembly. Be careful not to lose the spring in the top piece. 19


20 Clogged Printhead Repair Using your ink refill kit, place approximately 6ML of ink back into the tank. Be careful not to spill it when placing the top piece in the tank. Make sure the seal is in its track between the two pieces. Using your thumb and forefingers carefully pry the pieces back together until they seal. Ink may seep from the bottom for several minutes. Thoroughly clean off the printhead including the contacts, and the bottom where the ink comes out. Replace the round piece, it should snap into place. Let the printhead set for several minutes. The ink should stop flowing out of the bottom. Clean and replace the printhead in the printer and test. It may take several pages to clear and function properly. 20

21 HP Toolbox Performing the following functions from your HP toolbox is recommended after changing printheads or cartridges. Simply go to Start and Hewlett Packard and into your toolbox. Follow the on screen instructions for regular maintenance. Primer pages are included in the back of this manual. 21


22 Basic Printhead Cleaning Intermediate Printhead Cleaning 22

23 Printhead Ink Priming Repeat Process 23
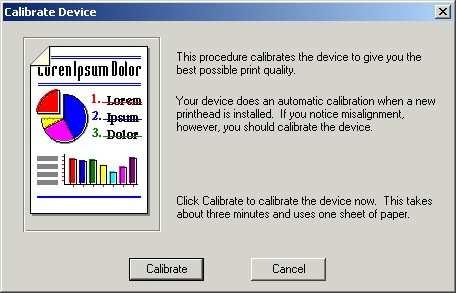
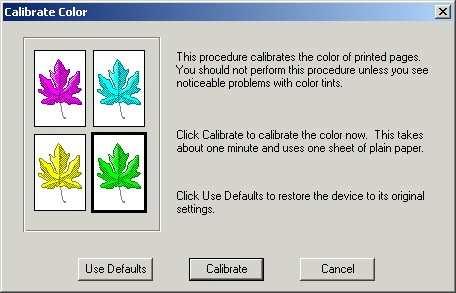
24 Device Calibration Color Calibration 24
25 3 Color Primer Page This should get the Color flowing out of your cartridge 25
26 CYMK 4 Color Primer This should get the Color flowing out of your cartridge well 26


27 Results Example of our results using the instructions in this manual. We use after market tanks that have been refilled. Before - No blue (Cyan) is present after several cleanings and calibrations. Tank was refilled but printhead is clogged. After - Blue (Cyan) was restored with Clogged Printhead Repair 27
REFILLABLE CARTRIDGE SYSTEM FOR THE EPSON STYLUS PRO 7800 & 9800
 REFILLABLE CARTRIDGE SYSTEM FOR THE EPSON STYLUS PRO 7800 & 9800 Thank you for purchasing an Ink2image bulk ink feed system. You have just taken the first step to enjoying the cost saving and superior
USING ABSOLUTE BLACK INKS FOR MAKING SCREEN POSITIVES ON THE EPSON STYLUS PRO 7700, 7890, 7900, 9700, 9890, & 9900
 USING ABSOLUTE BLACK INKS FOR MAKING SCREEN POSITIVES ON THE EPSON STYLUS PRO 7700, 7890, 7900, 9700, 9890, & 9900 The following instructions explain how the i2i Absolute Black ink for making screen positives
Premium Continuous Ink Supply Systems.
 Premium Continuous Ink Supply Systems. Instruction Manual For Epson Printers R200, R210, R230, R300, R310, RX650 RX510, RX630 157 Union Road, Ascot Vale Victoria 3032 Phone: (+613) 9005 5555 2 Installation
Installing a Printhead Cartridge
 Installing a Printhead Cartridge Summary: Procedure for installing a new printhead cartridge. Applicable Products: ijetpress Tools/Parts Required: A new printhead, deionized or distilled water, lint free
Removal and Installation8
 8 Screw Types 8-4 Top Cover Assembly 8-5 Left Hand Cover 8-6 Right Hand Cover 8-10 Front Panel Assembly 8-14 Left Rear Cover 8-15 Right Rear Cover 8-16 Extension Cover (60" Model only) 8-17 Media Lever
X940e, X945e. Maintenance Guide
 X940e, X945e Maintenance Guide July 2010 www.lexmark.com Contents...3 Storing supplies...3 Checking the status of supplies...3 Checking the status of supplies from the control panel... 3 Printing a menu
CONTINUOUS INK SUPPLY SYSTEM INSTALLATION INSTRUCTION FOR EPSON Workforce printer
 CONTINUOUS INK SUPPLY SYSTEM INSTALLATION INSTRUCTION FOR EPSON Workforce 630 635 840 845 530 545 645 7510 7010 7520 60 3520 3540 printer Caution: Please keep ink reservoirs on the same level as the printer.
C935 Series. Maintenance Guide
 C935 Series Maintenance Guide April 2007 www.lexmark.com Contents...3 Cleaning the exterior of the printer...3 Storing supplies...3 Conserving supplies...3 Checking the status of supplies...4 Checking
Before you can use the machine, you must set up the hardware. Please read this Quick Setup Guide for the correct setup procedure.
 FAX-2480C Quick Setup Guide Before you can use the machine, you must set up the hardware. Please read this Quick Setup Guide for the correct setup procedure. Setting Up the Machine Setup is Complete! Keep
Moving your printer 1. Remove cables. Printing Moving the printer. Using color. Paper handling. 1 Turn the printer off. Maintenance.
 Moving the printer Moving your printer 1 If you re going to move the printer, you must remove the supplies and attached options to prevent damage to the printer. Use the following steps to remove the options
Hewlett-Packard Product Number C6119A Maintenance Manual
 Hewlett-Packard Product Number C6119A Maintenance Manual Introduction This document acts as a guide for the maintenance and care of the Hewlett- Packard product number C6119A. The C6119A product is a disposable
HP DesignJet 3500CP/3000CP Printer. Quick Reference Guide
 HP DesignJet 3500CP/3000CP Printer i 18 425 325 488 4998 2000 1584 Quick Reference Guide Copyright Hewlett-Packard Company 1998 Manual part number C4724-90031 Printed in Europe For trademark information,
SuperPremiumElectronics.com
 Must read this before installation Important instructions about your CISS system HP10/11 1. If your printer is brand new you must first install the original cartridges that came with your printer. The
AstroJet L1 Quick Start Guide
 AstroJet L1 Quick Start Guide Step 1 Remove Printer and Accessories from packaging Place Printer on a level, stable surface. Make sure Printer is level. Step 2 Install Ink Drip Tray Assembly 1. Open Ink
 Must read this before installation Important instructions about your CISS system R260 R280 R380 1. If your printer is brand new you must first install the original cartridges that came with your printer.
AstroJet TM M2 Quick Start Guide
 AstroJet TM M2 Quick Start Guide Step 1 Remove Printer and Accessories from packaging. Place Printer on a flat, even surface. Step 2 Remove Service Station Transport Tab 1. Open Top Cover. 2. Open Print
AstroJet S1 Quick Start Guide
 AstroJet S1 Quick Start Guide Step 1 Remove Printer and Accessories from packaging Place Printer on a level, stable surface. Make sure Printer is level. Step 2 Assemble Ink Drip Tray Assembly 1. Select
K Service Source. Color StyleWriter 2200
 K Service Source Color StyleWriter 2200 K Service Source Basics Color StyleWriter 2200 Basics Overview - 1 Overview The Color StyleWriter 2200 is a desktop color bubblejet printer for personal use. It
Afinia Label L901 Label Printer Quick Start Guide
 Afinia Label L901 Label Printer Quick Start Guide Ver. 1.1 Page 2 Step 1 Remove Printer and Accessories from packaging Items included: Printer USB cable One ink set (CMYKK) Quick Start Guide Network cable
X925. Maintenance Guide
 X925 Maintenance Guide April 2011 www.lexmark.com Contents...3 Cleaning the exterior of the printer...3 Cleaning the scanner glass...3 Cleaning the ADF parts...4 Cleaning the printhead lenses...5 Storing
3 Manage the printer. This chapter provides information on the following topics: HP ToolboxFX. Embedded Web server ENWW 27
 3 Manage the printer This chapter provides information on the following topics: HP ToolboxFX Embedded Web server ENWW 27 HP ToolboxFX HP ToolboxFX is software that you can use to complete the following
Cleaning the printhead in a HP Photosmart Plus B210a (Gentle)
") Cleaning the printhead in a HP Photosmart Plus B210a (Gentle) WP Users: USE THE MOBILE SITE. THE INTRO DOES NOT WORK AND CONTAINS KEY INFORMATION. Written By: Nick ifixit CC BY-NC-SA www.ifixit.com Page
Cleaning the printhead in a HP Photosmart Plus B210a (Gentle) WP Users: USE THE MOBILE SITE. THE INTRO DOES NOT WORK AND CONTAINS KEY INFORMATION. Written By: Nick ifixit CC BY-NC-SA www.ifixit.com Page
Start Here. All-in-One Printer. Print Copy Scan
 Start Here All-in-One Printer Print Copy Scan Note: A USB 2.0 cable is required to connect your Kodak All-in-One printer to your Windows or Macintosh OS computer. Available in the Kodak online store or
Quick Setup Guide DCP-110C
 Quick Setup Guide DCP-110C Before you can use the machine, you must set up the hardware and install the driver. Please read this Quick Setup Guide for proper set up and installation instructions. Step
Installing the Dye Sublimation Printing System
 Installing the Dye Sublimation Printing System Instructions for Epson D120 Printer ArTainium UV+ D120 Bulk Ink Feeder ITec Economy Heat Press STX11 / STX20 Index Page Contents 1 Contact Information 2 Unpacking
Assembly and Set-Up Instructions
 HP DesignJet 500 and 800 Series Printers Assembly and Set-Up Instructions 1. Check the Contents of the Package This Assembly and Set-Up Poster Day-to-day package containing Using Your Printer documentation
Start Here. Remove all tape and lift display. Locate components USB
 HP Photosmart 2600/2700 series all-in-one User Guide Start Here 1 USB Important: Do not connect the USB cable until this guide instructs you to or the software may not install properly. If you have problems
Written By: Anthony Valdez
 ASUS Eee PC 1018P Fan Replacement This guide will show how to remove the fan, in order to replace it. Written By: Anthony Valdez ifixit CC BY-NC-SA www.ifixit.com Page 1 of 12 INTRODUCTION The CPU Fan
Windows is a registered trademark of Microsoft in the U.S. and other countries.
 User s Guide First Edition (February 1999) The following paragraph does not apply to any country where such provisions are inconsistent with local law: LEXMARK INTERNATIONAL, INC., PROVIDES THIS PUBLICATION
learn about the printer... 1
 quick help hp deskjet 845c/825c series table of contents learn about the printer.......................... 1 introducing the hp deskjet 845c/825c series printer............ 2 terms and conventions.................................
HP Pavilion dv7-6c90us Cooling fan Replacement
 HP Pavilion dv7-6c90us Cooling fan Replacement This guide will walk you through the process of replacing the cooling fan in an HP Pavilion dv7 laptop. Written By: Angelina Clayton ifixit CC BY-NC-SA www.ifixit.com
Continuous Ink Supply System for CANON PIXMA IP4200. Installation Instruction
 Continuous Ink Supply System for CANON PIXMA IP4200 Installation Instruction For ST Prefilled Version With Original Chips This Version of the Continuous Ink Flow System comes with Prefilled Cartridges
Installation Instructions for Continuous Ink Systems Table of Contents
 Installation Instructions for Continuous Ink Systems Table of Contents GENERAL CISS RULES OF THUMB...3 NEW ARTISAN 800-837 CISS RULES OF THUMB...4 BROTHER PRINTERS WITHOUT CHIPS LC950 LC960 LC11 LC61 LC38
A+B INK CARTRIDGES INSTALLATION INSTRUCTIONS
 Tel: 02 80655614 1300 213 589 www.mir-aus.com www.mir-aus.com.au info@mir-aus.com A+B INK CARTRIDGES INSTALLATION INSTRUCTIONS 1. Keep out of reach of children. Seek medical advice if taken. 2. Avoid exposure
3 Maintenance. Chapter contents
 3 Maintenance Chapter contents Life expectancies of consumables..................... 40 User-replaceable parts.............................. 40 Replacing the printer pickup roller................ 41 Replacing
1 Press the cover release button and then open the front cover of the printer. 2 Take out the drum unit assembly (drum unit with toner cartridge).
.") Replacing the toner cartridge To make sure you get high quality print, we recommend that you use only Brother genuine toner cartridges. When you want to buy toner cartridges, call the dealer you bought
Replacing the toner cartridge To make sure you get high quality print, we recommend that you use only Brother genuine toner cartridges. When you want to buy toner cartridges, call the dealer you bought
X500n, X502n. Maintenance Guide
 X500n, X502n Maintenance Guide April 2007 www.lexmark.com Contents...3 Storing supplies...3 Conserving toner...3 Cleaning the printer...3 Cleaning the exterior of the printer...3 Cleaning the scanner glass...4
Ready Reference Guide
 Ready Reference Guide English HP LaserJet 8100, 8100 N, and 8100 DN Printers Ready Reference Guide HP LaserJet 8100, 8100 N, and 8100 DN Printers Copyright Hewlett-Packard Company 1998 All Rights Reserved.
Inspiron Service Manual. 2-in-1. Computer Model: Inspiron Regulatory Model: P69G Regulatory Type: P69G001
 Inspiron 13 5000 2-in-1 Service Manual Computer Model: Inspiron 13-5378 Regulatory Model: P69G Regulatory Type: P69G001 Notes, cautions, and warnings NOTE: A NOTE indicates important information that helps
Before you can use the machine, you must set up the hardware. Please read this Quick Setup Guide for the correct setup procedure.
 FAX-2480C Quick Setup Guide Before you can use the machine, you must set up the hardware. Please read this Quick Setup Guide for the correct setup procedure. Setting Up the Machine Setup is Complete! Keep
Toshiba Satellite A105-S4011 Touchpad
 Toshiba Satellite A105-S4011 Touchpad Replacement This guide will instruct you on how to remove the current touchpad from this laptop and how to reinstall another. This is a straightforward process and
... Stoppage of Ink Flow. Technical Support. Revision 1.0 November 30, 2010
 ............ Technical Support Revision 1.0 November 30, 2010 Contact Info Corporate Office: AnaJet Inc. 3050 Redhill Ave Costa Mesa, CA 92626 USA Telephone: 714.662.3200 Toll Free: 877-6-ANAJET (877.626-2538)
Machine Starters Kit
 Machine Starters Kit Océ CS9000 Eco-Solvent printer series Dear Customer, Thank you for buying an Océ CS9000 Eco-Solvent printer series. This kit contains some tools to make your printer operative. Please
Windows is a registered trademark of Microsoft in the U.S. and other countries.
 User s Guide First Edition (February 1999) The following paragraph does not apply to any country where such provisions are inconsistent with local law: LEXMARK INTERNATIONAL, INC. PROVIDES THIS PUBLICATION
Setup Guide. Confirming the Installation Space. Installation space (W x D x H) 70.5 x 66.3 x 61.5 inches (1790 x 1684 x 1560 mm) 23.
 70.5 x 66.3 x 61.5 inches (1790 x 1684 x 1560 mm) 23.") Introductory Information Setup Guide ENGLISH Read this manual before attempting to operate the printer. Keep this manual in a handy location for future reference. Caution Instructions in this Setup Guide
Introductory Information Setup Guide ENGLISH Read this manual before attempting to operate the printer. Keep this manual in a handy location for future reference. Caution Instructions in this Setup Guide
PrismJET DTx Quick Start Guide
 PrismJET DTx Quick Start Guide The following items are included in an accessory kit for your printer: USB Cable 110V Power Cord JetPRO 13/JetCUT Setup DVD User Guide CD Phillips Screwdriver Unpacking the
Officejet Enterprise Color X555 Officejet Enterprise Color MFP X585
 shift caps lock A S D F G H J K L Z X C V B N M @ alt alt,. : ;? / shift enter Officejet Enterprise Color X555 Officejet Enterprise Color MFP X585 Repair Manual www.hp.com/support/ojcolorx555 www.hp.com/support/ojcolormfpx585
EPSON ActionLaser Read This First. eepa POLLUTION PREVENTER
 EPSON ActionLaser 1400 Read This First eepa POLLUTION PREVENTER This booklet is to help you set up your printer and begin printing quickly. It also gives you instructions for routine maintenance. If you
SuperPremiumElectronics.com
 Must read this before installation Important instructions about your CISS system R200, R210, R220, R300, R310, R340, RX500, RX600 & RX620 1. If your printer is brand new you must first install the original
Datacard CR500 Instant Issuance System. User Reference Guide. July Rev B
 Datacard CR500 Instant Issuance System User Reference Guide July 2015 527495-001 Rev B Datacard CR500 User Reference Guide The CR500 Instant Issuance System Contents The CR500 Instant Issuance System The
Inspiron 22. Service Manual Series. Regulatory Model: W17B Regulatory Type: W17B001
 Inspiron 22 3000 Series Service Manual Regulatory Model: W17B Regulatory Type: W17B001 Notes, cautions, and warnings NOTE: A NOTE indicates important information that helps you make better use of your
New Ricoh 1060 Copier. August 2004
 New Ricoh 1060 Copier August 2004 Step By Step Turn Main Power Switch ON Press operation switch to make ON indicator light up You may turn just the operation switch off at night DO NOT turn main power
Nintendo 3DS XL Upper LCD Display
 Nintendo 3DS XL Upper LCD Display Replacement This guide is going to help you take apart the Upper LCD screen so you will be able to once again play your favorite games on your Nintendo 3DS XL! Written
HOW TO REMOVE A STUCK INK CARTRIDGE
 15 February, 2018 HOW TO REMOVE A STUCK INK CARTRIDGE Document Filetype: PDF 236.13 KB 0 HOW TO REMOVE A STUCK INK CARTRIDGE You can normally remove the ink cartridge anytime you want to. Open up your
Hardware Replacement Guide Types 8099, 8116, 8155, 8156 Types 8157, 8158, 8159, 8160 Types 8215, 9210, 9211
 Hardware Replacement Guide Types 8099, 8116, 8155, 8156 Types 8157, 8158, 8159, 8160 Types 8215, 9210, 9211 Hardware Replacement Guide Types 8099, 8116, 8155, 8156 Types 8157, 8158, 8159, 8160 Types 8215,
 Must read this before installation Important instructions about your CISS system Instruction Manual for Canon MP500 MP530 MP800 MP830 MX850 Ip4200,ip4300,ip4500,ip6000,ip6600D,ip6700D and more 1. If your
XEROX PHASER 6250 TONER CARTRIDGE REMANUFACTURING INSTRUCTIONS
 XEROX PHASER 6250 TONER CARTRIDGE REMANUFACTURING INSTRUCTIONS XEROX PHASER 6250 TONER CARTRIDGE REMANUFACTURING THE XEROX PHASER 6250 TONER CARTRIDGE By Javier Gonzalez and the Technical Staff at UniNet
Replacing Consumables
 Replacing Consumables Failure to follow instructions as outlined in this manual could result in voiding your warranty. If an error message (TONER OUT, I/C LIFE END, etc.) appears, print out the configuration
MONARCH 9416 XL QUICK REFERENCE
 MONARCH 9416 XL QUICK REFERENCE This Quick Reference contains ribbon loading, supply loading, and general care, maintenance, and troubleshooting procedures for the 9416 XL Thermal Direct and 9416 XL Thermal
SuperPremiumElectronics.com
 Must read this before installation Important instructions about your CISS system C88, C88+ and C68 1. If your printer is brand new you must first install the original cartridges that came with your printer.
Lexmark Z51. Color Jetprinter. User s Guide for OS/2
 Lexmark Z51 Color Jetprinter User s Guide for OS/2 First Edition (October 1998) The following paragraph does not apply to any country where such provisions are inconsistent with local law: LEXMARK INTERNATIONAL,
Before you can use the machine, you must set up the hardware. Please read this Quick Setup Guide for the correct setup procedure.
 FAX-960C Quick Setup Guide Before you can use the machine, you must set up the hardware. Please read this Quick Setup Guide for the correct setup procedure. Setup is Complete! Keep this Quick Setup Guide
Start Here. Important setup information. Remove all tape and lift display. Locate components
 Start Here 1 Important setup information Wireless or wired network users: you must follow the instructions in this setup guide to be successful adding the HP All-in-One to your network. USB cable users:
Installation Manual on Continuous ink supply system (CISS) For printer EPSON 1290/2100/2200/950
 For printer EPSON 1290/2100/2200/950") Installation Manual on Continuous ink supply system (CISS) For printer EPSON 1290/2100/2200/950 Thank you for using the INKSYSTEM Continuous ink supply system. It is the best device for an inkjet printer,
Installation Manual on Continuous ink supply system (CISS) For printer EPSON 1290/2100/2200/950 Thank you for using the INKSYSTEM Continuous ink supply system. It is the best device for an inkjet printer,
Continuous Ink Supply System for Canon ip4000 Printer. Installation Instruction
 Continuous Ink Supply System for Canon ip4000 Printer Installation Instruction For TL Ink Pre-filled Version The whole operation is very easy. It s really an effective tool to save your money. CIS for
Cleaning the printhead in a HP Photosmart Plus B210a (Gentle)
") Cleaning the printhead in a HP Photosmart Plus B210a (Gentle) WP Users: USE THE MOBILE SITE. THE INTRO DOES NOT WORK AND CONTAINS KEY INFORMATION. Escrito por: Nick ifixit CC BY-NC-SA es.ifixit.com Página
Cleaning the printhead in a HP Photosmart Plus B210a (Gentle) WP Users: USE THE MOBILE SITE. THE INTRO DOES NOT WORK AND CONTAINS KEY INFORMATION. Escrito por: Nick ifixit CC BY-NC-SA es.ifixit.com Página
Nintendo DS Lite Rear Display Bezel Replacement
 Nintendo DS Lite Rear Display Bezel Replacement Replacement of the Nintendo DS Lite rear display bezel. Written By: Matt Newsom ifixit CC BY-NC-SA www.ifixit.com Page 1 of 17 INTRODUCTION Replace the rear
Start Here. Unpack. 1 Make sure you have these items: 2 Remove all the packing materials and tape.
 Epson Stylus Pro 3880 Start Here Unpack 1 Make sure you have these items: Printer Power cord CD-ROM User's Guide Ink cartridges Rear sheet guide Limited Warranty Warning: The printer weighs about 43 pounds
Removal and Installation 8
 Removal and Installation 8 8 Introduction 8-2 Service Calibration Guide to Removal and Installation 8-4 Window 8-8 Covers and Trims 8-12 Rear Tray 8-31 Rear Cover 8-32 Media Lever 8-33 Media Lever Position
Toshiba Satellite A215 S4697 Screen
 Toshiba Satellite A215 S4697 Screen Replacement When your computer screen is cracked or does not work anymore, it may need a new screen. Written By: Carlos ifixit CC BY-NC-SA www.ifixit.com Page 1 of 15
Removing and Replacing Parts
 Removing and Replacing Parts Preparing to Work Inside the Computer Recommended Tools Screw Identification System Components Hard Drive Fixed Optical Drive Media Bay Devices Memory Modules Mini PCI Card
HP Photosmart c3180 Main Circuit Board Replacement
 HP Photosmart c3180 Main Circuit Board Replacement Replacing a faulty main circuit board. Written By: Jim ifixit CC BY-NC-SA www.ifixit.com Page 1 of 26 TOOLS: Spudger (1) T10 Torx Screwdriver (1) ifixit
Manual for MantraJet 1100 CD/DVD auto-printer
 Manual for MantraJet 1100 CD/DVD auto-printer Rev 1.03 September 7, 2010 Table of contents Specifications...3 Unpacking MantraJet 1100...4 Quick installation reference MantraJet 1100...7 Installation of
Installing imac Intel 27" EMC 2390 Dual HDD or
 Installing imac Intel 27" EMC 2390 Dual HDD or SSD Drive Installing a secondary HDD or SSD in the mid 2010 27" imac EMC 2390. Written By: Brett Hartt ifixit CC BY-NC-SA www.ifixit.com Page 1 of 23 INTRODUCTION
Dell XPS 14z Owner s Manual
 Dell XPS 14z Owner s Manual Computer model: L412z Regulatory model: P24G series Regulatory type: P24G001 Notes, Cautions, and Warnings NOTE: A NOTE indicates important information that helps you make better
HP Envy TouchSmart m7 k010dx Screen
 HP Envy TouchSmart m7 k010dx Screen Replacement Use this guide to replace the screen in your HP Envy TouchSmart m7 k010dx. Written By: Owen Ou ifixit CC BY-NC-SA www.ifixit.com Page 1 of 12 INTRODUCTION
Fuser. Figure Remove the fuser assembly (1 of 2) 184 Chapter 5 Removal and replacement ENWW
 184 Chapter 5 Removal and replacement ENWW") Fuser 1. Remove the following assemblies. Scanner assembly. For the HP LaserJet 3015, see Scanner assembly. For the LaserJet 3020 and 3030, see Scanner assembly. Left cover. See Printer side covers. Rear
Fuser 1. Remove the following assemblies. Scanner assembly. For the HP LaserJet 3015, see Scanner assembly. For the LaserJet 3020 and 3030, see Scanner assembly. Left cover. See Printer side covers. Rear
Audi Climate Control LCD Rebuild Kit
 Audi Climate Control LCD Rebuild Kit Restores cracked, leaking or missing segment LCD s for the following vehicles: 1997-98 Audi A4 with electronic climate control center 1995-97 Audi A6 with electronic
Repairing a Nintendo DS that is not charging
 Repairing a Nintendo DS that is not charging Repairs not charging fault by replacing or bypassing the EM10 filter. Written By: Knut ifixit CC BY-NC-SA www.ifixit.com Page 1 of 14 INTRODUCTION If you have
HP rp5700 Repair Central Processing Unit(CPU) Replacement
 Replacement") HP rp5700 Repair Central Processing Unit(CPU) Replacement The CPU is the "brains" of any computer. The CPU is the component that process all the information in a computer. Use cation when following this
HP rp5700 Repair Central Processing Unit(CPU) Replacement The CPU is the "brains" of any computer. The CPU is the component that process all the information in a computer. Use cation when following this
Continuous Ink Supply System. for EPSON R285. Installation Instruction. For ST Prefilled Version
 Continuous Ink Supply System for EPSON R285 Installation Instruction For ST Prefilled Version This Version of the Continuous Ink Flow System comes with Prefilled Cartridges and Auto Reset Chips. You just
Dell Inspiron XPS and Inspiron 9100 Service Manual
 Dell Inspiron XPS and Inspiron 9100 Service Manual Dell Inspiron XPS and Inspiron 9100 Service Manual Before You Begin Memory Module, Mini PCI Card, and Devices System Components Subwoofer Bluetooth Card
Unpacking and Installing the Flora 2512 UV Printer. Steps 1: Unscrew the 10mm bolts holding the top. Then remove the top and put in a safe place.
 Unpacking and Installing the Flora 2512 UV Printer Steps 1: Unscrew the 10mm bolts holding the top. Then remove the top and put in a safe place. Step 2: Unscrew 10mm bolts holding the end panels. On the
Start Here. Remove all tape. Locate components
 2004 Hewlett-Packard Development Company, L.P. English Arabic Bahasa Português Hrvatski Cesky Dansk Nederland Suomi Français Deutsch Greek Hangul Hebrew Magyar Italiano Español 2004 Hewlett-Packard Development
Lexmark C54x Maintenance Guide
 Lexmark C54x Maintenance Guide July 2009 www.lexmark.com Contents...3 Storing supplies...3 Checking the status of supplies...3 Checking the status of supplies from the printer control panel...3 Checking
Version 1.0 February P Xerox Color C75 Press Quick Start Guide
 Version 1.0 February 2013 702P00982 2012 Xerox Corporation. All rights reserved. Xerox, and Xerox and Design are trademarks of Xerox Corporation in the United States and/or other countries. BR4006 Table
CARTRIDGE REMANUFACTURING INSTRUCTIONS TONER CARTRIDGE DRUM CARTRIDGE
 XEROX PHASER 7400 CARTRIDGE REMANUFACTURING INSTRUCTIONS TONER CARTRIDGE DRUM CARTRIDGE REMANUFACTURING THE XEROX PHASER 7400 TONER & DRUM CARTRIDGES By Mike Josiah and the Technical Staff at UniNet The
Troubleshooting. Chapter contents Service Tests and Utilities
 Troubleshooting To better help our customers - this DesignJet Z6200 series troubleshooting page is simply a guide / additional information for your convenience, as you search for assistance in repairing
Replacement Instructions
 apple PowerBook G4 Memory Replacement Instructions Be sure to follow the instructions in this sheet carefully. Failure to follow these instructions could result in damage to your equipment and may void
Start Here. All-in-One Printer. Print Copy Scan
 Start Here All-in-One Printer Print Copy Scan Note: A USB 2.0 (High Speed) cable is required to connect your Kodak All-in-One printer to your Windows or Macintosh OS computer. Black Ink Cartridge Color
6 Removal and replacement
 6 Removal and replacement This chapter contains information about the following topics: Removal and replacement strategy User-replaceable parts Covers and external components Main assemblies Motors and
table of contents notices special features getting started printing hp deskjet 6120 series printer
 hp deskjet 6120 series printer table of contents notices notices and acknowledgements terms and conventions accessibility using the onscreen user's guide special features getting started printer features
SAMSUNG ML 1630 CARTRIDGE REMANUFACTURING INSTRUCTIONS
 SAMSUNG ML 1630 CARTRIDGE REMANUFACTURING INSTRUCTIONS SAMSUNG ML 1630 LASER PRINTER TONER CARTRIDGE Remanufacturing the Samsung ML-1630 Toner Cartridge By Mike Josiah First released in October 2007, Samsung
Lexmark X203n and X204n Series. Maintenance Guide
 Lexmark X203n and X204n Series Maintenance Guide February 2011 www.lexmark.com Contents...3 Cleaning the exterior of the printer...3 Cleaning the scanner glass...4 Cleaning the ADF separator rollers...5
Quick Setup Guide MFC-5440CN
 Quick Setup Guide MFC-5440CN MFC-5840CN Before you can use the machine, you must set up the hardware and install the driver. To help you get started in setting up the machine and installing the driver
MultiPASS F50 Setup Instructions
 MultiPASS F50 Setup Instructions Step 1: Unpack the F50 MFP 1. Carefully remove all items from the box. Step 2: Set up the F50 MFP 1. Remove shipping tape and protective shipping materials. 2. Open the
MVPplus Quick Reference Guide
 MVPplus Quick Reference Guide Use this guide to operate your printer on a daily basis. For more detailed information, refer to the User Guide. Contents External View...........................................................
Written By: Colin Glaves
 Written By: Colin Glaves ifixit CC BY-NC-SA www.ifixit.com Page 1 of 9 INTRODUCTION Please try our Troubleshooting Guide prior to replacing your Display Assembly. This guide covers the detachment and assembly
Installing the Printer Software
 4 Printing Your First Page Attaching the Paper Support 7 1 Checking the Printer 6 2 Plugging in the Printer 3 Installing the Ink Cartridges 5 Installing the Printer Software Connecting the Printer 4012581-00
imac Intel 20" EMC 2133 and 2210 SSD
 imac Intel 20" EMC 2133 and 2210 SSD Installation Replace the hard drive in your imac Intel 20" EMC 2133 and 2210. Written By: Dozuki System 2017 guides.crucial.com Page 1 of 16 INTRODUCTION Upgrade your