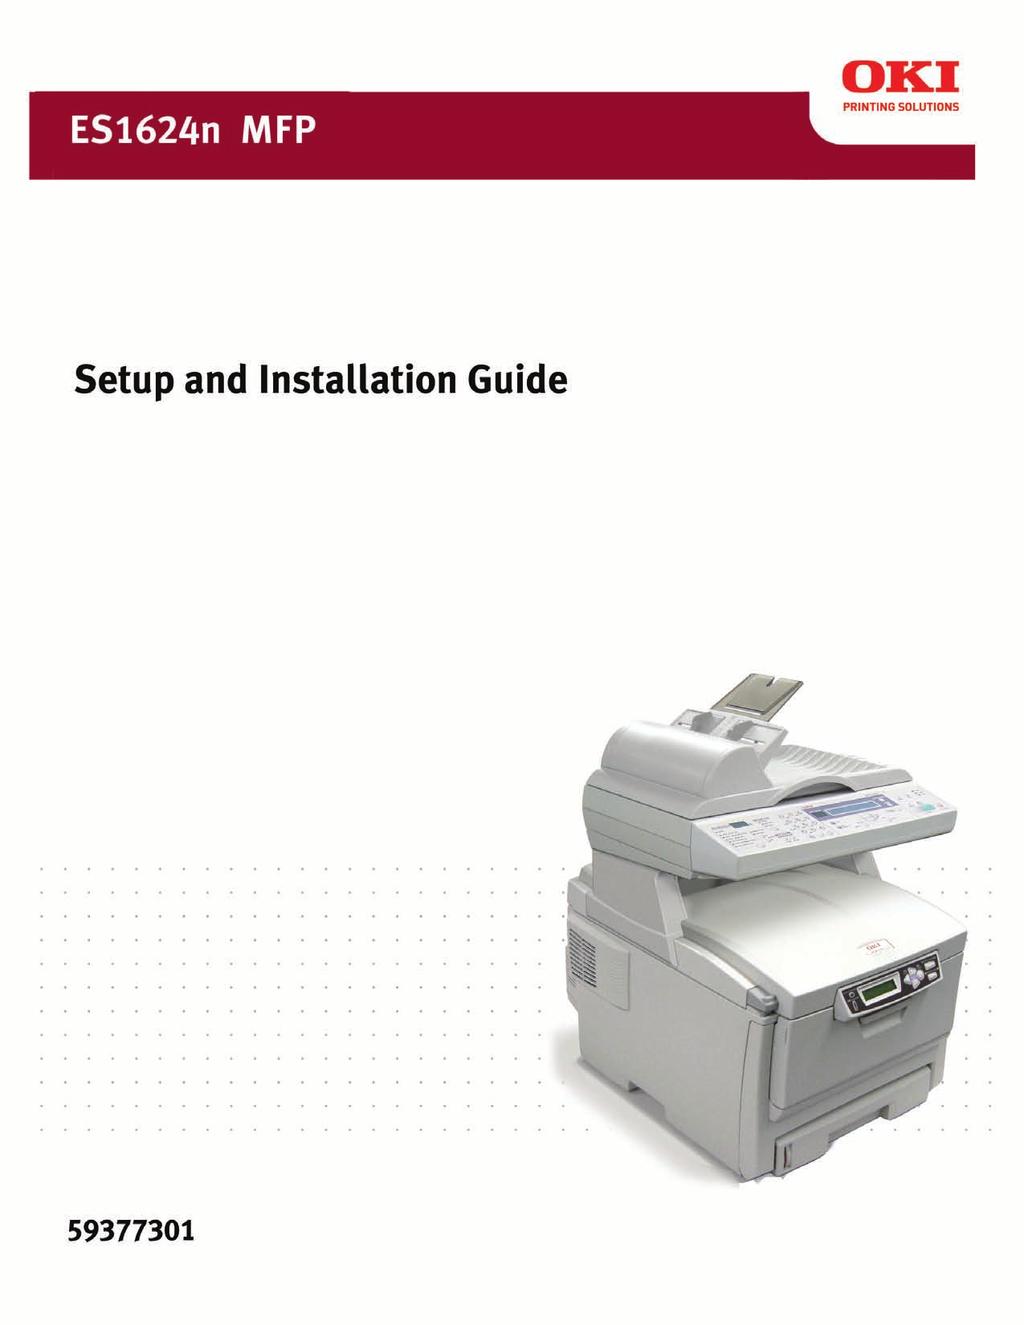
ES1624 MFP Setup and Installation Guide
|
|
|
- Douglas Anthony
- 5 years ago
- Views:
Transcription
1
2
3 ES1624 MFP Setup and Installation Guide Installation Overview Notes, Cautions, and Warnings...4 Select Location...4 Checking Package Contents...4 Scanning Unit... 4 Printing Unit... 4 Setting Up the Printing Unit...5 Setting up the Scanning Unit...5 Attaching the Scanning Unit... 6 Unlock the Scan Mechanism... 6 Connecting the Cables...7 Connect the ADF Cable... 7 Connect the Ethernet Cable... 7 Connect the Printing Unit Cable... 7 Connect the Computer Cable... 7 Connect the Scanning Unit Power Adapter... 7 Connect the Power Connector Cable... 8 Connect the printing unit power cable... 8 Preparing the Image Drum/Toner cartridges...9 Configuring Your MFP Configuring from the OKI Management Utility (OKI MFP Network Setup Tool)...15 Configuring from the Web Page...15 Configuring from the Control Panel...15 Additional Network Software...16 Web Driver Installer Utility...16 OKI LPR Utility...16 PrintSuperVision Utility...16 Network Printer Status Utility...16 Faxing...16 Profiles...16 Address Book...16 Operating Your MFP Placing document(s) in the ADF...17 Placing document(s) on the glass...17 Loading the Paper Cassette Tray...17 Quick Operation For Additional Information For Assistance Preparing the Fuser...10 Loading Paper...11 Turning Power On...12 Turn printing unit power on Turn scanning unit power on Network Installation: Windows...13 Minimum Configuration Requirements Pre Installation Information Internet Communication Features Scan to Scan to FTP Setting the IP Address Installing Drivers and Network Software


4 Notes, Cautions, and Warnings NOTE! A note provides important information to supplement the main text. Checking Package Contents Unpack the box and check to see that all components are included. If any item is missing, contact your dealer immediately. Main unit Scanning Unit Power Adapter CAUTION! A caution provides additional information which, if ignored, may result in equipment malfunction or damage. WARNING! A warning provides additional information which, if ignored, may result in a risk of personal injury. Only use genuine OKI original consumables to ensure the best quality and performance from your hardware. Non-OKI original products may damage your printing unit s performance and invalidate your warranty. Specifications subject to change without notice. All trademarks acknowledged. Thank you for purchasing this Multi-Function Product. Paper Feed Tray and Paper Support Software CD/Electronic User s Manual USB cables (2) Power Connector Cord Paper stopper ADF pad (extra replacement pad) NOTE! In order to send faxes on this MFP, you must have a fax modem installed in your computer. Note: Network cable is not supplied. Select Location Select a location where you have sufficient access space. Dimensions: 17.48" (444mm) x 22.09" (561mm) x 26.26" (667mm) (W x D x H) Main unit Printing Unit Power cord Support bracket Toner/Image Drum cartridges (4) factory installed 4


 at the back of the printing unit. Setting up the Scanning Unit 1.")


5 Setting Up the Printing Unit 1. Remove the transport tape from front and back of printing unit. 4. Make sure the printing unit and the support bracket are aligned and the unit is firmly in place. NOTE! Do not remove the orange paper band extending from inside the printing unit at this time. This band provides instructions for preparing the fusing unit. Install the Support Bracket 2. Place the printing unit on the surface you have chosen. Place the support bracket (1) at the back of the printing unit. Setting up the Scanning Unit 1. Attach the paper support to the paper feed tray. 1 WARNING! The support bracket prevents the unit from tipping over when in use. Using the unit without installing the support bracket may cause damage or personal injury. 2. Attach the paper feed tray to the machine. 3. Carefully lift the back of the printing unit and align the wells under the back of the printing unit with the plugs on the support bracket. Lower the printing unit on top of the bracket. The bracket provides stability for the MFP when the scanning unit is attached. 3. Install the Paper Stopper (1). If using letter size paper, pull the lever (2) up to stop paper from falling


6 Attaching the Scanning unit 1. Before attaching the scanning unit you must remove the two transport restraints (1) located on mounting posts on the printing unit. 3. Turn both locking knobs to the locked position to secure the scanning unit in place. 1 a.first, turn the locking knob on the side of the printing unit to the unlock position. This will release the transport restraint. Unlock the Scan Mechanism CAUTION! The scan mechanism is locked during transport to prevent damage. Be sure to unlock it before using the machine. 4. Locate the scan lock switch on the left side of the machine. b. Lift out the transport restraint. c. Repeat the procedure to remove the restraint on the other side. 2. Carefully position the scanning unit on the printing unit mounting posts. Slide it slightly to the back of the printing unit. 5. Lower the cover and move the lock switch to the unlocked position. Close the cover. 6
, to the ADF port on the scan unit.")

 to the USB port on the scanning unit.")


7 Connecting the Cables Connect the ADF Cable Connect the ADF cable (attached to the documents cover), to the ADF port on the scan unit. Connect the Computer Cable IMPORTANT NOTE! To ensure the scan function works properly, install the Scanning Unit Driver before connecting the USB cable to your computer. Connect one end of the USB cable (long cable) to the USB port on the scanning unit. DO NOT connect the other end to your computer. Complete the connection only after installing the driver. Connect the Ethernet Cable Connect one end of your Ethernet LAN cable to an available port of your Ethernet hub. Connect the other end to the LAN port at the back of the scan unit. Connect the Scanning Unit Power Adapter 1. To mount the power adapter box to the back of the scanning unit, position the clip on the back of the box on the scanning unit frame as shown, then slide the box to the left until it locks in place. Connect the Printing Unit Cable 1. Connect one end of the USB cable (short cable) to the printing unit. 2. Be sure the power switch is in the "O" position. Connect the power adapter cable to the power port. 2. Connect the other end to the Copy port of the scanning unit. 7


8 Connect the Power connector cord 1. Connect the power connector cord to the power adapter on the scanning unit. 2. Connect the other end to the printer unit power input port. Attach the AC power cord. 3. Be sure the printing unit power switch is in the "0" position. Connect the AC power cord to a power outlet. IMPORTANT NOTE! Do not turn power on scanning unit or printing unit! 8


9 Preparing the Image Drum/ Toner Cartridges 1. Press the cover release button and lift the top cover. 5. Carefully place the toner/drum cartridge back into the printing unit. 2. Carefully lift the black toner/drum cartridge out of the printing unit. 6. Push the blue lock lever towards the back of the unit as far as it will go. This unlocks the toner cartridge to release toner into the image drum. CAUTION! The green image drum surface at the base of the cartridge is very delicate and light sensitive. Do not touch it and do not expose it to normal room light for more than 5 minutes. 3. Unwrap the protective sheet and place the cartridge on a flat work surface. 4. Pull out both the protective sheet and the plastic sheet in the direction of arrow. 9


.")

10 7. Repeat steps 2 to 6 with remaining toner/ drum cartridges. Preparing the Fuser 1. Observe the instructions printed on the orange band. C M Y 2. Remove the orange band. Press firmly on the blue lock (1) to release the orange transport restraint (2). Pull the restraint out in the direction of the arrow Press firmly on both sides of the cover to close it. 10


 stopper and")

11 Loading Paper 1. Pull out the paper tray. 5. Close the paper tray. 2. Remove the transport restraint by pulling downward then out. 3. Adjust the rear (1) stopper and paper guides (2) to the size of paper being used. Do not overload. 4. Load the paper. 11
 LED is illuminated on the printing unit")

12 Turning Power On IMPORTANT NOTE! Do not turn the scanning unit power on until the Power (Ready) LED is illuminated on the printing unit status panel. READY BACK ENTER ON LINE ATTENTION MENU CANCEL Turn printing unit power on Turn power switch to the " " position. Turn scanning unit power on Wait until the Power (Ready) LED illuminates solid green on the printing unit status panel. Turn scanning unit power to the " " position. 12
13 Network Installation: Windows Minimum Configuration Requirements To make the best of this MFP, the following configuration is required: To send s: TCP/IP network. A SMTP and a optional POP3 server. To file document(s) via intranet: FTP, HTTP, or CIFS Protocol environment. Windows 98, Windows NT, Windows 2000, Windows ME, Windows XP, HTTP or FTP server. Pre Installation Information Your MFP must be set up properly on your network to perform scan to and scan to FTP functions. In order for other network devices to find the MFP on the network, the following network parameters must be set: For more information on these parameters, see the on-line User s Guide. Setting the IP Address An IP address is required to install the drivers. If you are using DHCP, the IP address will automatically be detected. If you are not using DHCP, you need to obtain the IP address from your network administrator and enter it using the front panel: 1. Press on the control panel. Print Menu appears on the LCD display. 2. Press until Network Settings appears on line Press. The default IP Address appears. 4. Press to select this item. 1. DHCP enable IP Address Subnet Mask Using the numeric keypad, enter the IP address. Use to move forward to the next digit or back to the previous digit. 4. Gateway IP DNS server Press to save the IP address. 6. SMTP server SMTP port POP3 server Press twice to exit the menu and return to the scanning unit LCD display. 9. POP3 Port 110 Internet Communication Features Scan to The MFP allows you to deliver your scanned document to addresses on the network. The document is first scanned and converted to a standard file format, then transmitted to remote recipients simultaneously as an attachment. Scan to FTP Deliver your scanned document via the intranet. The MFP allows you to save scanned documents directly to a designated server or a personal computer on the network. 13

 ScanSoft TextBridge ScanSoft PaperPort Includes the necessary software to manage your network connected MFP plus management of your address book,")
14 Installing Drivers and Network Software NOTE! To ensure the scan function works properly, DO NOT connect the USB cable to your computer until the MFP drivers have been installed. 1. Check to be sure the USB cable is not connected to your computer. 2. Insert CD1 into your CD-ROM drive. The CD will autorun. If it doesn t, click Start Run Browse. Browse to your CD-ROM drive. Double-click Install.exe. Click OK. 3. Select your language. 4. Click Next to accept the terms of the license agreement. 5. You can choose either MFP Essentials or Custom Install. OKI MFP Management (OKI Network Setup Tool) ScanSoft TextBridge ScanSoft PaperPort Includes the necessary software to manage your network connected MFP plus management of your address book, individual profiles, color adjustment and LDAP management. Converts paper documents into editable electronic documents. A popular scanning and document management application for Microsoft Windows. 1. Click MFP Essentials. 2. Select Network Installation. Click Next. 3. Follow the on-screen instructions. 4. When the software is installed, connect the USB cable to your computer. Choose Custom Install if you want to select and install each software tool. These main selections include the core software, plus additional software to support key MFP applications: When you select MFP Essentials, the core software needed to set up your MFP and support each function is installed automatically in sequence. The printing unit and scanning unit driver are installed first. Then you will be prompted to continue installation of the Productivity Software. The Productivity Software supports all network MFP operations and includes: Note: Move the cursor over each main choice button to see a list of the software tools included. 1. Check to be sure the USB cable is not connected to your computer. 2. Click Custom Install. 3. Select each driver and utility you want to install and follow the on-screen instructions. 4. When the installation is finished, connect the USB cable to your computer. 14


15 Configuring Your MFP This section is specifically for persons who are responsible for the administration of this MFP. There are three methods to configure your machine. From the OKI MFP Network Setup Tool From the MFP s web page From the control panel. Configuring from the OKI Management Utility (OKI MFP Network Setup Tool) This tool provides a convenient way to remotely configure all OKI MFP on the network. 1. Click Start > Setting > OKI MFP Network Setup Tool > OKI MFP Network Setup Tool. 2. Double click on the New Device icon. 3. Enter the IP Address. 4. Right-click the ES1624n MFP icon when it appears to open the program. 5. Use the OKI Management Utility (OKI MFP Network Setup Tool) to define parameters for TCP/ IP, SMTP and POP3 protocols. Then use it to manage your network connected MFP, including the address book, profiles, color adjustment and LDAP Management tools. Click on the utility s HELP tool for more information. 2. Click Network Settings and enter the relevant values. NOTE! Administrative Settings are blocked by a password. We recommend that the system administrator create a password since the machine is shipped without one. Configuring from the Control Panel Configuring from the Web Page 1. Type the IP address of the MFP in the URL field of your browser and then press Enter. The MFP web page appears. 1. Press Menu on the Control panel. This prompts the following menu items on the LCD display. Printing Unit Menu Network Settings Mail Server Report Print Management (This selection will be blocked by an administrator password. The machine is shipped without a specific password. It is recommended that the administrator create a new password to ensure security.) 2. Use the DOWN key to scroll to each item. The setup parameters are located in the Network Settings and Mail Server items. Use the SELECT key to select your desired item. For additional menu information and a description of each menu item, see the on-line User s Guide. 15
16 Additional Network Software The following additional network utilities can be installed by clicking on the Network Software button: Web Driver Installer Utility Use this utility to create a web page and set up your MFP with groups of clients who have access. Once the unit has been registered by the administrator, the utility can automatically send an to each registered client. OKI LPR Utility Oki LPR allows you to print directly to an MFP on the Ethernet without a print server. It creates an OKI print port and installs a pop-up utility to monitor printing unit status. Profiles Before sending documents to filing servers you should set up a few profiles to speed up the filing process. A profile contains a list of filing parameters such as your filing protocol, directory, file name and other scanning parameters. To create a new filing profile, either enter the machines s web page or install and start the Network Setup Tool in the supplied CD-ROM. You can create up to 20 profiles. Address Book An Address Book is a list of addresses to which you can send your scanned image. To create an address book, either enter the machines s web page or install and start the Network Setup Tool in the supplied CD-ROM. Note: The address book cannot be assigned on the Control Panel. PrintSuperVision Utility PSV.Net uses internet based software components to access and distribute data to support administrator control of all MFPs and printers on a network. Network Printer Status Utility This utility creates an additional tab called STATUS in the properties dialog that allows the client to monitor the selected MFP s status. Faxing To fax documents scanned from your MFP, you must have a fax modem installed in your computer. You can use your favorite program to set up and send faxes. Or, if you are using Windows 2000 or Windows XP, you can set up the Microsoft Fax utility and send faxes only. To do this: Click Start > Printers & Faxes > Setup Faxing. Follow the setup instructions. 16


 and paper guides (2). 4. Adjust the paper guides to center the document(s) in the ADF. Placing document(s) on the glass 1.")
17 Operating Your MFP IMPORTANT NOTE! Before sending a print job, be sure that the MFP is in SCAN TO MODE. In COPY MODE, the printing unit will not accept a print job. Loading the Paper Cassette Tray Recommended Paper weight = 17 to 32 lb. 1. Remove the paper tray from the printer. For more information on operating your machine, see the on-line Users Guide located on the supplied CD. Placing document(s) in the ADF 1. Make sure your document is free of staples, paper clips and is not torn. 2. If your have multiple pages, fan your documents to avoid occasional paper jams. The ADF holds up to 50 pages. 3. Place your document(s) with the text FACE UP in the ADF and make sure that the top of each page feeds in first.. 2. Fan the paper to be loaded to ensure all sheets are separated. 3. Load the paper into the paper cassette tray. 4. Adjust the rear stopper (1) and paper guides (2). 4. Adjust the paper guides to center the document(s) in the ADF. Placing document(s) on the glass 1. Open the document(s) cover to reveal the glass. 2. Place your document(s) with the text FACE DOWN on the glass and align the document(s) in the upper-left corner. 5. Replace the paper tray. For more information, see the on-line User's Guide on the Documentation CD provided with your printer. 3. Close the document cover. 17

18 Quick Operation Enter your copy count via the numeric keypad. Press Copy Mode key. Press B&W copy. to make Choose your address from the Address Book. Press color copy. to make Press Scan to Mode key. i.e. + Press to send your document in B&W. + Choose your desired destination from the FTP Address. Press to send your document in color. Press Scan to Mode key. i.e. + Press to file your document in B&W. + Press to file your document in color. 18
19 For Additional Information For additional information about your MFP, see these sources: The electronic User s Guide s on the supplied CD for expanded information on using your MFP. The Handy Reference Guide. The HELP files available with the utility programs. For Assistance If you need further assistance or have questions: See our web site U.S. & Canada, Call ( OKI-DATA) 24 hours a day, 7 days a week. 19
20 Oki Data Americas, Inc., 2000 Bishops Gate Blvd., Mt. Laurel, NJ Tel: (856) Fax: (856) Oki Data Americas, Inc., 2735 Matheson Blvd. East, Unit 1, Mississauga, Ontario L4W 4M8, Canada Télép: Téléc: Oki is a registered trademark of Oki Electric Industry Company, Ltd. Microsoft and Windows are registered trademarks of Microsoft Corporation Oki Data Americas, Inc
C5100 Computer Connections & Software Install Guide
 C5100 Computer Connections & Software Install Guide Installation Checklist Network Install: Hardware...4 Connect to the Network Port...4 Network Install: Software...5 TCP/IP...5 Local Install: USB, Hardware...7
Microline 420/421 & 490/491
 Check the contents: 1. Printer 2. Ribbon cartridge 3. Power Cable 4. CD with drivers and online User Guide 5. Setup Guide 2 1. 2. 1. Grasp tabs (1) and open access cover (2). 2. Remove printhead shipping
Executive Series 1220n Computer Connections & Software Install Guide
 Executive Series 1220n Computer Connections & Software Install Guide Installation Checklist Network Install: Hardware...2 Network Install: Software...3 TCP/IP...3 Novell...6 Local Install: Windows USB
Setup Guide. Overview Check Contents. ➊ Printer ➋ Toner ➌ Power Cord
 1 Setup Guide Overview Check Contents ➊ ➊ Printer ➋ Toner ➌ Power Cord ➍ CD ➏ ➎ Light-Shield Bag (to protect image drum from light when it is removed from printer) ➏ Setup Guide, Warranty and Regulatory
C5150n, C5200ne & C5200n Computer Connections & Software Install Guide
 C5150n, C5200ne & C5200n Computer Connections & Software Install Guide Installation Overview: Windows Windows TCP/IP Network Installation: C5150n & C5200ne Ethernet Connection... 2 Software... 3 Windows
Computer Connections & Software Install Guide
 C5400 & C5400n Computer Connections & Software Install Guide Installation Overview: Windows Network Installation: Model C5400n Only Ethernet Connection... 2 Software: TCP/IP... 3 Software: Novell... 8
Quick Setup Guide Imagistics ix 2701
 Quick Setup Guide Imagistics ix 2701 Before you can use the machine, you must set up the hardware and install the driver. Please read this Quick Setup Guide for proper set up and installation instructions.
C9600 Software Installation Guide
 C9600 Software Installation Guide Table of Contents Network Installation...2 Windows...2 Novell...6 Windows Installation...7 USB Connection...7 Parallel Connection...10 Macintosh Installation...12 OS 9.1
Quick Setup Guide MFC-8220
 Quick Setup Guide MFC-8220 Before you can use the MFC, you must set up the hardware and install the driver. Please read this Quick Setup Guide for proper set up and installation instructions. Step 1 Step
ES3640e MFP Software Installation Guide
 ES3640e MFP Software Installation Guide About this Guide This guide describes the initial printer driver installation. For more detailed information, refer to the EFI User Software Installation Guide and
Product Parts Front view... 2 Rear view... 2 Inside the product... 3 Scanner parts... 3 Control panel... 4
 Table of Contents Product Parts Front view................................................................. 2 Rear view.................................................................. 2 Inside the product...........................................................
Quick Start Guide. Chapter 1 : Setting the Machine. Unpack the machine and its components. Check that you have the following: Machine
 Quick Start Guide READ THIS FIRST Thank you for purchasing Canon Color imageclass MF8180c. To get your machine ready for use, please follow the instructions in this document before referring to any other
Quick Setup Guide MFC-8440
 Quick Setup Guide MFC-8440 MFC-8840D MFC-8840DN Before you can use the MFC, you must set up the hardware and install the driver. Please read this Quick Setup Guide for proper set up and installation instructions.
Product Update. Overview. Table of Contents
 Product Update Overview This Product Update explains the changes to the products listed below. Microline 320/321 Turbo Microline 320/321 Turbo / n Microline 390/391 Turbo Microline 390/391 Turbo / n Microline
Before Installing the Software
 Before Installing the Software Before using the printer, the printer software drivers must be installed. The software is on the CD-ROM included with your printer. Installation instructions are included
Set-Up Instructions. Set-Up Instructions. Unpack the machine and its components.
 Set-Up Instructions Thank you for purchasing the Canon FAXPHONE L80. To get your machine ready for use, please follow the instructions in this document before referring to any other documentation. Unpack
Loading paper and specialty media Learning about the printer. Stop all printer activity. 7 Back button Return to the previous screen.
 Quick Reference Use the 6 Stop or Cancel button To Stop all printer activity. Loading paper and specialty media Learning about the printer Using the printer control panel 0 Use the 9 To Display View the
4 Keypad Lets you enter numbers, letter, or symbols. 5 Submit Lets you submit changes made in the printer settings
 Quick Reference Learning about the printer Understanding the printer control panel 1 2 3 4 7 1 @!. 2 A B C 3 D E F 4 G H I 5 J K L 6 M N O 7 P Q R S 8 T U V 9 W X Y Z * 0 # 6 5 Item Description 3 Sleep
9 Start button Start a job, depending on which mode is selected. 10 Fax button Send faxes. 11 Back button Return to the previous screen.
 Quick Reference Use the To 9 Start button Start a job, depending on which mode is selected. > Settings > > Paper Menu > > Paper Size/Type > Learning about the printer Using the printer control panel 10
OKIFAX 5650 MFP Option Kit. Overview. Setup Guide
 OKIFAX 5650 MFP Option Kit Overview Setup Guide Every effort has been made to ensure that the information in this document is complete, accurate, and up-to-date. The manufacturer assumes no responsibility
Improper Setup icons alert you to devices and operations that are not compatible with the machine.
 Warning Caution Improper Setup Note User s Guide Warnings tell you what to do to prevent possible personal injury. Cautions specify procedures you must follow or avoid to prevent possible damage to the
Hard Disk Drive (HDD) Installation Instructions
 Installation Instructions") Hard Disk Drive (HDD) Installation Instructions HDD PART NUMBER 70043501 Every effort has been made to ensure that the information in this document is complete, accurate, and up-to-date. Oki Data assumes
Hard Disk Drive (HDD) Installation Instructions HDD PART NUMBER 70043501 Every effort has been made to ensure that the information in this document is complete, accurate, and up-to-date. Oki Data assumes
MultiPASS F50 Setup Instructions
 MultiPASS F50 Setup Instructions Step 1: Unpack the F50 MFP 1. Carefully remove all items from the box. Step 2: Set up the F50 MFP 1. Remove shipping tape and protective shipping materials. 2. Open the
Before Installing the Software
 Before Installing the Software Before using the printer, the printer drivers and status monitor software must be installed. The software is on the Software Installation CD-ROM included with your printer.
Unpack the machine and its components. Cassette/Multi-purpose tray
 Set-Up Sheet Thank you for purchasing the Canon imageclass D320. To get your machine ready for use, please follow the instructions in this Set-Up Sheet before referring to any other documentation. Unpack
Changing the Size of the Paper in the Paper Tray For Local Printing For Network Printing (WorkCentre PE120i only)...1.
...1.") Quick Start Guide CONTENTS Step 1: Unpacking... 1.3 Step 2: Installing the Toner Cartridge... 1.5 Step 3: Loading Paper... 1.7 Changing the Size of the Paper in the Paper Tray.. 1.9 Step 4: Connecting
Quick Start Guide CONTENTS Step 1: Unpacking... 1.3 Step 2: Installing the Toner Cartridge... 1.5 Step 3: Loading Paper... 1.7 Changing the Size of the Paper in the Paper Tray.. 1.9 Step 4: Connecting
Important! Save the box and shipping materials for transporting the MultiPASS in the future.
 Step 1: Unpack the MultiPASS 1. Carefully remove all items from the box. Remove these items from the documentation package: Quick Start Guide, the Canon Creative for MultiPASS CD-ROM, Registration card,
Quick Setup Guide DCP-9040CN STEP 1 STEP 2. Setup is Complete! Setting Up the Machine. Installing the Driver & Software
 DCP-9040CN Quick Setup Guide Before you can use the machine, you must set up the hardware and install the driver. Please read this Quick Setup Guide for proper set up and installation instructions. STEP
Quick Reference Manual
 Quick Reference Manual 100-100578 Trademarks XANTÉ is a registered trademark of XANTÉ CORPORATION. Adobe ; Adobe PageMaker ; Adobe PostScript, the PostScript, and Adobe logos are registered trademarks
EPSON ActionLaser Read This First. eepa POLLUTION PREVENTER
 EPSON ActionLaser 1400 Read This First eepa POLLUTION PREVENTER This booklet is to help you set up your printer and begin printing quickly. It also gives you instructions for routine maintenance. If you
Hard Disk Drive (HDD) Installation Instructions
 Installation Instructions") Hard Disk Drive (HDD) Installation Instructions 59375102 2007 by Oki Data Americas, Inc. All rights reserved. Every effort has been made to ensure that the information in this document is complete, accurate,
Hard Disk Drive (HDD) Installation Instructions 59375102 2007 by Oki Data Americas, Inc. All rights reserved. Every effort has been made to ensure that the information in this document is complete, accurate,
Setting Up the machine. Setup is Complete!
 MFC-8670DN Before you can use the machine, you must set up the hardware and install the software. Please read this Quick Setup Guide for the correct setup procedure and installation instructions. Step
Hard Disk Drive (HDD) Installation Instructions
 Installation Instructions") Hard Disk Drive (HDD) Installation Instructions 59393401 2007 by Oki Data Americas, Inc. All rights reserved. Document P/N 59383401 Disclaimer Every effort has been made to ensure that the information
Hard Disk Drive (HDD) Installation Instructions 59393401 2007 by Oki Data Americas, Inc. All rights reserved. Document P/N 59383401 Disclaimer Every effort has been made to ensure that the information
Quick Setup Guide MFC-3320CN
 Quick Setup Guide MFC-3320CN Before you can use the MFC, you must set up the hardware and install the driver. Please read this Quick Setup Guide for proper set up and installation instructions. Step 1
Setting Up the Machine. Setup is Complete!
 DCP-7020 Before you can use the machine, you must set up the hardware and install the software. Please read this Quick Setup Guide for the correct setup procedure and installation instructions. Step 1
Start Here. Unpack. 1 Make sure you have these items: 2 Remove all the packing materials and tape.
 Epson Stylus Pro 3880 Start Here Unpack 1 Make sure you have these items: Printer Power cord CD-ROM User's Guide Ink cartridges Rear sheet guide Limited Warranty Warning: The printer weighs about 43 pounds
Laser Printer WL-660 Series for Windows Quick Setup Guide
 Laser Printer WL-660 Series for Windows Quick Setup Guide First read this Quick Setup Guide to set up your printer and prepare your computer for the printer. CAUTION This printer has been designed specially
8 USB port Connect a flash drive to the printer. Notes:
 Quick Reference Using the 2.4-inch display printer model Learning about the printer Using the printer control panel 3 2 3 4 5 6 7 Use the 2 To 0 Display View the printer status and messages. 2 Left arrow
Quick Reference. ineo 3300P
 ineo 3300P Contents 1 Learning about the printer... 3 Using the printer control panel... 3 Understanding the printer control panel light sequences... 4 2 Loading paper and specialty media... 9 Setting
Memory DIMM Installation Instructions DIMM PART NUMBER 64MB: MB: MB: MB:
 Memory DIMM Installation Instructions DIMM PART NUMBER 64MB: 70040901 128MB: 70041101 256 MB: 70041201 512 MB: 70041901 Every effort has been made to ensure that the information in this document is complete,
Hard Disk Drive Installation Instructions
 Hard Disk Drive Installation Instructions HDD PART NUMBER 70043501 Every effort has been made to ensure that the information in this document is complete, accurate, and up-to-date. Oki Data assumes no
Learning about the printer...5. Loading paper and specialty media...9
 Quick Reference Contents Learning about the printer...5 Using the printer control panel...5 Understanding the printer control panel light sequences...6 Loading paper and specialty media...9 Setting the
3 Sleep button Enable Sleep mode or Hibernate mode. Notes:
 Quick Reference Use the To 3 Sleep button Enable Sleep mode or Hibernate mode. Indicator light color and its corresponding printer status Indicator light Printer status Off The printer is off or in Hibernate
OKI Hard Disk Drive Installation Instructions
 OKI 70037301 Hard Disk Drive Installation Instructions Every effort has been made to ensure that the infor-mation in this document is complete, accurate, and up-to-date. Oki Data assumes no responsibility
Stop all printer activity. Note: A list of options is displayed once Stopped appears on the display. Return to the previous screen.
 Quick Reference Using the non-touch-screen printer model Learning about the printer Using the four-arrow-button printer control panel 0 Use the 3 4 5 To 9 8 7 4 7 ABC 3 DEF GHI 5 JKL 6 MNO PQR 8 STU 9
Hard Disk Drive Installation Instructions
 Hard Disk Drive Installation Instructions HDD PART NUMBER 70040902 Prepare the Printer Note: Models designated Letter/Legal are those which take paper up to legal size. Models designated Tabloid take the
Xerox WorkCentre 3655
 Xerox WorkCentre 3655 Machine Overview Document Feeder Output Tray Control Panel Tray 1 Bypass Tray Loading Paper in Tray 1 Make sure the Green Guides are right up again the paper. Note: You will need
INSTALLATION MANUAL. I. Outline of installation procedures. d-color MF201. Applied Machine: d-color MF201 PC-105. Machine DF-612
 d-color MF201 INSTALLATION MANUAL Be sure to correctly follow the procedures in order as explained in this installation manual. If you do not follow the procedure in order, the image trouble
To Set Up your OKIPAGE 8z using Windows XP with USB or Parallel Connection:
 OKIPAGE 8z Product Update To Set Up your OKIPAGE 8z using Windows XP with USB or Parallel Connection: Follow steps 1 through 6 in the Quick Setup guide. Then follow the instructions below. Start with both
Quick Reference Manual
 Quick Reference Manual 100-100555 Trademarks XANTÉ is a registered trademark of XANTÉ CORPORATION. Adobe ; Adobe PageMaker ; Adobe PostScript, the PostScript, and Adobe logos are registered trademarks
Print Server. User s Manual. Rev. 01 (April, 2004) Made In Taiwan
 Made In Taiwan") Print Server User s Manual Rev. 01 (April, 2004) Made In Taiwan TABLE OF CONTENTS ABOUT THIS GUIDE... 4 INTRODUCTION... 5 PACKAGE CONTENTS... 6 SYSTEM REQUIREMENTS... 6 GENERAL FEATURES... 7 PRODUCT VIEW...
Print Server User s Manual Rev. 01 (April, 2004) Made In Taiwan TABLE OF CONTENTS ABOUT THIS GUIDE... 4 INTRODUCTION... 5 PACKAGE CONTENTS... 6 SYSTEM REQUIREMENTS... 6 GENERAL FEATURES... 7 PRODUCT VIEW...
Hard Disk Drive (HDD) Data Protection Kit Installation Instructions
 Data Protection Kit Installation Instructions") Hard Disk Drive (HDD) Data Protection Kit Installation Instructions 59399801 2009 by Oki Data Americas, Inc. All rights reserved. Disclaimer Every effort has been made to ensure that the information in
Hard Disk Drive (HDD) Data Protection Kit Installation Instructions 59399801 2009 by Oki Data Americas, Inc. All rights reserved. Disclaimer Every effort has been made to ensure that the information in
Setting Up the machine. Setup is Complete!
 MFC-8460N MFC-8860DN Before you can use the machine, you must set up the hardware and install the software. Please read this Quick Setup Guide for the correct setup procedure and installation instructions.
Quick Reference. Understanding the Operator Panel. Understanding the operator panel lights. Quick Reference
 Quick Reference Understanding the Operator Panel The printer operator panel has two buttons and two lights. Lights indicate the status of the printer. Buttons are used to continue or cancel the current
Use the To. 4 Keypad Enter numbers, letters, or symbols on the printer. Stop all printer activity. 6 Indicator light Check the status of the printer.
 Quick Reference Learning about the printer Using the control panel Use the To 4 Keypad Enter numbers, letters, or symbols on the printer. 5 Stop or Cancel button Stop all printer activity. 6 Indicator
 Every effort has been made to ensure that the information in this document is complete, accurate, and up-to-date. Oki Data assumes no responsibility for the results of errors beyond its control. Oki Data
Setup Guide. Confirming the Installation Space. Installation space (W x D x H) 70.5 x 66.3 x 61.5 inches (1790 x 1684 x 1560 mm) 23.
 70.5 x 66.3 x 61.5 inches (1790 x 1684 x 1560 mm) 23.") Introductory Information Setup Guide ENGLISH Read this manual before attempting to operate the printer. Keep this manual in a handy location for future reference. Caution Instructions in this Setup Guide
Introductory Information Setup Guide ENGLISH Read this manual before attempting to operate the printer. Keep this manual in a handy location for future reference. Caution Instructions in this Setup Guide
LBP-810 Laser Printer
 LBP-810 Laser Printer Getting Started Guide IMPORTANT: Read this manual carefully before using your printer. Save this manual for future reference. Copyright Copyright 2001 Canon Inc. All information in
Remove the accessory tray and check the contents. Toner cartridges (1 each: black, magenta, cyan, yellow)
") Overview 1 2 3 4 5 6 7 8 9 10 11 Unpack... 1 Install the Toner Waste Box... 4 Install the Oil Roller... 5 Prepare the Image Drums... 6 Install the Toner Cartridges... 7 Load paper... 8 Connect to Your
Overview 1 2 3 4 5 6 7 8 9 10 11 Unpack... 1 Install the Toner Waste Box... 4 Install the Oil Roller... 5 Prepare the Image Drums... 6 Install the Toner Cartridges... 7 Load paper... 8 Connect to Your
Contents Replacement Supplies... 3 Using the Address Book Using Profiles Loading Media Control Panel Keys... 6
 Contents Replacement Supplies... 3 Where to Purchase... 3 Part Numbers...3 Measuring Usage...5 Take Advantage of OKI s Supply Manager!...5 Check Out OKI Managed Services...5 Control Panel Keys... 6 Status
Printing Your First Page. Attaching the Paper Support. Plugging in the Printer. Checking the Printer
 Printing Your First Page Attaching the Paper Support Checking the Printer Plugging in the Printer Installing the Ink Cartridges Installing the Printer Software Connecting the Printer 4011307 XXX-00 Attaching
Part No. P May 4, Business Communications Manager. BCM Imaging Tool User Guide
 Part No. P0609711 01.01 May 4, 2004 Business Communications Manager BCM Imaging Tool User Guide 2 Copyright 2004 Nortel Networks All rights reserved. May 4, 2004. The information in this document is subject
Quick Start Plus. OKIFAX 5300 Plus
 PRS MN WXY Consumables and Optional Accessories Toner Cartridge: Part # 00 Image Drum: Part # 0 MB Non-battery backup memory expansion card: Part # 000 MB Non-battery backup memory expansion card: Part
READ ME FIRST. Windows NT. *DSL Equipment Installation Guide: Efficient Networks 5260
 READ ME FIRST Windows NT *DSL Equipment Installation Guide: Efficient Networks 5260 *Digital Subscriber Line Part Number: 5260NT02A Version 1.2-A. Table of Contents Follow Steps 1 through 8 to complete
Sending Scan Files by . Sending Scan Files to Folders. Sending Scan Files Using WSD. Storing Files Using the Scanner Function
 Operating Instructions Scanner Reference 1 Sending Scan Files by E-mail 2 Sending Scan Files to Folders 3 Sending Scan Files Using WSD 4 Storing Files Using the Scanner Function 5 Saving Scan Files on
Hard Disk Drive (HDD) Installation Instructions
 Installation Instructions") Hard Disk Drive (HDD) Installation Instructions c53_105_hdd.jpg for HDD Part Number 70043502 59387901 Copyright Information 2006 by Oki Data Americas, Inc. All rights reserved. Document Information Hard
Hard Disk Drive (HDD) Installation Instructions c53_105_hdd.jpg for HDD Part Number 70043502 59387901 Copyright Information 2006 by Oki Data Americas, Inc. All rights reserved. Document Information Hard
Quick Setup Guide MFC-9840CDW STEP 1 STEP 2. Setup is Complete! Setting Up the Machine. Installing the Driver & Software
 MFC-9840CDW Quick Setup Guide Before you can use the machine, you must set up the hardware and install the driver. Please read this Quick Setup Guide for proper set up and installation instructions. STEP
Before you can use the machine, you must set up the hardware. Please read this Quick Setup Guide for the correct setup procedure.
 FAX-2480C Quick Setup Guide Before you can use the machine, you must set up the hardware. Please read this Quick Setup Guide for the correct setup procedure. Setting Up the Machine Setup is Complete! Keep
fi-4120c Image Scanner
 P3PC-E007-01EN fi-4120c Image Scanner Cleaning and Maintenance 5 DAILY CARE This chapter describes how to clean the scanner. WARNING When cleaning the scanner, turn off the power, and unplug the AC cable
Quick Setup Guide MFC-5440CN
 Quick Setup Guide MFC-5440CN MFC-5840CN Before you can use the machine, you must set up the hardware and install the driver. To help you get started in setting up the machine and installing the driver
OKI C9000 Series Setup Guide
 OKI C9000 Series Setup Guide Installation Checklist: Please cut this page out and use it as a guide when installing your printer. 1 Install the Printer h Select a Location (see p. 3) h Unpack (see p. 4)
ES 2024/2024e and ES 3037/3037e Software Installation Guide
 ES 2024/2024e and ES 3037/3037e Software Installation Guide Installation Checklist Which Printer Driver?... 2 USB Versus Parallel Interface: Windows... 2 Installation... 3 Network Installation... 3 Connect
Multifunction Scan Center User's Manual
 Multifunction Scan Center User's Manual manual-en-250-0823-e-sc8800-v100 Regulatory model: DT-1214H Avision Inc. Safety Information When using this equipment, the following safety precautions should always
Check the status of the printer. 7 USB port Connect a USB a flash drive to the printer. Note: Only the front USB port supports flash drives.
 Quick Reference Use the 6 Indicator light Check the status of the printer. Learning about the printer Using the printer control panel 7 USB port Connect a USB a flash drive to the printer. Note: Only the
Lexmark X203n and X204n Series. Maintenance Guide
 Lexmark X203n and X204n Series Maintenance Guide February 2011 www.lexmark.com Contents...3 Cleaning the exterior of the printer...3 Cleaning the scanner glass...4 Cleaning the ADF separator rollers...5
User Manual. Unpacking and Setup
 User Manual USB Print Server LPV2-USB-TX1 Unpacking and Setup This section provides unpacking and setup information for the USB Print Server. Unpacking Open the shipping carton of the Switch and carefully
Trademarks. Copyright This manual is Copyrighted 2006 by Xanté Corporation. All Rights Reserved. Printed in the USA.
 Trademarks Xanté is a registered trademark of Xanté Corporation. Adobe ; Adobe PageMaker ; Adobe PostScript, the PostScript, and Adobe logos are registered trademarks of Adobe Systems Incorporated. Adobe
ImageScan Pro 800ix Series High-Speed ADF Scanner. Installation and Setup Guide. Installation and Setup Guide
 ImageScan Pro 800ix Series High-Speed ADF Scanner Installation and Setup Guide Installation and Setup Guide Box Contents: 1. Scanner 2. USB Cable 3. AC Adapter 4. Stacker Tray 5. Installation Guide 6.
Laser Printer P2500. Quick Setup Guide. Read this Setup Guide before you set up the printer.
 Laser Printer P2500 Quick Setup Guide Read this Setup Guide before you set up the printer. Before you can use the printer, you must set up the hardware and install the printer and scanner drivers. Identify
Chapter 1 - Introduction and Installation ScreenWriter 4 Printer
 Chapter 1 - Introduction and Installation ScreenWriter 4 Printer Fig. 1.1 ScreenWriter 4 Printer The ScreenWriter 4 is designed for high-end silk-screen and graphics applications. Standard density and
User Guide. Set Up & Start Up Basic Copier Operations Key Operator Functions
 User Guide Set Up & Start Up Basic Copier Operations Key Operator Functions Toshiba America Business Solutions, Inc. 2006 Training and Dealer Development SET UP & START UP Turning the System On Turning
Wireless USB Port Multi-Functional Printer Server. Model # AMPS240W. User s Manual. Ver. 1A
 Wireless USB 2.0 1-Port Multi-Functional Printer Server Model # AMPS240W User s Manual Ver. 1A Table of Contents 1 Introduction...3 1.1 Package Contents... 3 1.2 System Requirements... 3 2 Multi-Functional
PS-9000 User s Manual UK English
 PS-9000 User s Manual UK English Introduction Thank you for purchasing PS-9000 print server. This manual provides complete information on how to set up and use PS-9000 safely. Please read this manual carefully
User s Guide [Network Administrator]
![User s Guide [Network Administrator]](/thumbs/82/86930976.jpg "User s Guide [Network Administrator]") User s Guide [Network Administrator] Table of contents 1 Introduction 1.1 Welcome... 1-2 1.1.1 User's guides... 1-2 1.1.2 User's Guide... 1-2 1.2 Conventions used in this manual... 1-3 1.2.1 Symbols used
User s Guide [Network Administrator] Table of contents 1 Introduction 1.1 Welcome... 1-2 1.1.1 User's guides... 1-2 1.1.2 User's Guide... 1-2 1.2 Conventions used in this manual... 1-3 1.2.1 Symbols used
X940e, X945e. Maintenance Guide
 X940e, X945e Maintenance Guide July 2010 www.lexmark.com Contents...3 Storing supplies...3 Checking the status of supplies...3 Checking the status of supplies from the control panel... 3 Printing a menu
Quick Setup Guide DCP-110C
 Quick Setup Guide DCP-110C Before you can use the machine, you must set up the hardware and install the driver. Please read this Quick Setup Guide for proper set up and installation instructions. Step
Getting Started. Read Me First. series. Canon Inkjet Premium Photo Printer. 1 Preparation...P.1. Install the Print Head... P.3
 Canon Inkjet Premium Photo Printer series 1 Preparation...P.1 Getting Started Read Me First Symbols Used in This Document Prohibited actions. Instructions including important information. In this guide,
Quick Guide FS-C1020MFP. Names and Locations. Using the Copier Function. Using the Scanner Function. Using the Fax Function.
 FS-C1020MFP Quick Guide Names and Locations Using the Copier Function Using the Scanner Function Using the Fax Function Troubleshooting Removing Paper Jams Print Cartridges Read this manual carefully before
TABLE OF CONTENTS COPYRIGHT INTRODUCTION...3 PRODUCT OVERVIEW...3 COMPONENTS AND FEATURES...3 HARDWARE INSTALLATION
 TABLE OF CONTENTS COPYRIGHT...2 1. INTRODUCTION...3 PRODUCT OVERVIEW...3 COMPONENTS AND FEATURES...3 HARDWARE INSTALLATION...3 2. MFP SERVER INSTALLATION...5 PREPARATION...5 CONFIGURATION SOLUTION TABLE...5
Printer/Scanner Unit GM-2090
 Printer/Scanner Unit GM-2090 Operating Instructions Scanner Reference 1 2 3 4 5 6 Sending Scan Files by E-mail Sending Scan Files to Folders Storing Files Using the Scanner Function Scanning Originals
Mini-102MG ( MFP Server) Quick Installation Guide. User's Manual Version : Mini-102MG_QIG_EU-A_V1
 Quick Installation Guide. User's Manual Version : Mini-102MG_QIG_EU-A_V1") Mini-102MG ( MFP Server) Quick Installation Guide User's Manual Version : Mini-102MG_QIG_EU-A_V1 1. Product Introduction Thank you for purchasing and using our 802.11b/802.11g Wireless LAN MFP server.
Mini-102MG ( MFP Server) Quick Installation Guide User's Manual Version : Mini-102MG_QIG_EU-A_V1 1. Product Introduction Thank you for purchasing and using our 802.11b/802.11g Wireless LAN MFP server.
General Settings Guide
 Operating Instructions General Settings Guide 1 2 3 4 5 6 7 8 9 Connecting the Machine System Settings Copier Features Fax Features Printer Features Scanner Features Registering Addresses and Users for
Network Quick Install Cards Document Centre 490/480/470/460 ST
 Network Quick Install Cards Document Centre 490/480/470/460 ST This package contains Quick Install Cards that will help you connect the Document Centre to your network and install E-mail. Please read and
User's Guide Applied Functions
 User's Guide Applied Functions Table of contents 1 Using Web Connection 1.1 Web Connection... 1-2 Web Connection...1-2 Operating environment...1-2 1.2 Operations required to use this function... 1-3 1.2.1
Printing for Professionals
 Océ cx2100 Printing for Professionals Quick Setup Guide 1 Symbols used in this guide Warning Caution Improper Setup Warnings tell you what to do to prevent possible personal injury. Cautions specify procedures
Sun StorageTek SL48 Tape Library Getting started
 Sun StorageTek SL48 Tape Library Getting started IMPORTANT: Shipping Lock: The shippinglockmustberemovedfor the robotics to work properly. A robot move error is displayed if the shipping lock is not removed.
Getting Started. Read Me First. series. Photo Printer
 Photo Printer series Getting Started Read Me First Make sure to read this manual before using the printer. Please keep it in hand for future reference. Symbols Used in This Document Instructions including
Scanner Reference. Operating Instructions
 Operating Instructions Scanner Reference 1 2 3 4 5 6 7 Sending Scan Files by E-mail Sending Scan Files to Folders Storing Files Using the Scanner Function Delivering Scan Files Scanning Originals with
Available services can vary on your printer setup. For details about services and settings, see the User Guide. Menus
 Xerox ConnectKey.0 Technology Control Panel Available services can vary on your printer setup. For details about services and settings, see the User Guide. 3 4 5 Touch screen Menus 6 8 Alphanumeric keypad
Quick Setup Guide MFC-9840CDW STEP 1 STEP 2. Setup is Complete! Setting Up the Machine. Installing the Driver & Software
 MFC-9840CDW Quick Setup Guide Before you can use the machine, you must set up the hardware and install the driver. Please read this Quick Setup Guide for proper set up and installation instructions. STEP