Imagine. Create. Discover. User Manual. TopLine Results Corporation
|
|
|
- Candice Rice
- 6 years ago
- Views:
Transcription
1 Imagine. Create. Discover. User Manual TopLine Results Corporation Created: Tuesday, March 17, 2009
2 Table of Contents 1 Welcome 1 Features 2 2 Installation 4 System Requirements 5 Obtaining Installation Program 6 Running Installation 7 Activation 10 Web License Manager 15 Initial Setup 16 Adding Serial Numbers 19 Associating ACT Users 21 Obtaining Updates 24 Displaying Current Version 25 3 Administrator Functions 27 Applying Preconfigured Template 28 Managing Tables 31 Create a New Table 32 Editing an Existing Table 36 Deleting an Existing Table 40 Creating Fields 43 Editing Fields 46 Deleting Fields 48 Assigning Field Security 50 Defining Relationships 53 Add Relationship 54 Edit Relationship 59 Delete Relationship 62 Relationship with Activites and Opps 65 Managing Custom Table Screens 66 Adding a New Screen 67 Changing Screen Properties 70 Deleting a Screen 73 Designing Screen 75 Adding Fields 77 Moving Fields 79 Adding Static Images 81 Deleting Fields 83 Modifying Field Attributes 85 Changing Screen Color 87 Editing Screen Scripts 89 Scripting Events 92 Using Snippets 93 Scripting Assistance 95 Migrating Data 97 Importing Data 100 Managing Word Templates 106 Managing Schema 107
3 Exporting Schema Changes 108 Importing Schema Changes End User Functions 112 Using Designer Tabs 113 Managing Display Columns 114 Replace Values 115 Exporting to Excel 116 Merge to Word 117 Using List View 120 Using Lookups Windows vs Web Functionality Integration with TopLine Dash FAQ 132 Purchase and Licensing FAQ 133 Installation FAQ Videos 136 User Videos 137 Advanced Webinar Videos 138
4 1. Welcome Online Help TopLine Designer is an add-on product for ACT! by Sage that gives you the ability to add new custom sub-entities and it provides a framework for designing screens, relationships and calculations for those sub-entities. A sub-entity is another word for a sub-table. It is a table that must be related to a specific Contact, Company, or Group. Entities such as Contacts, Companies, and Groups are called Top-Level Entities. Top-Level Entities cannot be created using this tool. TopLine Designer has two major components. There is the Administration component and the End User component. Installation Administrator Functions End User Functions Windows vs Web Functionality Integration with TopLine Dash FAQ Videos Welcome Welcome to the online help system. Browse through the help pages by clicking on the links above or selecting pages in the table of contents. To quickly find specific product information, enter search criteria in the search box above and click the search button. Most popular pages Welcome System Requirements Installation Obtaining Installation Program Features Create a New Table Administrator Functions Displaying Current Version Running Installation Using List View
5 Welcome. 2 Home > Welcome > Features TopLine Designer Features For the ACT! Windows user: View tables interactively, go to the corresponding contact, company or group. Drill down on custom tables to access the detail view. Create a contact, company or group lookup. Click to sort or filter in the list view. Create robust queries and apply date ranges. Perform advanced calculations among fields and in the list view. Create activities or histories based on custom-table fields. Generate notifications. Modify field appearance (auto hide, change color) based on conditions. Drag and drop fields to group and organize your custom lists. Organize, sort or query your documents. Export list views to MS Excel. Merge custom-table fields into MS Word to create documents and templates. Synchronize your customizations and data. Integrate with TopLine Dash for enhanced reporting and graphical views. Automate your Excel or PDF custom table reports using TopLine Dash Alerts. For the ACT! Web user: View, edit or create table content interactively. Drill down on custom tables to access the detail view. Click to sort in the list view. For the ACT! administrator: Build relationships between contact, company or group tables. Build relationships between custom tables allowing for parent-child relationships. Build screens with one or more embedded custom tables. Create new fields and field calculations. Use scripting to perform advanced calculations, task automation and to vary field appearance based on conditions (auto hide, change color and more). Design, color code and embed your layout screens. Use snippets and scripting to add new functionality easily in.net. Import/export the TopLine Designer customizations.
6 3. Welcome Import data into your custom tables from any OLEDB-compatible data source; CSV files; Excel spreadsheets; or SQL, Oracle or MS Access databases. Synchronize and back up custom tables and customizations. Protect your database. Only the ACT! Administrator can perform customizations. See also
7 Installation. 4 Home > Installation This section will demonstrate how to: Install TopLine Designer for ACT! Activiate TopLine Designer with serial number Configure TopLine Designer to work with ACT! for Web Obtain Designer Updates Display the current version and serial number of Designer Articles in this section System Requirements Obtaining Installation Program Running Installation Activation Web License Manager Obtaining Updates Displaying Current Version See also Welcome Administrator Functions End User Functions Windows vs Web Functionality Integration with TopLine Dash FAQ Videos
8 5. Installation Home > Installation > System Requirements System Requirements TopLine Designer requires ACT! 2008 version or higher. ACT! 2009 is also supported. You must be an ACT! Administrator in order to make schema changes. Schema changes cannot be made on a remote database. See also Obtaining Installation Program Running Installation Activation Web License Manager Obtaining Updates Displaying Current Version
9 Installation. 6 Home > Installation > Obtaining Installation Program Obtaining Installation Program If you have a previous version of TopLine Designer installed, you must first uninstall it using Add/Remove Programs (or Programs and Features in Windows Vista) from the Control Panel. Direct your web browser to in order to download the latest version. Select TopLine Designer for the version of ACT! currently installed. When prompted, select Run to install TopLine Designer. After the software has been installed, you will see additional menu items in ACT!. See also System Requirements Running Installation Activation Web License Manager Obtaining Updates Displaying Current Version
 to start the Windows Installer. 2. On the TopLine Designer Setup Wizard screen, click Next. 3.")
10 7. Installation Home > Installation > Running Installation Running Installation Close ACT! before installing TopLine Designer. 1. Double click on the installer MSI (usually named X.X.X.X.msi, where X.X.X.X indicates the current version) to start the Windows Installer. 2. On the TopLine Designer Setup Wizard screen, click Next. 3. Agree to the License Agreement and click Next.


11 Installation Accept the default installation folder, or change with the Browse button. Allow Everyone to access TopLine Designer and click Next. 5. Confirm the installation and click Next.

12 9. Installation 6. Wait for the progress bar to complete, and click Close to finish the installation. TopLine Designer is a plugin to ACT! and will only be visible inside the ACT! program's user interface. See also System Requirements Obtaining Installation Program Activation Web License Manager Obtaining Updates Displaying Current Version


13 Installation. 10 Home > Installation > Activation Activation Upon logging into an ACT! database after installing TopLine Designer, the TopLine Designer Activation window will appear. TopLine Designer is available in a fully functional 30 day trial mode, starting from the day of installation. The Activation window will display how many day are remaining in the trial. Upon expiration of the trial, all TopLine Designer data or screens will be inaccessible, but they will remain in the database. 1. To activate TopLine Designer with a serial number, click on the lock icon. 2. Type the serial number into the field labeled Serial Number. 3. If an internet connection is available, click Next to attempt to activate with our servers. If a connection is successful, the My Record information will be displayed in the Registration boxes. Confirm this information and click Next. (Proceed to step 8)

14 11. Installation 4. If an internet connection is not available, click on the Activate Manually button. 5. Call TopLine Results at the phone number provided, and provide them the contents of Box A and Box B. They will in turn provide you with the unlock code for Box C.
15 Installation An unlock code can be generated without calling TopLine Results by clicking on the Unlock Code by Webpage link in Step A browser window will be opened. Enter the registration information into the boxes and click the Get Unlock Code button.
16 13. Installation The unlock code will appear on the next page. 8. Enter the unlock code in Box C and click Next. 9. Click Finish to complete the activation process and start ACT!

17 Installation. 14 See also System Requirements Obtaining Installation Program Running Installation Web License Manager Obtaining Updates Displaying Current Version
18 15. Installation Home > Installation > Web License Manager Web License Manager TopLine Designer data and screens are available to ACT! for Web users, but additional setup is required. The ACT for Web users must be designated to use TopLine Designer and must be less or equal to the total number of TopLine Designer licenses. The following steps are performed using the TopLine Designer for Web License Manager, which can be found under the TopLine Results program group from the Start Menu. Articles in this section Initial Setup Adding Serial Numbers Associating ACT Users Viewing / Exporting Configuration See also System Requirements Obtaining Installation Program Running Installation Activation Obtaining Updates Displaying Current Version
19 Installation. 16 Home > Installation > Web License Manager > Initial Setup Initial Setup The TopLine Designer for Web files must be installed in the same virtual folder as your ACT for Web program. 1. Start the Designer for Web License Manager from the Start Menu, under the TopLine Results program group. 2. On the startup screen, click the Initial Setup icon. 3. Select the Web Server Path. For a typical ACT for Web installation, this will be the Default Web Server Instance and the APFW Virtual Directory. 4. Click the Next button.


20 17. Installation 5. Click the Install TopLine Designer for Web button. 6. A progress bar will appear at the bottom of the window. Upon completion, a Success dialog box will appear. Click Ok. 7. The Designer for Web License Manager will display a Reset Web Server dialog box to restart the local webserver. Click Yes to proceed.


21 Installation A progress bar will appear at the bottom of the window. Upon completion, a Success dialog box will appear. Click Ok. 9. Click Next 10. Following the Initial Setup, a window will appear to perform another Initial Setup or continue to the next setup step. 11. Click Finish to return to the Main License Manager screen. See also Adding Serial Numbers Associating ACT Users Viewing / Exporting Configuration

22 19. Installation Home > Installation > Web License Manager > Adding Serial Numbers Adding Serial Numbers Once the Initial Setup has completed and the Designer for Web files have been installed, the TopLine Designer serial number must be entered into the License Manager for the ACT for Web application. 1. On the startup screen, click the Add Serial Numbers button 2. Enter the TopLine Designer serial number into the box, and press the Register Serial Number button. 3. Once the serial number has been confirmed, it will be displayed in the lower section of the screen. 4. Click Next


23 Installation Following the Initial Setup, a window will appear to perform another Initial Setup or continue to the next setup step. 6. Click Finish to return to the Main License Manager screen. The lower section of the screen will display all TopLine Designer serial numbers, the number of licenses associated with that serial number and number of licenses assigned to users. The serial number can be removed from the License Manager by highlighting the serial number in the lower section of the screen and pressing the Remove button. See also Initial Setup Associating ACT Users Viewing / Exporting Configuration

24 21. Installation Home > Installation > Web License Manager > Associating ACT Users Associating ACT Users Any ACT user must be designated to be allowed to see TopLine Designer data and screens. Multiple users can be associated with multiple databases using TopLine Designer. 1. On the startup screen, click the Associate ACT! Users button 2. Click on the Select ACT! Database button, browse to find the ACT! database and press Open. 3. Enter the ACT! username and password of the ACT! Administrator, then click Next.
 5.")
 6.")
25 Installation Select the TopLine Designer serial number (which has remaining, unused licenses) 5. Select the ACT! to have TopLine Designer access (by default, only active ACT! users will be displayed. To view ALL users, click the Include Inactive Users checkbox) 6. Press the Associate ACT! User with Serial Number button to allow the ACT user to have Designer access. 7. Click Next

26 23. Installation 8. Following the Initial Setup, a window will appear to perform another Initial Setup or continue to the next setup step. 9. Click Finish to return to the Main License Manager screen. See also Initial Setup Adding Serial Numbers Viewing / Exporting Configuration

27 Installation. 24 Home > Installation > Obtaining Updates Obtaining Updates Updates are provided on the TopLine Results website: TopLine Designer installs an Update Checker in the Program Groups. 1. Start the TopLine Designer Update from the Start Menu under the TopLine Results program group. 2. Status bars will show the Update program connecting to the TopLine server. 3. Click on the Check button. 4. If an update is available... See also System Requirements Obtaining Installation Program Running Installation Activation Web License Manager Displaying Current Version

28 25. Installation Home > Installation > Displaying Current Version About TopLine Designer - Finding the version you are on Open ACT! 2. Click on the Tools menu and select TopLine Designer - Manager If using a Publishing or Non-Publishing, the Entity Manager window will appear. Click on the About button in the lower left hand corner. 4. If using a Remote database, an dialog box will appear with a message about the Entity Manager being unavailable. Click Ok to see the version information.


29 Installation Version and Serial # will be displayed See also System Requirements Obtaining Installation Program Running Installation Activation Web License Manager Obtaining Updates
30 27. Administrator Functions Home > Administrator Functions With TopLine Designer, the Administrator can: Build relationships between contact, company or group tables. Build relationships between custom tables allowing for parent-child relationships. Build screens with one or more embedded custom tables. Create new fields and field calculations. Use scripting to perform advanced calculations, task automation and to vary field appearance based on conditions (auto hide, change color and more). Design, color code and embed your layout screens. Use snippets and scripting to add new functionality easily in.net. Import/export the TopLine Designer customizations. Import data into your custom tables from any OLEDB-compatible data source, CSV file, Excel spreadsheet; or SQL, Oracle, or MS Access database. Synchronize and back up custom tables and customizations. Protect your database. Only the ACT! Administrator can perform customizations. Articles in this section Applying Preconfigured Template Managing Tables Managing Custom Table Screens Migrating Data Importing Data Managing Word Templates Managing Schema See also Welcome Installation End User Functions Windows vs Web Functionality Integration with TopLine Dash FAQ Videos
31 Administrator Functions. 28 Home > Administrator Functions > Applying Preconfigured Template Applying Preconfigured Template The fastest way to get started is to apply one of the built-in templates provided. This will automatically add new tables and fields to your database to help you get started. Please note: It is strongly recommended that you back up your database before you continue. 1. Open ACT! 2. Click on the Tools menu and select TopLine Designer - Manager Click on the Database Template Wizard link


32 29. Administrator Functions 4. Read the warning and click Next 5. Select a preconfigured template from the categories listed. 6. Click on the active Apply Selected Template link. NOTE: The template will not be applied until this link is clicked.


33 Administrator Functions An ImportLog will open and show the template's status. 8. Click Finish to close the Apply Database Template window. See also Managing Tables Managing Custom Table Screens Migrating Data Importing Data Managing Word Templates Managing Schema
34 31. Administrator Functions Home > Administrator Functions > Managing Tables Managing Tables The Administrator can perform the following operations on a master database with TopLine Designer: Create a new custom table Edit the attributes of an existing custom table Delete an existing custom table Define relationships between custom tables Create new custom table fields Edit existing custom table fields Delete exisitng custom table fields Assign field security to custom table fields Articles in this section Create a New Table Editing an Existing Table Deleting an Existing Table Creating Fields Editing Fields Deleting Fields Assigning Field Security Defining Relationships See also Applying Preconfigured Template Managing Custom Table Screens Migrating Data Importing Data Managing Word Templates Managing Schema
35 Administrator Functions. 32 Home > Administrator Functions > Managing Tables > Create a New Table Create a New Table Creating a new sub-entity is easy. 1. Open ACT! 2. Click on the Tools menu and select Define Custom Tables Click the Add Table link
36 33. Administrator Functions 4. A wizard will display to guide you through the process of creating a new table. Click Next to begin. 5. Type the name of the table into the filed under Table Name. The table name is usually plural since multiple records will be stored within this table. Below, you will select the ACT! primary entities you want to link this table. All custom sub-entities must be linked to one or more primary entities in ACT!.

37 Administrator Functions Table Properties 1. Layout Tabs Placing a checkmark in these boxes will add a new tab to the contact, company or group layout for this table. 2. Lookup Menu Selecting Yes will add a new menu item to the Lookup menu which allows you to perform a lookup on records in this table. The result will be a lookup of contacts, companies or groups. 3. View Menu Selecting Yes will add a new menu item to the View menu. This allows you to view and filter a list of all of the records in this table. 7. Click the Finish button to create your table.
38 35. Administrator Functions You will now see the fields for the new table on the screen. See also Editing an Existing Table Deleting an Existing Table Creating Fields Editing Fields Deleting Fields Assigning Field Security Defining Relationships
39 Administrator Functions. 36 Home > Administrator Functions > Managing Tables > Editing an Existing Table Editing an Existing Table Editing an existing custom table is easy. 1. Open ACT! 2. Click on the Tools menu and select Define Custom Tables Select the appropriate custom table from the dropdown and click on the Edit Table link
40 37. Administrator Functions 4. A wizard will display to guide you through the process of editing the table. Click Next to begin. 5. The table name and ACT linked entities cannot be modified for existing tables.
41 Administrator Functions Table Properties can be modified. 1. Layout Tabs Placing a check mark in these boxes will add a new tab to the contact, company or group layout for this table. 2. Lookup Menu Selecting Yes will add a new menu item to the Lookup menu which allows you to perform a lookup on records in this table. The result will be a lookup of contacts, companies or groups. 3. View Menu Selecting Yes will add a new menu item to the View menu. This allows you to view and filter a list of all of the records in this table. 7. Click the Finish button to modify your table.
42 39. Administrator Functions See also Create a New Table Deleting an Existing Table Creating Fields Editing Fields Deleting Fields Assigning Field Security Defining Relationships
43 Administrator Functions. 40 Home > Administrator Functions > Managing Tables > Deleting an Existing Table Deleting an Existing Table Deleting an existing custom table is easy. 1. Open ACT! 2. Click on the Tools menu and select Define Custom Tables Select the appropriate custom table from the dropdown and click on the Delete Table link.

44 41. Administrator Functions 4. A warning will appear that all data will be deleted and cannot be undone. Click Yes to continue. 5. A confirmation box will appear. Click Yes to actually delete the custom table. Should an error occur while deleting a table, the following procedure should be used: 1. Start ACTDIAG 2. Detach the database from SQL. 3. Close ACTDIAG 4. Start ACT 5. Open the database using the.adf file to have SQL repair the database 6. Delete the custom table again See also Create a New Table Editing an Existing Table Creating Fields Editing Fields Deleting Fields
45 Administrator Functions. 42 Assigning Field Security Defining Relationships
46 43. Administrator Functions Home > Administrator Functions > Managing Tables > Creating Fields Creating Fields Numerous fields can be created in a custom table. 1. Open ACT! 2. Click on the Tools menu and select Define Custom Tables Select the appropriate custom table from the dropdown and click on the Add Field link


47 Administrator Functions Enter a name for the new field. Select the field type from the choices of: 1. Annual Event 2. Character 3. Currency 4. Date 5. DateTime 6. Decimal 7. Initial Caps 8. Lowercase 9. Memo 10. Number 11. Time 12. Uppercase 13. URL 14. Yes/No 5. The checkbox of Allow Blank indicates whether the field is required. 6. A dropdown list can be assigned to the field (depending on the type). Designer allows you to access the dropdown management screen from this area. 7. An additional screen may appear when using dropdowns to Limit to List, Allow Multi-Select, Show Descriptions and Enable Type Ahead, just like typical ACT fields.
48 45. Administrator Functions 8. An additional screen may appear depending on field type for Default Value and Field Length. 9. Click Finish to create the new field and return the Define Fields screen. See also Create a New Table Editing an Existing Table Deleting an Existing Table Editing Fields Deleting Fields Assigning Field Security Defining Relationships
49 Administrator Functions. 46 Home > Administrator Functions > Managing Tables > Editing Fields Editing Fields Like typical ACT! fields, custom table fields can be edited and have their properties changed. NOTE: System custom table fields cannot be edited. 1. Open ACT! 2. Click on the Tools menu and select Define Custom Tables Select the appropriate custom table from the dropdown, highlight the desired custom field and click the Edit Field link
50 47. Administrator Functions 4. Make the appropriate changes and click Finish to return to the Define Fields screen. See also Create a New Table Editing an Existing Table Deleting an Existing Table Creating Fields Deleting Fields Assigning Field Security Defining Relationships
51 Administrator Functions. 48 Home > Administrator Functions > Managing Tables > Deleting Fields Deleting Fields Just like typical ACT fields, custom table fields can be deleted. NOTE: System custom table fields cannot be deleted. 1. Open ACT! 2. Click on the Tools menu and select Define Custom Tables Select the appropriate custom table from the dropdown, highlight the desired custom field and click on the Delete Field link
52 49. Administrator Functions 4. A confirmation dialog will appear, warning that deletions cannot be undone. Press Yes to delete field and return to Define Fields screen. See also Create a New Table Editing an Existing Table Deleting an Existing Table Creating Fields Editing Fields Assigning Field Security Defining Relationships
53 Administrator Functions. 50 Home > Administrator Functions > Managing Tables > Assigning Field Security Assigning Field Security Like typical ACT! fields, custom table fields can have field level security, both default and by individual user. NOTE: System custom table fields cannot be edited. 1. Open ACT! 2. Click on the Tools menu and select Define Custom Tables Select the appropriate custom table from the dropdown, highlight the desired custom field and click the Field Security link.


54 51. Administrator Functions 4. Set the default permission from: 1. Full Access - allowed to view and edit 2. Read-Only - allowed to view 3. No-Access - blank field regardless if value present 5. The default permission can be overwritten for an individual user by highlighting the user and pressing the Edit button.


55 Administrator Functions Choose the appropriate access level and press OK. 7. Press OK to return to the Define Fields screen. See also Create a New Table Editing an Existing Table Deleting an Existing Table Creating Fields Editing Fields Deleting Fields Defining Relationships
56 53. Administrator Functions Home > Administrator Functions > Managing Tables > Defining Relationships Defining Relationships By default, a relationship is established between Contacts, Companies and Groups with the nearly created Custom Table. One record in the Parent (i.e. Contacts), can have many Child records (i.e. Custom Table) associated with it. This type of relationship can also be created between two custom tables. For example, a custom table could contain Service Contracts and a second custom table could contain Service Tickets. There can be several Service Tickets associated with each Service Contract. TopLine Designer allows these types of relationships to be built. See also Create a New Table Editing an Existing Table Deleting an Existing Table Creating Fields Editing Fields Deleting Fields Assigning Field Security
57 Administrator Functions. 54 Home > Administrator Functions > Managing Tables > Defining Relationships > Add Relationship Add Relationship To build a new relationship between existing custom tables is easy. 1. Open ACT! 2. Click on the Tools menu and select Define Custom Tables Click the Define Relationship link.
58 55. Administrator Functions 4. Click the Add Relationship link. 5. The Relationship Creation Wizard will appear. Click Next to begin.

59 Administrator Functions Select the Parent Table from the dropdown and the Child Table from the dropdown. Click Next. 7. Assign a name to the newly created key which will link the two fields. This Child Table field will hold the special key linking the two tables. Click Next.


60 57. Administrator Functions 8. Select the field in the Parent table which will identify it from the Child table or create a brand new field. Click Next. 9. Give the relationship a unique name. Click Next.

61 Administrator Functions Click Finish to create the relationship. 11. Click OK to return to the Define Fields screen. See also Edit Relationship Delete Relationship Relationship with Activites and Opps
62 59. Administrator Functions Home > Administrator Functions > Managing Tables > Defining Relationships > Edit Relationship Edit Relationship To edit a relationship between existing custom tables is easy. 1. Open ACT! 2. Click on the Tools menu and select Define Custom Tables Click on the Define Relationship link.
63 Administrator Functions Select a Table for which it is the Child, highlight the relationship, and click the Edit Relationship link. 5. The Relationship Creation Wizard will begin. Click Next to start.

64 61. Administrator Functions 6. The Parent and Child tables cannot be changed. Chick Next. 7. Modify the existing properties of the relationship as necessary. 8. Click OK to return to the Define Fields screen. See also Add Relationship Delete Relationship Relationship with Activites and Opps
65 Administrator Functions. 62 Home > Administrator Functions > Managing Tables > Defining Relationships > Delete Relationship Delete Relationship To delete a relationship between existing custom tables is easy. 1. Open ACT! 2. Click on the Tools menu and select Define Custom Tables Click on the Define Relationship link.

66 63. Administrator Functions 4. Select a Table for which it is the Child, highlight the relationship, and click on the Delete Relationship link. 5. A confirmation dialog box will appear warning that the action cannot be undone. Click Yes to delete the relationship. 6. Click OK to return to the Define Fields screen. NOTE: No data in either the Parent or Child will be deleted or altered with the deletion of the relationship. See also
67 Administrator Functions. 64 Add Relationship Edit Relationship Relationship with Activites and Opps
68 65. Administrator Functions Home > Administrator Functions > Managing Tables > Defining Relationships > Relationship with Activites and Opps Relationship with Activites and Opps Activities and Opportunities can be associated or related to the individual Custom Table records by creating a relationship between the two tables. Follow the steps under Add Relationship Parent Table = Activity (or Opportunity) Child Table = Custom Table Foreign Key = Display Key = See also Add Relationship Edit Relationship Delete Relationship
69 Administrator Functions. 66 Home > Administrator Functions > Managing Custom Table Screens Managing Custom Table Screens The Administrator can perform the following operations on a master database with TopLine Designer: Create a new custom table screen Edit the attributes of an existing custom table screen Delete an existing custom table screen Assign VB.NET scripts (snippets) to perform custom functions Articles in this section Adding a New Screen Changing Screen Properties Deleting a Screen Designing Screen Editing Screen Scripts See also Applying Preconfigured Template Managing Tables Migrating Data Importing Data Managing Word Templates Managing Schema
70 67. Administrator Functions Home > Administrator Functions > Managing Custom Table Screens > Adding a New Screen Adding a New Screen A blank, default screen will automatically be created upon custom table generation. However, creating a new custom table screen is easy. 1. Open ACT! 2. Click on the Tools menu and select Design Custom Table Screens Select the custom table and click on the Add Screen link.
71 Administrator Functions Type the name of the new screen, set the maximum number of rows and columns, and click Next. 5. Select either Horizontal or Vertical tab order, then click Next
72 69. Administrator Functions 6. Click Finish to create the new blank screen and return to the Define Screens window. See also Changing Screen Properties Deleting a Screen Designing Screen Editing Screen Scripts
73 Administrator Functions. 70 Home > Administrator Functions > Managing Custom Table Screens > Changing Screen Properties Changing Screen Properties A blank, default screen will automatically be created upon custom table generation, but creating a new custom table screen is easy. 1. Open ACT! 2. Click on the Tools menu and select Design Custom Table Screens Select the custom table and click the Screen Properties link.
74 71. Administrator Functions 4. Change the name of the new screen, set the maximum number of rows and columns, and click Next. 5. Select either Horizontal or Vertical tab order, click Next.
75 Administrator Functions Click Finish to commit the changes and return to the Define Screens window. See also Adding a New Screen Deleting a Screen Designing Screen Editing Screen Scripts
76 73. Administrator Functions Home > Administrator Functions > Managing Custom Table Screens > Deleting a Screen Deleting a Screen A custom table screen can be deleted at any time, but just ensure that no relationship is using the custom table screen. 1. Open ACT! 2. Click on the Tools menu and select Design Custom Table Screens Select the custom table and screen, click the Delete Screen link.

77 Administrator Functions Click YES to confirm the deletion. 5. Return to the Define Screens window. See also Adding a New Screen Changing Screen Properties Designing Screen Editing Screen Scripts
78 75. Administrator Functions Home > Administrator Functions > Managing Custom Table Screens > Designing Screen Designing Screen Place fields on the blank screen by: 1. Open ACT! 2. Click on the Tools menu and select Design Custom Table Screens Select the custom table and click the Design Screen link. 4. The Custom Entity Screen will appear.
79 Administrator Functions The Custom Table Screen is now ready to add fields, images and scripts. Articles in this section Adding Fields Moving Fields Adding Static Images Deleting Fields Modifying Field Attributes Changing Screen Color See also Adding a New Screen Changing Screen Properties Deleting a Screen Editing Screen Scripts


80 77. Administrator Functions Home > Administrator Functions > Managing Custom Table Screens > Designing Screen > Adding Fields Adding Fields Fields from the custom table or a grid containing all the immediate child records may be displayed on the custom table screen. 1. Click the Add Field button. 2. Select either a field or child table grid. 3. The field will appear in the next available section of the screen. See also
81 Administrator Functions. 78 Moving Fields Adding Static Images Deleting Fields Modifying Field Attributes Changing Screen Color

82 79. Administrator Functions Home > Administrator Functions > Managing Custom Table Screens > Designing Screen > Moving Fields Moving Fields Fields may be moved to any section of the custom table screen grid using the arrow keys or the arrow buttons in the upper right hand corner of the TopLine Designer window. 1. Select the field on the custom table screen. 2. Use the arrow keys or the arrow buttons to move the field to the next available section or swap with existing field. See also
83 Administrator Functions. 80 Adding Fields Adding Static Images Deleting Fields Modifying Field Attributes Changing Screen Color

84 81. Administrator Functions Home > Administrator Functions > Managing Custom Table Screens > Designing Screen > Adding Static Images Adding Static Images Static images, such as corporate logos, can be added to the custom table screen. 1. Press the Add Image button. 2. From the Open Dialog box, browse to find the image. Only BMP, JPG, GIF and PNG images are allowed. The image cannot be resized once it has been added to the screen. 3. The image will be placed in the first available section.
85 Administrator Functions. 82 See also Adding Fields Moving Fields Deleting Fields Modifying Field Attributes Changing Screen Color
86 83. Administrator Functions Home > Administrator Functions > Managing Custom Table Screens > Designing Screen > Deleting Fields Deleting Fields Fields can be removed from the custom table screen. 1. Select the field on the custom table screen. 2. Click the Delete Field button. 3. The field is removed.

87 Administrator Functions. 84 See also Adding Fields Moving Fields Adding Static Images Modifying Field Attributes Changing Screen Color
 2.")
88 85. Administrator Functions Home > Administrator Functions > Managing Custom Table Screens > Designing Screen > Modifying Field Attributes Modifying Field Attributes Field attributes define how the field is displayed on the screen. 1. Select the field on the custom table screen. 2. Click the Edit Field Properties button. 3. Modify the Field Properties as needed. 1. Label Text (always appears left of the field) 2. Field Width (in pixels) 3. Field Height (only valid for Memo Fields and Grids) 4. Row Span 5. Column Span 6. Label Color 7. Field Color 8. Field Text Color 4. Click Close to apply the changes.
89 Administrator Functions. 86 See also Adding Fields Moving Fields Adding Static Images Deleting Fields Changing Screen Color

90 87. Administrator Functions Home > Administrator Functions > Managing Custom Table Screens > Designing Screen > Changing Screen Color Changing Screen Color The background color of the Custom Table Screen can be changed, but gradients and tiled graphic files cannot be used. 1. Click on the color swatch below Screen Color in the lower right hand corner of the window. 2. Choose either a Basic Color or Define a Custom Color. 3. Click OK to apply the color to the screen.

91 Administrator Functions. 88 NOTE: Custom Colors are not remembered for future use. See also Adding Fields Moving Fields Adding Static Images Deleting Fields Modifying Field Attributes
92 89. Administrator Functions Home > Administrator Functions > Managing Custom Table Screens > Editing Screen Scripts Editing Screen Scripts TopLine Designer (along with ACT) can use Visual Basic Scripting to help manipulate ACT! data and automate tasks. 1. Open ACT! 2. Click on the Tools menu and select Design Custom Table Screens Select the custom table and click the Design Screen link. 4. The Custom Entity Screen will appear.
93 Administrator Functions Press the Modify Scripting button to enter the Script Editor. Articles in this section Scripting Events Using Snippets Scripting Assistance See also
94 91. Administrator Functions Adding a New Screen Changing Screen Properties Deleting a Screen Designing Screen
95 Administrator Functions. 92 Home > Administrator Functions > Managing Custom Table Screens > Editing Screen Scripts > Scripting Events Scripting Events There are 3 events in a TopLine Designer Custom Table Screen that can be used to lauch a script. 1. OnLoad = When the screen is first displayed. 2. OnBeforeClose = When the screen is closed. 3. OnFieldChange = When a field's value is changed. See also Using Snippets Scripting Assistance

96 93. Administrator Functions Home > Administrator Functions > Managing Custom Table Screens > Editing Screen Scripts > Using Snippets Using Snippets TopLine Designer include several "sniplets" to help the ACT! Administrator perform several common functions. To use a snippet: 1. From the Script Designer, click on Insert Snippet. 2. Select the appropriate snippet, fill in the wizard fields and assign the snippet to an event.


97 Administrator Functions The code in inserted into the Script Editor 4. Click OK to closethe Script Editor and have the Visual Basic code checked See also Scripting Events Scripting Assistance

98 95. Administrator Functions Home > Administrator Functions > Managing Custom Table Screens > Editing Screen Scripts > Scripting Assistance Scripting Assistance The TopLine Designer Script Editor includes a help file which explains all the current snippets and give other ACT methods for advanced scripting. TopLine Results also offers Scripting Consulting via out estore at 1. Click on the Help menu item from the Script Editor 2. The Help File will explain other ACT methods which can be used in more advanced scripting. See also
99 Administrator Functions. 96 Scripting Events Using Snippets

100 97. Administrator Functions Home > Administrator Functions > Migrating Data Migrating Data Migrating data allows the administrator to copy data from existing contact, company or group fields into new custom table records. For example, contact data such as: 1. Open ACT! 2. Click on the Tools menu and select TopLine Designer - Manager Click the desired Custom Tables for migration and press the Migrate from ACT! button.


101 Administrator Functions A Migrate Data from ACT! window will appear. Every field in the custom table will appear along with a drop down. Select the appropriate contact field to map data. Fields which are not mapped will remain blank and the Record Manager will be the current user. 5. Click the OK button. A confirmation dialog box will appear. Click Yes and watch the progress bar.
102 99. Administrator Functions When completed, a dialog box will ask if you would like to perform another migrate. Repeat for all additional rows. 6. Click OK to close the Define Fields Window. NOTE: Rows for which all data is empty will not create new Custom Table records. See also Applying Preconfigured Template Managing Tables Managing Custom Table Screens Importing Data Managing Word Templates Managing Schema
103 Administrator Functions. 100 Home > Administrator Functions > Importing Data Importing Data Data can be imported into the Custom Tables from CSV files or other data sources. The source data must have one (and only one) field to match the parent table (i.e. Contact, Company, Group, or other Custom Table). 1. Open ACT! 2. Click on the Tools menu and select TopLine Designer - Manager Click the desired Custom Tables for migration and press the Import Data button.

104 101. Administrator Functions 4. The Import Wizard will begin. Click Next. 5. Select a CSV or other datasource. This example will be with a CSV file. Click Next to continue.
 or load an existing data map.")

105 Administrator Functions Create a New Import profile (like this example) or load an existing data map. Select the Custom Table to import into and click Next. 7. Map the Datasource file to the ACT! field to find the proper Parent entity. In this example, the custom table will be matched to the Contact entity by the Contact field in the CSV file to the Contact field in ACT! Click Next.

 the matching record or skip the matching record.")
106 103. Administrator Functions 8. First, map the Source fields to the Custom Table ACT! fields. Select the Dupe Check box to have TopLine Designer check for duplicates based upon that field prior to importing. For this example, Designer will not import the new data if the current contact has another record with the same Model Number. 9. If a duplicate is found, have Designer update (replace) the matching record or skip the matching record. The number of records imported can be restricted to test the import settings. All import settings can be saved for future imports. Click Finish to begin the actual import.

 were updated")

107 Administrator Functions An import log will be shown displaying the progress of the import. 11. The data is imported. Notice the records with Company=(none) were updated because Company was not in the source data and was not matched. See also Applying Preconfigured Template Managing Tables Managing Custom Table Screens Migrating Data
108 105. Administrator Functions Managing Word Templates Managing Schema
109 Administrator Functions. 106 Home > Administrator Functions > Managing Word Templates Managing Word Templates The administrator can manage Word Templates which use Custom Table fields. Creating a New Template To create a new template, navigate to a tab that contains a record to merge and right click on a record. This will launch a new Microsoft Word document along with a popup window titled Merge Fields. You can now create your document using Microsoft Word. When you want to insert a merged field, place your cursor in Microsoft Word in the location where you want the merged field to be inserted and double click on the field in the popup window. Click on the Entity dropdown to select fields from different tables. The choices are: [Custom Table] This is the primary table that you will be merging. My Record This will insert contact fields. It will merge with data from your My Record contact. Contact This will insert contact fields. It will merge with data from the selected record s parent contact. Company This will insert contact fields. It will merge with data from the selected record s parent company. Group This will insert group fields. It will merge with data from the selected record s parent group. Not all of these options are always available. Once you have created your document, you must click on the Save and Close button on the popup window to save your template. Do not use the Save feature in Microsoft Word. Give the template a unique name. Editing an Existing Template To edit an existing template, navigate to a tab that contains a record to merge. Right click, choose Write and choose Edit Template. Choose the template you want to edit from the Open File box and click Open. The template must have been created using the procedure indicated in the above section. You cannot edit a template that was created manually in Microsoft Word or in ACT! The procedure for editing a template is the same as creating a new template. When finished, click on the Save and Close button. Do not use the Microsoft Word Save function. After clicking on Save and Close, you will be asked if you want to update the template. If you select Yes, the document will be saved using the same filename. If you choose No, then you will be prompted to enter a new filename for the template. Nested Custom Table Entities in a Template If there are Custom Tables which have a relationship, the template can include the parent custom table fields and all of the related child custom table fields. There are only a couple of steps involved in creating a table that contains a list of related child records. Create a new table in Microsoft Word that contains exactly two rows and however many columns you want with one column per field you want to merge. In the first row, you need to specify which field should be merged into each column. You do so by using the following format: Designer.[TABLENAME].[FIELDNAME] You must always start with the word Designer followed by a period. Specify the table you want to merge in followed by a period. Specify the field name. Example: Designer.Services.Duration where Services is the name of the table and duration is the field that you want to place into that cell. See also Applying Preconfigured Template Managing Tables Managing Custom Table Screens Migrating Data Importing Data Managing Schema
110 107. Administrator Functions Home > Administrator Functions > Managing Schema Managing Schema TopLine Designer allows the administrator to create custom tables, fields, screens and scripts in a test environment without affecting production. Once the project has been fully built and tested, the administrator can export the TopLine Designer settings and apply them to one or many production databases. Only settings will be applied; no test data will be copied to production. Articles in this section Exporting Schema Changes Importing Schema Changes See also Applying Preconfigured Template Managing Tables Managing Custom Table Screens Migrating Data Importing Data Managing Word Templates
111 Administrator Functions. 108 breadcrumbs] Exporting Schema Changes Exporting TopLine Designer Schema can be located on the Define Fields Windows. 1. Open ACT! 2. Click on the Tools menu and select Define Custom Tables Click the Export Schema link.


112 109. Administrator Functions 4. From the Export Schema dialog window: - Select the Custom Table Entities - Select the other ACT! items to include - Enter the Filename for the export - Give a description 5. Click OK to close the Define Fields Window. See also Importing Schema Changes
113 Administrator Functions. 110 Home > Administrator Functions > Managing Schema > Importing Schema Changes Importing Schema Changes Importing TopLine Designer Schema can be located on the Define Fields Windows. 1. Open ACT! 2. Click on the Tools menu and select Define Custom Tables Click on the Import Schema link.

114 111. Administrator Functions 4. A File Explorer window will appear. Browse to the location of the Schema file and click Open. 5. Several ImportLog windows will appear displaying the import progress. When finished, a success alert will appear. Click OK to continue. 6. Then newly created custom tables and fields will now be visible. Click OK to close the Define Fields Window. See also Exporting Schema Changes
115 End User Functions. 112 Home > End User Functions For the ACT! Windows user: View tables interactively, go to the corresponding contact, company or group. Drill down on custom tables to access the detail view. Create a contact, company or group lookup. Click to sort or filter in the list view. Create robust queries and apply date ranges. Perform advanced calculations among fields and in the list view. Create activities or histories based on custom-table fields. Generate notifications. Modify field appearance (auto hide, change color) based on conditions. Drag and drop fields to group and organize your custom lists. Organize, sort or query your documents. Export list views to MS Excel. Merge custom-table fields into MS Word to create documents and templates. Synchronize your customizations and data. Integrate with TopLine Dash for enhanced reporting and graphical views. Automate your Excel or PDF custom table reports using TopLine Dash Alerts. Articles in this section Using Designer Tabs Using List View Using Lookups See also Welcome Installation Administrator Functions Windows vs Web Functionality Integration with TopLine Dash FAQ Videos
 and are always right of the static tabs. Tab names are controlled by the Screen names.")
116 113. End User Functions Home > End User Functions > Using Designer Tabs Using Designer Tabs TopLine Designer Custom Table data is displayed as a tab under the Contact, Company or Group layout (as controlled by the ACT! Administrator) and are always right of the static tabs. Tab names are controlled by the Screen names. See also Using List View Using Lookups


117 End User Functions. 114 Home > End User Functions > Using Designer Tabs > Managing Display Columns List Views in TopLine Designer This opening paragraph should describe the feature that you are documenting. Explain how it is commonly used and what the benefits are. For example: The Widget Master link allows you to easily send information about each widget to various departments within your company. Often, the feature that you are documenting can be best explained by walking the reader through step by step. Use screenshots to illustrate the steps where possible. 1. Click on the blue columns icon. 2. Use the left and right arrows in the middle of the dialog box to add and remove columns from the view. User the up and down arrows on the right of the dialog box to change the order of the columns. Click OK when finished. 3. The new view appears with the selected columns in the selected order. See also Adding / Deleting Entities Grouping / Filtering Replace Values Exporting to Excel Merge to Word
, and then right click to display the context menu.")

118 115. End User Functions Home > End User Functions > Using Designer Tabs > Replace Values Replace Values Values can be replaced in multiple Custom Table records. 1. Highlight the row (or rows using CNTL-click), and then right click to display the context menu. Selelct Replace Values. 2. The Replace dialog box will appear. Select a method (Replace or Append), a field and enter a value. Click OK. 3. The new values will appear in the tab. See also Adding / Deleting Entities Managing Display Columns Grouping / Filtering Exporting to Excel Merge to Word

119 End User Functions. 116 Home > End User Functions > Using Designer Tabs > Exporting to Excel Exporting to Excel Export to Excel. 1. Select either the Tabd view or the list view. Note that the Export to excel will keep the settings you have from sorting, filtering, columns, and grouping as well. 2. On the startup screen, click the Data from tab appears in an Excel spreadsheet. See also Adding / Deleting Entities Managing Display Columns Grouping / Filtering Replace Values Merge to Word

 if you do not Topline Designer will attempt to create a merge in a document that does not contain")

120 117. End User Functions Home > End User Functions > Using Designer Tabs > Merge to Word Merge to Word With TopLine Designer MS-Word Merge Integration can: Merge to a template to Word Merge directly from a row Using the controls to merge a document to Word Creating or editing an existing template Note that the Contract template has a different extension.adtd it is important to create your template from a new one. It is also important to choose the correct list (or table-subentity) if you do not Topline Designer will attempt to create a merge in a document that does not contain any of the fields and an error will occur. TopLine Designer allows you to create merged documents from the following fields in the same documents: Contact, Company, Group fields and from the fields in the list view sub-entity that you are in and from fields of a subentity related to the one that you are in. (You can also select fields from another list provided that the sub-entity has a child relationship to the sub-entity list.)

![In the first row, you need to specify which field should be merged into each column. You do so by using the following format: Designer.[TABLENAME].](/docs-images/72/66939763/images/121-1.jpg "[FIELDNAME] You must always start with the word Designer followed by a period. You then specify the table that you want to merge in followed by a period. You then specify the field name.")
121 End User Functions. 118 Mail Merge to an embedded grid; Creating a table of child records There are only a couple of steps involved in creating a table that contains a list of related child records. 1. Create a new table in Microsoft Word that contains exactly two rows and however many columns you want with one column per field that you want to merge. 2. In the first row, you need to specify which field should be merged into each column. You do so by using the following format: Designer.[TABLENAME].[FIELDNAME] You must always start with the word Designer followed by a period. You then specify the table that you want to merge in followed by a period. You then specify the field name. Example: Designer.Services.Duration where Services is the name of the table and duration is the field that you want to place into that cell. Inside word you can also embed a list in a table with the content of child sub-entity list. Mail Merge from multiple record rows and into separate documents You can highlight multiple rows and mail merge each row to a separate word document.

122 119. End User Functions Tips: Using MS-Word merge always close MS-Word using file close to avoid the Normal.dot message warning. See also Adding / Deleting Entities Managing Display Columns Grouping / Filtering Replace Values Exporting to Excel


123 End User Functions. 120 Home > End User Functions > Using List View Using the List View The List View in TopLine Designer allows you to see all the fields that are available in the sub-entity or Tab. In this example below, we selected the Contract List View from the drop down menu View. Note that using list view is no different then using Designer Tabs, only now do you see all records for that sub-entity in the database. All the controls for Adding/Deleting Entries are the same, Displaying Columns, Grouping and Filtering as well as Exporting to Excel and using Merge to Word. Selecting Contract Lists will show the list below: This section is identical to Using Designer Tabs please refer to that section
 c.")

124 121. End User Functions a. Adding Click Add to create a new items to the list. You will be prompted to a new blank form. It is preferable to do so from the contact, company or group so as to automatically pre-populate the corresponding fields. b. Deleting Select any row and click on the delete icon (Red X) c. Choosing Columns In order to view more fields in the list view, select the field from the left column and bring to the right. (See Below) d. Exporting to Excel Exporting to Excel sends all the visible rows and columns to excel. If you have applied a group based on a field, MS-Excel will show those results as well.the same is true if you applied a filter; only the filtered data will show in the list view. e. Merging to Word - Please refer to the MS-Word Mail Merge section for more details. 1. Merge an existing template to Word 2. Create a new template 3. Edit an existing template 4. Mail Merge multiple rows to an embedded grid 5. Select multiple record rows and mail merge to separate documents the content of each record f. Printing Select the print icon and print a list directly to your printer. g. Grouping Click on group and Drag a field to the space created between the the icons and the list - Refer to the Grouping and Filtering section under Using Designer Tabs. See also Using Designer Tabs Using Lookups


125 End User Functions. 122 Home > End User Functions > Using Lookups Look-ups If you have checked the custom table to be viewable in TopLine Designer, you will be able to go to the Look-up menu. You can select the custom table name and the associate custom table fields to look-up the contents and return the resulting contacts, companies or groups. This is a unique feature in TopLine Designer and the Look-up is not just limited to contacts (see below the 5 options available: Contacts, Companies, Groups, Contacts At Companies, Contacts Within Groups). 1. Contacts This return the Look-up we are all familiar to when we look-up a contact field in ACT!


126 123. End User Functions the results are Contacts 2. Companies This Returns the Look-up we are familiar to when we look-up Companies in ACT!, e.g. the results are Companies 3. Groups This Returns any Group records link to the search criteria, the results are groups 4. Contacts At Companies This Returns all the Contacts at the Companies linked to our search within the custom table, the results are Contacts

127 End User Functions Contacts Within Groups This Returns all the Contacts within all Groups linked to our search, the results are contacts belonging to these groups See also Using Designer Tabs Using List View

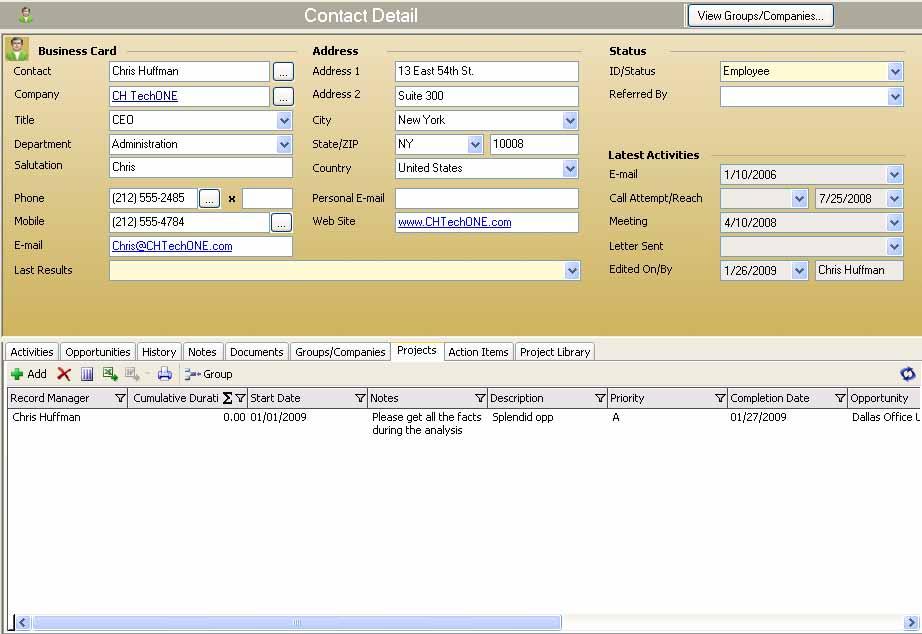
128 125. Windows vs Web Functionality Home > Windows vs Web Functionality Windows versus Web Functionality The following functionality is available with TopLine Designer on ACT! Premium and available with TopLine Designer on ACT! for Web. 1. You can view a total of 10 Tabs at the contact level, company level, group level 2. You arrange the columns to view any field in the custom table 3. You can double click and view the content of each Tab as it was designed in the Windows client on the server 4. You can sort by any field 5. You can edit and save the new content of almost all the fields in the custom table 6. You can add or delete a row or record under any Tab or in the List view 7. You can see an embedded table in the screen view and drill down on the content of the sub-custom child table 8. You can generate a list of each custom table in a List view and further arrange columns, sort by field and drill down from the list view, delete or add new records Below is an example of a comparison for a Project Module in Windows and in ACT! for Web: Windows: Web:

129 Windows vs Web Functionality. 126 Windows: Web:

130 127. Windows vs Web Functionality The following features are not available on the Web: Create a look-up, Grouping, Filtering, Exporting, Replacing Values, Merging to Word, Importing Data, as well as managing the tables such as table creation, field creation and security assignment, scripting in ACT! for web does not apply, as well as using fields to link activities, opportunities, or track documents using a URL. See also Welcome Installation Administrator Functions End User Functions Integration with TopLine Dash FAQ Videos

. If you purchased TopLine Designer Plus instead of TopLine Designer, you would have received a license for TopLine Dash which runs only in ACT! for Windows.")
 1. Click on the New Dashboard Icon. 2.Select Custom Sub-Entity 3. Now select which custom table to report.")
131 Integration with TopLine Dash. 128 Home > Integration with TopLine Dash TopLine Dash Integration TopLine Dash is the easiest way to create a powerful report in ACT!. In order to be able to leverage this interactive reporting tool you must first own a license of TopLine Dash. You may already have purchased a license which is installed on your computer If that is the case, make sure you run version 7 and above. In this example, we will show you version 7.5 which is soon to be released (May 2009). If you purchased TopLine Designer Plus instead of TopLine Designer, you would have received a license for TopLine Dash which runs only in ACT! for Windows. Because each Subentity in ACT! can be created by an ACT! Administrator, we do not have specific dashboard templates available. Instead, you have to create your own. First Click on TopLine Dash Icon in ACT! (Top Right) 1. Click on the New Dashboard Icon. 2.Select Custom Sub-Entity 3. Now select which custom table to report. Once you have selected the correct custom table you can create 2 filters: one for a date field and one from a general field (all other fields can be used as filters inside any ultralist view) These 2 filters will be used and reflected in the graphical views generated in the TopLine Dash.


132 129. Integration with TopLine Dash Next you can filter from within the list view. After you select to view the ultralist, using the filter icon next to each field, you can now filter your dashboard for any fields in the view. Note the Sigma Letter allows you to add statistics to the view below. While Filters can be saved when you save a new dashboard, stats are not. You can if you want to export your dashboard to excel. You can choose, in the dashboard, from any fields in the custom entity (Assets in this example) or the contact, company or group fields. This feature makes the dashboard very powerful as you can view any parent custom tables if there was one above asset.


133 Integration with TopLine Dash. 130 Below are dashboard created for Custom Entities: Below are the filters Setting for the two panels: Below is the filter.

134 131. Integration with TopLine Dash Please review the TopLine Dash Help file for further assistance. See also Welcome Installation Administrator Functions End User Functions Windows vs Web Functionality FAQ Videos
User Manual. Administrator s guide for mass managing VirtueMart products. using. VM Mass Update 1.0
 User Manual Administrator s guide for mass managing VirtueMart products using VM Mass Update 1.0 The ultimate product management solution for VirtueMart! Contents Product Overview... 3 Feature List...
Using Sitecore 5.3.1
 Using Sitecore 5.3.1 An End-User s Guide to Using and Administrating Sitecore Author: Sitecore Corporation Date: December 12, 2007 Release: Rev. 1.0 Language: English Sitecore is a registered trademark.
Table of Contents. Page 2 of 72. High Impact 4.0 User Manual
 Table of Contents Introduction 5 Installing High Impact email 6 Installation Location 6 Select Mail Client 6 Create a ReadyShare Account 6 Create a Default Profile 6 Outlook Configuration Message 6 Complete
SmartBar for MS CRM 2013
 SmartBar for MS CRM 2013 Version 2013.15, March 2014 Installation and User Guide (How to install/uninstall and use SmartBar for MS CRM 2013) The content of this document is subject to change without notice.
User Guide. Web Intelligence Rich Client. Business Objects 4.1
 User Guide Web Intelligence Rich Client Business Objects 4.1 2 P a g e Web Intelligence 4.1 User Guide Web Intelligence 4.1 User Guide Contents Getting Started in Web Intelligence 4.1... 5 Log into EDDIE...
DRAFT. Table of Contents About this manual... ix About CuteSITE Builder... ix. Getting Started... 1
 DRAFT Table of Contents About this manual... ix About CuteSITE Builder... ix Getting Started... 1 Setting up... 1 System Requirements... 1 To install CuteSITE Builder... 1 To register CuteSITE Builder...
Note: Act Today provide this KB article as a courtesy however accept no responsibility for content or the recipient performing these steps
 Note: Act Today provide this KB article as a courtesy however accept no responsibility for content or the recipient performing these steps How To Download and Apply Sage ACT! 2011 Premium Service Pack
Managing Your Website with Convert Community. My MU Health and My MU Health Nursing
 Managing Your Website with Convert Community My MU Health and My MU Health Nursing Managing Your Website with Convert Community LOGGING IN... 4 LOG IN TO CONVERT COMMUNITY... 4 LOG OFF CORRECTLY... 4 GETTING
Adobe Document Cloud esign Services. for Salesforce Version 17 Installation and Customization Guide
 Adobe Document Cloud esign Services for Salesforce Version 17 Installation and Customization Guide 2015 Adobe Systems Incorporated. All rights reserved. Last Updated: August 28, 2015 Table of Contents
Introduction to Qualtrics ITSC
 Introduction to Qualtrics ITSC August 2015 Contents A. General Information... 4 B. Login... 5 New Qualtrics User... 5 Existing Qualtrics User... 7 C. Navigating Qualtrics... 9 D. Create Survey... 10 Quick
Impossible Solutions, Inc. JDF Ticket Creator & DP2 to Indigo scripts Reference Manual Rev
 Impossible Solutions, Inc. JDF Ticket Creator & DP2 to Indigo scripts Reference Manual Rev. 06.29.09 Overview: This reference manual will cover two separate applications that work together to produce a
UTAS CMS. Easy Edit Suite Workshop V3 UNIVERSITY OF TASMANIA. Web Services Service Delivery & Support
 Web Services Service Delivery & Support UNIVERSITY OF TASMANIA UTAS CMS Easy Edit Suite Workshop V3 Web Service, Service Delivery & Support UWCMS Easy Edit Suite Workshop: v3 Contents What is Easy Edit
Forms/Distribution Acrobat X Professional. Using the Forms Wizard
 Forms/Distribution Acrobat X Professional Acrobat is becoming a standard tool for people and businesses to use in order to replicate forms and have them available electronically. If a form is converted
Introduction to Microsoft Access 2016
 Introduction to Microsoft Access 2016 A database is a collection of information that is related. Access allows you to manage your information in one database file. Within Access there are four major objects:
BW C SILWOOD TECHNOLOGY LTD. Safyr Metadata Discovery Software. Safyr User Guide
 BW C SILWOOD TECHNOLOGY LTD Safyr Metadata Discovery Software Safyr User Guide S I L W O O D T E C H N O L O G Y L I M I T E D Safyr User Guide Safyr 7.1 This product is subject to the license agreement
Creating Interactive PDF Forms
 Creating Interactive PDF Forms Using Adobe Acrobat X Pro for the Mac University Information Technology Services Training, Outreach, Learning Technologies and Video Production Copyright 2012 KSU Department
Objective 1: Familiarize yourself with basic database terms and definitions. Objective 2: Familiarize yourself with the Access environment.
 Beginning Access 2007 Objective 1: Familiarize yourself with basic database terms and definitions. What is a Database? A Database is simply defined as a collection of related groups of information. Things
This document contains information that will help you to create and send graphically-rich and compelling HTML s through the Create Wizard.
 This document contains information that will help you to create and send graphically-rich and compelling HTML emails through the Create Email Wizard. or warranty by AT&T and is subject to change. 1 Contents
Abila MIP DrillPoint Reports. Installation Guide
 Abila MIP DrillPoint Reports This is a publication of Abila, Inc. Version 16.1 2015 Abila, Inc. and its affiliated entities. All rights reserved. Abila, the Abila logos, and the Abila product and service
Excel 2013 Intermediate
 Excel 2013 Intermediate Quick Access Toolbar... 1 Customizing Excel... 2 Keyboard Shortcuts... 2 Navigating the Spreadsheet... 2 Status Bar... 3 Worksheets... 3 Group Column/Row Adjusments... 4 Hiding
CUSTOMISE FIELDS AND LAYOUTS 2010
 CUSTOMISE FIELDS AND LAYOUTS 2010 CUSTOMIZE YOUR FIELDS AND LAYOUTS Step 1 Define your fields Step 2 Customize your layouts Note: Changing the name of a field in the Define Fields box does not change the
Roxen Content Provider
 Roxen Content Provider Generation 3 Templates Purpose This workbook is designed to provide a training and reference tool for placing University of Alaska information on the World Wide Web (WWW) using the
Welcome to the Investor Experience
 Welcome to the Investor Experience Welcome to the Black Diamond Investor Experience, a platform that allows advisors to customize how they present information to their clients. This document provides important
Sage Construction Central Setup Guide (Version 18.1)
") Sage 300 Construction and Real Estate Sage Construction Central Setup Guide (Version 18.1) Certified course curriculum Important Notice The course materials provided are the product of Sage. Please do
Sage 300 Construction and Real Estate Sage Construction Central Setup Guide (Version 18.1) Certified course curriculum Important Notice The course materials provided are the product of Sage. Please do
MagicInfo VideoWall Author
 MagicInfo VideoWall Author MagicInfo VideoWall Author User Guide MagicInfo VideoWall Author is a program designed to construct a VideoWall layout and create VideoWall content by adding various elements
RONA e-billing User Guide
 RONA e-billing Contractor Self-Service Portal User Guide RONA e-billing User Guide 2015-03-10 Table of Contents Welcome to RONA e-billing What is RONA e-billing?... i RONA e-billing system requirements...
WebStudio User Guide. OpenL Tablets BRMS Release 5.18
 WebStudio User Guide OpenL Tablets BRMS Release 5.18 Document number: TP_OpenL_WS_UG_3.2_LSh Revised: 07-12-2017 OpenL Tablets Documentation is licensed under a Creative Commons Attribution 3.0 United
OrgChart Now Getting Started Guide. OfficeWork Software LLC
 OrgChart Now Getting Started Guide OfficeWork Software LLC Version 1.0.3 May 13, 2015 Introduction This guide provides step by step instruction on how to use OrgChart Now to create and maintain org charts
Veco User Guides. Grids, Views, and Grid Reports
 Veco User Guides Grids, Views, and Grid Reports Introduction A Grid is defined as being a list of data records presented to the user. A grid is shown generally when an option is selected from the Tree
Learn how to login to Sitefinity and what possible errors you can get if you do not have proper permissions.
 USER GUIDE This guide is intended for users of all levels of expertise. The guide describes in detail Sitefinity user interface - from logging to completing a project. Use it to learn how to create pages
General Training Curriculum
 General Training Curriculum Table of Contents 1.0 Getting Started 1.1 What is MODX? 1.2 Browser Support 1.3 How Do I Log In? 2.0 MODX Dashboard 2.1 What is a Dashboard? 2.2 Global Top Menu Bar 2.2.0 MODX
The Crypt Keeper Cemetery Software Online Version Tutorials To print this information, right-click on the contents and choose the 'Print' option.
 The Crypt Keeper Cemetery Software Online Version Tutorials To print this information, right-click on the contents and choose the 'Print' option. Home Greetings! This tutorial series is to get you familiar
C1 CMS User Guide Orckestra, Europe Nygårdsvej 16 DK-2100 Copenhagen Phone
 2017-02-13 Orckestra, Europe Nygårdsvej 16 DK-2100 Copenhagen Phone +45 3915 7600 www.orckestra.com Content 1 INTRODUCTION... 4 1.1 Page-based systems versus item-based systems 4 1.2 Browser support 5
How to Create Custom Name Badge Inserts with a Mail Merge in Microsoft Word 2007
 Many people know that you can use the Mail Merge feature in Microsoft Word 2007 to easily create mailing labels, but did you know you can use it to quickly create custom name badge inserts? Here, you will
POS2Net Quick Start Guide
 POS2Net Quick Start Guide Introduction POS2Net integrates your merchant s in-store QuickBooks Point of Sale (POS) system with Ecommerce Solution to offer added service, simplicity and convenience to your
KYOCERA Net Admin User Guide
 KYOCERA Net Admin User Guide Legal Notes Unauthorized reproduction of all or part of this guide is prohibited. The information in this guide is subject to change without notice. We cannot be held liable
Component Tracking System
 Component Tracking System User s Manual PREPARED BY Version 1.2 May 2014 Contents 1 Introduction... 1 2 Getting Started... 1 2.1 System Requirements... 1 2.2 Launching the Application... 1 2.3 Application
Contents. Announcer Pro Version 4.6 Page 2 of 35 Version V4.6
 User Guide Contents 1. Introduction... 3 1.1. Getting Started... 3 1.2. Navigation... 4 2. Create a Newsletter... 6 2.1. Confirm Company Details... 6 2.2. Choose Template... 8 2.3. Edit Newsletter... 8
Configuring Ad hoc Reporting. Version: 16.0
 Configuring Ad hoc Reporting Version: 16.0 Copyright 2018 Intellicus Technologies This document and its content is copyrighted material of Intellicus Technologies. The content may not be copied or derived
OneStop Reporting 4.5 OSR Administration User Guide
 OneStop Reporting 4.5 OSR Administration User Guide Doc. Version 1.2 Updated: 10-Dec-14 Copyright OneStop Reporting AS Contents Introduction... 1 Who should read this manual... 1 What s included in this
User Manual For SmartRoom Managers
 User Manual For SmartRoom Managers Table of Contents 1.0 Login 2.0 Confidentiality Agreement 3.0 Software Installation 4.0 Dashboard 5.0 Document Review and Index Maintenance 5.1 View by Index 5.1.1 Index
Multi-Sponsor Environment. SAS Clinical Trial Data Transparency User Guide
 Multi-Sponsor Environment SAS Clinical Trial Data Transparency User Guide Version 6.0 01 December 2017 Contents Contents 1 Overview...1 2 Setting up Your Account...3 2.1 Completing the Initial Email and
Adobe Acrobat Pro DC for Windows
 Adobe Acrobat Pro DC for Windows Creating Interactive PDF Forms University Information Technology Services Learning Technologies, Training & Audiovisual Outreach Copyright 2017 KSU Division of University
Solution Composer. User's Guide
 Solution Composer User's Guide January 2014 www.lexmark.com Contents 2 Contents Overview...4 Understanding the basics...4 System recommendations...5 Building custom solutions...6 Getting started...6 Step
Legal Notes. Regarding Trademarks KYOCERA MITA Corporation
 Legal Notes Unauthorized reproduction of all or part of this guide is prohibited. The information in this guide is subject to change without notice. We cannot be held liable for any problems arising from
Lava New Media s CMS. Documentation Page 1
 Lava New Media s CMS Documentation 5.12.2010 Page 1 Table of Contents Logging On to the Content Management System 3 Introduction to the CMS 3 What is the page tree? 4 Editing Web Pages 5 How to use the
WORKFLOW MANAGER RELEASE NOTES NEW FEATURES * OPEN ISSUES * ADDRESSED ISSUES RELEASE DATE: MAY 17, 2013 CS.THOMSONREUTERS.COM
 WORKFLOW MANAGER RELEASE NOTES NEW FEATURES * OPEN ISSUES * ADDRESSED ISSUES RELEASE DATE: MAY 17, 2013 CS.THOMSONREUTERS.COM Proprietary Materials No use of these Proprietary materials is permitted without
Spatial Data Standards for Facilities, Infrastructure, and Environment (SDSFIE)
") Spatial Data Standards for Facilities, Infrastructure, and Environment (SDSFIE) Model Builder User Guide Version 1.3 (24 April 2018) Prepared For: US Army Corps of Engineers 2018 Revision History Model
Spatial Data Standards for Facilities, Infrastructure, and Environment (SDSFIE) Model Builder User Guide Version 1.3 (24 April 2018) Prepared For: US Army Corps of Engineers 2018 Revision History Model
PediGait IP. Users Manual
 PediGait IP Users Manual April 2012 Table of Contents Clients Tab... 2 Open a Client file... 2 Delete Client file(s)... 2 Edit a Client... 3 Add a new client... 3 Add Comments to client files... 4 Profiles
E-FORM RS USER ADMINISTRATION
 E-FORM RS USER ADMINISTRATION INSTALLING E-FORM RS When you purchase e-form RS, you will receive an e-mail message with your account number and password. As the system administrator, you should be the
Searching and Favorites in Datatel Web UI 4.3
 Searching and Favorites in Datatel Web UI 4.3 Search Field The Search field uses icons and text prompts (see Figure 1) to switch between Person Search and Form Search. You can click the icon to the left
Sedao Ltd. QuickChange PROject. User Manual for QuickChange PROject version 2.1.5
 Sedao Ltd QuickChange PROject User Manual for QuickChange PROject version 2.1.5 Contents What is QuickChange PROject?... 2 Simple Artwork Creation... 5 Creating a project... 7 QuickChange PROject Template
Upgrading to Sage ACT! 2013 from ACT! 3.x, 4.x, 5.x (2000), or 6.x (2004)
, or 6.x (2004)") Upgrading to Sage ACT! 2013 from ACT! 3.x, 4.x, 5.x (2000), or 6.x (2004) Copyright 2012 Sage Software, Inc. All Rights Reserved. Sage, the Sage logos, ACT!, and the Sage product and service names mentioned
Upgrading to Sage ACT! 2013 from ACT! 3.x, 4.x, 5.x (2000), or 6.x (2004) Copyright 2012 Sage Software, Inc. All Rights Reserved. Sage, the Sage logos, ACT!, and the Sage product and service names mentioned
Microsoft Windows SharePoint Services
 Microsoft Windows SharePoint Services SITE ADMIN USER TRAINING 1 Introduction What is Microsoft Windows SharePoint Services? Windows SharePoint Services (referred to generically as SharePoint) is a tool
Kaltura Video Package for Moodle 2.x Quick Start Guide. Version: 3.1 for Moodle
 Kaltura Video Package for Moodle 2.x Quick Start Guide Version: 3.1 for Moodle 2.0-2.4 Kaltura Business Headquarters 5 Union Square West, Suite 602, New York, NY, 10003, USA Tel.: +1 800 871 5224 Copyright
DSS User Guide. End User Guide. - i -
 DSS User Guide End User Guide - i - DSS User Guide Table of Contents End User Guide... 1 Table of Contents... 2 Part 1: Getting Started... 1 How to Log in to the Web Portal... 1 How to Manage Account Settings...
Generating a Custom Bill of Materials
 Generating a Custom Bill of Materials Old Content - visit altium.com/documentation Modified by on 6-Nov-2013 This tutorial describes how to use the Report Manager to set up a Bill of Materials (BOM) report.
Administrative Training Mura CMS Version 5.6
 Administrative Training Mura CMS Version 5.6 Published: March 9, 2012 Table of Contents Mura CMS Overview! 6 Dashboard!... 6 Site Manager!... 6 Drafts!... 6 Components!... 6 Categories!... 6 Content Collections:
Learning Portal AE: Customization and Configuration in Microsoft Dynamics CRM 2016 Hands-On-Lab
 2 Learning Portal 80729AE: Customization and Configuration in Microsoft Dynamics Hands-On-Lab 80729AE: Customization and Configuration in Microsoft Dynamics Table of Contents 80729AE: Customization and
OBIEE. Oracle Business Intelligence Enterprise Edition. Rensselaer Business Intelligence Finance Author Training
 OBIEE Oracle Business Intelligence Enterprise Edition Rensselaer Business Intelligence Finance Author Training TABLE OF CONTENTS INTRODUCTION... 1 USER INTERFACE... 1 HOW TO LAUNCH OBIEE... 1 TERMINOLOGY...
INTRODUCTION TO BLACKBOARD
 INTRODUCTION TO BLACKBOARD Working URL - https://www.d11.org Layout of the site MY START BAR CHANNEL BAR HEADER GLOBAL ICONS Logging In Use your email as your username and your network password. SITE MANAGER
Managing your content with the Adobe Experience Manager Template Editor. Gabriel Walt Product Manager twitter.com/gabrielwalt
 Managing your content with the Adobe Experience Manager Template Editor Gabriel Walt Product Manager twitter.com/gabrielwalt Table of Contents 1. Introduction 3 1.1 Overview 3 1.2 Prerequisites 3 2. Getting
Secure Single Sign On with FingerTec OFIS
 Secure Single Sign On with FingerTec OFIS User Guide CONTENTS 3 1 INTRODUCTION Welcome to OFIS Gateway 4-11 2 INSTALLATION & SETUP Registering Your OFIS Gateway Installing & Setting Up Your OFIS Gateway
Investigator Site OC RDC PDF User Guide
 Investigator Site OC RDC PDF User Guide Version 1.0 Page 1 of 40 TABLE OF CONTENTS Accessing OC RDC Steps for Access 3 Logging On 4 Change Password 4 Laptop and System Security 5 Change Study 5 Navigating
Cascade User Guide. Introduction. Key System Features. User Interface
 Cascade User Guide Introduction Key System Features User Interface Menus and Moving Through the System Files and Pages Working with Existing Pages File Action Menu Version Control Deleting files Restoring
Volunteer Management Information System. AVCC User Guide
 Volunteer Management Information System AVCC User Guide Contents 1.0 - Welcome to VMIS... 4 Glossary... 4 VMIS Registration... 5 Army Family Web Portal (AFWP) & AFWP Accounts... 5 Single Sign-On (SSO)...
Coach s Office Playbook Tutorial Playbook i
 Playbook i The Playbook... 1 Overview... 1 Open the Playbook... 1 The Playbook Window... 2 Name the Chapter... 2 Insert the First Page... 3 Page Templates... 3 Define the Template Boxes... 4 Text on the
Basic Intro to ETO Results
 Basic Intro to ETO Results Who is the intended audience? Registrants of the 8 hour ETO Results Orientation (this training is a prerequisite) Anyone who wants to learn more but is not ready to attend the
Xton Access Manager GETTING STARTED GUIDE
 Xton Access Manager GETTING STARTED GUIDE XTON TECHNOLOGIES, LLC PHILADELPHIA Copyright 2017. Xton Technologies LLC. Contents Introduction... 2 Technical Support... 2 What is Xton Access Manager?... 3
Typefi Publish 7 User Guide
 Typefi Publish 7 Typefi Publish 7 User Guide January 2015 Typ fi typefi.com This document was created with Typefi Publish 7. 2003-2014 Typefi Systems Pty Ltd. All rights reserved. Typefi and the Typefi
TRAINING GUIDE. Web App End User Training
 TRAINING GUIDE Web App End User Training Web Application End-User Training In this booklet, we will introduce you to the Lucity Web application. The Web system allows you to utilize customized views, forms,
Focus University Training Document
 Focus University Training Document FOCUS Training: Nurses/Health Training Agenda Basic Navigation of SIS Searching for Students More Search Options Student Record and Sub menus o General Demographics o
DbSchema Forms and Reports Tutorial
 DbSchema Forms and Reports Tutorial Contents Introduction... 1 What you will learn in this tutorial... 2 Lesson 1: Create First Form Using Wizard... 3 Lesson 2: Design the Second Form... 9 Add Components
ER/Studio Enterprise Portal Evaluation Guide. Published: March 6, 2009
 ER/Studio Enterprise Portal 1.0.3 Evaluation Guide Published: March 6, 2009 Contents Introduction to ER/Studio Enterprise Portal 1.0... 3 Session 1: Getting Started with the Enterprise Portal... 4 Session
Learning Series. Volume 8: Service Design and Business Processes
 Learning Series Volume 8: Service Design and Business Processes NOTICES ServicePRO Learning Series Edition November 2014 HelpSTAR and ServicePRO are registered trademarks of Help Desk Technology International
Contents. Common Site Operations. Home actions. Using SharePoint
 This is a companion document to About Share-Point. That document describes the features of a SharePoint website in as much detail as possible with an emphasis on the relationships between features. This
Updated PDF Support Manual:
 Version 2.7.0 Table of Contents Installing DT Register... 4 Component Installation... 4 Install the Upcoming Events Module...4 Joom!Fish Integration...5 Configuring DT Register...6 General... 6 Display...7
SETTING UP SALESFORCE KNOWLEDGE
 SETTING UP SALESFORCE KNOWLEDGE Summary Salesforce Knowledge enhances your customer service. A knowledge base lets you create and manage custom articles that can be easily shared with your Salesforce Knowledge
User Guide. BlackBerry Workspaces for Windows. Version 5.5
 User Guide BlackBerry Workspaces for Windows Version 5.5 Published: 2017-03-30 SWD-20170330110027321 Contents Introducing BlackBerry Workspaces for Windows... 6 Getting Started... 7 Setting up and installing
Monitoring and Evaluation Tool
 Monitoring and Evaluation Tool USER MANUAL March, 2014 www.menarid.icarda.org THIS PAGE LEFT EMPTY INTENTIONALLY USER MANUAL Definitions and abbreviations Chart... Graphical representation of M&E project
AvePoint Permissions Manager
 User Guide Issued July 2017 1 Table of Contents What s New in this Guide...4 About...5 Supported Browsers...7 Submit Documentation Feedback to AvePoint...8 Integrate with AvePoint Online Services...9 AvePoint
The Connector Version 2.0 Microsoft Project to Atlassian JIRA Connectivity
 The Connector Version 2.0 Microsoft Project to Atlassian JIRA Connectivity User Manual Ecliptic Technologies, Inc. Copyright 2011 Page 1 of 99 What is The Connector? The Connector is a Microsoft Project
HOW TO BUILD YOUR FIRST ROBOT
 Kofax Kapow TM HOW TO BUILD YOUR FIRST ROBOT INSTRUCTION GUIDE Table of Contents How to Make the Most of This Tutorial Series... 1 Part 1: Installing and Licensing Kofax Kapow... 2 Install the Software...
Acuity 504. User Guide. Administrators 504 Coordinators Teachers. MSB Customer Care msb-services.
 TM Acuity 504 User Guide Administrators 504 Coordinators Teachers MSB Customer Care 800.810.4220 support@ Copyright 2014 MSB All rights reserved 1 Copyright MSB 2014 Table of Contents MSB Mission Statement...
Self-Service Portal Implementation Guide
 Self-Service Portal Implementation Guide Salesforce, Spring 6 @salesforcedocs Last updated: April 7, 06 Copyright 000 06 salesforce.com, inc. All rights reserved. Salesforce is a registered trademark of
MicroStrategy Desktop
 MicroStrategy Desktop Quick Start Guide MicroStrategy Desktop is designed to enable business professionals like you to explore data, simply and without needing direct support from IT. 1 Import data from
Task Management User Guide
 Task Management User Guide Version 18 April 2018 Contents About This Guide... 5 Tasks Overview... 5 Create a Project for Task Management... 5 Project Templates Overview... 5 Add a Project Template...
HP ALM Overview. Exercise Outline. Administration and Customization Lab Guide
 HP ALM 11.00 Administration and Customization Lab Guide Overview This Lab Guide contains the exercises for Administration and Customization of HP ALM 11 Essentials training. The labs are designed to enhance
SharePoint AD Administration Tutorial for SharePoint 2007
 SharePoint AD Administration Tutorial for SharePoint 2007 1. General Note Please note that AD Administration has to be activated before it can be used. For further reference, please see our Product Installation
Nintex Reporting 2008 Help
 Nintex Reporting 2008 Help Last updated: Thursday, 24 December 2009 1 Using Nintex Reporting 2008 1.1 Chart Viewer Web Part 1.2 Importing and Exporting Reports 1.3 Import Nintex report page 1.4 Item Level
How to Mail Merge PDF Documents
 How to Mail Merge PDF Documents A step-by-step guide to creating personalized documents using AutoMailMerge plug-in for Adobe Acrobat Table of Contents What is a mail merge?...2 What do I need to start?...2
APDM. Accounts Payable InstaDocs
 DSD Business Systems Sage 100 Enhancements APDM Accounts Payable InstaDocs Version 6.00 2 A/P InstaDocs Information in this document is subject to change without notice. Copyright 1993-2018, DSD Business
Password Memory 7 User s Guide
 C O D E : A E R O T E C H N O L O G I E S Password Memory 7 User s Guide 2007-2018 by code:aero technologies Phone: +1 (321) 285.7447 E-mail: info@codeaero.com Table of Contents How secure is Password
CMS 501: D2 Training for Contributors Updated: October 12, 2017
 CMS501: D2 Training for Contributors Agenda What is Documentum D2? Roles/Groups: Support, Coordinator, Contributor, Consumer D2 Overview: Login/Logout Main Menu Workspaces Widgets User settings Spaces/Folders/
Beginner Workshop Activity Guide 2012 User Conference
 Beginner Workshop Activity Guide 2012 User Conference TUESDAY, MARCH 6 2:00PM 5:00 PM Beginner Training Workshop Attendees will learn the end user functions of OU Campus TM. They will learn how to log
ADOBE DREAMWEAVER CS4 BASICS
 ADOBE DREAMWEAVER CS4 BASICS Dreamweaver CS4 2 This tutorial focuses on the basic steps involved in creating an attractive, functional website. In using this tutorial you will learn to design a site layout,
Designer TM for Microsoft Access
 Designer TM for Microsoft Access Application Guide 1.7.2018 This document is copyright 2009-2018 OpenGate Software. The information contained in this document is subject to change without notice. If you
Startup Guide. Version 1.7
 Startup Guide 1 INTRODUCTION 3 COMPANIES & USERS 4 Companies & Users Licensee Offices 4 Companies & Users Insurers 6 Companies & Users Distributors 7 Companies & Users Users 8 Reset Password 10 Companies
Managing the CaseMap Admin Console User Guide
 Managing the CaseMap Admin Console User Guide CaseMap Server, Version 2.3 Accessing the CaseMap Admin Console Registering CaseMap Servers Registering SQL Servers Setting Up Roles and Users Managing SQL
Cobra Navigation Release 2011
 Cobra Navigation Release 2011 Cobra Navigation - Rev.0.2 Date: November 27 2012 jmaas@flowserve.com Page 1 of 34 Contents Contents 1 Revision History... 5 2 Introduction.... 6 3 Cobra Login... 7 3.1 Initial