Hosted VOIP CommPortal
|
|
|
- Wesley Dorsey
- 5 years ago
- Views:
Transcription
1 Business Services Hosted VOIP CommPortal User Guide wowforbusiness.com
2 CommPortal Guide Table of Contents Getting Started... 4 Dashboard... 5 Messages and Calls... 6 Messages... 6 Missed Calls... 6 Dialed Calls... 6 Received Calls... 6 Contacts... 7 Contacts... 7 Finding a Contact List Entry... 7 Extensions... 8 Short Codes... 9 Call Manager Status: Available Status: Forward All Calls Ring my phones at the same time Ring my phones in order (Find me Follow me) Forward to another phone Forward to another phone (cont.) Send to voic Anonymous Callers Distinctive Ringing Forward Selected Unwanted Callers Status: Do Not Disturb Your Services Call Settings Message Settings General/VM to Mailbox Access Voic Greeting Recording a Message Notifications MWI Group Mailboxes Fax to Account Settings Security Change PINs and Passwords Support Downloads Support Help Support Send Feedback
3 Personal Details Personal Details Devices Configuring Keys Configuring Other Settings Dialer CommPortal Assistant Notification Area Icons Launching CommPortal LDAP Settings Outlook Contacts Synchronization Windows Toolbar Searching your contacts Additional Support

4 Getting Started When you go to the WOW! Business Hosted VoIP Web Portal link ( the first screen that appears is your login screen. Enter your telephone number and password. NOTE Your initial password is provided in your Hosted VoIP Quick Reference Guide, or by asking your System Administrator. Please note: you will need to change your pin and password. For security reasons, your new pin must be 6 20 digits. You will also be guided through changing your password on first time login. Your password should be between 8 and 20 characters, including 1 Capital letter, 1 number, and 1 special character. For improved security, passwords cannot have a letter or number that repeats three or more times (for example AMJ25554 ), can only have up to two sequential numbers (for example AMJ2345 ) and the password cannot be the phone number. Note: This document shows an account with all features activated. Your actual screens may differ due to the features assigned to your account. 4
5 Dashboard The Dashboard is the main view for the web portal. On this page you see the number of voic s, missed calls, contacts and the Call Manager settings. To access help, click view account settings in the bottom right of the screen and then click help in the menu. 5
6 Messages and Calls Messages To play a message, click on the icon to bring up the Voic Player. To save a copy of the message on your computer, right click on the > icon, and select Save Target As... or Save Link As. To delete the message, click on the icon. Missed Calls This tab lists your recent missed calls. To add an unrecognized caller to your contact list, click on the + icon. To go to a contact s entry in your contact list, click on their name. Dialed Calls This tab lists your recent dialed calls. The following actions are available to you on this tab. To add a dialed number to your contact list, click on the + icon. To go to a contact s entry in your contact list, click on their name. Received Calls This tab lists your recent received calls. 6

7 Contacts Contacts To add a new contact to the list, click the New Contact button below the contact list column. Once you have finished entering the details for the new contact, click the Save button to submit your changes. If you wish to discard the new entry, click Cancel. To import, contacts must be in a CSV file format. Finding a Contact List Entry There are multiple ways of finding an existing contact list entry. Alphabetically by name. Scroll through the names in the contact list column and click on the one you want to view the details of. Searching by name. To search by name, type the first few letters of any component of the name into the search box at the top of the contact list column. Matching proceeds as you type, and the more you type, the more constrained the list of matches is. Matching is performed against contacts first and last names, and also against various other text fields within the contact. Searching by number. To search for a contact by number type the first few digits of one of their telephone numbers into the search box. 7

8 Extensions Extensions allow you to quickly dial other numbers in the Business Group. You can search by typing in the search box above the table. The list will be restricted to those items that match, with the matching field highlighted. 8
9 Short Codes Short codes allow you to quickly dial common numbers. You can search by typing in the search box above the table. The list will be restricted to those items that match, with the matching field highlighted. Clicking on an extension or short code give you the options to call from your phone or another phone. Selecting one of those options completes the call by: first calls your phone when you answer that, places the call to the target phone typing the phone number typing the name or start of the phone number and then choosing from suggestions from your contacts or extensions typing a vanity number in which letters are used instead of numbers dialing using the on-screen keypad. 9

10 Call Manager Call Manager allows you to change your status between: Available Do Not Disturb You can also define how different callers can reach you depending on whether they are: Anonymous callers Priority contacts Unwanted - Barred contacts Note: Basic status information from the call manager can be manipulated from the home screen as well, however more advanced functionality requires you to click on and open the call manager page. 10

11 Status: Available This is your default status. You can choose to: Ring your phones in order Ring your phones together Forward to another phone Send to voic 11

12 Status: Forward All Calls You can use the Call Manager tab to unconditionally forward all your calls to another number. 1. Select the Forward to another phone option from the Incoming Call drop down box. 2. Click on the Incoming calls will be forwarded to option to open the Select Forwarding Number window. 3. Click on a saved number from the list or enter a temporary number to forward calls to. 4. Click OK. 5. Click Apply to save changes. To enable the Unconditional Call Forwarding feature directly from your phone, dial *72. To disable, dial *73. 12
13 Ring my phones at the same time You can choose to have multiple phones ring at once so that you can be reached on any of your phones when you receive a call. 1. Select the Ring your phones together option from the Incoming Call drop down box. 2. To add more phone numbers to this list, click the + symbol below your current account number. 3. In the Select Forwarding Number window, enter additional names and numbers in the boxes provided. Hover over, and Click X to delete any that you no longer want. 4. Click OK. 5. Click Apply to save changes. 13
14 Ring my phones in order (Find me Follow me) You can choose to have multiple phones ring in order so that you can be reached on any of your phones when you receive a call, or to configure a very basic form of call hunting. 1. Select the Ring your phones in order option from the Incoming Call drop down box. 2. To add more phone numbers to this list, click the + symbol below your current account number. 3. In the Select Forwarding Number window, enter additional names and numbers in the boxes provided. Hover over, and Click X to delete any that you no longer want. 4. Click the boxes in the steps next to the telephone numbers to setup how many seconds you want the phones to ring for before forwarding to the next line in the list. You can select multiple lines for each step so a highlighted box means that phone number is part of step one, two, three, etc. (Note, 5 seconds = on ring cycle) 5. Click OK. 6. Click Apply to save changes. 14

15 Forward to another phone You can choose to forward calls to a particular number when you are unable to answer, if your line is busy, or if your line is unavailable. To forward calls that come in while you are unable to answer. 1. Select the Forward to another phone radio button. 2. Set the timer to determine how many rings will occur before a call is forwarded (5 seconds = 1 ring). 3. Click the another phone link. 4. You will now see the Select Forwarding dialog box. Click on a saved number from the list or enter a temporary number that you want to forward your calls to. 5. Click OK. 6. Click Apply to save changes. To enable the Delayed Call Forwarding feature directly from your phone, dial *92. To disable, dial *93. To forward calls that come in while your phone is busy. 1. Select the Forward to another phone radio button. 2. Click the another phone link. 3. You will now see the Select Forwarding dialog box. Click on a saved number from the list or enter a temporary number that you want to forward your calls to. 4. Click OK. 5. Click Apply to save changes. To enable the Busy Call Forwarding feature directly from your phone, dial *90. To disable, dial *91. 15
16 Forward to another phone (cont.) To forward calls that come in while you are unavailable, 1. Click on the Advanced Settings arrow to display additional features. 2. Click on Forward if Unavailable. 3. Click the another phone link. 4. You will now see the Select Forwarding dialog box. Click on a saved number from the list or enter a temporary number that you want to forward your calls to. 5. Click OK. 6. Click Apply to save changes. 16
. 3. Click Apply to save changes.")
17 Send to voic You can choose to send calls to voic when you are unable to answer, or your line is busy. To send calls to voic when you are unable to answer, 1. Select the Send to voic radio button. 2. Set the timer to determine how many rings will occur (5 seconds = 1 ring). 3. Click Apply to save changes. To send calls to voic when your line is already busy, 1. Select the Send to voic radio button. 2. Click Apply to save changes. 17
18 Anonymous Callers You can choose to direct calls differently when the caller s identity is unknown or withheld. 1. From the Call Manager tab, click on the Advanced Settings arrow to display additional features. 2. Click on the Anonymous Callers option. 3. Click Apply to save changes. To enable the Anonymous Call Rejection feature directly from your phone, dial *77. To disable, dial *87. 18

19 Distinctive Ringing To enable a distinctive ring tone for incoming calls from selected numbers, 1. From the Call Manager tab, click on the Advanced Settings arrow to display additional features. 2. Click on Distinctive Ringtone. 3. Click on the list option. 4. The Distinctive Ringtone Screening list will appear. Enter a 10-digit phone number to utilize the distinct tone and click on Add New. 5. Click OK. 6. Click Apply to save changes. To enable or disable the Distinctive Ringing feature directly from your phone, dial *61 or *81. 19
20 Forward Selected You can choose to forward calls from a select list to a different line than Normal callers. 1. From the Call Manager tab, click on the Advanced Settings arrow to display additional features. 2. Click on Forward Selected. 3. Click on the list option. 4. The Selective Call Forwarding Screening List will appear. Enter a 10-digit phone number to be forwarded and click on Add New, and then click OK. 5. Now from the Advanced Settings tab, click on another phone option. 6. Click on a saved number from the Select Forwarding Number list or enter a temporary number that you want to forward these calls to. 7. Click OK. 8. Click Apply to save changes. To enable the Selective Call Forwarding feature directly from your phone, dial *63. To disable, dial *83. 20
21 Unwanted Callers You can choose to reject calls from unwanted callers without sending them to voic . 1. From the Call Manager tab, click on the Advanced Settings arrow to display additional features. 2. Click on Reject Selected. 3. Click on the list option. 4. The Selective Call Rejection Screening List will appear. Enter a 10-digit phone number to be rejected and click on Add New. 5. Click OK. 6. Click Apply to save changes. To enable or disable the Selective Call Rejection feature directly from your phone, dial *60 or *80. 21

22 Status: Do Not Disturb 1. From the main Call Manager screen, click the Available for Calls tab. 2. Select the Do Not Disturb option from the drop down box. 3. Click on Apply to save changes. To enable the Do Not Disturb feature directly from your phone, dial *78. To disable, dial *79. Selective Call Acceptance (Priority Callers) To allow priority callers to reach your line while in Do Not Disturb mode, 1. From the main Call Manager screen, click the Available for Calls tab. 2. Select the Do Not Disturb option from the drop down box. 3. Click on the check box next to Allow priority callers to ring in Do Not Disturb. 4. Click on the priority callers option. 5. In the Priority Callers Screening List window, enter a 10-digit phone number allowed to ring through, and click on Add New. 6. Click on OK. 7. Click on Apply to save changes. To enable the Selective Call Acceptance feature directly from your phone, dial *64. To disable, dial *84. 22
23 Your Services Call Settings The Call Settings button provides access to a number of settings that you are unlikely to need to change on a regular basis. No changes that you make on this page will be applied until you press the Apply button. Each section in this menu provides the following functions: General This section allows you to enable or disable caller id for inbound and outbound calls. It also lets you change your operator number if you have permissions to do so. Call Forwarding This section allows you to configure options for entering a new call forwarding number each time or using the number stored in memory from last time for several different versions of call forwarding. Call Blocking This section allows you to block certain types of calls from being made from your line. If an option box is greyed out, it means that WOW! doesn t allow for this field to be manipulated through CommPortal (ex: International calling). To enable or disable these functions, you ll have to call or chat with our care agents who will be able to assist. 23
24 Message Settings The message settings menu contains both commonly and infrequently used functions within the portal. No changes that you make on this page will be applied until you press the Apply button. Each section in this menu provides the following functions: General/VM to This section allows you to configure your forwarding options for receiving voic s in your box. To enable, click the checkbox to forward messages as s. Once enabled, you can add up to 5 addresses that will receive voic s from this account. You can also check the leave original in inbox checkbox to leave the message in your inbox. Not selecting this option deletes voic s from your account after they have been forwarded to . 24

25 Mailbox Access This section provides access to a number of settings that you are unlikely to need to change on a regular basis. From here, you can configure the following features: Skip Pin This allows you to setup your voic to allow you immediate access if you are calling from the telephone number associated with your voic box. Fast Login This allows the telephone number associated to your account to be able to access your voic box by entering a PIN only instead of the phone number and the PIN. Auto-play voic When this option is selected, your voic messages begin playing automatically once your voic account is accessed. Voic Playback This option allows you to select what parts of the voic messages are played back to you. Voic Greeting The Voic Greeting panel allows you to configure which greeting will be played to callers who reach your voic . You can choose to either use a standard system greeting, record or upload and use a personal message of your choice. You also have the option of just using the same greeting as your primary group mailbox. As well as defining the default greeting that you wish callers to hear, you can also configure alternative greetings to be played outside business hours choose to play an extended absence greeting, and optionally prevent callers from leaving messages while you are away choose to play a di erent greeting when a caller comes from within your business group After making any changes in the Voic Greeting panel you must press Apply to apply them. 25
26 Setting your default greeting For your default greeting, you should select a greeting from the list of available greetings in the dropdown box. The list of greetings includes the following standard system greetings. System - this plays the normal system greeting, with no identifying information. System with Number - this plays the normal system greeting, including your phone number. System with Name - this plays the normal system greeting, but includes your recorded name. You can also choose to use a greeting where you can record or upload a personal message. Greetings that already have a recording will be marked with a * beside the name in the list. You can choose to re-record or upload a greeting if you wish by selecting it as your chosen greeting and clicking edit. Greetings that do not yet have a recording will display the record link that you can click to launch the Greeting Recorder pop-up. See message recording. Once you have chosen, and if necessary recorded or uploaded, your voic greeting, expand the more options link to configure additional settings. These options will vary depending on the greeting that you are using. For system and personal greetings, you can choose to do one of the following: play a different message outside of business hours. Use the record or edit link to create the greeting that will played instead of your default greeting when a caller is put through to voic because of the time of day that they are calling. You can configure your business hours by dialing into your mailbox. play a different message when the caller is a colleague in your business group. Use the record or edit link to create the greeting that will be played when one of your Business Group colleagues is put through to your voic . Configure an extended absence greeting If you are going to be away for an extended period, you can choose to use an extended absence greeting as your default greeting. If you have not already recorded or uploaded the message, you will see a record link alongside the message selection box. Click this link to launch the Greeting Recorder and record or upload your message. When you are using an extended absence greeting as your default greeting, you can use the more options link to choose whether or not callers can leave you a message by clicking the Allow callers to leave a message checkbox. If you do not select this option then callers will be prevented from leaving you messages while you are absent. You may wish to do this to avoid your mailbox filling up while you are away. play a different message to colleagues in your business group whilst you have selected the Extended Absence greeting, by clicking the checkbox. Use the record or edit link to create the greeting that these callers will hear. Use same greeting as primary telephone number If you wish to use the same greeting as your primary telephone number, simply select Same as primary as your default greeting. Download Greetings To download a greeting, click the Download Greeting button, displayed in the greeting recorder, right below the recording buttons. Note that the download button will only be displayed if the greeting is already recorded and saved. 26

27 Recording a Message A number of controls are provided for recording your message. Starts recording. This will overwrite any message you have previously recorded. Stops playing or recording the message. Plays back your recorded message. This action will be unavailable if you have not yet recorded a message. This control allows you to adjust the gain of your microphone. Click and then adjust the slider to set the required volume level. While recording, the lights above this control will show how loud the signal is from your microphone. If the gain is set correctly then several green lights should appear while you are recording. If only one or two appear, then the gain is set too low and your message will be too quiet. If red lights appear then the gain is set too high and your message will be distorted. This control allows you to adjust the playback volume. Click and then adjust the slider to set the required volume level. This control allows you to view and change your Adobe Flash Player Settings, for example to adjust the settings for your microphone. When you first attempt to record a message, an Adobe Flash Player Settings overlay will appear. Ensure that the Allow radio button is selected, and if you do not wish to be shown these settings in future tick the Remember checkbox. To record a message you need to carry out the following steps. When you are ready to record your message, press the button. Read your message into your microphone, and when you have finished, press the button. Playback your message to check that it has recorded correctly by pressing the button. If you want to stop the playback, press. If there is a problem with the recording, e.g. you cannot hear it, or it is very quiet, see the section on troubleshooting below. If you are not happy with your message content, then record a new message by pressing the record button again. This will overwrite your previous message. 27
28 Troubleshooting I have recorded my message, but when I try to play it back I cannot hear anything. Check you have actually recorded something. The length of the current recording is shown as e.g. 0:01:35 (1 minute and 35 seconds). If the current recording length is 0 or much lower than expected then try recording your message again. Check that playback volume is turned up high enough. Volume can be adjusted using the volume slider described above. Try re-recording the message, and as you are recording, watch the lights appear, or only one or two appear, then check the following. lights on the player. If no Increase the gain of your microphone by clicking and moving the gain control nearer to the top end. Click the icon to bring up the Adobe Flash Player Settings and make sure that the Allow option is selected. Click on the microphone icon at the bottom of this settings box and check that the correct microphone is selected in the dropdown, and that the record volume is turned up. If you are using an external microphone, check that this is plugged in correctly. If this still doesn t solve the problem, then it may be that your microphone has been muted by the operating system (e.g. Windows) - refer to your operating system help for further information. If several green lights appear consistently while recording your message, then it is likely that your message has recorded correctly and the problem is occurring when playing it back. If you are using external speakers, check that these are plugged in correctly and turned on. If this does not resolve the problem, then it may be that your speaker has been muted by the operating system (e.g. Windows) - refer to your operating system help for further information. I have recorded my message, but when I try to play it back it is distorted This may be because your microphone gain is set too high. Reduce the gain by clicking control nearer to the bottom. and moving the gain 28
29 Notifications MWI You can use this panel to specify your other phones whose message waiting indications should be triggered when messages are received, and which types of messages cause the indication. To add another of your phones to the list, press New Entry. You are prompted for a phone number this should be the number of another phone you own under the same account as this one; you cannot trigger indicators on arbitrary other phones. To change the types of messages that trigger the notification use the checkboxes. To delete a phone from the list, press the icon. To clear the entire list, use the Clear List button. You must press the Apply button for any of your changes to take effect. 29

30 Group Mailboxes The Group Mailbox tab allows you to administer your group mailboxes and create new ones. For each group mailbox, you can configure the following properties. Whether the secondary mailbox is currently enabled. If you disable a mailbox, then it is not possible to either leave messages in it or retrieve messages from it. However, all settings and content will be maintained, and you can re-enable the mailbox whenever you wish. The name of the mailbox user. This name is used, for example, when the user of the mailbox forwards a message as an (the name is used to identify the user in the From field of the ). The mailbox PIN. This is the PIN used when dialing in to this mailbox, and when logging into the Web UI. Password. This is the password used when logging into the Web UI as this mailbox. MWI aggregation. If you enable MWI aggregation for a secondary mailbox, then any MWI notifications configured for your primary mailbox will also be triggered by messages left in this secondary mailbox. This is useful if, say, you share a single physical telephone with the user of the secondary account - enabling this feature means that the MWI indicator on the telephone will light if either of you have new messages. Message count aggregation. If you enable Message count aggregation for a secondary mailbox, then when you access your primary mailbox by dialing in from a telephone you are told both how many new and saved messages you have in your primary mailbox, and also how many you have in this secondary mailbox. To add a new group mailbox, press the New Mailbox button. Once you have created a new secondary mailbox, you should login as the mailbox user, and record the user s name and personal greeting. You can either do this by dialing into the mailbox from your handset, or by recording your system with name and personal greetings on the greetings tab on this page. To delete an existing group mailbox, press the icon. Warning: deleting a group mailbox is an irreversible operation that will result in the loss of all messages and configuration associated with that mailbox. 30

31 Fax to To use the Fax to service, you must first have an address configured for forwarded as indicated in the General/VM to section above. Once you have this address configured, both voic s and faxes will forward to the addresses provided. If your service package doesn t include faxing, you won t see these fields in the portal. Optionally, you may choose to have your faxes delivered to your messaging in-box as shown below. This tab lists all of the faxes in your inbox. New faxes (those you have not yet read) appear in bold type. For each fax in your inbox, you can see who sent the message, when the message was received, and how many pages the message contains. If the fax has been sent from a telephone number that appears in your contact list or the sender s name was provided, then the name of the sender will be displayed. Otherwise, you will just see the number that the fax was sent from. Your inbox may also contain special System Messages, such as delivery failure reports. The following actions are available to you on this tab. View a fax or save a local copy on your computer Manage your faxes by deleting them, or marking them as either new or read Forward a fax View contact details or add new callers to your contact list. View or save a fax To read a fax, click on the icon corresponding to the fax you wish to view. To save a local copy of a fax on your computer, right click on the or icon, and select Save Target 31
32 As... or Save Link As... Manage your faxes To delete a fax, press Delete All. in the row corresponding to the fax that you want to erase. To delete all faxes, press Faxes are automatically marked as read to when you play them. To mark a fax you have previously read as new (so that it appears in bold again), click the icon in the row corresponding to that fax and select Mark as new in the dropdown menu that appears. Similarly, to mark a fax as read without viewing it, click the icon in the row corresponding to that fax and select Mark as read in the dropdown menu that appears. Forward a fax If you wish, you can forward a fax as an to one or more addresses (the fax will be attached to the as a PDF file). Alternatively, if you wish to forward a fax to another user (or users) on the same messaging system, you can forward the message as a fax so that it appears in their fax inbox. To forward a fax as an Click the icon corresponding to the message you wish to forward and select Forward as to bring up the Forward as overlay. Enter one or more recipients in the To field. If the recipient is configured in your contact list, then you can identify them by name. Otherwise you must enter their complete address. You can specify multiple recipients by separating them with semicolons. The Forward as overlay also allows you to optionally specify additional recipients in the Cc or Bcc fields adjust the subject line of the message add text to be included along with the fax attachment. When you are done, press the Send button to send the message. Note: when forwarding a message as an , the From address specified will include your name as configured on the settings page. To forward a fax to one or more other users on the same messaging system: Click the icon corresponding to the fax you wish to forward and select Forward as Fax to bring up the Forward as Fax overlay. Enter one or more recipients in the To field. The recipients specified must be other users on the same messaging system, or the attempt to send the message will fail. If a recipient is configured in your contact list, then you can identify them by name, otherwise you must enter their fax number directly. You can specify multiple recipients by separating them with semicolons. You can optionally flag the fax as Urgent. When you are done, press the Send button to send the fax. View contact details or add new callers to your contact list If a fax has been sent from a telephone number that appears in your contact list, then the name of the sender will be displayed. To view your contact list entry for the sender, click on their name and select View contact. Otherwise you will just see the telephone number that the fax was sent from. In this case, you can create a contact list entry for the sender by clicking on their number, and selecting Add to contacts. 32
33 Account Settings The account settings section of CommPortal is where you go to manage and update information specific to your individual account such as passwords, devices, and downloads. You can also access CommPortal s build in help function from the account settings menu. To access it, click on the View Account Settings button at the bottom right hand side of CommPortal where a menu will slide up providing access to the functions mentioned below. 33
34 Security Change PINs and Passwords To change the PINs and passwords associated to your account, navigate to account settings and click on the function that you want to perform. Keep in mind the following when changing PINs and passwords: PINs must be between 6 and 20 digits long Passwords must be between 8 and 20 characters long Passwords must contain at least 1 letter, 1 number, and 1 special character (capital and lowercase letters are encouraged but not required). Allowable special characters in commportal passwords:! #$%& ()*+,-./:;<=>?@ [\]^_`{ }~ PINs and passwords cannot contain your phone number PIN s and passwords can only have 2 repeating characters or digits (ex ) The definitions of these PINs and passwords would be: Password This is the password you use to access your CommPortal account along with other voice and unified communications applications you may get from WOW!. These might include CommPortal Assistant, or a softphone application for example. Call Services PIN This is the PIN code you use to access call services. Call services would be features that require a pin code to use when accessing through the TUI such as remote access to call forwarding. Voic PIN This is the PIN code you use to access voic through a TUI or from a phone. 34

35 Support Downloads The downloads section of CommPortal is where you go to download any applications that WOW! provides to you as part of your service. This could be the CommPortal Assistant application referenced below, or applications such as softphones. 35
36 Support Help CommPortal s in-line help section allows you to get help and definition for any function within the tool. When you click on help, you will get a pop up with information containing help for the CommPortal site while being directed to help on the page you are currently viewing. If you select Send Feedback from within help, you can take screen captures from an area of the site you d like to feedback on so engineers will be able to better identify problems you are having. 36
37 Support Send Feedback When you select send feedback in your account settings, you ll get a pop-up that allows you to type the feedback you want to send regarding CommPortal. This is a good way for you to send feedback to WOW! on a bug or feature request that you might encounter but should not be a replacement for calling or chatting with our care agents as that is the fastest and most reliable way to get support from WOW!. 37
38 Personal Details The personal Details section of your account settings simply shows you the name WOW! has provisioned for your account long with any departments you might be associated to in your business group. In cases where you may have access to more than one CommPortal account, this is a good place to double check that you are working with the right account, or to verify that WOW! has the right name associated to you. 38
 or configure certain behaviors for your softphone application.")
39 Personal Details Devices The devices section of the account settings menu allows you to view all of the devices and software applications that are configurable with your service. Clicking on set keys opens a new window that allows you to set the behavior of keys on your hosted IP Phone (if applicable) or configure certain behaviors for your softphone application. The initial phone setup screen shows you the devices on your account. Clicking edit in any of these devices, takes you to a page where you can configure certain features within the device. 39
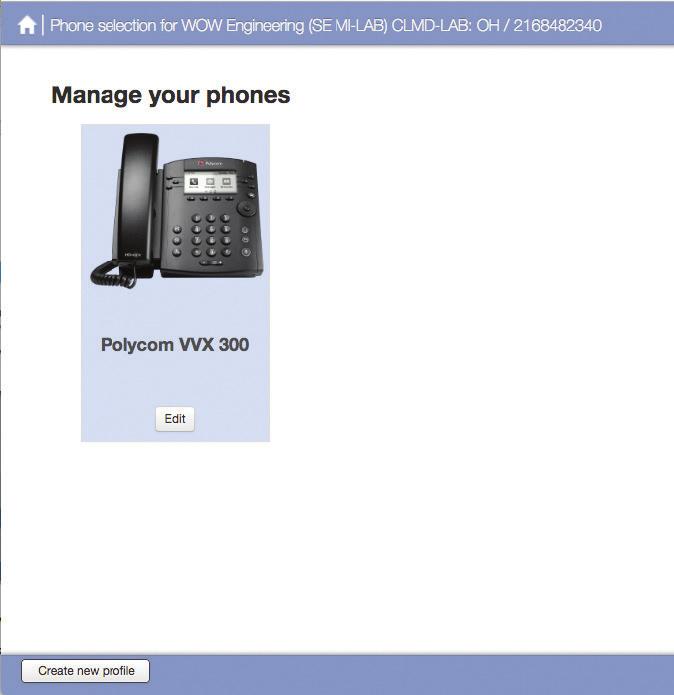
40 40

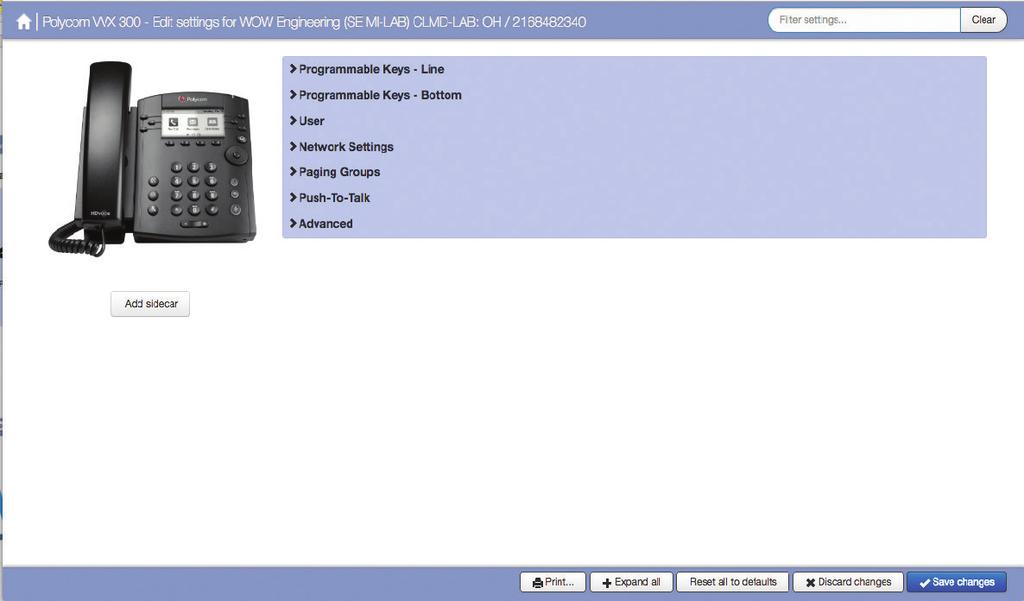
41 Configuring Keys Depending on the model of phone you have, you may have line keys or bottom keys to configure. If you drop down either of these options, the picture of your phone will highlight which keys you are modifying as shown with the blue ovals in the screen captures below: You will be able to configure some keys but not others. Which keys you can configure depends on what type of phone you are using, and what settings your Business Group administrator has configured. To find whether you can configure a key, move your mouse pointer over that key. If it turns into a hand icon, you can configure that key. Click on a key to configure it. A dialog box will appear to allow you to select the function you want the key to perform from a list of all the supported functions. If the function you selected requires additional settings to be specified, the dialog will prompt you for these. For example, the Speed Dial function will prompt you to specify the telephone number to dial. You can type in the telephone number directly, or search by contact name for a number from your Contact List (or the other named lines in your business). To search by name simply start typing the name. A dropdown list of matching contacts will be displayed for you to choose from. If available, the Enhanced Speed Dial and Enhanced Monitored Extension keys behave like Speed Dial and Monitored Extension keys with the exception that pressing the key while a call is in progress or ringing does an immediate blind transfer to the number or extension. If available, Enhanced Call Park keys combine the function of a Park and Retrieve key into one button. Pressing an Enhanced Call Park key immediately transfers a call to the park orbit if it is free. If the park orbit is occupied and no call is in progress, then pressing the button retrieves the parked call. When you assign a function to a key, you can also specify the text with which you would like to label the key. This will be displayed when viewing keys in Phone Settings and depending on the model of phone may be displayed on the phone s screen or may be printed as a paper insert for the phone (see below). Note that each model of phone can display labels slightly di erently. You should choose labels that are meaningful to you but be mindful that the phone may need to truncate the label depending on the phone s screen size. In addition, some phones use fixed labels for some functions. If you specify a label in this case, the label you specify will be displayed within Phone Settings but will not be displayed by the phone itself. For phones that have paper inserts instead of an LCD providing labels for the keys, you or your users can print out an insert for a phone. Once you have configured the keys with their labels, press the select print from the bottom menu of the pop-up window. 41
42 Configuring Other Settings To configure settings other than keys, such as ringtones and call services, you will need to navigate through the menu provided in the phone configuration screen. Optionally, some people like to click the expand all button from the bottom menu of the pop-up window in order to see all options. User - Preferences General device settings such as headset operation, backlight preferences, and certain key behaviors - Locale Languages, date formats for display, time zone, etc. - Call Services Call features and their behaviors - Lines Network Settings - RTP, jitter, packet loss settings Paging Groups - Settings General settings on how paging works from the device - Paging Groups Configure individual paging groups Push to Talk (If Applicable) Push to talk settings and configuration (similar to Paging Groups). This functionality isn t preferred by WOW!, but can be used if desired. Advanced - Call Services Advanced call services behaviors such as dial tone timeouts or transfer types. - Device Settings Advanced device settings - SIP settings Advanced SIP settings - Preferences Advanced preferences such as phone background images or power savings modes - Bottom Key Call States Advanced call states of Bottom line keys If a setting is grayed out, you cannot change that setting. In these cases, the field is view only. Otherwise, click on it to change it. There are three types of settings. On/off settings have a checkbox, which you can click to toggle. Keys can be assigned to a function and clicking on them will bring up the same function menu as in the Graphical View, as described above. Other settings have a text box, which you can edit by clicking inside it and typing. Reset all to defaults will remove all of your configuration for the current setting or category, and revert back to the default settings configured by your Business Group Administrator, if any. Paging group configuration Paging group membership Paging group keys 42
43 Saving or discarding your changes When you have finished making changes, you must either save or discard them. Press Save changes to store all your changes you have made. They will be applied to your phone when it next reboots, which is typically overnight. Press Discard changes to cancel all the changes you have made since the last time you clicked either Save changes or Discard changes for this phone. If you have more than one phone, then clicking on either button will also take you back to the thumbnail view of all your phones, from which you can select another phone. You can print out either a complete list of your settings or a list of your key bindings. Press the button. 43
 Once the first leg of the call is answered, it then completes the call to the destination")
44 Dialer CommPortal includes a dialer function to allow users to dial using the application. This works by first placing a call to the number you program in the From: field. The From field should be a phone where you can take the call from (typically your desk phone or cell phone) Once the first leg of the call is answered, it then completes the call to the destination you provided in the Make a call to: field. It can be accessed by clicking the icon. 44

45 CommPortal Assistant To access CommPortal assistant and other applications for download, navigate through your account settings section to download. From there, you will get a pop up with any application that you are able to download. This tab provides a link to download the toolbar installer. Running the installer gives you a desktop toolbar, which offers: access to contacts notification of new voic s configuration of call services all from the Windows desktop. 45
46 You will be provided with the required settings to configure CommPortal Assistant The toolbar application is composed of the following parts. Notification Area Icon: This component allows you to: - configure your settings such as username and password - synchronize your local Outlook Contacts with your CommPortal ones - quickly access CommPortal. Windows toolbar: The Windows toolbar allows you to search your contact list and configure any call services to which you are subscribed. Notification Area Icons The notification area icon has 4 states: Connected to the server Connecting Disconnected from the server There is an Outlook Contacts synchronization conflict between Outlook and CommPortal 46
47 Launching CommPortal When connected, double click on the icon to launch CommPortal. The Notification Icon menu To open the notification area menu, right click on the icon. The following menu options will appear: Open Dashboard: this gives you one-click access to your CommPortal dashboard Open Messages: one-click access to your voic s Synchronize Outlook now...: this only appears if you have enabled Outlook Synchronization in the configuration options Configure: configuration options for the application Check For Updates: allows you to manually check that you are using the latest version Help About CommPortal Assistant: for licensing information and to access diagnostics if you should encounter problems Exit Changing your general settings The settings dialog of the notification area icon allows you to change your username and password, proxy configuration and various other options. The meaning of the settings are as follows: CommPortal credentials: enter your username and password for the service. Proxy configuration: if your Internet connection requires a proxy, you can enter the details here. Open automatically when Windows starts: tick this box if you would like the application to start whenever you start Windows. Display a popup when a new voic arrives: this tick box has no e ect since you do not have voic . Check for updates automatically: tick this box if you would like the application to check for updates in the background. If an update is found you will be notified and asked if you would like it to be installed. You can check for updates at any time by clicking the Check for updates entry on the notification icon s menu. 47
48 LDAP Settings If you have access to a Microsoft Active directory or another LDAP server then the toolbar allows you to search these external contacts and add them to your contact list. For Microsoft Active Directory, no configuration should be required. To use a different LDAP server, click on the LDAP Settings tab. By default, the Use my Active Directory box is ticked, this means that the rest of the settings are ignored and the toolbar attempts to contact the default Microsoft Active Directory. To enter a different LDAP server, uncheck the box. The settings will then become enabled. You may now enter the details of your LDAP server. The details are specific to your network. You should contact your network administrator if you need assistance. 48
49 Outlook Contacts Synchronization If you use Microsoft Outlook 2003 or later you can configure CommPortal Assistant to automatically synchronize your local Outlook contacts and your CommPortal contacts. To setup synchronization configure the following. Select the Outlook Profile to use. Choose which direction you want synchronization to happen in. - Both directions will keep Outlook and CommPortal contacts the same, merging changes in both directions. - To Outlook Only will replace any existing Outlook contacts with your CommPortal contacts. - From Outlook Only will replace any existing CommPortal contacts with your local Outlook contacts. If you want synchronization to happen automatically every hour select the checkbox, otherwise synchronization can be manually started by right-clicking on the system tray icon and selecting Synchronize Outlook now.... Select which Outlooks Contact folder to synchronize with. Most people only have one folder, but you can select more than one if necessary. After you have set up Outlook Synchronization, on each synchronization CommPortal Assistant will perform contact synchronization in the direction(s) you set. You will be warned about any conflicts that occur and shown them, allowing you to choose which contact to keep. Windows Toolbar Overview The Windows toolbar provides several useful functions described below: Search your contacts Ring your phone Send all calls to voic Forward all calls to a number of your choice Use a configured set of rules Use a schedule Ring your phone Forward all calls Do not disturb Opening the toolbar use a schedule ring your phone forward all calls do not disturb - Opening the toolbar follows the normal Windows procedure, described below: Right-click on an empty area of the Windows taskbar. Select Toolbars from the resulting menu. - Click on the entry for CommPortal Assistant. 49
50 Searching your contacts Click on the text box on the toolbar (the hint text will disappear). Type your search text. A list of potential matches will appear as you type. If you see the required contact, select it with the mouse or by using the cursor keys. The contact s details are displayed in a dialog box. If the toolbar cannot find any contacts, then a message to that effect will be displayed. Choose the Show more options... entry in the list to search your external contacts. Click on the text box on the toolbar (the hint text will disappear). Type in the phone number you would like to dial, just as you would enter on your phone. Press the Enter key and a confirmation dialog will appear. Check the information in the dialog is correct and press the Dial button or press the Enter key to dial. 50
51 51
52 Additional Support Additional user guides and tutorials to assist you with your WOW! Business services can be found at 52
BUSINESS LINE COMMPORTAL GUIDE
 wowforbusiness.com BUSINESS LINE COMMPORTAL GUIDE WOW! Business BCSE.U.1505.O Business Line CommPortal Guide Table of Contents Getting Started...3 Dashboard...4 Messages and Calls...5 Messages...5 Missed
HOSTED VOIP COMMPORTAL GUIDE
 wowforbusiness.com HOSTED VOIP COMMPORTAL GUIDE WOW! Business CPSP.U.1506.R-ICM CommPortal Guide Table of Contents Getting Started...3 Dashboard...4 Messages and Calls...5 Messages...5 Missed Calls...5
For customers in Newnan, GA WEB PORTAL GUIDE. NuLink. NuLink_RES_0117
 WEB PORTAL GUIDE NuLink NuLink_RES_0117 Web Portal Guide Table of Contents Getting Started...3 Dashboard...4 Messages and Calls...5 Messages...5 Missed Calls...5 Dialed Calls...5 Received Calls...5 Contacts...6
Hosted IP Phone System End User CommPortal Reference Manual (Polycom)
") Hosted IP Phone System End User CommPortal Reference Manual (Polycom) POPP.com, Inc. All rights reserved. Service 24x7 @ 763-797-7900 or 1-800-234-POPP Page 1 of 42 8/15/18 Table of Contents 1 Introduction
Hosted IP Phone System End User CommPortal Reference Manual (Polycom) POPP.com, Inc. All rights reserved. Service 24x7 @ 763-797-7900 or 1-800-234-POPP Page 1 of 42 8/15/18 Table of Contents 1 Introduction
PREMIUM ATTENDANT GUIDE
 wowforbusiness.com PREMIUM ATTENDANT GUIDE WOW! Business PAGM.U.1408.O Premium Attendant Table of Contents Product Overview...3 CommPortal Login Screen...4 Main Page...5 Schedule...6 Special Days...8 Menus
End User Guide - Commportal
 End User Guide - Commportal Table of contents Table of contents 3 1 Introducing CommPortal 6 1.1 Accessing 6 1.2 Logging In 6 1.3 Using CommPortal 7 1.4 Getting Help 9 1.5 Refreshing a Page 9 1.6 Logging
Hosted Voice End User Guide Version 1.0 April End User Guide
 Hosted Voice End User Guide Version 1.0 April 2013 End User Guide Contents 1 Introduction... 1 2 Introducing CommPortal... 2 2.1 Accessing and Logging In... 2 2.2 Using CommPortal... 2 2.3 Getting help...
CommPortal Portal Guide
 CommPortal Portal Guide The User Portal is available at https://userportal.appiaservices.com. Please contact Appia Support at 877-277-4297, option 3, or support@appiaservices.com if you need login information.
AirePBX End User Guide
 AirePBX End User Guide Third Quarter 2012 Contents 1 Introduction 1-1 2 Making calls 2-1 1. Internally 2-1 2. Externally 2-1 3. Emergency calls 2-1 4. Speaker phone 2-1 5. Ending calls 2-1 3 Answering
CommPortal User Guide
 CommPortal User Guide Broadband and Voice Applications Turn your web browser into your personal call center CommPortal is an interactive web program that allows you to check your VoiceMail, set preferences
Premium Auto Attendant User Guide
 Premium Auto Attendant User Guide Contents Introduction to Premium Attendant... 1 Setting up Premium Attendant for the First Time...1 Working with the Premium Attendant Interface... 2 Names and Descriptions...2
Premium Auto Attendant USER GUIDE
 Premium Auto Attendant USER GUIDE CONTENTS 1.0 Introduction 4 2.0 Setting up for the First Time 4 3.0 Working with the Interface 5 3.1 Names and Descriptions 5 3.2 Error Icons 6 4.0 Configuring your Schedule
VIRTUAL OFFICE (EASY ATTENDANT) GUIDE
 GUIDE") wowforbusiness.com VIRTUAL OFFICE (EASY ATTENDANT) GUIDE WOW! Business VOSP.U.1506.R Virtual Office (Easy Attendant) Table of Contents Product Overview...3 CommPortal Login Screen...4 Main Page...5 Schedule...6
wowforbusiness.com VIRTUAL OFFICE (EASY ATTENDANT) GUIDE WOW! Business VOSP.U.1506.R Virtual Office (Easy Attendant) Table of Contents Product Overview...3 CommPortal Login Screen...4 Main Page...5 Schedule...6
AUGUST CommPortal GUIDE
 AUGUST 2018 CommPortal GUIDE 2 AirePBX CommPortal Guide Table of Contents 1 Introduction...4 1.1 About This Manual...4 2 CommPortal Overview...5 2.1 Interface overview...5 2.2 Browser and Operating System
Table of Contents. Phone Configuration
 User Manual 3.60 Table of Contents Phone Configuration... 1-5 Buttons... 1 Placing a Call... 1 Answering a Call... 2 DND... 2 Redial... 2 Call List / Callers... 2 Contacts... 2 Paging... 3 Transferring
QUICK START GUIDE NTS HOSTED PBX CALL MANAGER. Welcome. Getting Oriented
 QUICK START GUIDE NTS HOSTED PBX Welcome Welcome to NTS Hosted PBX! This guide is intended to get you up and running with the basic features associated with the product. For more in-depth information,
Hosted IP Phone System Administrator Portal Reference Manual (Polycom)
") Hosted IP Phone System Administrator Portal Reference Manual (Polycom) POPP.com, Inc. All rights reserved. Service 24x7 @ 763-797-7900 or 1-800-234-POPP Page 1 of 50 9/27/18 Table of Contents 1 Introduction
Hosted IP Phone System Administrator Portal Reference Manual (Polycom) POPP.com, Inc. All rights reserved. Service 24x7 @ 763-797-7900 or 1-800-234-POPP Page 1 of 50 9/27/18 Table of Contents 1 Introduction
Assistant User Guide
 mydatavo Assistant User Guide 1 2 3 4 5 6 7 8 9 10 11 12 13 14 15 16 17 18 19 20 21 22 Table Of Contents Features...ii Introduction...1 1. Installing mydatavo Assistant...1 1 System Requirements... 1 1.2
Altice Business Hosted Voice. End User Guide. v
 Altice Business Hosted Voice End User Guide v03-27-18 Contents 1 Introduction... 1-1 1.1 Accessing... 1-1 1.2 Logging into CommPortal BG Admin... 1-2 2 Introducing CommPortal... 2-1 2.1 Accessing... 2-1
Accession Desktop Communicator User Guide
 Welcome Accession Desktop Communicator is a unified communications softphone client that you can use on your PC or laptop. With Accession Desktop Communicator, all the rich functionality of your office
Solutions Reference Guide. IP TalkSM. Voic & Navigator Web Portal
 IP Talk SM Solutions Reference Guide IP TalkSM Voicemail & Navigator Web Portal Table of Contents Voicemail Accessing Your Voicemail................... 1 Voicemail Main Menu........................ 2
HughesFlex Cloud PBX Quick Start Guide
 HughesFlex Cloud PBX Quick Start Guide www.hughesflex.com 309-277-4111 info@hughestel.com WELCOME Welcome to HughesFlex Cloud PBX! This guide is intended to get you up and running with the basic features
Anonymous Call Rejection
 Contents Anonymous Call Rejection 4 Call Block 5 Call Forward 6-7 Call Return 8 Call Waiting 9 Caller ID 10-11 Do Not Disturb 12 Find Me 13 Selective Call Forwarding 14 Speed Dial 15 Three-Way Calling
Hosted PBX QUICK START GUIDE. Customer Portal, Unified Desktop, Mobile and Meeting
 Hosted PBX QUICK START GUIDE Customer Portal, Unified Desktop, Mobile and Meeting HOSTED PBX CUSTOMER PORTAL WELCOME Welcome to Hosted PBX. This guide is intended to get you up and running with the Customer
Dear Valued Customer:
 *Revised 5/08 Dear Valued Customer: We proudly welcome you to the Troy Cable Unlimited calling plan. Your Troy Cable Unlimited Voice plan provides digital quality features and affordability you won t find
Reference Guide. IP Phone/Calling Features Voice Mail Personal Assistant Toolbar. Dialing. Your Phone Calling Features.
 TelNet OfficeEdge Complete Polycom SoundPoint 550 IP Phone. Reference Guide IP Phone/Calling Features Voice Mail Personal Assistant Toolbar Dialing To dial phone number or extension Lift your handset and
EASY. SMART. POWERFUL. Hosted PBX End User Guide
 EASY. SMART. POWERFUL. Hosted PBX End User Guide Contents 1 Introduction... 1-1 2 Making calls... 2-1 2.1 Internally... 2-1 2.2 Externally... 2-1 2.3 Emergency calls... 2-1 2.4 Speaker phone... 2-1 2.5
COMMPORTAL. A better way to stay connected. SELF SERVICE GUIDE
 COMMPORTAL A better way to stay connected. SELF SERVICE GUIDE 1 TABLE OF CONTENTS WHAT IS COMMPORTAL... HOME TAB... ACCOUNT PHONE + SETTINGS, NO REPLY + BUSY STATUS, + ADVANCED SETTINGS. MESSAGES TAB...
Enterprise Voice SUBSCRIBER GUIDE
 Enterprise Voice SUBSCRIBER GUIDE Conterra Networks Enterprise Voice SUBSCRIBER GUIDE 3 TABLE OF CONTENTS Table of Contents Introduction... 6 Logging in... 6 Navigation Bar, Sub-Menu and Page Layout...
MY VOIC ON-LINE
 Learning and Development Department of Human Resources and Employee Relations MY VOICEMAIL ON-LINE (CALL10) Microcomputer Training Centre Microcomputer Training Centre 2007 TABLE OF CONTENTS Welcome to
Logging Into the Web Portal
 V0610 Logging Into the Web Portal Open your Web browser application. In the address field, enter the external WebPortal address, https://lightpathvoice.com Click Go. In the Phone Number field, enter your
ENTERPRISE SUBSCRIBER GUIDE
 ENTERPRISE SUBSCRIBER GUIDE Enterprise Subscriber Guide 880 Montclair Road Suite 400 Birmingham, AL 353 www. TABLE OF CONTENTS Table of Contents Introduction...6 Logging In...6 Navigation Bar, Sub-Menu
ShoreTel IP Phone 655 Quick Reference
 ShoreTel IP Phone 655 Quick Reference Introduction ShoreTel IP Phone 655 provides a large color touch screen display. Interaction between you and the phone is accomplished through the phone s touchable
First Communications Cloud IP PBX User Guide (Polycom)
") First Communications Cloud IP PBX User Guide (Polycom) 2017 Property of First Communications Contents Introduction... 3 General Phone Operations... 4 Polycom VVX 300 Series... 4 Polycom VVX 300 Series
First Communications Cloud IP PBX User Guide (Polycom) 2017 Property of First Communications Contents Introduction... 3 General Phone Operations... 4 Polycom VVX 300 Series... 4 Polycom VVX 300 Series
East-Central Vermont Community Fiber-Optic Network
 East-Central Vermont Community Fiber-Optic Network www.ecfiber.net support@ecfiber.net TELEPHONE SERVICE USER GUIDE Your ECFiber telephone service is an advanced Voice Over Internet Protocol (VOIP) system
This guide shows you how to get the most from your BT Softphone
 This guide shows you how to get the most from your BT Softphone For Windows 2000, XP and Vista (32 bit) CONTENTS Introduction What is BT Broadband Talk Softphone. 3 Getting Started Minimum requirements.
Residential Voice SUBSCRIBER GUIDE
 Residential Voice SUBSCRIBER GUIDE RESIDENTIAL VOICE SUBSCRIBER GUIDE TABLE OF CONTENTS Table of Contents Getting Started... 6 Requirements... 6 First Login... 6 Features Management... 0 Basic Features...
Digital Voice Services Residential User Guide
 Digital Voice Services Residential User Guide 2 P a g e * Feature Access Codes *11 Broadworks Anywhere (pulling call to alternate phone) *62 Access Voicemail *72 Call Forwarding Always Activation *73 Call
Harvard Phone. Introduction to Contact Center CONTACT CENTER CLIENT QUICK REFERENCE QUIDE
 Introduction to Contact Center Interaction Desktop is an interaction and communications manager for desktop or laptop PCs, and offers more functionality than your office telephone. Use it to manage all
Digital Voice Services Residential User Guide
 Digital Voice Services Residential User Guide TECH SUPPORT - 888.855.9997 734.324.7190 WYANDOTTECABLE.COM Feature Access Codes *62 Voice Portal *86 Direct Voice Mail Retrieval *77 Anonymous Call Rejection
Accessing VXView 3. Checking Messages 4. Folder Tabs/Toolbar 5. Message Area 6. Almost Full Warning 7. Managing Address Books 8. Adding a Contact 9
 CONTENTS Accessing VXView 3 Checking Messages 4 Folder Tabs/Toolbar 5 Message Area 6 Almost Full Warning 7 Managing Address Books 8 Adding a Contact 9 Modifying a Contact 10 Importing Contacts 11 Exporting
Unified Communicator Mobile
 MITEL Unified Communicator Mobile Mobile Client Handset User Guide Release 2.2 Mobile Client Handset User Guide NOTICE The information contained in this document is believed to be accurate in all respects
ENA SmartVoice User Guide
 TABLE OF CONTENTS SECTION 1: INTRODUCTION... 1 SECTION 2: MAKING CALLS... 2 Internally... 2 Externally... 2 Emergency Calls... 2 Speaker Phone... 2 Ending Calls... 2 SECTION 3: ANSWERING CALLS... 3 Using
Digital Telephone User Guide
 Digital Telephone User Guide 1 P. O. Box 99, Conway, AR 72033 (501) 450-6000 ConwayCorp.com * Feature Access Codes *11 Broadworks Anywhere (pulling call to alternate phone) *62 Access Voicemail *72 Call
Hosted Fax Mail. Blue Platform. User Guide
 Hosted Fax Mail Blue Platform Hosted Fax Mail User Guide Contents 1 About this Guide... 2 2 Hosted Fax Mail... 3 3 Getting Started... 4 3.1 Logging On to the Web Portal... 4 4 Web Portal Mailbox... 6 4.1
1 Page. Digital Voice Services Business User Guide
 1 Page Digital Voice Services Business User Guide Feature Access Codes *62 Voice Portal *86 Direct Voice Mail Retrieval *77 Anonymous Call Rejection Activation *87 Anonymous Call Rejection Deactivation
Zultys Advanced Communicator ZAC 2.0 User Manual
 December 16 Zultys Advanced Communicator ZAC 2.0 User Manual Author: Zultys Technical Support Department Z u l t y s, I n c. 7 8 5 L u c e r n e S u n n y v a l e, C a l i f o r n i a, U S A 9 4 0 8 5
User Manual 3CX VOIP client / Soft phone Version 6.0
 User Manual 3CX VOIP client / Soft phone Version 6.0 Information in this document is subject to change without notice. Companies names and data used in examples herein are fictitious unless otherwise noted.
The guide is divided into sections which describe how to configure and manage different aspects of the Hosted PBX service for your business group.
 Welcome This guide is intended to help Business Group Administrators of FairPoint Communications Hosted PBX service to perform the various tasks needed to administer the system, such as: Managing lines,
Dashboard User Guide For assistance, please call
 Dashboard User Guide For assistance, please call 1-866-399-8647. With these instructions, you will: PAGE 1. Login to the Clarity site, Configure 911, and Change your Password... 2 2. Set up Mobile Connect
Quick Reference Guide.
 TelNet OfficeEdge Complete Cisco SPA500 series phone. Quick Reference Guide. IP Phone/Calling Features VoiceMail Personal Assistant Toolbar Dialing Your Phone Calling Features To dial phone number or extension
Getting Started with Skype PSTN Calling Placing a call
 Getting Started with Skype PSTN Calling Placing a call Once Skype PSTN (Public Switched Telephone Network) calling has been enabled on your account, you will see a new Dialer icon on your Skype for Business
Enter your password. When you first login, your password will be Jag! followed by your account number with no spaces. Example: Jag!
 Jaguar Communications Voicemail - Online Access 01/10/19 REV 2 Go to https://commportal.jagcom.net in a web browser. Enter your ten digit VM enabled telephone number and the password for this number. Enter
CommPortal Communicator Desktop End User Guide 19 Feb 2014
 End User Guide 19 Feb 2014 Integra Hosted Voice Service PC Communicator Desktop End User Guide 19 Feb 2014 21 Feb 20134 End User Guide Contents 1 Introduction... 1-1 1.1 Using this End User Guide... 1-2
TELEPHONE BUTTONS & ICONS TOUCHSCREEN OVERVIEW
 This Telephone Guide describes the various features available to you. Telephone Buttons and Icons describe the physical buttons and keys on the phone, the Touchscreen Overview outlines basic functions
Zultys Mobile Communicator for iphone 4.0
 December 14 Zultys Mobile Communicator for iphone 4.0 Author: Zultys Technical Support Department This document covers basic use of the Zultys Mobile Communicator for iphone application. The Zultys Mobile
What you will learn today..
 What you will learn today.. Getting Started Dial Plan Phone and Calling Features Unified Communications 2 Getting Started Phone Navigation Note: SoundPoint IP 335 pictured. Appearance might vary slightly
Reference Guide. IP Phone/Calling Features Voic . Dialing. Your Phone Calling Features. Phone Views. To dial phone number or extension.
 TelNet OfficeEdge Complete Polycom VVX400 Series IP Phone. Reference Guide. IP Phone/Calling Features Voicemail Dialing Your Phone Calling Features To dial phone number or extension Lift your handset and
CALL FEATURES USER GUIDE. Houston Dallas Austin San Antonio Oklahoma City
 CALL FEATURES USER GUIDE Houston Dallas Austin San Antonio Oklahoma City Table of Contents Account / Authorization Codes.... 3 Advanced Hunting.... 4 Anonymous Call Rejection... 4 Anywhere.... 5 Auto Attendant...
How to use the One Talk for Desktop app. User guide
 How to use the One Talk for Desktop app Contents About One Talk from Verizon... 5 One Talk delivers...5 A good fit for your business...5 System requirements... 5 Windows (64 bit):...5 Mac OS (64 bit):...5
Portal User Guide. Portal Release 3.13
 Portal User Guide Portal Release 3.13 https://portal.3starsnet.com Page 1 01-08-2018 Contents 1 Introduction 4 2 Accessing Messages on the Web Interface 4 2.1 Searching for Messages 4 2.2 Sorting Messages
My Phone. My Phone - Overview. Signing In
 My Phone - Overview The Optus Loop My Phone portal gives you full access to your personal phone service settings, allowing you to customise and manage your service to suit your specific requirements. Within
Zultys Mobile Communicator for iphone 8.0
 July 18 Zultys Mobile Communicator for iphone 8.0 Author: Zultys Technical Support Department This document covers basic use of the Zultys Mobile Communicator for iphone application. The Zultys Mobile
CDK Communicator for Android Quick Reference Card
 Quick Reference Card This document highlights the use of CDK Communicator as both a softphone and an instant messenger & presence application on an Android smartphone. What is CDK Communicator? Download
Telstra VVX410 Phone Guide
 Select Save Config to Save the Config Your phone will automatically reboot Note 1: Restarting the phone may take a few minutes Note 2: If your phone has been preconfigured the QSetup soft key will not
Reference Guide. IP Phone/Calling Features Voic Dialing. Your Phone Calling Features. Phone Views. To dial phone number or extension.
 TelNet OfficeEdge Complete Polycom VVX300 / 310 IP Phone. Reference Guide. IP Phone/Calling Features Voicemail Dialing Your Phone Calling Features To dial phone number or extension Lift your handset and
Telecommunication Systems. CallXpress. Web PhoneManager. Page
 Telecommunication Systems CallXpress Web PhoneManager Page CallXpress Table of Contents Web PhoneManager Logging In... 3 Home Listening to your messages...... 4 Replying to a message...... 4 Forwarding
My Cloud Services Portal. User Guide
 My Cloud Services Portal User Guide Momentum Telecom 2018. All Rights Reserved. 888.538.3960 www.momentumtelecom.com/support 6.29.18 2 IN THIS GUIDE WELCOME... 6 INTRODUCTION... 6 MY CLOUD SERVICES PORTAL...
Avaya Aura Messaging Web Interface
 Avaya Aura Messaging Web Interface You can configure options for various Messaging features in the User Preferences Web pages. To go to User Preferences Web pages, use a web browser and on the address
Group Administrators
 Hosted VoIP Phone System Blue Platform Admin Portal Guide for Group Administrators Table of Contents 1 About this Guide... 6 2 Accessing the Hosted VoIP Phone System Admin Portal... 7 3 Hosted VoIP Admin
UC App for Android Mobile
 UC App for Android Mobile 2018 by Cox Communications. All rights reserved. No part of this document may be reproduced or transmitted in any form or by any means, electronic, mechanical, photocopying, recording,
CDK Communicator for iphone Quick Reference Card
 Quick Reference Card This document highlights the use of CDK Communicator as both a softphone and an instant messenger & presence application on an iphone. What is CDK Communicator? Download & First-time
The TELUS Business Connect Mobile solution. Admin guide
 The TELUS Business Connect Mobile solution Admin guide Table of contents. Part Getting started 4 Introduction 5 Admin homepage 5 Main functions 5 Admin Portal 5 My Extension 6 Do Not Disturb 7 RingOut
BUSINESS VOICE. Spectrum Business Voice. Business Voice. Quick Start Guide SpectrumBusiness.net
 Spectrum Business Voice Business Voice 1 1-800-314-7195 SpectrumBusiness.net Quick Start Guide CONTENTS Overview 3 Account Creation 3 Accessing the User Portal 4 Voice Feature Management 5 Messages and
Getting Started 3. Using this Guide 3 Connecting Your Phone 4
 Table of Contents Getting Started 3 Using this Guide 3 Connecting Your Phone 4 Adjusting the Footstand / Handset Rest 5 Signing In to Your Phone 5 Choosing the Proper Headset 5 An Overview of Your Phone
The Evolved Office Assistant
 The Evolved Office Assistant USER GUIDE TM 995 Old Eagle School Road Suite 315 Wayne, PA 19087 USA 610.964.8000 www.evolveip.net Release 1.0 Document Version 1 Copyright Notice Copyright 2008 Evolve IP,
BT CLOUD PHONE. USER GUIDE FOR MY EXTENSION.
 BT CLOUD PHONE. USER GUIDE FOR MY EXTENSION. WHAT S IN THIS GUIDE. 1. Welcome to BT Cloud Phone. 3 2. Express setup. 4 3. Accessing the BT Cloud Phone Portal. 5 4. My Extension Dashboard. 6 4.1 Overview:
Standard Hotline: Dashboard User Guide For assistance, please call ext. 102.
 Standard Hotline: Dashboard User Guide For assistance, please call 1-800-453-2251 ext. 102. With these instructions, you will: PAGE 1. Login to the VoiceConnect site and Change your Password... 2 2. Set
SBTS. Phone and Voic Training
 SBTS Phone and Voicemail Training Cisco 7945 Physical Phone Details 1- Line Buttons 2- Footstand Button 3- Display Button 4- Messages Button 5- Directories Button 6- Help Button 7- Settings Button 8- Services
Voic . Glossary of Terms. Click here to access your voic online.
 Voicemail Click here to access your voicemail online. Voicemail from Arvig will enhance the way you communicate! Our voicemail allows you to play, send, answer and forward voice messages from any touch-tone
CommPortal and CommPortal Assistant User Guide. Updated March 22, 2011
 CommPortal and CommPortal Assistant User Guide Updated March 22, 2011 SyncGlobal CommPortal User Guide Page A 1 SyncGlobal CommPortal User Guide Page 2 Contents 1 NOTICE... 6 1.1 CONTACT... 6 2 CommPortal
InformationTechnology
 dvanced Calling Features One of the benefits of running University voice service to Skype for Business is the opportunity to manage calls through a PC or laptop using the Skype application with a compatible
Logging into CommPortal for the first time
 Logging into for the first time Go to http://myphone.bayring.com Number: Your 10-digit telephone number (no dashes) Password: 112233 (temp pin) At this screen, click Next Enter Old password (temp pin is
AVAYA VOICE OVER INTERNET PROTOCOL (VOIP) TELEPHONE REFERENCE GUIDE
 TELEPHONE REFERENCE GUIDE") AVAYA VOICE OVER INTERNET PROTOCOL (VOIP) TELEPHONE REFERENCE GUIDE Information from Hawaiian Telecom Modified by Leeward Community College, UH West O ahu Copyright 2011 Table of Contents Pre-dial... 4
AVAYA VOICE OVER INTERNET PROTOCOL (VOIP) TELEPHONE REFERENCE GUIDE Information from Hawaiian Telecom Modified by Leeward Community College, UH West O ahu Copyright 2011 Table of Contents Pre-dial... 4
Polycom VVX500 Series IP Phone Reference Guide Dialing Your Phone Calling Features To dial phone number or extension Phone Views Speakerphone
 TelNet OfficeEdge Complete Polycom VVX500 Series IP Phone. Reference Guide IP Phone/Calling Features Voicemail. Dialing Your Phone Calling Features To dial phone number or extension Lift handset and dial
End User Guide. FastFind Links. Using Your Desk Phone. Using the User Web Portal. Voic . Answering Rules and Time Frames. Contacts.
 End User Guide Using Your Desk Phone FastFind Links Using the User Web Portal Voicemail Answering Rules and Time Frames Contacts Phones Music On Hold Call History Profile CONTENTS Contents... ii Introduction...
Voic to (including Voic )
") table of contents 2 Step 1 Initializing your Voicemail Step 2 Configuring rapid access to your message 2 6 7 What you will find in the Call Feature Manager Call Feature Manager by Internet and by phone
table of contents 2 Step 1 Initializing your Voicemail Step 2 Configuring rapid access to your message 2 6 7 What you will find in the Call Feature Manager Call Feature Manager by Internet and by phone
Harvard Phone Account USER GUIDE
 Harvard Phone Account USER GUIDE INTRODUCTION Welcome Welcome to managing your phone and going mobile. This guide describes how to use your Self Service interface to: View basic telephone information such
Cisco 504G, 514G, 508G, and 303G Initial Setup
 Cisco 504G, 514G, 508G, and 303G Initial Setup 1 Handset 2 Message Waiting Indicator 3 LCD Screen 4 Line keys 5 Softkey buttons 6 Navigation button 7 Messages button 8 Hold button 9 Setup button 10 Mute
Five9 Agent Desktop Toolkit
 Cloud Contact Center Software Five9 Agent Desktop Toolkit User s Guide November 2017 The Agent Desktop Toolkit comprises the CTI Web Services and the Web toolbar, a softphone integrated in your browser.
User's Guide. Voice Messaging and Fax Software. FaxTalk Communicator SETM
 User's Guide Voice Messaging and Fax Software FaxTalk Communicator SETM FaxTalk Communicator SE for Windows Version 4.7 Telephone Consumer Protection Act of 1991 "It shall be unlawful for any person within
FusionWorks: Fusion Communicator for iphone 2/24/2016 USER GUIDE
 FusionWorks: Fusion Communicator for iphone 2/24/2016 Contents: About this Document.............................................................................................. 4 Audience and Purpose..........................................................................................
Frequently Asked Questions: Cisco Jabber Voice 9.1(4) for Android
 for Android") Frequently Asked Questions Frequently Asked Questions: Cisco Jabber Voice 9.1(4) for Android FAQs 2 Setup 2 Basics 4 Connectivity 8 Calls 9 Contacts and Directory Search 16 Voicemail 17 Recents 22 Feedback
Frequently Asked Questions Frequently Asked Questions: Cisco Jabber Voice 9.1(4) for Android FAQs 2 Setup 2 Basics 4 Connectivity 8 Calls 9 Contacts and Directory Search 16 Voicemail 17 Recents 22 Feedback
BUSINESS PHONE USER S MANUAL
 Wire your business for success Find great business services inside. BUSINESS PHONE USER S MANUAL INSIDE: - PHONE PLANS - HOW TO ACCESS YOUR FEATURES ONLINE CLICK BUSINESS.CABLEONE.NET TODAY! BUSINESS CARE
ShoreTel IP Phone 420 Quick Reference
 SheTel IP Phone 420 Quick Reference PHONE OPERATION Place calls Use the handset, the speakerphone, a headset Lift handset press Make a blind conference call Ext. Make a consultative conference call Ext.
Telstra IP Telephony - Telstra IP Video Phone Feature Guide
 1. The Touch screen Your phone has a touch-sensitive screen. To access features or obtain information, tap the menu items, arrow keys, soft keys (the keys along the bottom of the touch screen) and field
Quickstart Guide Polycom VVX 400/410
 Quickstart Guide Polycom VVX 400/410 Polycom VVX 300/310 Features Message Indicator Line Keys Line Keys Soft Keys Speaker Transfer Messages Hold Dialpad Home/Lines key Navigation keys/ Select key Headset
InformationTechnology
 dvanced Calling Features The Polycom VVX 501 is the supported handset for the University's digital voice-over-ip telephone service. The VVX 501 integrates with the University's Skype for Business unified
Manage User Features
 As an administrator for the AT&T Collaborate service, you can manage features for each user from the Users widget on the Collaborate homepage. First, you assign a feature to the user, and then turn the
Cisco Unified Personal Communicator Release 8.5
 Frequently Asked Questions Cisco Unified Personal Communicator Release 8.5 FAQs 2 Basics 2 Setup 3 Availability 5 Contacts 8 Chat 10 Calls 18 Conference Calls 25 Voicemail 26 Web Meetings 27 Troubleshooting