Version: SIPPBXUM.100
|
|
|
- Gordon Hunt
- 6 years ago
- Views:
Transcription
1 SIPPBX 6200A User s Manual Version: SIPPBXUM.100
2 CH1. Overview Specifications Hardware Overview The Front Panel The Back Panel CH2. Start to configure SIPPBX 6200A Connection SIPPBX 6200A Network Configuration Extension Configuration Trunk Configuration CH3. Full Web Configurations Configuration IP PBX Office Call Rule Feature Code Extension Auto COnfig (IPv4) Trunk SIP Trunk Reg Outgoing Routing Incoming Call Rule Dial Group Speed Dial Broadcast Meetme Conf T.38 FAX Information Subscriber Info Call Monitor CDR System Info Network Network DHCP Srv. (IPv4) DDNS Srv. (IPv4) Management
3 3.4.1 Time Setting SMTP Setting VM Setting Security Firmware Upload Music Upload Import Setting Export Setting Rest To Default Reboot System Power Off System CH4. Application Setting Customize System prompt Record Greeting Enable Automated Attendant How to record the other System Prompts Customize Ring Back Tone (Transferring Tone) Call Features Authentication Automated Attendant Call Transfer Blind Transfer Call Forward on Busy Call Forward on No Answer Call Forward Unconditional Call Forward Unavailable Call Hold/Retrieval (Client based) Call Routing Call Waiting (Client based) Caller ID CLIR (Caller Line Identification Restriction) Do Not Disturb (Client based) Flexible Extension Logic Music On Hold Music On Transfer Call Pickup Call Park Camp-On (Call Back on Busy) Meetme Conference
4 Broadcast Time and Date Trunk (WG2680) VoIP Gateways (WG2680; WG2504) Voice Mail to Access Voice Mail by phone set Call Monitor CH5. Appendix Voice Mail System Concept System Prompts (Chinese)
5 CH1. Overview SIPPBX 6200A IP-PBX is a IP based IP-PBX which including legend digital PABX telephony services, Auto Attendant, Voice Mail, Music Ring Back Tone, Conference and Announcement features together. It also works on both IPv6 and IPv4 network address simultaneously, which makes migration from IPv4 to IPv6 network smoothly. SIPPBX 6200A is not only an IP-PBX, but also an efficient communication tool to help your business and management more efficient. With flexible and full functionality, Welltech SIPPBX 6200A can give a complete transition from traditional PABX to the new generation IP-PBX. 1.1 Specifications Protocol SIP RFC 3261 Compliance/ Asterisk Compatible Support IPv4/IPv6 Dual Stack Network (IPv4): Support Fixed IP, DHCP, And PPPoE mode Network (IPv6): Support Fixed And Autoconfig IVR Web Based Auto Attendant Call Rule Scheduled And Fixed Greeting Support Branch Office System Prompt Recording By Phone Set Voice Mail Voice Mail To (IPV4 Only) Voice Mail System Message Waiting Indication Personal Greeting Toll Restriction Provided Different Level Toll Restriction Service Support Call Duration Restriction Support Personal Password Support Outgoing Call Routing Password Call Features Flexible Extension Logic CPE Based Call Transfer (Consultant, Blind) Server Based Call Transfer (Consultant, Blind) Call Forward (Busy, No Answer, Unconditional, Unavailable) Call Hold/Retrieval Call Routing Call Waiting - 5 -
6 Call Pickup (Global, Specific) Call Park Call Camp-On (Call Back on Busy) CLIR (Caller Line Identification Restriction) DND (Do Not Disturb) Dial Group (Ring All, Sequential Ring, Dynamic Ring) Speed Dial Music Ring Back Tone Music On Hold Music On Transfer Built-in CDR Report Call Monitor Broadcasting Service (6 rooms, 16 members per group) Meetme Conference (6 rooms, 8 members per room) Busy Lamp Field (RFC 4235) Asterisk TAPI Codecs G.711 (A-Law & μ-law) G.729 G.723 Pass-Thru GSM H.263 Pass-Thru MPEG4 Pass-Thru Technical Features Support Subscriber Registration for IPv4 And IPv6 Support Call Routing Between IPv4 And IPv6 Support RTP Proxy Between IPv4 And IPv6 Support T.38 FAX (IPV4 Only) Support DDNS (IPV4 Only) Built-in NTP Client/Server Built-in DHCP Server (IPV4 Only) Built-in Simple Firewall Subscriber NAT Transversal Behind NAT Support (IPV4 Only) Voice Codec Transform (G.711/ G.729/ GSM) Auto Provision (Welltech Proprietary) Multiple Language Support Management: Web Browser Management HTTP Firmware Upgrade Export/Import Configuration - 6 -
7 Network Interface: 1WAN 1LAN DTMF: in-band, RFC2833, SIP-Info Capacity 200 Concurrent Registers 50 Concurrent Calls Dimension 19 Inch Rack Mount - 7 -
 2: H/D LED 3: Power LED 4: Network Interface LED (not used) 5: Network Interface LED (not used) 6: Power Switch 1.2.2 The Back Panel The SIPPBX 6200A ports are located on the back panel.")
8 1.2 Hardware Overview The Front Panel The SIPPBX 6200A LEDs, which inform you about network activities, are located on the front panel Functions: 1: System Status LED (not used) 2: H/D LED 3: Power LED 4: Network Interface LED (not used) 5: Network Interface LED (not used) 6: Power Switch The Back Panel The SIPPBX 6200A ports are located on the back panel Functions: 1: AC Power Outlet 2: Mouse (not used) 3: Keyboard - 8 -
9 4: RS232 Console Port 5: DVI (not used) 6: VGA 7: USB (not used) 8: Sound (not used) 9: WAN Interface 10: LAN Interface - 9 -

10 CH2. Start to configure SIPPBX 6200A 2.1 Connection SIPPBX 6200A Step 1: Connect LAN port of SIPPBX 6200A with PC via crossover cable or connect with Switch/ Hub via straight through cable. Step 2: Prepare one computer, and change the IP address to be x with subnet mask Step 3: Open browser and link to default LAN IP address of SIPPBX 6200A with default port number 10087, i.e. Step 4: Login SIPPBX 6200A with default user ID/Password: root/root. After login SIPPBX 6200A, user can start to configure basic and essential configurations. Step 5: To configure basic and essential configurations To make SIPPBX 6200A work have to set some basic and essential configurations, those include Network, Extension (FXS and IP Phone devices), and Trunk (FXO devices)

11 2.1.1 Network Configuration To change your Network Setting, click Network, and then click the Network Setting table. The screen appears as shown. Figure Network: Network Setting The following table describes the table in this screen Table Network: Network Setting Label WAN IP Support Mode Description Select use IP mode, provide ipv4, ipv6, ipv4/ipv6. Select SIPPBX 6200A WAN port network mode to be Fixed IP, DHCP or PPPoE. IP Address Subnet Mask Default Gateway Enter the IP Address. If user has set SIPPBX 6200A to be fixed IP mode. Enter the Subnet Mask Address. If user has set SIPPBX 6200A to be fixed IP mode. Enter the Default Gateway Address. If user has set SIPPBX 6200A to be fixed IP mode
12 Primary DNS Enter the IP address for Primary DNS. The default is Secondary DNS Enter the IP address for Secondary DNS. The default is null. Default Gateway Select Enable option, if any connection problem occurred on Backup primary default gateway connections, all the traffic will be guided and switched to the secondary default gateway for proper operation. The default is Disable. Secondary Default Enter the Secondary Default Gateway. If you choose the Gateway Default Gateway Backup to Enable. Check Point Enter the Check Point IP address. SIPPBX 6200A use ping this ip address, to check have any connection problem occurred on primary default gateway connections. If you choose the Default Gateway Backup to Enable. Current use Default This field will display now use the Defaut Gateway IP address. Gateway PPPoE ID Enter the PPPoE ID. If you choose the Mode to PPPoE. PPPoE PWD Enter the PPPoe Password If you choose the Mode to PPPoE. IPV6 Mode Select Manual option, you can enter IP Address/ Prefix Length/ Gateway. IPV6 IP Address Display the IPV6 IP Address. You can enter the IPV6 IP Address, if you choose the IPV6 mode to Manual. IPV6 Prefix Length Display the IPV6 Prefix Length. You can enter the IPV6 IP Address, if you choose the IPV6 mode to Manual. IPV6 IP Gateway Display the IPV6 Default Gateway Address. You can enter the IPV6 Default Gateway Address, if you choose the IPV6 mode to Manual. MAC This field shows the MAC address. The Mac address cannot be modified. LAN (IPV4) IP Address Enter the IP Address. The default is Subnet Mask Enter the Subnet Mask Address. The default is MAC This field shows the MAC address. The Mac address cannot be modified. Network Routing Table (IPV4) Select Select this check box, then modify or delete it. Destination This field shows the IP address. Network This field shows the Subnet Mask address. Gateway This field shows the Default Gateway address. Add Click on the Add button, then display Network Router screen
13 Modify Delete Apply Cancel IP address can be modify by click on the checkbox next to the IP address and click on the Modify button. IP address can be deleted by click on the checkbox next to the IP address and click on the Delete button. Click on the Apply button to save your customized settings and exit this screen. Click on the Cancel button to begin configuration this screen afresh
14 2.1.2 Extension Configuration User has to set Extension account for other device to register on SIPPBX 6200A. To change your Extension, click Configuration, and then click the Extension table. The screen appears as shown. Figure Configuration: Extension The following table describes the table in this screen Table Configuration: Extension Label Description Select Select this check box, then modify or delete it. Extension Number This field shows the Extension Number No information Comment This field shows the Comment information. Type This field shows the Type information. NAT Traversal This field shows the NAT Traversal information. Dial Plan This field shows the Dial Plan information. Add Click on the Add button, then display Extension Setting screen. Modify A extension can be modify by click on the checkbox next to the extension and click on the Modify button. Delete A extension can be deleted by click on the checkbox next to the A extension and click on the Delete button. Quick Add Click on the Add button, then display Extension Setting screen. Quick Delete Click on the Add button, then display Extension Setting screen. Total Count This field shows Total Count information. Number Search Enter the search number, then click enter key. The screen will display match search data. Total Page This field shows Total Page information
15 Page Next/Prev This field shows Page Number information. You can Enter page number, then click enter key. The screen will display this page data. Click on the Next/Prev to Next/Previous Page. The system will auto display the Next or Previous Information. Click Add/Modify. The screen appears as shown. Figure Configuration: Extension Setting The following table describes the table in this screen Table Configuration: Extension Setting Label Description Extension Number Assign the number of Extension. This number is also the register name for device. Subscriber Type Chose one option to Subscriber Type. Provide drop-down options: Normal, Autoconfig. Normal: You must enter Password. Autoconfig: You must enter MAC Address. Password Select Normal option to Subscriber Type. Assign the register password for device to register on SIPPBX 6200A. Subscriber MAC Select Autoconfig option to Subscriber Type. You must enter the CPE Device MAC Address. Call Group You can use the Call Group parameter to assign an Extension to
16 one or more groups. Pickup Group DialPlan Keypad You can use the Pickup Group option in conjunction with this parameter to allow a ringing phone to be answered from another extension. Note: The Pickup Group option is used to control which Call Groups a channel may pick up a channel is given authority to answer another ringing channel if it is assigned to the same Pickup Group as the ringing channel s Call Group. By default, remote ringing extensions can be answered with *8. You can define multiple Call Groups and Pickup Groups for one Extension by a comma. For example, you can input 1,3,5 into Call Group or Pickup Group. Define the dialing plan for Extension. It specifies the location of the instruction used to control what the phone is allowed to do, and what to do with incoming calls for this extension. In this field, you can Choose 5 dial level for Extension, including [ext-only], [ext+r1], [ext+r12], [ext+r123], [ext+allroutes]. You can define an Outgoing call record, to a certain Route Level, as R1, R2, etc. [ext-only] means this subscriber can only call to Extension. [ext+r1] means the subscriber with such DialPlan can call to Extension and Route Level with R1. [ext+r12] means the subscriber with such DialPlan can call to Extension and Route Level with R1 and R2. [ext+r123] means the subscriber with such DialPlan can call to Extension and Route Level with R1, R2 and R3. [ext+allroutes] means the subscriber with such DialPlan can call to Extension and Route Level with R1, R2, R3 and R4. Note: For more information about Route Level, please refer to the user manual: CH3.1.8 Outgoing Routing. User can select Keypad type to be RFC2833, In-band, SIP-Info and Auto. You can choose Auto to auto select the Keypad type. Choose RFC2833, Inband or SIP-Info here will force the Extension use RFC2833, Inband or SIP-Info only and the setting should be also match the Keypad setting of Extension device. Note: Now SIPPBX 6200A could not support G729 with Inband Keypad type. If SIPPBX 6200A detect the caller or callee not
17 NAT Traversal Fixed Trunk ID Absolute Timeout BLF Forward CallerID Unconditional FWD No Answer FWD Busy FWD Unavailable FWD Comment Mail Box support RFC2833 DTMF type. Then SIPPBX 6200A will force the Codec to G711 to make sure the DTMF detection is correctly. If the Extension device is behind a device performing NAT, such as firewall or router, and need to register to SIPPBX 6200A on public network, then user has to enable this function. Enable NAT Traversal to force SIPPBX 6200A to ignore the contact information for the Extension and use the address from which the packets are being received. User can define a Fixed Trunk for a certain extension. When such extension makes an outgoing call via routing table, SIPPBX 6200A will check Fixed Outgoing Call Rule first. If Fixed Outgoing Call Rule is enabled, then SIPPBX 6200A will confirm the Fix Trunk ID for the calling party. That means the outbound call will be routed by Fixed Trunk ID, if you define the Fixed Trunk ID for the calling party and you also enable Fixed Outgoing Call Rule. Note: For more information about Fixed Outgoing Call Rule, please refer to the user manual: CH3.1.8 Outgoing Routing. Specific the timeout value for the outgoing calls. Please also go to Outgoing Call Rule page to enable the Route Timeout function. Enable BLF function for extensions. By default, the from header of SIP invite will contain the caller s line number when forward function is activated. But this may make some errors occurred for some SIP Trunk services. So we add this function in the Extension Setting page, to let user modify the line number of SIP Invite s from header, from calling party s number to the called party s number. Enable Unconditional forward function for extensions. Enable No Answer forward function for extensions. Enable Busy forward function for extensions. Enable Unavailable forward function for extensions. You can input a 20 bytes note for each extension here. User can select to disable or enable mail box function. If this function is enabled, user could input address for the Extension. When having voice mail of incoming call, system will send this voice mail to the specified address. You can also login the mail box system by dialing to *
18 Address Save VM to Local VM Login Password This field will appear when you enable Mail Box function and you can input the Address here for voice mail to . Note: Please remember set the SMTP in the page of click Management, and then click SMTP Setting to activate the Voice Mail to . If the SIPPBX 6200A got a new message, it will send the message to the user by immediately. If you are using SIPPBX 6200A and u just hope the SIPPBX 6200A to save voice mail to it and not send the . You just need to input x to Address. If you select Enable to Save VM To Local, when you have Voice Mail message, will backup to Local folder. SIPPBX 6200A has a built-in voice mail system. And user can login voice mail system by dialing to *98, then input the mailbox number and password for voice mail. User can define the Voice Mail box login password here. Another way to login the voice mail system is dial to *98+extension number. For example, dial to *98101 can login EXT101 s voice mail box, and caller can just input password to access voice mail. Voice Mail Count Delete MailBox Content Apply Cancel Display the exact count of New Messages and Old Messages. User can delete all of the voice mails and personal greeting by mark the Delete MailBox Content and then press Apply. Click on the Apply button to save your customized settings and exit this screen. Click on the Cancel button to begin configuration this screen afresh
19 2.1.3 Trunk Configuration User has to set Trunk account for Trunk (FXO device, e.g. WG3804A) to register to SIPPBX 6200A or set some necessary configuration for SIP trunk. To change your Trunk, click Configuration, and then click the Trunk table. The screen appears as shown. Figure Configuration: Trunk The following table describes the table in this screen Table Configuration: Trunk Label Description Select Select this check box, then modify or delete it. Trunk Number This field shows the Trunk Number information Comment This field shows the Comment information NAT Traversal This field shows the NAT Traversal information Maximum Channels This field shows the Maximum Channels information Add Click on the Add button, then display Trunk Setting screen. Modify A Trunk can be modify by click on the checkbox next to the Trunk and click on the Modify button. Delete A Trunk can be deleted by click on the checkbox next to the A Trunk and click on the Delete button. Total Count This field shows Total Count information. Number Search Enter the search number, then click enter key. The screen will display match search data. Total Page This field shows Total Page information. Page This field shows Page Number information. You can Enter page
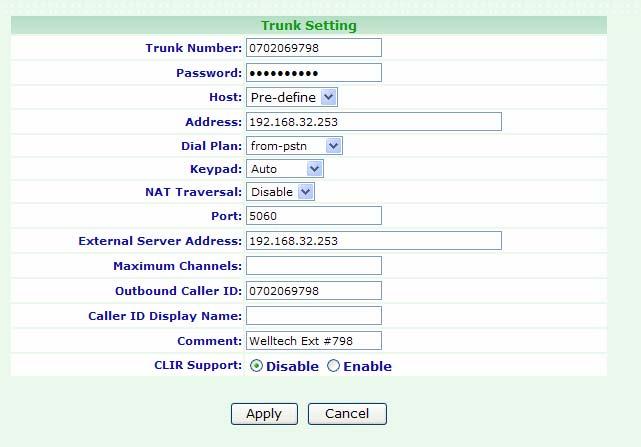
20 Next/Prev number, then click enter key. The screen will display this page data. Click on the Next/Prev to Next/Previous Page. The system will auto display the Next or Previous Information. Example 1: Set Trunk for FXO gateway Click Add/Modify. The screen appears as shown. Figure Configuration: Trunk Setting The following table describes the table in this screen Table Configuration: Trunk Setting Label Description Trunk Number Assign the number of Trunk. This number is also the register name for Trunk device. Note: The Trunk Number can also be a Trunk ID. In the Routing Table page, you should define the destination of prefix route. When you define the prefix route, you should set the Trunk ID (Trunk Number) in the Trunk page first; then you could input the correct Trunk ID in the Destination field. Password Assign the register password for device to register on SIPPBX 6200A. Host Setting the Host to Dynamic will require the trunk to register the SIPPBX 6200A so that the SIPPBX 6200A know how to reach the trunk. You can also set the Host to an IP address or FQDN if you set the Host to [Pre-define]. There will be a field called [Address] appeared when you choose Host to [Pre-define]. This limits only where you place calls to, as the user is allowed to place calls from anywhere
21 DialPlan Keypad NAT Traversal Port External Server Address Maximum Channels Outbound Caller ID Define the dialing plan for Trunk. It specifies the location of the instruction used to control what the phone is allowed to do, and what to do with incoming calls for this Trunk. In this field, you can Choose 6 dial level for Extension, including [from-pstn], [ext-only], [ext+r1], [ext+r12], [ext+r123], [ext+allroutes]. You can define an Outgoing call record, to a certain route level, as R1, R2, etc. [from-pstn] is used for Trunk only. [ext-only] means this subscriber can only call to Extension. [ext+r1] means the subscriber with such DialPlan can call to Extension and Route Level with R1. [ext+r12] means the subscriber with such DialPlan can call to Extension and Route Level with R1 and R2. [ext+r123] means the subscriber with such DialPlan can call to Extension and Route Level with R1, R2 and R3. [ext+allroutes] means the subscriber with such DialPlan can call to Extension and Route Level with R1, R2, R3 and R4. Note: For more information about Route Level, please refer to the user manual: CH3.1.8 Outgoing Routing. User can select Keypad type to be RFC2833, In-band, or SIP-Info and Auto. You can choose Auto to auto select the Keypad type. Choose RFC2833, Inband or SIP-Info here will force the Extension use RFC2833, Inband or SIP-Info only and the setting should be also match the Keypad setting of Trunk device. If the Trunk device is behind a device performing NAT, such as firewall or router, and need to register to SIPPBX 6200A on public network, then user has to enable this function. Enable NAT Traversal to force SIPPBX 6200A to ignore the contact information for the Trunk and use the address from which the packets are being received. You can use this to define the SIP signal port if you want to listen on a nonstandard SIP signal port. This field will allow you to set the domain in the SIP From URI. Setting this will avoid some unexpected issue if the service provider needs this for authentication. This will limit the maximum channels for this Trunk. For example, you set 2 into this field; only 2 outgoing calls could go via this Trunk. Default is no limit. Some service provider will require the correct registered caller ID if it got an incoming call. Default the SIPPBX 6200A will send
22 Caller ID Display Name Comment CLIR Support Apply Cancel the Extension s caller ID to this Trunk, if you set empty here. Note: Normally, SIP From URI will contain the Extension s calling ID and SIPPBX 6200A s IP address, but some ITSP may reject this call due to some security issue. You can modify the Calling ID and IP/ Domain in the fields of [External Server Address] and [Outbound Caller ID] when the call is going via the SIPPBX 6200A to the Destination (Trunk) to avoid such security issue. If you set a Welltech FXO gateway as the Trunk, you can just use the default Trunk 888 and 889 as the FXO s register number. For the FXO gateway, you may just only configure Trunk Number, Password, Host, DialPlan, Keypad, NAT Traversal and RTP Mode. If you set the ITSP as the Trunk, you may need to set the following configure: Port, External Server Address and Outbound Caller ID. When inbound call is coming from Trunk, such as 888. The caller ID Name will be the PSTN number or 888. Specify this will use the current setting instead. You can input a 10 byte note for each Trunk here. CLIR means "Caller Line Identification Restriction". It is a proper noun. It is a feature to hide the caller's number. For example, ext 101 call to ext 102. But 101 won t like to show the caller ID to 102. So 101 can activate this feature to hide the caller ID. When 102 got a call from 101, the LCD of 102 should display "Anonymous". Click on the Apply button to save your customized settings and exit this screen. Click on the Cancel button to begin configuration this screen afresh
23 CH3. Full Web Configurations After Login SIPPBX 6200A will see screen as below, and there are four main categories, user can click on each category to extend detail items. Configuration: Include all telephony configurations of SIPPBX 6200A. IP PBX Office Call Rule Feature Code Extension Auto Config (IPv4) Trunk SIP Trunk Reg. Outgoing Routing Incoming Routing Dial Group Speed Dial Broadcast Meetme Conf. T.38 FAX Information: To show related information. Subscriber Info. Call Monitor CDR System Info. Network: To show related information. Network
24 DHCP Srv. (Pv4) DDNS Srv. (Pv4) Management: Include all system management of SIPPBX 6200A. Time Setting SMTP Setting VM Setting Security Firmware Upload Music Upload Import Setting Export Setting Reset To Default Reboot System: To reboot system of SIPPBX 6200A. Power Off System
25 3.1 Configuration The Network screens can help you configuration IP PBX, Office Call Rule, Feature Code, Extension, Auto config (IPV4), Trunk, SIP Trunk Reg., Outgoing Routing, Dial Group, Speed Dial, Broadcast, Meetme Conf., T.38 FAX IP PBX To change your IP PBX Setting, click Configuration, and then click the IP PBX table. The screen appears as shown. Figure Configuration: IP PBX

26 The following table describes the table in this screen Table Configuration: IP PBX Label Description SIP Setting IP-PBX Realm Enter the IP-PBX Realm of SIPPBX 6200A. This parameter is essential when there is more than one SIPPBX 6200A, and user wants to have inter-calls between SIPPBX 6200A. Please refer to SIP Trunk configuration. IP-PBX User Agent Enter the IP-PBX User Agent. IP-PBX User Agent takes as its argument a string specifying the value for the user agent field in the SIP header. The default value is IP-PBX. Proxy Port Enter the Proxy Port. These optional parameters allow you to control the port on which you wish the SIPPBX 6200A to accept SIP connections. Default is RTP Port Start Enter the RTP Port Start. The voice media will use RTP as the transport protocol. You can define the RTP port range that SIPPBX 6200A opened. Default start port is
27 RTP Port End Max Expire Time Default Expire Time Codec Priority Codec Priority PBX Setting Ext Ring Time Out Ring Time Music RBT Music RBT (After AA) Call Monitor Refresh Enter the RTP Port End. The voice media will use RTP as the transport protocol. You can define the RTP port range that SIPPBX 6200A opened. Default end port is Note: Default RTP port range is to and default proxy port is If your SIPPBX 6200A is behind a firewall, please make sure you have already open the RTP port ( ) and proxy port (5060). And you should also make sure the proxy port (5060) has already mapped to SIPPBX 6200A. This sets the maximum amount of time, in seconds. This is used for the registration expire time. If this value less than the expired time from the client, and then click the SIPPBX 6200A will reply a certain expire time which is defined in Default Expire Time to client. This sets the default SIP registration expiration time, in seconds. A client will normally define this value when it initially registers, so the default value you set here will be used only if the client does not specify a timeout when it registers. If you are registering to another SIP Trunk, this is the registration timeout that it will send to the far end. Codec negotiation is attempted in the order in which the Codec Priority is defined. Default is G729 with first priority, G711u with second priority, G711A with third priority and GSM is fourth priority. That means the SIPPBX 6200A can only recognize these four Codec and it will force the Codec with the specified priority and forward to another subscriber. Now, SIPPBX 6200A can support G729, G711U, G711A, GSM and G723 Pass-Thru. This field defines the timeout value if the call is between Extension and Extension. Default is 20 seconds. This field defines the timeout value if the call is from Extension to outside (define by routing table). Default is no limitation. If this is call between extensions. Enabling this option will provide music to the calling party until the call is answered. If this is call comes from Auto Attendant. Enabling this option will provide music to the calling party until the call is answered. SIPPBX 6200A have call monitor function. The call situation will
28 RTP Timeout Video Support Video Format SRVlookup Support Invalid Number Support Behind NAT Behind NAT External IP Secondary External IP External Host be refreshed by the refresh time. Default is 30 seconds and user can change it here. It terminates a call if no RTP data received within the time specified. This field will enable video call with H263 pass-through or MPEG4 pass-through. Chose one option to Video Fomat. Provide drop-down options: H263 pass-through or MPEG4 pass-through. Enable or disable SRV lookup. DNS SRV is a way of setting up a logical, resolvable address where you can be reached. This allows calls to be forwarded to different locations without the need to change the logical address, but your DNS Server must support it also. If not sure, disable it. This option is Disable turned on by default!!! Normally, a busy tone will be heard if caller dial to a non-exist callee. Enable this option, the caller should hear an announcement to notify him that callee is not exist. If your SIPPBX 6200A is behind NAT, we strongly suggest you to enable Behind NAT to avoid some unexpected issue, such as one way voice. If you input External IP, SIPPBX 6200A will take that IP address as its argument. If SIPPBX 6200A is behind NAT, the SIP header will normally use the private IP address assigned to the server. The remote device will not know how to route back to this address; thus, it must be replaced with a valid, routable address. This should cooperate with Default Gateway Backup in Network page. When Default Gateway Backup is enabled, the SIPPBX 6200A will auto switch the default gateway to secondary one if primary default gateway is broken. The External IP is not functional when Backup Default Gateway is chosen. So you must input the Secondary External IP for Backup Default Gateway. External Host takes a fully qualified domain name as its argument. If SIPPBX 6200A is behind NAT, the SIP header will normally use the private IP address assigned to the server. If you set this option, SIPPBX 6200A will perform periodic DNS lookups on the hostname and replace the private IP address
29 Local Net Apply Cancel with the IP address returned from the DNS lookup. Note: You should not set both of External IP and External Host together; otherwise there will be some unexpected problems appeared. That means you can only choose one for External IP or External Host for Behind NAT. Local Net is used to tell SIPPBX 6200A which IP addresses are considered local. If one of caller or callee is not under Local Net, SIPPBX 6200A will set the address in the SIP header that can be translated to that specified by External IP or the IP address can be looked up with External Host. The format will be IP/ Subnet Mask. Example: / Click on the Apply button to save your customized settings and exit this screen. Click on the Cancel button to begin configuration this screen afresh
 or **988 (for office 12) to reach auto attendant.")
30 3.1.2 Office Call Rule You can define a business time to forward incoming call to company announcement or a certain destination. 6200A provide 12 kinds office call rule (**998 to **988). User can setup a FXO gateway and hotline to **999 (for office 1) or **988 (for office 12) to reach auto attendant. Now user can make SIPPBX 6200A to decide the destination when it got an invite with called number as **999 to **988. When SIPPBX 6200A got an invite with **999, SIPPBX 6200A will confirm the current time and forward this call to AA, Ext, Group or Outbound. If you choose the destination to EXT, Group or Outbound, please remember to input the destination number into the following field. When you set the destination to AA, please refer to CH4.1.3 How to record the other system prompts for the greeting recording. To change your Office Call Rule, click Configuration, and then click the Office Call Rule table. The screen appears as shown. Figure Configuration: Office Call Rule The following table describes the table in this screen Table Configuration: Office Call Rule Label Select Representative No. Comment Operator Call Rule Modify Description Select this check box, then modify it. This field shows the Representative No information This field shows the Comment information. This field shows the Operator information. This field shows the Call Rule information. A Representative no can be modify by click on the checkbox next to the Representative no and click on the Modify button

31 Click Modify. The screen appears as shown. Figure Configuration: Office 1 Call Rule The following table describes the table in this screen Table Configuration: Extension Setting Label Description General Setting Representative No Enter the Representative No. Comment You can input a 20 byte note for each Comment information.. Call Rule Rule Chose one option to the Call Rule. Provide drop-down options: Scheduled Call Rule, Fixed to Working Time Call Rule, Fixed to Non-working Time Call Rule, Fixed to Special Time Call Rule. Working Day Chose one option to the Working Day. Working Time AM Chose one option to the Working Time AM. To: Chose one option to the Rule. Provide drop-down options: AA, EXT, Group, Outbound. If you select EXT or Group and Outbound, will auto dispaly -- field. You must input the EXT or Group and Outbound data in this field. Lunch Break Chose one option to the Lunch Break. To: Chose one option to the Rule. Provide drop-down options:
32 Working Time PM Non-working Time Operator setting Operator OP to EXT OP Ext End To AA setting Play AA Greeting AA Greeting End & Interval Timer AA Greeting End To (Working Time) AA Greeting End To (Lunch Break) AA Greeting End To (non-working Time) AA Greeting End To (Special Time) Import Greeting Apply Cancel AA, EXT, Group, Outbound. If you select EXT or Group and Outbound, will auto dispaly -- field. You must input the EXT or Group and Outbound data in this field. Chose one option to the Working Time PM. Chose one option to the Non-working Time. Configure the Operator number and the destination to Extension or Call Group. If you set Operator to EXT, you can set extension number here. When you set Operator as an Extension, you can define the final destination to IVR system or Extension s function (i.e. voice mail) if Operation does not answer. You can define the times of greeting announcement, when caller entered Auto Attendant system. By default, the caller will hear greeting message 3 times when he reach the auto attendant. There will be an 3 seconds interval between these greeting messages. Now users can change the intervals here. Decide the destination after greeting announcement finished on working time. Decide the destination after greeting announcement finished on Lunch Break time. Decide the destination after greeting announcement finished on non-working time. Decide the destination after greeting announcement finished on Special time. File Name: Chose one option Greeting file. Provide drop-down options: greeting-day.wav (Working Time Greeting), greeting-noon.wav (Lunch Break Greeting). File: Type in the location of the file you want to upload in this field or click on the Browse.. button to find it. Import: Click on the Import button to upload greeting file. Click on the Apply button to save your customized settings and exit this screen. Click on the Cancel button to begin configuration this screen afresh

33 3.1.3 Feature Code To change your Feature Code, click Configuration, and then click the Feature Code table. The screen appears as shown. Figure Configuration: Feature Code The following table describes the table in this screen Table Configuration: Feature Code Label System Prompt Recording System Prompt Recording PWD Description User could dial an access code for system prompt recording, such as **111 for greeting-day.wav. Before dialing to **111, user should dial to the feature code of System Prompt Recording to start recording. Default feature code for System Prompt Recording is [*50]. So the recording procedure should be Dial to [*50] Input password (which defined in [System Prompt Recording PWD]) dial to access code (i.e. **111) Start recording. Add the feature for recording will avoid an unknown user incautious to record the system prompt. Before recording System Prompt, user may need to input password. Here you can specify the password for System
34 Prompt Recording. Default is 000. That means password is not necessary if this field is empty. System Prompt The prefix is for access code of System Prompt Recording. Recording Prefix Default is **. For example, the access code for [greeting-day.wav] is **111. So the System Prompt Recording Prefix is **. If you change the Prefix to *1, that means the access code for [greeting-day.wav] should be *1111. Note: Previously, you can just dial to the access code, such as **111, for announcement recording. But we change this procedure due to the security issue. For example, the record procedure of greeting message will be: Dial to [*50] Input password [000] dial to access code [**111] Start to record greeting-day.wav. For more information about announcement recording, please refer to user manual: CH4.1.3 How to record the other system prompts System Prompt The prefix is for access code of System Prompt listening. Listen Prefix Default is ***. For example, the access code for [greeting-day.wav] listening is ***111. So the System Prompt Recording Prefix is ***. If you change the Prefix to *11, that means the access code for [greeting-day.wav] listening should be * DND Activated The code to activate DND. Default is *78. DND Deactivated The code to deactivate DND. Default is *79. UCF Activated The code to activate Unconditional Forward. Default is *72. For example, dialing to *72101 will forward all the call to 101. UCF Deactivated The code to deactivate Unconditional Forward. Default is *73. BF Activated The code to activate Busy Forward. Default is *90. For example, dialing to *90101 will forward call to 101 if you are on the phone. BF Deactivated The code to deactivate Busy Forward. Default is *91. NAF Activated The code to activate No Answer Forward. Default is *92. For example, dialing to *92101 will forward call to 101 if you are not answering. NAF Deactivated The code to deactivate No Answer Forward. Default is *93. UAF Activated The code to activate Unavailable Forward. Default is *94. For example, dialing to *94101 will forward call to 101 if your phone is not registering. UAF Deactivated The code to deactivate Unavailable Forward. Default is *
35 OUCF Start Provide user use remote control function, then control Unconditional Forward. Default is *87. Note: 1. You can just dial to the PBX, and then PBX will play greeting message. 2. Dial to [*87] to use remote control function; then play greeting message. 3. You can enable or disable OUCF function. OUCF Activated The code to activate Unconditional Forward. Default is *88. Note: 1. You can just dial to the PBX, and then PBX will play greeting message. 2. Dial to [*87] to use remote control function; then play greeting message. 3. After, dialing to * will forward all the call to OUCF Deactivated The code to set disable for Unconditional Forward. Default is *89. Note: 1. You can just dial to the PBX, and then PBX will play greeting message. 2. Dial to [*87] to use remote control function; then play greeting message. 3. After, dialing to [*89] to disable OUCF function. CF Deactivated Disable all of the forward function, including Unconditional Forward, Busy Forward, No Answer Forward and Unavailable Forward. Default is *96. Voice Mail Box Login For SIPPBX 6200A only. SIPPBX 6200A has the ability to store voice mail within itself, and user can just dial to the feature code to login the voice mail system. The feature code of voice mail system default is *98. Camp-On Activated This function means [call back on busy]. For example, you dial to 101 but 101 is on the phone, then you should hear an announcement for called person is busy. You could dial to *66 by default to trigger the SIPPBX 6200A call back to you when 101 is idle. This function will let u talk to called party immediately when called party is not busy. Note: This Function is only workable when voice mail function is disabled
36 CLIR (per call) Prefix CLIR Activated CLIR Deactivated Ext Pwd Activated Ext Pwd Deactivated Apply Cancel When this function is enabled, SIPPBX 6200A will check the status of called party every 20 seconds, at most 15 times. That means the camp-on function may be performed when called party is idled after 20 seconds at most. And 300 (20*15) seconds later, this function will not be workable. Default is *67. Add this prefix will hide the caller s number. For example, 101 does not hope to show the caller id to can just dial to "*67102", where the *67 is the prefix for CLIR. When 102 got the incoming call, the LCD of 102 should display "Anonymous". If 101 just dial to "102", then 102 should see the Caller ID as 101. Default is *31. For example. 101 dial to "*31", SIPPBX 6200A should add the CLIR record for 101 into its database. When 101 call to 102, ,etc. The LCD of called party should always show "Anonymous". Default is *32. Dialing to *32 will remove the CLIR record from the database of SIPPBX 6200A. Ext Pwd means extension password. This is a personal password for external outgoing call. For example, ext 101 dial to *80+123, The Ext Pwd is activated. From now on, the ext 101 must input the password 123 for the external outgoing calls which are defined in the [Outgoing Routing] page.. This is a feature code to disable extension password (Ext Pwd). Click on the Apply button to save your customized settings and exit this screen. Click on the Cancel button to begin configuration this screen afresh

37 3.1.4 Extension User has to set Extension account for other device to register on SIPPBX 6200A. To change your Extension, click Configuration, and then click the Extension table. The screen appears as shown. Figure Configuration: Extension The following table describes the table in this screen Table Configuration: Extension Label Description Select Select this check box, then modify or delete it. Extension Number This field shows the Extension Number No information Comment This field shows the Comment information. Type This field shows the Type information. NAT Traversal This field shows the NAT Traversal information. Dial Plan This field shows the Dial Plan information. Add Click on the Add button, then display Extension Setting screen. Modify A extension can be modify by click on the checkbox next to the extension and click on the Modify button. Delete A extension can be deleted by click on the checkbox next to the A extension and click on the Delete button. Quick Add Click on the Add button, then display Extension Setting screen. Quick Delete Click on the Add button, then display Extension Setting screen. Total Count This field shows Total Count information. Number Search Enter the search number, then click enter key. The screen will display match search data. Total Page This field shows Total Page information

38 Page Next/Prev This field shows Page Number information. You can Enter page number, then click enter key. The screen will display this page data. Click on the Next/Prev to Next/Previous Page. The system will auto display the Next or Previous Information. Click Add/Modify. The screen appears as shown. Figure Configuration: Extension Setting The following table describes the table in this screen Table Configuration: Extension Setting Label Description Extension Number Assign the number of Extension. This number is also the register name for device. Subscriber Type Chose one option to Subscriber Type. Provide drop-down options: Normal, Autoconfig. Normal: You must enter Password. Autoconfig: You must enter MAC Address. Password Select Normal option to Subscriber Type. Assign the register password for device to register on SIPPBX 6200A. Subscriber MAC Select Autoconfig option to Subscriber Type. You must enter the CPE Device MAC Address. Call Group You can use the Call Group parameter to assign an Extension to
39 one or more groups. Pickup Group DialPlan Keypad You can use the Pickup Group option in conjunction with this parameter to allow a ringing phone to be answered from another extension. Note: The Pickup Group option is used to control which Call Groups a channel may pick up a channel is given authority to answer another ringing channel if it is assigned to the same Pickup Group as the ringing channel s Call Group. By default, remote ringing extensions can be answered with *8. You can define multiple Call Groups and Pickup Groups for one Extension by a comma. For example, you can input 1,3,5 into Call Group or Pickup Group. Define the dialing plan for Extension. It specifies the location of the instruction used to control what the phone is allowed to do, and what to do with incoming calls for this extension. In this field, you can Choose 5 dial level for Extension, including [ext-only], [ext+r1], [ext+r12], [ext+r123], [ext+allroutes]. You can define an Outgoing call record, to a certain Route Level, as R1, R2, etc. [ext-only] means this subscriber can only call to Extension. [ext+r1] means the subscriber with such DialPlan can call to Extension and Route Level with R1. [ext+r12] means the subscriber with such DialPlan can call to Extension and Route Level with R1 and R2. [ext+r123] means the subscriber with such DialPlan can call to Extension and Route Level with R1, R2 and R3. [ext+allroutes] means the subscriber with such DialPlan can call to Extension and Route Level with R1, R2, R3 and R4. Note: For more information about Route Level, please refer to the user manual: CH3.1.8 Outgoing Routing. User can select Keypad type to be RFC2833, In-band, SIP-Info and Auto. You can choose Auto to auto select the Keypad type. Choose RFC2833, Inband or SIP-Info here will force the Extension use RFC2833, Inband or SIP-Info only and the setting should be also match the Keypad setting of Extension device. Note: Now SIPPBX 6200A could not support G729 with Inband Keypad type. If SIPPBX 6200A detect the caller or callee not
40 NAT Traversal Fixed Trunk ID Absolute Timeout BLF Forward CallerID Unconditional FWD No Answer FWD Busy FWD Unavailable FWD Comment Mail Box support RFC2833 DTMF type. Then SIPPBX 6200A will force the Codec to G711 to make sure the DTMF detection is correctly. If the Extension device is behind a device performing NAT, such as firewall or router, and need to register to SIPPBX 6200A on public network, then user has to enable this function. Enable NAT Traversal to force SIPPBX 6200A to ignore the contact information for the Extension and use the address from which the packets are being received. User can define a Fixed Trunk for a certain extension. When such extension makes an outgoing call via routing table, SIPPBX 6200A will check Fixed Outgoing Call Rule first. If Fixed Outgoing Call Rule is enabled, then SIPPBX 6200A will confirm the Fix Trunk ID for the calling party. That means the outbound call will be routed by Fixed Trunk ID, if you define the Fixed Trunk ID for the calling party and you also enable Fixed Outgoing Call Rule. Note: For more information about Fixed Outgoing Call Rule, please refer to the user manual: CH3.1.8 Outgoing Routing. Specific the timeout value for the outgoing calls. Please also go to Outgoing Call Rule page to enable the Route Timeout function. Enable BLF function for extensions. By default, the from header of SIP invite will contain the caller s line number when forward function is activated. But this may make some errors occurred for some SIP Trunk services. So we add this function in the Extension Setting page, to let user modify the line number of SIP Invite s from header, from calling party s number to the called party s number. Enable Unconditional forward function for extensions. Enable No Answer forward function for extensions. Enable Busy forward function for extensions. Enable Unavailable forward function for extensions. You can input a 20 bytes note for each extension here. User can select to disable or enable mail box function. If this function is enabled, user could input address for the Extension. When having voice mail of incoming call, system will send this voice mail to the specified address. You can also login the mail box system by dialing to *
41 Address Save VM to Local VM Login Password Voice Mail Count Delete MailBox Content Apply Cancel This field will appear when you enable Mail Box function and you can input the Address here for voice mail to . Note: Please remember set the SMTP in the page of click Management, and then click SMTP Setting to activate the Voice Mail to . If the SIPPBX 6200A got a new message, it will send the message to the user by immediately. If you are using SIPPBX 6200A and u just hope the SIPPBX 6200A to save voice mail to it and not send the . You just need to input x to Address. If you select Enable to Save VM To Local, when you have Voice Mail message, will backup to Local folder. SIPPBX 6200A has a built-in voice mail system. And user can login voice mail system by dialing to *98, then input the mailbox number and password for voice mail. User can define the Voice Mail box login password here. Another way to login the voice mail system is dial to *98+extension number. For example, dial to *98101 can login EXT101 s voice mail box, and caller can just input password to access voice mail. Display the exact count of New Messages and Old Messages. User can delete all of the voice mails and personal greeting by mark the Delete MailBox Content and then press Apply. Click on the Apply button to save your customized settings and exit this screen. Click on the Cancel button to begin configuration this screen afresh. Click Quick Add. The screen appears as shown. Figure Configuration: Extension Setting

42 The following table describes the table in this screen Table Configuration: Extension Setting Label Description Quick Add Enter the number of the Qucik Add. If you enter 30, then extension number enter 330, will auto create 330 ~ 359 extension number. Extension Number Assign the start number of Extension. This number is also the register name for device. Subscriber Type Chose one option to Subscriber Type. Provide drop-down options: Normal, Autoconfig. Normal: You must enter Password. Password Select Normal option to Subscriber Type. Assign the register password for device to register on SIPPBX 6200A, the password will automatically increase by 1 digit. Call Group You can use the Call Group parameter to assign an Extension to one or more groups. Pickup Group You can use the Pickup Group option in conjunction with this parameter to allow a ringing phone to be answered from another extension. Note: The Pickup Group option is used to control which Call Groups a channel may pick up a channel is given authority to answer another ringing channel if it is assigned to the same Pickup Group as the ringing channel s Call Group. By default, remote ringing extensions can be answered with *8. You can define multiple Call Groups and Pickup Groups for one Extension by a comma. For example, you can input 1,3,5 into Call Group or Pickup Group
43 DialPlan NAT Traversal BLF Mail Box Save VM to Local VM Login Password Define the dialing plan for Extension. It specifies the location of the instruction used to control what the phone is allowed to do, and what to do with incoming calls for this extension. In this field, you can Choose 5 dial level for Extension, including [ext-only], [ext+r1], [ext+r12], [ext+r123], [ext+allroutes]. You can define an Outgoing call record, to a certain Route Level, as R1, R2, etc. [ext-only] means this subscriber can only call to Extension. [ext+r1] means the subscriber with such DialPlan can call to Extension and Route Level with R1. [ext+r12] means the subscriber with such DialPlan can call to Extension and Route Level with R1 and R2. [ext+r123] means the subscriber with such DialPlan can call to Extension and Route Level with R1, R2 and R3. [ext+allroutes] means the subscriber with such DialPlan can call to Extension and Route Level with R1, R2, R3 and R4. Note: For more information about Route Level, please refer to the user manual: CH3.1.8 Outgoing Routing. If the Extension device is behind a device performing NAT, such as firewall or router, and need to register to SIPPBX 6200A on public network, then user has to enable this function. Enable NAT Traversal to force SIPPBX 6200A to ignore the contact information for the Extension and use the address from which the packets are being received. Enable BLF function for extensions. User can select to disable or enable mail box function. If this function is enabled, user could input address for the Extension. When having voice mail of incoming call, system will send this voice mail to the specified address. You can also login the mail box system by dialing to *98, if you are using an SIPPBX 6200A. If you select Enable to Save VM To Local, when you have Voice Mail message, will backup to Local folder. SIPPBX 6200A has a built-in voice mail system. And user can login voice mail system by dialing to *98, then input the mailbox number and password for voice mail. The password will automatically increase by 1 digit. User can define the Voice Mail box login password here. Another way to login the voice mail system is dial to *98+extension number. For example, dial to *98101 can login EXT 101 s voice mail box, and caller can

44 just input password to access voice mail. Apply Cancel Click on the Apply button to save your customized settings and exit this screen. Click on the Cancel button to begin configuration this screen afresh. Click Quick Delete. The screen appears as shown. Figure Configuration: Extension Setting The following table describes the table in this screen Table Configuration: Extension Setting Label Description Quick Delete Enter the number of the Qucik Delete. If you enter 30, then extension number enter 330, will auto delete 330 ~ 359 extension number. Extension Number Enter the will delete start number of Extension Number. Apply Click on the Apply button to save your customized settings and exit this screen. Cancel Click on the Cancel button to begin configuration this screen afresh

45 3.1.5 Auto COnfig (IPv4) To change your Auto Config (IPV4), click Configuration, and then click the Auto Config (IPV4) table. The screen appears as shown. Figure Configuration: Auto Config-Device The following table describes the table in this screen Table Configuration: Auto Config-Device Label Description Auto Config-Device Select Select this check box, then modify or delete it. Model This field shows the Model information Call Waiting This field shows the Call Waiting information Broadcasting This field shows the Broadcasting information End of Digit This field shows the End of Digit information Current Version This field shows the Current Version information Add Click on the Add button, then display Config-Device screen. Modify A Model can be modify by click on the checkbox next to the A Model and click on the Modify button. Delete A Model can be deleted by click on the checkbox next to the A Model and click on the Delete button. Auto Config-Office Select Select this check box, then modify or delete it. Office This field shows the Office information Device Refresh This field shows the Device Refresh information Firmware Update This field shows the Firmware Update Time information Time Time Zone This field shows the Time Zone information Daylight Saving This field shows the Daylight Saving information Add Click on the Add button, then display Config-Office Setting screen

46 Modify Delete A office can be modify by click on the checkbox next to the office and click on the Modify button. A office can be deleted by click on the checkbox next to the A office and click on the Delete button. To change your Auto Config-Device, click Configuration, and then click the Auto Config-Device table. The screen appears as shown. Click Add/Modify. The screen appears as shown. Figure Configuration: Auto Config-Device The following table describes the table in this screen Table Configuration: Auto Config-Device Label Description Device Model Model Name Chose one option to Model name. This function is welltech proprietary, now only support lp600n. Current Version This field shows the S/W Version. Firmware Upload Upload the S/W file for the IP-Phone model. [Edit] Device Features Call Waiting Select Enable option to use Call waiting. Broadcasting Select Enable option to use Broadcasting

47 End of Digit Login Administrator Login Supervisor Login User Login Codec Priority Codec Priority 1 Codec Priority 2 Codec Priority 3 Codec Priority 4 Codec Priority 5 Apply Cancel Chose one option to End of Digit. Provide drop-down options: none, *, #. Enter the Administrator Login account/password Enter the Supervisor Login Login account/password Enter the User Login account/password Chose one option to Codec Priority. Chose one option to Codec Priority. Chose one option to Codec Priority. Chose one option to Codec Priority. Chose one option to Codec Priority. Click on the Apply button to save your customized settings and exit this screen. Click on the Cancel button to begin configuration this screen afresh. Click Firmware Updte Edit. The screen appears as shown. Figure Configuration: Firmware Upload-xxxx The following table describes the table in this screen Table Configuration: Firmware Upload-xxxx Label Firmware Upload File Browse Apply Cancel Description Type in the location of the file you want to upload in this field or click on the Browse.. button to find it. Click Browse to find the file you want to upload. Click on the Apply button to begin the upload process. This process may take up to two minute. Click on the Cancel button to begin configuration this screen afresh

48 To change your Auto Config-Office, click Configuration, and then click the Auto Config-Office table. The screen appears as shown. Click Add/Modify. The screen appears as shown. Figure Configuration: Auto Config-Office The following table describes the table in this screen Table Configuration: Auto Config-Office Label Description Basic Setting Office Enter the Office name. Phone Book Refresh Enter the Phone Book Refresh time (min). (min) Device Config Enter the Device Config Refresh time (min). Refresh (min) Firmware Update Enter the Firmware Update time. Default 99:99 for update Time ASAP. Time Setting Remote NTP Server Enter the Remote NTP Server IP Address. NTP Refresh Interval Enter the NTP Refresh Interval time (sec). (sec) Time Zone Select the current country s time zone. Daylight Saving Select the Enable option. SIPPBX 6200A is in a site whose country use Summer Time. Basic Setting Dial Rule [Edit] Click on the Edit button to Dialing Rule-xxx screen. Phone Book [Edit] Click on the Edit button to Phone Book-xxx screen

49 Apply Cancel Click on the Apply button to save your customized settings and exit this screen. Click on the Cancel button to begin configuration this screen afresh. Click Dial Rule Edit. The screen appears as shown. Figure Configuration: Dialing Rule-xxxx The following table describes the table in this screen Table Configuration: Dialing Rule- xxxx Label Dialed Prefix Max Digits Apply Cancel Index Dialed Prefix Max Digits Delete Description Enter the Dialed Prefix. Enter the Max Digits. Click on the Apply button to save your customized settings. Click on the Cancel button to begin configuration this screen afresh. Select this Index no. This field shows the Dialed Prefix information This field shows the Max Digits information Click on the Delete button to delete this record data. Click Phone Book Edit. The screen appears as shown. Figure Configuration: Phone Book- xxxx The following table describes the table in this screen Table Configuration: Phone Book- xxxx Label Description
50 Name Tel No Apply Cancel Index Name Tel No Delete Enter the Name. Enter the Tel No. Click on the Apply button to save your customized settings. Click on the Cancel button to begin configuration this screen afresh. Select this Record no. This field shows the Name information This field shows the Tel No information Click on the Delete button to delete this record data

51 3.1.6 Trunk User has to set Trunk account for Trunk (FXO device, e.g. WG3804A) to register to SIPPBX 6200A or set some necessary configuration for SIP trunk (For more application, please go to.). To change your Trunk, click Configuration, and then click the Trunk table. The screen appears as shown. Figure Configuration: Trunk The following table describes the table in this screen Table Configuration: Trunk Label Description Select Select this check box, then modify or delete it. Trunk Number This field shows the Trunk Number information Comment This field shows the Comment information NAT Traversal This field shows the NAT Traversal information Maximum Channels This field shows the Maximum Channels information Add Click on the Add button, then display Trunk Setting screen. Modify A Trunk Number can be modify by click on the checkbox next to the Trunk Number and click on the Modify button. Delete A Trunk Number can be deleted by click on the checkbox next to the A Trunk Number and click on the Delete button. Total Count This field shows Total Count information. Number Search Enter the search number, then click enter key. The screen will display match search data. Total Page This field shows Total Page information

52 Page Next/Prev This field shows Page Number information. You can Enter page number, then click enter key. The screen will display this page data. Click on the Next/Prev to Next/Previous Page. The system will auto display the Next or Previous Information. Example 1: Set Trunk for FXO gateway Click Add/Modify. The screen appears as shown. Figure Configuration: Trunk Setting The following table describes the table in this screen Table Configuration: Trunk Setting Label Description Trunk Number Assign the number of Trunk. This number is also the register name for Trunk device. Note: The Trunk Number can also be a Trunk ID. In the Routing Table page, you should define the destination of prefix route. When you define the prefix route, you should set the Trunk ID (Trunk Number) in the Trunk page first; then you could input the correct Trunk ID in the Destination field. Password Assign the register password for device to register on SIPPBX 6200A. Host Setting the Host to Dynamic will require the trunk to register the SIPPBX 6200A so that the SIPPBX 6200A know how to reach the trunk. You can also set the Host to an IP address or FQDN if you set the Host to [Pre-define]. There will be a field called [Address] appeared when you choose Host to [Pre-define]. This limits only where you place calls to, as the
53 user is allowed to place calls from anywhere. DialPlan Keypad NAT Traversal Port External Server Address Maximum Channels Define the dialing plan for Trunk. It specifies the location of the instruction used to control what the phone is allowed to do, and what to do with incoming calls for this Trunk. In this field, you can Choose 6 dial level for Extension, including [from-pstn], [ext-only], [ext+r1], [ext+r12], [ext+r123], [ext+allroutes]. You can define an Outgoing call record, to a certain route level, as R1, R2, etc. [from-pstn] is used for Trunk only. [ext-only] means this subscriber can only call to Extension. [ext+r1] means the subscriber with such DialPlan can call to Extension and Route Level with R1. [ext+r12] means the subscriber with such DialPlan can call to Extension and Route Level with R1 and R2. [ext+r123] means the subscriber with such DialPlan can call to Extension and Route Level with R1, R2 and R3. [ext+allroutes] means the subscriber with such DialPlan can call to Extension and Route Level with R1, R2, R3 and R4. Note: For more information about Route Level, please refer to the user manual: CH3.1.8 Outgoing Routing. User can select Keypad type to be RFC2833, In-band, or SIP-Info and Auto. You can choose Auto to auto select the Keypad type. Choose RFC2833, Inband or SIP-Info here will force the Extension use RFC2833, Inband or SIP-Info only and the setting should be also match the Keypad setting of Trunk device. If the Trunk device is behind a device performing NAT, such as firewall or router, and need to register to SIPPBX 6200A on public network, then user has to enable this function. Enable NAT Traversal to force SIPPBX 6200A to ignore the contact information for the Trunk and use the address from which the packets are being received. You can use this to define the SIP signal port if you want to listen on a nonstandard SIP signal port. This field will allow you to set the domain in the SIP From URI. Setting this will avoid some unexpected issue if the service provider needs this for authentication. This will limit the maximum channels for this Trunk. For example, you set 2 into this field; only 2 outgoing calls could go via this Trunk. Default is no limit
54 Outbound Caller ID Caller ID Display Name Comment CLIR Support Apply Cancel Some service provider will require the correct registered caller ID if it got an incoming call. Default the SIPPBX 6200A will send the Extension s caller ID to this Trunk, if you set empty here. Note: Normally, SIP From URI will contain the Extension s calling ID and SIPPBX 6200A s IP address, but some ITSP may reject this call due to some security issue. You can modify the Calling ID and IP/ Domain in the fields of [External Server Address] and [Outbound Caller ID] when the call is going via the SIPPBX 6200A to the Destination (Trunk) to avoid such security issue. If you set a Welltech FXO gateway as the Trunk, you can just use the default Trunk 888 and 889 as the FXO s register number. For the FXO gateway, you may just only configure Trunk Number, Password, Host, DialPlan, Keypad, NAT Traversal and RTP Mode. If you set the ITSP as the Trunk, you may need to set the following configure: Port, External Server Address and Outbound Caller ID. When inbound call is coming from Trunk, such as 888. The caller ID Name will be the PSTN number or 888. Specify this will use the current setting instead. You can input a 20 byte note for each Trunk here. CLIR means "Caller Line Identification Restriction". It is a proper noun. It is a feature to hide the caller's number. For example, ext 101 call to ext 102. But 101 won t like to show the caller ID to 102. So 101 can activate this feature to hide the caller ID. When 102 got a call from 101, the LCD of 102 should display "Anonymous". Click on the Apply button to save your customized settings and exit this screen. Click on the Cancel button to begin configuration this screen afresh. Example 2: Set Trunk ID for SIP Trunk Click Add/Modify. The screen appears as shown. Figure Configuration: Trunk Setting
55 - 55 -

56 3.1.7 SIP Trunk Reg. SIP Trunk is for SIPPBX 6200A to register to other systems only, such as ITSP or another SIPPBX 6200A. On screen of SIP Trunk will show all of the sets of SIP Trunks. You will find out the registered Account and registered server IP address, port number, Realm and the Register Status. User can press Add New to add new Trunk or Modify to configure the specified SIP Trunk. Press Delete will delete the specified SIP Trunk. To change your SIP Trunk Setting, click Configuration, and then click the SIP Trunk Setting table. The screen appears as shown. Figure Configuration: SIP Trunk Setting The following table describes the table in this screen Table Configuration: SIP Trunk Setting Label Description Select Select this check box, then modify or delete it. Line Number This field shows the Line Number information Account This field shows the Account information IP Address/DNS This field shows the IP Address/DNS information Port This field shows the Port information Status This field shows the Status information Add Click on the Add button, then display SIP Trunk Setting screen. Modify A Line Number can be modify by click on the checkbox next to the Line Number and click on the Modify button. Delete A Line Number can be deleted by click on the checkbox next to the A Line Number and click on the Delete button. Total Count This field shows Total Count information. Number Search Enter the search number, then click enter key. The screen will display match search data. Total Page This field shows Total Page information. Page This field shows Page Number information. You can Enter page

57 Next/Prev number, then click enter key. The screen will display this page data. Click on the Next/Prev to Next/Previous Page. The system will auto display the Next or Previous Information. Example 1: Disable SIP Trunk In SIP Trunk Setting table. Click Add. The screen appears as shown. Add New to configure SIPPBX 6200A register to ITSP. ITSP will provide related account information for SIPPBX 6200A to register. Please input the data here. Click Add/Modify. The screen appears as shown. Figure Configuration: SIP Trunk Setting The following table describes the table in this screen Table Configuration: SIP Trunk Setting Label Description Enable Check to enable this SIP Trunk. Line Number Line Number for registering to ITSP. Account Account Name/ ID for registering to ITSP. Password Account Password for registering to ITSP. IP Address/DNS Enter IP or domain name of ITSP server. Port Port number of ITSP server for registering. SIP Domain You can change the SIP domain here if necessary. Some SIP platform will confirm SIP domain which locate in the From header. Modify this field will let SIPPBX 6200A register to SIP Trunk successfully. Realm Realm of ITSP or another SIPPBX 6200A. Note: When a call was sent form SIPPBX 6200A to a remote SIP-Trunk, the SIP-Trunk may attempt to authenticate the

58 Status Apply Cancel call. So SIPPBX 6200A should reply the correct Account ID and Password. How does the SIPPBX 6200A know which ID and Password it should send? When the call is going to SIP-Trunk via SIPPBX 6200A, the SIP-Trunk may reply a 407 code, which will contain a parameter called Realm for authentication, SIPPBX 6200A will re-send the call again and contains correct ID and Password based on the Realm. So the Realm should be unique. For more information about Realm, please contact with your ITSP. If you have multiple SIPPBX 6200A, you may hope those SIPPBX 6200A could call to each other. You should set the Extension to let those SIPPBX 6200A can register to each other, and you should also confirm the [Realm] in the page of Configuration IP PBX. Once SIP Trunk is configured and enabled, here will show the registration status. Click on the Apply button to save your customized settings and exit this screen. Click on the Cancel button to begin configuration this screen afresh. Example 2: Enable SIP Trunk Click Add/Modify. The screen appears as shown. Figure Configuration: SIP Trunk Setting

59 3.1.8 Outgoing Routing Outgoing Call Rule means from subscriber (Extension or Trunk registered on SIPPBX 6200A) to call out. To change your Outgoing Call Routing, click Configuration, and then click the Outgoing Routing table. The screen appears as shown. Figure Configuration: Outgoing Call Routing The following table describes the table in this screen Table Configuration: Outgoing Call Routing Label Select Prefix Digits Length Destination Add Modify Delete Add Modify Delete Total Count Number Search Total Page Page Description Select this check box, then modify or delete it. This field shows the Prefix information This field shows the Digits Length information This field shows the Destination information Click Add to Add Outgoing Routing Setting Screen. Click Modify to Modify Outgoing Routing Setting screen. Click Delete to select list. Click on the Add button, then display Outgoing Routing screen. A prefix can be modify by click on the checkbox next to the prefix and click on the Modify button. A prefix can be deleted by click on the checkbox next to the A prefix and click on the Delete button. This field shows Total Count information. Enter the search number, then click enter key. The screen will display match search data. This field shows Total Page information. This field shows Page Number information. You can Enter page number, then click enter key. The screen will display this page

60 data. Next/Prev Total Count Click on the Next/Prev to Next/Previous Page. The system will auto display the Next or Previous Information. This field shows Total Count information. Example 1: Routing record with prefix 03 and no limit for Digits Length. Enable Route Password and Drop function. Click Add/Modify. The screen appears as shown. Figure Configuration: Outgoing Call Routing The following table describes the table in this screen Table Configuration: Outgoing Call Routing Label Prefix Digits Length Template Copy Description Set prefix number for routing rule. Set the digit length of dialed number, if user doesn t want to limit the length, please set this parameter as 0. The maximum length is 20. Note: If you set the Digits Length as a specific value, such as 10, the dialed number digits length should full match to 10, or you can set the Digits Length to 0 to ignore the digits length. It will copy settings for below Basic Setting and Routed
61 Features based on the other Outgoing Routing record. Basic Setting Primary/ Secondary/ Third/ Fourth/ Fifth/ Sixth/ Seventh/ Eighth Destination Add Drop Route Password Routed Features Guest Allow Fixed Outgoing Call Rule User can set 8 priorities for each routing rule, if SIPPBX 6200A fails to route to primary destination three times, it will try to route to secondary or third destination and so on. Here you can find some destination (Trunk) for choosing. You can define the destination for the prefix route. Note: Before setting the Routing Table, you should set the Trunk info in the Trunk page first. So that this field will contain the Trunk ID for choosing. If the Trunk was setting to Dynamic in the Host field, but it doesn t register on SIPPBX 6200A, SIPPBX 6200A will skip this priority and route call to next priority immediately without trying. If the Trunk was setting to Address in the Host field, but the Address is not reachable, SIPPBX 6200A will try three times then route call to next priority. To add assigned number. For example, you set 02 here and the called number is 03123, the SIPPBX 6200A will add 02 then send as the called number. To drop specified length of number. For example, you set 2 here and the called number is 03123, the SIPPBX 6200A will drop 03 then send 123 as outgoing number. Note: If you set both of the Drop and Add, SIPPBX 6200A will Drop first then Add. Set password here so the SIPPBX 6200A will request password before sending the call to Trunk. Enable Guest Allow will allow user who is not your subscriber (Extension) to use such routing record. User can reach the Auto attendant (The default Auto Attendant of SIPPBX 6200A is **999) first then send call to Destination (Trunk), if you enable Guest Allow. If you disable Guest Allow, only the Extension can use this Routing record. SIPPBX 6200A will confirm the Fixed Trunk ID if you enable Fixed Outgoing Call Rule. That means the SIPPBX 6200A will route the call to a fixed Trunk if you enable this feature. For example, you set Fixed Trunk ID for extension 101 to 888. And

62 Route Timeout Route Level Apply Cancel you enable Fixed Outgoing call Rule for a certain route record, such as 8 with length 10. When 101 call a number 8xxxxxxxxx, the SIPPBX 6200A will route this call to 888 no matter you set what s the Primary Destination for such route record. Note: For more information about Fixed Trunk ID, please refer to the user manual: CH3.1.4 Extension. Enable this field will make this route record initial Timeout function. You can define the Route Level for such route record. For example, you define a route record with prefix 0 and the Route Level to R3. That means only the subscriber with DialPlan [ext+r123] and [ext+allroutes] can use such record due to only these two DialPlan contain the Route Level of R3. Click on the Apply button to save your customized settings and exit this screen. Click on the Cancel button to begin configuration this screen afresh. Example 2: Routing record with prefix 2 and Digits Length is 8. Enable Route Guest Allow and Add function. Click Add/Modify. The screen appears as shown. Figure Configuration: Outgoing Call Routing
63 Example: If user set prefix as 002, digits length as 12, Primary destination as 888, Drop as 3, and Add as 0. When caller called , the prefix is 002; length is 12, so this call matches the routing rule (Drop 3 digits) (Add 0) Finally, SIPPBX 6200A will send to Trunk ID

64 3.1.9 Incoming Call Rule Incoming Call Rule means call from other non-subscriber device to SIPPBX 6200A. For example, you set the SIPPBX 6200A to register an ISTP as a SIP Trunk, so your SIPPBX 6200A could be as an Extension of ITSP. The other subscriber of ITSP could call to SIPPBX 6200A by the registered line number, when the SIPPBX 6200A got an incoming call, which is not its own subscriber, what will the SIPPBX 6200A do? The SIPPBX 6200A will perform the following example based on the Incoming Call Rule. The following example means the SIPPBX 6200A got a called number , which was sending from a non-subscriber of SIPPBX 6200A, SIPPBX 6200A will drop 6 digits then add **999 as the destination number. **999 is the default number of auto attendant. So the caller will hear greeting because the called number will be routed to auto attendant. To change your Incoming Routing, click Configuration, and then click the Incoming Routing table. The screen appears as shown. Figure Configuration: Incoming Routing The following table describes the table in this screen Table Configuration: Incoming Routing Label Select Prefix Digits Length Add Drop Add Modify Delete Total Count Description Select this check box, then modify or delete it. This field shows the Prefix information. This field shows the Digits Length information. This field shows the Add information. This field shows the Drop information. Click on the Add button, then display Incoming Routing Setting screen. A prefix can be modify by click on the checkbox next to the prefix and click on the Modify button. A prefix can be deleted by click on the checkbox next to the A prefix and click on the Delete button. This field shows Total Count information

65 Number Search Total Page Page Next/Prev Enter the search number, then click enter key. The screen will display match search data. This field shows Total Page information. This field shows Page Number information. You can Enter page number, then click enter key. The screen will display this page data. Click on the Next/Prev to Next/Previous Page. The system will auto display the Next or Previous Information. Click Add/Modify. The screen appears as shown. Figure Configuration: Incoming Routing Setting The following table describes the table in this screen Table Configuration: Incoming Routing Setting Label Description Prefix Enter the prefix number for routing rule. Digits Length Enter the Digits Length for dialed number, if user doesn t want to limit the length, please set this parameter as 0. The maximum length is 20. If you set the Digits Length as a specific value, such as 10, the dialed number should full match to 10, or you can set the Digits Length to 0 to ignore the digits length. If the called number from another non-subscriber is equal to Prefix, you should set the Digits Length as a specific value. If the called number is not equal to Prefix, you can set the Digits Length as a specific value or 0 to ignore Digits Length. Add Enter the Add assigned number. For example, you set **999 here and you do not set Drop. If the called number is , the SIPPBX 6200A will add **999 then send ** as the called number
66 Drop Apply Cancel Enter the drop specified length of number. For example, you set 6 here and you do not set Add. If the called number is , the SIPPBX 6200A will drop then send 101 as called number. If you set both of the Drop and Add, SIPPBX 6200A will Drop first then Add. For example, the SIPPBX 6200A got a called number , which was sending from a non-subscriber of SIPPBX 6200A, SIPPBX 6200A will drop 6 digits then add **999 as the destination number. **999 is the default number of auto attendant. So the caller will hear greeting because the called number will be routed to auto attendant. Click on the Apply button to save your customized settings and exit this screen. Click on the Cancel button to begin configuration this screen afresh
![3.1.10 Dial Group Dial Group is used to set the [group dialing], you can just input a group number and set specific members to join the group.](/docs-images/76/73825215/images/67-0.jpg "To change your Dial Group, click Configuration, and then click the Dial Group table. The screen appears as shown.")
67 Dial Group Dial Group is used to set the [group dialing], you can just input a group number and set specific members to join the group. To change your Dial Group, click Configuration, and then click the Dial Group table. The screen appears as shown. Figure Configuration: Dial Group The following table describes the table in this screen Table Configuration: Dial Group Label Description Select Select this check box, then modify or delete it. Group Number This field shows the Group Number. Telephone Number This field shows the Telephone Number. Ring Type This field shows the Ring Type. Add Click on the Add button, then display Dial Group Setting screen. Modify A Group Number can be modify by click on the checkbox next to the Group Number and click on the Modify button. Delete A Group Number can be deleted by click on the checkbox next to the A Group Number and click on the Delete button. Total Count This field shows Total Count information. Number Search Enter the search number, then click enter key. The screen will display match search data. Total Page This field shows Total Page information. Page This field shows Page Number information. You can Enter page number, then click enter key. The screen will display this page data

68 Next/Prev Click on the Next/Prev to Next/Previous Page. The system will auto display the Next or Previous Information. Click Add/Modify. The screen appears as shown. Figure Configuration: Dial Group Setting The following table describes the table in this screen Table Configuration: Dial Group Setting Label Group Number Telephone Number Ring Type Dial Group End To Apply Cancel Description Enter the Group Number. The Group number should NOT be the same with Extension, Trunk Number, and Speed Dial Number. All of the Numbers should be unique for SIPPBX 6200A system. Enter the Telephone Number to join this Dial Group. You can input multiple members by a comma, such as [101,102,103] You can choose the Ring type for Dial Group; Ring All, Sequential Ring and Random Ring. You can decide the final destination if no one of group answered. You can select IVR, EXT Voice Mail or a Number (extension or PSTN number, etc). Click on the Apply button to save your customized settings and exit this screen. Click on the Cancel button to begin configuration this screen afresh

69 Speed Dial Speed Dial Table is used to set the Speed Dial function; you can just input a Speed Dial Number and set the destination number to Telephone Number field. Subscriber can just dial to the Speed Dial number and SIPPBX 6200A will switch the call to Telephone Number then call out. To change your Speed Dial Table, click Configuration, and then click the Speed Dial table. The screen appears as shown. Figure Configuration: Speed Dial Table The following table describes the table in this screen Table Configuration: Speed Dial Table Label Select Speed Dial Number Telephone Number Add Modify Delete Total Count Number Search Total Page Page Next/Prev Description Select this check box, then modify or delete it. This field shows the Speed Dial Number. This field shows the Telephone Number. Click on the Add button, then display Speed Dial screen. A Speed Dial Number can be modify by click on the checkbox next to the Speed Dial Number and click on the Modify button. A Speed Dial Number can be deleted by click on the checkbox next to the A Speed Dial Number and click on the Delete button. This field shows Total Count information. Enter the search number, then click enter key. The screen will display match search data. This field shows Total Page information. This field shows Page Number information. You can Enter page number, then click enter key. The screen will display this page data. Click on the Next/Prev to Next/Previous Page. The system will

70 auto display the Next or Previous Information. Note: If you want to modify a current SpeedDial record, you should delete the current record first and add another new one. Example: User set SpeedDial number as *400 and Telephone Number as When caller called *400, SIPPBX 6200A will call to as destination number. Click Add/Modify. The screen appears as shown. Figure Configuration: Speed Dial The following table describes the table in this screen Table Configuration: Speed Dial Label Speed Dial Number Telephone Number Apply Cancel Description Enter the Speed Dial Number. The SpeedDial Number should not be the same with Extension, Trunk Number, and Group Number. All of the Numbers should be unique for SIPPBX 6200A system. Enter the Telephone Number. Click on the Apply button to save your customized settings and exit this screen. Click on the Cancel button to begin configuration this screen afresh


71 Broadcast To change your Broadcast, click Configuration, and then click the Broadcast table. The screen appears as shown. Figure Configuration: Broadcast The following table describes the table in this screen Table Configuration: Broadcast Label Description Select Select this check box, then modify or delete it. Broadcast Number This field shows the Broadcast Number. Telephone Number This field shows the Telephone Number. Add Click on the Add button, then display Broadcast Setting screen. Modify A Broadcst Number can be modify by click on the checkbox next to the Broadcst Number and click on the Modify button. Delete A Broadcst Number can be deleted by click on the checkbox next to the A Broadcst Number and click on the Delete button. Example: User set Broadcast number as *11. When caller called *11, SIPPBX 6200A will call to [101, 102, 103, 104, 105, 106, 107, 108] number. Click Add/Modify. The screen appears as shown. Figure Configuration: Broadcast Setting The following table describes the table in this screen Table Configuration: Broadcast Setting
72 Label Broadcast Number Telephone Number Apply Cancel Description Enter the Broadcast Number. Enter the Telephone Number. Members Click on the Apply button to save your customized settings and exit this screen. Click on the Cancel button to begin configuration this screen afresh


73 Meetme Conf. To change your Meetme Conference, click Configuration, and then click the Meetme Conference table. The screen appears as shown. Figure Configuration: Meetme Conference The following table describes the table in this screen Table Configuration: Meetme Conference Label Select Room Number Current Members Add Modify Delete Description Select this check box, then modify or delete it. This field shows the Room Number. This field shows the Current Members. Click on the Add button, then display Meetme Conference Setting screen. A Room Number can be modify by click on the checkbox next to the Room Number and click on the Modify button. A Room Number can be deleted by click on the checkbox next to the A Room Number and click on the Delete button. Example: User set Room number as *21. When caller called *21, will Login to *21 Room. Click Add/Modify. The screen appears as shown. Figure Configuration: Meetme Conference Setting The following table describes the table in this screen Table Configuration: Meetme Conference Setting
74 Label Description Meetme Conference Setting Room Number Enter the login Room Number. Room Number Enter the login Room Password. Apply Click on the Apply button to save your customized settings. Cancel Click on the Cancel button to begin configuration this screen afresh. Conference Members Table Select Select this check box, then delete it. Member This field shows the Member phone number. Join Duration This field shows the Join Duration. Delete A Member can expelled from the Conference room by click on the checkbox next to the A Member and click on the Delete button

75 T.38 FAX To change your T.38 FAX, click Configuration, and then click the T.38 FAX table. The screen appears as shown. Figure Configuration: T.38 FAX The following table describes the table in this screen Table Configuration: T.38 FAX Label Description Mode Select Enable option if your will use T.38 FAX function. The default is Enable. T.38 Start Port Enter the Start Port Number. The default is T.38 End Port Enter the End Port Number. The default is T.38 Redundancy Enter the Redundancy count. The default is 2. Apply Click on the Apply button to save your customized settings and exit this screen. Cancel Click on the Cancel button to begin configuration this screen afresh


76 3.2 Information The Information screens can help you view Subscriber Info., Call Monitor, CDR, and System Information Subscriber Info You can check Phone Number, IP Address, for Extension and Trunk here. If subscriber registered on SIPPBX 6200A, the IP Address will show up, on the other hand, if the subscriber doesn t register successfully on SIPPBX 6200A, the IP Address will not be displayed. Click Information, and then click the Subscriber Info table. The screen appears as shown. Figure Information: Subscriber Info The following table describes the table in this screen Table Information: Subscriber Info Label Phone number Description This field shows Phone Number and status. : Idle, : Answered, (blinking): Ringing,
77 : Un-register. Type IP Address DND CLR Ext Pwd Total Count Number Search Total Page Page Next/Prev This field shows Type information. This field shows IP Address information. This field shows Do Not Disturb information. This field shows Caller Line Identification Restriction Support information. This field shows Extension Password information. This field shows Total Count information. Enter the search number, then click enter key. The screen will display match search data. This field shows Total Page information. This field shows Page Number information. You can Enter page number, then click enter key. The screen will display this page data. Click on the Next/Prev to Next/Previous Page. The system will auto display the Next or Previous Information Call Monitor Click Information, and then click the Call Monitor table. The screen appears as shown. Figure Information: Call Monitor The following table describes the table in this screen Table Information: Call Monitor Label State Caller Number Called Number Start Time Elapsed Time Total Count Number Search Description This field shows State information and status. : Idle, : Answered (blinking): Ringing. This field shows Caller Number information. This field shows Called Number information. This field shows Call Date information. This field shows Elapsed Time information. This field shows Total Count information. Enter the search number, then click enter key. The screen will display match search data
78 Total Page Page Next/Prev This field shows Total Page information. This field shows Page Number information. You can Enter page number, then click enter key. The screen will display this page data. Click on the Next/Prev to Next/Previous Page. The system will auto display the Next or Previous Information

79 3.2.3 CDR Click Information, and then click the CDR table. The screen appears as shown. Figure Information: CDR The following table describes the table in this screen Table Information: CDR Label Description Start Date Enter the search start date. (YYYY-MM-DD) End Date Enter the search end date. (YYYY-MM-DD) Caller Number Enter the search caller number. Called Number Enter the search called number. CDR Display Click CDR to search your customized date, then display in below. Export CDR Click Export CDR to save CDR report to CDR_xxxx.csv file. CDR Display Index This field shows Index information. Call Date This field shows Call Date information. Caller Number This field shows Caller Number information. Called Number This field shows Called Number information. Elapsed Time This field shows Elapsed Time information. Bill Time This field shows Bill Time information. State This field shows State information. Total Count This field shows Total Count information. Total Page This field shows Total Page information. Page This field shows Page Number information. You can Enter page number, then click enter key. The screen will display this page data. Next/Prev Click on the Next/Prev to Next/Previous Page. The system will

80 auto display the Next or Previous Information. Figure Information: CDR_2010XXXX_2010XXXX.csv The following table describes the table in this screen Table Information: CDR_2010xxxx_2010xxxx.csv Label Description Call Date This field shows Call Date information. Caller Number This field shows Caller Number information. Called Number This field shows Called Number information. Elapsed Time This field shows Elapsed Time information. Bill Time This field shows Bill Time information. State This field shows State information

81 3.2.4 System Info Click Information, and then click the System Info table. The screen appears as shown. Figure Information: System Info The following table describes the table in this screen Table Information: System Info Label Application Kernel File System Library Hold Tone Ring Back Tone Configuration IVR Description This field shows Application information. This field shows Kernel information. This field shows File System information. This field shows Library information. This field shows Hold Tone information. This field shows Ring Back Tone information. This field shows Configuration information. This field shows IVR information
, DDNS Srv. (IPV4). 3.")

82 3.3 Network The Network screens can help you configuration Network, DHCP Srv.(IPV4), DDNS Srv. (IPV4) Network To change your Network Setting, click Network, and then click the Network Setting table. The screen appears as shown. Figure Network: Network Setting The following table describes the table in this screen Table Network: Network Setting
83 Label Description WAN IP Support Select use IP mode, provide ipv4, ipv6, ipv4/ipv6. Mode Select SIPPBX 6200A WAN port network mode to be Fixed IP, DHCP or PPPoE. IP Address Enter the IP Address. If user has set SIPPBX 6200A to be fixed IP mode. Subnet Mask Enter the Subnet Mask Address. If user has set SIPPBX 6200A to be fixed IP mode. Default Gateway Enter the Default Gateway Address. If user has set SIPPBX 6200A to be fixed IP mode. Primary DNS Enter the IP address for Primary DNS. The default is Secondary DNS Enter the IP address for Secondary DNS. The default is null. Default Gateway Select Enable option, if any connection problem occurred on Backup primary default gateway connections, all the traffic will be guided and switched to the secondary default gateway for proper operation. The default is Disable. Secondary Default Enter the Secondary Default Gateway. If you choose the Gateway Default Gateway Backup to Enable. Check Point Enter the Check Point IP address. SIPPBX 6200A use ping this ip address, to check have any connection problem occurred on primary default gateway connections. If you choose the Default Gateway Backup to Enable. Current use Default This field will display now use the Defaut Gateway IP address. Gateway PPPoE ID Enter the PPPoE ID. If you choose the Mode to PPPoE. PPPoE PWD Enter the PPPoe Password If you choose the Mode to PPPoE. IPV6 Mode Select Manual option, you can enter IP Address/ Prefix Length/ Gateway. IPV6 IP Address Enter the IPV6 IP Address. IPV6 Prefix Length Enter the IPV6 Prefix Lentgh. The default is 64. IPV6 IP Gateway Enter the D IPV6 efault Gateway Address. MAC This field shows the MAC address. The Mac address cannot be modified. LAN (IPV4) IP Address Enter the IP Address. The default is Subnet Mask Enter the Subnet Mask Address. The default is MAC This field shows the MAC address. The Mac address cannot be

84 modified. Network Routing Table (IPV4) Select Destination Network Gateway Add Modify Delete Apply Cancel Select this check box, then modify or delete it. This field shows the IP address. This field shows the Subnet Mask address. This field shows the Default Gateway address. Click on the Add button, then display Network Router screen. IP address can be modify by click on the checkbox next to the IP address and click on the Modify button. IP address can be deleted by click on the checkbox next to the IP address and click on the Delete button. Click on the Apply button to save your customized settings and exit this screen. Click on the Cancel button to begin configuration this screen afresh. Click Add/Modify. The screen appears as shown. You can add or modify a network routing record. Input subnet as Destination, subnet mask as Net mask, and gateway as Gateway. Figure Management: Network Routing The following table describes the table in this screen Table Management: Network Routing Label Description IP Address Enter the IP Address. Subnet Mask Enter the Subnet Mask Address. Default Gateway Enter the Default Gateway Address. Apply Click on the Apply button to save your customized settings and exit this screen. Cancel Click on the Cancel button to begin configuration this screen afresh
 The following table describes the table in this screen Table Network: DHCP Srv.")
85 3.3.2 DHCP Srv. (IPv4) To change your DHCP Srv (IPV4) Settings, click Network, and then click the DHCP Srv. (IPV4) table. The screen appears as shown. Figure Network: DHCP Srv. (IPV4) The following table describes the table in this screen Table Network: DHCP Srv. (IPV4) Label Description DHCP Server When select Enable the SIPPBX 6200A provides TCP/IP configuration for the clients, If disable, DHCP Service id disabled and your must have another DHCP Server on your LAN, or else the computers must be manually configured. The default is Enable. DHCP Interface 6200A has one WAN and one LAN. User can chose the DHCP interface (WAN or LAN) to assign IP settings for DHCP client. Client Range Start IP This field specifies the first of the contiguous addresses in the IP address Pool. Client Range End IP This field specifies the End of the contiguous addresses in the IP address Pool. Subnet Mask Enter the IP address for Subnet Mask. The default is Primary DNS Enter the IP address for Primary DNS. The default is Secondary DNS Enter the IP address for Secondary DNS. The default is null. SIP Provision Enter the IP address for SIP Provision. The default is Apply Click on the Apply button to save your customized settings and exit this screen

86 Cancel Click on the Cancel button to begin configuration this screen afresh DDNS Srv. (IPv4) To change your DDNS Setting (IPV4), click Network, and then click the DDNS Srv. (IPV4) table. The screen appears as shown. Figure Network: DDNS Setting (IPV4) The following table describes the table in this screen Table Network: DDNS Setting (IPV4) Label Mode Domain Name User Name Password Apply Cancel Description Select the Enable option if your will use DDNS function. The default is Disable. Enter the IP address or URL for your DDNS server. Enter your account. Enter the password assigned to you. Click on the Apply button to save your customized settings and exit this screen. Click on the Cancel button to begin configuration this screen afresh


87 3.4 Management The management screens can help you configuration Time, SMTP, VM, Security, Firmware Upload, Music Upload, Import, Export, Rest to Default, Reboot system Time Setting To select correct Time Setting for SIPPBX 6200A, this time will affect CDR and voice mail time display. And you can also check the system current time here. To change your Time Setting, click Management, and then click the Time Setting table. The screen appears as shown. Figure Management: Time Setting The following table describes the table in this screen Table Management: Time Setting Label Description Time Setting NTP Client Select Enable option if your will use NTP client. The default is Enable. Remote NTP Server Enter the IP address or URL for your time server. Check with your SIP/Network administrator if you are unsure of this information. The default is
88 Time Zone Choose the Time Zone of your location. This will set the time different between your time zone and Greenwich Mean Tie (GMT). The default is (GMT+08:00) Beijing, Hong Kong, Perth, Singapore, Taipei. Current Time This field display the time of your SIPPBX 6200A. NTP Server Local NTP Server Select the Enable or Disable option if you will use Local NTP Server. Enable this option will make SIPPBX 6200A be a NTP server and send the SIPPBX 6200A s local time to the NTP client. The default is Enable. Apply Click on the Apply button to save your customized settings and exit this screen

89 3.4.2 SMTP Setting SIPPBX 6200A can support Voice Mail to . Before activate this feature, you should give the SIPPBX 6200A an account and set the SMTP for SIPPBX 6200A, so that the SIPPBX 6200A has the ability to send the leaved message to the subscriber s mail box. To change your SMTP Setting, click Management, and then click the SMTP Setting table. The screen appears as shown. Figure Management: SMTP Setting The following table describes the table in this screen Table Management: SMTP Setting Label Description Mail Address Enter the IP address or URL for SIPPBX 6200A. SMTP server Enter the IP address or URL for your SMTP server. Check with your administrator if you are unsure of this information. Account Enter your account. Password Enter the password assigned to you. SMTP Server Auth. Select the Enable option if your will use SMTP Server Auth.. The default is Disable Apply Click on the Apply button to save your customized settings and exit this screen. Cancel Click on the Cancel button to begin configuration this screen afresh

90 3.4.3 VM Setting User can set the configurations related with Voice Mail. To change your VM Setting, click Management, and then click the VM Setting table. The screen appears as shown. Figure Management: VM Setting The following table describes the table in this screen Table Management: VM Setting Label Description General Setting Maximum Length Enter the maximum length to Voice Mail recording message. It means the maximum length per voice mail. Maximum Conut Enter the maximum count to Voice Mail recording message. It means the maximum voice mails per mailbox. Voice mail to Setting Subject Specifies the subject of voic notification messages. Encode Defines the character set for voic messages. Body Specifies the body of voic notification messages. Below are the variables to let user input into Subject and Body. VM_NAME: The receiver s name. VM_DUR: The total time of message
91 VM_MSGNUM: The id of current message. VM_MAILBOX: The receiver s mailbox number. VM_CIDNUM: The sender s number. VM_DATE: The date of message sent. Message Envelope Format Setting Envelope Function Select the Enable if your will use envelope playback before message playback. Envelope Format Choose the Envelope Format of your location. Your SIPPBX 6200A may be located in different country, or may have different message announcements for user s introductory message when they enter the voic system. And you may also need to modify the envelope Format. Thie default is 'vm-received' Q 'digits/at' IMp, where vm-received and digits/at are the sound files of SIPPBX 6200A and the others are the SIPPBX 6200A supported variable. Below lists the supported variable of SIPPBX 6200A. filename: filename of a sound file (such as vm-received, digits/at etc) A or a: Day of week (Saturday, Sunday,...) B or b or h : Month name (January, February,...) d or e: numeric day of month (first, second,..., thirty-first) Y: Year I: Hour, 12 hour clock H: Hour, 24 hour clock (single digit hours preceded by "oh") K: Hour, 24 hour clock (single digit hours NOT preceded by "oh") M: Minute, with 00 pronounced as "o'clock" N: Minute, with 00 pronounced as "hundred" (US military time) P or p: AM or PM Q: "today", "yesterday" or AbdY q: "" (for today), "yesterday", weekday, or AbdY R: 24 hour time, including minute Apply Click on the Apply button to save your customized settings and exit this screen. Cancel Click on the Cancel button to begin configuration this screen afresh

92 3.4.4 Security To change your Security Settings, click Management, and then click the Security table. The screen appears as shown. Figure Management: Security The following table describes the table in this screen Table Management: Security Label Description HTTP WAN Access Select Enable option if your will login SIPPBX 6200A Web page. The default is Enable. Http Port Enter the port number to You can change the Http port for SIPPBX 6200A. Default is Note: After Changing the Http port, you should reboot your SIPPBX 6200A manually to activate Http Port setting. User ID Enter the User ID. Default is root. Password Enter the Password. Default is root. Telnet WAN Access Select Enable option if your will Telnet to SIPPBX 6200A. The default is Enable. Http Port Enter the port number to You can change the Telnet port for SIPPBX 6200A. Default is 23. User ID Enter the User ID. Default is root. Password Enter the Password. Default is root. Ping (IPV4)
93 WAN Access Apply Cancel The SIPPBX 6200A will not respond to any incoming Ping request when Disable is select. Click on the Apply button to save your customized settings and exit this screen. Click on the Cancel button to begin configuration this screen afresh

94 3.4.5 Firmware Upload Click Management, and then click the Firmware Upload table. The screen appears as shown. Figure Management: Firmware Upload The following table describes the table in this screen Table Management: Firmware Upload Label Description Appliation, Kernel, Select one option to upload SIPPBX 6200A Firmware from your File System, Library computer. The default is Application. Firmware Upload File Name Choose the file name of your IVR file (wave). File Type in the location of the file you want to upload in this field or click on the Browse.. button to find it. Browse Click Browse to find the file you want to upload. Apply Click on the Apply button to begin the upload process. This process may take up to two minute. Cancel Click on the Cancel button to begin configuration this screen afresh. Note: Normally, you just need to upgrade the Application but in some situation you may need to also upgrade the Kernel or File System. For more information, please refer to the release note of SIPPBX 6200A. After pressing Apply, please wait for success message, and DO NOT power off. After upload succeed, on screen will show success message. Please reboot system to renew system firmware
95 3.4.6 Music Upload You can customize Ring Back Tone (Transferring Tone) by upload new wave file on SIPPBX 6200A. Please record wave file format as PCM, Channel Mode: Mono, Frequency: 8K, Bit Rate: 16 bit. And the file size must less than 10M. Click Management, and then click the Music Upload table. The screen appears as shown. Figure Management: Music Upload The following table describes the table in this screen Table Management: Music Upload Label Description Hold Tone/Ring Back Select this option to upload SIPPBX 6200A Hold Tone/Ring Back Tone Tone file from your computer. The default is Application. Music Upload File Name Choose the file name of your IVR file (wave). File Type in the location of the file you want to upload in this field or click on the Browse.. button to find it. Browse Click Browse to find the file you want to upload. Apply Click on the Apply button to begin the upload process. This process may take up to two minute. Cancel Click on the Cancel button to begin configuration this screen afresh. Note: After Upload succeed, on screen will show related information. Please reboot system to renew settings

96 3.4.7 Import Setting If there is SIPPBX 6200A setting file exported from SIPPBX 6200A, user can import this file and doesn t need to re-configure for SIPPBX 6200A. Click Management, and then click the Import Setting table. The screen appears as shown. Figure Management: Import Setting The following table describes the table in this screen Table Management: Import Setting Label Description Configuration, IVR Select one option to upload SIPPBX 6200A current Package, IVR File configuration from your computer. (wave) Import Setting Group Name Choose the Group Name of your IVR Group. File Name Choose the file name of your IVR file (wave). File Type in the location of the file you want to upload in this field or click on the Browse.. button to find it. Browse Click Browse to find the file you want to upload. Apply Click on the Apply button to begin the upload process. This process may take up to two minute. Cancel Click on the Cancel button to begin configuration this screen afresh. Note: After pressing Apply, please wait for success message, and DO NOT power off. After Import succeed, on screen will show related information. Please reboot system to renew settings. You can choose the Configuration or IVR option and import the file to restore the configuration setting, and you can also choose the IVR File option and import a

97 specific IVR files to SIPPBX 6200A. If you choose the option to IVR File (WAV). Before import the IVR File to SIPPBX 6200A, you should prepare the wav file by yourself first. You should choose the Group and select file name, then you can import a specific file with wav format to SIPPBX 6200A to instead the old one. For more information about the detail IVR files, please refer to user manual: CH4.1.3 How to record the other system prompts Export Setting You can export configuration and voice wave files. If there is more than one SIPPBX 6200A need to be configured, user can export configuration of one SIPPBX 6200A, and then import this setting file for the other SIPPBX 6200As, so that user doesn t need to re-configure for each SIPPBX 6200A. Click Management, and then the Export Setting table. The screen appears as shown. Figure Management: Export Setting The following table describes the table in this screen Table Management: Export Setting Label Description Configuration Select one option to save SIPPBX 6200A current configuration to your computer. The default is Configuration. Default file Name: configuration.cfg IVR Package Select this option to save SIPPBX 6200A IVR voice wave file to your computer. Default file Name: sounds.pak Export Click Export to expore save your customized settings and exit this screen


98 3.4.9 Rest To Default Click Management, and then the Rest To Default table. Click on the Apply button to clears all user-entered configuration information and returned the SIPPBX 6200A to factory defaults. Figure Management: Rest To Default Reboot System Click Management, and then the Reboot System table. Click on the Apply button to have the SIPPBX 6200A reboot. This does not affect the SIPPBX 6200A configuration. Figure Management: Reboot System Power Off System Click Management, and then the Power Off System table. Click on the Apply button to have the SIPPBX 6200A shutdown. This does not affect the SIPPBX 6200A configuration. Figure Management: Power Off System
99 CH4. Application Setting 4.1 Customize System prompt Record Greeting Use any Extension phone to enter the recording process. The feature code of System Prompt Recording is [*50]. The record procedure of greeting message will be: Dial to [*50] Input password [000] dial to access code [**111] Start to record greeting-day.wav. Greeting will renew immediately after recording. Note: For more information about the feature code of System Prompt Recording, please refer to user manual: CH Feature Code. The **111 means the office 1 working time greeting. For the other greeting s access code, please refer to CH4.1.3 How to record the other System Prompts Enable Automated Attendant User has to Enable Trunk (e.g. 3804A) hotline function and point to destination number **999 (Number of Automated Attendant for SIPPBX 6200A). Once system has incoming call from PSTN, it will automatically connect to Automated Attendant. Note: All of the Extensions can also dial to **999 to reach Automated Attendant directly. For more information, please refer to the CH5. Appendix-Application between Welltech CPE device and SIPPBX 6200A. The **999 means the office 1 presentation number. For the other presentation number, please refer to CH3.1.2 Office Call Rule How to record the other System Prompts User can record the greeting by Dial to [*50] Input password [000] dial to access code [**111] as default. After the tone, start recording then press pound key. So that the caller will hear the new greeting if user call to **999. When the user called to an Extension, which is on the phone, he will also hear an announcement of Extension is busy. How to record a new busy system prompt? The procedure is just like recording new greeting, dialing to access code for recording. And user can also dial to [*50] Input password [000] dial to access code [***xxxx] to listen the system prompt, too. You can also record the sound files with WAV format by your PC or other equipment, and choose the specific file name in the page of Import Setting, import the WAV file to instead the old one. For example, you can record the prompt for no body pick up, by your PC as a WAV file. Name it as noanswer.wav, then you can go to Import Setting page, choose IVR File (WAV)
100 Choose Group Name to Auto Attendant Sounds Files Choose File Name to noanswer.wav Upload new file. Below is the detail for system prompts. Group Name: Digits Sounds Files Record Playback File Name Default Announcement Code Code **0000 *** wav zero **0001 *** wav one **0002 *** wav two **0003 *** wav three **0004 *** wav four **0005 *** wav five **0006 *** wav six **0007 *** wav seven **0008 *** wav eight **0009 *** wav nine **0010 *** wav ten **0011 *** wav eleven **0012 *** wav twelve **0013 *** wav thirteen **0014 *** wav fourteen **0015 *** wav fifteen **0016 *** wav sixteen **0017 *** wav seventeen **0018 *** wav eighteen **0019 *** wav nineteen **0020 *** wav twenty **0030 *** wav thirty **0040 *** wav forty **0050 *** wav fifty **0060 *** wav sixty **0070 *** wav seventy **0080 *** wav eighty **0090 *** wav ninety Group Name: Time & Date Sounds Files Record Playback File Name Default Announcement Code Code
101 **0101 ***0101 h-1.wav first **0102 ***0102 h-2.wav second **0103 ***0103 h-3.wav third **0104 ***0104 h-4.wav fourth **0105 ***0105 h-5.wav fifth **0106 ***0106 h-6.wav sixth **0107 ***0107 h-7.wav seventh **0108 ***0108 h-8.wav eighth **0109 ***0109 h-9.wav ninth **0110 ***0110 h-10.wav tenth **0111 ***0111 h-11.wav eleventh **0112 ***0112 h-12.wav twelfth **0113 ***0113 h-13.wav thirteenth **0114 ***0114 h-14.wav fourteenth **0115 ***0115 h-15.wav fifteenth **0116 ***0116 h-16.wav sixteenth **0117 ***0117 h-17.wav seventeenth **0118 ***0118 h-18.wav eighteenth **0119 ***0119 h-19.wav nineteenth **0120 ***0120 h-20.wav twentieth **0130 ***0130 h-30.wav thirtieth **0131 ***0131 at.wav at **0132 ***0132 a-m.wav AM **0133 ***0133 p-m.wav PM **0134 ***0134 hundred.wav hundred **0135 ***0135 thousand.wav thousand **0136 ***0136 million.wav million **0137 ***0137 minus.wav minus **0201 ***0201 day-0.wav Sunday **0202 ***0202 day-1.wav Monday **0203 ***0203 day-2.wav Tuesday **0204 ***0204 day-3.wav Wednesday **0205 ***0205 day-4.wav Thursday **0206 ***0206 day-5.wav Friday **0207 ***0207 day-6.wav Saturday **0208 ***0208 dollars.wav dollars **0209 ***0209 mon-0.wav January **0210 ***0210 mon-1.wav February **0211 ***0211 mon-2.wav March
102 **0212 ***0212 mon-3.wav April **0213 ***0213 mon-4.wav May **0214 ***0214 mon-5.wav June **0215 ***0215 mon-6.wav July **0216 ***0216 mon-7.wav August **0217 ***0217 mon-8.wav September **0218 ***0218 mon-9.wav October **0219 ***0219 mon-10.wav November **0220 ***0220 mon-11.wav December **0221 ***0221 oh.wav O (spoken in a way meaning zero ) **0222 ***0222 oclock.wav a clock **0223 ***0223 pound.wav pound **0224 ***0224 star.wav star **0225 ***0225 today.wav today **0226 ***0226 tomorrow.wav tomorrow **0227 ***0227 yesterday.wav yesterday **0228 ***0228 year.wav year **0229 ***0229 date.wav date Group Name: Auto Attendant Sounds Files Record Playback File Name Default Announcement Code Code **111 ***111 greeting-day.wav Please dial the extension number, or press, 9, for the operator **112 ***112 greeting-noon.wav Please dial the extension number. Thank you. **113 ***113 greeting-night.wav Please dial the extension number. Thank you. **114 ***114 greeting-holiday.wav Please dial the extension number. Thank you. (It is reserved, not functional now) **115 ***115 greeting-temporary.wav Please dial the extension number. Thank you. **116 ***116 noanswer.wav I am sorry, the extension number you dialed, is not answering. Please dial another extension number. Thank you. **117 ***117 busy.wav I am sorry. the extension number you dialed is busy. Please dial
103 another extension number. Thank you. **118 ***118 goodbyeivr.wav goodbye **119 ***119 unavailable.wav I am sorry, the extension number you dialed is un available, please dial another extension number. Thank you. **120 ***120 invalid.wav I am sorry, that's not a valid extension. Please try again. **121 ***121 dnd-act.wav Do not disturb, activated. **122 ***122 dnd-deact.wav Do not disturb, dee-activated. **123 ***123 unconfwd-act.wav Unconditional forward, activated. **124 ***124 unconfwd-deact.wav Unconditional forward, dee-activated. **125 ***125 busyfwd-act.wav Busy forward, activated. **126 ***126 busyfwd-deact.wav Busy forward, dee-activated. **127 ***127 op-noanswer.wav The operator is not answering. Please call later, or dial another extension number. **128 ***128 op-busy.wav The operator is busy. Please call later, or dial another extension number. **129 ***129 op-unavailable.wav The operator is unavailable. Please call later, or dial another extension number. **130 ***130 noanswerfwd-act.wav No answer forward, activated. **131 ***131 noanswerfwd-deact.wav No answer forward, dee-activated. **132 ***132 allfwd-deact.wav Call forward, dee-activated. **133 ***133 transferop.wav Transfer-ring to operator. Please hold. **134 ***134 unavailablefwd-act.wav The Unavailable Forward is activated. **135 ***135 unavailablefwd-deact.wav The Unavailable Forward is deactivated. **136 ***136 greeting-day2.wav Please dial the extension number, or press, 9, for the operator **137 ***137 greeting-noon2.wav Please dial the extension number. Thank you. **138 ***138 greeting-night2.wav Please dial the extension number
104 Thank you. **139 ***139 greeting-holiday2.wav Please dial the extension number. Thank you. (It is reserved, not functional now) **140 ***140 greeting-temporary2.wav Please dial the extension number. Thank you. **141 ***141 greeting-day3.wav Please dial the extension number, or press, 9, for the operator **142 ***142 greeting-noon3.wav Please dial the extension number. Thank you. **143 ***143 greeting-night3.wav Please dial the extension number. Thank you. **144 ***144 greeting-holiday3.wav Please dial the extension number. Thank you. (It is reserved, not functional now) **145 ***145 greeting-temporary3.wav Please dial the extension number. Thank you. **146 ***146 greeting-day4.wav Please dial the extension number, or press, 9, for the operator **147 ***147 greeting-noon4.wav Please dial the extension number. Thank you. **148 ***148 greeting-night4.wav Please dial the extension number. Thank you. **149 ***149 greeting-holiday4.wav Please dial the extension number. Thank you. (It is reserved, not functional now) **150 ***150 greeting-temporary4.wav Please dial the extension number. Thank you. **151 ***151 greeting-day5.wav Please dial the extension number, or press, 9, for the operator **152 ***152 greeting-noon5.wav Please dial the extension number. Thank you. **153 ***153 greeting-night5.wav Please dial the extension number. Thank you. **154 ***154 greeting-holiday5.wav Please dial the extension number. Thank you. (It is reserved, not functional now) **155 ***155 greeting-temporary5.wav Please dial the extension number. Thank you
105 **156 ***156 greeting-day6.wav Please dial the extension number, or press, 9, for the operator **157 ***157 greeting-noon6.wav Please dial the extension number. Thank you. **158 ***158 greeting-night6.wav Please dial the extension number. Thank you. **159 ***159 greeting-holiday6.wav Please dial the extension number. Thank you. (It is reserved, not functional now) **160 ***160 greeting-temporary6.wav Please dial the extension number. Thank you. **161 ***161 greeting-day7.wav Please dial the extension number, or press, 9, for the operator **162 ***162 greeting-noon7.wav Please dial the extension number. Thank you. **163 ***163 greeting-night7.wav Please dial the extension number. Thank you. **164 ***164 greeting-holiday7.wav Please dial the extension number. Thank you. (It is reserved, not functional now) **165 ***165 greeting-temporary7.wav Please dial the extension number. Thank you. **166 ***166 greeting-day8.wav Please dial the extension number, or press, 9, for the operator **167 ***167 greeting-noon8.wav Please dial the extension number. Thank you. **168 ***168 greeting-night8.wav Please dial the extension number. Thank you. **169 ***169 greeting-holiday8.wav Please dial the extension number. Thank you. (It is reserved, not functional now) **170 ***170 greeting-temporary8.wav Please dial the extension number. Thank you. **171 ***171 greeting-day9.wav Please dial the extension number, or press, 9, for the operator **172 ***172 greeting-noon9.wav Please dial the extension number. Thank you. **173 ***173 greeting-night9.wav Please dial the extension number. Thank you
106 **174 ***174 greeting-holiday9.wav Please dial the extension number. Thank you. (It is reserved, not functional now) **175 ***175 greeting-temporary9.wav Please dial the extension number. Thank you. **176 ***176 greeting-day10.wav Please dial the extension number, or press, 9, for the operator **177 ***177 greeting-noon10.wav Please dial the extension number. Thank you. **178 ***178 greeting-night10.wav Please dial the extension number. Thank you. **179 ***179 greeting-holiday10.wav Please dial the extension number. Thank you. (It is reserved, not functional now) **180 ***180 greeting-temporary10.wav Please dial the extension number. Thank you. **181 ***181 greeting-day11.wav Please dial the extension number, or press, 9, for the operator **182 ***182 greeting-noon11.wav Please dial the extension number. Thank you. **183 ***183 greeting-night11.wav Please dial the extension number. Thank you. **184 ***184 greeting-holiday11.wav Please dial the extension number. Thank you. (It is reserved, not functional now) **185 ***185 greeting-temporary11.wav Please dial the extension number. Thank you. **186 ***186 greeting-day12.wav Please dial the extension number, or press, 9, for the operator **187 ***187 greeting-noon12.wav Please dial the extension number. Thank you. **188 ***188 greeting-night12.wav Please dial the extension number. Thank you. **189 ***189 greeting-holiday12.wav Please dial the extension number. Thank you. (It is reserved, not functional now) **190 ***190 greeting-temporary12.wav Please dial the extension number. Thank you
107 Group Name: Voice Mail Sounds Files Record Playback File Name Default Announcement Code Code **0301 ***0301 vm-advopts.wav Press, 3, for advanced options. **0302 ***0302 vm-and.wav and **0303 ***0303 vm-calldiffnum.wav Press, 2, to enter a different number. **0304 ***0304 vm-changeto.wav Change to which folder? **0305 ***0305 vm-cust1.wav Folder. Five **0306 ***0306 vm-cust2.wav Folder. Six **0307 ***0307 vm-cust3.wav Folder. Seven **0308 ***0308 vm-cust4.wav Folder. Eight **0309 ***0309 vm-cust5.wav Folder. Nine **0310 ***0310 vm-delete.wav Press, 7, to delete this message. **0311 ***0311 vm-deleted.wav Message deleted. **0312 ***0312 vm-dialout.wav Please wait, while I connect your call. **0313 ***0313 vm-enter-num-to-call.wav Please enter the number, you wish to call. **0314 ***0314 vm-extension.wav extension **0315 ***0315 vm-family.wav family **0316 ***0316 vm-first.wav first **0317 ***0317 vm-for.wav for **0318 ***0318 vm-forward.wav Press, 1, to enter an extension. Press, 2, to use the directory. **0319 ***0319 vm-forwardoptions.wav Press, 1, to pre-pend the message, or, 2, to forward a message without pre-pending. **0320 ***0320 vm-friends.wav friend **0321 ***0321 vm-from.wav from **0322 ***0322 vm-from-extension.wav Message from extension, **0323 ***0323 vm-from-phonenumber.wav Message from phone number, **0324 ***0324 vm-goodbye.wav goodbye **0325 ***0325 vm-helpexit.wav Press, star for help, or pound to exit. **0326 ***0326 vm-inbox.wav new **0327 ***0327 vm-incorrect.wav Login incorrect. **0328 ***0328 vm-incorrect-mailbox.wav Login incorrect. Mailbox **0329 ***0329 vm-instructions.wav To check your messages, press, 1, now. You may quit voic , at any
108 time by pressing the, pound key. **0330 ***0330 vm-intro.wav Please leave your message after the tone. When done, hang up or press the pound key. **0331 ***0331 vm-isonphone.wav is on the phone. **0332 ***0332 vm-isunavail.wav is unavailable. **0333 ***0333 vm-last.wav last **0334 ***0334 vm-leavemsg.wav Press, 5, to leave a message. **0335 ***0335 vm-login.wav Welcome to Voice Mail. Mailbox, **0336 ***0336 vm-mailboxfull.wav Sorry, but the user's mail box, can not accept anymore messages. **0337 ***0337 vm-message.wav message **0338 ***0338 vm-messages.wav messages **0339 ***0339 vm-minutes.wav minutes **0340 ***0340 vm-mismatch.wav The passwords you entered and re-entered did not match. Please try again. **0341 ***0341 vm-msginstruct.wav To hear the next message, press, 6. To repeat this message, press, 5. To hear the previous message, press, 4. To delete or undelete this message, press, 0. To quit voice mail, press, pound. **0342 ***0342 vm-msgsaved.wav Your message has been saved. **0343 ***0343 vm-newpassword.wav Please enter your new password, followed by the pound key. **0344 ***0344 vm-newuser.wav Welcome to Voice Mail! First, I will guide you through a short setup process. **0345 ***0345 vm-next.wav Press, 6, to play the next message. **0346 ***0346 vm-no.wav no **0347 ***0347 vm-nobodyavail.wav nobody is available to take your call at this moment. **0348 ***0348 vm-nobox.wav You can not reply to this message, because the sender, does not have a mailbox. **0349 ***0349 vm-nomore.wav No more messages. **0350 ***0350 vm-nonumber.wav I m afraid I don t know who sent this message
109 **0351 ***0351 vm-num-i-have.wav the number I have is, **0352 ***0352 vm-old.wav old **0353 ***0353 vm-onefor.wav Press, 1, for **0354 ***0354 vm-options.wav Press, 1, to record your un available message. Press, 2, to record your busy message. Press, 3, to record your name. Press, 4, to record your temporary greeting. Press, star to return to the main menu. **0355 ***0355 vm-opts.wav Press, 2, to change folders. Press, 3, for advanced options. Press, zero, for mailbox options. **0356 ***0356 vm-passchanged.wav Your passwords have been changed. **0357 ***0357 vm-password.wav password **0358 ***0358 vm-press.wav press **0359 ***0359 vm-prev.wav Press, 4, for the previous message. **0360 ***0360 vm-reachoper.wav Press, 9, to reach the operator. **0361 ***0361 vm-rec-busy.wav After the tone, say your busy message, then press the pound key. **0362 ***0362 vm-received.wav received **0363 ***0363 vm-rec-name.wav After the tone, say your name, then press the pound key. **0364 ***0364 vm-rec-temp.wav After the tone, say your temporary message, then press the pound key. **0365 ***0365 vm-rec-unv.wav After the tone, say your un available message, then press the pound key. **0366 ***0366 vm-reenterpassword.wav Please re enter your password followed by the pound key. **0367 ***0367 vm-repeat.wav Press, 5, to repeat the current message. **0368 ***0368 vm-review.wav Press, 1, to accept this recording. press, 2, to listen to it. press, 3, to re-record your message. **0369 ***0369 vm-saved.wav saved **0370 ***0370 vm-savedto.wav save to **0371 ***0371 vm-savefolder.wav Which folder should I save the message to? **0372 ***0372 vm-savemessage.wav or, 9, to save this message. **0373 ***0373 vm-saveoper.wav Press, 1,to accept this recording,
110 otherwise please continue to hold. **0374 ***0374 vm-sorry.wav I am sorry. I did not understand your response. **0375 ***0375 vm-star-cancel.wav Press, star to cancel. **0376 ***0376 vm-starmain.wav Press, star to return to the main menu. **0377 ***0377 vm-tempgreeting2.wav Press, 1, to record your temporary greeting, or press, 2, to erase your temporary greeting **0378 ***0378 vm-tempgreeting.wav Press, 1, to record your temporary greeting. **0379 ***0379 vm-tempremoved.wav Your temporary greeting has been removed. **0380 ***0380 vm-then-pound.wav Then press, pound. **0381 ***0381 vm-theperson.wav The person at extension, **0382 ***0382 vm-tocallback.wav Press, 2, to call the person, who sent this message. **0383 ***0383 vm-tocallnum.wav Press, 1, to call this number. **0384 ***0384 vm-tocancel.wav or press, pound, to cancel. **0385 ***0385 vm-tocancelmsg.wav Press, star to cancel this message. **0386 ***0386 vm-toenternumber.wav Press, 1, to enter a number **0387 ***0387 vm-toforward.wav Press, 8, to forward the message to another user. **0388 ***0388 vm-tohearenv.wav Press, 3, to hear the message envelope. **0389 ***0389 vm-tomakecall.wav Press, 4, to place an out-going call. **0390 ***0390 vm-tooshort.wav Your message is too short **0391 ***0391 vm-toreply.wav Press, 1, to send a reply. **0392 ***0392 vm-torerecord.wav Press, 3, to record your message. **0393 ***0393 vm-undelete.wav Press, 7, to undelete this message. **0394 ***0394 vm-undeleted.wav Message undeleted. **0395 ***0395 vm-unknow-caller.wav from an unknown caller **0396 ***0396 vm-whichbox.wav To leave a message, please enter a mailbox number. **0397 ***0397 vm-work.wav work **0398 ***0398 vm-youhave.wav you have, Group Name: General Sounds Files Record Playback File Name Default Announcement
111 Code Code **0400 ***0400 beep.wav (This is a beep tone) **0401 ***0401 hours.wav hours **0402 ***0402 minutes.wav minutes **0403 ***0403 auth-incorrect.wav Password incorrect. Please enter your password followed by the pound key. **0404 ***0404 auth-thankyou.wav thank you **0405 ***0405 pbx-invalid.wav I am sorry, that is not a valid extension. Please try again. **0406 ***0406 pbx-invalidpark.wav I am sorry, there is no call parked on that extension. Please try again. (It is reserved, not functional now) **0407 ***0407 pax-transfer.wav Transfer. **0408 ***0408 privacy-incorrect.wav I m sorry, that number is not valid. **0409 ***0409 privacy-prompt.wav Please enter your ten-digit phone number, starting with the area code. (It is reserved, not functional now) **0410 ***0410 privacy-thankyou.wav Thank you. **0411 ***0411 privacy-unident.wav The party you are trying to reach does not accept unidentified calls. (It is reserved, not functional now) **0412 ***0412 ss-noservice.wav The number you have dialed is not in service. Please check the number and try again. (It is reserved, not functional now) **0413 ***0413 transfer.wav Please hold, while I try that extension. **0414 ***0414 ivrrecord.wav Please enter the access code. After the tone, start recording, then press the pound key. **0415 ***0415 CB-act.wav Call back on Busy, activated. **0416 ***0416 clir-act.wav Call Line Identification Restriction, activated. **0417 ***0417 clir-deact.wav Call Line Identification Restriction, dee-activated. Group Name: Agent Sounds Files Record Playback File Name Default Announcement
112 Code Code **0445 ***0445 agent-pass.wav Please enter password followed by the pound key Group Name: Meetme Conf. Files Record Playback File Name Default Announcement Code Code **0470 ***0470 conf-adminmenu.wav Please press 1 to mute or unmute yourself, 2 to lock or unlock the conference, 3 to eject the last user, 4 or 6 to decrease or increase the conference volume, 7 or 9 to decrease or increase your volume, or 8 to exit **0471 ***0471 conf- enteringno.wav You are entering conference number **0472 ***0472 conf- errormenu.gm Invalid Choice **0473 ***0473 conf- getchannel.gm Please enter the channel number followed by the pound key. **0474 ***0474 conf- getconfno.wav Please enter your conference number followed by the pound key. **0475 ***0475 conf- getpin.wav Please enter the conference pin number. **0476 ***0476 conf- hasjoin.wav is now in the conference. **0477 ***0477 conf- hasleft.wav has left the conference. **0478 ***0478 conf- invalid.wav That is not a valid conference number. Please try again. **0479 ***0479 conf- invalidpin.wav That pin is invalid for this conference. **0480 ***0480 conf- kicked.wav You have been kicked from this conference **0481 ***0481 conf- leaderhasleft.wav The leader has left the conference. **0482 ***0482 conf- locked.wav This conference is locked! **0483 ***0483 conf- lockednow.wav The conference is now locked **0484 ***0484 conf- muted.wav You are now muted **0485 ***0485 conf- noempty.wav No empty conferences currently exist. **0486 ***0486 conf- onlyone.wav There is currently one other participant in the conference. **0487 ***0487 conf- onlyperson.wav You are currently the only person in
113 this conference. **0488 ***0488 conf- otherinparty.wav other participants in the conference **0489 ***0489 conf- placeintoconf.wav You will now be placed into the conference. **0490 ***0490 conf- thereare.wav There are currently **0491 ***0491 conf- unlockednow.wav The conference is now unlocked **0492 ***0492 conf- unmuted.wav You are now unmuted **0493 ***0493 conf- usermenu.wav Please press 1 to mute or unmute yourself, 4 or 6 to decrease or increase the conference volume, 7 or 9 to decrease or increase your volume, or 8 to exit **0494 ***0494 conf- userswilljoin.wav users will join the conference. **0495 ***0495 conf- userwilljoin.wav user will join the conference. **0496 ***0496 conf- waitforleader.wav The conference will begin when the leader arrives

114 4.2 Customize Ring Back Tone (Transferring Tone) User can customize Ring Back Tone by upload new wave file on SIPPBX 6200A. Please record wave file format as PCM, Channel Mode: Mono, Frequency: 8K, Bit Rate: 16 bit. Click Management, and then click the Music Upload. In Music Upload Table, click Press Browse, to select wave file, then Press Apply to upload special Ring Back Tone. After Upload is finished, press Reboot to reboot system to renew Ring Back Tone
Version: epbxum_
 epbx-100a-128 User s Manual Version: epbxum_128.300 CH1. Overview 5 1.1 Specifications 5 1.2 Hardware Overview 7 1.2.1 Front Panel and LED Indication...7 1.2.2 Back Panel...8 CH2. Start to configure epbx-100a-128
4 Port IP-PBX + SIP Gateway System
 4 Port IP-PBX + SIP Gateway System The IPG-40XG is an embedded Voice over IP (VoIP) PBX Server with Session Initiation Protocol (SIP) to provide IP extension phone connections for global virtual office
ANSEL FXS / 1 PSTN. VoIP Telephone Adaptor. User Manual V1.10
 ANSEL 5518 1 FXS / 1 PSTN VoIP Telephone Adaptor User Manual V1.10 Quick Guide Step 1: Broadband (ADSL/Cable Modem) Connections for ANSEL 5518 A. Connect ANSEL 5518 WAN port to ADSL NAT Router as the following
SoLink-Lite IP-PBX. Administrator Guide. (Version 1.0)
") SoLink-Lite IP-PBX Administrator Guide (Version 1.0) TABLE OF CONTENT 1.0 Introduction... 1 2.0 Setting Up the IP-PBX... 2 3.0 Logging On... 3 4.0 Configuring Network... 4 5.0 Configuring Hardware... 5
SoLink-Lite IP-PBX Administrator Guide (Version 1.0) TABLE OF CONTENT 1.0 Introduction... 1 2.0 Setting Up the IP-PBX... 2 3.0 Logging On... 3 4.0 Configuring Network... 4 5.0 Configuring Hardware... 5
TT11 VoIP Router 1FXS/1FXO TA User Guide
 TT11 VoIP Router 1FXS/1FXO TA User Guide Page 1 Table of Contents: 1.0 Introduction... 3 2.0 Package Contents... 3 3.0 Summary of LED & Connector Descriptions... 4 3.1 The Front LEDs... 4 3.2 The Rear
VoIP ATA series (ATA171plus, ATA172plus, ATA-171, ATA-172, ATA-171M, ATA-171P)
") ATA Web User Guide VoIP ATA series (ATA171plus, ATA172plus, ATA-171, ATA-172, ATA-171M, ATA-171P) User Guide Released Date : January-2015 Firmware Version : V.303 1. Introduction... 4 2. Hardware Overview...
ATA Web User Guide VoIP ATA series (ATA171plus, ATA172plus, ATA-171, ATA-172, ATA-171M, ATA-171P) User Guide Released Date : January-2015 Firmware Version : V.303 1. Introduction... 4 2. Hardware Overview...
Release Note for N412
 Yeastar Information Technology Co. Ltd. CONTENTS FIRMWARE VERSION 45.15.0.3... 3 FIRMWARE VERSION 45.15.0.1... 3 FIRMWARE VERSION 45.14.0.23... 5 FIRMWARE VERSION 45.14.0.22... 12 2/12 FIRMWARE VERSION
Welltech WellGate User Manual
 Welltech WellGate 2626 An Easy to Use PBX Gateway User Manual Copyright 2009 Welltech Computer Co., Ltd. All right reserved Table of Contents Introduction...2 WellGate 2626 - An Easy to Use PBX Gateway...2
EP502/EP504 IP PBX 1.1 Overview
 1.1 Overview The EP502/EP504 is an embedded Voice over IP (VoIP) Server with Session Initiation Protocol (SIP) to provide IP extension phone connection for global virtual office of small-to-medium business
User Manual NANO 2. Version 2.5
 Version 2.0 User Manual NANO 2 Version 2.5 Table of Contents 1. Introduction... 1 1.1. Typical setup of NanoPBX... 2 2. Getting Started With the NanoPBX... 3 2.1. Installation... 3 2.2. Accessing the GUI
Draft Version. Setup Reference guide for KX-HTS Series (Tested with HTS32 Version 1.5) VozTelecom SIP Trunk service with Built-in Router
 VozTelecom SIP Trunk service with Built-in Router") Draft Version Setup Reference guide for KX-HTS Series (Tested with HTS32 Version 1.5) VozTelecom SIP Trunk service with Built-in Router Version 0.1(PSCEU) 29th.March, 2017 SUMMARY This document is a reference
Draft Version Setup Reference guide for KX-HTS Series (Tested with HTS32 Version 1.5) VozTelecom SIP Trunk service with Built-in Router Version 0.1(PSCEU) 29th.March, 2017 SUMMARY This document is a reference
CHAPTER 3 CONFIGURING THE SIP-PHONE THROUGH WEB PAGES STEP 1. BROWSE THE IP ADDRESS PREDEFINED VIA KEYPAD... 36
 WellPhone-305 SIP CHAPTER 1 OVERVIEW OF THE SIP-PHONE... 3 1. HARDWARE OVERVIEW... 4 1.Front View and Keypad function... 4 2.Back View...11 3.Specification of connector...11 2. SOFTWARE FEATURES AND SPECIFICATION...
EIP 7012 Essence VoIP Phone Administration Guide Version 1.0B
 Essence Technology EIP 7012 Essence VoIP Phone Administration Guide Version 1.0B Table of Contents 1 Introduction... 1 1.1 Hardware Overview... 1 1.2 Software Overview... 1 2 Keypad interface for IP Phone
Sipdex M200s IPPBX. Embedded. Support Any IP Phone. Softphone and SIP Client App
 Sipdex M200s IPPBX Based on embedded asterisk system, SIPDEX M200s IPPBX is a high quality, stable PBX without any moving parts and a very small footprint required minimum technology knowledge to deploy.
UCM6100 Series IP PBX Firmware Release Note
 UCM6100 Series IP PBX Firmware Release Note Table of Content FIRMWARE VERSION 1.0.10.39... 2 PRODUCT NAME... 2 DATE... 2 IMPORTANT UPGRADING NOTE... 2 UPGRADING INSTRUCTIONS... 2 CHANGES SINCE FIRMWARE
New Rock Technologies, Inc. OM Series IP Telephony System. Administrator Manual OM20 OM50. Document Version:
 OM Series IP Telephony System Administrator Manual OM20 OM50 http://www.newrocktech.com Document Version: 201511 Amendment Records Document Rev. 01 (December 26, 2015) Copyright 2015 All Rights Reserved.
HT818 Firmware Release Note
 HT818 Firmware Release Note Table of Content FIRMWARE VERSION 1.0.10.6... 3 PRODUCT NAME... 3 DATE... 3 FIRMWARE FILE INFORMATION... 3 ENHANCEMENT... 3 BUG FIX... 3 NEW FEATURES OVERVIEW... 4 VISUAL MWI
SPA400 Internet Telephony Gateway with 4 FXO Ports
 SPA400 Internet Telephony Gateway with 4 FXO Ports Administration and Configuration Guide v1.0 Using the SPA400 The SPA400 features the ability to connect up to four (4) standard analog telephones lines
WellSIP 6550 IP Telephony Server
 Date: December 28, 2007 [R0] [ The VoIP Technology Expert ] WellSIP 6550 IP Telephony Server Provides VoIP Total SIP Solution ITSP VoIP Solution Welltech Computer Co., Ltd. was founded in 1988 in Taipei,
Draft Version. Setup Reference guide for KX-HTS Series (Tested with HTS32 Version 1.5) Peoplefone SIP Trunk service with External Router
 Peoplefone SIP Trunk service with External Router") Draft Version Setup Reference guide for KX-HTS Series (Tested with HTS32 Version 1.5) Peoplefone SIP Trunk service with External Router Version 0.1(CNS) 30th, July 2017 SUMMARY This document is a reference
Draft Version Setup Reference guide for KX-HTS Series (Tested with HTS32 Version 1.5) Peoplefone SIP Trunk service with External Router Version 0.1(CNS) 30th, July 2017 SUMMARY This document is a reference
ATCOM IPPBX IP01 Product Guide Version: VoIPon Tel: +44 (0) Fax: +44 (0)
 Fax: +44 (0)") Figure: ATCOM IPPBX IP01 ATCOM IPPBX IP01 Product Guide Version: 1.0 2010-05-10 Content CONTACT ATCOM... 3 CHAPTER 1 THE INTRODUCTION OF IP01... 4 CHAPTER 2 ACCESS TO THE IP01... 6 2.1 WEB PAGE ACCESS
Figure: ATCOM IPPBX IP01 ATCOM IPPBX IP01 Product Guide Version: 1.0 2010-05-10 Content CONTACT ATCOM... 3 CHAPTER 1 THE INTRODUCTION OF IP01... 4 CHAPTER 2 ACCESS TO THE IP01... 6 2.1 WEB PAGE ACCESS
Manual PBX IP Version: 1.0
 Manual PBX IP 2008 Version: 1.0 Content CONTACT ATCOM... 3 CHAPTER 1 THE INTRODUCTION OF PBX-IP 2008... 4 CHAPTER 2 ACCESS TO THE PBX-IP 2008... 7 2.1 WEB PAGE ACCESS BY BROWSER... 7 2.2 SSH ACCESS BY
IP/PRI/FXS/BRI PBX. User Manual. Version 2.0
 IP/PRI/FXS/BRI PBX User Manual Version 2.0 2 Table of Contents 1. Introduction... 6 1.1 Typical setup of IP/PRI/FXS/BRI PBX... 7 2. Getting Started With the IP/PRI/FXS/BRI PBX... 8 2.1 Hardware Setup...
IPNext NGN IP-PBX High-performance Next Generation IP-PBX Solution
 IPNext NGN IP-PBX High-performance Next Generation IP-PBX Solution Korea Telecom IP-PBX BMT www.addpac.com AddPac Technology 2005, Sales and Marketing Contents IP-PBX BMT Network Diagram IP-PBX Performance
Draft Version. Setup Reference guide for KX-HTS Series (Tested with HTS824 Version 1.5) Netia SIP Trunk service with External Router
 Netia SIP Trunk service with External Router") Draft Version Setup Reference guide for KX-HTS Series (Tested with HTS824 Version 1.5) Netia SIP Trunk service with External Router Version 0.1(PSN) 22th.June, 2017 SUMMARY This document is a reference
Draft Version Setup Reference guide for KX-HTS Series (Tested with HTS824 Version 1.5) Netia SIP Trunk service with External Router Version 0.1(PSN) 22th.June, 2017 SUMMARY This document is a reference
for VoIP Gateway Series
 Smart Web Manager for VoIP Gateway Series www.addpac.com AddPac Technology 2010, Sales and Marketing Contents Web Connection Main Page Layout System Configuration Language, WAN Setup, LAN Setup, NAT, NTP,
PANASONIC. Optimum Business Trunking and the Panasonic KX-NCP500 IP PBX V Configuration Guide
 PANASONIC Optimum Business Trunking and the Panasonic KX-NCP500 IP PBX V2.0502 Configuration Guide PANASONIC Table of Contents 1. Overview 2. SIP Trunk Adaptor Set-up Instructions 3. Additional Set-up
UCM6102/6104/6108/6116 Configuration
 UCM6102/6104/6108/6116 Configuration This document introduces manual configuration steps performed for interoperability testing between AccessLine and Grandstream UCM6102/6104/6108/6116. Configuration
RP-FSO522 2-Line FXO, 2-Line FXS SIP IP Gateway. Feature
 RP-FSO522 2-Line FXO, 2-Line FXS SIP IP Gateway RP-FSO522 is an 2-Line FXO plus 2-Line FXS gateway with SIP protocol IP device which allows to connect 2 Lines of analog PSTN telephone line and connect
New Rock Technologies, Inc. OM Series IP Telephony System. Administrator Manual OM20 OM50. Document Version:
 OM Series IP Telephony System Administrator Manual OM20 OM50 http://www.newrocktech.com Document Version: 201511 Amendment Records Document Rev. 01 (December 26, 2015) Copyright 2016 All Rights Reserved.
InterPBX Quick Installation Guide
 InterPBX Quick Installation Guide Prepare Your Telephone Numbering Plan InterPBX Communication System supports flexible numbering plan with maximum 5 digits of extension number. You need to prepare the
FXO-08 (SIP) User Manual
 User Manual") FXO-08 8-ports FXO VoIP Gateway (SIP) User Manual Revision Information Version Date Description EN-V2.0a April-8-2008 2 nd English Version Table of Contents 1. Introduction...3 1.1 FXO-08 --8-ports FXO
FXO-08 8-ports FXO VoIP Gateway (SIP) User Manual Revision Information Version Date Description EN-V2.0a April-8-2008 2 nd English Version Table of Contents 1. Introduction...3 1.1 FXO-08 --8-ports FXO
What you need today is Essence IPBX for tomorrow s productivity
 What you need today is Essence IPBX for tomorrow s productivity Energize your business with effective Essence IPBX system which comes with easy setup and administrator-friendly designs. Essence IPBX system
Cisco Unified Communications UC320W Pre-Installation Site Information
 Cisco Unified Communications UC320W Pre-Installation Site Information Use this workbook to gather information from your customer before you install the Cisco Unified Communications UC320W at the site.
Draft Version. Setup Reference guide for KX-HTS Series (Tested with HTS824 Version 1.5) LCR SIP Trunk service with Built-in Router
 LCR SIP Trunk service with Built-in Router") Draft Version Setup Reference guide for KX-HTS Series (Tested with HTS824 Version 1.5) LCR SIP Trunk service with Built-in Router Version 0.1(PSN) 22th.June, 2017 SUMMARY This document is a reference for
Draft Version Setup Reference guide for KX-HTS Series (Tested with HTS824 Version 1.5) LCR SIP Trunk service with Built-in Router Version 0.1(PSN) 22th.June, 2017 SUMMARY This document is a reference for
IPNext 187 Hybrid IP-PBX System High-performance Hybrid IP-PBX Solution
 IPNext 187 Hybrid IP-PBX System High-performance Hybrid IP-PBX Solution IP-PBX Features www.addpac.com AddPac Technology 2011, Sales and Marketing Contents IP-PBX Features Smart Multimedia Manager VoIP
2757 VoIP Phone Users Guide
 2757 VoIP Phone Users Guide Rev. 1.0 Table of Contents 1 Introduction... 5 1.1 Package Contents... 5 1.2 Features... 5 1.3 Basic Setup... 6 2 Network Setup... 8 2.1 Static IP Address... 8 2-2 PPPoE...11
 IPX Voice Communication Features and Services Auto Attendant Direct Inward Dialing (DID) Auto CO Line Hunting Multi Operator Hunting PBX/ATA Dial Plan Speed Call Short Number Life Line Custom Define Call
VOI-9200 SIP IP PBX User Manual
 VOI-9200 SIP IP PBX User Manual Ver. 1.01-0701 Table of Contents 1. INTRODUCTION... 3 1.1. OVERVIEW... 3 1.2. FEATURE... 4 1.3. PACKAGE CONTENT... 5 1.4. PHYSICAL... 5 1.5. DEFAULT SETTINGS... 7 1.6. CONNECTION
VOI-9300 SIP IP PBX. User Manual
 VOI-9300 SIP IP PBX User Manual September 2008 GENERAL PUBLIC LICENSE This product incorporates open source code into the software and therefore falls under the guidelines governed by the General Public
HT801/HT802 Firmware Release Note IMPORTANT UPGRADING NOTE
 HT801/HT802 Firmware Release Note IMPORTANT UPGRADING NOTE Once HT801/HT802 is upgraded to 1.0.5.7 or above, downgrading to 1.0.2.x firmware version or lower is not supported. Once HT801/HT802 is upgraded
HT801/HT802 Firmware Release Notes IMPORTANT UPGRADING NOTE
 HT801/HT802 Firmware Release Notes IMPORTANT UPGRADING NOTE Once HT801/HT802 is upgraded to 1.0.3.2 or above, downgrading to 1.0.2.x firmware version or lower is not supported. Once HT801/HT802 is upgraded
Please follow the steps that are listed here to get started with your Berkshire 10K ippbx telephone system.
 Please follow the steps that are listed here to get started with your Berkshire 10K ippbx telephone system. Step 1 Power-up and log into your PC. Unplug any existing ethernet cable from your PC. Step 2
SAPEX. The All in One Embedded IP PBX Server
 Warm Welcome SAPEX The All in One Embedded IP PBX Server Introduction Pure IP-PBX Embedded Server Platform Registrar, Proxy, Presence and Voice Mail Servers : All-Integrated Open-Standard SIP Protocol
Application Note Asterisk BE with SIP Trunking - Configuration Guide
 Application Note Asterisk BE with SIP Trunking - Configuration Guide 23 January 2009 Asterisk BE SIP Trunking Table of Contents 1 ASTERISK BUSINESS EDITION AND INGATE... 1 1.1 SIP TRUNKING SUPPORT... 2
Application Notes for Configuring SIP Trunking between the Skype SIP Service and an Avaya IP Office Telephony Solution Issue 1.0
 Application Notes for Configuring SIP Trunking between the Skype SIP Service and an Avaya IP Office Telephony Solution Issue 1.0 Abstract These Application Notes describe the steps to configure trunking
HT812/HT814 Firmware Release Note IMPORTANT UPGRADING NOTE
 HT812/HT814 Firmware Release Note IMPORTANT UPGRADING NOTE Once HT812/HT814 is upgraded to 1.0.3.2 or above, downgrading to 1.0.2.x firmware version or lower is not supported. Once HT812/HT814 is upgraded
Contents. 2 SmartVoice Gateway(s) User Guide YML832 Rev1
 User Guide YML832 Rev1") Contents 1. Introduction...4 Product Overview...4 Items that you will need and things you will need to know...5 NetComm SmartVoice Gateway Features...6 SmartVoice Gateway Hardware Description...9 Front
Contents 1. Introduction...4 Product Overview...4 Items that you will need and things you will need to know...5 NetComm SmartVoice Gateway Features...6 SmartVoice Gateway Hardware Description...9 Front
Application Note 3Com VCX Connect with SIP Trunking - Configuration Guide
 Application Note 3Com VCX Connect with SIP Trunking - Configuration Guide 28 May 2009 3Com VCX Connect Solution SIP Trunking Table of Contents 1 3COM VCX CONNECT AND INGATE... 1 1.1 SIP TRUNKING SUPPORT...
IPPBX IP4G User Manual
 For Firmware Version: V2.0 2013-08-23 Contents Contents... 1 1. Introduction... 4 2. Connection and Change IP Address of IPPBX... 5 2.1 Connection... 5 2.2 WAN Settings... 6 2.3 LAN Settings... 7 2.4 DHCP
GoIP Series SIM Card for GSM Voice Gateway User Manual
 GoIP Series SIM Card for GSM Voice Gateway User Manual V3.0 Shenzhen HYBERTONE Technology Co., Ltd Http://www.hybertone.com Marketing@ hybertone.com Support@ hybertone.com Content Content...1 1 Overview...3
GSM Gateway High Performance GSM Gateway Solution
 GSM Gateway High Performance GSM Gateway Solution WEB Setup Guide AP-GS1001 / AP-GS1002 / AP-GS1004 www.addpac.com Contents 1. WEB Connection 2. Network Setup 3. Language 4. GSM Setup 5. VoIP Setup 6.
Welltech proprietary documents. WellGate 3802A and 3804A application Note
 WellGate 3802A and 3804A application Note Date: June-01-2007 This application note is given several real application cases which were happened frequently from world wide customers. Welltech will release
Setting Up a Mitel SX-2000 Digital PIMG Integration with Cisco Unity Connection
 Up a Mitel SX-2000 Digital PIMG Integration with Cisco Unity Connection Up a Mitel SX-2000 Digital PIMG Integration, page 1 Up a Mitel SX-2000 Digital PIMG Integration Task List for Mitel SX-2000 PIMG
IPPBX IP02 User Manual
 For Firmware Version: V2.0 2013-08-23 Contents Contents... 1 1. Introduction... 4 2. Connection and Change IP Address of IPPBX... 5 2.1 Connection... 5 2.2 WAN Settings... 6 2.3 LAN Settings... 7 2.4 DHCP
FTA-102L. Free Roaming Gateway. User Manual
 FTA102L Free Roaming Gateway User Manual FTA102L PORTech Communications Inc. Content 1. Introduction... 1 2. System Topology... 2 3. Function Description... 2 4. Parts list... 3 5. Dimension: 14*9*3 cm...
HT801/HT802 Firmware Release Note IMPORTANT UPGRADING NOTE
 HT801/HT802 Firmware Release Note IMPORTANT UPGRADING NOTE Once HT801/HT802 is upgraded to 1.0.3.2 or above, downgrading to 1.0.2.x firmware version or lower is not supported. Once HT801/HT802 is upgraded
Dynamix DW FXS-08 (SIP) User Manual. 8-ports FXS VoIP Gateway. Revision Information Version Date Description EN-V2.0a Apr nd English Version
 User Manual. 8-ports FXS VoIP Gateway. Revision Information Version Date Description EN-V2.0a Apr nd English Version") Dynamix DW FXS-08 8-ports FXS VoIP Gateway (SIP) User Manual Revision Information Version Date Description EN-V2.0a Apr-2-2008 2 nd English Version Table of Contents 1. Introduction...3 1.1 FXS-08 --8-ports
Dynamix DW FXS-08 8-ports FXS VoIP Gateway (SIP) User Manual Revision Information Version Date Description EN-V2.0a Apr-2-2008 2 nd English Version Table of Contents 1. Introduction...3 1.1 FXS-08 --8-ports
KTA1010 INSTALL GUIDE
 KTA1010 INSTALL GUIDE Table of Contents 1 Check for Required Items... 2 2 Installation... 2 2.1 Installation View... 2 2.2 Connection Chart to determine cable types... 3 3 Ready to use... 3 3.1 Network
Table of Contents. Save Changes Restart System Troubleshooting Warranty Contacting Technical Support Registration...
 Table of Contents Product Overview...3 Introduction...3 Features...4 Hardware Overview...5 Front Panel - LEDs...5 Rear Panel - Connections...6 Installation...7 Requirements...7 Connection...8 Configuration...9
Cisco Unified IP Phone Settings
 Phone Settings Overview, page 1 Cisco Unified IP Phones 7906G and 7911G Menus, page 1 Phone Setup s, page 4 Network Configuration Menu, page 5 Device Configuration Menu, page 17 Security Configuration
Setting Up a Serial (SMDI, MCI, or MD-110) PIMG Integration with Cisco Unity Connection
 PIMG Integration with Cisco Unity Connection") CHAPTER 11 Setting Up a Serial (SMDI, MCI, or MD-110) PIMG Integration with Cisco Unity Connection For detailed instructions for setting up a serial (SMDI, MCI, or MD-110) PIMG integration with Cisco Unity
CHAPTER 11 Setting Up a Serial (SMDI, MCI, or MD-110) PIMG Integration with Cisco Unity Connection For detailed instructions for setting up a serial (SMDI, MCI, or MD-110) PIMG integration with Cisco Unity
D-Link DVG-1402S. Manual. 2Voice + 4SW VoIP Router. Version B.1. Building Networks for People
 D-Link DVG-1402S 2Voice + 4SW VoIP Router Manual Building Networks for People Version B.1 Contents Package Contents... 3 Introduction... 4 Rear Panel Connections... 5 Front Panel LEDs... 6 Features...
Setting Up an Alcatel 4400 Digital PIMG Integration with Cisco Unity Connection
 up Alcatel 4400 Digital PIMG Integration with Cisco Unity Connection Up an Alcatel 4400 Digital PIMG Integration with Cisco Unity Connection, page 1 Up an Alcatel 4400 Digital PIMG Integration with Cisco
Expandable SIP Phone System. Expandable SIP Phone System
 Expandable SIP Phone System Key Features Included: + One DVX-1000 SIP IP PBX + One DIV-140 Trunk Gateway + Ten DPH-140S IP Telephones + Unified Management + Save On Long-distance Calling + Create an IP
Contents. 2 V400 Series VoIP Gateway User Guide YML832 Rev1
 Contents 1. Introduction...4 Product Overview...4 Items that you will need and things you will need to know...5 NetComm V400 Series VoIP Gateway Features...6 Package Contents...9 Hardware Description...10
Avaya PBX SIP TRUNKING Setup & User Guide
 Avaya PBX SIP TRUNKING Setup & User Guide Nextiva.com (800) 285-7995 2 P a g e Contents Description... 3 Avaya IP PBX Configuration... 3 Licensing and Physical Hardware... 4 System Tab Configuration...
IPPBX IP02 User Manual
 For Firmware Version: V4.0 2015-11-16 Contents Contents...1 1. Introduction... 3 2. Connection and Change IP Address of IPPBX...5 2.1 Connection... 5 2.2 WAN Settings...6 2.3 LAN Settings... 7 2.4 DHCP
VOI-9300 SIP IP PBX. User Manual
 VOI-9300 SIP IP PBX User Manual Table of Content 1. INTRODUCTION...4 1.1. OVERVIEW...4 2. FEATURES...5 3. STANDARD COMPLIANCE...5 4. PACKING CONTENT...6 5. LED INDICATORS & INTERFACE CONNECTORS...6 6.
8-Port SIP VoIP Gateway (8 FXS)
") 8-Port SIP VoIP Gateway (8 FXS) Highlights Supports SIP 2.0 (RFC 326) Supports IPv6 and IPv4 simultaneously Up to 24 SIP service domains and Caller ID Supports auto HTTP provision and fax feature Flexible
8-Port SIP VoIP Gateway (8 FXS) Highlights Supports SIP 2.0 (RFC 326) Supports IPv6 and IPv4 simultaneously Up to 24 SIP service domains and Caller ID Supports auto HTTP provision and fax feature Flexible
Setting up Alcatel 4400 Digital PIMG Integration
 up Alcatel 4400 Digital PIMG Integration with Cisco Unity Connection Up an Alcatel 4400 Digital PIMG Integration with Cisco Unity Connection, on page 1 Up an Alcatel 4400 Digital PIMG Integration with
Smart IAD. User s Guide
 Smart IAD User s Guide I Trademarks Contents are subject to revise without prior notice. All trademarks belong to their respective owners. FCC Warning This equipment has been tested and found to comply
Brekeke PBX Version 3 Administrator's Guide (Basic) Brekeke Software, Inc.
 Brekeke Software, Inc.") Brekeke PBX Version 3 Administrator's Guide (Basic) Brekeke Software, Inc. Version Brekeke PBX version 3, Administrator s Guide (Basic) Copyright This document is copyrighted by Brekeke Software, Inc.
Brekeke PBX Version 3 Administrator's Guide (Basic) Brekeke Software, Inc. Version Brekeke PBX version 3, Administrator s Guide (Basic) Copyright This document is copyrighted by Brekeke Software, Inc.
VG422R. User s Manual. Rev , 5
 VG422R User s Manual Rev 1.0 2003, 5 CONGRATULATIONS ON YOUR PURCHASE OF VG422R... 1 THIS PACKAGE CONTAINS... 1 CONFIRM THAT YOU MEET INSTALLATION REQUIREMENTS... 1 1. INSTALLATION GUIDE... 2 1.1. HARDWARE
Internet Telephony PBX System IPX-1800 User s Manual
 Internet Telephony PBX System IPX-1800 User s Manual 1 of 49 FCC Notice This equipment has been tested and found to comply with the limits for a Class A digital device, pursuant to Part 15 of FCC Rules.
FREUND SIP SW - V SIP-server setup
 FREUND SIP SW - V1.7.13 SIP-server setup Content 1. Product Setup 4 2. Log in and Home 5 3. Menu 9 3.1 Tools 9 3.1.1 Dashboard 9 3.1.2 Extensions 10 3.1.3 Trunks 14 3.1.4 Groups 18 3.1.5 Ring groups 20
AG-110 SIP Gateway User Manual
 AG-110 SIP Gateway User Manual 1.AG-110 SIP Gateway Features...3 1.1 Product Appearance... 3 1.2 Backside Illustration... 4 1.3 Software... 4 1.4 Protocol and standard... 4 1.5 Interface features... 5
End User Guide Cloud PBX
 End User Guide Entrust ICT(EICT) reserves the right to change product specifications, functions, or features, at any time, without notice. Please refer to your EICT representatives for further details.
Managing your PBX- Administrator
 Managing your PBX- Administrator ACCESSING YOUR PBX ACCOUNT Navigate to https://voip.ancero.com/ and log in to the Ancero Utility VoIP portal account. If you would like your web browser to keep you logged
Figure: ATCOM IPPBX IP04. ATCOM IPPBX IP04 Product Guide Version:
 Figure: ATCOM IPPBX IP04 ATCOM IPPBX IP04 Product Guide Version: 1.0 2010-05-10 Content CONTACT ATCOM... 3 CHAPTER 1 THE INTRODUCTION OF IP04... 4 CHAPTER 2 ACCESS TO THE IP04... 7 2.1 WEB PAGE ACCESS
GIGABIT COLOR IP PHONE
 GIGABIT COLOR IP PHONE USER GUIDE UC842 Version:1.0.3.59 Nanjing Hanlong Technology Co., Ltd 86-25-84608050 support@hanlongtek.com Notices Information Notices Information Copyright Copyright 2005-2013
HT812/HT814 Firmware Release Notes IMPORTANT UPGRADING NOTE
 HT812/HT814 Firmware Release Notes IMPORTANT UPGRADING NOTE Once HT812/HT814 is upgraded to 1.0.3.2 or above, downgrading to 1.0.2.x firmware version or lower is not supported. Once HT812/HT814 is upgraded
Entry Level PoE IP Phone
 Entry Level IP Phone Key Features Highlights Supports SIP 2.0 (RFC3261) IEEE 802.3af Power over Ethernet compliant (VIP- 1000PT only) Supports HD voice (G.722) Voice Activity Detection Auto Provisioning:
WellGate 2522 User Guide
 WellGate 2522 User Guide Contents CH1 Introduction... 4 1-1 Physical Interface... 4 1-2 IP Network connection... 5 1-3 Environmental... 5 1-4 Front Panel... 6 1-5 Rear Panel... 7 1-6 QUICK SETUP... 8 CH2
HT812/HT814 Firmware Release Notes IMPORTANT UPGRADING NOTE
 HT812/HT814 Firmware Release Notes IMPORTANT UPGRADING NOTE Once HT812/HT814 is upgraded to 1.0.3.2 or above, downgrading to 1.0.2.x firmware version or lower is not supported. Once HT812/HT814 is upgraded
Chapter TIMG BOILERPLATE
 Pete is the writer for this content; Julie W. is the editor. This file contains the following flows: File: boilerplate.fm; Flow: Reqs-Serial, page -2 File: boilerplate.fm; Flow: Reqs-In-Band, page -4 File:
Setting Up an Avaya Definity ProLogix Digital PIMG Integration with Cisco Unity Connection
 CHAPTER 4 Setting Up an Avaya Definity ProLogix Digital PIMG Integration with Cisco Unity Connection For detailed instructions for setting up an Avaya Definity ProLogix digital PIMG integration with Cisco
Yeastar Technology Co., Ltd.
 TE100 Administrator's Guide Version 16.17.0.38 Yeastar Technology Co., Ltd. www.yeastar.com Page 1 Table of Contents 1. Introduction... 4 1.1 Features... 4 1.2 Hardware Specification... 5 1.2.1 Exterior
IPPBX IP2G4A User Manual
 For Firmware Version: V2.0 2013-08-23 Contents Contents... 1 1. Introduction... 4 2. Connection and Change IP Address of IPPBX... 5 2.1 Connection... 5 2.2 WAN Settings... 6 2.3 LAN Settings... 7 2.4 DHCP
VoiceAccess Users Guide
 Users Guide Table of Contents GETTING STARTED...1 Device Configuration...1 Connecting to a PBX...2 Plus Features...2 VoiceMail...2 Call Forwarding...2 Caller ID...3 MANAGING CALLING FEATURES FROM THE PHONE...4
VS Port FXS SIP. VoIP Telephone Adaptor. User Manual. V2.1h
 VS200 2-Port FXS SIP VoIP Telephone Adaptor User Manual V2.1h Quick Guide Step 1: Broadband (ADSL/Cable Modem) Connections for VS200 A. Connect VS200 LAN port to ADSL NAT Router as the following connection.
KT101 Broadband IP Phone User Manual
 KT101 Broadband IP Phone User Manual Content 1 Product Overview... 4 1.1 Introduction to IP Telephony... 4 1.2 Features... 4 1.3 Intended Users and Situations... 5 1.4 Top View and Button Description...
VOIP²ALL SERIES. 4 Channel Gateway User Guide. Version 5.38
 VOIP²ALL SERIES 4 Channel Gateway User Guide Version 5.38 Contents CONTENTS 1. INTRODUCTION TO THE VOIP²ALL GATEWAY... 4 1.1. The VoIP²ALL Gateway Solution Overview... 4 1.2. About this Manual... 5 1.3.
AR168F SIP Phone User Guide
 AR168F SIP Phone User Guide - 1 - INDEX 1. PRODUCT OVERVIEW...4 2. FEATURES AND SPECIFICATION...4 2.1. Hardware Features...4 2.2. Software Features...5 2.3. Standard and Protocol...6 2.4. Electric Requirements...7
IPNext180 Hybrid IP-PBX. AddPac Technology. Sales and Marketing. AP-NR1500 IP Voice Recording Server.
 IPNext180 IP Call Center Software Features IPNext180 Hybrid IP-PBX AddPac Technology AP-NR1500 IP Voice Recording Server www.addpac.com Sales and Marketing Contents Network Diagram Small Scale IP Call
Step 3 - How to Configure Basic System Settings
 Before configuring the IP address and network settings, complete Step 2 - How to Configure IP Address, network Settings, and Firewall. Verify the computer and the are connected to the same network, with
Application Notes for Configuring Cablevision Optimum Voice SIP Trunking with Avaya IP Office - Issue 1.1
 Avaya Solution & Interoperability Test Lab Application Notes for Configuring Cablevision Optimum Voice SIP Trunking with Avaya IP Office - Issue 1.1 Abstract These Application Notes describe the procedures
HT801/HT802 Firmware Release Notes IMPORTANT UPGRADING NOTE
 HT801/HT802 Firmware Release Notes IMPORTANT UPGRADING NOTE Once HT801/HT802 is upgraded to 1.0.3.2 or above, downgrading to 1.0.2.x firmware version or lower is not supported. Once HT801/HT802 is upgraded
Application Note Configuration Guide for ShoreTel and Ingate
 Application Note Configuration Guide for ShoreTel and Ingate 29 August 2008 Table of Contents 1 INTRODUCTION... 1 2 SHORETEL CONFIGURATION... 2 2.1 OVERVIEW... 2 2.1.1 Version Support... 2 2.1.2 ShoreTel
TB200/400 User Manual
 TB200/400 User Manual Version 18.18.0.2 Yeastar Information Technology Co. Ltd. Contents Introduction... 4 Application... 5 Configuration Guide... 8 1. Login... 8 2. Status... 9 2.1 System Status... 9