Theo. Miles. Olivia. Joseph. Nina. Kishan. The Richard Pate School, Cheltenham
|
|
|
- Wesley Morrison
- 5 years ago
- Views:
Transcription

1 Theo Miles Olivia Joseph Nina Kishan
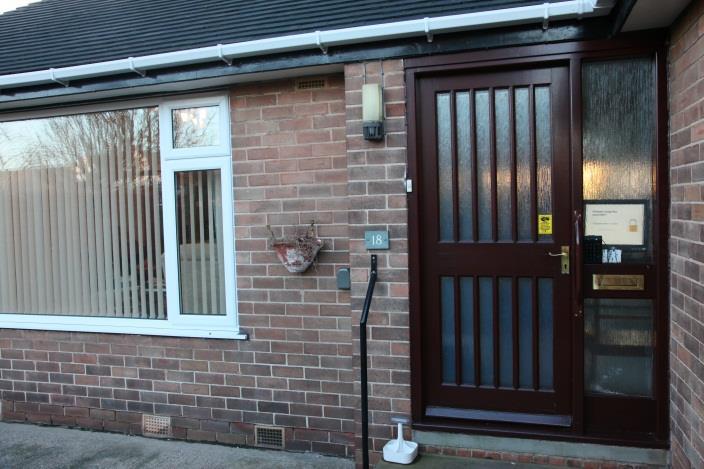
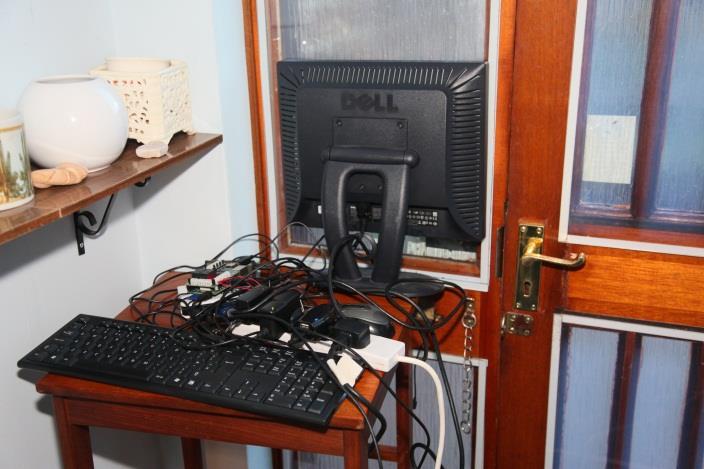
2 Summary We have developed a system to help old/disabled people answer the door, especially people who have difficulty walking or walk slowly. The system uses the Raspberry Pi with the Piface attachment. The problem is that old and disabled people sometimes take a very long time to reach the door to answer it so this system aims to eliminate that problem by letting the old or disabled person send a message to the person at the door and unlock the door remotely. The door can also be unlocked from the outside, and to make the system safe, there is a code required to unlock the door that the old/disabled person can give to trusted people (carers, relatives and friends). There are wireless and wired keypads for this. The wireless keypad hangs round the neck of the old/disabled person and they can use this anywhere in the house to unlock the door or send a message to the person standing at the door. Alternatively, the person waiting at the door can enter the code on the wired keypad outside at the door and get in straight away. There is a screen by the door with three items on it. A padlock shows two different displays: open and shut. This shows if the door is locked or unlocked. The other two items are messages; one of them varies so that the old person can send a message to the person standing at the
3 door and the other one will ask them to enter a code to open the door and shows them how many keys they have entered. We used the programming language Scratch to make the system. We realised we would need a Piface in order for the project to work. This took half of our budget. We needed the Piface because we needed an interface between Scratch and electronic items such as an electric door lock, LED lights and a buzzer. We tested the product in a play house we got from the reception classroom and it works.
 0.02 9.11 0.18 LED Lights 2 0.07 0.")

4 List of Items in the Project These are the items in the project with the price of all the extra items. Items Quantity Price for one Total price Piface Buzzer Electric Lock Wires (2m) LED Lights Resistor Wireless numeric keypad Wired Numeric Keypad V Battery Ribbon (1m) Sticky label Raspberry Pi Monitor Keyboard Mouse Scratch Gb SD Card PiFace SD Card Image Total (including vat) 56.55

5 Instructions for Making the Project This is how to make the door system. Preparing the SD card 1. Copy the SD card image from the University of Manchester 2. It s got a version of scratch that can talk to the Piface board 3. Put it on to a 4GB SD card on a windows 7 system using Win32DiskImager. Setting up the wireless keypad 1. Tape a ribbon to the back of the wireless keypad. 2. Stick a sticker on the back showing how to use it.
, a buzzer and approximately 1m of wire. 1. Warning!")

6 Setting up the Piface You will need, a red and a green LED, two resistors, a 390 ohm (orange white brown bands) and a 330 ohm (orange orange brown bands), a buzzer and approximately 1m of wire. 1. Warning! You may need an adult to do step 1 Solder the 390 ohm resistor to the red LED and solder wires to the other ends. Solder the 330 ohm resistor to the green LED and solder wires to the other ends. Use red wire for positive and black wire for negative.
7 2. Connect the positive (Red) wires to the 5V terminal on the Piface. Connect the negative (Black) wire of the green LED to Output pin 1. Connect the negative (black) wire of the Red LED to Output pin Connect the negative black wire of the buzzer into output pin 3 Putting it all together SET UP BY THE FRONT DOOR 1. Get the Raspberry Pi (with the keyboard, Monitor, etc.) with Piface 2. Connect the Piface to the raspberry pi using the pins on the boards 3. Connect the front door lock to the Piface. Connect the 12V battery to the lock. Connect the other two leads to relay 1 common and N.O (normally open) terminals on the Piface 4. Put in the Raspberry Pi SD card in the rear slot 5. Connect the monitor using an HDMI cable 6. Connect the Keyboard and Mouse 7. Plug in power for Raspberry Pi and a red light will come on. 8. When prompted. Type in the Username and Password which, by default, are pi as the username and raspberry as the password. When it has accepted your entry type startx.
8 9. Then you will be taken to the GUI (graphical user interface) a.k.a the desktop. Run up scratch. 10. Use File Open to open the file Door System in the pi folder. 11. Hold down the shift key and click on Share. If there is a Host Mesh option, choose this. It will display an ip address which is If there is no Host Mesh option, it s already running. 12. Minimize Scratch and run up LX terminal 13. Type in this: cd piface/scratch. Then press return. 14. Then type in python scratch_handler.py You will get a display saying sending sensor update. This will establish the connection between the Piface and Scratch. 16. Un-minimize Scratch 17. Press 09 to reset it first and then test. The code is Put scratch into presentation mode, top right hand corner 18. Unplug the keyboard and mouse because they interfere with the number pads. 19. Now plug the wireless keypad transmitter into a usb socket. 20. Flick the switch on the back of the keypad. 21. Test out the number keys, if they do not work, press the num lock key and try again. 22. If that doesn t work repeat steps 19 to 21

9 23. Plug in the wired number pad and test the numbers on that. If this doesn t work press the num lock key and try again.
10 Door system user guide This system will help you answer the door. There is a wireless keypad which you hang around your neck. Also a wired keypad is available to put on the front wall by the front door. A screen behind the window next to the door will display messages and a place to put in a code. Using the keypads The disabled or elderly person keypad is able to give out messages like I am unlocking the door. You can do so by pressing 0 and pressing a number from 1 to 8. To reset the system you must press 0 then 9.


11 These are the codes to use code message 01 Please wait five minutes while I get to the door 02 Please wait ten minutes while I get to the door 03 I am in the lounge, I m just coming 04 I am in the kitchen, I m just coming 05 I am just on the way 06 Please come to the window so I can see you 07 I am locking the door 08 I am unlocking the door, please come in 09 Please ring the doorbell [reset]

12 The outside keypad which is by the door is easy to use. You simply press the code which has to be in correct order which is Too many wrong codes will reset the system. If the code is right the buzzer will go on for two seconds and the door will unlock. The green led light means unlocked and red led light means the door is locked. Warning this product is not suitable for people who are blind, deaf or can t use their fingers.
13 How It Works Our program is made out of three sprites, they are called messages, codes and lock. The Messages Sprite The messages sprite is the sprite that changes the costumes to show messages. The costume can only be changed if 0 is pressed and when 0 is pressed it changes the variable 0 pressed to 1. If you press a number and 0 has already been pressed, it changes the costume which displays a new message. If 0 hasn t been pressed it broadcasts the number you pressed to the codes sprite. Once 0 has been pressed and then another number variable 0 pressed is set back to 0. The Code Sprite When the code sprite receives the broadcast got number it changes the variable number of codes by one then it sets the 1 st number to the number it was given in the number variable. The same with 2 nd, 3 rd and 4 th number.
14 Next it changes the code costume so it has one star if one number s been pressed then two so if you type in one number it will put in one star, if you put in two then it ll put in two and so on. Then if all the four numbers have been pressed and they re all correct then it broadcasts unlock to open the door and change the costume to the door is unlocked please come in. If however the person gets the code wrong then it changes the costume wrong code please try again broadcasts reset and waits 7.5 seconds to reset the system. The Lock Code The lock sprite deals with unlocking the door and broadcasting messages. We found out that we needed three variables they were called piface-output1, piface-output2 and piface-output3. Piface-output1 would unlock the door and set the green light on, piface-output2 would set the red light on and piface-output3 would turn the buzzer on. When the code is correct it would send a message to the lock sprite which would unlock the door and set the green light on as well as turning off the red light and making the buzzer work then waiting for two seconds then turning off. If the code is incorrect it will send a message and lock the door. Also if the person inside thinks the person on the outside is not safe
15 they can send a message and lock the door as well as turning the red light on. The correct code is stored in some variables, e.g. one variable is 3 the other is 5 the next is 7 and the last is 9. If the variables are changed then the code is changed for example if the 3 is changed to 6 then the code would be 6579.
16 The Making of the Product We started off with a few ideas. As our mentor s mother-inlaw has rheumatoid arthritis and Nina s brother is disabled we came up with an idea to help them answer the door. On the way we had some crazy ideas including a heartbeat sensor for people buried in an earthquake and a heat detector for a bath?! Eventually the six of us decided on a door answering system and decided to make the system send messages and use a code entry to unlock the door or it can be unlocked remotely from inside using a wireless numeric keypad. We met every Thursday lunch time to work on our project but we realised our 50 budget would not be enough to do everything we wanted so we had to decide. After a couple of weeks of online shopping to check prices we were ready to start programming! We divided the task up between the six of us but we didn t really get anywhere until Theo, Miles and Joseph made a breakthrough, using broadcasts, we figured out that you could make a sprite s costume or a stage change when you pressed a button. Joseph and Olivia set about taking this to the next level while Miles worked on the lock sprite and Theo and Kishan did costume designs and Nina worked on the messaging system. Miles was first to finish, presenting his working lock sprite to us. Theo and Kishan were next presenting their costumes for the scripts, Theo s
17 for Joseph s and Kishan s for Miles. Nina then did her costumes for Olivia s scripts. But we came across a problem while we were doing this. Since we were going to use two numeric keypads we needed to make sure that only the inside keypad could remotely unlock and lock the door. The answer turned out to be simple, cover the zero and other symbols so only numbers 1 to 9 are able to be pressed on the outside and use zero for the inside controls. We used a reception mini playhouse to test our system, it worked perfectly.

18 Questions for a User We put together a group of questions answered by Mr Hooper s mother-in-law. Q. Can you use the keypad with your fingers easily? A. Yes, it s OK Q. Can you use the keypad with it hanging round your neck? A. A longer ribbon would make it easier. Q. How many parcels do you get delivered every week? A. About one a week. Q. When do you need to answer the door for a parcel? A. When it comes from the Post Office. Q. Do you have any carers? A. Yes. Two regular ones and 4 casual ones. Q. Would you let them have the code to open the door?

19 A. Yes. Q. If you are preparing food or doing something else in the house, how long would it take to get to the door? A. It depends what I m doing. It can take more than 5 minutes, but usually less than 10 minutes. I have to get up from where I am and use a walking frame to get to the door, but I can only walk very slowly. Q. Please look at all the messages you can send to someone at the door. Are they OK? A. They are good. There s no need to change any of them. Q. How good are the graphics? A. Good. I love the padlock. Q. Are there any more improvements we could make? A. I would like to be able to see who is at the door. Also, I think the keypad on the outside would need to be waterproof.

20
21 Making this into a product This product would be sold to the elderly and disabled or people who find it hard going to the front door. Before this could be sold as a proper product it would have to have some changes made. We would need to screw the keypad for the outside on to the material of the outside wall of a house. The outside keypad would only be numbered 1 to 9. The outside keypad would have a water proof cover on top to protect it from the rain. The keypad that hangs around your neck would have to be numbered 0 to 9. We would make a way to change the code for opening the door to whatever the old/disabled person wants. We would also make a way to change the messages displayed. To make sure we only sell it to people with disability in their legs.
22 Improvements We Could Make We could put a flashing light outside by a window and get the person outside to go to it so the person inside could see who it is. We could use a camera and monitor as well so the person inside can see them. The lock could stay locked automatically if the person outside typed the code in wrong three times. We could also have an LED screen instead of putting a screen in the window to say the messages. We could have a thumb print scanner or a retina scanner so you can make sure they are who they say they are. We could give everyone the person knows their own code. We could make a personal alarm so if something happened to the person they would be able to tell people without using the phone. We could do a sound system so the person outside can talk to the person inside if there is no need to open the door.
NAME EET 2259 Lab 3 The Boolean Data Type
 NAME EET 2259 Lab 3 The Boolean Data Type OBJECTIVES - Understand the differences between numeric data and Boolean data. -Write programs using LabVIEW s Boolean controls and indicators, Boolean constants,
Single Door Standalone Access Control User Manual
 Single Door Standalone Access Control User Manual Reading this manual carefully before install and use the device 1. Packing List Name Quantity Remarks Keypad User manual Screw driver Rubber plug Self
Waterproof. Keypad/Reader/Controller
 Waterproof Keypad/Reader/Controller User Manual W1-C W3-C User manual 1. Packing List Name Quantity Remarks Digital Keypad-W1-C/W3-C 1 User manual 1 Screw driver 1 Rubber bungs 4 6*27mm, used for fixing
A. Monitor Settings. 1. Right-Click on the desktop. Select Properties. 2. Change color quality to highest (32bit).
.") A. Monitor Settings 1. Right-Click on the desktop. Select Properties 2. Change color quality to highest (32bit). 1 B. Hardware Installation 1. Connector Instruction Open the cover to find the cable connectors
A. Monitor Settings 1. Right-Click on the desktop. Select Properties 2. Change color quality to highest (32bit). 1 B. Hardware Installation 1. Connector Instruction Open the cover to find the cable connectors
Ding Dong, You've Got Mail! A Lab Activity for Teaching the Internet of Things
 Teaching Case Ding Dong, You've Got Mail! A Lab Activity for Teaching the Internet of Things Mark Frydenburg mfrydenberg@bentley.edu Computer Information Systems Department Bentley University Waltham,
BC Digital Keypad. User Manual
 BC2200 Digital Keypad User Manual Name Digital Keypad BC2200 User manual Screw driver Rubber bungs Self tapping screws Diode 1. Packing List Quantity Remarks 1 1 1 4 Φ6mm 28 mm, used for fixing 4 Φ4mm
SETTING UP FIBRE BROADBAND MOVING FROM BROADBAND TO FIBRE BROADBAND
 To make your life easier, we ve already set-up your Bright Box wireless router so it will connect to the internet once your broadband is ready. Simply plug it in and connect your device. If you d like
Standalone Keypad Access Control. User Manual. SS-TS2000 Size:120*80*25 mm
 Standalone Keypad Access Control User Manual SS-TS2000 Size:120*80*25 mm Please read the manual carefully before use this unit 1. Packing List Name Quantity Remarks Keypad 1 User manual 1 Screw driver
Internet and Phone in One Quick Start Guide
 Internet and Phone in One Quick Start Guide Start here! Welcome to BoB2 This guide provides easy, step-by-step instructions on settings up your new hardware and getting online. If you re just here for
D45 System. 7 touch screen handsfree internal unit. Front & side views
 D45 System Description Front & side views 10 D45 System 7 touch screen video internal unit. Complete door entry functions with alarm managements. International standard SOS pushbutton, intercom function,
User Manual. PCKeypad Wireless Keypad
 User Manual PCKeypad Wireless Keypad Description The PCKeypad is a wireless keypad with a PentaCODE transmitter built-in. It works with all of Elsema s PCR series receivers. The installer has the option
CHECK LIST 2 QUICK START 3 SAFE OPERATION & PROGRAMMING 3 HOW TO OPEN YOUR SAFE 3 CHANGING THE USER CODE 3 LOW BATTERY WARNING 4
 CATEGORY PAGE CHECK LIST 2 QUICK START 3 SAFE OPERATION & PROGRAMMING 3 HOW TO OPEN YOUR SAFE 3 CHANGING THE USER CODE 3 LOW BATTERY WARNING 4 CHANGING YOUR BATTERIES 4 OVERRIDE KEY INSTRUCTIONS 5 2015
Standalone Keypad Access Control. User Manual. Please read the manual carefully before use this unit
 Standalone Keypad Access Control User Manual Please read the manual carefully before use this unit 1. Packing List Name Quantity Remarks Keypad 1 User manual 1 Screw driver 1 Φ20mm 60mm,Special for keypad
CLEARVIEW KIT INSTALLATION GUIDE
 CLEARVIEW KIT INSTALLATION GUIDE Kit contents 1. Recorder with power supply 2. Camera Cables 3. Cameras 4. Mouse ** Display monitor and HDMI cable not included Remove recorder from the Kit and look over
CM-110SK Standalone Keypad Installation Instructions
 CM-0SK Standalone Keypad Installation Instructions. Packing List Qty Name Remarks 2 2 Keypad User manual Screwdriver Wall plugs Self-tapping screws Torx screw 0.8 x 2.4 Φ(20 mm 60 mm) 0.24 x.2 Φ (6 mm
Wireless Key fob, Key pad & Receiver Range
 Wireless Key fob, Key pad & Receiver Range 4Ch Wireless Receiver 4x Voltage Free relay outputs (NO + NC) 100m Transmission range Multiple user codes 2 Channel wireless control Clear hinge up lid 12V DC
1. Charging. 2. In-app Setup. 3. Physical Installation. 4. Features. 5. Troubleshooting
 Spotlight Cam Smart Security at Every Corner of Your Home Your new Spotlight Cam lets you extend the Ring of Security around your entire property. Now, you ll always be the first to know when someone s
Smart Security at Every Corner of Your Home
 Spotlight Cam Smart Security at Every Corner of Your Home Your new Spotlight Cam lets you extend the Ring of Security around your entire property. Now, you ll always be the first to know when someone s
Adafruit's Raspberry Pi Lesson 1. Preparing an SD Card for your Raspberry Pi
 Adafruit's Raspberry Pi Lesson 1. Preparing an SD Card for your Raspberry Pi Created by Simon Monk Last updated on 2016-12-03 03:20:15 AM UTC Guide Contents Guide Contents Overview You Will Need Downloading
Functional Skills. Entry 3 to Level 2. IT Basics Information
 Functional Skills Skills ICT Entry 3 to Level 2 YOU DO NOT NEED TO WORK THROUGH THIS. IT IS AN PACK TO TEACH YOU THE SKILLS NEEDED TO COMPLETE THE TASKS. YOU CAN USE IT WHILST WORKING THROUGH THE TASKS,
MEDICAL ALERT SETUP GUIDE
 MEDICAL ALERT SETUP GUIDE GETTING STARTED You have made a great decision to protect yourself with Medical Alert! Be sure to wear your wrist button or neck button everyday to stay protected all the time!
Free Standing Kiosk Manual v1 July 2016
 Free Standing Kiosk Manual v1 July 2016 Contents 1. What is the FSK?... 4 2. Set up... 4 3. USB Access... 5 4. Computer Access... 6 4. UPS... 8 3 Thank you for purchasing the Free Standing Kiosk The free
CV-110SPK Standalone Keypad/Prox Access Control Installation Instructions
 CV-110SPK Standalone Keypad/Prox Access Control Installation Instructions 1. Packing List Qty Name Remarks 1 1 1 2 2 1 Keypad User manual Screwdriver Wall plugs Self-tapping screws Torx screw 0.8 x 2.4
Experimental Procedure. Frequently Asked Questions (FAQ) Kit General Questions. Setting Up and Using Your Raspberry Pi Projects Kit
 Kit General Questions. Setting Up and Using Your Raspberry Pi Projects Kit") 1 of 11 9/13/2018, 2:31 PM https://www.sciencebuddies.org/science-fair-projects/project-ideas/compsci_p059/computer-science/design-your-own-video-game (http://www.sciencebuddies.org/science-fairprojects/project-ideas/compsci_p059/computer-science/design-your-own-video-game)
1 of 11 9/13/2018, 2:31 PM https://www.sciencebuddies.org/science-fair-projects/project-ideas/compsci_p059/computer-science/design-your-own-video-game (http://www.sciencebuddies.org/science-fairprojects/project-ideas/compsci_p059/computer-science/design-your-own-video-game)
QUICK START GUIDE FOR ACCESS CONTROL BOARDS. DX Series One Door TCP/IP Web Server Controller. Model: ACP-DXEL1 to ExitPushAccessAccessBoard PWR-
 QUICK START GUIDE FOR ACCESS CONTROL BOARDS DX Series One Door TCP/IP Web Server Controller Model: ACP-DXEL1 to ExitPushAccessAccessBoard PWR- Table of Contents 3 01- Introduction 4 02 - Overview 4 02.1
Manual of ET-LCD SW HAT
 ET- LCD SW HAT ET-LCD SW HAT is Board I/O that is specifically designed for connection with Board Raspberry Pi through Connector 40-PIN; this board includes LCD 16x2, SW, Buzzer, RTC DS3231 with Connector
Basic Computer and Mouse Skills Windows 10
 Basic Computer and Mouse Skills Windows 10 Hardware--is a term for the physical parts of the computer. The computer consists of four basic pieces of hardware. The Monitor The monitor displays the content
Adafruit's Raspberry Pi Lesson 1. Preparing an SD Card for your Raspberry Pi
 Adafruit's Raspberry Pi Lesson 1. Preparing an SD Card for your Raspberry Pi Created by Simon Monk Last updated on 2013-07-08 12:15:38 PM EDT Guide Contents Guide Contents Overview You Will Need Downloading
MOTOROLA Z3 DISASSEMBLY GUIDE
 Page: 1 MOTOROLA Z3 DISASSEMBLY GUIDE This guide will help you replace housing parts and get to the inner parts of your phone. I am in no way responsible for any damage occurred to your phone. If you follow
Features: (no need for QR Code)
") The Capp-Sure series brings a revolution in surveillance. Utilising a range of high-quality IP Wireless cameras, Capp-Sure provides stunning video clarity and optional Talk-Back audio over internet via
The Capp-Sure series brings a revolution in surveillance. Utilising a range of high-quality IP Wireless cameras, Capp-Sure provides stunning video clarity and optional Talk-Back audio over internet via
FAQ for KULT Basic. Connections. Settings. Calls. Apps. Media
 FAQ for KULT Basic 1. What do the Icons mean that can be found in notifications bar at the top of my screen? 2. How can I move an item on the home screen? 3. How can I switch between home screens? 4. How
LEGO BB-8 Release: LEGO BB-8. Learn how to automate a LEGO BB-8for motion, light, and sound using Crazy Circuits. Written By: Joshua
 LEGO BB-8 Learn how to automate a LEGO BB-8for motion, light, and sound using Crazy Circuits. Written By: Joshua 2018 browndoggadgets.dozuki.com/ Page 1 of 18 INTRODUCTION We absolutely LOVE the new LEGO
Copyright White Box Robotics Inc. and Frontline Robotics Inc
 Disclaimer Working with electronics and installing the plastics will require care and patience. PROPER GROUNDING PROCEDURES before handling the electronics. Touching the robot chassis (which is common
W3-H Waterproof Keypad/Reader/Controller
 W3-H Waterproof Keypad/Reader/Controller User Manual 1. Packing list Name Quantity Digital Keypad W3-H 1 User Manual 1 Screw Driver Rubber Bungs Self Tapping Screws Diode 1 4 4 1 Manager Card 2 Remark
HSY-S209 EM Metal waterproof access control system User Manual
 HSY-S209 EM Metal waterproof access control system User Manual Reading carefully before Install and use this manual 1. Product Profile The product is Contact-less inductive card Metal Password Access Controller,
WiFi Video Doorbell. User Manual
 WiFi Video Doorbell User Manual Introduction Content With Hisilicon Hi3518E processor and H.264 compression technology, this Wifi video intercom provides smooth realtime video transmission while keeps
WI-FI GARAGE DOOR CONTROLLER WITH CAMERA USER MANUAL
 WI-FI GARAGE DOOR CONTROLLER WITH CAMERA USER MANUAL Contents Introduction 4 Product Features 5 Garage Door Controller LED Indicators 6 What s Included 7 Wi-Fi Requirements 8 Mobile Device Requirements
Button Code Kit. Assembly Instructions and User Guide. Single Button Code Entry System
 Button Code Kit Single Button Code Entry System Assembly Instructions and User Guide Rev 1.0 December 2009 www.alan-parekh.com Copyright 2009 Alan Electronic Projects Inc. 1. Introduction... 4 1.1 Concept
BOOSTBYSMITH S ECU FLASHING INTERFACE (Gen II Hayabusa)
") BOOSTBYSMITH S ECU FLASHING INTERFACE (Gen II Hayabusa) Contact Information: Greg Smith www.boostbysmith.com greg@boostbysmith.com (517)743-3666 INDEX I. Hardware Included II. III. IV. ECU1.0 Basics Installation
BOOSTBYSMITH S ECU FLASHING INTERFACE (Gen II Hayabusa) Contact Information: Greg Smith www.boostbysmith.com greg@boostbysmith.com (517)743-3666 INDEX I. Hardware Included II. III. IV. ECU1.0 Basics Installation
Networking the printer
 Networking the printer General networking Networking overview A network is a collection of devices such as computers, printers, Ethernet hubs, wireless access points, and routers connected together for
Digital Keypad Introduction
 K2 Digital Keypad Introduction The K02 uses the latest microprocessor technology to operate door strikes and security systems that require a momentary (timed) or latching dry contact closure. All programming
ArdiTrack Demo Kits: Installation Guide (Rev 3 12/2014)
") ArdiTrack Demo Kits: Installation Guide (Rev 3 12/2014) Please read this guide before installing. System Diagram ( ArdiTech Demo Site Example): Product overview: 2.4G Technology with Cloud based monitoring
ArdiTrack Demo Kits: Installation Guide (Rev 3 12/2014) Please read this guide before installing. System Diagram ( ArdiTech Demo Site Example): Product overview: 2.4G Technology with Cloud based monitoring
Upgrading to the Raspberry Pi 3B or Pi 3B+ 1
 Upgrading to the Raspberry Pi 3B or Pi 3B+ 1 By Sandy McCauley April 30, 2018 Part 1: Before you commit to doing this NOTE: This is NOT a KNK USA-published procedure. Any questions should be directed to
5. LAPTOP PROCEDURES
 5. LAPTOP PROCEDURES Introduction This next section of the user guide will identify core essentials regarding your laptop turning it on, running the program, running the questionnaire, submitting the data,
When you are ready to build your computer you will have the following materials to work with.
 Copyright 2009 BOSMA Enterprises Chapter 3 Putting the Computer Together When you are ready to build your computer you will have the following materials to work with. 1. One motherboard. 2. One ribbon
STUDIO 7.0 USER MANUAL
 STUDIO 7.0 USER MANUAL 1 Table of Contents Safety Information... 3 Appearance and Key Functions... 4 Introduction... 5 Call Functions... 6 Notifications Bar... 7 Contacts... 8 Messaging... 9 Internet Browser...
Alecto Video Door System
 Alecto Video Door System 2-wire Series Installation and User Manual Digital Touch Screen 7 inch Monitor www.intelligenthomeonline.com -1- PRECAUTIONS Read this manual through before using the product.
A very quick guide to getting online
 A very quick guide to getting online Your quick guide to getting online Vodafone Power to you What s in the box? Vodafone modem Quick Start Guide Power Supply Ethernet cable (yellow) Ethernet cable (grey)
W3-M. Metal waterproof standalone access control/reader. User Manual
 W3M Metal waterproof standalone access control/reader User Manual Name Digital Keypad W3M User Manual Screw driver Rubber bungs Selftapping screws Diode 1. Packing List Quantity 1 1 1 4 4 1 Remark 6*27mm,
CV-550SPK V2 Waterproof Keypad/Reader/Controller Installation Instructions
 CV-550SPK V2 Waterproof Keypad/Reader/Controller Installation Instructions Packing List NAME MODEL/SIZE QTY Self tapping screw 0.15 x 1.06 (4mm 27 mm) Rubber plug 0.23 x 1.2 (6mm 30 mm) Star screw driver
Part 1: Understanding Windows XP Basics
 542362 Ch01.qxd 9/18/03 9:54 PM Page 1 Part 1: Understanding Windows XP Basics 1: Starting Up and Logging In 2: Logging Off and Shutting Down 3: Activating Windows 4: Enabling Fast Switching between Users
Minimizer Kiosk Instructions Pi 3 Model
 Minimizer Kiosk Instructions Pi 3 Model 1 This guide will help you set up a Minimizer Kiosk and connect it to the Internet. For assembly, make sure you have the correct tools and items. The Minimizer Kiosk
MalaRom flashing Guide
 MalaRom 1.1.0 flashing Guide Introduction This guide is ONLY valid for MalaRom 1.1.0 and ONLY for 256 Mb devices! Please make sure to read the entire guide before you begin. Also if you have flashed your
Ctdigi.com. Instruction manual. Production by S & W Technology Labs
 Ctdigi.com Instruction manual Production by S & W Technology Labs I. Install app II. Guard camera Guard camera Introduction Accessory Sensor Scenario Guard 360 Introduction - Catalog - Install app Scenario
Avadesign Technology DP-104. IP Video Door Phone. and APP - 1 -
 DP-104 IP Video Door Phone and APP - 1 - WELCOME Congratulations on purchasing the VBell DP-104 SIP IP Video Door Phone. This door phone is suitable for all your business, and home, door entry communication
Sony NEX-7 Screen Replacement
 Sony NEX-7 Screen Replacement If your camera's screen is broken or non functioning, this guide will show you how you can replace the screen. Written By: Jay Miley ifixit CC BY-NC-SA www.ifixit.com Page
SNAP, CLICK, DONE. Getting Started Guide
 SNAP, CLICK, DONE. Getting Started Guide Introducing Sateon Advance Sateon Advance offers a flexible new approach to access control, with a new range of hardware and software products. The hardware is
Programming Scratch to Control a K NEX Fairground Ride
 Programming Scratch to Control a K NEX Fairground Ride Raspberry Pi and K NEX System K NEX Model PiFace Motor Raspberry Pi Speaker LED Lights Switch Computer Control Parts Scratch Raspberry Pi PiFace How
Meet the Cast. The Cosmic Defenders: Gobo, Fabu, and Pele The Cosmic Defenders are transdimensional
 Meet the Cast Mitch A computer science student who loves to make cool programs, he s passionate about movies and art, too! Mitch is an all-around good guy. The Cosmic Defenders: Gobo, Fabu, and Pele The
NEO 4.5. User Manual
 1 NEO 4.5 User Manual Table of Contents Safety Information... 3 Appearance and Key Function... 4 Introduction... 5 Call Functions... 6 Contacts... 7 Messaging... 8 Internet Browser... 9 Bluetooth & Wi-Fi...
Standalone combined PIR camera with RF transmitter
 AlertCam Manual_Layout 5 28/02/2013 16:57 Page 1 Standalone combined PIR camera with RF transmitter AlertCam Manual_Layout 5 28/02/2013 16:57 Page 2 IMPORTANT IF IN ANY DOUBT ABOUT THE INSTALLATION OF
VIS-3200 / VIS-3201 User Manual
 2.4GHz Indoor Black Wireless Exit Button Receiver Keypad / Reader Access Control 500 Users Range of 50 Feet Delay and On/Off Toggle Mode Battery Operated Standalone No Software 1 VIS-3200 / VIS-3201 User
TrustOne Global TSG-550
 TrustOne Global TSG-550 Setting-up the device Configuring the device Open the box that the TSG-550 came in and inside the box you should have: 1. The TSG-550 2. A wall mount bracket 3. Various wires with
How to Include Your Home Control Door Lock
 How to Include Your Home Control Door Lock For Bosch Security Dealers Only Adding your Home Control Door Lock This section contains information on how to include Door Locks to your Home Control system.
9 Output Devices: Buzzers
 9 Output Devices: Buzzers Project In this project, you will learn how to connect and control LEDs (Light Emitting Diode) and a buzzer with the Raspberry Pi. Components In addition to your Raspberry Pi,
ClearClick Video2Digital Converter (Deluxe Edition) Quick Start Guide & User s Manual
 Quick Start Guide & User s Manual") ClearClick Video2Digital Converter (Deluxe Edition) Quick Start Guide & User s Manual Full 1-Year Warranty + FREE USA-Based Tech Support If you have any issue or question regarding this product, contacting
ClearClick Video2Digital Converter (Deluxe Edition) Quick Start Guide & User s Manual Full 1-Year Warranty + FREE USA-Based Tech Support If you have any issue or question regarding this product, contacting
Your . A setup guide. Last updated March 7, Kingsford Avenue, Glasgow G44 3EU
 fuzzylime WE KNOW DESIGN WEB DESIGN AND CONTENT MANAGEMENT 19 Kingsford Avenue, Glasgow G44 3EU 0141 416 1040 hello@fuzzylime.co.uk www.fuzzylime.co.uk Your email A setup guide Last updated March 7, 2017
SVT-WIFI Video Intercom System C
 SVT-WIFI Video Intercom System C User Manual Please read this user manual prior to installing the system, and keep it well for future use. CONTENTS 1. Parts and Functions... 1 2. Terminal Descriptions...
Modem Installation and Networking Instructions
 Modem Installation and Networking Instructions P/N 36870 Rev F Introduction The following instructions cover connecting a phone line to an incoming phone source, installing a modem, and setting up a network
Living. Keyfree Connected Smart Lock Manual. smart. The smarter way to protect your home
 smart Living Keyfree Connected Smart Lock Manual Please read the intructions before fitting and using the Keyfree Connected lock. The functions and design of this product can be changed without prior notice
Note. The above image and many others are courtesy of - this is a wonderful resource for designing circuits.
 Robotics and Electronics Unit 2. Arduino Objectives. Students will understand the basic characteristics of an Arduino Uno microcontroller. understand the basic structure of an Arduino program. know how
CPU fan has a power connector which needs to be connected to CPU fan power socket on your motherboard as shown on the image above.
 The first thing you should do is unpack your ATX case. Take off the cover of your case so that you can access the inside. Place the case on a desk so that you are looking down towards the open case. Your
Quick Start Guide. Start here!
 Quick Start Guide Start here! Welcome to BoB Lite This guide provides easy, step-by-step instructions on settings up your new hardware and getting online. If you re just here for a refresher course on
Introduction to Scratch Programming v1.4 (Second Ed) Lesson 6 Calculator
 Lesson 6 Calculator") Lesson What you will learn: how to perform simple calculations using Scratch how to use variables how to develop a design how to use the else if function how to create animated buttons Contents Exercise
Lesson What you will learn: how to perform simple calculations using Scratch how to use variables how to develop a design how to use the else if function how to create animated buttons Contents Exercise
WiFi Wireless Video Door Phone. User Manual
 WiFi Wireless Video Door Phone User Manual Introduction With Hisilicon Hi3518E hardware platform, this WIFI/IP video intercom doorbell uses H.264 image compression. Its picture transmission data is small
RETROPIE INSTALLATION GUIDE
 RETROPIE INSTALLATION GUIDE CONTENTS THE FOLLOWING GUIDE WILL COVER THE INSTALLATION, SETUP AND CONFIGURATION OF THE RASPBERRY PI, RASPBIAN OS AND RETROPIE Author: http://rpiarcadebuild.wordpress.com/
imac Intel 20" EMC 2266 Teardown
 Written By: David Patierno ifixit CC BY-NC-SA www.ifixit.com Page 1 of 19 INTRODUCTION We picked up the new imac 20" from our local Apple store on March 3rd. TOOLS: Phillips #1 Screwdriver (1) Heavy-Duty
Eanes ios5 Upgrade Guide
 Eanes ios5 Upgrade Guide These instructions are intended for people to follow on their home machine. District machines have deep freeze and older versions of itunes which could complicate the process.
U-FLASH Setup Guide U-FLASH.
 U-FLASH Setup Guide Thank you for purchasing the U-FLASH. This guide will assist you in the setup of the system. You can call for FREE technical support to get help anytime at 757-258-0910. Please note,
Chapter 3. Using the System CHANGING CHANNELS USING THE MENUS OPENING THE MENUS CLOSING THE MENUS MENU OPTIONS
 CHANGING CHANNELS There are three basic ways to change channels while watching a program: Press the remote control UP or DOWN ARROW button to get to the desired channel. Use the remote control number pad
WELCOME. For customer support or any inquiries, please visit our web site at or contact us at
 WELCOME Congratulations on purchasing the GBF Smart Four Wire Intercom System. Our factory engineers were the first to enable multiple security cameras being monitored through a smart mobile device and
Security Camera. by maartenbrysbaert. The SeCam is a security camera that allows you to: - Livestream. - Rotate your camera 180 degrees
 instructables Security Camera by maartenbrysbaert The SeCam is a security camera that allows you to: - Livestream - Rotate your camera 180 degrees - Capture and record - View captured photos and recorded
SP LOCKER USER MANUAL. v1.0
 SP LOCKER USER MANUAL v1.0 Table of Contents 1 Introduction to the SP Locker Security Software... 2 2 Before You Get Started... 2 3 Features... 2 4 Public and Secured Partition... 3 5 How to use SP Locker...
Magnetic base Indicator light Microphone Camera lens Micro SD card slot Infrared light Front Side Pivot connector Built-in speakers
 Niro USER MANUAL Contents Introduction 4 Product Features 5 Niro LED Indicators 6 What s Included 7 Wi-Fi Requirements 8 Mobile Device Requirements 8 Garage Door Opener Requirements 8 Download the Momentum
How to install a Crucial SSD in your computer
 How to install a Crucial SSD in your computer If you re a first-time installer, there s no need to fear the process is easy and straightforward. It ll take some time, but your computer will be radically
Studio 5.5. User Manual
 Studio 5.5 User Manual 1 Table of Contents Safety Information... 3 Appearance and Key Function... 4 Introduction... 5 Call Functions... 6 Contacts... 7 Messaging... 8 Internet Browser... 9 Bluetooth...
Dash Jr. User Manual
 Dash Jr. User Manual 1 Table of Contents Safety Information...4 Appearance and Key Function...6 Introduction...8 Call Functions...9 Contacts... 11 Messaging... 12 Internet Browser... 13 Bluetooth... 14
How to set up an Amazon Work Profile for Windows 8
 How to set up an Amazon Work Profile for Windows 8 Setting up a new profile for Windows 8 requires you to navigate some screens that may lead you to create the wrong type of account. By following this
Tablet PC User Manual
 Tablet PC User Manual Please read all instructions carefully before use to get the most out of your Time2Touch Tablet PC. The design and features are subject to change without notice. Contents Important
imac Intel 21.5" EMC 2389 Stand Replacement
 imac Intel 21.5" EMC 2389 Stand Replacement Replace a broken or cosmetically unappealing stand on the imac 2389 21.5 Written By: Aaron Cooke ifixit CC BY-NC-SA www.ifixit.com Page 1 of 30 INTRODUCTION
CYBERVIEW DVR Troubleshooting Guide
 CYBERVIEW DVR Troubleshooting Guide The DVR will not power up. Symptoms (Power) The DVR is powered up with a message No signal displayed on the screen. The DVR is only showing blue squares where the camera
M A C 3 Wind Speed Alarm & Controller
 M A C 3 Wind Speed Alarm & Controller Installation Instructions Thank you for purchasing the MAC3 wind speed alarm and controller. This manual is designed to lead you through a step-by-step process to
Spam. Time: five years from now Place: England
 Spam Time: five years from now Place: England Oh no! said Joe Turner. When I go on the computer, all I get is spam email that nobody wants. It s all from people who are trying to sell you things. Email
Yealink W60 IP DECT phone. A guide to using your phone with Cloud Voice
 Yealink W60 IP DECT phone A guide to using your phone with Cloud Voice 2 What can this guide help you with? Make sure you can successfully call emergency services 3 1. Check out everything in the box What
FUYLTower Software Upgrade - Instructions
 Overview This instructional is intended for those wishing to upgrade their FUYL Tower software. This procedure may be required from time to time when significant features become available in a new software
The GENIE Light Kit is ideal for introducing simple lighting projects, such as an electronic die, a wearable badge or a night-time warning system.
 Introduction 1 Welcome to the GENIE microcontroller system! The GENIE Light Kit is ideal for introducing simple lighting projects, such as an electronic die, a wearable badge or a night-time warning system.
BehringerMods.com. Instructions for modification of Behringer SRC analog inputs and outputs
 BehringerMods.com Instructions for modification of Behringer SRC analog inputs and outputs The following instructions will cover the details of fully modifying a unit with analog output and analog input
Wireless Video/Audio Intercoms
 Wireless Video/Audio Intercoms User Set-Up Guide and Instructions BEC Integrated Solutions Williamsville, New York 716-689-0871 1 Table of Contents: B-WSP1.Page 3 B-WSP2 Page 8 B-WC2..Page 13 B-WI2 Page
Operating Instructions KEYPAD. Compatible WIRELESS ACCESS CONTROL
 Operating Instructions KEYPAD Compatible WIRELESS ACCESS CONTROL Contents Technical specifications page 1 Approvals page 1 Changing the Master code page 2 Adding a User code page 3 Deleting a User code
Smart Security at Every Corner of Your Home
 Spotlight Cam Wired Smart Security at Every Corner of Your Home Your new Spotlight Cam lets you extend the Ring of Security around your entire property. Now, you ll always be the first to know when someone