USER MANUAL. Taos TOUCH of 40
|
|
|
- Carol Strickland
- 5 years ago
- Views:
Transcription

1 USER MANUAL 1 of 40
2 Jofemar S.A. Marcilla Road, Km Peralta (Navarra) SPAIN T F MNP143M01ENV01 Date: 2018/07/24 Rev of 40
3 TABLE OF CONTENTS 1. TECHNICAL SPECIFICATIONS...4 DESCRIPTION OF COMPONENTS...4 FRONT OF THE MACHINE...6 INTERIOR OF THE MACHINE...7 BACK OF THE MACHINE VOLUME AND WEIGHT...9 CONFIGURATIONS ELECTRICAL AND ELECTRONIC SPECIFICATIONS ELECTRICAL DRAWING BLOCK DIAGRAM INSTALLATION AND START UP INSTALLATION FASTENING THE MACHINE TO OTHER MACHINES START UP DISPLAY MODULE CONNECTIONS OPENING AND CLOSING THE DOOR CHANGING THE PRINT ROLL PAPER JAMS USER INTERFACE SOFTWARE PRODUCT SALES MACHINE PROGRAMMING PROGRAMMING MENU PROGRAMMING EXAMPLES CONNECTION OF VISION MACHINES USB EXTERNAL DRIVE WITH APPLICATION DATA APPLICATION FOR GENERATE A CUSTOM INTERFACE CONTROL CARD AND UPDATING NOTES MNP143M01ENV01 Date: 2018/07/24 Rev of 40


4 1. Technical specifications The vending payment module with display includes various payment solutions and a touchscreen graphical interface to purchase products available on slave machines connected to it. Simple and intuitive interface for purchasing products through a 10 touch screen Simultaneous purchasing of various products with shopping cart functionality View and detailed description of products Payment with coins, banknotes and RFID media Connection and configuration of up to four VISION slave machines Classification of products by sections Sales ticket printing Active heat dissipation Network Ethernet connection J Suite integration Description of components SECO SBC A62 Single Block Computer which parses the video displayed on the screen and manages the operations carried out on the machine. In addition, it controls some peripherals such as printer or touch panel. Figure 1 Control card Module which handles communications from connected slave machines and the SBC. Printer Sales ticket printing module. Uses 80 mm thermal printing paper. Figure 2 Touchscreen Integrated 10 touchscreen connected to the system with digital video output. MNP143M01ENV01 Date: 2018/07/24 Rev of 40


5 Coin slot Allows the machine to accept coins. Coin selector + 5 ways One way by hopper and the fifth for introduce coins in moneybox. Vault To store the accepted coins. Banknote reader Validator and accepted banknote stacker. Includes LED lighting with status information at banknote entry. Hoppers Up to four programmable hoppers for coin returns. RFID reader Identifies users through their card, which is detected by the reader without any physical contact between the two. It is only necessary to bring the card close to the reader. Figure 3 Figure 4 Figure 5 Bank card reader The machine can house an Ingenico, Verifone or Nayax card reader for bank card payments. Lock The lock is located on the door of the machine. It has a security system for opening and closing with a key. Open door microswitch The tool is fitted with a door open detection system connected to the control module. MNP143M01ENV01 Date: 2018/07/24 Rev of 40
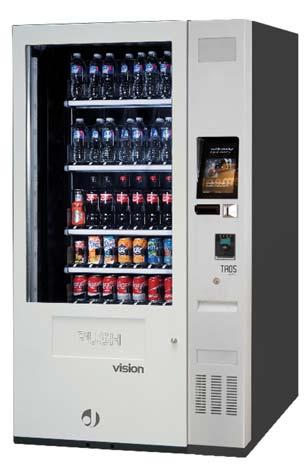
6 Front of the machine Front example for machine configuration with banknote reader, card reader and printer. Ticket output Card reader (Verifone card reader configuration) Pinpad (Verifone card reader configuration) Touchscreen with user interface Banknote and coin input (Banknote module BT11 configuration) Contactless card reader Verifone (Verifone card reader configuration) Lock Handgrip to ease module opening Coins return Figure 6 MNP143M01ENV01 Date: 2018/07/24 Rev of 40


 and")
7 Interior of the machine Power box: fuse and power switch DEX connections Connector 485 peripherals / slaves Connector for software updates with EasyFlash. Programming button Coin selector and banknote reader Display module connections: USB Touch and USB data memory RJ45 machine Ethernet connection DVI Digital video output Hoppers (4) and vault MNP143M01ENV01 Date: 2018/07/24 Rev of 40
 Power cable to connect the machine to the mains Ethernet network connection for the module to connect to the")
8 Back of the machine The rear view of the module shows the fan which exhausts the heat generated inside the machine and several connectors including: RJ45 connectors connecting the slave machines to the module, one connector for up to two slaves (see the connections diagram below) Power cable to connect the machine to the mains Ethernet network connection for the module to connect to the Internet through a gateway or external 3G router. Fan Slave machines connections Power supply cable Ethernet MNP143M01ENV01 Date: 2018/07/24 Rev of 40

9 2. Volume and weight Dimensions Height (H) Width (W) Depth (F) Weight Vending payment module with display 71,85 in 1825 mm 9,76 in 248 mm 36,85 in 936 mm 187,39 lbs 85 kg MNP143M01ENV01 Date: 2018/07/24 Rev of 40


10 Configurations The TAOS Touch 10 module is extensively configurable. Below are some examples of machine configurations: Configuration Example Bank card Printer reader Banknote reader Hoppers J Link 1 TG2480H VERIFONE NV11 NV200 NO 2 TG2480H VERIFONE BT11 NO Between 0 and 4 3 TG2480H INGENICO NV11 NV200 NO optional hoppers 4 TG2480H INGENICO BT11 NO with T15 coin 5 TG2480H NAYAX BT11 NV11 NV200 NO selector 6 NO NO BT11 NV11 NV200 NO 7 TG2480H NO BT11 NV11 NV200 YES MNP143M01ENV01 Date: 2018/07/24 Rev of 40
11 3. Electrical and electronic specifications Electrical drawing The following figure shows the drawing MNP143M01ENV01 Date: 2018/07/24 Rev of 40
12 Block diagram The following figure shows the drawing MNP143M01ENV01 Date: 2018/07/24 Rev of 40

13 4. Installation and start up Installation Do not install the machine near active heat sources (heaters, radiators, etc.). Avoid obstructing the grilles located at the back of the cabinet to ensure air circulation inside. Leave a distance of at least 10 centimetres between the back of machine and the wall or other items. IMPORTANT: It is important that the machine be properly placed to prevent movements that could damage machine components. Fastening the machine to other machines To fasten the TAOS Touch 10 module to a Slave VISION machine, follow the steps detailed below, in the order indicated: 1. Screw the bracket (Ref. Code ) and the support (Ref. Code ) to the TAOS Touch 10 module Screw the bracket (Ref. Code ) with three 3.9x6.5 screws (Ref. Code ) to the slave machine cabinet MNP143M01ENV01 Date: 2018/07/24 Rev of 40
 and 4 washers (Ref. Code 1331002) to the Module Nuts and washers 4.")
 with spring washer (Ref. Code 1331017) and flat washer (Ref.")
14 Attach the support (Ref. Code ) with 4 autoblock nuts (Ref. Code ) and 4 washers (Ref. Code ) to the Module Nuts and washers 4. At the bottom of the machine, insert 2 screws (Ref. Code ) with spring washer (Ref. Code ) and flat washer (Ref. Code ) MNP143M01ENV01 Date: 2018/07/24 Rev of 40

 Screws Autoblock nuts The threaded")

15 Screws, grover washers flat washers 5. Attach Module to Vision Es Plus cabinet with 2 screws (Ref. Code ) Screws Autoblock nuts The threaded portion of the screw should not protrude more than 3 mm from the nut, as the cabinet could be damaged. MNP143M01ENV01 Date: 2018/07/24 Rev of 40

 Data USB (black) HDMI (not used in LVDS version) MNP143M01ENV01 Date: 2018/07/24")
16 Start up We recommend consulting the manuals of the various peripherals before starting up machine. To start the machine up, press the main switch which is located on the power support inside the machine. Display module connections A detail image is shown below with display module connections: USB Touch GND RJ45 Ethernet USB Touch (grey) Data USB (black) HDMI (not used in LVDS version) MNP143M01ENV01 Date: 2018/07/24 Rev of 40

17 IMPORTANT: Do not open the display module. It contains electronic components like the SBC, the display controller and diverse wiring that could be seriously damaged if it s manipulated. External connections should be manipulated only by technical service. Data USB should be connected or disconnected with the display module off. Opening and closing the door The machine is fitted with a lock which prevents it from being opened without a key. To open, turn the key first, and then pull back gently. Changing the print roll To replace the print roll follow these steps: 1. Disconnect the printer power supply Figure 7 2. Remove the spent roll (if there is one) and insert the new roll on the paper shaft. MNP143M01ENV01 Date: 2018/07/24 Rev of 40


18 3. Connect the printer power supply Figure 8 Figure 9 4. Feed the paper into the printer until the printer roller can catch it Figure Check that a piece of paper comes out of the exit slot MNP143M01ENV01 Date: 2018/07/24 Rev of 40

19 Figure 11 At the end of step 5, the printer roll will have been replaced correctly. Paper jams The printer may jam if: the quality of printing paper is not good enough and it slips on the input roller it is the end of the roll and the last section of the paper is too curled and does not move forward the exit slot is clogged or improperly mounted IMPORTANT: We recommend using 80 mm thermal printing paper and change the print roll before its finished In the event of a jam, do not to force the printer or pull the paper sharply. To unjam the printer and return it to normal operation follow these steps: Access to the interior of the machine and check whether the paper is jammed by gently lifting the paper guide, as shown in the figure: MNP143M01ENV01 Date: 2018/07/24 Rev of 40
 putting it in a horizontal position MNP143M01ENV01 Date:")
20 Figure Disconnect the printer power supply Figure Lift paper roller plate (green) putting it in a horizontal position MNP143M01ENV01 Date: 2018/07/24 Rev of 40


21 Figure Roll the paper gently to remove the jammed piece. After removing it, check that the last paper cut is straight. If it is not, cut the end of the paper so that when you insert the paper it is rolled in evenly Figure Lower the roller plate (raised in step 3) and reconnect the power supply (disconnected in step 2). Now, gently insert the end of the paper in the printer inlet. If you manually thread the paper in 1 or 2 centimetres, the printer will detect it and pull it in automatically. MNP143M01ENV01 Date: 2018/07/24 Rev of 40

22 Figure The printer will collect a piece of paper and cut it. The printer will again print tickets normally after this operation. MNP143M01ENV01 Date: 2018/07/24 Rev of 40


23 5. User interface software Product sales The module features allow customers to purchase of several different products at once, with a maximum quantity of 5 units and/or 5 products, and also to choose the preferred payment method if it s not unique. Example of purchase To make a purchase, first, look at the standby screen on the display. In this mode you can see several things: Date and time Temperature of slave machines in real time Selected interface language Standby mode video Pressing the screen once switches the module from standby mode to sales mode. Figure 17 In sales mode, there is a classification of available products by sections and other elements such as: Temperature in slaves, available credit and total price of current sale Product classification sections according to categories Selected language Escape button, numeric keypad, shopping cart and checkout (confirm current purchase) Figure 18 MNP143M01ENV01 Date: 2018/07/24 Rev of 40


24 When you press a classifier it opens and shows the products contained in it. Each product key has: A thumbnail of the product and price If the button is transparent, the product is not available Press on the picture to get detailed product information Figure 19 The detailed product information includes: An enlarged picture of the product A detailed description of the selected product In the example in the figure, there is additional information such as nutritional information Price and purchase button Figure 20 MNP143M01ENV01 Date: 2018/07/24 Rev of 40
 Remove unwanted products (Trash icon) Check the number of selected items and the total price Abandon purchase (X button) Continue with the purchase (Checkout) Figure 21 When you")

25 Once the desired product or products are chosen, press Checkout to select the desired quantity of each selection. On this screen, you can: Choose the desired number of each product (+) ( ) (Max. 5 per checkout) Remove unwanted products (Trash icon) Check the number of selected items and the total price Abandon purchase (X button) Continue with the purchase (Checkout) Figure 21 When you continue with the purchase, a screen appears where you can choose the payment method. Here you can choose from among available payment methods. The machine will charge you cash or via a card, depending on your selection. Choose the payment method and press to finish: Payment in cash The next screen is displayed where coins are accepted as payment. Payment with card User is requested to follow the indications of the integrated card payment module. Note: this option will only appear if there are more than one payment method. Figure 22 MNP143M01ENV01 Date: 2018/07/24 Rev of 40


26 In cash payment method there are two fields at the top of the screen showing credit inserted and total amount to be paid. Underneath, the machine tells the buyer the coins and banknotes which are enabled at this time. The machine will not accept coins or banknotes which are not marked as enabled in this screen. Once the amount is paid, the machine will send the order to deliver the requested products reporting on dispensing progress at all times. The slave machine responsible for dispensing the product from the relevant channel will be marked in green, at the top of the screen, when your product is being dispensed. Figure 23 Once all the products on the list have been dispensed, the machine will conclude the purchase transaction. Figure Machine programming Programming menu The payment module has a programming mode with several menus which classify the various configuration options. To access this operating mode, you have to open the machine and press the programming button. You can find its location in figure in the Interior of the machine section of this manual. Following are details about the different configuration options offered by the module, classified as they appear on the machine. To browse through the different menus and options, use the module touch interface. MNP143M01ENV01 Date: 2018/07/24 Rev of 40
27 Important: Access to options should be reserved to technical personnel as an incorrect setting could cause operating problems working or even damage the machine. To access these options, it is important to be aware that you should only access the operations for the appropriate job in each case: operation, configuration, technical servicing, etc. Operator menu Operator menu options: Money audits Audits of sales performed by the machine in the relevant monetary unit (e.g., euro). Partial audits reset Audits per product Audits of sales made, classified from the settings configured on the machine Machine audits Audits of sales classified by types. It includes lost sales due unavailability of product or change Product code View and edit the product codes assigned to the different selections previously programmed into the machine Machine code See the module ID code Sales menu Sales menu options: Price programming Set or display the prices configured in the module for the products available, both for sales with money and with cards Credit policies Free or normal sales mode, enabling recovery and maximum return value Product blocking Blocking/unblocking machine with remote control, individual selections or all selections Machine menu Machine menu options: Manual operation menu Movement of machine mechanical parts using controls that allow you to do it manually: extractors, elevator, product checker and phototransistors Fault review in slave machines Check the condition of slave machines connected to the module to detect possible faults. Reset selected slave machine faults Configuration menu Configuration menu options: Link menu Set up the list of channels on slave machines and the module selections MNP143M01ENV01 Date: 2018/07/24 Rev of 40
28 Motor voltage View or set the voltage supplied to the product dispensing motors via the machine control module Post dispensing setting time Set it post dispensing setting time in seconds. Elevator waiting time Se elevator waiting time in seconds Interior lighting Enable or disable interior lighting in connected slave machine Schedule interior lighting on/off times Temperature options Temperature monitoring management on slave machines. Temperature expiry management Combination programming Configure the sale of several products with a single selection Hot and cold products Temperature management for hot or cold products according to specified times Date expiry Set expiry date per selection Peripherals menu Peripherals menu options: XH4 options menu Hopper management: state, coin loading, etc. Coin or token programming Banknote reader options menu Banknote reader state and programming Screen state and options Settings menu Settings menu options: Setting the date and time Change system time and date Beep programming Setting the beep of the machine by pressing on the touch panel Currency programming Monetary unit used in the module configuration Language selection On screen language selection settings MNP143M01ENV01 Date: 2018/07/24 Rev of 40

29 Programming examples All the programming options of the module are executed the same way, always using the touch interface of the display. The previous point shows how to access this mode. Example 1: Dispensing channels linking While the machine is configured, one of the sure things that will do is program the link between selections and channels of the slave machines. To do that, from the programming mode, select the links menu. Then will appear a selection box on which could choose the selection to program. When the selection is chosen, then select the channels to assign to that selection. It s possible to add zero or more channels to a selection. Figure 25 Programming mode, access to configuration menu, linking menu button Inside linking menu, we can choose which links between selections and channels want to do. To program each link, first step is mark the selection which we want to configure. Once is selected, select the channel or channels from the slave machines which want to be linked to. Figure 26 Applying a link between selection 011 and channel 111 Selection and channel can be changed by touching directly on the text box, then will appear a keyboard to insert the appropriate number easily. MNP143M01ENV01 Date: 2018/07/24 Rev of 40

30 Motors voltage The speed and the mode the motors dispense the products could be changed as we like. To do that, access to programming mode, configuration menu, motors voltage button. Figure 27 Programming mode, configuration menu, motors voltage button Once inside motors voltage submenu, two different parameters may be selected for each motor: voltage applied and function mode. Voltage must be a number between 0 and 9 (both included) and it will manage the dispensing power and speed. Calibrate it considering the size of the product to dispense. Mode: continuous or discontinuous. It will change the way the motor runs. If discontinuous mode is enabled the motor will simulate a step by step motor. Figure 28 Motors voltage configuration MNP143M01ENV01 Date: 2018/07/24 Rev of 40
 price, touch the text box that you")

31 Prices programming Prices programming is accessible from programming mode, sales menu, prices programming. Figure 29 Prices programming To configure a cash or card (if available) price, touch the text box that you want to edit and the keyboard to insert data will appear. Then, introduce the price wanted for current selection and touch Accept. Figure 30 Keyboard for data insert MNP143M01ENV01 Date: 2018/07/24 Rev of 40
32 Connection of VISION machines You can connect up to four slave machines and manage all their products and selections from the TAOS 10 module. The drawing below indicates how they should be connected with one another. Figure 31 Examples of connection module + slaves USB external drive with application data The module includes a USB memory stick with customizable user interface information connected to the USB port on the SBC. Customizable elements Some of the main customizable elements are: Categories and products configuration: images, descriptions, titles, etc. Wait mode Stand by: playlists of one or more videos sortable and classifiable by languages Customizable texts: the messages which compose the sale interface are customizable by languages Interface languages: one or more configurable languages available for client Purchase ticket: with corporative logotype printing, standard template for purchase ticket with text styles configuration and another parameter. Boot image: customize the image shown when the machine is starting Coins and notes images: could be both auto generated depending on currency configuration and customized using specific images Can generate a custom interface using a simple tool and for who have basic technical knowledge make more complex and detailed customizations. MNP143M01ENV01 Date: 2018/07/24 Rev of 40
33 Application for generate a custom interface There are two ways to edit the application data of the module: Editing files manually using a text editor and copying to the correct folder (indicated after) each image and/or resource you want to show at the interface. Using an application which you could request to create a simple interface, which you will be able to edit after and add new resources and customizations. Note: It s highly recommended to do a backup before editing data stored in the USB memory. Before editing a file manually, be sure you have enough technical knowledge to do it. File and folder structure and manual edition Here is an example of a list of the folders and files contained in an USB memory of the module and its explanation: MNP143M01ENV01 Date: 2018/07/24 Rev of 40

34 categories it s a folder to contain all the category images to show at the interface. All those images should be.png files with 128x128px resolution (preferable with transparency). config jdb.xml database file that includes products and categories specification. playlists.xml information about where are located the videos to show at wait mode and which is its name. pursachereceipt.xsl for customization of the purchase ticket, to add logo, company info, etc. boot.png boot image by default. Could be changed using the same format and size. idlescreen It contains the videos (mp4 extension) which are shown in wait mode. Recommended resolution: 1280x800px. Figure 32 products stores specs, descriptions, images and all information about products. translation This folder contains information about different languages available to show the user interface and it s on and off icons (language enabled or disabled). coins and notes Two folders that contains, as default values, the coins and notes icons of the monetary unit which are configured in the module. These icons can be modified to show customized icons, but it s necessary hold the same size of the default icons to avoid format issues. To get more technical information about module XML, images and folders editing contact with Jofemar Technical Support. MNP143M01ENV01 Date: 2018/07/24 Rev of 40
 Coins ISO Code 4217: 978 (EUR) N Figure 33 This graphics can be customized creating, both inside coins and notes folders, another folder named like the ISO code that you want")
35 Coins and notes images customization The module auto generates its own coins and notes graphics using both the currency code configured at the machine and its values. ISO Code 4217: 978 (EUR) Coins ISO Code 4217: 978 (EUR) N Figure 33 This graphics can be customized creating, both inside coins and notes folders, another folder named like the ISO code that you want to customize. ISO 4217 codes can be consulted at or at the ISO 4217 tables. Coins: graphics must be copied in png format with names: 0.png, 1.png, 2.png Depending on coin code that corresponds to the graph you want to customize. Example: 5c coin corresponds to code 0, its image must be saved at coins/978/ with the name 0.png. Recommended coin graphic size: 96x96 píxels. Notes: graphics must be copied in png format with names: 0.png, 1.png, 2.png Depending on note code that corresponds to the graph you want to customize. Example: 5 note corresponds to code 0, its image must be saved at notes/978/ with the name 0.png. Recommended note graphic size: 111x59 píxels. Data generation software This software eases the generation of a valid configuration file for the module. The software consists in a zip package with: An Excel file GENJDB.xlsm with macros and several data sheets A folder named resources with two applications and both configuration files that will not be executed or edited MNP143M01ENV01 Date: 2018/07/24 Rev of 40

36 To use it is necessary to extract de ZIP content to the TAOS USB stick with read, write and execution rights to ensure complete functionality. Once the content is extracted, open the Excel file GENJDB.xlsm. Its aspect should be like: Figure 34 In the main sheet appears: Up left zone: software version and language selection (this application language, no data generated language or configuration file language) Up right zone: machine model to apply this configuration. It must be TAOS Touch 10 Center zone: instructions for application use Down zone: buttons for image download and database generation of products and categories, besides several configurable parameters like data charge language Note: Parameters which value is grey shadowed shows that it is recommended configuration. These parameters will come always configured according the application and machine model so do not change it unless you have enough technical skills. Data insert: categories and products In Categories and Products sheets exist some preconfigured columns to fill following this field descriptions: Categories: first step, to define which categories will be shown in the module interface once it s configured MNP143M01ENV01 Date: 2018/07/24 Rev of 40
37 o ID: unique number for each category o Description: name for show at the interface o Logotype: representative icon type image for the category (recommended size 128x128 pixels) Products: product data which will be available in the module o ID: number that will be unique for each product (see note*) o Name: name of the product o Description: text content that will appear at it s detailed description o Categories: type here the category name, previously typed at Categories, which de product belongs to o List image: imagen for showing at main products catalogue (180x180 pixels) o Full image: imagen for showing at detailed description (400x400 píxels) o Specs image: image for showing below on detailed view with useful information for clients (670x350 píxeles) Note*: The product codes programmed in the machine must match with products ID specified at the software. For example, if an snack has been programmed with code 114, we must configure the same number as product ID. Downloading images from URL and transparency It s possible, if is needed, to apply an image downloaded from Internet for any else category or product image type. Besides, an enable transparency option could be enabled to apply a transparent background that will improve the final result (the final image must be checked previously). The image characteristics and URLs must meet the next points: Format / Extension: PNG or JPG Respect the image resolutions indicated at previous points for each image type URLs used to download images must be: FTP (ftp://...), HTTP ( or HTTPS ( Enable transparency must be used when the image resource to download have a uniform background color Execution button and result After entering the information relating to products, categories and corresponding image downloads (if needed), select Main sheet. In this sheet, check that language selected for data loading is the language desired and: If image download is included: first click at Download images button and then click the jdb.xml generation button. If image download is not included: do not click on image download, only click on generate jdb.xml. MNP143M01ENV01 Date: 2018/07/24 Rev of 40


38 This is the confirmation of images downloaded message that will be shown when the operation ends. After clicking this button, a folder called products and another called categories with your images downloaded could be found. Figure 35 Without altering the information generated by download button (only click Accept at de dialog box), click at generate jdb.xml to generate de database that corresponds to the entered information. A this point a description of products and other contents will be generated and stored at the appropriate folder in the USB stick. Note: Its recommended to do a backup of the USB memory stick before copying generated files. Figura 36 It s possible that the operating system requests to confirm files overwriting. In that case we must confirm the overwrite of all files affected by this operation. Control card and updating The control card has a specific connector to update its software with an EasyFlash device. To perform an update operation one of the following components is necessary: an EasyFlash device, the software version for the updated card and the relevant connection harness. Technical expertise and EasyFlash documentation are also necessary. a PC with Jofemar Flash recorder software installed and the update package of the relevant control card. In addition, you have to connect the PC and TAOS module using a serial communications cable. MNP143M01ENV01 Date: 2018/07/24 Rev of 40
39 7. Notes MNP143M01ENV01 Date: 2018/07/24 Rev of 40
40 Jofemar S.A. Reserves the right to introduce improvements in this model arising from its continuous research without prior notice MNP143M01ENV01 Date: 2018/07/24 Rev of 40
Jofemar S.A. (31350 Peralta (Navarra, Spain)) Tel Fax
) Tel Fax") Jofemar Jofemar S.A. (31350 Peralta (Navarra, Spain)) Tel. 34-948-751-212 Fax 34-948-750-143 Code: MNP38V03GBV00 Date: June 2001 Page 1 of 29 Table of Contents 1. DESCRIPTION OF THE MACHINE.... 3 1.1 -
Jofemar Jofemar S.A. (31350 Peralta (Navarra, Spain)) Tel. 34-948-751-212 Fax 34-948-750-143 Code: MNP38V03GBV00 Date: June 2001 Page 1 of 29 Table of Contents 1. DESCRIPTION OF THE MACHINE.... 3 1.1 -
ImageScan Pro 800ix Series High-Speed ADF Scanner. Installation and Setup Guide. Installation and Setup Guide
 ImageScan Pro 800ix Series High-Speed ADF Scanner Installation and Setup Guide Installation and Setup Guide Box Contents: 1. Scanner 2. USB Cable 3. AC Adapter 4. Stacker Tray 5. Installation Guide 6.
Toshiba Tec ST-Axx Series Installation Guide
 One Blue Hill Plaza, 16th Floor, PO Box 1546 Pearl River, NY 10965 1-800-PC-AMERICA, 1-800-722-6374 (Voice) 845-920-0800 (Fax) 845-920-0880 Toshiba Tec ST-Axx Series Installation Guide This document provides
TR Box Vending Machine Manual
 TR-3631 Box Vending Machine Manual Preface TR-3631 Box Vending Machine Welcome to use our box vending machine! Before you install and operate this machine, please read the manual carefully. In order to
Diamond Cabinet Slant Top Users Manual Revision 1.0
 Diamond Cabinet Slant Top Users Manual Revision 1.0 1 Table of Contents 1.1 Sections 1 Table of Contents...2 1.1 Sections...2 1.2 List of Figures...3 1.3 List of Tables...3 2 Revision History...5 3 Overview...6
TACC Parts List Description
 644-0037-003S AC ADAPTER, THERMAL PRINTER 83.49 FOR CII & IV WITH THERMAL PRINTER ONLY. Does not include power cord. 00050103S ANCHOR KIT 25.71 Includes 4 anchors, bolts and washers. Requires 5/8" masonry
INSTALLATION MANUAL KIOSK SX6 SF6
 INSTALLATION MANUAL KIOSK SX6 SF6 Boink Systems Inc SX6 Installation Manual 1 REVISION RECORDS DATE DESCRIPTION OF CHANGE APPROVED Oct-12-2003 First draft specifications L.P. Nov-18-2003 Change to SX6
Cutter Option Installation Instructions
 This kit includes the parts and documentation necessary to install the cutter option on the Zebra XiII, XiIII, and XiIIIPlus-Series printers. NOTE: The Cutter Option is not available for the 96XiIII. Adding
Operator s Manual Addendum
 Operator s Manual Addendum This document contains the most up-to-date information, additions and changes to the JVL Operators Manual itouch9 version. Page 2 Page 3 TABLE OF CONTENTS: Chapter 1 Introduction
High Definition LCD Digital Signage Display
 High Definition LCD Digital Signage Display User Manual Applicable Models L/PFxxH7(Android Version) MxxSA Cautions 1. Do Not install and use the unit in moisture, high temperature, outdoor and closed environment.
Inspiron Service Manual. 2-in-1. Computer Model: Inspiron Regulatory Model: P69G Regulatory Type: P69G001
 Inspiron 13 5000 2-in-1 Service Manual Computer Model: Inspiron 13-5378 Regulatory Model: P69G Regulatory Type: P69G001 Notes, cautions, and warnings NOTE: A NOTE indicates important information that helps
Specification. Contents. TY User Guide For all TY1 Models. Contents. External interfaces: Introduction...2 Guidelines. What you get...
 External interfaces: TY User Guide For all TY1 Models Specification Keypad Two keypad connectors, one on the back of unit and one on the underside Port 1 FCC68 8-way connector to printer or PC. RS232 interface
XPS 13 Convertible Service Manual
 XPS 13 Convertible Service Manual Computer Model: XPS 9365 Regulatory Model: P71G Regulatory Type: P71G001 Notes, cautions, and warnings NOTE: A NOTE indicates important information that helps you make
PRO line. Long manufacturing tradition combined with the latest technology. Money changing machines for any requirements. suzohapp.
 PRO line Money changing machines for any requirements DualCoin PRO Easy PRO Twin Jolly PRO Jolly PRO Long manufacturing tradition combined with the latest technology suzohapp.com Dual Coin PRO The ideal
AX3000 Platine Terminal Ethernet TCP/IP
 AX3000 Platine Terminal Ethernet TCP/IP Model 80 Installation Guide January 2012 - Ref: I80E0922-2 Model AX3000/M80 Type EA The reproduction of this material, in part or whole, is strictly prohibited.
Reference Guide for the KODAK Picture Kiosk GS Compact. Software Version 2.0
 Reference Guide for the KODAK Picture Kiosk GS Compact Software Version 2.0 Eastman Kodak Company, 2008 Contents Product Overview... 4 Console... 4 605 Photo Printer... 5 Product Choices... 6 Startup and
ELITE Test Systems. /Quick Start Wiring. Botron Company Inc.
 ELITE Test Systems 01 /Quick Start Wiring Botron Company Inc. GETTING TO KNOW YOUR ELITE P1 This guide shows you how to assemble and wire your ELITE Test System, and gets you ready for everyday use. Once
P630i/P640i USER GUIDE
 P630i/P640i USER GUIDE Part 2 Tech Notes TN 1 TN 2 TN 3 TN 4 TN 5 TN 6 TN 7 TN 8 TN 9 TN 10 General Information Card Transport Magnetic Encoder Print Station Flip Station Laminator ID/Log Using the Windows
Revision History E F G H J K Revision Description: K > Allegion Rebranding.
 Notes: Enter any notes here. These notes must include: how many sides of the paper are printed ink color (usually black, may also be one or two specific colors, such as a Pantone value, or 17.000 8.500
XPS 15 2-in-1. Service Manual. Computer Model: XPS Regulatory Model: P73F Regulatory Type: P73F001
 XPS 15 2-in-1 Service Manual Computer Model: XPS 15-9575 Regulatory Model: P73F Regulatory Type: P73F001 Notes, cautions, and warnings NOTE: A NOTE indicates important information that helps you make better
Job Aid: Replacing the Field Replaceable Units (FRUs) for the Avaya G430 Media Gateway
 for the Avaya G430 Media Gateway") Job Aid: Replacing the Field Replaceable Units (FRUs) for the Avaya G430 Media Gateway! Important: Important: Always check the Avaya Support Website for Product Support Notices at http:// support.avaya.com
Job Aid: Replacing the Field Replaceable Units (FRUs) for the Avaya G430 Media Gateway! Important: Important: Always check the Avaya Support Website for Product Support Notices at http:// support.avaya.com
DOT MATRIX PRINTER SP6000 SERIES
 DOT MATRIX PRINTER SP6000 SERIES Hardware Manual < Approval: CEL > Trademark acknowledgments SP6000 : Star Micronics Co., Ltd. Notice All rights reserved. Reproduction of any part of this manual in any
INSTALLATION INSTRUCTIONS
 INSTALLATION INSTRUCTIONS 19 20 21 01 07 22 23 13 10 12 08 17 18 11 02 14 15 04 03 16 WELCOME PARTS LIST Thank you for purchasing this HealthPoint Technology Cabinet from Humanscale! Before you begin installing
AMERICAN CHANGER & HOFFMAN MINT
 AMERICAN CHANGER & HOFFMAN MINT We Are Changing the Industry 1400 N. W. 65 th Place, Fort Lauderdale, Florida 33309 T: (+1) 954-917-3009 F: (+1) 954-917-3079 www.americanchanger.com www.hoffmanmint.com
QC-7600A. Instruction Manual. Anztec, P.O. Box 3288, Christchurch, New Zealand Phone ,
 QC-7600A Instruction Manual Anztec, P.O. Box 3288, Christchurch, New Zealand Phone +64 3 338 3139, www.anztec.com email:sales@anztec.com Serial # Key # Software Ver. QC-7600A Rev 1.2 Page 2 Contents Warning...6
MODEL : SLK-TS400EB. Receipt Printer User s Manual. TS400EB Rev. B 07/16. All specifications are subject to change without notice
 MODEL : SLK-TS400EB Receipt Printer User s Manual TS400EB Rev. B 07/16 All specifications are subject to change without notice Table of Contents 1. Parts Identifications 1. Parts Identifications 3 2.
Site Readiness Guide. September 2015
 Site Readiness Guide September 2015 Copyright This document is provided "as-is." Information and views expressed in this document, including URL and other Internet website references, may change without
BAUM K20B KNIFE FOLDER UNIT INSTRUCTION MANUAL
 BAUM K20B KNIFE FOLDER UNIT INSTRUCTION MANUAL 2015 BAUMFOLDER CORPORATION All Rights Reserved BaumFolderCorp., 2015 Printed in U.S.A. TP10669 Warning Do not operate this machine without all guarding in
Phase 8.3 and 8.4 Rev 2.2 and Rev 2.3 Microprocessor User s Manual
 Phase 8.3 and 8.4 Rev 2.2 and Rev 2.3 Microprocessor User s Manual Retain This Manual In A Safe Place For Future Reference IMPORTANT NOTE TO PURCHASER Table of Contents General User Information Coin/Debit
MX-8000 User Manual MX Rev
 MX-8000 Rev. 070202 Greeting Thank you for purchasing PAITEC USA products. This manual is prepared to provide guidelines on how to properly operate and maintain MX-8000. Copyright Any of the contents should
Instructions to Install Retrofit Kit 6/7000 Machine
 Instructions to Install Retrofit Kit 6/7000 Machine **TURN POWER OFF OF MACHINE BEFORE INSTALLATION** READ ALL INSTRUCTIONS BEFORE STARTING INSTALLATION Retrofit kit contents: PART NAME QUANTITY PART NUMBER
1.0 SELECT MODULE CREDIT CARD MODULE...
 1 Contents 1.0 SELECT MODULE... 3 2.0 CREDIT CARD MODULE... 5 2.1 HIGH SPEED MODEM... 6 2.2 WIRELESS INTERNET ACCESS... 7 2.3 WAN (Wide Area Network) CONNECTION... 9 3.0 RECEIPT PRINTER MODULE... 10 3.1
Copyright 2018 Xi an NovaStar Tech Co., Ltd. All Rights Reserved. No part of this document may be copied, reproduced, extracted or transmitted in any
 MCTRL R5 Independent Controller Product Version: Document Number: V1.0.1 NS110100550 Copyright 2018 Xi an NovaStar Tech Co., Ltd. All Rights Reserved. No part of this document may be copied, reproduced,
SERIES HRC-TS TOUCHSCREEN CONTROLS
 SERIES HRC-TS TOUCHSCREEN CONTROLS A SYSTEM ENGINEERED FOR TOTAL PERFORMANCE. Athena HRC-TS Touchscreen Interfaces have the raw computing power and capacity to perform some dazzling functions. The ergonomically
Token software -
 Project: Token Software: v1.9.5.1 Board: CASH-Interface2 Date: 3. September 2018 SPECIFICATION: Token software - http://www.casino-software.de With the TOKEN-Package it is possible to realize a simple
Table of Contents. Unpacking and Inspection Setup Loading the Media Mount the Printer on the Wall... 16
 WPL25/WHC25 Table of Contents Unpacking and Inspection... 1 Setup... 5 Loading the Media... 6 Mount the Printer on the Wall... 16 LED and Button Functions... 17 Troubleshooting... 18 Unpacking and Inspection
Setting up NCR Silver for ios. This guide will walk you through the initial set up of NCR Silver ios.
 Setting up NCR Silver for ios This guide will walk you through the initial set up of NCR Silver ios. V3 INTRODUCTION Welcome to NCR Silver! Use this document to set up your NCR Silver system. This document
Removal and Installation8
 8 Screw Types 8-4 Top Cover Assembly 8-5 Left Hand Cover 8-6 Right Hand Cover 8-10 Front Panel Assembly 8-14 Left Rear Cover 8-15 Right Rear Cover 8-16 Extension Cover (60" Model only) 8-17 Media Lever
RJ-2030/2050/2140/2150
 LBF85700 Unpacking Your Printer Check that the package contains the following before using your printer: RJ-030/050/40/50 Quick Setup Guide English Printer Rechargeable Li-ion Battery Belt Clip Thank you
Prisma II Platform. Optoelectronics
 Optoelectronics Prisma II Platform Description In optical transmission systems, the network platform forms the foundation of the product family. The Prisma II platform provides network operators with the
ThinkStation P320 Tiny User Guide and Hardware Maintenance Manual
 ThinkStation P320 Tiny User Guide and Hardware Maintenance Manual Machine Types (MTs): 30C1 (Energy Star), 30C2 (Energy Star), and 30C3 (Energy Star) Note: Before using this information and the product
Preparing for a Docking Drawer Slim Installation To prepare for a successful Docking Drawer Slim installation please ensure that the cable management
 Docking Drawer Install Manual Docking Drawer Slim Series Applicable Models: 0290 00031(W) / 24 0290-00030(W) / 21 0290-00047(W) / 18 0230-00004. r6 1/19/2016 CAUTION READ CAREFULLY Failure to follow these
Label Printer Quick Setup Guide QL-800
 Label Printer Quick Setup Guide QL-800 QL-800 Quick Setup Guide (English) Label Printer QL-800 Printed in China D00RPE001 Quick Setup Guide (English) Thank you for purchasing the QL-800! Read the Product
Software Manual. Revision 1.3
 Software Manual Revision 1.3 Copyright 2015 by Kudo3D. This material may be distributed only subject to the terms and conditions set forth in the Creative Commons Attribution-NonCommercial-NoDerivatives
RJ-2030/2050/2140/2150
 Printed in China LBF85400 Package Contents Check that the package contains the following before using your printer: RJ-030/050/40/50 Quick Setup Guide English Printer Rechargeable Li-ion Battery Belt Clip
TDM To MiniMech conversion ProceDure
 TDM To MiniMech conversion ProceDure (Model 9100 ATM) TDN 07102-00079 Apr 1 2009 CorporATe HeAdquArTers: 522 E. Railroad Street Long Beach, MS 39560 PHONE: (228) 868-1317 FAX: (228) 868-0437 COPYRIGHT
Megatouch FORCE Monitor Chassis Board Replacement
 Megatouch FORCE Monitor Chassis Board Replacement Visit the Merit Industries, Inc. Web site http://www.meritind.com merit industries, inc. PM0337-01 Rev C Table of Contents FORCE Classic Monitor Chassis
ACW-5 Operational Manual
 ACW-5 Operational Manual Document #101-0044 12/27/02 PLEASE READ THIS MANUAL CAREFULLY PRIOR TO INSTALLING THIS UNIT. A complete understanding of the operation of this unit is essential for a successful
JCM TRAINING OVERVIEW VEGA Banknote Acceptor
 July, 2013 JCM TRAINING OVERVIEW VEGA Banknote Acceptor Phone # (800) 683-7248 (702) 651-0000 Technical Support # (702) 651-3444 Fax # (702) 651-0214 E-mail techsupport@jcmglobal.com Web Address http://www.jcmglobal.com
Nevco Message Center Installation Manual Retain this manual in your permanent file. 08/27/ Rev. C
 Nevco Message Center Installation Manual Retain this manual in your permanent file. 08/27/2014 135-0144 Rev. C Table of Contents INSTALLATION INSTRUCTIONS... 1 UNPACKING THE EQUIPMENT... 1 MESSAGE CENTER
MONARCH 9416 XL QUICK REFERENCE
 MONARCH 9416 XL QUICK REFERENCE This Quick Reference contains ribbon loading, supply loading, and general care, maintenance, and troubleshooting procedures for the 9416 XL Thermal Direct and 9416 XL Thermal
Assembly and Setup Manual
 M-11 Series Copyboard/C-11 Series Captureboard Assembly and Setup Manual This is the installation and assembly manual for the M-11 series/c-11 series. To the Customer Specialized techniques are required
Series 3000V Input/Output Board
 Part E, Section 1 Model Voltage Pump Manifold Control This section covers the following unit configurations. All All All All Vista Standard (V) Vista Pattern (PC) E 1-0 E 1-1 Section E 1 WARNING: Allow
M910q. User Guide and Hardware Maintenance Manual. Overview. Computer locks. Specifications. Replacing FRUs. Replacing CRUs.
 M90q User Guide and Hardware Maintenance Manual Machine Type (MT): 0MU, 0MV, 0MW, 0MX, 0QN Energy Star MT: 0MU, 0MV, 0MW, 0MX, 0QN Overview Computer locks Specifications Locations of indicators, connectors,
VX6s XI'AN NOVASTAR TECH CO., LTD. User Manual. All-in-One Video Controller. Document Version:
 VX6s All-in-One Video Controller Document Version: Document Number: V1.0.0 NS160100270 Copyright 2018 Xi an NovaStar Tech Co., Ltd. All Rights Reserved. No part of this document may be copied, reproduced,
How to Design Custom Enclosures for Motherboard-Based Systems
 PROTOCASE TECHNICAL BULLETIN How to Design Custom Enclosures for Motherboard-Based Systems (covering ATX and Mini ITX form factors) Document Edition - 1 Last Updated: June 6 th,2011 Protocase, Inc. All
Peel/Rewind Upgrade Kit
 Peel/Rewind Upgrade Kit Installation Instructions This kit includes the parts and documentation necessary to install the Peel/Rewind upgrade kit on the following printers: ZM400 ZM600 Read these instructions
QL-1110NWB. Applications for Use with Computers. Applications for Use with Mobile Devices. Quick Setup Guide (English) NOTE
 NOTE") D00ZC6001 QL-1110NWB Quick Setup Guide (English) Thank you for purchasing the QL-1110NWB Label Printer! Read the Product Safety Guide first, then read this Quick Setup Guide for the correct setup procedure.
D00ZC6001 QL-1110NWB Quick Setup Guide (English) Thank you for purchasing the QL-1110NWB Label Printer! Read the Product Safety Guide first, then read this Quick Setup Guide for the correct setup procedure.
Specification Sheet: HT SERIES
 Specification Sheet: HT SERIES HT Series: High Specification 19 Enclosures Hi-tech Series of 19 enclosures, supplied in self assembly (flat pack) format for ease of transportation and storage. Manufactured
M101M4 Tablet PC Quick Start Guide V1.0
 M101M4 Tablet PC Quick Start Guide V1.0 Please read these instructions carefully before using this product, and save this manual for future use. Getting Started Congratulations on purchasing this rugged
MODEL : AP-8220 U Receipt Printer User s Manual
 MODEL : AP-8220 U Receipt Printer User s Manual AP-8220 U Rev.A 10/14 All specifications are subject to change without notice Table of Contents 1. Parts Identifications 1. Parts Identifications 3 2. Setting
Thomas. Change Machine. Operator Guide
 Thomas 5002 Change Machine Operator Guide Contents On Receiving Your New Change Machine...3 Coin Mech Installation...3 Fitting...3 Removing...3 Opening...3 Switching On...4 Machine Alarm and Alarm Keyswitch
Inspiron 22. Service Manual Series. Regulatory Model: W17B Regulatory Type: W17B001
 Inspiron 22 3000 Series Service Manual Regulatory Model: W17B Regulatory Type: W17B001 Notes, cautions, and warnings NOTE: A NOTE indicates important information that helps you make better use of your
Twisted Nitro Stunt Racing New Cabinet Design with Sintra Marquee Supplement to Operation & Service Manual
 Twisted Nitro Stunt Racing New Cabinet Design with Sintra Marquee Supplement to Operation & Service Manual Document Part #: 040-0271-01 Rev. C Your cabinet has a new design with a Sintra Marquee, stand-alone
Procedure to Upgrade from B&W Maintenance Panel to TIB Color Touchscreen Door in a Working Maxum or Maxum II Analyzer Equipped With a SYSCON2
 Procedure to Upgrade from B&W Maintenance Panel to TIB Color Touchscreen Door in a Working Maxum or Maxum II Analyzer Equipped With a SYSCON2 Difficulty Level: High Estimated time to execute: 3 Hours Revision
T4 series user s manual. Version: 1.1
 Version: 1.1 Table of contents 1. Introduction...1 1.1 In the box...1 1.2 Printer Features...2 1.2.1 Front view...2 1.2.2 Rear view...2 1.2.3 Interior view...3 2. Getting start...4 2.1 Loading the ribbon...4
Installation and Operation Back-UPS Pro BR700G-TW
 Installation and Operation Back-UPS Pro BR700G-TW Inventory Safety Do not install the UPS in direct sunlight, in excessive heat, humidity, or in contact with fluids. Do not connect a laser printer or hair
Site Readiness Guide. October 2017
 Site Readiness Guide October 2017 Copyright This document is provided "as-is." Information and views expressed in this document, including URL and other Internet website references, may change without
Value-Priced Cash Drawers with Lasting Quality
 VAL-u Line Series Enclose Protect Secure Value-Priced Cash Drawers with Lasting Quality 18" x 18" Cash Drawer Perfectly sized for any POS application - full to compact sizes available Enhance merchant's
EPSON ActionLaser Read This First. eepa POLLUTION PREVENTER
 EPSON ActionLaser 1400 Read This First eepa POLLUTION PREVENTER This booklet is to help you set up your printer and begin printing quickly. It also gives you instructions for routine maintenance. If you
A m e r i c a n C h a n g e r
 A m e r i c a n C h a n g e r 1400 NW 65 TH Place Ft. Lauderdale, FL 33309 AC7700/7800 BILL TO BILL SERIES CHANGER OPERATIONS MANUAL Parts & Service: (954)917-5963 Service Fax: (954)917-5204 Sales: (800)741-9840
RS3000 SERIES BILL ACCEPTORS
 Flash Diagnostic Codes RS3000 SERIES BILL ACCEPTORS INSTALLATION GUIDE s of the bill acceptor. Below is a chart that lists all the flash codes of the RS3000 Bill Acceptor and a description of each code.
 28/06/2011 Ins-30138 PROXIMITY LCD reader demonstration unit Paxton Technical Support 01273 811011 support@paxton.co.uk Technical help is available: Monday - Friday from 07:00-19:00 (GMT) Saturday from
Dell Venue 11 Pro Bundle
 One Blue Hill Plaza, 16 th Floor, PO Box 1546 Pearl River, NY 10965 1-800-PC-AMERICA, 1-800-722-6374 (Voice) 845-920-0800 (Fax) 845-920-0880 Dell Venue 11 Pro Bundle This document provides step-by-step
KM SERIES VENDING MACHINES OPERATION MANUAL
 KM SERIES VENDING MACHINES OPERATION MANUAL 1 Main Board & Driver Board MAIN BOARD DRIVER BOARD 2 Selection Keypad Old Keypad New Keypad 1. In the Standby Mode, here are the roles of the available Function
KM-4800w. Installation Guide
 KM-4800w Installation Guide TABLE OF CONTENTS page 1 Installation Requirements 2 2 Unpacking 3 2. 1 Unpacking 3 2. 2 Confirmation of Accessories 5 3 Leveling the Machine 7 4 Setup of the Roll Deck 9 5
AX3000 Platine Terminal Ethernet TCP/IP
 AX3000 Platine Terminal Ethernet TCP/IP Model 80WMS Installation Guide January 2012 - Ref: I80ME0922-2 Model AX3000/M80M Type EA The reproduction of this material, in part or whole, is strictly prohibited.
RMC HS. User Manual. Version 1.0
 RMC2108-670-HS User Manual Version 1.0 Content Manual Structure Foreword Chapter 1 Chassis Overview Chapter 2 Easy Installation Instruction Chapter 3 Chassis Parameters Foreword This manual is about the
load.up Account loader
 load.up Account loader Product Guide InterCard, Villingen-Schwenningen, Germany Table of Contents Page 1. Page 2. Page 3. Page 4. Front page & certification Table of contents About the load.up Set up Main
Flying Tickets FT Operation & Service Manual. Version 1.0. * Read this manual before use
 Flying Tickets FT-65-1001 Operation & Service Manual Version 1.0 * Read this manual before use Flying Ticket Manual V1.0 General Remark If you encounter any difficulties or if you need support on how to
Illustrated Parts List. Generator Systems. Reproduction MODEL Not for. 12,000 Watt. Generator Systems
 Illustrated Parts List Generator Systems MODEL 12,000 Watt Generator Systems Manual Part No. Revision D Rev. Date: 8/9/2016 Table Of Contents PRODUCT COMPONENTS PAGES Power Group... 4 Alternator... 6
Instructions to Install Retrofit Kit RVMC 4/5000 Machine (MDB Only)
") Instructions to Install Retrofit Kit RVMC 4/5000 Machine (MDB Only) **TURN POWER OFF OF MACHINE BEFORE INSTALLATION** READ ALL INSTRUCTIONS BEFORE STARTING INSTALLATION Retrofit Kit Contents PART NAME
Instructions to Install Retrofit Kit RVMC 4/5000 Machine (MDB Only) **TURN POWER OFF OF MACHINE BEFORE INSTALLATION** READ ALL INSTRUCTIONS BEFORE STARTING INSTALLATION Retrofit Kit Contents PART NAME
6165 MONEY COUNTING SCALE
 MANUAL English Nederlands Deutsch Français Español Italiano Português Polski Česky Slovenčina Magyar България 6165 MONEY COUNTING SCALE TABLE OF CONTENTS 01. INTRODUCTION page 3 1.1 Product 1.2 Display
CHASSIS INSTALLATION GUIDE
 SUPER SC942S-600 SC942i-600/550 SC942 CHASSIS INSTALLATION GUIDE 1.0 SUPER SC942 Chassis User's Guide Table of Contents Chapter I: Unpacking and Check Lists... 1-3 Chapter 2: Installation Procedures...
SMART Coin System QUICK START AND CONFIGURATION GUIDE
 SMART Coin System QUICK START AND CONFIGURATION GUIDE SMART Coin System Quick Start and Configuration Guide 2 SMART Coin System Quick Start and Configuration Guide 1 INTRODUCTION 4 2 ASSEMBLY 5 2.1 Detaching
USER MANUAL ENGLISH 285-S COMPACT VALUE COUNTER
 USER MANUAL ENGLISH 285-S COMPACT VALUE COUNTER INTRODUCTION ENGLISH Thank you for purchasing the Safescan 285-S compact value counter, a product of outstanding ease-of-use and quality. We recommend that
TT230SM THERMAL TRANSFER PRINTER USER S MANUAL
 TT230SM THERMAL TRANSFER PRINTER USER S MANUAL Operations Overview Unpacking and Inspection This printer has been specially packaged to withstand damage during shipping. Please carefully inspect the packaging
SECTION 3 NV9 USB MANUAL SET
 SECTION 3 NV9 USB MANUAL SET ITL SOFTWARE SUPPORT GUIDE NV9 USB Manual Set Section 3 2 NV9 USB MANUAL SET SECTION 3 3. ITL SOFTWARE SUPPORT GUIDE 3 3.1 Validator Manager Software 3 3.1.1 Preparing for
Alpha-3R. Direct Thermal Portable Printer SERVICE MANUAL
 Alpha-3R Direct Thermal Portable Printer SERVICE MANUAL i Contents 1. FUNDAMENTAL OF THE SYSTEM... 2 1.1 Overview... 2 2. ELECTRONICS... 3 2.1 Summary of Board Connectors... 3 3. MECHANISM... 7 3.1 Replacing
KIP Certified AutoCAD Driver. KIPFold 2800 User Guide Version SN 1.0
 KIP Certified AutoCAD Driver KIPFold 2800 User Guide Version SN 1.0 Safety Read these safety instructions completely before operating the folder and keep this manual for future reference close to the folder.
Thank you for selecting UTC RETAIL s innovative Model 1170 Point of Sale solution!
 1170 POS SYSTEM 1170 INSTALLATION GUIDE Thank you for selecting UTC RETAIL s innovative Model 1170 Point of Sale solution! This Installation Guide will help you efficiently install the 1170 POS. The document
AMERICAN CHANGER & HOFFMAN MINT. We Are Changing the Industry
 AMERICAN CHANGER & HOFFMAN MINT We Are Changing the Industry 1400 N. W. 65 th Place, Fort Lauderdale, Florida 33309 T: (+1) 954-917-3009 F: (+1) 954-917-3079 www.americanchanger.com www.hoffmanmint.com
Loading paper and specialty media Learning about the printer. Stop all printer activity. 7 Back button Return to the previous screen.
 Quick Reference Use the 6 Stop or Cancel button To Stop all printer activity. Loading paper and specialty media Learning about the printer Using the printer control panel 0 Use the 9 To Display View the
Documentation on all Paxton products can be found on our web site -
 01/11/2011 Ins-30091-US PROXIMITY LCD reader Paxton Technical Support 1.800.672.7298 support@paxton-access.com Technical help is available: Monday - Friday from 02:00 AM - 8:00 PM (EST) Documentation on
Assembly and Setup Manual
 M-12 Series Copyboard / C-12 Series Captureboard Assembly and Setup Manual This is the installation and assembly manual for the M-12 series Copyboard and C-12 series Captureboard. (The copyboard and/or
2190 POS System User Guide
 2190 POS System 2190 User Guide Thank you for selecting UTC RETAIL s innovative Model 2190 Point of Sale solution! This guide is designed to acquaint you with the features and functionality of the 2190
700TSU INSTALLATION MANUAL
 M 700TSU INSTALLATION MANUAL 2 Table of Contents Features...03 Specifications...04 Quick-Start...05 Remote Control...07 Hardware Installation...10 Software Installation...14 Touch Screen Driver Installation
Installation Manual. 65 Interactive LED/LCD. Model: HILF65101 (64.56 )
") Installation Manual 65 (64.56 ) Model: HILF65101 65 Interactive LED/LCD QUICK SETUP GUIDE For further information, see the user manual. Please contact directly if you have questions on the use of the touch
Installation Manual 65 (64.56 ) Model: HILF65101 65 Interactive LED/LCD QUICK SETUP GUIDE For further information, see the user manual. Please contact directly if you have questions on the use of the touch
Galaxy Rectifier Shelf Field Replacement
 Galaxy Rectifier Shelf Field Replacement Model PWRSYS-RFK-A203 Installation Guide Galaxy Rectifier Shelf Field Replacement Model PWRSYS-RFK-A203 Installation Guide, Part Number 139691-1 Copyright 2011,