Oracle FLEXCUBE Direct Banking
|
|
|
- Sophie Washington
- 5 years ago
- Views:
Transcription
1 Oracle FLEXCUBE Direct Banking Java Application Based Rich Mobile Banking User Manual Release Part No. E September 2013
2 Java Application Based Rich Mobile Banking User Manual September 2013 Oracle Financial Services Software Limited Oracle Park Off Western Express Highway Goregaon (East) Mumbai, Maharashtra India Worldwide Inquiries: Phone: Fax: Copyright 2008, 2013, Oracle and/or its affiliates. All rights reserved. Oracle and Java are registered trademarks of Oracle and/or its affiliates. Other names may be trademarks of their respective owners. U.S. GOVERNMENT END USERS: Oracle programs, including any operating system, integrated software, any programs installed on the hardware, and/or documentation, delivered to U.S. Government end users are commercial computer software pursuant to the applicable Federal Acquisition Regulation and agency-specific supplemental regulations. As such, use, duplication, disclosure, modification, and adaptation of the programs, including any operating system, integrated software, any programs installed on the hardware, and/or documentation, shall be subject to license terms and license restrictions applicable to the programs. No other rights are granted to the U.S. Government. This software or hardware is developed for general use in a variety of information management applications. It is not developed or intended for use in any inherently dangerous applications, including applications that may create a risk of personal injury. If you use this software or hardware in dangerous applications, then you shall be responsible to take all appropriate failsafe, backup, redundancy, and other measures to ensure its safe use. Oracle Corporation and its affiliates disclaim any liability for any damages caused by use of this software or hardware in dangerous applications. This software and related documentation are provided under a license agreement containing restrictions on use and disclosure and are protected by intellectual property laws. Except as expressly permitted in your license agreement or allowed by law, you may not use, copy, reproduce, translate, broadcast, modify, license, transmit, distribute, exhibit, perform, publish or display any part, in any form, or by any means. Reverse engineering, disassembly, or decompilation of this software, unless required by law for interoperability, is prohibited. The information contained herein is subject to change without notice and is not warranted to be error-free. If you find any errors, please report them to us in writing. This software or hardware and documentation may provide access to or information on content, products and services from third parties. Oracle Corporation and its affiliates are not responsible for and expressly disclaim all warranties of any kind with respect to third-party content, products, and services. Oracle Corporation and its affiliates will not be responsible for any loss, costs, or damages incurred due to your access to or use of third-party content, products, or services.
3 Contents 1. Preface Intended Audience Documentation Accessibility Access to OFSS Support Structure Related Information Sources Transaction Host Integration Matrix Log In Logout Pre-Login Transactions Online Application Process Current Accounts Overdraft Account Activity Account Details My Accounts Adhoc Statement Stop Cheque My Cheques New Cheque Book Loan Details Financing Details Mail Box Inbox Bulletin Sent Messages Compose Forex Inquiry Beneficiary Maintenance Own Account Transfer Internal Transfer Domestic Payment International Account Transfer My Schedule Payment Pay Bill Security Questions Manage Profile Register P2P Beneficiary Peer Beneficiary Registration P2P Payments P2P NFC Pay P2P Transfer P2P-QR Pay View Received P2P Payments Register Biller Delete Biller Open Term Deposit Deposit Redemption Deposit Details Transactions to Authorize Change Password Credit Card Details
4 42. Credit Card Statement Credit Card Payment Force Change Password Contract Deposits Buy Funds Redeem Funds Portfolio Switch Funds Order Status Transaction Password Behavior ATM Branch Locator Reminders Registration Deposit Calculator Savings Calculator Foreign Exchange Calculator Loan Eligibility Calculator Offers Live Help/Call
5 Preface 1. Preface 1.1. Intended Audience This document intended for the following audience: Customers Partners 1.2. Documentation Accessibility For information about Oracle's commitment to accessibility, visit the Oracle Accessibility Program website at Access to OFSS Support Structure This manual is organized into the following categories: Preface gives information on the intended audience. It also describes the overall structure of the User Manual Transaction Host Integration Matrix provides information on host integration requirements for the transactions covered in the User Manual. Introduction provides brief information on the overall functionality covered in the User Manual Chapters post Introduction are dedicated to individual transactions and its details, covered in the User Manual
6 Preface 1.5. Related Information Sources For more information on Oracle FLEXCUBE Direct Banking Release , refer to the following documents: Oracle FLEXCUBE Direct Banking Licensing Guide Oracle FLEXCUBE Direct Banking Installation Manuals
7 Transaction Host Integration Matrix 2. Transaction Host Integration Matrix Legends NH Y N No Host Interface Required. Host Interface to be developed separately. Pre integrated Host interface available. Pre integrated Host interface not available. Yes No Transaction Name FLEXCUBE UBS Third Party Host System Qualified with Mobile Enabler Log In NH NH Y Log Out NH NH Y Account Activity N Account Details Y Account Summary Y Ad-hoc Account Statement Request N
8 Transaction Host Integration Matrix Transaction Name FLEXCUBE UBS Third Party Host System Qualified with Mobile Enabler Stop /Unblock Cheque Request N Cheque Status Inquiry N Cheque Book Request N Loan Details N Mail Box NH NH N Exchange Rate Inquiry N Own Account Transfer Y Internal Account Transfer Domestic Account Transfer N N Pay Bill N Register Biller N Delete Biller NH N Redeem Term Deposit N TD Details N Transactions to Authorize NH NH N Change Password NH NH Y Credit Card Details N Credit Card Statement N Force Change Password NH NH Y Contract TD View N Buy Mutual Fund N Redeem Mutual Fund N Portfolio N Switch Mutual Fund N Order Status N
9 Transaction Host Integration Matrix Transaction Name FLEXCUBE UBS Third Party Host System Qualified with Mobile Enabler Transaction Password Behavior NH Y ATM / Branch Locator NH N Financing Details N Beneficiary Maintenance NH NH N Credit Card Payment NA N International Account Transfer N My Scheduled Transfers N Open Term Deposit N PreLogin Transaction NH NH N

10 Log In 3. Log In This option allows you to perform the transaction through FLEXCUBE Direct Banking system using the java based mobile. To login into the J2ME based Mobile Banking Application 1. Download the FCDB application in the Java enabled Mobile Phone. The system displays initial screen to launch the application. Oracle FLEXCUBE Direct Banking
11 Log In 2. Select the Launch option. The system displays Login screen. Login 3. Type the username and password provided to login. 4. Select the Login from the options. The system displays the Menu screen.

12 Log In Menu 5. Select any transaction icon by using up\down scroll key and the select key to proceed with that transaction.0.
13 Logout 4. Logout This option enables you to log off the application. To log out of the J2ME based Mobile Banking Application 1. Log on to the J2ME Based Mobile Banking Application. 2. Select the encircled Exit from the options in the Menu screen as shown below.0.

14 Logout Menu The system displays initial Launch screen.

15 Account Activity 5. Pre-Login Transactions These are the transactions that you can perform without logging into the application. These options are available on the Login screen as shown below. Login 1. As shown in above screen, you can perform below pre login transactions.
16 Account Activity 2. ATM Branch Locator: This enables user to search ATMs and bank branches across any location. It also displays maps along with the ATM Bank Branch address. Please refer ATM Branch Locator section for further details. 3. Contact Us: Using this option, user can contact bank for any required information or queries. 4. Offers: This option enables user to view various offers available. Please refer offers section for further details. 5. Help: This option enables user to ask for any help and get in contact with bank officials.0.
17 Account Activity 6. Online Application Process The Online Application Process is used for new account opening to avail the offers and services provided by the bank. It helps you to apply online for the desired product. Note: The entire application process is similar for all the types of customers, such as - Existing, Registered and the Prospects. Initial data requirement may vary depending upon the type of customer and the type of product. For the Existing Customer: 1. Login to the Mobile Banking Application. 2. Click Products from the Customer Services.0. Products

18 Account Activity The following Product group is displayed. Product Groups Note: Please refer to the individual sections to apply online for the respective products. For the Registered Customer: 1. Click the Login icon on the Home page.

19 Account Activity Home Page Login Page 2. Click Options as shown in the following screenshot. Login

20 Account Activity The following pop-up is displayed. Options for Login 3. Select the Register Now option from the pop-up. The following page is displayed. Channel Onboarding Existing Customer?
21 Account Activity 4. Click Continue. The following page is displayed. Channel Onboarding Relationship Type Field Description Field Name Description Online Application Form
![Account Activity Field Name Relationship Type Exit Submit Description [Dropdown] Select the desired Relationship Type from the dropdown.](/docs-images/95/124445526/images/22-0.jpg "Saving Account Customer Credit Card Customer Loans/Deposits Customer [Action Button] Click Exit to end the process. [Action Button] Click Submit to submit the details.")
22 Account Activity Field Name Relationship Type Exit Submit Description [Dropdown] Select the desired Relationship Type from the dropdown. Saving Account Customer Credit Card Customer Loans/Deposits Customer [Action Button] Click Exit to end the process. [Action Button] Click Submit to submit the details. Channel Onboarding Relationship Type The following page is displayed. Saving Account Customer
23 Account Activity Field Description Field Name Description Online Application Form Customer ID [Mandatory, Input Box, 20] Enter the appropriate Customer ID. Account Number [Mandatory, Input box, 20] This field is enabled only when Relationship Type selected is Saving Account Customer. Enter the appropriate Account Number. First Name [Mandatory, Input box, 35] Enter the desired First Name. Last Name [Mandatory, Input Box, 35] Enter the desired Last Name. 5. Enter the appropriate details in the respective fields. Saving Account Customer Details
24 Account Activity Saving Account Customer Details Field Description Field Name Description Online Application Form Login Password [Mandatory, Input Box, 20] Enter the desired Login Password. Confirm Login Password [Mandatory, Input box, 20] Re-Enter the desired Login Password.
![Account Activity Field Name Transaction Password Confirm Transaction Password Options Cancel Description [Mandatory, Input box, 20] Enter the desired Transaction Password.](/docs-images/95/124445526/images/25-0.jpg "[Mandatory, Input Box, 20] Re-Enter the desired Transaction Password.")
25 Account Activity Field Name Transaction Password Confirm Transaction Password Options Cancel Description [Mandatory, Input box, 20] Enter the desired Transaction Password. [Mandatory, Input Box, 20] Re-Enter the desired Transaction Password. [Action Button] Click Options to select the desired option from the following: View Messages View User ID Policy View Login Password Policy View Transaction Password Policy Submit [Action Button] Click Cancel to cancel the process. 6. Select Options. 7. Select Submit. Submit Details The screen displays the success message for user enrollment. Success Message


26 Account Activity 8. Click OK. The following page is displayed. Successful Registration 9. Click Options. 10. Click OK. The Login page is displayed.0. Note: Re-Login and follow the process for the Existing Customer of the bank. For the Prospect Customer: 1. Select Products on the Home page, as shown in the following screenshot:

27 Account Activity Home Page The following page is displayed. 2. Select the desired Product Category. Product Category Field Description Field Name Description Online Application Form
28 Account Activity Field Name Products Exit Next Description [Radio Buttons] Select the desired option from the following: Personal Corporate [Action Button] Click Exit to end the process. [Action Button] Click Next to continue with the process. 3. Select the desired Product Group.0. Product Showcase Field Description Field Name Description Online Application Form
29 Account Activity Field Name Products Exit Options Description [Radio Buttons] Select the desired option from the following: Credit Cards Current Accounts Insurance Loan Savings Accounts [Action Button] Click Exit to end the process. [Action Button] Click Options to select the desired option: Next Back View Application Status Exit Note: Please refer to the product - Current Accounts Overdraft to apply online for the remaining products. Certain fields are product-specific and are mandatory.
30 Account Activity 6.1. Current Accounts Overdraft The user can follow the procedure below to fill the Online Application Form for Current Accounts. 1. Click Current Accounts on the Product Group page, as shown in the following screenshot. Product Group 2. The following page is displayed. Click the Current Accounts Overdraft. Product Group Current Accounts The following page is displayed.


31 Account Activity 3. Select the Current Accounts Overdraft. 4. Select Options. 5. Select Next. The following page is displayed. Current Accounts Overdraft 6. Select Apply Now from the Options, as shown in the following screenshot: Options

32 Account Activity The following page is displayed. Are You an Existing Customer? 7. Select Continue from Options. Existing Customer Details Field Description Field Name Description Existing Customer Details
![Account Activity Field Name Relationship Type Credit Card Number Customer ID / Account Number Description [Dropdown] Select the desired option from the following: Savings Account Customer Credit Card](/docs-images/95/124445526/images/33-0.jpg "Customer Loans/Deposits Customer [Conditional, Input Box, 20] This field is enabled only when the Relationship Type is Credit Card Customer. Enter the appropriate Credit Card Number.")
33 Account Activity Field Name Relationship Type Credit Card Number Customer ID / Account Number Description [Dropdown] Select the desired option from the following: Savings Account Customer Credit Card Customer Loans/Deposits Customer [Conditional, Input Box, 20] This field is enabled only when the Relationship Type is Credit Card Customer. Enter the appropriate Credit Card Number. [Mandatory, Input Box, 20] Enter the appropriate Customer ID/Account Number. Current Account Overdraft - Online Application Form Field Description Field Name Description Online Application Form Date of Birth [Date-Picker] Select the appropriate Birth Date from the Date-Picker.
34 Account Activity Field Name City Description [Dropdown] Select the appropriate city from the following: Mumbai Delhi Mobile Number [Mandatory, Input Box, 15] Enter the appropriate Mobile Number. Address [Mandatory, Input Box, 255] Enter the valid ID. Preferred date of Contact Preferred Time of Contact Options Exit [Date-Picker] Select the desired date of contact from the Date-Picker. [Dropdown] Select the desired time from the dropdown. [Action Button] Select Options from the following values: Continue Cancel Exit [Action Button] Click Exit to cancel the application process. 8. Once the appropriate details are entered in the respective section, click Continue. The following page is displayed. Current Account Overdraft - Online Application Form
35 Account Activity Field Description Field Name Description Online Application Form Type of Ownership [Mandatory, Dropdown] Select the appropriate Type of Ownership from the dropdown: Company Other Partnership Firm Sole Proprietor Trust Association Others [Conditional, Input Box, 50] This field is enabled only when the Type of Ownership selected is Other. Type of Business [Dropdown] Select the appropriate Type of Business from the following: Manufacturing Other Retail Services Others [Conditional, Input Box, 50] This field is enabled only when the Type of Business selected is Other.
![Account Activity Current Account Overdraft - Online Application Form Field Description Name of Business [Mandatory, Input Box, 100] Enter the appropriate Name of Business.](/docs-images/95/124445526/images/36-0.jpg "Currency [Dropdown] Select the desired currency from the system-configured options. Annual Turnover [Mandatory, Input Box, 20] Enter the appropriate value for Annual Turnover.")
36 Account Activity Current Account Overdraft - Online Application Form Field Description Name of Business [Mandatory, Input Box, 100] Enter the appropriate Name of Business. Currency [Dropdown] Select the desired currency from the system-configured options. Annual Turnover [Mandatory, Input Box, 20] Enter the appropriate value for Annual Turnover. Overdraft Limit Required? Continue Exit [Dropdown] Select the desired Options from the following values: Yes No [Action Button] Select Continue to proceed with the application. [Action Button] Click Exit to cancel the application process. 9. Once the appropriate details are entered in the respective section, click Continue. The following page is displayed.
37 Account Activity Field Description Field Name Description Upload Document Document Type Options Exit [Dropdown] Select the desired Document Type from the system-configured dropdown values. [Action Button] Select Options to select the desired option from the following: Upload File Continue Exit [Action Button] Click Exit to cancel the application process. 10. Select Upload File. The following page is displayed. Attachments
![Account Activity Field Description Field Name Description Attachments Add Attachments Attachments Done Show / Delete Attachments [Action Button] Click Add Attachments to add more attachments to the](/docs-images/95/124445526/images/38-0.jpg "uploaded document list. [Action Button] Click Attachments Done if all the required documents are uploaded.")
38 Account Activity Field Description Field Name Description Attachments Add Attachments Attachments Done Show / Delete Attachments [Action Button] Click Add Attachments to add more attachments to the uploaded document list. [Action Button] Click Attachments Done if all the required documents are uploaded. [Action Button] Click Show / Delete Attachments to view and delete the uploaded docs from the list, if required. 11. Once done with the attachment uploading, click Continue from Options. The following page is displayed. Current Account Overdraft - Online Application Form


39 Account Activity 12. Click Yes to proceed further. The following page is displayed. Current Account Overdraft - Online Application Form 13. Once the Terms and Conditions are accepted, click Continue from Options. The following page is displayed. Current Accounts Overdraft Online Application Form Security Code

40 Account Activity Field Description Field Name Description Security Code Captcha Image Security Code Displays the Security Code. [Mandatory, Input Box] Enter the above Security Code. Options [Action Button] Click Continue from Options. Current Account Overdraft - Online Application Form Verify
41 Account Activity
42 Account Activity 14. Once all the information is verified, click Confirm from Options. The following Confirmed pag is displayed.
43 Account Activity

44 15. Click OK.0. Account Activity
45 Account Activity 7. Account Activity Using this option, you can get the account activity details for a selected account and a specified period. To view the account activity details 1. Log on to the J2ME based Mobile Banking Application. 2. Select Accounts > Account Activity icon from menu using up\down scroll key and the select key. The system displays the Account Activity screen.
46 Account Activity Account Activity Field Description Field Name Select Account Search By Description [Mandatory, Dropdown] Select the account from the dropdown list for account activity. [Mandatory, Dropdown] Select the search by option for account activity to be displayed from the dropdown list. The options are Last 2 Days Last 5 Days Between Two dates From Date [Conditional, Alphanumeric, 10] Type the date from which the account activity is to be viewed. This field is applicable on selecting between two dates option in search by field. To Date [Conditional, Alphanumeric, 10] Type the date to which the account activity is to be viewed. This field is applicable on selecting between two dates option in search by field.

47 Account Activity 3. Select the Submit from the options. The system displays Account Activity screen. Select the Exit from the options to exit from the application. Select the Home from the options to navigate to the menu screen. Select the Menu from the options to return to the sub menu screen. Account Activity (Screen 1) (Screen 2)

48 Account Activity (Screen 3) Field Description Field Name Account Number Opening Balance Closing Balance Transaction Date Value Date Description Description This field displays the account Number of the Customer. This field is not displayed in case of pagination. This field displays the Opening Balance of the Account. This field is not displayed in case of pagination. This field displays the Closing balance of the account. This field is not displayed in case of pagination. This field displays the date on which the transaction is carried Out. This field displays the Value date of the transaction. This field displays the description of the transaction.
49 Account Activity Field Name Transaction Reference Number User Reference Number Credit Amount Description This field displays the transaction reference number. This field displays the user reference number. This field displays the amount of the transaction. 4. Select the Back from the options to navigate to the previous screen.0. Select the Home from the options to navigate to the Menu screen. Select the Exit from the options to exit from the application. Select the Menu from the options to return to the sub menu.
50 Account Details 8. Account Details This menu allows you to view the account details of the selected account. To view the account details 1. Log on to the J2ME based Mobile Banking Application. 2. Select Accounts > Account Details icon from the menu using up\down scroll key and the select key. The system displays Account Details screen.
51 Account Details Account Details Field Description Field Name Select Account Description [Mandatory, Drop down] Select the account from the list for viewing the details. 3. Select the Submit from the options. The system displays Account Details screen. Select the Home from the options to return to the menu screen. Select the Exit from the options to exit from the application. Select the Menu from the options to return to the sub menu screen.

52 Account Details Account Details (Screen 1) (Screen 2) Field Description Field Name Customer Id Account Number Current Balance Uncleared Funds Overdraft limit Description This field displays the Customer Id of the user This field displays the Account Number of the Customer s account. This field displays the current balance of the account along with the account currency. This field displays the funds in the account that are not cleared with the base currency in the account. This field displays the uncleared funds of the account.
53 Account Details Field Name Net available balance for withdrawal Description This field displays the net available balance for withdrawal. 4. Select the Back from the options to navigate to the previous screen.0. Select the Home from the options to return to the Menu screen. Select the Exit from the options to exit from the application. Select the Menu from the options to return to the sub menu screen.
54 My Accounts 9. My Accounts Account summary provides a summarized view of all the accounts mapped to the customer id. To view the account summary 1. Log on to the J2ME based Mobile Banking Application. 2. Select Accounts > My Accounts icon from the menu using up\down scroll keys and the select key. The system displays My Accounts screen.
55 My Accounts My Accounts Field Description Field Name Account Current Balance Customer Id Description This field displays the account number selected from the dropdown. This field displays the balance available in the account with currency. This field displays the customer Id of the user 3. Select the Home from the options to go to the main menu screen.0. Select the Exit from the options to exit from the application. Select the Next Page, Last Page, Previous Page, and First Page from the menu to navigate to the respective page. Select the Menu from the options to return to the sub menu screen.
56 Adhoc Statement 10. Adhoc Statement This menu allows you to request for an account statement for the period specified. To request the Adhoc Statement 1. Log on to the J2ME based Mobile Banking Application. 2. Select Accounts > Adhoc Statement icon from the menu using up\down scroll keys and the select key. The system displays Adhoc Statement screen. 56
57 Adhoc Statement Adhoc Statement Request Field Description Field Name Account Type Description [Mandatory, Drop down] Select the type of account for which statement request is to be made. 3. Select the Submit from the options. The system displays Adhoc Statement screen. Select the Exit from the options to exit from the application. Select the Home from the options to go the menu screen. Select the Menu from the options to return to the sub menu screen.
58 Adhoc Statement Adhoc Statement Field Description Field Name Account Type Select Account Description This field displays the account type selected in the previous screen. [Mandatory, Drop down] Select the Account number radio button from the list of accounts. From Date [Mandatory, Alphanumeric, 10] Type the from date as start date for the Adhoc statement. To Date [Mandatory, Alphanumeric, 10] Type the To date as end date for the Adhoc statement. 4. Select the Submit from the options. The system displays Adhoc Statement Verify screen. Select the Back from the options to return to the previous screen. Select the Exit from the options to exit from the application. Select the Home from the options to go to the menu screen.
59 Adhoc Statement Select the Menu from the options to return to the sub menu screen. Adhoc Statement Verify 5. Select the Confirm from the options. The system displays Adhoc Statement Confirm screen. Select the Change from the options to navigate to the previous screen. Select the Exit from the options to exit from the application. Select the Home from the options to navigate to the menu screen. Select the Menu from the options to return to the sub menu screen.

60 Adhoc Statement Adhoc Statement Confirm (Screen 1) (Screen 2) 6. Select the Home from the options to get back to the Menu screen.0. Select the Exit from the options to exit from the application. Select the Ok from the options. The initial Adhoc Statement screen is displayed Select the Menu from the options to return to the sub menu screen.
61 Stop Cheque 11. Stop Cheque This menu allows you to stop unpaid cheque issued from the account or unblock a blocked/stopped cheque. You can stop/unblock a single cheque. To stop cheque 1. Log on to the J2ME based Mobile Banking Application. 2. Select Services > Cheques > Stop Cheque icon from the menu using up\down scroll keys and the select key. The system displays Stop Cheque screen. 61
62 Stop Cheque Stop Cheque Field Description Field Name Select Action Select Account Description [Mandatory, Dropdown] Select the action to be performed i.e. Stop or cancel from the dropdown list. [Mandatory, Dropdown] Select the account for which the request is being made from the dropdown list. Cheque Number [Mandatory, Numeric, 20] Input the Valid Cheque Number which has to be stopped or Unblocked. Reason [Mandatory, Alphanumeric, 40] Input the reason of Stop or Unblock Of cheque for reference. This field displays is an optional field for Cancel stopped cheque. 3. Enter the relevant details. 4. Select the Submit form the options. The system displays Stop Cheque Verify screen. Select the Exit from the option to exit from the application.
63 Stop Cheque Select the Home from the options to navigate to the menu screen. Select the Menu from the options to return to the sub menu screen. Stop Cheque Verify 5. Select the Confirm from the options. The system displays Stop Cheque Confirm screen. Select the Change from the options to return to the previous screen. Select the Exit from the options to exit from the application. Select the Home from the options to navigate to the menu screen. Select the Menu from the options to return to the sub menu screen.
64 Stop Cheque Stop Cheque Confirm 6. Select the Home from the options to navigate to the menu screen.0. Select the Menu from the options to get back to the sub Menu screen. Select the Exit from the options to exit from the application Select the OK from the options to navigate to the stop cheque initial screen..
65 My Cheques 12. My Cheques This menu enables you to view the status of a cheque issued. To inquire the cheque status 1. Log on to the J2ME based Mobile Banking Application. 2. Select Cheques > My Cheques icon from the menu using up\down scroll keys and the select key. The system displays My Cheques screen. 65
![My Cheques My Cheques Field Description Field Name Select Account Description [Mandatory, Drop down] Select the account for which the cheque status is to be inquired.](/docs-images/95/124445526/images/66-0.jpg "Cheque Number [Mandatory, Numeric, 20] Type the cheque number for which status is to be inquired. 3. Select the Submit from the options.")
66 My Cheques My Cheques Field Description Field Name Select Account Description [Mandatory, Drop down] Select the account for which the cheque status is to be inquired. Cheque Number [Mandatory, Numeric, 20] Type the cheque number for which status is to be inquired. 3. Select the Submit from the options. The system displays My Cheques screen with the cheque status details. Select the Exit from the options to exit from the application. Select the Home from the options to navigate to the menu screen. Select the Menu from the options to get back to the sub Menu screen.
67 My Cheques My Cheques Field Description Field Name Account Cheque Number Cheque Status Amount Description This field displays the account number. This field displays the cheque number. This field displays the cheque status. This field displays the cheque amount. 4. Select the Back from the options to navigate to the previous screen.0. Select the Home from the options to get back to the Menu screen. Select the Exit from the options to exit from the application.
68 My Cheques Select the Menu from the options to get back to the sub Menu screen.
69 New Cheque Book 13. New Cheque Book This menu enables you to place a request for a new cheque book to the bank. To request the cheque book 1. Log on to the J2ME based Mobile Banking Application. 2. Select Services > Cheques > Request Cheque Book icon from the menu using up\down scroll keys and the select key. The system displays New Cheque Book screen. 69
![New Cheque Book New Cheque Book Field Description Field Name Select Account Cheque Book Option Mode of Delivery Description [Mandatory, Drop down] Select the account for which new cheque book is to](/docs-images/95/124445526/images/70-0.jpg "be issued. [Mandatory, Drop down] Select the cheque book option.")
70 New Cheque Book New Cheque Book Field Description Field Name Select Account Cheque Book Option Mode of Delivery Description [Mandatory, Drop down] Select the account for which new cheque book is to be issued. [Mandatory, Drop down] Select the cheque book option. The options are: Cheque Book With 10 Leaves Cheque Book With 50 Leaves Cheque Book With 25 leaves [Mandatory, Drop down] Select the mode of delivery for the cheque book. The options are: Branch Courier 3. Select the Submit from the options. The system displays New Cheque Book Verify screen. Select the Home from the options to navigate to the menu screen.
71 New Cheque Book Select the Exit from the options to exit from the application. Select the Menu from the options to get back to the sub Menu screen. New Cheque Book Verify 4. Select the Confirm from the options. The system displays New Cheque Book Confirm screen. Select the Change from the options to navigate to the previous screen. Select the Exit from the options to exit from the application. Select the Home from the options to navigate to the menu screen. Select the Menu from the options to get back to the sub Menu screen.
72 New Cheque Book New Cheque Book Confirm 5. Select the Home from the options to get back to the Menu screen.0. Select the View Messages from the options from the options to view the messages. Select the Exit from the options to exit from the application. Select the Ok from the options. The initial New Cheque Book screen is displayed Select the Menu from the options to return to the sub menu screen.
73 Loan Details 14. Loan Details This allows you to view all the relevant details of the loan accounts. To view the loan details 1. Log on to the J2ME based Mobile Banking Application. 2. Select My Loans > Loan Details icon from the menu by using the up/down arrow keys. The system displays Loan Details screen. 73
74 Loan Details Loan Details Field Description Field Name Account Description [Mandatory, Drop down] Select the account for which loan details is to be viewed. 3. Select the Submit from the options. The system displays Loan Details screen. Select the Home from the options to navigate to the menu screen. Select the Exit from the options to exit from the application. Select the Menu from the options to return to the sub menu screen.
 (Screen 2) (Screen 3) (Screen")
75 Loan Details Loan Details (Screen 1) (Screen 2) (Screen 3) (Screen 4)
76 Loan Details Field Description Field Name Description Account Details Account Customer Id Product Name This field displays the Account Number of the Customer for the Loan amount. This field displays the customer id of the Customer This field displays the product name of the loan account. Loan Details Sanctioned Loan Amount Interest Rate Maturity date Disbursed Loan Amount This field displays the Approved loan amount. This field displays the Rate of interest charged for the loan. This field displays the Loan Maturity Date. This field displays the Loan amount disbursed till date. Outstanding Loan details Principal Balance Next Installment Date Next Installment Amount Installment arrears Loan outstanding This field displays the principal balance from the loan account. This field displays the Date when the next installment has to be paid. This field displays the next installment amount that has to be paid. This field displays the installment arrears for the loan account.. This field displays the loan outstanding amount that has to be paid. 4. Select the Home from Options to get back to the Menu screen.0.
77 Loan Details Select the Back from the options to navigate to the previous screen. Select the Exit from the options to exit from the application Select the Menu from the options to return to the sub menu screen..
78 Financing Details 15. Financing Details This allows you to view all the relevant details of the Islamic finance accounts. To view the financing details 1. Log on to the J2ME Based Mobile Banking Application. 2. Select My Loans > Financing Details icon from the menu by using the up/down arrow keys. The system displays Financing Details screen. 78
79 Financing Details Financing Details Field Description Field Name Account Description [Mandatory, Dropdown] Select the account from the dropdown list. 3. Select Submit from the options. The system displays the Loan Details screen. Select the Home from the options to navigate to the menu screen. Select the Exit from the options to exit from the application. Select the Menu from the options to return to the sub menu screen.
 (Screen 2) (Screen 3) (Screen 4)")
80 Financing Details Financing Account Details (Screen 1) (Screen 2) (Screen 3) (Screen 4)
81 Financing Details Field Description Field Name Description Account Details Account Customer Id Product Name This field displays the account numbers under a particular customer ID. This field displays the customer id of the selected account. This field displays the financing product name. Financing Details Amount Financed Profit Rate Maturity Date Lease Type Lease Payment Mode This field displays the financed amount. This field displays the profit rate applicable to the financing account. This field displays the maturity date of the financing account. This field displays the type of the lease. This field will be displayed when the selected account is opened under IJARAHA or TAWAROOQ product. This field displays the type of payment mode opted This field will be displayed when the selected account is opened under IJARAHA or TAWAROOQ product. Outstanding Financing Details Principal Balance Next Installment Date This field displays the outstanding principle balance on the loan account as on date. This field displays the due date of the next installment.
82 Financing Details Field Name Next Installment Amount Installment Arrears Outstanding Finance Amount Description This field displays the next installment amount. This field displays the unpaid installment amount. This field displays the outstanding finance amount to be paid. 4. Select the Home from the options to get back to the Menu screen.0. Select the Back from the options to navigate to the previous screen. Select the Exit from the options to exit from the application. Select the Menu from the options to return to the sub menu screen.
83 Mail Box 16. Mail Box This option allows you to communicate with the bank administrator. To access the Mailbox options 1. Log on to the J2ME Based Mobile Banking Application. 2. Select Services > Mailbox icon from the menu. The system displays Mailbox screen. 3. Select the Compose from the options. The system displays Compose Message screen. Select the Exit from the options to exit from the application. Select the Home from the options to navigate to the menu screen. Select the Menu from the options to return to the sub menu screen. Select Interactions from the dropdown and Click the Submit from the options. The system displays the Interactions / Inbox screen. 83
84 Mail Box Inbox 4. Select the message from the dropdown. 5. Select the View from the options. The system displays View inbox screen.0. Select the ATG from the options to call bank officials for any clarification. Select the Back from the options to return to the previous screen. Select the Exit from the options to exit from the application. Select the Home from the options to navigate to the menu screen. Select the Menu from the options to return to the sub menu screen. 0.

")
85 Mail Box Inbox Message Details (Screen1) (Screen2) (Screen3)
86 Mail Box 1. Select the Back button from the options to return to the previous screen Select the Exit from the options to exit from the application. Select the Home from the options to navigate to the menu screen. Select the Menu from the options to return to the sub menu screen. Select the ATG from the options to call bank officials for any clarification. Select the Reply from the options to reply to the current message. 2. Select the Bulletin from the options. The system displays View Bulletin screen.0. 0.
87 Mail Box Bulletin View Bulletin 1. Select the message to be viewed from the dropdown list. 2. Select View from the options. The system displays the message in the Bulletins screen. Select the ATG from the options to call bank officials for any clarification. Select Back from the options to navigate to the previous screen. Select the Exit from the options to exit from the application. Select the Home from the options to navigate to the menu screen. Select the Menu from the options to return to the sub menu screen.

88 Mail Box Bulletins (Screen1) (Screen2) 3. Select Back from the options to return to the previous screen. Select Exit from the options to exit the application. Select the Home from the options to navigate to the menu screen. Select the Menu from the options to return to the sub menu screen. 4. Click the Sent messages on the mailbox screen from the options. The system displays the Sent messages screen.0. 0.

89 Mail Box Sent Messages Sent Messages 1. Select the message to be viewed using up down arrow keys and select key. 2. Select View from the options. The system displays the message in the Sent Message screen. Select the ATG from the options to call bank officials for any clarification. Select Back from the options to navigate to the previous screen. Select the Exit from the options to exit from the application. Select the Home from the options to navigate to the menu screen. Select the Menu from the options to return to the sub menu screen.
90 Mail Box Sent Messages (Screen2) (Screen2) 3. Select Home from the options to navigate to the menu screen.0. Select the ATG from the options to call bank officials for any clarification. Select Back from the options to return to the previous screen.. Select Exit from the options to exit the application. Select the Menu from the options to return to the sub menu screen. Select the Forward from the options to forward the current message.


91 Mail Box Compose Compose 1. Click the Options menu. The system displays below pop up. 2. Select the Compose option to compose message. 3. You can also view Alerts & Tasks by selecting those options from the first screen shown above.
92 Mail Box 4. Select the Subject and Customer using up down arrow keys and select key. 5. In case Subject is selected as I will type my own subject, then you can type your custom subject in Custom Subject field. 6. Enter the message (mandatory). 7. Select the Exit from the options to exit from the application. Select Inbox from the options to return to Inbox screen. Select the ATG from the options to call bank officials for any clarification. Select the Home from the options to navigate to the menu screen. Select the Menu from the options to return to the sub menu screen. Select Add Attachment from options to add any attachment to the message. The system displays following screen: Click the Send from the options. The system displays below confirmation screen for message sent. Compose


93 Mail Box 8. Click Add Attachments to attach any document. The system will open one alert screen to browse and select file to be attached. Click the Show/Delete Attachments to view or delete any of the attachments. Click Attachments Done when attachments are finished. The system returns to below screen.

94 Mail Box Note: Maximum number of images than can be attached is 5. Size of any image should not be greater than 1 MB & Overall size of all the attachments should not exceed 2 MB. 9. Select the Exit from the options to exit from the application. Select Inbox from the options to return to Inbox screen. Select the ATG from the options to call bank officials for any clarification. Select the Home from the options to navigate to the menu screen. Select the Menu from the options to return to the sub menu screen. Select Add Attachment from options to add any attachment to the message. The system displays following screen. Click the Send from the options. The system displays below confirmation screen for message sent.
95 Mail Box 10. Select the Exit from the options to exit from the application.0. Select OK from the options to return to compose message screen. Select the ATG from the options to call bank officials for any clarification. Select the Home from the options to navigate to the menu screen. Select the Menu from the options to return to the sub menu screen.
96 Forex Inquiry 17. Forex Inquiry This menu enables you to inquire the latest exchange rate for various foreign currencies. Exchange rates will be displayed against the base currency of FLEXCUBE Direct Banking. To inquire Foreign Exchange Rates 1. Log on to the J2ME Based Mobile Banking Application. 2. Select Customer services >Exchange Rate Inquiry from the menu using up\down scroll keys and the select key. 3. Select the Submit option. The system displays Foreign Exchange Rate Inquiry screen. 96
97 Forex Inquiry Foreign Exchange Rate Inquiry Field Description Field Name From Currency To Currency Description This field displays the base currency to enquire the exchange rate. [Mandatory, Dropdown] Select the currency to which the exchange rate is being asked for from the dropdown list. 4. Select the To Currency. 5. Select Submit from Options. The system displays Foreign Exchange Rate Inquiry screen. Select the Exit from the options to exit from the application. Select the Home from the options to navigate to the menu screen. Select the Menu from the options to return to the sub menu screen.

98 Forex Inquiry Foreign Exchange Rate Inquiry (Screen 1) (Screen 2) Field Description Field Name Foreign Rate Unit To Currency Cash Buy Cash Sell TT Buy Description This field displays the foreign rate unit currency. This field displays the currency to which the exchange rate is being asked for. This field displays the rate at which the bank will buy the foreign currency in cash transaction This field displays the rate at which the bank will sell the foreign currency in a cash transaction This field displays the rate at which the bank will buy the foreign currency in a telegraphic transfer
99 Forex Inquiry Field Name TT Sell Description This field displays the rate at which the bank will sell the foreign currency in a telegraphic transfer. 6. Select the Home option to get back to the Menu screen.0. Select the Exit from the options to exit from the application. Select the Menu from the options to return to the sub menu screen Select the Back from the options to return to the previous screen.
100 Beneficiary Maintenance 18. Beneficiary Maintenance A Business user having access to Beneficiary Maintenance can maintain Beneficiary. You can also specify if the Beneficiary template created is available to other users of the same primary customer id by specifying the template access level as public If the Template is created with template access level as Private, it is available only to the User who has created it. The search criteria allow searching the beneficiary templates created earlier. Beneficiary Maintenance is supported for following Transactions Domestic Transfer Internal Transfer International Transfer 100
101 Beneficiary Maintenance 1. Navigate through the menus to Transfers > Beneficiary Maintenance. Beneficiary Maintenance Field Description Field Name Transaction Type Description [Mandatory, Drop-Down] Select the transaction type, for which template is to be searched, from the drop-down list. 2. Select any Transaction Type for which beneficiary is to be created.
102 Beneficiary Maintenance 3. Click Create Bene from Options. Below is shown for Domestic Account Transfer Beneficiary. Field Description Field Name Description Beneficiary ID [Mandatory, Alphanumeric, 10] Type the beneficiary ID
![Beneficiary Maintenance Field Name Description Beneficiary Name [Mandatory, Alphanumeric, 35] Type the beneficiary name.](/docs-images/95/124445526/images/103-1.jpg "Account Type [Mandatory, Drop down] Select the account type. 4. Click the Submit button from Options.")
103 Beneficiary Maintenance Field Name Description Beneficiary Name [Mandatory, Alphanumeric, 35] Type the beneficiary name. Account Type [Mandatory, Drop down] Select the account type. 4. Click the Submit button from Options. It will navigate you to the next screen as shown below.
104 Beneficiary Maintenance Field Description Field Name Description Beneficiary Account No [Mandatory, Alphanumeric, 35] Type the beneficiary account number. Beneficiary [Optional, Alphanumeric, 35] Type the beneficiary id. National Clearing Code Type National Clearing Codes Visibility [Optional, Drop-Down] Select the national clearing code type from the drop-down list. [Optional, Search, Lookup] Click the Look Up icon to search the beneficiary bank/branch code. [Mandatory, Drop-Down] Select the Beneficiary Access level from the drop-down list. The options are : Public Private 5. Click the Look up button for national clearing code from the options. The system display following screen.

105 Beneficiary Maintenance Beneficiary Maintenance 6. Select any code and click the Submit option. The system will return to below screen. Beneficiary Maintenance Verify
106 Beneficiary Maintenance 7. Click the Submit button from the options. The system displays Confirm screen shown below. Beneficiary Maintenance Confirm 8. Click OK. The system displays initial Beneficiary Maintenance screen.0.
107 Own Account Transfer 19. Own Account Transfer This menu enables you to initiate an own account transfer. Own account transfer can be done between any accounts owned by the same user I.e. the accounts that are under the customer ids mapped to you. To do the own account transfer 1. You can navigate from Transfers > Own Account Transfer.
108 Own Account Transfer Own Account Transfer Field Description Field Name From Account To Account Amount Description [Mandatory, Dropdown] Select the Source Account. The drop down menu gives the list of accounts. [Mandatory, Dropdown] Select the Destination Account. The drop down menu gives the list of accounts. [Mandatory, Numeric,15] Type the amount to be transferred in the Destination Account Currency. Narrative [Optional, Alphanumeric, 80] Type the details of the payment. 2. Click Options menu in the above screen. The system displays below pop over screen.

109 Own Account Transfer Pay now Pay later Click the Pay now button to process the funds transfer immediately. The transfer can be done in any of the three modes: Pay now, Pay later or Pay Periodically by Setting up Standing Instruction. Click the Pay later button to make the funds transfer on a future date. Note: Pay later transactions are future dated transactions. Hence all the Pay later payments will be available under My Scheduled Payment. Refer My Schedule Payment section for further details. Pay Periodically Setup Standing Instruction Click the Pay Periodically button to make the periodic payments by specifying start date and end date.
110 Own Account Transfer Payment Execution Frequency when Pay Periodically is selected Select the standing instruction execution frequency for the funds transfer from the pop over. The options are: Daily Weekly Fortnightly Monthly Bi-Monthly Quarterly Half -Yearly Yearly 3. Below is shown when Pay Later is clicked. The system asks for any future date at which payment is to be made. Own Account Transfer Pay Later 4. Enter any future date and click the submit button from the options. The system displays the Own Account Transfer Verify screen as shown below.
111 5. Click the OK button. The system returns to verification screen as shown below. Own Account Transfer
112 Own Account Transfer Own Account Transfer Verify 6. Click the Confirm button from the options. The system displays Own Account Transfer Confirm screen. Click the Change button to change the entered information.

113 Own Account Transfer Own Account Transfer Confirm 7. Click the OK button. The system returns to verification screen as shown below.0.
114 Internal Transfer 20. Internal Transfer This menu enables you to initiate an internal transfer. The Internal Transfer is the transfer of amount within different accounts of the same bank. To do the domestic account transfer 1. Navigate through the menus to Transfers > Internal Transfer. 114
115 Internal Transfer Internal Transfer 1. Select Beneficiary and click Continue option. The system display following Internal Transfer screen. Internal Transfer
![Internal Transfer Field Description Field Name From Account Description [Mandatory, Radio button] Select the From Account as the source account for the internal transfer.](/docs-images/95/124445526/images/116-0.jpg "To Account [Mandatory, Alphanumeric, 34] Type the To Account as the destination account for the internal transfer.")
116 Internal Transfer Field Description Field Name From Account Description [Mandatory, Radio button] Select the From Account as the source account for the internal transfer. To Account [Mandatory, Alphanumeric, 34] Type the To Account as the destination account for the internal transfer. Destination Branch [Mandatory, Radio button] Select the To Account as the destination account for the internal transfer. Amount [Mandatory, Numeric, 15] Type the amount for the transfer. Currency [Mandatory, Radio button] Type the amount for the transfer. Narrative [Optional, Alphanumeric, 35] Type the narrative for the transaction. 2. Click the options menu in above screen. The system displays below pop over screen. Internal Transfer
117 Internal Transfer Pay now Pay later Click the Pay now button to process the funds transfer immediately. The transfer can be done in any of the three modes: Pay now, Pay later or Pay Periodically by Setting up Standing Instruction. Click the Pay later button to make the funds transfer on a future date. Note: Pay later transactions are future dated transactions. Hence all the Pay later payments will be available under My Scheduled Payment. Refer My Schedule Payment section for further details. Pay Periodically Setup Standing Instruction Payment Execution Frequency when Pay Periodically is selected Click the Pay Periodically button to make the periodic payments by specifying start date and end date. Select the standing instruction execution frequency for the funds transfer from the pop over. The options are: Daily Weekly Fortnightly Monthly Bi-Monthly Quarterly Half -Yearly Yearly 3. Below is shown for Pay Now option. The system displays the Internal Transfer Verify screen.
118 Internal Transfer Internal Transfer Verify (Screen1) (Screen2) 4. Click Confirm from Options. The system display Internal Transfer Confirm screen. Click the Change option. The system displays Initial Internal Transfer screen.
119 Internal Transfer Internal Transfer Confirm (Screen1) (Screen2) 2. Click the OK button. The system displays Internal Transfer Confirm screen.0. Click the Download PDF button to download the PDF containing transfer details.
120 Domestic Payment 21. Domestic Payment This menu enables you to initiate Domestic account transfer. Domestic Transfer is transfer of amount within different accounts of the different bank. To do the domestic account transfer 1. Navigate through the menus to Transfers > Domestic Payment. 120
121 Domestic Payment Domestic Payment 2. Select Beneficiary and click Continue option. The system displays following screen. Domestic Payment Screen 1 Screen 2
![Domestic Payment Screen3 Field Description Field Name From Account Beneficiary Details Description [Mandatory, Drop down] Select the From Account as the source account for the domestic payment.](/docs-images/95/124445526/images/122-0.jpg "To Account [Mandatory, Drop down] Select the To Account as the destination account for the domestic payment.")
122 Domestic Payment Screen3 Field Description Field Name From Account Beneficiary Details Description [Mandatory, Drop down] Select the From Account as the source account for the domestic payment. To Account [Mandatory, Drop down] Select the To Account as the destination account for the domestic payment. Beneficiary Bank Details National Clearing Code type National Clearing Code [Mandatory, Drop down] Select the national clearing code type. [Mandatory, Alphanumeric, 20] Type the national clearing code. Payment details
123 Domestic Payment Field Name Description Amount [Mandatory, Numeric, 15] Type the amount for the domestic payment. Currency [Mandatory, Radio button] Select the currency for the amount. Other Details Narrative [Optional, Alphanumeric, 35] Type the Narrative for the transfer for future reference. Pay now Pay later Click the Pay now button to process the funds transfer immediately. The transfer can be done in any of the three modes: Pay now, Pay later or Pay Periodically by Setting up Standing Instruction. Click the Pay later button to make the funds transfer on a future date. Note: Pay later transactions are future dated transactions. Hence all the Pay later payments will be available under My Scheduled Payment. Refer My Schedule Payment section for further details. Pay Periodically Setup Standing Instruction Payment Execution Frequency when Pay Periodically is selected Click the Pay Periodically button to make the periodic payments by specifying start date and end date. Select the standing instruction execution frequency for the funds transfer from the pop over. The options are: Daily Weekly Fortnightly Monthly Bi-Monthly Quarterly Half -Yearly Yearly 3. Select the Payment options from Options. The system displays Domestic Payment Verify screen. Below is shown for Pay Now option.
124 Domestic Payment Select the Home from the options to navigate to the Menu screen. Select the Exit from the options to exit from the application. Domestic Payment Screen 1 Screen 2 4. Select the Confirm from the options. The system displays Domestic Payment Confirm screen.


125 Domestic Payment Domestic Payment Confirm Screen 1 Screen 2 5. Select the Home from the options to get back to the Menu screen.0. Select the View Messages from the options to view the messages. Select the Ok from the options. The initial Domestic Payment screen is displayed.
126 International Account Transfer 22. International Account Transfer Using the International Transfer option, you can transfer funds globally, i.e., you can transfer funds to any account in any bank across the globe. Such transfer can be made either by using an existing template or as a new payment transaction. The payment can be processed immediately, or on a specific future date, or as per your standing instructions with the bank. 1. Navigate through the menus to Transfers > International Account Transfer. 126
127 International Account Transfer International Account Transfer Field Description Field Name Description Transfer To Existing Beneficiary Make New Payment [Optional, Pop over] Select Existing Template option button to select the existing Payment template for funds transfer [Optional, Pop over] Select Make New Payment option button to make a new funds transfer entry. The transfer can be done either by using Existing Payment beneficiary or Make New Payment. Below is shown for Existing Beneficiary. 2. Click the Submit button from the options. The system displays below screen.
![International Account Transfer International Account Transfer Screen 1 Screen 2 Field Description Field Name From Account Description [Mandatory, Drop down] Select the From Account as the source](/docs-images/95/124445526/images/128-1.jpg "account for the domestic payment. Amount [Mandatory, Numeric, 15] Type the amount for the domestic payment. Currency Correspondence Charges [Mandatory, Drop down] Select the currency for the amount.")
128 International Account Transfer International Account Transfer Screen 1 Screen 2 Field Description Field Name From Account Description [Mandatory, Drop down] Select the From Account as the source account for the domestic payment. Amount [Mandatory, Numeric, 15] Type the amount for the domestic payment. Currency Correspondence Charges [Mandatory, Drop down] Select the currency for the amount. [Mandatory, Drop down] Select the party bearing the charges for transaction Narrative [Optional, Alphanumeric, 35] Type the Narrative for the transfer for future reference.
129 International Account Transfer Field Name Payment Instruction Description [Mandatory, Drop down] Select the Instructions to execute the payment Pay Now Pay Later Pay Periodically Default value will be Pay Now. Note: Pay later transactions are future dated transactions. Hence all the Pay later payments will be available under My Scheduled Payment. Refer My Schedule Payment section for further details. 3. Below is shown for Pay Now option. 4. Click the Submit button. The displays the International Account Transfer Verify screen. International Account Transfer Verify Screen 1 Screen 2 5. Click the Confirm button to navigate to confirm the payment. The system displays Confirmation screen.
130 International Account Transfer International Account Transfer Screen 1 Screen 2 6. Select the Home from the options to get back to the Menu screen.0. Select the View Messages from the options to view the messages. Select the Ok from the options. The initial International Account Transfer screen is displayed.
131 My Schedule Payment 23. My Schedule Payment All the future dated transactions/payments can be viewed under My Schedule Payment option. To view My Scheduled Payments 1. Log on to the Client/Application based Mobile Banking. Navigate to Transfers > My Schedule Payment. The system displays My Schedule Payment screen. 131
132 My Schedule Payment My Schedule Payment Field Description Field Name Source Account Mode Of Transfer Description [Mandatory, Drop down] Select an account from which transfer to be done. [Mandatory, Drop down] Select the Mode of Transfer. Options available are: Cross Border Within Bank Within Country 2. Click the Submit button from the options. The system displays below screen.

133 My Schedule Payment 3. Click the select option tab to select the pending transfer to be viewed, as shown below. 4. Click the Get Details button from the options pop over. The system displays details for the selected scheduled pending transfer payment transaction.
134 My Schedule Payment My Schedule Payment (Screen 1) (Screen 2) (Screen3)
135 My Schedule Payment Field Description Field Name Reference Number Transfer Type Start Date End Date Frequency Mode Of Transfer User Reference Number Source Account Destination Account Transfer Amount Currency Status Narrative Description Displays SI reference number. Displays the standing instruction Displays the start date of SI Displays the end date of SI Displays the frequency of SI Displays Mode of transfer scheduled by user Displays the truncation reference number. Displays the account for SI Displays the account for SI Displays transfer amount for SI Displays currency for SI Displays the status for SI Displays the narrative for SI 5. Click the Cancel from the options if you want to cancel this pending Transfer transaction. The system asks for confirmation as shown in below screen.

136 My Schedule Payment (Screen 1) 6. Select Yes from the options to confirm the cancellation. The system displays below confirmation screen.0. (Screen 2)
137 Pay Bill 24. Pay Bill This menu enables you to pay the Utility Bills for the Registered Billers with the Bank. To pay the bills 1. Log on to the J2ME based Mobile Banking Application. 2. Select Bill Payments > Pay Bill icon from the menu using up/down arrow key and Select key. The system displays Pay Bills screen.
138 Pay Bill Pay Bills (Screen 1) (Screen 2) Field Description Field Name Select Biller Bill Number Bill Generation Date Payment Amount From Account Description [Mandatory, Drop down] Select the Name of the Biller Radio button. [Mandatory, Alphanumeric,15] Type the Bill number for which payment is to be made [Mandatory, Alphanumeric, 10] Type the date on which the Bill payment is due. [Mandatory, Alphanumeric,15] Type the amount of payment being done. [Mandatory, Drop down] Select the account number from which payment is to be done. 3. Select Submit from the options. The system displays Pay Bill Verify screen. Select the Home from the options to navigate to the menu screen.

139 Pay Bill Select the Exit from the options to exit from the application. Select the Menu from the options to return to the sub menu screen. Pay Bill Verify (Screen 1) (Screen 2) 4. Select the Confirm from Options. The system displays the Pay Bill Confirm screen. Select the Exit from the options to exit from the application. Select the Home from the options to navigate to the menu screen. Select the Change from the options to navigate to previous screen. Select the Menu from the options to return to the sub menu screen.
140 Pay Bill Pay Bill Confirm (Screen 1) (Screen 2) 5. Select the Home from the options to get back to the Menu screen. Select the Exit from the options to exit from the application. Select the Menu from the options to return to the sub menu screen. Select the Ok from the options. The initial Pay Bill screen is displayed.0.

141 Security Questions 25. Security Questions The feature helps you to reset the Security Questions. 1. Login using the appropriate Banking URL. 2. Navigate to Customer Services > Security Questions. The following page is displayed. Security Questions 3. Enter the desired answers for the selected questions. 4. Click Confirm from Options. The following page is displayed. 141
142 Security Questions Modify Security Questions 5. Verify the details and click Confirm from Options. The following Success message is displayed. Alert 6. Click OK.0.
143 Manage Profile 26. Manage Profile This feature helps you to view and modify registered peer beneficiaries. 1. Login to the Banking Application. 2. Click Transfers, as shown in the following screenshot. Transfers 3. The following page is displayed. Click Claim/Manage Peer Account, as shown in the following screenshot.

144 Manage Profile 4. The following page is displayed. Click Options. Manage Profile 5. Click Modify Profile, as shown in the following screenshot. Modify Profile 6. The following page is displayed. Select the required Account Number from the dropdown. The relevant details appear in the respective fields. Modify Profile
145 Manage Profile 7. Make the necessary changes and click Submit. Submit Modify Profile 8. The Verify page for Modify Profile appears. Verify Modify Profile

146 Manage Profile 9. Click Confirm from Options. Confirm Details 10. The following success message appears. Click OK. Alert
147 11. Click OK.0. Manage Profile
148 Register P2P Beneficiary 27. Register P2P Beneficiary This feature helps you to add new P2P Beneficiaries to your account. 1. Click Transfers. Transfers 2. The following page is displayed. Click Add Peer Beneficiaries from Transfers. Add Peer Beneficiary

149 Register P2P Beneficiary 3. The Add Peer Beneficiary page is displayed. Enter the appropriate details in the respective fields. 4. Click Submit from Options.

150 Register P2P Beneficiary 5. The Verify page is displayed. Verify the details. Verify - Add Peer Beneficiary 6. Select Confirm from Options.

151 Register P2P Beneficiary 7. The following success message appears. Click OK.0. Alert

152 Peer Beneficiary Registration 28. Peer Beneficiary Registration 1. Click Beneficiaries from Transfers, as shown in the following screenshot. 2. The Peer Beneficiary Registration page is displayed. Select the appropriate option from the dropdown. Peer Beneficiary Registration
153 Peer Beneficiary Registration 3. Click Continue from Options. Register Without Using Security Code 4. The following page is displayed. Make the necessary changes to the information. Modify Peer Beneficiary Registration

154 Peer Beneficiary Registration 5. Click Submit from Options. Submit Peer Beneficiary Registration 6. Verify the details and click Confirm from Options. Confirm Peer Beneficiary Details

155 Peer Beneficiary Registration 7. The following success message appears. Click OK.0. Alert Proximity Pay

156 Note: For further process, please refer to the respective sections. Peer Beneficiary Registration
157 P2P Payments 29. P2P Payments This feature helps to user to make peer to peer payments. 1. Once the required Peer Beneficiary is added, Click Pay Now from Options. Pay Now 2. The following page is displayed. Select the desired ID Type from the dropdown. Select ID Type
158 P2P Payments 3. Click Continue from Options. Continue with the selected ID Type 4. The following page is displayed. Enter the appropriate information in the remaining fields. Peer to Peer Payments


159 P2P Payments 5. Select Continue from Options. Continue with the selected Contact Type 6. The following fields appear. Enter the required information for the respective fields. Additional Information - I for the selected Contact Type

160 P2P Payments Additional Information - II for the selected Contact Type Additional Information - III for the selected Contact Type

161 P2P Payments 7. Select Pay Now from the Options. Peer To Peer Payments - Pay Now 8. The Verify page appears. Verify the details. Peer To Peer Payments - Verify
162 P2P Payments 9. Click Confirm from the Options. Peer To Peer Payments Confirm Verified Details 10. The following page is displayed. Click Confirm from the Options. Peer to Peer Payments Confirm
163 11. Confirm the details from the Options.0. P2P Payments
164 P2P NFC Pay 30. P2P NFC Pay The transfer of funds between the peers through an application based phones should be provided using the NFC technology. Enabling this type of transfer through NFC based phones enables fund transfer between the account holders of the same bank. Note: Before proceeding further, please refer to the P2P Beneficiaries section. 1. Click Proximity Pay from Transfers, available in the More option. 2. Click the dropdown arrow of Proximity Pay. The extended list is displayed 3. Select NFC. Note: For the Send Money page, please refer to the following Field Description. Field Description Field Name Description Send Money Source From Account [Dropdown] Select the appropriate Account Number from the dropdown, from which the amount is to be transferred.
165 P2P NFC Pay Field Name Available Balance Description Displays the Available Balance for the account selected. Transfer Currency [Dropdown] Select the desired currency type from the dropdown. Transfer Amount [Mandatory, Numeric, Input Box, 15] Enter the desired amount. Narrative [Optional, Input Box, 50] Enter the desired description relevant to the transfer. Pay Now Back [Action Button] Click Pay Now to make an immediate payment. [Action Button] Click Back to go back to the previous screen. 4. Select the desired account for the payment. The Verify screen appears. 5. Verify the details and click Confirm.0.
166 P2P Transfer 31. P2P Transfer This transaction enables you to send payments to the known ids and contact (mobile numbers). Note: Before proceeding further, please refer to the P2P Beneficiaries section. For P2P Transfer 1. Log on to the J2ME Based Mobile Banking Application. 2. Navigate through Transfers> P2P Transfer from the menu. The system displays Peer To Peer Payments screen. Field Description
![P2P Transfer Field Name Select your Account Description [Mandatory, Dropdown] Select the desired Contact Type from the dropdown list. 3. Click Continue from Options.](/docs-images/95/124445526/images/167-0.jpg "The system displays the following screen.")
167 P2P Transfer Field Name Select your Account Description [Mandatory, Dropdown] Select the desired Contact Type from the dropdown list. 3. Click Continue from Options. The system displays the following screen. Peer To Peer Payments Field Description Field Name Description Peer to Peer Payments Contact Type Pay From [Dropdown] Select the desired Contact Type from the dropdown list. [Conditional] If the Contact Type selected is Listed then the respective details are fetched from the database. Else, enter the details manually. [Dropdown] Select the desired Account Number from the dropdown. Amount [Mandatory, Input Box, 15] Enter the desired amount. Description [Optional, Input Box, 50] Enter the desired description, if any.
168 P2P Transfer 4. Make the desired changes and click Pay Now / Pay Later from Options. 5. The following Verify screen is displayed. Verify the details. Peer To Peer Payments Verify 6. Click Confirm from Options. 7. Click OK. 8. Click Pay Now or Pay Later as per requirement.0. Note: Please refer to P2P Payments to complete the further transaction.
169 P2P-QR Pay 32. P2P-QR Pay Transfer of funds between the peers through an application based phones can be provided by scanning QR codes using the camera from the device. A business user will be able to transfer funds from their account to another user of the same bank by scanning the QR code. Sender should be able to scan QR code from any flat surface and read the beneficiary account details. The receiver of the payment should be able to generate the QR code by specifying the credit account no. The receiver will also be able to print and download the QR code for future reference. Once the sender scans the QR code, application should identify the beneficiary account details and initiate the transfer. Note: Before proceeding further, please refer to the P2P Beneficiaries section. To Proximity Pay QR Based 1. Log on to the J2ME Based Mobile Banking Application. 2. Navigate through Transfers> P2P QR Pay from the menu. The system displays Proximity Pay-QR screen. Proximity Pay-QR Note: For the Proximity Pay-QR screen, please refer to the following Field Description. Field Description Field Name Description
170 P2P-QR Pay Field Name Select Transfer choice Source Account Description [Mandatory, Radio Button] Select the transfer type. [Mandatory, Dropdown] Select the debit account from which the payment shall be made. Transfer Amount [Mandatory, Input box, 15] Enter the amount to be transferred. Currency [Mandatory, Dropdown] Select the currency of the amount being transferred. 3. Click Start Scan. The device camera is enabled and search for the QR Code to read the beneficiary account details. 4. Focus your camera to QR Code and click Submit on the screen. The QR Verify screen is displayed. 5. Click Continue button. The confirmation page is displayed. 6. Click OK.0.
171 View Received P2P Payments 33. View Received P2P Payments This transaction enables you to view the recent received payments to your account with details. Note: Before proceeding further, please refer to the P2P Beneficiaries section. To pay the bills 1. Log on to the J2ME Based Mobile Banking Application. 2. Select Transfer > P2P Acitivity from the menu. The system displays the Received Payment screen. Received Payments
172 View Received P2P Payments Field Description Field Name Date Received From User Reference Amount Description This field displays the date on which transaction has been generated. This field displays the name of the sender. This field displays the user reference number generated for transaction This field displays the amount received from the sender.
173 View Received P2P Payments Field Name Submit Description [Action Button] Select Submit from Options to view the details of the selected transaction. 3. Click any transaction from the list you want to view. The system displays the Detailed Received Payment screen. Received Payment Details Field Description Field Name Reference Number Host Reference Number Dated Currency Sender Received From Account Description This field displays the respective Reference Number of the selected transaction. This field displays the Host Reference Number of the transaction. This field displays the date at which the transaction is made. This field displays the Currency Type. Displays the name of the sender. Displays the respective Account Number of the Sender.
174 View Received P2P Payments Field Name Status Value Date Transaction Created By Updated By Amount Description Displays the status of the transaction. Displays the date on which payment is received. Displays the name of the transaction. Displays the name of the sender. Displays the name of the user who last updated the transaction. Displays the received amount. 4. Click Back. The system displays the Initial Received Payment screen.0.
175 Register Biller 34. Register Biller This menu enables you to register a Biller to Pay the Utility Bills through the Bank. To register the biller 1. Log on to the J2ME Based Mobile Banking Application. 2. Select Bill Payment > Register Biller icon from the menu using up/down arrow key and Select key. The system displays Biller Information screen.
176 Register Biller Biller Information (Screen 1) (Screen 2) Field Description Field Name Description Biller Information Biller Name This field displays the Name of the Biller Biller Nick Name Registered On Service Account Number Customer Id This field displays the Nick Name of the Biller This field displays the Date on which the Biller was Registered. This field displays the account number of the Customer for bill payment. This field displays the Customer Id of the Biller 3. Select Add Biller from the options. The system displays Register Biller screen.
177 Register Biller Select the Home from the options to navigate to the menu screen. Select the Exit from the options to exit from the application. Select First Page, Last Page, Next Page, and Previous Page from the menu to navigate to the respective pages. Select the Menu from the options to return to the sub menu screen. Register Biller Field Description Field Name Description Register Biller Select Customer [Mandatory, Drop down] Select the Customer for which the biller is to be registered.
178 Register Biller Field Name Select Biller Description [Mandatory, Drop down] Select the Biller from the list of the billers. Service Account Number [Mandatory, Alphanumeric,15] Type the Service account number. Biller Nick Name [Mandatory, Alphanumeric,15] Type the Service account number. 4. Select Submit from the options. The system displays Register Biller Verify screen. Select the Back from the options to navigate to the previous screen. Select the Home from the options to navigate to the menu screen. Select the Exit from the options to exit from the application. Select the Menu from the options to return to the sub menu screen. Register Biller Verify
179 Register Biller 5. Select the Confirm from the options. The system displays Register Biller Confirm screen. Select the Change from the options to navigate to the previous screen. Select the Exit from the options to exit from the application. Select the Home from the options to navigate to the menu screen. Select the Menu from the options to return to the sub menu screen. Register Biller Confirm 6. Select the Home from the options to get back to the Menu screen.0. Select the Exit from the options to exit from the application. Select the View Messages from the options to view the messages. Select the OK from the options to navigate to the initial Biller Information screen. Select the Menu from the options to return to the sub menu screen.
180 Delete Biller 35. Delete Biller This menu enables you to delete a already registered biller. To delete the biller 1. Log on to the J2ME Based Mobile Banking Application. 2. Select Bill Payment > Delete Biller icon from the menu using up/down arrow key and Select key. The system displays Delete Biller screen. 180
181 Delete Biller Delete Biller Field Description Field Name Biller Name Description [Mandatory, Drop down] Select the Biller from the list of the billers. 3. Select Submit from the options. The system displays Delete Biller Verify screen. Select the Home from the options to navigate to the menu screen. Select the Exit from the options to exit from the application. Select the Menu from the options to return to the sub menu screen.
182 Delete Biller Delete Biller Verify (Screen 1) (Screen 2) 4. Select the Confirm from the options. The system displays Delete Biller Confirm screen. Select the Back from the options to navigate to the previous screen. Select the Exit from the options to exit from the application. Select the Home from the options to navigate to the menu screen. Select the Menu from the options to return to the sub menu screen.
183 Delete Biller Delete Biller Confirm (Screen 1) (Screen 2) 5. Select the Home from the options to get back to the Menu screen.0. Select the Exit from the options to exit from the application. Select the View Messages from the options to view the messages. Select the OK from the options to navigate to the Delete Biller screen. Select the Menu from the options to return to the sub menu screen.

184 Open Term Deposit 36. Open Term Deposit This option allows you to open a new term deposit account with the Bank. 1. Navigate through menus, Accounts > Open Term Deposit to access Open Term Deposit transaction. Open Term Deposit 184
![Open Term Deposit Field Description Field Name Description Customer Details Holding Pattern [Mandatory, pop over] Select the appropriate holding pattern.](/docs-images/95/124445526/images/185-0.jpg "The option are as follows: Single: If this option is selected for the single term deposit account holder. Joint: If this option is selected for the joint account holder.")
185 Open Term Deposit Field Description Field Name Description Customer Details Holding Pattern [Mandatory, pop over] Select the appropriate holding pattern. The option are as follows: Single: If this option is selected for the single term deposit account holder. Joint: If this option is selected for the joint account holder. Joint Customer Id 1 [Conditional, Alphanumeric] This field displays Customer Id of the first joint account holder. This field will be enabled only if the Holding Pattern selected is Joint and will be mandatory.
![Open Term Deposit Field Name Joint Customer Id 2 Description [Optional, Alphanumeric] This field displays Customer Id of the second joint account holder.](/docs-images/95/124445526/images/186-0.jpg "This field will be enabled only if the Holding Pattern selected is Joint. Note: Customer Id cannot be same as customer id entered for first account holder.")
186 Open Term Deposit Field Name Joint Customer Id 2 Description [Optional, Alphanumeric] This field displays Customer Id of the second joint account holder. This field will be enabled only if the Holding Pattern selected is Joint. Note: Customer Id cannot be same as customer id entered for first account holder. Deposit Details Deposit Product From Account [Mandatory, Pop Over] Select the deposit product for which term deposit is to be opened. [Mandatory, Pop Over] Select the source account for the deposit from the pop over. Amount required to be deposited in the newly opened term deposit will be fetched from this account. Deposit Amount [Mandatory, Numeric, 15] Type the amount to be deposited. 2. Click Options. The system displays below pop up screen. Open Term Deposit
187 Open Term Deposit 3. Click the Continue option. The system asks for Maturity Date as shown in below screen. Open Term Deposit Field Description Field Name Description Maturity Date [Mandatory, Pick List ] Select the maturity date of the term deposit from the pick list. Note: Maturity date cannot be less than or equal to the current business date Maturity date cannot be less than the minimum period as specified by the bank for the selected product.
188 Open Term Deposit Field Name Maturity Instructions Transfer To (Account transfer options) Description [Mandatory, Drop-Down] Select the maturity instruction for the deposit from the drop-down list. The options for Conventional Deposit Products are as follows: Close on Maturity (No Rollover) Renew Principal and Interest Renew principal and Payout the interest Renew Special Amount and Pay Out the remaining amount. The options for Islamic Deposit Products are as follows Close on Maturity (No Rollover) Renew Principal and Profit Renew principal and Payout the profit Renew Special Amount and Pay Out the remaining amount Default value is Close on Maturity. [Conditional, Pop Over] Select the account to which the principal and interest are to be transferred from the drop-down list. The options are as follows: Transfer to users mapped accounts Transfer to internal bank account Transfer through domestic clearing network This field is not displayed if the Renew Principal and Interest option is selected from the Maturity Instruction drop-down list for Conventional Products and if the Renew Principal and Profit option is selected from the Maturity Instruction drop-down list for Islamic Product Default value is Transfer through domestic clearing network. Account [Conditional, Alphanumeric, 20] Type the account number to which the interest and principal will be transferred. This field is enabled if the following options are selected from the Account Transfer options drop-down list. Transfer to internal Bank account Transfer through domestic clearing network
189 Open Term Deposit Field Name Description [Conditional, Drop-Down] Select the account to which the interest is to be transferred from the drop-down list. This field is a drop -down list, if the Transfer to users mapped accounts options is selected from the Account Transfer options pop over. Network Type [Conditional, Drop-Down] Select the type of the network from the dropdown list. This field is enabled if the Transfer through domestic clearing network options is selected from the Account Transfer options drop-down list. Beneficiary Name [Mandatory, Alphanumeric, 35] Enter the beneficiary name. This field is enabled if the Transfer through domestic clearing network options is selected from the Account Transfer options drop-down list. Note: Beneficiary Name can be Alphanumeric with Special Characters -? : ( )., ' + Space Bank Code Bank Name Bank Address City [Conditional, Drop-Down] Select the bank code from the pick list. This field is enabled if the Transfer through domestic clearing network options is selected from the Account Transfer options drop-down list. This field displays the bank name in the clearing network. If you select Bank Code then this field will get populated automatically. This field displays the address of the bank. If you select Bank Code then this field will get populated automatically. This field displays the city in which the bank belongs. If you select Bank Code then this field will get populated automatically.

190 Open Term Deposit Field Name Country Description This field displays the country to which the Bank belongs. If you select Bank Code then this field will get populated automatically. Rollover Amount [Conditional, Numeric, 15] Type the amount which will be renewed at maturity. This field is enabled if the Renew Special Amount option is selected in the Maturity Instruction field. Note: You can enter Rollover amount less than maturity amount. 4. Click the Continue button. The system displays below screen. Below is shown for Transfer through Domestic Clearing Network. Open Term Deposit Payout Details Field Description Field Name Account Description [Mandatory] Select the Account to which proceeds to be transferred.
191 Open Term Deposit Field Name Network Type Description [Mandatory, Drop down ] Select the applicable domestic clearing network. 5. Click the Continue button. The system displays the below screen. Open Term Deposit Bank Details Field Description Field Name Bank Code Beneficiary Name Description [Mandatory, Drop down] Select the destination account s bank code. [Mandatory, Input Box ] Name of the beneficiary to whom funds are to be transferred. 6. Click Options. The system displays below pop over screen.
192 Open Term Deposit Open Term Deposit Bank Details 7. Click the Submit. The system displays Open Term Deposit Verify screen. Open Term Deposit Verify

193 Open Term Deposit 8. Click the Confirm from options. The system displays Open Term Deposit Confirm screen.

194 9. Click Ok option. The system displays Initial Open Term Deposit screen.0. Open Term Deposit
195 Deposit Redemption 37. Deposit Redemption The Redeem Term Deposit option allows you to redeem your Term Deposit details either partially or fully through J2ME Mobile Banking. To redeem the term deposit 1. Log on to the J2ME Based Mobile Banking Application. 2. Select My Deposits > Deposit Redemption icon from the menu using up/down arrow key and Select key. The system displays Deposit Redemption screen. 195
196 Deposit Redemption Deposit Redemption Field Description Field Name Select Deposit Description [Mandatory, Drop down] Select the deposit for redemption. 3. Select Submit from the options.the system displays Deposit Redemption screen. Select the Home from the options navigate to the menu screen. Select the Exit from the options to exit from the application. Select the Menu from the options to return to the sub menu screen.
197 Deposit Redemption Deposit Redemption (Screen 1) (Screen 2) (Screen 3)
198 Deposit Redemption Field Description Field Name Description Deposit Details Deposit Account Deposit Product Deposit Amount Maturity Date Interest Rate This field displays the deposit account. This field displays the deposit product. This field displays the deposit amount. This field displays the maturity date of the deposit. This field displays the interest rate. Redemption Redemption Type [Mandatory, Drop down] Select the redemption type. The options are: Partial Redemption Full Redemption Amount [Mandatory, Numeric, 15] This field displays the deposit account. Transfer To [Mandatory, Drop down] Select the transfer to account as the destination account for the redemption. 4. Select Redeem from the options. The system displays Deposit Redemption Verify screen. Select the Back from the options to navigate to the previous screen. Select the Home from the options to navigate to the menu screen. Select the Exit from the options to exit from the application. Select the Menu from the options to return to the sub menu screen.

199 Deposit Redemption Deposit Redemption Verify (Screen 1) (Screen 2) (Screen 3) 5. Select the Confirm from the options. The system displays Deposit Redemption Confirm screen.0.

200 Deposit Redemption Select the Change from the options to navigate to the previous screen. Select the Exit from the options to exit from the application. Select the Home from the options to navigate to the menu screen. Select the Menu from the options to return to the sub menu screen. Deposit Redemption Confirm (Screen 1) (Screen 2)
201 Deposit Redemption (Screen 3) 1. Select the Home from the options to get back to the Menu screen.0. Select the Exit from the options to exit from the application. Select the View Messages from the options to view the messages Select the OK from the options to return to the Deposit redemption initial screen. Select the Menu from the options to return to the sub menu screen..
202 Deposit Details 38. Deposit Details The Term Deposit Details displays the list of all Term Deposit accounts with details, under all the customer id s linked to your user id. To view the TD Details 1. Log on to the J2ME based Mobile Banking Application. 2. Select My Deposits > Deposit Details icon from the menu using up/down arrow key and Select key. The system displays Deposit Details screen. 202
203 Deposit Details Deposit Details Field Description Field Name Select Account Description [Mandatory, Drop down] Select the account for which deposit details are to be viewed. 3. Select the Submit from the options. The system displays Deposit Details screen. Select the Home from the options to navigate to the menu screen. Select the Exit from the options to exit from the application. Select the Menu from the options to return to the sub menu screen.
 (Screen")
")
204 Deposit Details Deposit Details (Screen 1) (Screen 2) (Screen 3) (Screen 4)
205 Deposit Details Field Description Field Name Description Account Details Customer Id Deposit Account Product Name Current Balance This field displays the Customer Id of the Customer. This field displays the Term deposit account number registered for Mobile banking under the customer ID This field displays the Product name of the term deposit product. This field displays the Balance in the Term deposit account. Deposit Details Deposit Date Maturity Date Interest Rate Profit Rate This field displays the date of deposit in the Term deposit. This field displays the Maturity date of the Term deposit. This field displays the interest rate of the Term deposit. This field is applicable only for the conventional term deposit. This field displays the profit rate of the Term deposit. This field is applicable only for Islamic term deposit. Maturity Instructions Rollover Instructions This field displays the rollover instruction. Payout Details Payout Type Percentage This field displays the payout type. This field displays the percentage for payout.
206 Deposit Details Field Name Additional Information Description This field displays the account number. 4. Select the Home from the options to navigate to the Menu screen.0. Select the Back from the options to return to the previous screen. Select the Exit from the options to exit from the application. Select the Menu from the options to return to the sub menu screen.
207 Transactions to Authorize 39. Transactions to Authorize Transaction to authorize displays all the transactions with their status as Pending, Semi Authorized or Initiated for the user. To view the transactions for authorization 1. Log on to the J2ME Based Mobile Banking Application. 2. Select Pending Authorizations icon from the menu using up\down scroll keys and select key. The system displays View Authorization Transactions screen. 207
208 Transactions to Authorize View Authorization Transactions Field Description Field Name Select Transaction Description [Mandatory, Drop down] Select the transaction to be authorized or rejected. 3. Select Submit from the options. The system displays Pending Authorizations screen. Select the Home from the options to navigate to the menu screen. Select the Exit from the options to exit from the application.
![Transactions to Authorize Pending Authorizations (Screen 1) (Screen 2) Field Description Field Name E banking Reference Number Status Initiator Select Record Description [Optional, Alphanumeric] Type](/docs-images/95/124445526/images/209-1.jpg "the E-Banking Reference Number as Search criteria. [Optional, Dropdown] Select the status of the transaction to be searched.")
209 Transactions to Authorize Pending Authorizations (Screen 1) (Screen 2) Field Description Field Name E banking Reference Number Status Initiator Select Record Description [Optional, Alphanumeric] Type the E-Banking Reference Number as Search criteria. [Optional, Dropdown] Select the status of the transaction to be searched. [Optional, Alphanumeric] Type the Initiator of the transaction as search criterion [Mandatory, Dropdown] Select the Record to search for authorization. 4. Select the Authorize from the options if you want to authorize the transaction. The system displays Verify Authorization Transaction screen. Select the Send To Modify from the options to send the transaction for modification.
210 Transactions to Authorize Select the Search from the options to search the transaction to authorize or reject as per the entered search criteria. Select the Change from the options to navigate to the previous screen. Select the Reject from the options if you want to reject the transaction. Select the View from the options to view the transaction details. Select the Home from the options to navigate to the options screen. Select the Exit from the options to exit from the application. Pending Transactions Verify (Screen 1) (Screen 2) 5. Select Confirm from the options. The system displays Pending Transactions Confirm screen. Select the Change from the options to navigate to the previous screen. Select the Home from the options to navigate to the menu screen.

211 Transactions to Authorize Select the Exit from the options to exit from the application. Pending Transactions Confirm (Screen 1) (Screen 2) 6. Select the Home from the options to get back to the Menu screen.0. Select the Exit from the options to exit from the application. Select the View Messages from the options to view the messages. Select the OK from the options to navigate to the initial View Authorization Transactions screen.

212 Change Password 40. Change Password The Change password allows you to change the password for a Mobile User. To change the password 1. Log on to the J2ME Based Mobile Banking Application. Services 2. Select Services > Change Password icon from the menu using up\down scroll keys and select key. Change Password 212
213 Change Password The system displays the Change Password screen. Change Password 3. Select the desired Password Type from the dropdown.
214 Change Password 4. Click Submit from Options. 5. The following page is displayed. Refer to the Password Policy and enter the Existing Password and the desired New Password in the respective fields. Note: The Login and Transaction Passwords cannot be the same. Password details


215 Change Password 6. Click Change from Options. Change Password Field Description Field Name User Id Password Type Existing password New Password Description This field displays the User Id of the user. This field displays the password type selected. [Mandatory, Alphanumeric,20] Type the Existing password of the user. [Mandatory, Alphanumeric,20] Type the New password for the user.
216 Change Password Field Name Confirm New password Description [Mandatory, Alphanumeric,20] Type the new password again to confirm for the user. The following Verify page is displayed. Verify Change Password 7. Select Change from the menu. The system displays Verify Change Password screen. Select the Home to navigate to the menu screen. Select the Exit from the options to exit from the application. Select the Menu from the options to return to the sub menu screen. Select the Back from the options to return to the previous screen. Note: New password has to be as per the Password Policy displayed below the text fields. Confirm Verify Change Password

217 Change Password 8. Select Yes from the options. The system displays Confirm Change Password screen. Select the Home from the options to navigate to the menu screen. Select the Exit from the options to exit from the application. Select the Menu from the options to return to the sub menu screen. Select the Back from the options to return to the previous screen.

218 Change Password Confirm Change Password 9. Click OK. The following page is displayed. Confirm Change Password 10. Select the Home from the options to get back to the Menu screen.0. Select the Exit from the options to exit from the application. Select the Menu from the options to return to the sub menu screen. Select the Ok from the options. The initial Change Password screen is displayed.
219 Change Password Note: If the user has been provided access to multiple channels under the main group through channel grouping then the changed/new password will be applied to all the channels of the group. The system will display disclaimer as The new password will be applicable for channels of group also.
220 Credit Card Details 41. Credit Card Details This menu enables you to view the details of the Credit Card. To view the credit card details 1. Log on to the J2ME Based Mobile Banking Application. 2. Select My Cards > Credit Card Details icon from the menu using down arrow key and Select key. The system displays Credit Card Details screen. 220
221 Credit Card Details Credit Card Details Field Description Field Name Select Card Description [Mandatory, Drop down] Select the credit card for which details are to be viewed. 3. Select Submit from the Options. The system displays selected card details in the Credit Card Details screen. Select the Home from the options to navigate to the menu screen. Select the Exit from the options to exit from the application. Select the Menu from the options to return to the sub menu screen.
 (Screen")
")
222 Credit Card Details Credit Card Details (Screen 1) (Screen 2) (Screen 3) (Screen 4)
223 Credit Card Details Field Description Field Name Card Number Product Name Expiry Date Reward Points Available Total Credit Limit Available Credit Limit Total Cash Limit Available Cash limit Total Unbilled Amount Last Payment Date Last Payment Amount Description This field displays the credit card number for which the details are displayed. This field displays the product name. This field displays the expiry date. This field displays the reward points available. This field displays the total credit limit. This field displays the credit limit available to you. This field displays the total cash limit. This field displays the available cash limit. This field displays the total unbilled amount. This field displays the last payment date. This field displays the last payment amount. Payment Due Details Statement Date Total Billed Amount Payment Due Date This field displays the statement date. This field displays the total billed amount. This field displays the last payment due date.
224 Credit Card Details Field Name Minimum Amount Due Description This field displays the minimum amount due. 4. Select the Home from the options to get back to the Menu screen.0. Select the Back from the options to navigate to the previous screen. Select the Exit from the options to exit from the application. Select the Menu from the options to return to the sub menu screen.
225 Credit Card Statement 42. Credit Card Statement This menu enables you to View the Statement of the Credit Card. To view the credit card statement 1. Log on to the J2ME Based Mobile Banking Application. 2. Select My Cards > Credit Card Statement icon from the menu using down arrow key and Select key. The system displays Credit Card Statement screen. Credit Card Statement 225
226 Credit Card Statement Field Description Field Name Card Number Month Year Description [Mandatory, Drop down] Select the card number for which statement is to be viewed. [Mandatory, Drop down] Select the month for viewing the statement. [Mandatory, Drop down] Select the year for viewing the statement. 3. Select Submit from the options. The system displays card statement details in the Credit Card Statement screen Select the Home from the options to navigate to the menu screen. Select the Exit from the options to exit from the application. Select the Menu from the options to return to the sub menu screen.
227 Credit Card Statement Credit Card Statement (Screen 1) (Screen 2) Field Description Field Name Card Number Month Year Reference Number Transaction Date Description Description This field displays the credit card number for which the details are displayed. This field displays the month for which statement is viewed. This field displays the year for which statement is viewed. This field displays the reference number. This field displays the transaction date. This field displays the description of the credit card.
228 Credit Card Statement Field Name Credit Description This field displays the credit amount. 4. Select the Home from the options to get back to the Menu screen.0. Select the Back from the options to navigate to the previous screen. Select the Exit from the options to exit from the application. Select the Menu from the options to return to the sub menu screen.
229 43. Credit Card Payment This menu enables you to pay out the credit card balances. To view the credit card statement 1. Log on to J2ME Based Mobile Banking Application. 2. Navigate to the Accounts > Credit Card Payment. 229
![Credit Card Payment Credit Card Payment Field Description Field Name Select Card Credit Card Number Description [Mandatory, Pop Over] Select the option as Select Card New Card.](/docs-images/95/124445526/images/230-0.jpg "[Mandatory, Pop Over] Select the credit card number from the pop over, for which payment is to be made. 3. Click the Continue button from the options.")
230 Credit Card Payment Credit Card Payment Field Description Field Name Select Card Credit Card Number Description [Mandatory, Pop Over] Select the option as Select Card New Card. [Mandatory, Pop Over] Select the credit card number from the pop over, for which payment is to be made. 3. Click the Continue button from the options. The system displays below screen for Step2 - Credit Card Payment.

![Amount [Mandatory, Numeric, 15] Enter the amount to be paid.](/docs-images/95/124445526/images/231-1.jpg "Payment Instruction [Mandatory, Radio button] Select payment instruction.")
231 Credit Card Payment Credit Card Payment Step2 (Screen 1) (Screen 2) Field Description Field Name Payment Due Date Description This field displays the payment due date. Amount [Mandatory, Numeric, 15] Enter the amount to be paid. Payment Instruction [Mandatory, Radio button] Select payment instruction. Values are: Total Amount Due Minimum Amount Due 4. Click the Submit button. The system display Credit Card Payment Verify screen.
232 Credit Card Payment Credit Card Payment Verify 5. Click the Confirm button. The system displays Credit Card Payment Confirm screen. Click the Change option. The system displays Initial Credit Card Payment screen. Credit Card Payment Confirm 6. Click the OK button to navigate to the Initial Credit Card Payment screen.0.
233 Credit Card Payment Click the Download PDF button to download the PDF containing Credit Card Payment details.
234 Force Change Password 44. Force Change Password This option forces you to mandatorily change your password. The Force Change Password screen comes in following scenarios. If you are login for the first time. If you have reset your password. If your password has expired. To perform the forced change password 1. Log on to the J2ME Based Mobile Banking Application in the case of above scenarios. The system forces to change the password by displaying Change Login Password screen.

235 Force Change Password Change Login Password (Screen 1) (Screen 2) Field Description Field Name User ID Existing Password New Password Description This field displays the user id. [Mandatory, Alphanumeric,20] Type your existing password. [Mandatory, Alphanumeric,20] Type the new password. Note: This new password should be as per Password Policy (displayed below the text fields in the above screen) set by the bank. Confirm new password [Mandatory,Alphanumeric,20] Retype the new password for confirmation. 2. Select the Change from the options. The system displays Confirm Change Password screen.
236 Force Change Password Select the Exit from the options to exit from the application. Confirm Change Password 3. Select OK from the options. The system displays Change Transaction password screen. Select Exit from the options to exit from the application.

237 Force Change Password Change Transaction Password (Screen1) (Screen2) Field Description Field Name User ID Existing Password New Password Description This field displays the user id. [Mandatory, Alphanumeric,20] Type your existing password. [Mandatory, Alphanumeric,20] Type the new password. Note: This new password should be as per Password Policy (displayed below the text fields in the above screen) set by the bank. Confirm new password [Mandatory,Alphanumeric,20] Retype the new password for confirmation. 4. Select the Change option. The system displays Confirm Change Password screen.
238 Force Change Password Confirm Change Password 5. Select the OK from the options. The system displays the main Menu screen.0. Select Exit from the options to exit from the application. Note: If the user has been provided access to multiple channels under the main group through channel grouping then the changed/new password will be applied to all the channels of the group. The system will display disclaimer as The new password will be applicable for channels of group also.
239 45. Contract Deposits This option allows you to view the contract term deposit details. To view the contract Deposit details 1. Log on to the J2ME Based Mobile Banking Application. 2. Select My Deposits > Contract Deposits from the menu using up\down scroll keys and select key. The system displays Contract Deposits screen. 239
![Contract Deposits Contract Deposits Field Description Field Name Contract Deposit Description [Mandatory, Drop down] Select the contract deposit from the list for which details are to be viewed. 3.](/docs-images/95/124445526/images/240-0.jpg "Select the Submit from the options. The system displays Contract Deposits screen. Select the Home from the options to navigate to the menu screen.")
240 Contract Deposits Contract Deposits Field Description Field Name Contract Deposit Description [Mandatory, Drop down] Select the contract deposit from the list for which details are to be viewed. 3. Select the Submit from the options. The system displays Contract Deposits screen. Select the Home from the options to navigate to the menu screen. Select the Exit from the options to exit from the application. Select the Menu from the options to return to the sub menu screen.
 (Screen")
")
241 Contract Deposits Contract Deposits (Screen 1) (Screen 2) (Screen 3) (Screen 4)
242 Contract Deposits Field Description Field Name Customer Id Contract Deposit Product Name Current Balance Description This field displays the user id. This field displays the contract deposit number. This field displays the product name. This field displays the balance of the term deposit. Deposit Details Deposit Date Maturity Date Interest Rate Accrued Interest Till Date This field displays the deposit date. This field displays the date on which deposit matures. This field displays the interest rate on the term deposit. Interest Instructions and Maturity Instructions are also displayed below this field. This field displays the accrued interest till date. Interest Instructions and Maturity Instructions are also displayed below this field. Interest Instructions Interest Instructions Account This field displays the interest instructions. This field displays the account number. Maturity Instructions Rollover Instructions This field displays the roll over instructions.
243 Contract Deposits Field Name Account Description This field displays the account number. 4. Select the Home from the options to get back to the Menu screen.0. Select the Back from the options to navigate to the previous screen. Select the Exit from the options to exit from the application. Select the Menu from the options to return to the sub menu screen.
244 46. Buy Funds This option allows you to buy the mutual funds. The fund is open for purchase if: The fund is in the Initial Public Offering (IPO) stage The fund is allowed for subscriptions in the given period. This information is available as part of fund rules definition. An investor can select for subscription of a fund. One Time Single Fund Purchase To buy mutual fund 1. Log on to the J2ME Based Mobile Banking Application. 2. Select Mutual Funds > Buy Funds icon from the menu using up\down scroll keys and select key. The system displays Buy Funds screen. 244
245 Buy Funds Buy Funds Field Description Field Name Unit Holder Fund AMC Description [Mandatory, Drop down] Select the unit holder. [Mandatory, Drop down] Select the Fund AMC for buying the funds. 3. Select the Submit from the options. The system displays Buy Funds screen. Select the Home from the options to navigate to the menu screen. Select the Exit from the options to exit from the application. Select the Menu from the options to return to the sub menu screen.
246 Buy Funds Buy Funds Field Description Field Name Fund Name Description [Mandatory, Drop down] Select the fund name. 4. Select Fund Details from the options. The system displays Buy Funds screen. Select the Back from the options to navigate to the previous screen. Select the Home from the options to navigate to the menu screen. Select the Exit from the options to exit from the application. Select the Menu from the options to return to the sub menu screen.
")
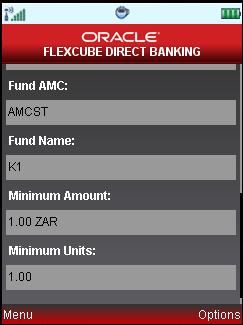
247 Buy Funds (Screen 1) (Screen 2) (Screen 2)
248 Buy Funds Field Description Field Name Investment Type Description [Mandatory, Drop down] Select the invest type. The options are: Amount Units Amount Or Unit [Mandatory, Numeric, 15] Type the amount for buying the funds. Dividend Re- Investment [Mandatory, Drop down] Select the dividend re-investment options. The options are: Yes No Fund Information Unit Holder Fund AMC Fund Name Minimum Amount Minimum Units This field displays the unit holder id. This field displays the fund AMC. This field displays the fund name. This field displays the minimum amount required to buy the funds. This field displays the minimum units of which funds can be purchased. 5. Select Place Order from the options. The system displays Buy Funds Verify screen. Select the Back from the options to navigate to the previous screen. Select the Home from the options to navigate to the menu screen. Select the Exit from the options to exit from the application. Select the Menu from the options to return to the sub menu screen.
249 Buy Funds Buy Funds Verify 6. Select the Confirm from the options. The system displays Buy Funds - Confirm screen. Select the Exit from the options to exit from the application. Select the Home from the options to navigate to the menu screen. Select the Back from the options to navigate to the previous screen. Select the Menu from the options to return to the sub menu screen.
250 Buy Funds Buy Funds Confirm (Screen 1) (Screen 2) 7. Select the Home from the options to get back to the Menu screen.0. Select the Exit from the options to exit from the application. Select the View Messages from the options to view the messages. Select the OK from the options to navigate to the Buy Funds screen. Select the Menu from the options to return to the sub menu screen.
251 47. Redeem Funds This option allows you to redeem mutual fund holdings. You may select to redeem full/part of the investment made in mutual fund by this option. The fund should be open for redemption. A fund is open for redemption if: The fund is allowed for redemption in the given period. This information is available as part of fund prospectus. The fund is not in book closure. The redemption process comprises of the following stages: Indicating the fund unit holder and the fund to be redeemed. Specifying redemption details including product, redemption type, transaction currency and payout mode. Verifying the details where user can confirm the information specified. To redeem mutual fund 1. Log on to the J2ME Based Mobile Banking Application. 2. Select Mutual Funds > Redeem Funds from the menu using up\down scroll keys and select key. The system displays Redeem Funds screen. 251
252 Redeem Funds Redeem Funds Field Description Field Name Description Unit Holder [Mandatory, Drop down ] Select the Unit holder from the unit holders available. 3. Select View Holdings from the options. The system displays Redeem Funds screen. Select the Home from the options to navigate to the menu screen. Select the Exit from the options to exit from the application. Select the Menu from the options to return to the sub menu screen.
253 Redeem Funds Redeem Funds Field Description Field Name Unit Holder Description This field displays the unit holder of the fund. Fund Name [Mandatory, Drop down ] Select the fund name from the funds available for the unit holder. 4. Select Place order from the options. The system displays Redeem Funds screen. Select the Back from the options to navigate to the previous screen. Select the Home from the options to navigate to the menu screen. Select the Exit from the options to exit from the application. Select the Menu from the options to return to the sub menu screen.

254 Redeem Funds Redeem Funds (Screen 1) (Screen 2) Field Description Field Name Unit Holder Fund Name Units Amount Description This field displays the unit holder of the fund. This field displays the fund name selected. This field displays the units held. This field displays the fund name selected. Place Order Redeem type [Mandatory, Drop down ] Select the type of redemption to be done. Options are: Amount Units
255 Redeem Funds Field Name Description Amount or Units [Mandatory, Numeric, 15] Type the amount or units as per the selection criteria. 5. Select Place Order from the options. The system displays Redeem Funds - Verify screen. Select the Back from the options to navigate to the previous screen. Select the Home from the options to navigate to the menu screen. Select the Exit from the options to exit from the application. Select the Menu from the options to return to the sub menu screen. Redeem Funds Verify 6. Select Confirm from the options. The system displays Redeem Funds - Confirm screen. Select the Back from the options to navigate to the previous screen. Select the Exit from the options to exit from the application.
256 Redeem Funds Select the Home option to navigate to the menu screen. Select the Menu from the options to return to the sub menu screen. Redeem Funds Confirm 7. Select the Home from the options to get back to the Menu screen.0. Select the Exit from the options to exit from the application. Select the View Messages from the options to view the messages. Select the OK from the options to navigate to the Redeem Funds screen. Select the Menu from the options to return to the sub menu screen.
257 48. Portfolio This option allows you to view the details of all the mutual fund holdings. To view the portfolio 1. Log on to the J2ME Based Mobile Banking Application. 2. Select Mutual Funds > Portfolio icon from the menu using up\down scroll keys and select key. The system displays Portfolio screen. 257
258 Portfolio Portfolio Filed Description Field Name Unit Holder Description [Mandatory, Drop down] Select the unit holder from the list of unit holders available. 3. Select View Holdings from the options. The system displays Portfolio Details screen. Select the Home from the options to navigate to the menu screen. Select the Exit from the options to exit from the application. Select the Menu from the options to return to the sub menu screen.


259 Portfolio Portfolio Details (Screen 1) (Screen 2) Filed Description Field Name Description Portfolio Details Unit Holder This field displays the name of the units holder. Holding Fund Details Fund Name Fund Type Fund Currency Units This field displays the fund name. This field displays the fund type. This field displays the fund currency. This field displays the number of units held.
260 Portfolio Field Name Amount in Fund Currency Description This field displays the amount in fund currency. 4. Select the Home from the options to get back to the Menu screen.0. Select the Back from the options to navigate to the previous screen. Select the Exit from the options to exit from the application. Select the Menu from the options to return to the sub menu screen.
261 49. Switch Funds This option allows you to switch investment in one mutual fund to another type of mutual fund using mobile banking. You can switch only a part or the entire investment made in the selected fund. A fund is open for switch if Fund is allowed for switch in the given period. Current date is between switch start date and switch close date. This information is available as part of Fund Rule definition. Fund is not in book closure. To switch mutual fund 1. Log on to the J2ME Based Mobile Banking Application. 2. Select Mutual Funds > Switch Funds icon from the menu using up\down scroll keys and select key. The system displays Switch Funds screen. 261
262 Switch Funds Switch Funds Filed Description Field Name Unit Holder Description [Mandatory, Drop down] Select the unit holder from the list of unit holders available. 3. Select View Holdings from the options. The system displays Switch Funds screen. Select the Home from the options to navigate to the menu screen. Select the Exit from the options to exit from the application. Select the Menu from the options to return to the sub menu screen.
263 Switch Funds Switch Funds Filed Description Field Name Unit Holder Fund Name Description This field displays the selected unit holder. [Mandatory, Drop down] Select the fund name from the list. 4. Select Place Order from the options. The system displays Switch Funds screen. Select Back from the options to navigate to the previous screen. Select the Home from the options to navigate to the menu screen. Select the Exit from the options to exit from the application. Select the Menu from the options to return to the sub menu screen.
![Switch Funds Switch Funds (Screen 1) (Screen 2) Filed Description Field Name Switch Type Description [Mandatory, Drop down] Select the Switch type.](/docs-images/95/124445526/images/264-1.jpg "Options are: Switch Amount Switch Units Amount Or Units [Mandatory, Numeric, 15] Type the amount or units to be switched. Fund Name [Mandatory, Drop down] Select the fund name from the list. 5.")
264 Switch Funds Switch Funds (Screen 1) (Screen 2) Filed Description Field Name Switch Type Description [Mandatory, Drop down] Select the Switch type. Options are: Switch Amount Switch Units Amount Or Units [Mandatory, Numeric, 15] Type the amount or units to be switched. Fund Name [Mandatory, Drop down] Select the fund name from the list. 5. Select Place Order from the options. The system displays Switch Funds - Verify screen. Select Back from the options to navigate to the previous screen. Select the Home from the options to navigate to the menu screen.
265 Switch Funds Select the Exit from the options to exit from the application. Select the Menu from the options to return to the sub menu screen. Switch Funds Verify 6. Select Confirm from the options. The system displays Switch Funds - Confirm screen. Select Change from the options to navigate to the previous screen. Select the Exit from the options to exit from the application. Select the Home from the options to navigate to the menu screen. Select the Menu from the options to return to the sub menu screen.
266 Switch Funds Switch Funds Confirm 7. Select the Home from the options to get back to the Menu screen.0. Select the Exit from the options to exit from the application. Select the View Messages from the options to view the messages. Select the Ok from the options. The initial Switch Funds screen is displayed. Select the Menu from the options to return to the sub menu screen.
267 50. Order Status You may place several purchase orders across various AMCs. An order goes through various stages of transfer i.e. placement, processing, allotment, authorization etc. This option displays the status details of the placed order. To view the order status 1. Log on to the J2ME Based Mobile Banking Application. 2. Select Mutual Funds > Order Status from the menu using up\down scroll keys and select key. The system displays Order Status screen. 267
268 Order Status Order Status Filed Description Field Name Unit Holder Transaction Ref. No. Status Description [Mandatory, Drop down] Select the unit holder from the list. [Mandatory, Alphanumeric, 16] Type the transaction reference number for which order status is to be viewed. [Mandatory, Drop down] Select the status. Options are: Allotted Completed Processed Unprocessed Authorized Unauthorized 3. Select Submit from the options. The system displays order status details in the Order Status screen.
269 Order Status Select the Home from the options to navigate to the menu screen. Select the Exit from the options to exit from the application. Select the Menu from the options to return to the sub menu screen. Order Status (Screen 1) (Screen 2)
270 Order Status (Screen 3) (Screen 4) Field Description Field Name Requested Received On Description This field displays the date and time of the request received. Transaction Details Unit Holder Fund Id Transaction Mode Transaction Type Transaction Amount This field displays the name of the unit holder. This field displays the fund id. This field displays the transaction mode. This field displays the transaction type. This field displays the transaction amount.
271 Order Status Field Name Description Payment Details Payment Type Payment Mode Transfer Branch Transfer Account Payment Amount Drawee Bank This field displays the payment type. This field displays the payment mode. This field displays the bank branch. This field displays the account number used for transfer. This field displays the amount of payment. This field displays the drawee bank. 4. Select the Home from the options to get back to the Menu screen. Select the Menu from the options to return to the sub menu screen. Select the Back from the options to navigate to the previous screen. Select the Exit from the options to exit from the application.
272 51. Transaction Password Behavior Transaction password is added security measure in mobile banking required for safer execution of any transaction. When transaction password is configured for any transaction, then while accessing that transaction, after selecting Confirm option on the verification screen, the system asks for transaction password. Following two kind of the transaction password can be configured for Mobile Banking as per requirement: Random Transaction Password Transaction password To perform the transaction for which transaction password is configured 5. Log on to the J2ME Based Mobile Banking Application. 6. Access any transaction for which transaction password is configured. (Below shown is for Pay Bills transaction). 7. Select My Payments > Own Account Transfer icon from the menu using up/down arrow key and Select key. The system displays Own Account Transfer screen. 272
273 Transaction Password Behavior Own Account Transfer Field Description Field Name Description From Account [Mandatory, Drop down ] Select the From Account as the source account for the own account transfer. To Account [Mandatory, Drop down] Select the To Account as the destination account for the own account transfer. Amount [Mandatory, Numeric, 15] Type the amount for the transfer. Narrative [Optional, Alphanumeric, 35] Type the narrative for the transaction. 8. Select the Submit from the options. The system displays Own Account Transfer Verify screen. Select the Home from the options to navigate to the menu screen. Select the Exit from the options to exit from the application.
274 Transaction Password Behavior Select the Menu from the options to return to the sub menu screen. Own Account Transfer Verify 9. Select the Confirm from the Options. The system displays the Transaction Initiation Authentication screen. Select the Change from the options to navigate to the previous screen. Select the Exit from the options to exit from the application. Select the Home from the options to navigate to the menu screen. Select the View Messages from the options to view the messages. Select the Menu from the options to return to the sub menu screen.
275 Transaction Password Behavior Transaction Initiation Authentication 10. Select the Submit from the options. The system displays Own Account Transfer - Confirm screen. Select the Exit from the options to exit from the application. Select the Home from the options to navigate to the menu screen. Select the Menu from the options to return to the sub menu screen.
276 Transaction Password Behavior Own Account Transfer Confirm 11. Select the Home from the options to get back to the Menu screen. Select the Exit from the options to exit from the application. Select the View Messages from the options to view the message. Select the OK from the options. The initial Own Account Transfer screen is displayed. Select the Menu from the options to return to the sub menu screen.
277 ATM Branch Locator 52. ATM Branch Locator This transaction allows you to view the address and the location of ATM/ branch location. To view the location and address of the ATM and branch 1. Log on to the J2ME Based Mobile Banking Application. 2. Select Customer Services >ATM Branch Locator from the menu. The system displays the ATM Branch Locator screen.
278 ATM Branch Locator Branch/ATM Locator Filed Description Field Name Enter location Description [Mandatory, Alphanumeric] Type the location to view the address and location of the branch /ATM. 3. Select View Address from the options. The system displays the address of the ATM/Branch. Select the Home from the options to navigate to the main menu screen. Select the Menu from the options to navigate to the menu screen.
279 ATM Branch Locator Branch/ATM Locator 4. Select the Home from the option to get back to the Menu screen. Select the View Map from the options to navigate to the View Map screen. Select the Back option to return to the previous screen.

280 ATM Branch Locator Branch/ATM Locator 5. Select the Home option to get back to the Menu screen.0. Select the Back from the options to navigate to the previous screen. Select the Exit option to exit from the application. Select the Satellite/Map to view the map in satellite /map view.
281 53. Reminders The Reminder functionality will enable business users to register for reminders. Once a reminder is registered the user will be able to view the reminder under the Reminder Schedule. The reminder schedule will display all registered reminders i.e. reminders that are due on the current date and also reminders that are due in the future. 1. Log on to the J2ME Based Mobile Banking Application. 2. Select Services from the menu using up/down arrow key and Select key. 3. Select Reminder from the menu using up/down arrow key and Select key. The system displays Reminders screen. 281
282 Reminders Reminder (Screen 1) (Screen 2) 4. Select Today, Week Month radio button to view reminder set for selected period. 5. Click the Submit from the options. The displays the set reminder in next screen as shown below.
283 Reminders Reminder (Screen 1) (Screen 2) 6. Select Exit option to exit. 7. Select Back to navigate to the previous screen. 8. Select View to view that particular selected reminder. The system displays below the Display screen. 9. Select Modify/Delete options in order to modify or delete that selected reminder respectively. 0.
284 Reminder Display Reminders
285 Reminders Registration Here, business user can register reminders. Below shown is the initial screen to set a reminder. Reminder 1. Select the Register option from the options, in order to register for reminders. 2. Click the Select option. The system displays Register Reminder screen.
 (Screen 2) (screen")
286 Reminders Register Reminder (Screen 1) (Screen 2) (screen 3)
![Reminders Field Description Field Name Description Subject [Mandatory, Alphanumeric, 50] Type the subject for the reminder.](/docs-images/95/124445526/images/287-0.jpg "Frequency Start Date End Date [Mandatory, Radio button] Select the frequency of the reminder. [Mandatory, Alphanumeric,10] Type the start date for reminder.")
287 Reminders Field Description Field Name Description Subject [Mandatory, Alphanumeric, 50] Type the subject for the reminder. Frequency Start Date End Date [Mandatory, Radio button] Select the frequency of the reminder. [Mandatory, Alphanumeric,10] Type the start date for reminder. [Mandatory, Alphanumeric,10] Type the end date for reminder. Description [Optional, Alphanumeric, 100] Type the description for reminder. 3. Select the Register option from the options as shown above in screen3. The system displays the Confirm screen for the reminders, as shown below. Reminder Confirm (Screen 1) (Screen 2) 4. Select OK from the options as shown in screen2 above. The system displays the Confirm screen for Reminders as shown screen2 above.0.
288 54. Deposit Calculator The Deposit Calculator helps you to understand the amount to be deposited as an investment for the given period of time. 1. Login to the Banking Application. The following page is displayed. Services 2. Click Services. The following page is displayed. Consultations 288
289 Deposit Calculator 3. Click Consultations. The following page is displayed. Deposit Calculator 4. Click Deposit Calculator. The following page is displayed. Deposit Calculator
![Deposit Calculator Field Description Field Name Amount I wish to Invest Rate of Interest (%) Description [Mandatory, Input Box, 15] Enter the amount you wish to invest. Displays the Interest Rate.](/docs-images/95/124445526/images/290-0.jpg "Choose Investment Period Maturity Date Tenure Currency I Require Reset Calculate [Date-Picker] Select the appropriate Maturity Date from the Date-Picker.")
290 Deposit Calculator Field Description Field Name Amount I wish to Invest Rate of Interest (%) Description [Mandatory, Input Box, 15] Enter the amount you wish to invest. Displays the Interest Rate. Choose Investment Period Maturity Date Tenure Currency I Require Reset Calculate [Date-Picker] Select the appropriate Maturity Date from the Date-Picker. [Dropdown] Select the appropriate Tenure from the dropdown. [Dropdown] Select the required type of currency from the dropdown. [Action Button] Click Reset to clear all values. [Action Button] Click Calculate to calculate the details entered for Deposit. 5. Click Calculate from Options. The result is displayed as shown in the following screenshot.0. Result - Details

291 Result Graph Deposit Calculator
292 Savings Calculator 55. Savings Calculator The Savings Calculator helps you to understand the calculation based on given the saving rate for the given amount and the specific period of time. 1. Login to the Banking Application. The following page is displayed. Services 2. Click Services. The following page is displayed. Consultations
293 Savings Calculator 3. Click Consultations. The following page is displayed. Savings Calculator 4. Select Savings Calculator. The following page is displayed. Savings Calculator - I

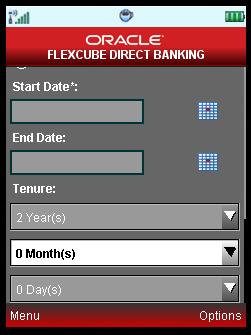
294 Savings Calculator Savings Calculator II Savings Calculator III

295 Savings Calculator 5. Click Calculate from Options.0. Calculate The result is displayed as shown in the following screenshot.

296 Foreign Exchange Calculator 56. Foreign Exchange Calculator The Foreign Exchange Calculator helps you to calculate the converted amount in the desired currency type with the help of available amount and its currency type. 1. Login to the Java Application Based Rich Mobile Banking. 2. Click Services > Consultations > Foreign Exchange Calculator. The following page is displayed. Foreign Exchange Calculator Field Description
![Foreign Exchange Calculator Field Name Purpose Currency I Have Amount Currency I Require Reset Submit Description [Dropdown] Select the desired purpose from the dropdown.](/docs-images/95/124445526/images/297-0.jpg "[Dropdown] Select the appropriate Currency Type from the dropdown. [Mandatory, Input Box] Enter the desired amount. [Dropdown] Select the required type of currency from the dropdown.")
297 Foreign Exchange Calculator Field Name Purpose Currency I Have Amount Currency I Require Reset Submit Description [Dropdown] Select the desired purpose from the dropdown. [Dropdown] Select the appropriate Currency Type from the dropdown. [Mandatory, Input Box] Enter the desired amount. [Dropdown] Select the required type of currency from the dropdown. [Action Button] Click Reset to clear all values. [Action Button] Click Submit to calculate the details entered for Foreign Exchange. 3. Click Submit. The result page is displayed. Result Page 4. Click OK from Options. 0.

298 Loan Eligibility Calculator 57. Loan Eligibility Calculator The Loan Eligibility Calculator helps you to determine the Loan Eligibility for the given Gross Monthly income and other details. 1. Navigate to Services > Consultations > Loan Eligibility Calculator. The following page is displayed.0. Loan Eligibility Calculator Field Description Field Name Description
299 Loan Eligibility Calculator Field Name Your Gross Monthly Income Ongoing Monthly Expenses Tenure of Loan (in Months) Interest Rate Reset Calculate Description [Mandatory, Input Box] Enter the appropriate value for the Gross Monthly Income. [Mandatory, Input Box] Enter the appropriate value for the Ongoing Monthly Expenses. [Mandatory, Input Box] Enter the appropriate value for the Tenure of Loan (in months). [Mandatory, Input Box] Enter the appropriate value for the Interest Rate. [Action Button] Click Reset from Options to clear all values. [Action Button] Click Calculate from Options to calculate the details entered for Foreign Exchange. The Result page is displayed.
300 Offers 58. Offers Location Based Offers: Business user will be able to receive the offers from the bank based on their physical location. Business user while on move will be able to get the offers available in the specific geo location. The system will be able to identify the user s geo location using the GPS option available in the user s mobile phone. Location will be maintained in terms of latitude and longitude. Based on the location identified, the offers available in the area will be identified and displayed to the user. The offers received can have hyperlinks to display more data. On clicking on an offer that has more details, a separate screen external to the user s login window / application will be opened to display the details. Personalized / Targeted Offers: Targeted offers or advertisements relevant to the user will be displayed in Personalized Offers section. These offers will be based on the user s details and activity.

301 Offers To access the Offers options 1. Log on to the Java Application Based Mobile Banking. 2. Navigate to Offers menu in menu list. Offers 3. On clicking Offers option from the menu list, the system displays Offers as Location based & Personalized offers, as shown in second screen above. 4. Click any of the Offer type in order to view it. You can view offers based on your location by clicking Location Based Offers icon. It will show offers with respect to your location. 5. You can also view personalized offers, displayed after clicking Personalized Offers icon.0.
Oracle FLEXCUBE Direct Banking
 Oracle FLEXCUBE Direct Banking Java Application Based Rich Mobile Banking User Manual Release 12.0.3.0.0 Part No. E52543-01 April 2014 Java Application Based Rich Mobile Banking User Manual April 2014
Oracle FLEXCUBE Direct Banking
 Oracle FLEXCUBE Direct Banking Java Application Based Plain Mobile Banking User Manual Release 12.0.2.0.0 Part No. E50108-01 September 2013 Java Application Based Plain Mobile Banking User Manual September
Oracle FLEXCUBE Direct Banking
 Oracle FLEXCUBE Direct Banking Retail Transfer and User Manual Release 12.0.2.0.0 Part No. E50108-01 September 2013 Retail Tranfer and User Manual September 2013 Oracle Financial Services Software Limited
Oracle FLEXCUBE Direct Banking
 Oracle FLEXCUBE Direct Banking Corporate Transfer and Payment User Manual Release 12.0.3.0.0 Part No. E52543-01 April 2014 Corporate Transfer and Payment User Manual April 2014 Oracle Financial Services
Oracle Banking Digital Experience
 Oracle Banking Digital Experience Wallets User Manual Release 15.1.0.0.0 Part No. E66313-01 October 2015 Wallets User Manual October 2015 Oracle Financial Services Software Limited Oracle Park Off Western
Oracle FLEXCUBE Direct Banking
 Oracle FLEXCUBE Direct Banking Retail Peer To Peer Payments User Manual Release 12.0.2.0.0 Part No. E50108-01 September 2013 Preface Retail Peer To Peer Payments User Manual September 2013 Oracle Financial
Oracle FLEXCUBE Direct Banking
 Oracle FLEXCUBE Direct Banking Dashboard Widgets Customer Services Release 12.0.2.0.0 Part No. E50108-01 September 2013 Dashboard Widgets Customer Service User Manual September 2013 Oracle Financial Services
Oracle FLEXCUBE Direct Banking
 Oracle FLEXCUBE Direct Banking Corporate Foreign Exchange user Manual Release 12.0.2.0.0 Part No. E50108-01 September 2013 Corporate Foreign Exchange User Manual September 2013 Oracle Financial Services
Oracle Banking Digital Experience
 Oracle Banking Digital Experience Retail Peer To Peer Payments User Manual Release 17.2.0.0.0 Part No. E88573-01 July 2017 Retail Peer To Peer Payments User Manual July 2017 Oracle Financial Services Software
Oracle FLEXCUBE Direct Banking
 Oracle FLEXCUBE Direct Banking User Manual SMS Banking Release 12.0.3.0.0 Part No. E52543-01 April 2014 SMS Banking User Manual April 2014 Oracle Financial Services Software Limited Oracle Park Off Western
Oracle FLEXCUBE Direct Banking
 Oracle FLEXCUBE Direct Banking Dashboard Widgets - Customer Services Release 12.0.3.0.0 Part No. E52543-01 April 2014 Dashboard Widgets Customer Service User Manual April 2014 Oracle Financial Services
Oracle FLEXCUBE Direct Banking
 Oracle FLEXCUBE Direct Banking Wealth Management (FCDB to FCPB) User Manual Release 12.0.3.0.0 Part No. E52543-01 April 2014 Wealth Management (FCDB to FCPB) User Manual April 2014 Oracle Financial Services
Oracle FLEXCUBE Direct Banking
 Oracle FLEXCUBE Direct Banking Retail Customer Services User Manual Release 12.0.2.0.0 Part No. E50108-01 September 2013 Retail Customer Services User Manual September 2013 Oracle Financial Services Software
Oracle FLEXCUBE Direct Banking
 Oracle FLEXCUBE Direct Banking User Manual SMS Banking Release 12.0.2.0.0 Part No. E50108-01 September 2013 Preface SMS Banking User Manual September 2013 Oracle Financial Services Software Limited Oracle
Oracle FLEXCUBE Direct Banking
 Oracle FLEXCUBE Direct Banking Retail Customer Services User Manual Release 12.0.3.0.0 Part No. E52543-01 April 2014 Retail Customer Services User Manual April 2014 Oracle Financial Services Software Limited
Oracle Banking Digital Experience
 Oracle Banking Digital Experience Retail Accounts User Manual Release 18.1.0.0.0 Part No. E92727-01 January 2018 Retail Accounts User Manual January 2018 Oracle Financial Services Software Limited Oracle
Oracle Banking Digital Experience
 Oracle Banking Digital Experience Push Notification User Manual Release 18.3.0.0.0 Part No. F12056-01 December 2018 Push Notification User Manual December 2018 Oracle Financial Services Software Limited
Oracle FLEXCUBE Direct Banking Release Corporate Foreign Exchange User Manual. Part No. E
 Oracle FLEXCUBE Direct Banking Release 12.0.1.0.0 Corporate Foreign Exchange User Manual Part No. E52306-01 Corporate Foreign Exchange User Manual Table of Contents 1. Transaction Host Integration Matrix...
Oracle Banking Digital Experience
 Oracle Banking Digital Experience Wearable User Manual Release 18.2.0.0.0 Part No. E97823-01 June 2018 User Manual June 2018 Oracle Financial Services Software Limited Oracle Park Off Western Express Highway
Oracle FLEXCUBE Direct Banking
 Oracle FLEXCUBE Direct Banking User Manual Core Release 12.0.3.0.0 Part No. E52543-01 April 2014 Core User Manual April 2014 Oracle Financial Services Software Limited Oracle Park Off Western Express Highway
Oracle FLEXCUBE Direct Banking
 Oracle FLEXCUBE Direct Banking Corporate Supply Chain User Manual Release 12.0.3.0.0 Part No. E52543-01 April 2014 Corporate Supply Chain User Manual April 2014 Oracle Financial Services Software Limited
Oracle FLEXCUBE Direct Banking
 Oracle FLEXCUBE Direct Banking Corporate to Bank Connectivity User Manual Release 12.0.3.0.0 Part No. E52543-01 April 2014 Corporate to Bank Connectivity User Manual April 2014 Oracle Financial Services
Oracle FLEXCUBE Direct Banking Release Dashboard Widgets Customer Services User Manual. Part No. E
 Oracle FLEXCUBE Direct Banking Release 12.0.1.0.0 Dashboard Widgets Customer Services User Manual Part No. E52306-01 Dashboard Widgets User Manual Table of Contents 1. Transaction Host Integration Matrix...
Oracle Banking Digital Experience
 Oracle Banking Digital Experience Corporate Customer Services User Manual Release 17.1.0.0.0 Part No. E83887-01 March 2017 Corporate Customer Services User Manual March 2017 Oracle Financial Services Software
Oracle Banking Digital Experience
 Oracle Banking Digital Experience Retail Accounts User Manual Release 17.2.0.0.0 Part No. E88573-01 July 2017 Retail Accounts User Manual July 2017 Oracle Financial Services Software Limited Oracle Park
Oracle Banking Digital Experience
 Oracle Banking Digital Experience FCUBS Originations Saving Account User Manual Release 18.3.0.0.0 Part No. F12056-01 December 2018 Preface FCUBS Originations Saving Account User Manual December 2018 Oracle
Oracle Banking Digital Experience
 Oracle Banking Digital Experience Soft Token Application User Manual Release 18.2.0.0.0 Part No. E97823-01 June 2018 User Manual June 2018 Oracle Financial Services Software Limited Oracle Park Off Western
Oracle Banking Digital Experience
 Oracle Banking Digital Experience Merchant Payments User Manual Release 18.1.0.0.0 Part No. E92727-01 January 2018 Merchant Payments User Manual January 2018 Oracle Financial Services Software Limited
Oracle Banking Digital Experience
 Oracle Banking Digital Experience Soft Token Application User Manual Release 18.1.0.0.0 Part No. E92727-01 January 2018 User Manual January 2018 Oracle Financial Services Software Limited Oracle Park Off
Oracle FLEXCUBE Direct Banking Release SMS Banking User Manual. Part No. E
 Oracle FLEXCUBE Direct Banking Release 12.0.1.0.0 SMS Banking User Manual Part No. E52306-01 SMS Banking User Manual Table of Contents 1. Transaction Host Integration Matrix... 4 2. CASA Account Details...
Oracle Banking Digital Experience
 Oracle Banking Digital Experience Checking Account Originations User Manual Release 18.2.0.0.0 Part No. E97823-01 June 2018 Checkings Account Originations User Manual June 2018 Oracle Financial Services
Module Code Entries Utility Oracle FLEXCUBE Universal Banking Release [December] [2016]
![Module Code Entries Utility Oracle FLEXCUBE Universal Banking Release [December] [2016]](/thumbs/95/125396641.jpg "Module Code Entries Utility Oracle FLEXCUBE Universal Banking Release [December] [2016]") Module Code Entries Utility Oracle FLEXCUBE Universal Banking Release 12.3.0.0.0 [December] [2016] Table of Contents 1. DSN ENTRIES UTILITY... 1-1 1.1 INTRODUCTION... 1-1 1.2 SETTING UP MODULE CODE ENTRIES...
Module Code Entries Utility Oracle FLEXCUBE Universal Banking Release 12.3.0.0.0 [December] [2016] Table of Contents 1. DSN ENTRIES UTILITY... 1-1 1.1 INTRODUCTION... 1-1 1.2 SETTING UP MODULE CODE ENTRIES...
Oracle FLEXCUBE Direct Banking
 Oracle FLEXCUBE Direct Banking Core Corporate Admin User Manual Release 12.0.3.0.0 Part No. E52543-01 April 2014 Core Corporate Admin User Manual April 2014 Oracle Financial Services Software Limited Oracle
Oracle Banking Digital Experience
 Oracle Banking Digital Experience Checking Account Originations User Manual Release 17.2.0.0.0 Part No. E88573-01 July 2017 Checkings Account Originations User Manual July 2017 Oracle Financial Services
Oracle Banking Digital Experience
 Oracle Banking Digital Experience Islamic Banking Retail Accounts User Manual Release 17.1.0.0.0 Part No. E83887-01 March 2017 Islamic Banking Retail Accounts User Manual March 2017 Oracle Financial Services
Oracle Banking Digital Experience
 Oracle Banking Digital Experience Core Corporate Admin User Manual Release 17.2.0.0.0 Part No. E88573-01 July 2017 Core Corporate Admin User Manual July 2017 Oracle Financial Services Software Limited
Installer Troubleshooting Oracle FLEXCUBE Universal Banking Release [October] [2015]
![Installer Troubleshooting Oracle FLEXCUBE Universal Banking Release [October] [2015]](/thumbs/75/72950709.jpg "Installer Troubleshooting Oracle FLEXCUBE Universal Banking Release [October] [2015]") Installer Troubleshooting Oracle FLEXCUBE Universal Banking Release 12.1.0.0.0 [October] [2015] Table of Contents 1. TROUBLESHOOTING... 1-1 1.1 INTRODUCTION... 1-1 1.2 CHECKING LOGS... 1-1 1.3 ABRUPT EXIT
Installer Troubleshooting Oracle FLEXCUBE Universal Banking Release 12.1.0.0.0 [October] [2015] Table of Contents 1. TROUBLESHOOTING... 1-1 1.1 INTRODUCTION... 1-1 1.2 CHECKING LOGS... 1-1 1.3 ABRUPT EXIT
Opera Browser Settings Oracle FLEXCUBE Release [May] [2017]
![Opera Browser Settings Oracle FLEXCUBE Release [May] [2017]](/thumbs/74/71339037.jpg "Opera Browser Settings Oracle FLEXCUBE Release [May] [2017]") Opera Browser Settings Oracle FLEXCUBE Release 12.4.0.0.0 [May] [2017] Table of Contents 1. CONFIGURING OPERA (VERSION LATEST QUALIFIED VERSION)... 1-1 1.1 CLEARING CACHE... 1-1 1.2 CLEARING BROWSER CACHE
Opera Browser Settings Oracle FLEXCUBE Release 12.4.0.0.0 [May] [2017] Table of Contents 1. CONFIGURING OPERA (VERSION LATEST QUALIFIED VERSION)... 1-1 1.1 CLEARING CACHE... 1-1 1.2 CLEARING BROWSER CACHE
Data Model Getting Started Oracle FLEXCUBE Universal Banking Release [May] [2018]
![Data Model Getting Started Oracle FLEXCUBE Universal Banking Release [May] [2018]](/thumbs/83/88015240.jpg "Data Model Getting Started Oracle FLEXCUBE Universal Banking Release [May] [2018]") Data Model Getting Started Oracle FLEXCUBE Universal Banking Release 14.1.0.0.0 [May] [2018] Contents 1. PREFACE... 3 1.1 AUDIENCE... 3 2. INTRODUCTION... 4 2.1 WHAT IS IN THIS GUIDE... 4 2.2 WHY REVERSE
Data Model Getting Started Oracle FLEXCUBE Universal Banking Release 14.1.0.0.0 [May] [2018] Contents 1. PREFACE... 3 1.1 AUDIENCE... 3 2. INTRODUCTION... 4 2.1 WHAT IS IN THIS GUIDE... 4 2.2 WHY REVERSE
Oracle FLEXCUBE Core Banking
 Oracle FLEXCUBE Core Banking Security Management Reports Manual Release 11.7.0.0.0 Part No. E87095-01 May 2017 Security Management Reports Manual May 2017 Oracle Financial Services Software Limited Oracle
Oracle FLEXCUBE Core Banking
 Oracle FLEXCUBE Core Banking IVR User Manual Release 5.2.0.0.0 Part No. E71602-01 March 2016 IVR User Manual March 2016 Oracle Financial Services Software Limited Oracle Park Off Western Express Highway
Apple Safari Settings Oracle FLEXCUBE Release [May] [2017]
![Apple Safari Settings Oracle FLEXCUBE Release [May] [2017]](/thumbs/72/66339650.jpg "Apple Safari Settings Oracle FLEXCUBE Release [May] [2017]") Apple Safari Settings Oracle FLEXCUBE Release 12.4.0.0.0 [May] [2017] Table of Contents 1. CONFIGURING APPLE SAFARI (LATEST QUALIFIED VERSION)... 1-1 1.1 CLEARING CACHE... 1-1 1.2 REMOVING BACK/FORWARD
Apple Safari Settings Oracle FLEXCUBE Release 12.4.0.0.0 [May] [2017] Table of Contents 1. CONFIGURING APPLE SAFARI (LATEST QUALIFIED VERSION)... 1-1 1.1 CLEARING CACHE... 1-1 1.2 REMOVING BACK/FORWARD
Open Development Tool Database Setup Oracle FLEXCUBE Universal Banking Release [May] [2017]
![Open Development Tool Database Setup Oracle FLEXCUBE Universal Banking Release [May] [2017]](/thumbs/86/93962724.jpg "Open Development Tool Database Setup Oracle FLEXCUBE Universal Banking Release [May] [2017]") Open Development Tool Database Setup Oracle FLEXCUBE Universal Banking Release 12.4.0.0.0 [May] [2017] Table of Contents 1. SETTING UP DATABASE FOR OPEN DEVELOPMENT TOOL... 1-1 1. Setting up Database for
Open Development Tool Database Setup Oracle FLEXCUBE Universal Banking Release 12.4.0.0.0 [May] [2017] Table of Contents 1. SETTING UP DATABASE FOR OPEN DEVELOPMENT TOOL... 1-1 1. Setting up Database for
Oracle Banking Digital Experience
 Oracle Banking Digital Experience Core Corporate Admin User Manual Release 17.1.0.0.0 Part No. E83887-01 March 2017 Core Corporate Admin User Manual March 2017 Oracle Financial Services Software Limited
Oracle FLEXCUBE Core Banking
 Oracle FLEXCUBE Core Banking General Ledger Reports Manual Release 11.7.0.0.0 Part No. E87095-01 May 2017 General Ledger Reports Manual May 2017 Oracle Financial Services Software Limited Oracle Park Off
Reports DSN Entries Utility Oracle FLEXCUBE Universal Banking Release [May] [2018]
![Reports DSN Entries Utility Oracle FLEXCUBE Universal Banking Release [May] [2018]](/thumbs/93/112011303.jpg "Reports DSN Entries Utility Oracle FLEXCUBE Universal Banking Release [May] [2018]") Reports DSN Entries Utility Oracle FLEXCUBE Universal Banking Release 14.1.0.0.0 [May] [2018] Table of Contents 1. REPORTS DSN ENTRIES UTILITY... 1-1 1.1 INTRODUCTION... 1-1 1.2 SETTING UP REPORTS DSN
Reports DSN Entries Utility Oracle FLEXCUBE Universal Banking Release 14.1.0.0.0 [May] [2018] Table of Contents 1. REPORTS DSN ENTRIES UTILITY... 1-1 1.1 INTRODUCTION... 1-1 1.2 SETTING UP REPORTS DSN
Oracle Banking Digital Experience
 Oracle Banking Digital Experience Corporate File Upload User Manual Release 18.2.0.0.0 Part No. E97823-01 June 2018 Corporate File Upload User Manual June 2018 Oracle Financial Services Software Limited
Oracle Banking Digital Experience
 Oracle Banking Digital Experience Brand Setup Guide Release 18.2.0.0.0 Part No. E97823-01 June 2018 Brand Setup Guide June 2018 Oracle Financial Services Software Limited Oracle Park Off Western Express
Oracle Banking Digital Experience
 Oracle Banking Digital Experience Islamic Banking Retail Accounts User Manual Release 18.2.0.0.0 Part No. E97823-01 June 2018 Islamic Banking Retail Accounts User Manual June 2018 Oracle Financial Services
Oracle FLEXCUBE Direct Banking
 Oracle FLEXCUBE Direct Banking Development Workbench for Direct and Mobile Banking Installation Manual Release 12.0.3.0.0 Part No. E52543-01 April 2014 Oracle Financial Services Software Limited Oracle
Internal Handoff Grants Utility Oracle FLEXCUBE Investor Servicing Release [October] [2015]
![Internal Handoff Grants Utility Oracle FLEXCUBE Investor Servicing Release [October] [2015]](/thumbs/93/114151769.jpg "Internal Handoff Grants Utility Oracle FLEXCUBE Investor Servicing Release [October] [2015]") Internal Handoff Grants Utility Oracle FLEXCUBE Investor Servicing Release 12.1.0.0.0 [October] [2015] Table of Contents 1. INTERNAL HANDOFF GRANTS UTILITY... 1-1 1.1 INTRODUCTION... 1-1 1.2 SETTING UP
Internal Handoff Grants Utility Oracle FLEXCUBE Investor Servicing Release 12.1.0.0.0 [October] [2015] Table of Contents 1. INTERNAL HANDOFF GRANTS UTILITY... 1-1 1.1 INTRODUCTION... 1-1 1.2 SETTING UP
FLEXCUBE General Ledger Application Deployment in Websphere Oracle FLEXCUBE Universal Banking Release [October] [2015]
![FLEXCUBE General Ledger Application Deployment in Websphere Oracle FLEXCUBE Universal Banking Release [October] [2015]](/thumbs/96/127261917.jpg "FLEXCUBE General Ledger Application Deployment in Websphere Oracle FLEXCUBE Universal Banking Release [October] [2015]") FLEXCUBE General Ledger Application Deployment in Websphere Oracle FLEXCUBE Universal Banking Release 12.1.0.0.0 [October] [2015] Table of Contents 1. FLEXCUBE GENERAL LEDGER APPLICATION FULL DEPLOYMENT...
FLEXCUBE General Ledger Application Deployment in Websphere Oracle FLEXCUBE Universal Banking Release 12.1.0.0.0 [October] [2015] Table of Contents 1. FLEXCUBE GENERAL LEDGER APPLICATION FULL DEPLOYMENT...
Data Model Getting Started Oracle FLEXCUBE Universal Banking Release [February] [2018]
![Data Model Getting Started Oracle FLEXCUBE Universal Banking Release [February] [2018]](/thumbs/89/99638257.jpg "Data Model Getting Started Oracle FLEXCUBE Universal Banking Release [February] [2018]") Data Model Getting Started Oracle FLEXCUBE Universal Banking Release 14.0.0.0.0 [February] [2018] Contents 1 Preface... 3 1.1 Audience... 3 2 Introduction... 3 2.1 What is in this guide... 3 2.2 Why reverse
Data Model Getting Started Oracle FLEXCUBE Universal Banking Release 14.0.0.0.0 [February] [2018] Contents 1 Preface... 3 1.1 Audience... 3 2 Introduction... 3 2.1 What is in this guide... 3 2.2 Why reverse
Switch Monitor Installation Oracle FLEXCUBE Universal Banking Release [May] [2017]
![Switch Monitor Installation Oracle FLEXCUBE Universal Banking Release [May] [2017]](/thumbs/80/81415215.jpg "Switch Monitor Installation Oracle FLEXCUBE Universal Banking Release [May] [2017]") Switch Monitor Installation Oracle FLEXCUBE Universal Banking Release 12.4.0.0.0 [May] [2017] Table of Contents 1. SWITCH INTERFACE INSTALLATION FOR GATEWAY MONITOR SETUP... 1-1 1.1 INTRODUCTION... 1-1
Switch Monitor Installation Oracle FLEXCUBE Universal Banking Release 12.4.0.0.0 [May] [2017] Table of Contents 1. SWITCH INTERFACE INSTALLATION FOR GATEWAY MONITOR SETUP... 1-1 1.1 INTRODUCTION... 1-1
Oracle FLEXCUBE Direct Banking
 Oracle FLEXCUBE Direct Banking Corporate Trade Finance User Manual Release 12.0.2.0.0 Part No. E50108-01 September 2013 Corporate Trade Finance User Manual September 2013 Oracle Financial Services Software
Oracle Banking Digital Experience
 Oracle Banking Digital Experience Islamic Banking Retail Accounts User Manual Release 17.2.0.0.0 Part No. E88573-01 July 2017 Islamic Banking Retail Accounts User Manual July 2017 Oracle Financial Services
Deploying Oracle FLEXCUBE Application on WebSphere Oracle FLEXCUBE Universal Banking Release [December] [2016]
![Deploying Oracle FLEXCUBE Application on WebSphere Oracle FLEXCUBE Universal Banking Release [December] [2016]](/thumbs/74/71078880.jpg "Deploying Oracle FLEXCUBE Application on WebSphere Oracle FLEXCUBE Universal Banking Release [December] [2016]") Deploying Oracle FLEXCUBE Application on WebSphere Oracle FLEXCUBE Universal Banking Release 12.3.0.0.0 [December] [2016] Table of Contents 1. DEPLOYING ORACLE FLEXCUBE ON WEBSPHERE... 1-1 1.1 INTRODUCTION...
Deploying Oracle FLEXCUBE Application on WebSphere Oracle FLEXCUBE Universal Banking Release 12.3.0.0.0 [December] [2016] Table of Contents 1. DEPLOYING ORACLE FLEXCUBE ON WEBSPHERE... 1-1 1.1 INTRODUCTION...
Servibanca Interface Oracle FLEXCUBE Universal Banking Release [April] [2014] Oracle Part Number E
![Servibanca Interface Oracle FLEXCUBE Universal Banking Release [April] [2014] Oracle Part Number E](/thumbs/74/69787264.jpg "Servibanca Interface Oracle FLEXCUBE Universal Banking Release [April] [2014] Oracle Part Number E") Servibanca Interface Oracle FLEXCUBE Universal Banking Release 11.3.83.02.0 [April] [2014] Oracle Part Number E53607-01 Servibanca Interface Table of Contents 1.1 INTRODUCTION... 1-1 1.1.1 Audience...
Servibanca Interface Oracle FLEXCUBE Universal Banking Release 11.3.83.02.0 [April] [2014] Oracle Part Number E53607-01 Servibanca Interface Table of Contents 1.1 INTRODUCTION... 1-1 1.1.1 Audience...
Oracle Banking Digital Experience
 Oracle Banking Digital Experience Corporate Customer Services User Manual Release 18.2.0.0.0 Part No. E97823-01 June 2018 Corporate Customer Services User Manual June 2018 Oracle Financial Services Software
Oracle Banking Digital Experience
 Oracle Banking Digital Experience Wallets User Manual Release 18.1.0.0.0 Part No. E92727-01 January 2018 Wallets User Manual January 2018 Oracle Financial Services Software Limited Oracle Park Off Western
Open Development Tool Application Deployment in Weblogic Oracle FLEXCUBE Universal Banking Release [May] [2017]
![Open Development Tool Application Deployment in Weblogic Oracle FLEXCUBE Universal Banking Release [May] [2017]](/thumbs/90/101584799.jpg "Open Development Tool Application Deployment in Weblogic Oracle FLEXCUBE Universal Banking Release [May] [2017]") Open Development Tool Application Deployment in Weblogic Oracle FLEXCUBE Universal Banking Release 12.4.0.0.0 [May] [2017] Table of Contents 1. OPEN DEVELOPMENT TOOL (ODT) APPLICATION FULL DEPLOYMENT...
Open Development Tool Application Deployment in Weblogic Oracle FLEXCUBE Universal Banking Release 12.4.0.0.0 [May] [2017] Table of Contents 1. OPEN DEVELOPMENT TOOL (ODT) APPLICATION FULL DEPLOYMENT...
Oracle Banking Digital Experience
 Oracle Banking Digital Experience FCUBS Originations Auto Loan User Manual Release 18.1.0.0.0 Part No. E92727-01 January 2018 FCUBS Originations Auto Loan User Manual January 2018 Oracle Financial Services
Configuring Internet Explorer Oracle FLEXCUBE Universal Banking Release [May] [2017]
![Configuring Internet Explorer Oracle FLEXCUBE Universal Banking Release [May] [2017]](/thumbs/74/71388905.jpg "Configuring Internet Explorer Oracle FLEXCUBE Universal Banking Release [May] [2017]") Configuring Internet Explorer Oracle FLEXCUBE Universal Banking Release 12.4.0.0.0 [May] [2017] Table of Contents 1. CONFIGURING INTERNET EXPLORER... 1 1.1 CONFIGURING INTERNET OPTIONS... 1 1.2 CREATING
Configuring Internet Explorer Oracle FLEXCUBE Universal Banking Release 12.4.0.0.0 [May] [2017] Table of Contents 1. CONFIGURING INTERNET EXPLORER... 1 1.1 CONFIGURING INTERNET OPTIONS... 1 1.2 CREATING
Exception Process User Guide Oracle Banking Credit Facilities Process Management Release Part No. E July 2018
 Exception Process User Guide Oracle Banking Credit Facilities Process Management Release 14.1.0.0.0 Part No. E97614-01 July 2018 Oracle Banking Credit Facilities Process Management User Guide Oracle Financial
Oracle FLEXCUBE Direct Banking
 Oracle FLEXCUBE Direct Banking Corporate Trade Finance User Manual Release 12.0.3.0.0 Part No. E52543-01 April 2014 Corporate Trade Finance User Manual April 2014 Oracle Financial Services Software Limited
Scheduler PLSQL JOB Creation Oracle FLEXCUBE Universal Banking Release [December] [2016]
![Scheduler PLSQL JOB Creation Oracle FLEXCUBE Universal Banking Release [December] [2016]](/thumbs/86/94792907.jpg "Scheduler PLSQL JOB Creation Oracle FLEXCUBE Universal Banking Release [December] [2016]") Scheduler PLSQL JOB Creation Oracle FLEXCUBE Universal Banking Release 12.3.0.0.0 [December] [2016] Table of Contents 1. INTRODUCTION... 1-1 2. BACKGROUND... 2-1 3. PROCEDURE... 3-1 4. EXAMPLE... 4-1 1.
Scheduler PLSQL JOB Creation Oracle FLEXCUBE Universal Banking Release 12.3.0.0.0 [December] [2016] Table of Contents 1. INTRODUCTION... 1-1 2. BACKGROUND... 2-1 3. PROCEDURE... 3-1 4. EXAMPLE... 4-1 1.
Oracle Banking APIs. Part No. E Origination Social Media Integration Guide Release April 2018
 Oracle Banking APIs Origination Social Media Integration Guide Release 18.1.0.0.0 Part No. E94092-01 April 2018 Origination Social Media Integration Guide April 2018 Oracle Financial Services Software
Scheduler JAVA JOB Creation Oracle FLEXCUBE Universal Banking Release [December] [2016]
![Scheduler JAVA JOB Creation Oracle FLEXCUBE Universal Banking Release [December] [2016]](/thumbs/75/71683699.jpg "Scheduler JAVA JOB Creation Oracle FLEXCUBE Universal Banking Release [December] [2016]") Scheduler JAVA JOB Creation Oracle FLEXCUBE Universal Banking Release 12.3.0.0.0 [December] [2016] Table of Contents 1. INTRODUCTION... 1-2 2. BACKGROUND... 2-1 3. PROCEDURE... 3-1 4. EXAMPLE... 4-1 1.
Scheduler JAVA JOB Creation Oracle FLEXCUBE Universal Banking Release 12.3.0.0.0 [December] [2016] Table of Contents 1. INTRODUCTION... 1-2 2. BACKGROUND... 2-1 3. PROCEDURE... 3-1 4. EXAMPLE... 4-1 1.
Oracle FLEXCUBE Core Banking
 Oracle FLEXCUBE Core Banking RCU Installation Guide Release 5.1.0.0.0 Part No. E57304-01 September 2014 Oracle FLEXCUBE Core Banking RCU Installation Guide September 2014 Oracle Financial Services Software
Oracle FLEXCUBE Direct Banking
 Oracle FLEXCUBE Direct Banking Database Scheduled Jobs Release 12.0.3.0.0` Part No. E52543-01 April 2014 Oracle Financial Services Software Limited Oracle Park Off Western Express Highway Goregaon (East)
PM Database Setup Oracle FLEXCUBE Universal Banking Release [May] [2016]
![PM Database Setup Oracle FLEXCUBE Universal Banking Release [May] [2016]](/thumbs/81/84332302.jpg "PM Database Setup Oracle FLEXCUBE Universal Banking Release [May] [2016]") PM Database Setup Oracle FLEXCUBE Universal Banking Release 12.2.0.0.0 [May] [2016] Table of Contents 1. INSTALLING STANDALONE PAYMENTS... 1-1 1.1 INTRODUCTION... 1-1 1.2 CREATING PM SCHEMA... 1-1 1.2.2
PM Database Setup Oracle FLEXCUBE Universal Banking Release 12.2.0.0.0 [May] [2016] Table of Contents 1. INSTALLING STANDALONE PAYMENTS... 1-1 1.1 INTRODUCTION... 1-1 1.2 CREATING PM SCHEMA... 1-1 1.2.2
FLEXCUBE Information Server Merge Repositories Oracle FLEXCUBE Universal Banking Release [March] [2018]
![FLEXCUBE Information Server Merge Repositories Oracle FLEXCUBE Universal Banking Release [March] [2018]](/thumbs/81/82696330.jpg "FLEXCUBE Information Server Merge Repositories Oracle FLEXCUBE Universal Banking Release [March] [2018]") FLEXCUBE Information Server Merge Repositories Oracle FLEXCUBE Universal Banking Release 12.3.0.0.0 [March] [2018] Table of Contents STEPS TO BE FOLLOWED TO MERGE TWO REPOSITORIES:... 3 Steps to be followed
FLEXCUBE Information Server Merge Repositories Oracle FLEXCUBE Universal Banking Release 12.3.0.0.0 [March] [2018] Table of Contents STEPS TO BE FOLLOWED TO MERGE TWO REPOSITORIES:... 3 Steps to be followed
Day-0 Setup Guide Release July 2018
 Day-0 Setup Guide Release 14.1.0.0.0 July 2018 Day-0 Setup Guide Oracle Financial Services Software Limited Oracle Park Off Western Express Highway Goregaon (East) Mumbai, Maharashtra 400 063 India Worldwide
Flexcube Information Server Oracle FLEXCUBE Enterprise Limits and Collateral Management Release [October] [2015]
![Flexcube Information Server Oracle FLEXCUBE Enterprise Limits and Collateral Management Release [October] [2015]](/thumbs/81/82696417.jpg "Flexcube Information Server Oracle FLEXCUBE Enterprise Limits and Collateral Management Release [October] [2015]") Flexcube Information Server Oracle FLEXCUBE Enterprise Limits and Collateral Management Release 12.1.0.0.0 [October] [2015] Table of Contents Steps to be followed to merge two Repositories:... 3 Steps
Flexcube Information Server Oracle FLEXCUBE Enterprise Limits and Collateral Management Release 12.1.0.0.0 [October] [2015] Table of Contents Steps to be followed to merge two Repositories:... 3 Steps
Purge Entity Definition. Oracle FLEXCUBE Universal Banking Release [May] [2018] Purge Entity Definition
![Purge Entity Definition. Oracle FLEXCUBE Universal Banking Release [May] [2018] Purge Entity Definition](/thumbs/93/112938564.jpg "Purge Entity Definition. Oracle FLEXCUBE Universal Banking Release [May] [2018] Purge Entity Definition") Oracle FLEXCUBE Universal Banking Release 14.1.0.0.0 [May] [2018] 1 Contents 1. Preface... 3 1.1 Audience... 3 1.2 Related Documents... 3 2. Introduction... 3 2.1 How to use this Guide... 3 3. Overview
Oracle FLEXCUBE Universal Banking Release 14.1.0.0.0 [May] [2018] 1 Contents 1. Preface... 3 1.1 Audience... 3 1.2 Related Documents... 3 2. Introduction... 3 2.1 How to use this Guide... 3 3. Overview
Payment Job Framework Property File Creation Oracle FLEXCUBE Universal Banking Release [October] [2015]
![Payment Job Framework Property File Creation Oracle FLEXCUBE Universal Banking Release [October] [2015]](/thumbs/85/92278407.jpg "Payment Job Framework Property File Creation Oracle FLEXCUBE Universal Banking Release [October] [2015]") Payment Job Framework Property File Creation Oracle FLEXCUBE Universal Banking Release 12.1.0.0.0 [October] [2015] Table of Contents Contents Creating Property File for Payment Job Framework (Payment Scheduler)...
Payment Job Framework Property File Creation Oracle FLEXCUBE Universal Banking Release 12.1.0.0.0 [October] [2015] Table of Contents Contents Creating Property File for Payment Job Framework (Payment Scheduler)...
Cross Schema Scripts Utility Oracle FLEXCUBE Investor Servicing Release [December] [2017]
![Cross Schema Scripts Utility Oracle FLEXCUBE Investor Servicing Release [December] [2017]](/thumbs/95/125799364.jpg "Cross Schema Scripts Utility Oracle FLEXCUBE Investor Servicing Release [December] [2017]") Cross Schema Scripts Utility Oracle FLEXCUBE Investor Servicing Release 12.1.0.5.4 [December] [2017] Table of Contents 1. CROSS SCHEMA SCRIPTS UTILITY... 1-1 1.1 INTRODUCTION... 1-1 1.2 SETTING UP CROSS
Cross Schema Scripts Utility Oracle FLEXCUBE Investor Servicing Release 12.1.0.5.4 [December] [2017] Table of Contents 1. CROSS SCHEMA SCRIPTS UTILITY... 1-1 1.1 INTRODUCTION... 1-1 1.2 SETTING UP CROSS
Development of Dashboard Forms. Oracle FLEXCUBE Universal Banking Release Development of Dashboard Forms
 Oracle FLEXCUBE Universal Banking Release 12.2.0.0.0 1 Table of Contents 1 Preface... 3 1.1 Audience... 3 1.2 Related Documents... 3 2 Introduction... 4 3 Creating Dashboard Form... 4 3.1 Preferences...
Custom RAD Extensibility Transaction Screens Oracle Banking Payments Release [Feb] [2018]
![Custom RAD Extensibility Transaction Screens Oracle Banking Payments Release [Feb] [2018]](/thumbs/90/104322618.jpg "Custom RAD Extensibility Transaction Screens Oracle Banking Payments Release [Feb] [2018]") Custom RAD Extensibility Transaction Screens Oracle Banking Payments Release 14.0.0.0.0 [Feb] [2018] Contents 1 Preface... 3 2 Approach... 4 1 Preface This document is a step by step guide to demonstrate
Custom RAD Extensibility Transaction Screens Oracle Banking Payments Release 14.0.0.0.0 [Feb] [2018] Contents 1 Preface... 3 2 Approach... 4 1 Preface This document is a step by step guide to demonstrate
Oracle GL Adapter - Database Layer Installation Oracle FLEXCUBE Universal Banking Release [October] [2015]
![Oracle GL Adapter - Database Layer Installation Oracle FLEXCUBE Universal Banking Release [October] [2015]](/thumbs/72/66509857.jpg "Oracle GL Adapter - Database Layer Installation Oracle FLEXCUBE Universal Banking Release [October] [2015]") Oracle GL Adapter - Database Layer Installation Oracle FLEXCUBE Universal Banking Release 12.1.0.0.0 [October] [2015] Table of Contents 1. SOFTWARE REQUIREMENTS... 3 2. ORACLE GL ADAPTER DATABASE LAYER
Oracle GL Adapter - Database Layer Installation Oracle FLEXCUBE Universal Banking Release 12.1.0.0.0 [October] [2015] Table of Contents 1. SOFTWARE REQUIREMENTS... 3 2. ORACLE GL ADAPTER DATABASE LAYER
Switch Interface Installation Oracle FLEXCUBE Universal Banking Release [December] [2016]
![Switch Interface Installation Oracle FLEXCUBE Universal Banking Release [December] [2016]](/thumbs/86/93974252.jpg "Switch Interface Installation Oracle FLEXCUBE Universal Banking Release [December] [2016]") Switch Interface Installation Oracle FLEXCUBE Universal Banking Release 12.3.0.0.0 [December] [2016] Table of Contents 1. SWITCH INSTALLATION... 1-1 1.1 INTRODUCTION... 1-1 1.2 INSTALLING SWITCH INTERFACE...
Switch Interface Installation Oracle FLEXCUBE Universal Banking Release 12.3.0.0.0 [December] [2016] Table of Contents 1. SWITCH INSTALLATION... 1-1 1.1 INTRODUCTION... 1-1 1.2 INSTALLING SWITCH INTERFACE...
BPEL Workflow User Guide Oracle FLEXCUBE Universal Banking. Release Part No. E
 BPEL Workflow User Guide Oracle FLEXCUBE Universal Banking Release 12.0.2.0.0 Part No. E49740-01 September 2013 BPEL Workflow User Guide September 2013 Oracle Financial Services Software Limited Oracle
Switch Interface Installation Oracle FLEXCUBE Universal Banking Release [May] [2017]
![Switch Interface Installation Oracle FLEXCUBE Universal Banking Release [May] [2017]](/thumbs/78/78629832.jpg "Switch Interface Installation Oracle FLEXCUBE Universal Banking Release [May] [2017]") Switch Interface Installation Oracle FLEXCUBE Universal Banking Release 12.4.0.0.0 [May] [2017] Table of Contents 1. SWITCH INTERFACE INSTALLATION... 1-1 1.1 INTRODUCTION... 1-1 1.2 INSTALLING SWITCH INTERFACE...
Switch Interface Installation Oracle FLEXCUBE Universal Banking Release 12.4.0.0.0 [May] [2017] Table of Contents 1. SWITCH INTERFACE INSTALLATION... 1-1 1.1 INTRODUCTION... 1-1 1.2 INSTALLING SWITCH INTERFACE...
Scheduler JAVA JOB Creation Oracle FLEXCUBE Investor Servicing Release [October] [2015]
![Scheduler JAVA JOB Creation Oracle FLEXCUBE Investor Servicing Release [October] [2015]](/thumbs/75/71683634.jpg "Scheduler JAVA JOB Creation Oracle FLEXCUBE Investor Servicing Release [October] [2015]") Scheduler JAVA JOB Creation Oracle FLEXCUBE Investor Servicing Release 12.1.0.0.0 [October] [2015] Table of Contents 1. INTRODUCTION... 1-3 2. BACKGROUND... 2-1 3. EXAMPLE... 3-1 1. Introduction This document
Scheduler JAVA JOB Creation Oracle FLEXCUBE Investor Servicing Release 12.1.0.0.0 [October] [2015] Table of Contents 1. INTRODUCTION... 1-3 2. BACKGROUND... 2-1 3. EXAMPLE... 3-1 1. Introduction This document
Oracle Banking Digital Experience
 Oracle Banking Digital Experience Connector Credential Store Guide Release 18.2.0.0.0 Part No. E97823-01 June 2018 Connector Credential Store Guide June 2018 Oracle Financial Services Software Limited
Oracle Banking Digital Experience
 Oracle Banking Digital Experience Retail Customer Services User Manual Release 17.2.0.0.0 Part No. E88573-01 July 2017 Retail Customer Services User Manual July 2017 Oracle Financial Services Software
Application Server Installation Guide for OPSS - CSF Oracle FLEXCUBE Universal Banking Release [May] [2016]
![Application Server Installation Guide for OPSS - CSF Oracle FLEXCUBE Universal Banking Release [May] [2016]](/thumbs/86/93520855.jpg "Application Server Installation Guide for OPSS - CSF Oracle FLEXCUBE Universal Banking Release [May] [2016]") Application Server Installation Guide for OPSS - CSF Oracle FLEXCUBE Universal Banking Release 12.2.0.0.0 [May] [2016] Table of Contents 1. Application Server Installation Guide for OPSS - CSF... 1 1.1
Application Server Installation Guide for OPSS - CSF Oracle FLEXCUBE Universal Banking Release 12.2.0.0.0 [May] [2016] Table of Contents 1. Application Server Installation Guide for OPSS - CSF... 1 1.1
Deploying Oracle FLEXCUBE Application on WebLogic Oracle FLEXCUBE Universal Banking Release [September] [2013] Part No.
![Deploying Oracle FLEXCUBE Application on WebLogic Oracle FLEXCUBE Universal Banking Release [September] [2013] Part No.](/thumbs/93/111890884.jpg "Deploying Oracle FLEXCUBE Application on WebLogic Oracle FLEXCUBE Universal Banking Release [September] [2013] Part No.") Deploying Oracle FLEXCUBE Application on WebLogic Oracle FLEXCUBE Universal Banking Release 12.0.2.0.0 [September] [2013] Part No. E49740-01 Table of Contents 1. DEPLOYING ORACLE FLEXCUBE ON WEBLOGIC...
Deploying Oracle FLEXCUBE Application on WebLogic Oracle FLEXCUBE Universal Banking Release 12.0.2.0.0 [September] [2013] Part No. E49740-01 Table of Contents 1. DEPLOYING ORACLE FLEXCUBE ON WEBLOGIC...
Oracle Banking Digital Experience
 Oracle Banking Digital Experience US Originations Credit Card User Manual Release 18.1.0.0.0 Part No. E92727-01 January 2018 US Originations Credit Card User Manual January 2018 Oracle Financial Services
Oracle Banking Digital Experience
 Oracle Banking Digital Experience Chat bot Configuration Release 17.2.0.0.0 Part No. E88573-01 July 2017 Chatbot Configuration July 2017 Oracle Financial Services Software Limited Oracle Park Off Western
Oracle FLEXCUBE Direct Banking
 Oracle FLEXCUBE Direct Banking Clustering on Weblogic 11g Release 12.0.3.0.0 Part No. E52543-01 April 2014 Clustering On Weblogic 11g April 2014 Oracle Financial Services Software Limited Oracle Park Off
Oracle Banking Digital Experience
 Oracle Banking Digital Experience Origination Social Media Integration User Manual Release 17.2.0.0.0 Part No. E88573-01 July 2017 Origination Social Media Integration User Manual July 2017 Oracle Financial
Oracle Banking APIs. Part No. E FCUBS Setup and Configuration Guide. Release April 2018
 Oracle Banking APIs FCUBS Setup and Configuration Guide Release 18.1.0.0.0 Part No. E94092-01 April 2018 FCUBS Setup and Configuration Guide January 2018 Oracle Financial Services Software Limited Oracle
Multi-byte Character Support Oracle FLEXCUBE Universal Banking Release [May] [2018]
![Multi-byte Character Support Oracle FLEXCUBE Universal Banking Release [May] [2018]](/thumbs/90/102654483.jpg "Multi-byte Character Support Oracle FLEXCUBE Universal Banking Release [May] [2018]") Multi-byte Character Support Oracle FLEXCUBE Universal Banking Release 14.1.0.0.0 [May] [2018] Contents 1. INTRODUCTION... 3 1.1 BACKGROUND... 3 1.2 APPROACH... 3 1. Introduction Oracle FLEXCUBE Universal
Multi-byte Character Support Oracle FLEXCUBE Universal Banking Release 14.1.0.0.0 [May] [2018] Contents 1. INTRODUCTION... 3 1.1 BACKGROUND... 3 1.2 APPROACH... 3 1. Introduction Oracle FLEXCUBE Universal
Oracle FLEXCUBE Core Banking
 Oracle FLEXCUBE Core Banking Security Management User Manual Release 11.7.0.0.0 Part No. E87095-01 May 2017 Security Management User Manual May 2017 Oracle Financial Services Software Limited Oracle Park
Corporate Customer Creation Oracle FLEXCUBE Universal Banking Release [April] [2014] Oracle Part Number E
![Corporate Customer Creation Oracle FLEXCUBE Universal Banking Release [April] [2014] Oracle Part Number E](/thumbs/81/83654544.jpg "Corporate Customer Creation Oracle FLEXCUBE Universal Banking Release [April] [2014] Oracle Part Number E") Corporate Customer Creation Oracle FLEXCUBE Universal Banking Release 11.83.03.0.0 [April] [2014] Oracle Part Number E80246-01 Corporate Customer Creation Table of Contents 1. CREATION OF CORPORATE CUSTOMER...
Corporate Customer Creation Oracle FLEXCUBE Universal Banking Release 11.83.03.0.0 [April] [2014] Oracle Part Number E80246-01 Corporate Customer Creation Table of Contents 1. CREATION OF CORPORATE CUSTOMER...
Oracle Banking Digital Experience
 Oracle Banking Digital Experience Retail Customer Services User Manual Release 18.2.0.0.0 Part No. E97823-01 June 2018 Retail Customer Services User Manual June 2018 Oracle Financial Services Software
Development Workbench - Bulk Generation. Oracle FLEXCUBE Universal Banking Release Development Workbench - Bulk Generation
 Oracle FLEXCUBE Universal Banking Release 12.3.0.0.0 1 Contents 1. Preface... 3 1.1 Audience... 3 1.2 Related Documents... 3 2. Introduction... 4 3. Bulk Generation... 4 3.1 Source File List... 5 3.1.1
Oracle Banking Digital Experience
 Oracle Banking Digital Experience File Upload Flow and Template Definition Guide Release 18.1.0.0.0 Part No. E92727-01 January 2018 File Upload Flow and Template Definition Guide January 2018 Oracle Financial
Oracle FLEXCUBE Direct Banking iphone/ipad Workspace Configuration
 Oracle FLEXCUBE Direct Banking iphone/ipad Workspace Configuration Release 12.0.3.0.0 Part No. E52543-01 April 2014 iphone/ipad Workspace Configuration April 2014 Oracle Financial Services Software Limited