For your safety and protection of the E-bot, please read and abide by the following important safety precautions.
|
|
|
- Baldwin Kelly
- 6 years ago
- Views:
Transcription
1
2 2 P age Safety Precautions For your safety and protection of the E-bot, please read and abide by the following important safety precautions. 1) Do not plug the AC adapter into a faulty electrical outlet. This is to prevent electrical shock or fire. 2) Do not touch the AC adapter with wet hands. 3) Use only the AC adapter provided with the E-bot. Using another AC adapter may damage the device. Be advised that damage caused by misuse is not covered by the warranty. 4) Please do not remove the power cable when the E-bot is turned on as this can damage the product. 5) Do not use the E-bot in a moisture-rich environment such as a bathroom, shower or a wet kitchen counter as moisture may get inside the unit and damage the components. 6) Do not use E-bot in extreme high or low temperatures. We recommend that you do not use this device in environments below 0 C or above 40 C, as the image may display inaccurately. 7) Always turn off the power before moving the product to another location. 8) When you press the release switch to fold the E-bot, please grip the arm and manually fold the unit. Allowing the arm to simply drop may cause impact damage to the unit. 9) Do not use the DC OUT at the back of the device as a power supply for devices other than authorized visual displays for E-bot as this can damage the product and/or the connected device. Marked Symbol Description Note: is used to introduce reference and usage Tips.
3 Page 3 Table of Contents 1. Package Contents E-bot Orientation Overview Back Side of E-bot Side of E-bot Front of E-bot E-bot Setup Unfolding the E-bot Folding the E-bot Inserting the Battery Removing the Battery Charging the E-bot How to Connect to Display Devices Connecting a Monitor via HDMI Connecting an On-Lap monitor Connecting to a PC Connecting to an Apple ipad or Android Tablet via Wi-Fi Changing Camera Modes Using the Control Panel on the Main Body Power On/Off Magnification Changing the Color Mode Contrast Finding your current Reading Position Focus Lock Light On/Off Information Main Body Channel Values... 28
4 4 P age Volume Up/Down Turning Wi-Fi On/Off Advanced Features Color Mode Settings Preferences Upgrade Tablet Viewer Gestures Quick Guide to PC operations Troubleshooting Warranty Customer Support FCC warning... 45
5 Page 5 1. Package Contents When you receive your E-bot, please make sure that the following items are included with your package. 1) E-bot 2) E-bot Battery 3) AC Adapter 4) Cables (USB 3.0, HDMI) 5) HDMI to DVI Gender Adapter 6) Carrying Case 7) User Guide 8) PC Installation Program CD
6 6 P age 2. E-bot Orientation 2.1 Overview Camera Close-up Lens Control Panel Camera Arm Arm Lock Button Table 2.2 Back Side of E-bot
7 Page 7 USB 3.0 Port HDMI Port Channel Switch DC OUT Port DC IN Port Battery Release Button 2.3 Side of E-bot
8 8 P age 2.4 Front of E-bot Power Button Mode Button Power Indicator Wi-Fi Indicator Zoom Button Contrast Button Light Button
9 Page 9 3. E-bot Setup 3.1 Unfolding the E-bot Follow the instructions below to unfold the E-bot. 1 Press and hold the arm lock button on the left side of the E- bot. 2 While holding the arm lock button, unfold the longer camera arm upward. 3 Then, grip the camera part and unfold it upward as well.
10 10 P age 4 The E-bot is ready for use. 3.2 Folding the E-bot 1 Grip the camera part and fold it downward.
11 Page 11 2 While holding the arm lock button, fold the longer camera arm downward. 3.3 Inserting the Battery 1 Grip the E-bot s main body and insert the battery. 2 When the battery is fully inserted, you will feel and hear it click in to place.
12 12 P age 3.4 Removing the Battery 1 Lift the battery release button on the back side of the unit. 2 While lifting the battery release button, pull the battery out of the compartment. 3.5 Charging the E-bot Charging via the AC Adapter
13 Page 13 1 The DC jack is located on the back side of the E-bot. 2 When E-bot is connected to the AC adapter, the battery is being charged. Note: When you use the E-bot for the first time or after a long period of disuse, please allow the unit to charge for more than 5 hours Charging via USB 1 Connect the flatter end of the USB 3.0 cable to the USB port on your PC. 2 Connect the smaller, larger end of the USB 3.0 cable to the USB port on the back side of the unit. Note: If you connect the E-bot to a computer via USB while E-bot is powered off, the E-bot s battery is charged. However, USB charging is quite slow. We recommend a minimum of 25 hours or more to charge The Power Indicator The Power Indicator is located on the top right of the control panel of the main body. The Power Indicator indicates status as follows: When the battery is being charged while E-bot is turned on, the
14 14 P age Power Indicator appears red. When the battery is fully charged while E-bot is turned on, the Power Indicator color is changed to green. When the battery is being charged while E-bot is turned off, the Power Indicator appears red. When the battery is fully charged while E-bot is turned off, the Power Indicator is not lit.

15 Page How to Connect to Display Devices E-bot is compatible with various types of display devices, such as desktop video monitors, laptop computers, and Apple or Android tablets. 4.1 Connecting a Monitor via HDMI 1 Plug the monitor's power cord into a power outlet. 2 Connect the HDMI cable to the HDMI port on the monitor. 3 Connect the opposite end of the HDMI cable to the HDMI port on the rear of the E-bot. Note: If the monitor has no HDMI port, but has a DVI port, please use the included HDMI to DVI gender adapter. 4.2 Connecting an On-Lap monitor The On-Lap Monitor is a portable, USB powered LCD, sold separately. 1 Connect the On-Lap Monitor's USB power cable (USB 2.0) to the DC OUT port on the back of E-bot. 2 Connect On-Lap s HDMI cable to E-bot s HDMI port to display E-bot s output on the On-Lap monitor.
16 16 P age Note: The DC OUT port is used only for connecting the On- Lap monitor. Please do not connect USB drives or other USB devices to the DC out port. 4.3 Connecting to a PC Recommended PC specifications are as follows: USB 3.0 support CPU: i5 RAM: 4GB Graphics: 1GB OS: Windows XP, Windows vista, Windows 7, Windows 8. Note: Tablets running full Windows are also supported. However, you cannot use the E-bot Viewer on tablets running Windows RT. Note: PC s using USB 2.0 can display E-bot s output, however, the display is a low-resolution image. To display E-bot s output on your PC, you first need to install the PC viewer program Installing the PC Viewer Program 1 Insert the installation CD into the PC. 2 The Installation program should run automatically. If not, run the E-bot_Package.exe file. 3 The following window appears.


17 Page 17 4 When you press this I Agree button, will pop up following window for selecting the installation path. 5 In the installation path window, select the path and click Install button. 6 Disconnect the E-bot from the PC, and proceed with the installation.


18 18 P age 7 The installation is in progress. 8 Installation is successfully completed. 9 PC Viewer icon will be generated on the desktop of your PC Connecting to the PC Viewer Program with E-bot 1) Connecting to a PC via USB


19 Page 19 1 Connect the E-bot s USB 3.0 port to the USB port of your PC using the included USB 3.0 cable. 2 And run the E-bot viewer program on your PC. Select USB as the connection method. Note: When connected to USB 2.0, USB 2.0 will be displayed. Note: If you connect E-bot to a PC which does not support USB 3.0, the enlarged image resolution is automatically adjusted to accommodate the difference in connection speed. Note: For instructions on controlling E-bot using a keyboard and mouse, please refer to the last section of this manual. 2) Connecting to a PC via Wi-Fi E-bot can output magnified images via Wi-Fi connection to Windows PC s, Android tablets and Apple ipads. 1 To output to your PC via Wi-Fi, turn on the E-bot.

20 20 P age 2 Set the E-bot Wi-Fi switch to ON. The Wi-Fi indicator is changed to blue to indicate Wi-Fi is on. 3 Enter the PC's wireless network connection area and connect to the E-bot network. 4 When you are asked for the network key, please enter the E-bot s Wi-Fi password. The default password is Once your PC is connected to the E-bot network, run the E-bot viewer program on your PC, and select Wi-Fi as the connection method. Note: In the E-bot's options menu, you can change the Wi-Fi password. Note: You cannot use the Internet via Wi-Fi when you connect to E-bot with PC via Wi-Fi. 4.4 Connecting to an Apple ipad or Android Tablet via Wi-Fi Tablets running ios 7 and higher and Android 4.3 and higher are supported. 1 To view and operate E-bot via your tablet, please connect

21 Page 21 to the Apple App Store or Google Play Store, and download and install the free E-bot Viewer application. 2 When the installation is complete, turn on the E-bot. Then turn on the Wi-Fi switch on the right side. Once Wi-Fi is turned on, the Wi-Fi indicator light on the main body appears blue. 3 Be sure Wi-Fi is ON on your tablet, then select and connect to E-bot from the Wi-Fi networks list. (For example : Ebot_03XX).
22 22 P age 4 Connecting to E-bot requires a network key. By default, it is Enter the network key and connect as you would normally connect to a Wi-Fi network on your tablet. 5 Run the E-bot Viewer app on your tablet, and make sure that the image is displaying correctly. Note: In the E-bot's options menu, you can change the Wi-Fi password. Note: For instructions on controlling E-bot using an ipad or Android tablet, please refer to the last section of this manual.
23 Page Changing Camera Modes Distance Viewing Mode Near Viewing Mode E-bot has two camera modes; near view mode and distance view mode. Flipping down the close-up lens switches to distance viewing mode. Flip the close-up lens closed to switch back to near viewing mode. Note: Magnification, color mode, and function settings for each mode are saved separately. So when switching the camera mode, the settings are automatically changed to the settings you last used for that mode.
24 24 P age 6. Using the Control Panel on the Main Body 6.1 Power On/Off 1 Press and release the power button on the E-bot's main body to power the unit on or off. 2 The HIMS logo appears, and loading time takes 30 to 40 seconds. 3 When the power is turned on, the boot-up sound is heard and the Power Indicator changes to green. When the battery is being charged, the Power Indicator is colored red. 4 Press the power button briefly again to place the E-bot into sleep mode. 5 When the power is turned on, press and hold the power button for more than 2 seconds to power the unit completely off. Note: The advantage of Sleep mode is that loading time is shortened. Note: If the E-bot is in the folded position, it cannot be powered on. If the E-bot is folded when it is turned on, the power shuts completely off.
25 Page Magnification You can change the magnification level to suit your visual needs and the size of the print you re currently reading. Press the Zoom In button (+) to increase the magnification level. Press the Zoom Out button (-) to decrease the magnification level. As you press and hold either of these buttons, the magnification level is adjusted continuously. 6.3 Changing the Color Mode You can change the color of the text and/or background on the screen to accommodate your visual needs in regards to text type and your visual condition. Press the Previous mode button to change to the previous color mode. To change to the next color mode, press the next mode button. 6.4 Contrast Due to variations in paper type, text type and color and the background color of documents or books that you are reading, you may need to adjust the contrast to read the documents or books
26 26 P age clearly. You can adjust contrast by using the Contrast Increase/Decrease buttons on the control panel on the main body. 6.5 Finding your current Reading Position Use the Find location function, to find the position of the magnified text you are currently reading in relation to the document placed on the reading plate or the presentation screen or whiteboard you are viewing from a distance. Press and hold the Zoom in button and Zoom out together, the magnification level is reduced back to normal and a red cross appears in the center of the display to assist your orientation so that you can locate the placement of the text in relation to the whole document. Release both the Zoom in and Zoom out buttons, and the magnification level returns to the rate you were using before pressing the Zoom buttons.


27 Page Focus Lock By default, E-bot uses automatic focus. However, if you re writing under the camera or doing something else on which you don t want the camera to focus, you can use the Focus lock to lock the focus on the text rather than allowing the auto focus to follow your hand or pen. Press both the Contrast Increase button and Contrast Decrease button on the top of the main body. When focus lock is activated, the Focus Lock icon is displayed on the top right of the screen. Note: Focus is unlocked automatically when the camera is switched from Distance view mode to Near view mode or when powering off when focus is locked. 6.7 Light On/Off In the near view mode, the built-in light is automatically turned on to ensure a clear image. E-bot contains a sensor to detect the amount of illumination in your current surroundings, and lighting is automatically adjusted according to the ambient brightness.
28 28 P age Press the Light button to turn the lights on or off. When viewing glossy objects, please turn off the light to avoid glaring. Note: When using distance view mode, the light is not turned on. 6.8 Information You can check general information about the E-bot. Press the Next Mode button and Contrast Decrease button together. You can check the following information about E-bot:. Software version Products serial number Remaining battery Wi-Fi AP 6.9 Main Body Channel Values You can check the channel values on the rear of the main body. An arrow is pointing to the currently set value. The main body and


29 Page 29 the connected controller s channel setting value must be set the same. Note: For information on checking the Wireless Controller Channel Value, please refer to section 7.3 of this manual Volume Up/Down 1 E-bot s volume dial is located on the right side of the body. 2 Turn the dial away from you, and the volume is increased, turn the dial toward you, and the volume is decreased Turning Wi-Fi On/Off To connect to a computer or Tablet via Wi-Fi, set the E-bot Wi-Fi switch on the right side of the unit to ON.
30 30 P age
31 Page Advanced Features 7.1 Color Mode Settings You can set the color mode to best accommodate your visual condition or the material you are reading. You can also disable color modes that are not useful to you Setting the color mode You can modify the existing color modes to set them as color combinations you frequently use. You can modify all color modes except for Natural color mode. Up to 6 color modes can be selected in the options settings. 1 Bring up the option by pressing both the Previous color button and Next color button on the top of the main body for more than 2 seconds while using the view in which you want to change (for instance, if you bring up the menu while using the color mode numbered 2 in Distance View, color mode numbered 2 is changed for Distance View) 2 You can modify any of the color modes numbered 1 to 6. Select the mode you want to set. Note: In the Natural color mode, you cannot change the color. 3 The text Letter Color is displayed on the screen. Select the color of the text using the Previous color button and Next color button. You can save the wanted color by pressing both the Previous color button and Next color button.

32 32 P age 4 Select the Background color when you have finished selecting the text color. Use the same method as when setting the letter color. If Grayscale is chosen when selecting the Letter color, the Color setting mode is exited without selecting a Background color. 5 After you have selected the background color by pressing both the Previous color button and Next color button, you are returned to the view mode.


33 Page Preferences 8.1 Using headphones You can hear the voice in a public place or classroom by using the headphones. Note: Use only standard headphones. Headsets with built-in microphones, such as Apple earbuds, will not work with E-bot. 8.2 Initialization 1 Set the settings back to the factory defaults. 2 When you turn on the device, press the Light button until you see the HIMS logo. 8.3 Wi-Fi password change An eight -digit number is needed to connect E-bot to Wi-Fi using an ipad, Android tablet or PC. The default password is To change the password, follow the instructions below: 1 Bring up the Wi-Fi Password Dialog by pressing the Previous color, Next color, Contrast Decrease and Contrast Increase buttons on the top of the main body all together for more than 5 seconds.

34 34 P age 2 A window asking for the current password appears. Input the password using the virtual keyboard on the screen. 3 Use the Next color, Zoom in, Zoom out and Contrast Decrease buttons to navigate to the character you want to type, and press the Contrast Increase button to input the character. Input the current password and press the Contrast Increase button on the Enter key of the virtual keyboard. Note: If you want to exit the Wi-Fi Password Dialog, please press the Previous color button.
35 Page 35 Lef t Up Down Right 4 A window asking for the new password appears. Input the 8-digit password in the manner described above. 5 A window asking you to reconfirm the password to change appears. Input the new password again. 6 When you have finished the above steps, the new password is set. 7 You are returned to the view mode. 8.4 Information Use this option to check general information about the E-bot. 1 Bring up the Information window by pressing both the Next color and Contrast Decrease buttons on the top of the main body. 2 Here, you can check the following information about E-bot:. Software version Products serial number Remaining battery Wi-Fi AP 3 To close the menu, press any button on the top of the main
36 36 P age body.
37 Page Upgrade 9.1 Upgrading from E-bot to E-bot ADV : To upgrade to E-bot ADV from E-bot, you must purchase the upgrade and obtain a certification number in order to authenticate the upgrade. 9.2 Authenticating the Upgrade 1 Make sure the main body and the purchased Wireless controller s channel setting values are the same. 2 Press any button on the wireless controller, and the certification number input window appears. 3 Input the certification number using the virtual keyboard on the screen. Use the arrow keys to navigate to the character you want to type, and the Enter button to input the character. 4 If the certification number matches, the upgrade to E-bot ADV is complete. Checking the Main Body Channel Values 1 Please check the channel values on the rear of the main body. An arrow points to the currently set value. Checking the Wireless Controller Channel Value 1 Remove the battery cover from the back of the wireless controller.
 a screw driver or your fingernail to change the setting.")
38 38 P age 2 Check the channel setting switch. It can set the channel values as shown in the below picture. Make sure it is set to the same channel value as the one shown on the main body of your E-bot. If the channel value is different, please use (-) a screw driver or your fingernail to change the setting. Note: If the wireless controller does not operate even though the channel value is the same, please change the battery in the wireless controller.

39 Page Tablet Viewer Gestures Functions Tablet Gesture Zoom In Move fingers away from each other Zoom Out Pinch fingers towards each other Open One finger Tap on the right end of the screen and flick to left Control Menu Previous/Ne xt color
40 40 P age mode Focus Lock On One finger Tap on the icon Focus Lock Off Contrast One finger flick to left or to right Open Set Color Mode Menu Tap the tab icon Move /Select / Set an item Enter the sub-item Save Cancel / Exit One finger Tap on the left end of the screen and flick to right One finger Tap on the icon One finger Tap on the wanted item One finger Tap on the wanted item One finger Tap on the confirm icon One finger Tap on the cancel icon Close One finger Tap on the right end of the screen and flick to left 11. Quick Guide to PC operations PC Function Keyboard Mouse Zoom-in Wheel Upwards
41 Page 41 Zoom-out Wheel Downwards Find position + - Next Color Left-Click Previous Color + - Quick color change - Increase Contrast - Decrease Contrast + - Focus Lock + - Set Color Mode Menu Set Color Mode Menu Open Move to the tab Move an item or or + Right-Click Select Items / Save Settings Left-Click on the Item
42 42 P age Cancel Settings / Close Exit program or + Left-Click the Exit Button
43 Page Troubleshooting 12.1 The E-bot does not turn on when you press the power button a. E-bot's battery may be discharged. Please connect the power cable. b. Please be sure the monitor is powered on. c. Make sure the E-bot is unfolded. The E-bot cannot be powered on in the folded position You cannot see the letters clearly a. Make sure the focus is not locked. In Focus Lock mode, E-bot doesn t focus automatically. Switch to Auto Focus by pressing both the Contrast Increase button and Contrast Decrease button on the top of the main body. b. Adjust the contrast by using the Contrast button. c. If viewing glossy pages, please turn off the light to avoid glaring. d. Be sure the camera lens is clean. If there is dust on the camera, the image will not look like it s in focus and the auto focus will not work properly. Clean the camera with the cleaning cloth You cannot execute the color mode settings a. Check the current color mode. Be sure you are not using Natural Color Mode. You must be using color modes 1-6 to adjust the color mode settings If the Wi-Fi password is incorrect or you have forgotten the Wi-Fi password a. Please initialize the option settings, and it will be returned to
44 44 P age Warranty 1) The Warranty term is 2 years from the date of purchase. 2) Warranty does not cover problems arising from damage caused by the user, including, but not limited to; damaged caused by external force or damage caused by introducing liquid in to the unit. 3) Disassembling of the unit by anyone other than an authorized repair technician will void the warranty. Customer Support Manufacturer: HIMS International Manufacturer Address: 174 Gajeong-ro, Yuseong-gu, Daejeon, Korea sale@himsintl.com Phone Number: FAX:
45 Page 45 FCC warning NOTE: This equipment has been tested and found to comply with the limits for a Class B digital device, pursuant to part 15 of the FCC Rules. These limits are designed to provide reasonable protection against harmful interference in a residential installation. This equipment generates uses and can radiate radio frequency energy and, if not installed and used in accordance with the instructions, may cause harmful interference to radio communications. However, there is no guarantee that interference will not occur in a particular installation. If this equipment does cause harmful interference to radio or television reception, which can be determined by turning the equipment off and on, the user is encouraged to try to correct the interference by one or more of the following measures: - Reorient or relocate the receiving antenna. - Increase the separation between the equipment and receiver. - Connect the equipment into an outlet on a circuit different from that to which the receiver is connected. - Consult the dealer or an experienced radio/tv technician for help. CAUTION: Changes or modifications not expressly approved by the manufacturer responsible for compliance could void the user s authority to operate the equipment.
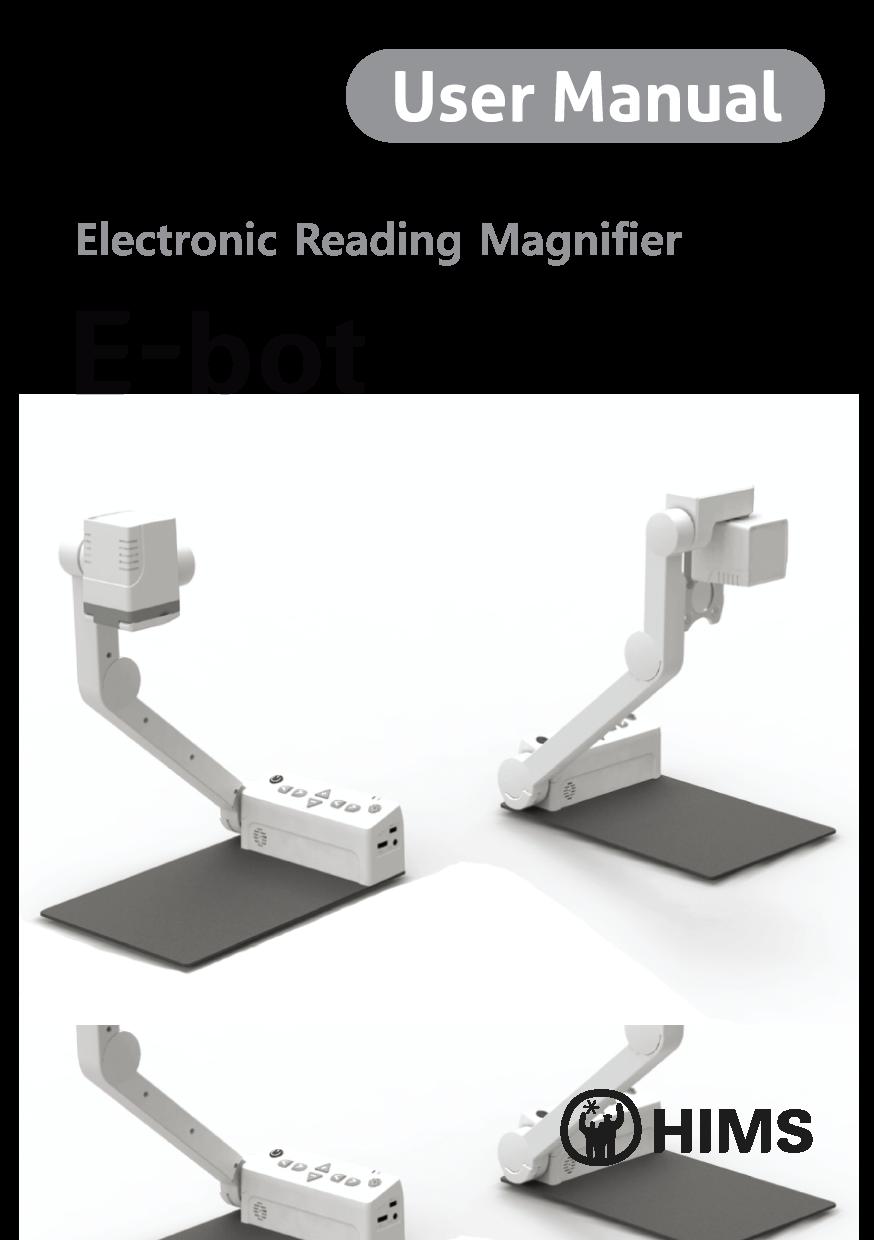
E-bot offers a variety of powerful features for low vision students and users of all ages including the following:
 2 Page Congratulations on your purchase of the E-bot. The E-bot, short for Education Robot, is a transportable video magnifier designed to meet the needs of the low vision student in a variety of situations.
Congratulations on your purchase of the E-bot Advanced.
 2 Page Congratulations on your purchase of the E-bot Advanced. The E-bot, short for Education Robot, is a transportable video magnifier designed to meet the needs of the low vision student in a variety
E-bot ADV offers a variety of powerful features for low vision students and users of all ages including the following:
 2 P a g e E-bot ADV offers a variety of powerful features for low vision students and users of all ages including the following: 1) Easy To Use Easily set up and transport from classroom to classroom,
Table of Contents. 2 Changing Focus Modes (e) Freeze Image (f) Mirror View... 18
 Freeze Image (f) Mirror View... 18") Table of Contents 1. What is LifeStyle CANDY GRIP?... 4 2. Safety Precautions... 5 3. What s in the Box?... 6 4. Physical Description... 7 5. Getting Started... 9 (a) Charging the Battery... 9 (b) Removing
Table of Contents 1. What is LifeStyle CANDY GRIP?... 4 2. Safety Precautions... 5 3. What s in the Box?... 6 4. Physical Description... 7 5. Getting Started... 9 (a) Charging the Battery... 9 (b) Removing
Table of Contents. 2 Changing Focus Modes (e) Freeze Image... 17
 Freeze Image... 17") Table of Contents 1. What is LifeStyle CANDY?... 4 2. Safety Precautions... 5 3. What s in the Box?... 6 4. Physical Description... 6 5. Getting Started... 10 (a) Charging the Battery... 10 (b) Removing
Table of Contents 1. What is LifeStyle CANDY?... 4 2. Safety Precautions... 5 3. What s in the Box?... 6 4. Physical Description... 6 5. Getting Started... 10 (a) Charging the Battery... 10 (b) Removing
Table of Contents Confirming the camera location
 Table of Contents 1. What is the SenseView PORTABLE...1 2. Safety precaution...2 3. Package...3 4. Configuration...4 5. After purchasing...6 (1)... Charging...6 (2)Remove LCD protective film...6 6. How
Model: MiTraveler 1081W
 10.1 Windows Tablet User Manual Model: MiTraveler 1081W Table of Contents 1. What s in the Box.1 2. Tablet Parts.. 1 3. Getting Started 2 4. The Start Screen 3 5. Getting Around.4 6. Apps..5 7. Charm Menu.6
PILOT QUICK START GUIDE
 PILOT QUICK START GUIDE www.hipstreet.com Getting started Device Layout Camera Touch screen App Menu 01 Back Button Home Button Menu Button History Button Volume -/+ Buttons Power Button Volume Buttons
Tablet PC. Android 5.1 User Manual
 Tablet PC Android 5.1 User Manual Tablet of Contents Specifications. What s inside the box Tablet Parts Getting started... How to use TF card How to connect to PC Connection to Internet.. Camera. Trouble
Safety and Maintenance You can use your Tablet PC under a wide range of environmental conditions. However, to ensure long use and continued high
 EVG7 DL46 Getting Started Congratulations on your purchase of a Tablet PC. The Tablet PC is a fully functional PC with built-in LAN, and wireless connectivity. With your Tablet PC you will be able to organize
N331 Wireless Mini Optical Mouse User s Guide
 N331 Wireless Mini Optical Mouse User s Guide Mouse 1. Left mouse button 2. Right mouse button 3. Scroll wheel 4. Charge port 5. Battery cover 6. Receiver storage compartment 7. Battery cover release button
7 Inch Quad Core Tablet
 7 Inch Quad Core Tablet Cautions This user manual has been specially designed to guide you through the functions and features of your device. ) Please read this manual carefully before using your device
mart atch B502 User Manual
 mart watch B502 User Manual Congratulations on your new ownership of a Polaroid smart watch. Please read the manual carefully for full understanding of all operations and functions of your new smart watch.
USER MANUAL CW14Q1P. CW14Q1P MANUAL-EN 70g 书纸,135x102mm
 CW14Q1P MANUAL-EN 70g 书纸,135x102mm USER MANUAL CW14Q1P Thank you for your choosing the new device This guide serves to enable users to get to know and familiar with our product as soon as possible. Here
W10 PRO QUICK START GUIDE
 W10 PRO QUICK START GUIDE GETTING STARTED Thank you for purchasing a Hipstreet product and we hope you enjoy using it. Please visit our website at www.hipstreet.com IMPORTANT SAFETY PRECAUTIONS Always
Wireless Smart Pad And Mini Keyboard User s Manual
 Wireless Smart Pad And Mini Keyboard User s Manual Version 1.0 2010/08 ID NO: About This Manual This manual is designed to assist you in installing and using the Wireless Touchpad Keyboard. Information
Quick Start Guide. For Android Tablet TR10RS1
 Quick Start Guide For Android Tablet TR10RS1 Federal Communication Commission Interference Statement This equipment has been tested and found to comply with the limits for a Class B digital device, pursuant
Wireless Entertainment Smart Pad Keyboard User s Manual
 Wireless Entertainment Smart Pad Keyboard User s Manual Version 1.0 2008/12 ID NO: PAKL-231B2001-00 0 About This Manual This manual is designed to assist you in installing and using the Wireless Touchpad
Hardware Installation 1. Install two AA batteries in the mouse. Pairing Process in Vista and Windows XP SP2
 Hardware Installation 1. Install two AA batteries in the mouse. Pairing Process in Vista and Windows XP SP2 1. Open the Windows control panel, then select Bluetooth devices. 2. Click Add.. 3. Select My
TABLET PC. Quick Start Guide. Model: TVE100 I
 TABLET PC Quick Start Guide Model: TVE100 I Safety Precautions 1. This production is suitable for use in non-tropic areas below 2,000 meters, and the mark in the nameplate indicates the product is suitable
Chromebook Owner s Manual
 CMT Chromebook Owner s Manual Before using, please read these operating instructions carefully. They contain important advice concerning the use and safety of your Chromebook. Use for its intended purpose
This user manual has been specially designed to guide you through the functions and features of your device.
 DL102 Cautions This user manual has been specially designed to guide you through the functions and features of your device. 1) Please read this manual carefully before using your device to ensure safe
Contents Welcome Know your Device Greeting started Features Accessing the Internet Taking Care of Your Device
 Thank you for purchasing the tablet PC and it is packaged with the following state of the art features and much more: 1 GHz Processor 7 Inch Full touch screen with Pinch Zoom 3G Dongle support via USB
7 inch HD IPS LCD, Resolution: 800*480 OS Android 4.2. Front:0.3MP Rear: 2.0MP(AF)
") Q PAD USER MANUAL Specification Display 7 inch HD IPS LCD, Resolution: 800*480 OS Android 4.2 CPU ARM Cortex A9,Dual core,mtk8312, 1GHz Camera G-sensor Network Audio Format Video Format Image Format Extended
Q PAD USER MANUAL Specification Display 7 inch HD IPS LCD, Resolution: 800*480 OS Android 4.2 CPU ARM Cortex A9,Dual core,mtk8312, 1GHz Camera G-sensor Network Audio Format Video Format Image Format Extended
WIRELESS THIN-PROFILE KEYBOARD AND MOUSE USER S MANUAL.
 WIRELESS THIN-PROFILE KEYBOARD AND MOUSE USER S MANUAL www.jascoproducts.com TABLE OF CONTENTS 1. INTRODUCTION...3 2. PACKAGE CONTENTS...3 3. SYSTEM REQUIREMENT...3 4. INSTALLATION INSTRUCTIONS...3 5.
TABLE OF CONTENTS Folding the Jacket Case into a Stand... 2 FCC Information... 3 Location of Parts and Controls... 4 Charging the Keyboard...
 TABLE OF CONTENTS Folding the Jacket Case into a Stand........................................ 2 FCC Information............................................................ 3 Location of Parts and Controls..............................................
Q U I C K S T A R T G U I D E
 QUICKSTART GUIDE 2 Top 4 5 6 3 13 14 18 19 16 17 12 1 20 7 8 9 10 15 Left Side Front Right Side Back 11 Bottom 1 Power Button 2 Earphone Connector 3 Front-Facing Camera 4 Speaker 5 Ambient Light Sensor
+Cam Quick Start Guide
 CAUTION RISK OF ELECTRIC SHOCK DO NOT OPEN CAUTION TO REDUCE THE RISK OF ELECTRIC SHOCK, DO NOT REMOVE COVER (OR BACK). NO USER SERVICEABLE PARTS INSIDE, REFER SERVICING TO QUALIFIED SERVICE PERSONNEL.
Copyright 2013 Esselte Leitz GmbH & Co. KG. All rights reserved.
 Copyright 2013 Esselte Leitz GmbH & Co. KG. All rights reserved. Mac, ipad, AirPrint, and OS X are trademarks of Apple Inc., registered in the U.S. and other countries. Google and Google Cloud Print are
podz wireless rechargeable speakers
 podz wireless rechargeable speakers with auto-tuning FPO working name podz wireless rechargeable speakers with auto-tuning BETTER BY BROOKSTONE We believe that exacting standards are the core of our success.
Tablet PC Model : V7023D
 Tablet PC Model : V7023D Contents 1 Overview... 1 1.1 Appearance and Keys... 1 1.2 Basic Operation... 2 1.2.1 Power ON... 2 1.2.2 Unlock Screen... 2 1.2.3 Lock Screen... 2 1.2.4 Power OFF... 2 1.2.5 Battery
OWNER'S GUIDE BT 390
 OWNER'S GUIDE BT 390 WIRELESS HEADPHONES Thank you for purchasing PHIATON BT 390. - Please follow the directions, and read the guidelines carefully before use. Please keep the owner s guide for future
Labtec Wireless Optical Desktop. Getting Started Guide
 Labtec Wireless Optical Desktop Getting Started Guide Important Ergonomic Information Long periods of repetitive motions using an improperly set-up workspace, incorrect body position, and poor work habits
SyncBraille User Manual HIMS Co., Ltd.
 SyncBraille User Manual HIMS Co., Ltd. 139-9, Gajung-dong, Yuseong-gu Daejeon, Korea 305-350 Tel : 042-864-4460 Fax : 042-864-4462 E-mail : hims@himsintl.com http://www.himsintl.com List 1. User guide...
Contents 1. Introduction Hardware Operation Software Operation Technical Data 5. IAdea Limited Warranty 6
 VS16021 User Manual Contents 1. Introduction 1 1.1. Package contents 1 1.2. Physical view 2 2. Hardware Operation 2 2.1. How to connect the player 2 3. Software Operation 3 3.1. System boot-up 3 3.2. Settings
PS4 Chatpad LBP-268 USER MANUAL. Dashine Electronics Co,Ltd
 PS4 Chatpad LBP-268 USER MANUAL Dashine Electronics Co,Ltd Address:Building D3,Xingtang Industrial park, Baishisha East Area, Fuyong Town, Baoan District, ShenZhen,China Package Content: Bluetooth Chatpad
Streaming Smart Stick. Quick Start Guide
 Streaming Smart Stick Quick Start Guide GETTING STARTED 1.1 Inside the Box 1 1.2 Equiso Streaming Smart Stick 2 1.3 Equiso Remote 3 1.4 Using Your Equiso Remote 4 1.5 What You Need 5 1.6 Charging the Remote
User Manual Bluetooth USB Dongle
 User Manual Bluetooth USB Dongle BTDG-40S 1. What s in the box? 1 2. General guidance 1 3. How to use with Native Windows 10 PC Plug and play 1 3.1) Windows own Bluetooth driver Auto installation 1 3.2)
Model WT1 Wireless Tablet Interface
 Model WT1 Wireless Tablet Interface User Manual Model WT1 Wireless Tablet Interface Thank you for purchasing the Califone Model WT1 Wireless Tablet Interface. We encourage you to visit our website www.
Smartphone Photo Printer
 Smartphone Photo Printer Safety Precautions Safety Precautions Denotes the possibility of serious injury or death Please keep you away at least 20cm distance from printer when printing. Use only recommended
User Guide. Version 2.
 User Guide Version 2 www.rmepad.com RM epad TM User Guide Please read all instructions carefully before using Please retain these instructions for future reference RM epad TM contains replaceable, rechargeable
Quick Installation Guide
 Quick Installation Guide For Network Attached Storage Ver.1.1.0.0320 Table of Contents Notices... 3 Safety Precautions... 4 1. Package Contents... 5 2. Hardware Installation Guide... 6 2.1. Hard Disk Installation...
Introduction. See page #6 for device requirements.
 W-FI CAMERA USER MANUAL Contents Introduction 4 Camera LED Indicators 5 Wi-Fi Requirements 6 Mobile Device Requirements 6 Download the Momentum App 7 Create an Account 8 Setup 10 Pairing 10 Connecting
BLUETOOTH WIRELESS EARBUD INSTRUCTION MANUAL
 BLUETOOTH WIRELESS EARBUD INSTRUCTION MANUAL 1 Getting Started Remove the product from the box. Remove any packaging from the product. Please retain all packaging after you have checked and counted all
WMC Remote Control and Receiver RRC-127 User Manual
 Welcome Congratulations on your purchase of the Remote Control and Receiver for Windows Media Center. The infrared (IR) remote control and receiver let you access and manage your Media Center PC and other
Manufacture:Shenzhen Roverstar Technology Co.,Ltd Dash camera/dvr D28RS
 1 USER MANUAL Introduction Dear Customer! Thank you for purchasing this NAVITEL product. NAVITEL R1000 is a multifunctional high-definition DVR with many functions and features that are described in this
Quick Installation Guide
 Quick Installation Guide Applicable Models: AS3102T/AS3104T/AS3202T/AS3204T Ver.2.5.0128 (2016-1-28) Table of Contents Notices... 3 Safety Precautions... 4 1. Package Contents... 5 2. Optional Accessories...
User Manual. Daffodil. 2.4GHz Wireless Mouse Souris Sans Fil 2.4GHz 2.4GHz Wireless Maus Mouse senza fili da 2.4 GHz Ratón Inalámbrica 2.
 Daffodil User Manual 2.4GHz Wireless Mouse Souris Sans Fil 2.4GHz 2.4GHz Wireless Maus Mouse senza fili da 2.4 GHz Ratón Inalámbrica 2.4GHz Model No. : UT-M3 User Manual Please follow the instructions
Chromebook Owner s Manual
 Chromebook Owner s Manual Before using, please read these operating instructions carefully. They contain important advice concerning the use and safety of your Chromebook. Use for its intended purpose
DVI KVM Switch user manual Model
 DVI KVM Switch user manual Model 156066 INT-156066-UM-0808-01 introduction Thank you for purchasing the INTELLINET NETWORK SOLUTIONS DVI KVM Switch, Model 156066. This convenient device lets you control
Digital Voice Recorder & Pen
 Digital Voice Recorder & Pen Model : MQ-71/MQ-72 Made in Korea Owner s Manual Thank you for purchasing this product. Before use, read this manual and understand its functions for appropriate use. After
Instruction Manual. for. Audio Ape Remotes. 1
 TM TM Instruction Manual for Audio Ape Remotes www.audioaperemote.com 1 Congratulations on acquiring your fine Audio Ape product Let s dive right in, getting up and running is a snap. Here are the components:
Enjoy TV Box User Manual
 Enjoy TV Box User Manual V1.7 Introduction Enjoy TV box is a product connected to your TV via HDMI that turn your TV to a multifunction smart TV. It is a revolutionary entertainment on your TV. It is also
Please read this guide before using the printer
 PD-450/450W/480/480W User Guide Please read this guide before using the printer Safety Precautions Safety Precautions Denotes the possibility of serious injury or death Use only recommended power sources.
Dash Jr. User Manual Table of Contents
 (/usermanuals) Dash Jr. User Manual Table of Contents Safety Information Safety Information Call Functions Contacts Messaging Opera Mini Browser Bluetooth & Wi Fi Camera Gallery Music Sound Recorder Alarm
FCC NOTICE: FCC STATEMENT:
 FCC NOTICE: This equipment has been tested and found to comply with the limits for a Class B digital device, pursuant to Part 15 of the FCC Rules. These limits are designed to provide reasonable protection
User s Manual Wireless Headset
 1. INTRODUCTION Package Contents User s Manual Wireless Headset BASE Unit HEADSET & HEADBAND POWER ADAPTOR EAR-HOOK TELEPHONE CONNECTION CORD USB CABLE (Optional) 2. Headset Mute/ Speaker volume Down Mute
Quick Installation Guide
 Quick Installation Guide For Network Attached Storage Ver.1.1.0.0517 Table of Contents Notices... 3 Safety Precautions... 4 1. Package Contents... 5 2. Hardware Installation Guide... 6 2.1. Hard Disk Installation...
Wireless Palm Style Keyboard with Touchpad PKA-1720A. User s Manual. Version /08 ID NO:
 Wireless Palm Style Keyboard with Touchpad PKA-1720A User s Manual Version 1.0 2013/08 ID NO: About This Manual This manual is designed to assist you in installing and using the Wireless palm style Keyboard.
8 Inch Full Ruggedized Tablet. Quick Start Guide
 8 Inch Full Ruggedized Tablet Quick Start Guide 1 Thank you for your choosing the new Tablet PC. This guide serves to enable users to get to know and familiar with our product as soon as possible. Here
Quick Start Guide. Reolink Argus 2. Technical Support QG2_A. For more troubleshooting, please go to FAQs on our website: https://reolink.
 Reolink Argus 2 Quick Start Guide Technical Support For more troubleshooting, please go to FAQs on our website: https://reolink.com/faqs/ For other technical support, please contact us at support@reolink.com
LevelOne BLH-1000 Bluetooth Headset User s Manual
 LevelOne BLH-1000 Bluetooth Headset User s Manual - 1 - Introduction Introduction to Bluetooth Wireless Technology Bluetooth is a short- range wireless communication technology. It allows wireless connections
IT S NOT JUST A RANDOM
 IT S NOT JUST A RANDOM WHAT S IN THE BOX When you open this awesome box, inside you will find: One HELLO Device One Remote Control H D M I H D M I One Adapter 220V and 110V + 3 different plugs (Europe,
Charging Pad / Charging Stand
 Charging Pad / Charging Stand Congratulations on your choice to purchase one of the FUEL ion charge bases! You ve chosen to take your mobile world fully wireless with an effortless secure and charge solution
Introduction. Package Contents. System Requirements
 VP6230 Page 1 Page 2 Introduction Congratulations on your purchase of the Blu-Link Folding Bluetooth Keyboard. This innovative portable folding keyboard connects via Bluetooth technology to provide a wireless
Quick Installation Guide
 Quick Installation Guide Applicable Models: AS6004U Ver.3.0.0 (2017-4-13) Table of Contents Notices... 3 Safety Precautions... 4 1. Package Contents... 5 2. Optional Accessories... 6 3. Hardware Installation
GAMESIR G3w WIRED CONTROLLER. We hope this manual answered any questions you may have had, If you have any further questions, please contact us:
 GAMESIR G3w WIRED CONTROLLER We hope this manual answered any questions you may have had, If you have any further questions, please contact us: GameSir Facebook: https://www.facebook.com/mygamesir Customer
Quick Start Guide Notion Ink Design Labs Pvt. Ltd. 1
 Quick Start Guide 2014 Notion Ink Design Labs Pvt. Ltd. 1 2014 Notion Ink Design Labs Pvt. Ltd. 2 Contents 1. Caring for your device 2. Travelling with your device 3. Device layout 4. Keyboard case layout
CHANGE THE DEFAULT PASSWORD
 User Manual CHANGE THE DEFAULT PASSWORD FCC Certification Requirements Caution: Any changes or modifications in construction of this device which are not expressly approved by the party responsible for
User Manual Mobile internet device Model: S
 User Manual Mobile internet device Model: S3 591-00101 Welcome... 3 Important Notices... 3 Keys and Functions... 4 I. Getting Started... 4 1.1 Turn on/off... 4 1.1.1 Turn on... 4 1.1.2 Turn off... 5 1.2
P OCKET POWER 6000 T. Powerful Universal Portable Charger PLEASE READ BEFORE OPERATING THIS EQUIPMENT
 P OCKET POWER 6000 T M Powerful Universal Portable Charger PLEASE READ BEFORE OPERATING THIS EQUIPMENT HALO POCKET POWER 6000 Thank you for choosing HALO. Innovative, fashionable and easy to use, the HALO
i9 MID User Manual ShenZhen Ramos Digital Technology Co.,Ltd
 i9 MID User Manual ShenZhen Ramos Digital Technology Co.,Ltd 1 Thank you for your choosing and buying the i9 tablet. Please carefully read this operation manual before using the product. Precautions 1.
RocketStor Dual-Bay Thunderbolt TM 10Gb/s Storage Dock
 RocketStor 5212 Dual-Bay Thunderbolt TM 10Gb/s Storage Dock Quick Installation Guide V1.02 Apr. 3, 2014 1 Table of Contents Table of Contents...2 HighPoint RocketStor 5212...3 Kit Contents...3 RocketStor
P OCKET POWER 9000 T. Powerful Universal Portable Charger PLEASE READ BEFORE OPERATING THIS EQUIPMENT
 P OCKET POWER 9000 T M Powerful Universal Portable Charger PLEASE READ BEFORE OPERATING THIS EQUIPMENT HALO POCKET POWER 9000 Thank you for choosing HALO. Innovative, fashionable and easy to use, the HALO
WiFi Inspection Camera Instruction Manual
 WiFi Inspection Camera Instruction Manual FERRET WiFi CFWF50A Version 1.1 2018 Patent Pending The Cable Ferret Company Limited The Cable Ferret Company Pty Ltd Cable Ferret, Inc. www.cableferret.com Designed
Welcome 1. Precaution
 0 Table of Contents 1. Precautions. 2 2. Preparation.. 2 Standard Accessories.. 5 Parts Names.. 6 Charging the Battery Pack..... 7 3. Recording Mode 9 Loading SD card 9 Connect External Camera.. 9 Powering
FCC NOTICE: FCC STATEMENT: FCC Radiation Ex posure Statement:
 FCC NOTICE: This equipment has been tested and found to comply with the limits for a Class B digital device, pursuant to Part 15 of the FCC Rules. These limits are designed to provide reasonable protection
GAMESIR T1 WIRELESS CONTROLLER. We hope this manual answered any questions you may have had, If you have any further questions, please contact us:
 GAMESIR T1 WIRELESS CONTROLLER We hope this manual answered any questions you may have had, If you have any further questions, please contact us: GameSir Facebook: https://www.facebook.com/mygamesir Customer
8 WiFi Digital Photo Frame with Touchscreen LCD Display Instructional Manual
 8 WiFi Digital Photo Frame with Touchscreen LCD Display Instructional Manual aluratek.com mnl M10438 model AWDMPF8BB Copyright 2017 Aluratek, Inc. All Rights Reserved. Table of Contents Frame Features...
Smartphone Docking Station with Speaker and Bed Shaker
 TM WARRANTY The Silent Call AlarmDock is warranted for (see individual items for length of warranty) from the day of purchase to be free of defects in material and workmanship. This warranty is limited
User s Manual BeamPod User Manual
 User s Manual BeamPod General Safety Information 1. Keep the device and packaging materials out of reach of infants and children. 2. Keep the power adapter and other contacts from water, Dry your hands
User Manual Infinity:One
 User Manual Infinity:One For the latest updates and information, please visit: support.one-education.org Notice The information in this user s manual is protected by copyright laws, all parts of this manual,
Manual LEICKE Sharon Mobile Bluetooth Keyboard with integrated Touchpad For Samsung Tablets (with limited functions universal for Android too)
") Manual LEICKE Sharon Mobile Bluetooth Keyboard with integrated Touchpad For Samsung Tablets (with limited functions universal for Android too) Product number: SI54196 Thank you for purchasing the Bluetooth
Manual LEICKE Sharon Mobile Bluetooth Keyboard with integrated Touchpad For Samsung Tablets (with limited functions universal for Android too) Product number: SI54196 Thank you for purchasing the Bluetooth
DEFENDER F100 & DEFENDER F150 USER GUIDE
 DEFENDER F100 & DEFENDER F150 USER GUIDE Contents Introducing Defender F100 & Defender F150 2 Minimum System Requirements 2 Imation Documentation 2 Getting Started 3 Opening and closing a device 3 Attaching
P OWERBUDS. The perfect accessory for anyone who wants to be truly wireless PLEASE READ BEFORE OPERATING THIS EQUIPMENT
 P OWERBUDS The perfect accessory for anyone who wants to be truly wireless PLEASE READ BEFORE OPERATING THIS EQUIPMENT HALO POWERBUDS Thank you for choosing HALO. The HALO POWERBUDS are the perfect accessory
OPERATING INSTRUCTIONS POWERSMART 10 10,000 MAH PORTABLE POWER PLEASE READ BEFORE OPERATING THIS EQUIPMENT
 POWERSMART 10 10,000 MAH PORTABLE POWER OPERATING INSTRUCTIONS PLEASE READ BEFORE OPERATING THIS EQUIPMENT HALO POWERSMART 10 Thank you for choosing HALO. Innovative and easy to use, the HALO POWERSMART
POWER WOLF SMART GLASSES
 POWER WOLF SMART GLASSES Operation Guide 1 Contents Android system operation Page 4~12 IOS system operation Page13~21 Processing Method Page22~23 Mobile Phone APP Download Android APP QR-code IOS APP QR-code
Use Specification of Pixie Princess
 User Manual ----------------------------------------------------------------------------1/14----------------------------------------------------------------------------- Preface Thank you for purchasing
MID MODEL: M1703 USER MANUAL
 MID MODEL: M1703 USER MANUAL Preface Thank you for buying the MID. We wish you enjoy using it. Please read and retain all the operating instructions before operating the unit, we do not assume any liability
Point of View Mobii 10 Tegra Tablet. Notice... 2
 TABLE OF CONTENTS Notice... 2 1.0 Preface... 2 2.0 Getting to know the basics... 4 3.0 How to Start... 7 3.1 Home Shell... 7 3.1.1 Home Shell > Widgets (Search RSS Weather)... 8 3.1.2 Home Shell > Widgets,
W IRELESS8000 T. Powerful Universal Portable Charger PLEASE READ BEFORE OPERATING THIS EQUIPMENT
 W IRELESS8000 T M Powerful Universal Portable Charger PLEASE READ BEFORE OPERATING THIS EQUIPMENT HALO WIRELESS 8000 Thank you for choosing HALO. The HALO WIRELESS 8000 is a portable charger with 8000mAh
SMART HOME ADAPTER. User manual HD2018GH
 SMART HOME ADAPTER User manual HD2018GH These safety precautions are for owner s safety and prevention of property damage. Therefore, please read this manual thoroughly before using your product. SMART
GAMESIR T1s WIRELESS CONTROLLER. We hope this manual answered any questions you may have had, If you have any further questions, please contact us:
 GAMESIR T1s WIRELESS CONTROLLER We hope this manual answered any questions you may have had, If you have any further questions, please contact us: GameSir Facebook: https://www.facebook.com/mygamesir Customer
PACKAGE CONTENTS LOCATION OF CONTROLS. The package comes with the following items: PC Camera User s Manual Microphone
 PACKAGE CONTENTS The package comes with the following items: PC Camera User s Manual Microphone LOCATION OF CONTROLS 1 2 3 1. Focus Ring Manual Focus 2. USB Cable 3. Swivel Mounting Clamp 1 INSTALLATION
FCC Compliance Statement This device complies with Part 15 of the FCC Rules. Operation is subjected to the following two conditions: (1) this device
 this device") 1 FCC Compliance Statement This device complies with Part 15 of the FCC Rules. Operation is subjected to the following two conditions: (1) this device may not cause harmful interference, and (2) this device
1 FCC Compliance Statement This device complies with Part 15 of the FCC Rules. Operation is subjected to the following two conditions: (1) this device may not cause harmful interference, and (2) this device
Clever Dog User Manual Welcome to Clever Dog
 Clever Dog User Manual Welcome to Clever Dog Hotline:400-716-3232 E-mail:jfg@cylan.com.cn Web:http://www.jfgou.com/ Product Overview User Guide 1. Device to connect the power supply 2. You can search Clever
CBTH3. Bluetooth Speakerphone User Guide
 Bluetooth Speakerphone User Guide CBTH3 1. Notice Before Using Thank you for purchasing the Cobra Bluetooth Visor Speakerphone CBTH3. Your Cobra CBTH3 is a Bluetooth wireless technology device that enables
U-Bell. Quick Start Guide. Two-way Audio. 180 Field of View. Motion Activated. 1080p Full HD. Night Vision. Wireless Video Doorbell DB1
 U-Bell Wireless Video Doorbell Quick Start Guide 1080p Full HD Two-way Audio Motion Activated 180 Field of View Night Vision U-Bell includes Lifetime Warranty DB1 Regulatory Information FCC Information
PTSGOB8W. Quick Start Guide
 PTSGOB8W Quick Start Guide Introduction Thank you for your choosing the new Tablet PC. This guide serves to enable users to get to know and familiar with our product as soon as possible. Here we have made
BRS 2001 Portable Audio System
 Samson Electronics Inc. 3400 E. Slauson Ave. Maywood, CA 90270 Ph: 323.585.6393 Fax: 323.585.6202 Web: http://www.blackmoremobile.com Introduction: BRS 2001 Portable Audio System FCC ID: 2AHR7 BRS 2000