DEAR VOLVO OWNER THANK YOU FOR CHOOSING VOLVO
|
|
|
- Lawrence Hunt
- 6 years ago
- Views:
Transcription

1 WEB EDITION S ENSUS INFOTAINMENT
2

3 DEAR VOLVO OWNER THANK YOU FOR CHOOSING VOLVO We hope you will enjoy many years of driving pleasure in your Volvo. The car has been designed for the safety and comfort of you and your passengers. Volvo is one of the safest cars in the world. Your Volvo has also been designed to satisfy all current safety and environmental requirements. In order to increase your enjoyment of the car, we recommend that you familiarise yourself with the equipment, instructions and maintenance information contained in this owner's manual.
4 Table of contents 01 INTRODUCTION 01 Introduction... 7 Volvo Sensus... 7 Support and information about the car on the Internet MY CAR 02 MY CAR MY CAR - search paths MY CAR - menu options MY CAR - Car settings MY CAR - driving support system MY CAR - System options MY CAR - Climate settings MY CAR Information AUDIO AND MEDIA Audio and media Audio and media - overview Audio and media - operating the system.. 21 Rear control panel with headphones socket* Favourites Save as favourite Audio and media - audio settings Audio and media - general audio settings Audio and media - advanced audio settings Setting the equaliser Setting the audio profile Setting the audio volume and automatic volume control Radio Radio tuning Automatic radio tuning Radio station list* Manual radio tuning Radio stations as presets RDS functions Alarms in the event of accidents and disasters * Option/accessory, for more information, see Introduction.
5 Table of contents Traffic information (TP) Enhanced Other Networks (EON) News broadcasts Radio programme types (PTY) Searching radio programme types (PTY).. 35 Show radio programme types (PTY) Volume control for interrupting radio programme types (PTY) Radio text Automatic radio frequency update (AF) Regional radio programmes (REG) Scan radio frequencies Resetting RDS functions Digital radio (DAB)* Storing channel groups (Ensemble learn). 38 Navigation in channel group list (Ensemble) DAB to DAB link Digital radio (DAB)* - wavelength Digital radio (DAB)* - subchannel Digital radio (DAB)* - resetting Media player CD/DVD* AUX/USB* input Playback and navigation of CD/DVD* disc Playback and navigation of burned discs with audio/video files* Fast forward/reverse Scan disc track or audio file Random selection of disc track or audio file Playback and navigation of DVD* video discs Camera angle for playback of DVD* video discs DivX Video On Demand* Picture settings* Media player - compatible file formats External audio source via AUX/USB* input Connecting an external audio source via Playback and navigation of external audio source* Setting the audio volume for external audio source Media Bluetooth * Connecting and disconnecting a Bluetooth device* Registering a Bluetooth device* Automatic connection of Bluetooth device* Changing to another Bluetooth device*.. 53 Disconnecting the Bluetooth device* Removing a Bluetooth device* Bluetooth handsfree phone* Bluetooth handsfree phone* - overview.. 56 Making and receiving calls* Bluetooth handsfree phone* - audio settings Bluetooth * version information Phone book* Phone book* - quick search for contacts. 59 Phone book* - character table keypad in centre console Phone book* - searching for contacts Phone book* - new contact Phone book* - speed dial numbers Phone book* - receiving a vcard Phone book* - memory status Phone book* - clearing TV* Searching TV* channels/preset list * Option/accessory, for more information, see Introduction. 3
6 Table of contents TV* - channel management Information about the current TV* programme Teletext* Reception of TV* channel is lost Remote control* Remote control* - functions Remote control* - battery replacement Audio and media - menu overview Menu overview - AM Menu overview - FM Menu overview - Digital radio (DAB)* Menu overview - CD Audio Menu overview - CD/DVD* Data Menu overview - DVD* Video Menu overview - ipod * Menu overview - USB* Menu overview - Media Bluetooth * Menu overview - AUX Menu overview - Bluetooth handsfree* Menu overview - TV* Licenses Type approval Alphabetical Index Alphabetical Index * Option/accessory, for more information, see Introduction.
7 Table of contents 5
8 INTRODUCTION

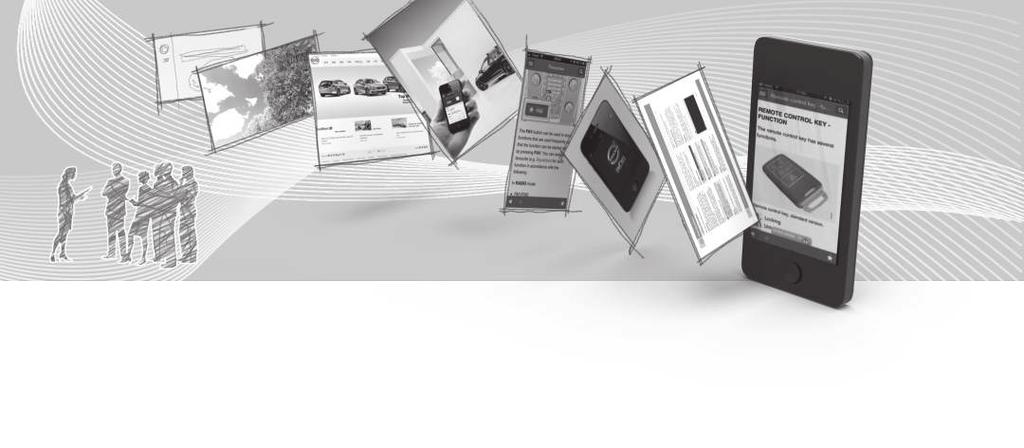
9 01 INTRODUCTION Introduction This supplement is a supplement to the normal owner's manual for the car. In the event of uncertainty regarding any of the car's functions, consult the owner's manual in the first instance. For answers to additional questions it is recommended to contact a dealer or a representative of Volvo Car Corporation. Owner's Manual in mobile devices Volvo Sensus Volvo Sensus is the heart of the personal Volvo experience and connects you with the car and outside world. Sensus provides information, entertainment and assistance when it is needed. Sensus consists of intuitive functions that both enhance the car journey and simplifies ownership of the car. 01 The specifications, design features and illustrations in this supplement are not binding. We reserve the right to make modifications without prior notice. Volvo Car Corporation Options/accessories All types of option/accessory are marked with an asterisk: *. In addition to standard equipment, the supplement also describes options (factory fitted equipment) and certain accessories (retrofitted extra equipment). The equipment described in the supplement is not available in all cars - they have different equipment depending on adaptations for the needs of different markets and national or local laws and regulations. In the event of uncertainty over what is standard or an option/accessory, contact a Volvo dealer. NOTE The Owner's manual is available for download as a mobile application (applies for certain car models and mobile devices), see The mobile application also includes video and searchable content and easy navigation between different sections. An intuitive navigation structure makes it possible to receive relevant support, information and entertainment when it is necessary, without distracting the driver. Sensus covers all the car's solutions that enable connection* to the outside world and provides you with intuitive control over all the car's capabilities. Volvo Sensus combines and presents many functions in several of the car's systems on the centre console's display screen. With Volvo Sensus the car can be personalised by means of an intuitive user interface. Settings }} * Option/accessory, for more information, see Introduction. 7


10 01 INTRODUCTION 01 can be made in Car settings, Audio and media, Climate control, etc. With the centre console buttons and controls or the steering wheel's right-hand keypad* functions can be activated or deactivated and many different settings can be made. With a press on MY CAR all settings related to the driving and control of the car are presented, such as City Safety, locks and alarm, automatic fan speed, setting the clock, etc. With a press on the respective function RADIO, MEDIA, TEL, *, NAV* and CAM* other sources, systems and functions can be activated, e.g. AM, FM, CD, DVD*, TV*, Bluetooth *, navigation* and park assist camera*. For more information about all functions/ systems, see the relevant section in the owner's manual or its supplement. Overview Control panel in centre console. The figure is schematic - the number of functions and layout of the buttons both vary, depending on the equipment selected and the market. Navigation* - NAV, see separate supplement (Sensus Navigation). Audio and media - RADIO, MEDIA, TEL*, see the relevant section in this supplement. Function settings - MY CAR, see MY CAR (p. 11). Internet-connected car - *, see the respective section in this supplement 1. Climate control system, see the Owner's Manual. Park assist camera - CAM*, see the Owner's Manual. Support and information about the car on the Internet There is additional information regarding your car on the Volvo Cars website and support page. From the website, it is also possible to navigate through to My Volvo, a personal web page for you and your car. Support on the Internet Go to support.volvocars.com or use the QR code below to visit the page. The support page is available for most markets. QR code that leads to the support page. The information on the support page is searchable and can also be subdivided into different categories. Available here is support for options related to e.g. Internet connected services and functions, Volvo On Call (VOC)*, the navigation system* and apps. Video and step-by-step instructions explain different procedures, e.g. how the car is connected to the Internet via a mobile phone. 1 Information only available if the car is equipped with this function. 8 * Option/accessory, for more information, see Introduction.
11 01 INTRODUCTION Downloadable information from the support page Maps For cars equipped with Sensus Navigation*, there is the facility to download maps from the support page. Mobile apps For selected Volvo models from model year 2014 and 2015, the owner's manual is available in the form of an app. The VOC* app can also be accessed from here. Owner's manuals from previous model years Owner's manuals from previous model years are available here in PDF format. The Quick Guide and supplement can also be accessed from the support page. Select car model and model year in order to download the publication required. Contact On the support page there is contact information for customer support and the nearest Volvo dealer. My Volvo on the Internet 2 From it is possible to navigate through to My Volvo Web which is a personal Web page for you and your car. Create a personal Volvo ID, log in to My Volvo Web and get an overview of service, agreements and warranties, amongst other things. At My Volvo Web there is also information about accessories and software adapted for your car model Applies to certain markets. * Option/accessory, for more information, see Introduction. 9
12 MY CAR


13 02 MY CAR MY CAR MY CAR is a menu source that handles many of the car's functions, e.g. City Safety, locks and alarm, automatic fan speed, setting the clock, etc. Certain functions are standard, others are optional - the range also varies depending on the market. Operation Navigation in the menus is carried out using buttons in the centre console or with the steering wheel's right-hand keypad*. vary, depending on the equipment selected and the market. MY CAR - opens the menu system MY CAR. OK/MENU - press the button in the centre console or the thumbwheel on the steering wheel to select/tick in the highlighted menu option or store the selected function in the memory. TUNE - turn the knob in the centre console or the thumbwheel on the steering wheel to scroll up/down through the menu options. EXIT 02 EXIT functions Depending on the function the cursor is on when EXIT is depressed briefly, and on which menu level, one of the following may occur: Control panel in centre console and steering wheel keypad. The figure is schematic - the number of functions and layout of the buttons both phone call is rejected current function is interrupted input characters are deleted most recent selections are undone leads up in the menu system. A long press on EXIT leads to the normal view for MY CAR or if you are in the normal view, to the highest menu level (main source menu). * Option/accessory, for more information, see Introduction. 11
14 02 MY CAR 02 MY CAR - search paths MY CAR is a menu source that handles many of the car's functions, e.g. setting the clock, door mirrors and locks. Current menu level is shown at the top right of the centre console's screen. The search paths to the menu system's functions are specified on the form: Settings Car settings Lock settings Doors unlock Driver door, then all. The following is an example of how a function can be accessed and adjusted using the steering wheel keypad: 6. Scroll between the options All doors and Driver door, then all and press the thumbwheel - the option is selected. 7. Exit the programming by backing out of the menus incrementally with short presses on EXIT or with one long press. The procedure is the same for the centre console controls (p. 11): OK/MENU, EXIT and the TUNE knob. MY CAR (p. 11) MY CAR - menu options (p. 12) MY CAR - menu options MY CAR is a menu source where many of the car's functions can be handled, e.g. setting the clock, door mirrors and locks. The following options are available in menu source MY CAR: My S60 1 Trip statistics 2 1. Press the centre console button MY CAR. 2. Scroll to the desired menu, e.g. Settings, with the thumbwheel and then press the thumbwheel - a submenu opens. 3. Scroll to the desired menu, e.g. Car settings and press the thumbwheel - a submenu opens. 4. Scroll to Lock settings and press the thumbwheel - a new submenu opens. 5. Scroll to Doors unlock and press the thumbwheel - a submenu of selectable functions opens. 1 Depending on car model. 2 Applies to the V60 Plug-in Hybrid and S60L Twin Engine. 12
15 02 MY CAR DRIVe 3 /Hybrid 2 Support systems Settings My S60 1 MY CAR My S60 1 The screen shows a grouping of all of the car's driver support systems - these can be activated or deactivated here. Trip statistics 2 MY CAR Trip statistics The screen shows the history as a bar chart with average consumption of electricity and fuel. DRIVe 3 MY CAR DRIVe Parts of the Volvo DRIVe concept are described here, among other things. Select from among the following headings: Start/Stop Hybrid 2 MY CAR Hybrid Information on the car's drive system is found here. Select from among the following headings: Power flow The screen shows whether the motor or engine is driving the car and how the motive force is flowing. Driving modes The car's different drive modes are explained. Eco driving guide Tips, advice and a description of what it means to drive economically can be found here. Driver support system MY CAR Support systems The screen shows a summary of the current status of the car's driver support systems. Menu level 1 Menu level 2 Menu level 3 Menu level 4 Shown here are the 4 first menu levels under Settings. Certain functions are standard, others are optional - the range also varies depending on the market. When selecting whether a function should be activated/on or deactivated/off a square is displayed: On: Selected square. Off: Empty square. Select On/Off with OK - then back out of the menu with EXIT. 02 Here there is information about the Start/ Stop function. Eco driving guide Tips, advice and a description of what it means to drive economically can be found here. Settings MY CAR Settings The menus are structured as follows: 3 Applies to the V40, V40 Cross Country, S60, S60L, V60, V60 Cross Country, XC60, S80 and V70/XC70. 2 Applies to the V60 Plug-in Hybrid and S60L Twin Engine. 1 Depending on car model. }} 13
16 02 MY CAR 02 Menus under settings Car settings, see MY CAR - Car settings (p. 14) Driver support systems, see MY CAR - driving support system (p. 16) System options, see MY CAR - System options (p. 17) Audio settings, see Audio and media - general audio settings (p. 27) Climate settings, see MY CAR - Climate settings (p. 18) Favourites (FAV) - link a normally used function in MY CAR to FAV button, see Favourites (p. 25) Volvo On Call, described in a separate manual. Information, see MY CAR Information (p. 18) MY CAR (p. 11) MY CAR - search paths (p. 12) MY CAR - Car settings Car settings menu option in the MY CAR menu source handles many of the car's functions, e.g. Car key memory and Lock settings for doors. Car settings Car key memory On Off Lock settings Automatic door locking On Off Doors unlock All doors Audible confirmation On Off Reduced Guard Activate once Ask when exiting Side mirror settings Fold mirrors Tilt left mirror Tilt right mirror Light settings Interior light Floor lights Ambient light Driver door, then all Ambient light colours Keyless entry Door lock confirmation light All doors On Any door Off Doors on same side Both front doors 14
17 02 MY CAR Unlock confirmation light On Off Approach light duration Off 30 sec 60 sec 90 sec or Temporary LH traffic On Off Temporary RH traffic On Off Active bending lights Speed in infotainment display On Off Reset car settings All menus in Car settings are given original factory settings. MY CAR (p. 11) MY CAR - menu options (p. 12) 02 Home safe light duration Off On Off 30 sec 60 sec 90 sec Auxiliary lights On Off Triple indicator On Off Tyre pressure system Warns if tyre pressure is too low Calibrate tyre pressure Steering wheel force Low Medium High 15
18 02 MY CAR 02 MY CAR - driving support system Driving support systems menu option in the MY CAR menu source handles functions such as e.g. Collision warning system and Lane keeping aid. Driver support systems Collision Warning On Off On at start-up On Off Increased sensitivity On Off Lane Keeping Aid Speed alert On Off DSTC On Off City Safety On Warning distance Lane Keeping Aid Off Long Normal Short Warning sound On Off On Off Assistance alternatives Full function Vibration only Steering assist only BLIS On Off Distance Alert On Off Lane Departure Warning Lane Departure Warning On Off Road Sign Information On Off Driver Alert On Off MY CAR (p. 11) MY CAR - menu options (p. 12) 16
19 02 MY CAR MY CAR - System options The system settings menu option in the MY CAR menu source handles functions such as e.g. time and languages. System options Time The combined instrument panel's clock is adjusted here. Show help text On Off Explanatory text for the display screen's current content is shown with this option selected. Distance and fuel units MPG (UK) MY CAR (p. 11) MY CAR - menu options (p. 12) 02 Time format 12 h 24 h MPG (US) km/l l/100km Screen saver On Off The display screen's current content fades out after a period of inactivity and is replaced by a blank screen if this option is selected. The current screen content returns if any of the display screen's buttons or controls are actuated. Language Temperature unit Celsius Fahrenheit Selects the unit for the display of outside temperature and setting of the climate control system. Volume levels Front park assist volume Rear park assist volume Phone ringing volume Selects language for menu texts. Reset system options All menus in System options are given original factory settings. 17
20 02 MY CAR 02 MY CAR - Climate settings Climate settings menu option in the MY CAR menu source handles functions such as e.g. fan adjustment and recirculation. Climate settings Interior air quality system On Off Reset climate settings MY CAR Information Information menu option in the MY CAR menu source handles functions such as Number of keys and VIN number. Information Automatic blower adjustment Normal High Low All menus in Climate settings are given original factory settings. MY CAR (p. 11) MY CAR - menu options (p. 12) Number of keys VIN number DivX VOD code Recirculation timer Bluetooth software version in car On Off Automatic rear defroster MY CAR (p. 11) MY CAR - menu options (p. 12) On Off Auto start steering wheel heater On Off Auto start driver seat heater On Off 18

21 AUDIO AND MEDIA


 as before the engine was switched off (the driver's door must be closed on cars with Keyless systems*).")
22 AUDIO AND MEDIA Audio and media The audio and media system consists of radio (p. 29), media player (p. 40), TV* (p. 64) as well as the option to communicate with mobile phone* (p. 55). Information is presented on a 5-inch screen* in the upper section of the centre console. Functions can be controlled via buttons in the steering wheel, in the centre console below the screen or via a remote control* (p. 68). Dolby Digital, Dolby Pro Logic* Audio and media - overview Overview of the audio and media system's different parts. If the audio and media system is active when the engine is switched off then it is automatically activated the next time the key is inserted into key position I or higher, and it continues with the same source (e.g. radio) as before the engine was switched off (the driver's door must be closed on cars with Keyless systems*). The audio and media system can be used for 15 minutes at a time without the remote control key being in the ignition switch by pressing the On/Off button. Made under license from Dolby Laboratories. Dolby Digital, Dolby Pro Logic and the double-d symbol are trademarks of Dolby Laboratories. Audyssey MultEQ* AUX and USB* inputs for external audio sources (p. 47) (e.g. ipod ). Steering wheel keypad*. Centre console control panel. 5-inch screen. When the car is being started the audio and media system is switched off temporarily and continues when the engine has started. NOTE Remove the remote control key from the ignition switch if the infotainment system is used when the engine is switched off. This is to avoid discharging the battery unnecessarily. Audyssey MultEQThe system has been used in the development and tuning of the sound to ensure a world-class sound experience. Rear control panel (p. 25) with headphones socket*. A/V-AUX input*. 20 * Option/accessory, for more information, see Introduction.

 switches off.")
23 AUDIO AND MEDIA Audio and media - operating the system The audio and media system is controlled from the centre console and partly from the steering wheel buttons. The information is presented on the screen in the upper section of the centre console. forwards through disc tracks or searches for the next available radio station. SOUND - press for access to audio settings (bass, treble, etc.). For more information, see general audio settings (p. 27). VOL - raise or lower the volume. - ON/OFF/MUTE - short press starts the system and long press (until the screen is off) switches off. Note that the whole of the Sensus system (including navigation * and phone functions*) starts/ switches off at the same time. Briefly press to mute the sound (MUTE) or restore the sound if it had been switched off. Disc insert and eject slot. Scroll/fast wind/search - Short press scrolls between disc tracks, preset radio stations 1 or chapter 2. A long press fast Main sources - press to select the main source (e.g. RADIO, MEDIA). Last active source is shown (e.g. FM1). A new source view is selected if the main source button is pressed while in RADIO or MEDIA. If you are in TEL* or NAV* and press the main source button then a shortcut menu is shown with commonly used menu options. Disc eject. 1 Does not apply to DAB. 2 Only applies to DVD discs. }} * Option/accessory, for more information, see Introduction. 21
24 AUDIO AND MEDIA OK/MENU - press the thumbwheel in the steering wheel or the button in the centre console to accept selections in menus. If you are in the normal view and press OK/ MENU a menu is shown for the selected source (e.g. RADIO or MEDIA). Arrow to the right of the screen is shown when there are underlying menus. TUNE - turn the thumbwheel in the steering wheel or the knob in the centre console to scroll among tracks/folders, radio and TV* stations, phone contacts* or to navigate among choices on the display screen. EXIT - short press leads upwards in the menu system, interrupts current function, interrupts/rejects phone calls or erases entered characters. Long press leads to normal view, or if you are in normal view to the highest menu level (main source view), from where you can reach the same main source buttons located in the centre console (6). INFO - If more information than can be shown on the screen is available, press the INFO button to see the remaining information. Preset buttons, input of numbers and letters. FAV - shortcut to a favourite setting. The button can be programmed for a commonly used function (e.g. FM, AUX). For more information, see favourites (p. 25). MUTE press to switch off the radio/ media audio or restore the audio if it has been switched off. 22 * Option/accessory, for more information, see Introduction.

 Main source button, (2) Normal view, (3)")


25 AUDIO AND MEDIA Menus The example shows navigation to different functions when a disc is played back. (1) Main source button, (2) Normal view, (3) Shortcut/Source menu, (4) Quick menu, (5) Source menu. Main source button - press in order to change the main source or to show the Shortcut/Source menu in the active source. Normal view - normal mode for the source. }} 23
26 AUDIO AND MEDIA Shortcut/Source menu - shows commonly used menu options in the main sources, e.g. TEL and MEDIA (accessed by pressing the active source's main source button (1)). Quick menu - fast mode when TUNE is turned, e.g. for changing disc tracks, radio station, etc. Source menu - for menu navigation (accessed by pressing OK/MENU). The appearance depends on the source, equipment in the car, settings, etc. Select main source by pressing a main source button (1) (RADIO, MEDIA, TEL). To navigate through the source menus, use the controls TUNE, OK/MENU, EXIT or the main source button (1). For available functions, see Audio and media - menu overview (p. 70). 24

 scrolls between disc tracks/audio files or seeks the next")
27 AUDIO AND MEDIA Rear control panel with headphones socket* It is possible to plug in headphones and listen to separate media, which is selected using the control rear panel. Headphones with an impedance of ohm and sensitivity of 102 db or higher are recommended for best sound reproduction. Activate/deactivate The control panel is activated with MODE. Deactivation is possible via a long press on MODE or when the engine is switched off. Scroll/search forward and backward Pressing (2) scrolls between disc tracks/audio files or seeks the next available radio station. Limitations The audio source (t.ex. FM1, AM, Disc) being played back through the speakers cannot be controlled from the rear control panel. Favourites Save (p. 26) frequently used functions as favourites. Possible functions that can be saved are within radio, media, reversing camera and menu source MY CAR where many of the car's functions are handled, e.g. setting the clock, door mirrors and locks. The function is then accessed easily by pressing the FAV button. In order that an audio source can be selected with MODE and listened to it is required that the audio source is available and connected in the car. Audio and media (p. 20) VOLUME Volume, left and right. Scroll/search forward and backward. MODE - Select between AM, FM1, FM2, DAB1*, DAB2*, Disc, USB*, ipod*, Bluetooth*, AUX, TV* and On/Off. Read about connection via AUX or USB* (p. 48) or via Bluetooth (p. 51). Headphones sockets (3.5 mm). FAVThe button can be used to save functions that are used frequently so that the function can be started simply by pressing FAV. You can select a favourite (e.g. Equalizer) for each function in accordance with the following: In RADIO mode: }} * Option/accessory, for more information, see Introduction. 25
28 AUDIO AND MEDIA AM 3 FM1/FM2 DAB1*/DAB2* In MEDIA mode: DISC USB* ipod * Bluetooth * AUX TV* It is also possible to select and save a favourite for MY CAR, CAM* and NAV*. Favourites can also be selected and saved under MY CAR. Audio and media (p. 20) MY CAR (p. 11) Radio (p. 29) Media player (p. 40) Save as favourite Save frequently used functions as favourites (p. 25). The function can then be started easily by pressing the FAV button. To save a function as a favourite: 1. Select a main source (e.g. RADIO, MEDIA). 2. Select a wavelength or source (FM1, Disc, etc.). 3. Press and hold the FAV button until the "favourites menu" is shown. 4. Turn TUNE to select an option from the list and press OK/MENU to save. > When the main source (e.g. RADIO, MEDIA) is active the saved function is available via a short press on FAV. Audio and media (p. 20) MY CAR - Car settings (p. 14) Audio and media - audio settings The audio system is pre-calibrated for optimal sound reproduction, but can be adapted to your needs. Setting for optimal sound reproduction The audio system is pre-calibrated for optimum sound reproduction by means of digital signal processing. This calibration takes into account loudspeakers, amplifiers, passenger compartment acoustics, listener position etc. for each combination of car model and audio system. There is a also a dynamic calibration that takes into account the position of the volume control, radio reception and vehicle speed. The controls explained in these operating instructions, e.g. Bass, Treble and Equalizer, are only intended for the user to be able to adapt the sound reproduction according to personal taste. 3 Does not apply to the V60 Plug-in Hybrid and S60L Twin Engine. 26 * Option/accessory, for more information, see Introduction.
29 AUDIO AND MEDIA Audio and media - general audio settings General audio settings for the audio and media system. DPL II centre level/3 channel centre level* - Volume for centre speaker. DPL II surround level/ 4 Level for surround. Audio and media - advanced audio settings Adapt the audio settings for radio and media according to your requirements. Press the SOUND button to access the audio settings menu (Bass, Treble, etc.). Scroll forward with SOUND or OK/MENU to your selection (e.g. Treble). Adjust the setting by turning TUNE and save the setting with OK/MENU. Continue pressing SOUND or OK/MENU to access other options: Surround* - Can be set to the On/Off position. When On is selected, the system selects the setting for optimal sound reproduction. Normally DPLII and then appear in the display screen. If the recording is made with Dolby Digital technology then playback will take place with this setting, then appears in the display screen. When Off is selected, 3- channel stereo is available. Bass - Bass level. Treble - Treble level. Fader Balance between the front and rear speakers. Balance Balance between the left and right-hand speakers. Subwoofer* - Bass speaker level. The following functions can be adapted: Setting the equaliser (p. 28) Setting the audio profile (p. 28) Setting the audio volume and automatic volume control (p. 28) Setting the audio volume for external audio source (p. 50) 4 Only when Surround is activated. * Option/accessory, for more information, see Introduction. 27
30 AUDIO AND MEDIA Setting the equaliser Set the equaliser* and adjust the volume separately for different radio frequencies or TV. 1. Press OK/MENU in the normal view for the media source in order to access Audio settings and select Equalizer. 2. Select wavelength by turning TUNE and confirm with OK/MENU. 3. Adjust the audio settings by turning TUNE and confirm with OK/MENU. Continue in the same way with other wavelengths you want to change. 4. When you have finished with audio settings, press EXIT to confirm and return to normal view. Audio and media - advanced audio settings (p. 27) Setting the audio profile Set the audio profile* and optimise your audio experience in accordance with your needs. The sound experience can be optimised for the driver's seat, both front seats or the rear seat. If there are passengers in both the front and rear seats then the option recommended is; both front seats. Access the options in the normal view for the media source by pressing OK/MENU and selecting Audio settings Sound stage. Audio and media - audio settings (p. 26) Setting the audio volume and automatic volume control Set the audio compensation for excessive noise in the passenger compartment. The audio system compensates for disrupting noises in the passenger compartment by increasing the volume in relation to the speed of the car. The compensation level can be set to low, medium, high or off. Select level in the normal view for the media source by pressingok/menu and then selecting Audio settings Volume compensation. Audio and media - advanced audio settings (p. 27) 28 * Option/accessory, for more information, see Introduction.
31 AUDIO AND MEDIA Radio It is possible to listen to the AM 5 and FM radio frequencies, and in certain cases also digital radio (DAB)* (p. 38). Controls for radio functions. For operating the radio, see Operating the system. Storing channel groups (Ensemble learn) (p. 38) Navigation in channel group list (Ensemble) (p. 39) Radio stations as presets (p. 31) Scan radio frequencies (p. 37) Radio programme types (PTY) (p. 34) Radio text (p. 36) DAB to DAB link (p. 39) Digital radio (DAB)* - wavelength (p. 39) Digital radio (DAB)* - subchannel (p. 40) Digital radio (DAB)* - resetting (p. 40) Menu overview - AM (p. 71) Menu overview - FM (p. 71) Menu overview - Digital radio (DAB)* (p. 72) Radio tuning The radio automatically compiles a radio station list* (p. 30) of the strongest radio stations whose signals it is currently receiving. It is possible to activate automatic (p. 30)- or manual (p. 31) radio tuning. NOTE The reception is dependent both on how good the signal strength and signal quality are. The transmission may be disturbed by various factors such as tall buildings or the transmitter being far away. Coverage level can also vary depending on where in the country you are located. AM 5 /FM radio Radio tuning (p. 29) Radio stations as presets (p. 31) Scan radio frequencies (p. 37) RDS functions (p. 32) Radio programme types (PTY) (p. 34) Radio text (p. 36) Digital radio* (DAB) Digital radio (DAB)* (p. 38) 5 Does not apply to the V60 Plug-in Hybrid and S60L Twin Engine. * Option/accessory, for more information, see Introduction. 29
32 AUDIO AND MEDIA Automatic radio tuning Searches for the next/previous available station. 1. Press RADIO, turn TUNE until the desired wavelength (e.g. FM1) is shown, press OK/MENU. 2. Hold in / in the centre console (or in the steering wheel keypad*). The radio searches for the next/previous available station. Radio station list* The radio automatically compiles a radio station list of the strongest radio stations whose signals it is currently receiving. This enables you to find a station when you drive into an area where you do not know the radio stations and their frequencies. To go to the list and select a station: 1. Select the desired wavelength (e.g. FM1). 2. Turn TUNE one step in either direction. This displays the list of all stations in the area. The currently tuned station is indicated with enlarged text in the list. 3. Turn TUNE again in either direction to select a station from the list. NOTE The list only shows the frequencies of stations that are currently being received, not a complete list of all radio frequencies on the selected wavelength. If the signal from the currently received station is weak, this may prevent the radio from updating the station list. If this occurs, press the INFO button (while the station list is shown in the display screen) in order to change to manual tuning and set a frequency. If the station list is no longer shown, turn TUNE one step in either direction to show the list again, and press INFO to switch. 4. Confirm your choice by pressing OK/ MENU. The list disappears from the display screen after a few seconds. If the station list is no longer shown, turn TUNE one step in either direction and press the INFO button in the centre console to change to manual tuning (p. 31) (or to return from manual tuning to the function for Station list). 30 * Option/accessory, for more information, see Introduction.

33 AUDIO AND MEDIA Manual radio tuning The radio automatically compiles a radio station list* (p. 30), but it is possible to perform radio tuning manually. The preset from the factory is that the radio shows the station list of the strongest stations in the area when you turn TUNE. When the radio station list is shown, press the INFO button in the centre console to change to manual tuning. This allows you to select a frequency from the list of all available radio frequencies in the selected wavelength. In other words, if turn TUNE one step in a manual search the frequency is changed from e.g to 93.4 MHz, etc. To manually select a station: 1. Press the RADIO button, turn TUNE until the desired wavelength (e.g. FM1) is shown, press OK/MENU. 2. Turn TUNE to select a frequency. NOTE The preset from the factory is that the radio automatically searches for the stations in the area where you are driving (see section "Radio station list"). But if you have changed over to manual tuning (by pressing the INFO button in the centre console when the station list was shown), then the radio remains set in the function for manual tuning the next time you switch on the radio. To change back to the function for "Radio station list", turn TUNE one step (to show the complete list of stations) and press the button INFO. Note that if you press INFO when the station list is not shown then INFO is activated. For more information on this function, see Audio and media - operating the system. Radio stations as presets Frequently used radio stations are optimally saved as presets in order to facilitate simple activation. Station presets. AM 6 /FM radio 10 presets can be stored per wavelength (e.g. FM1). The stored presets are selected using the preset buttons. 1. Tune into a station, see Radio tuning (p. 29). 2. Hold in one of the preset buttons for a few seconds, the sound disappears during this time and returns when the station is stored. The preset button can now be used. 6 Does not apply to the V60 Plug-in Hybrid and S60L Twin Engine. }} * Option/accessory, for more information, see Introduction. 31
34 AUDIO AND MEDIA A list of pre-selected channels can be shown in the screen*. To activate/deactivate the function, in the normal view for the AM/FM source, press OK/MENU and select Show presets. Digital radio* (DAB) 10 station presets can be stored per wavelength. DAB has 2 memories for presets: DAB1 and DAB2. Storage of presets is performed by means of a long press on the desired preset button, for more information see FM radio above. The stored presets are selected using the preset buttons. A preset contains one channel but no subchannels. If a subchannel is being played and a preset is saved then only the main channel is registered. This is because subchannels are temporary. At the next attempt to retrieve the preset, the channel which contained the subchannel will be played. The preset is not dependent on the channel list. RDS functions With RDS the radio can automatically change to the strongest transmitter. RDS provides the facility to receive e.g. traffic information (TP) and to search for certain programme types (PTY). RDS (Radio Data System) links FM transmitters into a network. An FM transmitter in such a network sends information that gives an RDS radio the following functions: Automatically switches to a stronger transmitter if reception in the area is poor. Searches for programme type, such as traffic information or news. Receives text information on current radio programme. NOTE Some radio stations do not use RDS or only selected parts of its functionality. A list of pre-selected channels can be shown in the screen*. To activate/deactivate the function, in the normal view for the DAB source, press OK/MENU and select Show presets. NOTE The audio system's DAB system does not support all functions in the DAB standard. If a required programme type is located the radio can switch stations interrupting the audio source currently in use. For example, if the CD player is in use, it is paused. The interrupting transmission is played back at a preset volume (p. 36). The radio returns to the previous audio source and volume when the set programme type is no longer broadcast. 32 * Option/accessory, for more information, see Introduction.
35 AUDIO AND MEDIA The programme functions alarm (ALARM!), traffic information (TP), news (NEWS), and programme types (PTY) interrupt one another in order of priority, where alarm has the highest priority and programme types has the lowest. For additional programme interruption settings (EON Distant and EON Local), see EON (p. 34). Press EXIT to return to the interrupted audio source, press OK/MENU to clear the message. Alarms in the event of accidents and disasters (p. 33) Radio text (p. 36) Automatic radio frequency update (AF) (p. 36) Regional radio programmes (REG) (p. 37) Resetting RDS functions (p. 37) Alarms in the event of accidents and disasters The radio function is used to warn of serious accidents and catastrophes. The message ALARM! appears on the display screen when an alarm message is transmitted. The alarm cannot be temporarily interrupted or deactivated. RDS functions (p. 32) Traffic information (TP) This function allows traffic information that is broadcast within a set radio station's RDS network to break through. The TP symbol indicates that the function is activated. If the preset station can send traffic information then this is shown by TP glowing brightly in the display screen, otherwise TP will be grey. To activate/deactivate, in the normal view for the FM source, press OK/MENU and select TP. TP from selected station/all stations The radio can only interrupt for traffic information from the selected station or all stations within the RDS network. To change, in the normal view for the FM source, press OK/MENU and select Advanced settings Set TP favourite. RDS functions (p. 32) 33
36 AUDIO AND MEDIA Enhanced Other Networks (EON) EON is useful in urban areas with many regional radio stations. It allows the distance between the car and the radio station transmitter to determine when programme functions should interrupt the current audio source. To activate/deactivate, in the normal view for the FM source, press OK/MENU and select one of the options under Advanced settings EON: Local interrupts only if the radio station transmitter is close. Distant 7 interrupts if the station transmitter is far away, even if there is a lot of static. RDS functions (p. 32) News broadcasts This function allows news broadcasts within a set radio station's RDS network to break through. The symbol NEWS shows that the function is active. To activate/deactivate, in the normal view for the FM source, press OK/MENU and select News settings News. News from selected station/all stations The radio can only interrupt for news from the selected station or all stations in the RDS network. To change, in the normal view for the FM source, press OK/MENU and select News settings Set news favourite. RDS functions (p. 32) Radio programme types (PTY) The PTY function can be used to select one or more radio programme types, such as Pop Music and Serious Classical Music. After selecting a programme type, navigation only takes place within the channels that are broadcasting that type. PTY can be selected for FM and DAB radio. The PTY symbol is shown in the screen when the function is active. This function allows programme types broadcast within a set station's RDS network to break through. PTY for FM radio 1. In the normal view for the FM source, activate by pressing OK/MENU and first selecting programme types under Advanced settings PTY settings Select PTY. 2. Following which, the PTY function must be activated by pressing OK/MENU and then selecting Advanced settings PTY settings Receive traffic bulletins from other networks. Deactivation of the PTY function is carried out in the normal view for the FM source by pressing OK/MENU and then Advanced settings PTY settings Receive traffic bulletins from other networks. Selected programme types (PTY) are not reset. 7 Factory settings. 34
37 AUDIO AND MEDIA Resetting and removing PTY is carried out in the normal view for the FM source by pressing OK/MENU and then Advanced settings PTY settings Select PTY Clear all. PTY for DAB radio Programme type is selected in the normal view for the DAB source by pressing OK/MENU and then PTY filtering. Exit this mode as follows: Press EXIT. > An indicator is shown in the screen when PTY is activated. In some cases DAB radio will exit PTY mode, see DAB to DAB link (p. 39). Searching radio programme types (PTY) (p. 35) Show radio programme types (PTY) (p. 35) Volume control for interrupting radio programme types (PTY) (p. 36) RDS functions (p. 32) Searching radio programme types (PTY) This function searches the whole frequency band for the selected radio programme type. 1. In the normal view for the FM source, select one or more PTY by pressing OK/MENU and then Advanced settings PTY settings Select PTY. 2. Then press OK/MENU and select Advanced settings PTY settings Seek PTY. To finish searching, press EXIT. To continue searching for another broadcast of the selected programme types, press on or. Radio programme types (PTY) (p. 34) Show radio programme types (PTY) (p. 35) RDS functions (p. 32) Show radio programme types (PTY) Some radio stations broadcast information about programme type and programme category. The current station's radio programme type, e.g. Pop Music and Serious Classical Music, can be shown in the screen. PTY can be selected for FM and DAB radio. Show radio programme type for FM radio To activate/deactivate, in the normal view for the FM source, press OK/MENU and select Advanced settings PTY settings Show PTY text. Show radio programme type for DAB radio To activate/deactivate, in the normal view for the DAB source, press OK/MENU and select Advanced settings Show PTY text. Radio programme types (PTY) (p. 34) Searching radio programme types (PTY) (p. 35) RDS functions (p. 32) 35
38 AUDIO AND MEDIA Volume control for interrupting radio programme types (PTY) The interrupting programme types, e.g. NEWS or TP, are heard at the volume selected for each respective programme type. If the volume level is adjusted during the programme interruption, the new level is saved until the next programme interruption. Radio programme types (PTY) (p. 34) RDS functions (p. 32) Radio text Certain RDS stations transmit information on programme content, artists etc. This information is shown in the display screen 8. Radio text can be shown for FM and DAB radio. Radio text for FM radio To activate/deactivate, in the normal view for the FM/DAB source, press OK/MENU and select Show radio text. NOTE Only one of the functions "Show radio text" and "Show presets" can be activated at a time. If one of them is activated when the other is already activated, then the previously activated function is deactivated automatically. Both functions can be deactivated. Automatic radio frequency update (AF) The function selects the strongest transmitter for the set radio station. In order to find a strong transmitter the function may, in exceptional cases, need to search the entire FM wavelength. To activate/deactivate, in the normal view for the FM source, press OK/MENU and select Advanced settings Alternative frequency. RDS functions (p. 32) RDS functions (p. 32) Digital radio (DAB)* (p. 38) 8 Only cars with 7-inch screen. 36 * Option/accessory, for more information, see Introduction.
39 AUDIO AND MEDIA Regional radio programmes (REG) This function causes the radio to continue with a regional radio transmitter despite that its signal strength is low. The symbol REG shows that the function is active. To activate/deactivate, in the normal view for the FM source, press OK/MENU and select Advanced settings REG. RDS functions (p. 32) Scan radio frequencies The function automatically searches for available radio channels and takes into account any programme type filtering (PTY). When a station is found, it is played for approx. 10 seconds before scanning is resumed. When a station is playing back it is saved as a preset in the usual way, see Radio stations as presets (p. 31). To start scanning, in the normal view for the FM/AM 9 /DAB* source, press OK/MENU and select Scan. Resetting RDS functions All radio settings can be reset to the original factory settings. To reset, in the normal view for the FM source, press OK/MENU and select Advanced settings Reset all FM settings. RDS functions (p. 32) NOTE Scanning stops if a station is saved. Scanning can also be selected in DAB-PTY mode. In which case only channels of the pre-selected programme type are played. Radio programme types (PTY) (p. 34) Digital radio (DAB)* (p. 38) 9 Does not apply to the V60 Plug-in Hybrid and S60L Twin Engine. * Option/accessory, for more information, see Introduction. 37
40 AUDIO AND MEDIA Digital radio (DAB)* DAB (Digital Audio Broadcasting) is a digital broadcasting system for radio. The car supports DAB, DAB+ and DMB. NOTE Coverage for DAB is not available in all locations. If there is no coverage then the message No reception is shown in the display screen. Service and Ensemble Service - Channel, radio channel (only audio services are supported by the system). Ensemble - A collection of radio channels on the same frequency. Storing channel groups (Ensemble learn) (p. 38) Navigation in channel group list (Ensemble) (p. 39) Radio (p. 29) Radio stations as presets (p. 31) Scan radio frequencies (p. 37) Radio programme types (PTY) (p. 34) Radio text (p. 36) DAB to DAB link (p. 39) Digital radio (DAB)* - wavelength (p. 39) Digital radio (DAB)* - subchannel (p. 40) Digital radio (DAB)* - resetting (p. 40) Storing channel groups (Ensemble learn) Storage of channel groups (Ensemble learn) for digital radio (DAB). When the vehicle is moved to a new broadcasting area, programming of existing channel groups in the area may be necessary. Programming of channel groups creates an updated list of all available channel groups. The list is not updated automatically. For programming, in the normal view for the DABsource, press OK/MENU and select Ensemble learn. Programming can also take place as follows: 1. Turn TUNE one step in either direction. > Ensemble learn is shown in the list of available channel groups. 2. Press OK/MENU. > New programming is started. Programming can be cancelled with EXIT. Digital radio (DAB)* (p. 38) Navigation in channel group list (Ensemble) (p. 39) 38 * Option/accessory, for more information, see Introduction.
41 AUDIO AND MEDIA Navigation in channel group list (Ensemble) Navigation in the channel group list (Ensemble) for digital radio (DAB). To navigate in and access the channel group list turn TUNE. The name of the Ensemble is shown in the upper part of the display screen. When switching to the new Ensemble the name changes to the new one. Service - Shows channels irrespective of the channel group to which they are allocated. The list can also be filtered using the selection of programme type (PTY filtering), see Radio programme types (PTY) (p. 34). Storing channel groups (Ensemble learn) (p. 38) Digital radio (DAB)* (p. 38) Radio programme types (PTY) (p. 34) DAB to DAB link DAB to DAB linking means that the DAB radio can go from one channel with poor or no reception to the same channel in another channel group with better reception. There may be a certain delay when changing channel group. There may be a period of silence between the current channel no longer being available to the new channel becoming available. To activate/deactivate, in the normal view for the DAB source, press OK/MENU and select Advanced settings DAB linking. Digital radio (DAB)* - wavelength DAB can be transmitted on two wavelengths 10. Band III - covers most areas. LBand - available only in a few areas. By selecting for example Band III on its own, channel programming takes place more quickly than if both Band III and LBand have been selected. It is not certain that all channel groups will be found. Wavelength selection does not affect the stored memories. In the normal view for the DAB source, wavelengths can be activated/deactivated by pressing OK/MENU and then selecting Advanced settings DAB band. Digital radio (DAB)* (p. 38) 10 Not all areas/countries use both wavelengths. * Option/accessory, for more information, see Introduction. 39

42 AUDIO AND MEDIA Digital radio (DAB)* - subchannel Secondary components are usually named subchannels. These are temporary and can contain e.g. translations of the main programme into other languages. If one or more subchannels are broadcast then the symbol is shown to the left of the channel name in the display screen. A subchannel is indicated by the - symbol appearing to the left of the channel name in the display screen. Digital radio (DAB)* - resetting All DAB settings can be reset to the original factory settings. Reset is performed in the normal view for the DAB source by pressing OK/MENU and then selecting Advanced settings Reset all DAB settings. Digital radio (DAB)* (p. 38) Media player The media player can playback audio and video from CD/DVD* (p. 41) discs and externally connected audio sources via the AUX/USB* (p. 47) input, or wirelessly stream audio files from external devices via Bluetooth. Certain media players can show TV* (p. 64) and have the option to communicate with a mobile phone* via Bluetooth. Press to access the subchannels. Subchannels can only be accessed on the selected main channel and not on any other channel without selecting it. In the normal view for the DAB source, display of subchannels can be activated/ deactivated by pressing OK/MENU and then selecting Advanced settings Sub channels. Controls for the media player. For operating the media player, see Operating the system. Audio and media (p. 20) Media Bluetooth * (p. 51) Remote control* (p. 68) Media player - compatible file formats (p. 46) 40 * Option/accessory, for more information, see Introduction.
43 AUDIO AND MEDIA CD/DVD* Media player (p. 40) can play back pre-recorded and burned CD/DVD discs. The media player supports and can play the following main types of discs and files: Pre-recorded CD discs (CD Audio). Burned CD discs with audio and/or video files. Pre-recorded DVD video discs. Burned DVD discs with audio and/or video files. For more information about the supported formats, see compatible file formats (p. 46). Playback and navigation of CD/DVD* disc (p. 41) Playback and navigation of DVD* video discs (p. 44) Playback and navigation of CD/DVD* disc For basic information on playback and navigation, see Operating the system. See below for a more detailed description. Starting playback of a disc Press the MEDIA button in the normal view for the media source, turn TUNE until Disc is shown and press OK/MENU. If there is a disc in the media player then the disc starts playing back automatically, otherwise Insert disc is shown in the display screen. Then insert a disc, with text side up. The disc starts to play back automatically. If a disc with audio/video files is inserted into the player then the disc's folder structure needs to be loaded. Depending on the quality of the disc and the quantity of information there may be a certain delay before playback starts. Disc eject Press the eject button to eject the disc. A disc remains in the ejected position for about 12 seconds, after which it is inserted back into the player for safety reasons. Pause in playback (pause) When the volume is reduced entirely or MUTE is pressed, the media player is paused. When the volume is increased or MUTE is pressed again, the media player starts. It is also possible to pause via the menu system 11, press OK/MENU and select Play/Pause. NOTE A video film is only shown when the car is stationary. When the car is moving at a speed of over about 8 km/h no picture is shown and No visual media available while driving appears on the display screen, although the audio is heard during this time. The picture is shown again as soon as the car's speed falls below about 6 km/h. NOTE Some audio files that are copy-protected by record companies or privately copied audio files cannot be loaded by the player. Playback and navigation of burned discs with audio/video files* (p. 42) Playback and navigation of DVD* video discs (p. 44) 11 Does not apply to CD Audio. }} * Option/accessory, for more information, see Introduction. 41
44 AUDIO AND MEDIA Fast forward/reverse (p. 43) Scan disc track or audio file (p. 43) Random selection of disc track or audio file (p. 44) Media player - compatible file formats (p. 46) Playback and navigation of burned discs with audio/video files* Playback and navigation of burned discs with audio/video files. NOTE A video film is only shown when the car is stationary. When the car is moving at a speed of over about 8 km/h no picture is shown and No visual media available while driving appears on the display screen, although the audio is heard during this time. The picture is shown again as soon as the car's speed falls below about 6 km/h. audio files or only video files is loaded into the media player and then plays back these files. However, the system does not change setting if a disc containing a mixture of audio and video files is loaded into the media player, but instead the player continues to play back the previous file type. Repeat folder This function makes it possible to play files in a folder over and over again. When the last file has been played out, playback of the first file starts again. 1. Press OK/MENU 2. Turn TUNE to Repeat folder NOTE Some audio files that are copy-protected by record companies or privately copied audio files cannot be loaded by the player. Audio files have the symbol, video files have the symbol and folders have the symbol. When playback of a file is complete the playback of the other files (of the same type) in that particular folder continues. Change 12 of folder takes place automatically when all the files in the current folder have been played back. The system automatically detects and changes setting when a disc containing only 3. Press OK/MENU to activate/deactivate the function. Playback and navigation of CD/DVD* disc (p. 41) Playback and navigation of DVD* video discs (p. 44) Fast forward/reverse (p. 43) Scan disc track or audio file (p. 43) Random selection of disc track or audio file (p. 44) 12 If Repeat folder is activated then this does not take place. 42 * Option/accessory, for more information, see Introduction.
45 AUDIO AND MEDIA Media player - compatible file formats (p. 46) DivX Video On Demand* (p. 45) Fast forward/reverse It is possible to fast forward/rewind audio and video files 13. Scan disc track or audio file This function play backs the first ten seconds of each disc track/audio file. 14 Hold the button for / depressed in order to fast forward/rewind audio or video files forward/backward. Audio files are fast forwarded/rewound at one speed, while video files can be fast forwarded/rewound at several speeds. Repeatedly press the buttons / to increase the fast forward/rewind speed for video files. Release the button to return to viewing at normal speed. Playback and navigation of CD/DVD* disc (p. 41) Playback and navigation of external audio source* (p. 49) To scan selected source: 1. Press OK/MENU in the normal view for the selected source 2. Turn TUNE to Scan > The first 10 seconds of each disc track or audio file are played. 3. Cancel the scan with EXIT, the disc track or audio file being played back will continue playing. Playback and navigation of CD/DVD* disc (p. 41) Playback and navigation of external audio source* (p. 49) Media Bluetooth * (p. 51) 13 Only applies to CD/DVD* discs, USB and ipod. 14 Does not apply to DVD video discs. For externally connected audio sources via the AUX/USB input this only applies to USB and ipod. Not supported by all mobile phones. * Option/accessory, for more information, see Introduction. 43
46 AUDIO AND MEDIA Random selection of disc track or audio file This function plays the tracks/audio files in random order 15. To listen to the tracks/audio files in random order for the selected source: 1. Press OK/MENU in the normal view for the selected source 2. Turn TUNE to Random Playback and navigation of DVD* video discs When playing back a DVD video disc a disc menu may appear on the display screen. The disc menu gives access to additional functions and settings, such as selecting subtitles, language and scene selection. For basic information on playback and navigation, see Operating the system. See below for a more detailed description. Navigation in the DVD video disc's menu 3. Press OK/MENU to activate/deactivate the function. Playback and navigation of CD/DVD* disc (p. 41) Playback and navigation of external audio source* (p. 49) Media Bluetooth * (p. 51) NOTE A video film is only shown when the car is stationary. When the car is moving at a speed of over about 8 km/h no picture is shown and No visual media available while driving appears on the display screen, although the audio is heard during this time. The picture is shown again as soon as the car's speed falls below about 6 km/h. Navigation in the DVD video disc's menu is performed using the number keys in the centre console as illustrated above. Changing chapter or title Turn TUNE to access the list of chapters and navigate through them (if the film is being played back then it is paused). Press OK/ MENU to select the chapter, this also leads back to the original position (if the film was being played back then it is restarted). Press EXIT to access the title list. Titles are selected in the title list by turning TUNE and the selection is confirmed with OK/MENU, this also leads back to the chapter list. Press OK/MENU to activate the selection and return to the start position. Use 15 Does not apply to DVD video discs. For externally connected audio sources via the AUX/USB input this only applies to USB and ipod. Not supported by all mobile phones. 44 * Option/accessory, for more information, see Introduction.
47 AUDIO AND MEDIA EXIT to cancel the selection and this leads back to the original position (without any selection being made). The chapter can also be changed by pressing on / on the centre console or the steering wheel keypad*. Playback and navigation of CD/DVD* disc (p. 41) Camera angle for playback of DVD* video discs (p. 45) Playback and navigation of burned discs with audio/video files* (p. 42) Fast forward/reverse (p. 43) Scan disc track or audio file (p. 43) Random selection of disc track or audio file (p. 44) Media player - compatible file formats (p. 46) Camera angle for playback of DVD* video discs If the DVD video disc supports it, the function can be used to choose from which camera position a particular scene should be shown. In the normal view for the disc source, press OK/MENU and select Advanced settings Angle. DivX Video On Demand* The media player can be registered to play back files of the type DivX VOD from CD-/DVD discs, USB or ipod. The code for registration can be found in the menu system MY CAR, see MY CAR (p. 11). For more information visit vod. Playback and navigation of DVD* video discs (p. 44) Playback and navigation of burned discs with audio/video files* (p. 42) Playback and navigation of external audio source* (p. 49) * Option/accessory, for more information, see Introduction. 45
48 AUDIO AND MEDIA Picture settings* You can adjust the display settings (when the car is stationary) for brightness and contrast. 1. In playback mode, press OK/MENU and select Image settings, confirm with OK/ MENU. 2. Turn TUNE to the adjustment option and confirm with OK/MENU. 3. Adjust the setting by turning TUNE and confirm with OK/MENU. To return to the settings list, press the OK/ MENU or EXIT. The picture settings can be reset to factory settings with the Reset option. Audio and media (p. 20) Media player - compatible file formats The media player can play back a variety of file types and is compatible with the formats in the following tables. Compatible file formats for CD/DVD discs NOTE Dual format, double-sided discs (DVD Plus, CD-DVD format) are thicker than regular CD discs and therefore playback cannot be guaranteed and malfunction may arise. If a CD contains a mixture of MP3 and CDDA tracks, all MP3s will be ignored. Audio format Video format CD audio, mp3, wma, aac, m4a CD video, DVD video, divx, avi, asf Compatible file formats via USB connection Audio and video files in the following table are supported by the system for playback via the USB connection. Technical data for file formats.avi and.divx For the file to be played back, the following criteria must be met: DivX version 3, 4, 5, 5:2 Image size Video frame rate Total capacity (total bit rate) Audio format Audio channels (ch) 32x32-720x576 pixels Up to 30 fps DivX standard Up to 4 Mbps on average, up to 8 Mbps maximum (incl. video bit rate and audio bit rate) MP3 (MPEG-1/2 Layer 3), MPEG-1 (Layer 2), AC3 (Dolby D) See table below for audio specifications 2ch for MP3/MPEG-1, 5.1ch for AC3 Audio specifications for file formats.avi and.divx Format khz kbps Audio format Video format mp3, wma, aac, m4a divx, avi, asf MPEG-1 Layer * Option/accessory, for more information, see Introduction.

 Up to 384 kbs (incl.")
49 AUDIO AND MEDIA Format khz kbps MPEG-2 Layer 3 (MP3) MPEG-1 Layer 3 (MP3) A A A AC A Does not apply to 144 kbps. Technical data for file format.asf For the file to be played back, the following criteria must be met: Image size Video frame rate Total capacity (total bit rate) 32x32-720x576 pixels Up to 30 fps Audio format ITU-T G.726 Audio channels (ch) Up to 384 kbs (incl. video bit rate and audio bit rate) 1ch Stereo not supported Audio sampling rate Audio bit rate 8 khz 16, 24, 32 or 40 kbps (for 8 khz sampling) Playback and navigation of CD/DVD* disc (p. 41) Playback and navigation of DVD* video discs (p. 44) Playback and navigation of burned discs with audio/video files* (p. 42) Playback and navigation of external audio source* (p. 49) External audio source via AUX/USB* input An external audio source, e.g. an ipod or MP3 player, can be connected (p. 48) to the audio system. An audio source connected to the USB input can be operated 16 using the car's audio controls. A device connected via the AUX input cannot be controlled via the car. There is a recess in the right-hand rear edge of the tunnel console where cables can be routed so that the hatch can be closed without cables being pinched. An ipod or MP3 player with rechargeable batteries is recharged (when the ignition is on or the engine is running) if the device is plugged into the USB connection. 16 Only applies to the media source connected via the USB connection. }} * Option/accessory, for more information, see Introduction. 47


50 AUDIO AND MEDIA USB memory To facilitate the use of a USB memory stick, only store music files on it. It takes a lot longer for the system to load storage media that contains anything other than compatible music files. NOTE The system supports mobile media compliant with USB 2.0 and the FAT32 file system and can handle 1000 folders with a maximum of 254 subfolders/files in every folder. The top level, which can handle up to 1000 subfolders/files, is an exception to this. NOTE When using a longer model USB memory stick the use of a USB adapter cable is recommended. This is to avoid mechanical wear to the USB input and the connected USB memory stick. USB hub It is possible to connect a USB hub to the USB connection and thereby connect multiple USB devices simultaneously. USB device selection is carried out in the normal view for the USB source by pressing OK/MENU and then selecting Select USB device. MP3 player Many MP3 players have their own file systems that are not supported by the audio system. For use in the system, an MP3 player must be set in USB Removable device/ Mass Storage Device mode. ipod An ipod is charged and supplied with power by the USB connection via the player's connection cable. NOTE The system only supports the playback of audio files from ipod. NOTE When an ipod is used as audio source, the car's infotainment system has a menu structure that is similar to the ipod player's own menu structure. Playback and navigation of external audio source* (p. 49) Setting the audio volume for external audio source (p. 50) Connecting an external audio source via AUX/USB* input An external audio source, e.g. an ipod or MP3 player, can be connected to the audio system via any of the connections in the centre console. Connection points for external audio sources. To connect the audio source: 1. In the normal view for the media source, press MEDIA, turn TUNE to the desired audio source USB, ipod or AUX and press OK/MENU. > If USB is selected then Connect USB is shown in the screen. 2. Connect your audio source to one of the connections in the centre console's storage compartment (see previous illustration). 48 * Option/accessory, for more information, see Introduction.
51 AUDIO AND MEDIA The text Reading USB is shown in the screen when the system is loading the storage media's file structure. Depending on the file structure and number of files there may be some delay before loading is finished. NOTE The system supports most ipod models produced in 2005 or later. NOTE To prevent damage to the USB connection, this is shut off if the USB connection is short-circuited or if a connected USB unit is taking too much power (this may happen if the unit connected does not meet the USB standard). The USB connection is reactivated automatically the next time the ignition is turned on, unless the fault persists. External audio source via AUX/USB* input (p. 47) Playback and navigation of external audio source* (p. 49) Playback and navigation of external audio source* Playback and navigation of external audio source 17. For basic information on playback and navigation, see Operating the system. See below for a more detailed description. Audio files have the symbol, video files* have the symbol and folders have the symbol. See Compatible file formats (p. 46) for information about file formats that are supported by the media player. When playback of a file is complete the playback of the other files (of the same type) in that particular folder continues. Change 18 of folder takes place automatically when all the files in the current folder have been played back. The system automatically detects and changes setting when a device containing only audio files or only video files is connected to the USB port and then it plays back these files. However, the system does not change setting if a device containing a mixture of audio and video files is connected to the USB port, but instead the player continues to play back the previous file type. Search function 17 The keypad on the control panel in the centre console can be used to find a filename in the current folder. The search function is accessed either by turning TUNE (to access the folder structure) or by pressing one of the letter keys. As a letter or character in a search string is entered you get closer to your search target. After a few seconds the search results are shown on the screen. Start playback of a file by pressing OK/MENU. Repeat folder 19 This function makes it possible to play files in a folder over and over again. When the last file has been played out, playback of the first file starts again. 1. Press OK/MENU 2. Turn TUNE to Repeat folder 3. Press OK/MENU to activate/deactivate the function. Fast forward/reverse For information, see Fast forward/rewind (p. 43). 17 Only applies to USB and ipod. 18 If Repeat folder is activated then this does not take place. 19 Only applies to USB. }} * Option/accessory, for more information, see Introduction. 49
52 AUDIO AND MEDIA Pause When the volume is reduced entirely or MUTE is pressed, the media player is paused. When the volume is increased or MUTE is pressed again, the media player starts. It is also possible to pause via the menu system 20 by pressing OK/MENU, selecting USB MENU and then Play/Pause. NOTE A video film is only shown when the car is stationary. When the car is moving at a speed of over about 8 km/h no picture is shown and No visual media available while driving appears on the display screen, although the audio is heard during this time. The picture is shown again as soon as the car's speed falls below about 6 km/h. Setting the audio volume for external audio source Set the volume for an external audio source (p. 47). If the volume is too high or too low then the quality of the sound may deteriorate. If an external audio source (e.g. an MP3 player or ipod ) is connected to the AUX input then the audio source that is connected can have a different volume than the audio system's internal volume (e.g. radio). Correct this by adjusting the volume of the input: 1. In the normal view for the media source, press the MEDIA button and turn TUNE to AUX and wait a few seconds or press OK/MENU. 2. Press OK/MENU and then turn TUNE to AUX input volume. Confirm with OK/ MENU. Audio and media - advanced audio settings (p. 27) Connecting an external audio source via AUX/USB* input (p. 48) External audio source via AUX/USB* input (p. 47) Scan disc track or audio file (p. 43) Random selection of disc track or audio file (p. 44) DivX Video On Demand* (p. 45) Picture settings* (p. 46) 3. Turn TUNE to adjust the volume for the AUX input. NOTE If the external audio source's volume is too high or too low, the quality of the sound may deteriorate. The audio quality may also be impaired if the player is charged while the infotainment system is in AUX mode. In which case, avoid charging the player via the 12 V socket. 20 Does not apply to ipod 50 * Option/accessory, for more information, see Introduction.
.")
53 AUDIO AND MEDIA Media Bluetooth * The car's media player is equipped with Bluetooth and can wirelessly play streaming audio files from external devices with Bluetooth, such as mobile phones and PDAs. Media Bluetooth functions, controls overview. The device must first be registered and connected to the car (p. 52). Navigation and control of the audio can be carried out via the centre console buttons or via the steering wheel keypad*. In some external devices it is also possible to change tracks from the device. To play back the audio the car's media player must first be set in Bluetooth mode. When a mobile phone is connected to the car, it is also possible to remotely control a selection of the mobile phone's functions, see Bluetooth handsfree phone* (p. 55). Switch between the main sources TEL and MEDIA to operate each one's functions. NOTE The Bluetooth media player must support the Audio/Video Remote Control Profile (AVRCP) and Advanced Audio Distribution Profile (A2DP). The player should use AVRCP version 1.3, A2DP 1.2. Otherwise some functions may not work. Not all mobile phones and external media players available in the market are fully compatible with the Bluetooth function in the car's media player. Volvo recommends that you contact an authorised Volvo dealer for information on compatible phones and external media players. NOTE The car's media player can only play the audio files via the Bluetooth function. Scan disc track or audio file (p. 43) Random selection of disc track or audio file (p. 44) Connecting and disconnecting a Bluetooth device* The car is equipped with Bluetooth and can wirelessly communicate with other Bluetooth devices after registration and connection (p. 52). A maximum of ten Bluetooth devices can be registered. Registration is performed once per device. After registration the device no longer needs to be activated as visible/ searchable. When the Bluetooth function is active and the last device connected is in range it is connected automatically to the car. When the car searches for the last device connected its name is shown in the display screen. To connect to another device, press EXIT and select to change device (p. 53). When the Bluetooth device is out of range of the car it is automatically disconnected. It is also possible to manually disconnect (p. 54) a device. To deregister a Bluetooth device from the car, select Removing a Bluetooth device* (p. 55). The car will then not locate the device automatically. It is possible to have two Bluetooth devices connected simultaneously. One phone and one media device, which it is possible to switch between (p. 53). It is also possible to call with the phone and simultaneously stream audio files. }} * Option/accessory, for more information, see Introduction. 51

54 AUDIO AND MEDIA Media Bluetooth * (p. 51) Bluetooth handsfree phone* (p. 55) Registering a Bluetooth device* It is possible to have two Bluetooth devices connected simultaneously. One phone and one media device, which it is possible to switch between. It is also possible to call with the phone and simultaneously stream audio files. There are two possible ways of connecting devices, either search for the external device from the car, or search for the car from the external device. If one option does not work then try with the other. If you are not already in the normal view for the phone, press TEL in the centre console. A maximum of ten Bluetooth devices can be registered. Registration is performed once per device. After registration the device no longer needs to be activated as visible/ searchable. NOTE If the phone's operating system is updated then it is possible that the registration of the phone is interrupted. In which case, disconnect the phone, see Removing a Bluetooth device* (p. 55) and then reconnect it. Connecting an external device takes place in different ways depending on whether or not the device has been connected previously. The connection options below presume that this is the first time the device is being connected (registered) and that no other device is connected. The connection options show the connection of a phone. Connecting a media device (p. 51) is performed in the same way, but starting from the main source MEDIA. Example of normal view for the phone. Alternative 1 - search for the external device via the car's menu system 1. Make the external device searchable/visible via Bluetooth, see the external device's manual or 2. Press OK/MENU and follow the instructions on the car's display screen. > The external device is now connected and can be controlled from the car. Connection failed, press EXIT twice and connect in accordance with Alternative * Option/accessory, for more information, see Introduction.
55 AUDIO AND MEDIA Alternative 2 - Search for the car with the Bluetooth function of the external device 1. Make the car searchable/visible via Bluetooth. Turn TUNE to Phone settings, confirm with OK/MENU, select Discoverable and confirm with OK/MENU. 2. Select My Volvo Car on the external device's screen and follow the instructions. 3. Enter an optional PIN code into the external device, then select the option to connect. 4. Press OK/MENU and then enter the same PIN code via the car's keypad in the centre console. When the external device is connected, the external device's Bluetooth name is shown in the car's display screen and the device can be controlled from the car. Connecting and disconnecting a Bluetooth device* (p. 51) Automatic connection of Bluetooth device* When a Bluetooth device is registered (p. 52) in the car the last external device connected is connected automatically when it is within range. When the Bluetooth function is active and the last device connected is in range it is connected automatically. When the car searches for the last device connected its name is shown in the display screen. If the last connected device is not available then the system will try to connect an earlier device. To connect to another device, press EXIT, select to connect a new device (p. 52) or change to another already registered device (p. 53). Connecting and disconnecting a Bluetooth device* (p. 51) Changing to another Bluetooth device* It is possible to change from a connected device to another one if there are several devices in the car. The device must first have been registered (p. 52) to the car. Changing media device 1. Check that the external device is searchable/visible via Bluetooth, see the manual for the external device. 2. In the normal view for the Bluetooth media source, press OK/MENU and select Change device. > The car searches for previously connected devices. The external devices detected are specified with their respective Bluetooth name in the screen. 3. Select the device to be connected. > Connection of the external device takes place. Changing phone 1. Check that the external device is searchable/visible via Bluetooth, see the manual for the external device. }} * Option/accessory, for more information, see Introduction. 53
56 AUDIO AND MEDIA 2. In the normal view for the phone source, press OK/MENU and select Change phone. > The car searches for previously connected devices. The external devices detected are specified with their respective Bluetooth name in the screen. 3. Select the device to be connected. > Connection of the external device takes place. Connecting and disconnecting a Bluetooth device* (p. 51) Disconnecting the Bluetooth device* When the Bluetooth device is out of range of the car it is automatically disconnected. It is also possible to disconnect a phone manually. When the mobile phone has been disconnected an ongoing call can be continued by using the mobile phone's built-in microphone and speaker. The handsfree function is deactivated when the engine is switched off and the door is opened. If you want to deregister a Bluetooth device from the car, select Remove Bluetooth device (p. 55). The car will then not locate the device automatically. Manual disconnection of phone The phone can be manually disconnected in the normal view for the phone source by pressing OK/MENU and then selecting Disconnect phone. Connecting and disconnecting a Bluetooth device* (p. 51) Media Bluetooth * (p. 51) Bluetooth handsfree phone* (p. 55) NOTE Even when your mobile phone has been manually disconnected, some mobile phones may automatically couple up to the last handsfree unit connected, e.g. when a new call begins. 54 * Option/accessory, for more information, see Introduction.

57 AUDIO AND MEDIA Removing a Bluetooth device* If you do not want a Bluetooth device registered to the car any longer then it is possible to remove (deregister) it from the car. The car will then not locate the device automatically. Removing a media device In the normal view for the Bluetooth media source, press OK/MENU and select Remove Bluetooth device. Turn TUNE to select the device to be removed, confirm with OK/ MENU. Removing a phone In the normal view for the phone source, press OK/MENU and select Remove Bluetooth device. Turn TUNE to select the device to be removed, confirm with OK/ MENU. Connecting and disconnecting a Bluetooth device* (p. 51) Media Bluetooth * (p. 51) Bluetooth handsfree phone* (p. 55) Bluetooth handsfree phone* A mobile phone equipped with Bluetooth can be connected wirelessly to the car. Phone functions, controls overview. The device must first be registered and connected to the car (p. 52). The audio and media system acts as handsfree, with the facility to remotely control a selection of the mobile phone's functions. The mobile phone can be operated by its own keys irrespective of whether or not it is connected. When a mobile phone is connected to the car, it is also possible to stream audio files from the phone or another Bluetooth -connected media device, see Media Bluetooth * (p. 51). Switch between the main sources TEL and MEDIA to operate each one's functions. NOTE Only a selection of mobile phones are fully compatible with the handsfree function. Volvo recommends that you seek assistance from an authorised Volvo dealer for information on compatible phones. Activate A short press on TEL activates/searches last connected phone. If a phone is already connected, and TEL is pressed, a shortcut menu is shown with commonly used menu options for the phone. The symbol indicates that a phone is connected. To call 1. Make sure that the symbol appears at the top of the screen and that the handsfree function is in phone mode. 2. Dial either the desired number or the speed dial number (p. 62). Or in normal view turn TUNE to the right to access the phone book, and to the left for the call register for all calls. For information on the phone book, see Phone book* (p. 58). 3. Press OK/MENU. The call is interrupted with EXIT. }} * Option/accessory, for more information, see Introduction. 55
 Bluetooth handsfree phone* - overview System overview for Bluetooth handsfree phone. Making and receiving calls* Functions for handling phone calls.")
58 AUDIO AND MEDIA Connecting and disconnecting a Bluetooth device* (p. 51) Making and receiving calls* (p. 56) Bluetooth handsfree phone* - audio settings (p. 57) Bluetooth * version information (p. 58) Bluetooth handsfree phone* - overview System overview for Bluetooth handsfree phone. Making and receiving calls* Functions for handling phone calls. Incoming call Press OK/MENU to answer the call, even if the audio system is in e.g. RADIO or MEDIA mode. Refuse or end with EXIT. Automatic answer The automatic answer function means that calls are accepted automatically. To activate/deactivate, in the normal view for the phone source, press OK/MENU and select Call options Auto answer. System overview Mobile phone Microphone Steering wheel keypad Centre console control panel Connecting and disconnecting a Bluetooth device* (p. 51) In call menu In the normal view for the phone source, one press on OK/MENU during the current call gives access to the following functions: Mute - audio system microphone is muted. Mobile phone - the call is transferred from handsfree to the mobile phone. For some mobile phones the connection is interrupted. This is normal. The handsfree function asks if you want to reconnect. Dial number - option to call a third party using the number keys (current call set in standby). 56 * Option/accessory, for more information, see Introduction.
59 AUDIO AND MEDIA Call lists The call lists are copied to the handsfree function at each new connection and are then updated during the connection. In normal view, turn to the left with TUNE to see the call register for All calls. In the normal view for the phone source, press OK/MENU and select All calls to view all call registers: All calls Missed calls Answered calls Dialled calls Call duration NOTE Certain mobile phones show a list of the last dialled numbers in reverse order. Voice mailbox A speed dial number for the voice mailbox can be programmed in the normal view for the phone source, and then accessed later via a long press on 1. The voice mailbox number is changed in normal view for the phone source by pressing OK/MENU and selecting Call options Voic number Change number. If there is no number stored then this menu can be reached with one long press on 1. Bluetooth handsfree phone* (p. 55) Bluetooth handsfree phone* - audio settings (p. 57) Phone book* (p. 58) Bluetooth handsfree phone* - audio settings It is possible to adjust the call volume, audio system volume and ring signal volume, and change the ring tone. Phone call volume The phone call volume can only be changed during a call. Use the steering wheel keypad* or turn the VOL control. Audio system volume Providing there is no ongoing call taking place, the audio system volume is controlled in the normal way by turning VOL. If an audio source is active during an incoming call then it can be muted automatically. To activate/deactivate, in the normal view for the phone source, press OK/MENU and select Phone settings Sounds and volume Mute radio/media. Ring volume In the normal view for the phone source, press OK/MENU and select Phone settings Sounds and volume Ring volume. Adjust by turning VOL, press OK/MENU to hear the audio volume and press EXIT to save. Ring signals The built-in ring signals for the handsfree function can be selected in the normal view }} * Option/accessory, for more information, see Introduction. 57
60 AUDIO AND MEDIA for the phone source by pressing OK/MENU and then selecting Phone settings Sounds and volume Ring signals Ring signal 1 etc. NOTE For some mobile phones, the ringtone on the phone connected will not be switched off when one of the inbuilt signals for the handsfree system is used. In order to select the connected phone's ring signal 21, in the normal view for the phone source, press OK/MENU and then select Phone settings Sounds and volume Ring signals Mobile phone ring signal Bluetooth handsfree phone* (p. 55) Bluetooth * version information Show the car's current Bluetooth version. The car's current Bluetooth version can be seen from the normal view in the main sources MEDIA or TEL: Press OK/MENU and select Bluetooth software version in car. Press OK/MENU and select Phone settings Bluetooth software version in car. Bluetooth handsfree phone* (p. 55) Media Bluetooth * (p. 51) Phone book* There are two phone books. These are combined in the car and are shown as a single phone book. The car downloads the connected mobile phone's phone book and only shows this phone book when the mobile phone it was downloaded from is connected. The car also has a built-in phone book. This contains all the contacts stored in the car irrespective of which phone was connected when saving them. These contacts are visible for all users, regardless of the mobile phone that is connected to the car. If a contact is saved in the car then the symbol is shown in front of the contact in the phone book. NOTE Changes made from the car to a record in the mobile phone's telephone book will result in a new record in the car's telephone book, i.e. changes will not be saved to the phone. From the car, this will now look like you have double records, with different icons. Note also that when a shortcut number is saved or a change to a contact is made, this will result in a new record in the car's phone book. All use of the phone book requires that the symbol appears at the top of the 21 Not supported by all mobile phones. 58 * Option/accessory, for more information, see Introduction.
61 AUDIO AND MEDIA screen and that the handsfree function is in phone mode. Copy the mobile's phone book to the car's phone book The audio and media system stores a copy of each registered mobile phone's phone book. The phone book can be copied automatically to the audio and media system during each connection. To activate/deactivate the function, in the normal view for the phone source, press OK/MENU and select Phone settings Download phone book. If the phone book contains a ringing caller's contact information then this is shown in the screen. Copy individual contact to the car's phone book There is also the option to copy an individual contact from the mobile phone's phone book to the car. 1. In the normal view for the phone source, press OK/MENU and select Phone book Search contact. 2. Select the contact and press OK/MENU. 3. Press OK/MENU and then select Options Copy to car memory. > The symbol is shown in front of the saved contact in the car's phone book and the contact is saved. Bluetooth handsfree phone* (p. 55) Phone book* - speed dial numbers (p. 62) Phone book* - receiving a vcard (p. 63) Phone book* - memory status (p. 63) Phone book* - clearing (p. 63) Phone book* - quick search for contacts In the normal view for the phone source, turn TUNE to the right to show a list of contacts. Turn TUNE to select and press OK/MENU to call. Under the name of the contact is the phone number that is selected by default. If the symbol > appears to the right of the contact then there are several phone numbers stored for the contact. Press OK/MENU to show the numbers. Change and dial a number other than that selected by default by turning TUNE. Press OK/MENU to dial. Search in the list of contacts by using the centre console's keypad to key in the start of the contact's name. For the function of the buttons, see Phone book* - character table keypad in centre console (p. 60). The list of contacts can also be accessed from normal view by pressing and holding the button on the centre console's keypad with the letter that the contact searched for starts with. For example, a long press on the button for 6 gives instant access to that part of the list where the contacts with the letter M are located. Bluetooth handsfree phone* (p. 55) * Option/accessory, for more information, see Introduction. 59
. Space., -?")
62 AUDIO AND MEDIA Phone book* - character table keypad in centre console Character table of possible characters for use in the phone book. Key Function Key Function + 0 p w # * Phone book* - searching for contacts Searching for contacts in the phone book (p. 58). Space., : ; / ( ) 1 A B C Å Ä Æ À Ç 2 D E F È Δ 3 Bluetooth handsfree phone* (p. 55) Phone book* (p. 58) G H I Ì 4 J K L 5 M N O Κ Ø Ñ Ò 6 P Q R S Τ 7 T U V Ü Ù 8 W X Y Z 9 Shift between upper and lower case letter. Search contacts using the text wheel. Character list Changing the input mode (see following table) Phone book To search for or edit a contact, in the normal view for the phone source, press OK/MENU and select Phone book Search. NOTE There is no text wheel for High Performance, so TUNE cannot be used there to input characters: only the digit and letter buttons on the control panel in the centre console can be used for this. 60 * Option/accessory, for more information, see Introduction.
63 AUDIO AND MEDIA 1. Turn TUNE to the desired letter, press OK/MENU to confirm. The number and letter buttons on the control panel in the centre console can also be used. 2. Continue with the next letter and so on. The result of the search is shown in the phone book (3). 3. To change the input mode to numbers or special characters, or to go to the phone book, turn TUNE to one of the options (see explanation in the table below) in the list for changing the input mode (2), press OK/MENU. pressing the number key to the desired letter and then release. Continue with the next letter and so on. When a button is depressed the entry is confirmed when another button is depressed. To enter a number, hold in the corresponding number key. Bluetooth handsfree phone* (p. 55) Phone book* - new contact Create new contact in the phone book. 123/ABC More Change between letters and numbers with OK/MENU. Change to special characters with OK/MENU. Leads to the phone book (3). Turn TUNE to select a contact, press OK/MENU to see the saved numbers and other information. A short press on EXIT deletes an input character. A long press on EXIT will clear all entered characters. By pressing a number key in the centre console when the text wheel is shown (see previous illustration), a new character list (1) is shown in the screen. Continue repeatedly Entering letters for New contact. Changing the input mode (see following table). Input field. In the normal view for the phone source, new contacts can be added by pressing OK/MENU and then selecting Phone book New contact. NOTE There is no text wheel for High Performance, so TUNE cannot be used there to input characters: only the digit and letter buttons on the control panel in the centre console can be used for this. }} * Option/accessory, for more information, see Introduction. 61
64 AUDIO AND MEDIA 1. When the Name row is selected, press OK/MENU to reach the input mode (illustration above). 2. Turn TUNE to the desired letter, press OK/MENU to confirm. The number and letter buttons on the control panel in the centre console can also be used. 3. Continue with the next letter and so on. The name entered is shown in the input field (2) in the screen. 4. To change the input mode to numbers, special characters, change between uppercase/lowercase letters, etc., turn TUNE to one of the options (see explanation in the following table) in the list (1) and then press OK/MENU. When the name has been fully entered, select OK in the list on the display screen (1) and press OK/MENU. Now continue with the telephone number in the same way as above. When the telephone number has been entered, press OK/MENU and select a telephone number type (Mobile phone, Home, Work or General). Press OK/MENU to confirm. When all details have been filled in, select Save contact in the menu to save the contact. 123/ABC More OK Change between letters and numbers with OK/MENU. Change to special characters with OK/MENU. Save and go back to Add contact with OK/MENU. Change between uppercase and lowercase letters with OK/ MENU. Press OK/MENU, the cursor moves to the input field (2) at the top of the display screen. The cursor can now be moved, with TUNE, to the appropriate place to e.g. insert new letters or delete with EXIT. To be able to insert new letters first go back to the input mode, by pressing OK/MENU. Bluetooth handsfree phone* (p. 55) Phone book* (p. 58) Phone book* - speed dial numbers Store as speed dial number in the phone book (p. 58) in order to easily dial a number or a contact. In the normal view for the phone source, speed dial numbers can be added by pressing OK/MENU and then selecting Phone menu Phone book Speed dial. Dialling with speed dial numbers can be performed in phone mode using the number keys on the keypad in the centre console, by pressing a number key and then pressing OK/MENU. If there is no contact stored on the speed dial number then an option is shown to save a contact to the selected speed dial number. Bluetooth handsfree phone* (p. 55) 62 * Option/accessory, for more information, see Introduction.
65 AUDIO AND MEDIA Phone book* - receiving a vcard Receiving electronic business cards (vcard) to the car's phone book (p. 58). It is possible to receive a vcard to the car's phone book from other mobile phones (other than the one currently connected to the car). In order to allow this the car is set to visible mode for Bluetooth. The function is activated in the normal view for the phone source by pressing OK/MENU and then selecting Phone book Receive vcard. Bluetooth handsfree phone* (p. 55) Phone book* - memory status Show phone book (p. 58) memory status. The memory status of the car's phone book and the connected mobile phone's phone book can be viewed in the normal view for the phone source by pressing OK/MENU and then selecting Phone book Memory status. Bluetooth handsfree phone* (p. 55) Phone book* - clearing Clear the car's built-in phone book (p. 58). The car's phone book can be deleted, this is carried out in the normal view for the phone source by pressing OK/MENU and then selecting Phone book Clear phone book. NOTE Deleting the car's telephone book only deletes contacts in the car's telephone book. Contacts in the mobile phone's phone book are not deleted. Bluetooth handsfree phone* (p. 55) * Option/accessory, for more information, see Introduction. 63
66 AUDIO AND MEDIA TV* The TV picture is only shown when the car is stationary. When the car is moving at a speed over approx. 6 km/h the picture disappears, although the audio is heard during this time. The picture reappears when the car has stopped. TV functions, control overview. For basic operation, see Audio and media - operating the system. NOTE This system only supports TV broadcasts in the countries that broadcast in MPEG-2 or MPEG-4 format and follow the DVB-T standard. The system does not support analogue broadcasts. NOTE The TV picture is only shown when the car is stationary. When the car is moving at a speed over about 6 km/h the picture disappears, No visual media available while driving appears on the display screen, although the audio is heard during this time. The picture reappears when the car has stopped. Cars with RSE do not shut off the rear screens. NOTE The reception is dependent both on how good the signal strength and signal quality are. The transmission may be disturbed by various factors such as tall buildings or the TV transmitter being far away. Coverage level can also vary depending on where in the country you are located. IMPORTANT A TV licence is required for this product in some countries. Watch TV In the normal view for the media source, press MEDIA, turn TUNE to TV and then press OK/MENU. > A search starts and after a short while the most recently used channel is shown. Changing channel It is possible to change channel as follows: Turn TUNE, a list of all available channels in the area is shown. If any of these channels is already saved as a preset then its preset number is shown to the right of the channel name. Turn TUNE to the required channel and press OK/MENU. By pressing the preset buttons (0-9). Via a short press on the / buttons the next available channel in the area is shown. NOTE If the car has been moved within the country, for example, from one city to another, it is not certain that the presets are available at the new location as the frequency range may have changed. Then do another search and save a new preset list; see Save available TV channels as presets (p. 66). NOTE If no reception is available on the preset buttons, it may be because the car is at a location other than where the scan of TV channels was run, for example, if the car was driven from Germany to France. A new selection of country and a new search may then need to be carried out. 64 * Option/accessory, for more information, see Introduction.
67 AUDIO AND MEDIA Teletext* (p. 67) Picture settings* (p. 46) Reception of TV* channel is lost. (p. 67) Menu overview - TV* (p. 77) Searching TV* channels/preset list After a search of TV channels the available channels are saved in a preset list. 1. In the normal view for the TV source, press OK/MENU. 2. Turn TUNE to TV menu and press OK/ MENU. 3. Turn TUNE to Select country and press OK/MENU. > If one or more countries have previously been selected then they are shown in a list. 4. Turn TUNE to either Other countries or one of the previously selected countries. Press OK/MENU. > A list of all available countries is shown. 5. Turn TUNE to the desired country (e.g. Sweden) and press OK/MENU. > An automatic scan for available TV channels starts, this scan takes a little while. During this time the figure for each channel found and added as a preset is shown. When the scan is complete a message is shown and the picture is shown. A preset list (max. 30 presets) has now been created and is available. To change channel, see Changing channel (p. 64). The scan and preset storage can be cancelled with EXIT. * Option/accessory, for more information, see Introduction. 65
68 AUDIO AND MEDIA TV* - channel management The preset list can be edited. You can change the order of the channels that are shown in the preset list. A TV channel can have more than one place in the preset list. The TV channel positions can also vary in the preset list. To change the order in the preset list, in the normal view for the TV source, press OK/MENU and select Reorganise presets. 1. Turn TUNE to the channel you want to move in the list and confirm with OK/MENU. > The selected channel is highlighted. 2. Turn TUNE to the new location in the list and confirm with OK/MENU. > The channels change places with each other. After the preset channels (max. 30) come all the other channels available in the area. It is possible to move a channel up to a place in the preset list. Save the available TV channels as presets If the car has been moved within the country, for example, from one city to another, it is not certain that the presets are available at the new location as the frequency range may have changed. In which case, carry out another scan and save a new preset list. 1. In the normal view for the TV source, press OK/MENU. 2. Turn TUNE to TV menu and press OK/MENU. 3. Turn TUNE to Autostore and press OK/MENU. > An automatic scan for available TV channels starts, this scan takes a little while. During this time the figure for each channel found and added as a preset is shown. When the scan is complete a message is shown and the picture is shown. A preset list (max. 30 presets) has now been created and is available. To change channel, see Changing channel (p. 64). Scanning the TV channels This function automatically scans through the frequency range for all channels available in the area where you are. When a channel is found, it is shown for approx. 10 seconds before scanning is resumed. Scanning is stopped with EXIT, then the channel that you just watched continues to be shown. Scanning does not affect the preset list. Activate scanning in the normal view for the TV source by pressing OK/MENU and then selecting Scan. TV* (p. 64) Searching TV* channels/preset list (p. 65) 66 * Option/accessory, for more information, see Introduction.
69 AUDIO AND MEDIA Information about the current TV* programme Press the INFO button in order to display information about the current programme, the next programme and its start time. If the INFO button is pressed once more then additional information on the current programme can sometimes be displayed, such as start and end times and a brief description of the current programme. To return to the TV picture, wait several seconds or press EXIT. Teletext* It is possible to look at Teletext. Proceed as follows: 1. Press the button on the remote control. 2. Enter the page number (3 digits) with the number keys (0-9) to select page. > The page is shown automatically. Enter new page number, or press the remote control buttons / to go to the next page. Return to TV screen with EXIT or by pressing the button on the remote control. It is also possible to control the teletext with the coloured buttons on the remote control. TV* (p. 64) Remote control* (p. 68) Reception of TV* channel is lost. If the reception for the TV channel that is being shown disappears then the picture will freeze. When the reception returns the display starts again. If the reception for the TV channel that is being shown disappears then the picture will freeze. Shortly after this a message appears informing that the reception has been lost for the current TV channel, and a new search for the channel continues. When the reception returns the display of the TV channel starts immediately. It is possible to change channel at any time when the message is shown. If the message Reception lost, searching is shown then this is because the system has detected that there is no reception for all TV channels. One possible reason may be that a border has been crossed and that the system is set to the wrong country. In which case, change to the right country in accordance with Searching TV* channels/preset list (p. 65). TV* (p. 64) * Option/accessory, for more information, see Introduction. 67

70 AUDIO AND MEDIA Remote control* The remote control can be used for all functions in the audio and media system. The remote control's buttons have the same functions as the buttons in the centre console or steering wheel keypad*. Then aim the remote control at the IR receiver, which is located to the right of the INFO button in the centre console. WARNING Keep loose objects such as mobile phones, cameras, remote controls for accessories, etc. in the glove compartment or other compartments. Otherwise they may injure people in the car in the event of sudden braking or a collision. NOTE Do not expose the remote control to direct sunlight (e.g. on the instrument panel) - otherwise problems may arise with the batteries. Corresponds to TUNE in the centre console. When using the remote control, first press the remote control's button to position F. 68 * Option/accessory, for more information, see Introduction.
71 AUDIO AND MEDIA Remote control* - functions Possible functions to be controlled using the remote control. Key Function Change between: L = Rear left display screen* F = Front display screen R = Rear right display screen* Change to navigation* Change to radio source (e.g. FM1) Key Function To previous, cancels function, deletes input characters Navigate up/down Navigate right/left Confirm selection or go to the menu system for the selected source Volume, decrease Volume, increase Key Function Subtitles, selection of language for text Teletext*, On/Off Change to media source (Disc, TV* etc.) Change to Bluetooth handsfree* 0-9 Preset channels, number and letter input Shortcuts for favourite setting Scroll/fast rewind, change track/ song Play/pause Stop Scroll/fast forward, change track/song Information about the current programme, song, etc. Also used when there is more information available than can be shown in the display screen Selection of language for soundtrack Menu * Option/accessory, for more information, see Introduction. 69

72 AUDIO AND MEDIA Remote control* - battery replacement How to replace the batteries in the remote control for the audio and media system. NOTE Battery life is normally 1-4 years and depends on how much the remote control is used. The remote control is powered by four batteries of the AA/LR6 type. Take along extra batteries for a long journey. NOTE Be sure to dispose of the exhausted batteries in an environmentally safe manner. Audio and media - menu overview Overview of possible options and settings in the audio and media system menus. RADIO AM (p. 71) 22 FM (p. 71) DAB (p. 72) MEDIA CD Audio (p. 72) CD/DVD Data (p. 73) DVD Video (p. 73) ipod (p. 74) USB (p. 74) Media Bluetooth (p. 75) AUX (p. 76) TV (p. 77) TEL Bluetooth handsfree (p. 76) 1. Push down the catch on the battery cover and slide the battery cover in the direction of the infrared lens. 2. Remove the used batteries, turn the new batteries in accordance with the symbols in the battery compartment and fit them. 3. Refit the cover. 70 * Option/accessory, for more information, see Introduction.
TABLE OF CONTENTS AUDIO AND MEDIA INTRODUCTION MY CAR
 SENSUS INFOTAINMENT VÄLKOMMEN! We hope you will enjoy many years of driving pleasure in your Volvo. The car has been designed for the safety and comfort of you and your passengers. Volvo is one of the
TABLE OF CONTENTS AUDIO AND MEDIA INTRODUCTION MY CAR
 SENSUS INFOTAINMENT VÄLKOMMEN! We hope you will enjoy many years of driving pleasure in your Volvo. The car has been designed for the safety and comfort of you and your passengers. Volvo is one of the
DEAR VOLVO OWNER THANK YOU FOR CHOOSING VOLVO
 WEB EDITION S ENSUS INFOTAINMENT DEAR VOLVO OWNER THANK YOU FOR CHOOSING VOLVO We hope you will enjoy many years of driving pleasure in your Volvo. The car has been designed for the safety and comfort
TABLE OF CONTENTS MY CAR INTRODUCTION AUDIO AND MEDIA
 SENSUS INFOTAINMENT VÄLKOMMEN! We hope you will enjoy many years of driving pleasure in your Volvo. The car has been designed for the safety and comfort of you and your passengers. Volvo is one of the
DEAR VOLVO OWNER THANK YOU FOR CHOOSING VOLVO
 WEB EDITION S ENSUS INFOTAINMENT DEAR VOLVO OWNER THANK YOU FOR CHOOSING VOLVO We hope you will enjoy many years of driving pleasure in your Volvo. The car has been designed for the safety and comfort
DEAR VOLVO OWNER THANK YOU FOR CHOOSING VOLVO
 WEB EDITION S ENSUS INFOTAINMENT DEAR VOLVO OWNER THANK YOU FOR CHOOSING VOLVO We hope you will enjoy many years of driving pleasure in your Volvo. The car has been designed for the safety and comfort
Infotainment Manual Model Year 2013 Edition: May 2012 TS 1686-A-13. VAUXHALL Vivaro
 Infotainment Manual Model Year 2013 Edition: May 2012 TS 1686-A-13 VAUXHALL Vivaro 0-1 Infotainment Manual Model Year 2013 Edition: May 2012 TS 1686-A-13 Contents Introduction... 2 Radio... 28 CD Player...
FORD TOURNEO CUSTOM / TRANSIT CUSTOM Audio System Owner's Manual
 FORD TOURNEO CUSTOM / TRANSIT CUSTOM Audio System Owner's Manual The information contained in this publication was correct at the time of going to print. In the interest of continuous development, we reserve
Quick GUIDE Web Edition
 RSE Quick GUIDE Web Edition REAR SEAT ENTERTAINMENT SYSTEM Your car is equipped with an exclusive multimedia system. The Rear Seat Entertainment system expands the normal audio system in the car with:
OPEL INSIGNIA. Infotainment System
 OPEL INSIGNIA Infotainment System Contents Introduction... 4 Radio... 28 CD Player... 44 AUX input... 50 USB port... 52 Digital picture frame... 56 Navigation... 59 Speech recognition... 104 Phone...
Opel Astra GTC Infotainment System
 Opel Astra GTC Infotainment System Contents Introduction... 4 Radio... 28 CD Player... 44 AUX input... 50 USB port... 52 Digital picture frame... 56 Navigation... 59 Speech recognition... 104 Phone...
AUDIO AND TELEMATICS GUIDE
 AUDIO AND TELEMATICS GUIDE On-line handbook line... CITROËN website, under "MyCITROËN". If the "MyCITROËN" function is not available on the CITROËN public address: http://service.citroen.com/ddb/ this
VOLVO AUDIO SYSTEM. Operating Instructions. Radio AM/FM/CD MP3/USB/iPod Delphi part number
 VOLVO AUDIO SYSTEM Operating Instructions Radio AM/FM/CD MP3/USB/iPod Delphi part number 2823960 Radio AM/FM/CD MP3/USB/iPod/Bluetooth Delphi part numbers 2823962, 2823964 2 Table of Contents Table of
Audio unit overview AUDIO UNIT OVERVIEW. Audio controls. WARNING Sustained exposure to high sound levels can damage your hearing.
 unit overview unit overview AUDIO UNIT OVERVIEW The Jaguar infotainment system contains radio, compact disc player and portable audio interface. Satellite radio and six-disc player are optional. WARNING
RW-50/15 User Manual
 RW50 User Manual Polaris 26/07/15 8:34 AM Page 1 RW-50/15 User Manual RW50 User Manual Polaris 26/07/15 8:34 AM Page 2-2 - RW50 User Manual Polaris 26/07/15 8:34 AM Page 3 Thank you for purchasing the
Controls and Operation 2-1
 2 Controls and Operation Controls and Operation 2-1 Steering Wheel Controls (The XJ and S-TYPE) (X-TYPE) Audio System Display Panel (in AM/FM mode) PTY TA Priority programme type selected Traffic announcement
AM/FM/USB CD/MP3 PLAYER WITH BLUETOOTH
 INSTALLATION NOTES AM/FM/USB CD/MP3 PLAYER WITH BLUETOOTH 1. Please read these installation and operation instructions before installation. 2. Make sure to connect all other wires before power connection.
OWNER'S MANUAL Infotainment Blues
 SIMPLY CLEVER OWNER'S MANUAL Infotainment Blues 6V0012720CB Preface This Owner's Manual is provided for the Infotainment Blues (hereinafter referred to only as a device). Please read this Owner's Manual
INSTRUCTION MANUAL K101R
 INSTRUCTION MANUAL K101R MP3/USB/AUX/BLUETOOTH/iPod CD PLAYER WITH AM/FM RADIO BEFORE USE Before operating the unit, please read this manual thoroughly and retain it for future reference 1. OPERATING INSTRUCTIONS
Audio System. Audio System. The in-dash CD changer holds up to six discs. You operate the CD changer with the same controls used. changer operation.
 Without Navigation System AM/FM/CD Changer For EX, EX-V6, and LX-V6 models Your Honda s audio system provides clear reception on both AM and FM bands, while the preset bars allow you to easily select your
2014 Cadillac Escalade Rear Seat Entertainment M
 2014 Cadillac Escalade Rear Seat Entertainment M Infotainment System...... 3 Rear Seat Infotainment.... 3 Rear Seat Entertainment (RSE) System....................... 3 Index..................... i-1 Rear
DAB/DAB+ Radio User Manual
 DAB/DAB+ Radio User Manual Quick Start Guide Press and hold the Power Button for more than 3 seconds to turn on the radio. The green power indicator will flash and then stay illuminates and start-up screen
Introduction MULTIMEDIA OWNER S MANUAL IMPORTANT INFORMATION ABOUT THIS MANUAL HOW TO READ THIS MANUAL SAFETY INSTRUCTION
 Introduction MULTIMEDIA OWNER S MANUAL IMPORTANT INFORMATION ABOUT THIS MANUAL HOW TO READ THIS MANUAL SAFETY INSTRUCTION TABLE OF CONTENTS 1 QUICK GUIDE 9 2 BASIC FUNCTION 15 3 AUDIO/VISUAL SYSTEM 43
YOU&Mii COLOUR CONNECTION Owner s manual
 YOU&Mii COLOUR CONNECTION Owner s manual About this manual This manual contains information, recommendations, advice and warnings related to your radio system. The other publications in the vehicle documentation
Honda Toyota Accord Venza Quick Start Guide
 Multimedia Navigation System Honda Pilot Quick Start Guide In-Dash Multi-Media / Navigation System Honda Toyota Accord Venza Quick Start Guide G System Features: Navigation Bluetooth Hands-Free ipod and
Contents. Precaution. Before installing this product. Precaution... Main Menu... Radio... Play DVD... USB/SD Important safety information
 USER MANUAL Thank you for buying this XTRONS product. Please read through these instructions so you will know how to operate this unit properly. After you have finished reading the instructions, keep this
OPERATION MANUAL MM1C25 DIGITAL AUDIO PLAYER AM/FM STEREO USB BLUETOOTH CAPABLE HEADPHONE OUTPUT
 OPERATION MANUAL MM1C25 DIGITAL AUDIO PLAYER AM/FM STEREO USB BLUETOOTH CAPABLE HEADPHONE OUTPUT CONTENTS CONTENTS. 1 CONTROL PANEL ILLUSTRATION 2 WIRE DIAGRAM 3 INSTALLATION.. 4 BASIC OPERATION... 5 RADIO
Contents. Precaution. Before installing this product. Precaution... Main Menu... Radio... Play DVD... USB/SD Important safety information
 USER MANUAL Thank you for buying this XTRONS product. Please read through these instructions so you will know how to operate this unit properly. After you have finished reading the instructions, keep this
Controls. Preset recall button Memo button Alarm 2 button
 RCR-9 GB Version 1 Content Controls... 2-4 Using the clock radio for the first time... 5-6 Operating your radio - Search tuning FM / AM... 7-8 Manual tuning - FM / AM... 9 Setting up the tuning step increment...
Steering wheel ADJUSTING THE STEERING WHEEL. Entry and exit mode
 Steering wheel ADJUSTING THE STEERING WHEEL E91122 WARNING Never adjust the steering wheel position whilst the vehicle is in motion. Doing so will reduce control of the vehicle and may cause unpredictable
DDR-36 中文 GB. Version 1
 DDR-36 中文 GB Version 1 Contents Controls... 2-5 Using the radio for the first time... 6 Operating your radio... 7 Selecting a station - DAB... 8 Secondary services - DAB... 8 Display modes DAB... 9 Finding
FUSION MS-NRX300 ENGLISH
 FUSION MS-NRX300 MARINE WIRED REMOTE OWNER S MANUAL ENGLISH FUSIONENTERTAINMENT.COM 2016 2017 Garmin Ltd. or its subsidiaries All rights reserved. Under the copyright laws, this manual may not be copied,
BLUETOOTH HALF HELMET
 BLUETOOTH HALF HELMET CLICK ANY SECTION TO BEGIN ABOUT THE HELMET BLUETOOTH MODULE PAIRING WITH DEVICES MOBILE PHONE USAGE STEREO MUSIC INTERCOM SETUP USING THE FM RADIO GENERAL SETTINGS LEGEND: REMOTE
Contents. Precaution. Before installing this product. Precaution... Main Menu... Radio... Play DVD... Important safety information USB/SD...
 USER MANUAL Thank you for buying this XTRONS product. Please read through these instructions so you will know how to operate this unit properly. After you have finished reading the instructions, keep this
Pilot. Technology Reference Guide
 Pilot 2 0 1 0 Technology Reference Guide Information Display/MID Information Display (models without navigation) Consists of several displays that provide you with useful information. Accessing Information
MEDIA SYSTEM PLUS NAVI SYSTEM NAVI SYSTEM PLUS Owner s manual
 MEDIA SYSTEM PLUS NAVI SYSTEM NAVI SYSTEM PLUS Owner s manual About this manual This manual contains information, recommendations, advice and warnings related to your radio system. The other publications
MEDIA SYSTEM PLUS NAVI SYSTEM NAVI SYSTEM PLUS LEON Owner s manual
 MEDIA SYSTEM PLUS NAVI SYSTEM NAVI SYSTEM PLUS LEON Owner s manual About this manual This manual contains information, recommendations, advice and warnings related to your radio system. The other publications
Media System 2.2. Owner s manual 5P JP. Inglés 5P JP (07.12) (GT9)
 (GT9)") Media System 2.2 Owner s manual Inglés 5P0012006JP (07.12) (GT9) 5P0012006JP Foreword This Instruction Manual and its corresponding supplements should be read carefully to familiarise yourself with your
Media System 2.2 Owner s manual Inglés 5P0012006JP (07.12) (GT9) 5P0012006JP Foreword This Instruction Manual and its corresponding supplements should be read carefully to familiarise yourself with your
FUSION MS-RA70/MS-RA70N
 FUSION MS-RA70/MS-RA70N M A R I N E E N T E R T A I N M E N T S Y S T E M O W N E R S M A N U A L ENGLISH FUSIONENTERTAINMENT.COM 2015 2016 Garmin Ltd. or its subsidiaries All rights reserved. Under the
Read the following pages to become familiar with the infotainment system features.
 xtooltipelement Service Information 2015 GMC Truck Terrain Chevrolet/GMC Equinox/Terrain/Terrain Denali Infotainment System GMNA-Localizing-U.S./Canada-7639744 Infotainment System Radio General Information
MEDIA SYSTEM TOUCH/COLOUR. Owner s manual
 MEDIA SYSTEM TOUCH/COLOUR Owner s manual About this manual This manual contains information, recommendations, advice and warnings related to your radio system. The other publications in the vehicle documentation
OPEL CORSA Infotainment Manual
 OPEL CORSA Infotainment Manual Contents IntelliLink... 5 CD 3.0 BT / R 3.0... 59 FlexDock... 101 IntelliLink Introduction... 6 Radio... 20 External devices... 30 Speech recognition... 42 Phone... 44
ROCKA MODEL: ROCKA PORTABLE DAB & FM RADIO USER MANUAL
 MODEL: PORTABLE DAB & FM RADIO USER MANUAL 1 2 Welcome Your Portable DAB Radio 2.1 In The Box 2.2 Top View 2.3 Side View 2.4 Rear View 3 Quick Setup 3.1 Connect Rocka to power supply 3.2 Power on Rocka
OPEL INSIGNIA Infotainment Manual
 OPEL INSIGNIA Infotainment Manual Contents Touch R700 IntelliLink / Navi 900 IntelliLink... 5 R300 Color / R400 Color... 87 Touch R700 IntelliLink / Navi 900 IntelliLink Introduction... 6 Basic operation...
MOBILE AUDIO SYSTEM PATVR14 USER MANUAL
 MOBILE AUDIO SYSTEM PATVR14 USER MANUAL CONTENTS Installation... 3 Mounting... 4 Wiring Connection... 5 Operation... 6 Location of the keys... 6 Power on/off the unit... 7 Main menu... 7 Setup... 7 Reset
Portable media PORTABLE MEDIA PORTABLE MEDIA CONNECTIONS
 PORTABLE MEDIA Do not adjust the auxiliary device or allow the device to distract the driver while the vehicle is moving. Driver distraction can lead to accidents causing serious injury or death. Auxiliary
Owner s Manual AWM910 JENSEN AWM910 COMPACT DISC PLAYER RADIO CD COMPACT MUSIC SYSTEM MUTE AUX BAND AUX IN PUSH PUSH PWR VOL ALARM T/F AUD SPK A SPK B
 AWM910 Owner s Manual COMPACT DISC PLAYER PUSH 1 2 3 4 5 6 RPT SCAN RDM H M PUSH PWR VOL ALARM SET ON/OFF EQ T/F AUD RADIO CD COMPACT MUSIC SYSTEM MUTE AUX BAND CD AUX IN A B A+B JENSEN AWM910 Thank You!
UVO SYSTEM USER'S MANUAL
 UVO SYSTEM USER'S MANUAL Congratulations on the Purchase of your new UVO system! Your new UVO system allows you to enjoy various audio and multimedia features through the main audio system. For the latest
WALLMOUNT Entertainment System
 Wiring Diagram AV IN AV OUT SUBWOOFER OUT HDMI JACK R R R L L L IR REMOTE JACK AUDIO IN ANTENNA WIRING CONNECTING SOCKET Specification GENERAL Supply Voltage Current Consumption Power Output Number of
Important Safety Notices DANGER AN IMPROPERLY LOCATED OR INSTALLED MONITOR CAN CAUSE DEATH OR SERIOUS BODILY INJURY
 Important Safety Notices DANGER AN IMPROPERLY LOCATED OR INSTALLED MONITOR CAN CAUSE DEATH OR SERIOUS BODILY INJURY READ THE FOLLOWING INFORMATION THOROUGHLY BEFORE INSTALLATION It is unlawful in most
OWNER S MANUAL G4-RM55OO
 OWNER S MANUAL G4-RM55OO INSTALLATION... 3-4 WIRING CONNECTION... 5 OPERATION... 6 LOCATION OF THE KEYS... 6 POWER ON/OFF THE UNIT... 7 MAIN MENU... 7 SETUP... 7 RESET FUNCTION... 9 SLIGHTFOG AFTER OPERATION...9
PA15-HON3. PA15-HON3 ipod to HONDA / ACURA car stereo interface with song title display PRELIMINARY OWNER'S MANUAL
 PA15-HON3 ipod to HONDA / ACURA car stereo interface with song title display PA15-HON3 ipod to HONDA / ACURA car stereo interface with song title display KEY FEATURES This adaptor connects an ipod, iphone,
TOCMR-OE100. Quick Start Guide
 TOCMR-OE100 Quick Start Guide Introduction Congratulations on your purchase of the TOCMR-OE100 Mobile Multimedia Receiver. Please read the instruction manual for this product before using. The documentation
OPEL ZAFIRA TOURER Infotainment Manual
 OPEL ZAFIRA TOURER Infotainment Manual Contents Navi 950/650 / CD 600... 5 CD 400plus (1)/400/300... 79 CD 400plus (2)... 131 Navi 950/650 / CD 600 Introduction... 6 Basic operation... 16 Radio... 23
Uconnect. 4.3/4.3S Owner s Manual Supplement
 Uconnect 4.3/4.3S Owner s Manual Supplement SECTION TABLE OF CONTENTS PAGE 1 SAFETY GUIDELINES...3 2 INTRODUCTION...5 3 RADIO MODE...9 4 DISC MODE...19 5 USBMODE...23 6 AUXMODE...27 7 BLUETOOTH MODE...29
OPEL ASTRA. Infotainment System
 OPEL ASTRA Infotainment System Contents Navi 950/650 / CD 600... 5 Navi 900/600 / CD 400plus/ 400/300... 75 Navi 950/650 / CD 600 Introduction... 6 Basic operation... 16 Radio... 24 CD Player... 30 External
INSTRUCTION MANUAL CAR RADIO RECEIVER / MP3 PLAYER WITH BULETOOTH HAND FREE SYSTEM TUNING / SEEK UP / DOWN NEXT/ BACK BUTTON LCD DISPLAY RANDOM
 INSTRUCTION MANUAL CAR RADIO RECEIVER / MP3 PLAYER WITH BULETOOTH HAND FREE SYSTEM TUNING / SEEK UP / DOWN NEXT/ BACK LCD DISPLAY AUX TALK CANCEL/ SRC ENCODER VOLUME KNOB MENU PLAY/ PAUSE INTRO REPEAT
OPEL Insignia Infotainment Manual
 OPEL Insignia Infotainment Manual Contents Touch R700 / Navi 900... 5 R300 Color / R400 Color... 103 Touch R700 / Navi 900 Introduction... 6 Basic operation... 14 Radio... 47 CD Player... 52 External
ADDITIONAL CAM POWER REVERSE CAM POWER BLUETOOTH MUTE AUDIO + IN AUDIO - IN 12V ACC OUTPUT 12V CONSTANT GROUND
 UNPLUG ORIGINAL RADIO CONNECTORS THEN PLUG IN HERE PLUG AND PLAY NO OTHER CONNECTIONS ARE NECESSARY USE HANDSFREE KIT MICROPHONE IPOD/IPHONE/ITOUCH/IPAD CONNECTION USB INPUT ADD YOUR BLUETOOTH HANDSFREE
EXCLUSIVELY FROM. User guide DAB211PT. Portable DAB radio
 EXCLUSIVELY FROM User guide DAB211PT Portable DAB radio INDEX Safety information... 2 Introduction... 3 Unpacking... 4 Key to controls... 5 DAB station display... 6 FM station display... 7 Status display...
Audio System. Audio System (without navigaton)* CD Button. CDSlot. CD Eject Button. XM Button. AM/FM Button. Auxiliary Button.
* CD Button. CDSlot. CD Eject Button. XM Button. AM/FM Button. Auxiliary Button.") Audio System Audio System (without navigaton)* CD Load Button Audio Display CD Button CDSlot XM Button CD Eject Button AM/FM Button Auxiliary Button Volume/Power Button Title Button Category Bar Skip Bar
Audio System Audio System (without navigaton)* CD Load Button Audio Display CD Button CDSlot XM Button CD Eject Button AM/FM Button Auxiliary Button Volume/Power Button Title Button Category Bar Skip Bar
PA15-HON2. ipod to HONDA and ACURA Car Stereo Interface. Owner's Manual. (Preliminary Version)
") PA15-HON2 ipod to HONDA and ACURA Car Stereo Interface Owner's Manual (Preliminary Version) 2008.10.20 9AM to 5PM (Pacific Time) Tech Support Hot Lines 626-3363836 626-8906410 Quick Guide. If the radio
PA15-HON2 ipod to HONDA and ACURA Car Stereo Interface Owner's Manual (Preliminary Version) 2008.10.20 9AM to 5PM (Pacific Time) Tech Support Hot Lines 626-3363836 626-8906410 Quick Guide. If the radio
OWNER S MANUAL M3-TFT DAB+
 OWNER S MANUAL M3-TFT DAB+ INSTALLATION... 3-4 WIRING CONNECTION... 5 OPERATION... 6 LOCATION OF THE KEYS... 6 POWER ON/OFF THE UNIT... 7 MAIN MENU... 7 SETUP... 7 RESET FUNCTION... 9 SLIGHTFOG AFTER OPERATION...
OPEL Astra Infotainment Manual
 OPEL Astra Infotainment Manual Contents Navi 950/650 / CD 600... 5 CD 400plus (1)/400/300... 81 CD 400plus (2)... 133 FlexDock... 175 Navi 950/650 / CD 600 Introduction... 6 Basic operation... 16 Radio...
Multimedia. Navigation. System Quick Start Guide Toyota. Navigation. Bluetooth Hands-Free. ipod and MP3 compatible. Back-up camera ready
 Multimedia Navigation System Quick Start Guide Toyota Navigation Bluetooth Hands-Free ipod and MP3 compatible Back-up camera ready Play DVDs, Audio CDs, MP3 Discs Supports steering wheel controls Customizable
OWNER S MANUAL ELECTRONICALLY TUNED AM/FM/MPX RADIO WITH AUTO-REVERSE CASSETTE PLAYER, CD PLAYER, CD CHANGER CONTROLS AND QUARTZ CLOCK.
 OWNER S MANUAL ELECTRONICALLY TUNED AM/FM/MPX RADIO WITH AUTO-REVERSE CASSETTE PLAYER, CD PLAYER, CD CHANGER CONTROLS AND QUARTZ CLOCK Model GC-600 Operating Instructions 1) ON/OFF POWER BUTTON Press this
Play DVDs, Audio CDs, MP3 Discs. Supports steering wheel controls. Customizable backgrounds. Bluetooth Phonebook and favorites
 Multimedia Navigation System Quick Start Guide GM Series Navigation Bluetooth Hands-Free ipod and MP3 compatible Back-up camera ready Play DVDs, Audio CDs, MP3 Discs Supports steering wheel controls Customizable
Navigation capabilities. EXISTENCE OF NAVIGATION CAPABILITIES Existence of navigation capabilities can be confirmed by performing the following:
 Introduction CONFIRMING DISPLAY AUDIO MODEL This manual is made up of 2 sections. The first describing available functions for models without navigation capabilities (WITHOUT NAVIGATION) such as audio
Contents. Navi 950/650 / CD CD 400/ CD 400plus FlexDock
 Infotainment Manual Contents Navi 950/650 / CD 600... 5 CD 400/300... 77 CD 400plus... 111 FlexDock... 151 Navi 950/650 / CD 600 Introduction... 6 Basic operation... 16 Radio... 23 CD Player... 29 External
Specifications. General and Radio Controls
 General and Radio Controls 2 7 6 4 AUX IN BAND LOUDNESS Specifications Supply voltage : 12V DC(11V-15V) Current consumption : Less than 10A Audio Signal Output : 2ch line out Characteristics : (1) Frequency
G BT 2.4 TFT DISPLAY DAB/DAB+ RADIO CAR ADAPTER WITH FM TRANSMITTER & BLUETOOTH MUSIC STREAMING
 G4-234BT 2.4 TFT DISPLAY DAB/DAB+ RADIO CAR ADAPTER WITH FM TRANSMITTER & BLUETOOTH MUSIC STREAMING G4-2 3 4BT IMPORTANT: Please read the manual carefully before using the product and keep it for future
CROSSLAND X Infotainment Manual
 CROSSLAND X Infotainment Manual Contents Navi 5.0 IntelliLink... 5 R 4.0 IntelliLink... 55 R 4.0... 97 Navi 5.0 IntelliLink Introduction... 6 Basic operation... 14 Radio... 21 CD Player... 25 External
Precautions... 1 Take Precaution...1 Installation Installation Procedures... 2 Installation Opening...
 CONTENTS Precautions... 1 Take Precaution...1 Installation...2-3 Installation Procedures... 2 Installation Opening... 2 Wiring Connections...3 Removal of the Main Unit... 3 Overview of the Components...
Locations and Names of the Controls
 Locations and Names of the Controls 1 2 3 4 5 6 20 19 18 7 8 9 10 11 12 13 14 15 16 17 1. NFC DETECTION AREA 2. IR REMOTE CONTROL SENSOR 3. 1/2/3 BUTTON 1 TEL /REDIAL BUTTON 2 HANG UP BUTTON 4. ZONE 1/2
MR100 INSTALLATION/OWNER'S MANUAL Digital Media Marine Receiver
 MR100 INSTALLATION/OWNER'S MANUAL Digital Media Marine Receiver Preparation MR100 INSTALLATION Please read entire manual before installation. Before You Start Disconnect negative battery terminal. Consult
Radio Reception RADIO RECEPTION
 Radio Reception Audio Controls RADIO RECEPTION ICE 1527 Your radio receives signals whilst on the move, and may experience widely differing reception characteristics. Because of this, some interference
Coastal Electronic Technologies, Inc. GM LOCKPICK GMX-320 Installation and Operation Instructions
 Coastal Electronic Technologies, Inc. GM LOCKPICK GMX-320 Installation and Operation Instructions Thank you for your purchase of the Coastal Electronic Technologies, Inc. GM LOCKPICK GMX- 320. The GMX-320
Infotainment. file://c:\program Files\cosids\DATA\TMP\ rtf.html
 Page 1 of 12 Infotainment All Infotainment components communicate via the MS CAN bus. The main unit of the Infotainment system is always a radio (EHU - Entertainment Head Unit), which, depending on the
Contents. Precaution Main Menu Radio Play DVD... 8 USB/SD AUX Input Bluetooth Navigation VMCD...
 USER MANUAL Thank you for buying this XTRONS product. Please read through these instructions so you will know how to operate this unit properly. After you have finished reading the instructions, keep this
OWNER S MANUAL. Marine Audio System SEA9526 AM/FM/MPX WITH SINGLE CD PLAYER RCA LINE OUT. HIGH POWER 4 X 35 Watts Max.
 SEA9526, OWNER S MANUAL Marine Audio System PWR VOL- VOL+ MUT OPEN DIRECT-IN PLAY POWER LOADING TOP/REPEAT/RANDOM/ 3-BEAMLASER TRACKING SYSTEM DUAL 1-BIT D/A CONVERTERS 24AM/FMPRESETSTATIONS SEEK UP/DOWN
KIV-BT901 KIV-701 DIGITAL MEDIA RECEIVER INSTRUCTION MANUAL. Register Online Register your Kenwood product at
 KIV-BT901 KIV-701 DIGITAL MEDIA RECEIVER INSTRUCTION MANUAL Before reading this manual, click the button below to check the latest edition and the modified pages. Take the time to read through this instruction
DEUTSCH ENGLISH NEDERLANDS FRANÇAIS NORSK ITALANIO ČEŠTINA Hersteller DAB650SI
 DEUTSCH NEDERLANDS NORSK ČEŠTINA ENGLISH FRANÇAIS ITALANIO Hersteller Wörlein GmbH Tel.: +49 9103/71670 Gewerbestrasse 12 Fax.: +49 9103/716712 D 90556 Cadolzburg Email. info@woerlein.com GERMANY Web:
Genus Digital DU1/DU2 DAB Digital Radio UPGRADE User Guide
 Genus Digital DU1/DU2 DAB Digital Radio UPGRADE User Guide All rights Reserved 2005 Genus Digital Genius Consultancy and Marketing Limited Page 1/14 Contents 1 Introduction to Genus Digital DU1/DU2...
ROBERTS RD-41. Sound for Generations. DAB / FM RDS / MP3 / WMA / EPG digital radio with timed recording and. Please read this manual before use
 ROBERTS Sound for Generations RD-4 DAB / FM RDS / MP3 / WMA / EPG digital radio with timed recording and Please read this manual before use Contents Controls... 2-3 Digital radio features... 4 Battery
OVERHEAD AUDIO UNIT Model A10049
 R R R OVERHEAD AUDIO UNIT Model 2879459 21A10049 R NOTES APPENDICES TROUBLESHOOTING Resetting the unit Should the overhead unit become unresponsive: Remove power for 5minutes and then reconnect. CONTENTS
DT-500W. GB Version 1
 DT-500W Version 1 Control 1 Key lock: The key lock function is used to prevent unintentional operation of the radio. Slide the lock switch to the lock position (left), the symbol will appear on the display.
Entertainment System. Specification GENERAL SCREW SCREW PLASTIC FRAME OF THE FRONT PANEL. Current Consumption FM SECTION
 SCREW Specification GENERAL Supply Voltage Current Consumption Power Output Number of channels Unit Dimensions FM SECTION Frequency range Effective sensitivity I.F Frequency DC 12V Max.5A 2x 20W RMS 2
SUBARU STARLINK. Quick Reference Guide. your subaru connected. Love. It s what makes a Subaru, a Subaru.
 SUBARU STARLINK your subaru connected Quick Reference Guide 2017 Love. It s what makes a Subaru, a Subaru. Table of Contents 2 Controls 3 Bluetooth Basics 4 8 Hands-free Calling SUBARU STARLINK 6.2" Multimedia
Volvo on call (VOc) USER GUIDE
 USER GUIDE") Volvo on call (VOc) USER GUIDE VALUABLE DOCUMENT This document, volvo on call, describes the functionality of the system, Volvo on Call. Best regards Volvo Car Corporation The specifications, design data
Volvo on call (VOc) USER GUIDE VALUABLE DOCUMENT This document, volvo on call, describes the functionality of the system, Volvo on Call. Best regards Volvo Car Corporation The specifications, design data
INSTRUCTIONS Please read all instructions carefully before using
 INSTRUCTIONS Please read all instructions carefully before using CONTENTS 1.Basic Operation Panel Introduction 02 Remote control function 04 Turn the Unit On/Off 06 Access main interface 06 U Disc/SD Card
Your ipod through ACURA / HONDA Car Stereo System!
 Your ipod through ACURA / HONDA Car Stereo System! KEY FEATURES This adaptor connects an ipod, iphone, or itouch to your ACURA / HONDA audio system with the following benefits: Connects ipod s audio output
DAB / FM personal digital radio with loudspeaker ROBERTS. Enjoy Listening. Please read this manual before use
 DAB / FM personal digital radio with loudspeaker ROBERTS Enjoy Listening Please read this manual before use Contents Controls... 3-4 Using the AC adaptor... 5-6 Keylock function... 7-8 Navigation... 9-10
AC OPERATION BATTERY OPERATION RADIO OPERATION Note : FM STEREO INDICATOR ANTENNAS BASS BOOST AUXILIARY (AUX) MODE
 MODE") 1. FUNCTION SWITCH AUX/CD/TAPE (OFF)/RADIO 2. BAND SWITCH 3. FM ANTENNA 4. CD DOOR 5. TUNING KNOB 6. BASS BOOST BUTTON 7. CD SKIP/SEARCH FORWARD BUTTON 8. CD SKIP/SEARCH BACKWARD BUTTON 9. CD PROGRAM BUTTON
1. FUNCTION SWITCH AUX/CD/TAPE (OFF)/RADIO 2. BAND SWITCH 3. FM ANTENNA 4. CD DOOR 5. TUNING KNOB 6. BASS BOOST BUTTON 7. CD SKIP/SEARCH FORWARD BUTTON 8. CD SKIP/SEARCH BACKWARD BUTTON 9. CD PROGRAM BUTTON
OPEL KARL Infotainment Manual
 OPEL KARL Infotainment Manual Contents R 4.0 IntelliLink... 5 R300 BT... 47 R 4.0 IntelliLink Introduction... 6 Basic operation... 14 Radio... 20 External devices... 26 Speech recognition... 33 Phone...
PLMR7BTW OWNER S MANUAL. Mobile Audio System
 PLMR7BTW OWNER S MANUAL Mobile Audio System PLL Synthesizer Stereo Radio Automatic Memory Storing USB Interface SD Interface 3.5mm Input Jack Bluetooth Function 1 CONTENTS Installation... 3 Take out screw
ROBERTS. Sound for Generations. CD/DAB/FM Digital Sound System with dock for ipod. Please read this manual before use
 ROBERTS Sound for Generations CD//FM Digital Sound System with dock for ipod Please read this manual before use ipod is a trademark of Apple Inc., registered in the U.S. and other countries. "Made for
>> Audio system basic. Supplement
 >> Audio system basic. Supplement Symbols * Optional equipment $ Warning % Environmental note! Possible damage to the vehicle + Tip X Instruction YY Continuation symbol (Y page) Page reference Contents
Satellite Radio Functions
 Satellite Radio Functions 1 ENTER - Select in the menu, activate a selection. 2 ON/OFF - Press for audio On / Off. 3 VOLUME - Volume control. 4 MUTE - Press to mute the volume at any time. Press again
Disconnect the battery to ensure there will be no shorted wires during the installation procedure.
 The round-style headunit receiver radio features Bluetooth technology allowing music to wirelessly stream from your compatible Bluetooth-enabled device. Control the audio from a distance -- all from your
Precautions... 1 Take Precaution...1 Installation Installation Procedures... 2 Installation Opening...
 CONTENTS Precautions... 1 Take Precaution...1 Installation... 2-3 Installation Procedures... 2 Installation Opening... 2 Wiring Connections... 3 Remove of the Main Unit...3 Control Panel Button Locations...