To ensure safety while driving. and to comply with laws, drivers should not watch video or. operate the video device while driving.
|
|
|
- Aubrey Parker
- 6 years ago
- Views:
Transcription
1
2 To ensure safety while driving and to comply with laws, drivers should not watch video or operate the video device while driving.
3 INSTRUCTIONS CONTENTS General Information 1 Safety Notice 2 Accessories 3 Remote Control Operation 4 Unit Installation 6 Wires Connection Description 7 Panel Introduction 8 Main Menu Operation Instruction 9 Access Setup Interface.11 General Setup 11 Disc Setup 12 Audio Setup 13 Navigation Setup 13 Other Setup 14 SWC-Steering Wheel Control Setting 14 Radio Operation 15 Disc Playback-Video 17 Disc Playback-Audio 18 Music Playing Menu 19 Bluetooth Operation 19 Bluetooth Operation Menu 19 Bluetooth Dialing 20 Bluetooth Call 21 Bluetooth Phone Book 21 Bluetooth Phone Call History 22 Bluetooth Music Streaming-A2DP 23 Viewing Photos 23 Camera/Aux/A/V Menu 25 Troubleshooting 26
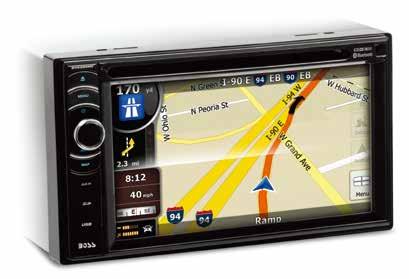
4 BV9386NV DVD ±R/ RW Audio & Video CD ±R/RW Audio & Video FM/AM Tuner (Switchable Tuner) USB Port SD Port (64GB Max) USB Charging (1A) A/V In/Out Rear Camera Input Front, Rear, Sub Pre-Amp Outputs Steering Wheel Control Input 6.2 TFT (800 x 480 Resolution) V DC Allowable, Negative Ground 4 x 80 Watts Compatible Formats Picture/Audio formats JPEG, BMP, PNG, MP3,AAC,WAV
5 SAFTY NOTICE Please read and understand the following safety information before operating this unit. The device is suitable for 12V power supply (requires grounding). Do not connect it to 24V power supply in trucks or buses, or else it will be damaged. Please use genuine discs, instead of incompatible and poor discs, or else it will damage the device or shorten the service life. Without the guide of qualified personnel, do not replace the fuse, or else it may damage the device or cause fire. Please follow the traffic laws and regulations and do not watch program or operate the device when you are driving, to avoid accidents (excluding passengers watching through rear monitor). To ensure safety and operate the device normally, please ask qualified personnel to install the device. do not disassemble or repair the device without authorization, to avoid damage and accidents. Please contact local car audio distributor for details. Do not put the device in moist environment or water, to avoid electric shock, damage and fire due to short circuit. The mechanical drive part of the monitor uses automatic precision transmission component. Do not pull, push or rotate the device by force or impact the TFT screen to avoid damaging the device. Do not insert the audio plug of the vehicle into the master unit directly. please convert with the dedicated end cable provided by our company. When install the unit, prevent metal objects falling into the master unit from the vents to avoid short circuit and damaging the device. Safety Statement For the safety of you and others, do not watch programs or operate the device when you are driving. It is prohibited by the laws and regulations. The backing monitor function should be used as auxiliary means. we are not responsible for any accidents occurred during backing. 2


6 Remote Control GPS Antenna RCA Cable Power Cable Flat washer 2pcs Installation key 2pcs Metal Strap 1pc Mounting Sleeve
7
8
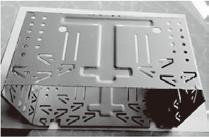
9 UNIT INSTALLATION THE UNIT IS INSTALLED TO BE AN ANTI-THEFT ONE. THE CHASSIS OF THE UNIT WEARS A SLIDING METAL HOUSING. PLEASE DO THE CONNECTION OF THE POWER, SPEAKERS AND ANTENNA ACCORDING TO THE REQUIREMENT OF THE INSTRUCTION BOOK, THEN INSTALL THE SLIDING METAL HOUSING IN THE CAR AS FOLLOWS. METAL STRAP TO BOOST UP THE CAPABILITY O ANTI-JAMMING, PLEASE FIX THE METAL STRAP ON THE METAL CONNECTED TO THE BOTTOM BRACKET OF THE CAR. DASH BOARD SLIDING METAL HOUSING UNIT CHASSIS TO DRAW THE CHASSIS OUT OF THE SLIDING METAL HOUSING, INSERT THE LEFT AND RIGHT KEY PLATES INTO THE RIGHT POSITION OF THE 2 SIDES OF CHASSIS.
10 WIRES CONNECTION DESCRIPTION The Description of the Input/Output Interface A Description of the Wiring Diagram for Socket A
11 PANEL INTRODUCTION MIC receive hole Place to receive the signal of microphone. 2.Eject key When there is a Disc in the unit, press EJECT to remove the Disc. And press again to insert the Disc if you do not take out it. 3.MENU key Press to go back to main menu in any interface. 4.TURN ON/OFF & VOLUNE UP/DOWN Long touch to turn ON/OFF the unit. Short touch to activate MUTE function and silence the audio output. Press again to restore sound. Rotate to adjust the output volume UP or DOWN. 5.Map key Press to enter into navigation function. Or back media from GPS. 6.AUX IN (AUX IN /SD/ USB/RESET/GPS card slot) Open to see AUX IN /SD/ USB/GPS card port and reset key. 8


12 MAIN MENU OPERATION INSTRUCTION MAIN MENU NAVI: Navigation Interface 2. Disc Interface 3. Radio Interface 4. Streaming Interface 5. Phone Interface 6. Video Interface 7.Music Interface 8. Settings Interface 9

13 MAIN MENU 2 MAIN MENU OPERATION INSTRUCTION AUX IN interface 10. AV In Interface 11. Camera: it will show rear camera interface when reverse. 12: SWC interface 13. Picture: Press to see picture files in the unit. 14.Shows the present date and time of the unit. 15.Press to go to EQ setting up interface. 16.Press to slide to another page. If it is grey, means this is the last page menu. 10
14 RADIO OPERATION All this icon means return back to main menu of the unit. 2.Radio frequency saving area: can save 18 frequencies and can only show 6 in a page 3.Press to OPEN/HIDE the function bar. 4.Long press to search backward. Short press to move backward in step. 5.Search the frequencies, play the searched one for 5S and go on to search next one and repeat it. 6.Long press to search forward. Short press to move forward in step. 7.Band changing: Click to change between FM1/FM2/FM3/AM1/AM2. 8.Press to see RBDS function AF as default choosing interface show as below: 11
15 RADIO OPERATION c a b a. TA(Traffic Announcement) ON: When the taffic station is turned on, the radio will automatically search for traffic stations. After a staton is searched, screen displays TP Only when traffic information is broadcasted can it be received, after traffic information is completed, the radio will automatically switch to the previous mode. OFF: Repress [TA] button to close TA function. In other modes, traffic announcement will automatically switch to radio mode, after the traffic announcement is completed, it will automatically switch to the previous mode. b. PTY(Programming Type) Touch the button the screen displays program types, users can search station according to program type. c.ct (Clock Time) To provide current time correction information, the RBDS station can automatically correct the system clock of the receiver when the clock RBDS is opened. 12

16 RADIO OPERATION 9.Press to see EQ function interface: 10.LO/DX: Touch to select Local or Distant broadcasting frequencies. 13
17 MUSIC PLAYING This refers to music playing from USB and SD. Click the Music icon in main menu and you will see: PRESS LIST TO SEE BELOW a b a. Scan the file in the SD and USB b. Long press the song name to save the song to the playlist and you can play anytime you want. 14

18 DISC PLAYING Show the process and time of the present video. Touch the bar to set the playing time. 2. Function Area: This bar will disappear in a while, and click this area to show this function bar again. 3.Press to OPEN/HIDE the whole function bar: Audio: Touch to see EQ setting menu. Prev: Touch to choose last item. Play/Pause: Touch to begin playing. And touch the icon again to pause playing. Next: Touch to choose next item. GOTO: Touch to choose item manually. And click the relevant key to choose the chapter. 15

19 DISC PLAYING Press the no. of the item you want to listen and click GREEN CLICK to start. Root: Touch to enter DVD menu Angle: Touch to select DVD video angle Sub Title:Touch to select the subtitle languge if the disc is recorded in multiple languages. Shuffle: Random play Repeat: Loop playback.(all/single loop play) NOTE: When properly installed, DVD video cannot be displayed unless the parking brake is applied. If you attempt to play a DVD while the vehicle is moving, the screen displays the following warning. 16

20 VIDEO PLAYING AUDIO/DISC FORM PLAYIN Buttons same as DISC menu are the same functions. 17

21 STREAMING PLAYING MENU ----BT MUSIC Press STREAMING in the main menu, it refers to the music file from BT. PHONE ---BLUETOOTH OPERATION MENU Bluetooth for this model is default ON. When you touch PHONE in the main menu, if not successfully connected, you will see below interface If not connect successfully, you need to press it and connect manually. 2.Touch to see Bluetooth settings: 18
22 PHONE ---BLUETOOTH OPERATION MENU ON/OFF: Turn on and turn off of Bluetooth when not using 2.Can turn on or turn off the function of listen to calls automatically 3.Can connect the devices automatically which have already been connected before. 4.PIN code: Default password 0000 for this unit to be connected with other device 5.Synchronization of the phone book of user s cellphone 6.Default Bluetooth name for this unit: Boss Audio BV9386NV. 19


23 BLUETOOTH DIALING Shows the number you press in, and press wrong. 2.Key area. 3.Touch to call out. 4.Click to see the Bluetooth phonebook. to delete if it is 5.Click to see the Bluetooth call history. 20
24 BLUETOOTH CALL Press to hang up the phone call. 2.Mute the phone. 3.Touch to talk through Bluetooth. 4.Touch to talk through cellphone. 5.Touch to get keypad. 21


25 BLUETOOTH PHONE BOOK Total: Touch to see missed calls. 2.Touch to see received calls. 3.Touch to see dialed calls. 4.Move up and down to search phone number. 5.It will show on beginning of updating the cellphone book of users phone. And then will disappear. PICTURE Press PICTURE in the bottom line of main menu. You will see:


26 PICTURE You can see the present picture sequence and total picture 2.Touch to OPEN/HIDE function bar. 3.Touch to see EQ setting menu. 4.Press to turn to the previous picture. 5.PLAY/PAUSE: touch to begin play. Press again the icon to pause. During picture playing mode, one picture will be played for 5s automatically and goes to the next if you do not press it. 6.Press to turn to the next picture. 7.Press to choose picture. 8.Touch to see picture list: a b a.press to go back to last picture interface. b.refresh the picture file of your SD or USB. 9.Zoom Out the present picture 10.Zoom In the present picture 11.Turn left 90 degree 12.Turn right 90 degree. 23


27 SETUP MENU There are eight menus in setup: GENERAL SETUP Menu Press to see different setup items. 2.Touch to choose radio field between: USA/Europe/Latin/ORIT/China/Japan/Korea. 3.Touch to choose the navigation path. 24
.")
28 SETUP MENU 4.Turn on if you have a rear view camera. Turn off if you don t have it. 5.Turn it on, it will go back from the main menu to the latest playing mode in 10S if you do not operate. 6.Touch to set wallpaper as you want from the 5 wallpapers storage of the system. 7.Backlight dimmer selection: Night/Dark/Normal/Bright. 8.Go sleep time: OFF(one minute/five minutes/ten minutes). Will show as below: 9.Touch to choose the menu animation style: Left-Right/Right-Left/Top-Bottom/Bottom-Top/Big-Samll/Small-Big/Gra dient/random 10.Touch to do calibration for the unit. 11.Load factory setting 12.Show the software version information. 25


29 SETUP MENU VIDEO SETUP -Menu 2 AUDIO SETUP -Menu 3 Reverb selection: OFF/Living room/hall/concert/cave/bathroom/arena. Subwoofer selection: OFF/80HZ/120HZ/160HZ. EQ Menu: 26
30 SETUP MENU 1.Press to choose the present Audio EQ set up menu. 2.Press to choose the audio playing mode: LIVE/CLASSIC/ROCK/JAZZ/DANCE/POP. And USER is the default mode. 3.Area to set the equalizing. 4.Press to enter into Audio Control setup menu(balance/fader) TIME SETUP -Menu

31 1.Touch to set the time of the unit manually. 2.Touch to set the date of the unit. 3.Touch to set the clock mode: 12hr/24hr 4.Touch to set AM/PM. 5.Touch to set time zone. Default time zone is:gmt-05:00 6.Touch to set Daylight Saving time ON/OFF LANGUAGE SETUP -Menu 5 SETUP MENU Default language is English and users can touch to set unit language from: English/Francais/Deutsch/Espanol BLUETOOTH SETUP -Menu Bluetooth default is ON. Users can touch to set Bluetooth status: ON/OFF. 2.Default Auto Answer is OFF. Users can touch to set it: ON/OFF. 3.Default Auto Connect is on. Users can touch to set it: ON/OFF. 4.PIN code: Default password 0000 for this unit to be connected with other device. 28
32 SETUP MENU DISC SETUP -Menu 7 PBC: Touch to turn on/off the VCD PBC function. Parental Lock: Touch to set the DVD level. Default password is VOLUME SETUP -Menu Touch to set BEEP sound: ON/OFF. 2.Turn on/off the navigation voice mix function. Turn on, once report navigation information, and also have audio source play. Turn off, there is only navigation broadcasting. 29
33 SWC-STEERING WHEEL CONTROL SETTING 30
34 Table 1: Error message Media displayed Loading No Disc/Bad Disc Unknown Disc Error Cause Disc is being read Disc is dirty Table 2:General problems Disc is upside down TROUBLESHOOTING Corrective Action Clean the disc Insert Disc in right way Unsupported Disc type Check the disc and change one Illegal mechanism operation Press EJECT for 5s to reset loading mechanism Problem Unit will not power on Screen touch is insensitive No audio output Low audio output Cause Radio fuse blown Car battery fuse blown Illegal operation Place of touch screen is offset Improper audio output connection VOLUME 0 Improper MUTE connection Speaker damaged Volume set too low Heavily biased volume balance Corrective Action Install new fuse with right rating Install rating new fuse with right Press the RESET button Go to setup menu and set the calibration Check wiring and correct Turn up the volume Check wiring and TEL MUTE connection Change speakers Increase the volume Check and adjust the channel balance to the center position 31
35 TROUBLESHOOTING Poor sound quality or distortion No GPS image Speaker power rating not compatible with unit Speaker is shorted Image has not been changed to GPS system Connect proper speakers Check speaker contrast Change to GPS system Table 3: TFT monitors Problem No image Flashing image or interference appears on screen Improper image, improper height/width ratio display Cause Incorrect connection to parking wire Parking brake is not engaged DVD is not compatible with current TV system settings Corrective Action Check wiring and correct Stop vehicle in safe place and set parking brake ON Change setup to accommodate Disc Improper video signal connections Check wiring and correct Improper aspect ratio setup Use correct aspect ratio setting Table 4: Tuner Problem Cause Weak station Auto antenna is not fully searching extended LOCAL function is activated Corrective Action Connect the auto antenna properly Turn LOCAL function OFF 32
36 TROUBLESHOOTING Table 5: Disc Problem Cannot insert Disc Lots of noise during play, and stop then No repeat or searching while playing VCD Cause Corrective Action Disc already inside unit Eject the current Disc and insert the new one Disc is scratched or warped Disc is dirty or wet PBC is ON Use a new one in good condition Clean the Disc Turn PBC OFF 33
 Use the wired 3.")
37 Technical Service Bulletin Steering Wheel Control Wiring Diagram BV9386NV For SWC interfacing we only recommend using the Metra Axxess ASWC with our models. Please use the below steps as a guide to help with wiring to the Boss Audio BV9386NV. If you have any questions, please call our Tech Support: (M-F 8:30a-5:00p PST) Use the wired 3.5mm adapter that came with the interface, and connect the following: ASWC Brown Brown/White GND BV9386NV Key A Key B Key GND When programming the Axxess interface, change the radio type to, Type: 11 Key A Key B Brown Key GND Metra Axxess ASWC Brown/White TSB_1214.1
38
Working power 11-16V DC Allowable,Negative Ground MPEG/AC-3 MPEG-4 O MPEG/AAC AVC X MPEG/AC-3 MPEG-1/2 O AAC AVC X
 PNV9650 SPECIFICATIONS Model No. PNV9650 General features DVD ±R/RW Audio & Video CD ±R/RW Audio & Video FM/AM Tuner (Switchable Tuner) USB Port SD Port (64GB Max) USB Charging (1A) A/V In/Out Rear Camera
To ensure safety while driving. and to comply with laws, drivers should not watch video or. operate the video device while driving.
 To ensure safety while driving and to comply with laws, drivers should not watch video or operate the video device while driving. INSTRUCTIONS CONTENTS General Information 1 Safety Notice 2 Accessories
To ensure safety while driving. and to comply with laws, drivers should not watch video or. operate the video device while driving.
 To ensure safety while driving and to comply with laws, drivers should not watch video or operate the video device while driving. R Congratulations on your purchase of a Boss Audio Systems Multimedia Receiver.
To ensure safety while driving. and to comply with laws, drivers should not watch video or. operate the video device while driving.
 To ensure safety while driving and to comply with laws, drivers should not watch video or operate the video device while driving. Unit Installation Wires Connection Description 25 26 BV9976B 85W*4 85W*4
Contents. Precaution Main Menu Radio Play DVD... 8 USB/SD AUX Input Bluetooth Navigation VMCD...
 USER MANUAL Thank you for buying this XTRONS product. Please read through these instructions so you will know how to operate this unit properly. After you have finished reading the instructions, keep this
INSTRUCTIONS Please read all instructions carefully before using
 INSTRUCTIONS Please read all instructions carefully before using CONTENTS 1.Basic Operation Panel Introduction 02 Remote control function 04 Turn the Unit On/Off 06 Access main interface 06 U Disc/SD Card
Contents. Precaution. Before installing this product. Precaution... Main Menu... Radio... Play DVD... USB/SD Important safety information
 USER MANUAL Thank you for buying this XTRONS product. Please read through these instructions so you will know how to operate this unit properly. After you have finished reading the instructions, keep this
INSTRUCTIONS INSTRUCTIONS PANEL INTRODUCTION
 INSTRUCTIONS INSTRUCTIONS Warning: To ensure safety while driving and to comply with laws, drivers should not watch video or operate the video device while driving. PANEL INTRODUCTION 1. PWR/VOL button
Smart Interact Navigation Entertainment System user manual
 Smart Interact Navigation Entertainment System user manual Contents 1. Attentions.2 2. Features...2 3. Installation...3 4. Panel and Key...... 3 5. Power on operation. 4 6. Radio operation...6 7. CD/DVD/USB/SD
USER MANUAL. Specifications and relevant information in this manual
 USER MANUAL Specifications and relevant information in this manual Table of Contents USER INSTRUCTIONS... 3 PRODUCT INTRODUCTION... 3 HOME PAGE OPERATION... 4 EXTERNAL DVD PLAYER (OPTIONAL)... 5 Enter/Exit...
Table of contents. Precautions. Media and Data Type. Menu operation. 1. Radio. 2.Multimedia player. Play disc. Play SD/USB. 4.Bluetooth (optional)
") DD-6442B T Table of contents Precautions Media and Data Type Menu operation 1. Radio 2.Multimedia player Play disc Play SD/USB 3.GPS navigation system (optional) 4.Bluetooth (optional) 5.TV function (optional)
DD-6442B T Table of contents Precautions Media and Data Type Menu operation 1. Radio 2.Multimedia player Play disc Play SD/USB 3.GPS navigation system (optional) 4.Bluetooth (optional) 5.TV function (optional)
AM/FM/USB CD/MP3 PLAYER WITH BLUETOOTH
 INSTALLATION NOTES AM/FM/USB CD/MP3 PLAYER WITH BLUETOOTH 1. Please read these installation and operation instructions before installation. 2. Make sure to connect all other wires before power connection.
INSTRUCTIONS PANEL INTRODUCTION. 1. / SRC button 2. IR 3. EQ button 4. MENU button 5. VOL / MUTE button 6. SD slot 7. USB slot 8.
 INSTRUCTIONS PANEL INTRODUCTION 1. / SRC button 2. IR 3. EQ button 4. MENU button 5. VOL / MUTE button 6. SD slot 7. USB slot 8. AUX slot 9. RESET 10. 11. 12. 13. 14. 15. Disk load slot BASIC FUNCTION
PROBLEM CAUSE SOLUTION
 CONTENTS Panel Introduction 02 Remote control function 04 Turn on/off Host 06 Main interface 06 Radio Function Operation 06 Wiring Diagram This player is equipped with ISO standard connector, Please follow
Accessories Unit Installation..03. Wire Connection 03. Parking Brake Connection 04. Speaker connection.05. Button Description.
 Content Accessories...02 Unit Installation..03 Wire Connection 03 Parking Brake Connection 04 Speaker connection.05 Button Description.06 Remote Control..07 Main Menu...09 Radio Operation.09 USB /SD Operation..10
NOTICES NOTICE OF INTENDED USE
 USER MANUAL Thank you for buying this XTRONS product. Please read through these instructions so you will know how to operate this product properly. After you have finished reading the instructions, keep
Contents. Precaution. Before installing this product. Precaution... Main Menu... Radio... Play DVD... Important safety information USB/SD...
 USER MANUAL Thank you for buying this XTRONS product. Please read through these instructions so you will know how to operate this unit properly. After you have finished reading the instructions, keep this
Panel Introduction CONTENTS. Panel Introduction 02. Remote control function. Turn on/off Host 06. Main interface 06. Radio Function Operation 06
 CONTENTS Panel Introduction Panel Introduction 02 Remote control function 04 Turn on/off Host 06 2 10 9 8 Main interface 06 Radio Function Operation 06 Disc Function Operation 07 Play SD/external memory
HD829THD USER MANUAL
 HD829THD USER MANUAL Thank you for buying this XTRONS product. Please read through these instructions so you will know how to operate this product properly. After you have finished reading the instructions,
INSTRUCTIONS CONTENTS
 INSTRUCTIONS CONTENTS Panel Introduction 02 Basic Function 03 Remote Control Operation 04 Turn on/off Access main interface USB/SD Card Operation Radio Operation 07 Disc Operation 08 Play/Eject Disc 08
CONTENTS. Panel Introduction. Remote control function. Turn on/off Host. Main interface. Radio Function Operation. Disc Function Operation
 CONTENTS Panel Introduction Remote control function Turn on/off Host Main interface Radio Function Operation Disc Function Operation Play SD/external memory device BT Function Operation External input
INSTRUCTIONS CONTENTS
 0514 CONTENTS INSTRUCTIONS Panel Introduction 02 Basic Function 03 Remote Control Operation 05 Turn on/off Host Access main interface USB/SD Card Operation Radio Operation 08 Disc Operation 09 Play/Eject
INSTRUCTIONS INSTRUCTIONS CONTENTS ACCESSORY. DVD Parental control function. Accessory. DVD Parental control function
 INSTRUCTIONS CONTENTS Panel Introduction 02 Basic Function 03 Remote Control Operation 04 Turn on/off Access main interface USB/SD Card Operation Radio Operation 07 Disc Operation 08 Play/Eject Disc 08
Accessories Unit Installation..03. Wire Connection 03. Parking Brake Connection 04. Speaker connection.05. Button Description..
 Content Accessories...02 Unit Installation..03 Wire Connection 03 Parking Brake Connection 04 Speaker connection.05 Button Description..06 Remote Control..07 Main Menu...10 Radio Operation.10 DVD Operation..11
To ensure safety while driving. and to comply with laws, drivers should not watch video or. operate the video device while driving.
 To ensure safety while driving and to comply with laws, drivers should not watch video or operate the video device while driving. R Congratulations on your purchase of a Boss Audio Systems Multimedia Receiver.
INSTRUCTIONS INSTRUCTIONS CONTENTS. Panel Introduction
 0814 CONTENTS Panel Introduction 02 Basic Function 03 Remote Control Operation 05 Turn on/off Host Access main interface USB/SD Card Operation Radio Operation 08 Disc Operation 09 Play/Eject Disc 09 DVD/VCD
Accessories Unit Installation..03. Wire Connection 03. Parking Brake Connection 04. Speaker connection.05. Button Description.
 Content Accessories...02 Unit Installation..03 Wire Connection 03 Parking Brake Connection 04 Speaker connection.05 Button Description.06 Remote Control..07 Main Menu...10 Radio Operation.10 DVD Operation..11
USER S MANUAL P9640B USER S MANUAL P9640B.
 USER S MANUAL USER S MANUAL P9640B BLUETOOTH DVD/MP3 AM/FM RECEIVER 6.2" (157 mm) WIDESCREEN TOUCHSCREEN DIGITAL TFT LED MONITOR www.planetaudiousa.com TELEPHONE 888-990-1236 US Toll-free 805-751-4854
JRV4100 Owner s Manual
 JRV4100 Owner s Manual Content Button Description.02 Remote Control..03 Main Menu...04 Radio Operation.04 USB /SD Operation..06 Settings Operation..06 Bluetooth Operation..08 Aux-In Operation 09 Troubleshooting..11
USER S MANUAL P9630B USER S MANUAL P9630B.
 USER S MANUAL USER S MANUAL P9630B BLUETOOTH DVD/MP3 AM/FM RECEIVER 6.2" (157 mm) WIDESCREEN TOUCHSCREEN DIGITAL TFT LED MONITOR www.planetaudiousa.com TELEPHONE 888-990-1236 US Toll-free 805-751-4854
USER S MANUAL. BV9362BI BLUETOOTH DVD/MP3/CD AM/FM RECEIVER FEATURING 6.2" (157 mm) WIDESCREEN TOUCHSCREEN DIGITAL TFT LCD MONITOR USER S MANUAL
 WIDESCREEN TOUCHSCREEN DIGITAL TFT LCD MONITOR USER S MANUAL") USER S MANUAL BV9362BI BLUETOOTH DVD/MP3/CD AM/FM RECEIVER USER S MANUAL BV9362BI BLUETOOTH DVD/MP3/CD AM/FM RECEIVER FEATURING 6.2" (157 mm) WIDESCREEN TOUCHSCREEN DIGITAL TFT LCD MONITOR BOSS Audio Systems
USER S MANUAL BV9362BI BLUETOOTH DVD/MP3/CD AM/FM RECEIVER USER S MANUAL BV9362BI BLUETOOTH DVD/MP3/CD AM/FM RECEIVER FEATURING 6.2" (157 mm) WIDESCREEN TOUCHSCREEN DIGITAL TFT LCD MONITOR BOSS Audio Systems
USER S MANUAL. BV9358B BLUETOOTH DVD/MP3/CD AM/FM RECEIVER FEATURING 6.2" (157 mm) WIDESCREEN TOUCHSCREEN DIGITAL TFT LED MONITOR USER S MANUAL
 WIDESCREEN TOUCHSCREEN DIGITAL TFT LED MONITOR USER S MANUAL") USER S MANUAL BV9358B BLUETOOTH DVD/MP3/CD AM/FM RECEIVER USER S MANUAL BV9358B BLUETOOTH DVD/MP3/CD AM/FM RECEIVER FEATURING 6.2" (157 mm) WIDESCREEN TOUCHSCREEN DIGITAL TFT LED MONITOR BOSS Audio Systems
USER S MANUAL BV9358B BLUETOOTH DVD/MP3/CD AM/FM RECEIVER USER S MANUAL BV9358B BLUETOOTH DVD/MP3/CD AM/FM RECEIVER FEATURING 6.2" (157 mm) WIDESCREEN TOUCHSCREEN DIGITAL TFT LED MONITOR BOSS Audio Systems
Car navigation multimedia system. Operation Manual
 Car navigation multimedia system Operation Manual Index P1-----Safety Precautions P2-----Front-Panel function P3-----Home page Operation P4-----DVD Operation P5-----Radio Operation P6-----Bluetooth Operation
USER S MANUAL. BV9358B BLUETOOTH DVD/MP3/CD AM/FM RECEIVER FEATURING 6.2" (157 mm) WIDESCREEN TOUCHSCREEN DIGITAL TFT LED MONITOR USER S MANUAL
 WIDESCREEN TOUCHSCREEN DIGITAL TFT LED MONITOR USER S MANUAL") USER S MANUAL BV9358B BLUETOOTH DVD/MP3/CD AM/FM RECEIVER USER S MANUAL BV9358B BLUETOOTH DVD/MP3/CD AM/FM RECEIVER FEATURING 6.2" (157 mm) WIDESCREEN TOUCHSCREEN DIGITAL TFT LED MONITOR BOSS Audio Systems
USER S MANUAL BV9358B BLUETOOTH DVD/MP3/CD AM/FM RECEIVER USER S MANUAL BV9358B BLUETOOTH DVD/MP3/CD AM/FM RECEIVER FEATURING 6.2" (157 mm) WIDESCREEN TOUCHSCREEN DIGITAL TFT LED MONITOR BOSS Audio Systems
Amaseaudio. Stay tuned, stay amased. ---Amaseaudio 1
 Stay tuned, stay amased. ---Amaseaudio 1 User manual Android 8.0.0 Stay tuned, stay amased. ---Amaseaudio 2 Installation Notes Introduction Thank you for using our product. To clearly understand and use
WITH DUAL ( FRONT AND REAR) AND SD MEMORY CARD PORT AND SIDE PANEL AUX INPUT MEMORY CARD PORT AND SIDE PANEL AUX INPUT PWR
 AND SD MEMORY CARD PORT AND SIDE PANEL AUX INPUT MEMORY CARD PORT AND SIDE PANEL AUX INPUT PWR") WITH DUAL (FRONT AND REAR) USB AND SD MEMORY CARD PORT AND SIDE PANEL AUX INPUT PWR WITH DUAL ( FRONT AND REAR) USB AND SD MEMORY CARD PORT AND SIDE PANEL AUX INPUT 12-2012 CONTENTS Panel Introduction
WITH DUAL (FRONT AND REAR) USB AND SD MEMORY CARD PORT AND SIDE PANEL AUX INPUT PWR WITH DUAL ( FRONT AND REAR) USB AND SD MEMORY CARD PORT AND SIDE PANEL AUX INPUT 12-2012 CONTENTS Panel Introduction
PRECAUTIONS. How to Handle Discs. Lithium Battery Cell Warnings
 CONTENTS Precautions... 1 How to Handle Discs... 1 Lithium Battery Cell Warnings... 1 Installation... 2 Prepare Radio... 2 Mount Radio... 2 Wiring Connections... 3 Uninstall the Main Unit... 4 Control
To ensure safety while driving. and to comply with laws, drivers should not watch video or. operate the video device while driving.
 To ensure safety while driving and to comply with laws, drivers should not watch video or operate the video device while driving. Congratulations on your purchase of a Planet Audio Multimedia Receiver.
P9756. One Din In-Dash 7" (178mm) Digital with dual (front and rear)usb and SD Memory card port and AUX Input
 Digital with dual (front and rear)usb and SD Memory card port and AUX Input") P9756 One Din In-Dash 7" (178mm) Digital with dual (front and rear)usb and SD Memory card port and AUX Input Planet Audio is not affiliated with Apple, Inc CONTENTS Panel Introduction 02 Basic Function
P9756 One Din In-Dash 7" (178mm) Digital with dual (front and rear)usb and SD Memory card port and AUX Input Planet Audio is not affiliated with Apple, Inc CONTENTS Panel Introduction 02 Basic Function
Android Operation Manual. DVD Navigation with Capacitive screen
 Android ---- 4.2.2 DVD Navigation with Capacitive screen ---- Operation Manual catalog P1 1.Safety Precautions P10 10.DVR Operation P2 2.Product Introduction P11 11.File Management P3 3.Front-Panel function
AX1300BT SPECIFICATIONS: MECHLESS AM/FM MULTIMEDIA PLAYER RECEIVER BLUETOOTH w BUILT-IN SPEAKERS DESIGNED FOR AUSTRALASIAN CONDITIONS
 MECHLESS AM/FM MULTIMEDIA PLAYER RECEIVER BLUETOOTH w BUILT-IN SPEAKERS SPECIFICATIONS: GENERAL: Mechless Fixed Face Panel Ultra Memory Power Backup Built-In Speakers ISO DIN Mounting ISO Wiring harness
USER S MANUAL. BV9371BD BLUETOOTH DVD/MP3/CD AM/FM RECEIVER FEATURING DETACHABLE 6.2" (157 mm) WIDESCREEN TOUCHSCREEN DIGITAL TFT LED MONITOR
 WIDESCREEN TOUCHSCREEN DIGITAL TFT LED MONITOR") USER S MANUAL BV9371BD BLUETOOTH DVD/MP3/CD AM/FM RECEIVER USER S MANUAL BV9371BD BLUETOOTH DVD/MP3/CD AM/FM RECEIVER FEATURING DETACHABLE 6.2" (157 mm) WIDESCREEN TOUCHSCREEN DIGITAL TFT LED MONITOR BOSS
USER S MANUAL BV9371BD BLUETOOTH DVD/MP3/CD AM/FM RECEIVER USER S MANUAL BV9371BD BLUETOOTH DVD/MP3/CD AM/FM RECEIVER FEATURING DETACHABLE 6.2" (157 mm) WIDESCREEN TOUCHSCREEN DIGITAL TFT LED MONITOR BOSS
Quick Reference Guide For
 Quick Reference Guide For GPS Navigation Model : VTG43/ VTG43A 1.Rear-view mirror 2.GPS navigation system 3.Bluetooth hands free system 4.Media center 5.Rear view visual system (with AV-IN) Clip the clamp
USER S MANUAL. SD726MB BLUETOOTH DVD/MP3/CD AM/FM RECEIVER FEATURING 7" (178 mm) MOTORIZED WIDESCREEN TOUCHSCREEN DIGITAL TFT LCD MONITOR SD726MB
 MOTORIZED WIDESCREEN TOUCHSCREEN DIGITAL TFT LCD MONITOR SD726MB") SOUND STORM LABORATORIES 3451 Lunar Court, Oxnard CA 93030 TECHNICAL ASSISTANCE www.soundstormlab.com/customer-support 888-387-8676 US Toll-free 805-751-4855 Customer Service USER S MANUAL SD726MB BLUETOOTH
SOUND STORM LABORATORIES 3451 Lunar Court, Oxnard CA 93030 TECHNICAL ASSISTANCE www.soundstormlab.com/customer-support 888-387-8676 US Toll-free 805-751-4855 Customer Service USER S MANUAL SD726MB BLUETOOTH
GSMR30 OWNER S MANUAL
 GSMR30 OWNER S MANUAL Version 1.0 MP4/MP3/Photo Playback Gauge Series Marine Radio FEATURES 4 Channel Full Range, Class A/B 45W x 4 @ 4Ω IPX5 Water proof INPUTS AND OUTPUTS Bluetooth Audio Streaming Easy
PRECAUTIONS. How to Handle Discs. Lithium Battery Cell Warnings
 CONTENTS Precautions... 1 How to Handle Discs... 1 Lithium Battery Cell Warnings... 1 Installation... 2 Prepare Radio... 2 Mount Radio... 2-3 Wiring Connections... 3 Removal of the Main Unit... 4 Control
CD / SD / USB / MP3 / AM / FM / BLUETOOTH RECEIVER QA30BT CD / SD / USB / MP3 / AM / FM / BLUETOOTH RECEIVER MP3 / WMA CALLS & MUSIC STREAMING
 TM CD / SD / USB / MP3 / AM / FM / BLUETOOTH RECEIVER MODE SD USB AMS RST QA30BT MUTE BND CLK 1/ 2/INT 3/RPT 4/RDM 5 6 AUX QA30BT CD / SD / USB / MP3 / AM / FM / BLUETOOTH RECEIVER Bluetooth MP3 / WMA
INSTALLATION. Remove the Old Unit from the Dashboard. DIN Front Mount. 1. Remove the outer trim frame.
 INSTALLATION Tools for Installation Use the 2 removal wrenches of the old unit to take out the old unit and place with this brand new car radio. The following tools and supplies may also be needed for
Automotive Navigation System
 Automotive Navigation System User s Manual Please read user manual carefully before installation Contents Standard accessories---------------------------------------------------------2 Quick guide for
car multimedia entertainment system S200 NO: 59S
 User Manual car multimedia entertainment system S200 NO: 59S2001010001 Forward Contents Thank you for choosing the vehicle-mounted video navigation system product manufactured by our company! Before use,
RW-50/15 User Manual
 RW50 User Manual Polaris 26/07/15 8:34 AM Page 1 RW-50/15 User Manual RW50 User Manual Polaris 26/07/15 8:34 AM Page 2-2 - RW50 User Manual Polaris 26/07/15 8:34 AM Page 3 Thank you for purchasing the
Precautions... 1 Lithium Battery Cell Warnings... 1 Take Precaution...1 Installation Installation Procedures... 2 Installation Opening...
 CONTENTS Precautions... 1 Lithium Battery Cell Warnings... 1 Take Precaution...1 Installation...2-3 Installation Procedures... 2 Installation Opening... 2 Wiring Connections... 3 Remove of the Main Unit...
Please read this manual carefully before you use the unit and save it for future reference.
 ANDROID STEREO RECEIVER Please read this manual carefully before you use the unit and save it for future reference. Installation Precaution: 1. This unit is designed for using a 12V negative ground system
Android car audio and video operation instructions 1. Safety precautions
 Android car audio and video operation instructions 1. Safety precautions This machine is suitable for 12V power system (cathode grounding). It is forbidden to directly install the machine on 24V vehicle,
INSTRUCTION MANUAL CD MP3 WMA USB AUX-IN
 NA99i Car Audio System Player INSTRUCTION MANUAL CD MP3 WMA USB AUX-IN ipod/iphone Safety WARNING Stop the car before operating the unit. Important to know... To prevent a short circuit, never put or leave
CONTENTS. Next/Previous Track... 4 Fast Forward/Backward... 4 Set the Clock (CLK)... 4 Insert SD Card... 4
... 4 Insert SD Card... 4") CONTENTS Precautions... 1 Lithium Battery Cell Warnings... 1 Take Precaution...1 Installation...2-3 Installation Procedures... 2 Installation Opening... 2 Wiring Connections... 3 Remove of the Main Unit...3
CONTENTS Precautions... 1 Lithium Battery Cell Warnings... 1 Take Precaution...1 Installation...2-3 Installation Procedures... 2 Installation Opening... 2 Wiring Connections... 3 Remove of the Main Unit...3
CAR MULTIMEDIA SYSTEM (USER MANUAL)
") CAR MULTIMEDIA SYSTEM (USER MANUAL) SAFETY The power supply of this unit is 12V only (negative ground), please don t connect it to 24V, otherwise it will damage this unit. Don t operate the machine during
CAR MULTIMEDIA SYSTEM (USER MANUAL) SAFETY The power supply of this unit is 12V only (negative ground), please don t connect it to 24V, otherwise it will damage this unit. Don t operate the machine during
Car Stereo Receiver and Audio Player
 Car Stereo Receiver and Audio Player USER MANUAL AND INSTALLATION INSTRUCTIONS Sondpex Corporation of America Model: MRDP-C01 Thanks for your purchase! Our car audio equipment lets you enjoy diversified
CONTENTS. Store/Recall Preset Stations (1-6) Next/Previous Track...
 Next/Previous Track...") CONTENTS Precautions... 1 Lithium Battery Cell Warnings... 1 Use Cautions...1 Installation... 2 Installation Precedures... 2 Installation Opening... 2 Wiring Connections... 3 Remove of the Main Unit...4
CONTENTS Precautions... 1 Lithium Battery Cell Warnings... 1 Use Cautions...1 Installation... 2 Installation Precedures... 2 Installation Opening... 2 Wiring Connections... 3 Remove of the Main Unit...4
INSTRUCTIONS INSTRUCTIONS CONTENTS ACCESSORY. DVD Parental control function. DVD Parental control function. Accessory. Quantity 1PC.
 CONTENTS Panel Introduction 02 Basic Functions 03 Remote Control Function 05 Turn the Unit On/Off 07 Enter into the Main Interface 07 Play SD card/usb memory device 07 Radio Function Operation 08 Disc
MR100 INSTALLATION/OWNER'S MANUAL Digital Media Marine Receiver
 MR100 INSTALLATION/OWNER'S MANUAL Digital Media Marine Receiver Preparation MR100 INSTALLATION Please read entire manual before installation. Before You Start Disconnect negative battery terminal. Consult
FDS3NAV2. For Ford Vehicles Equipped With SYNC3. Installation Instructions. Calibration and Setup Guide. Page 1 of 14
 FDS3NAV2 For Ford Vehicles Equipped With SYNC3 Installation Instructions Calibration and Setup Guide Page 1 of 14 Please read this manual thoroughly before installation. This manual illustrates a typical
NG7 User Manual Polaris 16/05/2017 3:40 pm Page 1 NG7. User Manual
 NG7 User Manual Polaris 16/05/2017 3:40 pm Page 1 NG7 User Manual NG7 User Manual Polaris 16/05/2017 3:40 pm Page 2 Thank you for purchasing the Polaris NG7. Before operation, be sure to thoroughly read
Play DVDs, Audio CDs, MP3 Discs. Supports steering wheel controls. Customizable backgrounds. Bluetooth Phonebook and favorites
 Multimedia Navigation System Quick Start Guide GM Series Navigation Bluetooth Hands-Free ipod and MP3 compatible Back-up camera ready Play DVDs, Audio CDs, MP3 Discs Supports steering wheel controls Customizable
PRECAUTIONS. How to Handle Discs. Lithium Battery Cell Warnings
 PRECAUTIONS How to Handle Discs Handle a disc by its edges. Do not touch the playing side. Before inserting a disc, wipe the disc outward from the disc center with a clean, soft, dry and lint-free cloth.
Multimedia. Navigation. System Quick Start Guide Toyota. Navigation. Bluetooth Hands-Free. ipod and MP3 compatible. Back-up camera ready
 Multimedia Navigation System Quick Start Guide Toyota Navigation Bluetooth Hands-Free ipod and MP3 compatible Back-up camera ready Play DVDs, Audio CDs, MP3 Discs Supports steering wheel controls Customizable
WALLMOUNT Entertainment System
 Wiring Diagram AV IN AV OUT SUBWOOFER OUT HDMI JACK R R R L L L IR REMOTE JACK AUDIO IN ANTENNA WIRING CONNECTING SOCKET Specification GENERAL Supply Voltage Current Consumption Power Output Number of
PRECAUTIONS. Lithium Battery Cell Warnings. Take Precaution. Cell leakage may cause damage to the remote control. Do not throw cells into
 PRECAUTIONS Lithium Battery Cell Warnings Cell leakage may cause damage to the remote control. Do not throw cells into as this may cause an explosion. Keep battery cells out of reach of children. Take
CONTENTS. Store/Recall Preset Stations (1-6)... 5 Next/Previous Track...
... 5 Next/Previous Track...") CONTENTS Precautions... 1 Lithium Battery Cell Warnings... 1 Use Cautions...1 Installation... 2 Installation Procedures... 2 Installation Opening... 2 Wiring Connections... 3 Uninstall the Main Unit...4
CONTENTS Precautions... 1 Lithium Battery Cell Warnings... 1 Use Cautions...1 Installation... 2 Installation Procedures... 2 Installation Opening... 2 Wiring Connections... 3 Uninstall the Main Unit...4
2012 product introduction
 2012 product introduction Brand represents products designed to be simple, useful and easily adapted to your mobile lifestyle Features that enable you to be productive, deliver rich entertainment with
WayteQ GPS Navigation x980bt User Manual. English Version
 WayteQ GPS Navigation x980bt User Manual Version Thanks for using WAYTEQ products! WAYTEQ reserves the rights of final interpretation of the manual. The product is subject to change without any further
Quickstart Guide (English)
") Quickstart Guide (English) Introduction 1. Make sure all items listed in the Box Contents are included in the box. Look in the box under the foam sheet for the speaker stand rubber feet, speaker stand
Quickstart Guide (English) Introduction 1. Make sure all items listed in the Box Contents are included in the box. Look in the box under the foam sheet for the speaker stand rubber feet, speaker stand
Contents. Google Play Store Settings Troubleshooting... 25
 USER MANUAL Thank you for buying this XTRONS product. Please read through these instructions so you will know how to operate this unit properly. After you have finished reading the instructions, keep this
ANDROID IN-CAR ENTERTAINMENT SYSTEM
 ANDROID IN-CAR ENTERTAINMENT SYSTEM User Manual X7506A8P5-S5/X6905A8P5-S4/S5 REv3.0 V1.06 Thank you very much for purchasing and using our digital audio-visual car series products! To ensure correct use
Precautions. Please read carefully before using this product.
 Thank you for purchasing this BEWITH Mirror Media MM-1. It is designed to give you many years of enjoyment. Please read all instructions in this manual before attempting operation and keep it handy for
ipod Digital Media Center AM / FM Radio
 INSTRUCTION MANUAL MULTI- ENVIRONMENT PLAYER AQ-IP-3B- AQ-IP-3B-X ipod Digital Media Center AM / FM Radio INFO TOP 1. MOUNTING PRECAUTIONS The AQ-IP-3B-X is designed for a multi environment application.
CONTENTS. Store/Recall Preset Stations (1-6) Next/Previous Track...
 Next/Previous Track...") CONTENTS Precautions... 1 Lithium Battery Cell Warnings... 1 Use Cautions...1 Installation...2 Installation Procedures...2 Installation Opening... 2 Wiring Connections... 3 Remove of the Main Unit... 3
CONTENTS Precautions... 1 Lithium Battery Cell Warnings... 1 Use Cautions...1 Installation...2 Installation Procedures...2 Installation Opening... 2 Wiring Connections... 3 Remove of the Main Unit... 3
INSTRUCTION MANUAL. AM/FM Digital Tuning Radio W/ USB/SD/MP3 & Hands-Free Bluetooth + SEL 5 * 9 0 # T-M TEL CLEAR LOUD PTY TA AF RPT RDM EON TP POWER
 BND MOD AP INSTRUCTION MANUAL MIC LOUD PTY TA AF RPT RDM EON TP POWER A.P SCN DN MODE BND TOP 1 5 * MUTE + SEL CLK INT RPT 2 3 6 7 8 9 0 # T-M TEL CLEAR CAR AUDIO REMOTECONTR OLLER UP ST LOC LOUD RDM 4
USERS MANUAL 7 INCH DASH MP5 PLAYER
 USERS MANUAL 7 INCH DASH MP5 PLAYER Summarizes the basic functions This product uses high-definition digital touch screen, Fine bright image, Coupled with high-quality audio processing chip, Has reached
PRECAUTIONS. How to Handle Discs. Lithium Battery Cell Warnings
 CONTENTS Precautions... 1 How to Handle Discs... 1 Lithium Battery Cell Warnings... 1 Installation... 2 Prepare Radio... 2 Mount Radio... 2-3 Wiring Connections... 3 Removal of the Main Unit...3 Control
CAR MULTIMEDIA SANTA CRUZ 370
 Subject to availability and technical modification. CAR MULTIMEDIA SANTA CRUZ 370 Sales Start JUNE 2017 Order Number 2 002 017 000 004 EAN-Code 4260 499 850 319 Highlights High-Grade FM (RDS), AM Tuner
CAR MULTIMEDIA OSLO 370 DAB
 Subject to availability and technical modification. CAR MULTIMEDIA OSLO 370 DAB Sales Start JULY 2017 Order Number 2 002 017 000 003 EAN-Code 4260 499 850 302 Highlights High-End CODEM Automotive Tuner
INSTRUCTION MANUAL VENU100A. Portable PA Amplifier System. Never-Ending Learning Innovation
 INSTRUCTION MANUAL VENU100A Portable PA Amplifier System Never-Ending Learning Innovation 80 Little Falls Road, Fairfield, NJ 07004 1-800-631-0868 www.hamiltonbuhl.com www.hamiltonbuhl.com Contents Table
WayteQ GPS Navigation X960BT User Manual. English Version
 WayteQ GPS Navigation X960BT User Manual English Version Thanks for using WAYTEQ products! WAYTEQ reserves the rights of final interpretation of the manual. The product is subject to change without any
PRECAUTIONS. Lithium Battery Cell Warnings. Use cautions
 PRECAUTIONS Lithium Battery Cell Warnings Cell leakage may cause damage to the remote control. Do not throw cells into as this may cause an explosion. Keep battery cells out of reach of children. Use cautions
MS30. Owner s Manual + FOLDER VOL+ VOL- >ll MUTE. >>l. l<< MS30 MODE FOLDER
 Owner s Manual MS30 VOL- + FOLDER VOL+ lll MUTE >>l l FOLDER CONTENTS Introduction... 1 Features... 1 Box Contents... 1 Compliance... 1 Safety Information... 2 Installation... 3 Mounting the
2014 Cadillac Escalade Rear Seat Entertainment M
 2014 Cadillac Escalade Rear Seat Entertainment M Infotainment System...... 3 Rear Seat Infotainment.... 3 Rear Seat Entertainment (RSE) System....................... 3 Index..................... i-1 Rear
6 Track/Folder Navigation... 6 Mute... 6
 CONTENTS Precautions... 1 Lithium Battery Cell Warnings... 1 Use Cautions...1 Installation... 2 Installation Procedures... 2 Installation Opening... 2 Wiring Connections... 3 Uninstall the Main Unit...
PRECAUTIONS. Lithium Battery Cell Warnings. Use cautions. Cell leakage may cause damage to the remote control. Do not throw cells into
 CONTENTS Precautions... 1 Lithium Battery Cell Warnings... 1 Use Cautions...1 Installation... 2 Installation Precedures... 2 Installation Opening... 2 Wiring Connections... 3 Uninstall the Main Unit...
PLHRDVD101KT. Dual Vehicle Headrest Mount Multimedia Disc Player System Car Video Entertainment Display Monitors with Wireless Headphones (10.
 PLHRDVD101KT Dual Vehicle Headrest Mount Multimedia Disc Player System Car Video Entertainment Display Monitors with Wireless Headphones (10.5 -inch) FRONT PANEL REMOTE CONTROL MULTIMEDIA PLAYER 1. LCD
GSMR20 OWNER S MANUAL
 GSMR20 OWNER S MANUAL Version 1.0 FEATURES AM/FM/Radio/Preset 180 Watts Max Power Pre-Amplifier Outputs Splash Proof LCD Display Bluetooth Audio Streaming (Bluetooth 3.0) A2DP Audio Streaming USB/AUX Input
INSTALLATION AND USER MANUAL FOR GATEWAY PRO BT
 INSTALLATION AND USER MANUAL FOR GATEWAY PRO BT 1. INTRODUCTION The Dension Gateway Pro BT lets you connect your ipod or USB storage (stick, hard drive or mass storage capable mp3 player) to your original
PRE-INSTALL QUESTIONS
 PRE-INSTALL QUESTIONS Is it really Plug and Play? Yes. The Navos comes with all the necessary plugs and harnesses to connect directly to your car; no extra adapters or dash trim kits required. Is the Navos
USER S MANUAL. BV9351B BLUETOOTH DVD/MP3/CD AM/FM RECEIVER FEATURING 6.2" (157 mm) WIDESCREEN TOUCHSCREEN DIGITAL TFT LED MONITOR USER S MANUAL
 WIDESCREEN TOUCHSCREEN DIGITAL TFT LED MONITOR USER S MANUAL") USER S MANUAL BV9351B BLUETOOTH DVD/MP3/CD AM/FM RECEIVER USER S MANUAL BV9351B BLUETOOTH DVD/MP3/CD AM/FM RECEIVER FEATURING 6.2" (157 mm) WIDESCREEN TOUCHSCREEN DIGITAL TFT LED MONITOR BOSS Audio Systems
USER S MANUAL BV9351B BLUETOOTH DVD/MP3/CD AM/FM RECEIVER USER S MANUAL BV9351B BLUETOOTH DVD/MP3/CD AM/FM RECEIVER FEATURING 6.2" (157 mm) WIDESCREEN TOUCHSCREEN DIGITAL TFT LED MONITOR BOSS Audio Systems
Contents. Precaution... Main Menu... Radio... Play DVD... USB/SD AUX Input Bluetooth Screen Mirroring Navigation...
 USER MANUAL Thank you for buying this XTRONS product. Please read through these instructions so you will know how to operate this unit properly. After you have finished reading the instructions, keep this
KIV-BT901 KIV-701 DIGITAL MEDIA RECEIVER INSTRUCTION MANUAL. Register Online Register your Kenwood product at
 KIV-BT901 KIV-701 DIGITAL MEDIA RECEIVER INSTRUCTION MANUAL Before reading this manual, click the button below to check the latest edition and the modified pages. Take the time to read through this instruction
Honda Toyota Accord Venza Quick Start Guide
 Multimedia Navigation System Honda Pilot Quick Start Guide In-Dash Multi-Media / Navigation System Honda Toyota Accord Venza Quick Start Guide G System Features: Navigation Bluetooth Hands-Free ipod and
Owner s Manual AWM910 JENSEN AWM910 COMPACT DISC PLAYER RADIO CD COMPACT MUSIC SYSTEM MUTE AUX BAND AUX IN PUSH PUSH PWR VOL ALARM T/F AUD SPK A SPK B
 AWM910 Owner s Manual COMPACT DISC PLAYER PUSH 1 2 3 4 5 6 RPT SCAN RDM H M PUSH PWR VOL ALARM SET ON/OFF EQ T/F AUD RADIO CD COMPACT MUSIC SYSTEM MUTE AUX BAND CD AUX IN A B A+B JENSEN AWM910 Thank You!
Contents. Precaution... Main Menu... Radio... Play DVD... USB/SD AUX Input Bluetooth Screen Mirroring Navigation...
 USER MANUAL Thank you for buying this XTRONS product. Please read through these instructions so you will know how to operate this unit properly. After you have finished reading the instructions, keep this