18.1 Access to Google Talk Web Browser Enter the main interface Change your home page Visit a Web page...
|
|
|
- April Simpson
- 5 years ago
- Views:
Transcription
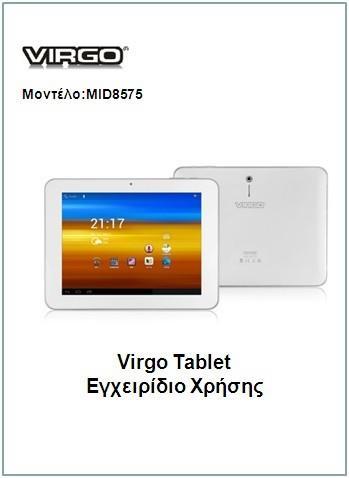
1 1
2 contents 1 Basic introduction The main function The main menu interface Message and status icons View the message Battery Using the charger Please note the following before the charge Gravity sensor Memory card Boot Input information Sign In Add a mail account Delete the mail account G Internet Set 3G Internet Memory card Storage settings for the machine Copy the file to a memory card Delete files on the memory card View the available storage space Recording Recording operations View recording Delete the recording Music Access and play music Adding songs to a new playlist Delete Playlist Set up WIFI settings Ethernet settings Cameras and camcorders The picture is taken Filming Play video View image G-mail Read the new information Write Message
3 18.1 Access to Google Talk Web Browser Enter the main interface Change your home page Visit a Web page Take good care of the machine

4 1 Basic introduction Home screen extends beyond the screen width to provide more space for new icons, gadgets, etc.. On the desktop quickly with your fingers sliding around, you can skip the extension of there spense to the Home screen. 2 The main function Volume control button Switch key Back key Home key Search button Call, press the "+" to increase the volume, press the "-" to decrease the volume until mute, no phone, adjust the system sound Long press: Power on / open the system menu contains shut down Short press: put out the screen lock screen, the phone goes into sleep mode Return to the previous steps, or a user interface In any interface,click this button to quickly return to the main menu inter fac Click this button to enter the search interface can be related to the search operation; 4

5 3 The main menu interface The main menu will show all applications on this machine, click the application icon will start the appropriate application, the application's shortcut in the main menu interface can long press the application icon will be added to the standby interface. 3.1 Message and status icons The status bar is located at the top of the screen. The prompt will be the arrival of the calendar thing, or an alarm clock, the status bar will be displayed to the left of the home button icon. The right side of the status bar back key the Home key, the recent task keys, menu key, time and battery icon. 3.2 View the message When prompted in the status bar by holding down the column box on the screen with your fingers sliding open the notification list. Click to view the corresponding content of a notification options 5

6 Back to Home Flight Mode Vibration mode New voice mail Pending events Alarm Clock Play music Data synchronization In upload / download The download is complete 2G connection, the data exchange 3G service connected, data exchange Lack of SD card space More Charging Wi-Fi service is connected, open networks are available Battery change marked 4 Battery 4.1 Using the charger The smaller end of the charging cable mini USB port to insert the USB interface of the device at the bottom of the charging line to the other end is plugged into the computer for charging or charging port for charging with the charger directly into the bottom of the device. 4.2 Please note the following before the charge 1.Equipment, the initial lack of Kaifeng, when battery; 2.Turned off when charging, the charging animation, full of show full of pictures; 5 Gravity sensor 6
7 The gravity sensor is a new type of a sensor technology will automatically switch when the screen of the machine anyway, you can play the game instead of up and down, when you encounter the machine by hand or shaking the machine, the devices emit vibrations or tones for equipment off the loss of perception. 1.The setup steps are as follows: 2.In the main screen, press the Menu button, click on "System Settings"; 3.Click "Show"; 4.Select the "Automatically rotate the screen, that is successfully set. 6 Memory card The device uses a Micro SD memory card and built-in storage,can store multimedia files such as music, ring tones, wallpaper,and video. The built-in storage is set in the machine store. Built-in storage memory, the device comes without memory card memory space,like when the factory than the machine itself had brought a small hard drive. External to install the memory card, follow these steps: 1.Remove your SD card; 2.SD card is inserted into the SD card slot in the lower end of the machine. 7 Boot Long hold down the switch button for 3 seconds to start the device 8 Input information Start a program or select a field that requires text or numbers will appear on-screen keyboard. The on-screen keyboard available in two configurations to choose from: Android keyboard, Google Pinyin input Android keyboard input, long press to open the menu in the Google Pinyin input method, press and Open the menu, this menu to select the keyboard and configuration options that you want to use. 7


8 9 The machine can receive information from a POP3 or IMAP accounts. Can simultaneously support up to five accounts. 9.1 Sign In 1.Find and click the icon in the menu interface, 2.Enter the appropriate information in the Setup Wizard page that pops up, click "Next"; 3.Select the "pop3" account type; 4.Security type select "SSL / TLS, click Next 5.Outgoing server settings interface, the port to "25", then click Next to enter the next page, until it is completed. 9.2 Add a mail account 1.Sign In , click on the "menu button" click "Settings"; 2.Click on the top right of the screen to add the account into the new interface; 8
9 3.Enter the appropriate information in the pop-up setup wizard page until completed. The application can automatically set a common mailbox server.go to your in box, set the issue before the name of the message display, after the completion of these steps, click "Next" to go to your in box. If the account does not automatically set in accordance with the prompt for the mailbox server addresses, protocols, and other account information. To verify the account settings, click "Next" to go to your in box. 9.3 Delete the mail account Delete already set up POP3 or IMAP mail account: 1.Enter the mailbox, click on the "menu"; 2.Click on "Settings"; 3.Click the "Delete account"; 4.Click "OK". 10 3G Internet Sure to insert the 3G card terminal device before the 3G Internet WIFI device is turned off Set 3G Internet 1.3G card inserted in the device's SIM card slot; 2.Click Settings, click on "More"; 3.Click on the "mobile network" 4.Check the "data" and "data roaming" enabled; 5.Click the name of the access point will connect automatically. 11 Memory card Memory card for storing music and pictures and other files, use the camera and download data from the network prior to insert a memory card Storage settings for the machine Prior to transfer files, just to the equipment connected through the USB cable and computer, "USB debugging" is enabled, you can not pass this machine direct access to the pictures or music, you want to access the pictures or music, you need to disconnect the USB cable 9
10 11.2 Copy the file to a memory card The machine with a USB cable connected to the computer; Click on the "status bar"; Click on the "USB connected"; Click "Open the USB storage device"; Locate and open "My Computer" on your computer, click on"removable Disk" to enter, you can copy files between memory card and computer. Folder in the Pictures folder in the native form of an album Delete files on the memory card 1.Locate the file you want to delete; 2.Long click on the "file name"; 3.Click the "Delete" View the available storage space 1.In the main screen, click on the "menu key"; 2.Click on "Settings"; 3.Click on the "store". 12 Recording 12.1 Recording operations 1.Click on the "tape recorder" icon in the main interface; 2.Click on the button and start recording; 3.Click on the button to end the recording View recording The view path of the recording in two ways: 1.View through the file manager path 1)View in the main screen, click on "File Manager" icon; 2)Click on the file containing the "recording"; 3)Selection operation to select the file type "pop-up interface 2View through the music path 1)Click the music icon in the main interface, click the play list 10

11 2)After clicking the "recording" into my recording interface to view 12.3 Delete the recording 1.Locate the file you want to delete; 2.Long click on the "file name"; 3.Click the "Delete". 13 Music The music is divided into four categories: artist, album, song and playlist. Press the corresponding icon to view the list of content into the appropriate classification. For example, select the "artist"category, to be able to see the name of the artist list, arranged from A to Z order. If you select an artist, showing the artist's album and the album's song list. This unit can play music files of the following formats: *MP3 *M4A(iTunes AAC, DRM-free) *AMR *MIDI *WAV *OGG Vorbis 13.1 Access and play music 1.After entering the main interface, click the icon of the "music"; 2.Click on the "songs", "Artist", "album" "playlist" one of them to further select a song; on or 11
12 3.Click the "songs" to play Adding songs to a new playlist 1.After entering the music player, click on the song you want to add; 2.Click on the "menu key"; 3.Click "add to playlist"; 4.Click on the "New Playlist"; 5.Enter the name of the playlist; 6.Click "Save"; 13.3 Delete Playlist 1.After entering the playlist, press and you want to delete the playlist; 2.Click the "Delete". 14 Set up 14.1 WIFI settings WI-FI network access steps as follows: 1.In the main screen, click on "Settings"; 2.WIFI to open it; 3.Click to connect to WI-FI network; 4.If necessary, enter the password in the dialog box and click "Connect" Ethernet settings Before using the Ethernet, the device adapter to connect to the Internet terminal, WI-FI is turned off. Ethernet settings steps are as follows: 1.After entering the "Settings" click on "More" 2.Click on the "Ethernet"; 3.Check the "Ethernet"; 4.Click on the "Ethernet Configuration", as "DHCP dynamic connection type in the pop-up dialog box, select 5.Click Save. 12

13 15 Cameras and camcorders The device has a camera can take pictures and video The picture is taken 1.Click on the "camera" icon in the main interface; 2.Click " " to take pictures Filming 1.Click on the "camera" icon in the interface; 2.Select a video camera; 3.Click" "on the "filming; 4.Click" " on the "Stop filming. 16 Ultra-clear to player The ultra-clear player can play video and view pictures Click on the icon of the "super clear player to enter the main interface Play video In the main interface, click on the ultra-clear playback icon, and then click to watch video, you can start the movie. 13
 17 G-mail G-mail messages are classified by topic.")

14 16.2 View image Into the ultra-clear, click on the player interface to look at pictures you can (when the memory card to store more files, it may take some time to load pictures) 17 G-mail G-mail messages are classified by topic. Viewing messages,select the appropriate topic, the recent dialogue at the bottom.not read the number of information will be displayed in the title bar, display unread messages in bold format. If you add a message mark, the mark appears at the time the top of a colored rectangle. 14
,simply click on GMAIL")

15 17.1 Read the new information You can through your G-mail account to receive mail. The first time you log need to fill in the G-mail account and password (if there is no need to apply for a GMAIL account),simply click on GMAIL icon after login. 1.After entering the main interface, click the "G-mail"; 2.Click an in the In box to read Write Message 1.Go to the G-mail ; 2.Click on the " "; 3.Enter the recipient's address in the To field; 4.Enter a subject and message content; 5.To add an attachment, click on " "Select the attachment is added; 15

; 4.")
16 6.Writing is completed, then click "Send." 18 Instant Messaging 18.1 Access to Google Talk If you have already registered for the G-mail account, you can use Google Talk to a friend send instant messages. Open the Google Talk: 1.Into the main interface, click on the Google Talk; 2.Click the "Talk" is enabled; 3.Click " " to enter the appropriate information in the dialog box until the completion of (the other is also a G-mail account); 4.Add after the success of the chat. 19 Web Browser 19.1 Enter the main interface 1.On the home screen, click on the "application"; 2.Click on the "browser". 16
17 19.2 Change your home page 1.Into the browser, press the Menu button; 2.Click 'more'; 3.Click on "Settings"; 4.Click on the "Set Home"; 5.Enter a URL, click "OK." 19.3 Visit a Web page Into the browser, press the Menu button; 2.Click on the URL input field; 3.Enter the URL; 4.Click on the "go". 20 Take good care of the machine This machine is a complex electronic device, or even as a minicomputer. The following tips can help extend the life of the machine. 1.The best equipment in a safe place, away from water sources to protect the machine and accessories; 2. Only use the original manufacturers of the machine parts. Without the permission of the accessories is likely to damage the machine and shorten the life of the machine; 3.To avoid the weight from height, fall, etc., not forced to run the machine. 17
18 18
STUDIO 7.0 USER MANUAL
 STUDIO 7.0 USER MANUAL 1 Table of Contents Safety Information... 3 Appearance and Key Functions... 4 Introduction... 5 Call Functions... 6 Notifications Bar... 7 Contacts... 8 Messaging... 9 Internet Browser...
NEO 4.5. User Manual
 1 NEO 4.5 User Manual Table of Contents Safety Information... 3 Appearance and Key Function... 4 Introduction... 5 Call Functions... 6 Contacts... 7 Messaging... 8 Internet Browser... 9 Bluetooth & Wi-Fi...
Dash Jr. User Manual
 Dash Jr. User Manual 1 Table of Contents Safety Information...4 Appearance and Key Function...6 Introduction...8 Call Functions...9 Contacts... 11 Messaging... 12 Internet Browser... 13 Bluetooth... 14
Studio 5.5. User Manual
 Studio 5.5 User Manual 1 Table of Contents Safety Information... 3 Appearance and Key Function... 4 Introduction... 5 Call Functions... 6 Contacts... 7 Messaging... 8 Internet Browser... 9 Bluetooth...
DASH 4.5 user manual 1
 DASH 4.5 user manual 1 Table of Contents Safety Information... 3 Appearance and Key Function... 4 Introduction... 4 Call Functions... 6 Contacts... 6 Messaging... 8 Internet Browser... 9 Bluetooth... 10
Dash 4.0. User Manual
 1 Dash 4.0 User Manual Table of Contents Safety Information... 3 Appearance and Key Function... 4 Introduction... 5 Call Functions... 6 Contacts... 7 Messaging... 8 Internet Browser... 9 Bluetooth... 10
<,W,EϬϱ E USER MANUAL
 USER MANUAL GETTING STARTED To get started with the Agora handset, please take both the phone and the battery out of the box. On the rear of the phone you will find a plastic backing cover with a small
USER MANUAL TABTRONICS QUANTUM 7
 USER MANUAL TABTRONICS QUANTUM 7 This user manual has been specially designed to guide you through the functions and features of your device. Please read this manual carefully before using your device
LIFE PURE User Manual
 LIFE PURE User Manual 1 Table of Contents Safety Information... 3 Appearance and Key Function... 4 Introduction... 5 Call Functions... 6 Contacts... 7 Messaging... 8 Internet Browser... 9 Bluetooth...
NID- 7006A. Memory Powered by Android TM OS 4.1
 THE NEW GENERATION IN TECHNOLOGY NID- 7006A Core TM 7 Tablet PC with 8GB Built- In Memory Powered by Android TM OS 4.1 Basic Introduction... 1 Quick Start... 1 Battery management and charging... 1 Boot
STUDIO MINI LTE USER MANUAL
 Studio Mini LTE English Manual STUDIO MINI LTE USER MANUAL Table of Contents Safety Information Call Functions Notifications Bar Contacts Messaging Bluetooth & Wi-Fi Opera Browser Gmail Play Store Camera
LIFE 8 XL USER MANUAL
 1 LIFE 8 XL USER MANUAL Table of Contents Safety Information... 4 Call Functions... 7 Notifications Bar... 8 Contacts...10 Messaging...13 Bluetooth & Wi-Fi...14 Opera Browser...17 Gmail...18 Play Store...20
User Manual. Please read this manual before operating your tablet, and keep it for future
 User Manual Read me first Please read this manual before operating your tablet, and keep it for future reference. The descriptions in this manual are based on the default settings. Images and screenshots
VEGA. Operation Manual T A B L E T P C. advent vega operation manaul_new.indd 1
 VEGA T A B L E T P C Operation Manual advent vega operation manaul_new.indd 1 advent vega operation manaul_new.indd 2 CONTENTS SETTING UP YOUR TABLET FOR THE FIRST TIME... 4 USING THE DEVICE S BUTTONS
USER MANUAL Model T705
 USER MANUAL Model T705 1 Thank you for choosing 3nStar StarTab. This user manual has been specially designed to guide you through the functions and features of your device. Please read this manual carefully
Dash Jr. User Manual Table of Contents
 (/usermanuals) Dash Jr. User Manual Table of Contents Safety Information Safety Information Call Functions Contacts Messaging Opera Mini Browser Bluetooth & Wi Fi Camera Gallery Music Sound Recorder Alarm
Take and Send a Picture. To send the picture, press. Send Send To. Tip: To store or discard the picture, press Options and select Store Only.
 Take and Send a Picture This feature is network/ subscription dependent and may not be available in all areas. Contact your service provider for more details. Press the centre key, then select Camera.
STUDIO 5.0CE USER MANUAL
 STUDIO 5.0CE USER MANUAL 1 Table of Contents Safety Information... 4 Appearance and Key Function... 7 Introduction... 9 Call Functions... 10 Notifications Bar... 12 Contacts... 14 Messaging... 17 Bluetooth
FAQ For IDOL 5S. SW: v4e1z+ul
 FAQ For IDOL 5S SW: v4e1z+ul i. Basic Setting 1. How can I set up my Alcatel device when I turn it on for the first time? The first time you turn on the phone, you will see a welcome screen. You can start
User Operating Manual
 User Operating Manual Contents 1 Introduction... 1 1.1 Acknowledgements... 1 1.2 Safety Notice... 1 1.3 Abbreviation/term... 2 2 Brief Product Introduction... 3 2.1 Diagram for TABLET... 3 2.2 Introduction
STUDIO 6.0 LTE USER MANUAL
 STUDIO 6.0 LTE USER MANUAL 1 Table of Contents Safety Information... 3 Appearance and Key Function... 5 Introduction... 6 Call Functions... 7 Notifications Bar... 8 Contacts... 9 Messaging... 11 Bluetooth
1. Introduction. 1.1 Cosmo Specifications
 1. Introduction 1.1 Cosmo Specifications Details CPU Memory Storage Operating System Connectivity Sensor Camera Display Video Formats Description Quad Core 1.3 GHz ARM Cortex A7 Processor 512MB RAM 8 GB
HotSpot USER MANUAL. twitter.com/vortexcellular facebook.com/vortexcellular instagram.com/vortexcellular
 HotSpot USER MANUAL www.vortexcellular.com twitter.com/vortexcellular facebook.com/vortexcellular instagram.com/vortexcellular 1 Contents Quick User Guide... 2 1. Power On/Off... 2 2. Turn On /Off Screen...
Your phone Important keys & connectors
 Your phone Important keys & connectors USB home Search Volume up/down Power on/off menu back Receiver Proximity sensors camera LCD Camera Flash light Anti-noise Mic Speaker 1 Contents Your phone................................
DASH L USER MANUAL 1
 1 DASH L USER MANUAL Table of Contents Safety Information... 4 Call Functions... 7 Notifications Bar... 8 Contacts... 10 Messaging... 13 Bluetooth & Wi-Fi... 14 Downloads... 17 Opera... 18 Gmail... 19
HELLOMOTO. contents MOTO U9
 HELLOMOTO MOTO U9 Feel It, See It, Hear It! Your MOTO U9 phone is made to be held, and made to be seen! Transfer your favorite quickly and easily with Microsoft Windows Media Player 11. Control playback
VIVO AIR USER MANUAL
 VIVO AIR USER MANUAL 1 Table of Contents Safety Information... 4 Appearance and Key Functions... 7 Introduction... 9 Call Functions... 10 Notifications Bar... 12 Contacts... 14 Messaging... 17 Bluetooth
Getting Started. Parts & Functions Handset Status Bar
 Getting Started 1 Parts & Functions... 1-2 Handset... 1-2 Status Bar... 1-4 Memory Card... 1-6 Enabling Automatic Backup... 1-6 Restoring Backed Up Data to Handset... 1-6 Memory Card Installation... 1-6
Specifications. What s Inside The box
 Tablet of Contents Specifications.1 What s inside the box 1 Tablet Parts 2 Getting started...2 Connecting to the Internet..6 Task Bar..8 Install and Uninstall 9 Camera.10 HDMI.11 Trouble Shooting 11 Warranty..13
Dell Streak 7. User's Manual COMMENT
 Dell Streak 7 User's Manual COMMENT Notes, Cautions, and Warnings NOTE: A NOTE indicates important information that helps you make better use of your device. CAUTION: A CAUTION indicates potential damage
VIVO 5 USER MANUAL 1
 VIVO 5 USER MANUAL 1 Table of Contents Safety Information... 4 Introduction... 8 Navigation Bar... 9 Notifications Bar... 10 Call Functions... 13 Contacts... 15 Messaging... 19 Bluetooth & Wi-Fi... 20
Aero. Quickstart. Important Icons
 Important Icons Icon Description AGPS is available Missed call Outgoing call Silent mode is enabled Vibrate mode is enabled Battery charge level is 60% Battery is charging Icon Description Wi-Fi is in
Vivo 5 English User Manual VIVO5. USER MANUAL Table of Contents. Safety Information
 (/usermanuals) Vivo 5 English User Manual VIVO5 USER MANUAL Table of Contents Safety Information Please carefully read the terms below: Use Safely Safety Information Introduction Navigation Bar Notifications
User Manual. Mode: Elite 7.0L. Please read this manual before operating your tablet, and keep it for future
 User Manual Mode: Elite 7.0L Read me first Please read this manual before operating your tablet, and keep it for future reference. The descriptions in this manual are based on the default settings. Images
Quick Start Guide U.S. Cellular Customer Service
 Quick Start Guide U.S. Cellular Customer Service 1-888-944-9400 LEGAL INFORMATION Copyright 2017 ZTE CORPORATION. All rights reserved. No part of this publication may be quoted, reproduced, translated
Tala. Quick Start Guide
 Tala Quick Start Guide Table of contents 1. First use 1.1 SIM card and micro-sd card 1.2 Charging the battery 1.3 Power ON/OFF the device 1.4 To exit the idle screen 2. Start-Up 2.1 First Start-Up 2.2
FAQ For IDOL 5 Basic Setting ii. Home screen iii. Phone call iv. Contact Ringtone & Sounds vi. Message
 FAQ For IDOL 5 i. Basic Setting 1. How can I set up my Alcatel device when I turn it on for the first time? 2. How can I change the language of the device? 3. How can I check the IMEI number of my Alcatel
1 Safety & Notice Your Phone Keypad function descriptions Icons (Icon changes without prior NOTICE) Battery...
 Battery...") 1 E435 User Manual 1 Safety & Notice... 3 2 Your Phone... 4 2.1.1 Keypad function descriptions... 5 2.1.2 Icons (Icon changes without prior NOTICE)... 6 2.2 Battery... 7 2.2.1 Remove and install of the
1 E435 User Manual 1 Safety & Notice... 3 2 Your Phone... 4 2.1.1 Keypad function descriptions... 5 2.1.2 Icons (Icon changes without prior NOTICE)... 6 2.2 Battery... 7 2.2.1 Remove and install of the
BlackBerry Bold 9700 Smartphone
 BlackBerry Bold 9700 Smartphone User Guide Version: 6.0 To find the latest user guides, visit www.blackberry.com/docs/smartphones. SWDT643442-941426-0127080340-001 Contents Quick Help... 9 Top 10... 9
USER MANUAL MODEL#:ID706WTA Table of Contents
 USER MANUAL MODEL#:ID706WTA Table of Contents Table of Contents... 1 1 Outlook Description... 3 2 Power Button Usage... 4 3 Transfer Box... 4 4 Using microsd Card... 4 5 Getting Started... 5 Charge the
viii. Bluetooth 36. How can I turn on Bluetooth and pair with another Bluetooth device?
 FAQ For TCL Mobiles i. Basic Setting 1. How can I set up my TCL device when I turn it on for the first time? 2. How can I change the language of the device? 3. How can I check the IMEI number of my TCL
Get. Started. All you need to know to get going.
 Get Started All you need to know to get going. Special note for Sprint As You Go customers With Sprint As You Go you can free yourself from long-term contracts and enjoy more wireless flexibility. Some
Catalogue. Assembling... 1 Unpack Charge the Battery Install the Memory Card Product Basics Buttons and Connections...
 Catalogue Assembling... 1 Unpack... 1 Charge the Battery... 1 Install the Memory Card... 1 1 Product Basics... 2 1.1 Buttons and Connections... 2 1.2 Start Up and Shut Down... 2 2 Introduction of Google
CONTENTS. Safety Information Cleaning and Maintenance Function Information Messaging
 CONTENTS Safety Information... - 3 - Cleaning and Maintenance... - 3 - Function Information... - 5 - Messaging... - 7 - Email... - 8 - Camera... - 9 - Music... - 10 - FM Radio... - 12 - Sound Recorder...
STUDIO M LTE USER MANUAL
 STUDIO M LTE USER MANUAL 1 Table of Contents Safety Information... 3 Introduction... 8 Navigation Bar... 9 Notifications Bar... 10 Call Functions... 13 Contacts... 15 Messaging... 19 Bluetooth & Wi-Fi...
BlackBerry Bold 9780 Smartphone Version: 6.0. User Guide. To find the latest user guides, visit
 BlackBerry Bold 9780 Smartphone Version: 6.0 User Guide To find the latest user guides, visit www.blackberry.com/docs/smartphones. SWDT643442-941426-0922024829-001 Contents Quick Help... 9 Top 10... 9
Contents. Get Started Install SIM Card
 Contents Get Started... 2 Install SIM Card... 2 Insert Micro SD card... 2 Charge Mobile Phone... 3 PC-Phone File Transfer... 4 Keys and Parts... 5 Fingerprint... 7 Lock and Unlock the Screen... 9 Notification
User Manual Maxell. **Product specifications are subject to change**
 User Manual Maxell **Product specifications are subject to change** Keys and Functions 2 Connect to PC via USB cable When connecting to PC with a USB cable, the icon appears at the left side of the status
Tablet PC. User Manual
 Tablet PC User Manual Product Model: ZH10X2-PAD Operation Manual The pictures or words may be inconsistent due to upgrade of product edition or specification modification and are subject to actual products
FAQ for KULT Basic. Connections. Settings. Calls. Apps. Media
 FAQ for KULT Basic 1. What do the Icons mean that can be found in notifications bar at the top of my screen? 2. How can I move an item on the home screen? 3. How can I switch between home screens? 4. How
PA0942. Mobile Internet Device. User s Manual. Version
 PA0942 Mobile Internet Device User s Manual Version-01-20130606 2 Power Switch... 2 3 Touch Screen... 2 4 Using SD Card... 3 5 Getting Started... 3 8 Reinstalled applications... 6 9 Desktop menu function...
Get. Started. All you need to know to get going.
 Get Started All you need to know to get going. Welcome! Thanks for choosing Sprint. This booklet introduces you to the basics of getting started with Sprint Prepaid and your LG G Stylo. For ongoing support
C LED light off indicating that Charging is complete.
 Battery Please charging when you first use the device or the device power shortage. onnect the device and outlet by special adapter 1 of the device. Power off the device, when you press the ON/OFF key
PENDOPAD 9.7 QUICKSTART GUIDE & USER MANUAL PNDPP42DG9BLK. > Please read carefully before use
 PENDOPAD 9.7 PNDPP42DG9BLK QUICKSTART GUIDE & USER MANUAL > Please read carefully before use This manual contains important safety precautions and information of correct use. Please be sure to read this
Aspera R7. User Manual
 1 Aspera R7 User Manual Contents Safety Information... 3 Appearance and Key Function... 5 Introduction... 6 Call Functions... 7 Notifications Bar... 8 Contacts... 9 Messaging... 9 Bluetooth and Wi-Fi...
VIVO XL3 PLUS USER MANUAL YHLBLUVIVOXL3
 VIVO XL3 PLUS USER MANUAL YHLBLUVIVOXL3 1 Table of Contents Safety Information... 5 Introduction... 10 Navigation Bar... 10 Notifications Bar... 11 Call Functions... 14 Contacts... 16 Messaging... 19 Bluetooth
YPAD A7. User manual - 1 -
 YPAD A7 User manual - 1 - Content Chapter One Quick Start Guide... - 5-1.1 PRODUCT DESCRIPTION... - 5 - Front and rear view... - 5 - Side view... - 6-1.2 ACCESSORIES... - 7-1.3 INSTALLATION OF SIM CARD
Table of Contents. Safety Information Introduction Navigation Bar Notifications Bar Call Functions Contacts...
 R1 HD USER MANUAL 1 Table of Contents Safety Information... 4 Introduction... 8 Navigation Bar... 9 Notifications Bar... 10 Call Functions... 13 Contacts... 15 Messaging... 19 Bluetooth & Wi-Fi... 21 2
1. Introduction P Package Contents 1.
 1 Contents 1. Introduction ------------------------------------------------------------------------------- P. 3-5 1.1 Package Contents 1.2 Tablet Overview 2. Using the Tablet for the first time ---------------------------------------------------
NID Memory Powered by Android TM OS 4.1
 THE NEW GENERATION IN TECHNOLOGY NID- 7007 Core TM 7 Tablet PC with 8GB Built- In Memory Powered by Android TM OS 4.1 i TABLE OF CONTENTS 1 OUTLOOK DESCRIPTION... 1 2 POWER BUTTON USAGE... 1 3 TOUCH-SCREEN
STUDIO G2 USER MANUAL
 STUDIO G2 USER MANUAL 1 Table of Contents Safety Information... 4 Introduction... 8 Navigation Bar... 9 Notifications Bar... 10 Call Functions... 13 Contacts... 15 Messaging... 19 Bluetooth & Wi-Fi...
S1 Smart Watch APPS GUIDE. Models: S1, S1C & S1 PLUS
 S1 Smart Watch APPS GUIDE Models: S1, S1C & S1 PLUS SETTINGS The settings app in the S1 allows you to make adjustments on all local settings on the watch. You can change the look of the screen, sound and
NETWORK THE HOME 10 FOLDERS APPS
 NID-7006 NAXA NID Tablet User s Guide Table of Contents GETTING STARTED 4 CONNECTING TO A WIRELESS NETWORK 4 USING THE TOUCHSCREEN 4 USING THE HOME SCREENS 5 USING THE NAVIGATION ICONS 6 USING THE ALL
Quick Start Guide Use your phone for more than just talking
 Quick Start Guide Use your phone for more than just talking Music Player with 3D Stereo Sound Cellular Video 1.3 Megapixel Rotating Camera with Video Mobile Email Instant Messaging (IM) MEdia TM Net See
 1.1 1.2 2.1 2.2 2.3 3.1 3.2 INTRODUCING YOUR MOBILE PHONE Learn about your mobile phone s keys, display and icons. Keys From the front view of your phone you will observe the following elements: (See 1.1
Karbonn All rights reserved
 User Manual V97 HD Table of Contents Safety instructions ------------------------------------------------------------------ 3 Device overview --------------------------------------------------------------------
Sony Ericsson W880i Quick Start Guide
 Sony Ericsson W880i Quick Start Guide In just a few minutes we ll show you how easy it is to use the main features of your phone. This is a Vodafone live! with 3G phone, so you can take advantage of the
Table of Contents. 2 Know your device. 4 Device setup. 8 Customize. 10 Connections. 11 Apps. 12 Contacts. 13 Messages. 14 Camera.
 Table of Contents 2 Know your device 4 Device setup 8 Customize 10 Connections 11 Apps 12 Contacts 13 Messages 14 Camera 15 Internet Know your device Front view Front Camera SIM Card Slot microsd Card
LIFE ONE X2 USER MANUAL Table of Contents. Safety Information
 LIFE ONE X2 USER MANUAL Table of Contents Safety Information Please carefully read the terms below: Use Safely Safety Information Introduction Navigation Bar Notifications Bar Call Functions Contacts Messaging
User Guide. Welcome to HUAWEI
 User Guide Welcome to HUAWEI Contents Introduction.................................... 1 Installation..................................... 2 Keys and Functions.................................. 2 Installing
S1 Smart Watch APPS GUIDE. Models: S1, S1C & S1 PLUS
 S1 Smart Watch APPS GUIDE Models: S1, S1C & S1 PLUS SETTINGS The settings app in the S1 allows you to make adjustments on all local settings on the watch. You can change the look of the screen, sound and
LIFE ONE X2 USER MANUAL
 LIFE ONE X2 USER MANUAL 1 Table of Contents Safety Information... 4 Introduction... 8 Navigation Bar... 9 Notifications Bar... 10 Call Functions... 13 Contacts... 15 Messaging... 19 Bluetooth & Wi-Fi...
General notices for use... 2 Disclaimer... 2 Box Contents... 2
 TAB-PI847 Table of Contents General notices for use... 2 Disclaimer... 2 Box Contents... 2 1.0 Product basics... 3 1.1 Buttons and connections... 3 1.2 Start up and shut down... 4 2.0 Introduction to Google
Index. Symbols. 24-hour clock, enabling/disabling,
 14_0789737264_index.qxd 9/24/07 5:36 PM Page 325 Index Symbols 24-hour clock, enabling/disabling, 213 A accepting cookies, 179 accessing settings, 300 accounts AT&T accounts, creating, 7-9 itunes Store
1. Introduction P Package Contents 1.
 1 Contents 1. Introduction ------------------------------------------------------------------------------- P. 3-5 1.1 Package Contents 1.2 Tablet Overview 2. Using the Tablet for the first time ---------------------------------------------------
Quick Start Guide Use your phone for more than just talking
 Quick Start Guide Use your phone for more than just talking Music Player with 3D Stereo Sound Cingular Video TM 1.3 Megapixel Rotating Camera with Video Mobile Email Instant Messaging (IM) MEdia TM Net
TCC8803 PAD User Manual
 TCC8803 PAD User Manual Important Safety Instructions Please read the following instructions carefully before using this player. Do not remove the T-Flash card while it s in use to avoid damage to the
1. Notes. 2. Accessories. 3. Main Functions
 Contents 1. Notes... 2 2. Accessories... 2 3. Main Functions... 2 4. Appearance And Buttons... 3 5. MID Hardware Parameters... 4 6. MID Use And Preparation... 4 7. Keys Functions... 4 8. Start-up And Shutdown...
Quick Start Guide D U.S Service Hotline : More support at
 TM Quick Start Guide D-7 U.S Service Hotline : -888-707-655 More support at www.dpad.info Overview Touch Screen App Menu 4 5 4 5 6 Camera Power Key Earphone Jack Mini USB Port 7 6 7 8 9 8 7 Power DC Input
Quick Start Guide. U.S. Cellular Customer Service
 Quick Start Guide U.S. Cellular Customer Service 1-888-944-9400 LEGAL INFORMATION Copyright 2014 ZTE CORPORATION. All rights reserved. No part of this publication may be quoted, reproduced, translated
VIVO 6 USER MANUAL 1
 VIVO 6 USER MANUAL 1 Table of Contents Safety Information... 4 Introduction... 8 Navigation Bar... 9 Notifications Bar... 10 Call Functions... 13 Contacts... 15 Messaging... 18 Bluetooth & Wi-Fi... 20
User manual. For Support Ring:
 www.wishtel.com User manual For Technical queries Email: query@wishtel.com Ring: 022 30010707 / 08 For Support Email: support@wishtel.com Ring: 022 30010700 Table of Contents Table of Contents 1 Out Look
This guide describes features that are common to most models. Some features may not be available on your tablet.
 User Guide Copyright 2014 Hewlett-Packard Development Company, L.P. Bluetooth is a trademark owned by its proprietor and used by Hewlett-Packard Company under license. Google, Google Now, Google Play,
Know your device. SPen Front camera. Camera. Power key. Volume keys. Recent apps Home key Back key USB/Charger port
 Know your device SPen Front camera Power key Camera Volume keys Recent apps Home key Back key USB/Charger port 1 2 S Pen The S Pen enables fast, accurate, and precise input while providing a natural writing
StarryBay. User Guide
 StarryBay User Guide SW-08 Smart Watch 1 / 13 Contents 3 Chapter 1: Overview 3 External part & Internal part 3 Accessories 3 On screen keyboard 4 Basic gestures 5 Status icons 6 Three working modes 7 Chapter
ZYRO. User Guide.
 ZYRO User Guide www.v7devices.com To ensure safe and proper use, please read all the safety precautions and this manual carefully before using your device. The descriptions in this manual are based on
Contents Welcome Know your Device Greeting started Features Accessing the Internet Taking Care of Your Device
 Thank you for purchasing the tablet PC and it is packaged with the following state of the art features and much more: 1 GHz Processor 7 Inch Full touch screen with Pinch Zoom 3G Dongle support via USB
Insignia Flex Tablet (NS-14T004) FAQ. February 2014
 FAQ. February 2014") Insignia Flex Tablet (NS-14T004) FAQ February 2014 Setup... 2 Question 1: How do I set up my tablet for the first time?... 2 Android... 2 Question 2: What is Android Jelly Bean?... 2 Question 3: How are
Insignia Flex Tablet (NS-14T004) FAQ February 2014 Setup... 2 Question 1: How do I set up my tablet for the first time?... 2 Android... 2 Question 2: What is Android Jelly Bean?... 2 Question 3: How are
F58.fm Page 1 Thursday, June 21, :19 PM MOTORAZR 2
 6803570F58.fm Page 1 Thursday, June 21, 2007 3:19 PM MOTORAZR 2 V8 6803570F58.fm Page 2 Thursday, June 21, 2007 3:19 PM 6803570F58.fm Page 3 Thursday, June 21, 2007 3:19 PM welcome Your MOTORAZR 2 V8 phone
User guide. Xperia C4 dual E5343
 User guide Xperia C4 dual E5343 Contents Getting started...6 About this User Guide...6 Overview...6 Assembly...7 Starting your device for the first time...8 Why Do I Need a Google Account?...8 Charging
QUICK START GUIDE.
 QUICK START GUIDE Touch UI (Touch Screen) Customizable Home Screens Intuitive Rotating Display Using the Virtual QWERTY Handwriting Recognition Transferring Music Browsing the Web Taking a Picture Recording
NeoIDesc 595. Quick Manual ( Preliminary Version V8.28) The NeoIDesc 595 is mainly screen driven and easy to use by screen Icons and Instructions
 The NeoIDesc 595 is mainly screen driven and easy to use by screen Icons and Instructions") NeoIDesc 595 Quick Manual ( Preliminary Version V8.28) The NeoIDesc 595 is mainly screen driven and easy to use by screen Icons and Instructions 1.) Notice: Before you use the 595 first time, you must
NeoIDesc 595 Quick Manual ( Preliminary Version V8.28) The NeoIDesc 595 is mainly screen driven and easy to use by screen Icons and Instructions 1.) Notice: Before you use the 595 first time, you must
Get Started. Insert SIM card The phone is a Dual SIM mobile phone allowing you to use the facility of two networks.
 Thank You for Purchasing this Smart mobile device. This device will provide you with high quality mobile communication and entertainment based on SMART and high standards. Content in this manual may differ
Table of Contents. Safety Information... 4 Introduction... 8 Navigation Bar... 8 Notifications Bar Call Functions Contacts...
 1 USER MANUAL Table of Contents Safety Information... 4 Introduction... 8 Navigation Bar... 8 Notifications Bar... 9 Call Functions... 12 Contacts... 14 Messaging... 18 Bluetooth & Wi-Fi... 20 Opera Browser...
Package Contents. Firmware Updates. Device Overview
 1 This Quick Start Guide covers the basics for initial setup and usage of your SuperNova. For complete instructions on all features and functionality, refer to the device User Guide (preloaded in the device)
User guide. Xperia SP C5302/C5303/C5306
 User guide Xperia SP C5302/C5303/C5306 Contents Xperia SP User guide...6 Getting started...7 About this User guide...7 Android what and why?...7 Device overview...7 Assembly...8 Turning the device on and
TALK 5H USER S MANUAL
 TALK 5H USER S MANUAL 2 INTRODUCTION... 5 GETTING STARTED... 5 Important Safety Precautions... 5 Cleaning the Panel... 6 Cleaning the Phone... 6 Features... 6 Buttons overview... 7 What s int he Box...
Quick Start Guide D502PB. U.S Service Hotline : More support at
 Quick Start Guide D502PB U.S Service Hotline : 1-888-863-0138 More support at www.d2pad.info Overview ENGLISH 1 2 3 8 7 4 5 6 1 2 3 4 5 6 7 8 Volume Keys Status Bar Front Camera Menu Key Home Key Back
Getting Started Guide
 Getting Started Guide Cingular 3125 C I N G U L A R M A K E S B U S I N E S S R U N B E T T E R Table of Contents Welcome to Cingular 2 What s in the Box? 2 Get To Know Your 3 Set Up Your 4 Insert Battery
X8 Extended User guide
 X8 Extended User guide Contents User support...5 User guide in the phone...5 User support application...5 Experience more. Discover how...5 Getting started...6 Assembly...6 Turning the phone on and off...7