CONTENTS I Getting to know your camera..1 II Software & Download 15 III Maintenance. 23 IV Specification and system requirement...
|
|
|
- Edwin Dickerson
- 5 years ago
- Views:
Transcription
1 CONTENTS I Getting to know your camera Configuration & installation Monitor screen display Preparation before capture Shooting 3 5. Video& Audio recording Audio input /output Image review setup Other setup 12 II Software & Download 15 1 PC-CAM driver installation How to use PC CAM function 22 3 How to download the photos...23 III Maintenance. 23 IV Specification and system requirement...27

2 I Getting to know your camera 1. Configuration & installation 1 Shutter button 2 Power button 3 Flash light 4 Macro switch 5 USB jack 6 Lens 7 TFT monitor screen 8 Left/self-timer button 9 Playback button 10 Zoom out button 11 Zoom in button 12 Busy light 13 Macro light 14 Up/Display button 15 Ok button 16 Right / Flash button 17 Down/Mode button 18 Delete Button 19 Menu button 20 Battery cover 21 SD card slot 22 Tripod socket 1

3 2. Monitor screen display 3. Preparation before capture 3.1 Battery It s optional to use AAA alkaline batteries or rechargeable batteries. Open the battery cover and load the batteries according to the polarity indicated on the battery door. 3.2 Insert the memory card Insert the memory card to the card slot carefully. Check the right direction before insert the memory card. Attention: If you can not insert the SD card, take it out and insert again. 2
4 4. Shooting 1): Press POWER button to enter the default capture mode; 2): Press the SHUTTER button to take pictures. Attention: Do not take the memory card or battery out when camera is saving the image, otherwise, the image won't be saved completely. The screen will power off automatically if the camera is not in working status for 30 seconds. Press any key to restart the screen. 4.1 Review photos Press PLAYBACK button to view the pictures. Press the LEFT or RIGHT button to select the picture. 4.2 Delete photos a) Press the PLAYBACK button to enter review mode. b) Press the DELETE button to enter the DELETE mode; c) Press the LEFT button to select Yes ;and press the OK button to delete the file. 4.3 Shooting setup Press MENU to enter main menu for 2 options: Image mode and Setup mode: Select Image, the following settings are: Resolution, Quality, White Balance, Color Effect, Exposure, DateStamp, Selftimer, and Burst Snapshot 3
5 A. Resolution: a) Press the UP or DOWN button to select the resolution mode, then press the RIGHT button for 5 options : 2592*1944, 2048*1536,1600*1200,1280*960,640*480. Press the UP or DOWN button to select the resolution. b) press the OK button to confirm and press MENU button to exit. B. Quality: a) Press the UP or DOWN button to select Quality and press the RIGHT button for 3 options: Super, Fine, Normal. b) Press the UP or DOWN button to select the image quality. c) Press the OK button to confirm and press the MENU button to exit. C. White Balance: a) Press the UP or DOWN button to select White Balance, press the RIGHT button for 5 options: Auto, Day Light, Tungsten, Fluorescent, and Cloudy; b) Press the UP or DOWN button to select the proper mode; c) Press the OK button to confirm and press the MENU button to exit; D. Color Effect: a) Press the UP or DOWN button to select Color Effect, press the RIGHT button for 3 options: Color, Sepia, Monochrome ; b) Press the UP or DOWN button to select the color you desired; c) Press the OK to confirm and press the MENU button to exit. 4
6 E. Exposure: a) Press the UP or DOWN button to select Exposure, and then press the RIGHT button to select; b) Press the LEFT or RIGHT button to adjust the exposure from -2.0 to +2.0; then press the OK button to confirm. F. Date Stamp: Set up "date stamp" if you would like to show the date" on you picture a) Press the UP or DOWN button to select Date Stamp, press the RIGHT button to select; b) Press the UP or DOWN button to select Enable or Disable ; c) Press the OK button to confirm and press the MENU button to exit. G. Self-timer: a) Press the UP or DOWN button to select Selftimer, press the RIGHT button to select: Disable, 10SEC, 20SEC ; b) Press the UP or DOWN button to select the time you desired; c) press the OK to confirm and press MENU button to exit. Attention: select Disable if you want to cancel the selftimer function. H. Burst Snapshot: You can select the Burst Snapshot to take 3 pictures continuously. a) Press the UP or DOWN button to select Burst Snapshot, press the RIGHT button for 2 option: Single, Burst ; b) Press the UP or DOWN button to select Burst ; 5
7 c) Press the OK button to confirm and press the MENU button to exit. Flashlight Auto: Automatically turn on/off according to the light Flash on: Force on the flash Flash off: Force off the flash In capture mode, press the FLASH button to adjust the flash mode. The screen is in blank when the flash is in charge status, the next image can be shot only when the charge is completed. If shooting with flash under a bright environment, the facular in the image will cause the incorrect exposure. Attention: The flash does not work in Burst snapshot mode. In order to save power, the flash will not work when battery is low. Digital zoom To view the zoom effected by LCD. Note: digital zoom may affect the quality of image. The higher digital zoom multiples, the lower of the image quality, maximum 4X digital zoom is available. In the camera/video/playback mode, press the ZOOM IN button to zoom in or zoom out; or ZOOM OUT 6
8 5. Video recording: 1): Press the MODE button to select video mode ; 2): Press the SHUTTER button to start video recording; 3): Press the SHUTTER button again to stop recording. 5.1 Play video files a) Press the PLAYBACK button to view the video file. b): Press the LEFT or RIGHT button to select the video file; c): Press the SHUTTER button to play video file and press the SHUTTER button again to end the playing; d): Press the OK button to pause, press it again to continue. Attention: Please note that this camera does not support the speaker; the volume is only available when connecting with TV or PC. 5.2 Delete video file See page 3 for detail set up. 5.3 Video recording setup In the video mode press the MENU button to enter the main menu for 2 options: video and setup. There are 4 options available for video setup: Resolution, Frame rate, White balance and Audio. A: Video Resolution: a) Press the UP or DOWN button to select Resolution, press the RIGHT button to select: 640*480 or 320*240; 7
9 b) Press the UP or DOWN button to select the resolution. c) Press the OK button to confirm and press the MENU button to exit. B: Frame rate: a) Press the UP or DOWN button to select Frame rate, press the RIGHT button for 2 options: 30FPS or 15FPS; b) Press the UP or DOWN button to select the frame rate; c) Press the OK button to confirm and press the MENU button to exit. C: White balance See page 5 for detail set up. D: Audio Recording:. a) Press the MENU button under the video mode, press the UP or DOWN button to select Audio, press the RIGHT button for 2 options : Enable or Disable ; b) The video is with voice recorded when select Enable, the video is without voice recorded when select Disable ; c) Press the OK button to confirm and press the MENU button to exit. 6. Audio recording 6.1 Audio input a): Power on; b): Press the MODE button to select Audio Mode; ( ) c): Press the SHUTTER button to start audio recording, the recording time will be showed on the screen; 8
10 d): Press the SHUTTER button again to stop recording. 6.2 Delete audio files See page 4 for detail set up 6.3. Play video /audio file on TV You can play video/audio file on TV by connecting the AV cable: a): Power on TV and switch to AV mode; b): Power on the camera and connect it to TV by the AV cable; c): Press the MODE button to enter the PLAYBACK mode; d): Press LEFT or RIGHT button to select the file. Press the SHUTTER button to play and press it again to end the playing. e): Press the OK button to pause and press it again to continue. Attention: The camera screen will automatically off when the cable is connected to the camera; The battery will also be used when the camera connected to TV; The TV system may affect the image quality, please adjust the camera system PAL or NTSC to comply with the TV system(see page 16); Please adjust the TV setting if the image does not display at the center of TV screen; this is not the failure of the camera. Please use the cable attached to connect with the camera and TV. 9
11 7:Image review setup: In image playback mode, press the MENU button to enter the main menu for 2 options: play and Setup. There are 8 Options in play mode: Delete Current, Delete All, lock, thumbnail, set logo, rotate, slideshow. 7.1 Delete image a) Press the UP or DOWN button to select delete current or delete all. b) Select Delete Current to delete the current image. Press the RIGHT button to confirm. c) Select Delete All to delete all the images. Press RIGHT button to confirm. Attention: You can also delete current file by the DELETE button. 7.2 Lock image a) Press the UP or DOWN button to select lock, press the RIGHT button for 4 options: lock current, lock all, unlock current, unlock all ; b) Press the UP or DOWN button to select; c) Press the OK button to confirm and press the MENU button to exit. Attention: The locked image can not be deleted. 7.3 Thumbnail a) Press MENU button in image playback mode, then press the UP or DOWN button to select thumbnail, press the RIGHT button to 10
12 enter thumbnail mode; b) Press the LEFT, RIGHT, UP and DOWN button to select image, then press the OK button to restore the original size. 7.4 Set Logo: You can set the picture you like as the startup logo. a) Press the UP or DOWN button to select Set logo, press the RIGHT button for 2 options: Yes, No ; b) Press the UP or DOWN button to select Yes ; c) Press the OK button to confirm and back to playback mode. 7.5 Rotate a) Press the playback button to enter the image playback mode; b) Press the UP or DOWN button to select Rotate, press the RIGHT button to enter rotate mode: 90º, 180º and 270º; c) Press the UP or DOWN button to select the rotate degree you need, then press the OK button to confirm. Attention: The Rotate function does not work on resolution 2592x1944 (5Mega pixel) or above. 7.6 Slideshow: a) Press the UP or DOWN button to select slide show ; b) Press the RIGHT button to set slideshow; c) Press the SHUTTER button to return to the normal playback mode. 11
13 8. Other settings A: Language (Abc): a) Power on and press the MENU button to enter Image and Setup ; b) Press RIGHT button to select Setup ; c) Press the UP or DOWN button to select Language (Abc), d) Press the RIGHT button to enter Language (Abc) ; e) Press the UP or DOWN button to select the language you need; then press the OK button to confirm. B: Auto Power Off a) Power on and press the MENU button to enter Setup ; b) Press the UP or DOWN button to enter Auto Power Off ; c) Press the RIGHT button to select Disable, 60Sec, 120Sec ; d) Press the UP or DOWN button to select power off time, then press OK button to confirm. C: TV Output a) Power on and press the MENU button to enter Setup ; b) Press the UP or DOWN button to enter TV Output ; c) Press the RIGHT button to enter NTSC,PAL ; d) Press the UP or DOWN button to select the proper TV system; then press the OK button to confirm. d) Press the MENU button to exit. 12
14 D: Play Logo a) Press the UP or DOWN button to select Play Logo ;l b) Press the RIGHT button to select Enable or Disable ; c) Press the UP or DOWN button to select the operation you need; then press the OK button to confirm. d) Press the MENU button to exit. Attention: No startup screen is displayed when you select Disable E: Light Frequency a) Power on and press the MENU button to select Setup ; b) Press the UP or DOWN button to select Light Frequency ; c) Press the RIGHT button to select: 50HZ or 60HZ then press the OK button to confirm. d) Press the MENU button to exit. F: Date/Time a) Power on and press the MENU button to enter Setup mode; b) Press the UP or DOWN button to enter Date/Time ; c) Press the RIGHT button to enter the Date/Time interface; d) Press the RIGHT button to select year, month, date, hour, and minute; e) Press the UP or DOWN button to set up the year, month, date hour and minute; and then press the OK button to confirm. G: Buzzer 13
15 a) Power on and press the MENU button to select Setup mode; b) Press the UP or DOWN button to select Buzzer ; press the right button to select Enable or Disable, and then press the OK button to confirm. c) Press the MENU button to exit. H: Format a) Power on and press the MENU button to select Setup mode; b) Press the UP or DOWN button to select Format ; c) Press the RIGHT button to select Yes to format the camera internal memory or SD card. d) Press the OK button to confirm and press the MENU button to exit. Attention: All the saved files will disappear if you format the memory. I: Default setting a) Power on and press the MENU button to select Setup ; b) Press the UP or DOWN button select Default setting ; c) Press the RIGHT button for 2 options: Load, NO, d) Press the UP or DOWN button to select load to back to the default setting. e) Press the OK button to confirm. f) Press MENU button to exit. J: USB Mode 14
16 Select PC Camera mode when you use this camera as a PC camera. Select Mass Storage mode when you download, delete or upload file, it can also be used as a removable disk. a) Power on and press the MENU button to enter Setup ; b) Press the UP or DOWN button to select USB Mode ; c) Press RIGHT button for options: mass storage or PC camera. d) Press UP or DOWN button to select; e) Press the OK button to confirm and press MENU button to exit. K: Firmware version a) Power on and press the MENU button to enter Setup ; b) Press the UP or DOWN button to select Firmware version ; c) Press the RIGHT button to enter, it will show the firmware version and updated date. d) Press OK button to exit. II. Software & Download 1. PC-CAM driver installation Insert the CD into the CD-ROM of your PC, An interface appears as follows, Click the Install Camera Driver to install the camera driver. 15


17 Select the installed language 16


18 Connect the camera with PC by USB cable, Power on the camera, then press mode button to select PC CAMERA 17

, click next ;")
19 An interface Found new hardware Wizard appears, select Yes, this time only, then click next ; Select install the software automatically (Recommended), click next ; 18

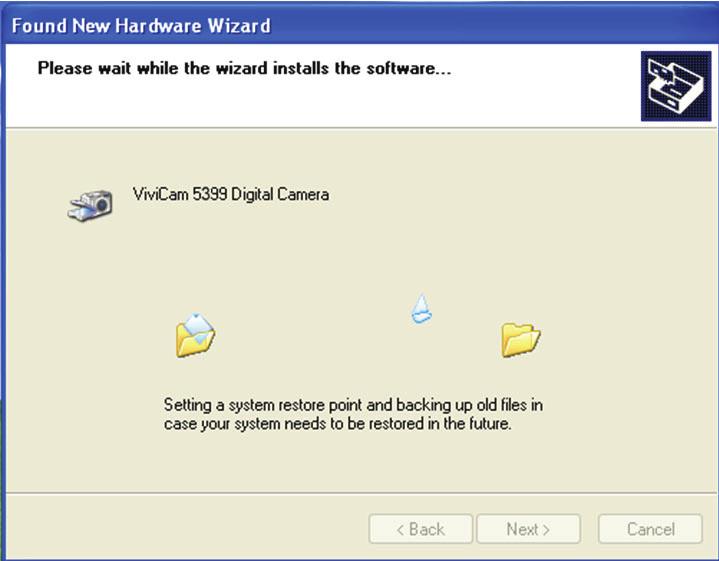

20 If hardware installation interface appears, click Continue Anyway ; 19

, click next ;")
21 If the following interface appears, click cancel ; An interface Found new hardware Wizard appears, select Yes, this time only, then click next ; Select install the software automatically (Recommended), click next ; 20

22 If hardware installation interface appears, click Continue Anyway ; 21

23 The installation is finished and now you can use the pc camera function; 2. How to use PC-CAM function 1. Power on the camera, Press the mode button to Select PC camera 2. Double click the icon my computer on the desktop of PC 3. Double click the icon Vivicam 5399 video camera, Then you can start to use the pc-cam function 22
: Double click Vivicam 5399 icon d): Double click DCIM file folder; e): Copy all the files to your PC. Attention: 1.")
24 3. How to download the photos Set the USB mode to mass storage, and then the camera becomes a removable storage device: a): Connect the USB cable with PC and the camera; b): Double click the icon my computer on the desktop of PC; c): Double click Vivicam 5399 icon d): Double click DCIM file folder; e): Copy all the files to your PC. Attention: 1. do not take out the SD card or the batteries when you copy the files to PC, otherwise the files might be destroyed or lost. 2. When you download the photos, please always connect the USB cable to PC first, then to the camera; if you connect the USB cable to camera first, the screen will go blank, and if in this case, you can restart the camera. III. Maintenance Always keep your camera and accessories in proper condition. 1. Camera Use dry, soft and clean cloths to wipe out the fingerprint and the dust on the 23
25 lens and LCD. Do not use rough cloths or abrasive of laundry to avoid the surface scrape of the camera. Do not put the camera in the sun or under the high-temperature environment (such as high temperature tool bag, trolley case and so on). Wait few minutes before use when you bring the camera from a low temperature environment to a warm environment. 2. Battery Energy management The energy status of the power can be displayed on LCD as below: low half full The factors influence the lifetime of the battery: The used frequency and time of LCD; The used frequency of flashlight; Quantity of image shooting Temperature (it will shorten the lifetime of the battery when the camera is used in low temperature environment). Note: Manganese battery is not allowed for this camera; Don t take out the battery when power on, otherwise it will affect the 24
26 internal settings and functions of the camera; The following situation will affect the lifetime of the battery: LCD turn on; LCD in playback status for a long time. Please replace new battery when battery low, and follow the battery instruction on when using. Please take out the battery if you won t use the camera for a long time. Don t insert the leakage, eroded or inflated battery into the camera. Note: if you use rechargeable battery, please full charge the battery before using. 3. Memory card The format is necessary in the following situations: a): Unformatted SD card; b): Repeat format card when it does not working in camera properly although it has been formatted before; c): It is important to format the card first when it will be used in another camera. Attention: please keep the card in unlock status before using. All data will be deleted and unable to recover when the card is formatted, please backup the data before formatting. Memory card format a. Keep the card in n unlock status; 25
27 b. Insert the card into the camera; c. Power on c. Press the MENU button to enter setup : d. Press the UP or DOWN button to select format ; e. Press the RIGHT button for 2 options: Yes, No. Then press the UP or DOWN button to select yes ; f. Press the OK button to format the memory card. Attention: do not pull out the card or take out the battery when formatting to avoid any failure of the card. The following card is available to this camera: Standard SD card(8 MB 2GB) 3V(3.3V)card(8 MB 2 GB) 5V card is not available The camera may be unable to recognize the non-standard card or formatted by another device (such as another camera). Please format the card in this camera before use. 4. Security To avoid the danger of electric shock, do not open the camera or fix the camera by yourself. Keep the camera in dry condition, the humidity may cause the failure of the camera. Stop using the camera immediately if the camera affected with damp. It is necessary to dry the camera in the air before reuse the camera. 26
28 IV. Specifications & system requirement: 1. Specifications of the camera sensor 5 Mega pixel CMOS Image resolution 2592 x 1944, 2048 x 1536, 1600 x 1200, 1280 x 960, 640x 480 storage Internal 32MB Flash, External SD card(8mb to 2GB) File format JPEG, EXIF 2.2, MJPEG(AVI) Capture Single/Burst Video Quality VGA 640x480,QVGA 320X240 at 30fps or 15fps snapshot speed Electronic shutter:1/2 ~ 1/2000 sec Self timer 10 sec/20 sec zoom 4 x digital zoom White balance Auto Daylight tungsten fluorescent Cloudy exposure control Auto flash mode flash off,flash on,flash Auto illumination Auto PC-Camera mode 640x480 interface USB1.1 TV output NTSC/PAL TFT monitor screen 2.4 TFT LCD monitor screen power 2 x AAA alkaline batteries rechargeable batteries OSD language focal range aperture /French/German/Spanish/TC/Italian/Portuguese f=8.25mm F=3.0 27
29 Auto power off 60sec/120sec System required WIN98SE /2000/ME/XP/Vista Weight Approx. 85g(3.0oz)(without batteries and SD card) Dimensions Approx. 85 x 56 x 22mm(3.3x2.2x0.86 in) Attention: The product design and the specifications are subject to change without prior notice. 2. System required: Windows 98SE/2000/ME/XP/Vista CPU: Pentium III 800MHz and upper Memory:64 MB and upper memory Disk space:at least 128 MB space free 28
User Manual Package Contents:
 User Manual Package Contents: Bean - Carabiner Camera Li-Ion Rechargeable Battery USB Cable/Video Cable AC Adapter User Guide ArcSoft PhotoImpression and Driver Installation CD CONTENTS I Getting to Know
I. Getting to know your camera 1. Configuration and installation
 I. Getting to know your camera 1. Configuration and installation 1 Display button 2 LED On / Off button 3 Mode button (DV / DSC) 4 Shutter button 5 Up button 6 OK button 7 AV / USB jack 8 Right button
DV 5470 User Manual Package Contents:
 DV 5470 User Manual Package Contents: Manual Camera Pouch Installation CD Earbuds AV Cable CONTENTS 1. NOTICE...2 2. SETUP...3 2.1 BATTERY INSTALLATION...3 2.2 MEMORY CARD...4 2.3 CONFIGURATION & INSTALLATION...4
SIC 3608S/G7. Digital camera with swivel lens. User manual
 SIC 3608S/G7 Digital camera with swivel lens User manual Thank you for purchasing the Philips SIC 3608S/G7 digital camera where we encourage you to... do the swivel! Capturing photos your way. Enjoy the
DVR 528 Digital Video Camera
 DVR 528 Digital Video Camera User Manual 2010 Sakar International, Inc. All rights reserved. Windows and the Windows logo are registered trademarks of Microsoft Corporation. All other trademarks are the
Hamilton Electronics CAMERA-DC2. User s Manual
 Hamilton Electronics CAMERA-DC2 User s Manual 1 1. PARTS OF THE DIGITAL CAMERA...5 2. PREPARING FOR USING...6 INSTALLING THE BATTERY... 6 CHARGE THE BATTERY... 7 INSERTING THE MEMORY CARD... 9 FORMAT THE
INSTRUCTION MANUAL 1
 INSTRUCTION MANUAL 1 Precautions...4 Disclaimer 5 PREPARING FOR USE...6 Parts of the Camera.. 7-8 Inserting the Battery and SD Card..9-10 BASIC OPERATION.. 11 Powering the Camcorder On and Off...11 Setting
DVR 514 Digital Video Recorder
 DVR 514 Digital Video Recorder User Manual 2010 Sakar International, Inc. All rights reserved. Windows and the Windows logo are registered trademarks of Microsoft Corporation. All other trademarks are
Product Manual. Intova Duo
 Product Manual Intova Duo 1 Introduction Thank you for purchasing an Intova Duo. Your Duo is a tough and robust Sports Camera with a wide range of features. Please read this manual carefully for usage
Knox KN-DC20MP Instruction Manual
 Knox KN-DC20MP Instruction Manual Camera Interface, Inputs, and Outputs 1) Shutter - Press this button to take photographs or to start /stop recording a video clip, or to confirm changes in menu mode 2)
615HD Digital Video Camera
 615HD Digital Video Camera User Manual 2009-2011 Sakar International, Inc. All rights reserved. Windows and the Windows logo are registered trademarks of Microsoft Corporation. All other trademarks are
DVR 520 / 1.8 Digital Video Recorder
 DVR 520 / 1.8 Digital Video Recorder User Manual 2010 Sakar International, Inc. All rights reserved. Windows and the Windows logo are registered trademarks of Microsoft Corporation. All other trademarks
DVR 710HDv2 Digital Video Recorder
 DVR 710HDv2 Digital Video Recorder User Manual 2009-2011 Sakar International, Inc. All rights reserved. Windows and the Windows logo are registered trademarks of Microsoft Corporation. All other trademarks
1. PARTS OF THE CAMCORDER PREPARING FOR USING... 5
 INSTRUCTION MANUAL 1. PARTS OF THE CAMCORDER... 4 2. PREPARING FOR USING... 5 INSTALLING THE BATTERY... 5 CHARGING THE BATTERY... 5 FORMAT THE MEMORY CARD... 6 SETTING THE LANGUAGE... 7 SETTING THE DATE
DVR 505 Digital Camcorder
 DVR 505 Digital Camcorder User Manual 2016 Sakar International, Inc. All rights reserved. Windows and the Windows logo are registered trademarks of Microsoft Corporation. All other trademarks are the property
DVR 560HD Digital Video Recorder
 DVR 560HD Digital Video Recorder User Manual 2010 Sakar International, Inc. All rights reserved. Windows and the Windows logo are registered trademarks of Microsoft Corporation. All other trademarks are
Introduction Congratulations on your purchase of this digital video camera. Before using the camera, please read this user manual carefully.
 EVC1700 User Guide 2 Introduction Congratulations on your purchase of this digital video camera. Before using the camera, please read this user manual carefully. The main purpose is to shoot videos. It
DVR 548HD Digital Video Recorder
 DVR 548HD Digital Video Recorder User Manual 2009-2011 Sakar International, Inc. All rights reserved. Windows and the Windows logo are registered trademarks of Microsoft Corporation. All other trademarks
CAMERA-DC2 Digital Camera Instruction Manual
 CAMERA-DC2 Digital Camera Instruction Manual 80 Little Falls Road, Fairfield, NJ 07004 800.631.0868 www.hamiltonbuhl.com Read manual carefully before using the product and keep for future reference. 80
DIGITAL CAMERA OWNER S MANUAL KT7015A
 DIGITAL CAMERA OWNER S MANUAL KT7015A 1 Contents Contents..2 Preface.4 System Requirements..5 Notices.6 Install Driver...8 Start to Use 10 Install Battery 10 Charge Battery.. 10 Use SD Card.. 10 Switch
Table of Contents 1 Features and Specifications Functions Technical Specifications Appearance and Accessories
 Table of Contents 1 Features and Specifications... 2 1.1 Functions... 2 1.2 Technical Specifications... 3 2 Appearance and Accessories... 4 2.1 Appearance... 4 2.2 Accessories... 6 3 Preparations before
Table of contents Introduction Getting Started Taking still images or videos
 User Manual Table of contents Introduction Features............................................1 Package contents.....................................2 Camera overview.....................................2
Welcome 1. Camera Precaution
 0 Table of Contents 1. Camera Precautions 4 2. Preparation... 7 Standard Accessories... 7 Parts Names... 8 Charging the Battery...... 9 Loading the SD card.. 11 Attaching the Strap.... 12 3. Quick Start.
PRECAUTIONS... 1 DISCLAIMER... 1 FACTORY DEFAULT SETTINGS... 1 PREPARATION...
 CONTENTS PRECAUTIONS... 1 DISCLAIMER... 1 FACTORY DEFAULT SETTINGS... 1 PREPARATION... 2 INTRODUCTION... 2 INSERTING BATTERY... 4 INSERTING MEMORY CARD... 4 BASIC OPERATION... 5 TURN ON / OFF THE DV...
TE-DVR-MM User Manual
 TE-DVR-MM User Manual 1. Components Front Back Remote Control Wiring Connections: Yellow - Battery + Red - Accessory + Black - Ground 2. ibeam Brackets (Sold Separetly) 3. Operation AV1 = Video 1 input
ViviCam T026 Digital Camera
 ViviCam T026 Digital Camera User Manual 2010 Sakar International, Inc. All rights reserved. Windows and the Windows logo are registered trademarks of Microsoft Corporation. All other trademarks are the
Handbuch CL 83_UK.indd :18
 1. Parts of the digital camera...30 2. Preparing for using...31 Installing the Battery... Charge the battery... Inserting the Memory Card... Format the memory card... Setting the Language... Setting the
2014 All Rights Reserved. Windows and the Windows logo are registered trademarks of Microsoft Corporation. All other trademarks are the property of
 2014 All Rights Reserved. Windows and the Windows logo are registered trademarks of Microsoft Corporation. All other trademarks are the property of their respective companies. 1 2 Thank you for purchasing
Use Specification of Pixie Princess
 User Manual ----------------------------------------------------------------------------1/14----------------------------------------------------------------------------- Preface Thank you for purchasing
IN-CAR HD Digital Video Recorder
 IN-CAR HD Digital Video Recorder USER MANUAL KPT-200 In order to ensure better use of each function of your Kapture In-Car HD DVR, it is recommended that you read these product instructions carefully before
Function Description 3. Notice for Use...3. System Requirements.5. Start to use..6. ArcSoft PhotoImpression, VideoImpression and MediaImpression.
 0 1 Contents Function Description 3 Notice for Use...3 System Requirements.5 Start to use..6 ArcSoft PhotoImpression, VideoImpression and MediaImpression.13 Product Specifications..28 Supplied Accessories
Contents. Section 1 Getting to Know Your Digital Camera Overview...1 Front View...1 Rear View...2 Side View...2 Bottom View...
 1 Contents Section 1 Getting to Know Your Digital Camera... 1 Overview...1 Front View...1 Rear View...2 Side View...2 Bottom View...3 Section 2 Getting Up and Running... 4 Loading the Batteries...4 Inserting
Car DVR User Manual. 1, Key features. Preface. Notes
 Car DVR User Manual Preface Thank you for purchasing this DVR, this device has a unique ultra-portable design; it can be used in various fields, to bring you convenient, safe, colorful daily life. Please
DVR 808HD Digital Camcorder
 DVR 808HD Digital Camcorder User Manual 2009-2016 Sakar International, Inc. All rights reserved. Windows and the Windows logo are registered trademarks of Microsoft Corporation. All other trademarks are
DVR 949HD Digital Video Camera
 DVR 949HD Digital Video Camera User Manual 2009-2012 Sakar International, Inc. All rights reserved. Windows and the Windows logo are registered trademarks of Microsoft Corporation. All other trademarks
DVR 426HDv3. Digital Camcorder
 DVR 426HDv3 Digital Camcorder User Manual 2009-2012 Sakar International, Inc. All rights reserved. Windows and the Windows logo are registered trademarks of Microsoft Corporation. All other trademarks
ViviCam T027 Digital Camera
 ViviCam T027 Digital Camera User Manual 2010 Sakar International, Inc. All rights reserved. Windows and the Windows logo are registered trademarks of Microsoft Corporation. All other trademarks are the
DVR 508NHD Digital Camcorder
 DVR 508NHD Digital Camcorder User Manual 2009-2012 Sakar International, Inc. All rights reserved. Windows and the Windows logo are registered trademarks of Microsoft Corporation. All other trademarks are
User Guide Version 1. Primary ICT Ltd Tel: Fax:
 Please Read All Instructions Carefully Before Using User Guide Version 1 Please retain these instructions for future reference Tuff-Cam 2 contains a non-replaceable, rechargeable battery Do not attempt
ViviCam X029-10MP Digital Camera
 ViviCam X029-10MP Digital Camera User Manual 2009-2012 Sakar International, Inc. All rights reserved. Windows and the Windows logo are registered trademarks of Microsoft Corporation. All other trademarks
DXG-202V User's Manual
 DXG-202V User's Manual Contents 1.Attention..... 4 Safety Precautions........4 Before Using Your Digtial Video Camera.........4 Operational Precautions......... 5 Package Contents...........5 2.Getting
DVR 960HD Digital Video Recorder
 DVR 960HD Digital Video Recorder User Manual 2010 Sakar International, Inc. All rights reserved. Windows and the Windows logo are registered trademarks of Microsoft Corporation. All other trademarks are
ViviCam X014 Digital Camera
 ViviCam X014 Digital Camera User Manual 2010 Sakar International, Inc. All rights reserved. Windows and the Windows logo are registered trademarks of Microsoft Corporation. All other trademarks are the
Content Prooduct Specification... 4 Getting to Know your camera... 5 Device overview... 5 battery... 7 memory card... 7 Turning your camera on...
 User Manual Content Prooduct Specification... 4 Getting to Know your camera... 5 Device overview... 5 battery... 7 memory card... 7 Turning your camera on... 9 modes... 9 Capture Mode... 10 photo... 10
DVR 548NHD Digital Camcorder
 DVR 548NHD Digital Camcorder User Manual 2009-2012 Sakar International, Inc. All rights reserved. Windows and the Windows logo are registered trademarks of Microsoft Corporation. All other trademarks are
Digital Camera / GVA12DC. Instruction Manual
 Digital Camera / GVA12DC Instruction Manual Introduction Thank you for purchasing the 12 Mega-Pixel Digital Camera. Everything you need to take quality digital photos and videos is included with your camera.
G-SHOT3000CC. (User Guide)
") 82-170-00041 G-SHOT3000CC Digital Video (User Guide) Warning: In the event of return of this product, it will only be accepted by the retailer with the supplied 32Mb memory card. Goodmans Helpline Phone
82-170-00041 G-SHOT3000CC Digital Video (User Guide) Warning: In the event of return of this product, it will only be accepted by the retailer with the supplied 32Mb memory card. Goodmans Helpline Phone
Please read this manual carefully before use and keep it for future reference. Please format your SD card first in our camera when you start to use
 1 Please read this manual carefully before use and keep it for future reference. Please format your SD card first in our camera when you start to use our camera, or format it in computer. Table of Content
ViviCam S327 Digital Camera
 ViviCam S327 Digital Camera User Manual 2009-2012 Sakar International, Inc. All rights reserved. Windows and the Windows logo are registered trademarks of Microsoft Corporation. All other trademarks are
1, Key features. Preface. Notes
 Car DVR User Manual Preface Thank you for purchasing this DVR, this device has a unique ultra-portable design; it can be used in various fields, to bring you convenient, safe, colorful daily life. Please
ViviCam X014N Digital Camera
 ViviCam X014N Digital Camera User Manual 2009-2011 Sakar International, Inc. All rights reserved. Windows and the Windows logo are registered trademarks of Microsoft Corporation. All other trademarks are
ViviCam F529 Digital Camera
 ViviCam F529 Digital Camera User Manual 2010 Sakar International, Inc. All rights reserved. Windows and the Windows logo are registered trademarks of Microsoft Corporation. All other trademarks are the
Instructions for using the memory card
 User Manual ITEM CODE: DVH5299JC Function Thank you for choosing this camera. Please carefully read the manual before using, and keep it at a safe place for future reference. The compilation of the user
ViviCam S126 Digital Camera
 ViviCam S126 Digital Camera User Manual 2009-2017 Sakar International, Inc. All rights reserved. Windows and the Windows logo are registered trademarks of Microsoft Corporation. All other trademarks are
ViviCam S124 Digital Camera
 ViviCam S124 Digital Camera User Manual 2009-2013 Sakar International, Inc. All rights reserved. Windows and the Windows logo are registered trademarks of Microsoft Corporation. All other trademarks are
ViviCam S131 Digital Camera
 ViviCam S131 Digital Camera User Manual 2009-2012 Sakar International, Inc. All rights reserved. Windows and the Windows logo are registered trademarks of Microsoft Corporation. All other trademarks are
Konica Minolta introduces the affordable DiMAGE E500 digital camera
 Konica Minolta introduces the affordable DiMAGE E500 digital camera Konica Minolta introduces the affordable new 5 Megapixel DiMAGE E500 digital camera. Featuring a 5 Megapixel CCD, large 2-inch LCD, and
Nature Cam TX-09. User Manual Declaration of Conformity internet link:: (in bottom bar Konformitätserkärung ) Features
 Features") Nature Cam TX-09 User Manual Declaration of Conformity internet link:: www.technaxx.de/ (in bottom bar Konformitätserkärung ) Features Security camera for indoor and outdoor use Ideal for viewing wild
Nature Cam TX-09 User Manual Declaration of Conformity internet link:: www.technaxx.de/ (in bottom bar Konformitätserkärung ) Features Security camera for indoor and outdoor use Ideal for viewing wild
Introduction. Precautions
 User Manual Introduction Thank you for choosing this camera. The product adopts high-performance chip which can achieve HD video, motion graphics with strong continuity, support AVI video format, and take
Instruction Manual for Waterproof DV
 Instruction Manual for Waterproof DV Thanks for choosing HD portable DV - HAPPY waterproof type series Please read the manual before you use Please follow below instructions if design or specification
WARNING! Not suitable for children under 36 months. Choking hazard!
 WARNING! Not suitable for children under 36 months. Choking hazard! 1 System Requirement Microsoft Windows ME/2000/XP/Vista/7, Mac OS10.4 or above, Pentium III 800MHz or above, 128MB system memory and
USER MANUAL KGNDVCFVAA
 USER MANUAL KGNDVCFVAA Contents Contents... 1 Function Description... 2 Notice for use... 2 System requirements... 4 Start to use... 5 1. Appearance and Buttons... 5 2. Basic operation... 7 Product specifications
2017 All Rights Reserved. Windows and the Windows logo are registered trademarks of Microsoft Corporation. All other trademarks are the property of
 2017 All Rights Reserved. Windows and the Windows logo are registered trademarks of Microsoft Corporation. All other trademarks are the property of their respective companies. 1 2 Thank you for purchasing
VIV-CV-1225V v2 Digital Camera Binoculars. Instruction Manual
 VIV-CV-1225V v2 Digital Camera Binoculars Instruction Manual 2009-2019 Sakar International, Inc. All rights reserved Windows and the Windows logo are registered trademarks of Microsoft Corporation. All
28056 Digital Camera
 28056 Digital Camera User Manual HASBRO and its logo and NERF are trademarks of Hasbro and are used with permission. 2012 Hasbro. All rights reserved. Windows and the Windows logo are registered trademarks
Contents. I. Safety Instructions II. Parts of Sport Camera III. Technical Parameters...5. IV. Application Description...
 Contents I. Safety Instructions... 1 II. Parts of Sport Camera... 3 III. Technical Parameters...5 IV. Application Description...7 V. Detailed Description of All Menus...15 VI. WIFI Function Description...
DVR 584HD Digital Camcorder
 DVR 584HD Digital Camcorder User Manual 2009-2012 Sakar International, Inc. All rights reserved. Windows and the Windows logo are registered trademarks of Microsoft Corporation. All other trademarks are
Shenzhen SUNSKY Technology Limited
 Introduction Thank you for purchasing the 15 Mega-Pixel Digital Camera w ith Auto-Focus zoom lens. Everything you need to take quality digital photos and videos is included with your camera. Your digital
YHC-308 & YHC-618 YHC-309M & YHC-619M
 YHC-308 & YHC-618 YHC-309M & YHC-619M YHC-308 Mini Digital Video Recorder and YHC- 618 Mini Button Camera YHC-309M Mini Digital Video Recorder and YHC-619M Motion Activation Camera Operating Instructions
Thank you for purchasing this digital video camera. Please carefully read through this
 0 1 Preface Thank you for purchasing this digital video camera. Please carefully read through this manual before using, and properly keep it for future reference. This manual was compiled based on updated
DXG-599V TWIST HD User s Manual
 DXG-599V TWIST HD User s Manual DXG USA Preface Congratulations on your purchase of this advanced camcorder. Make sure that you read this manual carefully and keep it in a safe place for future reference.
MANUAL Foreword. Operation Notice This camera uses the TF card (Multimedia memory card) Instructions for using the memory card
 Instructions for using the memory card") MANUAL Foreword Thank you for purchasing this digital camera. Please carefully read through this product manual before using, and keep this manual properly for future reference. Contents of the product
MANUAL Foreword Thank you for purchasing this digital camera. Please carefully read through this product manual before using, and keep this manual properly for future reference. Contents of the product
D11VR. USER MANUAL DVR Camera
 D11VR USER MANUAL DVR Camera WHAT S INCLUDED D11VR WINDSHIELD BRACKET DC POWER CORD USB CABLE OWNER S MANUAL Welcome Thank you for choosing a Whistler product. We are dedicated to providing products that
Quick start guide. Technical Assistance
 Technical Assistance If you need assistance setting up or using your Gator product now or in the future, call Gator Support. Australia TEL: 03 8587 8898 Quick start guide FAX: 03 8587 8866 Mon-Fri 9am
Compact digital still camera with built-in flash and 4.0x Optical/4.1x Digital/16x Combined Zoom
 Canon Powershot G6 Digital Camera Compact digital still camera with built-in flash and 4.0x Optical/4.1x Digital/16x Combined Zoom IMAGE CAPTURE DEVICE Type 1/1.8 inch type Charge-Coupled Device (CCD)
G-SHOT5030Z. (User Guide)
") G-SHOT5030Z Multi-Functional ZOOM Digital Camera (User Guide) Specifications Specifications Digital Still Camera Digital Camcorder Resolution : Fine: 2912 x 2208 Fine: 640 x 480 (H/W enhancement) Normal:
G-SHOT5030Z Multi-Functional ZOOM Digital Camera (User Guide) Specifications Specifications Digital Still Camera Digital Camcorder Resolution : Fine: 2912 x 2208 Fine: 640 x 480 (H/W enhancement) Normal:
Polaris G50 Dash cam incident recorder.
 Polaris G50 Dash cam incident recorder. Operation manual Quick Guide Thank you for purchasing the Polaris G50 DVR. The Polaris G50 DVR is a great product for capturing adventures and incidents both on
About this Manual Copyright Federal Communications Commission (FCC) Compliance Declaration of Conformity Trademark Recognition
 Compliance Declaration of Conformity Trademark Recognition") Preface About this Manual The contents of this manual and the bundled Basic Reference are subject to change without notice. Note that the example screens and product illustrations shown in this User s
Preface About this Manual The contents of this manual and the bundled Basic Reference are subject to change without notice. Note that the example screens and product illustrations shown in this User s
DVR 1440HD Digital Camcorder
 DVR 1440HD Digital Camcorder User Manual 2009-2013 Sakar International, Inc. All rights reserved. Windows and the Windows logo are registered trademarks of Microsoft Corporation. All other trademarks are
FHD Digital Video Camera. 24 Max /2.7 TFT. ActionPro FHD Digital Video Camera. Instruction Manual. Model #: HDV17BK. Never-Ending Learning Innovation
 ActionPro FHD Digital Video Camera MP 24 Max /2.7 TFT ActionPro FHD Digital Video Camera Instruction Manual Model #: HDV17BK Never-Ending Learning Innovation 2 1. About...4 1a. System Requirements...4
ViviCam 8025 Digital Camera
 ViviCam 8025 Digital Camera User s Manual CD500DOGF 2009 Sakar International, Inc. All rights reserved. Windows and the Windows logo are registered trademarks of Microsoft Corporation. All other trademarks
DXG-5F0V HD User s Manual DXG USA
 DXG-5F0V HD User s Manual DXG USA Table of Contents About this manual...iv Copyright...iv Precautions...v Before You Start...vii Copyright information...vii 1 Introduction... 1 1.1 System requirements...1
DVR101 HD DASH CAM & 12MP CAMERA
 DVR101 HD DASH CAM & 12MP CAMERA GENERAL - Display: 3 HD LCD - Chipset: Novatek 96223 - Image Sensor: SC1143, 1.0M CMOS - Outputs: USB - PC Interface: USB - Power Supply: 12/24V Cig. Lead Charger - Input
High Definition Digital Video Camera
 High Definition Digital Video Camera User Manual Contents Section 1 Getting to Know Your Camera... 2 Section 2 Getting Started... 5 Section 3 Record Mode... 8 Section 4 Playback Mode... 34 Section 5 Listening
Thanks for you purchasing of this product. Please kindly read this user manual and keep it carefully for reference.
 CONTENTS Thanks for you purchasing of this product. Please kindly read this user manual and keep it carefully for reference. 01Read This First...01 Product Information...01 Standard Package Contents...02
Operation Manual Defender Car vision 5018FullHD Car DVR
 Operation Manual Defender Car vision 5018FullHD Car DVR 1 Thank you for buying Defender Car Vision 5018FullHD car DVR. Before using the device, read attentively this manual and keep it for the whole period
Luxmedia. User Manual
 Luxmedia User Manual PRAKTICA International Ltd, 5 Century Point, Halifax Road, High Wycombe, HP12 3SL, United Kingdom www.praktica.com care@praktica.com +44(0)344 822 9940 Copyright This manual contains
DXG-5C0V HD and DXG-5C8V HD. User s Manual DXG USA
 DXG-5C0V HD and DXG-5C8V HD User s Manual DXG USA Table of Contents Preface...v About this manual...v Copyright...v Precautions...vi Before You Start...viii 1 Introduction... 1 1.1 System requirements...1
Users Manual English
 Users Manual English Welcome Dear user, thanks for purchasing this product. Much investment in time and effort has gone into its development, and it is our hope that it will give you many years of trouble-free
1. Parts of the camcorder 1: Preview button 2: Menu button 3: LCD screen 4: HDMI jack 5: Mode dial 6: Power LED 7: Shutter button 8: Charging LED 9:
 USER MANUAL 1. Parts of the camcorder 1: Preview button 2: Menu button 3: LCD screen 4: HDMI jack 5: Mode dial 6: Power LED 7: Shutter button 8: Charging LED 9: Up/Exposure button 10: Right button 11:
Table of Contents Welcome 1 Safety Notice 1 Table of Contents 2 Camera Parts 5 Getting Started 6 Loading the batteries 6 Inserting the SD/MMC card (op
 Welcome Dear user, thanks for purchasing this product. Much investment in time and effort has gone into its development, and it is our hope that it will give you many years of trouble-free service. Safety
CONTENTS. Before You Start. Initial Operation. Prepare For Shooting. What's in the Box Camera Parts Display Icons
 CONTENTS Before You Start What's in the Box Camera Parts Display Icons Initial Operation Install microsd Card & Batteries Power On/ Off Power Saving Mode Set Date & Time Prepare For Shooting Change Capture
Digital Camera / GVAD212. Instruction Manual
 Digital Camera / GVAD212 Instruction Manual Operating Guide Thank you for purchasing GVA digital camera. Before use of this video camera, please read this user manual carefully and place it in a safe place
USER MANUAL KGNDVCVEA
 USER MANUAL KGNDVCVEA Read This Before Using the Camera SAFETY INSTRUCTIONS Do not drop, puncture or disassemble the camera. Use the camera with care. Rough handling may damage the internal components.
DVR 985HD Digital Video Camera
 DVR 985HD Digital Video Camera User Manual 2009-2012 Sakar International, Inc. All rights reserved. Windows and the Windows logo are registered trademarks of Microsoft Corporation. All other trademarks
Please read this manual carefully before using this product. Please keep this manual for future reference.
 Please read this manual carefully before using this product. Please keep this manual for future reference. DASHcam manual.indd 1 Precautions 1. Do not expose the camera to moisture, dusty, dirty or sandy
78056N HD Action Camcorder
 78056N HD Action Camcorder User Manual 2009-2015 Sakar International, Inc. All rights reserved. Windows and the Windows logo are registered trademarks of Microsoft Corporation. All other trademarks are
DashCam HD DVR Operating Manual Step by Step Set-Up Guide DashCam DVR sketch and operating key
 DashCam HD DVR Operating Manual Step by Step Set-Up Guide DashCam DVR sketch and operating key 1. Accessories Operating Manual Battery Mount USB Cable Vehicle Charger, the transformer adaptor automatically
ViviCam S830 Digital Camera
 ViviCam S830 Digital Camera User Manual 2009-2012 Sakar International, Inc. All rights reserved. Windows and the Windows logo are registered trademarks of Microsoft Corporation. All other trademarks are
USER MANUAL
 www.activeon.com USER MANUAL Table Of Contents Names of each part 1 Operation & button description 2 Start the camera 3 LCD screen shot 4 Graphical icon description 5 Video recording 8 Photo shoot 8 Quick