MongoDB Management Suite Manual Release 1.4
|
|
|
- Sophie Green
- 5 years ago
- Views:
Transcription
1 MongoDB Management Suite Manual Release 1.4 MongoDB, Inc. Aug 10, 2018
2 MongoDB, Inc
3 Contents 1 On-Prem MMS Application Overview MMS Functional Overview On-Prem MMS Components On-Prem MMS Example Deployments Install On Prem MMS On-Prem MMS Hardware and Software Requirements Preparing Backing MongoDB Instances Install the On Prem MMS Application Optional: Install On-Prem MMS Backup Optional On-Prem MMS Configuration Start and Stop MMS Application On Prem MMS Administration Administration Interface Activity Application Settings User and Environment Management Create an Alert Manage Alerts Backup Alerts Connect to Hosts with Kerberos Authentication On Prem MMS Monitoring Getting Started with MMS Monitoring Using MMS Monitoring Monitoring Operations On Prem MMS Backup Getting Started with MMS Backup Restore MongoDB Instances with MMS Backup Backup Use and Operation Frequently Asked Questions Frequently Asked Questions: Management Frequently Asked Questions: Backup Frequently Asked Questions: Monitoring Reference Configuration MMS User Roles MMS Agent Authentication Requirements On Prem MMS Reference Monitoring Reference Supported Browsers Monitoring Agent Configuration Backup Agent Configuration Release Notes MMS Server Changelog Monitoring Agent Changelog Backup Agent Changelog
4 On-Prem MongoDB Management Service is a package for managing MongoDB deployments. On-Prem MongoDB Management Service provides MMS Monitoring and MMS Backup, which helps users optimize clusters and mitigate operational risk. You can also download a PDF edition of the MMS Manual. On-Prem MMS Application Overview Introduces the operation and architecture of the MMS application, and describes the requirements for running MMS On Prem. Install On Prem MMS Install the On Prem Application Components. On Prem MMS Administration Configure and manage On-Prem MongoDB Management Service. On Prem MMS Monitoring High level overview of issues related to On Prem MMS Monitoring. On Prem MMS Backup High level overview of issues related to On Prem MMS Backup. Frequently Asked Questions Common questions about the operation and use of MMS. Reference Reference material for MMS components and operations. Release Notes Changelogs and notes on MMS releases. 1 On-Prem MMS Application Overview MMS Functional Overview Describes the operation of the MMS application. On-Prem MMS Components Describes the components and operation of the MMS backup application. On-Prem MMS Example Deployments Diagrams of possible MMS application deployment patterns. 1.1 MMS Functional Overview On this page Overview Overview The MongoDB Management Service (MMS) is a service for monitoring and backing up a MongoDB infrastructure. MMS Monitoring MMS provides real-time reporting, visualization and alerting on key database and hardware indicators and presents the data in an intuitive web dashboard. A lightweight Monitoring Agent runs within your infrastructure and connects to the configured MongoDB instances. The Monitoring Agent collect statistics from the nodes in your deployment and transmit it back to MMS. The MMS user interface allowsthe user to view the visualized data and set alerts. 4
5 MMS Backup Engineered specifically for MongoDB, MMS Backup features scheduled snapshots and point in time recovery. Once the service is up and running, MMS provides a web interface to support backup and restoration. MMS Backup supports horizontal scaling. A lightweight Backup Agent runs within your infrastructure and connects to the configured MongoDB instances. The agent performs an initial sync and then tail the oplog of a replica set s primary. For a sharded cluster, the backup agent tails the primary of each shard and each config server. The agent ships initial sync and oplog data over HTTPS back to the MMS service. The MMS service recreates every replica set you backup and applies the oplog entries sent by the backup agents. MMS then maintains a standalone MongoDB database on disk, also called a head, for each backed up replica set. Each head is consistent with the original primary up to the last oplog supplied by the agent. The initial sync and tailing of the oplog are all done using standard MongoDB queries. Operations The MMS Backup service recreates every replica set you back up and applies the oplog entries the backup agents send. The production replica set, or sharded cluster, is not aware of the copy of the backup data. The initial sync and tailing of the oplog are all done using standard MongoDB queries. The service takes scheduled snapshots of all heads and retains those snapshots based on a user-defined policy. On Prem MMS Backup captures snapshots of replica sets interval based on an observed change in oplog time. Sharded clusters snapshots temporarily stop the balancer via the mongos so that they can insert a marker token into all shards and config servers in the cluster. MMS takes a snapshot when the marker tokens appear in the backup data. Compression and block-level deduplication technology reduces snapshot data size. The snapshot only stores the differences between successive snapshots. Snapshots use only a fraction of the disk space required for full snapshots. Restores Restores of specific snapshots and point in time restores are both available for replica sets. Clusters restore from a snapshot time for consistency. A snapshot restore reads directly from the Backup Blockstore Database and transfers files via an HTTPS download link (pull) or by the MMS service sending files via SSH (push). A point in time restore first creates a local restore of a snapshot from the blockstore. After the MMS service has the snapshot locally it applies stored oplogs until the desired point in time. The service then delivers the point in time backup via the same HTTPS or SSH mechanisms. The amount of oplog to keep per backup is configurable and affects the time window available for point in time restores. 1.2 On-Prem MMS Components On this page MMS Application Package Backup Daemon Package 5
6 Data Storage Additional Information See On-Prem MMS Example Deployments for diagrams of potential deployment architectures and On Prem MMS Reference for system reference. MMS Application Package The front-end package contains the UI the end user interacts with, as well as HTTPS services used by the monitoring agent and backup agent to transmit data to and from MMS. All three components start automatically when the frontend MMS package starts. These components are stateless. Multiple instances of the front-end package can run as long as each instance has the same configuration. Users and agents can interact with any instance. For MMS Monitoring, you only need to install the application package. The application package consists of the following components: MMS Application and Monitoring Server MMS Backup Ingestion Server MMS Backup Alerts Service MMS HTTP Service The HTTP server runs on port 8080 by default. This component contains the web interface for managing MMS users, monitoring of MongoDB servers, and managing those server s backups. Users can sign up, create new accounts and groups, as well as join an existing group. The MMS Web Server also contains endpoints used by the MMS Agent to report back information on monitored MongoDB instances. Backup HTTP Service The HTTP server runs on port 8081 by default. The Backup HTTP Service contains a set of web services used by the backup agent. The agent retrieves its configuration from this service. The agent also sends back initial sync and oplog data through this interface. There is no user interaction with this service. The Backup HTTP service runs on port 8081 by default. The Backup HTTP Service exposes an endpoint that reports on the state of the service and the underlying database to support monitoring of the Backup service. This status also checks the connections from the service to the MMS Application Database and the MMS Backup Blockstore Database. See Backup HTTP Service Endpoint. Backup Alert Service The Backup Alert Service watches the state of all agents, local copies of backed up databases, and snapshots. It sends alerts as problems occur. The Backup Alert Service exposes a health-check endpoint. See Backup Alert Service Endpoint. Backup Daemon Package 6
7 Backup Daemon The Backup Daemon is the only component in the Backup Daemon Package. The Backup Daemon manages all local copies of backed up database (i.e. HEADs) as well as backup snapshots. The daemon does scheduled work based on data coming in to the Backup HTTP Service from the backup agents. No client applications talk directly to the daemon. Its state and job queues come from the MMS Application Database. The daemon creates a local copy of the backed up database on in its local storage in the rootdirectory path. If you run multiple Backup Daemons, when you add a new backup the system selects a daemon for that instance and the local copy of that instance resides with that Daemon. The daemon will take scheduled snapshots and stores those snapshots in the Snapshot Storage (also known as the Blockstore). It will also act on restore requests by retrieving data from the Blockstore and delivering it to the requested destination. The server running the Backup Daemon acts as a hidden secondary for every replica set assigned to it. Multiple Backup Daemons can increase your storage by scaling horizontally and can provide manual failover. The Backup Daemon exposes a health-check endpoint. See Backup Daemon Endpoint. Data Storage All data about the state of the MMS service, and the backup snapshot data, persists in MongoDB databases. These databases are not part of the MMS package installation. Set up these databases separately with their location recorded in the MMS configuration files. These databases are referred to as Backing MongoDB Instances or backing databases. MMS Application Database This database will contain MMS users, groups, hosts, monitoring data, backup state, etc. This metadata should be small in size (less than 1GB per monitored/backed up server) but will be updated frequently. It is highly recommended this database be configured as a replica set to provide durability and automatic failover from the MMS service. See Preparing Backing MongoDB Instances for more information. MMS Backup Blockstore Database This database contains all snapshots of databases backed up and oplogs retained for point in time restores. The snapshot database will require disk space proportional to the backed up databases. Configure the Blockstore as a replica set to provide durability and automatic failover to the backup and restore components. See Preparing Backing MongoDB Instances for more information. Additional Information To learn more about On Prem MMS Backup requirements and On Prem MMS Backup, see Frequently Asked Questions: Backup and the main main Backup documentation page. 1.3 On-Prem MMS Example Deployments Consider the following diagrams of example MMS deployments: 7

8 Minimal Deployment Moderate Deployment 8

9 Full Deployment 2 Install On Prem MMS Hardware and Software Requirements Outlines all of the requirements and prerequisites for On-Prem MMS. Preparing Backing MongoDB Instances Configure the underling MongoDB instances for On-Prem MMS. Install the On Prem MMS Application Documentation that describes the procedure for installing the core On-Prem MMS Application and Monitoring Component with all supported packaging options. Optional: Install On-Prem MMS Backup Describes the procedure for installing the On Prem MMS Backup software. Optional On-Prem MMS Configuration Introduces optional On-Prem MMS application configuration. Start and Stop MMS Application Manage the On-Prem MMS application process. 2.1 On-Prem MMS Hardware and Software Requirements On this page Hardware Requirements Software Requirements For an overview of the components of an On-Prem MMS deployment, see On-Prem MMS Components and On-Prem MMS Example Deployments. For a higher level view of MMS itself see MMS Functional Overview. 9
10 Hardware Requirements To install MMS you will need a server for the MMS application, which includes Monitoring, and a MongoDB instance (i.e. replica set). Backup is an optional component of MMS, and if you want support for Backup, you must deploy additional servers for the Backup Daemon and for blockstore storage. MMS Application Server Deploy the MMS Application Package on the MMS Application Server with requirements according to the following table. Number of Monitored Hosts CPU Cores RAM Up to 400 monitored hosts GB Up to 2000 monitored hosts GB More than 2000 hosts Contact MongoDB Account manager Contact MongoDB Account manager These requirements support only the software components in the MMS Application Package. If you wish to install the MMS Application Database on the same physical server, you will additionally need to satisfy the storage requirements for the MMS Application Database. MMS Application Database Servers Please see Preparing Backing MongoDB Instances for requirements for the MMS Application Database Servers. Optional: MMS Backup Daemon This server is required only if you are installing and running MMS Backup. Number of Hosts CPU Cores RAM Storage Capacity Storage IOPS/s Up to 200 hosts 4+ 2Ghz+ 15 GB Contact MongoDB Contact MongoDB Account manager Account manager A server running the Backup Daemon Package will act as a hidden secondary for every replica set assigned to it. Therefore this system must have the disk space and write capacity to maintain for all replica sets. To support point in time restore the disk must have capacity to store an additional copy of the data. Typically daemons must be able to store 2 to 2.5 times the data size. Before installing MMS Backup we recommend contacting your MongoDB Account Manager for assistance in estimating the storage requirements for your Backup Daemon server. Optional: MMS Backup Blockstore Database Servers Blockstore servers store snapshots of MongoDB instances. Only provision Blockstore servers if you are deploying MMS Backup. Blockstores must have the capacity to store 2 to 3 times the total backed up data size. Please contact your MongoDB Account Manager for assistance in estimating the storage requirements for your blockstore server. Medium grade HDDs will have enough I/O throughput to handle the load of the Blockstore. Each replica set member should have 4 x 2ghz+ CPU cores. We recommend 8GB of RAM for every 1TB disk of Blockstore to provide good snapshot and restore speed. 10
11 Software Requirements Operating System MMS supports the following 64-bit Linux distributions: CentOS 5 or later, Red Hat Enterprise Linux 5, or later, SUSE 11 or Later, Amazon Linux AMI (latest version only,) Ubuntu or later. Ulimits The MMS packages automatically raise the open file, max user processes, and virtual memory ulimits. On Red Hat, be sure to check for a /etc/security/limits.d/90-nproc.conf file that may override the max user processes limit. If the /etc/security/limits.d/90-nproc.conf file exists, remove it before continuing. MongoDB The MongoDB databases backing MMS must be MongoDB or later. To back up a Replica set with MMS, all members of the set must run at least MongoDB 2.2 or later. To back up a sharded cluster, all components of the sharded cluster must be MongoDB or later. Web Browsers On-Prem MongoDB Management Service supports clients using the following browsers: Chrome 8 and greater. Firefox 12 and greater. IE 9 and greater. Safari 6 and greater. The MMS application will display a warning on non-supported browsers. SMTP MMS requires for fundamental server functionality such as password reset and alerts. Many Linux server-oriented distributions include a local SMTP server by default, for example, Postfix, Exim, or Sendmail. You also may configure MMS to send mail via third party providers, including Gmail and Sendgrid. SNMP If your environment includes SNMP, you can configure an SMNP trap receiver with periodic heartbeat traps to monitor the internal health of MMS. For more details, see Configure SNMP Heartbeat Support. 11
12 2.2 Preparing Backing MongoDB Instances On this page Overview Prerequisites Setup and Install Replica Sets Overview The backing MongoDB instances store the data that On-Prem MongoDB Management Service uses to support basic application functions, as well as to store the collected monitoring data and backed up data. MMS application requires one replica set to store application and monitoring data, and the Backup component requires a second replica set to store backed up data. All backing MongoDB instances must be running MongoDB or later. MongoDB instances are also referred to as backing databases. MMS Application Database MMS Monitoring requires a MongoDB replica set to hold the MMS application database. The database stores: Monitoring data collected from monitoring agents. Meta data for MMS users, groups, hosts, monitoring data, and backup state. For up to 400 monitored hosts, the MMS Application Database requires 200 GB of storage space. For up to 2000 monitored hosts, the MMS Application Database requires 500 GB of storage space. If you have more than 2000 monitored hosts, please contact your MongoDB Account Manager. The application database should be a single three-member MongoDB replica set. If you cannot allocate 3 data instances, you may deploy 2 mongod instances that hold data and one arbiter. You may run the MMS Application Server on the same physical server as one member of the MMS Application Database replica set. For reference: an AWS EC2 Standard Extra Large (i.e. m1.xlarge) with a provisioned 500 IOP/s EBS volume may support the 400-host configuration above. An AWS EC2 High I/O Quadruple Extra Large (hi1.4xlarge) may support the 2000 host configuration above. For the best results use SSD-backed storage. A MongoDB standalone may also be used in please of a replica set, but this is not recommended for production deployments. Optional: MMS Backup Blockstore Database MMS Backup requires a separate, dedicated MongoDB replica set to hold the backup snapshot data. This system should have enough capacity to store 2 to 3 times the total backed up data size. Prior to installing MMS Backup, consider contacting your MongoDB Account Manager to arrange a sizing consultation for the MMS Backup database. For testing only you may use a standalone mongod instance in place of a replica set. 12
13 Prerequisites Read the MongoDB Production Notes before installing MongoDB and other software on your servers. If you are deploying MMS on Amazon AWS, please see :/tutorial/configure-aws-hosts. The MMS application requires $where. As a result, you must ensure that security.javascriptenabled is true, which is the default, for all backing mongod instances. Setup and Install Replica Sets To create replica sets, start the mongod instances for each member of a new replica set, configure the replica set, then add the mongod instances to the replica set. The Deploy a Replica Set guide has step by step details how to setup and deploy replica sets for use as backing MongoDBs for MMS. Each backing instance should be a single three-member MongoDB replica set. If you cannot allocate 3 data instances, you may deploy 2 mongod instances that hold data and one arbiter. For additional information on installing MongoDB, see Install MongoDB. 2.3 Install the On Prem MMS Application Install from DEB Packages Describes the procedure for installing On-Prem MMS on Debian and Ubuntu systems. Install from RPM Packages Describes the procedure for installing On-Prem MMS on Red Hat, Fedora, CentOS, and Amazon AMI Linux. Install from Archives Describes the procedure for installing On-Prem MMS on other Linux systems without using package management. Quick Start Installation Describes the procedure for quickly setting up an On Prem MMS instance with all components running on a single machine. Use this process for becoming familiar with the installation process and to test the On Prem MMS Application before deploying a production version of the application. Install or Upgrade the On-Prem MMS Monitoring with deb Packages On this page Overview Prerequisites Procedures Additional Information Overview On-Prem MongoDB Management Service is a service to monitor and back up a MongoDB infrastructure. This tutorial describes the basic process to install or upgrade the MMS Application Package. At a high level, a basic installation will look like the following. The estimated setup time is less than an hour. 1. Configure an MMS Application Server that meets the hardware requirements. 13
14 2. Install a single MongoDB replica set to be used for the MMS application database, as described in Preparing Backing MongoDB Instances. 3. Install an SMTP server as appropriate for your environment. 4. Install the MMS Application Package. 5. Configure the MMS server s URL, addresses, and Mongo URI connection strings. See Configuration for more information. 6. Start up the MMS application. See Start and Stop MMS Application for more information. 7. Optionally install the backup server, as described in Install On-Prem MMS Backup with deb Packages. Prerequisites Configure an MMS Application Server that meets the hardware requirements and software requirements. Ensure that you have deployed the backing MongoDB instances that MMS uses to store application data. For additional information on installing MongoDB, see the MongoDB Installation tutorials. Procedures Install and Start the On Prem MMS Service Step 1: Download On Prem MMS Monitoring. Download the latest On-Prem Monitoring releases from the downloads page. Step 2: Install On Prem MMS Monitoring. Install the.deb package by issuing the following command, where <version> is the version of the.deb package: sudo dpkg --install mongodb-mms_<version>_x86_64.deb When installed, the base directory for the MMS software is /opt/mongodb/mms/. The.deb package creates a new system user mongodb-mms under which the server will run. Step 3: Configure On Prem MMS Monitoring. In the conf-mms.properties file, ensure that the following required settings are correct: mms.centralurl mms.backupcentralurl mms.from addr mms.replyto addr mms.adminfrom addr mms.admin addr mms.bounce addr mongo.mongouri 14
15 mongo.replicaset Consider the following example configuration: mms.centralurl= mms.backupcentralurl= mongo.mongouri=mongodb://<mms_mongod_ip>:27017/ mongo.replicaset=rs0 At this point, you can also configure authentication, , and optional Kerberos integration, as described in the Configuration. If you would like to run the MMS application in a highly available configuration, please consider Configure a Highly Available MMS Application Server. Step 4: Start On Prem MMS Monitoring. To start MMS, issue the following command: sudo service mongodb-mms start Upgrade On-Prem MongoDB Management Service from 1.3 and Later If you have an existing On-Prem MMS deployment, use the following procedure to upgrade to the latest release. There are no supported downgrade paths for On-Prem MMS. Step 1: Recommended. procedure. Take a full backup of the MMS database before beginning the upgrade Step 2: Shut down MMS. For example: sudo service mongodb-mms stop Step 3: If you are running MMS Backup, shutdown the MMS Backup Daemon. The daemon may be installed on a different server. It is critical that this is also shut down. To shut down, issue a command similar to the following: sudo service mongodb-mms-backup-daemon stop 15
16 Step 4: Save a copy of your previous configuration file. For example: sudo cp /opt/mongodb/mms/conf/conf-mms.properties ~/. Step 5: Upgrade the package. For example: sudo dpkg -i mongodb-mms_<version>_x86_64.deb Step 6: Edit the new configuration file. Fill in the new configuration file at /opt/mongodb/mms/conf/conf-mms.properties using your old file as a reference point. Step 7: Start MMS. For example: sudo service mongodb-mms start Step 8: Update all Monitoring Agents and Backup Agents. See Update the Monitoring Agent on UNIX/Linux for more information. Step 9: Update the Backup Daemon Package and any Backup Agent, as appropriate. If you are running MMS Backup, update the Backup Daemon Package and any Backup Agent. See Install On-Prem MMS Backup with deb Packages and Install and Start the Backup Agent for more information. Upgrade On-Prem MongoDB Management Service from 1.2 and Earlier Due to the company name change, the name of the MMS package changed between versions 1.2 and 1.3. Therefore, to upgrade the On-Prem MongoDB Management Service server from any version before 1.3, use the following procedure: 1. Recommended. Take a full backup of the MMS database before beginning the upgrade procedure. 2. Shut down MMS, using the following command: /etc/init.d/10gen-mms stop 3. Download the latest package from the downloads page and proceed with the instructions for a fresh install. Do not attempt to use your package manager to do an upgrade. When complete, On-Prem MongoDB Management Service is installed in the /opt/mongodb/mms directory. 16
17 4. Follow all procedures for a new install include configuring the options in /opt/mongodb/mms/conf/ conf-mms.properties. If you used encrypted authentication credentials you will need to regenerate these manually. Do not copy the credentials from your old properties file. Old credentials will not work. 5. Start MMS using the new package name: sudo /etc/init.d/mongodb-mms start 6. Update any Monitoring Agent. See Update the Monitoring Agent on UNIX/Linux for more information. Additional Information See Configuration for documentation of all configuration options for the MMS application. For complete instructions on managing the MMS application process, see Start and Stop MMS Application. To configure the MMS application for high availability, see Configure a Highly Available MMS Application Server. Install or Upgrade the On-Prem MMS Monitoring with rpm Packages On this page Overview Prerequisites Procedures Additional Information Overview On-Prem MongoDB Management Service is a service to monitor and back up a MongoDB infrastructure. This tutorial describes the basic process to install or upgrade the MMS Application Package. At a high level, a basic installation will look like the following. The estimated setup time is less than an hour. 1. Configure an MMS Application Server that meets the hardware requirements. 2. Install a single MongoDB replica set to be used for the MMS application database, as described in Preparing Backing MongoDB Instances. 3. Install an SMTP server as appropriate for your environment. 4. Install the MMS Application Package 5. Configure the MMS server s URL, addresses, and Mongo URI connection strings. See Configuration for more information. 6. Start up the MMS application. See Start and Stop MMS Application for more information. 7. Optionally install the backup server, as described in Install On-Prem MMS Backup with rpm Packages. 17
18 Prerequisites Configure an MMS Application Server that meets the hardware requirements and software requirements. Ensure that you have deployed the backing MongoDB instances that MMS uses to store application data. For additional information on installing MongoDB, see the MongoDB Installation tutorials. Procedures Install and Start the On Prem MMS Service Step 1: Download On Prem MMS Monitoring. Download the latest On-Prem Monitoring releases from the downloads page. Step 2: Install On Prem MMS Monitoring. Install the.rpm package by issuing the following command, where <version> is the version of the.rpm package: sudo rpm -ivh mongodb-mms-<version>.x86_64.rpm When installed, the base directory for the MMS software is /opt/mongodb/mms/. The RPM package creates a new system user mongodb-mms under which the server runs. Step 3: Configure On Prem MMS Monitoring. In the conf-mms.properties file, ensure that the following required settings are correct: mms.centralurl mms.backupcentralurl mms.from addr mms.replyto addr mms.adminfrom addr mms.admin addr mms.bounce addr mongo.mongouri mongo.replicaset Consider the following example configuration: mms.centralurl= mms.backupcentralurl= mms.from addr=mms-admin@example.net mms.replyto addr=mms-admin@example.net mms.adminfrom addr=mms-admin@example.net mms.admin addr=mms-admin@example.net mms.bounce addr=mms-admin@example.net (continues on next page) 18
19 (continued from previous page) mongo.mongouri=mongodb://<mms_mongod_ip>:27017/ mongo.replicaset=rs0 At this point, you can also configure authentication, , and optional Kerberos integration, as described in the Configuration. If you would like to run the MMS application in a highly available configuration, please consider Configure a Highly Available MMS Application Server. Step 4: Start On Prem MMS Monitoring. To start MMS, issue the following command: sudo service mongodb-mms start Upgrade On-Prem MongoDB Management Service from 1.3 and Later If you have an existing On-Prem MMS deployment, use the following procedure to upgrade to the latest release. There are no supported downgrade paths for On-Prem MMS. Step 1: Recommended. procedure. Take a full backup of the MMS database before beginning the upgrade Step 2: Shut down MMS. For example: sudo service mongodb-mms stop Step 3: If you are running MMS Backup, shutdown the MMS Backup Daemon. The daemon may be installed on a different server. It is critical that this is also shut down. To shut down, issue a command similar to the following: sudo service mongodb-mms-backup-daemon stop Step 4: Save a copy of your previous configuration file. For example: sudo cp /opt/mongodb/mms/conf/conf-mms.properties ~/. 19
20 Step 5: Upgrade the package. For example: sudo rpm -U mongodb-mms-<version>.x86_64.rpm Step 6: Move the new version of the configuration file into place. For example: sudo mv /opt/mongodb-mms/conf/conf-mms.properties.rpmnew /opt/mongodb-mms/conf/conf- mms.properties Step 7: Edit the new configuration file. Fill in the new configuration file at /opt/mongodb/mms/conf/conf-mms.properties using your old file as a reference point. Step 8: Start MMS. For example: sudo service mongodb-mms start Step 9: Update all Monitoring Agents and Backup Agents. See Update the Monitoring Agent on UNIX/Linux for more information. Step 10: Update the Backup Daemon Package and any Backup Agent, as appropriate. If you are running MMS Backup, update the Backup Daemon Package and any Backup Agent. See Install On-Prem MMS Backup with rpm Packages and Install and Start the Backup Agent for more information. Upgrade On-Prem MongoDB Management Service from 1.2 and Earlier Due to the company name change, the name of the MMS package changed between versions 1.2 and 1.3. Therefore, to upgrade the On-Prem MongoDB Management Service server from any version before 1.3, use the following procedure: 1. Recommended. Take a full backup of the MMS database before beginning the upgrade procedure. 2. Shut down MMS, using the following command: /etc/init.d/10gen-mms stop 3. Download the latest package from the downloads page and proceed with the instructions for a fresh install. Do not attempt to use your package manager to do an upgrade. When complete, On-Prem MongoDB Management Service is installed in the /opt/mongodb/mms directory. 20
21 4. Follow all procedures for a new install include configuring the options in /opt/mongodb/mms/conf/ conf-mms.properties. If you used encrypted authentication credentials you will need to regenerate these manually. Do not copy the credentials from your old properties file. Old credentials will not work. 5. Start MMS using the new package name: sudo /etc/init.d/mongodb-mms start 6. Update any Monitoring Agent. See Update the Monitoring Agent on UNIX/Linux for more information. Additional Information See Configuration for documentation of all configuration options for the MMS application. For complete instructions on managing the MMS application process, see Start and Stop MMS Application. To configure the MMS application for high availability, see Configure a Highly Available MMS Application Server. Install or Upgrade the On-Prem MMS Service: tar.gz and zip On this page Overview Prerequisites Procedures Additional Information Overview On-Prem MongoDB Management Service is a service to monitor and back up a MongoDB infrastructure. This tutorial describes the basic process to install or upgrade the MMS Application Package. At a high level, a basic installation will look like the following. The estimated setup time is less than an hour. 1. Configure an MMS Application Server that meets the hardware requirements. 2. Install a single MongoDB replica set to be used for the MMS application database, as described in Preparing Backing MongoDB Instances. 3. Install an SMTP server as appropriate for your environment. 4. Install the MMS Application Package. 5. Configure the MMS server s URL, addresses, and Mongo URI connection strings. See Configuration for more information. 6. Start up the MMS application. See Start and Stop MMS Application for more information. 7. Optionally install the backup server. See Optional: Install On-Prem MMS Backup for more information. 21
22 Prerequisites Configure an MMS Application Server that meets the hardware requirements and software requirements. Ensure that you have deployed the backing MongoDB instances that MMS uses to store application data. For additional information on installing MongoDB, see the MongoDB Installation tutorials. Procedures Install and Start the On Prem MMS Service Step 1: Download On Prem MMS Monitoring. Download the latest On-Prem Monitoring releases from the downloads page. Step 2: Install On Prem MMS Monitoring. You can install On Prem MMS Monitoring from the provided tar.gz or zip archive without making any changes to the underlying system (i.e. without creating users). To install, extract the package, as in the following command: tar -zxf mongodb-mms-<version>.x86_64.tar.gz When complete, On-Prem MongoDB Management Service is installed in the /opt/mongodb/mms directory. Step 3: Create a symlink (optional). Optionally create a symlink in /etc/init.d to the included control script for convenience, as in the following: sudo ln -s <install_dir>/bin/mongodb-mms /etc/init.d/ Note, when the app is first started, it will create and store an encryption key in $HOME/.mongodb-mms for the app user. Step 4: Configure On Prem MMS Monitoring. In the conf-mms.properties file, ensure that the following required settings are correct: mms.centralurl mms.backupcentralurl mms.from addr mms.replyto addr mms.adminfrom addr mms.admin addr mms.bounce addr mongo.mongouri mongo.replicaset 22
23 Consider the following example configuration: mms.centralurl= mms.backupcentralurl= mongo.mongouri=mongodb://<mms_mongod_ip>:27017/ mongo.replicaset=rs0 At this point, you can also configure authentication, , and optional Kerberos integration, as described in the Configuration. If you would like to run the MMS application in a highly available configuration, please consider Configure a Highly Available MMS Application Server. Step 5: Start On Prem MMS Monitoring. To start MMS, issue the following command: sudo /etc/init.d/mongodb-mms start Upgrade On-Prem MongoDB Management Service from 1.3 and Later If you have an existing On-Prem MMS deployment, use the following procedure to upgrade to the latest release. There are no supported downgrade paths for On-Prem MMS. To upgrade a tarball installation, backup the configuration file and logs, and then re-install the On-Prem MMS server. Important: It is crucial that you back up the existing configuration because the upgrade process will delete existing data. In more detail: Step 1: Shutdown the MMS server and take a backup of your existing configuration and logs. For example: sudo /etc/init.d/mongodb-mms stop sudo cp -a <install_dir>/conf ~/mms_conf.backup sudo cp -a <install_dir>/logs ~/mms_logs.backup Step 2: If you are running MMS Backup, shutdown the MMS Backup Daemon. The daemon may be installed on a different server. It is critical that this is also shut down. To shut down, issue a command similar to the following: 23
24 sudo /etc/init.d/mongodb-mms-backup-daemon stop Step 3: Remove your existing MMS server installation entirely and extract latest release in its place. For example: cd <install_dir>/../ sudo rm -rf <install_dir> sudo tar -zxf -C. /path/to/mongodb-mms-<version>.x86_64.tar.gz Step 4: Compare and reconcile any changes in configuration between versions. For example: diff -u ~/mms_conf.backup/conf-mms.properties <install_dir>/conf/conf-mms.properties diff -u ~/mms_conf.backup/mms.conf <install_dir>/conf/mms.conf Step 5: Edit your configuration to resolve any conflicts between the old and new versions. Make any changes as appropriate. Changes to mms.centraluri, addresses, and MongoDB are the most common configuration changes. Step 6: Restart the On-Prem MMS server. For example: sudo /etc/init.d/mongodb-mms start Step 7: Update all Monitoring Agents and Backup Agents. See Update the Monitoring Agent on UNIX/Linux for more information. Step 8: Update the Backup Daemon Package and any Backup Agent, as appropriate. If you are running MMS Backup, update the Backup Daemon Package and any Backup Agent. See Optional: Install On-Prem MMS Backup and Install and Start the Backup Agent for more information. Upgrade On-Prem MongoDB Management Service from 1.2 and Earlier Due to the company name change, the name of the MMS package changed between versions 1.2 and 1.3. Therefore, to upgrade the On-Prem MongoDB Management Service server from any version before 1.3, use the following procedure: 1. Recommended. Take a full backup of the MMS database before beginning the upgrade procedure. 2. Shut down MMS, using the following command: 24
25 /etc/init.d/10gen-mms stop 3. Download the latest package from the downloads page and proceed with the instructions for a fresh install. Do not attempt to use your package manager to do an upgrade. See Install On Prem MMS for more information. When complete, On-Prem MongoDB Management Service is installed in the /opt/mongodb/mms directory. 4. Follow all procedures for a new install include configuring the options in /opt/mongodb/mms/conf/ conf-mms.properties. If you used encrypted authentication credentials you will need to regenerate these manually. Do not copy the credentials from your old properties file. Old credentials will not work. 5. Start MMS using the new package name: sudo /etc/init.d/mongodb-mms start 6. Update any Monitoring Agent. See Update the Monitoring Agent on UNIX/Linux for more information. Additional Information See Configuration for documentation of all configuration options for the MMS application. For complete instructions on managing the MMS application process, see Start and Stop MMS Application. To configure the MMS application for high availability, see Configure a Highly Available MMS Application Server. Install MMS On-Prem for Testing On this page Overview Considerations Procedures Overview MMS On Prem is a package that lets you run the MongoDB Management Service (MMS) on site. MMS monitors and backs up your MongoDB infrastructure. On Prem MMS uses the components described in On-Prem MMS Components. In a test deployment, you can run an entire On Prem MMS deployment on a single system as in the Minimal Deployment diagram. Run the replica set being monitored on a separate system. The minimal deployment is for testing only. Running on a single server is not suitable for production deployments. Considerations The IP address for the MMS On Prem Service is stored in the conf-mms.properties file. If the IP address should change, for example if you run on EC2 and choose to stop and restart the EC2 instance, then you must update the previous address with the new one in the /opt/mongodb/mms/conf/conf-mms.properties file. 25
26 Your test users who access the service must also update the address in the URL they use to connect and in their monitoring-agent.config files. Procedures Set up the On Prem Service Step 1: Set up a server and firewall. Prepare the server that will run the MMS On Prem components, the Application Database, and Backup Blockstore Database. Use a RHEL 6+ or Amazon Linux Server with at least: 15 GB of memory 50 GB of disk space for the root partition For example, you can meet the size requirements by using an AWS EC2 m3.xlarge instance and changing the size of the root partition from 8 GB to 50 GB. When you log into the instance, execute df -h to verify the root partition has 50 GB of space. Set up a firewall or EC2 Security Group that: Allows administrators to SSH into the server. Allows MMS users to connect from browsers to ports 8080 and 8081 through the server s public IP address. Step 2: Configure ulimits. Remove the default ulimit settings that come with the operating system: sudo rm /etc/security/limits.d/90-nproc.conf Edit the /etc/security/limits.conf file to configure the following settings: * soft nofile * hard nofile * soft nproc * hard nproc Step 3: Install MongoDB. Use the following series of commands to install MongoDB, which you use for the MMS Application Database and the MMS Backup Blockstore Database. Set up a repository definition by issuing the following command: echo "[MongoDB] name=mongodb Repository baseurl= gpgcheck=0 enabled=1" sudo tee -a /etc/yum.repos.d/mongodb.repo Install MongoDB by issuing the following two commands: 26
27 sudo yum install -y mongodb-org mongodb-org-shell Step 4: Download the MMS Application Package. Download the latest version of the MMS Application Package from the MMS downloads page. The MMS Application Package is listed as Monitoring and Core on the downloads page. Alternately, you can download the MMS Application Package by issuing the following command, where <version> is the MMS version: sudo curl -OL 64.rpm For example, for version issue: curl -OL rpm Step 5: Install the MMS Application Package. Install the package using the following command, where <version> is the MMS version: sudo rpm --install mongodb-mms-<version>.x86_64.rpm For example, for version issue: sudo rpm --install mongodb-mms x86_64.rpm Step 6: Download the Backup Daemon Package. Alternately, you can download the package by issuing the following command, where <version> is the MMS version: curl -OL <version>.x86_64.rpm For example, for version issue: curl -OL x86_64.rpm Step 7: Install the Backup Daemon Package. Install the package using the following command, where <version> is the MMS version: sudo rpm --install mongodb-mms-backup-daemon-<version>.x86_64.rpm For example, for version , you would issue the following: 27
28 sudo rpm --install mongodb-mms-backup-daemon x86_64.rpm Step 8: Set up the two backing databases. Create a data directory for each backing database and set mongod.mongod as each data directory s owner. The backing databases are the MMS Application Database and MMS Backup Blockstore Database. The following command creates two data directories, one for each backing database. You can use different directory names: sudo mkdir -p /data /data/mmsdb /data/backupdb The following command sets mongod.mongod as owner of the new directories: sudo chown mongod:mongod /data /data/mmsdb /data/backupdb Step 9: Start the MongoDB instances for the two backing databases. Start each MongoDB instance using the mongod daemon and specifying mongod as the user. Start each instance on its own dedicated port number and with the data directory you created in the last step. The following two commands start separate instances for the MMS Application Database and for the Backup Blockstore Database: sudo -u mongod mongod --port dbpath /data/mmsdb --logpath /data/mmsdb/mongodb. log --fork sudo -u mongod mongod --port dbpath /data/backupdb --logpath /data/backupdb/ mongodb.log --fork Step 10: Configure the MMS Application Service. Edit /opt/mongodb/mms/conf/conf-mms.properties. Set values for the following properties, substituting your install s values for <public_ip> and mms-admin@example.net: mms.centralurl= mms.backupcentralurl= mms.from addr=mms-admin@example.net mms.replyto addr=mms-admin@example.net mms.adminfrom addr=mms-admin@example.net mms.admin addr=mms-admin@example.net mms.bounce addr=mms-admin@example.net mongo.mongouri=mongodb:// :27017/ mongo.backupdb.mongouri=mongodb:// :27018/ Step 11: Start the MMS Application Service. Issue the following command: 28
29 sudo service mongodb-mms start Step 12: Open the MMS On Prem home page. Enter the following URL in a browser, where <public_ip> is the public IP address of the server: Step 13: Configure the MMS Backup Daemon. Edit /opt/mongodb/mms-backup-daemon/conf/conf-daemon.properties to configure the the following settings: mongo.mongouri=mongodb:// :27017/ mongo.backupdb.mongouri=mongodb:// :27018/ Step 14: Start the MMS Backup Daemon. Issue the following command: sudo service mongodb-mms-backup-daemon start Begin Monitoring and Backing Up a Replica Set The following procedure creates a three-member replica set, populates it with data, and then uses the On Prem Service to monitor and backup the replica set. Step 1: Set up the server that will run the MongoDB replica set. Use a RHEL 6+ or Amazon Linux Server with at least: 3 GB of memory. 50 GB of disk space for the root partition. For example, you can meet the size requirements by using an AWS EC2 m3.medium instance and changing the size of the root partition from 8 to 50 gigabytes. When you log into the instance, use df -h to verify the root partition has 50 gigabytes of space. Step 2: Configure ulimits. Remove the default ulimit settings that come with the operating system: sudo rm /etc/security/limits.d/90-nproc.conf Edit the /etc/security/limits.conf file to configure the following settings: 29
30 * soft nofile * hard nofile * soft nproc * hard nproc Step 3: Install MongoDB. Use the following series of commands to install MongoDB. Set up a repository definition by issuing the following command: echo "[MongoDB] name=mongodb Repository baseurl= gpgcheck=0 enabled=1" sudo tee -a /etc/yum.repos.d/mongodb.repo Install MongoDB by issuing the following two commands: sudo yum install -y mongodb-org mongodb-org-shell Step 4: Create the data directories for the replica set. Create a data directory for each replica set member and set mongod.mongod as each data directory s owner. The following command creates the directory /data and then creates a data directory for each member of the replica set. You can use different directory names: sudo mkdir -p /data /data/nodea /data/nodeb /data/nodec The following command sets mongod.mongod as owner of the new directories: sudo chown mongod.mongod /data /data/nodea /data/nodeb /data/nodec Step 5: Start a separate MongoDB instance for each replica set member. Start each mongod instance on its own dedicated port number and with the data directory you created in the last step. For each instance, specify mongod as the user. Start each instance with the replset command-line option specifying the name of the replica set. The following three commands start separate instances for each member of a new replica set named example: sudo -u mongod mongod --port dbpath /data/nodea --replset example --logpath / data/nodea/mongodb.log --fork sudo -u mongod mongod --port dbpath /data/nodeb --replset example --logpath / data/nodeb/mongodb.log --fork sudo -u mongod mongod --port dbpath /data/nodec --replset example --logpath / data/nodec/mongodb.log --fork 30
31 Step 6: Initiate the replica set. Connect to one of the members and initiate the replica set using the rs.initiate() method. Add the other members using the rs.add() method. The rs.add() method requires the hostame of the server: if necessary, first execute the hostname command to determine the name. Use the following sequence of commands to initiate the replica set and add members. Replace <hostname> with the hostname of your server. The commands use the mongod running on port to initiate the set and add the other members. mongo --port eval "rs.initiate()"; mongo --port eval "rs.add("<hostname>:27018")"; mongo --port eval "rs.add("<hostname>:27019")"; Step 7: Connect to the replica set and verify the replica set configuration. To connect to the replica set, issue the mongo command: mongo To verify the configuration, issue the rs.status() method: rs.status() Verify that the members array lists the three members. For a full description of the output, see the explanation in replsetgetstatus. Step 8: Add data to the replica set. While still connected to the replica set, issue the following for loop to create a collection titled testdata and populate it with 25,000 documents, each with an _id field and a field x set to a random string. for (var i = 1; i <= 25000; i++) { db.testdata.insert( { x : Math.random().toString(36).substr(2, 15) } ); sleep(0.1); } Step 9: Log into MMS. In a browser running on the same server as the replica set, enter the following URL, where <public_ip> is the public IP address of the server that runs MMS On Prem. Log in as the user you registered in the first procedure in this tutorial. Step 10: Set up the Monitoring Service for the replica set. On the Welcome page, click the Get Started button for Monitoring. If the Welcome page is not visible, click the Settings tab to refresh MMS and then click the Setup tab to display the Welcome page. 31
32 After you click Get Started, follow the instructions, which will take you through steps to download, configure, and run the Monitoring Agent. When the agent is running, the instructions prompt you to add a host. On the Add a Host page, enter the hostname and port of the replica set member running on port For example, enter <hostname>:27017, replacing <hostname> with the hostname of the server running the replica set. When you finish the instructions, the Monitoring Agent is running and monitoring the replica set. Step 11: Set up the Backup Service for the replica set. On the Welcome page, click the Get Started button for Backup. If the Welcome page is not visible, click the Settings tab to refresh MMS and then click the Setup tab to display the Welcome page. After you click Get Started, follow the instructions to set up the Backup Service. When you reach the Enable Backup page, select the example replica set, which is the set you created when initializing the replica set members. If you chose a different name when initializing the members, choose that name here instead. When you finish the instructions, the Backup Agent is running and backing up the replica set. It may take up to 30 minutes for the first snapshot to complete, even for a very small replica set. While you are waiting, this is a good time to take a tour of your MMS Backup environment. 2.4 Optional: Install On-Prem MMS Backup Install with DEB Packages Install the On Prem MMS Backup software on Ubuntu using deb packages.. Install with RPM Packages Install the On Prem MMS Backup software on Red Hat Enterprise, CentOS, Amazon, or SUSE Enterprise Linux using rpm packages. Install On-Prem MMS Backup with deb Packages On this page Overview Prerequisites Procedures Overview On-Prem Backup provides continuous backup of your data. Use this tutorial to install On-Prem MMS Backup on Ubuntu systems. To arrange a guided install of the MMS Backup components, contact your MongoDB Account Manager. A MongoDB representative can assist you sizing the components and installing the software. Prerequisites Please see On-Prem MMS Hardware and Software Requirements for complete description of the requirements for running On-Prem MMS. 32
33 Procedures Install Core Component Step 1: Download On Prem MMS Monitoring. Download the latest On-Prem Monitoring releases from the downloads page. Step 2: Install On Prem MMS Monitoring. Install the.deb package by issuing the following command, where <version> is the version of the.deb package: sudo dpkg --install mongodb-mms_<version>_x86_64.deb When installed, the base directory for the MMS software is /opt/mongodb/mms/. The.deb package creates a new system user mongodb-mms under which the server will run. Step 3: Configure On Prem MMS Monitoring. In the conf-mms.properties file, ensure that the following required settings are correct: mms.centralurl mms.backupcentralurl mms.from addr mms.replyto addr mms.adminfrom addr mms.admin addr mms.bounce addr mongo.mongouri mongo.replicaset Consider the following example configuration: mms.centralurl= mms.backupcentralurl= mms.from addr=mms-admin@example.net mms.replyto addr=mms-admin@example.net mms.adminfrom addr=mms-admin@example.net mms.admin addr=mms-admin@example.net mms.bounce addr=mms-admin@example.net mongo.mongouri=mongodb://<mms_mongod_ip>:27017/ mongo.replicaset=rs0 At this point, you can also configure authentication, , and optional Kerberos integration, as described in the Configuration. If you would like to run the MMS application in a highly available configuration, please consider Configure a Highly Available MMS Application Server. 33
34 Step 4: Start On Prem MMS Monitoring. To start MMS, issue the following command: sudo service mongodb-mms start Install Backup Component Step 1: Stop any currently running instance. If you are upgrading an existing installation, please stop the currently running instance: sudo service mongodb-mms-backup-daemon stop Step 2: Download the Backup Daemon Package software. To download the Backup Daemon Package for use on Ubuntu, run the following, replacing <version> with the software version number: sudo dpkg -i mongodb-mms-backup-daemon_<version>_x86_64.deb The software is installed to /opt/mongodb/mms-backup-daemon. Step 3: Configure the MMS monitoring application for connection to MMS Backup. Ensure that the MMS Application server is configured to support backup. Edit the /opt/mongodb/mms/conf/ conf-mms.properties file and specify the following settings. mongo.backupdb.mongouri mongo.backupdb.replicaset Step 4: Configure the back-end software package. Configure the Backup Daemon, by editing the /opt/mongodb/mms-backup-daemon/conf/ conf-daemon.properties file. Specify the required configuration options,. See Configuration for information about each value. The following values of the following settings must correspond to the values set in the monitoring application: mongo.mongouri mongo.replicaset mongo.backupdb.mongouri mongo.backupdb.replicaset Consider the following example configuration: 34
35 mongo.mongouri=mongodb://<mms_mongod_ip>:27017/ mongo.replicaset=rs0 mongo.backupdb.mongouri=mongodb://<backup_mongod_ip>:27017/ mongo.backupdb.replicaset=rs1 Additionally, ensure that the file system that holds the rootdirectory has sufficient space to accommodate the current snapshots of all backed up instances. Step 5: Synchronize the gen.key file Synchronize the /etc/mongodb-mms/gen.key file from a MMS Application Server. This is only required if the Backup Daemon Package was installed on a different server then the MMS Application Package. Step 6: Start the back-end software package. To start the Backup Daemon Package run: sudo service mongodb-mms-backup-daemon start If everything worked the following displays: Start Backup Daemon [ OK ] If you run into any problems, the log files are at /opt/mongodb/mms-backup-daemon/logs. Install On-Prem MMS Backup with rpm Packages On this page Overview Prerequisites Procedures Overview On-Prem Backup provides continuous backup of your data. Use this tutorial to install On-Prem MMS Backup on RHEL, CentOS, Amazon Linux, or SLES systems. To arrange a guided install of the MMS Backup components, contact your MongoDB Account Manager. A MongoDB representative can assist you sizing the components and installing the software. Prerequisites Please see On-Prem MMS Hardware and Software Requirements for complete description of the requirements for running On-Prem MMS. 35
36 Procedures Install Core Components Step 1: Download On Prem MMS Monitoring. Download the latest On-Prem Monitoring releases from the downloads page. Step 2: Install On Prem MMS Monitoring. Install the.rpm package by issuing the following command, where <version> is the version of the.rpm package: sudo rpm -ivh mongodb-mms-<version>.x86_64.rpm When installed, the base directory for the MMS software is /opt/mongodb/mms/. The RPM package creates a new system user mongodb-mms under which the server runs. Step 3: Configure On Prem MMS Monitoring. In the conf-mms.properties file, ensure that the following required settings are correct: mms.centralurl mms.backupcentralurl mms.from addr mms.replyto addr mms.adminfrom addr mms.admin addr mms.bounce addr mongo.mongouri mongo.replicaset Consider the following example configuration: mms.centralurl= mms.backupcentralurl= mms.from addr=mms-admin@example.net mms.replyto addr=mms-admin@example.net mms.adminfrom addr=mms-admin@example.net mms.admin addr=mms-admin@example.net mms.bounce addr=mms-admin@example.net mongo.mongouri=mongodb://<mms_mongod_ip>:27017/ mongo.replicaset=rs0 At this point, you can also configure authentication, , and optional Kerberos integration, as described in the Configuration. If you would like to run the MMS application in a highly available configuration, please consider Configure a Highly Available MMS Application Server. 36
37 Step 4: Start On Prem MMS Monitoring. To start MMS, issue the following command: sudo service mongodb-mms start Install Backup Components Step 1: Stop any currently running instance. If you are upgrading an existing installation, please stop the currently running instance: sudo service mongodb-mms-backup-daemon stop Step 2: Download the Backup Daemon Package software. To download the Backup Daemon Package for use on RHEL, CentOS, Amazon Linux, or SLES, run the following, replacing <version> with the software version number: sudo rpm -U mongodb-mms-backup-daemon-<version>.x86_64.rpm The software is installed to /opt/mongodb/mms-backup-daemon. Step 3: Configure the MMS monitoring application for connection to MMS Backup. Ensure that the MMS Application server is configured to support backup. Edit the /opt/mongodb/mms/conf/ conf-mms.properties file and specify the following settings. mongo.backupdb.mongouri mongo.backupdb.replicaset Step 4: Configure the back-end software package. Configure the Backup Daemon, by editing the /opt/mongodb/mms-backup-daemon/conf/ conf-daemon.properties file. Specify the required configuration options,. See Configuration for information about each value. The following values of the following settings must correspond to the values set in the monitoring application: mongo.mongouri mongo.replicaset mongo.backupdb.mongouri mongo.backupdb.replicaset Consider the following example configuration: 37
38 mongo.mongouri=mongodb://<mms_mongod_ip>:27017/ mongo.replicaset=rs0 mongo.backupdb.mongouri=mongodb://<backup_mongod_ip>:27017/ mongo.backupdb.replicaset=rs1 Additionally, ensure that the file system that holds the rootdirectory has sufficient space to accommodate the current snapshots of all backed up instances. Step 5: Synchronize the gen.key file Synchronize the /etc/mongodb-mms/gen.key file from a MMS Application Server. This is only required if the Backup Daemon Package was installed on a different server then the MMS Application Package. Step 6: Start the back-end software package. To start the Backup Daemon Package run: sudo service mongodb-mms-backup-daemon start If everything worked the following displays: Start Backup Daemon [ OK ] If you run into any problems, the log files are at /opt/mongodb/mms-backup-daemon/logs. 2.5 Optional On-Prem MMS Configuration HTTPS with Jetty Configure the Jetty server that runs the core MMS application to use HTTPS. Application High Availability Outlines the process for achieving a highly available MMS deployment. Backup High Availability Make the Backup system highly available. Manage Backup Daemon Jobs Manage job assignments among the backup daemon Backup Daemon Binaries Configure how MMS downloads versions of MongoDB to manage the backup filesystems. LDAP Authentication Configure On-Prem MMS to use LDAP to store user data and permissions. Configure On Prem MMS Monitoring Jetty Instances to use HTTPS On this page Overview Create and Prepare a Valid SSL Certificate Configure Jetty Instances to use HTTPS 38
39 Overview You can optionally configure the Jetty instances that serve the On-Prem MongoDB Management Service application to use HTTPS to encrypt connections between the MMS application and the MMS agent as well as the web interface. Alternately, you can provide access to the MMS application using a load balancer that provides HTTPS access. Before you can configure On Prem MMS Monitoring Jetty instances to use HTTPS, you must have a valid SSL certificate prepared in the right format. If you do not, this page provides procedures for creating and preparing a valid SSL certificate. Create and Prepare a Valid SSL Certificate Create the certificate either through a 3rd-party authority or as a self-signed certificate. If you have an existing certificate, you can use that instead but still must prepare it. Preparing a certificate can involve converting its format and concatenating it with other certificates in a certificate chain. Use the appropriate procedures in this section to generate and prepare the certificate. To generate certificates must have access to the openssl utility. Create a New Certificate and Signing Request for a 3rd-party Certificate Authority Step 1: Create a new certificate and certificate signing request (CSR). Issue the following command at the system prompt: openssl req -new -out mms-ssl.csr -newkey rsa:2048 -keyout mms-ssl.key Step 2: Enter answers for the certificate s meta data. openssl prompts you to answer questions for the certificate s meta data. Complete all prompts. The Common Name must have the same hostname value as the mms.centralurl configuration. Refer to the instructions provided by the certificate authority to ensure that they do not have any more requirements for the certificate signing authority or the certificate meta data. Step 3: Submit your new CSR to the 3rd-party certificate authority. The certificate authority will return a signed certificate. Each certificate authority may have a different certificate signing procedure. Create a Self-Signed Certificate Step 1: Create a self-signed certificate. To generate a self-signed certificate, issue the following command at the system prompt: openssl req -x509 -days newkey rsa:2048 -keyout mms-ssl.key -out mms-ssl.crt 39
40 Step 2: Enter answers for the certificate s meta data. openssl prompts for a private key passphrase, and for the answers to questions for the certificate s meta data. Complete all prompts. The Common Name must have the same hostname value as the mms.centralurl configuration. Prepare the Certificate as a PEM Certificate Step 1: If the certificate is in DER format, convert it to PEM. If the signed certificate is in DER format, convert the certificate to PEM format with the following command: openssl x509 -in mms-ssl.cer -inform DER -outform PEM -out mms-ssl.crt Step 2: If the CA uses a certificate chain, concatenate the certificates. If the certificate authority uses a certificate chain, concatenate the certificates together to create a unified certificate, with a command that resembles the following: cat mms-ssl.crt <intermediate-certificate> <root-certificate> > mms-ssl-unified.crt Replace <intermediate-certificate> with the intermediate certificate chain and <root-certificate> with the certificate authority s root certificate. Prepare the Certificate as a PKCS12 Certificate Step 1: Create a PKCS12-formatted keystore. Combine the private key and signed certificate, or certificate chain, into a PKCS12-formatted keystore with the following command: openssl pkcs12 -inkey mms-ssl.key -in mms-ssl-unified.crt -export -out mms-ssl.pkcs12 Step 2: Enter answers for the certificate s meta data. openssl prompts you to enter the private key passphrase as well as a new passphrase for the PKCS12 keystore. Configure Jetty Instances to use HTTPS Once you have created and prepared a valid SSL certificate, use the following sequence of procedures to configure the Jetty instances to use HTTPS to encrypt connections between the MMS application and the MMS agent. Create Java Truststore 40
41 Step 1: Import the PEM certificate into a Java truststore. Import the PEM certificate into a Java truststore, so that the MMS server trusts its own mms.centralurl when making HTTP requests. The default installation directory for the MMS server is /opt/mongodb/mms. If your installation uses a different directory, replace /opt/mongodb/mms with that path. /opt/mongodb/mms/jdk/bin/keytool -import -keystore mms-truststore.jks -file mms-ssl- unified.crt Step 2: Enter a Java keystore passphrase. keytool prompts you to specify a Java keystore passphrase. Enter it and type yes to confirm import of the certificate. Create Java Keystore Step 1: Convert the PKCS12 keystore into a Java Keystore. Convert the PKCS12 keystore into a Java Keystore, so that the MMS server can access the required SSL infrastructure. The default installation directory for the MMS server is /opt/mongodb/mms. If your installation uses a different directory, replace /opt/mongodb/mms with that path. /opt/mongodb/mms/jdk/bin/keytool -importkeystore \ -srckeystore mms-ssl.pkcs12 \ -srcstoretype PKCS12 \ -destkeystore mms-keystore.jks Step 2: Enter the PKCS12 keystore passphrase. You must use the same passphrase for the Java keystore as for the PKCS12 key. Step 3: Enter a passphrase for the new Java keystore. You must use the same passphrase for the Java keystore as for the PKCS12 key. Set Truststore and Keystore Location and Permissions Step 1: Move the Java keystore and truststore files to the /etc/mongodb-mms directory. Issue the following command to move the Java keystore and truststore files to the /etc/mongodb-mms directory: sudo mv mms-truststore.jks mms-keystore.jks /etc/mongodb-mms/ Step 2: Set permissions. Issue the following sequence of commands to set the appropriate permissions on the Java keystore and truststore files. If the MMS application server runs as a different user, change mongodb-mms in the chown command as needed. 41
42 sudo chown mongodb-mms:root /etc/mongodb-mms/*.jks sudo chmod 600 /etc/mongodb-mms/*.jks Generate Credentials Step 1: Generate a credential pair for the MMS application to use to access the Java Keystore. Issue the following command, replacing /opt/mongodb/mms with the path of the installation directory for the MMS server: /opt/mongodb/mms/bin/credentialstool --username keystore --password credentialstool returns output that resembles the following: Your encrypted credentials pair: Username: abcdef d41ae0a98c Password: abcdef cc28e525d1f Step 2: Copy the credential pair. Configure MMS Application to use SSL Step 1: Edit the mms.conf file to enable SSL. Edit the mms.conf (e.g. /opt/mongodb/mms/conf/mms.conf) file to add the following options: JAVA_MMS_SSL_OPTS="${JAVA_MMS_SSL_OPTS} -Dxgen.webServerSslEnabled=true" JAVA_MMS_SSL_OPTS="${JAVA_MMS_SSL_OPTS} -Dxgen.webServerSslKeyStorePath=/etc/mongodb- mms/mms-keystore.jks" JAVA_MMS_SSL_OPTS="${JAVA_MMS_SSL_OPTS} -Dxgen. webserversslkeystoreencryptedpassword=abcdef cc28e525d1f543464" Step 2: Edit the conf-mms.properties file to change the mms.centralurl value to the new HTTPS information. For example: mms.centralurl= Step 3: Configure MMS Application to use SSL. For example: JAVA_MMS_SSL_OPTS="${JAVA_MMS_SSL_OPTS} -Dxgen.webServerSslTrustStorePath=/etc/ mongodb-mms/mms-truststore.jks" JAVA_MMS_SSL_OPTS="${JAVA_MMS_SSL_OPTS} -Dxgen. webserverssltruststoreencryptedpassword=f6a5a6b19603c0c04f-97dbb68c2bb1" (continues on next page) 42
43 (continued from previous page) JAVA_MMS_SSL_OPTS="${JAVA_MMS_SSL_OPTS} -Dxgen.webServerSslKeyStorePath=/etc/mongodb- mms/mms-keystore.jks" JAVA_MMS_SSL_OPTS="${JAVA_MMS_SSL_OPTS} -Dxgen. webserversslkeystoreencryptedpassword=f6a5a6b19603c0c04f-97dbb68c2bb1" Configure the Monitoring Agent to Trust the MMS Server Starting with On-Prem MMS 1.4, the monitoring agent validates the SSL certificate of the MMS server by default. This means the monitoring agent must be configured to trust the MMS server if not using a certificate signed by a trusted 3rd party. To specify a self-signed certificate of the MMS server that the monitoring agent should trust, do the following: Step 1: Copy your PEM certificate to /etc/mongodb-mms/. Issue the following sequence of commands: sudo cp -a mms-ssl-unified.crt /etc/mongodb-mms/ sudo chown mongodb-mms-agent:mongodb-mms-agent /etc/mongodb-mms/mms-ssl-unified.crt sudo chmod 600 /etc/mongodb-mms/mms-ssl-unified.crt Step 2: Edit the following parameter in /etc/mongodb-mms/monitoring-agent.config. For example: ssltrustedmmsservercertificate=/etc/mongodb-mms/mms-ssl-unified.crt Step 3: Restart the monitoring agent for the configuration update to take effect. For example: sudo /etc/init.d/mongodb-mms-monitoring-agent restart Restart MMS Application Server Before you can access MMS using an HTTPS connection you must restart the MMS application server. Step 1: Restart the MMS application server. sudo /etc/init.d/mongodb-mms start Step 2: You can now connect to MMS by accessing the following URL in a web browser: 43
44 Configure a Highly Available MMS Application Server On this page Overview Prerequisites Procedure Additional Information Overview The On Prem MMS Application Server provides high availability through horizontal scaling and through use of a replica sets for the backing MongoDB instance that hosts the MMS Application Database. Horizontal Scaling The MMS Application Servers are stateless between requests. Any server can handle requests as long as all the servers read from the same backing MongoDB instance. If one Application Server becomes unavailable, another fills requests. To take advantage of this for high availability, configure a load balancer to balance between the pool of MMS Application Servers. Use the load balancer of your choice. Configure each Application Server s conf-mms.properties file to point its mms.centralurl property to the load balancer. The load balancer then manages the MMS HTTP Service and Backup HTTP Service that runs on each Application Server. Replica Set for the Backing Instance Deploy a replica set rather than a standalone as the backing MongoDB instance for monitoring. Replica sets have automatic failover if the primary becomes unavailable. When deploying a replica set with members in multiple facilities, ensure that a single facility has enough votes to elect a primary if needed. Choose the facility that hosts the core application systems. Place a majority of voting members and all the members that can become primary in this facility. Otherwise, network partitions could prevent the set from being able to form a majority. For details on how replica sets elect primaries, see Replica Set Elections. You can create backups the replica set using file system snapshots. File system snapshots use system-level tools to create copies of the device that holds replica set s data files. Prerequisites Deploy a replica set for the backing instance for the MMS Application Database. To deploy a replica set, see Deploy a Replica Set. 44
45 Procedure To configure multiple Application Servers with load balancing: Step 1: Configure a load balancer with the pool of MMS Application Servers. This configuration depends on the general configuration of your load balancer and environment. Step 2: Update each MMS Application Server with the load balanced URL. On each Application Server, edit the conf-mms.properties file to configure the mms.centralurl property to point to the load balancer URL. The conf-mms.properties file is located in the <install_dir>/conf/ directory. Step 3: Update each MMS Application Server with the replication hosts information. On each Application Server, edit the conf-mms.properties file to define the replication hosts used as the backing MongoDB instances. Set the mongo.mongouri property to the connection string of the backing instance used for monitoring data. For example: mongo.mongouri=mongodb://<mms0.example.net>:<27017>,<mms1.example.net>:<27017>,<mms2. example.net>:<27017>/?maxpoolsize=100 mongo.replicaset=<mmsreplset0> If you use On Prem MMS Backup, set the mongo.backupdb.mongouri property to the connection string of the the backing instance used for backup. For example: mongo.backupdb.mongouri=mongodb://<mms3.example.net>:<27017>,<mms4.example.net>: <27017>,<mms5.example.net>:<27017>/?maxPoolSize=100 mongo.backupdb.replicaset=<mmsbackupreplset0> You must specify at least 3 hosts in the mongo.mongouri and mongo.backupdb.mongouri connection strings. Step 4: Synchronize the gen.key file across all the MMS Application Servers. Synchronize the /etc/mongodb-mms/gen.key file across all Application Servers. The MMS Application Server uses this file to encrypt sensitive information before storing the data in a database. Additional Information For information on making MMS Backup highly available, see Configure a Highly Available MMS Backup Service. Configure a Highly Available MMS Backup Service 45
46 On this page Overview Additional Information Overview The Backup Daemon maintains copies of the data from your backed up mongod instances, and creates snapshots used for restoring data. The file system that the Backup Daemon uses must have sufficient disk space and write capacity to store the backed up instances. For replica sets, the local copy is equivalent to an additional secondary replica set member. For sharded clusters the daemon maintains a local copy of each shard as well as a copy of the config database. Multiple Backup Daemons To increase your storage and to scale horizontally, you can run multiple instances of the Backup Daemon. With multiple daemons MMS binds each backed up replica set or shard to a particular Backup Daemon. For example, if you run two Backup Daemons for a cluster that has three shards, and if MMS binds two shards to the first daemon, then that daemon s server replicates only the data of those two shards. The server running the second daemon replicates the data of the remaining shard. Multiple daemons allow for manual failover should the daemon become unavailable. You can instruct MMS to transfer the daemon s backup responsibilities to another Backup Daemon. MMS reconstructs the data on the new daemon s server and binds the associated replica sets or shards to the new daemon. See Move Jobs from a Lost Backup Service to another Backup Service for a description of this process. MMS reconstructs the data using a snapshot and the oplog from the Backup Blockstore Database. To deploy Backup Daemons, see Optional: Install On-Prem MMS Backup. Replica Set for the Backing Instance Deploy a replica set rather than a standalone as the backing MongoDB instance for backup. Replica sets have automatic failover if the primary becomes unavailable. When deploying a replica set with members in multiple facilities, ensure that a single facility has enough votes to elect a primary if needed. Choose the facility that hosts the core application systems. Place a majority of voting members and all the members that can become primary in this facility. Otherwise, network partitions could prevent the set from being able to form a majority. For details on how replica sets elect primaries, see Replica Set Elections. To deploy a replica set, see Deploy a Replica Set. Additional Information To move jobs from a lost Backup server to another Backup server, see Move Jobs from a Lost Backup Service to another Backup Service. For information on making the MMS Application Server highly available, see Configure a Highly Available MMS Application Server. 46
47 Move Jobs from a Lost Backup Service to another Backup Service On this page Overview Procedure Overview If the server running a Backup Daemon fails, and if you run multiple Backup Daemons, then an administrator with the global owner or global backup admin role can move all the daemon s jobs to another Backup Daemon. The new daemon takes over the responsibility to back up the associated shards and replica sets. When you move jobs, the destination daemon reconstructs the data using a snapshot and the oplog from the Backup Blockstore Database. Reconstruction of data takes time, depending on the size of the databases on the source. During the time it takes to reconstruct the data and reassign the backups to the new Backup Daemon: MMS Backup does not take new snapshots of the jobs that are moving until the move is complete. Jobs that are not moving are not affected. MMS Backup does save incoming oplog data. Once the jobs are on the new Backup Daemon s server, MMS Backup takes the missed snapshots at the regular snapshot intervals. Restores of previous snapshots are still available. MMS can produce restore artifacts using existing snapshots with point-in-time recovery for replica sets or checkpoints for sharded clusters. Procedure With administrative privileges, you can move jobs between Backup daemons using the following procedure: Step 1: Click the Admin link at the top of MMS. Step 2: Select Backup and then select Daemons. The Daemons page lists all active Backup Daemons. Step 3: Locate the failed Backup Daemon and click the Move all heads link. MMS displays a drop-down list from which to choose the destination daemon. The list displays only those daemons with more free space than there is used space on the source daemon. Step 4: Move the the jobs to the new daemon. Select the destination daemon and click the Move all heads button. 47
48 MMS On-Prem Backup Binary Management On this page Settings The MMS service backup daemon recreates every replica set you backup up and applies the oplog entries sent by the backup agents. MMS maintains a standalone MongoDB database on disk for each backed up replica set, also called a head. Each head is less than or equal to the last oplog supplied by the backup agent. The backup daemon must use a mongod equal or greater than the version of any replica set it backs up. If version is the latest revision installed on the daemon, for example, backing up a mongod with version will use a mongo for head. However, backing up a mongod with a daemon will result in an error. The conf-daemon.properties configuration file in the /opt/mongodb/mms-backup-daemon/conf folder includes two directives to manage and use the mongod binaries: mongodb.release.directory and mongodb.release.autodownload. Settings mongodb.release.directory Specify the full directory path of a folder that contains every MongoDB release that the backup daemon requires. If you update versions manually, name the folders within this full directory path using the following form: mongodb-<platform>-<architecture>-<version> For example: mongodb-linux-x86_ mongodb-linux-x86_ mongodb-linux-x86_ mongodb-linux-x86_ mongodb.release.autodownload Specify true for active or false for inactive. The /opt/mongodb/backup-daemon/bin directory includes the mongodb-fetch utility that will download the latest releases directly from downloads.mognodb.org. The autodownload setting operation runs automatically this utility once an hour when the service starts. If automatic downloading is a security concern, set mongodb.release.autodownload to false. You must then place the needed MongoDB releases in the mongodb.release.directory manually. Optional LDAP Authentication On this page Overview Prerequisites Considerations 48
49 Procedure Configuration Files Important: There is no method to transition an existing MMS deployment with independent user management to use LDAP for user management. You will need to start with a fresh installation of the latest version of MMS. Overview On-Prem MongoDB Management Service can use a Lightweight Directory Access Protocol (LDAP) service to store users and manage user authentication. Users continue to log in using the standard MMS interface. After successful LDAP authentication, MMS synchronizes the firstname, lastname, and attributes in a LDAP user record with their MMS user record. Integration requires adding LDAP user record values in the MMS configuration file. Upon submission of login form data, MMS authenticates in two steps: 1. First, MMS searches the LDAP server for a matching LDAP user record with the MMS mms.ldap.binddn and mms.ldap.bindpassword configuration values to match the username. 2. With a match, MMS searches the LDAP server with the user record attribute defined for the mms.ldap.user. searchattribute parameter to authenticate for MMS access. Upon successful login with LDAP, the first user completes a welcome form to create the initial MMS group. Prerequisites LDAP server installed, configured, and accessible to MMS. An LDAP group name used to populate the mms.ldap.global.role.owner configuration value used to match LDAP records with MMS data. MMS server installed and configured. It s also possible to create LDAP groups to assign to users with read only or other non-administrative roles, then update the global roles property settings as needed. In this case, create one or more additional LDAP groups. Considerations For successful integration, each user record sent by the LDAP server must contain the list of LDAP groups assigned to the user. The first user to login with LDAP authentication must have the LDAP Owner role assigned to their account. The mms.ldap.global.role.owner property setting in the MMS configuration file must match an LDAP owner group. For example, if LDAP has an admin group for use by MMS admins, set the mms.ldap.global.role.owner property to admin in the MMS configuration file. Procedure 1. Define LDAP record schema attributes and values. 2. Update the LDAP server configuration values in the MMS conf-mms.properties file. 49
50 3. Update the LDAP user configuration values in the MMS conf-mms.properties file. 4. Update the Global Role configuration values in the MMS conf-mms.properties file. The sections below define configuration values to update for each step. Configuration Files Configuration parameters connect one or more LDAP groups to roles used in MMS, as well as retrieve user data to authenticate users. LDAP Server Configuration Parameter Update this LDAP server property in the MMS conf-mms.properties configuration file. Property mms.usersvcclass Value com.xgen.svc.mms.svc.user.usersvcldap LDAP User Configuration Parameters Update these LDAP directory schema properties in the MMS conf-mms.properties configuration file: Property Example Description mms.ldap.url ldap:// The URI for the LDAP server 167:3890 mms.ldap.binddn _search_ The LDAP user used to execute searches for other users mms.ldap.bindpassword disdfffnj7wmmc The credentials for the search user mms.ldap.user.basedn c\=users,d\=identity The base dn used for searching for users mms.ldap.user.searchattribute uid The LDAP user record attribute MMS uses to search then authenticate users when a user types their username into the MMS login form. mms.ldap.user.firstname givenname The LDAP user attribute that contains the user s first name. mms.ldap.user.lastname sn The LDAP user attribute that contains the user s last name. mms.ldap.user. mail The LDAP user attribute that contains the user s address. mms.ldap.user.group groups The LDAP user attribute that contains the list of groups that the user belongs to. These can be cn s or dn s. It doesn t matter as long as they are consistent with those provided in the MMS global role configuration, explained below. Global Role Configuration Global parameters can be in any format for an LDAP group. They can be a cn (Common Name) or a dn (Distinguished Name). The format must match the property specified by the mms.ldap.user.group configuration property 50
51 defined in the table above. Update these LDAP directory schema properties in the MMS conf-mms.properties configuration file: Property Example Description mms.ldap.global.role.read_only AcmeDbas The LDAP group attribute name for users assigned the global read-only role in MMS. This role can only view data in MMS. mms.ldap.global.role.monitoring_admin AcmeDbas The LDAP group attribute name for users assigned the global monitoring administrative role in MMS. This role can view hosts, charts, and other data, as well as monitor hosts, manage monitoring settings, download the monitoring agent, and other tasks. mms.ldap.global.role.backup_admin AcmeDbas The LDAP group attribute name for users assigned the global backup administrative role in MMS. This role can view backup status, snapshot lists, and modify backup settings, as well as start/stop/terminate backups, request restores, view/edit host passwords, and other tasks. mms.ldap.global.role.owner AcmeDbas The LDAP group attribute name for users assigned the global owner role in MMS. This role can perform all administrative tasks in MMS. mms.ldap.group.separator ; Each of the global role values may also take a delimited list of groups; for example: "dbas,sysadmins". If any group value contains the delimiter (, in the above case), the delimiter must be set to another value, e.g. ;. Otherwise, MMS will parse "CN\=foo,DN\=bar" as two elements rather than as the description for a single group. 2.6 Start and Stop MMS Application On this page Start the On-Prem MMS Server Stop the On-Prem MMS Server Startup Log File Output Optional: Run as Different User Optional: MMS Application Server Port Number Start the On-Prem MMS Server 51
52 Note: If you installed from a tar.gz or zip archive, you must create a symlink located at the path /etc/init. d/mongodb-mms that points to the <install_dir>/bin/mongodb-mms. After configuring your On Prem MMS Monitoring deployment, you can start the MMS server with this command: sudo /etc/init.d/mongodb-mms start In some situations, starting MongoDB may take several minutes to pre-allocate the journal files. This is normal behavior. You can now use the On Prem MMS Monitoring instance by visiting the URL specified in the mms.centralurl parameter (e.g. to continue configuration: Unlike the SaaS version of MMS, On Prem MMS Monitoring stores user accounts in the local MongoDB instance. When you sign into the On Prem MMS Monitoring instance for the first time, the system will prompt you to register and create a new group for your deployment. After completing the registration process, you will arrive at the MMS Hosts, page. Because there are no Monitoring agents attached to your account, the first page you see in On Prem MMS Monitoring will provide instructions for downloading the Monitoring agent. Click the download agent link to download a preconfigured agent for your account. Continue reading this document for installation and configuration instructions for the MMS agent. Stop the On-Prem MMS Server Enter the following command: sudo /etc/init.d/mongodb-mms stop Startup Log File Output The On-Prem MMS server logs its output to a logs directory inside the installation directory. You can view this log information with the following command: sudo less <install_dir>/logs/mms0.log If the server starts successfully, you will see content in this file that resembles the following: [main] INFO ServerMain:202 - Starting mms... [main] WARN AbstractConnector:294 - Acceptors should be <=2*availableProcessors: SelectChannelConnector@ :0 [null] LoginService=HashLoginService identityservice=org.eclipse.jetty.security. DefaultIdentityService@1eb3319f [main] INFO AppConfig:46 - Starting app for env: hosted [main] INFO MmsAppConfig:67 - Not loading backup components [main] INFO GraphiteSvcImpl:67 - Graphite service not configured, events will be ignored. [main] INFO TwilioSvcImpl:48 - Twilio service not configured, SMS events will be ignored. [main] INFO OpenDMKSnmpTrapAgentSvcImpl:91 - SNMP heartbeats hosts not configured, no heartbeat traps will be sent. [main] INFO ServerMain:266 - Started mms in: (ms) 52
53 Optional: Run as Different User 1. Edit <install_dir>/conf/mms.conf: MMS_USER=foo_user 2. Change Ownership of <install_dir> for new user: sudo chown -R foo_user:foo_group <install_dir> 3. Restart MMS server: sudo <install_dir>/bin/mongodb-mms restart Optional: MMS Application Server Port Number 1. Edit <install_dir>/conf/conf-mms.properties: mms.centralurl= 2. Edit <install_dir>/conf/mms.conf BASE_PORT=<newport> 3. Restart MMS server: sudo <install_dir>/bin/mongodb-mms restart 3 On Prem MMS Administration Administration Interface Lists and explains the MMS Administration page. Activity Events, alerts, and related configuration. Application Settings Lists and explains the MMS Settings page. User and Environment Management Details how to manage users and groups in MMS. Create an Alert Outlines procedures for creating alerts in MMS. Manage Alerts Outlines procedures for creating and manipulating alerts in MMS. Backup Alerts Describes alert messages concerning the MMS Backup system. Configure Kerberos Authentication Configure the MMS agents to connect to MongoDB hosts with the Kerberos authentication mechanism. 3.1 Administration Interface On this page Overview General Tabs 53
54 Backup Tabs Control Panel Tabs The MMS Administration section of the On-Prem MongoDB Management Service application provides access to user management, system status, and system-wide messaging. Overview On-Prem MongoDB Management Service includes a tool to view system status and perform administrative tasks, for example, set cron jobs and manage users and groups. If you have administrative privileges for the MMS deployment, click the Admin link in the top right corner of MMS to access the system administration tool. The Admin page includes the following sections and tabs: The default tab is the Overview tab which provides a system overview. Messages, Reports, Users, and Groups tabs provide additional functionality. The Backup section includes tabs for Jobs, Logs, Daemons, Blockstores, Grooms, and Job Timeline. The Control Panel section includes tabs for Send Test and Send Test SMS pages. General Tabs Overview The Overview tab provides reports on system use and activity. This tab displays the summary table and Total Pages Viewed and Total Chart Requests charts. A summary table reports totals for: groups active groups active hosts users users active ping spillover queue increment spillover queue Additionally two charts report: total page views total chart requests Messages You can display a short message on any page of the MMS application to notify or remind users, such as impending maintenance windows. Messages may be active, i.e. visible, on all pages or a subset of pages. 54
55 The Messages tab provides information on existing messages as well as an interface to add new messages or manage existing messages. Message Table The UI Messages page holds a table of all available messages. Use the search box on the top right to filter the list of messages. For each message, the message table reports: which page or page prefix the message will appear on. the text of the message. whether the message is active or inactive. Active messages are also highlighted in orange. the creation date and time for the message. the date and time of the last modification for the message. Add a Message To add a message which appears on one page, or on all pages, 1. Click the:guilabel:add Message button. 2. In the Add Message interface, enter the message, and the page URL or optionally, page prefix in the Add Message interface. The page prefix allows you to specify a path of a single page or the URL prefix of a group of pages. The prefix must begin with a / character. For example, entering the page prefix /settings/profile will display a message on the default Settings page and Profile tab but not on any other page or tab in the application. 3. Click the Active checkbox to make the message live. Optionally, you can leave the box unchecked to disable the message. 4. Click the Add button to add the message. Once added, active messages take 60 seconds before they display. Disable a Message To disable a message, click the orange square button to the right of any alert listed on the Messages tab. The orange button will change to a grey button. To re-enable a disabled message, click the grey button; the grey button will change to back to an orange button. Delete a Message To delete a message, click the garbage can icon to the right of any alert listed on the Messages tab. 55
56 Users The Users tab displays a list of user information for all people with permission to use the On-Prem MongoDB Management Service application as well as provides an interface to manage users. Use the search box on the upper right corner to find a user record. Users Information For each user, the users table reports: the username the available administrative roles, if any the date and time of the last login. the date and time of the last access event. the total number of login. the user s configured timezone. the creation date and time. Edit a User Record To edit a user record, 1. Click the pencil icon at the far right of the user record. 2. In the Edit User interface, you can: Edit the user s . Select the user s groups and roles. Lock or unlock the account. Specify the user s global roles. 3. When finished, click the Save button to save any changes and exit. Groups The Groups tab lists all groups created with their date created and the last date and time an agent for the group pinged MMS. At the top right of the page is a search box to find a group by name. Click a group name to go directly to the group pages in MMS. To return to the system administration tool, click the browser back button or click the Admin link in the top right of any page. Backup Tabs Jobs You can see all active and stopped backup agent jobs on the Jobs tab. For each backup job, the tab lists job group, name, last agent conf, last oplog, head time, last snapshot, what the agent is working on, the daemon, and the blockstore. 56
57 Click the group name to go directly to the backup job page for the group. To return to the system administration tool, click the browser back button or click the Admin link in the top right of any page. Click the job name to see the results of the job on a detail page. On the job detail page, click links to see the logs, resource usage, conf call, and download a zipped archive file containing complete diagnostic information for the specified job. Logs The Logs tab lists backup logs by job and class with messages grouped and counted by last 2 hours, last day, and last 3 days. Click a count number to see all messages in the group. Daemons This tab lists all active backup daemons, as well as the ability to pre-configure a new Backup Daemon. For each Backup Daemon, this tab lists the server name, configuration, head space used, head space free, the number of replica sets backed up, the percentage of time the backup agent was busy, and job runtime counts by 1 minute, 10 minutes, 60 minutes, less than or equal to 180 minutes, and greater than 180 minutes. Click the Show JSON link to view the Backup Daemon JSON. When JSON displays, click the View raw runtime data link under the code to view raw data. To hide the daemon JSON, click the Hide JSON link. Click the Move all heads link to move the Backup Daemon head location. Select the location and click the Move all heads button to move all jobs that live on this daemon to a new daemon. For each Backup Daemon, you can select or deselect the assignment, backup jobs, restore jobs, resource usage, and garbage collection configuration, as well as indicate whether the disk type is SSD or HDD. If selected, the algorithm that assigns jobs to daemons uses disk type to assign jobs with high oplog churn to HHD daemons. To pre-configure a new Backup Daemon, scroll to the bottom of this tab and type the <machine>:<root head path> in the text field above the Pre-Configure New Daemon button. Click the button to pre-configure the new Backup Daemon. Blockstores The Blockstores tab lists all backup blockstores with the ability to add a new blockstore. To update an existing blockstore, edit the <hostname>:<port>, MongoDD Auth Username, and MongoDB Auth Password. Click the Encrypted Credentials checkbox if the username and password entered above used the credentialstool for encryption. To add a blockstore, enter the <id> and <hostname:port> in the text fields above the Add New Blockstore button then click the button to save and add the blockstore. For all MongoDB connections, enter a single <hostname>:<port> for a MongoDB standalone or a comma separated list of all replica set members. A newly configured blockstore only becomes active when you select the assignment checkbox. Grooms New in version
58 Background On-Prem MongoDB Management Service performs periodic garbage collection, or Grooms, that removes unused blocks from the blockstore database to reclaim space. A scheduling process determines when a particular backed-up replica set has unreclaimed space and creates a groom job. The groom forces the backup process to write all new data to a new location, copy all existing, needed data from the old location to the new one, update references to maintain data relationships, and then drops the old database. During groom operations, you may notice that blockstore filesize will fluctuate, sometimes dramatically. Interface This tab lists all active backup groom jobs, bytes saved from recent groom jobs, and recently finished groom jobs. A groom is the process of garbage collecting dead bytes from the Blockstore Database. Dead blocks are blocks no longer referenced by a non-expired snapshot and, therefore, eligible for garbage collection. For active and recently finished backup groom jobs, the tab lists the group, job name, savings, running time, stage, total blocks, scanned blocks as a percent of total for active jobs, copied blocks as a percent of total for finished jobs, direction, blockstore, and machine. Job Timeline The Job Timeline tab displays the present and future scheduled backup status for active jobs, as well as the ability to search backup jobs by group, replica set, and machine. To update the list automatically every 10 seconds, click the Auto refresh checkbox at the top left of the list. Or click the Refresh button to refresh data manually as needed. To view the backup job JSON, click the Show JSON link under the Group heading for any backup job. When JSON displays, click the View raw runtime data link under the code to view raw data. To hide the daemon JSON, click the Hide JSON link. To move the job to a new Backup Daemon, click the Move head link under the Machine heading for a backup job. Select the location and click the Move head button to move the job to a new Backup Daemon. You can bind a backup job to a head by clicking the Set binding button under the Machine heading for any backup job. To break the backup job, click the Break Job link under the Machine heading for any backup job. To unbreak the backup job, click the Unbreak Job link. Control Panel Tabs Send Test Use this tab to send a test with MMS. Fill out the To and Body message then click the Send button. Send Test SMS Use this tab to send an SMS message. Fill out the To and Body message then click the Send button. 58
59 3.2 Activity The Activity page has three sections in tabs: All Activity shows a feed of all MMS events as well as a gear icon to download the activity feed as a CSV file or filter the feed by date. Closed Alerts shows a list of alerts that users have closed explicitly or where the metric has dropped below the threshold of the alert. Alert Settings shows a list of active alerts with a Add Alert button to create new alerts and a gear icon to edit, clone, disable, or delete existing alerts. New groups automatically have two alerts created, a monitoring agent down alert and a host is exposed to the public Internet alert. Existing groups must create these alerts manually. See the Exposed Host Alerts FAQ for details about that alert. Additional Resources See Manage Alerts for an overview of common procedures for using the activity system in MMS. 3.3 Application Settings On this page My Settings Group Settings Agents On Prem MMS Backup Settings Backup The Settings section of the On-Prem MongoDB Management Service (MMS) console enables users to personalize their console and activate or deactivate a variety of features. The following sections correspond to a tab on the Settings page. My Settings These settings are specific to the logged in user, and will only affect their MMS experience. Profile The Profile page allows users to update their personal information. The username, address, and password are also used for jira.mongodb.org. Changing your address or password in MMS will also change the address and password you use to log into Jira. User Name: displays the user s name. You cannot change your username. Address: displays the address MMS associates with your account. You can change your address by clicking on the pencil icon. 59
60 Password: allows you to change your MMS password. Passwords must fulfill MMS s password requirements. Two-Factor Authorization: All restores, backups, and deletion confirmations require two-factor authentication. MMS does not use two factor authentication for login. MMS supports two-factor authentication with either a mobile phone (SMS) or the Google Authenticator application. Mobile Phone Number: displays the mobile phone number MMS uses for two-factor authentication. You can change the number by clicking on the pencil icon. If you are outside of the United States or Canada, you will need to include 011 and your country code. For instance, for New Zealand (country code 64), you would need to enter 01164, followed by your phone number. Alternately, you can sign up for a Google Voice number, and use that number for your authentication. Note: From India, use Google Authenticator for two-factor authentication. Google Authenticator is more reliable than authentication with SMS text messages to Indian mobile phone numbers (i.e. country code 91). Google Authenticator: the Google Authenticator Application (ios and Android) generates unique timesensitive verification codes, used to confirm identify in addition to usernames and passwords. To configure for the first time, click the Configure button to the right side of the Profile page, follow the instructions, then click the Authenticate button to complete authentication. After configuring two-factor authentication using Google Authenticator, update the authentication code by clicking on the pencil icon. Then enter two sequential verification codes and click the Authenticate button. If you require both SMS and Google Authenticator, configure SMS then Google Authenticator. Configuring SMS after Google Authenticator will disable the Google Authenticator settings. Contact support to delete or reset any configured two-factor authentication. Personalization The Personalization page allows users to configure the console to suit their needs and preferences. My Dashboard: sets the default dashboard on the Dashboard page. You can select from a list of all of your dashboards. My Time Zone: sets your local time zone. My Date Format: allows you to select your preferred date format. Page Shown When Switching Groups sets which page of the MMS console you will see when you select a different group. You can select the Hosts page or the Dashboard page. Alternatively, select Current and MMS will not change pages when you select a different group. Display Opcounters On Separate Charts: allows you to control the presentation of Opcounter Charts. If enabled, MMS charts each opcounter type separately. Otherwise, each opcounter type is overlaid together in a single chart. Display Chart Annotations: toggles the presence of chart annotations. Chart annotations overlay information about significant system events on the charts. For example, with chart annotations MMS will draw a red vertical line over the charts. Notifications: allows you to opt-in to, or opt-out of receiving newsletters about MMS. 60
61 Group Settings These settings are general settings that apply to all users in the current group. Group Settings Group Time Zone: sets your group s time zone. Billing Address: sets the address to use for billing. Collect Logs For All Hosts: activates or deactivates the collection of log data for all hosts. This overwrites the statuses set on the individual hosts. On Prem MMS Monitoring displays log data in the Logs tab of the Host Statistics page. Collect Profiling Information for All Hosts: activates or deactivates the collection of profiling information for all hosts. MMS Monitoring can collect data from MongoDB s profiler to provide statistics about performance and database operations. Ensure exposing profile data to MMS Monitoring is consistent with your information security practices. Also be aware the profiler can consume resources which may adversely affect MongoDB performance. Collect Database Specific Statistics: allows you to enable or disable the collection of database statistics. For more information, see How does MMS gather database statistics?. Monitoring Agent s Log Level: allows adjustment of the log level of the monitoring agent from the settings menu without restarting the agent. The Default level maintains the level specified when starting the monitoring agent. Setting the log level on the agent requires monitoring agent version Preferred Hostnames: allows you to specify the hostname to use for servers with multiple aliases. This prevents servers from appearing multiple times under different names. By default, the monitoring agent tries to connect by resolving hostnames. If the agent cannot connect by resolving a hostname, you can force the monitoring agent to prefer an IP address over its corresponding hostname for a specific IP address. To override this default behavior, set an IP address as a preferred hostname. If your IP addresses have a common prefix, create a preferred hostname with the ends-with button or click the regexp button to use a regular expression. Reset Duplicates: allows you to reset and remove all detected duplicate hosts. This is useful if your server environment has drastically changed and you believe a host is incorrectly marked as a duplicate. API Settings API Settings displays the On Prem MMS Monitoring API Key for your MMS group. Keep this key private. Use the API key to support automated installation of your monitoring agent with scripts included with the agent installation files. Group Alerts Group Alerts defines the default settings for HipChat, PagerDuty, and other third-party groups used to send alerts. See Activity Alert Settings page page for details about using these third-party services to manage alerts. Agents Monitoring Agent Monitoring Agent provides links for downloading the pre-configured Monitoring agent in both.zip and.tar.gz formats. 61
62 On Prem MMS Backup Settings The following settings will only be visible to users of On Prem MMS Backup. Backup Agent Backup Agent provides links for downloading the pre-configured Backup agent in both.zip and.tar.gz formats, on a variety of platforms. On Prem MMS Backup requires this agent. Public Key for SCP Restores Public Key for SCP Restores, or MMS Backup Public Key enables users who have signed up for On Prem MMS Backup to generate a new public key that MMS will use to connect via SSH and transmit a snapshot of your data. Backup Agent Backup Agent provides links to download the pre-configured Backup agent in both.zip and.tar.gz formats. The software is dynamically assembled with your API key. Instructions are included to set up and start the Backup agent, as well as create a new user for the agent if MongoDB authentication is used. Backup Restore Settings Restore Settings provides the ability to generate a public key for SCP backup restoration through the Backup and Restore Service. 3.4 User and Environment Management On this page User Management Working with Multiple Environments Assigning Roles to Users This page helps you manage users that have access to your On-Prem MongoDB Management Service groups, create and manage groups, and assign roles to users to provide controlled access to the MMS application. There is no planned upgrade path from existing MMS user authentication to using LDAP. You will need to recreate users, groups, and roles manually with your LDAP service, as described in the Optional LDAP Authentication document. User Management You can grant users access to your group in the Users section of the MMS console. Click on the + ADD USER icon next to your account name and enter their in the dialogue. If the console finds a connected account, MMS will automatically add the user to the MMS console. 62
63 Note: With MongoDB Management Service On-Prem, user accounts and groups are independent from JIRA. This is in contrast to the MongoDB Management Service, which shares account and group information with the MongoDB JIRA instance. Users can create accounts at any time using the account registration page of your MMS installation. See Assigning Roles to Users for details about roles and privileges, as well as adding users and assigning roles with LDAP integration. Working with Multiple Environments If you have multiple MongoDB systems in distinct environments and cannot monitor all systems with a single agent, you will need to add a new group. Having a second group makes it possible to run two agents. You may also use a second group and agent to monitor a different set of MongoDB instances in the same environment if you want to segregate the hosts within the MMS console. A user can only view data from the hosts monitored in a single group at once. After adding a second group, the MMS interface will have a drop down list that will allow you to change groups. Selecting a new group will refresh the current page with the data available from the servers in this group. Create Group To add a group, select the Users page and click the Edit Group Name button at the top of the page. Type the new name for your current group in the Add New Group Name interface and click the Add New Group button. For security and auditing reasons, you cannot use a group name used earlier. New group names will appear in the Group drop down list at the top left of the MMS interface. Select a group to refresh the page and display only the server(s) assigned to the group. You are the first user added to a new group. To add more people to the new group, confirm the group name appears in the Group drop down list at the top left of the MMS interface. Then click the Add/Invite User button at the top of the page. On the Add/Invite User interface, type the JIRA username or address and select their role. Then click the Add/Invite button. Rename Group If you need to rename a group created within your account, confirm the group name appears in the Group drop down list at the top left of the MMS interface. Then select the Users page and click the Edit Group Name button at the top of the page. Type the new name for your current group in the Edit Group Name interface and click the Submit button. For security and auditing reasons, you cannot use a group name used earlier. If you continue to have problems, contact MMS Support. Remove Group You can remove users from a group at any time from the Users tab, by clicking on the garbage can icon. To delete any group, remove all users and hosts assigned to the group. The group will no longer appear in the Group drop down list at the top left of the MMS interface. You can remove users from groups from the Users tab by clicking on the garbage can icon in the last column. 63
64 if you have problems, contact MMS support. Assigning Roles to Users MMS or an LDAP server can assign roles to individual users to limit actions users can perform, as well as data users see in the application. With LDAP integration, follow the steps to setup Optional LDAP Authentication then create LDAP groups for each available MMS role. Users must have User Admin or Global User Admin roles assigned to them to assign roles to users. A person with the User Admin role can assign roles to users in their group. A person with the Global User Admin role can assign roles to any user in any group. You cannot assign roles for yourself. Upon successful login, the first user completes a welcome form to create the initial MMS group. This form includes assigning roles. For LDAP authentication, the welcome form includes the ability to assign LDAP groups to the MMS group-level and global roles. See MMS User Roles for roles available for a group. Assign a Role with MMS To assignroles with On-Prem MongoDB Management Service, go to the Users page, click the Users tab, and click the pencil icon to the far right of the name of the user record to edit. Click the checkboxes to assign roles. Assign Roles with LDAP First, create groups on your LDAP server for each of the available MMS group-level and global roles. To assign LDAP groups to MMS roles, click the Admin link at the top right of any MMS page, then click the Groups tab on the Admin page. Click the pencil icon at the far right of a group name. Edit the Roles interface by adding the appropriate LDAP group name to its corresponding MMS group name. Because MMS does not update role assignments stored in your LDAP server, assign roles by assigning users to groups in your LDAP server. Configure global roles in conf-mms.properties file. See Optional LDAP Authentication for more details about LDAP integration with MMS. 3.5 Create an Alert On this page Overview Procedures Overview You can create an alert from scratch or clone it from an existing alert. This section describes both. 64
65 To implement alert escalation, you can create multiple alerts with different minimum frequencies. MMS processes alerts on a 5-minuet interval. Therefore, the minimum frequency for an alert is 5 minutes. The time between renotifications increases by the frequency amount every alert cycle (e.g. 5 minutes, 10 minutes, 15 minutes, 20 minutes, etc.) up to a maximum of 24 hours. When an alert state triggers, you can set a time to elapse before MMS will send alert messages at the specified interval. This helps eliminate false positives. Type in the after waiting field the number of minutes to wait before sending the alert at the specified interval for each recipient. Costs to send alerts depend on your telephone service contract. Many factors may affect alert delivery, including do not call lists, caps for messages sent or delivered, delivery time of day, and message caching. Procedures You can create a new alert or clone an existing one. This section provides both procedures. Create an Alert Step 1: Select the Activity tab, and then select the Alert Settings tab. Step 2: Click the Add Alert button. Step 3: In Alert if, choose the target category to monitor. Target categories refer to the monitored target and include: hosts, replica set, agents and backups. If you select Host, choose the host type and then the condition or metric. Conditions include defining alert thresholds above or below metrics tracked in charts displayed when you click a hostname on the Hosts page, for example, Asserts, Opcounter, and Queues. Alerts are sensitive to changes in host state. When a host changes state, MMS will automatically close alerts that are no longer relevant. For example, if a secondary becomes primary, replication lag alerts for that host will close automatically since the host is no longer required to replicate. If you select Agent, choose the agent to monitor. Step 4: In For, choose the hosts to monitor. Choose to create an alert for either any monitored target (i.e. host, replica set, agent, or backup) or a subset of the monitored targets. If you want to specify a subset of monitored targets, you can specify the criteria used to select targets here. Step 4: Select the alert recipients and choose how they receive the alerts. In Send to, specify the alert interval and distribution method for each alert recipient. Click Add to add more recipients. For a user to receive an SMS alert, the user must have correctly entered their telephone number in their Alerts window. MMS removes all punctuation and letters and only uses the digits for the telephone number. If you are outside of the United States or Canada, you will need to include 011 and your country code. For instance, for New Zealand (country code 64), you would need to enter 01164, followed by your phone number. Alternately, you can sign up for a Google Voice number, and use that number for your authentication. 65
66 For HipChat alerts, enter the HipChat room name and API token. Alerts will appear in the HipChat room message stream. See the Settings page to define default group alerts settings for HipChat. For PagerDuty alerts, enter only the service key. Define escalation rules and alert assignments in PagerDuty. See the Settings page to define default group alerts settings for PagerDuty. For SNMP alerts, specify the hostname that will receive the v2c trap on standard port 162. The MIB file for SNMP is available for download here. Users must ensure that they have entered the correct number into the Alerts window. MMS removes all punctuation and letters and only uses the digits for the telephone number. If you are outside of the United States or Canada, you will need to include 011 and your country code. For instance, for New Zealand (country code 64), you would need to enter 01164, followed by your phone number. Alternately, you can sign up for a Google Voice number, and use that number for your authentication. Step 6: Click Save. Clone an Alert You can create new alerts by cloning an existing alert then editing it. Step 1: Select the Activity tab, and then select the Alert Settings tab. Step 2: Click the gear icon to the right of an alert and then select Clone. Step 3: In Alert if, choose the target category to monitor. Target categories refer to the monitored target and include: hosts, replica set, agents and backups. If you select Host, choose the host type and then the condition or metric. Conditions include defining alert thresholds above or below metrics tracked in charts displayed when you click a hostname on the Hosts page, for example, Asserts, Opcounter, and Queues. Alerts are sensitive to changes in host state. When a host changes state, MMS will automatically close alerts that are no longer relevant. For example, if a secondary becomes primary, replication lag alerts for that host will close automatically since the host is no longer required to replicate. If you select Agent, choose the agent to monitor. Step 4: Select the alert recipients and choose how they receive the alerts. In Send to, specify the alert interval and distribution method for each alert recipient. Click Add to add more recipients. For a user to receive an SMS alert, the user must have correctly entered their telephone number in their Alerts window. MMS removes all punctuation and letters and only uses the digits for the telephone number. If you are outside of the United States or Canada, you will need to include 011 and your country code. For instance, for New Zealand (country code 64), you would need to enter 01164, followed by your phone number. Alternately, you can sign up for a Google Voice number, and use that number for your authentication. 66
67 Step 5: Click Save. 3.6 Manage Alerts On this page Overview Procedures Overview The Activity page s Alert Settings tab displays all available alerts. From here you can edit, clone, disable, or delete an alert. Procedures Modify an Alert Each alert has a distribution list you can edit, a frequency setting to control how often MMS will distribute the alert, and a waiting period after an alert state triggers before sending alert messages at the specified interval. MMS processes alerts on a 5 minute interval. Step None: Select the alert recipients and choose how they receive the alerts. In Send to, specify the alert interval and distribution method for each alert recipient. Click Add to add more recipients. For a user to receive an SMS alert, the user must have correctly entered their telephone number in their Alerts window. MMS removes all punctuation and letters and only uses the digits for the telephone number. If you are outside of the United States or Canada, you will need to include 011 and your country code. For instance, for New Zealand (country code 64), you would need to enter 01164, followed by your phone number. Alternately, you can sign up for a Google Voice number, and use that number for your authentication. Step 1: Select the Activity tab, and then select the Alert Settings tab. Step 2: Click the gear icon to the right of an alert and then select Edit. Step 3: In Alert if, choose the target category to monitor. Target categories refer to the monitored target and include: hosts, replica set, agents and backups. If you select Host, choose the host type and then the condition or metric. Conditions include defining alert thresholds above or below metrics tracked in charts displayed when you click a hostname on the Hosts page, for example, Asserts, Opcounter, and Queues. Alerts are sensitive to changes in host state. When a host changes state, MMS will automatically close alerts that are no longer relevant. For example, if a secondary becomes primary, replication lag alerts for that host will close automatically since the host is no longer required to replicate. 67
68 If you select Agent, choose the agent to monitor. Step 4: Select the alert recipients and choose how they receive the alerts. In Send to, specify the alert interval and distribution method for each alert recipient. Click Add to add more recipients. For a user to receive an SMS alert, the user must have correctly entered their telephone number in their Alerts window. MMS removes all punctuation and letters and only uses the digits for the telephone number. If you are outside of the United States or Canada, you will need to include 011 and your country code. For instance, for New Zealand (country code 64), you would need to enter 01164, followed by your phone number. Alternately, you can sign up for a Google Voice number, and use that number for your authentication. For HipChat alerts, enter the HipChat room name and API token. Alerts will appear in the HipChat room message stream. See the Settings page to define default group alerts settings for HipChat. For PagerDuty alerts, enter only the service key. Define escalation rules and alert assignments in PagerDuty. See the Settings page to define default group alerts settings for PagerDuty. For SNMP alerts, specify the hostname that will receive the v2c trap on standard port 162. The MIB file for SNMP is available for download here. Users must ensure that they have entered the correct number into the Alerts window. MMS removes all punctuation and letters and only uses the digits for the telephone number. If you are outside of the United States or Canada, you will need to include 011 and your country code. For instance, for New Zealand (country code 64), you would need to enter 01164, followed by your phone number. Alternately, you can sign up for a Google Voice number, and use that number for your authentication. Step 6: Click Save. Delete an Alert Step 1: Select the Activity tab, and then select the Alert Settings tab. Step 2: Click the gear icon to the right of an alert and then select Delete. Step 3: Click Confirm. Disable or Re-enable an Alert When you disable an alert, the alert configuration remains visible in a grayed out state. MMS automatically cancels active alerts related to a disabled alert configuration. You can reactivate disabled alerts. For example, if you have an alert configured for Host Down and you currently have an active alert telling you a host is down, MMS automatically cancels active Host Down alerts if you disable the default Host Down configuration. MMS will send no further alerts of this type unless the disabled alert is re-enabled. To disable or enable an alert: Step 1: Select the Activity tab, and then select the Alert Settings tab. 68
69 Step 2: Click the gear icon to the right of an alert and then select either Disable or Enable. View Open Alerts To view open alerts, select the Activity tab, and then select the All Activity tab. Open alerts appear above the Feed section in an Open Alerts section that only appears if there are open alerts. From this window you can acknowledge an alert and select the duration of the acknowledgment. Once a user acknowledges an alert in the interface, MMS sends no further notifications to the alert s distribution list until the acknowledgement period has passed. The distribution list receives no notification of alert acknowledgment. If you configure an alert with PagerDuty, a third-party incident management service, you can only acknowledge the alert on your PagerDuty dashboard. 3.7 Backup Alerts On this page Backup Agent Down Backups Broken Clustershot Failed Bind Failure Snapshot Behind Snitch If a problem with the MMS Backup system occurs, MMS sends an alert to system administrators. This page describes possible alerts and provides steps to resolve them. Backup Agent Down This alert is triggered if a Backup Agent for a group with at least one active replica set or cluster is down for more than 1 hour. To resolve this alert: 1. Open the group in MMS by typing the group s name in the GROUP box. 2. Select the Backup tab and the Backup Agents page to see what server the Backup Agent is hosted on. 3. Check the Backup Agent log file on that server. Backups Broken If MMS On-Prem Backup detects an inconsistency, the Backup state for the replica set is marked as broken. To debug the inconsistency: 1. Check the corresponding Backup Agent log. If you see a Failed Common Points test, one of the following may have happened. A significant rollback event occurred on the backed-up replica set. 69
70 The oplog for the backed-up replica set was resized or deleted. If either is the case, you must resync the replica set. See Resync a Member of a Replica Set. 2. Check the corresponding job log for an error message explaining the problem. In MMS, click Admin, then Jobs, then the name of the job, then Logs. Contact MongoDB Support if you need help interpreting the error message. Clustershot Failed This alert is generated if MMS Backup cannot successfully take a snapshot for a sharded cluster backup. The alert text should contain the reason for the problem. Common problems include the following: There was no reachable mongos. To resolve this issue, ensure that there is at least one mongos showing in the MMS Monitoring tab s Hosts page. The balancer could not be stopped. To resolve this issue, check the log files for the first config server to determine why the balancer will not stop. Could not insert a token in one or more shards. To resolve this issue, ensure connectivity between the Backup Agent and all shards. Bind Failure This alert is generated if a new replica set cannot be bound to a Backup Daemon. The alert test should contain a reason for the problem. Common problems include: No primary is found. At the time the binding occurred, no primary could be detected by the Monitoring Agent. Ensure that the replica set is healthy. Not enough space is available on any Backup Daemon. In both cases, resolve the issue and then re-initiate the initial sync. Alternatively, the job can be manually bound through the MMS Admin interface. In MMS, click Admin and then Job Timeline. For information on initial sync, see Replica Set Data Synchronization. Snapshot Behind Snitch This alert is triggered if the latest snapshot for a replica set is significantly behind schedule. Check the job log in the MMS Admin interface for any obvious errors. In MMS, click Admin, then Jobs, then the name of the job, and then Logs. 3.8 Connect to Hosts with Kerberos Authentication On this page Considerations Install Required Operating System Packages Configure Kerberos Environment Create Kerberos Principal and MongoDB User Specify Kerberos for Hosts 70
71 Enterprise Feature Only MongoDB Enterprise provides support for Kerberos. Kerberos is a generic authentication protocol available in MongoDB Enterprise after version 2.4. The On Prem MMS Monitoring and On Prem MMS Backup agents can authenticate to hosts using Kerberos in addition to the default MongoDB authentication protocol. Considerations Agent Directory After you install the Backup Agent, do not use the agent s directory location for anything other than the agent itself. The Backup Agent periodically deletes the contents of its root directory. Kerberos Install the monitoring agent and/or backup agent and all requirements before beginning to configure Kerberos. You must configure the Kerberos Key Distribution Center (KDC) to grant tickets that are valid for at least four hours. The monitoring agent takes care of periodically renewing the ticket. The KDC service provides session tickets and temporary session keys to users and computers. Install Required Operating System Packages Debian and Ubuntu Linux Install the following required packages: sudo apt-get install krb5-user libsasl2-modules-gssapi-mit Red Hat Enterprise, CentOS and Fedora Linux Install the following required packages: sudo yum install krb5-workstation.x86_64 cyrus-sasl-gssapi.x86_64 Configure Kerberos Environment Step 1: Create or configure the /etc/kerb5.conf file on the system to integrate this host into your Kerberos environment. Step 2: Ensure the kinit binary is available at the /user/bin/kinit path. Create Kerberos Principal and MongoDB User Tip 71
72 If you are running both the Monitoring Agent and the Backup Agent on the same server, then both agents must connect as the same Kerberos Principal. Step 1: Create or choose a Kerberos principal for the On Prem MMS Monitoring and/or On Prem MMS Backup agent. Step 2: Generate a keytab for the Kerberos principal and copy it to the system where the agent runs. Ensure the user that will run the agent is the same user that owns the keytab file. Step 3: Create a MongoDB user for the new Kerberos principal. See MMS Agent Authentication Requirements for more information about required user roles. Step 4: Edit the agent s /etc/mongodb-mms/monitoring-agent.config file to inform the agent about the keytab and principal identifier. Set the krb5principal to the name of the Kerberos principal: krb5principal=<id> For example: krb5principal=mmsagent/someserver.example.com@example.com Set the kerb5keytab value to the complete absolute path of the keytab file: krb5keytab=none For example: krb5keytab=/etc/mongodb-mms/mmsagent.keytab Specify Kerberos for Hosts For each host that connects with Kerberos, go to the Hosts page, and the Hosts, Mongos, or Configs tab to display the lists of available hosts. Click the gear icon on the right of any host and select Kerberos (GSSAPI) as the Auth Mechanism on the Credentials tab of the Edit Host interface. 4 On Prem MMS Monitoring On Prem MMS Monitoring is a service for monitoring MongoDB deployments, and an integral part of of the On- Prem MongoDB Management Service. On Prem MMS Monitoring collects statistics on all key server and hardware indicators and presents this data through an intuitive web interface. This manual describes the installation of the Monitoring agent and operation of the On Prem MMS Monitoring web console. You can find answers to common questions in the FAQs, but for all other inquiries please feel free to open a JIRA ticket. 72
73 Getting Started with MMS Monitoring Register for backup, install the backup agent, and begin using MMS backup to capture real-time back ups of MongoDB deployments. Using MMS Monitoring Use the MMS monitoring interface to configure the monitoring agent and the operation of your MMS Monitoring deployment.. Monitoring Operations An outline of the interfaces for Monitoring data in MMS. 4.1 Getting Started with MMS Monitoring Install and Update the Monitoring Agent Outlines the process for integrating MMS Monitoring with your MongoDB deployment to collect data and provide alerts to help you maintain the health of your system. Add Hosts to MMS Monitoring Outlines the process for adding hosts to MMS Monitoring. Install and Update the Monitoring Agent On this page Overview Considerations Procedures Additional Information Overview The MMS monitoring agent is a lightweight component that runs within your infrastructure, connects to your MongoDB processes, collects data about the state of your deployment, and then sends the data to the On Prem MMS Monitoring service which processes and renders this data. The agent initiates all connections to the On Prem MMS Monitoring service, and communications between the agent and the On Prem MMS Monitoring service are encrypted. A single agent can collect data from multiple MongoDB processes. Consider the following diagram of an example deployment: This tutorial will guide you through the steps necessary to install or update On Prem MMS Monitoring on your system. You must install the On-Prem Monitoring server itself before installing the monitoring agent. See the Frequently Asked Questions: Monitoring page for additional information. Considerations Connectivity You must configure the networking rules of your deployment so that: the Monitoring Agent can connect to all mongod and mongos instances that you want to monitor. the Monitoring agent can connect to On Prem MMS Monitoring server on port 443 (i.e. https.) The On Prem MMS Monitoring server does not make any outbound connections to the agents or to MongoDB instances. If Exposed DB Host Check is enabled, the On Prem MMS Monitoring server will attempt to connect to your servers occasionally as part of a vulnerability check. 73
74 74
75 Ensure all mongod and mongos instances are not accessible to hosts outside your deployment. Monitoring Agent Redundancy Only one Monitoring agent per group or environment will report to On Prem MMS Monitoring at a time. If your monitoring agent can connect to all hosts in your deployment, a single monitoring agent is sufficient and strongly recommended. Multiple agents can cause unexpected problems. However, you can run a second instance of the agent to provide redundancy as a hot standby. To install secondary agents, simply repeat the installation process in the installation guide for each hot standby agent. Access Control If you are using MongoDB authentication, see the Authentication Requirements documentation. Collection Interval If you are updating the agent, keep in mind that when the Monitoring agent restarts, there is a five-minute delay before that agent begins collecting data and sending pings to On Prem MMS Monitoring. If you have multiple agents, this delay permits other agents in your infrastructure to become the primary agent and permits On Prem MMS Monitoring to determine which agent will be primary. During this interval, the restarted Monitoring agent will not collect data. Procedures This section includes procedures for installing and for updating the Monitoring agent. Install the Monitoring Agent To install the monitoring agent, do the following: Step 1: Open MMS and select the Settings tab. Step 2: Click the Monitoring Agent tab. Step 3: Select your operating system. Step 4: Follow the installation instructions. The installation instructions describe how to download, install, configure, and start the agent. Step 5: Optional: Configure Agent to Use Proxy If the agent will connect to the service via a proxy server, you must configure the http_proxy environment variable. To export the variable, use an operation that resembles the following in your system shell session before starting the agent. 75
76 export http_proxy=" To connect through a proxy, you must install the agent from a.tar.gz file, not from a.deb or.rpm file. Update the Monitoring Agent on UNIX/Linux To update the Monitoring agent on UNIX/Linux systems: Step 1: Stop the agent processes. Step 2: Download the latest Monitoring agent from the Settings page and the Monitoring Agent tab. Step 3: Restart the Monitoring agent. Update the Monitoring Agent on Windows To update the agent on Windows systems: Step 1: Download the latest Monitoring agent from the Settings page and the Monitoring Agent tab. Step 2: Stop and uninstall the Monitoring agent. Enter the following sequence of commands to stop and then uninstall the monitoring agent: sc stop MongoMMS sc delete MongoMMS Step 3: Confirm the monitoring service no longer exists. Enter the following command: sc query MongoMM This operation will return a message that resembles the following: [SC] EnumQueryServicesStatus:OpenService FAILED 1060: The specified service does not exist as an installed service. Step 4: Install the new Monitoring agent. Enter the following command: mongommsinstall.bat 76
77 Step 5: Restart the Monitoring agent. Additional Information If you installed the Monitoring agent from the tar.gz archives, see /tutorial/rotate-agent-log-files to configure log rotation. Add Hosts to MMS Monitoring The Monitoring agent automatically discovers MongoDB processes based on existing cluster configuration. You ll have to manually seed at least one of these hosts from the MMS console. To add a host to On Prem MMS Monitoring, click the ADD HOST button at the top of the Hosts page. This displays the New Host interface. Enter the hostname, port, and optionally an admin database username and password. Then select Add to submit data. If the host is only accessible by specific hostname or IP address, or you need to specify the hostname to use for servers with multiple aliases, set up a preferred hostname. See the Preferred Hostnames section for details. Once it has a seed host, the Monitoring agent will discover any other nodes from associated clusters. These clusters, and their respective seed hosts, include: Master databases, after adding slave databases. Shard clusters, after adding mongos instances. Replica sets, after adding any member of the set. Once you add these seed nodes, the Monitoring agent will fetch this information from the MMS servers. Thus, when configuring the monitoring environment, you may need to wait for several update cycles (e.g minutes) to complete the auto-discovery process and host identification. During this period, you may see duplicate hosts in the MMS web console. This is normal. The Monitoring agent fetches configuration and reports to On Prem MMS Monitoring every minute, so, again, there may be a delay of several minutes before data and host information propagate to the MMS console. You can find immediate evidence of a working installation in the agent output or logs. For more information, check the MMS console s Monitoring Agent Log tab on the Hosts page, as well as the Last Ping and Daily Pings tabs visible when you click a hostname on the Hosts, Mongos, and Configs tabs on the Hosts page. Once On Prem MMS Monitoring has data, you can view and begin using the statistics. If the agent cannot collect information about a host for 24 hours, the On Prem MMS Monitoring system deactivates the instance in the Monitoring agent and console. Deactivated hosts must be manually reactivated from the MMS console if you wish to collect data from these hosts. 4.2 Using MMS Monitoring Manage Hosts Procedures to create host aliases as well as remove hosts. Monitoring Configuration Discusses configurable options with On Prem MMS Monitoring: hardware monitoring with munin-node and using On Prem MMS Monitoring with MongoDB instances running with SSL. Diagnostic and Troubleshooting Guide Troubleshooting advice for common issues encountered with On Prem MMS Monitoring. Delete Monitoring Agents Remove an existing monitoring agents from an MMS group. 77
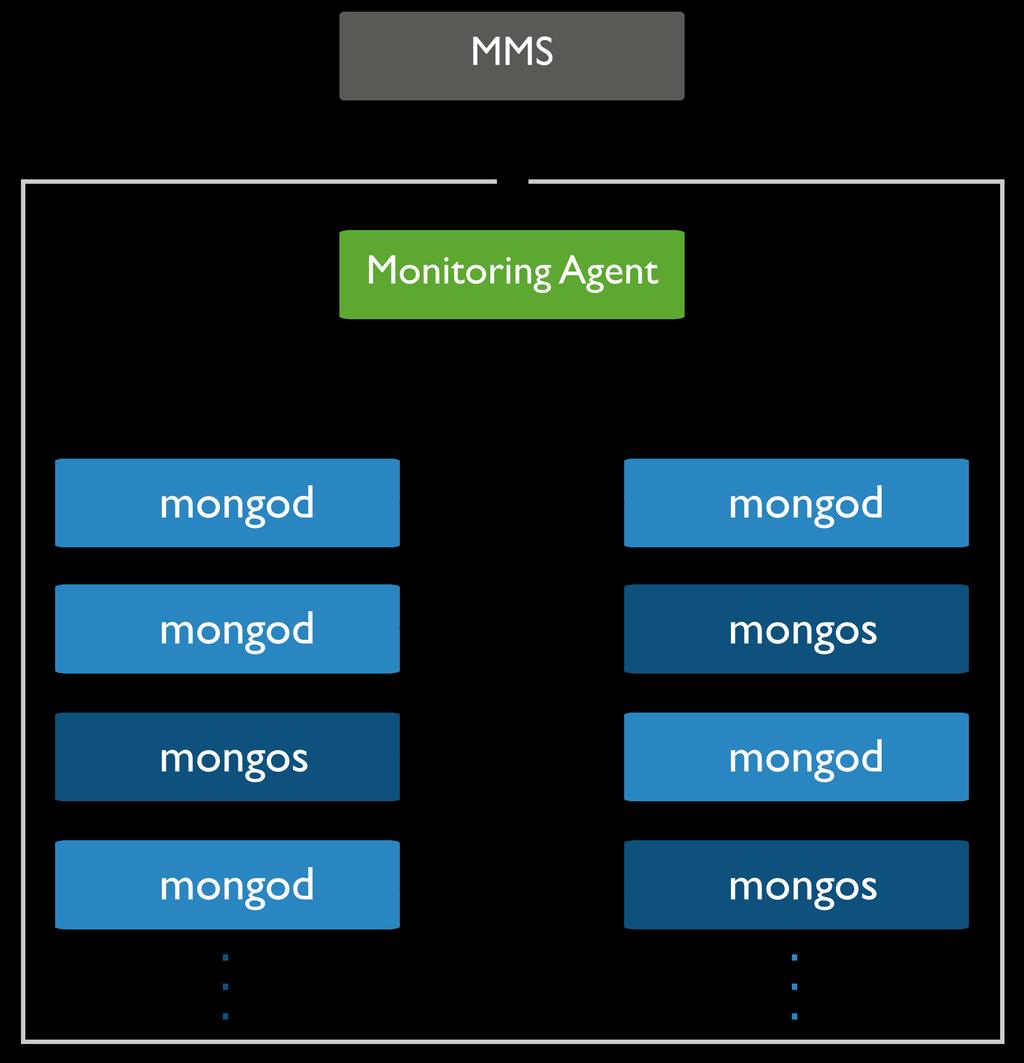
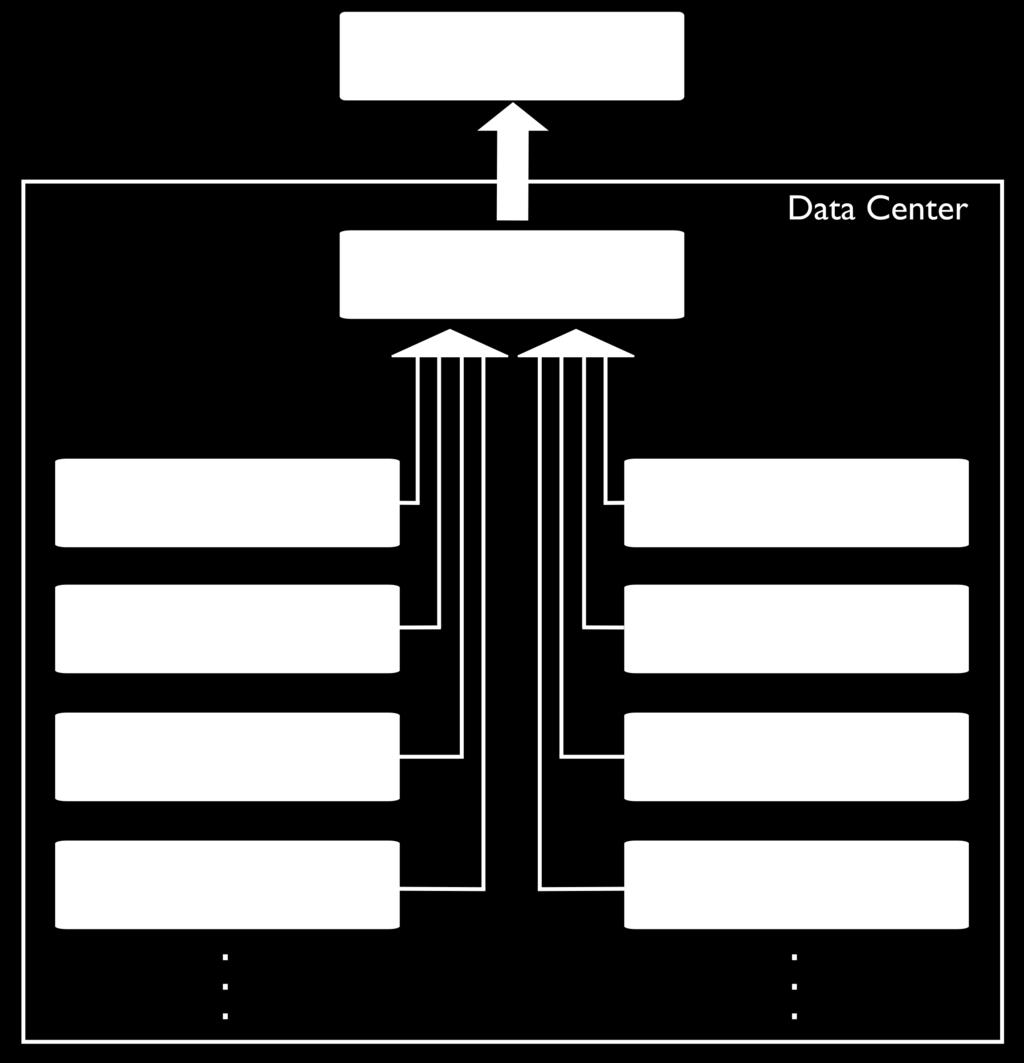
78 78
MMS Backup Manual Release 1.4
 MMS Backup Manual Release 1.4 MongoDB, Inc. Jun 27, 2018 MongoDB, Inc. 2008-2016 2 Contents 1 Getting Started with MMS Backup 4 1.1 Backing up Clusters with Authentication.................................
Deploying Rubrik Datos IO to Protect MongoDB Database on GCP
 DEPLOYMENT GUIDE Deploying Rubrik Datos IO to Protect MongoDB Database on GCP TABLE OF CONTENTS INTRODUCTION... 1 OBJECTIVES... 1 COSTS... 2 BEFORE YOU BEGIN... 2 PROVISIONING YOUR INFRASTRUCTURE FOR THE
MongoDB Management Suite Manual Release 1.1
 MongoDB Management Suite Manual Release 1.1 MongoDB, Inc. Dec 03, 2017 MongoDB, Inc. 2008-2016 2 Contents 1 On Prem MMS Monitoring 4 1.1 On Prem MMS Monitoring Overview..................................
StreamSets Control Hub Installation Guide
 StreamSets Control Hub Installation Guide Version 3.2.1 2018, StreamSets, Inc. All rights reserved. Table of Contents 2 Table of Contents Chapter 1: What's New...1 What's New in 3.2.1... 2 What's New in
VMware AirWatch Content Gateway for Linux. VMware Workspace ONE UEM 1811 Unified Access Gateway
 VMware AirWatch Content Gateway for Linux VMware Workspace ONE UEM 1811 Unified Access Gateway You can find the most up-to-date technical documentation on the VMware website at: https://docs.vmware.com/
EDB Postgres Enterprise Manager EDB Ark Management Features Guide
 EDB Postgres Enterprise Manager EDB Ark Management Features Guide Version 7.4 August 28, 2018 by EnterpriseDB Corporation Copyright 2013-2018 EnterpriseDB Corporation. All rights reserved. EnterpriseDB
How to Scale MongoDB. Apr
 How to Scale MongoDB Apr-24-2018 About me Location: Skopje, Republic of Macedonia Education: MSc, Software Engineering Experience: Lead Database Consultant (since 2016) Database Consultant (2012-2016)
Zadara Enterprise Storage in
 Zadara Enterprise Storage in Google Cloud Platform (GCP) Deployment Guide March 2017 Revision A 2011 2017 ZADARA Storage, Inc. All rights reserved. Zadara Storage / GCP - Deployment Guide Page 1 Contents
MongoDB Backup & Recovery Field Guide
 MongoDB Backup & Recovery Field Guide Tim Vaillancourt Percona Speaker Name `whoami` { name: tim, lastname: vaillancourt, employer: percona, techs: [ mongodb, mysql, cassandra, redis, rabbitmq, solr, mesos
Performing an ObserveIT Upgrade Using the Interactive Installer
 Performing an ObserveIT Upgrade Using the Interactive Installer ABOUT THIS DOCUMENT This document contains detailed procedures and instructions on how to upgrade ObserveIT by using the interactive "One
Installing Cisco CMX in a VMware Virtual Machine
 Installing Cisco CMX in a VMware Virtual Machine This chapter describes how to install and deploy a Cisco Mobility Services Engine (CMX) virtual appliance. Cisco CMX is a prebuilt software solution that
MongoDB Database on NetApp AFF8080
 Technical Report MongoDB Database on NetApp AFF8080 Customer Blueprint Ranga Sankar, NetApp February 2018 TR-4659 Abstract This document describes the installation of MongoDB database on NetApp AFF8080
VMware vrealize Log Insight Getting Started Guide
 VMware vrealize Log Insight Getting Started Guide vrealize Log Insight 2.5 This document supports the version of each product listed and supports all subsequent versions until the document is replaced
EDB Postgres Enterprise Manager EDB Ark Management Features Guide
 EDB Postgres Enterprise Manager EDB Ark Management Features Guide Version 7.6 January 9, 2019 by EnterpriseDB Corporation Copyright 2013-2019 EnterpriseDB Corporation. All rights reserved. EnterpriseDB
Upgrade Instructions. NetBrain Integrated Edition 7.0
 NetBrain Integrated Edition 7.0 Upgrade Instructions Version 7.0b1 Last Updated 2017-11-14 Copyright 2004-2017 NetBrain Technologies, Inc. All rights reserved. Contents 1. System Overview... 3 2. System
Installing SmartSense on HDP
 1 Installing SmartSense on HDP Date of Publish: 2018-07-12 http://docs.hortonworks.com Contents SmartSense installation... 3 SmartSense system requirements... 3 Operating system, JDK, and browser requirements...3
VMware AirWatch Content Gateway Guide for Linux For Linux
 VMware AirWatch Content Gateway Guide for Linux For Linux Workspace ONE UEM v9.7 Have documentation feedback? Submit a Documentation Feedback support ticket using the Support Wizard on support.air-watch.com.
Clearswift SECURE Gateway Installation & Getting Started Guide. Version 4.3 Document Revision 1.0
 Clearswift SECURE Email Gateway Installation & Getting Started Guide Version 4.3 Document Revision 1.0 Copyright Revision 1.1, March, 2016 Published by Clearswift Ltd. 1995 2016 Clearswift Ltd. All rights
Downloading and installing Db2 Developer Community Edition on Red Hat Enterprise Linux Roger E. Sanders Yujing Ke Published on October 24, 2018
 Downloading and installing Db2 Developer Community Edition on Red Hat Enterprise Linux Roger E. Sanders Yujing Ke Published on October 24, 2018 This guide will help you download and install IBM Db2 software,
MongoDB in AWS (MongoDB as a DBaaS)
") MongoDB in AWS (MongoDB as a DBaaS) Jing Wu Zhang Lu April 2017 Goals Automatically build MongoDB cluster Flexible scaling options Automatically recover from resource failures 2 Utilizing CloudFormation
MongoDB in AWS (MongoDB as a DBaaS) Jing Wu Zhang Lu April 2017 Goals Automatically build MongoDB cluster Flexible scaling options Automatically recover from resource failures 2 Utilizing CloudFormation
OnCommand Cloud Manager 3.2 Deploying and Managing ONTAP Cloud Systems
 OnCommand Cloud Manager 3.2 Deploying and Managing ONTAP Cloud Systems April 2017 215-12035_C0 doccomments@netapp.com Table of Contents 3 Contents Before you create ONTAP Cloud systems... 5 Logging in
Intellicus Cluster and Load Balancing- Linux. Version: 18.1
 Intellicus Cluster and Load Balancing- Linux Version: 18.1 1 Copyright 2018 Intellicus Technologies This document and its content is copyrighted material of Intellicus Technologies. The content may not
System Specification
 NetBrain Integrated Edition 7.0 System Specification Version 7.0b1 Last Updated 2017-11-07 Copyright 2004-2017 NetBrain Technologies, Inc. All rights reserved. Introduction NetBrain Integrated Edition
Upgrading an ObserveIT One-Click Installation
 Upgrading an ObserveIT One-Click Installation This document was written for ObserveIT Enterprise version 7.6.1. This document uses screenshots and procedures written for Windows Server 2012 R2 and SQL
CPM. Quick Start Guide V2.4.0
 CPM Quick Start Guide V2.4.0 1 Content 1 Introduction... 3 Launching the instance... 3 CloudFormation... 3 CPM Server Instance Connectivity... 3 2 CPM Server Instance Configuration... 4 CPM Server Configuration...
Xcalar Installation Guide
 Xcalar Installation Guide Publication date: 2018-03-16 www.xcalar.com Copyright 2018 Xcalar, Inc. All rights reserved. Table of Contents Xcalar installation overview 5 Audience 5 Overview of the Xcalar
ElasterStack 3.2 User Administration Guide - Advanced Zone
 ElasterStack 3.2 User Administration Guide - Advanced Zone With Advance Zone Configuration TCloud Computing Inc. 6/22/2012 Copyright 2012 by TCloud Computing, Inc. All rights reserved. This document is
System Specification
 NetBrain Integrated Edition 7.1 System Specification Version 7.1a Last Updated 2018-09-04 Copyright 2004-2018 NetBrain Technologies, Inc. All rights reserved. Introduction NetBrain Integrated Edition features
Server Monitoring. AppDynamics Pro Documentation. Version 4.1.x. Page 1
 Server Monitoring AppDynamics Pro Documentation Version 4.1.x Page 1 Server Monitoring......................................................... 4 Standalone Machine Agent Requirements and Supported Environments............
SafeConsole On-Prem Install Guide. version DataLocker Inc. July, SafeConsole. Reference for SafeConsole OnPrem
 version 5.2.2 DataLocker Inc. July, 2017 SafeConsole Reference for SafeConsole OnPrem 1 Contents Introduction................................................ 2 How do the devices become managed by SafeConsole?....................
Clearswift SECURE Gateway Installation & Getting Started Guide. Version Document Revision 1.0
 Clearswift SECURE Email Gateway Installation & Getting Started Guide Version 4.6.0 Document Revision 1.0 Copyright Revision 1.0, April, 2017 Published by Clearswift Ltd. 1995 2017 Clearswift Ltd. All rights
Installation and Setup Guide
 OnCommand Unified Manager 7.0 Installation and Setup Guide For Red Hat Enterprise Linux July 2016 215-11252_A0 doccomments@netapp.com Table of Contents 3 Contents Introduction to Unified Manager installation
VMware Identity Manager Connector Installation and Configuration (Legacy Mode)
") VMware Identity Manager Connector Installation and Configuration (Legacy Mode) VMware Identity Manager This document supports the version of each product listed and supports all subsequent versions until
VMware Identity Manager Connector Installation and Configuration (Legacy Mode) VMware Identity Manager This document supports the version of each product listed and supports all subsequent versions until
System Specification
 NetBrain Integrated Edition 7.1 System Specification Version 7.1 Last Updated 2018-07-10 Copyright 2004-2018 NetBrain Technologies, Inc. All rights reserved. Introduction NetBrain Integrated Edition features
Isilon InsightIQ. Version Installation Guide
 Isilon InsightIQ Version 4.1.0 Installation Guide Copyright 2009-2016 EMC Corporation All rights reserved. Published October 2016 Dell believes the information in this publication is accurate as of its
Let s manage agents. Tom Sightler, Principal Solutions Architect Dmitry Popov, Product Management
 Let s manage agents Tom Sightler, Principal Solutions Architect Dmitry Popov, Product Management Agenda Inventory management Job management Managed by backup server jobs Managed by agent jobs Recovery
Archiware Pure User Manual
 Archiware Pure User Manual Content 1 Preface... 3 1.1 About This Manual... 3 1.2 Who Should Read This Document?...3 1.3 Software Description... 3 1.4 Software Licensing... 3 1.5 Registration... 3 1.6 Technical
dbx MNT AWS Setup Guide
 dbx MNT AWS Setup Guide Rev 4.0 June 2018 XtremeData, Inc. 999 Plaza Dr., Ste. 570 Schaumburg, IL 60173 www.xtremedata.com 1. Overview... 3 1.1 Architectural Diagram... 4 1.2 Architectural Elements...
OnCommand Unified Manager 7.2 Installation and Setup Guide
 OnCommand Unified Manager 7.2 Installation and Setup Guide April 2018 215-12015_C0 doccomments@netapp.com Table of Contents 3 Contents Introduction to OnCommand Unified Manager... 5 What the Unified Manager
SafeConsole On-Prem Install Guide
 SafeConsole On-Prem Install Guide This guide applies to SafeConsole 5.0.5 Introduction This guide describes how to install a new SafeConsole server on Windows using the SafeConsole installer. As an option,
PRODUCT DOCUMENTATION. Backup & Replication v5.0. User Guide.
 PRODUCT DOCUMENTATION User Guide Backup & Replication v5.0 www.nakivo.com Table of Contents Solution Architecture... 4 Deployment...11 System Requirements... 12 Deployment Scenarios... 15 Installing NAKIVO
Installation & Getting Started Guide. Version Document Revision 1.0
 Installation & Getting Started Guide Version 1.7.2 Document Revision 1.0 Copyright Revision 1.0, April, 2018 Published by Clearswift Ltd. 1995 2018 Clearswift Ltd. All rights reserved. The materials contained
Veritas CloudPoint 1.0 Administrator's Guide
 Veritas CloudPoint 1.0 Administrator's Guide Veritas CloudPoint Administrator's Guide Last updated: 2017-09-13 Document version: 1.0 Rev 6 Legal Notice Copyright 2017 Veritas Technologies LLC. All rights
VMware AirWatch Content Gateway Guide For Linux
 VMware AirWatch Content Gateway Guide For Linux AirWatch v9.2 Have documentation feedback? Submit a Documentation Feedback support ticket using the Support Wizard on support.air-watch.com. This product
Ansible Tower Quick Setup Guide
 Ansible Tower Quick Setup Guide Release Ansible Tower 2.4.5 Red Hat, Inc. Jun 06, 2017 CONTENTS 1 Quick Start 2 2 Login as a Superuser 3 3 Import a License 4 4 Examine the Tower Dashboard 6 5 The Setup
Hortonworks SmartSense
 Hortonworks SmartSense Installation (April 3, 2017) docs.hortonworks.com Hortonworks SmartSense: Installation Copyright 2012-2017 Hortonworks, Inc. Some rights reserved. The Hortonworks Data Platform,
Installing Cisco MSE in a VMware Virtual Machine
 Installing Cisco MSE in a VMware Virtual Machine This chapter describes how to install and deploy a Cisco Mobility Services Engine (MSE) virtual appliance. Cisco MSE is a prebuilt software solution that
Edge Device Manager R15 Release Notes
 2017-03 Software releases are created to add new features, make enhancements or correct defects. These releases are tested on all current, actively shipping platforms and operating systems as applicable.
NetApp Element Plug-in for vcenter Server User Guide
 NetApp Element Plug-in for vcenter Server User Guide Version 4.2 November 2018 215-13259_A0 doccomments@netapp.com Table of Contents 3 Contents About this guide... 8 vcenter Plug-in overview... 9 Network
Clearswift SECURE Gateway Installation & Getting Started Guide. Version Document Revision 1.0
 Clearswift SECURE Email Gateway Installation & Getting Started Guide Version 4.8.0 Document Revision 1.0 Copyright Revision 1.0, July, 2018 Published by Clearswift Ltd. 1995 2018 Clearswift Ltd. All rights
Getting Started. Update 1 Modified on 03 SEP 2017 vrealize Log Insight 4.0
 Update 1 Modified on 03 SEP 2017 vrealize Log Insight 4.0 You can find the most up-to-date technical documentation on the VMware website at: https://docs.vmware.com/ If you have comments about this documentation,
SafeConsole On-Prem Install Guide
 version 5.4 DataLocker Inc. December, 2018 Reference for SafeConsole OnPrem 1 Contents Introduction................................................ 3 How do the devices become managed by SafeConsole?....................
2016 OPSWAT, Inc. All rights reserved. OPSWAT, MetadefenderTM and the OPSWAT logo are trademarks of OPSWAT, Inc.All other trademarks, trade names,
 2016 OPSWAT, Inc. All rights reserved. OPSWAT, MetadefenderTM and the OPSWAT logo are trademarks of OPSWAT, Inc.All other trademarks, trade names, service marks, service names, and images mentioned and/or
Tasktop Sync - Installation Primer. Tasktop Sync - Installation Primer
 Tasktop Sync - Installation Primer 1 Contents Overview... 3 Hardware Requirements... 3 Supported Operating Systems... 3 Java Runtime Environment... 3 Networking... 3 Hardware Sizing for Deployment Scenarios...
Troubleshooting Cisco APIC-EM Single and Multi-Host
 Troubleshooting Cisco APIC-EM Single and Multi-Host The following information may be used to troubleshoot Cisco APIC-EM single and multi-host: Recovery Procedures for Cisco APIC-EM Node Failures, page
Launch and Configure SafeNet ProtectV in AWS Marketplace
 ProtectV TECHNICAL INSTRUCTIONS Launch and Configure SafeNet ProtectV in AWS Marketplace Contents Overview... 2 Prerequisites... 2 Configure KeySecure... 3 Configure the Firewall (for Linux Clients Only)...
OnCommand Unified Manager Installation and Setup Guide for Use with Core Package 5.2 and Host Package 1.3
 IBM System Storage N series OnCommand Unified Manager Installation and Setup Guide for Use with Core Package 5.2 and Host Package 1.3 GA32-1020-03 Table of Contents 3 Contents Preface... 10 Supported
Test-King.VMCE_V8.40Q.A
 Test-King.VMCE_V8.40Q.A Number: VMCE_V8 Passing Score: 800 Time Limit: 120 min File Version: 2.8 http://www.gratisexam.com/ VMCE_V8 Veeam Certified Engineer v8 1. It put me out from my hurdles and I got
Clearswift SECURE Gateway Installation & Getting Started Guide. Version Document Revision 1.0
 Clearswift SECURE Email Gateway Installation & Getting Started Guide Version 4.7.0 Document Revision 1.0 Copyright Revision 1.0, November, 2017 Published by Clearswift Ltd. 1995 2017 Clearswift Ltd. All
Launch and Configure SafeNet ProtectV in AWS Marketplace
 ProtectV TECHNICAL INSTRUCTIONS Launch and Configure SafeNet ProtectV in AWS Marketplace Contents Overview... 2 Prerequisites... 2 Configure KeySecure... 3 Configure the Firewall (for Linux Clients Only)...
Open Source Database Performance Optimization and Monitoring with PMM. Fernando Laudares, Vinicius Grippa, Michael Coburn Percona
 Open Source Database Performance Optimization and Monitoring with PMM Fernando Laudares, Vinicius Grippa, Michael Coburn Percona Fernando Laudares 2 Vinicius Grippa 3 Michael Coburn Product Manager for
SECURE Gateway with Microsoft Azure Installation Guide. Version Document Revision 1.0
 SECURE Email Gateway with Microsoft Azure Installation Guide Version 4.7.0 Document Revision 1.0 Copyright Revision 1.0, November, 2017 Published by Clearswift Ltd. 1995 2017 Clearswift Ltd. All rights
Installing and Configuring VMware Identity Manager Connector (Windows) OCT 2018 VMware Identity Manager VMware Identity Manager 3.
 OCT 2018 VMware Identity Manager VMware Identity Manager 3.") Installing and Configuring VMware Identity Manager Connector 2018.8.1.0 (Windows) OCT 2018 VMware Identity Manager VMware Identity Manager 3.3 You can find the most up-to-date technical documentation on
Installing and Configuring VMware Identity Manager Connector 2018.8.1.0 (Windows) OCT 2018 VMware Identity Manager VMware Identity Manager 3.3 You can find the most up-to-date technical documentation on
SnapCenter Software 4.0 Concepts Guide
 SnapCenter Software 4.0 Concepts Guide May 2018 215-12925_D0 doccomments@netapp.com Table of Contents 3 Contents Deciding whether to use the Concepts Guide... 7 SnapCenter overview... 8 SnapCenter architecture...
Linux Essentials Objectives Topics:
 Linux Essentials Linux Essentials is a professional development certificate program that covers basic knowledge for those working and studying Open Source and various distributions of Linux. Exam Objectives
Advanced Architectures for Oracle Database on Amazon EC2
 Advanced Architectures for Oracle Database on Amazon EC2 Abdul Sathar Sait Jinyoung Jung Amazon Web Services November 2014 Last update: April 2016 Contents Abstract 2 Introduction 3 Oracle Database Editions
Getting Started. 05-SEPT-2017 vrealize Log Insight 4.5
 05-SEPT-2017 vrealize Log Insight 4.5 You can find the most up-to-date technical documentation on the VMware Web site at: https://docs.vmware.com/ The VMware Web site also provides the latest product updates.
Installation & Getting Started Guide. Version Document Revision 1.0
 Installation & Getting Started Guide Version 1.9.0 Document Revision 1.0 Copyright Revision 1.0, November, 2018 Published by Clearswift Ltd. 1995 2018 Clearswift Ltd. All rights reserved. The intellectual
MySQL and Virtualization Guide
 MySQL and Virtualization Guide Abstract This is the MySQL and Virtualization extract from the MySQL Reference Manual. For legal information, see the Legal Notices. For help with using MySQL, please visit
VMware Mirage Getting Started Guide
 Mirage 5.8 This document supports the version of each product listed and supports all subsequent versions until the document is replaced by a new edition. To check for more recent editions of this document,
Quick Setup Guide. NetBrain Integrated Edition 7.0. Distributed Deployment
 NetBrain Integrated Edition 7.0 Quick Setup Guide Distributed Deployment Version 7.0b1 Last Updated 2017-11-08 Copyright 2004-2017 NetBrain Technologies, Inc. All rights reserved. Contents 1. System Overview...
Technical White Paper NetBackup 8.1 and later. NetBackup in the AWS Cloud: Required setup to use Amazon EFS as the NetBackup CloudCatalyst cache
 Technical White Paper NetBackup 8.1 and later NetBackup in the AWS Cloud: Required setup to use Amazon EFS as the NetBackup CloudCatalyst cache 1 Contents 1.0 Summary... 3 2.0 Terminology... 3 3.0 Configuring
Amazon Web Services (AWS) Solutions Architect Intermediate Level Course Content
 Solutions Architect Intermediate Level Course Content") Amazon Web Services (AWS) Solutions Architect Intermediate Level Course Content Introduction to Cloud Computing A Short history Client Server Computing Concepts Challenges with Distributed Computing Introduction
Amazon Web Services (AWS) Solutions Architect Intermediate Level Course Content Introduction to Cloud Computing A Short history Client Server Computing Concepts Challenges with Distributed Computing Introduction
Venafi Platform. Architecture 1 Architecture Basic. Professional Services Venafi. All Rights Reserved.
 Venafi Platform Architecture 1 Architecture Basic Professional Services 2018 Venafi. All Rights Reserved. Goals 1 2 3 4 5 Architecture Basics: An overview of Venafi Platform. Required Infrastructure: Services
TANDBERG Management Suite - Redundancy Configuration and Overview
 Management Suite - Redundancy Configuration and Overview TMS Software version 11.7 TANDBERG D50396 Rev 2.1.1 This document is not to be reproduced in whole or in part without the permission in writing
CDP Data Center Console User Guide CDP Data Center Console User Guide Version
 CDP Data Center Console User Guide CDP Data Center Console User Guide Version 3.18.2 1 README FIRST Welcome to the R1Soft CDP Data Center Console User Guide The purpose of this manual is to provide you
System Requirements ENTERPRISE
 System Requirements ENTERPRISE Hardware Prerequisites You must have a single bootstrap node, Mesos master nodes, and Mesos agent nodes. Bootstrap node 1 node with 2 cores, 16 GB RAM, 60 GB HDD. This is
SOURCEFIRE 3D SYSTEM RELEASE NOTES
 SOURCEFIRE 3D SYSTEM RELEASE NOTES Version 5.3.0.2 Original Publication: April 21, 2014 Last Updated: April 25, 2016 These release notes are valid for Version 5.3.0.2 of the Sourcefire 3D System. Even
Installing Connector on Linux
 CHAPTER 3 Revised: July 15, 2010 Overview This chapter provides a step-by-step guide to installing the Linux Connector on x86 and x86-64 servers running either Red Hat Enterprise Linux version 5 or Cent
OnCommand Unified Manager 7.3 Installation and Setup Guide
 OnCommand Unified Manager 7.3 Installation and Setup Guide November 2017 215-12452_A0 doccomments@netapp.com Table of Contents 3 Contents Introduction to OnCommand Unified Manager... 5 What the Unified
User Instruction UBC Department of Botany insync Backup Service. Prepared by: Botany IT
 User Instruction UBC Department of Botany insync Backup Service Prepared by: Botany IT Nov 11, 2018 0 Table of Contents SECTION I: PREREQUISITES... 2 1. Hardware and software prerequisites... 2 2. Obtain
Installing and Configuring VMware vrealize Orchestrator
 Installing and Configuring VMware vrealize Orchestrator vrealize Orchestrator 6.0.1 This document supports the version of each product listed and supports all subsequent versions until the document is
EDB Postgres Cloud Management Administrative User s Guide
 Administrative User s Guide Version 2.0 April 13, 2016 Administrative User s Guide EDB Postgres Cloud Management Administrative User s Guide, Version 2.0 by EnterpriseDB Corporation Copyright 2016 EnterpriseDB
Installation & Getting Started Guide. Version Document Revision 1.0
 Installation & Getting Started Guide Version 4.10.0 Document Revision 1.0 Copyright Revision 1.0, April, 2019 Published by Clearswift Ltd. 1995 2019 Clearswift Ltd. All rights reserved. The intellectual
Installation and User Guide
 OnCommand Cloud Manager 3.0 Installation and User Guide For Volume Management September 2016 215-11109_B0 doccomments@netapp.com Table of Contents 3 Contents Deciding whether to use this guide... 4 Product
Dell Wyse Management Suite. Version 1.0 Quick Start Guide
 Dell Wyse Management Suite Version 1.0 Quick Start Guide Notes, cautions, and warnings NOTE: A NOTE indicates important information that helps you make better use of your product. CAUTION: A CAUTION indicates
Acronis Backup & Recovery 11.5
 Acronis Backup & Recovery 11.5 Installation Guide Applies to the following editions: Update 2 Advanced Server Server for Windows Virtual Edition Server for Linux Advanced Server SBS Edition Workstation
CS Druva insync User Guide. 28 th Oct. 2011
 CS Druva insync User Guide 28 th Oct. 2011 Contents Installing the Druva insync Client... 1 1. Installation Prerequisites... 1 2. Installation on Microsoft Windows 7/ Vista/ XP... 1 3. Installation on
Scrutinizer Virtual Appliance Deployment Guide Page i. Scrutinizer Virtual Appliance Deployment Guide. plixer
 Scrutinizer Virtual Appliance Deployment Guide Page i Scrutinizer Virtual Appliance Deployment Guide Contents What you need to know about deploying a Scrutinizer virtual appliance.. 1 System Requirements..................................2
Backup Solution. User Guide. Issue 01 Date
 Issue 01 Date 2017-08-30 Contents Contents 1 Introduction... 1 1.1 What Is the Backup Solution?... 1 1.2 Why Choose the Backup Solution?... 2 1.3 Concepts and Principles...3 1.3.1 Basic OBS Concepts...3
Getting Started. April 12, 2018 vrealize Log Insight 4.6
 April 12, 2018 vrealize Log Insight 4.6 You can find the most up-to-date technical documentation on the VMware website at: https://docs.vmware.com/ If you have comments about this documentation, submit
Oracle BDA: Working With Mammoth - 1
 Hello and welcome to this online, self-paced course titled Administering and Managing the Oracle Big Data Appliance (BDA). This course contains several lessons. This lesson is titled Working With Mammoth.
CA Agile Central Administrator Guide. CA Agile Central On-Premises
 CA Agile Central Administrator Guide CA Agile Central On-Premises 2018.1 Table of Contents Overview... 3 Server Requirements...3 Browser Requirements...3 Access Help and WSAPI...4 Time Zone...5 Architectural
Reference Architecture. Modified on 17 AUG 2017 vrealize Operations Manager 6.6
 Modified on 17 AUG 2017 vrealize Operations Manager 6.6 You can find the most up-to-date technical documentation on the VMware Web site at: https://docs.vmware.com/ The VMware Web site also provides the
Redis for Pivotal Cloud Foundry Docs
 Redis for Pivotal Cloud Foundry Docs Version 1.5 User's Guide 2018 Pivotal Software, Inc. Table of Contents Table of Contents Redis for PCF Redis for PCF Redis for PCF Release Notes Installing Redis for
Carbon Black QRadar App User Guide
 Carbon Black QRadar App User Guide Table of Contents Carbon Black QRadar App User Guide... 1 Cb Event Forwarder... 2 Overview...2 Requirements...2 Install Cb Event Forwarder RPM...2 Configure Cb Event
Control Center Release Notes
 Release 1.4.1 Zenoss, Inc. www.zenoss.com Copyright 2017 Zenoss, Inc. All rights reserved. Zenoss, Own IT, and the Zenoss logo are trademarks or registered trademarks of Zenoss, Inc., in the United States
Design Patterns for the Cloud. MCSN - N. Tonellotto - Distributed Enabling Platforms 68
 Design Patterns for the Cloud 68 based on Amazon Web Services Architecting for the Cloud: Best Practices Jinesh Varia http://media.amazonwebservices.com/aws_cloud_best_practices.pdf 69 Amazon Web Services
Installing the Nasuni Filer on the EC2 Platform. Version 7.9 July 2017 Last modified: July 10, Nasuni Corporation All Rights Reserved
 Installing the Nasuni Filer on the EC2 Platform Version 7.9 July 2017 Last modified: July 10, 2017 2017 Nasuni Corporation All Rights Reserved Document Information Installing the Nasuni Filer on the EC2
VMware vcloud Air User's Guide
 vcloud Air This document supports the version of each product listed and supports all subsequent versions until the document is replaced by a new edition. To check for more recent editions of this document,