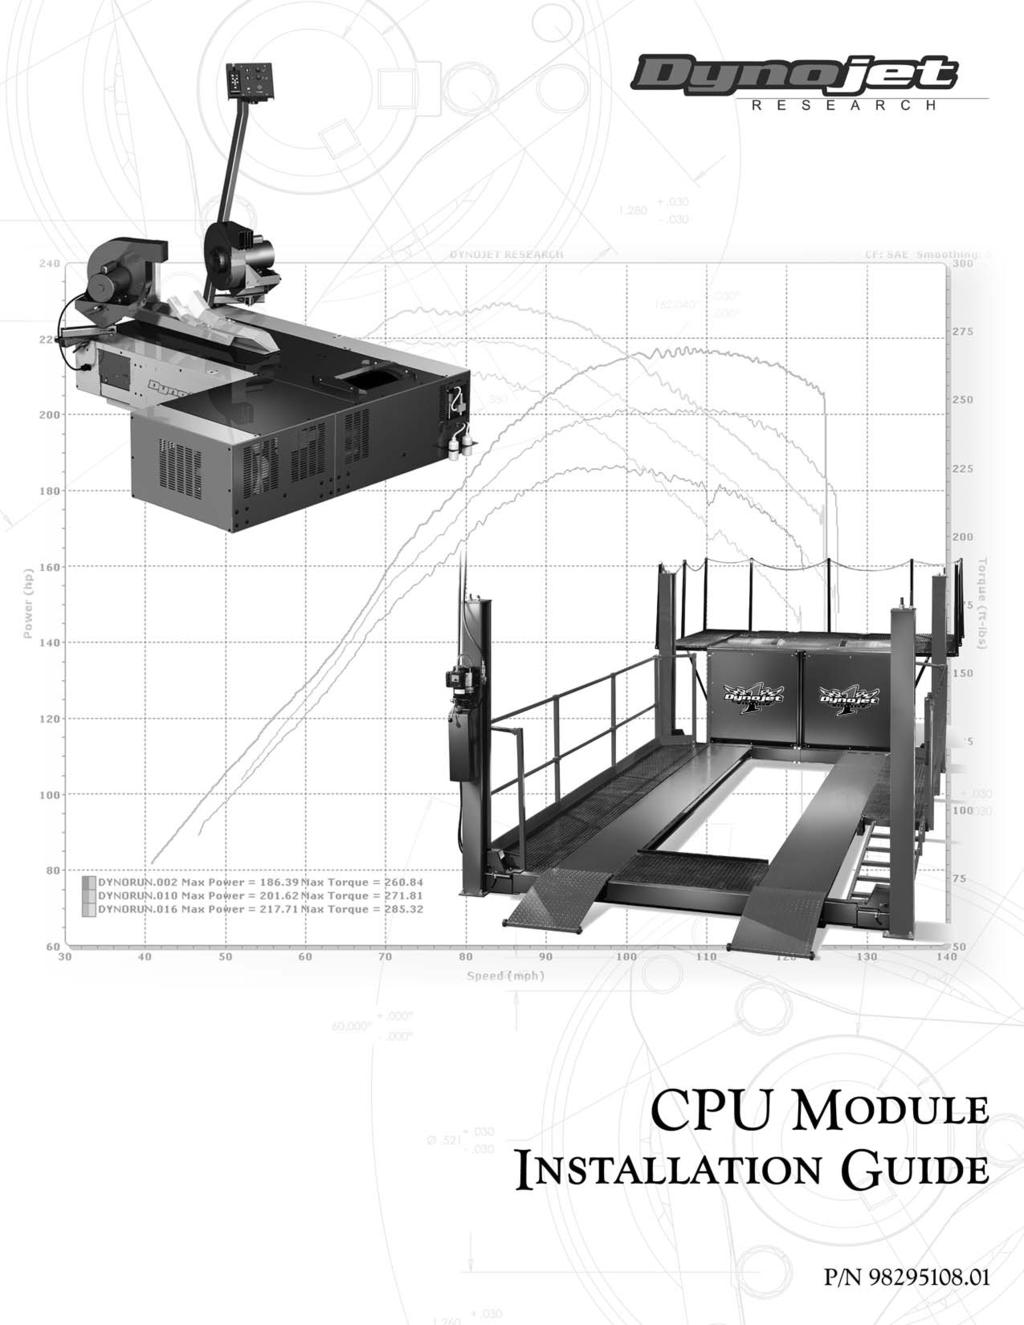
2001 Dynojet Research, Inc. All Rights Reserved. CPU Module Installation Guide
|
|
|
- Archibald Gilmore
- 5 years ago
- Views:
Transcription
1
2 2001 Dynojet Research, Inc. All Rights Reserved. This manual is copyrighted by Dynojet Research, Inc., hereafter referred to as Dynojet, and all rights are reserved. This manual, as well as the software described in it, is furnished under license and may only be used or copied in accordance with the terms of such license. This manual is furnished for informational use only, is subject to change without notice, and should not be construed as a commitment by Dynojet. Dynojet assumes no responsibility or liability for any error or inaccuracies that may appear in this manual. Except as permitted by such license, no part of this manual may be reproduced, stored in a retrieval system, or transmitted, in any form or by any means, electronic, mechanical, recording, or otherwise, without the prior written permission of Dynojet. The Dynojet logo is a trademark of Dynojet Research, Inc. Any trademarks, trade names, service marks, or service names owned or registered by any other company and used in this guide are the property of their respective companies. Dynojet Research, Inc., 2191 Mendenhall Drive, North Las Vegas, Nevada 89081, USA. Printed in USA. Part Number: Version 01 (07/2001)
3 TABLE OF CONTENTS CPU Module Installation Introduction Tools Conventions Used In This Manual Technical Support Installation Removing the CPU Module Installing the CPU Module i
4

5 CPU MODULE INSTALLATION This document provides instructions for installing the CPU module. To ensure safety and accuracy in the procedures, perform the procedures as they are described. Document Part Number: Version 01 Last Updated:
6 CPU MODULE Introduction INTRODUCTION TOOLS The CPU module is one of the four standard interconnected DynoWare EX+ dynamometer electronics modules. The CPU module contains a 32-bit processor which acquires data from the expansion modules and communicates to the main computer running the WinPEP software. The processor queries the expansion modules to determine their identity and capabilities. For more information refer to your dynamometer installation guide. The following tools are required to install the CPU module: 5/64-inch allen wrench No. 10 torx wrench CONVENTIONS USED IN THIS MANUAL The conventions used in this manual are designed to aid the user and protect both the user and the equipment. example of convention Bold description Highlights items you can select on in the software interface, including buttons and menus. The Caution icon indicates a potential hazard to the dynamometer equipment. Follow all procedures exactly as they are described and use care when performing all procedures. TECHNICAL SUPPORT For assistance, please contact Dynojet Technical Support at , or write to Dynojet at 2191 Mendenhall Drive, North Las Vegas, NV Visit us on the World Wide Web at where Dynojet provides state of the art technical support, on-line shopping, 3D visualizations, and press releases about our latest product line. 2

7 INSTALLATION GUIDE Installation INSTALLATION This section describes procedures for removing and replacing the CPU module. Always turn the hardware stack power off before removing or making any connections. REMOVING THE CPU MODULE 1 Turn the power switch off at the CPU module and unplug the power cord. 2 Disconnect all of the cables from the hardware stack. atmospheric sensing module RPM module dynamometer input/output module CPU module power switch stack base Figure 1: Hardware Stack 3 Using a No. 10 torx wrench, loosen the top right screw on the back of the CPU module to release the grounding strap. grounding strap screw on CPU module Figure 2: Grounding Strap Version 1 3


8 CPU MODULE Installation 4 Remove the cable ducts from each side of the CPU module. 5 Firmly hold the stack base with one hand and carefully lift the top three modules up, as straight as possible. remove top modules cable duct Figure 3: Remove Cable Ducts And Top Modules 6 Using a 5/64-inch allen wrench, remove the four black button-head screws (two on each side) from the stack base. 7 Remove the CPU module from the stack base. button head screws Figure 4: Remove CPU Module From Stack Base 8 Tilt the CPU module allowing the four nuts (two on each side) to slide from the module. nuts Figure 5: Remove Nuts From CPU Module 4
. 2 Secure the CPU module to the stack base.")
9 INSTALLATION GUIDE Installation INSTALLING THE CPU MODULE Note: Examine the new CPU module for damage. Make sure the battery on the bottom of the module is properly seated. It the battery has come loose, contact Dynojet. 1 Insert the nuts you removed earlier into the new CPU module (two on each side). 2 Secure the CPU module to the stack base. 2a Set the CPU module on the stack base. 2b Line up one of the front nuts with the stack base and secure with a button-head screw. 2c Line up the remaining front nut with the stack base and secure with a button-head screw. 2d Cover the back openings on the CPU module and tilt the module until the nuts slide down and hit your fingers. 2e Using the allen wrench, slide the nuts until they are aligned with the holes on the back of the stack base and secure with button-head screws. use the allen wrench to slide nut into place line up front nut with stack base Figure 6: Line Up Nuts With Stack Base 3 Carefully align the top three modules on the CPU connector. Be sure to place one hand on the stack base as you are replacing the top modules in order to ground the modules. 4 Gently but firmly, snap the two module sections together. 5 Make sure the grounding strap slips over the top right nut on the CPU module. Note: Do not secure the grounding strap at this point. Version 1 5

10 CPU MODULE Installation 6 Verify each module is being recognized. Note: Be sure to check for proper module communication before securing the grounding strap and cable ducts. This will make it easier to troubleshoot and reposition the modules if needed. 6a Attach the 9-pin serial cable from the PC to the RS-232 socket on the CPU module. Refer to Figure 8 for cable placement. 6b Attach the 3-pin power plug from the power supply to the CPU module with the flat side facing down. Refer to Figure 8 for cable placement. 6c Plug in the power supply to the power source. Turn the power switch on at the CPU module. Verify that the green power LEDs glow on each module. 6d Use Dyno Find to verify each module is recognized. Open Windows Explorer. Double-click dynofind.exe located in the WinPEP folder (C:\WinPEP). Click Search. Verify each module is being recognized. Your CPU module number will be different from the one used in this example. Note: Be sure any additional modules, such as the Air/Fuel Ratio module, are being recognized by Dyno Find. recognized modules Figure 7: Dyno Find Window 6e If the top modules are not responding, turn off the power and separate the top modules from the CPU module. Make sure all the connector pins are straight and carefully replace the top modules. 6f Repeat steps 6c through 6e until all of the modules are recognized. 7 Once all of the modules are recognized, turn the power off. 8 Using the No. 10 torx wrench, tighten the top right screw on the back of the CPU module to secure the grounding strap. 9 Replace the cable ducts on both sides of the CPU module. 6
11 INSTALLATION GUIDE Installation 10 Attach the cables removed earlier to the hardware stack. Refer to Figure 8 for cable placement. Attach the 9-pin shielded serial cable from the PC to the RS-232 socket on the CPU module (if not already connected). Tighten the screws. Attach the 25-pin shielded cable from the dynamometer to the Dynamometer Input/Output module. Tighten the screws. Attach the 9-pin connector from the hand-held pendant to the Dynamometer Input/Output module. Tighten the screws. Attach the 3-pin plug from the power supply to the CPU module with the flat side facing down (if not already connected). If you have an Air/Fuel Ratio module (not shown), attach the cable and tighten the screws. Be sure to attach any additional module cables you may have to the hardware stack. primary inductive pickup socket 25-pin socket power LEDs 9-pin, hand-held pendant 9-pin, RS-232 socket 3-pin power plug Figure 8: Attach Hardware Stack Cables 11 Turn the power switch on at the CPU module and verify operation with WinPEP. Version 1 7
12
DynoWare EX+ Upgrade Installation Guide for Motorcycle Dynamometers.
 1993-2002 Dynojet Research, Inc. All Rights Reserved. for Motorcycle Dynamometers. This manual is copyrighted by Dynojet Research, Inc., hereafter referred to as Dynojet, and all rights are reserved. This
AUTOMOTIVE DYNAMOMETER HARDWARE AND SOFTWARE
 AUTOMOTIVE DYNAMOMETER HARDWARE AND SOFTWARE DYNOWARE RT DYNAMOMETER HARDWARE DYNOWARE RT THE NEXT GENERATION OF DYNOJET DYNAMOMETER ELECTRONICS AND SOFTWARE HAS ARRIVED. DynoWare RT is the next generation
Automotive Dynamometer
 Automotive Dynamometer hardware and software DynoWaRe Rt DYNAMOMETER HARDWARE DynoWare rt THe next GeneraTion of DynoJeT DynamomeTer electronics and software Has arrived. DynoWare RT is the next generation
Installing and Removing SDRAM and DRAM
 CHAPTER 4 This chapter explains how to remove and replace the main memory modules on the network processing engine or network services engine. For the location of the memory module you are replacing, find
Outdoor PTZ. Mounting on the Ceiling Using Pendant Mount. Installation Guide. For Models: I93, I94, I95, I96, KCM /12/03
 Outdoor PTZ Mounting on the Ceiling Using Pendant Mount For Models: I93, I94, I95, I96, KCM-8211 2013/12/03 Table of Contents Mounting Solutions... 3 Straight Tube Installation Procedures... 4 Step 1:
Replacing Preamplifier Circuit Boards
 Instruction Guide Replacing Preamplifier Circuit Boards Before you begin This instruction sheet applies to the Plexon PBX-series preamplifiers. Use these instructions to expand, replace, or upgrade the
To connect the AC adapter:
 Replacing the AC Adapter Replacing the AC Adapter 3 Plug the power cord into a wall outlet. The power indicator turns on. To connect the AC adapter: Connect the power cord to the AC adapter. Power indicator
Replacement Instructions
 imac G5 Inverter, 20-inch Replacement Instructions Follow the instructions in this document carefully. Failure to follow these instructions could damage your equipment and void its warranty. Note: Online
ATTENTION: OBSERVE PRECAUTIONS FOR HANDLING ESD-SENSITIVE DEVICES
 Hard Drive Removal IMPORTANT NOTE: If you are replacing a PATA hard drive with a SATA hard drive, please see PATA to SATA Hard Drive Conversion. Hard Drive Identification: To determine whether your hard
Mac mini Late 2018 Memory (RAM) Replacement
 Replacement") Mac mini Late 2018 Memory (RAM) Replacement How to upgrade the RAM in your shiny new 2018 Mac mini. Written By: Rod Bland ifixit CC BY-NC-SA www.ifixit.com Page 1 of 15 INTRODUCTION Learn how to upgrade
Mac mini Late 2018 Memory (RAM) Replacement How to upgrade the RAM in your shiny new 2018 Mac mini. Written By: Rod Bland ifixit CC BY-NC-SA www.ifixit.com Page 1 of 15 INTRODUCTION Learn how to upgrade
Section. Service & Maintenance. - Core & Hard Disk Drive (HDD) - Amplifier - Monitor - UPS - Dollar Bill Acceptor - Fan Filter G - 1
 - Amplifier - Monitor - UPS - Dollar Bill Acceptor - Fan Filter G - 1") Section G Service & Maintenance - Core & Hard Disk Drive (HDD) - Amplifier - Monitor - UPS - Dollar Bill Acceptor - Fan Filter G - 1 Core Removal Core & HDD 1. Open the door. 2. Perform shutdown procedure.
Section G Service & Maintenance - Core & Hard Disk Drive (HDD) - Amplifier - Monitor - UPS - Dollar Bill Acceptor - Fan Filter G - 1 Core Removal Core & HDD 1. Open the door. 2. Perform shutdown procedure.
Replacing the PanelMate Power Pro 1785 Series, PanelMate epro 7585x-8 and 7685x-8 Series Backlight Assembly
 Replacing the PanelMate Power Pro 1785 Series, PanelMate epro 7585x-8 and 7685x-8 Series Assembly Introduction The Replacement Kit provides a replacement backlight for the PanelMate Power Pro 1785 Series,
TDM To MiniMech conversion ProceDure
 TDM To MiniMech conversion ProceDure (Model 9100 ATM) TDN 07102-00079 Apr 1 2009 CorporATe HeAdquArTers: 522 E. Railroad Street Long Beach, MS 39560 PHONE: (228) 868-1317 FAX: (228) 868-0437 COPYRIGHT
Upgrading and Servicing Guide
 Upgrading and Servicing Guide The only warranties for Hewlett-Packard products and services are set forth in the express statements accompanying such products and services. Nothing herein should be construed
Replacing the Gateway M275 Keyboard
 Replacing the Gateway M275 Keyboard This package includes a replacement keyboard for your Gateway M275 notebook and these printed instructions. Tools you need You need a small Phillips screwdriver and
CRESCENDO /7200 G3. Quick Start Guide for Crescendo /7200. Processor Upgrade Card for Power Macintosh 7200/8200 Computers
 CRESCENDO /7200 G3 Processor Upgrade Card for Power Macintosh 7200/8200 Computers Quick Start Guide for Crescendo /7200 System Compatibility At this printing, processor upgrade cards are compatible with
Replacing the Hardware Configuration Option EPROM on the 1822
 MPMS Service Note 1014-806 Replacing the Hardware Configuration Option EPROM on the 1822 When you install an MPMS option, you will use these procedures to replace the hardware configuration option EPROM
Dell Inspiron N5110 Service Manual
 Dell Inspiron N5110 Service Manual Regulatory model: P17F Regulatory type: P17F001 Notes, Cautions, and Warnings NOTE: A NOTE indicates important information that helps you make better use of your computer.
Replacement Keyswitch Assembly
 Installation Instructions Replacement Keyswitch Assembly (Catalog No. 2711E-NKSW1) Applicable Terminals Use this replacement keyswitch with PanelView Terminals 2711-KA1, -KC1, -TA1, -TC1, -TA4, -TC4 and
120Ra-1 Pentium III Processor Installation Insert
 120Ra-1 Pentium III Processor Installation Insert PN: 455-01614-000 Proprietary Notice and Liability Disclaimer The information disclosed in this document, including all designs and related materials,
Instructions for installing your QuiltCam on your Gammill quilt machine.
 Instructions for installing your QuiltCam on your Gammill quilt machine. The items include with your QuiltCam Items included in all packages: QuiltCam Control Box, See Figure 1 Power Supply, Figure 2 Video
Written By: senordingdong
 Installation of the UniMac V4 adapter into the Apple imac Intel 17". This enables the usage of non OEM LCD panels, and offers an otherwise unavailable Full HD upgrade. This used for repair of the common
Design and Manufacture of Video Pipeline Inspection Systems A Full Service Company
 Design and Manufacture of Video Pipeline Inspection Systems A Full Service Company www.rstechserv.com Omni Star LED Pan and Tilt Zoom Color Camera Modell 10-1660 INSTALLATION MANUAL Made in USA IMPORTANT
Replace the edrive TINI Module and Battery
 Product All edrive Configurations Special Information INFORMATION: This service bulletin is for informational purposes only. It is intended for use by Northrop Grumman Cutting Edge Optronics (NG CEO) employees
Mounting on the Ceiling Using Flush Mount (Face Down)
") Mounting on the Ceiling Using Flush Mount (Face Down) Installation Guide 2014/02/14 Table of Contents Safety Information... 3 Installation Procedures... 5 Step 1: Drill a Hole on the Ceiling... 5 Step
Mounting on the Ceiling Using Flush Mount (Face Down) Installation Guide 2014/02/14 Table of Contents Safety Information... 3 Installation Procedures... 5 Step 1: Drill a Hole on the Ceiling... 5 Step
Replacing the Battery HP t5730 and t5735 Thin Clients
 Replacing the Battery HP t5730 and t5735 Thin Clients Copyright 2009 Hewlett-Packard Development Company, L.P. The information contained herein is subject to change without notice. Microsoft and Windows
Prisma II Chassis 56-Port Upgrade Technical Bulletin
 Prisma II Chassis 56-Port Upgrade Technical Bulletin Overview Audience Introduction This technical bulletin applies to all cable system operators and technicians who use the Prisma II Chassis configured
Upgrading and Servicing Guide
 Upgrading and Servicing Guide Copyright Information The only warranties for Hewlett-Packard products and services are set forth in the express statements accompanying such products and services. Nothing
21 TRACK MAINTENANCE GUIDE
 Mountain Engineering II, Inc. 21 TRACK MAINTENANCE GUIDE 1233 Sherman Drive, Longmont, CO 80501-6133 303-651-0277 303-651-6371 (fax) www.mountainengineering.com Table of contents Table of contents...2
In-Sight 7000 Series Vision System. Optional Configurations
 In-Sight 7000 Series Vision System Optional Configurations Legal Notices The software described in this document is furnished under license, and may be used or copied only in accordance with the terms
Dell Edge Gateway. Service Manual Series
 Dell Edge Gateway 5000 Series Service Manual Computer Model: Dell Edge Gateway 5000/5100 Regulatory Model: N01G/N02G Regulatory Type: N01G001/N02G001 Notes, cautions, and warnings NOTE: A NOTE indicates
SpO 2 Upgrade Instructions
 SpO 2 Upgrade Instructions M3535A/M3536A HeartStart MRx Notice About This Edition Edition 3 Printed in the USA Publication number M3535-90905 The information in this document applies to the HeartStart
Upgrading and Servicing Guide
 Upgrading and Servicing Guide The only warranties for Hewlett-Packard products and services are set forth in the express statements accompanying such products and services. Nothing herein should be construed
Figure 4-29 Removing the CPU compartment cover
 4 Replacement Procedures 4.9 CPU 4 4.9 CPU Removing the CPU To remove the CPU, follow the steps below. 1. Turn the computer upside down and remove two M2.5 4 security screws securing the CPU compartment
Packard Bell Vibe 300 Disassembly Manual
 Packard Bell Vibe 300 Disassembly Manual 1 Table of Contents Overview 2 Technician Notes 2 Disassembly Instructions 2 Reassembly Instructions 2 Required Tools 2 Removing the Bottom Cover 3 Removing the
Installing a New Solo 1150 Hard Drive
 Installing a New Solo 1150 Hard Drive This package includes a new hard drive kit for your Solo 1150 notebook computer and these printed instructions. Tools you need You will need a small Phillips screwdriver
Upgrading and Servicing Guide
 Upgrading and Servicing Guide The information in this document is subject to change without notice. Hewlett-Packard Company makes no warranty of any kind with regard to this material, including, but not
and above (Standard) and above (Option 74) A14 Replacement (Display Module Subassembly w/touch Panel) VM700T
 and above (Option 74) A14 Replacement (Display Module Subassembly w/touch Panel) VM700T") Instructions 050-2925-08 and above (Standard) 050-3119-07 and above (Option 74) A14 Replacement (Display Module Subassembly w/touch Panel) VM700T 075-0899-02 Warning The servicing instructions are for
Instructions 050-2925-08 and above (Standard) 050-3119-07 and above (Option 74) A14 Replacement (Display Module Subassembly w/touch Panel) VM700T 075-0899-02 Warning The servicing instructions are for
How to add a Second Drive to a Mac mini (2012) using the OWC Data Doubler SSD/2.5 Installation Kit
 using the OWC Data Doubler SSD/2.5 Installation Kit") Instructional Video Series How to add a Second Drive to a Mac mini (2012) using the OWC Data Doubler SSD/2.5 Installation Kit Skill Level: Challenging Time to Complete: Approximately 45 Minutes Required
Instructional Video Series How to add a Second Drive to a Mac mini (2012) using the OWC Data Doubler SSD/2.5 Installation Kit Skill Level: Challenging Time to Complete: Approximately 45 Minutes Required
Upgrading and Servicing Guide
 Upgrading and Servicing Guide The information in this document is subject to change without notice. Hewlett-Packard Company makes no warranty of any kind with regard to this material, including, but not
P1 PowerStation Backlight Bulb
 The P1 PowerStation is designed to allow you to easily replace the backlight bulb without removing the unit from its enclosure. However, CTC recommends that you remove the touch screen completely before
Thank you for purchasing this Factory Service Manual CD/DVD from servicemanuals4u.com.
 Thank you for purchasing this Factory Service Manual CD/DVD from servicemanuals4u.com. Please check out our ebay auctions for more great deals on Factory Service Manuals: servicemanuals4u Dell Latitude
Installing the A4504A PMC Bridge Adapter and A4509A Expansion Adapter. HP Part No. A Edition E1197 Printed in U.S.A.
 Installing the A4504A PMC Bridge Adapter and A4509A Expansion Adapter HP Part No. A4504-90601 Edition E1197 Printed in U.S.A. Hewlett-Packard Co. 1997 Printing History First Printing: November 1997 UNIX
2 To display the Administration Home page, click the Administration link. (You may need to provide the Administrator password.)
") The Disk Drive Snap Server 4100 To install the new disk drive properly, follow the procedure carefully. Failure to follow instructions puts your data at risk. These preparatory steps assist you in completing
The Disk Drive Snap Server 4100 To install the new disk drive properly, follow the procedure carefully. Failure to follow instructions puts your data at risk. These preparatory steps assist you in completing
Gateway Profile 4 service guide
 Gateway Profile 4 service guide Customizing Troubleshooting Contents Replacing Components in Your Gateway Profile 4.................. 1 About this guide.....................................................
Written By: John Sutton
 Replacing the fan on your HP g7-2275 dx. Written By: John Sutton ifixit CC BY-NC-SA www.ifixit.com Page 1 of 20 INTRODUCTION Laptop cooking your lap? This guide will walk you through replacing your fan.
Snap Server 4400 Power Supply
 Snap Server 4400 Power Supply Snap Server 4400 Note You can set up your system to send an e-mail alert in the event of a hardware failure. For details, see the section on e-mail notification in your Administrator
Nov. 07, 2013 p. 5 - changed the B axis unit value to from Changed by Randy per Frank s request.
 Correction notes Nov. 07, 2013 p. 5 - changed the B axis unit value to 45.1389 from 40.0000. Changed by Randy per Frank s request. Jan. 22, 2018 p. 5 - changed the B axis unit value and corresponding picture
Ion Memory Upgrade. Visit the AMI Entertainment Web site PM
 Ion Memory Upgrade Visit the AMI Entertainment Web site http://www.meritgames.com PM0672-04 COPYRIGHT 2011 AMI ENTERTAINMENT NETWORK, INC. Ion Memory Upgrade CONTENTS: QTY PART NUMBER DESCRIPTION 1 EC0146-06
Sun StorageTek. 1U Rackmount Media Tray Reference Guide. Sun Doc Part Number: Second edition: December 2007
 Sun StorageTek nl 1U Rackmount Media Tray Reference Guide Sun Doc Part Number: 875 4297 10 Second edition: December 2007 Legal and notice information Copyright 2007 Hewlett Packard Development Company,
Installing and Upgrading Memory and Virtual Private Network Modules
 APPENDIX C Installing and Upgrading Memory and Virtual Private Network Modules This chapter tells how to install or upgrade memory and how to install a Virtual Private Network (VPN) module in your Cisco
Service Manual - Memory Upgrade
 Inspiron 14 3000 Series Service Manual - Memory Upgrade Regulatory Model: P53G Regulatory Type: P53G002 Contents Before working inside your computer...3 Before you begin... 3 Safety instructions... 3 Recommended
Cutter Option Installation Instructions
 This kit includes the parts and documentation necessary to install the cutter option on the Zebra XiII, XiIII, and XiIIIPlus-Series printers. NOTE: The Cutter Option is not available for the 96XiIII. Adding
CARD PRINTER PRINTHEAD REPLACEMENT INSTRUCTIONS
 CARD PRINTER PRINTHEAD REPLACEMENT INSTRUCTIONS CAUTION: The discharge of electrostatic energy that accumulates on the surface of the human body or other surfaces can damage or destroy the printhead. Please
TRC-190 User s Manual
 User s Manual Edition 3.2, May 2017 www.moxa.com/product 2017 Moxa Inc. All rights reserved. User s Manual The software described in this manual is furnished under a license agreement and may be used only
Tools required: Philips Small/Hobby Screw Driver Flat Screw Driver RESET Card CR1220 Battery 3mm Allen Key Stylis or Sharp Pencil
 info@icoolsport.com www. icool Touch Screen Memory Battery Replacement AND RE-SETTING SYSTEM CLOCK RESET Tools required: Philips Small/Hobby Screw Driver Flat Screw Driver RESET Card CR1220 Battery 3mm
1. If the impaired node is part of an HA pair, disable automatic giveback from the console of the healthy node:
 AFF A200 systems Replacing DIMMs You must replace a DIMM in the controller module when your system registers an increasing number of correctable error correction codes (ECC); failure to do so causes a
imac Intel 27" EMC 2429 SSD Dual Drive
 imac Intel 27" EMC 2429 SSD Dual Drive Installation Install the dual hard drive kit in an imac Intel 27" EMC 2429. Written By: Dozuki System 2017 guides.crucial.com Page 1 of 22 INTRODUCTION This guide
E2460GS Oscilloscope Upgrade Kit
 Installation Instructions for E2460GS Oscilloscope Upgrade Kit Agilent 1670G-Series Logic Analyzers This kit upgrades either the Agilent Technologies 1670G, Agilent 1671G, Agilent 1672G, or the Agilent
Print Mechanism Maintenance Kit
 Print Mechanism Maintenance Kit Installation Instructions This kit includes the parts and documentation necessary to install the print mechanism maintenance kit in the following printers: ZT0 ZT0 ZT0 Read
H4 Series Hardware Replacement Guide
 Machine type: 10059/7723 10060/7724 10068/7752 10080/3099/1194 10091/2558/1196 H4 Series Hardware Replacement Guide Version 3.0 2011.08 31500379 Hardware Replacement Guide Copyright Lenovo 2011. All rights
Memory (RAM) Replacement Instructions. apple PowerBook (FireWire) Tools Required. Electrostatic Discharge (ESD)
 Replacement Instructions. apple PowerBook (FireWire) Tools Required. Electrostatic Discharge (ESD)") apple PowerBook (FireWire) Memory (RAM) Replacement Instructions Be sure to follow these instructions carefully. Failure to follow these instructions could result in damage to your equipment and may void
apple PowerBook (FireWire) Memory (RAM) Replacement Instructions Be sure to follow these instructions carefully. Failure to follow these instructions could result in damage to your equipment and may void
Dell OptiPlex All-in-One. Stand Installation Guide
 Dell OptiPlex All-in-One Stand Installation Guide Notes, cautions, and warnings NOTE: A NOTE indicates important information that helps you make better use of your product. CAUTION: A CAUTION indicates
Dell XPS L702X Service Manual
 Dell XPS L702X Service Manual Regulatory model: P09E series Regulatory type: P09E002 Notes, Cautions, and Warnings NOTE: A NOTE indicates important information that helps you make better use of your computer.
Wall-Mounting your HP TouchSmart. User Guide
 Wall-Mounting your HP TouchSmart User Guide The only warranties for Hewlett-Packard products and services are set forth in the express statements accompanying such products and services. Nothing herein
Dell Latitude V710/V740 Service Manual
 Dell Latitude V710/V740 Service Manual Dell Latitude V710/V740 Service Manual Before You Begin Preparing to Work Inside the Computer Recommended Tools Computer Orientation Screw Identification System Components
256 Kbytes (1771-DRS) 1 Mbyte (1771-DRS1) 4 Mbytes (1771-DRS4) Installation Data
 1 Mbyte (1771-DRS1) 4 Mbytes (1771-DRS4) Installation Data") Installation Data You can add static RAM memory to your control coprocessor main module to expand user memory. The RAM single inline memory module (SIMM) is available in the following sizes: 256 Kbytes
Installation Data You can add static RAM memory to your control coprocessor main module to expand user memory. The RAM single inline memory module (SIMM) is available in the following sizes: 256 Kbytes
Print Head Replacement and Adjustment Guide for the CD Printer Revision C
 Print Head Replacement and Adjustment Guide for the CD Printer 110488-001 Revision C Rimage is the trademark of the Rimage Corporation. Perfect Image is a registered trademark of the Rimage Corporation.
*E * E E0606
 75000 SERIES B Instrument BASIC Installation Note Copyright Agilent Technologies, Inc., 1990-2006 *E1300-90020* E1300-90020 E0606 Manual Part Number: E1300-90020 Printed: June 2006 Edition 1 Rev 2 Microfiche
Replacing a PCIe card
 AFF A700s systems Replacing a PCIe card To replace a PCIe card, you must disconnect the cables from the cards in the riser, remove the riser, replace the riser, and then recable the cards in that riser.
edrive RAM Battery Alternate Replacement Procedure
 edrive RAM Battery Summary This technical note describes the process for replacing the TINI RAM battery with a higher capacity battery. With the edrive turned on, the external battery can be changed without
Hardware Replacement Guide Types 8099, 8116, 8155, 8156 Types 8157, 8158, 8159, 8160 Types 8215, 9210, 9211
 Hardware Replacement Guide Types 8099, 8116, 8155, 8156 Types 8157, 8158, 8159, 8160 Types 8215, 9210, 9211 Hardware Replacement Guide Types 8099, 8116, 8155, 8156 Types 8157, 8158, 8159, 8160 Types 8215,
Power Supply, 17-inch
 apple imac G5 Power Supply, 17-inch Replacement Instructions Follow the instructions in this sheet carefully. Failure to follow these instructions could damage your equipment and void its warranty. Note:
2015 SIMMCONN LABS, LLC. All rights reserved. NewScope-T1 Operation Manual
 2015 SIMMCONN LABS, LLC. All rights reserved NewScope-T1 Operation Manual April 12, 2017 NewScope-T1 Operation Manual 1 Introduction... 3 2 Installation... 4 2.1 Initial Inspection... 4 2.2 Installation
ww.battery-adapter.com
 Removing and replacing an FRU Lenovo G470/G475/G570/G575 This section presents exploded figures with the instructions to indicate how to remove and replace the FRU. Make sure to observe the following general
V5420 Host Card Upgrade Kit for R3082D Quick Start Guide
 Quick Start Guide Upgrade kit contents The table below shows the contents of the V5420 Host Card Upgrade Kit (components are not shown to scale). Part Function Pieces V5420 Host Card 1 Host card bracket
Inspiron 22. Service Manual Series. Regulatory Model: W17B Regulatory Type: W17B001
 Inspiron 22 3000 Series Service Manual Regulatory Model: W17B Regulatory Type: W17B001 Notes, cautions, and warnings NOTE: A NOTE indicates important information that helps you make better use of your
Replacing Failed Memory in the 6580/6780 Controller Module
 Replacing Failed Memory in the 6580/6780 Controller Module May 2011 51355-00, Rev. A ST2501 M2 Drive Module Initial Setup Guide May 2011 Revision History Version and Date 51355-00, Rev. A, May 2011 Initial
In-Sight 7000 Series Vision System. Optional Configurations
 In-Sight 7000 Series Vision System Optional Configurations Legal Notices The software described in this document is furnished under license, and may be used or copied only in accordance with the terms
Smart Multivariable Transmitter (SMV 3000) Electronics Module Replacement Kit Instruction
 Electronics Module Replacement Kit Instruction") Smart Multivariable Transmitter (SMV 3000) Electronics Module Replacement Kit Instruction Electronics Module (Part number 51404208 503, -513) Document Form: 34-SM-33-01 Effective: 09-01 Supersedes: 34-SM-33-01,
Smart Multivariable Transmitter (SMV 3000) Electronics Module Replacement Kit Instruction Electronics Module (Part number 51404208 503, -513) Document Form: 34-SM-33-01 Effective: 09-01 Supersedes: 34-SM-33-01,
DATA DOUBLER. Apple Mac mini (2009)
") DATA DOUBLER Apple Mac mini (2009) TABLE OF CONTENTS Introduction... 1 1.1 Hardware Compatibility 1.1.1 Host Computer Compatibility 1.1.2 Drive Compatibility 1.2 Package Contents 1.3 About This Manual
DATA DOUBLER Apple Mac mini (2009) TABLE OF CONTENTS Introduction... 1 1.1 Hardware Compatibility 1.1.1 Host Computer Compatibility 1.1.2 Drive Compatibility 1.2 Package Contents 1.3 About This Manual
Replacing the SATA PCI Controller Card
 Replacing the internal controller PCI card may be performed by a single administrator; no tools are necessary. Caution There are static-sensitive electronics inside the unit. Before you handle any parts,
MegaRAID Remote Kit for the LSIiBBU06, LSIiBBU07, and LSIiBBU08 Intelligent Battery Backup Units. Quick Installation Guide
 MegaRAID Remote Kit for the LSIiBBU06, LSIiBBU07, and LSIiBBU08 Intelligent Battery Backup Units Quick Installation Guide Version A July 2010 Revision History Version and Date Version A, July 2010 Initial
CAMERA ASSEMBLY. Removal/Replacement of the Camera Box Assembly APR-CA. Install Camera Assembly. Remove Camera Assembly
 CAMERA ASSEMBLY Removal/Replacement of the Camera Box Assembly APR-CA REQUIRED TOOLS: 9/64 hex key Small flat-tip screwdriver Remove Camera Assembly camera 1. Locate the camera assembly underneath the
PoE/FPR Kit for Auto-Sync Time Clock. The Auto-Sync Time Clock is a validated time system with a Web interface and auto discovery.
 ASTCPOEK PoE/FPR Kit for Auto-Sync Time Clock The Auto-Sync Time Clock is a validated time system with a Web interface and auto discovery. The ASTCPOEK Kit provides Power over Ethernet with Full Power
Ethernet Adapter Installation Instructions
 Ethernet Adapter Installation Instructions DOC. #569040000 A 7/30/04 PRINTED IN U.S.A. Disclaimer Logic One is a registered trademark of Novar Controls Corporation. The material in this manual is for information
Indy R4400SC 200 MHz CPU Upgrade Installation Guide
 Indy R4400SC 200 MHz CPU Upgrade Installation Guide Document Number 007-3057-001 CONTRIBUTORS Written by Judy Muchowski Illustrated by Dany Galgani, Maria Mortati Production by Cindy Stief Cover design
SCSI Cable Installation Instructions
 Identifying the SCSI Cable Parts SCSI Cable Installation Instructions for HP ProLiant DL100 Series Generation 2 Servers Item Description 1 Connector end 2 240 mm location 3 Terminator end Read instructions
HP Compaq 6730b Display Replacement
 Here is a HP Compaq 6730b with a cracked LCD after having been dropped. This is a straight forward repair. Written By: oldturkey03 ifixit CC BY-NC-SA www.ifixit.com Page 1 of 11 INTRODUCTION This laptop
SNAP-IT-1U Installation Guide
 Chapter 1 SNAP-IT-1U Installation Guide Introduction The SNAP-IT rack-mount unit is a packaged solution for attaching electrical, electronic, and mechanical devices to an Ethernet network. Once attached
742S 742i SC742 CHASSIS USER'S GUIDE
 742S 742i SC742 CHASSIS USER'S GUIDE 1.0a SC742 Chassis User s Guide The information in this User s Guide has been carefully reviewed and is believed to be accurate. The vendor assumes no responsibility
Upgrading and Servicing Guide
 Upgrading and Servicing Guide Copyright Information The only warranties for Hewlett-Packard products and services are set forth in the express statements accompanying such products and services. Nothing
PRODUCT MARKING AND BARCODE IDENTIFICATION. up to Serial No Barcode/Label printer MACH4. Service Manual. Edition 11/06
 PRODUCT MARKING AND BARCODE IDENTIFICATION up to Serial No. 9999 Barcode/Label printer MACH4 Service Manual Edition 11/06 copyright by cab / 9008553 / Q49 / 1 All specifications about delivery, design,
Z Series and S4M Ribbon Take-Up Spindle Maintenance Kit
 Z Series and SM Installation Instructions This kit includes the parts and documentation necessary to install the Ribbon Take-Up Spindle Maintenance Kit into the following printers: Z Series (ZM, Z6M, ZMplus,
Q2 XBee Handheld Controller Assembly Guide
 Q2 XBee Handheld Controller Assembly Guide Copyright Quantum Robotics Inc. Q2 Controller V1.0 1 Parts List: The kit comes with 14 individual bags. 1. Case Top and Bottom 2. Case Screw Package containing:
This diagram shows the workflow of the DIMM replacement procedure for a FAS2600 system.
 FAS2600 series Replacing DIMMs This diagram shows the workflow of the DIMM replacement procedure for a FAS2600 system. Video overview This video shows an overview of the DIMM replacement procedure for
OnePlus 5 Screen and Digitizer Assembly Replacement
 OnePlus 5 Screen and Digitizer Assembly Replacement Follow this guide to replace the screen and digitizer for the OnePlus 5. This replaces the screen as well as the frame it is attached to. Written By:
System Storage EXP3000 Rack Installation Instructions
 System Storage EXP3000 Rack Installation Instructions Review the documentation that comes with your rack cabinet for safety and cabling information. When you install the IBM System Storage EXP3000 in a
GPIB-232CT-A IBCL EPROM Installation Guide
 NATIONAL INSTRUMENTS The Software is the Instrument Installation Guide GPIB-232CT-A IBCL EPROM Installation Guide This guide describes how to replace the factory-installed EPROM that comes with your GPIB-232CT-A.
Stacking Module. Installation Guide AT-MCF2000S. PN Rev A
 Stacking Module AT-MCF2000S Installation Guide PN 613-000708 Rev A Copyright 2007 Allied Telesis, Inc. All rights reserved. No part of this publication may be reproduced without prior written permission