MockupScreens - User Guide
|
|
|
- James Cain
- 6 years ago
- Views:
Transcription
1 MockupScreens - User Guide
2 Contents 1. Overview Getting Started...5 Installing the software... 5 Registering Understanding the Interface...11 Menu Bar Tool bar Elements Screens Basic and advanced options Comments Using MockupScreens...19 Managing elements Choosing elements to build a screen prototype...19 Setting the basic options of elements...20 Setting the advanced options of elements...23 Adjusting elements on the screen...27 Cut/Copy/Paste Elements...27 Transforming one element to the other...27 Selecting multiple elements...28 Managing Screen Prototypes and Groups Creating screen prototypes...28 Creating groups...31 Moving screens from one group to the other...32 Importing scenarios Exporting scenarios Exporting scenarios to a folder...32 Exporting scenarios to html...33 Export scenario to xml...34 Running slideshow of a scenario Taking snapshot of the current screen Printing screens/groups/projects... 36
3 5. Setting Options...38 Editor options Export options Print options Slideshow options Snapshot options Switching skins... 44
4 1. Overview MockupScreens is an easy-to-use software application designed to handle the early stages of the software development process. MockupScreens helps you to: sketch screen prototypes of your product and arrange them in groups or scenarios. experiment interactively with clients, and quickly visualize scenarios of software application, even before the coding has started. communicate your product developments to your clients and discuss design ideas. create five prototypes in ten minutes without any programming knowledge.

5 2. Getting Started Installing the software Before installing the software, you need to download the trial version and then register it with license key. To download the software: 1. Click the following link: 2. In the Opening Mockup4Setup.exe box, click Save File. The Mockup4Setup.exe icon is downloaded. You can install the MockupScreens application by performing the following steps. To install the software: 1. Double-click the Mockup4Setup.exe icon. 2. In the Setup window, click Next to continue.

6 3. In the Licence Agreement window, click the I Agree button. 4. In the Choose Install Location window, click the Browse button.


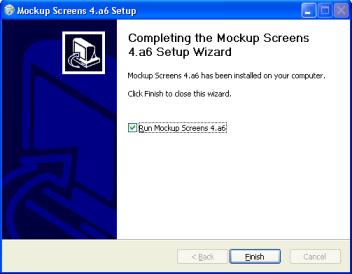
7 5. In the Browse For Folder dialog box, navigate to the destination folder in which you want to install Mockup Screens 4.a6. Click Next. 6. In the Choose Start Menu Folder dialog box, select the Start Menu Folder in which you want to create the program s shortcuts. Note: You can also create a new folder. 7. Select the Do not create shortcuts check box if you do not want to create any shortcuts. 8. Click the Install button. 9. In the Completing the Mockup Screens 4.a6 Setup Wizard dialog box, click Finish. 10. To run the application instantly, select the Run Mockup Screens 4.a6 check box.
8


9 Registering Though you can avail the unregistered 30-day trial version facility, it is highly recommended that you register to get the full version of the application. Registering of the application ensures you: No watermark image on your screens No annoying messages of time limits 12 months of free upgrades and free support If you are using the trial version, do the following to register yourself: To register: 1. Click Register on the Help menu, the submenu is displayed. 2. In the Buy the Full Version of Mockup Screens dialog box, click the Buy the Full Version Now... button.

10 The page is displayed where you buy your license by opting one of the following packages based on the team size that use the product: Single User Team Corporate Education 3. Select a package based on your requirements. 4. Fill in the registration form and click Submit. Note: Once you are successfully registered, you will receive the registration code to your mail ID (which you have provided in the registration form.) 5. In the Buy the Full Version of Mockup Screens dialog box, click the Enter your registration Code... button. 6. In the prompted message box, enter the registration code and click OK. The MockupScreens application opens.

11 3. Understanding the Interface MockupScreens comes with a user-friendly interface and is easy to use. The simplified design of the interface, which is almost confined to a single screen, enables you to perform the tasks easily and quickly. The following screen shot explains different components of the interface: Menu Bar The menu bar consists of five menus: File, Edit, Drawing, Tools, and Help. File: Using the File menu, you can: create a new project or open an existing project. save the project in a specified location. print the whole project or a selected group or the current screen.


12 open the recent files that you have worked on. exit the MockupScreens application. Edit: Using the Edit menu, you can: undo or redo the previously performed actions. copy, cut, and paste. Drawing: Using the Drawing menu, you can: create, delete, and rename a screen. create, delete, and rename a group. transform one element to the other. Show/ hide the grid. bring an element to front or send it to back if there are two elements.


13 Tools: Using the Tools menu, you can: run a slideshow of the screens. take a snapshot of a screen and either save it or copy it to the clipboard. export the whole project or a selected group to a HTML page. export the whole project or a selected group to a XML page. export the whole project or a selected group to a scenario. import a scenario into the root group or a selected group. set Editor, Export, Print, Slideshow, Snapshot, and General options. Help: Using the Tools menu, you can: go to the product help. register yourself and buy MockupScreens. visit the M website.

14 Tool bar In addition to the menu functions, the tool bar consists of some more functions. Using the tool bar, you can perform the following functions in the same order as displayed in the application: Create a new project or open an existing project. Save a project. Print a screen. Undo or redo the previously performed actions. Cut, copy, and paste. Run a slideshow of the screens. Take a snapshot of a screen and either save it or copy it to the clipboard. Change the screen skin to Web or Black & White or Windows. set Editor, Export, Print, Slideshow, Snapshot, and General options. Bold, italicize, and underline text. Change color and font size of text. Align text to left, center, and right. Elements The screen elements are displayed in the left panel called Widgets. These elements are used to create a prototype of your product screen. You click elements in the left panel and click on the screen in the work area where you want the elements to appear. Using the elements, you can create prototypes according to your requirement.


15 The following image displays how the elements appear when you place them in the work area:

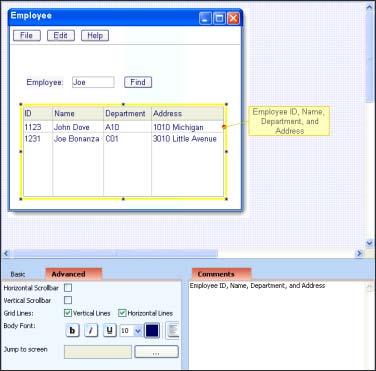
16 Screens The screens are displayed in the right panel called Screens. After you create screens in the work area, they are displayed in the Screens panel so that you can select any screen from the panel and work on it. The default Screens panel consists of one Screens folder, and within it, a Group folder. The following image displays that when a screen is created in the work area, it is displayed in the Screens panel: Basic and advanced options By setting the basic and advanced options to elements, you can create prototypes to suit your requirements. These basic and advanced options vary from element to element. You can set these options in the specified tab areas below the work area. You can also modify the options whenever you like. The following image displays the advanced options of the table element. To go to the basic options, you need to click the adjacent Basic tab.

17 Comments You can attach comments to elements if using the Comments tab below the work area. When a comment is typed for a specific element, the comment is displayed for the element with a line attached to it. The following image displays how a comment is attached to the table element:
18
19 4. Using MockupScreens This chapter helps you perform different functions of the application. Managing elements This section consists of the following topics: Choosing Elements to build a screen prototype screen Setting the Basic Options of Elements Setting the Advanced Options of Elements Adjusting Elements on the screen Cut, Copy, Paste Elements Attaching Comments to Elements Transforming one element to the other Selecting multiple elements Choosing elements to build a screen prototype To choose an element into the screen: 1. Click the element in the Widgets panel.

20 2. Click on the screen in the work area. The element is displayed on the screen. Setting the basic options of elements To set the basic options of an element: 1. Right-click the element on the screen and click Edit element. 2. In the Basic tab area, do the following:
21 Caption: Type a name for the element. Checked: Select or clear the check box to enable or disable the check box. This option is meant for the Checkbox element. Text: Type text in the box. This option is meant for the Text element. Transparent: Select the check box to make the text transparent. This option is meant for the Text element. Tab Captions: Type the tab captions in a list form in the box and the captions are displayed for the tabs. This option is meant for the Tab element. Active tab: In the drop-down list, select the tab which you want to be active. This option is meant for the Tab element. Select Gallery Image: Click the button to navigate and select a gallery image. This option is meant for the Image element. Select a Custom Image: Click the button to navigate and select a custom image. This option is meant for the Image element. Options: Type options in a list form in the box and the options are displayed as radio buttons. This option is meant for the Radio element. Selected Option: In the drop-down list, choose the option which you want to be displayed as selected. This option is meant for the Radio element. List Values: Type the list values in a list form in the box and the values are displayed as list values. This option is meant for List and Label.List elements. Tree Items: Type the tree items in a list form in the box and the items are displayed as tree items. This option is meant for the Tree element. Flip Diagonal: Select the check box to flip the line diagonally. This option is meant for the Line element. Columns: Type the column name in a list form in the box and the names are displayed as columns for the table element. This option is meant for the Table element. Table Editor: Click the Edit button to enter table data. In the prompted Edit Table Values dialog box, you can o o o o o o Add a column: Click the Add Column button. Delete a column: Select the column header (on the alphabet) and click the Delete Column button. Add a row: Click the Add Row button. Delete a row: Select the row header (on the numeral at the left side) and click the Delete Row button. Paste data from an excel sheet: Select the row or column and click the Paste from Excel button. Resize table column s width: Drag the column lines to expand or reduce the column width.


22 Label: Type the label names in a list form in the box and the labels are displayed in the element. This option is meant for Label.Field, Label.Dropdown, and Label.List elements. Change Mark Icon: Click the button to select an icon from the box. This option is meant for the Marks element. Marks icons are meant to point something out on the screen. Marks icons are useful to explain the user interface.

23 Setting the advanced options of elements To set the advanced options of an element: 1. Select the element on the screen in the work area. 2. In the Advanced tab area, do the following: Disabled: Select the check box to disable the element. To enable the element, clear the check box. Jump to Screen: Using the Jump to Screen feature, you can set basic interactivity for presenting mockups to your customer. You can set any screen element to jump to any other screen within the project when clicked during slideshow or in the HTML export. This feature is explained below using the following example: o o o Select the Group Codes element in the screen. In the Advanced tab area, click the dotted button. In the prompted Select Screen to Jump message box, select the Group Codes screen from the list and click OK.

24 In the slideshow or in the HTML export, when you click the Group Codes button, it takes you to the Group Codes screen which you have set in the Select Screen to Jump box.


25 Horizontal Scrollbar: Select the check box to create a horizontal scroll bar for the element. Vertical Scrollbar: Select the check box to create a horizontal scroll bar for the element. Connection Lines: Select the check box to enable connection lines for the Tree element.


26 Grid Lines: Select the Vertical Lines check box to enable the vertical lines in the table. Select the Horizontal Lines check box to enable the horizontal lines in the table. Body Font: Using the formatting tolls, you can o bold, italicize, and underline the text in the table o change the font size and color of the text in the table o align text to left, center, and right in the table

27 Adjusting elements on the screen When two elements are placed one on the other, you can bring an element to front or send it to back according to the requirement. To adjust elements one on the other: 1. Right-click the element and click Bring to Front to bring it to front. 2. Right-click the element and click Send to back to send it to back. The following image displays how the field element and button element are adjusted one on the other: Cut/Copy/Paste Elements You can cut or copy screen elements from one location and paste them in another location on the screen. To copy/cut/paste an element: Right click the element and select the relevant option. You can also use the Edit menu to perform these actions. Transforming one element to the other You can transform one element to the other so that you can change the prototypes according to your ideas quickly. To transform one element to the other: 1. Right-click an element on the screen. 2. Point to Transform and click the element to which you want to transform it.

28 Note: When transforming one element to the other, the element changes to the selected element but data is preserved. You need not type all the data again. You, however, can set the basic and advanced options which you want to modify. Selecting multiple elements Instead of performing an element function for each element separately, you can select multiple elements and apply the same function to all at a time. To select multiple elements: Select multiple elements on the screen while holding the Ctrl or Shift key. (Or) Click and drag the mouse button around the elements. To deselect one of the multiple elements: Click the element while holding the Ctrl or Shift key. Managing Screen Prototypes and Groups This section consists of the following topics: Creating Screen Prototypes Creating Groups Moving Screens from one Group to the other Importing Screens into Projects Exporting Screens Creating screen prototypes To create a prototype screen:


29 1. Click New Screen on the Drawing menu. The new screen is displayed in the work area. 2. Click the element you want from the Widgets panel. 3. Now, click on the screen. The element is placed on the screen. Based on the prototype requirement, you can select and add them to the screen. The following image displays how elements can be arranged for a prototype using the Basic and Advanced options. 4. To set the basic and advanced options to an element, Right-click the element on the screen and then click Edit Element. 5. In the Basic and Advanced tab areas, set the required options for the element such as providing a caption for the element, disabling the element etc. Note: These basic and advanced options vary from element to element.

30 6. To add a comment to an element, type the comment text in the Comments tab area. The comment is attached to the element on the screen. 7. To set the comment settings, click Options on the Tools menu. 8. In the Editor tab area, set the comment options in the Marks and Comments area. Display Comments: Select the check box to display comments you used. If you clear the check box, comments are not shown on the screen. Comment Word Wrap Length: Enter numerals in the field to set the word wrap length in the displayed comment box on the screen. Comment Max Display Length: Enter numerals in the field to set the display length of the comment. Note that this comment display length cannot be less than word wrap length. To cut/copy/paste a screen: On the Edit menu, click the Cut, Copy, Paste button according to the requirement. (Or) In the Screens panel, right-click the screen and click Cut/Copy/Paste. To delete or rename a screen:

31 On the Drawing menu, select Delete Screen or Rename Screen. (Or) In the Screens panel, right-click the screen and click Delete or Rename. Creating groups Groups consist of the prototype screens you have created. You can organize all the related screens in one group. You can create any number of groups, rename the groups, and delete unnecessary groups. The default Screens panel consists of one group within the default Screen folder. You can rename the default group or create a new group. To create a group: Click New Group on the Drawing menu. The new group is displayed in the Screens panel. The following image displays how screen prototypes are arranged in groups. To cut/copy/paste a group: 1. Select the group in the Screens panel. 2. On the Edit menu, click the Cut, Copy, Paste button according to the requirement. (Or) In the Screens panel, right-click the group and click Cut/ Copy/Paste. To delete or rename a group: 1. Select the group in the Screens panel.

32 2. On the Drawing menu, select Delete Screen or Rename Screen. (Or) In the Screens panel, right-click the group and click Delete or Rename. Moving screens from one group to the other You can move screens of one group to the other according to your requirement. To move screens: 1. Right-click the screen you want to move and click Cut or Copy. 2. Right click the group you want to place the screen and click Paste. Importing scenarios A scenario is a.mck file which is a collection of screens. You can import a scenario from outside folders into the project. To import a scenario: 1. Click Import Scenario on the Tools menu. The Select Scenario Import Option box is displayed. 2. Click one of the two buttons based on the requirement: Import into root group: The scenario will be imported to the root group in the Screens panel. Import into selected group: The scenario will be imported to the selected group in the Screens panel. 3. In the Choose a Mock file dialog box, navigate to the scenario (.mck file). 4. Select the scenario and click Open. The scenario is imported in the Screens panel. Exporting scenarios You can export scenarios to an outside location, or to HTML, or to XML. Exporting scenarios to a folder To export a scenario to a folder:
33 1. Click Export Scenario on the Tools menu. The Select Scenario Export Option box is displayed. 2. Click one of the two buttons based on the requirement: Export Whole Project: The whole project will be exported to the selected location. Export Selected Group: The selected group will be exported. 3. In the Save Scenario as... dialog box, navigate to the folder into which you want to export the scenario. 4. In the File name field, type a name for the scenario. 5. Click Save. The scenario is exported to the folder. Exporting scenarios to html To export a scenario into HTML: 1. Click Export to HTML on the Tools menu. The Select HTML Export Option box is displayed. 2. Click one of the two buttons based on the requirement: Export Whole Project: The whole project will be exported HTML. Export Selected Group: The selected group will be exported. 3. In the Browse For Folder dialog box, navigate to the folder into which you want to export the scenario.


34 4. In Folder field, type a name for the folder. To make a new folder, click the Make New Folder button. 5. Click OK. The scenario is exported to HTML and the HTML page also opens. Export scenario to xml To export a scenario to XML: 1. Click Export to XML on the Tools menu. The Select XML Export Option box is displayed. 2. Click one of the two buttons based on the requirement: Export Whole Project: The whole project will be exported to XML. Export Selected Group: The selected group will be exported. 3. In the Save XML as... dialog box, navigate to the folder into which you want to export the scenario.
35 4. In the File name field, type a name for the XML file. 5. Click Save. The XML file is saved to the folder and the XML file also opens. Running slideshow of a scenario You can view the slideshow of a scenario for a better view for explanation. To run a slideshow of a scenario: 1. Click Run Slideshow... on the Tools menu. The Slideshow window is displayed. 2. Click the Go Screen button to view screens one by one. You can also use the UP and Down arrow buttons to move from one screen to the other. 3. To close the slideshow, click the Close button. Taking snapshot of the current screen You can take a snapshot of the screen you are working on. You can either save it to a folder or copy it to the clipboard.

36 To take a snapshot: 1. Click Take Snapshot on the Tools menu. The Select Snapshot Option box is displayed. 2. Click Save to file to save the snapshot to a folder. 3. In the Save Image as... dialog box, navigate to a location. 4. In the File name field, type a name for the image. 5. From the Save as type drop-down box, select the image format. 6. Click Save. The snapshot is saved to the folder. 7. The Select Snapshot Option box, click Copy to Clipboard to copy the image for later use. Printing screens/groups/projects You can print the whole project or a selected group or a current screen. To print: 1. Click Print on the File menu. The Mockup Print box is displayed.


37 2. Click one of the buttons to print the whole project, a selected group, the current screen. The Mockup Print Preview dialog box is displayed. 3. To move from one screen to the other use the arrow buttons on the top bar. 4. Click the Goto button. 5. In the Goto Page box, enter the page numbers that you want print and click OK. 6. Click Print. 7. In the Print dialog box, set the required options and click Print.

38 5. Setting Options Based on your requirements, you can set different options to make functions work the way you like. Setting element options determines how the element looks on the screen and populates its data. You can set options in six areas: Editor, Export, Print, Slideshow, Snapshot, and General. Editor options To set editor options: 1. Click Options on the Tools menu. 2. In the Set Options dialog box, click the Editor tab. 3. In the Grid area: Snap to Grid: Select the check box to snap to grid. Show Grid: Select the check box to show grid. Clear the check box to hide the grid. Size(px): Enter a numeral in the field to set the size of the each grid pixel. Note that grid size does not take less than In the Marks and Comments area:

39 Display Marks: Select the check box to display marks you used. If you clear the check box, marks are not shown on the screen. Display Comments: Select the check box to display comments you used. If you clear the check box, comments are not shown on the screen. Comment Word Wrap Length: Enter numerals in the field to set the word wrap length in the displayed comment box on the screen. Comment Max Display Length: Enter numerals in the field to set the display length of the comment. Note that this comment display length cannot be less than word wrap length. 5. Click OK. The following image shows how the setting options feature works for you. By changing the comment word wrap length, you can change the appearance of the comment box. Export options To set export options: 1. Click Options on the Tools menu.

40 2. In the Set Options dialog box, click the Export tab. 3. In the Image Format area: Export images as: Select the image format from the drop-down list. 4. In the Marks and Comments area: Export comments as text below the image: Select this radio button to display comments as text below the image. Embed comments in the image: Select this radio button to embed comments in the image. Don t export comments: Select this radio button if you do not want to export comments. 5. In the Grid area: Export Grid: Select the check box to export grid. 6. Click OK. Print options To set print options: 1. Click Options on the Tools menu. 2. In the Set Options dialog box, click the Print tab.
41 3. In the Marks and Comments area: Print comments as text below the image: Select this radio button to print comments as text below the image. Embed comments in the image: Select this radio button to embed comments in the image. Don t print comments: Select this radio button if you do not want to print comments. 4. In the Grid area: Print Grid: Select the check box to print grid. 5. Click OK. The following image displays how the comment displays when you change the options.

42 Slideshow options To set slideshow options: 1. Click Options on the Tools menu. 2. In the Set Options dialog box, click the Slideshow tab.

43 3. In the Grid area: Show Grid: Select the check box to show grid. 4. In the Marks and Comments area: Display Marks: Select the check box to display marks. Display Comments: Select the check box to display comments. 5. Click OK. Snapshot options To set snapshot options: 1. Click Options on the Tools menu. 2. In the Set Options dialog box, click the Snapshot tab.
44 3. In the Grid area: Show Grid: Select the check box to show grid. 4. In the Marks and Comments area: Display Marks: Select the check box to display marks. Display Comments: Select the check box to display comments. 5. Click OK. Switching skins You can switch the skin, look and feel of the screen prototypes, by using the General options in the Tools menu. To switch skins: 1. Click Tools> Options. The Set Options dialog box is displayed.

45 2. Click the General tab. It displays the default skin. 3. Select a skin type from the three options. Windows, Black& white and Web, 4. Click OK. The look and feel of the screens is changed accordingly.
SPARK. User Manual Ver ITLAQ Technologies
 SPARK Forms Builder for Office 365 User Manual Ver. 3.5.50.102 0 ITLAQ Technologies www.itlaq.com Table of Contents 1 The Form Designer Workspace... 3 1.1 Form Toolbox... 3 1.1.1 Hiding/ Unhiding/ Minimizing
Excel 2003 Tutorial II
 This tutorial was adapted from a tutorial by see its complete version at http://www.fgcu.edu/support/office2000/excel/index.html Excel 2003 Tutorial II Charts Chart Wizard Chart toolbar Resizing a chart
1 Ctrl + X Cut the selected item. 2 Ctrl + C (or Ctrl + Insert) Copy the selected item. 3 Ctrl + V (or Shift + Insert) Paste the selected item
 Copy the selected item. 3 Ctrl + V (or Shift + Insert) Paste the selected item") Tips and Tricks Recorder Actions Library XPath Syntax Hotkeys Windows Hotkeys General Keyboard Shortcuts Windows Explorer Shortcuts Command Prompt Shortcuts Dialog Box Keyboard Shortcuts Excel Hotkeys
Tips and Tricks Recorder Actions Library XPath Syntax Hotkeys Windows Hotkeys General Keyboard Shortcuts Windows Explorer Shortcuts Command Prompt Shortcuts Dialog Box Keyboard Shortcuts Excel Hotkeys
Nauticom NetEditor: A How-to Guide
 Nauticom NetEditor: A How-to Guide Table of Contents 1. Getting Started 2. The Editor Full Screen Preview Search Check Spelling Clipboard: Cut, Copy, and Paste Undo / Redo Foreground Color Background Color
PowerPoint 2010 Level 1 Computer Training Solutions Student Guide Version Revision Date Course Length
 Level 1 Computer Training Solutions Version 1.2 Revision Date Course Length 2012-Feb-16 6 hours Table of Contents Quick Reference... 3 Frequently Used Commands... 3 Manitoba ehealth Learning Management
NiceForm User Guide. English Edition. Rev Euro Plus d.o.o. & Niceware International LLC All rights reserved.
 www.nicelabel.com, info@nicelabel.com English Edition Rev-0910 2009 Euro Plus d.o.o. & Niceware International LLC All rights reserved. www.nicelabel.com Head Office Euro Plus d.o.o. Ulica Lojzeta Hrovata
Excel Main Screen. Fundamental Concepts. General Keyboard Shortcuts Open a workbook Create New Save Preview and Print Close a Workbook
 Excel 2016 Main Screen Fundamental Concepts General Keyboard Shortcuts Open a workbook Create New Save Preview and Print Close a Ctrl + O Ctrl + N Ctrl + S Ctrl + P Ctrl + W Help Run Spell Check Calculate
OU EDUCATE TRAINING MANUAL
 OU EDUCATE TRAINING MANUAL OmniUpdate Web Content Management System El Camino College Staff Development 310-660-3868 Course Topics: Section 1: OU Educate Overview and Login Section 2: The OmniUpdate Interface
Excel Select a template category in the Office.com Templates section. 5. Click the Download button.
 Microsoft QUICK Excel 2010 Source Getting Started The Excel Window u v w z Creating a New Blank Workbook 2. Select New in the left pane. 3. Select the Blank workbook template in the Available Templates
button Double-click any tab on the Ribbon to minimize it. To expand, click the Expand the Ribbon button
 PROCEDURES LESSON 1: CREATING WD DOCUMENTS WITH HEADERS AND FOOTERS Starting Word 1 Click the Start button 2 Click All Programs 3 Click the Microsoft Office folder icon 4 Click Microsoft Word 2010 1 Click
Microsoft Publisher 2010
 Microsoft Publisher 2010 Chapter 2 Publishing a Trifold Brochure Objectives Discuss advantages of the brochure medium Choose brochure options Copy and paste with paste options Wordwrap text Format characters
Microsoft Word 2011 Tutorial
 Microsoft Word 2011 Tutorial GETTING STARTED Microsoft Word is one of the most popular word processing programs supported by both Mac and PC platforms. Microsoft Word can be used to create documents, brochures,
BASIC MICROSOFT POWERPOINT
 BASIC MICROSOFT POWERPOINT PART ONE PHONE: 504-838-1144 IT Training Team Jefferson Parish Library EMAIL: jpltrain@jplibrary.net In this class you will learn to: Launch, close, and interact with Microsoft
Designer Reference 1
 Designer Reference 1 Table of Contents USE OF THE DESIGNER...4 KEYBOARD SHORTCUTS...5 Shortcuts...5 Keyboard Hints...5 MENUS...7 File Menu...7 Edit Menu...8 Favorites Menu...9 Document Menu...10 Item Menu...12
Microsoft Word 2010 Basics
 1 Starting Word 2010 with XP Click the Start Button, All Programs, Microsoft Office, Microsoft Word 2010 Starting Word 2010 with 07 Click the Microsoft Office Button with the Windows flag logo Start Button,
Formatting, Saving and Printing in Word 2013
 Revision 3 (--04) Computer Basics Formatting, Saving and Printing in Word 03 MICROSOFT WORD 03: This program allows you to create new documents, make easy changes, insert media, and effectively save and
Quick Start Guide. ARIS Architect. Version 9.8 Service Release 2
 ARIS Architect Version 9.8 Service Release 2 October 2015 This document applies to ARIS Version 9.8 and to all subsequent releases. Specifications contained herein are subject to change and these changes
Libraries. Multi-Touch. Aero Peek. Sema Foundation 10 Classes 2 nd Exam Review ICT Department 5/22/ Lesson - 15
 10 Classes 2 nd Exam Review Lesson - 15 Introduction Windows 7, previous version of the latest version (Windows 8.1) of Microsoft Windows, was produced for use on personal computers, including home and
Application of Skills: Microsoft Excel 2013 Tutorial
 Application of Skills: Microsoft Excel 2013 Tutorial Throughout this module, you will progress through a series of steps to create a spreadsheet for sales of a club or organization. You will continue to
Getting Started. Custom Reports Software
 Getting Started Custom Reports Software Custom Reports software Custom reporting The Custom Reports software lets you transfer quantitative results from Data Analysis into the Custom Reports spreadsheet
Creating Reports in Access 2007 Table of Contents GUIDE TO DESIGNING REPORTS... 3 DECIDE HOW TO LAY OUT YOUR REPORT... 3 MAKE A SKETCH OF YOUR
 Creating Reports in Access 2007 Table of Contents GUIDE TO DESIGNING REPORTS... 3 DECIDE HOW TO LAY OUT YOUR REPORT... 3 MAKE A SKETCH OF YOUR REPORT... 3 DECIDE WHICH DATA TO PUT IN EACH REPORT SECTION...
Introduction to MS Word XP 2002: An Overview
 Introduction to MS Word XP 2002: An Overview Sources Used: http://www.fgcu.edu/support/office2000/word/files.html Florida Gulf Coast University Technology Skills Orientation Word 2000 Tutorial The Computer
Lesson 4 - Creating a Text Document Using WordPad
 Lesson 4 - Creating a Text Document Using WordPad OBJECTIVES: To learn the basics of word processing programs and to create a document in WordPad from Microsoft Windows. A word processing program is the
WEEK NO. 12 MICROSOFT EXCEL 2007
 WEEK NO. 12 MICROSOFT EXCEL 2007 LESSONS OVERVIEW: GOODBYE CALCULATORS, HELLO SPREADSHEET! 1. The Excel Environment 2. Starting A Workbook 3. Modifying Columns, Rows, & Cells 4. Working with Worksheets
Microsoft Word (97, 98, 2000) Word Processing Instructions
 Word Processing Instructions") Microsoft Word (97, 98, 2000) Word Processing Instructions Managing Toolbars Click on View. Select Toolbars. Click to select Standard, Formatting, and Drawing. Formatting Text 1. Once text is typed in,
Microsoft Word (97, 98, 2000) Word Processing Instructions Managing Toolbars Click on View. Select Toolbars. Click to select Standard, Formatting, and Drawing. Formatting Text 1. Once text is typed in,
Microsoft Excel 2010 Basic
 Microsoft Excel 2010 Basic Introduction to MS Excel 2010 Microsoft Excel 2010 is a spreadsheet software in the new Microsoft 2010 Office Suite. Excel allows you to store, manipulate and analyze data in
MPLAB Harmony Help - MPLAB Harmony Graphics Composer User's Guide
 MPLAB Harmony Help - MPLAB Harmony Graphics Composer User's Guide MPLAB Harmony Integrated Software Framework v1.11 2013-2017 Microchip Technology Inc. All rights reserved. MPLAB Harmony Graphics Composer
Some useful shortcut keys applicable for both Excel and Word (16 to 19 is only for Excel): Sr.No. Shortcut Keys Description
: Sr.No. Shortcut Keys Description") Some useful shortcut keys applicable for both Excel and Word (16 to 19 is only for Excel): Sr.No. Shortcut Keys Description 1 Ctrl + C Copy the selected data 2 Ctrl + X Cut the selected data 3 Ctrl + V
Some useful shortcut keys applicable for both Excel and Word (16 to 19 is only for Excel): Sr.No. Shortcut Keys Description 1 Ctrl + C Copy the selected data 2 Ctrl + X Cut the selected data 3 Ctrl + V
Quick Start Guide. ARIS Architect. Version 9.7
 ARIS Architect Version 9.7 October 2014 This document applies to ARIS Version 9.7 and to all subsequent releases. Specifications contained herein are subject to change and these changes will be reported
Exploring Microsoft Office Word 2007
 Exploring Microsoft Office Word 2007 Chapter 3: Enhancing a Document Robert Grauer, Keith Mulbery, Michelle Hulett Objectives Insert a table Format a table Sort and apply formulas to table data Convert
While editing a page, a menu bar will appear at the top with the following options:
 Page Editor ===> Page Editor How Can I Use the Page Editor? The Page Editor will be your primary way of editing your website. Page Editor Basics While editing a page, you will see that hovering your mouse
SPARK. User Manual Ver ITLAQ Technologies
 SPARK Forms Builder for SharePoint User Manual Ver. 4.5.60.120 0 ITLAQ Technologies www.itlaq.com Table of Contents 1 The Form Designer Workspace... 4 1.1 Form Toolbox... 4 1.1.1 Hiding/ Unhiding/ Minimizing
Changing Worksheet Views
 PROCEDURES LESSON 1: TOURING EXCEL Starting Excel 1 Click the Start button 2 Click All Programs 3 Click the Microsoft Office folder icon 4 Click Microsoft Excel 2010 Naming and Saving (Ctrl+S) a Workbook
MICROSOFT POWERPOINT BASIC WORKBOOK. Empower and invest in yourself
 MICROSOFT POWERPOINT BASIC WORKBOOK Empower and invest in yourself 2 Workbook Microsoft PowerPoint Basic onlineacademy.co.za MODULE 01 GETTING STARTED WITH POWERPOINT 1. Launch a blank PowerPoint presentation.
Introduction to Microsoft Word 2010
 Introduction to Microsoft Word 2010 Microsoft Word is a word processing program you can use to write letters, resumes, reports, and more. Anything you can create with a typewriter, you can create with
Microsoft Office 2000 & Microsoft Word 2000 Page 1. ***** Help Options ***** To access [? ] quickly & for specific use then
![Microsoft Office 2000 & Microsoft Word 2000 Page 1. ***** Help Options ***** To access [? ] quickly & for specific use then](/thumbs/90/104468223.jpg "Microsoft Office 2000 & Microsoft Word 2000 Page 1. ***** Help Options ***** To access [? ] quickly & for specific use then") Microsoft Office 2000 & Microsoft Word 2000 Page 1 ***** Help Options ***** Microsoft Help: Options and Search [ F1 ] Fastest way to get to Office Assistant and MS Office Help! ESC to Exit File > Help
Microsoft Office 2000 & Microsoft Word 2000 Page 1 ***** Help Options ***** Microsoft Help: Options and Search [ F1 ] Fastest way to get to Office Assistant and MS Office Help! ESC to Exit File > Help
Excel 2010: Basics Learning Guide
 Excel 2010: Basics Learning Guide Exploring Excel 2010 At first glance, Excel 2010 is largely the same as before. This guide will help clarify the new changes put into Excel 2010. The File Button The purple
Microsoft PowerPoint 2007 Beginning
 Microsoft PowerPoint 2007 Beginning Educational Technology Center PowerPoint Presentations on the Web... 2 Starting PowerPoint... 2 Opening a Presentation... 2 Microsoft Office Button... 3 Quick Access
FrontPage 2000 Tutorial -- Advanced
 FrontPage 2000 Tutorial -- Advanced Shared Borders Shared Borders are parts of the web page that share content with the other pages in the web. They are located at the top, bottom, left side, or right
Mi c r o s o f t Wo r d Qu i c k Re f e r e n c e Ca r d
 Tech Talk # 5 Mi c r o s o f t Wo r d Qu i c k Re f e r e n c e Ca r d Introduction by Renae Schmidt Hello! Welcome to Tech Talk #5. This week we are sharing a Microsoft Word 2010 Quick Reference Card.
DRAFT. Table of Contents About this manual... ix About CuteSITE Builder... ix. Getting Started... 1
 DRAFT Table of Contents About this manual... ix About CuteSITE Builder... ix Getting Started... 1 Setting up... 1 System Requirements... 1 To install CuteSITE Builder... 1 To register CuteSITE Builder...
IBM Rational Rhapsody Gateway Add On. User Guide
 User Guide Rhapsody IBM Rational Rhapsody Gateway Add On User Guide License Agreement No part of this publication may be reproduced, transmitted, stored in a retrieval system, nor translated into any
Kenora Public Library. Computer Training. Introduction to Excel
 Kenora Public Library Computer Training Introduction to Excel Page 2 Introduction: Spreadsheet programs allow users to develop a number of documents that can be used to store data, perform calculations,
The Photo Gallery. Adding a Photo Gallery Page. Adding a Photo Gallery App
 Adding a Photo Gallery Page The Photo Gallery Above the Summary tab, in the list of Current Pages, click on the New Page button. Choose Photo Gallery from the Available Page Types. Give the page a name.
ARIS Architect QUICK START GUIDE. Version Service Release 7
 ARIS Architect QUICK START GUIDE Version 9.8 - Service Release 7 December 2016 This document applies to ARIS Version 9.8 and to all subsequent releases. Specifications contained herein are subject to change
MS Word 2010 An Introduction
 MS Word 2010 An Introduction Table of Contents The MS Word 2010 Environment... 1 The Word Window Frame... 1 The File Tab... 1 The Quick Access Toolbar... 4 To Customize the Quick Access Toolbar:... 4
Introducing Gupta Report Builder
 Business Reporting Chapter 1 Introducing Gupta Report Builder You can use Report Builder to design reports. This chapter describes: Our approach to building reports. Some of the reports you can build.
Quick Reference Card Business Objects Toolbar Design Mode
 Icon Description Open in a new window Pin/Unpin this tab Close this tab File Toolbar New create a new document Open Open a document Select a Folder Select a Document Select Open Save Click the button to
Included with the system is a high quality speech synthesizer, which is installed automatically during the SymWord setup procedure.
 Introduction to SymWord SymWord is a simple to use, talking, symbol-word processor. It has the basic functionality of a word processor. SymWord can also be configured to produce speech and/or display text
USING MICROSOFT ACCESS 2013 Guided Project 7-1
 Guided Project 7-1 For this project, you enhance the functionality of a database for a friend s music collection. You use Design view to create a main form and a subform, and customize the form to add
Introduction to Microsoft Excel 2010
 Introduction to Microsoft Excel 2010 THE BASICS PAGE 02! What is Microsoft Excel?! Important Microsoft Excel Terms! Opening Microsoft Excel 2010! The Title Bar! Page View, Zoom, and Sheets MENUS...PAGE
Introduction to PowerPoint
 L E S S O N 1 Introduction to PowerPoint Lesson objectives Suggested teaching time To become familiar with PowerPoint's presentation capabilities, you will: 40-50 minutes a b c Start the program, open
Easy Windows Working with Disks, Folders, - and Files
 Easy Windows 98-3 - Working with Disks, Folders, - and Files Page 1 of 11 Easy Windows 98-3 - Working with Disks, Folders, - and Files Task 1: Opening Folders Folders contain files, programs, or other
User Manual Version 1.1 January 2015
 User Manual Version 1.1 January 2015 - 2 / 112 - V1.1 Variegator... 7 Variegator Features... 7 1. Variable elements... 7 2. Static elements... 7 3. Element Manipulation... 7 4. Document Formats... 7 5.
BHM Website Teacher User Guide
 BHM Website Teacher User Guide How to Login 1. Go to HUhttp://bhmschools.org/userUH 2. Enter your username and password and click Log in How to Change Your Password 1. Go to My Account in your Nav bar
Creating Interactive PDF Forms
 Creating Interactive PDF Forms Using Adobe Acrobat X Pro for the Mac University Information Technology Services Training, Outreach, Learning Technologies and Video Production Copyright 2012 KSU Department
Word Creating & Using Tables. IT Training & Development (818) Information Technology
 Information Technology") Information Technology Word 2007 User Guide Word 2007 Creating & Using Tables IT Training & Development (818) 677-1700 training@csun.edu www.csun.edu/it/training Table of Contents Introduction... 1 Anatomy
Information Technology Word 2007 User Guide Word 2007 Creating & Using Tables IT Training & Development (818) 677-1700 training@csun.edu www.csun.edu/it/training Table of Contents Introduction... 1 Anatomy
[ Getting Started with Analyzer, Interactive Reports, and Dashboards ] ]
![[ Getting Started with Analyzer, Interactive Reports, and Dashboards ] ]](/thumbs/88/117545107.jpg "[ Getting Started with Analyzer, Interactive Reports, and Dashboards ] ]") Version 5.3 [ Getting Started with Analyzer, Interactive Reports, and Dashboards ] ] https://help.pentaho.com/draft_content/version_5.3 1/30 Copyright Page This document supports Pentaho Business Analytics
Version 5.3 [ Getting Started with Analyzer, Interactive Reports, and Dashboards ] ] https://help.pentaho.com/draft_content/version_5.3 1/30 Copyright Page This document supports Pentaho Business Analytics
AgWare ClickFORMS 7.0 Introductory Tutorial
 AgWare ClickFORMS 7.0 Introductory Tutorial MAIN WINDOW If you have used Office 2007, our new layout will look familiar. Here is a screenshot of the new and improved AgWare ClickFORMS window: The Forms
Advanced Excel. Click Computer if required, then click Browse.
 Advanced Excel 1. Using the Application 1.1. Working with spreadsheets 1.1.1 Open a spreadsheet application. Click the Start button. Select All Programs. Click Microsoft Excel 2013. 1.1.1 Close a spreadsheet
Report Generator for DPOPWR
 Online Help Report Generator for DPOPWR Adapted from the Report Generator for DPOPWR Online Help www.tektronix.com Copyright Tektroni x. All rights reserved. Licensed software products are owned by Tektronix
Specification Manager
 Enterprise Architect User Guide Series Specification Manager How to define model elements simply? In Sparx Systems Enterprise Architect, use the document-based Specification Manager to create elements
Table of Contents Lesson 1: Introduction to the New Interface... 2 Lesson 2: Prepare to Work with Office
 Table of Contents Lesson 1: Introduction to the New Interface... 2 Exercise 1: The New Elements... 3 Exercise 2: Use the Office Button and Quick Access Toolbar... 4 The Office Button... 4 The Quick Access
Microsoft Access 2013
 Microsoft Access 2013 Chapter 1 Databases and Database Objects: An Introduction Objectives Describe the features of the Access window Create a database Create tables in Datasheet and Design views Add records
Table Basics. The structure of an table
 TABLE -FRAMESET Table Basics A table is a grid of rows and columns that intersect to form cells. Two different types of cells exist: Table cell that contains data, is created with the A cell that
Microsoft Word: Steps To Success (The Bare Essentials)
") Microsoft Word: Steps To Success (The Bare Essentials) Workbook by Joyce Kirst 2005 Microsoft Word: Step to Success (The Bare Essentials) Page Contents 1 Starting Word 2 Save 3 Exit 5 Toolbars, Alignment,
Microsoft Word: Steps To Success (The Bare Essentials) Workbook by Joyce Kirst 2005 Microsoft Word: Step to Success (The Bare Essentials) Page Contents 1 Starting Word 2 Save 3 Exit 5 Toolbars, Alignment,
Word Select New in the left pane. 3. Select Blank document in the Available Templates pane. 4. Click the Create button.
 Microsoft QUICK Word 2010 Source Getting Started The Word Window u v w x z Opening a Document 2. Select Open in the left pane. 3. In the Open dialog box, locate and select the file you want to open. 4.
Day : Date : Objects : Open MS Excel program * Open Excel application. Select : start. Choose: programs. Choose : Microsoft Office.
 Day : Date : Objects : Open MS Excel program * Open Excel application. Select : start Choose: programs Choose : Microsoft Office Select: Excel *The interface of Excel program - Menu bar. - Standard bar.
Table of Contents. Page 2 of 72. High Impact 4.0 User Manual
 Table of Contents Introduction 5 Installing High Impact email 6 Installation Location 6 Select Mail Client 6 Create a ReadyShare Account 6 Create a Default Profile 6 Outlook Configuration Message 6 Complete
Getting Started Guide
 UX-App Getting Started Guide Contents Keyboard Shortcuts... 2 Basic Shortcuts... 2 Component Manipulation... 2 Working with groups... 3 Grid Control... 3 Context Menu... 4 User Interface... 5 Managing
Sedao Ltd. QuickChange PROject. User Manual for QuickChange PROject version 2.1.5
 Sedao Ltd QuickChange PROject User Manual for QuickChange PROject version 2.1.5 Contents What is QuickChange PROject?... 2 Simple Artwork Creation... 5 Creating a project... 7 QuickChange PROject Template
PRESENCE. RadEditor Guide. SchoolMessenger 100 Enterprise Way, Suite A-300 Scotts Valley, CA
 PRESENCE RadEditor Guide SchoolMessenger 100 Enterprise Way, Suite A-300 Scotts Valley, CA 95066 800-920-3897 www.schoolmessenger.com Contents Contents... 2 Introduction... 3 What is RadEditor?... 3 RadEditor
Corel Ventura 8 Introduction
 Corel Ventura 8 Introduction Training Manual A! ANZAI 1998 Anzai! Inc. Corel Ventura 8 Introduction Table of Contents Section 1, Introduction...1 What Is Corel Ventura?...2 Course Objectives...3 How to
4) Study the section of a worksheet in the image below. What is the cell address of the cell containing the word "Qtr3"?
 Study the section of a worksheet in the image below. What is the cell address of the cell containing the word Qtr3?") Choose The Correct Answer: 1) Study the highlighted cells in the image below and identify which of the following represents the correct cell address for these cells: a) The cell reference for the selected
Choose The Correct Answer: 1) Study the highlighted cells in the image below and identify which of the following represents the correct cell address for these cells: a) The cell reference for the selected
Table of Contents. Contents
 Spring 2009 R.A. Table of Contents Contents Opening PowerPoint... 2 PowerPoint 2007 Interface... 2 PowerPoint Features... 2 Creating, Opening and Saving Presentations... 3 Creating a Presentation... 3
Colleague UI4.3 Documentation
 Colleague UI4.3 Documentation Table of Contents Getting Started... 2 Add the Shortcuts to your Desktop... 2 Searching for and Using Forms... 3 Begin Your Form Search... 3 Form Search Results... 3 The Navigation
Basic Microsoft Excel 2007
 Basic Microsoft Excel 2007 Contents Starting Excel... 2 Excel Window Properties... 2 The Ribbon... 3 Tabs... 3 Contextual Tabs... 3 Dialog Box Launchers... 4 Galleries... 5 Minimizing the Ribbon... 5 The
Microsoft How to Series
 Microsoft How to Series Getting Started with EXCEL 2007 A B C D E F Tabs Introduction to the Excel 2007 Interface The Excel 2007 Interface is comprised of several elements, with four main parts: Office
Appendix J: Using Shortcut Keys and Shortcut Menus
 Appendix J: Using Shortcut Keys and Shortcut Menus Introduction This appendix covers shortcuts to many of the menu options, dialog boxes, and commands used in PC-DMIS. Using shortcuts will speed up your
FirmSite Control. Tutorial
 FirmSite Control Tutorial 1 Last Updated June 26, 2007 by Melinda France Contents A. Logging on to the Administrative Control Center... 3 Using the Editor Overview:... 3 Inserting an Image... 7 Inserting
User Guide. Web Intelligence Rich Client. Business Objects 4.1
 User Guide Web Intelligence Rich Client Business Objects 4.1 2 P a g e Web Intelligence 4.1 User Guide Web Intelligence 4.1 User Guide Contents Getting Started in Web Intelligence 4.1... 5 Log into EDDIE...
User Guide. Chapter 6. Teacher Pages
 User Guide Chapter 6 s Table of Contents Introduction... 5 Tips for s... 6 Pitfalls... 7 Key Information... 8 I. How to add a... 8 II. How to Edit... 10 SharpSchool s WYSIWYG Editor... 11 Publish a...
Microsoft Word Tutorial
 Microsoft Word Tutorial 1 GETTING STARTED Microsoft Word is one of the most popular word processing programs supported by both Mac and PC platforms. Microsoft Word can be used to create documents, brochures,
Excel 2016 Basics for Mac
 Excel 2016 Basics for Mac Excel 2016 Basics for Mac Training Objective To learn the tools and features to get started using Excel 2016 more efficiently and effectively. What you can expect to learn from
Contents. Launching Word
 Using Microsoft Office 2007 Introduction to Word Handout INFORMATION TECHNOLOGY SERVICES California State University, Los Angeles Version 1.0 Winter 2009 Contents Launching Word 2007... 3 Working with
Intro to Excel. To start a new workbook, click on the Blank workbook icon in the middle of the screen.
 Excel is a spreadsheet application that allows for the storing, organizing and manipulation of data that is entered into it. Excel has variety of built in tools that allow users to perform both simple
Websites. Version 1.7
 Websites Version 1.7 Last edited 15 Contents MyNetball Information...3 Websites...4 Web packages...4 Setting up the layout...5 Uploading files and images...6 Using Dropbox to Increase your Website Data...7
Excel 2016 Basics for Windows
 Excel 2016 Basics for Windows Excel 2016 Basics for Windows Training Objective To learn the tools and features to get started using Excel 2016 more efficiently and effectively. What you can expect to learn
TEACHER PAGES USER MANUAL CHAPTER 6 SHARPSCHOOL. For more information, please visit: Chapter 6 Teacher Pages
 SHARPSCHOOL USER MANUAL CHAPTER 6 TEACHER PAGES For more information, please visit: www.customernet.sharpschool.com 0 TABLE OF CONTENTS 1. 2. 3. 4. 5. 6. 7. 8. 9. 10. 11. INTRODUCTION... 1 I. TEACHER PAGE
A PRACTICAL GUIDE TO USING WIX TO BUILD A WEBSITE
 A PRACTICAL GUIDE TO USING WIX TO BUILD A WEBSITE AN AID TO ENABLE STUDENTS TO UNDERSTAND THE FUNDAMENTELS OF WEBSITE DESIGN WITHIN THE FRAMEWORK OF A WEBSITE PROJECT USING WEB DESIGN TOOLS YANNIS STEPHANOU
Cell to Cell mouse arrow Type Tab Enter Scroll Bars Page Up Page Down Crtl + Home Crtl + End Value Label Formula Note:
 1 of 1 NOTE: IT IS RECOMMENDED THAT YOU READ THE ACCOMPANYING DOCUMENT CALLED INTRO TO EXCEL LAYOUT 2007 TO FULLY GRASP THE BASICS OF EXCEL Introduction A spreadsheet application allows you to enter data
Introduction to Microsoft Excel
 Athens-Clarke County Library Page 1 What is a spreadsheet program? Microsoft Excel is an example of a spreadsheet program that will maintain records for you relating to finances, products, activities,
Using SymPrint to Make Overlays, Templates & More...
 Welcome to SymPrint SymPrint is an easy-to-use tool for creating communication overlays, worksheets, classroom activities and more using a modern toolbar and common-sense interface modeled after the programs
A Guide to Quark Author Web Edition 2015
 A Guide to Quark Author Web Edition 2015 CONTENTS Contents Getting Started...4 About Quark Author - Web Edition...4 Smart documents...4 Introduction to the Quark Author - Web Edition User Guide...4 Quark
Microsoft Excel Chapter 3. Working with Large Worksheets, Charting, and What-If Analysis
 Microsoft Excel 2013 Chapter 3 Working with Large Worksheets, Charting, and What-If Analysis Objectives Rotate text in a cell Create a series of month names Copy, paste, insert, and delete cells Format
MICROSOFT WORD 2010 Quick Reference Guide
 MICROSOFT WORD 2010 Quick Reference Guide Word Processing What is Word Processing? How is Word 2010 different from previous versions? Using a computer program, such as Microsoft Word, to create and edit
Using the Web in Mathematics Foundations Course An Introduction to Microsoft PowerPoint Sarah L. Mabrouk, Framingham State College
 Using the Web in Mathematics Foundations Course An Introduction to Microsoft PowerPoint Sarah L. Mabrouk, Framingham State College Overview: MS PowerPoint is powerful presentation software that enables
Best Practices for Using the Rich Text Editor
 Best Practices for Using the Rich Text Editor Overview Many pages in ilearn contain large text entry boxes along with many icons and pull down lists (located above the actual text entry area). These icons
Ms excel. The Microsoft Office Button. The Quick Access Toolbar
 Ms excel MS Excel is electronic spreadsheet software. In This software we can do any type of Calculation & inserting any table, data and making chart and graphs etc. the File of excel is called workbook.
POS Designer Utility
 POS Designer Utility POS Designer Utility 01/15/2015 User Reference Manual Copyright 2012-2015 by Celerant Technology Corp. All rights reserved worldwide. This manual, as well as the software described