Table of Contents. Front Matter 1.1. Chapter 1: Overview OJS Features What's New in Viewing and Reading Overview
|
|
|
- Diana Osborne
- 5 years ago
- Views:
Transcription
1 Table of Contents Front Matter Chapter 1: Overview OJS Features What's New in Viewing and Reading Overview System Requirements Getting Help Community Contributions Test-Drive OJS Chapter 2: Navigating OJS Common Interface Elements Journal-Specific Interface Elements Chapter 3: User Roles Available Roles within OJS Registering with a Journal Viewing and Changing your Profile Resetting your Password Chapter 4: Site Administrator Site Settings Hosted Journals Sitewide Language Settings Authentication Sources Categories Administrative Functions Chapter 5: Journal Management Journal Management Pages The Five-Step Setup Process Step One: Details Step Two: Policies Step Three: Submissions Step Four: Management Step Five: The Look Announcements The Files Browser Journal Sections Review Forms Languages Masthead Prepared
2 Reading Tools Statistics and Reports Payments Subscriptions Individual Subscriptions Institutional Subscriptions System Plugins Metadata Plugins Authorization Plugins Block Plugins Citation Plugins Gateway Plugins Generic Plugins Implicit Authentication Plugins Import/Export Plugins Payment Plugins Report Plugins Theme Plugins Install a New Plugin Import/Export Data User Management ing Users Enrolling Existing Users Show Users with No Role Creating Users Merge Users Chapter 6: Authors Author Home Page Active Submissions RefBacks Archive Submitting an Article Submission Step One: Starting the Submission Submission Step Two: Uploading the Submission Submission Step Three: Entering the Submission's Metadata Submission Step Four: Uploading Supplementary Files Submission Step Five: Confirming the Submission Authors and Submission Review and Editing Process Submissions Summary Page Submissions Review Page Submissions Editing Page Chapter 7: Editors
3 Editor Home Page Submissions Searching Submissions Issues Chapter 8: Section Editors Section Editor Home Page Submission Summary Submissions In Review Editor Decision Submissions In Editing Copyediting Scheduling Layout Editing Proofreading Submission References Submission Archives Chapter 9: Reviewers Submissions Reviews Chapter 10: Copyeditors Copyediting Chapter 11: Layout Editors Layout Editor Home Page Layout Proofreading Chapter 12: Proofreaders Proofreading Chapter 13: Readers Accessing Content Reading Tools
4 Front Matter Learning OJS 2.4.8: A Visual Guide to Open Journal Systems Copyright: The Public Knowledge Project,
5 Chapter 1: Overview Overview Open Journal Systems (OJS) is an open source solution to managing and publishing scholarly journals online. It is a highly flexible editor-operated journal management and publishing system that can be downloaded for free and installed on a local web server. It has been designed to reduce the time and energy devoted to the clerical and managerial tasks associated with editing a journal, while improving the record-keeping and efficiency of editorial processes. It seeks to improve the scholarly and public quality of journal publishing through a number of innovations, from making journal policies more transparent to improving indexing. 5
6 OJS Features OJS Features OJS includes the following features: 1. OJS is installed locally and controlled locally. 2. Editors configure requirements, sections, review process, etc. 3. Online submission, double-blind review, and management of all content. 4. Subscription module with delayed open access and non-open access options. 5. Comprehensive indexing of content. 6. Reading Tools for content, based on field and editors' choice. 7. notification and commenting ability for readers. 8. Complete context-sensitive online Help support. 9. Payments module for accepting journal fees and donations. 6
7 What's New in What's New in Some of the many new features in OJS include: To be determined. Private LOCKSS Network (PLN)? 7

8 Viewing and Reading Overview Viewing and Reading Overview By default, Open Journal Systems is installed with a very simple, functional user interface. This includes a top header, a top navigation bar, a series of navigation blocks to the right, and a main content block in the middle of the page. The following image is a screenshot of an OJS Demonstration Journal Table of Contents. The next images show HTML and PDF versions of an article, including Reading Tools in the right column. HTML Article View 8

9 Viewing and Reading Overview PDF Article View 9


10 Viewing and Reading Overview PDFs can also be view in a full-screen mode, for a more present, uninterrupted reading experience. Full-screen Article View Finally, it's worth noting that both HTML and PDF galleys can be read on mobile devices, without the need of any special apps (aside from a web browser, of course). Open Journal Systems HTML on iphone 10

11 Viewing and Reading Overview Open Journal Systems PDF on iphone 11

12 Viewing and Reading Overview The OJS interface can be extensively customized by uploading new stylesheets at the site, journal, and article level, and by various other journal-specific customizations. For the advanced user, the underlying template system can also be modified. As open source software, you are free to customize OJS as you wish. 12
13 System Requirements System Requirements A server environment meeting the following requirements is recommended: * PHP support (4.2.x or later) * MySQL (3.23 or later) or PostgreSQL (7.1 or later) * Apache (1.3.2x or later) or Apache 2 (2.0.4x or later) or Microsoft IIS 6 (PHP 5.x required) * Linux, BSD, Solaris, Mac OS X, Windows operating systems Other versions or platforms may work but are not supported and may not have been tested. We welcome feedback from users who have successfully run OJS on platforms not listed above. More detailed information on installing and administering OJS is available in the section on system administration. 13
14 Getting Help Getting Help If you need help with OJS, there are several resources at your disposal. The Open Journal Systems platform has a help document that is contextually embedded within itself, with the relevant pages displayed depending on the page you are currently viewing. You can find this context-senstive help by clicking the Journal Help link (typically located on the right navigation bar). You can also view the help document at OJS Help. You will find relevant documentation on our OJS Documentation page, the PKP School offers self-paced courses for journal managers, editors, authors and reviewers, and many of these videos are also available on the PKP YouTube page. Our support forum is an active place to find help with common and uncommon problems. We highly recommend you search the forum for past answers to questions, and post your own question if you can't find an answer. The old forum will continue to be available as an archive, but new posts are no longer permitted. Finally, our development wiki is a storehouse of developer-centric information, including specialized documentation on extending OJS themes and plugin-wise; information on translating OJS; and roadmaps and general software milestone information. All of these links can be accessed right from the PKP homepage under the Support menu. 14
15 Community Contributions Community Contributions The OJS team encourages contributions from the developer community. If you are interested in getting involved in making OJS even better, we welcome your participation. Excellent examples of community contributions include the vast array of languages that OJS is available in; and third-party plugins posted to the community forum and the archived forum page. We also welcome software testing and bug reporting contributions. 15
16 Test-Drive OJS Test-Drive OJS A demonstration journal utilizing OJS has been set up at In addition, potential users of OJS may take OJS out for a test-drive as a Journal Manager, Editor, or a Reviewer at a second demonstration journal site that has been set up for this purpose at Log in with username: admin and password: testdrive, and select one of the available roles in the editorial process, and explore how it operates. Also feel free to submit a test manuscript to see what authors experience, or assign submissions to reviewers, and log in as an assigned reviewer. 16

17 Chapter 2: Navigating OJS Chapter 2: Navigating OJS Open Journal Systems has been designed as a multi-journal system which can host any number of journals on a single installation. Visitors have access to overall site-level pages, and can also navigate to any journal's individual pages from the site's home page. Example of Multi-Journal Site Page In this example, users will see a list of all the journals hosted by the University of Guelph from the site-level main page, and can visit a journal by clicking on the View Journal link. The system can also be set up to redirect visitors to a single journal, which is helpful if the site is hosting only one journal. Example of Single Journal Page 17

18 Chapter 2: Navigating OJS To navigate back to the Site level, users can click the Other Journals link on the right navigation bar in the Journal Content section, under Browse. 18
19 Common Interface Elements Common Interface Elements There are a number of common interface elements at the Site and Journal levels of any default OJS system. Top Navigation Bar The topmost navigation bar includes Home, About, Login, Register and Search links. If you are logged in as a user, the Login and Register links are replaced with a User Home link. Top Navigation Bar, Site-level and Not Logged In: Top Navigation Bar, Site-level and Logged In: The Home link takes you to the site homepage if you are navigating at the site-level; if you are looking at a journal, it will take you to the journal's homepage. If you are browsing at the site level, the About link takes you to the site's About page, which may include a description of the site as a whole, and also includes links to the About pages for every journal on the system. If you are browsing at the journal level, clicking the About link will take you to that journal's About page only. If you click the Login link you will be taken to a login page, where you will be asked to provide your username and password. You will also be prompted to register with the site if you are not a user. If you have forgotten your password, you can click Forgot Your Password? to begin the retrieval process. If you log in from the site level, you will be taken to your site-wide User Home page, which provides information on which journals you are registered with, and in which role. If you log in from the journal level, you will be taken to your journal-specific User Home page, which lists only role information regarding that journal. If you click the Register link while browsing at the site level, you will be asked to choose a journal to register with followed by a form to fill out. If you click the Register link while browsing at the journal level, you will be presented with a registration form to fill out, or a message stating that registrations are not being accepted at this time if registration has been disabled. Clicking the Search link will bring you to a comprehensive search page. If you are currently browsing at the site level, you will be able to choose whether to search across all journals on the site, or only against a particular journal. If you are browsing at the journal level, your search will only be performed against that journal's contents. If you have already logged in, you will see a User Home link rather than the Login and Register links. Clicking this will take you to your site or journal-specific User Home page. The Breadcrumb Directly under the topmost navigation bar you will find a series of breadcrumb links, one for the the site- or journal-level homepage, and one for each subpage that you have navigated to, leading to one for the page you are on, which is highlighted in bold. Each link will bring you back to that specific subpage. In this example, the Editor is logged in and viewing the Editing page for Submission #10. You can return to any of these pages by clicking the relevant breadcumb link. 19

20 Common Interface Elements The Sidebar The right sidebar actually consists of a set of "blocks", described below. Note By default, these sidebar blocks are placed on the right. However, a Journal Manager can move any of these blocks to the left to create a new sidebar, and can also prevent any block from displaying entirely. The Journal Manager can also reorder the vertical position of these blocks. For more information on arranging blocks, see Step 5: The Look in the Journal Management pages of Chapter 5. Journal Managers can also create their own blocks, enter any content they wish, and add them to the sidebar. For more information, see the section on System Plugins in Chapter 5. The top block is the Developed By block, which provides a link to the Public Knowledge Project website. The Journal Help block provides a link to the system's context-sensitive help. No matter where you are in the system, you can click this link to access help specific to the matter at hand. The User block provides useful user-specific information and options. If you have not logged in, you can enter your username and password information to log in. If you have logged in, it displays your username, and provides links to journals you have registered with; to your profile; and to log out. The Language block only appears if there is more than one language installed on the system or for the particular journal you are browsing. You can toggle between these languages by choosing from the dropdown menu. The Journal Content block allows you to search journal content. You can search all fields, or you can pick a particular field (for example, authors) to search against. If you are browsing at the site level, you can search against all journals; if you are browsing a specific journal, you will only be able to search against that particular journal. The Font Size block allows you to increase or decrease the entire website's font size. 20
21 Journal-Specific Interface Elements Journal-Specific Interface Elements There are a number of interface elements that are only seen when you are browsing at the journal level. Journal-Specific Top Navigation Bar Elements When browsing at the journal level, the topmost navigation bar includes two extra links by default: The Current link takes you to the table of contents of the most-recently published issue. If the journal has no current material published, the page you see when clicking the link will say so. The Archives link takes you to a listing of all published issues, including the most-recently published issue. You will be able to visit each issues' table of contents by clicking the issue title. Note Sometimes you may see even more links in the topmost navigation bar. For example, you may see an Announcements link, which will take you to a page containing journal-specific announcements. The Jounal Manager may also have created custom links to appear here, taking you to specific pages within the system, or even to other websites (see Journal Setup for more information). Neither the Announcements link nor the custom links are on by default. Journal-Specific Sidebar Elements You will notice some new sidebar blocks when browsing at the journal level. 21

22 Journal-Specific Interface Elements The Subscription block will only appear for subscription journals, and display information about the user's account. The Notifications block allows you to manage and view your journal-specific notifications. The Browse block allows you to browse lists of journal content. You can browse by Issue, Author and Title. Additionally, if you click the Other Journals link, you will be brought to the site-level journal list. The Information block displays the For Readers, For Authors, and For Librarians links. The content for these pages is added in the Journal Setup. If the content is deleted, these links will automatically disappear. The Keywords block relates to journal content, and link to lists of articles with those keywords that were added during the submission phase. 22

23 Chapter 3: User Roles Chapter 3: User Roles About User Roles OJS uses a comprehensive roles system to divide work between users, assign workflows, and limit access to different parts of the system. Since one installation of OJS can host multiple journals, users can be enrolled in different roles for more than one journal. When a user logs into the system, they will be taken to their User Home page. From here, they will see a list of the roles they belong to for each journal in the system (along with user-specific links to edit their profile, change their password, etc.). In the example below, the user has been enrolled as a Site Administrator; as a Journal Manager, Editor, Section Editor, Author and Reviewer for the Social Informatics Journal; and as a Journal Manager for Demo Journal. A user might be an Editor in one journal (with all of the accompanying permissions), but only an Author on another (and limited to only performing Author tasks for that journal). User Home Users can subsequently return to this listing by clicking either the My Journals link in the User block in the sidebar, or the User Home link in the topmost navbar; either link will return them to their site-wide User Home. Journals can be configured to allow users to self-enroll as Readers, Authors, and/or Reviewers, or self-registration can be disabled completely. Access to journal content, or even to the journal itself, can be limited to registered users, and subscription support can also be enabled. 23
24 Chapter 3: User Roles 24
25 Available Roles within OJS Available Roles within OJS Site Administrator The Site Administrator is responsible for the overall OJS installation, ensuring the server settings are accurate, adding language files, and creating any new journals on the installation. The Site Administrator account is created as part of the installation process. Unlike all other OJS roles, there can only be one Site Administrator. See Chapter 4: Site Administrator for more details. Journal Manager The Journal Manager is responsible for setting up the journal web site, configuring the system options, and managing the user accounts. This does not involve any advanced technical skills, but entails filling out web-based forms and uploading files. The Journal Manager also enrolls the Editors, Section Editors, Copyeditors, Layout Editors, Proofreaders, Authors, and Reviewers. Alternately, if the names and addresses of potential users already exist in another database (e.g., a spreadsheet), they can be imported into the system. The Journal Manager also has access to the journal's other management features, and can create new Sections for the journal, set up Review Forms, edit the default s, manage the Reading Tools, view Statistics and Reports, and more. Note Although the Journal Manager is a peer-journal role, journal managers should generally be considered system-wide trusted users, as they have the ability to assume the identities of other users who may be enrolled in other journals. See Chapter 5: Journal Management for more details. Author Authors are able to submit manuscripts to the journal directly through the journal's website. The Author is asked to upload a submission file and to provide metadata or indexing information. (The metadata improves the search capacity for research online and for the journal.) The Author can upload Supplementary Files, in the form of data sets, research instruments, or source texts that will enrich the item, as well as contribute to more open and robust forms of research and scholarship. The Author is able to track the submission through the review and editorial process as well as participate in the copyediting and proofreading of submissions accepted for publication by logging in to the journal's website. See Chapter 6: Authors for more details. Editor The Editor oversees the entire review, editing and publishing process. The Editor, working with the Journal Manager, typically establishes the policies and procedures for the journal. In the editorial process, the Editor assigns submissions to the Section Editors to see through Submission Review and Submission Editing. The Editor keeps an eye on the submission's progress and assists with any difficulties. Once review is completed, the Editor typically sees the submission through the Editing process (including copyediting, layout editing, and proofreading) although in some journals this remains the responsibility of the Section Editor in charge of the submission's review process. The Editor also creates the journal issues, schedules submissions for publication, arranges the Table of Contents, and publishes the issue as part of the Publishing Process. The Editor can restore archived submissions to the active In Review or In Editing lists. See Chapter 7: Editors for more details. Section Editor 25
26 Available Roles within OJS The Section Editor manages the review and editing of submissions to which they have been assigned. In some cases, a Section Editor who is assigned to see submissions through the Review Process will also be responsible for seeing the submissions that are accepted through the Editing process (that is, through copyediting, layout editing, and proofreading). Often, however, Section Editors only work with the review process, and an Editor, acting in the role of Section Editor, sees the submissions through the Editing process. The journal will have a policy on how the tasks are divided. See Chapter 8: Section Editors for more details. Reviewer The Reviewer is selected by the Section Editor to review a submission. Reviewers are asked to submit reviews to the journal's web site (although some journals opt for an review policy) and are able to upload attachments for the use of the Editor and Author. Reviewers may be rated by Section Editors, again depending on the policies for this journal. See Chapter 9: Reviewers for more details. Copyeditor The Copyeditor edits submissions to improve grammar and clarity, works with authors to ensure everything is in place, ensures strict adherence to the journal's bibliographic and textual style, and produces a clean, edited copy for the Layout Editor to turn into the galleys that will be in the published format of the journal. Some journals have an Editor or Section Editor play this role. See Chapter 10: Copyeditors for more details. Layout Editor The Layout Editor transforms the copyedited versions of the submission into galleys in HTML, PDF, PS, etc. -- files which the journal has elected to use for electronic publication. This system does not provide software for converting word processing documents to galley formats, so the Layout Editor should have access to and be able to use third-party software packages for creating galleys present the articles on the screen with a well-formatted and readable layout, in the manner of scholarly journals, and with an eye to this new publishing medium (by consulting the layout used by other publishers of online journals, such as Highwire Press, for example, in the life sciences or Project Muse in the humanities). In some cases, the Editor or Section Editor will also serve as Layout Editor. See Chapter 11: Layout Editors for more details. Proofreader The Proofreader carefully reads over the galleys in the various formats in which the journal publishes (as does the author). The Proofreader (and the Author) record any typographic and formatting errors for the Layout Editor to fix. In the case of some journals, the Editor or Section Editor will also serve as Proofreader. See Chapter 12: Proofreaders for more details. Reader The Reader role is the simplest role in OJS, and has the fewest capabilities. Readers include both subscribers for journals for which access is subscription-based, and readers who choose to register for open access journals (whether immediately open access or open after a period of time). Registered Readers receive a notification with the publication of each issue, which includes the Table of Contents for that particular issue. See Chapter 13: Readers for more details. 26
27 Available Roles within OJS 27

28 Registering with a Journal Registering with a Journal Unregistered visitors to a journal can normally register as a Reader, Author, and/or Reviewer. Journal Managers are able to remove the ability for visitors to self-register, in which case a notice will appear stating that registration is currently closed; see Journal Setup Step 4, but managers can always register users from the Journal Management Home page at any time, and for any role. To register with a journal, click the Register link on the topmost navigation bar, select the journal you want to register with if asked, and fill out the ensuing Registration Form. You will not be able to self-register for an Editorial Role (Editor; Section Editor; Copyeditor; Layout Editor; Proofreader; Subscription Manager; or Journal Manager); if you need to be enrolled at that level, ask a current Journal Manager or Site Administrator. All fields with an asterisk beside them (Username; Password; Repeat Password; Validation; First Name; Last Name; ; Confirm ) are mandatory. If the journal is multilingual, you will need to select your preferred language. Your username and your address must be unique; furthermore, while you can change your address at a later date, you will be unable to change your username. You may be able to register as a Reader, an Author and/or a Reviewer, depending on how the journal has been configured. Check the box next to each role available to Confirm Registration. If you register as a Reviewer, you can also supply your reviewing interests. 28
 you can log in; go to Edit My Profile (under My Account")
29 Registering with a Journal In some cases, the journal you are trying to register with may not be allowing registrations; if that is so, you will see a note to that effect. If you want to register in another role within the same journal (for example, if you are already a Reader, but also want to become an Author) you can log in; go to Edit My Profile (under My Account on your User Home page); and check off the checkboxes next to any available roles, near the bottom of the page. If you want to unenroll yourself from a journal completely, all you have to do is visit your profile and uncheck all role checkboxes. If you are enrolled at an editorial level, you will have to ask the Journal Manager to unenroll you. Note Please be aware that you can't completely delete your account from the system yourself. If you would like to delete your account you should contact the Journal Manager or take a look at the section on merging accounts. 29

30 Viewing and Changing your Profile Viewing and Changing your Profile To view and edit your profile, log in and click the Edit My Profile link from your User Home page. Alternatively, once logged in you can always click the My Profile link from the User Navigation block on the sidebar, if available. From here, you can update your address, change your personal information, or change your password. 30
31 Resetting your Password Resetting your Password Resetting your password is a simple process if you remember it and just want to change it to something else: log in, and from your User Home page click the Change Password link. You will have to enter your current password, and then your new password twice. Resetting your password if you have forgotten it is still a simple process, but it takes a few more steps: 1. Click the Log In link on the topmost navigation bar. 2. Click the Forgot Your Password? link. 3. Enter your address in the box provided, and click the Reset Password link. This will send a confirmation to your address (if you do not see an in your Inbox, check your spam folder). 4. The will include a link to reset your password: click it, and you should return to the journal web site. 5. On returning to the journal web site, you should be notified that an containing a new password has been sent to your address. Check for that second , and use your new credentials to log into the site. 6. After successfully logging in, you will be asked to immediately change your password. Enter the ed password first (Current Password), and then a new, secret password twice (New Password, Repeat New Password). 31


32 Chapter 4: Site Administrator Chapter 4: Site Administrator As part of installing OJS, you will have created a Site Administrator user account. When you log into OJS with that account you will have access to Site Administrator settings from your User Home page. You will be able to create new hosted journal instances; manage language support across your system; and perform other administrative functions. To access Site Administration pages, log in as a Site Administrator and from your User Home Page, click the Site Administrator link. Site Administration responsibilities fall into two categories: Site Management and Administrative Functions. The activities of both are described on the following pages. 32
33 Chapter 4: Site Administrator 33

34 Site Settings Site Management Site Settings To change your site's title, any text on the home page, or your principal contact information, you will want to review your Site Settings. From the Site Administration page, under the Site Management heading, choose Site Settings. This will allow you to add information regarding your overall OJS installation, not individual journals. This includes the name of your site, an introductory statement about your site, a redirect option (leave this blank if you do not need to redirect users), a description of your site, contact information, a minimum password length for registered users, and indexing registration. You will have the opportunity to provide details about your individual journal(s) at a later stage. 34
35 Site Settings Below is a detailed breakdown of all options: Form Language: This will not appear if your site is unilingual. If you have multiple languages, however, you will need to fill in each form in the first language, save your changes, return to the form, change this dropdown to the second language, complete the form in the second language, and save again. Site Title: This option is mandatory, and comes with "Open Journal Systems" as the default text. You can upload a header image if you would prefer. This will appear on the overall site. Introduction: Any text entered into the Introduction field will appear on your site's home page, above your hosted journal list. Journal Redirect: You can choose to have any attempts at accessing your website redirect to a particular hosted journal. This is useful if you only have one journal, and would prefer attempted access to your site pages be redirected. This will not redirect access to the Site Administration pages (although these pages will still need Site Administrator credentials to be accessed). About the Site Description: Any text entered here will be displayed on the Site-level About page, and appear just above the links to your hosted journals' About pages. 35
36 Site Settings Name of Principal Contact: This is a mandatory field, and by default is populated with "Open Journal Systems". of Principal Contact: This is a mandatory field, and by default is populated with the Site Administrator's address as specified during the install process. Minimum Password Length: This is a mandatory field, and by default is set at 6 characters. This sets the length sitewide. Site Theme and Site Style Sheet: Select a theme from the drop down menu, or if you would like to implement a style sheet for site-level pages, you can upload one here. Hosted journals will not use this style sheet unless you upload it specifically for them. Options: Choose to have an alphalist display on the site homepage to allow users to quickly navigate to a journal, or have the list of journals broken up over multiple pages. Journal Elements: Select whether to display journal thumbnails, titles and/or descriptions on the site page. Security: The Site Administrator can have exclusive control over plugins by selecting this option. Register Site for Indexing (Metadata Harvesting): Information is provided that will allow you to register your site with the PKP's demo harvester, though you are encouraged to register with any/all relevant OAI-compliant harvesters you can find. If you register with an OAI-compliant harvester using the site URLs included on this page, every journal on your site will be harvested. 36

37 Hosted Journals Hosted Journals From the Hosted Journals page you can create, edit and delete hosted journal sites. You can also migrate old journals from earlier OJS installations and manually sort the order by which the journals are displayed on the main site page. From the Site Administration menu, under the Site Management heading, choose Hosted Journals. Your Hosted Journals page will look like this, and if you haven't created any journals yet, it will be empty. Creating a New Journal To create a new journal, simply click the Create Journal link and fill out the following Journal Settings form. 37
38 Hosted Journals Form Options are as follows: Form Language: If you are working in a multilingual journal, you will need to complete this form in all languages. Journal Title: This field is mandatory. What you enter here will appear as the new journal's title in its header. You can change the journal title at a later date, and Journal Managers will be able to change it, and upload header images, from their journal management pages as well. Journal Description: Anything entered in this field will appear on the new journal's home page. You can change this information at a later date, and Journal Managers will be able to change the information as well from their journal management pages. Path: This field is mandatory. The path you enter here will become part of the new journal's URL, listed after index.php. For example, if your journal title was Journal of Canadian Studies, you may want your path to be 'jcs', or perhaps 'canstudies'. If you enter 'jcs', that journal's URL will be You can come back to this page and change the path value at a later date; be aware, however, that you may break search engine and other links by doing so. Enable This Journal to Appear Publicly on the Site: Checking this box will display the journal title as a hyperlink on the site's home page. If you uncheck the box the journal will not be listed -- but the URL will still be accessible by nonprivileged users. Your new journal will be created once you have filled in all appropriate information and clicked the Save button. Additionally, you will have been enrolled as a Journal Manager for this new journal. At this point you will be the only registered user for that journal, and you should either register an appropriate Journal Manager for initial setup, or undertake initial setup yourself. Editing, Deleting and Ordering Hosted Journals Once you have created a journal you will have a hosted journal list. Figure: Populated Hosted Journals Page 38
39 Hosted Journals You will notice that the journal title is hyperlinked. Clicking it will take you to the journal's Journal Management pages, where you can complete basic journal setup, or enroll another Journal Manager to do so. To the right of the hyperlinked journal title you will also see Edit and Delete links. Clicking Edit will bring you back to the same page you saw when you created the journal, if you need to edit the journal's title, description, and other preferences. Clicking Delete will delete the journal and all of its contents permanently. 39
40 Sitewide Language Settings Sitewide Language Settings OJS is designed to be a multilingual system, allowing journals supporting a wide variety of languages to be hosted under a single site. The Site Administrator can specify the default language of the site and install additional locales to make other languages available for use by journals. Journal Managers can then manage their own language settings. Additional language packages will typically be available for download from the Open Journal Systems language page as user-contributed translations are received. These packages can be installed into an existing OJS system to make them available to journals. To access your site's language settings, click the Languages link where you can subsequently manage any languages already installed, or download languages to install them. Figure: Site Administrator Language Options The Languages page is divided into three sections: Language Settings, Manage Locales, and Download Locales. 40
41 Sitewide Language Settings The Download Locales section allows you to download new locales straight from the OJS website to your OJS install as they become available. To download locales, your server must be able to execute the GNU tar utility, and must be able to modify the locale registry file (registry/filename.xml). Locales can always be downloaded and installed manually -- see the online documentation for more information. The Manage Locales section allows you to install new locales, reload existing locales in case you have updated locale files, and uninstall locales if they are no longer necessary. To install a new locale, check the box next to the locale name and click the Install Locale button. If you have modified a previously installed locale and would like to reload it, click the Reload link. To remove the locale from the list of installed locales, click the Uninstall Locale link. The Language Settings section allows you to enable locales to be used across the site as a whole, and also with journals. Locales that have been installed will appear in this section, with checkboxes next to their name. To enable locales to be available on-site, check the box next to their name and click the Save button. Users will then be able to choose the locale from the drop-down on the right sidebar on all general site pages; Journal Managers will also now have the option of for their journal (these locales will not be enabled at the journal level by default). to users on the site, check the box next to You can also choose the site's primary locale -- this is the locale that users will first see the site in when first visiting the web site, and will be the default language for any hosted journal. 41

42 Authentication Sources Authentication Sources By default, OJS authenticates users against its internal database. It is possible, however, to use other methods of authentication, such as LDAP. Additional authentication sources are implemented as OJS plugins; refer to the documentation shipped with each plugin for details. To access authentication settings, click the Authentication Sources link from the Site Administration page; you will be presented with the following options. By default only the OJS User Database is listed. To add a new source, choose one from the drop-down menu and click the Create button. You will then be asked to configure the source. 42


43 Categories Categories Creating categories can help organize large sets of journals hosted on a site. After selecting Categories from the Site Administration page, you can choose whether or not to allow journals to be organized into categories. From this page you can create new categories relevant to your collection by clicking on Create a New Category. Enter the term and select the language type for the category. Your newly created category appears in the list of available categories, and the option to browse by categories is now visible on the right hand side bar under Browse. 43
44 Categories 44
45 Administrative Functions Administrative Functions System Information To access detailed system information, from the Site Administration page, under the Administrative Functions menu, click the System Information link. OJS Version information shows which version is currently installed, and your version history including any upgrades. You can click the Check for updates link to see if you are using the most recent version of OJS. The OJS Configuration section displays all of the configuration options and their values as they are in config.inc.php. You can find more information about config.inc.php configuration parameters in the file itself. 45
46 Administrative Functions The final section on this page displays server information: your operating system, PHP version, server and database information. You can also view extended PHP information by clicking the Extended PHP information link (this displays the output of phpinfo()). All of this information can be useful when trying to troubleshoot a problem. Sessions and Caches The Site Administrator has a final few administrative tools available: the Expire User Sessions, Clear Data Caches, Clear Template Cache options, Clear Scheduled Task Execution Logs, as well as the Merge Users feature (described below). Clicking the Expire User Sessions clears all active user sessions in the system, requiring any user that is currently logged in to sign in to the system again. Clicking the Clear Data Caches link clears all cached data, including locale information, help cache, and search cache. This function may be useful to force data to be reloaded after customizations have been made. Clicking the Clear Template Cache link clears all cached versions of HTML templates. This function may be useful to force templates to be reloaded after customizations have been made. If scheduled tasks have been enabled for your journal, clicking the Clear Scheduled Task Execution Logs will delete the task execution log files from your server. The execution log files include dates that correspond to previously completed scheduled tasks (e.g. sending automatic review reminders). Merging Users This page allows you to merge two or more user accounts into one, handy if a user has accidentally created two accounts, or if you have unused or spam accounts in your system. The first selected account will be subsumed into the second account. The Site Administrator can merge users across the whole site; Journal Managers can also merge users, but only those enrolled with their journal. Comprehensive information on merging users can be found in Chapter 5: Journal Management. 46
47 Chapter 5: Journal Management Chapter 5: Journal Management Journal Management involves managing the overall publishing system. The Journal Manager does the setup for the journal, and enrolls and manages the Editors, Section Editors, Copyeditors, Layout Editors, Proofreaders, and Reviewers. This position entails filling out web-based forms and uploading files, and advanced technical skills are not required. Journal Management is divided into Management Pages, Users, and Roles. Management Pages and Users are described here in Chapter 5, and Roles are described in Chapter 3: User Roles. Journal Manager User Home Page 47
48 Journal Management Pages Journal Management Pages The Journal Management Pages allow Managers to configure the journal's web site, its policies, and workflow. The Journal Manager also has access to the journal's other management systems and advanced features, and can create new sections for the journal, edit the default set of s the system uses, manage available reading tools, and see to journal statistics. We'll start with the Five-Step Setup Process, found by selecting Setup. 48
49 The Five-Step Setup Process The Five-Step Setup Process The Journal Manager sets up the journal, after the system has been installed on a web server, by working through five steps which requires filling in web-based forms. The setup does not have to be done all at once; the forms can be filled in and saved, and you can return to Setup to complete the task or make changes at any time. Setting up the journal's web site will require decisions and text for the sections below, which can be prepared in advance in consultation with the Editors or added at a later point. Complete as many of the sections in the five steps as possible, but remember that you can always go back and fill in additional details as they become available. Default options are often pre-selected for common functions. You can get started quickly by filling in the most important information first (journal name, principal contact, etc.) and returning to the details later. 49

50 The Five-Step Setup Process Step One: Getting Down the Details 1.1 General Information This form provides general details about your journal including the name, abbreviation, address, and print or online ISSN. The Journal Title and Journal Initials fields are mandatory. OJS provides links to the ISSN web site if you wish to learn more about ISSNs. 1.2 Principal Contact You must list the primary journal contact here. Any outgoing s will typically be sent care of this person. Name and fields are mandatory. 50


51 The Five-Step Setup Process 1.3 Technical Support Contact You must supply a name and for your technical support contact. This contact information will be presented for contact purposes in key areas throughout the system, and will be available from About the Journal Identification OJS makes extensive use of internal forms. This signature will appear on the bottom of all s sent by the system. You can also enter a bounce address (if the allow_envelope_sender configuration option is enabled in config.inc.php) where any undeliverable messages will be sent. 51
 will add information to the About the Journal section of your journal web site, under Journal Sponsorship.")

52 The Five-Step Setup Process 1.5 Publisher The following three forms (1.5, 1.6, 1.7) will add information to the About the Journal section of your journal web site, under Journal Sponsorship. You can specify publisher information in the first form. 1.6 Sponsoring Organizations You can add information about any sponsoring organizations your journal might have in Step 1.6. Additional organizations can be added by clicking the "Add Sponsoring Organization" button 52


53 The Five-Step Setup Process 1.7 Sources of Support You can add any sources of support in Step 1.7. Additional sources can be added by clicking the "Add Contributor" button 1.8 Search Engine Indexing This optional section will allow you to add hidden HTML metatags to your journal's web pages. Accurate information here can increase your visibility in search engines such as Google. 53


54 The Five-Step Setup Process 1.9 Journal History This section will display information about the history of your journal on the About page. 54

55 The Five-Step Setup Process Step Two: Journal Policies Setup Step Two allows you to configure many different policy aspects of your journal: the journal's scope; review policy; author guidelines; and so on. 2.1 Focus and Scope of Journal This form will add information to the About the Journal section of your journal web site, under its own Focus and Scope section. 2.2 Peer Review The Peer Review section is split into different components: Review Policy: This public policy will be visible on the About the Journal section. Whatever is entered here should clearly explain the kind of review process your journal undertakes. 55


56 The Five-Step Setup Process Review Guidelines: These instructions will be available to reviewers at the time of review. They should be clear, detailed step-by-step instructions for your reviewers. Figure: Review Guidelines Review Process: This section allows you to choose the best method of peer-review for your journal. By default, the standard review process is selected, but you may prefer to bypass this internal OJS process, and rely on attachments. Review Options: OJS allows for the configuration of a number of review options, including how long reviewers have to complete their review; when to send reminders to reviewers; whether to use a rating system for reviewers (visible only to the editors); and one-click access for reviewers. One-click access allows editors to send reviewers an message with a URL that goes directly to the review page for the article in question, without the need to create an account or login. This option is meant to reduce any technical barriers to reviewer participation, however it is somewhat insecure as anyone who might be able to guess the URL could navigate to the review page. 56

57 The Five-Step Setup Process The Blind Review option will add links to the Ensuring a Blind Review document to both Author and Reviewer pages. This document describes the importance of removing any identifying information in the submission file or review file, and describes how to do so in various ways. 2.3 Privacy Statement The privacy statement will appear on the About the Journal section of your web site. Because you will be asking people to register with your journal and collecting their personal information, it is important to let them know of your policies in this regard. 2.4 Editor Decision Check this box to add all co-authors to the include list when an Editor sends a Notify Author . 57
58 The Five-Step Setup Process 2.5 Add Item to Appear in "About the Journal" If you wish to add more information to the "About the Journal" section, this section allows you to enter content. Multiple entries are permitted, using the Add About Item button. 2.6 Journal Archiving LOCKSS is an open source solution to archiving online journals. To ensure the preservation of your journal, follow the steps outlined in this section. OJS will even generate the message to send to participating libraries. Visit LOCKSS to find out more bout the program. 58


59 The Five-Step Setup Process 2.7 Potential Reviewer Database You can add a link to an external Reviewer database here. This will provide a quick reference source for Section Editors or Editors looking for potential new reviewers for the journal. 59

60 The Five-Step Setup Process Step Three: Guiding Submissions 3.1 Author Guidelines These guidelines will appear on the About the Journal page and be available for potential authors to consult before submitting. You can also configure the Submission Preparation Checklist in this section. When submitting an article to your journal, authors will be asked to ensure certain conditions are met using this submission preparation checklist. Authors will not be able to proceed past the first submission step until they agree to all checklist conditions. Default items are provided, but you may add new ones or delete any that do not apply to your journal by using the Add Checklist Item or Delete buttons. 60

61 The Five-Step Setup Process 3.2 Copyright Notice The copyright notice you write here will appear on the About the Journal page. You also have the option to require that authors agree to your copyright notice before completing their submission, and to add a Creative Commons license to the journal web site. 61

62 The Five-Step Setup Process 3.3 Competing Interests This allows for the option of requiring authors and/or reviewers to file a Competing Interests statement. 62

63 The Five-Step Setup Process 3.4 For Authors to Index Their Work Carefully selecting the most appropriate disciplines, classification system, and keywords will enhance the ability of others to find your articles. In OJS, Authors index their own submissions, but this information can be checked over and changed by Editors at any time. This form allows you to select from a number of indexing formats, add relevant examples to guide the authors, and provide them with a link to a subject classification system (such as the Library of Congress). 63

, which will allow for comprehensive searching among sites that adhere to the OAI Protocol for metadata harvesting. 3.")
64 The Five-Step Setup Process 3.5 Register Journal for Indexing You can register the contents of your journal with the Public Knowledge Project Metadata Harvester or other OAI-compliant services (e.g., OAIster), which will allow for comprehensive searching among sites that adhere to the OAI Protocol for metadata harvesting. 3.6 Notification of Author Submission You can request a notification be sent to the journal's primary contact, or another address, whenever an author has completed the submission process. 64


65 The Five-Step Setup Process 3.7 Citation Markup Assistant You can configure a Citation Markup Assistant for your Editors, Section Editors and Copyeditors to use during the manuscript editing process. This Assistant will allow Editors to check the Author's list of references against external databases, and will convert approved citations into NLM XML or any of a variety of citation styles for inclusion into the final galley files. If you enable this feature, Authors will be asked to submit their list of references in a separate field during Step 3 of the submission process. Configuration of the Citation Markup Assistant consists of four general steps: Enabling the Citation Markup Assistant. Unless this step is done, Editors will not have access to the Assistant. Configuring the Citation Extraction Services. These services allow the system to extract and parse citation information from the list of references the Author provides. Configuring the Citation Database Connectors. These connectors will allow Editors to check the extracted citations 65


66 The Five-Step Setup Process against external databases for added accuracy. Configuring the Citation Output. This allows you to configure which kind of citation style Editors will use to compare extracted citations against. Once these steps have been completed, Authors will be able to submit references separately, Editors will be able to use the Citation Markup Assistant to extract and check them, and the citations will be subsequently available in a variety of export formats including NLM XML and citation-style-specific formatted text. 66

67 The Five-Step Setup Process Step Four: Managing the Journal Here you can set the journal's Open Access policy, control how users register on the site and for what, and define copyedit and layout instructions. 4.1 Access and Security Settings This section provides a number of options for access to your journal's content. Access to Journal Content: Here are you can decide between full open access or the use of subscriptions to control access to some or all content. If you enable subscription control, you can allow for delayed open access to content. You may also target individual articles as openly-available within a subscription issue. If subscription access is chose, the role of Subscription Manager will be created, allowing for the creation/management of subscriptions, subscription types, and subscription policies. Additional Site and Article Access Restrictions: You can further restrict site- and article-level access through the use of user registration, and decide how users are allowed to register themselves. The advantage of selecting these options is that anyone wanted to read your content will need to register, providing you with reliable readership statistics (especially in the absence of subscriptions). The disadvantage, however, is that some potential readers will simply click away from your site rather than creating yet another user account. 67


68 The Five-Step Setup Process User Registration: Select these options to allow visitors to enroll themselves as Authors, Reviewers, or Readers. 4.2 Publication Scheduling OJS allows you to set the publication schedule that is best for your journal. 68
69 The Five-Step Setup Process 4.3 Identification of Journal Content Digital Object Identifiers are becoming increasingly common for online journals, and OJS supports them. You can visit The DOI System to learn more about registering for a Digital Object Identifier for your journal. A page number option is also available for journals. This is often useful for print journals that are going online. 69

70 The Five-Step Setup Process 4.4 Announcements This allows you to create an Announcements page for your journal web site, and post messages to your readers. Once this is activated, an Announcements link will automatically appear in the navigation bar of the journal, and an Announcement section will be added to the Journal Manager's Management Pages menu. 4.5 Copyeditors The Copyeditor edits submissions to improve grammar and clarity, works with authors to ensure everything is in place, ensures strict adherence to the journal's bibliographic and textual style, and produces a clean, edited copy for the Layout Editor to turn into the galleys that will be in the published format of the journal. If you have individuals to act as copyeditors, select the first option. If your editors will be acting as copyeditors, select the second option. The instructions will be made available to copyeditors, authors, and section editors in the Submission Editing stage. 70


71 The Five-Step Setup Process 4.6 Layout Editors The Layout Editor transforms the copyedited versions of the submission into galleys in HTML, PDF, PS, etc., files which the journal has elected to use for electronic publication. If you have individuals to act as layout editors, select the first option. If your editors will be acting as layout editors, select the second option. Further options in this section include: Layout Instructions: The instructions will be made available to layout editors and section editors on the Editing page of each submission. 71

72 The Five-Step Setup Process Layout Templates: These templates can be created in any file format (e.g., Microsoft Word) and be used by the Layout Editor to ensure a consistent design. Reference Linking: This option allows you to provide instructions to your Layout Editors to add reference links to articles. This is not a requirement, but is a very useful feature to make available to your readers. 72

 records any typographic and formatting errors for the Layout Editor to")
73 The Five-Step Setup Process 4.7 Proofreaders The Proofreader carefully reads over the galleys in the various formats in which the journal publishes (as does the author). The Proofreader (and the Author) records any typographic and formatting errors for the Layout Editor to fix. If you have individuals to act as proofreaders, select the first option. If your editors will be acting as proofreaders, select the second 73
74 The Five-Step Setup Process option. The instructions will be made available to proofreaders, authors, layout editors, and section editors in the Submission Editing stage. 74
. Title image allows you to upload an imagebased header (.gif,.jpg,.png).")
75 The Five-Step Setup Process Step Five: Customizing the Look 5.1 Journal Homepage Header Titles and images can be added to give your journal a unique appearance and identity. Title text will add the text to the top of your journal web site's home page (NOT to all the other pages -- see below). Title image allows you to upload an imagebased header (.gif,.jpg,.png). A common size is 800px X 150px, but it can be as large or as small as you wish. The Logo image allows you to add an image to the upper left corner of your site's home page. Often these are square image (e.g., 125px X 125px). Whether using Title images or Logo images, remember to hit the Upload button before moving on to the next step. 5.2 Journal Homepage Content Use this section to customize the appearance of your journal's homepage, including a description, an image, the table of contents for the latest issue, and any additional content. Experiment with what looks good, but be careful not to make it too busy! The appearance of your home page will be the first impression many have of your journal, and if it doesn't look professional, it will undermine its credibility. Take a look at what some of the many other OJS journals have done, and you'll be sure to find several examples that appeal to you. 75
76 The Five-Step Setup Process 5.3 Journal Page Header This option allows you to place a different title, image, or logo on pages other than the homepage. In many cases, this may simply be a smaller version of the homepage logo. If you just want the other journal pages to look the same as the home page, just repeat what you did in Step 5.1. You can also add a favicon here, and it will appear in reader's browser URL bar. The Alternate Header box allows you to add your own HTML to customize the header exactly as you wish. 76
. Additional links may be added using the \"Add Item\" button.")
77 The Five-Step Setup Process 5.4 Journal Page Footer Footers can also be added to each page of your journal. It can be a good place to add your ISSN or a copyright statement. 5.5 Navigation Bar By default, the most important navigation links will be included in your journal. However, if there are additional items to include, you may do so here (e.g., a link to the publishing institution's home page). Additional links may be added using the "Add Item" button. Be sure to check the boxes if you are typing in plain text and a full URL. Otherwise, it will appear as ##SFU##. 77


78 The Five-Step Setup Process 5.6 Journal Layout Under Journal Layout you can choose a journal theme or upload a style sheet of your own. You can also modify the position of content blocks from left to right sidebars, move them up or down the sidebar, or eliminate them altogether. A copy of the general OJS v.2.x style sheet is available at: You can also find a thorough guide on customizing your journal's style and using themes in the online documentation. 5.7 Information Each of these descriptions will appear on your journal's web site, on the right sidebar at the bottom by default. If you can change the information here, and if you delete the information, the link will automatically disappear from your site's sidebar. 78
79 The Five-Step Setup Process 5.8 Lists You can control the number of items to appear on any given list (e.g., 100 items will appear 25 per page over 4 pages), and the number of page links shown at the bottom of any list (e.g., 1, 2, 3, 4, Next). 79


80 Announcements Announcements If you have chosen the announcements option in Step Four for your journal, a link to manage Announcements will appear under Management Pages. Select this link to discover your announcement options. To create a new Announcement Type, select Announcement Types from the menu under Announcements, and then Create Announcement Type. Fill in the name for a new announcement type and click save. You may only have one type for now (e.g., Standard), but this gives you the opportunity to create others at any time, or return here to edit this announcement type. Return to the main Announcement page by selecting Announcements. From here you can create and post an announcement using the Create New Announcement link. 80
, fill in the announcement title, provide the short and detailed descriptions for the")

81 Announcements On the next screen, select announcement type from the dropdown (e.g., Standard), fill in the announcement title, provide the short and detailed descriptions for the announcement, and specify the expiry date for the announcement to display. This announcement will now be visible by clicking on the journal Announcements link on the top navigation bar, and remain there until the expiry date selected. 81

82 Announcements To see the full announcement, click on the More link. 82

83 The Files Browser The Files Browser The Files Browser is an advanced feature that allows the files and directories associated with a journal to be viewed and manipulated directly. In addition to directories for article and issue files, you can also see any layout templates uploaded during the Journal Setup. Note The Files Browser does not currently allow access to the journal's public / directory. To access Files Browser, select the link from the Journal Management Pages. 83
84 Journal Sections Journal Sections OJS journals may contain several sections (e.g., Articles, Reviews, Research, etc.). You will need to create at least one section for your journal (all journals start with a default "Articles" section, which can be edited). If you do not wish for the section title to be visible to your readers, you can choose to omit it from the Table of Contents (this may be handy for things like introductions and editorials, for example). To create a new section: Go to Management Pages and select Journal Sections: Select Create Section: Complete the form with the new section's information, and check the appropriate options. In the example below, the new section is for Editorials, so options have been selected that will indicate that peer-review is not required, an abstract is not required, that only editors can submit to this section (it will not be available for authors to choose when submitting), the author name will not show on the table of contents, and it will not appear in the list of Sections on the About page. Remember, you can go back and edit this section at anytime if you wish to make changes. It is also possible to add a unique review form to a section. See Review Forms for more information about setting these up. 84


85 Journal Sections Further down this same form, choose a user as the Section Editor for this journal section. If you haven't set up your journal's users yet, go to Create Users to do so. Until a Section Editor is assigned to a section, notification of submissions will go to the Editor, who will need to manually select a Section Editor. Once a Section Editor has been added here, however, all submissions to this section will go directly to her, bypassing the editor completely. This is designed to speed up the workflow and save the Editor's time, but in some cases, journal Editors may want to have all submissions come through them. If this is the case, simply remove the Section Editor from the section using the Remove link. 85

86 Journal Sections 86

87 Review Forms Review Forms By default, Reviewers will have a text form to add their comments on the submission they are reviewing, with a text field for Authors and Editors, and a separate field for Editors only. By using the Review Forms, however, you can create web-based forms that include a variety of pre-set questions to guide your Reviewers and result in more consistent commentary. Setting up a new Review Form for the first time can be a little tricky, so follow these steps carefully. To create a new Review Form, select Review Forms from the Management Pages menu. Click on Create Review Form link Fill in title and description for a review form, then press the Save button. Remember, you can have many Review Forms, targeting them to specific sections or even to specific reviewers. In this example, the review form titled "Articles Form" will be a review form for submissions to the Articles section. 87

 to this review form.")
88 Review Forms Back on the previous page, the title of a newly-created review form appears. Click on the Edit link next to the title of review form, and then on the Review Form page select Form Items to start adding questions (i.e., "items") to this review form. From the Form Items page, select Create New Item. 88

89 Review Forms On the resulting New Item page, you can configure your first question for this form. In the Item box, type in the question. You can then select whether or not to make the question required. Finally, choose an item type from the dropdown menu: single word text box, single line text box, extended text box (this is a larger text box allowing for a more detailed response), checkbox (this would allow reviewers to check off one or more choices), radio button (this limits reviewers to selecting a single answer), or drop-down box (this also limits reviewers to selecting a single answer, but does so using a dropdown menu rather than a list of buttons). If you choose the radio button or checkbox option you have the option to Add Selection. Selections are possible checkbox or radio button answers to the question. Remember to Save! 89

90 Review Forms All created items can be edited, deleted or reordered. Additional items (i.e., questions) can be added by clicking on Create New Item. Notice that you can also copy the question to another Review Form if you have more than one. Selecting Preview Form allows you to view the review form before activating it. 90
91 Review Forms To return to the main Review Form menu, select Review Forms from the breadcrumbs at the top of your screen. Back at the main Review Forms page, you can create another form (perhaps for your Book Review section), or edit, activate, preview, delete, or re-order existing forms. Once a review form is activated, it is ready to be used by editors when assigning a reviewer. 91
 or \"Completed\" (were used as part of a review that is now finished).")
92 Review Forms Note Once a Review Form has been activated and used in at least one review, it cannot be deleted, deactivated, or modified. This is to preserve data consistency within OJS. You can always stop using a form, or copy previous form items to new forms. From this page you can also quickly see how many forms are currently "In Review" (i.e., part of review that is still in process) or "Completed" (were used as part of a review that is now finished). 92

93 Languages Languages OJS can be made available to users in any of several supported languages. As well, OJS can operate as a multilingual system, providing users with an ability to toggle between languages on each page, and allowing Authors to submit content in any supported language. Here is an example of a Journal from Arizona publishing in both Spanish and English. Using the language toggle in the sidebar, readers can switch from Spanish to English. You can see that all of the OJS terms (About, Log In, Register, Search, etc.) have been translated (the system takes care of this). The content, however, must be translated by the journal. In this example, the journal has translated the abstracts of articles into both languages. 93

94 Languages To activate another language for your journal, go to the Management Pages. From here you will see all of the languages available for your journal. If you do not see any additional languages to choose, have your Site Administrator add them for you. Figure: Languages 94

95 Languages You will be able to enable any installed language to be used as part of the overall user interface; as an Author-selectable submission option; with user-filled web forms, or a mix of all three. 95
96 Masthead Masthead The Masthead is used to list people associated with the journal. You can access this from the Journal Manager's Management Pages. The Masthead information will appear in About the Journal, under People. The Masthead configuration page provides two methods of displaying the members of your journal's Editorial Team: either automatically (generated from assigned user roles -- e.g., anyone enrolled as an Editor will appear on the page), or manually (using the Create Position Title option). This can be useful if you wish to have titles other than those provided by OJS (e.g., Editor-in-Chief, Managing Editor, etc.). Using the automatic member display, every Editorial Team member is listed under About the Journal: 96
97 Masthead To use the second option and choose which members display, on the Masthead page change the radio button to "The Journal Manager creates titles and adds people under each title "and hit Record (note, that last step is commonly overlooked, so be sure to hit it if you wish to change from one option to the other). Next, select Create a Position Title. Fill out the title field; choose whether s for this group will be publicly displayed; and choose whether the title will appear under the Editorial Team or under People on its own in About the Journal. It could be the position of a single person (e.g., Managing Editor) or of a group (e.g., Board Members). 97
98 Masthead After saving, you will be able to use the Membership link to add a name or names to the position. Note the icon next to the Managing Editor title. Once this group has been populated with members, you can use this icon to quickly everyone in that group. On the resulting page, you will see a list of existing members of this group. From here you can also add members by clicking on 'Membership'. From the list of user accounts, use the Add Member link to add them to the group. send an to all members of a group by clicking on the icon next to the title name. Figure: Adding the Member 98

99 Masthead Once this is done, you can see the results on the About page, under Editorial Team. 99

100 Prepared Prepared OJS facilitates work flow communication through the use of prepared messages. The wording of these messages has been added to get you started, but they can be easily modified. Go to Management Pages section and select Prepared s: From the Prepared s page, select the template you wish to edit by using the Edit link. You will probably have more than one page of templates to choose from. Make your changes to the selected template. Avoid changing any of the embedded program variables (anything that looks like {$this}) however, as these will dynamically generate appropriate information. (For example, {$reviewername} in the figure below will insert the Reviewer recipient's name into the .) Remember to Save your changes. 100

101 Prepared 101
102 Reading Tools Reading Tools The Reading Tools are designed to assist experienced and novice readers by providing a rich context of related materials from a wide variety of largely open access sources. These optional tools use an author's keywords to automatically search a relevant open access database for related materials which are presented to the reader in another window. Readers have a choice of tools, and within each tool a choice of databases, along with access to information about the database. Configuring the Reading Tools By default, the Reading Tools are disabled. To activate and configure them: Go to Management Pages section and select Reading Tools. Choose Reading Tool Options. Checking the "Enable Reading Tools..." checkbox will activate them for your journal. 102


103 Reading Tools From the same page you can configure which tools will be available to your readers. You may wish to experiment with these yourself to see if some or all of them will be useful to your audience. Under Related Item Tools, you will find a dropdown menu of subject areas. Select the subject that best matches your journal to provide an additional reading tool set specific to that discipline. For example, if you choose Humanities, you will not see search options for the Health Science index PubMed. Select the subject appropriate item set for your journal To further customize the Reading Tools for your journal, Click Related Items Sets here, or return to the Reading Tools menu and choose Related Item Sets This will allow you to add or remove what resources are available to readers in the tool set. From here, you will see a list of subject areas, and the configuration options for each of them. 103

104 Reading Tools For each subject, you will see a series of options: Validate, Metadata, Contexts, Export, and Delete. While scrolling down the page of subject items, you will also see the option to create your own set for a discipline not listed here. Validate will check that all of the URLs for the resources associated with that subject are valid. Depending on the amount of associated resources, this may take a few minutes. Metadata describes the subject item. Contexts shows the various options that are available for that subject area. Export creates an XML file of the items. Delete removes the item. Here are the options for each subject area found by selecting Contexts (example Humanities): 104
. The Metadata link within Contexts allows you to rename tools and set options.")
105 Reading Tools The Up and Down arrows allow you to reposition the contexts -- or you can click on the item in the Title or Abbrev column and drag the entry to a new position (this is easier than using the up and down arrows!). The Metadata link within Contexts allows you to rename tools and set options. 105


106 Reading Tools The Searches link lets you view, edit, add, or delete the various resources associated with the context. This example shows the currently available search options under "Author's work". Here you could revise the Searches options that will be available to readers under Author's work on their sidebar. You can use the Create Search link to add a new one, or use the Edit link to modify an existing one. It's advisable to check the link on any url you make available. 106

107 Reading Tools You may need to contact the search service directly to find out the appropriate Search URL. Managing the Reading Tools Returning to the Reading Tools menu, you can now choose Validate URLs for Reading Tools under the Management heading to test all of the Reading Tool URLs. This can take a few minutes, as all of the URLs are tested. Use the configuration options outlined previously to fix any broken URLs (and delete any non-function search services). Sharing the Reading Tools This option will allow you to add social networking links (Facebook, Delicious) to your Reading Tools via the AddThis service. First, under Sharing select Configure AddThis. 107
108 Reading Tools Next, fill in the form with your AddThis information (you will need to visit their site and create an account first). Once this is saved, the sharing image/link will appear in your sidebar. Displaying the Reading Tools Reading Tools must be configured in Journal Setup Step 5.6: The Look -- Journal Layout before they appear. Both the Reading Tools and Related Items are treated as blocks, and can be moved from the left sidebar to the right, and moved up and down in the block hierarchy. 108

109 Reading Tools 109
110 Statistics and Reports Statistics and Reports OJS provides a number of statistical and reporting features for your journal. To access them, go to the Journal Management Pages and select Stats & Reports. Statistics The Statistics section provides a summary of your journal's usage. You can use the checkboxes to make these statistics available to readers in About the Journal. If your journal has been running for several years you would be able to click through by year and see totals for issues and items published, and other powerful statistics. 110
111 Statistics and Reports Reports The Reports section provides spreadsheets of data on all of the articles submitted to your journal, all of the reviews that have been done, and other aspects of your journal's activity. 111
112 Statistics and Reports The following reports are offered in CSV format: View Report summarizes abstract view counts, and total counts for galley views on a per-article basis for every published article. Articles Report summarizes all of the articles in your journal with title, author and status data. Subscriptions Report summarizes membership information for individual and institutional subscriptions Review Report summarizes the review activities including article and reviewer names, and dates of assignments. OJS Usage Statistics Report Summarizes all published objects (article, galleys, issue, issue galleys) view or download counts, and also the journal index page view counts. Timed Views Report allows you to select a date range for reporting. You can also choose to remove records from the logs in Clear Logs. The COUNTER plugin is available for COUNTER-style journal reporting. Be sure to check the requirements on the Project COUNTER website. 112
113 Statistics and Reports The option to Generate a Custom Report is also available by selecting the link from the Stats & reports page. Report templates are available, and you can make selections based on location and date range. Advanced options allow you to customize columns to build the report, choose filters to narrow results, and select the order in which results will display. 113
114 Statistics and Reports Click Generate custom report to create a CSV file with your results. A Report URL is also generated, which you can be use to generate the report at a later time with the current form settings. For more detailed information, see OJS Report Generator: Examples and Tips. 114
; article access (subscriptions and pay-per-view options); and for")
115 Payments Payments OJS includes a Payment module for charging various fees. Fees can be charged for author actions (including fees for article submission, fast-track peer review, and article publication); article access (subscriptions and pay-per-view options); and for donations and membership dues. Payment Options To enable the Payment Module, click on the Payments link listed under Management Pages. Fee Payment Options You can enable the Payments Module by clicking the box under General Options. You can also choose your currency here. You should ensure that the currency you select here matches up with the currency selected under Subscriptions, if the subscriptions component is also being used. Further down the page, you can enable and customize author fees for article submission, fast-track peer review, and article publication. Note the Waiver Policy. If filled in, this will display along with the Submission Checklist in article Submission Step One, and in About the Journal, under Submissions. 115
116 Payments Reader fees can also be enabled for either subscriptions or pay-per-view purchases. 116
117 Payments General Fees for association membership and/or donations can also be added. The Association Membership information will appear in About the Journal under Policies, and the Donation link will appear above the search function in the righthand frame (it is a sidebar block that can be re-positioned -- see Journal Setup for details). Gift subscriptions can also be purchased through the Subscriptions page. 117


118 Payments Payment Methods You can edit fee payment options by clicking the Fee Payment Methods link at the top of the Fee Payment Options page. Fee Payment Options If you choose the Manual Fee Payment option, you can enter instructions on how to pay fees to the journal. These instructions will be displayed whenever a user needs to pay a fee. If you choose the PayPal Fee Payment method, you must enter the appropriate PayPal account information for the service to work correctly. The advantage of this option is that readers can make immediate payments and have immediate access to your content. With the Manual Payment Method, readers will need to wait until you have approved their payment. 118

119 Payments Payment Records The Payment module tracks system payments, and provides records on the Records page. You can access this page by clicking the Records link at the top of the Fee Payment Options page. You will be provided a list of users who have made payments to your journal, with payment type and timestamp listed. If you click on the Details link next to a listed item, you will see a more comprehensive summary of the payment record. 119
120 Payments 120
121 Subscriptions Subscriptions If you have chosen the subscription option for your journal (see Journal Setup Step 4: Management), a link to manage your subscriptions will appear on your Journal Management Pages menu. After selecting Subscriptions from the menu, you will see an overview of the subscription activity for your journal, and a set of choices to configure and manage your subscriptions, including Subscription Types, Subscription Policies, Payments, Individual Subscriptions and Institutional Subscriptions. From this page you can also create a new subscription. Subscription Types 121


122 Subscriptions The first step in setting up subscription management is to designate the types of subscriptions the journal offers. Journals typically offer individual subscription and institutional subscription rates. Some journals may have special offers for members of an organization or students. OJS will support the management of print and/or online subscriptions. More than one type of subscription can be created to cover longer periods of time (e.g. 12 months, 36 months). To begin, select Subscription Type and from the resulting page, click Create New Subscription Type. Next, fill in the details, including a unique name, a description, cost, and currency. You can also determine if it is for online, print, or online + print. You can also set the duration of the subscription, and whether it is individual (login required) or institutional (access via IP address or domain name -- e.g., sfu.ca). Lastly, you can require a membership for the subscription (perhaps for a reduced fee) and hide the subscription type from being published on the About page. Subscription Policies Under the Subscription Policies heading you will enter information in several sections. Subscription Manager: Add the contact information for the journal's Subscription Manager. This will appear on the 122


123 Subscriptions About page. Subscription Information: The Subscription Types and fee structure will be automatically placed under Subscriptions on the About the Journal page, along with the name and contact information for the Subscription Manager. Additional information about subscriptions, such as methods of payment or support for subscribers in developing countries, can be added here. Subscription Expiry: Upon subscription expiry, readers may be denied access to all subscription content, or to those published after subscription expiry date. Useful reminders can be sent out to your subscribers, informing them of expiry dates. The Site Administrator will need to enable and configure scheduled_tasks within config.inc.php to allow for these options to be enabled. 123


124 Subscriptions Online Payment Notifications: Use this option to allow for automatic notification of online payments for the Subscription Manager. Delayed Open Access: Although a journal may wish to limit their content to subscribers, it is also possible to allow for back issues to become openly accessible over time. You can set the number of months to pass before content is opened. It is also possible to send readers a notice when content becomes open, and to add a statement about delayed open access to your About the Journal page. Author Self-Archiving Policy: This section allows you to also post a statement about your journal's author selfarchiving policy. A default statement is provided, but can be changed to best suit your needs. Payments 124


125 Subscriptions Returning to the Subscriptions Summary page you will see an option to select Payments. Selecting the Payments here will take you to the Fee Payment Option page configured in the Payments page in the previous section. 125


126 Subscriptions Individual Subscriptions The Individual Subscriptions section allows you to see all individual subscribers, edit their accounts, and create new ones. To create a new individual subscription, select the Create New Subscription link. If the user already has an account with the journal their name will appear here. Use their Select link to sign them up with a subscription. Once the Select link for the user is clicked, fill in the resulting form to create the new subscription. 126


127 Subscriptions If the new subscriber does not already have an account, you can create one for them by selecting the Create New User link at the bottom of the screen. You then need to fill in the resulting form. After filling in the form, you will then need to select them from the list of existing users and fill in their subscription details (as in the previous section). 127
128 Subscriptions 128


129 Subscriptions Institutional Subscriptions Institutional Subscriptions differ from Individual Subscriptions in a number of important ways. Obviously, one is for entire institutions and the other is just for single users. Individual Subscribers access the content of your journal by logging in with their username and password. Institutional Subscribers, however, will access the content on a computer from a recognized IP address or domain. No logging in is required for these institutional readers. From the Subscriptions Summary page, Select Institutional Subscriptions to configure or manage institutional subscriptions. On the resulting page, you can view/edit any existing Institutional Subscriptions, or use the Create New Subscription link to create a new one. In the same way as in Individual Subscriptions, you will have the option to select from a list of existing users. Institutional Subscriptions cover entire organizations, but still must be owned by an individual account holder from your journal. 129


130 Subscriptions If there is no current account holder, use Create New User to make one. This will open the same New User form seen previously. The form will be filled in with information about the representative from the institution (often a librarian). 130

.")
131 Subscriptions Once completed, this new user can then be selected as a new institutional subscriber. Click their Select link and fill in the resulting form to Create New Subscription. This information includes the domain and IP information (this is what will allow readers from that institution to access your content with logging in). If you are unsure what the IP range is, the contact should be able to tell you. 131
132 Subscriptions 132
133 System Plugins System Plugins System plugins allow OJS to expand its functionality, and accept contributions from participating developers, without altering the core of the program. If you are interested in writing a plugin for OJS, please contact us using the Support Forum or the old forum. There is a special plugin gallery on the old forum dedicated to plugins. The most widely used plugins are shipped with OJS by default, but it is always a good idea to check this gallery for new ones particular to your needs, as well as updated plugins. You can use the Upgrade Plugin option for each to upload the new files found on the forum. Most journals wait for any new plugins to be included with a new release of OJS, but if you need a new feature right away, this is the way to upgrade it. As a Journal Manager, you can decide which plugins to add to your journal, and which to leave out. Currently included plugins include an alternative user authentication system (LDAP), imports and exports, an indexing tool for Google Scholar, themes, block plugins for UI extensions, and more. To see all of the available plugins, select System Plugins from the Journal's Management pages. On the resulting page, you will see all categories of plugins. 133
134 System Plugins 134

135 System Plugins Metadata Plugins Additional metadata standards can be implemented using Metadata plugins. NLM, OpenURL, Dublin Core and MODS are installed with OJS. Open Archives Initiative metadata formats can be added as plugins. 135

136 System Plugins 136

137 System Plugins Authorization Plugins Authorization Plugins allow for alternative systems of user authentication. Most journals do not make use of these plugins. Note In the above figure, note the Upgrade Plugin option mentioned earlier. Clicking this will provide an upload tool for the latest LDAP plugin files found on the forum. 137
138 System Plugins Block Plugins Block Plugins add components to the user interface. For example, the Reading Tools Block controls the display of the Reading Tools link on the sidebar, if Reading Tools has been activated for the journal. Most journals do not modify these plugins. 138
139 System Plugins Citation Plugins Citation Format Plugins Citation Format Plugins are used as part of the Reading Tools, allowing readers to export the article citation in a variety of formats. Most journals do not modify these plugins. Citation Database Connector Plugins Citation Database Connector Plugins connect to citation databases for citation look up. 139
140 System Plugins Citation Output Plugins Citation Output Plugins implement citation standards and would take the place of the citation format plugins. Citation Extraction Plugins These plugins will extract field-level data from raw citations. 140

141 System Plugins 141

142 System Plugins Gateway Plugins Gateway Plugins provide your data to external systems. Most journals do not modify these plugins. 142
143 System Plugins Generic Plugins Generic Plugins cover a wide range of functionality. The more commonly-used ones are the Static Pages, Web Feeds, Custom Block Manager and Google Analytics plugins. Static Pages Plugin This plugin allows you to create new OJS pages for additional content (e.g., an Advertising page). Once you have enabled the plugin, an Edit/Add Content link will appear. After clicking Edit/Add Content, you can either edit any existing pages (e.g., the previously-added "Links" page shown in the figure below) by using the Edit link next to the existing page; or you can create a new one by selecting Add New Page link. After selecting the Add New Page link, fill in the resulting form. The "path" will be used as part of the page URL and the title will appear as the page title. After saving the form, you can view the page at the URL indicated.any time you need to update this page, simply return to the Static Page plugin and edit the page. Web Feed Plugin 143
144 System Plugins Activating this plugin produces RSS/Atom web syndication feeds for the current issue and displays RSS/Atom links in the sidebar. When a user selects one of the RSS/Atom links from the sidebar, it will produce a list of current issues and the option of adding it to their feed reader or live bookmarks. To activate the current issue Web Feeds, select the Enable link and select Settings. This page allows you to determine where the feeds will display and how many items will display (e.g., the entire current issue, or just the first few articles). External Feeds Plugin This plugin will allow you to display the content of external RSS feeds from other sources in your journal. For example, you can display the latest posts from the PKP News blog or the Open Access News blog in your sidebar. SEHL Plugin This plugin implements Search Engine HighLighting (SEHL) so that when a search engine locates an HTML article, the sought-after keywords are highlighted in the article text. This can be enabled by selecting the Enable link. Thesis Abstracts Feed Plugin This plugin will produce an RSS/Atom feed (see the Web Feed Plugin, above, for an explanation on RSS feeds) for Thesis Abstracts. Only journals publishing Thesis Abstracts (see below) should consider enabling this feature. Thesis Abstracts Plugin This plugin allows your journal to solicit and publish thesis abstracts. You can see this in action at the Canadian Journal of Communication by selecting the Thesis Abstracts link in their navigation bar. From here, you can view the thesis abstracts or submit a new one. Upon submission, the thesis senior supervisor is automatically notified by and asked to confirm the accuracy of the submitted information by sending an response to the Thesis Abstracts Contact. Once the confirmation is received, the Thesis Abstracts Contact can activate the thesis abstract submission by editing its corresponding record and changing the Status from 'Inactive' to 'Active'. The thesis abstract will then become available to journal readers. Select the Enable link to activate this plugin for your journal. Once you have enabled the plugin, you can edit its Settings. Rounded Corners Plugin Rounded Corners: This Plugin puts a background on each sidebar block and rounds its corners. Changes can be made to the colours used by editing the CSS stylesheet found in the plugin. Select Enable to use this plugin. Custom Block Manager Plugin This plugin allows you to add new items to the sidebar. You might want to use this to emphasize your editorial board members or direct potential authors to your online submissions. To enable, select the Enable link. Announcement Feed Plugin This plugin produces RSS/Atom web syndication feeds for journal announcements, similar to the Web Feeds plugin above. Only journals that have activated Announcements would consider using this plugin. To activate it, select the Enable link. Google Analytics Plugin This plugin integrates OJS with Google Analytics, Google's web site traffic analysis application. It provides an excellent way to track the web traffic to your journal. It requires that you have already setup a Google Analytics account. To activate this plugin, select Enable. This will create a Settings link, which you can click to configure the plugin. Fill in the account number provided when you set up your Google Analytics account. Remember to clik Save. In a few hours, Google will start tracking your web traffic and generating a report. 144
145 System Plugins SWORD Plugin The SWORD plugin allows authors and/or journals to deposit articles to online repositories such as DSpace and Fedora via the SWORD protocol. You can configure the plugin so that authors are able to specify a deposit point for their submitted article (they will be ed with instructions when their article has been accepted for publication). You can also specify one or more deposit points, and configure how content is deposited there. phpmyvisites Integrates OJS with phpmyvisites, a free and open source web site traffic analysis application. Requires that phpmyvisites is already installed on the server. (phpmyvisites has been deprecated in favour of Piwik, which also has a plugin.) XML Galleys This plugin automatically generates HTML and PDF galleys from XML files. NLM 2.3 XML is supported by default, but custom XSLT files are also supported. Translator Plugin This plugin allows web-based maintenance of translation files, which are used to provide text for the OJS interface. You must first use the Enable link to activate the plugin, and then hit the Translate link to see the list of available locale files. Use the Edit link for the language you wish to update. There are many. You will be shown a list of all locale files for that given locale. Click on the Edit link next to a locale file to modify one. You will see the English text in the top box, and the translated text in the lower box. Change the appropriate text and save. Your changes will be visible immediately. Custom Locale Plugin Similar to the Translator Plugin, this allows you to modify the OJS text for your default language (e.g., to change "About the Site" to "About this Site"). However, it doesn't change the locale file itself, but rather stores the change in the OJS database. You can also make custom changes on a per-journal basis using this plugin, whereas using the Translator plugin will change the locale site-wide, across all journals. Referral Plugin This plugin tracks incoming refback URLs to articles (i.e., when a reader follows an external link to an article), allowing Authors to maintain and potentially publish an automatically-updated list of refbacks to an article. The Journal Manager can specify exclusions from the plugin's Settings page. This limits the number of web crawler requests from cluttering the Author's referral interface. Regular expressions can be used. COinS Plugin The COinS plugin adds an OpenURL descriptor to article pages (abstract and HTML) that can be used e.g. for extraction to citation tools such as Zotero. TinyMCE Plugin This plugin enables WYSIWYG editing of OJS textareas using the TinyMCE content editor. Books for Review Plugin 145
146 System Plugins The Books for Review plugin allows Editors to manage their journal's book review process. Editors can publicly list books that are available for review; Authors can request to review books; and Authors and Editors can manage the workflow process through request confirmation, book mailing, review submission, and publication. After the Books for Review plugin has been enabled, Editors will find a link to Books For Review in their User Home page. Clicking on the link will bring you to the Books for Review interface. In order for the books to be available to Authors and the general public, the Editor must configure the plugin's workflow settings. This can be done by clicking the Settings link and, at a minimum, choosing a Management Mode. The Editor can also configure other aspects of the book review workflow and publication process, including whether and where book cover images are displayed; whether book reviews have due dates; and whether reminders for late reviews should be sent out. Additional information for potential reviewers can also be provided; this will be displayed along with the list of books available for review. Editors can add new books available for review by clicking the Create Book for Review link available on either the All or Available pages. The following form, with fields such as author, title, description, ISBN, and so on must be filled out. Additionally, a book cover image can be uploaded; an Author can be assigned to complete the review at the outset; or the Editor can associate the book to a current submission, in the case that an Author has already submitted the review for consideration. Note "Books for review" as entered into the system by Editors are distinct from Author submissions; but they must eventually be tied to an Author submission, which is in the end the review itself. Think of the book for review that the Editor enters into the system as a book entity in and of itself, which must eventually be attached to the review of it. Any book that the Editor has listed for review, and which has not yet been assigned, is available from a new Books for Review link on the topmost navigation bar, and from an Available Books link in the Author's User Home page. Authors can request to review the book by clicking the Request This Book for Review link, which will send a notification request to the Editor. The Author can check on the status of this book review request by clicking on the My Books link on their User Home page, and viewing the Requested page. Likewise, the status of assigned, mailed and submitted books can be seen at a glance. Editors can also see which books have been requested, and by whom, from their Books for Review interface. They can Accept or Deny Author review requests; the Author by clicking the mail icon next to their name; or select an existing submission to match the review with. If the Editor accepts or denies the request, a notification will be sent to the Author. The Editor will be able to edit this before it is sent. If the request is accepted, the will include the Author's mailing address (if available from their user profile), and instructions on adding or updating a mailing address. The will also include a link that will take the Author to the article submission process, whereby the review can be submitted as a normal submission. The only key difference is that at the end of the submission process the Author will be asked to confirm whether the submission is a book review for one of the reviews assigned to them. The review will otherwise be reviewed and edited following the normal conventions. Authors and Editors alike can use their Books for Review interface to track submitted reviews, from submission to publication. 146
147 System Plugins Implicit Authentication Plugins These plugins provide your data to external systems. Most journals do not modify these plugins. 147

148 System Plugins Import/Export Plugins Import/Export Plugins: These plugins share information between systems. Details on these plugins are provided in the section on Importing and Exporting. 148

149 System Plugins Payment Plugins These plugins allow you to enable different payment types for your journal's subscriptions, author fees, donations, and so on. Details on configuring payments can be found in the Payment section. 149
150 System Plugins Report Plugins These plugins allows you to export content from your journal into a.csv (comma separated value) format suitable for opening in a spreadsheet programs such as Excel or Calc. The Review Report will provide information about the review process (reviewer names, reviewer decisions, reviewer comments, etc.). The Articles Report provides information about submissions (e.g., authors, titles, abstracts, keywords, etc.). The View Report provides information on abstract and galley views. Select Report Generator to build the report. These reports are also available from the Journal Manager's Stats and Reports page. 150
151 System Plugins Theme Plugins These plugins make different CSS themes available for your journal website. See For simple changes including header colour, link colour, page background colour, foreground (i.e., text) colour, use the Custom Theme plugin. 151

152 System Plugins Once you have made the change, go to Journal Setup Step 5.6 and activate the custom theme. Save your change and the new theme will appear immediately. 152

153 System Plugins If you change your mind, you can return to Step 5.6 and change the Journal Theme. 153
 to your journal. New plugin files can be found on the Support Forum's Plugin Gallery.")
154 System Plugins Install a New Plugin Not a plugin itself, this utility allows you to easily upload a new plugin file (in.tar.gz format) to your journal. New plugin files can be found on the Support Forum's Plugin Gallery. 154
. Note This section serves only as an overview of OJS' import/export functionality.")
155 Import/Export Data Import/Export Data Open Journal Systems offers a variety of tools and Import/Export plugins which allow the Journal Manager to inject data into and extract data from OJS. More information can be found for each plugin's documentation within OJS' plugin directory (plugins/). Note This section serves only as an overview of OJS' import/export functionality. Some import/export functions, notably the Users and Issues & Articles functions, are complex to use and to explain. For detailed usage instructions for all import/export functions, see the documentation online. Journal Managers can begin to import and export different types of data by going to the Journal Management menu and selecting Import/Export Data. The resulting page displays the available options to Import/Export Data. *Should these all be described here? Covered in the online documentation: Erudit Article Export Plugin: This plugin allows you to export articles using the English Erudit DTD. This would allow your journal to interoperate with the Erudit publishing system from the Université de Montréal. 155
156 Import/Export Data PubMed XML Export Plugin: Export article metadata in PubMed XML format for indexing in MEDLINE. This would be appropriate for health science journals that have been accepted for indexing in MEDLINE. DuraCloud Import/Export Plugin: Allows you do export your journal issues to an external DuraCloud repository service. DOAJ Export Plugin: Use this to send your metadata to the Directory of Open Access Journals. Users XML Plugin: Supports the import and export of users and their roles. To export a list of users from your journal, select one or more roles and hit the Export Users button, or use the Export All link. To import a list of users, you can use the User Data File upload tool. Public Identifiers XML Plugin: Import and export public identifiers. METS XML Export Plugin: Export journal metadata in METS XML format. DataCite Export/Registration Plugin: Export or register issue, article, galley and supplementary file metadata in DataCite format. QuickSubmit Plugin: Allows you to quickly add complete submissions to the editing queue or directly into an issue. Provides a one-step submission process for editors needing to bypass the traditional submission, review, and editing process. This is a useful tool for 5-10 articles, but if you have more than that, you may wish to use the Article XML Import feature (see below). medra Export/Registration Plugin: Export issue, article and galley metadata in Onix for DOI (O4DOI) format and register DOIs with the medra registration agency. CrossRef Export/Registration Plugin: Export or register article metadata in CrossRef format. Articles & Issues XML Plugin: This is useful for exporting the article and issue metadata from one OJS journal to another. It can also be used for importing large amounts of back content from outside of OJS. 156


157 User Management User Management In addition to managing the journal web site, the Journal Manager is also responsible for all of the user accounts in the system. From the Journal Manager's User Home page, you'll find the Users menu, which includes all possible user management options. To see a list of all of your journal's registered users, select Users Enrolled in this Journal. From here you can edit any user account, log in as any user to temporarily perform any of their tasks or troubleshoot a problem, remove users from the list, or disable their account. Clicking Remove next to any user's name will unenroll them from that particular role; it won't delete their account from the system. Clicking Disable will stop users from logging in with 157
158 User Management that profile, but again it won't remove them from the site proper. See the section on Merging Users for tips on deleting an account. 158
, and click Email Users. This will bring up an email message that you can write in and send to everyone.")
159 ing Users ing Users The ability to send an message to several, or all of your users at once is another useful feature available at the bottom of this page. To use this function, check each of the desired recipients (or use the Select All button), and click Users. This will bring up an message that you can write in and send to everyone. Remember, the Select All button only selects all on that page. If your user list covers several pages, you will need to select all for each page, or temporarily make your list all fit on one page using the Lists option in the Journal Setup. 159
 can be enrolled with your journal.")

160 Enrolling Existing Users Enrolling Existing Users Users already enrolled in the journal can be given additional roles, and users registered to the site with other journals (if you are working in a multi-journal OJS installation) can be enrolled with your journal. To do so, click on 'Enroll a User from this Site in this Journal' from the Journal Management Page under Users, or click on 'Enroll Existing User' from the 'Users Enrolled in this Journal' page. You will be provided with a list of all site-wide users. This feature allows you to enroll an existing user into an additional role. For example, if Ted is currently registered as an author, but volunteers to become a reviewer, this feature will allow you to add that role to his profile. From the list of users, select Enroll an Existing User. On the resulting page, use the dropdown menu to select the role and place a check next to the user's name. Hit Enroll Selected User to enroll that user in the selected role. 160
161 Show Users with No Role Show Users with No Role Occasionally, you may end up with a user without a role. They may have been accidentally unenrolled by the Journal Manager (by using the Remove option described earlier). When this user logs in, they have no options to choose from. To find any "lost" users, select Show Users with No Role from the Journal Management Page under Users. From there you can re-enroll them with the journal. In this example Nicole Bell was previously without a role, and will now be enrolled as an author. 161
162 Creating Users Creating Users To create a new user for your journal, select Create New User from the Journal Management Page under Users. Fill in the form and press Save. You can optionally send the user a welcome containing their username and password, which is a very useful feature. If you have activated additional languages, you can choose a language preference for your new user as well. 162

. He wishes to keep the account with \"Dr.\" and have the account without the salutation merged with it.")
163 Merge Users Merge Users Occasionally, a user may have created two separate accounts (using two different addresses), or you may find yourself in a situation where one or more users have to be removed entirely from the system. To accomplish either task, you must use the Merge Users feature. Select Merge Users from the Journal Management Page under Users. On the resulting page, select a user you wish to merge with another user, or select more than one user to merge at once by using the checkboxes next to the account names. In this example, Ted Trudeau has two accounts (Ted Trudeau and Dr. Ted Trudeau). He wishes to keep the account with "Dr." and have the account without the salutation merged with it. Here, we'll select Merge User next to the Ted Trudeau account. Next, we'll select the Dr. Ted Trudeau account (which is the keeper) and click Merge Users. This action has effectively deleted the Ted Trudeau account from the system. To remove garbage, test or spam accounts, simply merge the unwanted accounts into your Journal Manager account. Again, you can merge more than one account at a time by clicking the checkboxes next to the unwanted accounts. 163
164 Chapter 6: Authors Chapter 6: Authors OJS exists to serve Authors as well as journals. Not only does OJS provide an easy-to-use submission process, it can collect and disseminate key information about Authors and their work across important research and citation databases, including Google Scholar, PubMed, the Directory of Open Access Journals, and others. As an Author, your tasks include submission; submitting revised copy; copyediting; and proofreading. To make a submission, you must have a user account and be enrolled as an Author. User accounts can either be created by the Journal Manager or, if journal policies allow, you can register yourself. Once you have an account, log in to the journal site and under User Home select the role of Author. 164
165 Author Home Page Author Home Page After clicking on the Author link on your User Home page, you will be directed to your Author User Home page, which includes information on Active Submissions; a link to start a New Submission; and information on any Refbacks you may have. 165
166 Active Submissions Active Submissions This page will list any of your submissions to the journal that are still in process and are either complete or incomplete (in which case you can return and finish the submission at any point). Each completed submission will fall into one of the following categories: Awaiting Assignment: the submission has been completed by you; you can no longer delete the submission from the system yourself. The Editor can now see the submission, and must assign an Editor or Section Editor to it. Queued for Review: the submission has been vetted and is now in the review process. You should receive notice shortly on the review decision. Queued for Editing: the submission has completed the review process and been accepted for publication; it will now make its way through the system's copyediting, layout editing and proofreading processes. In the example below, there is one submission in process and it is awaiting assignment. The journal is only charging a fee to fasttrack submission. If a journal does not charge submission fees of any kind, this link will not appear. The author must use the Pay link to proceed if fees are required. As the author, you can click on the hyperlinked title of any listed submission and review it. Clicking a submission title will bring you to your submission's Summary page. From here, you could revise the title or abstract by clicking the Edit Metadata link. If the editor asks for revisions, you will upload the changes this way too (in the Review section of your submission). 166
167 Active Submissions 167
168 RefBacks RefBacks The RefBacks section displays any incoming links from external web sites such as blogs, news sites, or other articles that link directly to your articles. Each RefBack can be edited: it can be ignored, deleted, or published, in which case it appears publicly at the end of your published article on the web site. 168
169 Archive Archive Your Archive page will list all published submissions along with information on which issue they appear in, as well as any declined submissions. 169
170 Submitting an Article Submitting an Article There are five steps for submitting an article in OJS. To begin, from the Author User Home page click [New Submission] or from the Author page with Active Submissions, select the Click Here link under Start a New Submission, to proceed to the first step of the submission process. 170


")
171 Submission Step One: Starting the Submission Submission Step One: Starting the Submission Step One ensures that the Author understands the journal's submission rules. The Author will have to pick the appropriate section to submit to, and will be provided with information on the journal's privacy statement, copyright notice, competing interest statement and/or author fees, if applicable. If you need any help the journal's technical support contact is provided at the top of this page. If the journal allows content to be submitted in more than one language, you will be able to choose a specific language to complete the submission in. You must complete all required fields for the submission language you choose; you can also optionally fill out required and optional fields for the other languages supported by the journal. For example, if you choose French as your submission language, you must provide an article and title in French; but you may also provide that information in English (or whichever other language(s) supported by your journal), as well as any other metadata -- indexing keywords, etc. If the journal charges Author Fees, these will be presented to the author. If the journal does not charge submission fees, this section will not appear. Next, the author must check each of the items from the Submission Checklist. These items were established in Journal Management Setup Step


172 Submission Step One: Starting the Submission The journal's copyright policy will appear next, and, if configured as a requirement, the author will need to agree to this policy. If the journal has not added a Copyright Notice, this section will not appear. Authors can then review the Privacy Statement. If the journal has not added a Privacy Statement, this section will not appear. Finally, the author can add any comments, which will be visible to the editor. Move to the next step by hitting the Save and Continue button. 172

173 Submission Step Two: Uploading the Submission Submission Step Two: Uploading the Submission Submission Step Two allows you to upload the submission file, typically a word-processing document. Click Browse to open a Choose File window for locating the file on the hard drive of your computer. Locate the file you wish to submit and highlight it. Click Open on the Choose File window, which places the name of the file on this page. Click Upload on this page, which uploads the file from the computer to the journal's web site and renames it following the journal's conventions. Once the submission is uploaded, click Save and Continue. 173

174 Submission Step Three: Entering the Submission's Metadata Submission Step Three: Entering the Submission's Metadata The third step of the submission process serves to collect all relevant metadata from the author. The first section of metadata covers the authors. The submitting author will have their personal information automatically appear. Any additional information, such as Competing Interests should also be added at this time, if required. If there are multiple authors for the submission, their information can be added using the Add Author button. You can also re-order the list of authors, make one of the authors the principal contact with the editor, and delete any authors added in error. Next, enter the submission title and abstract. 174


175 Submission Step Three: Entering the Submission's Metadata You will then add indexing information. This will help others find your article. The suggested indexing options were determined by the Journal Manager in Setup Step 3. The next section allows you to enter the name of any organization that may have supported your research. Depending on how the journal is configured, you may find an option to provide your list of references separately. This will allow the journal's Editors and Copyeditors to check your references using a Citation Markup Assistant. You should provide your list with each reference on a separate line. 175

176 Submission Step Three: Entering the Submission's Metadata Hit the Save and Continue button to move on to Step

177 Submission Step Four: Uploading Supplementary Files Submission Step Four: Uploading Supplementary Files This step is optional. If you have any supplementary files, such as research instruments, data sets, etc., you may add them here. These files are also indexed by the author, identifying their relation to the submission, as well as their ownership. Supplementary Files can be uploaded in any file format and will be made available to readers in their original format. Locate the file you wish to submit and highlight it. Click Open on the Choose File window, which places the name of the file on this page. Click Upload on this page, which uploads the file from the computer to the journal's web site and renames it following the journal's conventions. Once the submission is uploaded, click Save and Continue. 177


178 Submission Step Five: Confirming the Submission Submission Step Five: Confirming the Submission This final step provides a summary of your submission. If the journal charges submission, fast-track review, or publication fees, your required payment will also be detailed here. If you paid previously, use the checkbox to indicate that you have. If you require a fee waiver to be considered, check that box and an provide an explanation (required). Click Finish Submission to submit your manuscript. You will receive an acknowledgment by and will be able to view your submission's progress through the review and editorial process by returning to the Active Submissions section of your Author page. 178
179 Authors and Submission Review and Editing Process Authors and Submission Review and Editing Process To track your submission's progress through the review and editorial process, you will need to log into the journal web site and choose your role as Author. Click on the linked title to go a particular submission record. From the resulting 'Summary' page, you will see links to Summary, Review, and Editing pages. Each of these pages will provide details about your submission. 179
180 Authors and Submission Review and Editing Process Submissions Summary Page The Summary page contains several sections, including Submission, which displays the author name, submission title, original submission file, any supplementary files, the ability to add a supplementary file, the name of the submitter, the date submitted, the section the article is assigned to, the editor responsible for the submission, and the comments to the editor you made as part of your submission. The next section outlines any required Author Fees. If the journal does not charge author fees, this section will not appear. The Status section lets you know where your submission is in the publishing process (see above for status possibilities). It also lets you know when you made your submission and the date of the most recent status change. The final section outlines the submission Metadata, including author details, title, abstract, indexing, and supporting agency. You can modify any of this information by selecting Edit Metadata. 180
181 Authors and Submission Review and Editing Process 181

 and any revised files (e.g.")
.")

182 Authors and Submission Review and Editing Process Submissions Review Page If your submission is in Review, you can view its details in the Review section linked from the top of the page. First, you will see the basic submission information again. An editor has now been assigned to the submission. Below that is the Peer Review section. You will see information about each round of review (there may be one or more, or none yet taken place) and any revised files (e.g., a version of your original submission file with changes marked in) uploaded by each reviewer (Reviewer A, Reviewer B, etc.). In this example Peer Review has started, and the information displayed will change as the submission moves through the stage. Last on this page is the Editor Decision section. From this section you can notify the editor once you have submitted your revised submission file, view the reviewer comments (click on the cloud icon), and upload your revised submission file (if revisions were required). In this example an editor decision has not been made yet, but an author can check back to see updates on this stage. Possible decisions include: 182
183 Authors and Submission Review and Editing Process Accept: Your submission has been accepted as is. Revisions Required: Your submission requires minor changes and will be accepted once those have been completed. Resubmit for Review: Your submission needs significant re-working. A new file must be submitted and another round of review will take place. Reject: Your submission was not accepted for publication with this journal, either because it was not seen to be of high enough quality, or its subject did not match the journal. 183
, and Proofreading to take one final look at the article before it is made publicly available.")
184 Authors and Submission Review and Editing Process Submissions Editing Page Your submission is considered "In Editing" once it has been approved for publication. Next it will go through Copyediting to correct any grammatical or stylistic errors, Layout Editing to create the published galleys (e.g., HTML or PDF), and Proofreading to take one final look at the article before it is made publicly available. If your submission is In Editing, you can view its details in the Editing section (linked from the top of your page). The first section again includes basic submission information. Copyediting In the next section, you can follow the copyediting process. Step 1: The journal's Copyeditor (Sarah Simpson) has made changes to the submission file. You can download a revised copy here from Initial Copyedit (e.g., CE.DOCX). Step 2: You will review the Copyeditor's changes, and make any final changes of your own. You then upload your revised submission file here under Author Copyedit (e.g., CE.DOCX). Be sure to use the icon to notify the Copyeditor that you have submitted your file. Step 3: The Copyeditor takes a last look at your changes before passing the submission over to the Layout Editor in Final Copyedit (e.g., ce.docx) No action is required by the author. Note Copyedit comments can be added using the icon near the bottom of this section. There is also a link to "Copyedit Instructions". 184
185 Authors and Submission Review and Editing Process Layout Editing The next stage in the editorial process is layout editing. The Layout Editor takes the final copyedited version of the submission and converts it into a format suitable for publishing on the journal web site (e.g., typically HTML or PDF). These are known as the "galleys". As the author, from here you can view the proof of the converted file, or even download it. Proofreading The final editing stage is proofreading. Similar to Copyediting, it is also broken down into 3 steps. The Author's role in proofreading is in Step 1. Step 1: Once the galleys have been uploaded by the Layout Editor, you will receive an from the Editor asking that you review them and note any errors in the Proofreading Corrections comments. Proofing Instructions are also available. To view these, you will need to login to the journal and select the appropriate submission link: On the resulting screen, you can use the View Proof links to display the files. You can click the linked file names (e.g, PB.PDF) to download a copy. 185
186 Authors and Submission Review and Editing Process Review the files and make any comments using the Layout Comments icon. Once you have completed your review and noted any necessary changes, hit the Complete button. This will generate an informing the Proofreader and Section Editor that you are satisfied with the galleys. 186
187 Authors and Submission Review and Editing Process Step 2: The journal's own Proofreader will also check for errors and make their own notes and inform the Layout Editor when all proofreading is complete. No action is required by the Author. Step 3: The Layout Editor takes all of the notes and incorporates all of the changes into revised galleys. These are then ready to publish. No action is required by the Author. You have now completed all of the steps involved in submitting to the journal and participating in the review and editing of your submission. 187
188 Chapter 7: Editors Chapter 7: Editors The Editor oversees the entire editorial and publishing processes. The Editor, working with the Journal Manager (or playing both roles), typically establishes the policies and procedures for the journal, which are used in configuring the journal in Journal Setup in Chapter 5. Via the Editorial Process, the Editor assigns submissions to the Section Editors to see through the Review and Editing processes, while keeping an eye on the submission's progress and assisting with any difficulties in the process. The Editor can also play the role of Section Editor in the Editing process, seeing accepted submissions through copyediting, layout, and proofreading. The Editor also schedules submissions for publication, arranges the Table of Contents and publishes the issue, as part of the Publishing Process. Note The Editor and Section Editor may share many responsibilities. While the Review and Editing processes alike can be handled by both roles, they are only discussed in Chapter 8: Section Editors. Pages unique to the Editor only are here in Chapter
189 Editor Home Page Editor Home Page You can reach the Editor Home page by logging in and clicking the Editor link from your User Home page. Note the addition of quick links that can take you directly to various tasks (Create Issue, Notify Users, etc.). The Editor Home page is divided into three distinct sections: the Submissions section, with Unassigned, In Review and In Editing queues, as well as a link to the submission Archives; a Submission Search section; and the Issues section, where you can schedule and publish new issues and edit previously published content. 189

190 Submissions Submissions Unassigned Submissions On the Editor Home page under the Submissions section you will see links to Unassigned, In Review, In Editing and Archives. We will look first at Unassigned Submissions. The submission record appears after clicking on a single submission in any of the submission categories. When an author completes a submission it automatically arrives in the Editor's Unassigned queue, available from the Editor's User Home page. If the submission was made to a journal section with an assigned Section Editor, however, the submission will go directly to the In Review queue for that Section Editor (see the configuration option for Journal Sections for details). Click the Unassigned link to go to the Unassigned queue. The Unassigned page contains links to the other queues (In Review, In Editing, Archives), a search function, and the list of submissions awaiting assignment to an Editor or Section Editor. Although the example below has only one unassigned submission, your journal may have hundreds, and the search feature will help you find the one you are looking for. To assign a submission, you must click the submission title. This will take you to the submission record. Submission Record: Summary Each submission has a submission record of four pages: Summary, Review, Editing, and History. Complete details on the Review and Editing pages are covered in Chapter 8: Section Editors in this manual. Submission Information The Summary page includes basic submission details. 190


191 Submissions In addition to details about the submission (author, title, original files, etc.), you have the option to upload any additional supplementary files using the Add A Supplementary File link. You can also see the section selected by the Author, and change it if necessary using the dropdown "Change To" menu and the Record button. You can also see any comments the author has made for you when the submission was originally made. Submission Author Fees The Summary page also lists Author Fees. If your journal does not charge fees, this section will not appear. From here you can note if the fees have been paid, or you can choose to waive fees. Submission Assignment Next, from the Editors section you can assign either a Section Editor, another Editor, or yourself to guide this submission through the review and editing process. Clicking the Add Section Editor (or Add Editor) link will bring up a selection page. (Clicking the Add Self link will assign yourself to the submission and bring you to the submission's Review page.) From here, use the Assign link to assign this user to the submission. 191

192 Submissions An box will appear, addressed the assignee, from you, with text pulled from the appropriate template. At this point, you can add addresses to the TO, CC or BCC fields, upload an attachment, and change the Subject or Body text. Once the message is ready to go, use the Send button to deliver it. The Cancel button does not send the message and cancels the assignment. The Skip button does not send the message but does complete the assignment. Once the message is sent, cancelled, or skipped, you will be returned to the Summary page. If you have completed the assignment, the assigned user's name will appear. By default, she will be given the responsibility to guide the submission through both the review and editing process, but this can be limited by unchecking either of the Review or Editing boxes. Be sure to use the Record button after making a change. From here, you can also use the Delete link to reverse the assignment and also assign another Section Editor, Editor, or yourself. 192

193 Submissions Submission Status Next, you can see the Status of the submission. If a Section Editor has been assigned, the submission will be listed as "In Review". If the submission is clearly unsuitable and should not be sent through peer review, you can use the Reject and Archive Submission link to send it immediately to the Archives (where it will be listed as Rejected). This will generate an (based on an existing template) to the author. Submission Metadata The final section of the Summary page contains the submissions' Metadata. From here, you can review the metadata and make any changes using the Edit Metadata link. 193

194 Submissions Using the Edit Metadata link allows you to make any necessary changes to the information supplied by the Author, including author information. You can add any additional authors using the Add Author button. You can also modify the title and abstract. The next section allows you to upload a small Article Cover image for the submission. This would appear with the article in the Table of Contents (and in the abstract view page) upon publication. This is an optional feature, but can serve to add some visual interest to your journal design. 194


195 Submissions You can also modify the Indexing information supplied by the author. Next, you can modify the supporting agencies included by the author. If the author did not include a formatted list of references for works cited during the submission process, references can be copy and pasted here. 195


196 Submissions Finally, you can determine whether or not the author names should display in the Table of Contents. This is typically controlled by the Journal Section policy, but it can be overridden here. For example, you may have set your Editorial section to not display author names, but one issue will have a special editor and you do want her name to appear. Also, the agreed upon permissions are displayed here. Remember to hit the Save Metadata button. For further information on working with submissions, see Section Editor. 196

197 Searching Submissions Searching Submissions As an Editor you can search through all submissions from your Editor Home page. Between your Submissions queues and your Issues options is a comprehensive search field: you can use it to search against a submission title, or against any user associated with the submission; you can also use it to search for submissions that were submitted, copyedited, layout edited, or proofread between any given date range. All submissions matching search parameters will display together after clicking Search. 197
 submissions to an existing issue, but they cannot create an issue.")

198 Issues Issues As an Editor you have four issue-specific pages available: Create Issue, Notify Users, Future Issues, and Back Issues. Only Editors can create issues and publish issues. Section Editors can add (schedule) submissions to an existing issue, but they cannot create an issue. It is the Editor's responsibility to check that all edited material has been proofread by the Author and (optionally) by a Proofreader. The Editor can arrange journal section and article order for each issue; can modify issue data like volume and number information, issue details and cover images, and so on. The Editor is also the only one who may remove published material from a Table of Contents. Finally, the Editor is the only person who can send out a notification to all registered Readers, notifying them of a new issue. Note Journal content can be published in bundled issues in traditional volume/number/year format, or can be published as soon as they are ready by adding finished submissions to the 'current' issue. See Publication Scheduling at step 4.2 for more information on configuration options. Create Issue To create an issue, you must select the Create Issue link. On the resulting page using the drop down menu, you will specify if you are creating a Current, Future or Back Issue. The Create Issue page has three sections: Identification, Access, and Cover. Identification The issue needs to be identified with the appropriate numbers and/or title, depending on the option chosen in Publication Setup (e.g., Vol 2, No 5, 2008). While the system will prompt the Editor with the next issue each time an issue is created, the Editor can override these settings and enter a new set of numbers or a different year. You also have the opportunity to add a special title and description for the new issue. 198

199 Issues Access If your journal has enabled subscriptions, you will next see an Access section, where you can set the status of the issue (open, subscription) and an open access date (if applicable). Cover You can also upload a cover illustration for the journal, in the form of a.jpg,.png or.gif file. This file will be posted on the Table of Contents as a cover page. It will appear on the journal's homepage while the journal issue is Current, and can be clicked on to reach the Table of Contents for that issue. Once the issue is archived, the cover will remain available with the issue through the Table of Contents. 199


200 Issues Notify Users Back at the Editor Home page, click the Notify Users link to send an notification to users associated with your journal. Before sending the , you can choose to have the sent to all users associated with the journal, or optionally to a subset of those users, such as Readers; published Authors; Subscribers; etc. You can also opt to include the table of contents of an issue. Finally, you have one more chance to edit the prepared template before it is sent. 200
.")

201 Issues Future Issues On the Editor Home page is the link to manage Future Issues. The Future Issues are where the Editor schedules submissions that are to be published next and into the future. The Editor may wish to ensure that there are always two or three unpublished issues, which enables submissions to be scheduled over a couple of issues (for reasons of balance, for example). Once an issue is created, it appears in the Future Issues list. A planned special issue is another example of a future issue. Every entry in the Future Issues list displays the issue title and as it was created by the Editor and as it will appear online; the number of items (edited submissions that have been scheduled with that particular issue; and a Delete option. clicking Delete will remove the issue from the Future Issues list, and all scheduled submissions will revert to their original unscheduled status (they will not be archived or deleted, nor will they be resubmitted for review: they will remain in Editing, but will have to be rescheduled). 201
.")
202 Issues Table of Contents Clicking on an issue title in the Future Issues list will take you the issue's Table of Contents, Issue Data and Preview Issue pages. Clicking the Table of Contents link will display all submissions that have been scheduled against that issue, enveloped within their respective journal sections (e.g., Articles, Commentary, etc.). By default, journal sections are ordered as they have been ordered by the Journal Manager in the Journal Sections configuration pages; articles are ordered by the date they have been scheduled. You can reorganize the order of both the journal sections and the articles by clicking the up and down arrows next to each item or by single-clicking and dragging an element with your mouse. Rearranging journal sections in one issue will not affect the order of already-published issues, and future issues will still default to the Journal Manager's prescribed order. After making changes, make sure to click the Save button at the bottom of the page. Every submission entry in the Table of Contents displays the submission title as a link: clicking the link will take you to the submission's Summary, Review, Editing and History pages. There is also a checkbox you can check to remove the submission from that particular issue. Removing a submission from an issue will not delete or archive the submission: it will only 'deschedule' it, and you will have to reschedule it from its Editing page, or archive it from its Summary page. The 'Proofed' column shows which submissions have had the Author sign off on the final galley copy via the Proofreading process. Your journal may not rely on proofreading online, but this is a handy check to see whether Authors have had a final say on how their work has been represented. 202

203 Issues Finally, you have the Publish Issue button at the bottom of the unpublished Table of Contents. Clicking this will publish the issue, moving it from the Future Issues list to the Back Issues page and promoting it to Current status on the website. The issue will also be listed in the journal's Archives page. NOTE TO ME: OTHER publish_ to insert here Issue Data The Issue Data page allows you to edit any of the information you entered when creating an issue including Identification, Access and Cover information input during the create issue stage. Issue Galleys This section allows


204 Issues Preview Issue You can preview an issue layout and associated information by clicking the Preview Issue link. You should do this to double-check that the article and section orders looks okay, and that the issue data looks as it should. Back Issues Back Issues can be accesses from the Editor Home page or from the Create Issue or Future Issue pages. The Back Issues page lists issues that have already been published, including the Current issue. There are three differences between this page and the Future Issues page listing: this page shows the issues' publication dates; you can reorder back issues up and down (which will affect the order in which they are displayed in the Archives); and you can assign any of the published issues to be the Current issue by choosing from the dropdown menu near the bottom and pressing Record. 204

205 Issues This demo journal has one back issue created as an example. Clicking on any issue title in the Back Issues listing will bring you to that title's Table of Contents page, which is exactly the same as the Table of Contents available for Future Issues. Similarly, you also have access to the issue's Issue Data page. As the issue has already been published, you do not need - - or have -- a Preview Issue option. 205
206 Chapter 8: Section Editors Chapter 8: Section Editors Section Editors usually manage the review of submissions and the editing of those that are accepted. Depending on the journal's policies, however, a Section Editor initially assigned to a submission by an Editor may be asked only to see it through the Review stage, after which, if the submission is accepted, the Editor or another Section Editor takes over the Editing Process; or vice-versa. Editors can self-assign and accomplish the functions described in the following pages. 206

207 Section Editor Home Page Section Editor Home Page To access the Section Editor Home Page, users login and click User Home. Submissions to the journal that are assigned to a Section Editor appear in that Section Editor's Submissions In Review or In Editing queue. Section Editors will have received an from the Editor requesting that you take on this submission. Section Editors have access to only those submissions to which they have been assigned. Depending on the journal's policies, Section Editors may be responsible for just the Review of the submission or for both the Review and the Editing of the Submission. Click on the 1 In Review link to see the submissions assigned to you that are currently going through the review process. On the resulting page, you will see a list of all submissions in your Review queue. Select a hyperlinked title to proceed to the submission's Summary page. 207
208 Submission Summary Submission Summary The Section Editor's Submission Summary page is almost identical to the Editor's Submission Summary Page, with the exception that the Section Editor does not have access to the Editors Assignment section. Otherwise, the Section Editor can add supplementary files; change the article section; adjust fees and status; and/or modify the article's metadata just as the Editor can. For further information, please refer to the Editor's pages in this manual. 208
.")
209 Submissions In Review Submissions In Review To begin the review process, select Review from the top of the submission record. Review Summary The first part consists of basic submission information, and a review version of the submission (automatically generated from the original submission file). Managing Review Rounds Assigning Peer Reviewers is an important part of a Section Manager's role. You can manage one or more rounds of review. Click on the Select Reviewer link to assign one or more users for Peer Review to this submission. The View Regrets, Cancels, Previous Rounds link will show you a list of past, inactive reviews. From the resulting screen, you can choose from your list of enrolled Reviewers. If there are many to choose from, you can use the search tool to narrow your choices such as search for matching review interests. This list may grow as will more details about reviewing interests and the number of articles reviewed to date by each reviewer. If you know of an existing user in the journal that is not currently enrolled as a Reviewer, this can be quickly done using the Enroll An Existing User As Reviewer link. You can also use the Create New Reviewer to enroll someone who is not currently an existing user. To assign a Reviewer select Assign. 209
. You can remove this Reviewer using the Clear Reviewer link.")
210 Submissions In Review Once you've made the selection, you will be returned to the Review page. You can select another Reviewer. Notice the addition of Reviewer A (your first selection). You can remove this Reviewer using the Clear Reviewer link. Use the Request icon to send an to the Reviewer (using an template), asking him to take on the task. 210

211 Submissions In Review By default, Reviewers will be provided with an extended text box to type in their comments. However, the Journal Manager can setup Review Forms allowing for more focused questions. Use the Assign Review Form link to provide a review form to this Reviewer. If there are several Review Forms to choose from, use the Preview link to take a quick look at each. 211
212 Submissions In Review The Reviewer will send you an both when he agrees to do the review and when the review is completed. Returning to the Review section, you can see the Reviewer's decision (e.g., Revisions Required). Any competing interests are also displayed. You can also view the Reviewer comments by clicking on the Review Form Response icon. If the Reviewer uploaded a revised version of the submission (e.g., a Word document with changes included), this would also be available here. If the journal has set up reviewer ratings (see Journal Setup), use the dropdown menu to grade the Reviewer. This is invisible to the Reviewers, but will display for Editors and Section Editors assigning new Reviewers. Be sure to use the Acknowledge icon to your thanks to the Reviewer. At this point, you can enroll more Reviewers (see above) or make a decision about the article (see Editor Decision). 212
213 Submissions In Review Editor Decision A Section Editor will wait for reviewer feedback to come in before making an editorial decision about an article. The Section Editor will synthesize the reviewer input into a decision about whether to publish the submission. She can see at a glance the two reviewers' recommendations. To see the review data from each reviewer she can click the talk bubble beside the Review Form Response. In this example, both reviewers had made the recommendation of "Revisions Required". Editor Decision choices include: 213

214 Submissions In Review Accept Submission: The submission will be accepted without revisions. Revisions Required: The submission will be accepted after minor changes have been made. Resubmit for Review: The submission needs to be re-worked, but with significant changes, may be accepted. It will require a second round of review, however. Decline Submission: The submission will not be published with the journal. Once you've selected a decision from the dropdown menu, hit the Record Decision button. Important Note: The Section Editor must use the Notify Author icon to generate an to the Author, informing him or her of your decision. Until this is done, no further work can be done with the submission. Use the Import Peer Reviews button on the form to pull the anonymous reviewer comments (or form results) into the body of the . Hitting the Send button delivers the message. The option to upload attachments gives the Section Editor the opportunity to share a copy of the reviewer's edited manuscript with the author. Be sure the edited manuscript is stripped of any personal information. 214


215 Submissions In Review After sending the message to the author, the option to send a BCC copy to reviewers is presented. Using OJS the Section Editor is able to record the decision about the submission, communicate this decision and the review data to the author, and notify the reviewers while letting them see how others responded to the paper. Summary of Decision Options and any next steps: Accept Submission If the decision is to Accept, select the appropriate version (i.e., Review Version, Author Version, or Editor Version) and hit the Send button to move the submission from the "In Review" queue to the "In Editing" queue. Another important note here is for the Section Editor to select the version of the submission headed for Copyediting. Use the radio button to choose for example, the Editor Version and click "Send to Copyediting". 215
216 Submissions In Review Revisions Required If the decision is Revisions Required, the Author will need to make the required changes and upload them for you to view. Once this is done, you will receive an and will be able to access the revised file by clicking on the Author Version link. If the revisions are not complete, use the Notify Author link to send another with further instructions. Resubmit for Review If the decision is Resubmit for Review, the Author will need to upload a significantly revised version of the submission. You will receive an when this is ready. You can access the revised author submission file using the Author Version link. To send it for another round of review, select it using the radio button, and hit the Resubmit button. This will allow you to select Reviewers for a second round of review. Decline Submission If the decision is to Decline, the submission automatically moves from the "In Review" queue to the "Archive" queue upon notifying the Author. 216
.")
217 Submissions In Editing Submissions In Editing Upon acceptance, the submission moves from "In Review" to "In Editing". You can go to "In Editing" by selecting the Editing link at the top of the submission record. The first section provides basic submission information (authors, title, section, editor). The Copyediting section follows below. The Editing process comprises 4 sections: Copyediting Scheduling Layout Editing Proofreading 217
218 Submissions In Editing Copyediting The "Section Editor as Copyeditor" Process Copyediting consists of checking the submission for grammatical or stylistic errors. The journal has two options for the copyediting process. In Chapter 5 the Journal Manager can choose to have the Editor or Section Editor act as the Copyeditor, or allow the Editor or Section Editor to select a separate Copyeditor. If you as the Section Editor are doing the copyediting, follow the 3 copyediting steps: Step 1: Select the Initiate link to indicate that copyediting has begun. The version of the submission file that was sent to Copyediting in the Editor Decision stage is linked here. Once you are finished copyediting, you can upload the revised file at the bottom of this section, under "Upload file to - Step 1". Once this is done, hit the Complete link in the Step 1 line. Note the link to Copyedit Instructions and the ability to make Copyedit Comments, shared by the Copyeditor, Section Editor, and Author. Step 2: Having completed Step 1, you must now select the Request icon. This will send an to the Author, asking him to review your copyediting changes (note the instructions provided in the prepared template). 218
.")
219 Submissions In Editing Once the has been sent, the Author will be able to upload any further changes to the submission. Once the Author has uploaded any revisions, be sure to use the Acknowledge icon to thank him. Step 3: Next, review the Author's latest file (available in Step 2 above). Make any final changes and upload the submission file (by selecting Step 3 and using the file upload tool). Hit the Complete link when this is done. The submission is now ready to move to Scheduling. 219


220 Submissions In Editing The Separate Copyeditor Process If your journal is configured to use separate Copyeditors, you must first select one for the submission using the Assign Copyeditor link. On the resulting screen, select an available Copyeditor by clicking Assign. If there isn't one, ask your Journal Manager to enroll one. Use the Request mail icon to ask the Copyeditor to undertake the assignment. 220

221 Submissions In Editing This will generate with prepared template text automatically provided. For details on the Copyeditor's tasks and the order in which they are performed, see Chapter 10: Copyeditors. Once the Copyeditor has completed the first stage of copyediting, both you and the Author will receive an notification. The Author will review the changes and make any final changes of his own. You will be able to access both revisions from the copyediting section of the submission record. Remember to use the Acknowledge icon to let the Author and Copyeditor know that you have received their revisions. 221
. Remember to review any Copyedit Comments located just under the upload tool. Once the Copyeditor is finished with the final revisions, you will receive an email notification.")

222 Submissions In Editing Use the Request icon in Step 3 to ask the Copyeditor to make the final revisions, incorporating changes from the Author (and from you, if you choose to upload your own revised version). Remember to review any Copyedit Comments located just under the upload tool. Once the Copyeditor is finished with the final revisions, you will receive an notification. Returning to the submission record, you will see the final copy (e.g ce.docx) and be able to use the Acknowledge icon to thank her for her work. This file will now automatically become the first layout file. At any time in the editing process, an editor or section editor can view the History of a submission which includes an Event Log, Log and any Submission Notes on the article. 222

223 Submissions In Editing 223
224 Submissions In Editing Scheduling Use the scheduling dropdown menu to select the issue for this submission. You can change it later if you change your mind. If you have not yet created the required issue see the Issues page in Chapter 7: Editors. 224

225 Submissions In Editing Layout Editing Layout editing is another role that can be configured in different ways. A journal may have the section editor or copyeditor do the layout editing, or assign a separate layout editor. The journal must be configured by the Journal Manager in Step 4: Managing the Journal to accommodate a separate Layout Editor. The "Section Editor as Layout Editor" Process Layout editing consists of taking the final copyedited submission file from OJS and using external software (e.g., Adobe Acrobat or Dreamweaver) to create the HTML or PDF files, known as galleys, which will be published on the web site. This is a critical step, as it uploads the files that will be viewed by the journal's readers. If you as the Section Editor doing the layout editing, follow these steps: First, download the final copyedited version of the submission which has automatically moved to the Layout section: Next, using the downloaded submission file as your source document, convert it into an HTML or PDF version suitable for online viewing. For HTML files, you might want to use software such as Adobe Dreamweaver or the open source Nvu. Exercise caution if using Microsoft Word to generate the HTML, as it will introduce non-standard tags which may disrupt the display of the submission when published on your web site (Note: Dreamweaver has a "Clean Up Word HTML" option that can help with this). For PDF files, Adobe Acrobat can easily convert Word documents, as can Microsoft Word The open source Open Office suite can also open Word documents and easily convert them into PDF files. Many journals on a limited budget have opted to only display PDFs, as it takes significantly less time to create PDF files, and requires less technical knowledge. Returning to OJS, you will next need to upload your HTML or PDF file as a "galley": 225

226 Submissions In Editing If it is an HTML file, the following screen will appear: OJS will automatically include a "label" (eg. "HTML"), which will become the link text on the Table of Contents. 226
, which will be the link text on the Table of Contents.")
227 Submissions In Editing If you upload an HTML file, you can also optionally upload a separate stylesheet for the file and images or other media associated with the article. If it is a PDF file, this screen will appear: OJS will automatically include a "label" (PDF), which will be the link text on the Table of Contents. Returning to the Layout section, you will now see your galleys. View Proof will display the galley in your browser. The linked file name will allow you to download a copy of the file. The Order arrows will allow you to change the order of the galley links on the Table of Contents. In this example, the HTML link would appear before the PDF link. These Order arrows would allow you to adjust that. 227
.")
228 Submissions In Editing The Edit link will take you back to the "Edit a Layout Galley" screen, allowing you to replace the galley file (without modifying that galley's view count) or, in the case of an HTML galley, add a new stylesheet or images. Using the Delete link will remove the file (and all viewing statistics -- see the Views column). The Views number (0 in this example as it has not yet been published) is an important statistic that records the number of times readers have downloaded a copy of the galley file. If you delete the file, these views will be reset to zero. If you edit the file, these numbers will be maintained. Finally, you may wish to upload additional supplementary files for the article, such as Powerpoint slides or an Excel spreadsheet of data. You can do this by changing the "Upload File to" button from Galley to Supp. Files and using the upload tool. These files will be visible in the Reading Tools for the article. The Separate Layout Editor Process Once the Copyeditor completes the final Copyediting step, you have a "clean" version of the submission, which automatically moves to the Layout stage. As the Section Editor, on receiving notification of the completion of the copyediting, return to the submission record to select a Layout Editor. The record has been highlighted to indicate an action is required in the layout editing stage. Select the submission record, scroll to the Layout area on the page, and click on Assign Layout Editor. 228

229 Submissions In Editing The resulting page displays individuals assigned to the role of copyeditor. Select one by clicking Assign. Request that the Layout Editor begin work by using the icon under Request to generate an message from a template. 229


230 Submissions In Editing The Layout Editor will prepare galleys for the submission in each of the journal's publishing formats (e.g., HTML, PDF, PS, etc.). The Supplementary Files, which remain in the original file format in which they were submitted, will be reviewed by the Layout Editor and Proofreader to ensure that basic formatting is in place, and that the files conform as well as possible to journal standards. You will receive an when the Layout Editor has completed the initial production of the galleys. See Chapter 11 Layout Editors for more on this role. Upon receiving the notification, log back into the system and return to the submission record. You will see the galleys in place. Use the Acknowledge icon to thank the Layout Editor for his work. As above, when the Section Editor performs Layout duties, you can: 230
231 Submissions In Editing select the View Proof links to quickly view the galley files. click on the linked File names to download a copy of the galley file. use the Order arrows to determine which galley appears first on the Table of Contents. use the Edit link to revise the galley files. use the Delete link to remove the galley files. note the numbers in the Views column. 231
232 Submissions In Editing Proofreading The Section Editor as Proofreader Process Now that the galleys have been created and uploaded into OJS, the next step will be to proofread those files, to ensure that no errors exist before publication. The journal has two options for the proofreading process. The Journal Manager can choose to have the Editor or Section Editor act as the Proofreader or allow the Editor or Section Editor to select a separate Proofreader. If you as the Section Editor are acting as Proofreader, follow these steps: First, request that the Author undertake the proofreading of the galley using the Request icon: This will generate an message for the author. Hit the Send button to deliver this 232


233 Submissions In Editing Once the Author has completed her review, use the Acknowledge icon to thank her for her work. Use the Proofreading Corrections icon to view any comments made by the Author. You can optionally use the Initiate link to indicate that you have begun your proofreading responsibilities for this submission. Alternatively, you could simply revise the galleys and upload them in the Layout section using the Edit link for each galley. Make any required changes to the galleys, and upload them as Layout Versions in the Layout section. Hit the Complete link when finished. 233
.")


234 Submissions In Editing As the final step, select the Initiate link to indicate that you have started the Layout Editor proofing (again, this is optional and may not be required for your journal's workflow). Download the corrected Layout Versions, make any final changes, upload as revised galleys, and hit the Complete link to indicate that you have finished your proofreading. Repeat these editorial steps for each submission. Once you have scheduled all of the submissions to the issue, you can Publish the issue and make it available on your journal web site. The Separate Proofreader Process As the Section Editor, once you have been notified by the Layout Editor of the completion of the galleys, select a Proofreader. Select a Proofreader from the resulting list using the Assign link. If no Proofreaders are listed, contact the Journal Manager to enroll someone in this role. The Section Editor then sends the Request to the Author to begin the Proofreading process using the Request icon. 234

235 Submissions In Editing This will generate an message, which includes detailed instructions for the Author. You and the Proofreader will receive an from the Author when he has completed his proofreading. You can use the Acknowledge icon to thank him for his work. The Author, upon completing his review of the galleys and Supplementary Files, if any, sends a completion to the Proofreader, with a CC to the Section Editor. Any typos or formatting errors are noted in the Corrections text-box in Proofreading (because the Authors and Proofreaders cannot mark up the galleys). The Proofreader, on completing the review of the galleys and Supplementary Files, if any, notifies the Layout Editor, with a CC to the Section Editor, and the Layout Editor proceeds to correct the galleys and Supplementary Files, if any. Finally, The Layout Editor will notify you that the submission is ready to be scheduled for publication. Use the Acknowledge icons to thank them for their work. 235

236 Submissions In Editing At this point, you may again wish to review the files, and if satisfied, schedule the submission for publication by choosing an issue under Scheduling, and pressing Record. The submission's galley files will then be available for readers when the issue is published. 236
.")
237 Submission References Submission References At any point in the review and editing process, the Editor, Section Editor and Copyeditor assigned to the submission can access the submission's References page. This page contains the Citation Markup Assistant tool (configured in Journal Setup Step 3.7). This tool helps to edit article references, and allows approved citations to be exported in various formats (including NLM XML and a number of different citation styles) to be added to final article galleys. The first time you use the assistant, you will see an introductory text explaining how it can be used. If you don't want to see this text every time you use the assistant, check the bottom check-box. The assistant helps you with two processes: editing citations, including attempting to extract them from the reference list supplied by the Author, and checking them against external databases for accuracy and extra detail; and formatting citations for export in various formats. These two processes are available in their own tabs and you can switch between them Note All citations must be approved through the editing process before they can be exported. Clicking on the Edit Citations tab will display all extracted citations on the left view pane. 237

238 Submission References Clicking on an individual citation in the left pane will display information on that citation in the right view pane. Changes can be made and saved by clicking the Save button at the bottom of the pane, or canceled by clicking the Cancel button. New citations can be added by clicking the New Citation icon, found just above the left view pane, and individual citations can be deleted by clicking the Delete Citation icon to the left of the citation listing in the left view pane. Citations that have been fully proofed can be marked as approved by clicking the Save and Approve button. When a citation has been approved, it will show up with a blue border in the left view pane, and you will be automatically moved to the next unapproved citation. You will see the original citation, and the changes the Assistant has made as part of the extraction and lookup process. It will display the way the citation will appear as per your journal's selected citation style. 238


239 Submission References Additionally, you can also manually edit the citation; check it again against the journal's configured citation database services; search for it in Google Scholar; or ask the Author for further citation information. Finally, you can access and choose between detailed expert internal citation service results to help improve the citation. You can access and choose results for each citation database connector that has been configured by the Journal Manager. 239


240 Submission References Once all citations have been approved, you will be automatically moved to the Export Citations tab. Citations can be exported in NLM XML (2.3 or 3.0), or in a variety of different citation formats, including ABNT, APA, MLA, and Vancouver. Exported citations can be copied and pasted directly into your final galley document; the different citation formats, meant for pasting into Word or other non-xml-specific layout and editing applications, include links to look up each citation in Google Scholar. 240

241 Submission References 241
.")

242 Submission Archives Submission Archives Submissions in this queue have been through the editorial process, whether they have been declined, scheduled to be published, or are published. This queue provides Editors and the assigned Section Editor complete access to the submission's editorial history (Summary, Submission, Review, Editing, and History). Rejected submissions can be deleted by clicking the Delete link if one appears next to the title. Published submissions have their issue number listed instead of a delete button. To Restore an Archived Item to the Active List: the Editor should go to the Archives on the Editor Home page and find the submission. Clicking on the submission's title will lead to the Summary, Review, Editing and History pages for the submission. On the Summary page you will find a Restore to Active List link; clicking this will move the submission back into the In Review or In Editing list, depending on what stage the submission was at when it was archived. 242
243 Chapter 9: Reviewers Chapter 9: Reviewers The Reviewer is invited by to review a submission. The includes the submission title and abstract, as well as the journal's URL and a username and password for the Reviewer to use to enter the journal. The Journal Manager has the option of setting up and using a review process that will send the submission as an attachment to the Reviewer instead, along with an invitation to review. In this case, the Reviewer responds to the process by . See Journal Management Step Two. Described here is the principal method for reviewing and ensuring complete records of the process, which involves the Reviewer conducting the Review on the journal's web site. 243


244 Submissions Submissions After logging in to the journal the Reviewer will arrive at the User Home page. This user is both an Author and Reviewer. To see the submissions to review, click the Reviewer link, or click the "x" Active link. Both will take you to your Active Submissions page. This page lists the submissions which you have been invited to review or are currently in the process of reviewing. The Submissions queue also notes when the review is due and what round the review is, as some reviews may have entered a second round of reviewing, following the Section Editor's decision that the submission must be "resubmitted for review." This page also provides access to past reviews which the Reviewer has completed for the journal. Clicking on the linked title of an active submission will take you to the review process. 244


. Step 1.")
245 Reviews Reviews You will first see a details summary of the submission you have been asked to review. Next, you will see the review schedule, and the associated deadline. Next, the Review process is divided into six or seven Review Steps (depending upon whether Reviewer Guidelines was set up in the Journal Setup; here they do not appear). Step 1. Notify the Section Editor whether you will undertake the review. The decision should be made after reviewing 245
. If you are unable to do the review, click on \"Unable to do the review\" which leads to a standard email to the Section Editor.")
246 Reviews the submission's abstract and perhaps looking at the submission, by clicking on the file name in Step 3 (depending on the journal's policies, the file may not be available before agreeing to review it). If you are unable to do the review, click on "Unable to do the review" which leads to a standard to the Section Editor. If able to do the review, click on "Will do the review", which leads to a standard to the Section Editor, and which will indicate to the Section Editor and Author that the review is underway. Step 2. The Author has uploaded the submission as a file, which you can download from the journal's web site to your computer by clicking on the file name. The Supplementary Files refer to materials the Author may have uploaded in addition to the submission, such as data sets, research instruments, or source texts. Step 3. The journal may require you to declare whether or not you have competing interests with the article being reviewed. You may type in here if you do or do not have competing interests and proceed accordingly. Step 4. Click on the Review Form icon to be presented with the review form defined by the Journal Manager. If a custom form has not been created, the reviewer will be presented with the default form which consists two text-boxes where the Review can be either entered by hand or pasted: one for the Editor and Author, and one visible to the Editor only. The Reviewer may enter or paste partial reviews into these boxes and click the Save button at the bottom of the form to return and make changes later. The Reviewer may return to make such changes until a recommendation on the main Review pages is chosen, at which time the Review process is complete. 246

247 Reviews Please note: As is the case in this example, the Journal manager, in conjunction with the journal's Editor(s), created an extended custom review form to be filled out here. More information on the custom form can be found in the Reviewer's Guidelines. The form can be returned to and edited until a recommendation has been chosen. Step 5. You also have the option, in addition to entering a review, of uploading files for the Section Editor and/or the Author to see. These files may be an annotated version of the submission or some relevant data or other materials that will assist Editor and/or Author. It will be at the Editor's discretion whether these files are shown to the Author, but you can certainly comment on this in the Review (Step 5). Step 6. You must select a recommendation for the submission from among the following options: Accept, Revisions Required, Resubmit for Review, Resubmit Elsewhere, Decline Submission, See Comments. When you click Submit Review to the Editor, it leads to a prepared to the Section Editor, and makes your recommendation, saved Review (which is now locked) and any uploaded files available to the Editor. A recommendation is made for "Revisions Required". After the steps are complete, the Reviewer's work is finished. Below is a completed review page with the addition of Reviewer Guidelines so you can see what the process looks like with 7 steps. 247
248 Reviews 248
249 Chapter 10: Copyeditors Chapter 10: Copyeditors A submission that has passed the review stage and been accepted by the Journal Editor or Section Editor will move into the Copyediting stage. The Copyeditor receives an request from the Section Editor to copyedit a submission, which will then appear in the Copyeditor's Submissions queue. A Copyeditor who is unable to do the copyediting simply responds by to the Section Editor. A submission goes through three steps in the Copyediting stage. 1. Initial Copyedit is undertaken by Copyeditor. 2. Author Copyedit is when an author completes the edits made by the Copyeditor and uploads the changes. 3. Final Copyedit is where a Copyeditor reviews the submission a final time and uploads the final document. 249

250 Copyediting Copyeditor Home Page After logging in, you will have access to your User Home Page. Clicking on the Copyeditor link in the User Home page, or on the linked number of items next to it, will lead to the Submissions queue. This queue lists the Active Submissions ready for copyediting. To access the copyediting page for a particular submission, click on the linked title. On the resulting submission record screen, you can see some of the details (Authors, Title, Section, Editor). Below that is the Copyediting section, where you can begin working with the submission. 250
.")

251 Copyediting Use the Review Metadata link to see more information about the submission if desired (abstract, keywords, etc.). To access the file to edit, click on the linked file name in step 1 (e.g., CE.DOCX). Open the document in your word processor, make the required changes, and then upload your revised version using the Upload tool. Use the Complete mail icon to notify the Section Editor and Author your work is complete. An message will be generated, informing both the Author and the Section Editor that the first step of copyediting is complete and the submission is ready for review. 251
, located in Step 2. Author Copyedit.")
252 Copyediting You must now wait for the Author to look over the edited document and complete her copyedits. Once it is ready, you will receive an notification and be able to download the revised submission (e.g., CE.DOCX), located in Step 2. Author Copyedit. Be sure to check the Copyedit Comments, found just under the file upload tool for any additional information the Author or the Section Editor may have noted. The next step will be to open the Author's revised file in your word processor, make any required changes, and upload these in Step 3. Final Copyedit using the file upload tool. Use the Complete mail icon to notify the Section Editor that you have completed the copyediting of the submission. This will send a notification and is the end of your responsibilities as Copyeditor for this submission. 252
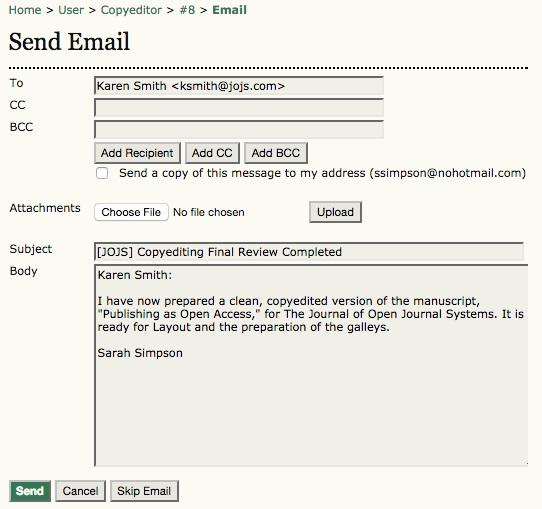
253 Copyediting 253
254 Chapter 11: Layout Editors Chapter 11: Layout Editors Layout editing is another role that can be configured in different ways. A journal may have the Section Editor or Copyeditor do the layout editing, or assign a separate Layout Editor. The journal must be configured by the Journal Manager in Step 4: Managing the Journal to accommodate a separate Layout Editor. The Layout Editor uses the final copyedited version of the submission to create the PDF, HTML or EPUB formats of the published articles and makes sure they have a common look and feel. These formatted versions are known as the galleys, or galley proofs. If the option for a separate Layout Editor has been configured, the Layout Editor will receive an request from the Copyeditor or the Section Editor requesting the layout of a submission that has been through the copyedit stage. A Layout Editor who is unable to do the Layout simply responds by to the Section Editor. 254
255 Layout Editor Home Page Layout Editor Home Page Once you've logged in, as a Layout Editor you will have access to your User Home Page. This page includes a link to an Active Submissions page, as well an Archives link to view previously completed submissions. Clicking on the Active link from the Layout Editor link will take you to the Active Submissions page. Alternatively, from the User Home page, select the link displaying the number of submissions in editing (e.g. 1 In Editing). Select the submission from the resulting list by clicking on its linked title. 255
 to download a copy of the file. You will need to use third party-software to prepare the galley files (e.g., Adobe Acrobat, Microsoft Word or Open Office).")
256 Layout Layout On the resulting page, you will see the layout version of the submission, which has been prepared by the Copyeditor according to the journal's standards. Click on the linked file name (e.g., LE.DOCX) to download a copy of the file. You will need to use third party-software to prepare the galley files (e.g., Adobe Acrobat, Microsoft Word or Open Office). Here, the Journal Manager has made a set of Layout and Reference Linking instructions and a Layout Template available to assist in properly formatting the files for publication. Clicking on Layout Instructions, for example, will open the instructions set out by the Journal Manager. Once you have created the HTML or PDF files, upload them as galleys using the file upload tool (e.g., LE.pdf). Be sure to change the radio button to Galley. 256

257 Layout OJS will identify the file type based on its suffix (e.g., PDF, HTML), as well as provide information on the file size, language (if your journal is multilingual), original file name, etc. The label is added automatically, and will appear as such on the journal's Table of Contents in association with the item published. You also have the option of manually labelling the file. When uploading an HTML galley, the Edit screen provides additional information, including the option to upload a stylesheet (unique to the submission) or images. You can upload more than one Galley Format file, view the proof or the file, delete files that have been uploaded, and edit information such as the file name. If the Author has uploaded any Supplementary Files, such as data sets, they will already be in place. They will be published in the journal in their original file format by default, unless the journal has a special policy with regard to their preparation (as with Figures or illustrations). Even if the policy is to publish them in their original format, you may still wish to consult the files to ensure they are legible and to see whether they can be made to further conform to journal style and standards. When you have completed uploading the galley files, use the Complete mail icon to generate an message to the Section Editor. 257

258 Layout You will see a date has been entered under "complete" once the has been sent. You have now completed the first phase of layout editing and must now wait for the Author and Proofreader to make any necessary changes. 258
259 Proofreading Proofreading The Layout Editor assumes proofreading duties after the Author and Proofreader have proofed the galley files for typographical and formatting errors. They will record the corrections needed in the Corrections text-box, following the Proofreading Instructions. Once the Proofreader s you that the proofing is complete, you will need to log back into the system and return to the submission record. Use the Proofreading Corrections icon to see the comments made by the Author and Proofreader. This will produce a window with the required corrections. Apply any changes to the galley files, upload them again to the layout section. On completing this task, you may wish to add comments to the corrections text-box (e.g. explaining a change), before clicking on the icon under complete which will generate an notifying the Section Editor that the submission is ready to be scheduled for publication. 259

260 Proofreading As Layout Editor, you have now completed your layout editing responsibilities. 260
261 Chapter 12: Proofreaders Chapter 12: Proofreaders The Proofreader will receive an from the Section Editor requesting that the Proofreader complete a round, or rounds, of proofreading. It is then the Proofreader's duty to accept or decline the responsibility; if accepted, the Proofreader can then log in and begin the proofreading process from their User Home page. Upon logging in, clicking on the Proofreader link on the User Home page leads to the Active Submissions page, which displays submissions requiring proofreading. You can access past submissions under the Archive link. To access the submission's proofreading page, click on the article title. 261
262 Proofreading Proofreading From here, you can review the submission metadata (using the Review Metadata link) and the galley files (under Layout), and also see the Proofreading Corrections identified by the Author by clicking the Proofreading Corrections icon. Clicking this link will open a comment box, where you can see the Author's comments and add your own. These comments will be available to the Section Editor and the Layout Editor, allowing them to make any final corrections before publication. Using the Save button will save your comments and return you to the submission page. Use the Complete mail icon to inform the Section Editor (add Layout Editor if required) through an template that you have completed your work. 262
263 Proofreading A date stamp will display under "complete" beside Proofreader Comments, and the Layout Editor will take on the final proofread. You are now finished with the submission. 263
264 Chapter 13: Readers Chapter 13: Readers Readers include subscribers to subscription-based journals, and readers who choose to register for open access journals (whether immediately open access or open after a period of time after initial publication of journal content). Registered Readers receive a notification with the publication of each issue which includes the Table of Contents from the journal. 264

265 Accessing Content Accessing Content For open access journals using OJS, accessing content is as simple as selecting the Current link to see the latest issue, or the Archives link to see previous issues. You do not need to login to access open access journals. Subscribing If a subscription is required to access content, you will need to register for a Reader account with the OJS journal. 265

266 Accessing Content Signing up for notification If you would like to receive an automatic message alerting you to new content from an OJS journal you can often register for a Reader account and check the box for notification: 266

267 Reading Tools Reading Tools Reading Tools are intended to assist both expert and novice readers of the journal in building a context for interpreting, evaluating and utilizing the research they are reading. Reading Tools have been developed for a wide range of academic disciplines and the Journal Manager can select, as well as update and edit these tools to support the journal's reading environment. The Tools are displayed in the user's browser to the right of the item being read. Reading Tools provide Readers with access to things like an item's indexing information, a print version and a citation. The Tools also enable Readers to look up words in the item (by double clicking on any work in the HTML version of the item); to the author, share the article with another Reader; or to comment on the article. All of these features create a much more interactive reading environment. The Tools are also designed to take the first two keywords from the submission and feed them into search engines of open access databases and other resources. These features are found under the heading Related Items, and are grouped under Author's Work, Media reports, Government Websites, Teaching files, Online Forums, and other categories, depending on the set of Tools selected. In each category the Tools provide multiple choices or databases to consult, while allowing the Reader to learn more about each database by providing a link to an About page for the resource. (The Journal Manager is able to edit or delete existing resources and add new ones as well see the Journal Management section regarding Reading Tools for details.) 267
Open Journal Systems: Authors guide. John Willinsky Kevin Stranack Alec Smecher James MacGregor
 Open Journal Systems: Authors guide John Willinsky Kevin Stranack Alec Smecher James MacGregor Open Journal Systems: Authors guide by John Willinsky, Kevin Stranack, Alec Smecher, and James MacGregor 2nd
Open Journal Systems: A Complete Guide to Online Publishing. John Willinsky Kevin Stranack Alec Smecher James MacGregor
 Open Journal Systems: A Complete Guide to Online Publishing John Willinsky Kevin Stranack Alec Smecher James MacGregor Open Journal Systems: A Complete Guide to Online Publishing by John Willinsky, Kevin
CONTENT OVERVIEW NAVIGATING OJS-IJMSPI Common Interface Elements The Top Navigation Bar... 1
 IJMSPI READER GUIDE CONTENT OVERVIEW... 1 1. NAVIGATING OJS-IJMSPI... 1 1.1. Common Interface Elements... 1 1.1.1. The Top Navigation Bar... 1 1.1.2. The Breadcrumb... 2 1.1.3. The Sidebar... 2 1.2. Journal-Specific
Editors. Getting Started
 Editors The Editor oversees entire editorial and publishing process. The Editor, working with the Journal Manager, typically establishes the policies and procedures for the journal, which are used in setting
IJMSPI ASSOCIATE EDITOR GUIDE
 IJMSPI ASSOCIATE EDITOR GUIDE CONTENT OVERVIEW... 1 1. NAVIGATING OJS-IJMSPI... 1 1.1. Common Interface Elements... 1 1.1.1. The Top Navigation Bar... 1 1.1.2. The Breadcrumb... 2 1.1.3. The Sidebar...
This is a quick guide on how to register with the Interbull Bulletin and then submit your paper via the new Open Journal System.
 - This is a quick guide on how to register with the Interbull Bulletin and then submit your paper via the new Open Journal System. Please read through the Author Guidelines on the Bulletin website, this
Table of Contents. Preface 1.1. Chapter 1: Introduction Background OJS Features. What's New in OJS
 Table of Contents Preface Chapter 1: Introduction Background OJS Features What's New in OJS 3 Reader Interface Editorial Interface aka the Dashboard Community Contributions Support Chapter 2: Installing
As an Author, your tasks include submission; submitting revised copy; copyediting; and proofreading.
 Chapter 5. Authors Overview OJS exists to serve Authors as well as journals. Not only does OJS provide an easy-to-use submission process, it can collect and disseminate key information about Authors and
CFHSS OCS Guide. An Introduction to Open Conference Systems Version 2.0
 CFHSS OCS Guide An Introduction to Open Conference Systems Version 2.0 Open Conference Systems is a research and development initiative of the Public Knowledge Project at the University of British Columbia.
Chapter 11: Editorial Workflow
 Chapter 11: Editorial Workflow Chapter 11: Editorial Workflow In this chapter, you will follow as submission throughout the workflow, from first submission to final publication. The workflow is divided
About the Tutorial. Audience. Prerequisites. Copyright & Disclaimer. WordPress
 About the Tutorial WordPress is an open source Content Management System (CMS), which allows the users to build dynamic websites and blog. WordPress is the most popular blogging system on the web and allows
eportfolio Support Guide
 eportfolio Support Guide D2L Services West Chester University of Pennsylvania www.wcupa.edu/d2l 610-436-3350, option 2 Anderson Hall, room 20 d2l@wcupa.edu v10.3 September 2014 1 CONTENTS EPortfolio Basics
CONTENTS. What is Moodle? Logging in to Moodle Introducing the Workspace Customising the Workspace... 8
 Moodle Training March 2012 Material produced by the VLE Group (Monash University) and elearning Services (Faculty of Medicine, Nursing and Health Sciences, Monash University) vle.monash.edu/supporttraining/learnbytech/moodle/
Web Site Documentation Eugene School District 4J
 Eugene School District 4J Using this Documentation Revision 1.3 1. Instruction step-by-step. The left column contains the simple how-to steps. Over here on the right is the color commentary offered to
ScholarOne Manuscripts. Editor User Guide
 ScholarOne Manuscripts Editor User Guide 28-November-2017 Clarivate Analytics ScholarOne Manuscripts Editor User Guide Page i TABLE OF CONTENTS INTRODUCTION... 1 Use Get Help Now and FAQs... 1 Site Configuration
ScholarOne Manuscripts. Editor User Guide
 ScholarOne Manuscripts Editor User Guide 18-June-2018 Clarivate Analytics ScholarOne Manuscripts Editor User Guide Page i TABLE OF CONTENTS INTRODUCTION... 1 Use Get Help Now and FAQs... 1 Site Configuration
ScholarOne Manuscripts. Author User Guide
 ScholarOne Manuscripts Author User Guide 1-May-2018 Clarivate Analytics ScholarOne Manuscripts Author User Guide Page i TABLE OF CONTENTS LOGIN AND ACCOUNT CREATION... 1 Logging In... 1 ORCID Account Creation
REUTERS/Tim Wimborne SCHOLARONE MANUSCRIPTS TM EDITOR USER GUIDE
 REUTERS/Tim Wimborne SCHOLARONE MANUSCRIPTS TM EDITOR USER GUIDE 21-JUNE-2016 TABLE OF CONTENTS Select an item in the table of contents to go to that topic in the document. INTRODUCTION... 1 USE GET HELP
Blogs.mcgill.ca guide
 Blogs.mcgill.ca guide A step-by-step document to blogging at McGill McGill University Table of Contents BLOGGING AT MCGILL...3 BLOGGING IN TEACHING AND LEARNING...3 LOGGING IN TO BLOGS.MCGILL.CA...4 USING
SharePoint User Manual
 SharePoint User Manual Developed By The CCAP SharePoint Team Revision: 10/2009 TABLE OF CONTENTS SECTION 1... 5 ABOUT SHAREPOINT... 5 1. WHAT IS MICROSOFT OFFICE SHAREPOINT SERVER (MOSS OR SHAREPOINT)?...
Managing Your Website with Convert Community. My MU Health and My MU Health Nursing
 Managing Your Website with Convert Community My MU Health and My MU Health Nursing Managing Your Website with Convert Community LOGGING IN... 4 LOG IN TO CONVERT COMMUNITY... 4 LOG OFF CORRECTLY... 4 GETTING
End-User Reference Guide Troy University OU Campus Version 10
 End-User Reference Guide Troy University OU Campus Version 10 omniupdate.com Table of Contents Table of Contents... 2 Introduction... 3 Logging In... 4 Navigating in OU Campus... 6 Dashboard... 6 Content...
SCHOLARONE MANUSCRIPTS Author Guide
 SCHOLARONE MANUSCRIPTS Author Guide TABLE OF CONTENTS Select an item in the table of contents to go to that topic in the document. LOGGING ON AND OFF THE AUTHOR CENTER... 1 LOGGING IN... 1 ORCID ACCOUNT
Creating a Technical Writing Online Portfolio with Wikispaces.com
 Creating a Technical Writing Online Portfolio with Wikispaces.com November 11, 2010 Hollie Cookson Tyler Kiefer Allison Knowles Andrew Neutzling 1 Table of Contents I. Getting Started A. Create a Wikispaces.com
STUDY ASSISTANT. Adding a New Study & Submitting to the Review Board. Version 10.03
 STUDY ASSISTANT Adding a New Study & Submitting to the Review Board Version 10.03 Contents Introduction... 3 Add a Study... 3 Selecting an Application... 3 1.0 General Information... 3 2.0 Add Department(s)...
Getting Started Guide
 Getting Started Guide for education accounts Setup Manual Edition 7 Last updated: September 15th, 2016 Note: Click on File and select Make a copy to save this to your Google Drive, or select Print, to
TransUnion Direct User Guide
 Topics Welcome to TransUnion Direct... 2 The First Time You Log Into TransUnion Direct... 4 Individual Services... 5 Portfolio Services... 15 Activity Reports... 17 Your User Profile... 19 Help Resources...
Student Guide INTRODUCTION TO ONLINE RESOURCES
 Student Guide INTRODUCTION TO ONLINE RESOURCES Date: 08. June. 2017 By: Technical Support Team STUDENT GUIDE southwales.unicaf.org 1)Introduction...4 2)Student Panel (SIS)...4 2.1)Student Panel (SIS) Login...4
Using the Control Panel
 Using the Control Panel Technical Manual: User Guide Creating a New Email Account 3. If prompted, select a domain from the list. Or, to change domains, click the change domain link. 4. Click the Add Mailbox
Student Guide. By UNICAF University
 vnhgfj Student Guide By UNICAF University 1 2 Table of Contents 1) Introduction... 5 2) Student Panel (SIS)... 5 2.1) Student Panel (SIS) Login... 5 2.1.1) Definitions... 5 2.1.2) Registration Email...
Contents. Announcer Pro Version 4.6 Page 2 of 35 Version V4.6
 User Guide Contents 1. Introduction... 3 1.1. Getting Started... 3 1.2. Navigation... 4 2. Create a Newsletter... 6 2.1. Confirm Company Details... 6 2.2. Choose Template... 8 2.3. Edit Newsletter... 8
Microsoft Windows SharePoint Services
 Microsoft Windows SharePoint Services SITE ADMIN USER TRAINING 1 Introduction What is Microsoft Windows SharePoint Services? Windows SharePoint Services (referred to generically as SharePoint) is a tool
Help for Authors. Table of Contents
 Help for Authors Table of Contents 1 General Information... 1 2 Access to the Beilstein Publishing System... 1 3 Change User Role... 3 4 Manuscript Submission... 3 4.1 Checklist... 4 4.2 My Details...
BrandingUI (Basic, Advanced, Enterprise) Getting Started - Important First Steps
 Getting Started - Important First Steps") BrandingUI (Basic, Advanced, Enterprise) Getting Started - Important First Steps Step 1: Log into your BrandingUI Administrative site https:// yourclientid.brandingui.com/admin-signin.php Use the initial
BrandingUI (Basic, Advanced, Enterprise) Getting Started - Important First Steps Step 1: Log into your BrandingUI Administrative site https:// yourclientid.brandingui.com/admin-signin.php Use the initial
SCHULICH MEDICINE & DENTISTRY Website Updates August 30, Administrative Web Editor Guide v6
 SCHULICH MEDICINE & DENTISTRY Website Updates August 30, 2012 Administrative Web Editor Guide v6 Table of Contents Chapter 1 Web Anatomy... 1 1.1 What You Need To Know First... 1 1.2 Anatomy of a Home
Student Guide INTRODUCTION TO ONLINE RESOURCES
 Student Guide INTRODUCTION TO ONLINE RESOURCES Date: 12. March. 2018 By: Technical Support Team Table of Contents 1) Introduction 3 2) Student Panel (SIS) 3 2.1) Student Panel (SIS) Login 3 2.1.1) Definitions
ScholarBlogs Basics (WordPress)
") Emory Center for Digital Scholarship Library and Information Technology Services ScholarBlogs Basics (WordPress) Table of Contents (click on the headings below to go directly to the section) Use of ScholarBlogs
Emory Center for Digital Scholarship Library and Information Technology Services ScholarBlogs Basics (WordPress) Table of Contents (click on the headings below to go directly to the section) Use of ScholarBlogs
Frooition Implementation guide
 Frooition Implementation guide Version: 2.0 Updated: 14/12/2016 Contents Account Setup: 1. Software Checklist 2. Accessing the Frooition Software 3. Completing your Account Profile 4. Updating your Frooition
One of the fundamental kinds of websites that SharePoint 2010 allows
 Chapter 1 Getting to Know Your Team Site In This Chapter Requesting a new team site and opening it in the browser Participating in a team site Changing your team site s home page One of the fundamental
Confluence User Training Guide
 Confluence User Training Guide Below is a short overview of wikis and Confluence and a basic user training guide for completing common tasks in Confluence. This document outlines the basic features that
OMICS Publishing Group Online Submission System
 OMICS Publishing Group Online Submission System Editorial Manager - Author Tutorial Editorial Manager is an online manuscript submission, review and tracking systems for quality and quick review processing.
Administrator Manual. Last Updated: 15 March 2012 Manual Version:
 Administrator Manual Last Updated: 15 March 2012 Manual Version: 1.6 http://www.happyfox.com Copyright Information Under the copyright laws, this manual may not be copied, in whole or in part. Your rights
MOODLE MANUAL TABLE OF CONTENTS
 1 MOODLE MANUAL TABLE OF CONTENTS Introduction to Moodle...1 Logging In... 2 Moodle Icons...6 Course Layout and Blocks...8 Changing Your Profile...10 Create new Course...12 Editing Your Course...15 Adding
ACADEMIC TECHNOLOGY SUPPORT
 ACADEMIC TECHNOLOGY SUPPORT D2L : Introduction A Guide for Instructors ats@etsu.edu 439-8611 www.etsu.edu/ats Table of Contents Introduction...1 Objectives... 1 Logging In to D2L...1 My Home... 2 The Minibar...
GradeConnect.com. User Manual
 GradeConnect.com User Manual Version 2.0 2003-2006, GradeConnect, Inc. Written by Bernie Salvaggio Edited by Charles Gallagher & Beth Giuliano Contents Teachers...5 Account Basics... 5 Register Your School
BOLT eportfolio Student Guide
 BOLT eportfolio Student Guide Contents BOLT EPORTFOLIO STUDENT GUIDE... I BOLT EPORTFOLIO BASICS... 3 BOLT eportfolio user interface overview... 3 Dashboard... 3 My Items Page... 4 Explore Page... 5 Sharing
Brill s Editorial Manager (EM) Manual for Authors Contents
 Manual for Authors Contents") Brill s Editorial Manager (EM) Manual for Authors Contents 1. Introduction... 2 2. Getting Started: Creating an Account... 2 2.1 Creating an Account Using Your ORCID Record... 3 3. Logging into EM... 4
Brill s Editorial Manager (EM) Manual for Authors Contents 1. Introduction... 2 2. Getting Started: Creating an Account... 2 2.1 Creating an Account Using Your ORCID Record... 3 3. Logging into EM... 4
FileNET Guide for AHC PageMasters
 ACADEMIC HEALTH CENTER 2 PageMasters have the permissions necessary to perform the following tasks with Site Tools: Application Requirements...3 Access FileNET...3 Login to FileNET...3 Navigate the Site...3
Create and Manage Partner Portals
 Create and Manage Partner Portals Salesforce, Summer 18 @salesforcedocs Last updated: June 20, 2018 Copyright 2000 2018 salesforce.com, inc. All rights reserved. Salesforce is a registered trademark of
Administrator Manual. Last Updated: 15 March 2012 Manual Version:
 Administrator Manual Last Updated: 15 March 2012 Manual Version: 1.6 http://www.helpdeskpilot.com Copyright Information Under the copyright laws, this manual may not be copied, in whole or in part. Your
Conference Editors Guide
 Accessing Editors Tools from the My Account Page: Log in to Trace: 1. Go to http://trace.tennessee.edu 2. From the homepage, select My Account from the left-hand menu, and enter your NetID and password.
Pages are static content, generally linked in your navigation. They are used for things like your about page and contact page.
 North Star Marketing Client : The Guthrie Group Deliverable : Website Training +++ LOGGING IN AND OUT +++++++++ 1. Go to http://tgg.northstarmarketing.com/wp admin/. This is the address for the staging
FileNET Guide for AHC PageMasters
 PageMasters have the permissions necessary to perform the following tasks with Site Tools: ACADEMIC HEALTH CENTER 2 Application Requirements...3 Access FileNET...3 Log in to FileNET...3 Navigate the Site...3
ithenticate User Guide Getting Started Folders Managing your Documents The Similarity Report Settings Account Information
 ithenticate User Guide Getting Started Folders Managing your Documents The Similarity Report Settings Account Information 1 Getting Started Whether you are a new user or a returning one, to access ithenticate
Table of Contents. Table of Contents 3
 User Guide for Administrators EPiServer 7 CMS Revision A, 2012 Table of Contents 3 Table of Contents Table of Contents 3 Introduction 5 About this Documentation 5 Accessing EPiServer Help System 5 Online
Basic Instructor Manual Blackboard 9.1
 Basic Instructor Manual Blackboard 9.1 Instructor manual July 2017 Applications management Blackboard, Student and Educational Affairs (SEA), Leiden University Introduction... 2 1. Blackboard Navigation...
icontact for Salesforce Installation Guide
 icontact for Salesforce Installation Guide For Salesforce Enterprise and Unlimited Editions Lightning Experience Version 2.3.4 Last updated October 2016 1 WARNING DO NOT SKIP ANY PART OF THIS GUIDE. EVERY
Creating an with Constant Contact. A step-by-step guide
 Creating an Email with Constant Contact A step-by-step guide About this Manual Once your Constant Contact account is established, use this manual as a guide to help you create your email campaign Here
Welcome to the Investor Experience
 Welcome to the Investor Experience Welcome to the Black Diamond Investor Experience, a platform that allows advisors to customize how they present information to their clients. This document provides important
Scitation.org. User Guide
 Scitation.org User Guide Physical Science Research Illuminated. Every day, there are scores of scientific breakthroughs that could directly impact your life s work in the physical sciences. But with limited
SCHOLARONE MANUSCRIPTS Author Guide
 SCHOLARONE MANUSCRIPTS Author Guide TABLE OF CONTENTS Select an item in the table of contents to go to that topic in the document. LOGGING ON AND OFF THE AUTHOR CENTER... 1 LOGGING IN... 1 ORCID ACCOUNT
The Journal of The Textile Institute
 The Journal of The Textile Institute And Tutorial for Authors Table of Contents Registering 3 Logging In 4 Changing your password 5 Submitting a paper 6-9 Reviewing & approving your paper 10 Tracking the
Installation & Configuration Guide Enterprise/Unlimited Edition
 Installation & Configuration Guide Enterprise/Unlimited Edition Version 2.3 Updated January 2014 Table of Contents Getting Started... 3 Introduction... 3 Requirements... 3 Support... 4 Recommended Browsers...
CANVAS OBSERVER GUIDE
 CANVAS OBSERVER GUIDE This work is licensed under a Creative Commons Attribution-NonCommercial-ShareAlike License Table of Contents Introduction...3 What is the Observer role?...4 How can I use Canvas
Administrative Training Mura CMS Version 5.6
 Administrative Training Mura CMS Version 5.6 Published: March 9, 2012 Table of Contents Mura CMS Overview! 6 Dashboard!... 6 Site Manager!... 6 Drafts!... 6 Components!... 6 Categories!... 6 Content Collections:
WPM for Departments Using WPM to Edit Your Department s Website
 Overview Web Profile Manager allows Ithaca College community members to easily edit department sites. All of the specialty language and code has been omitted to provide a consistent format and to make
EFM Community 3.1 Portal Administration Guide
 EFM Community 3.1 Portal Administration Guide WHITE PAPER For technical support please call: 1-800-787-8755 Or visit: Hwww.Vovici.comH Please contact Vovici technical support if you believe any of the
Tasks. Editorial Workflow
 Editorial Workflow In this chapter, you will follow as submission throughout the workflow, from first submission to final publication. The workflow is divided into 4 stages: Submission: This is where new
Getting Started Quick Start Guide
 Getting Started Quick Start Guide This guide provides tips for users new to using the Learning Environment. It discusses how to navigate the main areas and how to change your personal preferences and settings.
Internet Society: Chapter Portal (AMS)
") Internet Society: Chapter Portal (AMS) User Guide Last Updated: January 2017 Feedback? Email amshelp@isoc.org Contents Overview... 4 Accessing the Portal... 5 Logging In... 6 Retrieving Your Username or
Internet Society: Chapter Portal (AMS) User Guide Last Updated: January 2017 Feedback? Email amshelp@isoc.org Contents Overview... 4 Accessing the Portal... 5 Logging In... 6 Retrieving Your Username or
Test Information and Distribution Engine
 SC-Alt Test Information and Distribution Engine User Guide 2018 2019 Published January 14, 2019 Prepared by the American Institutes for Research Descriptions of the operation of the Test Information Distribution
A Guide to Understand, Install and Use Pie Register WordPress Registration Plugin
 A Guide to Understand, Install and Use Pie Register WordPress Registration Plugin 1 P a g e Contents 1. Introduction... 5 2. Who is it for?... 6 3. Community v/s PRO Version... 7 3.1. Which version is
Experimental nonlocality-based network diagnostics of multipartite entangled states
 ACCEPTED MANUSCRIPT OPEN ACCESS Experimental nonlocality-based network diagnostics of multipartite entangled states To cite this article before publication: Mario Arnolfo Ciampini et al 1 New J. Phys.
The Paperless Classroom with Google Docs by - Eric Curts
 The Paperless Classroom with Google Docs by - Eric Curts Table of Contents Overview How to name documents and folders How to choose sharing options: Edit, Comment, and View How to share a document with
Welcome to our Moodle site! What is Moodle?
 Welcome to our Moodle site! We are excited to introduce the use of this online e-learning platform in our "Get SMART FAST" Training Program! We believe the use of this virtual classroom and training format
AUTHOR S GUIDELINES FOR MANUSCRIPT SUBMISSION
 AUTHOR S GUIDELINES FOR MANUSCRIPT SUBMISSION Registration and Login Details Registration 1. All first time users are required to Register within the system. 2. Once you are registered, you will receive
Web Site User Manual
 www.dktinternational.org Web Site User Manual Last edited 12/18/2011 ACCESS TO EDIT WEB SITE CONTENT Logging in The access URL to edit pages is: http://www.dktinternational.org/wp-admin All userid information
Introduction. Paradigm Publishing. SNAP for Microsoft Office SNAP for Our Digital World
 Introduction Paradigm Publishing Paradigm understands the needs of today s educators and exceeds the demand by offering the latest technological advancements for coursework settings. With the success of
Hands-On Introduction to Queens College Web Sites
 Hands-On Introduction to Queens College Web Sites This handout accompanies training workshops for Queens College Content Editors who will manage and maintain the web content in their areas. Overview of
OMICS Publishing Group Online Submission System
 OMICS Publishing Group Online Submission System Editorial Manager -Reviewer Tutorial Contents Reviewer Software Requirements Reviewer Login Overview Registering with EM Duplicate Registration check Possible
You can find the addresses of all instructors and your fellow students by conducting a people search on the ETSU homepage.
 What is a Student Account? Your student account is your official ETSU username. It is assigned when you enter the university. You will use this account to login to Desire2Learn (D2L), to check your Goldmail,
OpenSpace provides some important benefits to you. These include:
 Cengage Education A member of Open Colleges Welcome to OpenSpace OpenSpace is our virtual campus. It is our online space for students, tutors and staff to interact. It provides you with a secure, interactive
EventCenter Training SEPTEMBER CrowdCompass 2505 SE 11 th Ave, Suite #300 Portland, OR
 EventCenter Training SEPTEMBER 2014 CrowdCompass 2505 SE 11 th Ave, Suite #300 Portland, OR www.crowdcompass.com Toll-free: +1.888.889.3069 Fax: +1.877.615.6699 Contents Familiarize Yourself... 3 Introduction...
VolunteerMatters Wordpress Web Platform Calendar Admin Guide. Version 1.1
 VolunteerMatters Wordpress Web Platform Calendar Admin Guide Version 1.1 VolunteerMatters Wordpress Web: Admin Guide This VolunteerMatters Wordpress Web Platform administrative guide is broken up into
USER MANUAL. SalesPort Salesforce Customer Portal for WordPress (Lightning Mode) TABLE OF CONTENTS. Version: 3.1.0
 TABLE OF CONTENTS. Version: 3.1.0") USER MANUAL TABLE OF CONTENTS Introduction...1 Benefits of Customer Portal...1 Prerequisites...1 Installation...2 Salesforce App Installation... 2 Salesforce Lightning... 2 WordPress Manual Plug-in installation...
USER MANUAL TABLE OF CONTENTS Introduction...1 Benefits of Customer Portal...1 Prerequisites...1 Installation...2 Salesforce App Installation... 2 Salesforce Lightning... 2 WordPress Manual Plug-in installation...
Administrator Quick Guide
 1 Administrator Quick Guide Login Screen The first page employees will see when visiting their training site is the login screen. This is where employees must enter their username and password to access
SAP Jam Communities What's New 1808 THE BEST RUN. PUBLIC Document Version: August
 PUBLIC Document Version: August 2018 2018-10-26 2018 SAP SE or an SAP affiliate company. All rights reserved. THE BEST RUN Content 1 Release Highlights....3 1.1 Anonymous access to public communities....4
Extranet User Manager User Guide
 Extranet User Manager User Guide Version 3.1 April 15, 2015 Envision IT 7145 West Credit Avenue Suite 100, Building 3 Mississauga, ON L5N 6J7 www.envisionit.com/eum TABLE OF CONTENTS NOTICE... 1 INTENDED
Blog Pro for Magento 2 User Guide
 Blog Pro for Magento 2 User Guide Table of Contents 1. Blog Pro Configuration 1.1. Accessing the Extension Main Setting 1.2. Blog Index Page 1.3. Post List 1.4. Post Author 1.5. Post View (Related Posts,
System Administrator s Guide Login. Updated: May 2018 Version: 2.4
 System Administrator s Guide Login Updated: May 2018 Version: 2.4 Contents CONTENTS... 2 WHAT S NEW IN THIS VERSION 2018R1 RELEASE... 4 Password Retrieval via Email (GDPR Alignment)... 4 Self-Registration
LimeSurvey User Guide to Creating Surveys
 LimeSurvey User Guide to Creating Surveys Created: October 7, 2016 Last updated: March 20, 2017 Contents Gaining access to LimeSurvey... 3 Change your LimeSurvey password... 3 Importing an existing survey
Episerver CMS. Editor User Guide
 Episerver CMS Editor User Guide Episerver CMS Editor User Guide 17-2 Release date 2017-03-13 Table of Contents 3 Table of contents Table of contents 3 Introduction 11 Features, licenses and releases 11
PlanWell Enterprise. User Manual
 PlanWell Enterprise User Manual 1 Table of Contents Finding PlanWell and Logging On... 4 Public Projects... 5 Guest Access... 5 Login to your Account... 6 Populating Shopping Cart... 6 Most Current Set...
HOTDOCS DOCUMENT SERVICES
 HotDocs Document Services ~ February 2012 Page 1 HOTDOCS DOCUMENT SERVICES Getting Started in the Cloud AT A GLANCE Sign up for HotDocs Document Services Receive contract order confirmation email Install
About the Tutorial. Audience. Prerequisites. Copyright & Disclaimer. Joomla
 About the Tutorial Joomla is an open source Content Management System (CMS), which is used to build websites and online applications. It is free and extendable which is separated into frontend templates
INTRODUCTION. This guidebook provides step-by-step information on the process of submission on the new website.
 0 INTRODUCTION On March 14, 2018, Makara Human Behavior Studies in Asia (Makara Hubs- Asia) starts using a new website: http://hubsasia.ui.ac.id. Every submitted manuscript after March 14, 2018 is processed
WORDPRESS USER GUIDE HWDSB Websites
 WORDPRESS USER GUIDE HWDSB Websites Table of Contents Forward - About Wordpress... 3 1. Getting Started... 5 1.1) Log into your account... 5 1.2) About the Dashboard... 6 1.3) Internal vs. External Views...
Elizabeth Garrett Anderson. FAQs. The Anderson Team Journey. EGA FAQ s
 Elizabeth Garrett Anderson FAQs The Anderson Team Journey www.leadershipacademy.nhs.uk 1 Contents Entering / editing your team name... 3 Adding team members one at a time... 4 Adding non-team members...
CourseWorks Quick Start
 Introduction CourseWorks Quick Start CourseWorks (aka Sakai ) is the university's new course management system, which allows instructors to develop and maintain course Web sites. With CourseWorks, instructors
Training Manual and Help File
 Training Manual and Help File 30.06.2011 Update Manage Grow Welcome to your new Juniper Website Management System with CMS Introduction The Juniper Website Management System with CMS (Website Content Management