|
|
|
- Eileen Shelton
- 5 years ago
- Views:
Transcription


1
2 Trend Micro Incorporated reserves the right to make changes to this document and to the product described herein without notice. Before installing and using the product, review the readme files, release notes, and/or the latest version of the applicable documentation, which are available from the Trend Micro website at: Trend Micro Incorporated. All Rights Reserved.Trend Micro, the Trend Micro t-ball logo, Safe Lock, Intelligent Manager, Portable Security, and TrendLabs are trademarks or registered trademarks of Trend Micro Incorporated. All other product or company names may be trademarks or registered trademarks of their owners. Document Part No.: SLEM26724/ Release Date: December 2014 Protected by U.S. Patent No.: Patents pending.
3 This documentation introduces the main features of the product and/or provides installation instructions for a production environment. Read through the documentation before installing or using the product. Detailed information about how to use specific features within the product may be available at the Trend Micro Online Help Center and/or the Trend Micro Knowledge Base. Trend Micro always seeks to improve its documentation. If you have questions, comments, or suggestions about this or any Trend Micro document, please contact us at docs@trendmicro.com. Evaluate this documentation on the following site:
4
5 Table of Contents Preface Preface... v About the Documentation... v Audience... vi Document Conventions... vi Terminology... vii Chapter 1: Introduction About Trend Micro Safe Lock Intelligent Manager Server Features and Benefits Server Accounts Overview About Trend Micro Safe Lock What's New in This Version Agent Features and Benefits Agent Use Overview Chapter 2: Working with Agents About the Agents Screen Querying Agents Displaying Agent Status Details Editing Tags Collecting Logs and Status Exporting Agent Data Removing Agents Remotely Changing Application Lockdown Status Chapter 3: Monitoring Safe Lock About the Dashboard About Web Console Accounts and the Dashboard i
6 Trend Micro Safe Lock Intelligent Manager Administrator's Guide About Dashboard Tabs About Widgets About the Agent Events Screen Querying Agent Event Logs Marking Warning Events About the Server Events Screen Querying Server Event Logs Maintaining Logs Chapter 4: Configuring Administration Settings About the Component Updates Screen Manually Updating Components Scheduling Component Updates Downloading an Up-to-Date Agent Installer Package Configuring Component Download Locations Configuring Notification Settings Example Notification Messages About the Account Management Screen Adding Accounts Editing Accounts Configuring Proxy Settings About the License Management Screen Changing Activation Codes Chapter 5: Using the Agent Console Setting Up the Approved List About the Agent Console About Status Icons About the Approved List About Hashes Configuring the Approved List ii
7 Table of Contents Account Types Configuring Passwords About Feature Settings Enabling or Disabling Feature Settings Chapter 6: Using the Agent Command Line Interface (CLI) Using SLCmd at the Command Line Interface (CLI) SLCmd Program and Console Function Comparison SLCmd Program Commands Chapter 7: Managing Agents Remotely The Remote Setup Tool (SLrst) Remote Installation Considerations Preparing the Agent Target Files Downloading an Up-to-Date Agent Installer Package Installing Agents Remotely Applying Patches and Hot Fixes to Agents Remotely Uninstalling Agents Remotely Restarting Agents Remotely The Remote Tasks Tool (SLtasks) Sending Remote Tasks Applying Message Time Groups Chapter 8: Local Agent Installation Local Installation Overview Installing from Windows Setting Up the Approved List Installation Using the Command Line Installer Command Line Interface Parameters Installation Customization Chapter 9: Working with the Agent Configuration File Working with the Agent Configuration File Changing Advanced Settings iii
8 Trend Micro Safe Lock Intelligent Manager Administrator's Guide Configuration File Syntax Configuration File Parameters Chapter 10: Local Agent Uninstallation Uninstalling Agents from Windows Chapter 11: Troubleshooting & FAQs Troubleshooting Remote Agent Installations Chapter 12: Technical Support Troubleshooting Resources Using the Support Portal Trend Community Contacting Trend Micro Speeding Up the Support Call Other Resources TrendEdge Download Center TrendLabs About Trend Micro Chapter 13: Appendix: Reference Enabling Local Administrator Accounts Enabling Local Accounts for Default Shares Agent Event Log Descriptions Agent Error Code Descriptions Index Index... IN-1 iv
9 Preface This Installation Guide introduces Trend Micro Safe Lock Intelligent Manager and guides administrators through installation and deployment. Topics in this chapter include: About the Documentation on page v Audience on page vi Document Conventions on page vi Terminology on page vii About the Documentation Trend Micro Safe Lock Intelligent Manager documentation includes the following: TABLE 1. Trend Micro Safe Lock Intelligent Manager Documentation DOCUMENTATION Installation Guide Administrator's Guide Readme file Knowledge Base DESCRIPTION A PDF document that discusses requirements and procedures for installing Safe Lock Intelligent Manager. A PDF document that discusses getting started information and Safe Lock Intelligent Manager usage and management. Contains a list of known issues. It may also contain latebreaking product information not found in the printed documentation. An online database of problem-solving and troubleshooting information. It provides the latest information about known product issues. To access the Knowledge Base, go to the following website: Download the latest version of the PDF documents and Readme at: v
10 Trend Micro Safe Lock Intelligent Manager Administrator's Guide Audience Trend Micro Safe Lock Intelligent Manager documentation is intended for administrators responsible for Safe Lock Intelligent Manager management, including agent installation. These users are expected to have advanced networking and server management knowledge. Document Conventions The following table provides the official terminology used throughout the Trend Micro Safe Lock Intelligent Manager documentation: TABLE 2. Document Conventions CONVENTION UPPER CASE Bold Italics Monospace Navigation > Path Note DESCRIPTION Acronyms, abbreviations, and names of certain commands and keys on the keyboard Menus and menu commands, command buttons, tabs, and options References to other documents Sample command lines, program code, web URLs, file names, and program output The navigation path to reach a particular screen For example, File > Save means, click File and then click Save on the interface Configuration notes vi
11 CONVENTION Tip DESCRIPTION Recommendations or suggestions Important Information regarding required or default configuration settings and product limitations WARNING! Critical actions and configuration options Terminology The following table provides the official terminology used throughout the Trend Micro Safe Lock Intelligent Manager documentation: TABLE 3. Safe Lock Intelligent Manager Terminology TERMINOLOGY DESCRIPTION Server Server endpoint Agents Managed agents Managed endpoints Target endpoints Administrator (or Safe Lock Intelligent Manager administrator) The Safe Lock Intelligent Manager server program The host where the Safe Lock Intelligent Manager server is installed The hosts running the Safe Lock program The hosts running the Safe Lock program that are known to the Safe Lock Intelligent Manager server program The hosts where the Safe Lock Intelligent Manager managed agents will be installed The person managing the Safe Lock Intelligent Manager server vii
12 Trend Micro Safe Lock Intelligent Manager Administrator's Guide TERMINOLOGY Web console CLI License activation Agent installation folder DESCRIPTION The user interface for configuring and managing Safe Lock Intelligent Manager settings and managed agents Command line interface Includes the type of Safe Lock Intelligent Manager server installation and the allowed period of usage that you can use the application The folder on the host that contains the Safe Lock Intelligent Manager agent files. If you accept the default settings during installation, you will find the installation folder at the following location: "c:\program Files\Trend Micro\Safe Lock" Server installation folder The folder on the host that contains the Safe Lock Intelligent Manager server files. If you accept the default settings during installation, you will find the installation folder at the following location: "c:\program Files\Trend Micro\Safe Lock Intelligent Manager" viii
13 Chapter 1 Introduction Trend Micro Safe Lock Intelligent Manager delivers a simple, no-maintenance solution to lock down and protect fixed-function computers, helping protect businesses against security threats and increase productivity. Topics in this chapter include: About Trend Micro Safe Lock Intelligent Manager on page 1-2 About Trend Micro Safe Lock on page
14 Trend Micro Safe Lock Intelligent Manager Administrator's Guide About Trend Micro Safe Lock Intelligent Manager Trend Micro Safe Lock Intelligent Manager provides centralized monitoring and management of Trend Micro Safe Lock agent deployment, status, and events. For example, administrators can remotely deploy agents, deploy initial agent Approved Lists, and change agent Application Lockdown states. Additionally, Safe Lock Intelligent Manager performs malware scans and administrators can view root cause information on files blocked from running by Safe Lock agents, reducing the time and effort needed to verify events and allowing quick responses to incidents. Server Features and Benefits Trend Micro Safe Lock Intelligent Manager includes the following features and benefits. TABLE 1-1. Features and Benefits Dashboard FEATURE Centralized Agent Management Centralized Event Management BENEFIT The web console dashboard provides summarized information about monitored Safe Lock agents. Administrators can check deployed Safe Lock agent status easily, and can generate security reports related to Safe Lock agent activity for specified periods. Administrators can monitor Safe Lock agent status, examine connection status, view configurations, collect agent logs on-demand or by policy, and remotely turn agent Application Lockdown on or off. On endpoints protected by Safe Lock agents, administrators can monitor events and status and respond when files are blocked from running. Safe Lock Intelligent Manager provides event management features that let administrators know about blocked file events quickly and allows them to manage these events. For example, events can be marked open or closed for tracking, and the detailed event information needed to resolve events can be collected quickly and easily. 1-2
15 Introduction FEATURE Root Cause Information Analysis Server Event Auditing BENEFIT When blocked file events happen, administrators can determine if they are the result of a significant incident or not. Safe Lock Intelligent Manager provides malware scanning features and root cause information and diagrams to help administrators investigate blocked files quickly. For example, administrators can check if a blocked file is required to launch a mission-critical program, or if the blocked file is detected as malware. Administrators can also learn where blocked files are run from and what process launched them. Operations performed by Safe Lock Intelligent Manager web console accounts are logged. Safe Lock Intelligent Manager records an operating log for each account, tracking who logs on, who deletes event logs, and more. Safe Lock Intelligent Manager Requirements Important Trend Micro Safe Lock Intelligent Manager has specific requirements that vary based on other software running on the server endpoint. 1-3
16 Trend Micro Safe Lock Intelligent Manager Administrator's Guide TABLE 1-2. Required Software for Safe Lock Intelligent Manager REQUIRED SOFTWARE SPECIFICATIONS Operating systems Windows XP SP2/SP3 (32-bit) Windows 7 Enterprise (Ultimate) No-SP/SP1 (32-bit and 64- bit) Windows 8 Enterprise No-SP (32-bit and 64-bit) Windows 8.1 Enterprise No-SP (32-bit and 64-bit) Windows Server 2003 No-SP/SP1/SP2 (32-bit and 64-bit) Windows Server 2003 R2 No-SP/SP2 (32-bit and 64-bit) Windows Server 2008 SP1/SP2 (32-bit and 64-bit) Windows Server 2008 R2 No-SP/SP1 (64-bit) Windows Server 2012 No-SP (64-bit) Windows Server 2012 R2 No-SP (64-bit) Web browser (for Safe Lock Intelligent Manager web console access) Microsoft Internet Explorer 7 or later The latest version of Google Chrome The latest version of Mozilla Firefox TABLE 1-3. Required Hardware for Safe Lock Intelligent Manager (without Safe Lock agent) REQUIRED HARDWARE SPECIFICATION RAM 2GB minimum 4GB or more recommended Processor 1 CPU core minimum 1 CPU core or more recommended Available disk space 10GB minimum 20GB or more recommended 1-4
17 Introduction TABLE 1-4. Required Hardware for Safe Lock Intelligent Manager (with Safe Lock agent) REQUIRED HARDWARE SPECIFICATION RAM 2GB minimum 4GB or more recommended Processor 1 CPU core minimum Available disk space 10GB minimum 2 CPU cores or more recommended 20GB or more recommended TABLE 1-5. Required Hardware for Safe Lock Intelligent Manager (with or without Safe Lock agent) + SQL Express 2008 REQUIRED HARDWARE SPECIFICATION RAM 4GB minimum 8GB or more recommended Processor 1 CPU core minimum Available disk space 30GB minimum 2 CPU cores or more recommended 50GB or more recommended TABLE 1-6. Required Hardware for Safe Lock Intelligent Manager (with or without Safe Lock agent) + SQL Server REQUIRED HARDWARE SPECIFICATION RAM 32GB or more required Processor 2 CPU cores minimum 4 CPU cores or more recommended Available disk space 1TB minimum 2TB or more recommended 1-5
18 Trend Micro Safe Lock Intelligent Manager Administrator's Guide Server Accounts Overview Trend Micro Safe Lock Intelligent Manager features web console accounts with different privileges and limitations. Use these accounts to configure Safe Lock Intelligent Manager and to monitor or manage Safe Lock agents. The following table outlines typical Safe Lock Intelligent Manager tasks and the account privileges required to perform them. TASK 1 Add Safe Lock Intelligent Manager accounts. 2 Use remote deployment tools (SLrst.exe) to centrally deploy agents from the server. 3 Use the Safe Lock Intelligent Manager console and remote deployment tools (SLtasks.exe) to manage the Approved List and Write Protection List on Safe Lock agents. ACCOUNT PRIVILEGE REQUIRED admin N/A Note admin Using the SLrst.exe tool does not require specific account privileges, but does require the Safe Lock agent password to deploy tasks. Full Control 4 Monitor Server Event logs. admin Full Control 5 Monitor Agent Event logs. admin Full Control Read Only 1-6
19 Introduction About Trend Micro Safe Lock Trend Micro Safe Lock protects fixed-function computers like Industrial Control Systems (ICS), Point of Sale (POS) terminals, and kiosk terminals from malicious software and unauthorized use. By using fewer resources and without the need for regular software or system updates, Safe Lock can reliably secure computers in industrial and commercial environments with little performance impact or downtime. What's New in This Version This section lists the new features and enhancements available in each release. Trend Micro Safe Lock 2.0 Features and Enhancements Trend Micro Safe Lock 2.0 includes the following new features and enhancements. TABLE 1-7. New Features FEATURE Write Protection Integrity Monitoring Approved List and Trusted Updater support Digital Signatures Exception Path Custom Action DESCRIPTION Prevents write access to all files in the Approved List and all objects (files, folders, and registry entries) in the Write Protection List Monitors file change events system-wide for files, folders, and the registry Allow to loading or launching files that have pre-defined digital signatures, even if the files are not in the Approved List Allow to loading or launching files in a pre-defined exceptions folder without adding them to the Approved List Takes action on blocked files, for example Ignore, Quarantine, or Ask Server (requires Safe Lock Intelligent Manager Intelligent Manager) 1-7
20 Trend Micro Safe Lock Intelligent Manager Administrator's Guide Agent Features and Benefits Trend Micro Safe Lock includes the following features and benefits. Application Lockdown By preventing programs, DLL files, drivers, and scripts not specifically on the Approved List of applications from running (also known as application white listing), Safe Lock provides both improved productivity and system integrity by blocking malicious software and preventing unintended use. Exploit Prevention Known targeted threats like Downad and Stuxnet, as well as new and unknown threats, are a significant risk to ICS and kiosk computers. Systems without the latest operating system updates are especially vulnerable to targeted attacks. Safe Lock provides both intrusion prevention, which helps prevent threats from spreading to the endpoint, and execution prevention, which helps prevent threats from spreading to the endpoint or from running. Easy Management When software needs to be installed or updated, the Trusted Updater and Predefined Trusted Updater List provide an easy way to make changes to the endpoint and automatically add new or modified files to the Approved List, all without having to unlock Trend Micro Safe Lock. Small Footprint Compared to other endpoint security solutions that rely on large pattern files that require constant updates, application lockdown uses less memory and disk space, without the need to download updates. 1-8
21 Introduction Role Based Administration Trend Micro Safe Lock provides a separate administrator and Restricted User account, providing full control during installation and setup, as well as simplified monitoring and maintenance after deployment. Graphical and Command Line Interfaces Anyone who needs to check the software can use the console, while system administrators can take advantage of the command line interface (CLI) to access all of the features and functions available. Trend Micro Portable Security Compatible Out-of-the-box compatibility with Trend Micro Portable Security ensures straightforward removal of any threats that do get on to the endpoint, without the need to update the Approved List or unlock the endpoint. Safe Lock Agent Requirements This section introduces Safe Lock system requirements and upgrade limitations. Agent Requirements Trend Micro Safe Lock does not have specific hardware requirements beyond those specified by the operating system, with the following exceptions: TABLE 1-8. Required Hardware for Safe Lock Available disk space Monitor resolution HARDWARE/SOFTWARE DESCRIPTION 200MB minimum 300MB recommended 640x
22 Trend Micro Safe Lock Intelligent Manager Administrator's Guide Important Safe Lock cannot be installed on a system that already runs one of the following: Trend Micro OfficeScan Trend Micro Titanium Another Trend Micro endpoint solution Agent Operating Systems See the readme file for the most up-to-date list of supported operating systems for Safe Lock agents. Note Memory Randomization, API Hooking Prevention, and DLL Injection Prevention are not supported on 64-bit platforms. 1-10
23 Introduction TABLE 1-9. List of Supported Operating Systems WINDOWS VERSION TYPE Windows Clients Windows 2000 SP4* (32-bit) WINDOWS VERSION NAME Note *Without Update Rollup, this version of Windows does not support DLL/Driver Lockdown, Integrity Monitoring, and the Predefined Trusted Updater. Windows XP SP1*/SP2/SP3 (32-bit) (except Starter and Home editions) Note *This version of Windows does not support DLL/Driver Lockdown, Integrity Monitoring, and the Predefined Trusted Updater. Safe Lock does not support a custom action of quarantine on Windows XP or Windows Windows Vista No-SP/SP1/SP2 (32-bit) (except Starter and Home editions) Windows 7 No-SP/SP1 (32-bit and 64-bit) (except Starter and Home editions) Windows 8 Enterprise No-SP (32-bit and 64-bit) Windows 8.1 Enterprise No-SP (32-bit and 64-bit) 1-11
24 Trend Micro Safe Lock Intelligent Manager Administrator's Guide WINDOWS VERSION TYPE Windows Server WINDOWS VERSION NAME Windows 2000 Server SP4* (32-bit) Note *Without Update Rollup, this version of Windows does not support DLL/Driver Lockdown, Integrity Monitoring, and the Predefined Trusted Updater. Windows Server 2003 SP1/SP2 (32-bit) Note Safe Lock does not support a custom action of quarantine on Windows XP or Windows Windows Server 2003 R2 No-SP/SP2 (32-bit) Note Safe Lock does not support a custom action of quarantine on Windows XP or Windows Windows Server 2008 SP1/SP2 (32-bit and 64-bit) Windows Server 2008 R2 No-SP/SP1 (64-bit) Windows Server 2012 No-SP (64-bit) Windows Server 2012 R2 No-SP (64-bit) 1-12
25 Introduction WINDOWS VERSION TYPE Windows Embedded Standard WINDOWS VERSION NAME Windows (Standard) XP Embedded SP1*/SP2 (32-bit) Note *This version of Windows does not support DLL/Driver Lockdown, Integrity Monitoring, and the Predefined Trusted Updater. Safe Lock does not support a custom action of quarantine on Windows XP or Windows Windows Embedded Standard 2009 (32-bit) Windows Embedded Standard 7 (32-bit and 64-bit) Windows Embedded Standard 8 (32-bit and 64-bit) Windows Embedded Standard 8.1 (32-bit and 64-bit) Windows Embedded POSReady Windows Embedded POSReady (32-bit) Windows Embedded POSReady 2009 (32-bit) Windows Embedded POSReady 7 (32-bit and 64-bit) Windows Embedded Enterprise Windows Embedded Enterprise XP SP1*/SP2/SP3 (32-bit) Note *This version of Windows does not support DLL/Driver Lockdown, Integrity Monitoring, and the Predefined Trusted Updater. Safe Lock does not support a custom action of quarantine on Windows XP or Windows Windows Embedded Enterprise Vista (32-bit) Windows Embedded Enterprise 7 (32-bit and 64-bit) 1-13
26 Trend Micro Safe Lock Intelligent Manager Administrator's Guide WINDOWS VERSION TYPE Windows Embedded Server WINDOWS VERSION NAME Windows Embedded Server 2003 SP1/SP2 (32-bit) Note Safe Lock does not support a custom action of quarantine on Windows XP or Windows Windows Embedded Server 2003 R2 (32-bit) Note Safe Lock does not support a custom action of quarantine on Windows XP or Windows Windows Embedded Server 2008 (32-bit and 64-bit) Windows Embedded Server 2008 R2 (64-bit) Windows Embedded Server 2012 (64-bit) Windows Embedded Server 2012 R2 (64-bit) Agent Upgrade Preparation WARNING! Depending on the installation method you select, Safe Lock versions require different preparation before upgrading. Before upgrading, take the appropriate action below for your installation method and installed Safe Lock agent version: 1-14
27 Introduction TABLE Upgrade Actions Required by Installation Method and Installed Agent Version INSTALLATION METHOD INSTALLED AGENT VERSION REQUIRED ACTION SETTINGS RETAINED Local installation using Windows Installer 1.0 No preparation needed 1.1 No preparation needed No settings retained Compatible settings retained 2.0 or later No preparation needed No settings retained Local installation using Command Line Interface Installer 1.0 Manually uninstall No settings retained 1.1 No preparation needed Compatible settings retained 2.0 or later Manually uninstall No settings retained Remote 1.0 Manually uninstall No settings retained 1.1 Manually uninstall No settings retained 2.0 or later Manually uninstall No settings retained Agent Use Overview Trend Micro Safe Lock is a whitelist solution that locks down computers, preventing all applications not on the Approved List from running. Safe Lock can be configured and maintained using the graphical user interface (GUI) agent console or the command line interface (CLI). System updates can be applied without turning off Application Lockdown at the endpoint through the Predefined Trusted Updater List or by using the Trusted Updater. 1-15

28 Trend Micro Safe Lock Intelligent Manager Administrator's Guide Consider this typical use case scenario: 1. Set up the Approved List and turn on Application Lockdown on the endpoint so that unapproved applications cannot be run. 2. Use the Trusted Updater to update or install software whose installer is not on the Predefined Trusted Updater list. 3. Configure and enable the Restricted User account for later maintenance. If someone tries to run an application not specifically on the Approved List, the following message displays: FIGURE 1-1. Trend Micro Safe Lock blocking message 1-16
29 Chapter 2 Working with Agents This chapter introduces Trend Micro Safe Lock Intelligent Manager web console screen for agent management. Topics in this chapter include: About the Agents Screen on page 2-2 Remotely Changing Application Lockdown Status on page
30 Trend Micro Safe Lock Intelligent Manager Administrator's Guide About the Agents Screen To display the Agent Management screen, go to Agents in the navigation at the top of the web console. This screen displays a list of agents managed by Safe Lock Intelligent Manager. Note To refine the list of displayed agents, see Querying Agents on page 2-2. To display the status of each Safe Lock setting for a selected agent, see Displaying Agent Status Details on page 2-3. The following table lists the available tasks on the Agent Management screen after selecting at least one agent endpoint. Edit Tags FUNCTION Clear Tags Collect Logs & Status Export Remove DESCRIPTION Edit tags to help you identify and search for agents. Clear existing tags for the selected endpoints. Collect logs and status to update the Safe Lock Intelligent Manager database with the latest information from the selected agents. Save data about selected endpoints as a CSV file. Remove agents from the list that Safe Lock Intelligent Manager no longer monitors. Querying Agents Procedure 1. Go to Agents in the navigation at the top of the web console. The Agent Management screen appears. 2-2
31 Working with Agents 2. Search for specific endpoints by selecting criteria from the drop-down list and specifying additional search criteria as required. Tip Safe Lock Intelligent Manager supports partial string matching. All Agents Endpoint Tags IP Address IP Range OPTION Operating System Application Lockdown State Status Collected On Logs Collected On Select to display all agents. DESCRIPTION Type the host name of the endpoint. Type the tag name. Type the IPv4 address. Type the IPv4 address. Select an operating system. Select the Application Lockdown state: Application Lockdown On or Application Lockdown Off. Select from the default time ranges or Custom and specify your own range. Select from the default time ranges or Custom and specify your own range. 3. Click Search (if required). Safe Lock Intelligent Manager displays all hosts that match the search criteria. Displaying Agent Status Details The Agent Status screen displays information about the selected agent, such as Application Lockdown status, program version number, and last log collection time. This screen also displays the status of specific Safe Lock features for the selected agent. 2-3
32 Trend Micro Safe Lock Intelligent Manager Administrator's Guide Procedure 1. Go to Agents in the navigation at the top of the web console. The Agent Management screen appears. 2. Click the endpoint name to display agent status details. The Agent Status screen appears. Editing Tags Edit tags to help you identify and search for agents. Procedure 1. Go to Agents in the navigation at the top of the web console. The Agent Management screen appears. 2. Select one or more agents. 3. Click Edit Tags. 4. Type or modify the agent tags. Tip 5. Click Save. Safe Lock Intelligent Manager does not use a delimiter for tags. Collecting Logs and Status Logs and status contain information about agent activity. Collecting logs and status updates the Safe Lock Intelligent Manager database with the latest information from the selected agents. 2-4
33 Working with Agents Procedure 1. Go to Agents in the navigation at the top of the web console. The Agent Management screen appears. 2. Select one or more agents. 3. Click Collect Logs & Status. Safe Lock Intelligent Manager updates the date and time displayed in the Last Status Collected On and Last Logs Collected On columns after each Safe Lock agent successfully sends logs and status to Safe Lock Intelligent Manager. Exporting Agent Data Safe Lock Intelligent Manager allows you to save data about selected agents as a CSV file. Procedure 1. Go to Agents in the navigation at the top of the web console. The Agent Management screen appears. 2. Select one or more agents. 3. Click Export. 4. Save the file. Removing Agents Remove agents from the list that Safe Lock Intelligent Manager no longer manages. Agents unregister from Safe Lock Intelligent Manager during uninstallation. However, if you are unable to uninstall an agent before removing it from the environment, the agent may continue to appear on the Agent Management screen. To remove the endpoints 2-5
34 Trend Micro Safe Lock Intelligent Manager Administrator's Guide that Safe Lock Intelligent Manager no longer manages from the list of monitored agents, use the Remove feature to unregister the agents. Note Removing an agent from the list of monitored agents does not delete any preexisting agent event logs. Procedure 1. Go to Agents in the navigation at the top of the web console. The Agent Management screen appears. 2. Select the agents in the list that you want to remove. 3. Click Remove. 4. Confirm that you want to remove the selected agents. Safe Lock Intelligent Manager removes the agents from the list. Important Agents removed from the list of monitored agents that you did not remove from the network will continue to report to the server. If a removed agent reports to the server, Safe Lock Intelligent Manager adds the agent back to the list of monitored agents. Remotely Changing Application Lockdown Status Note Safe Lock agent administrators can also change the Application Lockdown status from the Safe Lock agent console. 2-6
35 Working with Agents Procedure 1. Go to Agents in the navigation at the top of the web console. 2. Click the endpoint name to display agent status details. The Agent Status screen appears. 3. Click the button to change the Application Lockdown status. Turn Application Lockdown On Turn Application Lockdown Off 2-7
36
37 Chapter 3 Monitoring Safe Lock This chapter introduces Trend Micro Safe Lock Intelligent Manager monitoring practices. Topics in this chapter include: About the Dashboard on page 3-2 About the Agent Events Screen on page 3-8 About the Server Events Screen on page 3-13 Maintaining Logs on page
38 Trend Micro Safe Lock Intelligent Manager Administrator's Guide About the Dashboard The Safe Lock Intelligent Manager dashboard provides at-a-glance information using tabs and widgets. The dashboard displays the following components in a customized view for each web console account: Tabs: Allow users to organize widgets on customizable screens Widgets: Provide various data summaries on a tab About Web Console Accounts and the Dashboard Each web console account can customize the dashboard tabs and widgets for that account s specific needs. Customizing the tabs or widgets for one account has no effect on the tabs or widgets for a different account. Note When an account logs on to Safe Lock Intelligent Manager for the first time, default tabs and widgets appear on the dashboard. See About Default Tabs on page 3-3. About Dashboard Tabs The Safe Lock Intelligent Manager dashboard uses tabs to provide a flexible data monitoring solution for administrators. Tabs provide a container for widgets, allowing web console accounts to create their own customized dashboard. The dashboard supports up to 30 tabs per account. Closing tabs permanently removes them from that account. There is no way to recover closed tabs, but you can re-create similar tabs later. Closing a tab has no impact on the dashboard of other user accounts. Use the slide show function to assist in monitoring widgets on different tabs by using the following controls: Click Play Tab Slide Show to rotate through tabs automatically at a specified interval. 3-2
39 Monitoring Safe Lock Tip Configure the duration of rotation intervals in Tab Settings. See Configuring Tab Settings on page 3-5. Click Pause Tab Slide Show to stop the slide show at the current tab. Tip Navigating to a different tab also stops the slide show. About Default Tabs The dashboard provides the following default tabs: Event Overview: This tab contains widgets that display information relating to agent events on managed Safe Lock endpoints. WIDGET Open Warnings Top Endpoints Triggering Blocked Events Blocked Event History Top Blocked Files Blocked File Scan Results DESCRIPTION Displays the latest open warnings. Displays the endpoints that triggered the most blocked events. Displays blocked events during the specified time period. Displays the files that are blocked the most. Displays malware scan results for blocked files. Agent Overview: This tab contains widgets that display information relating to managed Safe Lock endpoints. WIDGET Application Lockdown State DESCRIPTION Displays the Application Lockdown status for agents. 3-3
40 Trend Micro Safe Lock Intelligent Manager Administrator's Guide Versions WIDGET Latest Component Updates DESCRIPTION Displays the number of endpoints with specific versions of Safe Lock installed. Displays the latest versions of components. Note Change the default names of tabs on the Tab Settings screen. See Configuring Tab Settings on page 3-5. Adding Tabs Add tabs to the dashboard to provide a customized information summary to your Safe Lock Intelligent Manager account. Procedure 1. Go to Dashboard in the navigation at the top of the web console. 2. Click the + tab. The New Tab screen appears. 3. In the Title field, type a meaningful title for the tab. 4. Select a layout for the tab. Note The number of widgets that you can add to a tab depends on the layout for the tab. Once the tab contains the maximum number of widgets, you must remove a widget from the tab or create a new tab for the widget. 5. Configure slide show and auto-fit settings. 6. Click Save. The empty tab appears on the dashboard. 3-4
41 Monitoring Safe Lock 7. Click Add Widgets to populate the tab with widgets. Configuring Tab Settings Procedure 1. Go to Dashboard in the navigation at the top of the web console. 2. Click Tab Settings. The Tab Settings screen appears. 3. In the Title field, type a meaningful title for the tab. 4. Select a layout for the tab. 5. Configure slide show and auto-fit settings. About Widgets Widgets are the core components for the dashboard. Tabs provide the layout and widgets provide the actual data summary for the dashboard. The following widgets are available: WIDGET CATEGORY DESCRIPTION Application Lockdown State Agent Status Displays the Application Lockdown State for agents. Versions Agent Status Displays the number of endpoints with specific versions of Safe Lock installed. Open Warnings Events Displays the latest open warnings. Top Endpoints Triggering Blocked Events Events Displays the endpoints that triggered the most blocked events. 3-5
42 Trend Micro Safe Lock Intelligent Manager Administrator's Guide WIDGET CATEGORY DESCRIPTION Blocked Event History Top Blocked Files Blocked File Scan Results Latest Component Updates Events Events Events Server Status Displays blocked events during a specified time period. Displays the files that are blocked the most. Displays malware scan results for blocked files. Displays the latest versions of components. You can configure the data scope on many widgets individually. For example, some widgets allow you to specify the following: Time period Pie chart or line chart Legend Move widgets in tabs by dragging and dropping widgets to various locations on a tab. The layout for a tab determines where you can move a widget. Using Widgets Perform the following tasks on each widget: TASK Move a widget STEPS Move widgets on tabs by clicking and holding on the title bar at the top of the widget and dragging to various locations on a tab. Tip The layout for a tab determines where you can move a widget. As you drag, a red, dotted border appears when the widget is able to move to an area. 3-6
43 Monitoring Safe Lock TASK Resize a widget Refresh widget data Specify automatic refresh settings STEPS Horizontally resize a widget on a multi-column tab by doing the following: 1. Hover the pointer at the edge of a widget. A vertical, gray bar appears. 2. Drag the pointer left or right. Vertically resize widgets on a multi-column tab by enabling Autofit in the Tab Settings. This automatically adjusts widgets to be the same height as the widgets beside them. Click the Refresh icon at the top of the widget. 1. Click the More Options icon at the top of the widget. 2. Select Refresh Settings. The Refresh Settings screen appears. 3. To enable automatic refresh for this widget, do the following: a. Select Automatically refresh the widget. b. Specify a frequency. Rename a widget 1. Click the More Options icon at the top of the widget. 2. Select Widget Settings. The Widget Settings screen appears. 3. Type a meaningful title for the widget. Close a widget 1. Click the More Options icon at the top of the widget. 2. Select Close Widget. Adding Widgets The number of widgets that you can add to a tab depends on the layout for the tab. Once the tab contains the maximum number of widgets, you must remove a widget from the tab or create a new tab for the widget. 3-7
44 Trend Micro Safe Lock Intelligent Manager Administrator's Guide Procedure 1. Go to Dashboard in the navigation at the top of the web console. 2. Go to the tab on the dashboard that you want to add the widget to. 3. Click Add Widget. The Add Widget screen appears. 4. Optionally, click one of the following to filter the widgets that display: CATEGORY Most Recent Widgets All Widgets Agent Status Events Server Status DESCRIPTION Queries for widgets added to a tab recently Queries for all widgets available Queries for only widgets that display data about managed Safe Lock agents. Queries for only widgets that display data about managed Safe Lock agent events. Queries for only widgets that display data about Safe Lock Intelligent Manager. 5. Select one or more widgets to add to the current tab. 6. Click Add. About the Agent Events Screen To display the Agent Events screen, go to Logs > Agent Events in the navigation at the top of the web console. This screen displays a list of events related to applications not in the Approved List on agents managed by Safe Lock Intelligent Manager. When Lockdown is off and a file not on an agent's Approved List attempts to run or make changes to the endpoint, Safe Lock logs the event but allows the file to run. 3-8
45 Monitoring Safe Lock When Lockdown is on and a file not on an agent's Approved List attempts to run or make changes to the endpoint, Safe Lock stops the file and may prompt the user for the appropriate action. Event logs contain information from managed agents about files not in the Approved List and any action taken. You can take the following actions on files not in the Approved List when Lockdown is on: Add to Approved List : Prevent the file from executing for this instance but add the file to the agent's Approved List. Ignore : Prevent the file from executing but do not move or change the file. Quarantine : Prevent the file from executing and hold the file in quarantine for later analysis. Delete : Prevent the file from executing and delete the file. Querying Agent Event Logs Querying refines the list of displayed agent event logs. Procedure 1. Go to Logs > Agent Events in the navigation at the top of the web console. The Agent Events screen appears. 2. Click the drop-down list under Agent Events. A list of criteria to search by appears. 3. Select the type of criteria to search by. Appropriate search fields appear for the selected criteria. 4. Follow the appropriate steps depending on the selected criteria: OPTION All Events DESCRIPTION Displays all events logged by agents 3-9
46 Trend Micro Safe Lock Intelligent Manager Administrator's Guide OPTION Time Period Do one of the following: Select a listed time range. DESCRIPTION Specify a custom time range. a. Go to Custom in the list. b. Specify your custom time range. c. Click Search. Level Source Event Endpoint Tags IP Address IP Range Blocked File Name Blocked File Hash Marked Integrity Monitoring Select an event level. Select an event source. Select a specific event. Type the beginning or all of an endpoint host name and click Search. Type all or part of the tag and click Search. Type the IPv4 address and click Search. Type the IPv4 address range and click Search. Type all or part of a file name and click Search. Type a file hash and click Search. Select Open or Closed. a. Select one of the following: File or folder Registry key or value b. Type the search criteria and click Search. Your search results appear in the list of events. 3-10
47 Monitoring Safe Lock Exporting Agent Events Save data about selected agent event log entries as a CSV file. Procedure 1. Go to Logs > Agent Events in the navigation at the top of the web console. The Agent Events screen appears. 2. Select the events in the list that you want to export information for. 3. Click Export. 4. Save the file. Importing Agent Events Safe Lock Intelligent Manager supports importing agent events from the following applications: Trend Micro Safe Lock Intelligent Manager: Logs exported by Safe Lock Intelligent Manager 2.0 in CSV format Trend Micro Portable Security: Collect logs from Safe Lock agents running versions 1.1 and 2.0 in DB format Note Portable Security exports Safe Lock logs to the tmsllog.db file by default. Procedure 1. Go to Logs > Agent Events in the navigation at the top of the web console. The Agent Events screen appears. 2. Click Import. The Import screen appears. 3-11
48 Trend Micro Safe Lock Intelligent Manager Administrator's Guide 3. Select the CSV file you want to import. 4. Click Open. 5. Click OK. The event logs are imported into Safe Lock Intelligent Manager. Note If you interrupt or cancel the import, no data will be added to the Safe Lock Intelligent Manager database. Marking Warning Events To help you track Warning events, change the status displayed for them under Marked in the list. Note Safe Lock Intelligent Manager does not display a Marked status for Information events. Procedure 1. Go to Logs > Agent Events in the navigation at the top of the web console. The Agent Events screen appears. 2. Select the Warning event or events you want to change the status of. 3. Change the status by doing one of the following: Click Mark Open. Click Mark Closed. 3-12
49 Monitoring Safe Lock About the Server Events Screen To display the Server Events screen, go to Logs > Server Events in the navigation at the top of the web console. This screen displays a log of audited Safe Lock Intelligent Manager web console account activity. Note Server event logs contain collected information about actions taken by Safe Lock Intelligent Manager web console account users and policies. Querying Server Event Logs Querying refines the list of displayed server event logs. Procedure 1. Go to Logs > Server Events in the navigation at the top of the web console. The Server Events screen appears. 2. Click the drop-down list under Server Events. A list of search criteria. 3. Select the type of search criteria. Appropriate search fields appear for the selected criteria. 4. Follow the appropriate steps depending on the selected criteria: OPTION Time Period Do one of the following: Select a listed time range. DESCRIPTION Specify a custom time range. 3-13
50 Trend Micro Safe Lock Intelligent Manager Administrator's Guide OPTION User Name Event a. Go to Custom in the list. DESCRIPTION b. Specify your custom time range. c. Click Search. Type the beginning or all of a Safe Lock Intelligent Manager account user name. Select a specific event. Your search results appear in the list of server event logs. Exporting Server Event Logs Save data about selected server event log entries as a CSV file. Procedure 1. Go to Logs > Server Events in the navigation at the top of the web console. The Server Events screen appears. 2. Select the server log entries in the list that you want to export information for. 3. Click Export. 4. Save the file. Maintaining Logs Purge older logs to reduce the size of the Safe Lock Intelligent Manager database. Procedure 1. Go to Logs > Log Maintenance in the navigation at the top of the web console. 3-14
51 Monitoring Safe Lock The Log Maintenance screen appears. 2. Under Purge agent event log entries older than, specify the maximum age of agent event log entries to keep. 3. Under keep at most, specify the maximum number of agent event entries to keep. Note If the number of entries exceeds the limit set under keep at most, Safe Lock Intelligent Manager purges agent event logs newer than the age specified in the Purge agent event log entries older than field. 4. Under Purge server auditing log entries older than, specify the maximum age of server event log entries that will be preserved. 5. To prohibit automatically purging without a backup, do the following: a. Select Always back up logs before automatically purging. b. Click Backup Path. c. Specify the full path for backups. d. If you want Safe Lock Intelligent Manager to create folders in the specified path that do not exist, select Create the folder if not already present. 6. To manually purge log entries based on their age, do the following: a. In the Manual Purge section, select the minimum age of entries to preserve. b. Click Purge Now. 3-15
52 Trend Micro Safe Lock Intelligent Manager Administrator's Guide WARNING! Safe Lock Intelligent Manager does not automatically back up manually purged log entries. To back up existing log entries, perform the appropriate steps to export the entries manually. See Exporting Agent Events on page See Exporting Server Event Logs on page
53 Chapter 4 Configuring Administration Settings This chapter introduces Trend Micro Safe Lock Intelligent Manager administration settings. Topics in this chapter include: About the Component Updates Screen on page 4-2 Configuring Component Download Locations on page 4-5 Configuring Notification Settings on page 4-5 About the Account Management Screen on page 4-8 Configuring Proxy Settings on page 4-11 About the License Management Screen on page
54 Trend Micro Safe Lock Intelligent Manager Administrator's Guide About the Component Updates Screen To display the Component Updates screen, go to Administration > Components > Updates in the navigation at the top of the web console. This screen displays the list of components used by Safe Lock Intelligent Manager. Perform the following tasks from this screen: FUNCTION DESCRIPTION Update Schedule Updates Download Agent Installer Package Manually update the components you select. Configure the update schedule. Enable or disable scheduled updates for each component. Download an up-to-date agent installer package. Manually Updating Components Procedure 1. Go to Administration > Components > Updates in the navigation at the top of the web console. The Component Updates screen appears. 2. Click Update. 3. Select the components you want to update. 4. Click Update. The Update Progress screen appears. Safe Lock Intelligent Manager updates Current Version and Latest Update information after components update successfully. 4-2
55 Configuring Administration Settings Scheduling Component Updates Procedure 1. Go to Administration > Components > Updates in the navigation at the top of the web console. The Component Updates screen appears. 2. Click Scheduled Updates. 3. Enable the components you want to update on a schedule. 4. In the Update Schedule section, select the schedule you want to use. Important If you select Monthly, on day and select a number higher than the actual number of days in a given month, Safe Lock Intelligent Manager updates selected components on the last day of that month instead. Downloading an Up-to-Date Agent Installer Package Procedure 1. Go to Administration > Components > Updates in the navigation at the top of the web console. The Component Updates screen appears. 2. Click Download Agent Installer Package. 3. Select the language the installation package. Your browser downloads the most up-to-date agent installer package. 4-3
56 Trend Micro Safe Lock Intelligent Manager Administrator's Guide Note The agent installer package is considered up-to-date by Safe Lock Intelligent Manager based on the component versions displayed on the Component Updates screen. If the cached agent installer package is not up-to-date, Safe Lock Intelligent Manager prepares and caches an up-to-date package before starting the download. Preparing an up-to-date agent installer package is system-intensive. Depending on the hardware running Safe Lock Intelligent Manager, preparing an up-to-date agent installer package can take a while. 4. To use the downloaded agent installer package for remote installations using the SLrst program at the command line interface (CLI), copy the downloaded agent installer package to the path used by SLrst. For example, if you installed Safe Lock Intelligent Manager to the default path on the C drive, copy the downloaded agent installer package to the following path: c: \Program Files\Trend Micro\Safe Lock Intelligent Manager \CmdTools\RemoteAgentSetupTool\ Important The package file name must follow the format: TMSL2.0_<language_abbreviation>.zip For example: TMSL2.0_EN.zip TMSL2.0_JA.zip VALID NOT VALID TMSL2.0_EN (1).zip TMSL2.0_EN_1.zip About Modifying the Agent Installer Package Safe Lock Intelligent Manager supports specific modifications to the agent installer package. If you choose to modify the agent installer package, use caution and observe the following requirements: Modify only the Setup.ini and trend.cer files. 4-4
57 Configuring Administration Settings Maintain the internal directory structure of the agent installer package. Modify the agent installer package at your own risk. Configuring Component Download Locations Procedure 1. Go to Administration > Components > Update Source in the navigation at the top of the web console. The Server Update Source screen appears. 2. Select the appropriate download location for your environment: OPTION Trend Micro ActiveUpdate server Internet or local server Local server requiring authentication DESCRIPTION Use the Trend Micro-managed update server on the Internet. Specify an update server that does not require authentication. Specify a local, private update server that requires authentication. Configuring Notification Settings Safe Lock Intelligent Manager sends the following types of notifications based on configured settings: 4-5
58 Trend Micro Safe Lock Intelligent Manager Administrator's Guide General: Notification of information and warning messages sent to Safe Lock Intelligent Manager by endpoints after blocking files Outbreak: Notification sent when the specified number of open warning messages in the specified time period has passed the threshold See Example Notification Messages on page 4-8. Procedure 1. Go to Administration > Notification Settings in the navigation at the top of the web console. The Notification Settings screen appears, open to the General tab. 2. To send general notifications using a. Select Send notifications using
59 Configuring Administration Settings b. Specify the recipient addresses. c. Specify your SMTP server settings. d. If your SMTP server requires authentication, select SMTP authentication and specify credentials. e. To send a test message using this configuration, click Send Test. 3. To send general notifications using SNMP: a. Select Send notifications using SNMP. b. Specify your SNMP server IPv4 address or Fully Qualified Domain Name (FQDN). c. Specify your SNMP Community string. 4. To send general notifications using third party applications: a. Select Launch a third-party application. b. Specify the full path to the third-party application. c. Optionally, specify any run-time parameters for the application. 5. To send outbreak notifications: a. Go to the Outbreak tab. b. Select Send outbreak notifications. c. Specify the threshold number of open warnings in a time period. d. Specify the threshold time period of those warnings. e. To display a Windows notification on the screen of the physical Safe Lock Intelligent Manager server endpoint during outbreaks, select Display pop-up outbreak notification balloon. 4-7
60 Trend Micro Safe Lock Intelligent Manager Administrator's Guide Example Notification Messages If you configure Safe Lock Intelligent Manager to send SMTP or SNMP notifications, Safe Lock Intelligent Manager sends the notifications for all types of events. TABLE 4-1. Example Notifications EVENT TYPE CAUSE EXAMPLE NOTIFICATION MESSAGE Outbreak Outbreak Safe Lock: Outbreak notification Action Required Scan Result Warning Warning Warning Blocked file Malware detection Unauthorized change Application Lockdown status change Device access blocked Safe Lock: [Action required] File access blocked on <computer_name> (<file_name>) Safe Lock: [Scan Result] Malware detected on <computer_name> (<file_name>) Safe Lock: [Warning] Unauthorized change of File/ Folder allowed on <computer_name> Safe Lock: [Warning] Application Lockdown Turned Off on <computer_name> Safe Lock: [Warning] Device access blocked on <computer_name> About the Account Management Screen To display the Account Management screen, go to Administration > Account Management in the navigation at the top of the web console. Use this screen to manage Safe Lock Intelligent Manager web console accounts. 4-8
61 Configuring Administration Settings Trend Micro Safe Lock Intelligent Manager web console accounts have the following privileges and permissions: PRIVILEGES PERMISSIONS Administrator Add, edit, enable, disable, or delete Safe Lock Intelligent Manager web console accounts from the Account Management screen. Modify their own account description, address, and password Specify actions to take on files blocked by agents View the Safe Lock Intelligent Manager web console Logs > Server Events screen Full Control Modify their own account description, address, and password Specify actions to take on files blocked by agents View the Safe Lock Intelligent Manager web console Logs > Server Events screen Read Only Modify their own account description, address, and password Note The default account created during installation is named admin and is the only account that has Administrator privileges. Adding Accounts Procedure 1. Log on the web console using the admin account. 2. Go to Administration > Account Management in the navigation at the top of the web console. The Account Management screen appears. 4-9
62 Trend Micro Safe Lock Intelligent Manager Administrator's Guide 3. Click Add. The Add User screen appears. 4. Specify the privileges for the account. See About the Account Management Screen on page Specify the account name. Note Only lowercase a to z, 0 to 9, - and _ are supported. 6. Specify whether the account should be Enabled or Disabled upon creation. 7. Optionally, type an account description. Note The following characters are not supported: > < & " ' 8. Optionally, specify an address for this account. 9. Specify the password. Note The password must be 8 to 64 alphanumeric characters. The following characters are not supported: > " : < \ spaces Editing Accounts Only an account with Administrator privileges is able to add, enable or disable, or delete accounts. All other accounts are only able to edit their own account description, address, and password. 4-10
63 Configuring Administration Settings Procedure 1. Go to Administration > Account Management in the navigation at the top of the web console. The Account Management screen appears. 2. Click the user name of the account. The Edit User screen appears. 3. Modify settings. Configuring Proxy Settings Procedure 1. Go to Administration > Proxy Settings in the navigation at the top of the web console. The Proxy Settings screen appears. 2. To configure proxy settings for updates: a. Select Use a proxy server for pattern and engine updates. b. Specify the IPv4 address or FQDN of the proxy server. c. Specify the port. d. If your proxy server requires authentication, select Proxy server authentication and specify credentials. 3. To configure proxy settings used by Safe Lock Intelligent Manager when sending messages to Safe Lock agents: a. Select Use a proxy server when Safe Lock Intelligent Manager communicates to Safe Lock agents. b. Specify the IPv4 address or FQDN of the proxy server. 4-11
64 Trend Micro Safe Lock Intelligent Manager Administrator's Guide c. Specify the port. d. If your proxy server requires authentication, select Proxy server authentication and specify credentials. Tip To configure proxy settings used by Safe Lock agents when sending messages to Safe Lock Intelligent Manager: Before remote installation: Add the proxy information to the configuration file used by the agent installer package. After remote installation: Use the SLCmd.exe Command Line Interface tool on the local Safe Lock agent. About the License Management Screen To display the License Management screen, go to Administration > License Management in the navigation at the top of the web console. The following details appear on this screen: ITEM DESCRIPTION Activation Code License Status Expiration date Displays the Activation Code Displays Full or Trial Displays Activated, Not Activated or Expired Displays the date when features and support end 4-12
65 Configuring Administration Settings Changing Activation Codes Procedure 1. Go to Administration > License Management in the navigation at the top of the web console. The License Management screen appears. 2. Click Change Activation Code. 3. Type your new Trend Micro Safe Lock Intelligent Manager Activation Code. 4-13
66
67 Chapter 5 Using the Agent Console This chapter describes how to configure Trend Micro Safe Lock using the agent console on the endpoint. Topics in this chapter include: Setting Up the Approved List on page 5-2 About the Agent Console on page 5-5 About the Approved List on page 5-8 Account Types on page 5-15 About Feature Settings on page
68 Trend Micro Safe Lock Intelligent Manager Administrator's Guide Setting Up the Approved List Before Trend Micro Safe Lock can protect the endpoint, it must check the endpoint for existing applications and installers necessary for the system to run correctly. Procedure 1. Open the Safe Lock console. The Safe Lock log on screen appears. 2. Provide the password and click Login. Safe Lock asks if you want to set up the Approved List now. 5-2
69 Using the Agent Console 3. At the notification window, select Yes. Set up the Approved List now and click OK. Safe Lock scans the endpoint and adds all applications to the Approved List. 5-3
70 Trend Micro Safe Lock Intelligent Manager Administrator's Guide Safe Lock displays the Approved List Configuration Results. Note 4. Click Close. When Trend Micro Safe Lock Application Lockdown is on, only applications that are in the Approved List will be able to run. 5-4

71 Using the Agent Console About the Agent Console The agent console provides easy access to commonly used features in Trend Micro Safe Lock. FIGURE 5-1. The Safe Lock console The following table describes the features available on the console: 5-5
72 Trend Micro Safe Lock Intelligent Manager Administrator's Guide TABLE 5-1. Console Feature Descriptions # ITEM DESCRIPTION 1 Overview Display the software status Approved List Password Settings About Display applications allowed to run and let users manage the list Change the Safe Lock administrator or Restricted User passwords (only available to administrators) Enable or disable vulnerability protection settings and export or import the system configuration Display the product and component version numbers 2 Status information The current status of the software 3 Turn Application Lockdown On Turn Application Lockdown Off Lock down the system, blocking applications not on the Approved List from running Release the system from lock down, allowing applications not on the Approved List to run Note After disabling Lockdown mode, Safe Lock Intelligent Manager switches to a monitor mode. Safe Lock Intelligent Manager does not block any applications from running, but logs when applications that are not in the Approved List run. You can use these logs to assess if the Approved List contains all the applications required on the endpoint. 4 Application Lockdown on since Application Lockdown off since The date and time that Application Lockdown was last turned on The date and time that Application Lockdown was last turned off 5-6
73 Using the Agent Console # ITEM DESCRIPTION 5 Exploit Prevention Enabled: All Exploit Prevention features are enabled Click the status to open the settings screen. Enabled (Partly): Some Exploit Prevention features are enabled Click the status to open the settings screen. Disabled: No Exploit Prevention features are enabled Click the status to open the settings screen. 6 Approved List status Click the number of Approved List items or last updated date to open the Approved List. Click the last application blocked date to open the Blocked Application Event Log. 7 License expires on The time and date that the software expires Click the date to provide a new Activation Code. About Status Icons Use the status icons for a visual indication of the current status of Safe Lock. Note System Tray icons display if they were enabled during installation. 5-7
74 Trend Micro Safe Lock Intelligent Manager Administrator's Guide TABLE 5-2. Status Icon Descriptions CONSOLE ICON SYSTEM TRAY ICON STATUS DESCRIPTION Locked The Approved List is being enforced. Unauthorized applications cannot be run. Unlocked The Approved List is not being enforced. Unauthorized applications can be run. N/A Expired When the Safe Lock license has expired, the system cannot be locked. Update the Activation Code by clicking on the expiration date. About the Approved List Use the Approved List to display the files that Safe Lock allows to run or make changes to the endpoint. 5-8

75 Using the Agent Console FIGURE 5-2. The Safe Lock Approved List The following table describes the features available on the Approved List. TABLE 5-3. Approved List Item Descriptions # ITEM DESCRIPTION 1 Add Item/Delete Item Adds or removes selected items to or from the Approved List. 2 Search bar Searches the Application and File Path columns. 3 Check Hash/Update Hash Checks or updates the hash values for applications in the Approved List. 4 Export/Import Exports or imports the Approved List using a SQL database (.db) file. 5-9
76 Trend Micro Safe Lock Intelligent Manager Administrator's Guide # ITEM DESCRIPTION 5 Copy to Clipboard Copies the Approved List to the clipboard in the comma separated values (CSV) format for easy review or reporting. About Hashes Trend Micro Safe Lock calculates a unique hash value for each file in the Approved List. This value can be used to detect any changes made to a file, since any change results in a different hash value. Comparing current hash values to previous values can help detect file changes. The following table describes the hash check status icons. TABLE 5-4. Hash Check Status Icons ICON DESCRIPTION The calculated hash value matches the stored value. The calculated hash value does not match the stored value. There was an error calculating the hash value. Moving or overwriting files manually (without using the Trusted Updater) can result in the hash values not matching, but the mismatch could result from other applications (including malware) altering or overwriting existing files. If unsure why a hash value mismatch has occurred, scan the endpoint for threats with Trend Micro Portable Security. Checking or Updating Hashes Checking the hash value of files in the Approved List can help verify the integrity of files currently permitted to run. 5-10
77 Using the Agent Console Procedure 1. Open the Trend Micro Safe Lock console using the desktop icon (if available) or the Start menu by clicking All Programs > Trend Micro Safe Lock. 2. Provide the password and click Login. 3. Click the Approved List menu item to open the list. To check the file hash values: a. Select the files to check. To check all files, select the check box at the top of the Approved List. b. Click Check Hash. To update the file hash values: a. Select the files to update. b. Click Update Hash. Important If unsure why a hash value mismatch has occurred, scan the endpoint for threats. Configuring the Approved List After setting up the Approved List, users can add new programs by clicking Add Item, which displays the options in the following table. 5-11
78 Trend Micro Safe Lock Intelligent Manager Administrator's Guide TABLE 5-5. Methods for Adding Applications to the Approved List OPTION Manually browse and select files Automatically add files created or modified by the selected application installer (Trusted Updater) WHEN TO USE Choose this option when the software already exists on the endpoint and is up-to-date. Adding a file grants permission to run the file, but does not alter the file or the system. For example, if Windows Media Player (wmplayer.exe) is not in the Approved List after initial setup, users can add it to the list using the console. Choose this option to open the Trusted Updater when updating the endpoint or installing new software. For example, if Mozilla Firefox needs to be installed or updated, use the Trusted Updater. Trend Micro Safe Lock Intelligent Manager adds or updates any files modified by an installer to the Approved List. Adding or Removing Files Procedure 1. Open the Trend Micro Safe Lock console using the desktop icon (if available) or the Start menu by clicking All Programs > Trend Micro Safe Lock. 2. Provide the password and click Login. 3. Click the Approved List menu item to open the list. To add an item: a. Click Add Item, select Manually browse and select files, and click Next. b. In the window that opens, choose Specific applications, All applications in folders and subfolders, or All applications in a folder from the drop-down list. A selection window appears. c. Select the desired application or folder to add, and click Open or OK. d. Click OK. Confirm the items to be added, and click Approve. 5-12
79 Using the Agent Console e. After adding the desired items to the Approved List, click Close. To remove an item: a. Search the Approved List for the application to remove. b. Select the check box next to the file name to be removed, and click Delete Item. c. When asked to remove the item, click OK. d. Click OK again to close the confirmation window. Updating or Installing Using the Trusted Updater Trend Micro Safe Lock automatically adds applications to the Approved List after the Trusted Updater adds or modifies the program files. Procedure 1. Open the Trend Micro Safe Lock console using the desktop icon (if available) or the Start menu by clicking All Programs > Trend Micro Safe Lock. 2. Provide the password and click Login. 3. Click the Approved List menu item to open the list. 4. To install or update an application, select the installer that the Trusted Updater should temporarily allow to run: a. Click Add Item, select Automatically add files created or modified by the selected application installer, and click Next. b. In the window that opens, choose File, Folder, or Folder and sub folders from the drop-down list. c. Select the desired installation package or folder to add, and click Open. 5-13

80 Trend Micro Safe Lock Intelligent Manager Administrator's Guide Note Only existing EXE, MSI, BAT, and CMD files can be added to the Trusted Updater. d. Check that the correct items appear on the list, and click Start. The Safe Lock Trusted Updater window displays. FIGURE 5-3. The Safe Lock Trusted Updater 5. Install or update the program as usual. When finished, click Stop on the Trusted Updater. 6. Check that the correct items appear on the Approved List, and click Approve, and then click Close. 5-14
81 Using the Agent Console Exporting or Importing the Approved List Users can export or import the as a database (.db) file for reuse in mass deployment situations. Copy to Clipboard creates a CSV version of the list on the Windows clipboard. Procedure 1. Open the Trend Micro Safe Lock console using the desktop icon (if available) or the Start menu by clicking All Programs > Trend Micro Safe Lock. 2. Provide the password and click Login. 3. Click the Approved List menu item to open the list. To export the Approved List: a. Click Export, and choose where to save the file. b. Provide a filename, and click Save. To import an Approved List: a. Click Import, and locate the database file. b. Select the file, and click Open. Account Types Trend Micro Safe Lock provides role-based administration, allowing administrators to grant users access to certain features on the main console. Through the configuration file, Safe Lock administrators can specify the features available to the Restricted Users account. 5-15
82 Trend Micro Safe Lock Intelligent Manager Administrator's Guide TABLE 5-6. Safe Lock Accounts ACCOUNT DETAILS Administrator Default account Full access to Safe Lock functions Can use both the console and command line interface (CLI) Restricted User Secondary maintenance account Limited access to Safe Lock functions Can only use the console To enable the Restricted User account, see Configuring Passwords on page To sign in with a specific account, specify the password for that account. Configuring Passwords While the Safe Lock administrator and Restricted User passwords can be changed from the console, only the administrator can change passwords. To log on the console as the administrator account, provide the administrator password when launching the console. Important The Safe Lock administrator and Restricted User passwords cannot be the same. Procedure 1. Open the Trend Micro Safe Lock console using the desktop icon (if available) or the Start menu by clicking All Programs > Trend Micro Safe Lock. 2. Provide the Safe Lock administrator password and click Login. 3. Click the Password menu item to display the administrator password page. To change the Safe Lock administrator password: a. Provide the current password, specify and confirm the new password, and click Save. 5-16
83 Using the Agent Console WARNING! The only way to recover after losing the Safe Lock administrator password is by reinstalling the operating system. To create a Restricted User password: a. Click Restricted User at the top of the console. b. Select the Use Restricted User check box. c. Specify and confirm the password, and click Save. To change an existing Restricted User password: a. Specify and confirm the new password, and click Save. About Feature Settings Safe Lock offers the following protection features. 5-17

84 Trend Micro Safe Lock Intelligent Manager Administrator's Guide FIGURE 5-4. Safe Lock settings screen TABLE 5-7. Intrusion Prevention SETTING USB Malware Protection Network Virus Protection DESCRIPTION USB Malware Protection prevents threats on USB or remote drives from infecting the endpoint. Just viewing the contents of the drive may be enough to pass along an infection. Enable this feature to prevent files on USB devices from infecting the endpoint. Network Virus Protection scans incoming and outgoing network traffic, blocking threats from infected computers or other devices on the network. Enable this feature to prevent threats on the network from infecting the endpoint. 5-18
85 Using the Agent Console TABLE 5-8. Execution Prevention SETTING Memory Randomization DESCRIPTION Address Space Layout Randomization helps prevent shellcode injection by randomly assigning memory locations for important functions, forcing an attacker to guess the memory location of specific processes. Enable this feature on older operating systems such as Windows XP or Windows Server 2003, which may lack or offer limited Address Space Layout Randomization (ASLR) support. Note The endpoint must be restarted to enable or disable Memory Randomization. DLL Injection Prevention API Hooking Prevention DLL Injection Prevention detects and blocks API call behaviors used by malicious software. Blocking these threats helps prevent malicious processes from running. Never disable this feature except in troubleshooting situations since it protects the system from a wide variety of serious threats. API Hooking Prevention detects and blocks malicious software that tries to intercept and alter messages used in critical processes within the operating system. Never disable this feature except in troubleshooting situations since it protects the system from a wide variety of serious threats. TABLE 5-9. Application Lockdown SETTING DLL/Driver Lockdown Script Lockdown DESCRIPTION DLL/Driver Lockdown prevents unapproved DLLs or drivers from being loaded into the memory of protected endpoints. Script Lockdown prevents unapproved script files from being run on protected endpoints. 5-19
86 Trend Micro Safe Lock Intelligent Manager Administrator's Guide SETTING Write Protection DESCRIPTION Write Protection prevents write access to objects (files, folders, and registry entries) in the Write Protection List and optionally prevents write access to files in the Approved List. TABLE Other SETTING Integrity Monitoring DESCRIPTION Integrity Monitoring logs events related to file changes system-wide for files, folders, and the registry. Enabling or Disabling Feature Settings Note By default, Trend Micro Safe Lock enables all Exploit Prevention settings. If Network Virus Protection was not included in the initial installation, it cannot be selected. Reinstall Trend Micro Safe Lock if Network Virus Protection is not available. Procedure 1. Open the Trend Micro Safe Lock console using the desktop icon (if available) or the Start menu by clicking All Programs > Trend Micro Safe Lock. 2. Provide the password and click Login. 3. Click the Settings menu item to configure Exploit Prevention settings. 4. Enable or disable the desired features. 5. Click Save. 5-20
87 Chapter 6 Using the Agent Command Line Interface (CLI) This chapter describes how to configure and use Trend Micro Safe Lock using the command line interface (CLI). Topics in this chapter include: Using SLCmd at the Command Line Interface (CLI) on page
88 Trend Micro Safe Lock Intelligent Manager Administrator's Guide Using SLCmd at the Command Line Interface (CLI) Administrators can work with Trend Micro Safe Lock directly from the command line interface (CLI) using the SLCmd.exe program at the command line. Procedure 1. Open a command prompt window with Windows administrator privileges. 2. Navigate to the Trend Micro Safe Lock installation folder using the cd command. For example, type the following command to reach the default location: cd /d "c:\program Files\Trend Micro\Trend Micro Safe Lock\" 3. Type SLCmd.exe. SLCmd Program and Console Function Comparison The following table lists the Trend Micro Safe Lock features available in SLCmd program and the Safe Lock console program.. TABLE 6-1. SLCmd Program at the Command Line Interface (CLI) and Console Function Comparison FUNCTION SLCMD PROGRAM AT THE COMMAND LINE INTERFACE (CLI) CONSOLE Account Management Yes Yes Approved List Management Yes Yes Decrypt/Encrypt configuration file Yes No Display the blocked log Yes Yes 6-2
89 Using the Agent Command Line Interface (CLI) FUNCTION SLCMD PROGRAM AT THE COMMAND LINE INTERFACE (CLI) CONSOLE Export/Import Approved List Yes Yes Export/Import configuration Yes Yes Install Yes Yes Lock/Unlock Yes Yes License Management Yes Yes Settings Limited Limited Start/Stop Trusted Updater Yes Yes Start/Stop the service Yes No Uninstall No No Not all settings are available through the command line interface (CLI) or console. See Working with the Agent Configuration File on page 9-2 for information about modifying the system configuration. SLCmd Program Commands The following tables list a summary commands available using the SLCmd program at the command line interface (CLI). To use the program, type SLCmd and the desired command. Type SLCmd and press ENTER to display the list of available commands. Note Only a Safe Lock administrator with Windows administrator privileges can use SLCmd at the command line interface (CLI). SLCmd will prompt for the administrator password before running certain commands. The following is a full list of commands available using the SLCmd program. 6-3
90 Trend Micro Safe Lock Intelligent Manager Administrator's Guide General Commands Perform general actions using the Command Line Interface. The following table lists the available abbreviated forms of parameters. TABLE 6-2. Abbreviations and Uses PARAMETER ABBREVI ATION USE adminpassword ap Manage the Safe Lock admistrator password lock lo Manage Application Lockdown status blockedlog bl Manage the applications blocked by Safe Lock license lc Manage the Safe Lock license settings set Manage the Safe Lock settings service srv Manage the Safe Lock service The following table lists the commands, parameters, and values available. TABLE 6-3. General Commands COMMAND PARAMETER VALUE DESCRIPTION help Display a list of Safe Lock commands For example, type: SLCmd.exe help activate <activatio n_code> Activate the Safe Lock program using the specified Activation Code For example, type: SLCmd.exe activate XX-XXXX- XXXXX-XXXXX-XXXXX-XXXXX-XXXXX 6-4
91 Using the Agent Command Line Interface (CLI) COMMAND PARAMETER VALUE DESCRIPTION set adminpassword <new_pas sword> Change the currently logged on administrator password to the newly specified password For example, type: SLCmd.exe -p <admin_password> set adminpassword Prompt the currently logged on administrator to specify a new password For example, type: SLCmd.exe -p <admin_password> set adminpassword set lock enable Turn on Application Lockdown For example, type: SLCmd.exe -p <admin_password> set lock enable disable Turn off Application Lockdown For example, type: SLCmd.exe -p <admin_password> set lock disable Display the current Safe Lock Application Lockdown status For example, type: SLCmd.exe -p <admin_password> set lock show blockedlog Display a list of applications blocked by Safe Lock For example, type: 6-5
92 Trend Micro Safe Lock Intelligent Manager Administrator's Guide COMMAND PARAMETER VALUE DESCRIPTION SLCmd.exe -p <admin_password> show blockedlog show license Display the current Safe Lock license information For example, type: SLCmd.exe show license show settings Display the current status of the vulnerability attack prevention features For example, type: SLCmd.exe -p <admin_password> show settings start service Start the Safe Lock service For example, type: SLCmd.exe start service status Display the current status of Application Lockdown and the auto update function of the Approved List For example, type: SLCmd.exe -p <admin_password> status stop service Stop the Safe Lock service For example, type: SLCmd.exe -p <admin_password> stop service version Display the current versions of Safe Lock components For example, type: 6-6
93 Using the Agent Command Line Interface (CLI) COMMAND PARAMETER VALUE DESCRIPTION SLCmd.exe -p <admin_password> version Central Management Commands Configure central management features using the Command Line Interface by typing your command in the following format: SLCmd.exe -p <admin_password> <command> <parameter> <value> The following table lists the available abbreviated forms of parameters. TABLE 6-4. Abbreviations and Uses PARAMETER ABBREVI ATION USE managedmodeconfiguration mmc Manage the configuration file servercertification sc Manage server certificate files managedmode mm Manage agent Managed Mode The following table lists the commands, parameters, and values available. TABLE 6-5. Central Management Commands COMMAND PARAMETER VALUE DESCRIPTION decrypt managedmodeconfigur ation <path_of_ encrypted _file> <path_of_ decrypted _output_fil e> Decrypt the configuration file used by Managed Mode encrypt managedmodeconfigur ation <path_of_f ile> <path_of_ encrypted Encrypt the configuration file used by Managed Mode 6-7
94 Trend Micro Safe Lock Intelligent Manager Administrator's Guide COMMAND PARAMETER VALUE DESCRIPTION _output_fil e> export managedmodeconfigur ation <path_of_ encrypted _output> Export the encrypted configuration file used by Managed Mode servercertification <path_of_ certificatio n_file> Export the encrypted Safe Lock Intelligent Manager SSL communication certificate file import managedmodeconfigur ation <path_of_ encrypted _input> Import the encrypted configuration file used by Managed Mode servercertification <path_of_ certificatio n_file> Import the encrypted Safe Lock Intelligent Manager SSL communication certificate file set managedmode enable [- cfg <path_of_ encrypted _file>] [-sc <path_of_ certificatio n_file>] Enable Managed Mode Note Using the optional -cfg value specifies the path of the configuration file. Using the optional -sc value specifies the path of the certificate file. set managedmode Display the current Managed Mode status show managedmodeconfigur ation Display the configuration used by Managed Mode test managedmode Connect a test Managed Mode session with Safe Lock Intelligent Manager 6-8
95 Using the Agent Command Line Interface (CLI) Optional Feature Commands Configure optional security features using the Command Line Interface by typing your command in the following format: SLCmd.exe -p <admin_password> <command> <parameter> <value> The following table lists the available abbreviated forms of parameters. TABLE 6-6. Abbreviations and Uses PARAMETER ABBREVI ATION USE usbmalwareprotection usb Manage USB Malware Protection networkvirusprotection net Manage Network Virus Protection memoryrandomization mr Manage Memory Randomization dllinjectionprevention dll Manage DLL Injection Prevention apihookingprevention api Manage API Hooking Prevention dlldriverlockdown dd Manage DLL/Driver Lockdown script scr Manage Script Lockdown writeprotection wp Manage Write Protection writeprotection-includesapprovedlist wpal Manage Write Protection includes Approved List integritymonitoring in Manage Integrity Monitoring customaction ca Manage actions taken when Safe Lock blocks specific types of events exceptionpath ep Manage exceptions to Application Lockdown The following table lists the commands, parameters, and values available. 6-9
96 Trend Micro Safe Lock Intelligent Manager Administrator's Guide TABLE 6-7. Optional Feature Commands COMMAND PARAMETER VALUE DESCRIPTION set usbmalwareprotectio n enable Enable USB Malware Protection For example, type: SLCmd.exe -p <admin_password> set usbmalwareprotection enable disable Disable USB Malware Protection For example, type: SLCmd.exe -p <admin_password> set usbmalwareprotection disable Display the current status of USB Malware Protection For example, type: SLCmd.exe -p <admin_password> set usbmalwareprotection set networkvirusprotect ion enable Enable Network Virus Protection For example, type: SLCmd.exe -p <admin_password> set networkvirusprotection enable disable Disable Network Virus Protection For example, type: SLCmd.exe -p <admin_password> set networkvirusprotection disable Display the current status of Network Virus Protection For example, type: 6-10
97 Using the Agent Command Line Interface (CLI) COMMAND PARAMETER VALUE DESCRIPTION SLCmd.exe -p <admin_password> set networkvirusprotection set memoryrandomization enable Enable Memory Randomization For example, type: SLCmd.exe -p <admin_password> set memoryrandomization enable disable Disable Memory Randomization For example, type: SLCmd.exe -p <admin_password> set memoryrandomization disable Display the current status of Memory Randomization For example, type: SLCmd.exe -p <admin_password> set memoryrandomization set dllinjectionprevent ion enable Enable DLL Injection Prevention For example, type: SLCmd.exe -p <admin_password> set dllinjectionprevention enable disable Disable DLL Injection Prevention For example, type: SLCmd.exe -p <admin_password> set dllinjectionprevention disable Display the current status of DLL Injection Prevention For example, type: 6-11
98 Trend Micro Safe Lock Intelligent Manager Administrator's Guide COMMAND PARAMETER VALUE DESCRIPTION SLCmd.exe -p <admin_password> set dllinjectionprevention set apihookingpreventio n enable Enable API Hooking Prevention For example, type: SLCmd.exe -p <admin_password> set apihookingprevention enable disable Disable API Hooking Prevention For example, type: SLCmd.exe -p <admin_password> set apihookingprevention disable Display the current status of API Hooking Prevention For example, type: SLCmd.exe -p <admin_password> set apihookingprevention set dlldriverlockdown enable Enable DLL/Driver Lockdown For example, type: SLCmd.exe -p <admin_password> set dlldriverlockdown enable disable Disable DLL/Driver Lockdown For example, type: SLCmd.exe -p <admin_password> set dlldriverlockdown disable Display the current status of DLL/ Driver Lockdown For example, type: 6-12
99 Using the Agent Command Line Interface (CLI) COMMAND PARAMETER VALUE DESCRIPTION SLCmd.exe -p <admin_password> set dlldriverlockdown set script enable Enable Script Lockdown For example, type: SLCmd.exe -p <admin_password> set script enable disable Disable Script Lockdown For example, type: SLCmd.exe -p <admin_password> set script disable Display the current status of Script Lockdown For example, type: SLCmd.exe -p <admin_password> set script set writeprotection enable Enable Write Protection For example, type: SLCmd.exe -p <admin_password> set writeprotection enable disable Disable Write Protection For example, type: SLCmd.exe -p <admin_password> set writeprotection disable Display the current status of Write Protection For example, type: SLCmd.exe -p <admin_password> set writeprotection 6-13
100 Trend Micro Safe Lock Intelligent Manager Administrator's Guide COMMAND PARAMETER VALUE DESCRIPTION set writeprotectionincludesapprovedlist enable Enable protection of the Approved List (in addition to the Write Protection List) when Write Protection is enabled For example, type: SLCmd.exe -p <admin_password> set writeprotection-includesapprovedlist enable disable Disable protection of the Approved List (in addition to the Write Protection List) when Write Protection is enabled For example, type: SLCmd.exe -p <admin_password> set writeprotection-includesapprovedlist disable Display the current status of Write Protection includes Approved List For example, type: SLCmd.exe -p <admin_password> set writeprotection-includesapprovedlist set integritymonitoring enable Enable Integrity Monitoring For example, type: SLCmd.exe -p <admin_password> set integritymonitoring enable disable Disable Integrity Monitoring For example, type: SLCmd.exe -p <admin_password> set integritymonitoring disable 6-14
101 Using the Agent Command Line Interface (CLI) COMMAND PARAMETER VALUE DESCRIPTION Display the current status of Integrity Monitoring For example, type: SLCmd.exe -p <admin_password> set integritymonitoring set customaction ignore Ignore blocked files or processes when Application Lockdown blocks any of the following events: Process launch DLL loading Script file access quaranti ne Quarantine blocked files or processes when Application Lockdown blocks any of the following events: Process launch DLL loading Script file access Note Safe Lock does not support a custom action of quarantine on Windows XP or Windows ask Ask what to do for blocked files or processes when Application Lockdown blocks any of the following events: Process launch DLL loading 6-15
102 Trend Micro Safe Lock Intelligent Manager Administrator's Guide COMMAND PARAMETER VALUE DESCRIPTION Script file access Display the current setting for actions taken when Safe Lock blocks specific types of events set exceptionpath enable Enable exceptions to Application Lockdown disable Disable exceptions to Application Lockdown Display current setting for using exceptions to Application Lockdown Restricted User Account Commands Configure the Restricted User Account using the Command Line Interface by typing your command in the following format: SLCmd.exe -p <admin_password> <command> <parameter> <value> The following table lists the available abbreviated forms of parameters. TABLE 6-8. Abbreviations and Uses PARAMETER ABBREVI ATION USE user us Manage the Restricted User account userpassword up Manage the Restricted User password The following table lists the commands, parameters, and values available. TABLE 6-9. Restricted User Account Commands COMMAND PARAMETER VALUE DESCRIPTION set user enable Enable the Restricted User account For example, type: 6-16
103 Using the Agent Command Line Interface (CLI) COMMAND PARAMETER VALUE DESCRIPTION SLCmd.exe -p <admin_password> set user enable disable Disable the Restricted User account For example, type: SLCmd.exe -p <admin_password> set user disable Display the the Restricted User account status For example, type: SLCmd.exe -p <admin_password> set user set userpassword <new_pas sword> Change the Restricted User account password to the newly specified password For example, type: SLCmd.exe -p <admin_password> set userpassword Prompt the currently logged on administrator to specify a new Restricted User account password For example, type: SLCmd.exe -p <admin_password> set userpassword Script Commands Deploy scripts using the Command Line Interface by typing your command in the following format: SLCmd.exe -p <admin_password> <command> <parameter> <value> The following table lists the available abbreviated forms of parameters. 6-17
104 Trend Micro Safe Lock Intelligent Manager Administrator's Guide TABLE Abbreviations and Uses PARAMETER ABBREVI ATION USE script scr Manage script commands The following table lists the commands, parameters, and values available. TABLE Script Commands COMMAND PARAMETER VALUE DESCRIPTION add script <extensio n> <interpret er1> [interprete r2]... Add the specified script extension and the interpreter(s) required to execute the script For example, to add the script extension JSP with the interpreter file jscript.js, type: SLCmd.exe -p <admin_password> add script jsp C:\Scripts \jscript.js remove script <extensio n> [interprete r1] [interprete r2]... Remove the specified script extension and the interpreter(s) required to execute the script For example, to remove the script extension JSP with the interpreter file jscript.js, type: SLCmd.exe -p <admin_password> remove script jsp C:\Scripts \jscript.js 6-18
105 Using the Agent Command Line Interface (CLI) COMMAND PARAMETER VALUE DESCRIPTION Note If you do not specify any interpreter, the command removes all interpreters related to the script extension. If you specify interpreters, the command only removes the interpreters specified from the script extension rule. show script Display all script rules For example, type: SLCmd.exe -p <admin_password> show script Approved List Commands Configure the Approved List using the Command Line Interface by typing your command in the following format: SLCmd.exe -p <admin_password> <command> <parameter> <value> The following table lists the available abbreviated forms of parameters. TABLE Abbreviations and Uses PARAMETER ABBREVI ATION USE approvedlist al Manage files in the Approved List list li Manage the Approved List import and export functions The following table lists the commands, parameters, and values available. 6-19
106 Trend Micro Safe Lock Intelligent Manager Administrator's Guide TABLE Approved List Commands COMMAND PARAMETER VALUE DESCRIPTION add approvedlist [-r] <file_or_fo lder_path> Add the specified file to the Approved List For example, to add all Microsoft Office files to the Approved List, type: SLCmd.exe -p <admin_password> add approvedlist -r "C: \Program Files\Microsoft Office" Note Using the optional -r value includes the specified folder and related subfolders. remove approvedlist <file_path > Remove the specified file from the Approved List For example, to remove notepad.exe from the Approved List, type: SLCmd.exe -p <admin_password> remove approvedlist C:\Windows \notepad.exe show approvedlist Display the files in the Approved List For example, type: SLCmd.exe -p <admin_password> show approvedlist check approvedlist -f Update the hash values in the Approved List and displays detailed results For example, type: 6-20
107 Using the Agent Command Line Interface (CLI) COMMAND PARAMETER VALUE DESCRIPTION SLCmd.exe -p <admin_password> check approvedlist -f -q Update the hash values in the Approved List and displays summarized results For example, type: SLCmd.exe -p <admin_password> check approvedlist -q -v Compare the hash values in the Approved List with the hash values calculated from the actual files and prompts the user after detecting mismatched values For example, type: SLCmd.exe -p <admin_password> check approvedlist -v export list <output_fil e> Export the Approved List to the file path and file name specified For example, type: SLCmd.exe -p <admin_password> export list c:\approvedlist \ap.db Note The output file type must be DB format. import list [-o] <input_file > Import an Approved List from the file path and file name specified For example, type: SLCmd.exe -p <admin_password> import list c:\approvedlist \ap.db 6-21
108 Trend Micro Safe Lock Intelligent Manager Administrator's Guide COMMAND PARAMETER VALUE DESCRIPTION Note The input file type must be DB format. Using the optional -o value overwrites the existing list. Application Lockdown Commands Perform actions related to Application Lockdown using the Command Line Interface by typing your command in the following format: SLCmd.exe -p <admin_password> <command> <parameter> <value> The following table lists the available abbreviated forms of parameters. TABLE Abbreviations and Uses PARAMETER ABBREVI ATION USE quarantinedfile qf Manage quarantined files exceptionpath ep Manage exceptions to Application Lockdown The following table lists the commands, parameters, and values available. TABLE Application Lockdown Commands COMMAND PARAMETER VALUE DESCRIPTION show quarantinedfile Display a list of quarantined files restore quarantinedfile <id> [-al] [-f] Restore the specified file from quarantine Using the optional -al value also adds the restored file to Approved List. 6-22
109 Using the Agent Command Line Interface (CLI) COMMAND PARAMETER VALUE DESCRIPTION Using the optional -f value forces the restore. remove quarantinedfile <id> Delete the specified file show exceptionpath Display current exceptions to Application Lockdown add exceptionpath -e <file_path >-t file -e <folder_pa th>-t folder -e <folder_pa th>-t folderan dsub remove exceptionpath -e <file_path >-t file Add an exception for the specified file Add an exception for the specified folder Add an exception for the specified folder and related subfolders Remove an exception for the specified file Note Specify the exact <file_path> originally specified in the corresponding add command. -e <folder_pa th>-t folder Remove an exception for the specified folder Note Specify the exact <folder_path> originally specified in the corresponding add command. 6-23
110 Trend Micro Safe Lock Intelligent Manager Administrator's Guide COMMAND PARAMETER VALUE DESCRIPTION -e <folder_pa th>-t folderan dsub Remove an exception for the specified folder and related subfolders Note Specify the exact <folder_path> originally specified in the corresponding add command. Write Protection Commands Configure Write Protection List and Write Protection Exception List using the Command Line Interface by typing your command in the following format: SLCmd.exe -p <admin_password> <command> <parameter> <value> The following table lists the available abbreviated forms of parameters. TABLE Abbreviations and Uses PARAMETER ABBREVI ATION USE writeprotection wp Manage the Write Protection feature writeprotection-file wpfi Manage files in the Write Protection List writeprotection-folder wpfo Manage folders in the Write Protection List writeprotection-regvalue wprv Manage registry values and associated registry keys in the Write Protection List writeprotection-regkey wprk Manage registry keys in the Write Protection List writeprotection-fileexception wpfie Manage files in the Write Protection Exception List 6-24
111 Using the Agent Command Line Interface (CLI) PARAMETER ABBREVI ATION wpfoe wprve wprke USE Manage folders in the Write Protection Exception List Manage registry values and associated registry keys in the Write Protection Exception List Manage registry keys in the Write Protection Exception List The following tables list the commands, parameters, and values available. TABLE Write Protection List File Commands COMMAND PARAMETER VALUE DESCRIPTION show writeprotection Display the entire Write Protection List Display the files in the Write Protection List For example, type: SLCmd.exe -p <admin_password> show writeprotection-file writeprotection-folderexception writeprotection-regvalueexception writeprotection-regkeyexception writeprotectionfile writeprotectionfile-exception Display the files in the Write Protection Exception List For example, type: SLCmd.exe -p <admin_password> show writeprotection-fileexception writeprotectionfolder Display the folders in the Write Protection List For example, type: SLCmd.exe -p <admin_password> show writeprotection-folder 6-25
112 Trend Micro Safe Lock Intelligent Manager Administrator's Guide COMMAND PARAMETER VALUE DESCRIPTION writeprotectionfolder-exception Display the folders in the Write Protection Exception List For example, type: SLCmd.exe -p <admin_password> show writeprotection-folderexception add writeprotectionfile <file_path > Add the specified file to the Write Protection List For example, type: SLCmd.exe -p <admin_password> add writeprotection-file archive.txt Note The <file_path> value pattern matches from the end of the path toward the beginning of the path. For example, specifying userfile.txt matches c:\windows \userfile.txt and c:\temp \userfile.txt. writeprotectionfile-exception -t <file_path > -p <process_ path> Add the specified file and a specific process path for that file to the Write Protection Exception List For example, to add write access by a process named notepad.exe to a file named userfile.txt, type: SLCmd.exe -p <admin_password> add writeprotection-fileexception -t userfile.txt -p notepad.exe 6-26
113 Using the Agent Command Line Interface (CLI) COMMAND PARAMETER VALUE DESCRIPTION Note The -p and -t values pattern match from the end of the path toward the beginning of the path. For example, specifying userfile.txt matches c:\windows \userfile.txt and c:\temp \userfile.txt. -t <file_path > Add the specified file to the Write Protection Exception List For example, to add write access by any process to a file named userfile.txt, type: SLCmd.exe -p <admin_password> add writeprotection-fileexception -t userfile.txt Note The -t value pattern matches from the end of the path toward the beginning of the path. For example, specifying userfile.txt matches c: \Windows\userfile.txt and c:\temp\userfile.txt. -p <process_ path> Add the specified process path to the Write Protection Exception List For example, to add write access by a process named notepad.exe to any files, type: SLCmd.exe -p <admin_password> add writeprotection-fileexception -p notepad.exe 6-27
114 Trend Micro Safe Lock Intelligent Manager Administrator's Guide COMMAND PARAMETER VALUE DESCRIPTION Note The -p value pattern matches from the end of the process path toward the beginning of the path. For example, specifying notepad.exe matches c:\windows \notepad.exe and c:\temp \notepad.exe. [-r] <folder_pa th> Add the specified folder(s) to the Write Protection List For example, type: SLCmd.exe -p <admin_password> add writeprotection-folder -r userfolder Note Using the optional -r value includes the specified folder and related subfolders. The <folder_path> value pattern matches from the end of the path toward the beginning of the path. For example, specifying userfile.txt matches c: \Windows\userfolder and c:\temp\userfolder. writeprotectionfolder writeprotectionfolder-exception [-r] -t <folder_pa th> -p <process_ path> Add the specified folder and processes run from the specified path to the Write Protection Exception List For example, to add write access by a process named notepad.exe to a 6-28
115 Using the Agent Command Line Interface (CLI) COMMAND PARAMETER VALUE DESCRIPTION folder and related subfolders at c: \Windows\System32\Temp, type: SLCmd.exe -p <admin_password> add writeprotection-folderexception -r -t c:\windows \System32\Temp -p notepad.exe Note Using the optional -r value includes the specified folder and related subfolders. The -p and -t values pattern match from the end of the path toward the beginning of the path. For example, specifying userfile.txt matches c:\windows \userfile.txt and c:\temp \userfile.txt. [-r] -t <folder_pa th> Add the specified folder(s) to the Write Protection Exception List For example, to add write access by any process to a folder at userfolder, type: SLCmd.exe -p <admin_password> add writeprotection-folderexception -r -t userfolder 6-29
116 Trend Micro Safe Lock Intelligent Manager Administrator's Guide COMMAND PARAMETER VALUE DESCRIPTION Note Using the optional -r value includes the specified folder and related subfolders. The -t value pattern matches from the last part of the folder path toward the beginning of the path. For example, specifying userfolder matches c:\windows \userfolder and c:\temp \userfolder. -p <process_ path> Add processes run from the specified paths to the Write Protection Exception List For example, to add write access by a process named notepad.exe to any folder, type: SLCmd.exe -p <admin_password> add writeprotection-folderexception -p c:\windows \notepad.exe Note The -p value pattern matches from the end of the process path toward the beginning of the path. For example, specifying notepad.exe matches c:\windows \notepad.exe and c:\temp \notepad.exe. remove writeprotectionfile <file_path > Remove the specified file from the Write Protection List For example, type: 6-30
117 Using the Agent Command Line Interface (CLI) COMMAND PARAMETER VALUE DESCRIPTION SLCmd.exe -p <admin_password> remove writeprotection-file archive.txt Note Specify the exact <file_path> originally specified in the corresponding add command. writeprotectionfile-exception -t <file_path > -p <process_ path> Remove the specified file and process path from the Write Protection Exception List For example, type: SLCmd.exe -p <admin_password> remove writeprotection-fileexception -t userfile.txt -p notepad.exe -t <file_path > Note Specify the exact <file_path> and <process_path> originally specified in the corresponding add command. Remove the specified file from the Write Protection Exception List For example, type: SLCmd.exe -p <admin_password> remove writeprotection-fileexception -t userfile.txt 6-31
118 Trend Micro Safe Lock Intelligent Manager Administrator's Guide COMMAND PARAMETER VALUE DESCRIPTION Note The -t value pattern matches from the end of the path toward the beginning of the path. For example, specifying userfile.txt matches c: \Windows\userfile.txt and c:\temp\userfile.txt. -p <process_ path> Remove the specified process path from the Write Protection Exception List For example, type: SLCmd.exe -p <admin_password> remove writeprotection-fileexception -p notepad.exe writeprotectionfolder [-r] <folder_pa th> Note The -p value pattern matches from the end of the process path toward the beginning of the path. For example, specifying notepad.exe matches c:\windows \notepad.exe and c:\temp \notepad.exe. Remove the specified folder(s) from the Write Protection List For example, type: SLCmd.exe -p <admin_password> remove writeprotection-folder -r c:\windows 6-32
119 Using the Agent Command Line Interface (CLI) COMMAND PARAMETER VALUE DESCRIPTION Note Using the optional -r value includes the specified folder and related subfolders. Specify the exact <folder_path> and -r value originally specified in the corresponding add command. writeprotectionfolder-exception [-r] -t <folder_pa th> -p <process_ path> Remove the specified folder and process path from the Write Protection Exception List For example, type: SLCmd.exe -p <admin_password> remove writeprotection-folderexception -r -t c:\windows \System32\Temp -p c:\windows \notepad.exe Note Using the optional -r value includes the specified folder and related subfolders. Specify the exact <folder_path>, <process_path>, and -r value originally specified in the corresponding add command. [-r] -t <folder_pa th> Remove the specified folder(s) from the Write Protection Exception List For example, type: SLCmd.exe -p <admin_password> remove writeprotection-folderexception -r -t userfolder 6-33
120 Trend Micro Safe Lock Intelligent Manager Administrator's Guide COMMAND PARAMETER VALUE DESCRIPTION Note Using the optional -r value includes the specified folder and related subfolders. The -t value pattern matches from the last part of the folder path toward the beginning of the path. For example, specifying userfolder matches c:\windows \userfolder and c:\temp \userfolder. -p <process_ path> Remove the specified process path from the Write Protection Exception List For example, type: SLCmd.exe -p <admin_password> remove writeprotection-folderexception -p c:\windows \System32 Note The -p value pattern matches from the end of the process path toward the beginning of the path. For example, specifying notepad.exe matches c:\windows \notepad.exe and c:\temp \notepad.exe. 6-34
121 Using the Agent Command Line Interface (CLI) TABLE Write Protection List Registry Commands COMMAND PARAMETER VALUE DESCRIPTION show writeprotection Display the entire Write Protection List writeprotectionregvalue Display the registry values in the Write Protection List writeprotectionregvalue-exception Display the registry values in the Write Protection Exception List writeprotectionregkey Display the registry keys in the Write Protection List writeprotectionregkey-exception Display the registry keys in the Write Protection Exception List add writeprotectionregvalue <path_of_ registry_k ey> <registry_ value> Add the specified registry value and its related registry key to the Write Protection List For example, to add the registry value of testvalue in the HKEY \test registry key to the Write Protection List, type: SLCmd.exe -p <admin_password> add writeprotection-regvalue HKEY\test testvalue writeprotectionregvalue-exception -t <path_of_ registry_k ey> <registry_ value> -p <process_ path> Add the specified registry value and its related registry key and a specific process path for that value to the Write Protection Exception List 6-35
122 Trend Micro Safe Lock Intelligent Manager Administrator's Guide COMMAND PARAMETER VALUE DESCRIPTION Note This command allows write access by the specified process to the specified registry values. The -p value pattern matches from the end of the path toward the beginning of the path. -t <path_of_ registry_k ey> <registry_ value> -p <process_ path> Add the specified registry value and its related registry key to the Write Protection Exception List Note This command allows write access by any process to the specified registry value. Add the specified process to the Write Protection Exception List writeprotectionregkey [-r] <path_of_ registry_k ey> Note This command allows write access by the specified process to any registry values. The -p value pattern matches from the end of the process path toward the beginning of the path. Add the specified registry key to the Write Protection List 6-36
123 Using the Agent Command Line Interface (CLI) COMMAND PARAMETER VALUE DESCRIPTION Note Using the optional -r value includes the specified registry key and related subkeys. writeprotectionregkey-exception [-r] -t <path_of_ registry_k ey> -p <process_ path> Add the specified registry key and processes run from the specified path to the Write Protection Exception List Note This command allows write access by the specified process to the specified registry keys. Using the optional -r value includes the specified registry key and related subkeys. The -p value pattern matches from the end of the process path toward the beginning of the path. [-r] -t <path_of_ registry_k ey> Add the specified registry key to the Write Protection Exception List Note This command allows write access by any process to the specified registry keys. Using the optional -r value includes the specified registry key and related subkeys. 6-37
124 Trend Micro Safe Lock Intelligent Manager Administrator's Guide COMMAND PARAMETER VALUE DESCRIPTION -p <process_ path> Add processes run from the specified paths to the Write Protection Exception List Note This command allows write access by the specified process to any registry keys. The -p value pattern matches from the end of the process path toward the beginning of the path. remove writeprotectionregvalue <path_of_ registry_k ey> <registry_ value> Remove the specified registry value from the Write Protection List Note Specify the exact <path_of_registry_key> and <registry_value> originally specified in the corresponding add command. writeprotectionregvalue-exception -t <path_of_ registry_k ey> <registry_ value> -p <process_ path> Remove the specified registry value and process path from the Write Protection Exception List 6-38
125 Using the Agent Command Line Interface (CLI) COMMAND PARAMETER VALUE DESCRIPTION Note Specify the exact <path_of_registry_key>, <registry_value>, and <process_path> originally specified in the corresponding add command. The -p value pattern matches from the end of the path toward the beginning of the path. -t <path_of_ registry_k ey> <registry_ value> -p <process_ path> Remove the specified registry value from the Write Protection Exception List Remove the specified process path from the Write Protection Exception List writeprotectionregkey [-r] <path_of_ registry_k ey> Note The -p value pattern matches from the end of the path toward the beginning of the path. Remove the specified registry key from the Write Protection List 6-39
126 Trend Micro Safe Lock Intelligent Manager Administrator's Guide COMMAND PARAMETER VALUE DESCRIPTION Note Specify the exact <path_of_registry_key> and - r value originally specified in the corresponding add command. Using the optional -r value includes the specified registry key and related subkeys. writeprotectionregkey-exception [-r] -t <path_of_ registry_k ey> -p <process_ path> Remove the specified registry key and process path from the Write Protection Exception List Note Specify the exact <path_of_registry_key>, <process_path>, and -r value originally specified in the corresponding add command. Using the optional -r value includes the specified registry key and related subkeys. The -p value pattern matches from the end of the path toward the beginning of the path. [-r] -t <path_of_ registry_k ey> Remove the specified registry key from the Write Protection Exception List Note Using the optional -r value includes the specified registry key and related subkeys. 6-40
127 Using the Agent Command Line Interface (CLI) COMMAND PARAMETER VALUE DESCRIPTION -p <process_ path> Remove the specified process path from the Write Protection Exception List Note The -p value pattern matches from the end of the path toward the beginning of the path. Trusted Certification Commands Configure Trusted Certificates using the Command Line Interface by typing your command in the following format: SLCmd.exe -p <admin_password> <command> <parameter> <value> The following table lists the available abbreviated forms of parameters. TABLE Abbreviations and Uses PARAMETER ABBREVI ATION USE trustedcertification tc Manage Trusted Certifications The following table lists the commands, parameters, and values available. TABLE Trusted Certificate Commands COMMAND PARAMETER VALUE DESCRIPTION set trustedcertificatio n enable disable Enable using Trusted Certifications Disable using Trusted Certifications Display current setting for using Trusted Certifications 6-41
128 Trend Micro Safe Lock Intelligent Manager Administrator's Guide COMMAND PARAMETER VALUE DESCRIPTION show trustedcertificatio n [-v] Display the certificate files in the Trusted Certifications List Using the optional -v value displays detailed information. add trustedcertificatio n -c <file_path > [-l <label>] [- u] Add the specified certificate file to the Trusted Certifications List Using the optional -l value specifies the unique label for this certificate file. Using the optional -u value treats the file signed by this certificate file as a Trusted Updater. remove trustedcertificatio n -l <label> Remove a certificate file from the Trusted Certifications List by specifying its label Trusted Updater Commands Configure Trusted Updaters using the Command Line Interface by typing your command in the following format: SLCmd.exe -p <admin_password> <command> <parameter> <value> The following table lists the available abbreviated forms of parameters. TABLE Abbreviations and Uses PARAMETER ABBREVI ATION USE trustedupdater tu Manage the Predefined Trusted Updater tool process The following table lists the commands, parameters, and values available. 6-42
129 Using the Agent Command Line Interface (CLI) TABLE Trusted Updater Commands COMMAND PARAMETER VALUE DESCRIPTION start trustedupdater [-r] <path_of_i nstaller> Start the Trusted Updater and add the installation packages (EXE and MSI file types) in the specified folder to the Approved List Note Using the optional -r value includes the specified folder and related subfolders. For example, to include all installation packages in the C: \Installers folder and all subfolders, type: SLCmd.exe -p <admin_password> start trustedupdater -r C: \Installers stop trustedupdater [-f] Stop the Trusted Updater function Note Using the optional -f value specifies that the Trusted Updater does not prompt the administrator before committing a file to the Approved List. For example, to stop the Trusted Updater and commit all identified installers (indentified before receiving the stop command) to the Approved List after receiving a prompt, type: 6-43
130 Trend Micro Safe Lock Intelligent Manager Administrator's Guide COMMAND PARAMETER VALUE DESCRIPTION SLCmd.exe -p <admin_password> stop trustedupdater -f Predefined Trusted Updater Commands Important The add command for adding files to the Predefined Trusted Updater List follows a different format than the general commands specified in the Predefined Trusted Updater Commands table. For details on adding files to the Predefined Trusted Updater List, see Predefined Trusted Updater "Add" Command on page Configure Predefined Trusted Updaters using the Command Line Interface by typing your command in the following format: SLCmd.exe -p <admin_password> <command> <parameter> <value> The following table lists the available abbreviated forms of parameters. TABLE Abbreviations and Uses PARAMETER ABBREVI ATION USE predefinedtrustedupdater ptu Manage files in the Predefined Trusted Updater Lists The following table lists the commands, parameters, and values available. TABLE Predefined Trusted Updater Commands COMMAND PARAMETER VALUE DESCRIPTION add predefinedtrustedup dater -e <folder_or _file_exce ption> Add the specified file or folder to the Predefined Trusted Updater Exception List 6-44
131 Using the Agent Command Line Interface (CLI) COMMAND PARAMETER VALUE DESCRIPTION Important The add command for adding files to the Predefined Trusted Updater List follows a different format than the other commands specified in the this list. For details on adding files to the Predefined Trusted Updater List (not the Predefined Trusted Updater Exception List), see Predefined Trusted Updater "Add" Command on page For example, to add notepad.exe to the Predefined Trusted Updater Exception List, type: SLCmd.exe -p <admin_password> add predefinedtrustedupdater - e C:\Windows\notepad.exe decrypt predefinedtrustedup dater <path_of_ encrypted _file> <path_of_ decrypted _output_fil e> Decrypt a file to the specified location For example, to decrypt C: \Notepad.xen to C:\Editors \notepad.exe, type: SLCmd.exe -p <admin_password> decrypt predefinedtrustedupdater C: \Notepad.xen C:\Editors \notepad.exe encrypt predefinedtrustedup dater <path_of_f ile> <path_of_ encrypted Encrypt a file to the specified location For example, to encrypt C: \notepad.exe to C:\Editors \Notepad.xen, type: 6-45
132 Trend Micro Safe Lock Intelligent Manager Administrator's Guide COMMAND PARAMETER VALUE DESCRIPTION _output_fil e> SLCmd.exe -p <admin_password> encrypt predefinedtrustedupdater C: \Editors\notepad.exe C: \Notepad.xen export predefinedtrustedup dater <path_of_ encrypted _output> Export the Predefined Trusted Updater List to the specified encrypted file For example, type: SLCmd.exe -p <admin_password> export predefinedtrustedupdater C: \Lists\ptu_list.xen import predefinedtrustedup dater <path_of_ encrypted _input> Import a Predefined Trusted Updater List from the specified encrypted file For example, type: SLCmd.exe -p <admin_password> import predefinedtrustedupdater C: \Lists\ptu_list.xen remove predefinedtrustedup dater -l <label_na me> Remove the specified labeled rule from the Predefined Trusted Updater List For example, to remove the Notepad rule, type: SLCmd.exe -p <admin_password> remove predefinedtrustedupdater -l Notepad -e <folder_or _file_exce ption> Remove the specified exception from the Predefined Trusted Updater Exception List For example, to remove the notepad.exe exception, type: 6-46
133 Using the Agent Command Line Interface (CLI) COMMAND PARAMETER VALUE DESCRIPTION SLCmd.exe -p <admin_password> remove predefinedtrustedupdater -e C: \Windows\notepad.exe set predefinedtrustedup dater enable Enable the Predefined Trusted Updater List disable Disable the Predefined Trusted Updater List show predefinedtrustedup dater Display the files in the Predefined Trusted Updater List For example, type: SLCmd.exe -p <admin_password> show predefinedtrustedupdater -e Display the files in the Predefined Trusted Updater Exception List For example, type: SLCmd.exe -p <admin_password> show predefinedtrustedupdater -e Predefined Trusted Updater "Add" Command Add processes, files, or folders to the Predefined Trusted Updater List using the Command Line Interface by typing your command in the following format: SLCmd.exe -p <admin_password> add predefinedtrustedupdater -u <folder_or_file> -t <type_of_object> [<optional_values>] The following table lists the command, parameter, and base value. 6-47
134 Trend Micro Safe Lock Intelligent Manager Administrator's Guide TABLE Predefined Trusted Updater Add Command COMMAND PARAMETER VALUE DESCRIPTION add predefinedtrustedup dater <folder_or _file Add a specified file or folder to the Predefined Trusted Updater List For example, to add notepad.exe to the Predefined Trusted Updater List, type: SLCmd.exe -p <admin_password> add predefinedtrustedupdater C:\Windows\notepad.exe Append the following additional values at the end of the command: TABLE Predefined Trusted Updater Add Additional Values REQ VALUE UIRE D / DESCRIPTION EXAMPLE OPTI ONAL -u <folder_or_ file> Req uire d Add the specified file or folder to the Predefined Trusted Updater List N/A Note This parameter requires the use of the -t <type_of_object> value. -t <type_of_o bject> Req uire d Specify the type of object to add to the Predefined Trusted Updater List located in -u <folder_or_file> Available objects types are as follows: process Indicates only EXE file types SLCmd.exe -p <admin_password> add predefinedtrustedupda ter -u C:\Windows \notepad.exe -t process 6-48
135 Using the Agent Command Line Interface (CLI) REQ VALUE UIRE D / DESCRIPTION EXAMPLE OPTI ONAL file folder folderands ub Indicates only MSI and BAT file types Indicates all EXE, MSI, and BAT files in the specified folder Indicates all EXE, MSI, and BAT files in the specified folder and related subfolders -p <parent_pr ocess> Opti onal Add the full file path to the specified parent process used to invoke the file(s) specified in -u <folder_or_file> SLCmd.exe -p <admin_password> add predefinedtrustedupda ter -u C:\Windows \notepad.exe -t process -p C:\batch files\note.bat -l <label_nam e> Opti onal Specify a label name for the file(s) specified in -u <folder_or_file> Note When left blank, Safe Lock assigns an arbitrary label name. SLCmd.exe -p <admin_password> add predefinedtrustedupda ter -u C:\Windows \notepad.exe -t process -l EDITOR -al enable Opti onal Compare the hash values in the Approved List with the hash values calculated from the actual files Note Enabled by default even when - al is not specified. SLCmd.exe -p <admin_password> add predefinedtrustedupda ter -u C:\Windows \notepad.exe -t process -al enable 6-49
136 Trend Micro Safe Lock Intelligent Manager Administrator's Guide REQ VALUE UIRE D / DESCRIPTION EXAMPLE OPTI ONAL -al disable Opti onal Do not compare the hash values in the Approved List with the hash values calculated from the actual files SLCmd.exe -p <admin_password> add predefinedtrustedupda ter -u C:\Windows \notepad.exe -t process -al disable Configuration File Commands Perform actions on the configuration file using the Command Line Interface by typing your command in the following format: SLCmd.exe -p <admin_password> <command> <parameter> <value> The following table lists the available abbreviated forms of parameters. TABLE Abbreviations and Uses PARAMETER ABBREVI ATION USE configuration con Manage the configuration file The following table lists the commands, parameters, and values available. TABLE Configuration File Commands COMMAND PARAMETER VALUE DESCRIPTION decrypt configuration <path_of_ encrypted _file> <path_of_ decrypted _output_fil e> Decrypts a configuration file to the specified location For example, to decrypt C: \config.xen to C:\config.xml, type: 6-50
137 Using the Agent Command Line Interface (CLI) COMMAND PARAMETER VALUE DESCRIPTION SLCmd.exe -p <admin_password> decrypt configuration C: \config.xen C:\config.xml encrypt configuration <path_of_f ile> <path_of_ encrypted _output_fil e> export configuration <path_of_ encrypted _output> Encrypts a configuration file to the specified location For example, to encrypt C: \config.xml to C:\config.xen, type: SLCmd.exe -p <admin_password> encrypt configuration C: \config.xml C:\config.xen Export the configuration file to the specified location For example, type: SLCmd.exe -p <admin_password> export configuration C: \config.xen import configuration <path_of_ encrypted _input> Import a configuration file from the specified location For example, type: SLCmd.exe -p <admin_password> import configuration C: \config.xen 6-51
138
139 Chapter 7 Managing Agents Remotely This chapter describes remote Trend Micro Safe Lock agent management. Topics in this chapter include: The Remote Setup Tool (SLrst) on page 7-2 The Remote Tasks Tool (SLtasks) on page
140 Trend Micro Safe Lock Intelligent Manager Administrator's Guide The Remote Setup Tool (SLrst) You can use the Remote Setup Tool to perform silent installations, patching, and uninstallations of the Safe Lock agent program using a command line interface (CLI). SLrst.exe remotely performs operations on target endpoints while target endpoints directly access the Safe Lock Intelligent Manager server. By default, Safe Lock Intelligent Manager stores the SLrst.exe file in the following location: <Safe_Lock_Intelligent_Manager_installation_folder>\CmdTools \RemoteAgentSetupTool\ The Remote Setup Tool uses the following syntax for all CLI functions: SLrst <targets CSV file> <parameter> Type SLrst at the command prompt and press ENTER to view an example of the Remote Setup Tool syntax. Important Only a Safe Lock Intelligent Manager administrator with Windows administrator privileges can use SLrst at the command line interface (CLI). Tip Optionally, copy the entire RemoteAgentSetupTool folder containing SLrst.exe from the Program Files folder to other locations to run the program. SLrst.exe is designed to run from within the RemoteAgentSetupTool folder on any endpoint in your network with.net Framework 2.0 or 3.5 installed, with SLrst.exe added to the Safe Lock Approved List or with Application Lockdown turned off, and with access to the Safe Lock Intelligent Manager server. The following table lists the functions available using the SLrst program. 7-2
141 Managing Agents Remotely TABLE 7-1. SLrst Remote Agent Setup Parameters PARAMETER --install --patch --reboot FUNCTION Deploys and installs the Safe Lock agent on the endpoint See Remote Installation Considerations on page 7-3. Patches the Safe Lock agent Restarts the endpoint (required if you want to reinstall the Safe Lock agent) Restarting Agents Remotely on page 7-13 Note The reboot function is not compatible on systems running Windows 2000 platforms. Manually restart endpoints running Windows 2000 platforms if you want to reinstall the Safe Lock agent. --uninstall Uninstalls the Safe Lock agent from the endpoint Uninstalling Agents Remotely on page 7-12 Remote Installation Considerations Before you remotely install Safe Lock Intelligent Manager agents, ensure the following: Safe Lock Intelligent Manager is installed on the server endpoint. Safe Lock agent versions earlier than 1.1 are not installed on target endpoints. See Agent Upgrade Preparation on page Network, target endpoints, and the server endpoint firewall settings allow for the following: Safe Lock Intelligent Manager ports (by default 8000, 8001, and 14336) File sharing services WMI services 7-3
142 Trend Micro Safe Lock Intelligent Manager Administrator's Guide IPC services Target endpoints have the following settings: Simple File Sharing is disabled. (Windows XP) File sharing is enabled. A local account has access to the default share admin$. Windows Management Instrumentation (WMI) service is enabled. Windows Interprocess Communications (IPC) service is enabled. Target endpoints are not running Windows Installer sessions. Specifically, confirm that Windows Update is not updating the endpoint in the background. Preparing the Agent Target Files The Remote Setup Tool utilizes two files when processing commands. endpoint_info.csv: Stores relevant connection information for agent endpoints targets.csv: Targets specific endpoints for the current deployment Important To edit endpoint_info.csv or targets.csv files that are in the Program Files folder, copy them to a path with file write priveleges, edit them, then copy them back to the suggested path below. Procedure 1. Prepare the endpoint info file and save it as endpoint_info.csv in the following path: <Safe_Lock_Intelligent_Manager_installation_folder> \CmdTools\RemoteAgentSetupTool\ See Endpoint Info File Specifications on page
143 Managing Agents Remotely 2. Create the targets file or batches of files and save them in the following path: <Safe_Lock_Intelligent_Manager_installation_folder> \CmdTools\RemoteAgentSetupTool\ See Targets File Specifications on page 7-5. Targets File Specifications The targets file used during remote agent installation contains the IP address of target endpoints. The targets file uses CSV format and has the file name targets.csv by default. Tip Remote agent setup using the SLrst command line program can be done in batches using more than one targets file and the same endpoint info file. The endpoint info file can contain information for endpoints outside the scope of the target endpoints listed in the targets file. To create customized targets CSV files, specify the IP address of each target endpoint. Use one line per record. Use of spaces, quotation marks, or other delimiters is not supported. For example: VALID NOT VALID , " " " " " " 7-5
144 Trend Micro Safe Lock Intelligent Manager Administrator's Guide Tip The targets file can be reused. Therefore, you can use the same targets file to deploy, patch, and uninstall a batch of target endpoints. Check the log information and make backups of any critical information each time you run the SLrst program. SLrst ignores and overwrites any log information in the file each time it is run. Endpoint Info File Specifications The endpoint info file used during remote agent installation contains the IP address, user name, and password of a local account on each target endpoint with access to the default share admin$. Tip Trend Micro recommends using the local administrator account on each target endpoint for deployment. The endpoint info file uses CSV format. The filename must be endpoint_info.csv. 7-6
145 Managing Agents Remotely Note To create the endpoint info CSV file, divide the records into fields for IP address, user name, and password. Use one line per record. Separate these fields using a comma. Use of spaces, quotation marks, or other delimiters is not supported. For example: VALID ,Administrator,password ,Administrator,password ,Administrator,password ,Daniel,his_pwd ,Sophia,her_pwd NOT VALID ,Administrator,password3, ,Daniel,his_pwd " ","Administrator","password1" " ""Administrator","password2" " ","Administrator","password3" " ","Daniel","his_pwd" " ","Sophia","her_pwd" Microsoft Excel will save a chart as a CSV using valid formatting. Downloading an Up-to-Date Agent Installer Package Procedure 1. Go to Administration > Components > Updates in the navigation at the top of the web console. The Component Updates screen appears. 2. Click Download Agent Installer Package. 3. Select the language the installation package. Your browser downloads the most up-to-date agent installer package. 7-7
146 Trend Micro Safe Lock Intelligent Manager Administrator's Guide Note The agent installer package is considered up-to-date by Safe Lock Intelligent Manager based on the component versions displayed on the Component Updates screen. If the cached agent installer package is not up-to-date, Safe Lock Intelligent Manager prepares and caches an up-to-date package before starting the download. Preparing an up-to-date agent installer package is system-intensive. Depending on the hardware running Safe Lock Intelligent Manager, preparing an up-to-date agent installer package can take a while. 4. To use the downloaded agent installer package for remote installations using the SLrst program at the command line interface (CLI), copy the downloaded agent installer package to the path used by SLrst. For example, if you installed Safe Lock Intelligent Manager to the default path on the C drive, copy the downloaded agent installer package to the following path: c: \Program Files\Trend Micro\Safe Lock Intelligent Manager \CmdTools\RemoteAgentSetupTool\ Important The package file name must follow the format: TMSL2.0_<language_abbreviation>.zip For example: TMSL2.0_EN.zip TMSL2.0_JA.zip VALID NOT VALID TMSL2.0_EN (1).zip TMSL2.0_EN_1.zip 7-8
147 Managing Agents Remotely Installing Agents Remotely Important Before remotely managing Safe Lock agents using the Remote Setup Tool, prepare the endpoint info and targets files. See Preparing the Agent Target Files on page 7-4. Before remotely installing Safe Lock agents, download an up-to-date agent installer package. See Downloading an Up-to-Date Agent Installer Package on page 4-3. Use the SLrst.exe program at the command line interface (CLI) to install one or more Safe Lock agents connected to the network. Procedure 1. Open a command prompt window with Windows administrator privileges. 2. Navigate to the Trend Micro Safe Lock Intelligent Manager Safe Lock Remote Setup Tool program folder using the cd command. For example, type the following command to reach the default location: cd /d "c:\program Files\Trend Micro\Safe Lock Intelligent Manager\CmdTools \RemoteAgentSetupTool\" 3. To remotely install agents using the default targets file targets.csv, type the following at the command prompt: SLrst.exe targets.csv --install. The remote setup tool looks for targets in the targets.csv file. For large production environments, Trend Micro recommends that you install agents in batches. Run the remote setup tool separately for each CSV batch file. 4. At the prompt, provide a password used to access the Safe Lock agent program and then confirm the password. 5. Select the target language. 7-9
148 Trend Micro Safe Lock Intelligent Manager Administrator's Guide 6. Select to perform a prescan for malware on the target endpoints before installing the Safe Lock agent. 7. Select to enable root cause analysis on the target endpoints. 8. Monitor the progress of the remote installation process. Safe Lock writes log information directly in the CSV file (by default, targets.csv) specified in the command line argument. Applying Patches and Hot Fixes to Agents Remotely Important Before remotely managing Safe Lock agents using the Remote Setup Tool, prepare the endpoint info and targets files. See Preparing the Agent Target Files on page 7-4. Use the SLrst.exe program at the command line interface (CLI) to apply patches or hot fixes to one or more Safe Lock agents connected to the network. Procedure 1. Download an agent patch or hot fix using the Trend Micro Technical Support Download Center website: 2. Copy the downloaded agent patch or hot fix to the path used by SLrst. For example, if you installed Safe Lock Intelligent Manager to the default path on the C drive, copy the downloaded agent installer patch or hot fix to the following path: c:\program Files\Trend Micro\Safe Lock Intelligent Manager\CmdTools\RemoteAgentSetupTool\package\ 7-10
149 Managing Agents Remotely Important The patch or hot fix file name must follow the format: TMSL2.0_Hotfix_<language_abbreviation>.zip For example: VALID TMSL2.0_Hotfix_EN.zip TMSL2.0_Hotfix_JA.zip NOT VALID TMSL2.0_Hotfix_EN (1).zip TMSL2.0_Hotfix_EN_1.zip 3. Navigate to the Trend Micro Safe Lock Intelligent Manager Safe Lock Remote Setup Tool folder inside the installation folder using the cd command. For example, type the following command to reach the default location: cd /d "c:\program Files\Trend Micro\Safe Lock Intelligent Manager\CmdTools \RemoteAgentSetupTool\" 4. To remotely patch or hot fix agents using the default targets file targets.csv, type the following at the command prompt: SLrst.exe targets.csv --patch. The remote setup tool looks for targets in the targets.csv file. For large production environments, Trend Micro recommends that you patch or hot fix agents in batches. Run the remote setup tool separately for each CSV batch file. 5. At the prompt, provide the password used to access the Safe Lock agent program. 6. Monitor the progress of the remote patch or hot fix. Safe Lock writes log information directly in the CSV file (by default, targets.csv) specified in the command line argument. 7-11
150 Trend Micro Safe Lock Intelligent Manager Administrator's Guide Uninstalling Agents Remotely Important Before remotely managing Safe Lock agents using the Remote Setup Tool, prepare the endpoint info and targets files. See Preparing the Agent Target Files on page 7-4. Use the SLrst.exe program at the command line interface (CLI) to uninstall one or more Safe Lock agents connected to the network. Procedure 1. Open a command prompt window with Windows administrator privileges. 2. Navigate to the Trend Micro Safe Lock Intelligent Manager Safe Lock Remote Setup Tool folder inside the installation folder using the cd command. For example, type the following command to reach the default location: cd /d "c:\program Files\Trend Micro\Safe Lock Intelligent Manager\CmdTools \RemoteAgentSetupTool\" 3. To remotely install agents using the default targets file targets.csv, type the following at the command prompt: SLrst.exe targets.csv --uninstall. The remote setup tool looks for targets in the targets.csv file. For large production environments, Trend Micro recommends that you uninstall agents in batches. Run the remote setup tool separately for each CSV batch file. 4. At the prompt, provide the password used to access the Safe Lock agent program. 5. Monitor the progress of the remote uninstallation process. Safe Lock writes log information directly in the CSV file (by default, targets.csv) specified in the command line argument. 6. Restart endpoints to complete the uninstallation process. 7-12
151 Managing Agents Remotely Restarting Agents Remotely Important Before remotely managing Safe Lock agents using the Remote Setup Tool, prepare the endpoint info and targets files. See Preparing the Agent Target Files on page 7-4. Use the SLrst.exe program at the command line interface (CLI) to restart one or more Safe Lock agents connected to the network. Procedure 1. Open a command prompt window with Windows administrator privileges. 2. Navigate to the Trend Micro Safe Lock Intelligent Manager Safe Lock Remote Setup Tool folder inside the installation folder using the cd command. For example, type the following command to reach the default location: cd /d "c:\program Files\Trend Micro\Safe Lock Intelligent Manager\CmdTools \RemoteAgentSetupTool\" 3. To remotely install agents using the default targets file targets.csv, type the following at the command prompt: SLrst.exe targets.csv --reboot. The remote setup tool looks for targets in the targets.csv file. For large production environments, Trend Micro recommends that you restart agents in batches. Run the remote setup tool separately for each CSV batch file. 4. Monitor the progress of the remote restart process. Safe Lock writes log information directly in the CSV file (by default, targets.csv) specified in the command line argument. Endpoints restart automatically after receiving the command. 7-13
152 Trend Micro Safe Lock Intelligent Manager Administrator's Guide The Remote Tasks Tool (SLtasks) You can use the Remote Tasks Tool to initialize agent Approved Lists, lockdown agents, match licenses, and query the status of agents using a command line interface (CLI). By default, Safe Lock Intelligent Manager stores the SLtasks.exe file is the following location: <Safe_Lock_Intelligent_Manager_installation_folder>\CmdTools \RemoteAgentTasksTool\ Important Only a Safe Lock Intelligent Manager administrator with Windows administrator privileges can use SLtasks at the command line interface (CLI). Sending Remote Tasks Procedure 1. Open a command prompt window with Windows administrator privileges. 2. Navigate to the Trend Micro Safe Lock Intelligent Manager Safe Lock Remote Tasks Tool folder inside the installation folder using the cd command. For example, type the following command to reach the default location: cd /d "c:\program Files\Trend Micro\Safe Lock Intelligent Manager\CmdTools \RemoteAgentTasksTool\" 3. Log on the Safe Lock Intelligent Manager server by typing the following command: SLtasks.exe --logon 4. Type your Safe Lock Intelligent Manager credentials. The CLI confirms a successful log on to the server. 5. Query agent statuses by typing the following command: 7-14
153 Managing Agents Remotely SLtasks.exe --query The results of the query are saved in query_results.csv. Tip Trend Micro recommends querying agent statuses before deploying any tasks. A warning message appears if the query results are out-of-date when attempting to deploy tasks. 6. Perform the necessary tasks using the following syntax: SLtasks.exe <task_parameter> TABLE 7-2. SLtasks Task Parameters PARAMETER TASK --init --lockdown --match Initialize the Approved List Turn Application Lockdown on Match agent licenses with the server Important The logged on account must have admin or Full Control privilege to send tasks to agents. To reduce network and endpoint impact, Safe Lock Intelligent Manager queries target agents for their configurations and then sends only tasks it determines are needed. Tip To send tasks to a specific agent, append --targetpc to the command and type the computer name. For example: SLtasks.exe <task_parameter> --targetpc <computer_name> 7. Log off the Safe Lock Intelligent Manager server by typing the following command: 7-15
154 Trend Micro Safe Lock Intelligent Manager Administrator's Guide SLtasks.exe --logoff The CLI confirms a successful log off from the server. Applying Message Time Groups Message time groups use message-sending cycles to add additional bandwidth control to automated messages sent from Safe Lock agents to the Safe Lock Intelligent Manager. During a message-sending cycle, agents in the active group send automated messages, which include log and status as well as quarantined files to be scanned, to Safe Lock Intelligent Manager. When a message-sending cycle ends, the next group of agents becomes active and sends automated messages. Agents outside the active group do not send automated messages. However, agents in all groups respond as soon as possible to direct requests from Safe Lock Intelligent Manager. For example, a request to send logs and status from the web console will be replied to by the target agent as soon as network connectivity allows. Note The following conditions apply to automated messages: By default, Safe Lock Intelligent Manager puts all agents into one "always on" group. During a message-sending cycle, messages are sent in the following order: Higher priority first Oldest (least recent) first Use SLtasks.exe to apply message time groups to agents. Procedure 1. Open a command prompt window with Windows administrator privileges. 2. Navigate to the Trend Micro Safe Lock Intelligent Manager Safe Lock Remote Tasks Tool folder inside the installation folder using the cd command. For example, type the following command to reach the default location: 7-16
155 Managing Agents Remotely cd /d "c:\program Files\Trend Micro\Safe Lock Intelligent Manager\CmdTools \RemoteAgentTasksTool\" 3. Log on the Safe Lock Intelligent Manager server by typing the following command: SLtasks.exe --logon 4. Type your Safe Lock Intelligent Manager credentials. The CLI confirms a successful log on to the server. 5. Query message time groups by typing the following command: SLtasks.exe --querygroup The results of the query are saved in group_info.csv. Important Applying message time groups requires querying message time groups, editing the results as needed, and then applying the configured message time groups to agents. A warning message appears if the query results are out-of-date when attempting to apply message time groups to agents. 6. Edit the group_info.csv to configure the following message time group controls: COLUMN NAME TotalGroupNum CONTROL DESCRIPTION Divide agents into any number of groups Tip Set this value to 1 to turn the feature off OwnGroupIndex TimePeriod Set which group an agent belongs to Set a duration for how long each group is allowed to send messages to Safe Lock Intelligent Manager when that group's message-sending cycle is active 7. Apply message time groups to agents using the configured group_info.csv file by typing the following command: 7-17
156 Trend Micro Safe Lock Intelligent Manager Administrator's Guide SLtasks.exe --applygroups Important The logged on account must have admin or Full Control privilege to apply message time groups to agents. Only agents listed in group_info.csv receive the command. 8. Log off the Safe Lock Intelligent Manager server by typing the following command: SLtasks.exe --logoff The CLI confirms a successful log off from the server. 7-18
157 Chapter 8 Local Agent Installation This chapter describes local Trend Micro Safe Lock agent installation and setup procedures. Topics in this chapter include: Local Installation Overview on page 8-2 Installing from Windows on page 8-2 Setting Up the Approved List on page 5-2 Installation Using the Command Line on page
158 Trend Micro Safe Lock Intelligent Manager Administrator's Guide Local Installation Overview Trend Micro Safe Lock can be installed using either the Windows Installer or the command line interface (CLI) installer. WARNING! Depending on the installation method you select, Safe Lock versions require different preparation before upgrading. See Agent Upgrade Preparation on page 1-14 for more information. TABLE 8-1. Safe Lock Local Installation Methods INSTALLATION METHOD Windows Installer Command line interface installer BENEFITS The Windows Installer provides simplified step-by-step installation wizard for first-time or single installation. Also suitable for preparing for mass deployment for cloned computer systems. The command line interface (CLI) installer provides silent installation and can be integrated into a batch file for mass deployment. Installing from Windows To install Trend Micro Safe Lock, you must log on using an account with administrator privileges. Procedure 1. Double-click Setup.exe. If a User Account Control warning from Windows appears, click Yes. 8-2

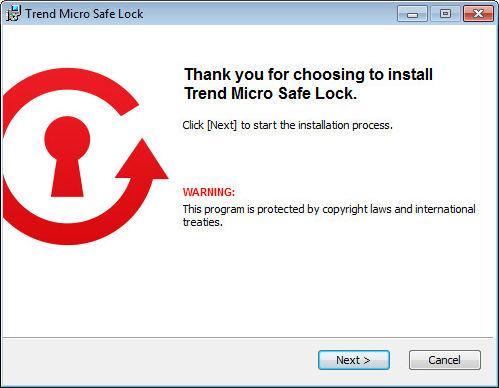
159 Local Agent Installation 8-3

160 Trend Micro Safe Lock Intelligent Manager Administrator's Guide 2. When the installation wizard opens, click Next. Note If there is another version of Safe Lock on the endpoint, the installer will remove it before installing the latest version. 3. Read the license agreement, select I accept the terms in the License Agreement, and click Next. 4. Make any necessary changes to the installation options, and click Next. Important Network Virus Protection can only be installed during the initial program installation and can be disabled after installation if necessary. See Exploit Prevention Settings in the Administrator's Guide for more information. 8-4

161 Local Agent Installation 5. Provide the Activation Code and specify an administrator password for Trend Micro Safe Lock. Note The password must be 8 to 64 alphanumeric characters. The following characters are not supported: > < \ " spaces. The Safe Lock administrator password is unrelated to the Windows administrator password. 8-5

162 Trend Micro Safe Lock Intelligent Manager Administrator's Guide 6. Click Next. WARNING! Do not forget the Safe Lock administrator password. The only way to recover after losing the Safe Lock administrator password is by reinstalling the operating system. 8-6

163 Local Agent Installation A message appears asking if you would like to scan the endpoint for threats before continuing with the installation. 7. Optionally, scan the endpoint for threats before continuing with the installation. Trend Micro recommends you perform this scan. To scan the endpoint for threats, click Scan. a. The Endpoint Prescan window appears. b. To customize the scan settings, click Edit Scan Settings. c. Click Scan Now. If Endpoint Prescan detects security risks, Trend Micro recommends canceling the installation. Remove threats from the endpoint and try again. If critical programs are detected as threats, confirm that the endpoint is secure and that the versions of the programs installed do not contain threats. Ignore detected threats only if you are absolutely certain that they are false positives. To skip scanning, click Do Not Scan. 8. When the Installation Complete window displays, click Finish. 8-7

164 Trend Micro Safe Lock Intelligent Manager Administrator's Guide Note While restarting the endpoint after installation is not necessary, memory randomization will not be enabled until the endpoint is restarted. See Exploit Prevention Settings in the Administrator's Guide for more information. Setting Up the Approved List Before Trend Micro Safe Lock can protect the endpoint, it must check the endpoint for existing applications and installers necessary for the system to run correctly. Procedure 1. Open the Safe Lock console. 8-8


165 Local Agent Installation The Safe Lock log on screen appears. 2. Provide the password and click Login. Safe Lock asks if you want to set up the Approved List now. 3. At the notification window, select Yes. Set up the Approved List now and click OK. 8-9

166 Trend Micro Safe Lock Intelligent Manager Administrator's Guide Safe Lock scans the endpoint and adds all applications to the Approved List. 8-10

167 Local Agent Installation Safe Lock displays the Approved List Configuration Results. Note 4. Click Close. When Trend Micro Safe Lock Application Lockdown is on, only applications that are in the Approved List will be able to run. Installation Using the Command Line Administrators can install Safe Lock from the command line interface (CLI) or using a batch file, allowing for silent installation and mass deployment. For mass deployment, 8-11
 Trend Micro Incorporated reserves the right to make changes to this document and to the product described herein without notice. Before installing and using the product, review the readme files, release
 Trend Micro Incorporated reserves the right to make changes to this document and to the product described herein without notice. Before installing and using the product, review the readme files, release
Copyright 2013 Trend Micro Incorporated. All rights reserved.
 Trend Micro reserves the right to make changes to this document and to the products described herein without notice. Before installing and using the software, please review the readme files, release notes,
 Trend Micro Incorporated reserves the right to make changes to this document and to the product described herein without notice. Before installing and using the product, review the readme files, release
Copyright 2012 Trend Micro Incorporated. All rights reserved.
 Trend Micro reserves the right to make changes to this document and to the products described herein without notice. Before installing and using the software, please review the readme files, release notes,
 Trend Micro Incorporated reserves the right to make changes to this document and to the product described herein without notice. Before installing and using the product, review the readme files, release
 Trend Micro Incorporated reserves the right to make changes to this document and to the product described herein without notice. Before installing and using the product, review the readme files, release
 Trend Micro Incorporated reserves the right to make changes to this document and to the product described herein without notice. Before installing and using the product, review the readme files, release
 Trend Micro Incorporated reserves the right to make changes to this document and to the product described herein without notice. Before installing and using the product, review the readme files, release
 Trend Micro Incorporated reserves the right to make changes to this document and to the product described herein without notice. Before installing and using the product, review the readme files, release
 Trend Micro Incorporated reserves the right to make changes to this document and to the product described herein without notice. Before installing and using the product, review the readme files, release
 Trend Micro Incorporated reserves the right to make changes to this document and to the product described herein without notice. Before installing and using the product, review the readme files, release
 Trend Micro Incorporated reserves the right to make changes to this document and to the product described herein without notice. Before installing and using the product, review the readme files, release
 Trend Micro Incorporated reserves the right to make changes to this document and to the product described herein without notice. Before installing and using the product, review the readme files, release
 Trend Micro Incorporated reserves the right to make changes to this document and to the product described herein without notice. Before installing and using the product, review the readme files, release
 Trend Micro Incorporated reserves the right to make changes to this document and to the product described herein without notice. Before installing and using the product, review the readme files, release
 Trend Micro Incorporated reserves the right to make changes to this document and to the product described herein without notice. Before installing and using the product, review the readme files, release
 Trend Micro Incorporated reserves the right to make changes to this document and to the product described herein without notice. Before installing and using the product, review the readme files, release
 Trend Micro Incorporated reserves the right to make changes to this document and to the products described herein without notice. Before installing and using the software, please review the readme files,
 Trend Micro Incorporated reserves the right to make changes to this document and to the products described herein without notice. Before installing and using the software, please review the readme files,
 Trend Micro Incorporated reserves the right to make changes to this document and to the product described herein without notice. Before installing and using the product, review the readme files, release
 Trend Micro Incorporated reserves the right to make changes to this document and to the product described herein without notice. Before installing and using the product, review the readme files, release
 Trend Micro Incorporated reserves the right to make changes to this document and to the products described herein without notice. Before installing and using the product, please review the readme files,
 Trend Micro Incorporated reserves the right to make changes to this document and to the service described herein without notice. Before installing and using the service, review the readme files, release
 Trend Micro Incorporated reserves the right to make changes to this document and to the product described herein without notice. Before installing and using the product, review the readme files, release
 Trend Micro Incorporated reserves the right to make changes to this document and to the service described herein without notice. Before installing and using the service, review the readme files, release
Trend Micro Incorporated reserves the right to make changes to this document and to the products described herein without notice.
 Trend Micro Incorporated reserves the right to make changes to this document and to the products described herein without notice. Before installing and using the software, please review the readme files,
 Trend Micro Incorporated reserves the right to make changes to this document and to the products described herein without notice. Before installing and using the software, please review the readme files,
 Trend Micro Incorporated reserves the right to make changes to this document and to the product described herein without notice. Before installing and using the product, review the readme files, release
 Trend Micro Incorporated reserves the right to make changes to this document and to the products described herein without notice. Before installing and using the product, please review the readme files,
 Trend Micro Incorporated reserves the right to make changes to this document and to the products described herein without notice. Before installing and using the product, please review the readme files,
 Trend Micro Incorporated reserves the right to make changes to this document and to the product described herein without notice. Before installing and using the product, please review the readme files,
 Trend Micro Incorporated reserves the right to make changes to this document and to the product described herein without notice. Before installing and using the product, review the readme files, release
 Trend Micro Incorporated reserves the right to make changes to this document and to the product/service described herein without notice. Before installing and using the product/service, review the readme
 Trend Micro Incorporated reserves the right to make changes to this document and to the product described herein without notice. Before installing and using the product, review the readme files, release
 Trend Micro Incorporated reserves the right to make changes to this document and to the product described herein without notice. Before installing and using the product, review the readme files, release
 Trend Micro Incorporated reserves the right to make changes to this document and to the products described herein without notice. Before installing and using the product, please review the readme files,
 Trend Micro Incorporated reserves the right to make changes to this document and to the products described herein without notice. Before installing and using the software, please review the readme files,
 Trend Micro Incorporated reserves the right to make changes to this document and to the products described herein without notice. Before installing and using the product, please review the readme files,
 Trend Micro Incorporated reserves the right to make changes to this document and to the product described herein without notice. Before installing and using the product, review the readme files, release
 Trend Micro Incorporated reserves the right to make changes to this document and to the products described herein without notice. Before installing and using the product, please review the readme files,
Trend Micro Incorporated reserves the right to make changes to this document and to the products described herein without notice.
 Trend Micro Incorporated reserves the right to make changes to this document and to the products described herein without notice. Before installing and using the software, please review the readme file
 Trend Micro Incorporated reserves the right to make changes to this document and to the product described herein without notice. Before installing and using the product, review the readme files, release
 Trend Micro Incorporated reserves the right to make changes to this document and to the products described herein without notice. Before installing and using the product, please review the readme files,
Cox Business Online Backup Administrator Guide. Version 2.0
 Cox Business Online Backup Administrator Guide Version 2.0 2012 by Cox Communications. All rights reserved. No part of this document may be reproduced or transmitted in any form or by any means, electronic,
Document Part No. PPEM27723/ Protected by U.S. Patent No.
 Trend Micro Incorporated reserves the right to make changes to this document and to the products described herein without notice. Before installing and using the software, please review the readme files,
 Trend Micro Incorporated reserves the right to make changes to this document and to the products described herein without notice. Before installing and using the software, please review the readme files,
 Trend Micro Incorporated reserves the right to make changes to this document and to the product described herein without notice. Before installing and using the product, review the readme files, release
Client Server Security3
 Client Server Security3 for Small and Medium Business Getting Started Guide Trend Micro Incorporated reserves the right to make changes to this document and to the products described herein without notice.
Trend Micro Incorporated reserves the right to make changes to this document and to the products described herein without notice.
 Trend Micro Incorporated reserves the right to make changes to this document and to the products described herein without notice. Before installing and using the software, please review the readme files,
 Trend Micro Incorporated reserves the right to make changes to this document and to the product/service described herein without notice. Before installing and using the product/service, review the readme
 Trend Micro Incorporated reserves the right to make changes to this document and to the product described herein without notice. Before installing and using the product, review the readme files, release
Copyright 2012 Trend Micro Incorporated. All rights reserved. Protected by U.S. Patent No. 7,516,130 and U.S. Patent No. 7,747,642.
 Trend Micro Incorporated reserves the right to make changes to this document and to the products described herein without notice. Before installing and using the software, please review the readme files,
 Trend Micro Incorporated reserves the right to make changes to this document and to the products described herein without notice. Before installing and using the software, please review the readme file
 Trend Micro Incorporated reserves the right to make changes to this document and to the product described herein without notice. Before installing and using the product, review the readme files, release
 Trend Micro Incorporated reserves the right to make changes to this document and to the products described herein without notice. Before installing and using the software, please review the readme file
 Trend Micro Incorporated reserves the right to make changes to this document and to the products described herein without notice. Before installing and using the software, please review the readme files,
 Trend Micro Incorporated reserves the right to make changes to this document and to the product described herein without notice. Before installing and using the product, review the readme files, release
McAfee Network Security Platform 8.3
 8.3.7.44-8.3.7.14 Manager-Virtual IPS Release Notes McAfee Network Security Platform 8.3 Revision A Contents About this release New features Enhancements Resolved issues Installation instructions Known
 Trend Micro Incorporated reserves the right to make changes to this document and to the product described herein without notice. Before installing and using the product, please review the readme files,
 Trend Micro Incorporated reserves the right to make changes to this document and to the products described herein without notice. Before installing and using the software, please review the readme files,
 Trend Micro Incorporated reserves the right to make changes to this document and to the product described herein without notice. Before installing and using the product, review the readme files, release
 Trend Micro Incorporated reserves the right to make changes to this document and to the products described herein without notice. Before installing and using the software, please review the readme files,
 Trend Micro Incorporated reserves the right to make changes to this document and to the product described herein without notice. Before installing and using the product, please review the readme files,
IBM Security SiteProtector System User Guide for Security Analysts
 IBM Security IBM Security SiteProtector System User Guide for Security Analysts Version 2.9 Note Before using this information and the product it supports, read the information in Notices on page 83. This
The following topics describe how to use dashboards in the Firepower System:
 The following topics describe how to use dashboards in the Firepower System: About, page 1 Firepower System Dashboard Widgets, page 2 Managing, page 14 About Firepower System dashboards provide you with
McAfee Network Security Platform 8.3
 8.3.7.28-8.3.3.9 Manager-Mxx30-series Release Notes McAfee Network Security Platform 8.3 Revision C Contents About this release New features Enhancements Resolved issues Installation instructions Known
Trend Micro. Apex One as a Service / Apex One. Best Practice Guide for Malware Protection. 1 Best Practice Guide Apex One as a Service / Apex Central
 Trend Micro Apex One as a Service / Apex One Best Practice Guide for Malware Protection 1 Best Practice Guide Apex One as a Service / Apex Central Information in this document is subject to change without
 Trend Micro Incorporated reserves the right to make changes to this document and to the product described herein without notice. Before installing and using the product, please review the readme files,
McAfee Network Security Platform 8.3
 8.3.7.28-8.3.7.6 Manager-Virtual IPS Release Notes McAfee Network Security Platform 8.3 Revision B Contents About this release New features Enhancements Resolved issues Installation instructions Known
The following topics describe how to work with reports in the Firepower System:
 The following topics describe how to work with reports in the Firepower System: Introduction to Reports Introduction to Reports, on page 1 Risk Reports, on page 1 Standard Reports, on page 2 About Working
 Trend Micro Incorporated reserves the right to make changes to this document and to the products described herein without notice. Before installing and using the software, please review the readme files,
 Trend Micro Incorporated reserves the right to make changes to this document and to the product described herein without notice. Before installing and using the product, review the readme files, release
HP Operations Manager
 HP Operations Manager Software Version: 9.22 UNIX and Linux operating systems Java GUI Operator s Guide Document Release Date: December 2016 Software Release Date: December 2016 Legal Notices Warranty
OfficeScanTM 10 For Enterprise and Medium Business
 OfficeScanTM 10 For Enterprise and Medium Business Installation and Upgrade Guide es Endpoint Security Trend Micro Incorporated reserves the right to make changes to this document and to the products
 Trend Micro Incorporated reserves the right to make changes to this document and to the product described herein without notice. Before installing and using the product, review the readme files, release
 Trend Micro Incorporated reserves the right to make changes to this document and to the product described herein without notice. Before installing and using the product, review the readme files, release
 Trend Micro Incorporated reserves the right to make changes to this document and to the product described herein without notice. Before installing and using the product, please review the readme files,
OBIEE. Oracle Business Intelligence Enterprise Edition. Rensselaer Business Intelligence Finance Author Training
 OBIEE Oracle Business Intelligence Enterprise Edition Rensselaer Business Intelligence Finance Author Training TABLE OF CONTENTS INTRODUCTION... 1 USER INTERFACE... 1 HOW TO LAUNCH OBIEE... 1 TERMINOLOGY...
2.5. Smart Protection Server Security Made Smarter. Administrator s Guide. Endpoint Security. Messaging Security
 Smart Protection Server Security Made Smarter 2.5 Administrator s Guide e m p w Endpoint Security Messaging Security Protected t Cloud Web Security Trend Micro Incorporated reserves the right to make
ZENworks 2017 Audit Management Reference. December 2016
 ZENworks 2017 Audit Management Reference December 2016 Legal Notice For information about legal notices, trademarks, disclaimers, warranties, export and other use restrictions, U.S. Government rights,
SC-T35/SC-T45/SC-T46/SC-T47 ViewSonic Device Manager User Guide
 SC-T35/SC-T45/SC-T46/SC-T47 ViewSonic Device Manager User Guide Copyright and Trademark Statements 2014 ViewSonic Computer Corp. All rights reserved. This document contains proprietary information that
Product Guide. McAfee GetSusp
 Product Guide McAfee GetSusp 3.0.0.461 COPYRIGHT LICENSE INFORMATION Copyright 2013-2017 McAfee, LLC. YOUR RIGHTS TO COPY AND RUN THIS TOOL ARE DEFINED BY THE MCAFEE SOFTWARE ROYALTY-FREE LICENSE FOUND
Kaseya 2. User Guide. Version 7.0. English
 Kaseya 2 AntiMalware User Guide Version 7.0 English January 6, 2015 Agreement The purchase and use of all Software and Services is subject to the Agreement as defined in Kaseya s Click-Accept EULATOS as
Integrate Sophos Enterprise Console. EventTracker v8.x and above
 Integrate Sophos Enterprise Console EventTracker v8.x and above Publication Date: September 22, 2017 Abstract This guide provides instructions to configure Sophos Enterprise Console to send the events
Release Notes McAfee Application Control 6.1.0
 Release Notes McAfee Application Control 6.1.0 About this document New features Known issues Resolved issues Installation instructions Find product documentation About this document Thank you for choosing
User Guide. Version R95. English
 Anti-Malware (Classic) User Guide Version R95 English July 20, 2017 Copyright Agreement The purchase and use of all Software and Services is subject to the Agreement as defined in Kaseya s Click-Accept
Central Administration Console Installation and User's Guide
 IBM Tivoli Storage Manager FastBack for Workstations Version 7.1 Central Administration Console Installation and User's Guide SC27-2808-03 IBM Tivoli Storage Manager FastBack for Workstations Version
 Trend Micro Incorporated reserves the right to make changes to this document and to the product described herein without notice. Before installing and using the product, please review the readme files,
NetIQ Secure Configuration Manager Installation Guide. October 2016
 NetIQ Secure Configuration Manager Installation Guide October 2016 Legal Notice For information about NetIQ legal notices, disclaimers, warranties, export and other use restrictions, U.S. Government restricted
 Trend Micro Incorporated reserves the right to make changes to this document and to the product described herein without notice. Before installing and using the product, review the readme files, release
 Trend Micro Incorporated reserves the right to make changes to this document and to the product described herein without notice. Before installing and using the product, review the readme files, release
KYOCERA Net Admin User Guide
 KYOCERA Net Admin User Guide Legal Notes Unauthorized reproduction of all or part of this guide is prohibited. The information in this guide is subject to change without notice. We cannot be held liable
Central Administration Console Installation and User's Guide
 IBM Tivoli Storage Manager FastBack for Workstations Version 7.1.1 Central Administration Console Installation and User's Guide SC27-2808-04 IBM Tivoli Storage Manager FastBack for Workstations Version
 Trend Micro Incorporated reserves the right to make changes to this document and to the product described herein without notice. Before installing and using the product, review the readme files, release
ForeScout Extended Module for Tenable Vulnerability Management
 ForeScout Extended Module for Tenable Vulnerability Management Version 2.7.1 Table of Contents About Tenable Vulnerability Management Module... 4 Compatible Tenable Vulnerability Products... 4 About Support
 Trend Micro Incorporated reserves the right to make changes to this document and to the product described herein without notice. Before installing and using the product, review the readme files, release
Firepower Management Center High Availability
 The following topics describe how to configure Active/Standby high availability of Cisco Firepower Management Centers: About, on page 1 Establishing, on page 7 Viewing Status, on page 8 Configurations