Technical Training (V1.0)
|
|
|
- Corey Edwards
- 6 years ago
- Views:
Transcription
1 Technical Training (V1.0)
2 Contents APS Product System Installation ECU Configuration EMA Setup EMA Remote Configuration For Installer Account Power Watch Installer Tool-ArrayAPP
 Cable End")
3 APS Product YC250 YC YC500 ECU End(AC) Cable End Cap EMA
4 Microinverter YC First Three-Phase Microinverter in the world No Electrolytic capacitors Four modules connecting Balanced three-phase output Power line / Zigbee Individual module monitoring
(all over the world) Lightest (1.")
5 Microinverter YC500 Twin-pack Microinverter Two Individual MPPT Simplely installation YC250 Single Microinverter Smallest(160mmX 150mmX 29mm)(all over the world) Lightest (1.5kg)
6 Component Of YC LED Light Fixture Zigbee antenna AC Cable AC Bus Cable 4 DC Connectors Channel 1,2,3,4 Removable serial number AC Connector

 LED Light DC Connector")
7 Component Of YC500 Fixture Removable serial number Female AC Connector Male AC Connector AC Cable DC Connector (Channel B) LED Light DC Connector (Channel A)


8 Component Of YC250 Fixture Female AC Connector Male AC Connector AC Cable Removable serial number LED Light DC Connector
9 End Cable&End Cap End Cable Female connector for the first Microinverter for YC500&YC250 Connect to junction box End Cap Female connector for the last Microinverter for YC500&YC250 Protection End Cap End protection cap at the end of AC bus cable for YC Protection
 PLC or Zigbee EMA Energy")

10 Monitor ECU Energy Communication Unit A device for monitoring(monitoring device) PLC or Zigbee EMA Energy Monitoring Analysis Monitoring software EMA accounts for three different grades Customer (Distributor Installer End customer)

11 Component Of ECU LCD Power interface Serial port Network interface USB interface Reset button Menu button
12 EMA-Login Interface

13 EMA- Account List

14 EMA-Homepage

15 EMA-Module Power

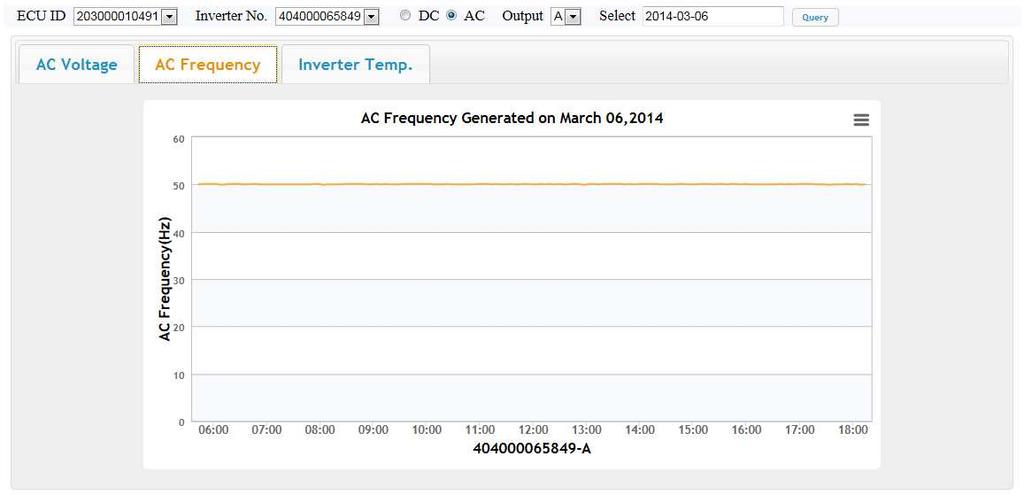
16 EMA-Performance Graph


17 System Installation Distribution Box ECU could talk with inverter by PLC or Zigbee ECU could upload the data to internet by LAN cable or WiFi bridge or GPRS


18 Step1 Attach the Microinverters to the PV racking M8 Screw WARNING: 1 Do not mount the Micro-inverter in a location that allows it exposure to the sunlight directly. 2 Allow a minimum of 10 centimeters(cm) between the top of the roof and the bottom of the Micro-inverter.


19 Step2 One AC branch installation -YC500&YC250 You will hear "click" which means the AC cable connection is ok CE: YC500: 9 for 25A breaker YC250: 18 for 25A breaker VDE: YC500: 7 for 20A breaker YC250: 14 for 20A breaker Last microinverter install an End Cap


20 Step2 One AC branch installation (YC1000-3) NA:11 for 15A x3 Breaker. SAA:12 for 20A x3 Breaker. CN:11 for 20A x3 Breaker End cap Optional Zigbee or PLC Communication Between ECU and YC1000s The default length between two connectors on AC bus cable is 2 or 4 metres. Customer could custom the expexted length in advance.

21 Step2 One AC branch installation
22 Step3 Complete the installation map Removable serial number AB 1.Each APS Microinverter has 2 removable serial number label. 2.Peel one label and affix it to the respective location on APS installation map. 3.Peel the other label and affix it to the frame edge of the panel

23 Step4 Connect Panels to Microinverter You will hear "click" which means the DC cable connection is ok The red light twinkles every 10s indicates the DC inputs connect to Micro-inverter successfully.

24 Step5 Connect End Cable and Install the AC Junction Box First Microinverter End Cable Junction Box 1, Install an junction box at a suitable location on the PV racking system. 2, The End cable is used to connect to first Microinverter and junction box. 3, Cable color Live wire Brown Neutral wire Blue Earth wire Yellow/Green


25 Step6 Connect extension cables to Distribution Box and Grid Junction Box Extension Cable Distribution Box Grid 1 Connect extension cables to junction box and breaker of distribution box. 2 Connect AC output of distribution box to grid.
26 Step7 Microinverter Grounding Connect Ground wire of Microinverter to earth bar of distribution box.


27 Step8 ECU Installation Option 1:Distribution Box Mounting Loosen the two M3 screws at back of ECU and rotate the holders. Fix the ECU on the frame with M3/ M4 screws Holder M3/M4 Screw M3 Screw
 Use two drywall screws or wall anchors to affix the ECU to the wall mounted at the dimensions shown. The maximum screw head diameter is 0.35. Use #8 screws (not included in kit).")
28 Step9 ECU Installation Option 2: Wall Mounting Mount the ECU in a cool, dry, indoor location.(ip30) Use two drywall screws or wall anchors to affix the ECU to the wall mounted at the dimensions shown. The maximum screw head diameter is Use #8 screws (not included in kit). Slide the ECU onto the mounting screws, Lower the ECU onto the screw posts to secure the unit to the wall.

29 Step10 Connect ECU to the Distribution Box Connect extension cable to breaker Connect Socket to breaker Connect ECU to socket


30 Step11 Connect ECU to Internet Option 1: ECU Ethernet Cable Router Internet Option 2: ECU Wifi Bridge Wireless Router Internet
31 Step12 On Grid Turn on the breaker within 5min in the distribution box, the system starts to generate power. The system will show below. Flashing short Green 3 times Microinverter start up Flashing Red (10s gap) Not generating power. Flashing Green (2s gap) Generating power and not communicating with ECU. Flashing Green (10s gap) Generating power and communicating with ECU. New IP Address ECU connect to the router + WEB ECU connect to EMA - WEB ECU not connect to EMA 900W 20kWh 004 ECU connect to the Microinverter

32 ECU Configuration Step1 Login ECU local interface Open the Internet Browse. Input the IP address shown on LCD of ECU. unote: Make sure the ECU and the PC are in the same LAN.

33 Local Interface The page will display the logo of APS.
34 Step2 Set Date/ Time/ Time Zone Click Administration Click Date,Time,Timezone Update date and time Update timezone
35 Step3 Clear ID number of Microinverter Click Administration Click ID Management Click Clear ID
36 The page will display Inverter ID were successfully Cleared.
37 Step4 Input ID number of Microinverter a. Input the serial number of all microinverters. b. Press Enter after finish each serial number. c. Click the OK after finish all serial numbers.
38 Click OK The page will display the total number of microinverters
39 Note1: Customer also could input the UID into the ECU with a computer at home. 1,Firslty, Input UID number into ECU with a computer at home before you goes to the constrution site. 2,Then install the ECU on the distribution box on site. 3,Power up the ECU. Then ECU will search for all inverters. Note2: Don't forget peeling the inverters' serial number and affixing on the corresponding installation map. Make sure the ECU could pick up all inverters. Note3: Customer also could re-enter all inverters UID into the ECU by EMA on line to pick up all inverters if some inverters lose communication with ECU. Please refer to the "EMA Remote Configuration For Installer Account" about the detailed troubleshot below.
40 Return to Home page and check the Number of Modules Online.
41 Step5 Search Microinverter ECU will display searching ECU will display the number of microinverters that the ECU has picked up.
42 Setup EMA Distributor Account EMA Installer Account End Customer Account APS Account control all accounts. Distributor can setup accounts for Installer and end customer. Installer can setup accounts for end customer.

43 Step1 Login the APS website Go to Click EMALOGIN
44 Enter the Username and Password, then click Login.

45 Step2 Homepage

46 Step3 Input customer information Click Registration and Customer. Input information of customer.


47 Step4 Input ECU information Click ECU. Input information of ECU.

48 Step5 Input Microinverter information Click Inverter. Input information of the Microinverter.

49 Step6 Installation layout

50 Manual Layout Area

51 Step7 Upload the drawings
52 EMA Remote Configuration For Installer Account Summary 1.0 EMA LOGIN 2.0 enter the configuration PAGE 3.0 ECU status CONFIGURATION ECU SETTING-time zone ecu setting-inverter links Inverter Setting-AC Protection Inverter Setting-Inverter Status Inverter Setting-GFDI 3.3 Setting List
53 Summary EMA Remote configuration is specially designed for the installer account. It will help the installer to save the time and money when do the troubleshoot. So only installer account has the authority to use this function. The function is only compatible with the latest ECU version which should be more than V3.9. When you modify some parameters by EMA remote configuration. Maybe it need to wait for more than 15 minutes. Please pay attention to wait for the feedback. If you have any problem when do this troubleshoot please don t hesitate to contact APS technical support.
:enter your installer user name and password.")
54 1.0 EMA LOGIN (a):enter APS website (b):enter your installer user name and password. Then click Login.


55 2.0 Enter The Configuration Page (a)input the customer account. (b)click the button Change ECU Status.

56 3.0 ECU Status Configuration (a):click the drop-down button to select the status of the customer s ECU. 1,If the ECU is connect to the internet. Then select normal. 2,If the ECU is not connect to the internet. Then click no internet connection. Then click Submit. You have to wait about 15 minutes for the feedback.

57 3.1.0 ECU Setting-Time Zone (a):click the drop-down button to select the correct time zone of the customer s ECU. Then click Sent. You have to wait about 15 minutes for the feedback.

58 3.1.1 ECU Setting-Inverter Links (a):change to Inverter Links page. (b):if you want to add one Inverter in the system. Step1:Select Add in the Operation options. Step2:Enter the UID number you want to add. Step3:Click Sent. Then you have to wait about 15 minutes for the feedback.
 again. Wait about 15 minutes to pick up this inverter. (d):if you want pick up all inverters in the system. Step1:Select Clear ALL in the Operation options.")
59 (c):if you want to pick up one Inverter which was lose communication with ECU in the system. Step1:Select Delete in the Operation options. Step2:Enter the UID number in the blank. Step3:Click Sent. Then do the troubleshot (b) again. Wait about 15 minutes to pick up this inverter. (d):if you want pick up all inverters in the system. Step1:Select Clear ALL in the Operation options. Then click Sent. Step2:Enter all inverters UID number into the frame and select Add. Step3:Click Sent. Wait 15 minutes to pick up all inverters.

60 3.2.0 Inverter Setting-AC Protection (a):select the AC protection page. (b):fill in the parameters in the blank. Then click Sent. You have to wait about 15 minutes for the feedback. (Note:This page is used to change the AC protection range if the system is under AC protection. Please set the parameters follow the direction by APS technical support.)

61 3.2.1 Inverter Setting-Inverter Status (a):select the Inverter Status page. Step1:Select the Inverter Status on or off. Step2:Select the special ones. Step3:Click sent. You have to wait about 15 minutes for the feedback. (Note:This page is used to close or open the inverters. Please do this troubleshoot follow the direction by APS technical support.)

62 3.2.2 Inverter Setting-GFDI (b):select the GFDI page. Step1:Select the special ones. Step2:Tick the Clear GFDI. Step3:Click sent.you have to wait about 15 minutes for the feedback If an inverter has GFDI protection,it won t work. The error will only be cleared via the ECU after the ground fault condition has been remedied. Please do this troubleshoot follow the direction by APS technical support.

63 3.3 Setting List Note:This page is used to query the reply time list. If you have modified some parameters. You could get the feedback in about 15 minutes. Then you could query the relevant reply time.
64 Power Watch Introdution How to use Power Watch Functions Part1 Main Page Part2 Dashboard Page Part3 Setting Page
65 Introdution Power Watch is an Android application developed by APS which allows customer to monitor their solar system via their smart phone with Android system. Power Watch could communicate with ECU by Wi-Fi. (Note:Make sure your phone is connected to the same router with ECU or connect to the ECU with inbuilt Wifi directly.) How to use Power Watch Step1.Click the IP address select English Page. Step2.Select the Download Library by suspending the arrow on the Support tab, then download the Application (Power Watch).(Note: Run Power Watch application, you need to keep the Android software verison 3.0 or above.) Step3.Install Power Watch (.apk) in your Android smart phone.
 Step5.Click Link on your smart phone once you have entered your ECU s IP address. Power Watch will connect to your ECU and display your system s total power generation.")
66 Step4.You'll be asked to enter your ECU s IP address once you login in the application for the first time.(note: The ECU s IP address is showing on the ECU s LCD screen.) Step5.Click Link on your smart phone once you have entered your ECU s IP address. Power Watch will connect to your ECU and display your system s total power generation.
 Functions Part1 Main Page The Main Page shows many power information the same as your Dashboard Page on APS EMA.")
67 Successfully connected to ECU (Note:The sign in the upper right corner of the page means the Power Watch application has successfully connected to your ECU. The sign means Power Watch has failed to connect to your ECU.) Functions Part1 Main Page The Main Page shows many power information the same as your Dashboard Page on APS EMA. (Note: You can return to the Main Page at any time by selecting the Main icon at the bottom of each page.) Main page icon


68 Part2 Dashboard Page You can get to the Dashboard Page by selecting the Dashboard icon at the bottom of each page.the Dashboard Page shows real-time power generation in Day page, every day power generation in Month page, every month power generation in Year page. You can select Day, Month, or Year. You also can query your system on a specific day in the past. Day View Month View You could select Day,Month,Year from this icon. Query a specific day in the past. Every day's Power Generation Dashboard Icon

69 Part3 Setting Page You can get to the Settings Page by selecting the Setting icon at the bottom of each page. You can connect to another ECU by Entering another ECU's IP address if you have a multi-ecu installated in your system. Then click Save. It will connect to another ECU automatically. (Note: Make sure the Power Watch is successfully connected to the ECU by check the sign.) ECU IP Adress You can enter your revenue (per 1kWh) on this page Setting Page
70 Installer Tool ArryAPP(iOS) Operation Manual Introduction How to Login in ArrayApp How to Add a New Customer How to Set ECU Information How to Set Group and Inverter Information How to Modify the panels Orientation --From Vertical to Horizontal How to Modify a inverter's UID How to Add or Delete Columns and Rows to Your System How to Upload registration information to EMA Server How to Manage Customer Account How to Export the Inverters' UID How to Enter all Inverters' UID into the ECU's local interface How to Manage Your Own Configuration Settings
71 Introduction ArrayApp is designed to help installers register EMA accounts quickly via their ios smart phone devices. Using the ArrayApp application, installers can complete the registration while on the construction site, customers can use their EMA account in time. ArrayApp could connect to the EMA Server via a Wi-Fi / GPRS connection. Note:You can't edit the system any more in ArrayApp, Once you have submit the info to EMA successfully. But you can modify the system from EMA. How to login in ArrayApp Step1.iOS (Requires 7.0 or above): 1>Search for ArrayApp in the App Store. 2>Download the Application (ArrayApp) and install on your smart devices. (Note:The first time you login into the application, you will be asked to enter your EMA installer UserName and password.) Step2.Enter your User Name. Step3.Enter your Password. Step4.Press the Login button.

72 You ll be offered the opportunity to login and work with On or Off line once you have logged into the application successfully for the second time. Step5. Slide On or Off. Slide "On" or "Off" line and enter your username and password. Offline: If you choose to work in offline status,arrayapp will save the information what you have entered and it will upload the data to the EMA Server once connected to the Internet. Online:It will upload the data to EMA Server when you finish the registration and click "Submit".
73 How To Add a New Customer Step1: Configure Customer Information 1>Login into the ArrayApp. ArrayApp displays your customer list. 2>Select the icon on the top right corner. The new registration page is displayed on the right. 3>Fill in the customer details. Note: The country name will be preset by APS when provide customer the installer account. Press this button to go to next step
 TrueName:This is your customer s full/true name.(required) Email:This is your customer s email address. This email address will receive some information.")
74 UserName:Input the Username which customer expect to use. The UserName is not case sensitive. (Required) Password: Input the Password which the customer expect to use. (Required) TrueName:This is your customer s full/true name.(required) This is your customer s address. This address will receive some information. Such as the customer's registration information when they are being modified. (Required) State:Customer s state. (Required) City:Customer s city. (Required) Address:Customer s address.correct to street. (Optional) Phone:Customer s phone number. (Optional) (Note:You can only fill in the UserName if you don t konw all other information below. Then go to the next step. You have to refill the rest of the needed information later.) How To Set ECU Information 4>Press the icon (Note: Once you have pressed Configuration page will display.) in the upper right corner of the screen to save the entered information.,your customer information will be saved in the system. The ECU Input ECU UID number Select right Time Zone


75 5>Enter the 12 digit ECU ID number(s) into the ECU UID field. The ECU ID number is located on the top of the ECU, as well as on the front flap of the shipping box. (Note: The ECU ID number is a unique APS software serial number that is assigned to the ECU during manufacture which start with 203*********. It is necessary to enter the ECU ID correctly, because ECU can't upload the data to EMA server even ECU can collect data from inverter if not enter right ECU ID.) ECU ID Number on top of ECU ECU ID Number on front flap of shipping box
76 6>Select right Time Zone where ECU is located.(note: You could set the default Time Zone to make sure it matches most of your customers) 7>Press the icon in the upper right corner of the screen to save the entered information. The layout and inverter configuration page is displayed. Go back one step Save and go to next step Inverter UID Area Switching function Expand the Layout
.")
 Inverter ID Number on the top of the inverter Inverter ID Number on back flap of shipping")
77 How To Set Group and Inverter Information The Inverter's serial number is located the top of the inverter, as well as the back flap of the shipping box (see the two pictures below).(note:configure the default Row or Column to make sure it matches most of your customers.) Inverter ID Number on the top of the inverter Inverter ID Number on back flap of shipping box

78 8. Add the Inverter into the Right Location- 1>Enter the inverter ID number manully Click the panel where the inverter you want to add is located, enter the Inverter ID and press on the icon to save. R:1, C:1 Double click the panel to enter the inverter ID number manually. (Note: R means the row where the panel is located in. C means the column where the panel located in. In the case above, panel is located in position R:1, C:1.) : Save the UID you have entered. : Do not save the UID.
 Slide the Camera in \"on\" status.")
 (3) (4) Select \"Inverter\" Click this Icon at customer list")

79 2>To Scan Inverter UID By the built-in Camera in your phone (1) (2) Slide the Camera in "on" status. (Note the default setting is in "off" status.) (3) (4) Select "Inverter" Click this Icon at customer list page Select the panel then click the "Scan" Icon.(Note: you can input the UID by scan the Bar code on the inverter or the shipping box) Then you will input the UID automatically
 (2) Slide the Faster Scan in \"on\" status. (Note: the default setting is in \"off\" status.")

80 3>To Use a Third Party Scanning Device Firstly connect the Scanner to your ios device with Bluetooth. (1) (2) Slide the Faster Scan in "on" status. (Note: the default setting is in "off" status.) (3) Press this to select the input orientation "Horizontal" or "Vertical". Click this Icon at customer list page Select "Inverter" Double click the panel. Scan the UID with Scanner.Then the UID will be input automatically.

 (2) Press on the panel for seconds. Then release. Click \"Rotation\" (Note: The default orientation of the panel is vertical.")
81 How to Modify the panels Orientation --From Vertical to Horizontal The YC200 and YC250 have one channel, The YC500 has two channels: A and B. The YC1000 has four channels:1,2,3,4. When you enter an inverter UID, the application automatically allocate a channel for this inverter. You can change the inverter's channel by the "Change Channel" function if it not being allocated a right channel. Make sure the Switching function is on (1) (2) Press on the panel for seconds. Then release. Click "Rotation" (Note: The default orientation of the panel is vertical. "Purple" means the orientation is vertical, "blue" means the orientation is horizontal.) (3) The orientation of the panel changes to horizontal.


82 How to Modify a inverter's UID Press this Icon Press this Icon Press this Icon Press this Icon Double click the panel to modify the UID Note: You can modify the inverter UID if you haven't "Submit" the info.

83 How To Add or Delete Columns and Rows to Your System Starting point Starting point Click the Icon The "plus" sign indicates you are in the Add mode. Before you enter the Add mode, you should select a starting point panel first, then using the four arrows on the Add Column/row to add rows or columns as needed.once you have finished, click the arrow above the circle to hide this functioality.(click the "Plus" change to "Minus" ) When you enter the Delete mode, you also should select a starting point panel first, then using the arrows on the Minus Column/row selector, delete rows or columns as needed.once you have finished, click the arrow above the circle to hide this function.


84 9,Press the icon in the upper right corner of the screen to save the entered information How to upload registration information to EMA Server 10.Enter the Group View Name and click OK to save the group view. The registration information list page is displayed.
85 11>Press Submit to upload the registration information to the EMA once you have finished step 1-3.(Note: keep the internet connection is ok when you are attempting to sync to EMA) This means customer hasn't submit the registration information to EMA. This icon means the customer had submit information to EMA successfully.once submit to EMA successfully, You can't edit the system any more in ArrayApp. But you can modify the system from EMA. This icon means the customer s information has errors or failed to sync to EMA. If this occurs, make sure all the information is correct and keep a good Internet connection. Then click "submit" again.
86 How to Manage Customer Account 1>To Edit an Incomplete Registration Login in ArrayApp. Enter the "Customer"page. Input the customer's name to select the incomplete system. Press this to delete this account. Press this to modify the customer personal information. Click the "Plus" to add an additional ECU to this customer account. Click this this modify the ECU's UID
87 How to Export the Inverters' UID Login in ArrayApp. Enter the "Customer"page. Input the customer's name to select the specific system. (1) (2) (3) Press "Copy to Export the inverters' UID Press this Icon Press this Icon


88 How to enter the Inverters' UID into the ECU's local interface Step1:The installer could take a wireless router to the construction site. Then configure the ECU and your phone connected to the same wireless router. Note: The router could have no internet connection. Keep the ECU connected to the Wireless router with Enthernet cable Keep the phone connected to the wireless router by wireless signal.

89 Step2: Export all inverters' UID number Step3: Enter the ECU's IP address into the address bar with a broswer in your phone Press "Copy to Export the inverters' UID

90 Step4: Click "Administration", Then click "ID Management" Step5: Paste all inverters UID number into the blank box.


91 Step6: Click "ok" after enter all inverter UID number. Step7: Click "Home" page. Wait for a few minutes to pick up all inverters.
92 How to Manage Your Own Configuration Settings Click this icon to enter thw setting page Press this to modify the ECU's TimeZone Press this to change the default "Rows" and "Columns" Press this to select one way to scan inverter UID Press this to Change Language Press this to see the brief introdution about ArrayAPP Press this to Change Installer
93 Thanks
APsystems Installer Tool ArrayApp (Android) Operation Manual
 Operation Manual") APsystems Installer Tool ArrayApp (Android) Operation Manual Version: 2.0 Copyright 2015 Altenergy Power System, Inc. Table of Contents Introduction... 1 To Sign onto ArrayApp... 1 To Add a New Customer...
APsystems Installer Tool ArrayApp (Android) Operation Manual Version: 2.0 Copyright 2015 Altenergy Power System, Inc. Table of Contents Introduction... 1 To Sign onto ArrayApp... 1 To Add a New Customer...
APsystems Online Energy Management Analysis (EMA) Website User Guide (Dealer/Installer)
 Website User Guide (Dealer/Installer)") APsystems Online Energy Management Analysis (EMA) Website User Guide (Dealer/Installer) Version: 3.0 Copyright 2015 Altenergy Power System, Inc. Table of Contents TO LOG ONTO ENERGY MANAGEMENT ANALYSIS
APsystems Online Energy Management Analysis (EMA) Website User Guide (Dealer/Installer) Version: 3.0 Copyright 2015 Altenergy Power System, Inc. Table of Contents TO LOG ONTO ENERGY MANAGEMENT ANALYSIS
Operation Manual. Installer Tool ArrayApp. Version: 3.0. All Rights Reserved
 Operation Manual Installer Tool ArrayApp Version: 3.0 All Rights Reserved Table of Contents 1.Introduction... 2 2.To Sign onto the ArrayAPP... 3 2.1 Android (Requires 4.0 or above):... 3 2.2 ios (Requires
Installation/User Manual
 Installation/User Manual APsystems ECU-3 (V4) Energy Communication Unit (ECU) Version 1.0 6/16 All Rights Reserved APsystems.com TABLE OF CONTENTS INTRODUCTION 3 HARDWARE INSTALLATION 5 Preparation Selecting
Installation/User Manual
 Installation/User Manual APsystems ECU-3 Energy Communication Unit (ECU) Version 4.2 7/15 APsystems 600 Ericksen Ave. NE Ste 200 Seattle, WA 98110 TEL: 844-666-7035 EMAIL: info@apsystems.com WEB: www.apsystems.com
Data Transfer Unit (DTU) User Manual
 User Manual") Data Transfer Unit (DTU) User Manual AP213041144 REV1.0 Corporate Headquarters Contact Information Hoymiles Converter Technology Co.,Ltd. No.18 Kangjing Road, Hangzhou 310015, China www.hoymiles.com info@hzconverter.com
Data Transfer Unit (DTU) User Manual AP213041144 REV1.0 Corporate Headquarters Contact Information Hoymiles Converter Technology Co.,Ltd. No.18 Kangjing Road, Hangzhou 310015, China www.hoymiles.com info@hzconverter.com
Installation / User Manual APsystems ECU-3Z
 Installation / User Manual APsystems ECU-3Z Energy Communication Unit with ZGB Version: W2 All Rights Reserved Rev 1.1 Table of Contents Introduction... 2 Interface Explanation...3 Interface Layout...
Installation / User Manual
 Installation / User Manual APsystems Energy Communication Unit ECU-R Rev 1.4 Please use mobile browser to scan the QR codes to download ECUAPP : (Android) (ios) All Rights Reserved Table of Contents 1.
Installation / User Manual APsystems ECU-Z/ECU-3Z (W1)
") Installation / User Manual APsystems ECU-Z/ECU-3Z (W1) Energy Communication Unit with ZGB Rev 2.0 All Rights Reserved Table of Contents Introduction... 2 Interface Explanation...3 Interface position...3
Installation / User Manual APsystems ECU-Z/ECU-3Z (W1) Energy Communication Unit with ZGB Rev 2.0 All Rights Reserved Table of Contents Introduction... 2 Interface Explanation...3 Interface position...3
Installation / User Manual APsystems Three-phase ECU-3 (V3)
") Installation / User Manual APsystems Three-phase ECU-3 (V3) Three-phase Energy Communication Unit Rev 3.0 All Rights Reserved Table of Contents Introduction... 2 Interface Explanation...3 Interface position...3
Installation / User Manual APsystems Three-phase ECU-3 (V3) Three-phase Energy Communication Unit Rev 3.0 All Rights Reserved Table of Contents Introduction... 2 Interface Explanation...3 Interface position...3
Terminology. Proprietary and confidential. Property of APsystems.
 Terminology MLPE - module level power electronics MPPT maximum power point tracking MTBF mean time between failure MLPM module level power management ECU energy communication unit (H/W) EMA energy management
Installation / User Manual APsystems ECU-3
 Installation / User Manual APsystems ECU-3 Energy Communication Unit (ECU) Version: 4 All Rights Reserved Rev 1.5 Table of Contents Introduction... 2 Interface Explanation...3 Interface Layout... 3 Power
Installation / User Manual APsystems ECU-3 (V4)
") Installation / User Manual APsystems ECU-3 (V4) Energy Communication Unit(ECU) Rev 1.1 All Rights Reserved Table of Contents Introduction... 2 Interface Explanation...3 Interface Position... 3 Power Connection
Installation / User Manual APsystems ECU-3 (V4) Energy Communication Unit(ECU) Rev 1.1 All Rights Reserved Table of Contents Introduction... 2 Interface Explanation...3 Interface Position... 3 Power Connection
Installation / User Manual APsystems ECU-R
 Installation / User Manual APsystems ECU-R Energy Communication Unit Rev 1.1 Please use mobile browser to scan the QR codes to download ECU APP : (Android) (ios) All Rights Reserved Table of Contents 1.
Installation/User Manual
 Installation/User Manual APsystems YC500-A Photovoltaic Grid-connected Inverter Version 4.1 8/15 APsystems 600 Ericksen Ave. NE Ste 200 Seattle, WA 98110 TEL: 844-666-7035 EMAIL: info@apsystems.com WEB:
Kuna Installation Guide
 Kuna Installation Guide We ve designed Kuna to replace your existing light fixture in a few easy steps. Just take down your old fixture and connect Kuna to your existing power wires, then mount Kuna to
APS Online Energy Management Analysis (EMA) Website User Guide (Customer)
 Website User Guide (Customer)") APS Online Energy Management Analysis (EMA) Website User Guide (Customer) Version: 2.0 Copyright 2014 Altenergy Power System, Inc. Table of Contents To Log onto Energy Management Analysis (EMA) Website...
APS Online Energy Management Analysis (EMA) Website User Guide (Customer) Version: 2.0 Copyright 2014 Altenergy Power System, Inc. Table of Contents To Log onto Energy Management Analysis (EMA) Website...
What s in the Box Get Started Hardware Installation For Mobile Device Set Up Camera... 6
 Quick Start Guide Table of Contents What s in the Box... 1 Get Started... 1 Hardware Installation... 2 For Mobile Device... 2 Set Up Camera... 6 Set Up Wi-Fi Without Network Cable... 8 View in Windows
Installation / User Manual
 Installation / User Manual APsystems YC500A (240V) Photovoltaic Grid-connected Microinverter Rev 1.4 Please scan the QR code to get mobile app and more support to help the installation. ALTENERGY POWER
HSIP2 User Manual. ios Application Android Application PC Setup
 HSIP2 User Manual ios Application Android Application PC Setup Please read all instructions carefully before use to get the most out of your HSIP2 Wireless Surveillance Camera. The design and features
Installation / User Manual
 Installation / User Manual APsystems YC600 Microinverter Rev 2.0 (For EMEA) ALTENERGY POWER SYSTEM Inc. emea.apsystems.com APsystems Cypresbaan 7, 2908 LT,Capelle aan den Ijssel The Netherlands Tel: +31-10-2582670
HSIP2 User Manual. ios Application Android Application PC Setup
 HSIP2 User Manual ios Application Android Application PC Setup Please read all instructions carefully before use to get the most out of your HSIP2 Wireless Surveillance Camera. The design and features
Smart Sensor Gateway Installation Manual
 TECHNICAL DOCUMENT Smart Sensor Gateway Installation Manual 2019-02-08 1/16 Table of Contents 1 GENERAL 3 2 INSTALLATION 4 2.1 Prerequisites for Installation 4 2.2 Recommended Location 5 2.3 Gateway Configuration
Outdoor User Manual. ios Application Android Application PC Setup
 Outdoor User Manual ios Application Android Application PC Setup Please read all instructions carefully before use to get the most out of your Outdoor Wireless Surveillance Camera. The design and features
Do not place or mount Ocli 1 in an area where it will be exposed to water. Ocli 1 is designed for indoor use.
 1 Manual: Ocli 1 with Observeye Viewer App for Android Setting Up Ocli 1 Live Viewing with Ocli 1 Recording Video and Taking Snapshots Using Advanced Features Setting Up Ocli 1 Place or Mount the Camera
M215 Microinverter Installation Planning
 TECHNICAL BRIEF M215 Microinverter Installation Planning The M215 Microinverter The M215 Microinverter is a powerful and efficient grid-tied microinverter. It is compatible with most 60- cell PV modules
Installation/User Manual
 Installation/User Manual APsystems YC500i Photovoltaic Grid-connected Inverter Version 1.0 7/16 APsystems 600 Ericksen Ave. NE Ste 200 Seattle, WA 98110 TEL: 844-666-7035 EMAIL: info@apsystems.com WEB:
System Design Guide. APsystems YC Photovoltaic 3-Phase Grid-connected Microinverter. APsystems. Version 1.1 3/15
 System Design Guide APsystems YC1000-3 Photovoltaic 3-Phase Grid-connected Microinverter Version 1.1 3/15 APsystems 600 Ericksen Ave NE. Ste 200; Seattle, WA 98110 TEL: 844-666-7035 EMAIL: info@apsystems.com
IP Camera User Manual
 the world through my eyes R IP Camera User Manual EN App Store Google Play Version:TWS20180723 1Product description 1.1Product Feature 1.2Package Contents 1.3IP Camera Overview 1.4Operating System Requirement
Installation/User Manual
 Installation/User Manual APsystems YC500-A Photovoltaic Grid-connected Inverter Version 4.2 11/15 APsystems 600 Ericksen Ave. NE Ste 200 Seattle, WA 98110 TEL: 844-666-7035 EMAIL: info@apsystems.com WEB:
Model Number Electrical Compatibility Module Connector Type M LL-S22 M LL-S22-NA M LL-S23 M LL-S23-NA
 M215 Microinverter Installation Planning The Enphase M215 Microinverter The M215 Microinverter is Enphase s most powerful and efficient model yet. This grid-tied microinverter is compatible with most 60-cell
IP Camera Quick Start Guide ==================== H Series V3.1
 IP Camera Quick Start Guide ==================== H Series V3.1 1. Package Contents IP Camera 5V Power Adaptor Bracket and Screws Wi-Fi Antenna Network Cable Quick Start Guide 2. Get Started Step-1 Download
ZNV Client User Manual (Android)
") ZNV Client User Manual (Android) SHENZHEN ZNV TECHNOLOGY CO., LTD. 1 Contents 1 Device Connection...
ZNV Client User Manual (Android) SHENZHEN ZNV TECHNOLOGY CO., LTD. 1 Contents 1 Device Connection...
Installation / User Manual
 Installation / User Manual APsystems QS1 Microinverter Rev 1.0 (For EMEA) ALTENERGY POWER SYSTEM Inc. emea.apsystems.com APsystems Cypresbaan 7, 2908 LT,Capelle aan den Ijssel The Netherlands Tel: +31-10-2582670
Version: DSD0221EN01. Quick Start Guide
 Version: DSD0221EN01 Quick Start Guide Table of Contents Quick Installation Guide... 1 What s in the Box... 1 Quick Start Guide... 2 Notes for Installation... 2 Operation Steps for ios Device... 3 Live
Installation and Operations Manual INVOLAR MAC250 Microinverter
 Installation and Operations Manual INVOLAR MAC250 Microinverter Contact Information INVOLAR Corporation, Ltd. 887 Zuchongzhi Road, Build 84, Room 408, Shanghai, China 201203 Tel: 86-21-50272208 Fax: 86-21-50277705
WELCOME. For customer support or any inquiries, please visit our web site at or contact us at
 WELCOME Congratulations on purchasing the GBF Smart Four Wire Intercom System. Our factory engineers were the first to enable multiple security cameras being monitored through a smart mobile device and
WI-FI GARAGE DOOR CONTROLLER WITH CAMERA USER MANUAL
 WI-FI GARAGE DOOR CONTROLLER WITH CAMERA USER MANUAL Contents Introduction 4 Product Features 5 Garage Door Controller LED Indicators 6 What s Included 7 Wi-Fi Requirements 8 Mobile Device Requirements
HSPA+ WiFi Router with Voice
 NETCOMM LIBERTY SERIES HSPA+ WiFi Router with Voice 3G22WV Quick Start Guide This router has been designed to be placed on a desktop. All of the cables exit from the rear for better organization. The LED
F3102 / F3107 / F3110 / F3115 / F3210 / F3215 PN: 86085K K
 F3102 / F3107 / F3110 / F3115 / F3210 / F3215 86085K3000020 PN: 86085K3000030 Zavio F3102/F3107/F3110/F3115/F3210/F3215 Quick Installation Guide Please follow the installation steps below to set up F3102
User Manual For AT-100BW/200BW
 User Manual For AT-100BW/200BW www.alptopsecurity.com support@alptopsecurity.com This manual is written based on the current version of the software and hardware. If there are any inaccuracies or imperfect
User Manual V1.0. User Manual of Z10 Internal Data Collector
 User Manual V1.0 User Manual of Z10 Internal Data Collector Catalogue 1. Unpacking... 2 2. PV Data Collector... 2 3. S/N Label... 3 4. Wi-Fi Installation... 3 5. Wi-Fi Card Information... 7 6. Register
The Otto Home Control app allows for control of your motorized window coverings through your smartphone/tablet
 TM SET UP INSTRUCTIONS ABOUT THE OTTO HOME CONTROL APP The Otto Home Control app allows for control of your motorized window coverings through your smartphone/tablet THE APP ALLOWS FOR: Individual and
Content. Original configuration... 1 Configuration method for Android phones... 3 Configuration method for Apple phones... 4
 Content Download and install App... 1 Configuration... 1 Original configuration... 1 Configuration method for Android phones... 3 Configuration method for Apple phones... 4 Functions introduction... 6
spoe NVR system Quick Start Guide
 spoe NVR system Quick Start Guide 1 HDD Installation If your system does not include a pre-installed HDD, you can purchase your own and follow the steps below for installation. Make sure you purchase a
Smart Business Security System Quick Start Guide
 Smart Business Security System Quick Start Guide 1 Getting to know your Business Security System The Zmodo Business Security System provides a full-featured monitoring solution to cover your entire business
Installing the Enphase IQ Commercial Envoy
 QUICK INSTALL GUIDE (Model ENV-IQ-AM3-3P) Installing the Enphase IQ Commercial Envoy To install the Enphase IQ Commercial Envoy, read and follow all warnings and instructions in this Guide and in the Enphase
Hardware overview. Package contents MSM710, documentation, power supply, self-adhesive rubber feet.
 In MSM710 Controller Quickstart This Quickstart applies to both the MSM710 Access Controller (J9328A) and the MSM710 Mobility Controller (J9325A). This Quickstart introduces the HP ProCurve Networking
User Manual V1.0. User Manual of Omnik TL2 Internal Data Collector. Omnik New Energy Co., Ltd.
 User Manual V1.0 User Manual of Omnik TL2 Internal Data Collector Omnik New Energy Co., Ltd. Catalog 1. Unpacking... 2 2. PV Data Collector... 2 3. S/N Label... 3 4. WiFi Installation... 3 5. WiFi Card
QUICK START GUIDE. Wireless Pan&Tilt IP Camera FSC880. Smart Reliable Secure. Faleemi Technologies Ltd.
 Wireless Pan&Tilt IP Camera QUICK START GUIDE FSC880 Smart Reliable Secure Faleemi Technologies Ltd www.faleemi.com support@faleemi.com support@faleemi.com www.facebook.com/faleemi Apple, Apple Store,
F3102 / F3107 / F3110 / F3115 / F3210 / F3215 PN: 86085K K
 F3102 / F3107 / F3110 / F3115 / F3210 / F3215 0 86085K3000020 PN: 86085K3000020 Zavio F3102/F3107/F3110/F3115/F3210/F3215 Quick Installation Guide Please follow the installation steps below to set up
ViZion DR + Wireless Install Guide
 1 ViZion DR + Wireless Install Guide 1. Open the DR panel box. 2. Put aside the three cables from the top layer of Styrofoam for storage. These cables are only required for potential troubleshooting scenarios.
Installation Manual. ID station. CamFi controller
 ID station CamFi controller Last change : July 12th, 2016 1 Introduction This manual will guide you through the process of connecting a CamFi controller to your camera and pairing it to an ID station.
Quick Install Guide. Model: PLC-223W, PLC-233W
 Quick Install Guide Model: PLC-223W, PLC-233W This installation guide provides basic instructions for installing the PLC-213W/ PLC-223W/PLC-233W indoor wireless IP camera on your network. By following
User manual for WIFI camera. Version 2.0
 User manual for WIFI camera Version 2.0 Congratulations on your new nest box with camera. When you have read and observed these instructions you are ready to offer the birds in your garden a new home,
Installing the Enphase Envoy-S Metered
 QUK INSTALL GUIDE (Model ENV-S-AM1-120) Installing the Enphase Metered To install the Enphase Standard, read and follow all warnings and instructions in this Guide and in the Enphase Installation and Operation
TECHNICAL SPECIFICATION
 TECHNICAL SPECIFICATION WIRELESS SMART SWITCH Functions: One channel wireless ON/OF switch Control is done from anywhere with IOS or Android mobile application Control electrical devices over Wi-Fi Control
Magnetic base Indicator light Microphone Camera lens Micro SD card slot Infrared light Front Side Pivot connector Built-in speakers
 Niro USER MANUAL Contents Introduction 4 Product Features 5 Niro LED Indicators 6 What s Included 7 Wi-Fi Requirements 8 Mobile Device Requirements 8 Garage Door Opener Requirements 8 Download the Momentum
CHILICON POWER GATEWAY
 CHILICON POWER GATEWAY Visual User Manual TABLE OF CONTENTS Introduction Specifications Quick Start Guide In-Wall Installation Configuring Microinverter Extended Ranges PLC Advanced Modes Wireless Power
one cool inverter. GT Series Solar Inverter Quick Install Guide v1.4
 one cool inverter. GT Series Solar Inverter Quick Install Guide v1.4 This quick installation guide must be used in conjunction with the Installation Manual. For installation support contact your local
1. Introduction P Package Contents 1.
 1 Contents 1. Introduction ------------------------------------------------------------------------------- P. 3-5 1.1 Package Contents 1.2 Tablet Overview 2. Using the Tablet for the first time ---------------------------------------------------
Zavio P5111/ P5116/ P5210 Quick Installation Guide
 86085M2000010 Zavio P5111/ P5116/ P5210 Quick Installation Guide Installation Steps Please follow the installation steps below to set up your P5111 / P5116/ P5210 Day/Night Pan/Tilt IP Camera. Check the
Installation / User Manual
 Installation / User Manual APsystems YC1000-3 3-Phase Microinverter Rev 3.7 Please scan the QR code to get mobile app and more support to help the installation ALTENERGY POWER SYSTEM Inc. WEB: usa.apsystems.com
1. Charging. 2. In-app Setup. 3. Physical Installation. 4. Features. 5. Troubleshooting
 Spotlight Cam Smart Security at Every Corner of Your Home Your new Spotlight Cam lets you extend the Ring of Security around your entire property. Now, you ll always be the first to know when someone s
NetCommWireless. Quick Start Guide NTC-30 Series - Outdoor WiFi Router
 NetCommWireless Quick Start Guide NTC-30 Series - Outdoor WiFi Router NetCommWireless Let s get this show on the road You must be excited to get started with your Outdoor WiFi Router. If all goes to plan,
Sensors. EasySense. SNS200 Advanced Grouping. Application Manual. Philips Field Apps User Manual for Easysense NFC and Easysense IR
 Sensors EasySense SNS200 Advanced Grouping Application Manual Philips Field Apps User Manual for Easysense NFC and Easysense IR October 2016 2 Application Manual - EasySense Advanced Grouping SNS200 October
12V DC ROLLER SHADE User Manual
 12V DC ROLLER SHADE User Manual English Revision 8.1 November 27th, 2017 INTRODUCTION Thank you for your purchase. The following user manual will walk you through the setup of your Link Shades device.
Please read these instructions carefully before installing This will ensure an easy start and a great first customer experience with TS4 installation
 Please read these instructions carefully before installing This will ensure an easy start and a great first customer experience with TS4 installation INTERACTIVE INSTALLATION AND SAFETY MANUAL FOR TS4:
1900AC. Digital TV box. User Manual.
 1900AC Digital TV box User Manual http://www.mygica.com 1 2 3 4 Quick Setup Guide 8 8 1 5 6 7 1. USB 2.0 Port 3. Reset 5. LAN Port 7. DC Input 2. Micro SD Port 4. HDMI Port 6. SPIDF Port 8. Wi-Fi Antenna
CONTROL4 INTEGRATION WITH THE SHADE STORE MOTORS CONTROL4 INTEGRATION OVERVIEW:
 CONTROL4 INTEGRATION WITH THE SHADE STORE MOTORS CONTROL4 INTEGRATION OVERVIEW: Take your motorized window treatment experience to the next level by integrating them into your Savant smart home control
Toucan Surveillance Kit Camera & Smart Socket. User s Manual Model: TSK100KU
 Toucan Surveillance Kit Camera & Smart Socket User s Manual Model: TSK100KU Table of Contents 1. Key Features... 3 2. What Is Included... 6 3. Toucan Camera & Socket Installation... 8 4. Getting The Kuna
ShareLink 200 N Setup Guide
 ShareLink 00 N Setup Guide This guide provides instructions for installing and connecting the Extron ShareLink 00 N Collaboration Gateway Network Version. The ShareLink 00 N allows anyone to present content
Features: (no need for QR Code)
") The Capp-Sure series brings a revolution in surveillance. Utilising a range of high-quality IP Wireless cameras, Capp-Sure provides stunning video clarity and optional Talk-Back audio over internet via
The Capp-Sure series brings a revolution in surveillance. Utilising a range of high-quality IP Wireless cameras, Capp-Sure provides stunning video clarity and optional Talk-Back audio over internet via
Quick Start Guide. Wireless IP Camera. Technical Support QG4_A
 Technical Support Wireless IP Camera Quick Start Guide For Windows Client & Mac Client, please download the PC software: https://reolink.com/software-and-manual/ For advanced setup, please download the
Meikai N220/N300 Micro-Inverter Installation and Operation Manual
 Meikai / Micro-Inverter Installation and Operation Manual Version: 1.0 NOTICE: MKSTAR N270: Pairs with most 60-cell PV modules MKSTAR /: Pairs with most 72-cell PV modules Page 1 Copyright MeiKai ENERGY
M215 (M215-60) Safety
 Safety") M215 QUICK INSTALL GUIDE M215 (M215-60) Safety Important Safety Information This document contains important instructions to use during installation and maintenance of the Enphase M215 Microinverter. To
M215 QUICK INSTALL GUIDE M215 (M215-60) Safety Important Safety Information This document contains important instructions to use during installation and maintenance of the Enphase M215 Microinverter. To
SVT-WIFI Video Intercom System C
 SVT-WIFI Video Intercom System C User Manual Please read this user manual prior to installing the system, and keep it well for future use. CONTENTS 1. Parts and Functions... 1 2. Terminal Descriptions...
nettalk DUO WiFi Configuration (using an Android smartphone)
") nettalk DUO WiFi Configuration (using an Android smartphone) Step 1. Activate your Device a. Locate your username and password inside of the box. b. Go to www.nettalk.com/activate and follow the activation
nettalk DUO WiFi Configuration (using an Android smartphone) Step 1. Activate your Device a. Locate your username and password inside of the box. b. Go to www.nettalk.com/activate and follow the activation
Tracking Platform Operation
 Tracking Platform Operation This platform is designed for CCTR-8XX series GPS Tracker, Language can be selected from the login page : www.999gps.net, every tracker have a unique user name and password,
Smart Security at Every Corner of Your Home
 Spotlight Cam Smart Security at Every Corner of Your Home Your new Spotlight Cam lets you extend the Ring of Security around your entire property. Now, you ll always be the first to know when someone s
Introduction. Built-in speaker. Infrared lights. Camera lens. Reset button. Indicator light. Micro- USB port for power supply.
 Axel USER MANUAL Contents Introduction 4 LED Indicators 5 What s Included 6 Wi-Fi Requirements 7 Mobile Device Requirements 7 Download the Momentum App 8 Pairing 9 Pairing additional Momentum Devices 11
Quick Installation Guide
 Quick Installation Guide DL-200 Cellular Data logger V1.2_201610 TABLE OF CONTENTS CHAPTER 1 INTRODUCTION... 4 1.1 CONTENTS LIST... 5 1.2 HARDWARE INSTALLATION... 6 1.2.1 WARNING... 6 1.2.2 SYSTEM REQUIREMENTS...
CAP300-Outdoor. Installation Guide. 300Mbps Wireless N Outdoor Access Point
 CAP300-Outdoor Installation Guide 300Mbps Wireless N Outdoor Access Point Contents Overview 1 Typical Network Topology 4 Lightning and ESD Protection 5 Hardware Installation Mount CAP Connect Cables Power
GPSteltronic Tracking Platform Operation Guide
 GPSteltronic Tracking Platform Operation Guide Welcome to use this Real Time GPS tracking platform, This software is web based system, it is not necessary to download any software or any plug-in software,
Savant Pro Lamp Control SAV-LMP-0300
 Savant Pro Lamp Control SAV-LMP-0300 Deployment Guide Document Number: 009-1388-01 Document Date: August 2016 Document Supports: da Vinci 8.0 45 Perseverance Way, Hyannis, MA 02601 Savant.com 508.683.2500
Setup Guide for Wi-Fi Hotspot Boosting Kit
 Setup Guide for WI-KIT-02 Wi-Fi Hotspot Boosting Kit Congratulations on purchasing the WI-KIT-02, this contains everything you need to be able to connect to Wi-Fi at a camp site / marina / other location.
ELAN INTEGRATION WITH THE SHADE STORE MOTORS ELAN INTEGRATION OVERVIEW:
 ELAN INTEGRATION WITH THE SHADE STORE MOTORS ELAN INTEGRATION OVERVIEW: Take your motorized window treatment experience to the next level by integrating them into your ELAN smart home control system. The
Ctdigi.com. Instruction manual. Production by S & W Technology Labs
 Ctdigi.com Instruction manual Production by S & W Technology Labs I. Install app II. Guard camera Guard camera Introduction Accessory Sensor Scenario Guard 360 Introduction - Catalog - Install app Scenario
USER S MANUAL K03 WIFI USB IMPORTANT NOTE:
 USER S MANUAL K03 WIFI USB IMPORTANT NOTE: Read the manual carefully before installing or connecting your Smart kit. Make sure save this manual for future reference. This manual gives detailed description
Introduction. Package Checklist. Minimum System Requirements. Registering Your Product. More Help
 Introduction Keep a watch on your family, pet, home or office 24/7, even when you re not there. Creative Live! Cam IP SmartHD gives you a live update on your phone, wherever you are. Get activity alerts,
Wifi Smart. Thank you for choosing our product. For proper operation, please read and keep this manual carefully.
 Wifi Smart Thank you for choosing our product. For proper operation, please read and keep this manual carefully. Content Download and install App... 1 Configuration... 1 Functions introduction... 3 User
Automate Pulse Set-Up Instructions
 Automate Pulse Set-Up Instructions ABOUT THE AUTOMATE SHADES SKILL The Automate Pulse app allows for control of your motorized window coverings through your smartphone/tablet THE APP ALLOWS FOR: Individual
Introduction to the Autologic Vehicle Diagnostic Tool
 Introduction to the Autologic Vehicle Diagnostic Tool User Instructions Version 4.0 Issued April 2012 For the latest version of this document see www.autologic.com Ltd has made every effort to make sure
Enphase S-Series Microinverter and Engage Cable Safety
 SAFETY Enphase S-Series Microinverter and Engage Cable Safety Important Safety Information (S280-60-LL and S230-60-LL) This document contains important instructions to use during installation of the Enphase
HOME SECURITY KIT. USER MANUAL SMART PROTECTION WITH THE ALL-IN-ONE SOLUTION. SMART WINDOW SENSOR SMART POWER SOCKET SMART MOTION SENSOR SMART IP CAM
 HOME SECURITY KIT. SMART PROTECTION WITH THE ALL-IN-ONE SOLUTION. SMART WINDOW SENSOR SMART POWER SOCKET SMART IP CAM SMART MOTION SENSOR USER MANUAL SL-900100/900111 HOME SECURITY KIT A/B SHORT INSTRUCTION
Smart Home System Kit
 Smart Home System Kit IP SECURITY ALARM SERIES More information, please visit the online CD information on the website http//netcam360.com 0 P a g e BRIEF INSTRUCTION 1. Start Infrared box camera a. Install
Sotion Wireless Camera. User Manual.
 Sotion Wireless Camera User Manual Email: Help@sotiongroup.com App Download & Installation The camera is compatible with Wi-Fi 2.4 GHz only, please connect camera to 2.4 GHz Wi-Fi. Make sure your network
Note: These watches are not waterproof but water resistant. We will not replace a watch where water damage is suspected.
 IMPORTANT INFORMATION ABOUT YOUR WATCH & TRACKING LOCATIONS / ACCURACY All the GPS tracking devices is tracked when outdoors via a map location (Google Maps) & GPS Satellites. When a device is indoors
Carkuda (VTG500X) User Manual
 User Manual") Carkuda (VTG500X) User Manual Contents Carkuda Concepts Quick Start Installing Carkuda Mirror Using Carkuda Mirror Using Carkuda Smartphone App Technical Specifications Packing List FAQs Revision History
Carkuda (VTG500X) User Manual Contents Carkuda Concepts Quick Start Installing Carkuda Mirror Using Carkuda Mirror Using Carkuda Smartphone App Technical Specifications Packing List FAQs Revision History
User Manual. Wireless IP Camera
 User Manual Wireless IP Camera Introduction Hi. Thank you for purchasing the AUKEY VT-CM1 Wireless Security IP Camera. Please read this user manual carefully and keep it in a safe place for future reference.