MetaDefender ICAP Server 4.3.0
|
|
|
- Allan Blankenship
- 5 years ago
- Views:
Transcription


1 MetaDefender ICAP Server OPSWAT, Inc. All rights reserved. OPSWAT, MetadefenderTM and the OPSWAT logo are trademarks of OPSWAT, Inc. All other trademarks, trade names, service marks, service names, and images mentioned and/or used herein belong to their respective owners.
2 Table of Contents About This Guide 7 About MetaDefender ICAP Server 9 Summary 9 ICAP 9 MetaDefender ICAP Server 10 Web Gateway or NGFW Integration 10 Web Proxy Integration 10 Reverse Proxy Integration 11 Web Proxy Servers Supported 12 Feedback Quick Start with MetaDefender ICAP Server Installation 14 Installing MetaDefender ICAP Server on Ubuntu or Debian computers 14 Installing MetaDefender ICAP Server on Red Hat Enterprise Linux or CentOS computers 15 Installing MetaDefender ICAP Server on Windows Basic configuration wizard License activation Creating MetaDefender Core server profile 22 Creating Core server profile Basic security rule 23 Prerequisites 24 Configuration Web traffic redirection 25 Example 25
3 2. Installing or Upgrading MetaDefender ICAP Server Before Installation Increase capacity and resiliency System Requirements Sizing guide Installing MetaDefender ICAP Server 34 Installation overview 34 Installation 35 Installation notes Installing MetaDefender ICAP Server using the command line Upgrading MetaDefender ICAP Server 36 Notes for upgrading from MetaDefender ICAP Server v3 36 Upgrading from MetaDefender ICAP Server v MetaDefender ICAP Server Licensing Activating MetaDefender ICAP Server licenses Checking your MetaDefender ICAP Server license Configuring MetaDefender ICAP Server MetaDefender ICAP Server configuration Web Management Console MetaDefender ICAP Server configuration file Configuring TLS 56 Web Management Console 57 ICAP interface User management 62 Users and groups tab 63 Roles tab 69 User directories tab 71 Transport Layer Security 83 LDAP attributes 83 Active Directory attributes 83 Notes Change user password Active Directory attributes LDAP attributes 87
4 3.5 Logging Configuration Debug logging Web Management Console logs Logging traffic of bad requests Internet connection 101 Proxy configuration Other settings 102 Global settings 102 Data retention Customizing the block page 104 Replacing the default block page Server profiles 107 Properties 108 Property validation 109 Testing the configuration MetaDefender Core specific inventory properties Operating MetaDefender ICAP Server Dashboard 115 Overview page 116 ICAP history 116 Config history Search Security rules 119 Security rules overview 120 Security Rule Management 125 Use case examples ICAP response headers Web Proxy Integrations 131 ICAP URL 132 Supported ICAP Clients ARA network JAGUAR BlueCoat ProxySG F5 BIG IP 149
5 4.4.4 McAfee Web Gateway Squid FortiGate Other Integration 203 Next Generation Firewalls: HTTP Header Handling 205 Filename Troubleshooting MetaDefender ICAP Server How to create support package 209 Linux 209 Windows 210 Content of the created package How to read the MetaDefender ICAP Server log 211 Linux 211 Windows Inaccessible Web Management Console 212 Connection refused or browser is waiting 212 Invalid license Startup failure 214 Could not create temporary directory Can't view scan details 214 Symptoms Resetting user passwords 215 Admin account 216 General accounts Release Notes 220 Version Version Version Version
6 Version Version Version Version Version Version Version Legal 223 Copyright 223 DISCLAIMER OF WARRANTY 223 COPYRIGHT NOTICE 223 Export Classification EAR Knowledge Base Articles 224 How to upgrade from ICAP Server to a newer ICAP Server v4 release 224 Installing ICAP Server on Debian Symptom 225 Reason 225 Resolution 225
7 About This Guide This guide is intended to provide the information you need to: Install, configure, and manage MetaDefender ICAP Server v4.x. If you are using MetaDefender ICAP Server v3.x, refer to MetaDefender ICAP Server v3.x user guide. Learn about new features, updated features, and bug fixes on each MetaDefender ICAP Server release (i.e. each product version's release notes). Learn about frequently asked questions and additional concepts through our library of knowledge base articles. While we offer the option to download this guide to a PDF file, it is optimized for online browser viewing. OPSWAT updates the online version of the guide regularly on an "as needed" basis. By viewing the document online, you are assured that you are always seeing the most recent and most comprehensive version of the guide

8 Upgrading from MetaDefender ICAP Server v4.0.0 MetaDefender ICAP Server v4.0.0 release contains an issue which can cause configuration data loss during upgrade. This issue applies to Windows deployments only. On Linux the upgrade can be performed on the traditional way, with no data loss. When upgrading from MetaDefender ICAP Server v4.0.0, the newer version's installer aborts with the following message: To upgrade your existing installation please read the instructions on the following page: opswat.com/icap/ To upgrade from MetaDefender ICAP Server v4.0.0 to a newer version, follow the instructions described at the knowledge base article: How to upgrade from ICAP Server to a newer ICAP Server v4 release
9 About MetaDefender ICAP Server Summary The MetaDefender ICAP Server product is designed to enable scanning the contents of HTTP traffic that enter or leave an internal network for advanced threats. MetaDefender ICAP Server provides ICAP interface between MetaDefender Core and ICAP clients (mainly Proxies: Web or Reverse Proxy Servers). Any content routed through the ICAP interface will be scanned with the same anti-malware engines and policies as files scanned through any other MetaDefender Core interface. Scan results can be cached by MetaDefender Core and/or by the Proxy, which can significantly improve scanning throughput and lower traffic load. Scanning with a MetaDefender ICAP Server also allows logging files entering the network. This log information may be used later as evidence during the investigation of security incidents. ICAP The Internet Content Adaption Protocol (ICAP) is, in essence, a lightweight protocol for executing a "remote procedure call" on HTTP messages. It allows ICAP clients to pass HTTP messages to ICAP servers for some sort of transformation or other processing ("adaptation"). The server executes its transformation service on messages and sends back responses to the client, usually with modified messages. Typically, the adapted messages are either HTTP requests or HTTP responses. [ IETF] ICAP is a lightweight HTTP-like protocol specified in RFC 3507 which is used to extend transparent proxy servers, thereby freeing up resources and standardizing the way in which new features are implemented. ICAP is generally used to implement virus scanning and content filters in transparent HTTP proxy caches. Content adaptation refers to performing the particular value added service (content manipulation) for the associated client request /response. [ WIKI] ICAP concentrates on leveraging edge-based devices ( caching proxies) to help deliver value- added services. At the core of this process is a cache that will proxy all client transactions and will process them through ICAP web servers. These ICAP servers are focused on a specific function, for example malware scanning. Off-loading value-added services from web servers to ICAP servers allows those same web servers to be scaled according to raw HTTP throughput versus having to handle these extra tasks. [ WIKI]
10 MetaDefender ICAP Server MetaDefender ICAP Server provides ICAP interface on top of MetaDefender Core. When a user uploads data over HTTP (for example with a PUT or POST request), the contents of the request are forwarded to MetaDefender Core by MetaDefender ICAP Server for scanning. When a user downloads data from an external server (for example wit a GET request), the contents of the reply are also forwarded for scanning, before being sent to the user s computer. HTTP requests and responses are always redirected to the MetaDefender ICAP server, independently from the HTTP method. Based on the scan results MetaDefender ICAP Server may either accept or reject the request: If attached data is clean, then MetaDefender ICAP Server accepts the traffic and returns HTTP contents that can be forwarded normally by the Proxy. Based on the configuration of MetaDefender Core, clean files can be still be modified. sanitized, so the contents of a clean file may If attached data is identified as a threat, then MetaDefender ICAP Server rejects the traffic and modifies the HTTP request or reply accordingly (e.g., a custom HTML message): the original, malicious content won't reach its intended destination. Web Gateway or NGFW Integration MetaDefender ICAP Server allows system administrators to easily integrate MetaDefender Core's multi-scanning technology into an existing web gateway or new-generation firewall to enable anti-malware scanning of all HTTP downloads and uploads. Any web gateway or newgeneration firewall that implements ICAP such as Fortinet FortiGate can be set up to automatically forward HTTP requests to MetaDefender ICAP Server
11 Web Proxy Integration MetaDefender ICAP Server allows system administrators to easily integrate MetaDefender Core's multi-scanning technology into an existing web proxy to enable anti-malware scanning of all HTTP downloads and uploads. Any proxy that implements ICAP such as Blue Coat ProxySG or Squid can be set up to automatically forward HTTP requests to MetaDefender ICAP Server. Reverse Proxy Integration MetaDefender ICAP Server allows system administrators to easily integrate MetaDefender Core's multi-scanning technology into an existing reverse proxy to enable anti-malware scanning of all HTTP file uploads. Any reverse proxy that implements ICAP such as F5 BIG- IP Load Traffic Manager (LTM ) can be set up to automatically forward any uploaded files to MetaDefender ICAP Server

12 Web Proxy Servers Supported ARA network JAGUAR BlueCoat ProxySG F5 BIG IP McAfee Web Gateway Squid FortiGate
13 Feedback For comments and questions regarding this document, please contact OPSWAT on the Support tab at
14 1. Quick Start with MetaDefender ICAP Server This guide describes the basic steps for installing and using MetaDefender ICAP Server: 1.1 Installation 1.2 License activation 1.3 Creating MetaDefender Core server profile 1.4 Basic security rule 1.5 Web traffic redirection This Quick Guide assumes that the test machine has working Internet connection. 1.1 Installation Before starting the installation please make sure your server computer or virtual machine meets the minimum hardware and software requirements. Installing MetaDefender ICAP Server on Ubuntu or Debian computers Download mdicapsrv package from the OPSWAT Portal. Make sure that you download the applicable package for your distribution Upload the installation package to your server computers Install the product with the following command ( <filename> is the MetaDefender ICAP Server package you downloaded from our portal): $ sudo dpkg -i <filename> 4. If dpkg shows error messages about missing dependencies you should execute: $ sudo apt-get install -f 5. Open a web browser and point to ( <server name or IP> is the DNS name or IP address of your server): name or IP>:
15 6. Enter default login credentials, username: admin, password: admin Installing MetaDefender ICAP Server on Red Hat Enterprise Linux or CentOS computers Download mdicapsrv package from the OPSWAT Portal. Make sure that you download the applicable package for your distribution Upload the installation package to your server computers Install the product with the following command ( <filename> is the MetaDefender ICAP Server package you downloaded from our portal): $ sudo yum install <filename> 4. Open a web browser and point to ( <server name or IP> is the DNS name or IP address of your server): name or IP>: Enter default login credentials, username: admin, password: admin Installing MetaDefender ICAP Server on Windows Download mdicapsrv Windows installer from the OPSWAT Portal Upload the installation package to your server computers Install the product with executing the installer Open a web browser and point to ( <server name or IP> is the DNS name or IP address of your server): name or IP>: Enter default login credentials, username: admin, password: admin To continue the basic setup, follow the license activation instructions on License activation. For more information on Installation procedures see Installing MetaDefender ICAP Server Basic configuration wizard
16 Introduction Basic configuration steps End-User License Agreement Admin User Setup License activation Wizard completion Transport Layer Security Introduction When trying to access the Web Management Console for the first time, you are to complete a basic configuration wizard in order to be able to use the product. The Web Management Console will be available only after you have successfully finished this wizard. The basic configuration wizard steps include: Accepting the EULA Setting up an admin user Activating the product (optional)
17 To start the wizard click CONTINUE. Sensitive information This wizard may transfer sensitive information over an unencrypted connection. Always use this wizard on a secure, closed network or localhost, and with care! Basic configuration steps End-User License Agreement In the first page you can find the End-User License Agreement. You have to accept the terms before moving on. Please read through the EULA carefully and if you agree with it, check I ACCEPT THE TERMS IN THE LICENSE AGREEMENT and click NEXT to continue. Admin User Setup The next step is to set up an administrator account. This account will be the first one being able to access the Web Management Console and to create accounts for other users. You have to fill all fields in this page to be able to move forward. When you are done, click NEXT to continue
18 User directory The administrator account, that is created via the basic configuration wizard, is always added to the LOCAL user directory as a member. The following information is required for the administrator account: ACCOUNT NAME The unique name of the account that is used at the time of login and in log messages for accountability. Admin account name restriction The legacy administrator account name admin is not allowed as ACCOUNT NAME. ACCOUNT DISPLAY NAME Name of the person bound to this account. This name (appended to the name of the account's user directory) is displayed in the top right corner of the Web Management Console. PASSWORD Password of the user bound to this account that is used at the time of login. Passwords sent clear-text As long as TLS is not configured for the basic configuration wizard, passwords are sent clear-text over the network and may be disclosed to unauthorized parties. As a mitigation action: Either use the wizard on localhost or on a direct network connection, or Enable TLS as soon as possible and change the password immediately if it has already been set. address of the person bound to this account
19 License activation For license activation details see Activating MetaDefender ICAP Server licenses. Wizard completion After you have completed every steps you are ready to finish the wizard and start using the product. Click the FINISH button to complete the wizard. The product's service will be restarted and the browser will be redirected to the Web Management Console. This could take several seconds. You can login to the Web Management Console with the administrator user that have just been created in the previous steps
20 Transport Layer Security Transport Layer Security (TLS) is a cryptographic protocol that provides communications security over a computer network. Websites, like the Web Management Console, are able to use TLS to secure all communications between their servers and web browsers. The TLS protocol aims primarily to provide confidentiality (privacy) and data integrity between two communicating computer applications. No TLS for the wizard By default, TLS is not enabled for the basic configuration wizard. As a consequence sessions between the wizard's backend and the browser may be insecure. Performing the same steps as for the Web Management Console, it is possible to set up TLS for the basic configuration wizard. Remember completing the TLS setup before launching the wizard. For instructions to set up TLS see 3.2 Configuring TLS
21 1.2 License activation To activate your installation go to the Settings > License menu in the Web Management Console. If you have no valid license, you will only see your installation's Deployment ID. You will also see a warning in the Web Management Console header. 1. Press the ACTIVATE button to bring up the Activation menu, where you should choose from the available modes: Online: the product will contact the OPSWAT license server online, and acquire its license based on your Activation key and Deployment ID. Offline: you can upload a manually acquired license file. Request trial key online: if you want to try out the product first, you can receive a trial Activation key via Select the desired option Follow the on-screen instructions Finally press the SEND button After successful activation the product will be available with all its functionality. For detailed license activation instructions see [ICAP] Activating MetaDefender ICAP Server Licenses
22 When your hardware information changes, for example your mac address changes because the product runs in a virtual machine, the license get automatically reactivated on the first update attempt. 1.3 Creating MetaDefender Core server profile After installation and successful license activation MetaDefender ICAP Server user interface is ready to be used with full functionality. For requests to be scanned MetaDefender ICAP Server needs, however, to be connected to MetaDefender Core. Establishing this connection requires two steps: Creating a MetaDefender Core type server profile Assigning this server profile to the ICAP Server (see 1.4 Basic security rule) Creating Core server profile Go to Inventory > Server profiles and click ADD NEW PROFILE. In the SERVER PROFILE TYPE drop-down list select MetaDefender Core and specify the details of your MetaDefender Core instance(s). Properties not listed in the table below may be left on their default values or blank, or filled according to the organizational policies. Server profile Profile Server specifications (URI) type name Value MetaDefender Unique Core servers URI Core name

23 Server profile Profile Server specifications (URI) type name Examples MetaDefender Core Core URI example Transport level encryption None TLS :8008 For further details about server profiles see 3.9 Server profiles. 1.4 Basic security rule Prerequisites Configuration
24 After installation, successful license activation and basic configuration MetaDefender ICAP Server is ready to be used. However, MetaDefender ICAP Server blocks all requests by default. To allow web traffic some basic security rule configuration is needed. The basic security rules created in this chapter may be too permissive and may not be suitable for production deployments. Prerequisites The following information is needed to create the basic security rules: 1. MetaDefender Core type server profile containing the Core (see 1.3 Creating MetaDefender Core server profile) Configuration To allow web traffic go to Policy > Security rules and create the following basic security rule. In the examples below we assume that The Core server is configured in the MetaDefender Core type serve profile CoreProfile. Properties not listed in the table below may be left on their default values (if they have, e.g. settings on ACTIONS or ADVANCED tabs) or filled according to the organizational policies (e.g. USE TLS). Tab SCAN Field METADefeNDER CORE Value MetaDefender Core type server profile containing the Core Examples CoreProfile For details about security rules in MetaDefender ICAP Server see 4.2 Security rules
25 1.5 Web traffic redirection As a final step when all the previous steps in this chapter are done the web traffic must be redirected to flow through MetaDefender ICAP Server. MetaDefender ICAP Server's ICAP service is listening on port 1344 by default. For further details about integrating MetaDefender ICAP Server with various ICAP clients see 4.4 Web Proxy Integrations and 4.5 Other Integration. Example In case of Squid proxy installed on the same machine as ICAP Server the following configuration must be appended to the squid.conf file: Sqiud example icap_enable on icap_send_client_ip on icap_preview_enable on icap_preview_size 0 icap_service_failure_limit -1 icap_service metascan_req reqmod_precache bypass=0 icap:// :1344/OMSScanReq-AV adaptation_access metascan_req allow all icap_service metascan_resp respmod_precache bypass=0 icap:// :1344/OMSScanResp-AV adaptation_access metascan_resp allow all icap_persistent_connections on
26 2. Installing or Upgrading MetaDefender ICAP Server 2.1. Before Installation 2.2 Installing MetaDefender ICAP Server 2.3. Upgrading MetaDefender ICAP Server 2.4. MetaDefender ICAP Server Licensing 2.1. Before Installation Before installing MetaDefender ICAP Server make sure the target computer meets the hardware and software requirements Increase capacity and resiliency System Requirements Sizing guide
27 2.1.1 Increase capacity and resiliency
28 Sizing examples Number of simultaneous users (threads) 10 Data throughput (kb/s) 8005 Request throughput (req/s) Total requests Total time 367 CPU cores 2 RAM 8 GB Load Average Minimum Maximum CPU (%) IO (/SEC) RAM (BYTES) Load chart
29 Measurement methodology MetaDefender Core connection was disabled to eliminate potential bottleneck caused by Core 100 ms delay was applied between requests Each user requested the whole dataset 10 times a. Files were requested in a randomized fashion Test environment Error rendering macro 'drawio' : null Traffic mix File type Share Archive (zip) 2.8 %
30 File type Share Image 2.5 % Microsoft Office 10.7 % PDF 1.5 % Windows executable (.exe) 24.2 % HTML 19.6 % Text 37.3 % Total 98.6 % Rounding error 1.4 % System Requirements Operating system and hardware requirements Other software requirements MetaDefender Core Version compatibility matrix Security rules Browser requirements Additional installation of Windows services Ports that must be available Operating system and hardware requirements Please confirm that your system meets the minimum requirements listed below before installing MetaDefender ICAP Server. Only 64-bit platforms are supported
31 Operating System: CentOS 6.6+, 7.0+ Red Hat Enterprise Linux 6.6+, 7.0+ Debian 7.0+, 8.0+ Ubuntu 14.04, Windows 7+ (64 bit) Microsoft Windows Server 2008 R2 or newer (64 bit) Hardware requirements RAM: min. 2 GB HDD: 2 GB + ~500MB * [number of managed scan engines] If MetaDefender Core or any other system is installed on the same physical machine as MetaDefender ICAP Server then the additional systems' hardware requirements need also be taken into consideration. Other software requirements MetaDefender Core Version compatibility matrix MetaDefender ICAP Server MetaDefender Core Scan engines The following scan engines must be active: Scan engine Version Data sanitization
32 Scan engine Version At least one of the available anti-malware engines N/A Security rules Under Policy > Security rules on Core, security rules that are used by MetaDefender ICAP Server's security rules 1. SHOULD enable the following Visibility of scan result: Role Visibility Everybody FULL DETAILS Without this visibility ICAP Server can still work, but certain details may not be provided on the UI. Browser requirements One of the following desktop browsers is suggested to view the MetaDefender ICAP Server's UI: Chrome Firefox Safari Microsoft Edge Internet Explorer 11 Chrome, Firefox, Safari and Edge browsers are tested with the latest available version at the time of release. Mobile layouts are not supported yet
33 Additional installation of Windows services Name Service Name Optional MetaDefender ICAP Server mdicapsrv REQUIRED Ports that must be available Direction Component / Service Port Note Inbound MetaDefender ICAP Server ICAP 1344 Customizable; adjust accordingly if modified. Inbound MetaDefender Web Management 8048 Customizable; adjust accordingly ICAP Server Console and if modified. REST interface Outbound MetaDefender Core 8008 only if MetaDefender Core is installed on a remote system Sizing guide This document describes a subset of the configuration and sizing options for MetaDefender ICAP Server. If more detailed technical sizing is required, please contact your sales engineer or representative. Hardware CPU cores RAM 4 GB 8 GB 16 GB Storage 25 GB 50 GB 100 GB NIC 1 GbE 1 GbE 1 GbE Raw ICAP capacity * Internet throughput (Mb /s) 100 Mb/s 250 Mb/s 500 Mb/s
34 Web traffic (req /s) Employee count / Number of users ICAP + Core capacity ** Core servers / engine count Internet throughput (Mb /s) Bundled, Single / Bundled, Single / Separate, 2 x 4 4 load balancing / Mb/s 250 Mb/s 500 Mb/s Web traffic (req /s) Employee count / Number of users * The raw ICAP capacity is useful for cases when MetaDefender Core is going to be deployed to a separate server. ** The ICAP + Core capacity is useful for cases when MetaDefender Core is going to be deployed to the same server as MetaDefender ICAP Server. 2.2 Installing MetaDefender ICAP Server Installation overview The following steps are needed to be executed to install MetaDefender ICAP Server Download the package of your choice from the OPSWAT portal Install the package on your computer via the Command Line 3. Open a web browser and point to ( <server name or IP> is the DNS name or IP address of your test server):
35 name or IP>: Login with the default credentials, username: You must Activate this deployment to use its features admin, password: admin Installation Installing MetaDefender ICAP Server using the command line Installation notes If the MetaDefender ICAP Server package dependencies are not installed on your system you may need to have a working Internet connection or you may have to provide the Installation media during the installation. Consult your Operating System documentation on how to use Installation media as a package repository. During installation the databases might need to be upgraded. This could take noticeable time Installing MetaDefender ICAP Server using the command line Preliminary notes If the MetaDefender ICAP Server package dependencies are not installed on your system you may need to have a working Internet connection or you may have to provide the Installation media during the installation. Consult your Operating System documentation on how to use Installation media as a package repository. For each case below start with the following steps: Download mdicapsrv package from the OPSWAT Portal. Make sure that you download the applicable package for your distribution Upload the installation package to your test computers Install the product with the provided command ( <filename> is the MetaDefender ICAP Server package you downloaded from our portal) Debian / Ubuntu package (.deb) $ sudo dpkg -i <filename> sudo apt-get install -f
36 Red Hat Enterprise Linux / CentOS package (.rpm) $ sudo yum install <filename> Windows package (.msi) On Windows systems it is possible to install the product by running the corresponding.msi file. From command line interface it is also possible to install the product by executing > msiexec /i <filename> <option key>=<option value> where the possible option keys and their default option values are the following: Key Default Value Description RESTADDRESS REST interface binding address RESTPORT 8048 REST interface binding port ICAPADDRESS ICAP interface binding address ICAPPORT 1344 ICAP interface binding port For details on using msiexec please consult Windows installer documentation Upgrading MetaDefender ICAP Server Notes for upgrading from MetaDefender ICAP Server v3 It is not possible to directly upgrade MetaDefender ICAP Server v3 to v4. MetaDefender ICAP Server v3 comes built into MetaDefender Core v3. Uninstall MetaDefender Core v3 first, then start a fresh installation. There is no support for importing MetaDefender ICAP Server v3 configuration into MetaDefender ICAP Server v4. The configuration must be migrated manually
37 Upgrading from MetaDefender ICAP Server v4 To upgrade from a former version of MetaDefender ICAP Server v4 a simple installation of the latest version is enough. All existing MetaDefender ICAP Server configuration and data will be kept during the upgrade MetaDefender ICAP Server Licensing In order to use MetaDefender ICAP Server you need to activate the product. If you already purchased ICAP server together with MetaDefender Core v3 then please contact OPSWAT sales for your activation key Activating MetaDefender ICAP Server licenses Checking your MetaDefender ICAP Server license Activating MetaDefender ICAP Server licenses Initial steps Online activation Offline activation Offline activation details Request trial key online Trial key request details Notes Initial steps 1. To activate your installation go to the Settings > License menu in the Web Management Console. If you have no valid license, you will only see your installation's Deployment ID. You will also see a warning in the Web Management Console header
38 2. Press the ACTIVATE button to bring up the Activation menu. The following modes are available: a. b. c. Online Offline Request trial key online Online activation With internet connection on the server, the MetaDefender ICAP Server instance may be activated directly using the Activation key received at the time of purchasing the product
39 Offline activation With no internet connection on the server the MetaDefender ICAP Server instance may be activated indirectly from a different machine, that has internet connection. The Deployment ID of the MetaDefender ICAP Server instance and the the Activation key received at the time of purchasing the product will be required. Follow the steps on the screen to activate the product offline
40
41 Offline activation details 1 Log on to 2 Select MetaDefender ICAP Server as MetaDefender Package 3 Fill in the requested information about your deployment
42 4 Click the Request Unlock Key button
43 The Download Unlock Key link appears

44 5 Click the Download Unlock Key link and save the activation file. 6 Go back to MetaDefender ICAP Server's Web Management Console. Browse for the activation file and click the SEND button
45 Request trial key online An evaluation license may be acquired for 14 days. To obtain a trial key register on the OPSWAT Portal first
46
47 Trial key request details 1 Provide your address (that was registered on the OPSWAT portal) in the ADD and click the SEND button. 2 An response will arrive from sales@opswat. com containing your trial activation key and activation instructions. 3 Using the received activation key continue with an online or offline activation. Notes If you activated your installation, but your license becomes invalid or expired, you will see a RE-ACTIVATE button. After clicking it, the product tries to activate the license with the formerly entered activation information

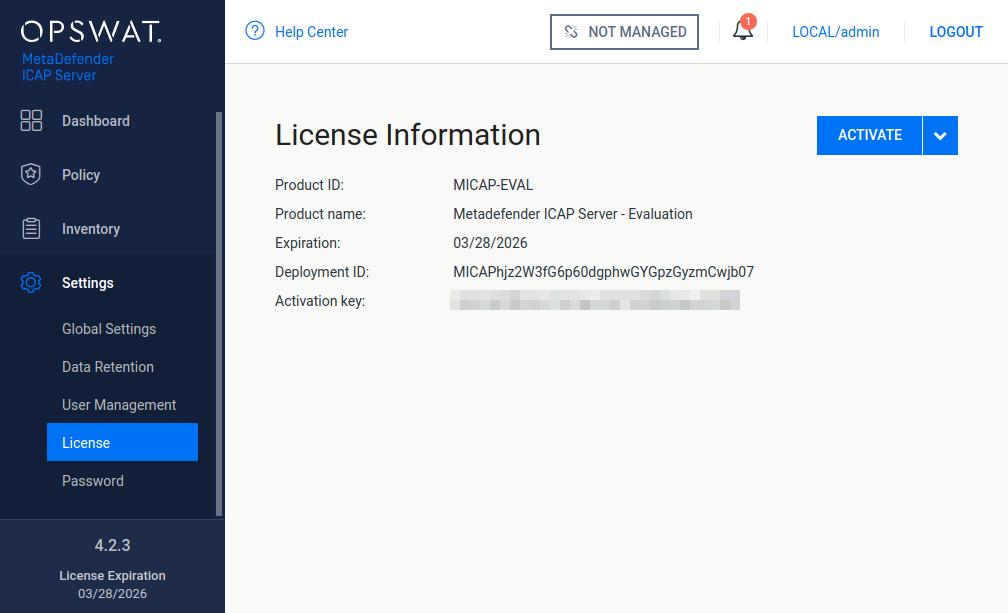
48 2.4.2 Checking your MetaDefender ICAP Server license User menu pane Basic license information is always visible in the user menu pane on the lower left side of the screen. The following information is available Product version License expiration: last day of license validity License menu For more license details and activating your installation go to Settings > License menu on the Web Management Console: Product ID: product identification as on your order Product name: product name as on your order Expiration: last day of license validity Max clients: number of licenses committed / number of licenses allowed Deployment ID: identification of this installation
49
50 3. Configuring MetaDefender ICAP Server 3.1. MetaDefender ICAP Server configuration Web Management Console MetaDefender ICAP Server configuration file 3.2 Configuring TLS 3.3 User management Change user password Active Directory attributes LDAP attributes 3.5 Logging Configuration Debug logging Web Management Console logs Logging traffic of bad requests 3.6. Internet connection 3.7 Other settings 3.8 Customizing the block page 3.9 Server profiles MetaDefender Core specific inventory properties 3.1. MetaDefender ICAP Server configuration The MetaDefender ICAP Server configuration is separated into two parts. The basic server configurations are stored in the configuration files. Other configuration values can be set via the Web Management Console Web Management Console MetaDefender ICAP Server configuration file Web Management Console The Web Management Console is available at ( <server name or IP> is the DNS name or IP address of your test server):
51 name or IP>:8048 After installing the product the default password for the admin user is admin. As long as TLS is not configured for the Web Management Console, passwords are sent clear-text over the network. To set up TLS see Configuring TLS. Every change made in MetaDefender ICAP Server configuration via the Web Management Console is applied when you select Save settings or OK, except if the change cannot be applied. Typical issues related to the Web Management Console: Inaccessible Web Management Console MetaDefender ICAP Server configuration file Linux [global] section [logger] section Windows
52 HKEY_LOCAL_MACHINE\SOFTWARE\OPSWAT\ICAP Server\global HKEY_LOCAL_MACHINE\SOFTWARE\OPSWAT\ICAP Server\logger Linux The configuration file for the server is located in /etc/mdicapsrv/mdicapsrv.conf. After modifying the server configuration file you must restart the MetaDefender ICAP Server service in order for the changes to take effect. You should use the distribution-standard way to restart the mdicapsrv service. [global] section parameter default required description value icapaddress required One of the IP addresses of the computer that runs the product to serve ICAP interface ( means all interface) icapport 1344 required Designated port number for the ICAP interface restaddress required One of the IP addresses of the computer that runs the product to serve REST API and web user interface ( means all interface) restport 8048 required Designated port number for the web and REST interface tempdirectory /var/tmp optional Root directory for temporary files /mdicapsrv creation. /temp A /temp subdirectory is automatically created within a customized directory. For example:
53 parameter default required description value If /tmp is configured as tempdirectory then /tmp/temp will be used for creating temporary files skip_multipart_without_filename false optional When enabled the ICAP server won't send files from a multipart request for scanning when the given part does not have a filename key in it's own Content- Disposition header [logger] section key default required description value logfile /var/log optional Full path of a logfile to write log messages to /mdicapsrv /mdicapsrv. log loglevel info optional Level of logging. Supported values are: debug, info, warning, error syslog optional Switch on logging to a local ('local') or remote ('protocol://hostname:port') syslog server. (Multiple server can be specified separated with comma) syslog_level optional Level of logging. Supported values are: debug, info, warning, error
54 key default required description value override optional Override specific log ids to display them on another level e.g.: "1723:error,663:info". Note: when displaying these log ids their original level will remain the same. capture_traffic optional Capture raw TCP traffic in case of bad requests. See Logging traffic of bad requests. cef false optional If true, the log format is Common Event Format You should set both of syslog and syslog_level or none of them and you should set both of logfile and loglevel or none of them. Windows The configuration for the server is located in Windows Registry. After modifying the server configuration file you must restart the MetaDefender ICAP Server service in order for the changes to take effect. Default logging target is Windows event log with default level of info (see below). HKEY_LOCAL_MACHINE\SOFTWARE\OPSWAT\ICAP Server\global parameter default value type required descriptio icapaddress string value required One of the computer to serve IC means all icapport 1344 string value required Designate ICAP inter restaddress string value required
55 parameter default value type required descriptio One of the computer to serve R user interf interface) restport 8048 string value required Designate web and R tempdirectory C:\Program string optional Root direc Files\OPSWAT\Metadefender value creation. ICAP Server\data\temp A \ is a with dire skip_multipart_without_filename false string value optional When ena won't send request fo given part filename k Dispositio HKEY_LOCAL_MACHINE\SOFTWARE\OPSWAT\ICAP Server\logger
56 parameter default value type required description logfile string value optional Location of a logfile to write log messages to loglevel string value optional Level of logging. Supported values are: debug, info, warning, error wineventlog_level info string value optional Level of logging. Supported values are: debug, info, warning, error syslog string value optional Value can only by in form of 'udp://<hostname>:<port>'. (Multiple server can be specified separated with comma) syslog_level string value optional Level of logging. Supported values are: debug, info, warning, error override string value optional Override specific log ids to display them on another level e.g.: "1723:error,663: info". Note: when displaying these log ids their original level will remain the same. capture_traffic DWORD optional Capture raw TCP traffic in case of bad requests. See Logging traffic of bad requests. cef false string value optional If true, the log format is Common Event Format You should set both of syslog and syslog_level or none of them and you should set both of logfile and loglevel or none of them. 3.2 Configuring TLS
57 Web Management Console Linux Windows Important notes ICAP interface Installation Linux Debian / Ubuntu (.deb) Red Hat / CentOS (.rpm) Windows Configuration Linux Red Hat / CentOS Windows Important notes For production MetaDefender ICAP Server deployments a more sophisticated TLS configuration is recommended than what is described below. Please consult the nginx documentation on Configuring HTTPS servers and stunnel manual for further details. It is not recommended to use self-signed certificates in production environments. If you do not have a suitable certificate, you can apply to a Certificate Authority to obtain one. Web Management Console MetaDefender ICAP Server supports accessing Web Management Console via HTTPS. This feature is, however, not enabled by default. To enable the TLS/HTTPS you should modify MetaDefender ICAP Server configuration by following the next steps. Linux Let us assume that MetaDefender ICAP Server is installed in:
58 /path/to/mdicapsrv and the server certificate is: /path/to/certificate.crt and the private key belonging to the certificate is: /path/to/privatekey.key To simply enable TLS: Create file ssl.conf in the directory /path/to/mdicapsrv/nginx.d Add the following lines: ssl on; ssl_certificate ssl_certificate_key /path/to/certificate.crt; /path/to/privatekey.key; 3. Restart mdicapsrv service. Windows Let us assume that MetaDefender ICAP Server is installed in: C:\Path\To\Metadefender ICAP Server and the server certificate is: C:\Path\To\certificate.crt and the private key belonging to the certificate is: C:\Path\To\privatekey.key To simply enable TLS:
59 1. 2. Create file ssl.conf in the directory C:\Path\To\Metadefender ICAP Serve\nginx. Add the following lines: ssl on; ssl_certificate "C:\Path\To\certificate.crt"; ssl_certificate_key "C:\Path\To\privatekey.key"; 3. Restart OPSWAT MetaDefender ICAP Server service. Important notes When choosing location for certificate and key files, make sure that these files are in a location which is readable to the service user. Certificate and key files should be obtained and saved by the user in a convenient location, adjust the paths accordingly. ICAP interface MetaDefender ICAP Server does not support TLS portocol on the ICAP interface out of the box. Stunnel can be configured to accept ICAP requests from a TLS connection, decrypt the request, and pass it to the local MetaDefender ICAP Server.Error rendering macro 'drawio' : null Installation Linux Debian / Ubuntu (.deb) $ sudo apt-get install stunnel Red Hat / CentOS (.rpm) $ sudo yum install stunnel
60 Windows Download the Windows installer from stunnel's download page Start the installer and follow its steps (use default values if you are not sure) During the installation you will be asked to generate a self-signed certificate file. Fill in the required fields with your information Make sure that " Start stunnel after installation" is not checked at the end of the setup Configuration Linux Red Hat / CentOS 1. You need a valid certificate for stunnel regardless of what service you use it with. If you do not have a suitable certificate, you can apply to a Certificate Authority to obtain one, or you can create a self-signed certificate. To create the self-signed certificate for stunnel: [ RHEL] # cd /etc/pki/tls/certs # make stunnel.pem The certificate is being created. Fill in the required fields with your information. Create and edit /etc/stunnel/stunnel.conf file and add the following lines: [icaps] accept = connect = 1344 cert = /etc/pki/tls/certs/stunnel.pem Where: a. b. accept: The port number where stunnel listens for TLS connections for the given service connect: The port number where the decrypted connections are forwarded to. (This should be the port used by MetaDefender ICAP Server) c. cert: The TLS certificate used by the service. You can set your own or use the one generated during stunnel setup (which is stunnel.pem next to stunnel.conf)
61 4. 5. Save and close the configuration file. Start stunnel with the following command: # stunnel /etc/stunnel/stunnel.conf Windows Let us assume that stunnel is installed in: C:\Path\To\stunnel Locate and open the stunnel.conf file. It should be under the config directory in the stunnel installation directory. (e.g., C:\Path\To\stunnel\config\stunnel.conf) Add the following lines at the end of the file: [icaps] accept = connect = 1344 cert = C:\Path\To\stunnel\config\stunnel.pem Where: a. b. c. accept: The port number where stunnel listens for TLS connections for the given service connect: The port number where the decrypted connections are forwarded to. (This should be the port used by MetaDefender ICAP Server) cert: The TLS certificate used by the service. You can set your own or use the one generated during stunnel setup (which is stunnel.pem next to stunnel.conf) Save and close the configuration file. Start stunnel service. Important notes The certificate generated by stunnel is a self-signed certificate. It is not recommended to use self-signed certificates in production environments. If you do not have a suitable certificate, you can apply to a Certificate Authority to obtain one
62 3.3 User management Users and groups tab Legacy default user Functions Add new user from a Local type user directory API keys Add new users from an LDAP type or Active Directory type user directory Add new group from an LDAP type or Active Directory type user directory Assign roles to a user, LDAP group or Active Directory group Delete user Special user accounts SYSTEM/management account Roles tab Default roles Permissions Effective right Functions Modify role User directories tab Default user directories Local type user directories Active Directory type user directories LDAP type user directories Functions Add new Local type user directory Add new LDAP type or Active Directory type user directory Differences between LDAP and Active Directory type user directories Delete user directory Enable or disable user directory
63 Unlock locked accounts Transport Layer Security LDAP attributes Active Directory attributes Notes To manage the users of the product, go to the Settings > User Management menu in the Web Management Console. Users and groups tab The USERS AND GROUPS tab lists the existing users, LDAP groups and Active Directory groups in the system. Legacy default user Previous versions of the product created a default user during the installation with the following credentials and parameters. This default user may still exist if the product was upgraded from previous versions
64 Username Password Name Roles User directory admin admin Administrator Administrators LOCAL Functions Besides listing existing users, LDAP and AD groups, the USERS AND GROUPS tab provides the following functions: Add new user, LDAP or AD group Modify (and view) existing user's, LDAP or AD group's properties Delete existing user, LDAP or AD group Add new user from a Local type user directory To add a new user from a Local type user directory click the ADD NEW USER button and select a Local type user directory in the USER DIRECTORY drop down list. The field ASSIGN TO ROLES lists all the roles that are assigned to this user. See section Assign roles to a user, LDAP group or Active Directory group for details about role assignment. As long as TLS is not configured for the Web Management Console, passwords are sent clear-text over the network. For details see Transport Layer Security. API keys The APIKEY value provides access to the product's REST API for the user under editing with no authentication. If no such functionality is needed for the user then this field can be left blank. There are two methods to create an APIKEY for a user: Generate the APIKEY by using Generate link next to the APIKEY field, Manually enter the APIKEY value; it must matches the following criteria: APIKEY validation criteria The length of the API key must be exactly 36 characters. It must contain numeric and lower case a, b, c, d, e and f letter characters only (e.g. "1x2y3z..." is invalid because of the x, y and z characters)
.")
65 It must contain at least 10 lower case a, b, c, d, e or f letter characters. It must contain at least 10 numeric characters. It is allowed to contain at most 3 consecutive lower case letter characters (e.g. "abcd1a2b3c..." is invalid because of the four consecutive letters). It is allowed to contain at most 3 consecutive numeric characters (e.g. "1234a1b2c3..." is invalid because of the four consecutive numeric characters). Add new users from an LDAP type or Active Directory type user directory To add a new user from an LDAP type or Active Directory type user directory click the ADD NEW USER button and select an LDAP type or Active Directory type user directory in the USER DIRECTORY drop down list. Select USER as the ACCOUNT TYPE. Provide the name of the account in the ACCOUNT NAME field and click the FIND ACCOUNT button to look up the account in the LDAP or Active Directory. If the lookup succeeds then the ACCOUNT DISPLAY NAME and the DISTINGUISHED NAME fields are filled automatically

66 Do provide the account name precisely. There is no functionality to look up similar names or partial matches. The field ASSIGN TO ROLES lists all the roles that are assigned to this user. See section Assign roles to a user, LDAP group or Active Directory group for details about role assignment. Add new group from an LDAP type or Active Directory type user directory The purpose of adding an LDAP or Active Directory group to the product is to assign role(s) to all the users in that LDAP or Active Directory group. The users of the LDAP or Active Directory group can authenticate with their LDAP or Active Directory credentials in the product's Web Management Console and will be assigned with the roles assigned to the group. To add a new group from an LDAP type or Active Directory type user directory click the ADD NEW USER button and select an LDAP type or Active Directory type user directory in the USER DIRECTORY drop down list. Select GROUP as the ACCOUNT TYPE
67 Provide the name of the group in the ACCOUNT NAME field and click the FIND ACCOUNT button to look up the group in the LDAP or Active Directory. If the lookup succeeds then the ACCOUNT DISPLAY NAME and the DISTINGUISHED NAME fields are filled automatically. Do provide the group name precisely. There is no functionality to look up similar names or partial matches. The field ASSIGN TO ROLES lists all the roles that are assigned to all users of the selected group. See section Assign roles to a user, LDAP group or Active Directory group for details about role assignment. Assign roles to a user, LDAP group or Active Directory group Role(s) must be assigned to users, LDAP groups and Active Directory groups in order they can use the Web Management Console. The roles assigned to a certain user determine what pages that user can access in the Web Management Console and wheter she can only read, or modify as well values on a page. The field ASSIGN TO ROLES in the Add/assign new user(s) and Modify user dialogs lists all the roles that are assigned to the user. The following is the role assignment policy: At least one role must be assigned to a user, LDAP group or Active Directory group Optionally multiple different roles can be assigned a. In this case the most permissive available right applies to each function. For details about the permissiveness of roles see the Roles tab section. Example: Roles assigned Effective permissions Read only permission No permission security_auditor Config history, Global settings help_desk Global settings Config history
68 Roles assigned Effective permissions security_admin AND security_auditor Config history, Global settings Delete user Active sessions of the deleted user will be aborted at the time of the next interaction with the server. Special user accounts Some user accounts are reserved in the product for system internal usage. These accounts are documented in this section. The special accounts documented in this section are for internal usage. Do not directly modify these accounts through the user management functions cause it may give unexpected results. SYSTEM/management account The SYSTEM/management account is reserved for Central Management. When the product is connected to Central Management as a managed instance, then this account is automatically created by Central Management at the first successful connection with the following parameters: Username Password Name Roles User director management N/A Metadefender Central Management management@localhost Administrators SYSTE All consecutive connection attempts are performed by Central Management using the SYSTEM /management account

69 Roles tab Roles can be assigned to users. This simplifies controlling permissions. The Roles tab lists the existing roles in the system. Default roles After installation the following default roles are created with the following parameters: Rolename Display name Default member username Permissions admin Administrators admin Full on all functions security_admin Security administrators Full on ICAP history, Security rules, Server profiles and Global settings security_auditor Security auditor Read-only on all functions
70 Rolename Display name Default member username Permissions help_desk Help desk Read-only on ICAP history, Security rules, Server profiles and Global settings Permissions Each role has a set of rights associated to it. Each of these rights represent the level of access to the appropriate function of the MetaDefender product's Web Management Console. A right can be set to one of three different values: Right Description NONE Users with this effective right have no right to access the given function of the MetaDefender product's Web Management Console. The menu belonging to the function is not displayed. READ- ONLY Users with this effective right are granted to access the given function for observation purposes only. Users of this role can, however, not effectuate any modifications or any change to the function. FULL Users with this effective right have full access to the given function, including viewing any data belonging to it and modifying its configuration. Effective right A single user may have multiple roles assigned to it. There may be cases, when one of the assigned roles of the user would prohibit, while the other assigned role of the user would permit a certain function. In this case the more permissive right will be effective. See section Assign roles to a user, LDAP group or Active Directory group for details about assigning multiple roles to a single user
71 Functions Besides listing existing roles the Roles tab provides the following functions: Add new role Modify (and view) existing role Delete existing role The default role Administrators can not be deleted or modified. Modify role The users' permissions won't be modified during the session, even if one of their roles are modified in the meantime. For example: A user is assigned to the role security_admin and has Full permissions on C onfig history She can see Config history changes During her session the Config history permissions are set to None for the security_admin role. The logged in user can still select the Config history menu and can see the configuration changes there. Then new permissions will be effective only after a logout and new login. Delete role A role can not be deleted as long as it is assigned to any user. As a consequence deleting a role can not affect active sessions of users. User directories tab Users can be organized into separate user directories. User directories help to enforce the following login policies:
72 1. 2. Lockout after a number of consecutive failed login attempts Disable logins for all users of the user directory The Users tab lists the existing user directories in the system. Default user directories After installation two default user directories are created with the following parameters: User Name Number of Lockout Purpose directory failed logins time type before lockout [minutes] Local LOCAL 3 5 This user directory can be used to add local user accounts to the system. Local SYSTEM 0 0 This user directory is used to add special, (e.g. machine-to-machine) user accounts to the system
73 User Name Number of Lockout Purpose directory failed logins time type before lockout [minutes] This user directory is for system internal use, do not modify (delete, assign users, etc.) it manually. Three types of user directories exist in MetaDefender products: Local LDAP Active Directory Local type user directories Local type user directories allow creating users that locally exist on the MetaDefender product. To protect user accounts of a local user directory against brute force password breaking attacks, the following policy settings may be applied to each local type user directory: NUMBER OF FAILED LOGINS BEFORE LOCKOUT: After this number of consecutive failed login attempts the account gets locked. LOCKOUT TIME [MINUTES]: The account remains locked for the given minutes. When the lockout time elapses, the account lock gets released automatically. Users with appropriate permission may release the account lock earlier using the RELEASE LOCKOUT button. Active Directory type user directories Active Directory type user directories allow users defined in an Active Directory to access the MetaDefender product. Active Directory type user directories do not provide the possibility to define login policies; these policies may be defined in the Active Directory directly. LDAP type user directories LDAP type user directories allow users defined in an LDAP directory to access the MetaDefender product
 existing user directory Delete existing user")
74 LDAP type user directories do not provide the possibility to define login policies; these policies may be defined in the LDAP directory directly. Functions Besides listing existing user directories the USER DIRECTORIES tab provides the following functions: Add new user directory Modify (and view) existing user directory Delete existing user directory Enable or disable existing user directory Unlock locked accounts Add new Local type user directory Click the ADD NEW USER DIRECTORY button and select Local in the USERDIRECTORY TYPE drop down list. For explanation of the NUMBER OF FAILED LOGINS BEFORE LOCKOUT and LOCKOUT TIME [MINUTES] fields read the Local type user directories section
75 Add new LDAP type or Active Directory type user directory Click the ADD NEW USER DIRECTORY button and select LDAP or Active Directory in the USERDIRECTORY TYPE drop down list respectively. Learn more about the differences between LDAP and Active Directory type user directories. Multiple LDAP or Active Directory servers can be configured to provide high availability of the directory services. a. Server preference: i. The configured servers are taken for a connection attempt in a top-bottom fashion. b. Failover conditions i. If the connection to a certain LDAP or AD server fails (for a reason other then authentication error) then ii. The next server in the preference order is attempted
76 c. Server properties The following properties must be specified for each LDAP or AD server: i. ii. iii. SERVER HOST: IP address or FQDN of the server SERVER PORT: The TCP port on which the directory service is listening ENCRYPTION: What kind of encryption to use when establishing the connection 1. None: No encryption, communication on a clear-text channel As long as ENCRYPTION field is set to None there is no encryption used between the MetaDefender product and the LDAP or Active Directory server. All passwords and other information are sent clear-text over the network. Use StartTLS or SSL as ENCRYPTION whenever possible
77 2. 3. StartTLS: The connection is established on a clear-text channel, then upgraded to TLS (TLS over LDAP) SSL: The connection is established on a TLS encrypted channel (LDAP over TLS) For StartTLS and SSL type encrypted connections the LDAP or Active Directory server must authenticate itself with a certificate that's validity can be verified by the MetaDefender product. This can happen in basically two ways: a. b. Trusted certificate: the certificate's root certificate is issued by a trusted certificate authority (e.g. Comodo, Symantec, GoDaddy, GlobalSign, IdenTrust, DigiCert, StartCom, Entrust, Trustwave, Verizon, etc.) These root certificates are usually pre-installed in modern operating systems and as a result can be verified by the MetaDefender product. Self-signed certificate: the certificate (or it's root certificate) is added to the system as a trusted root certificate. For details about adding a certificate as a trusted root certificate, see the manuals of the operating system of your MetaDefender product. For your convenience here are the necessary commands for Windows and some Linux distributions (the path to the self signed certificate file is C: \Path\To\certificate.crt or /path/to /certificate.crt on Windows or Linux respectively): Windows > certutil -addstore -f "ROOT" C: \Path\To\certificate.crt 3. The BIND USERNAME and BIND PASSWORD values must be the name as DN (distinguished name) and password of a user who has permissions to do searches in the directory
78 As long as TLS is not configured for the Web Management Console, passwords are sent clear-text over the network. For details see Transport Layer Security. 4. The USER BASE DN and the GROUP BASE DN values should provide the entries in the LDAP or Active Directory tree where user and group entity lookups should be started. For further LDAP specific property details see LDAP attributes. For further Active Directory specific property details see Active Directory attributes. 5. Click the TEST button to test the LDAP or Active Directory settings. If the test succeeds then the user directory can be added to the list with the ADD button
79
80
81 Differences between LDAP and Active Directory type user directories From MetaDefender products' perspective LDAP directories are supersets of Active Directory directories. In other words, an Active Directory configuration can be specified using LDAP user directory type, setting certain properties to predefined values. The following properties must be set to the following values to implement an Active Directory type user directory with LDAP type user directory Property Value USER OBJECT CLASS user
82 Property Value USER ACCOUNT ATTRIBUTE samaccountname USER ATTRIBUTE mail USER DISPLAY NAME ATTRIBUTE cn GROUP OBJECT CLASS group GROUP ACCOUNT ATTRIBUTE samaccountname GROUP DISPLAY NAME ATTRIBUTE cn Delete user directory Users of the deleted user directory will be deleted as well. As a consequence: active sessions of the users of the deleted user directory will be aborted at the time of the next interaction with the server (for details see Delete user). Enable or disable user directory To disable a user directory hover over the user directory's entry in the list and click the Disable user directory icon. When disabling a user directory, all users that are assigned to it will be blocked from logging in. Active sessions of users of the disabled user directory will not be aborted. The user will be blocked at the time of the next login. When a user directory is disabled then the user directory's entry in the list displays the x mark. To enable the user directory click the Enable user directory icon
83 Unlock locked accounts All the locked user accounts that belong to a Local type user directory, can be released clicking the RELEASE LOCKOUT button. Transport Layer Security Transport Layer Security (TLS) is a cryptographic protocol that provides communications security over a computer network. Websites, like the Web Management Console, are able to use TLS to secure all communications between their servers and web browsers. The TLS protocol aims primarily to provide confidentiality (privacy) and data integrity between two communicating computer applications. For instructions to set up TLS see 3.2 Configuring TLS LDAP attributes For further details see LDAP attributes Active Directory attributes For further details see Active Directory attributes Notes The currently logged on user can not disable the user directory to which her account is assigned to. For example the admin user can not disable the LOCAL user directory. The currently logged on user can not delete the following: Her own user account. For example the admin user can not delete the admin user account. The user directory to which her account is assigned to. For example the admin user can not delete the LOCAL user directory Change user password The current user can change her password under Settings > Password

84 The password change option is only available for users of Local type user directories. Changing passwords in LDAP or Active Directory services is not supported. Important notes As long as TLS is not configured for the Web Management Console, passwords are sent clear-text over the network. To set up TLS see Configuring TLS Active Directory attributes Bind username User base and group base DN This page contains tips on how to obtain the BIND USERNAME, the USER BASE DN and GROUP BASE DN attributes when creating an Active Directory type user directory. Normally a domain administrator should provide these values
85 All three attributes must be expressed using a valid LDAP syntax
86 Bind username Normally a domain administrator should provide these values, however there is a way to get the BIND USERNAME as an LDAP DN, that is needed for the product to do searches in the directory information tree, and it is as follows: Log on to a Windows server machine that has connectivity to the Active Directory Choose a user that is intended for this purpose (ie: has rights to do searches in the tree) Open a Command window with elevated rights (Run as Administrator) Assuming example.com as domain and John Smith with account name john.smith as the user, type the following: > dsquery user domainroot -samid john.smith or > dsquery user domainroot -name John Smith The commands above will return the correct DN for the user in question. The DN should look something like this: CN=John Smith,OU=People,OU=Engineering,DC=example, DC=com Please note, the actual user DN will not look exactly like the above example, but will depend on the structure of the underlying directory information tree in the Active Directory server. On non-server Windows machines the dsquery command can be obtained with installing the Remote Server Administration Tools (RSAT)
87 User base and group base DN Once the bind user DN is obtained, an easy way to get the DNs for the user and group searches is by taking all the DC parts of the user DN and leaving the rest out, which results in the following DN: DC=example,DC=com Please note that using only DC components for the user/group DNs may result in searches to be executed from the top of the directory information tree and potentially slow down AD server responses a lot and thus have an impact on the MetaDefender product's password validation. The rule of thumb here is that the more specific the user /group DN the faster the server response. Taking the above example into consideration: a user search DN of "OU=People,OU=Engineering,DC=example,DC=com" could potentially result in much faster server response than "DC=example,DC=com" and should be preferred assuming all users reside under "OU=People,OU=Engineering, DC=example,DC=com" in the directory information tree. Please also note that users and groups may reside in different parts of the directory information tree, as a consequence applying the same, more specific DN both as USER BASE DN and GROUP BASE DN may cause the MetaDefender product to not find group accounts in the directory information tree. So these DNs should be chosen carefully LDAP attributes Bind username User base and group base DN LDAP user schema settings Example LDAP group schema settings
88 This page contains tips on how to obtain the BIND USERNAME, the USER BASE DN and GROUP BASE DN attributes, the LDAP USER SCHEMA SETTINGS and the LDAP GROUP SCHEMA SETTINGS when creating an LDAP type user directory. Normally a domain administrator should provide these values. The BIND USERNAME, the USER BASE DN and GROUP BASE DN attributes must be expressed using a valid LDAP syntax
89
90 Bind username Normally an LDAP administrator should provide these values, however there is a way to get the BIND USERNAME as an LDAP DN, that is needed for the product to do searches in the directory information tree. To get this information, there is, however, some information about the LDAP tree, that must be known in advance: LDAP property Notes Example DN of the LDAP tree node that has the bind user as a child. This will be the base for the search. If selected improperly then the search may be very slow or won't find the appropriate user. ou=users,dc=test Attributes and their values that uniquely identify the bind user account. These will be used as filter conditions to find the proper user. uid=bind To find the bind user, perform the following steps: 1. Log on to a Windows machine that has connectivity to the LDAP server 2. Choose a user that is intended for this purpose (ie: has rights to do searches in the tree)
91 3. 4. Open the LDP.exe tool with elevated rights (Run as Administrator) Assuming the example properties above are correct, do the following search: The search above will return the attributes for the user in question: The DN should look something like this: cn=bind,ou=users,dc=test
92 Please note, the actual user DN will most probably look completely different than the above example, as it depends on the structure of the underlying directory information tree in the LDAP server. On non-server Windows machines the LDP.exe tool can be obtained with installing the Remote Server Administration Tools (RSAT). User base and group base DN Once the bind user DN is obtained, an easy way to get the DNs for the user and group searches is by taking all the DC parts of the user DN and leaving the rest out. Using the examples above the result DN will be the following: dc=test Please note that using only DC components for the user/group DNs may result in searches to be executed from the top of the directory information tree and potentially slow down the LDAP server responses a lot and thus have an impact on the MetaDefender product's password validation. The rule of thumb here is that the more specific the user/group DN, the faster the server response is. Please also note that users and groups may reside in different parts of the directory information tree, as a consequence applying the same, more specific DN both as USER BASE DN and GROUP BASE DN may cause the MetaDefender product to not find group accounts in the directory information tree. So these DNs should be chosen carefully. LDAP user schema settings Similarly to the search in appropriate values. Bind username, we can search for users and determine the

93 Example 1. Let's assume the following search is executed: 2. That gives the following result: 3. The LDAP USER SCHEMA SETTINGS may be the following: User schema setting LDAP attribute USER OBJECT CLASS user
94 User schema setting LDAP attribute USER ACCOUNT ATTRIBUTE uid or samaccountname USER ATTRIBUTE mail USER DISPLAY NAME ATTRIBUTE cn LDAP group schema settings Similarly to the search in the appropriate values. LDAP user schema settings, we can search for users and determine 3.5 Logging MetaDefender ICAP Server has wide variety of options to configure logging. Log settings are in the configuration files or in the Windows Registry. To see more details about log configuration see the following pages: Configuration Debug logging Web Management Console logs Logging traffic of bad requests Configuration Logging configuration To configure the log outputs and levels, consult the MetaDefender ICAP Server configuration file section. Linux log rotation The installer configures the logrotate service to rotate MetaDefender ICAP server log files. Configuration file is located in: /etc/logrotate.d/mdicapsrv
95 The default configuration will rotate daily and store the last 30 days. If the log file path is modified, the logrotate config file should be updated as well. The new log settings will be used after a service restart or a HUP signal Debug logging Debug logging can be used to identify issues with connections. It provides debug level details for each connections as well as the time each step took (e.g. parsing time, scan time, response time). It also tracks the number of active connections. Important notes Step-by-step guide Windows Enable debug logging Disable debug logging Linux (CentOS syntax) Enable debug logging Disable debug logging Important notes Debug logging is not designed to be constantly enabled. It should only be used for investigating issues for short periods of time. Keeping it enabled permanently may impact performance. If running for too long, the log file can become huge and significantly reduce the available disk space. In each case below, both of logfile and loglevel must be set or none of them
96 Step-by-step guide Windows Enable debug logging Perform the following steps to enable debug logging: 1. Make sure MetaDefender ICAP Server is stopped > net stop mdicapsrv Open the Windows Registry with regedit. Go to the HKEY_LOCAL_MACHINE\SOFTWARE\OPSWAT\ICAP Server\logger entry Add or modify the following entries with the following values: a. b. loglevel: debug wineventlog_level: debug Close the registry editor Start MetaDefender ICAP server > net start mdicapsrv Disable debug logging Perform the following steps to disable debug logging: 1. Make sure MetaDefender ICAP Server is stopped > net stop mdicapsrv Open the Windows Registry with regedit. Go to the HKEY_LOCAL_MACHINE\SOFTWARE\OPSWAT\ICAP Server\logger entry Add or modify the following entries with the following values: a. loglevel: info
97 b. wineventlog_level: info Close the registry editor Start MetaDefender ICAP server > net start mdicapsrv Linux (CentOS syntax) Enable debug logging Perform the following steps to enable debug logging: 1. Make sure MetaDefender ICAP Server is stopped # service mdicapsrv stop Edit /etc/mdicapsrv/mdicapsrv.conf Add or modify the following entry under the [logger] section with the following value: a. loglevel: debug Save and close the configuration file Start MetaDefender ICAP server # service mdicapsrv start Disable debug logging Perform the following steps to enable debug logging: 1. Make sure MetaDefender ICAP Server is stopped # service mdicapsrv stop Edit /etc/mdicapsrv/mdicapsrv.conf Add or modify the following entry under the [logger] section with the following value: a. loglevel: info
98 4. 5. Save and close the configuration file Start MetaDefender ICAP server # service mdicapsrv start Web Management Console logs The MetaDefender ICAP Server Web Management Console and REST interface is hosted by the nginix web server. Web Management Console and REST interface logs are written by nginx. Linux On Linux nginx logs to syslog. For details about syslog configuration see your distribution's manual. Windows Let us assume that MetaDefender ICAP Server is installed in: C:\Path\To\Metadefender ICAP Server In this case on Windows nginx logs to the following file: C:\Path\To\Metadefender ICAP Server\nginx\nginx_error.log Logging traffic of bad requests Important notes Windows Enable logging raw TCP traffic Disable logging raw TCP traffic Linux (CentOS syntax) Enable logging raw TCP traffic Disable logging raw TCP traffic
99 Logging raw TCP traffic can be used to identify issues with bad requests. It provides debug level details for requests that were refused by ICAP Server's request parser due to syntax errors. Important notes Logging raw TCP traffic is not designed to be constantly enabled. It should only be used for investigating issues for short periods of time. Keeping it enabled permanently may impact performance. If running for too long, the log database can become huge and significantly reduce the available disk space. Raw TCP traffic logs may contain sensitive or private information in a clear-text format. Step-by-step guide For configuration details see MetaDefender ICAP Server configuration file. Windows Enable logging raw TCP traffic Perform the following steps to enable traffic logging: 1. Make sure MetaDefender ICAP Server is stopped > net stop mdicapsrv Open the Windows Registry with regedit. Go to the HKEY_LOCAL_MACHINE\SOFTWARE\OPSWAT\ICAP Server\logger entry Add or modify the following entry with the following value: a. capture_traffic: 1 4. Close the registry editor 5. Start MetaDefender ICAP server
100 > net start mdicapsrv Disable logging raw TCP traffic Perform the following steps to disable traffic logging: 1. Make sure MetaDefender ICAP Server is stopped > net stop mdicapsrv Open the Windows Registry with regedit. Go to the HKEY_LOCAL_MACHINE\SOFTWARE\OPSWAT\ICAP Server\logger entry Delete or modify the following entries with the following values: a. capture_traffic: Close the registry editor Start MetaDefender ICAP server > net start mdicapsrv Linux (CentOS syntax) Enable logging raw TCP traffic Perform the following steps to enable traffic logging: 1. Make sure MetaDefender ICAP Server is stopped # service mdicapsrv stop Edit /etc/mdicapsrv/mdicapsrv.conf Add or modify the following entry under the [logger] section with the following value: a. capture_traffic: 1 4. Save and close the configuration file 5. Start MetaDefender ICAP server
101 # service mdicapsrv start Disable logging raw TCP traffic Perform the following steps to enable traffic logging: 1. Make sure MetaDefender ICAP Server is stopped # service mdicapsrv stop Edit /etc/mdicapsrv/mdicapsrv.conf Delete or modify the following entry under the [logger] section with the following value: a. capture_traffic: Save and close the configuration file Start MetaDefender ICAP server # service mdicapsrv start 3.6. Internet connection MetaDefender ICAP Server requires internet connection for online license activation. Proxy configuration Linux Set variable https_proxy in file /etc/default/mdicapsrv. Windows Under Windows use the netsh tool to set the proxy, e.g.: netsh winhttp set proxy <ADDRESS> In some cases setting the proxy with netsh is not sufficient. In that case set the proxy by starting Internet Explorer with SYSTEM rights and configure the proxy in the settings. To do this please follow this article
102 You might need to configure Windows proxy to bypass local addresses if you can't access Web Management Console from the host itself. Consult netsh documentation for additional configuration options. 3.7 Other settings Global settings Global settings may be configured under Settings > Global settings. The following properties are available for configuration: 1. USE PERSISTENT CONNECTIONS: When this options is enabled the MetaDefender ICAP Server keeps the connections open, so that they can be reused for several requests. 2. ENABLE PERMISSIVE PARSING: by default MetaDefender ICAP Server verifies requests strictly against the syntax specified in RFCs. If this option is enabled, then the parser is more permissive: e.g. space characters will be allowed in request URLs
103 Data retention Data retention settings may be configured under Settings > Data retention. The following properties are available for configuration: 1. ICAP history clean up: ICAP history records under Dashboard > ICAP history will be retained for the time configured here. a. b. OFF: Switch off automatic clean up. 1 HOUR.. 12 MONTHS: ICAP history records are automatically deleted after reaching the age specified by the configuration value. 2. Config history clean up: audit records under Dashboard > Config history will be retained for the time configured here. a. OFF: Switch off automatic clean up. b. 1 HOUR.. 12 MONTHS: audit records are automatically deleted after reaching the age specified by the configuration value
104 3.8 Customizing the block page Replacing the default block page ICAP Server block messages Example Default block page source code When a request is blocked for some reason then a block page is displayed that by default looks as follows (the actual blocking reason message may differ): This page can be completely replaced using a custom block page. Replacing the default block page To replace the default block page create a HTML file with the custom content according to the following: Operating system Path Default path Owner Permissio Local Service Read
105 Operating system Path Default path Owner Permissio Windows <Installation folder> C:\Program or \data\block_page. Files\Metadefender Windows html ICAP Server Server\data\block_page. html Linux <Data folder> /var/lib/mdicapsrv mdicapsrv: r-- (400 (RHEL / block_page.html /block_page.html mdicapsrv CentOS / Debian / Ubuntu) The default block page is not represented as a file in the file system. If the above file exists, then the default block page is overridden. ICAP Server block messages To display ICAP Server block messages in the custom page include the following token at the desired position in the page: %%%icap_block_message%%% This token will be replaced by the appropriate ICAP Server block message. Example The following example is the source code of a simple custom page that displays the ICAP Server messages only with no formatting at all: <!doctype html> <html> <body> %%%icap_block_message%%% </body> </html>

106 It renders a very simple page that looks like this: Default block page source code The default lock page's source code can be reused to create a customized one. Default block page source code <!doctype html> <html> <head> <title>metadefender ICAP server - File blocked</title> <style> body {font-family:arial, Sans-serif;color:#333;background-color: #ede9e3;margin:0;padding:0;} #stripe {height:10px;background:#00a6dd;} #error {width:678px;background:#fff;-moz-border-radius:7px;borderradius:7px;box-shadow:0 0 3px rgba(68,68,68,0.4);border:1px solid #a69f96;margin:50px auto 0;padding:50px;word-wrap:break-word;} #error h2 {margin-top:0;color:#00a6dd;font-size:200%;} #error p {margin:0 0 50px;}
107 #metascan {font-size:70%;border-top:1px solid #e0e0e0;color: #808083;padding-top:20px;margin-bottom:0!important;} #metascan a {color:#808083;text-decoration:underline;} </style> </head> <body> <div id="stripe"></div> <div id="error"> <h2>file blocked</h2> <p>%%%icap_block_message%%%</p> <p id="metascan">your administrator is using OPSWAT s <a href=" target="_blan k">metadefender Core technology</a> to scan downloads with multiple anti-malware engines. See additional ways MetaDefender Core can be used by trying the <a href=" /products/metadefender/client" target="_blank">metadefender Client</a> demo for scanning endpoint processes and files or the < a href=" target="_blank">metadefende r.com</a> file scanning service.</p> </div> </body> </html> 3.9 Server profiles Server profiles under Inventory > Server profiles help to organize services of one or more servers based on the service type. For example in case of security rules one or more MetaDefender Core servers are needed to scan requests. For this purpose a server inventory may be created collecting all available Core servers. Then at the rule itself simply this server profile needs to be selected. Currently MetaDefender ICAP Server uses and allows MetaDefender Core type server profiles only
108 Properties Property Description Server profile type Service type Supported service types are: 1. MetaDefender Core Profile name Unique identifier of the server profile Server specifications (URI) Service specifications in URI syntax. Multiple server specification may be added to a server profile. At least one server specification must exist in a server profile. Only the following URI components are used: scheme host port Example: In case of MetaDefender Core server profile types the very same URI will be used for the URLs of View scan details links on the Request details page under Dashboard > ICAP history. If the URI specified here is not reachable on the machine where the actual browsing of the Web Management Console happens (e. g. it is and browsing happens on an other machine) then the View scan details link will be broken. See also the Request details section in 4.1. Dashboard. Server preference Preference order in which servers are addressed for services Possible values: 1. FAILOVER: high availability order; first successfully addressed server in the list will do the service
109 Property Description 2. ROUND ROBIN: load balancing order; next successfully addressed server in the list will do the service Certificate based client authentication If the destination server requires certificate based client host authentication then this checkbox must be marked MetaDefender ICAP Server will use the actual deployment's digital ID, for details see 3.2 Configuring TLS Property validation Some of the server profile properties have cross-dependencies and as so must match. Server profile type Server specifications (URI) allowed schemes MetaDefender Core http https Server specifications (URI) scheme Transport level encryption allowed values http N/A https N/A If https scheme is specified then the HTTP connection is established over TLS. Testing the configuration Clicking the TEST button will test the configuration. The test consists of two steps: 1. Syntactical validation of the values 2. Connection test
110 If the test fails, then the server profile can not be added. Syntactical validation The correctness of the provided values is validated: PROFILE NAME must be unique The SERVER SPECIFICATIONS (URI) values must conform with the URI syntax with the restriction that only the scheme, host and port values are allowed Cross dependencies must match (see the Property validation section) Connection test If the syntactical validation pass, then each server specification is tested for a successful connection. Limitations Currently the connection is tested without using TLS (when configured at all) MetaDefender Core specific inventory properties Query parameters Addresses specified in CORE URI ADDRESS may contain optional query parameters for specific use cases. Syntax With the optional query parameters the Core URI is formatted as follows: URI schema with query parameter scheme://host:port[?query]
111 Valid parameters Name Value Use case Example apikey 32 characters long API key of an account that belongs to the role the Core side rule is restricted to. Core side rules may be restricted to roles (for details see Security rule configuration in MetaDefender Core v4 documentation). Security can use these rules if: URI example with query parameter A user is created on Core, a. That belongs to the role the Core side rule is restricted to; b. And the user has an API key generated. In Security the Core is added to a server profile : 8058? apikey=24 a586f3023 b4309b65a a d 6c6 a. And the API key above is specified in the Core URI. Rule Right after the CORE URI ADDRESS has been specified, and is valid (connection can be established) the RULE drop-down list is populated with the available rules on the corresponding MetaDefender Core instance

112 The desired security rule may be selected from the configured Core's available rules. Default is Automatic. Please note that if the security rules on the configured MetaDefender Core under Policy > Security rules are limited to a specific user agent other than mdicapserver or restricted to specific roles other than what is specified in the server URI, then those security rules will not be available in MetaDefender ICAP Server. MetaDefender ICAP Server identifies itself on MetaDefender Core with the user agent mdicapserver

113 On the example below the Core rule File process with Kiosk and File process with SFT are not listed in ICAP Server as those rules are restricted to user agent kiosk and sft respectively

114 Otherwise all unrestricted core rules are in the list
115 4. Operating MetaDefender ICAP Server 4.1. Dashboard 4.2 Security rules 4.3 ICAP response headers 4.4 Web Proxy Integrations 4.5 Other Integration 4.6 HTTP Header Handling 4.1. Dashboard MetaDefender ICAP Server's Dashboard gives overview of ICAP Server status. Note that the default refresh rate of displayed information is 1 minute
116 Overview page The Overview page shows information on Number of blocked requests Number of processed requests License information Number of processed requests chart Clicking the Settings icon the following properties can be customized: Refresh rate (default: 1 minute) Time-span displayed (default: 24 hours) ICAP history The ICAP history shows information on ICAP events in the system. On the ICAP history page you can search for ACTION, RESULT, HTTP URI, CLIENT IP, PROXY IP, HOST, CORE RULE or ICAP RULE. Also you can filter the list by ACTION. Due to usability reasons the ICAP history list is not updated automatically. Click the Refresh icon to update. The RESULT value Undisclosed means that MetaDefender Core did not return a scan result for this entry. The reason for this value appearing in ICAP History is that MetaDefender Core is configured to provide OVERALL RESULTS ONLY for VISIBILITY OF SCAN RESULTS in the security rule that matches ICAP file scans. Request details Clicking an ICAP history entry displays public details (that do not require authentication on MetaDefender Core) about the scan. The View scan details link points to the scan details on the MetaDefender Core instance where the actual scanning took place. The View scan details link works with MetaDefender Core version (or later) only
117 For MetaDefender Core versions earlier than the Dashboard is opened. To generate the View scan details links, MetaDefender ICAP Server stores the actual Core IP where the current request's files were scanned. As a result the View scan details links continue to work properly even after a new Core is configured instead the old one. View scan details links stop working after the referenced Core is uninstalled or migrated to a new address. Config history The Config history shows information on configuration changes made via the Web Management Console. Changes made directly in the configuration file are not reflected here. On the Config history page you can search for USER, TYPE, CHANGE TYPE, PARAMETER, OLD VALUE or NEW VALUE. Also you can filter the list by DATE. Due to usability reasons the Config history list is not updated automatically. Click the Refresh icon to update Search Value only search By default it is possible to search for a certain value among the values of all columns
118 Example List ID RESULT STATUS 1 ALLOWED BLOCKED 2 BLOCKED COMPLETED Search results Search term Matching rows BLOCKED 1, 2 Lists with value only search The following lists in ICAP Server implement value only search: 1. Dashboard > Config history Full text search (FTS) MetaDefender ICAP Server implements the SQLite MATCH feature of SQLite FTS3 and FTS4 Extensions (see section 3. Full-text Index Queries). In addition to the capabilities the value only search provides, using the MATCH feature makes it possible to search for certain values in certain fields. Example List ID RESULT STATUS 1 ALLOWED BLOCKED 2 BLOCKED COMPLETED
119 ID RESULT STATUS 3 NOT BLOCKED COMPLETED 4 BLOWN BLOCKED Search results Search term Matching rows BLOCKED 1, 2 RESULT:BLOCKED 1, 3 RESULT:^BLOCKED 1 RESULT:BLO* 1, 3, 4 RESULT:^BLO* 1, 4 For a more complete reference of possible search terms see /fts3.html. Lists with FTS The following lists in ICAP Server implement full text search: 1. Dashboard > ICAP history 4.2 Security rules MetaDefender ICAP Server security rules can be configured under Policy > Security rules. Security rules overview Request filter Filter parts Host IP/Domain conditions
120 Client IP conditions Wildcard matching examples Generic conditions Header references Security policy Scan settings Advanced settings Rule order First match policy No match policy Security Rule Management Default security rule Functions Use case examples Enable anti-malware test site for test clients Security rules overview Security rules help to assign security policies to specific requests. A security rule consists of two parts: Request filter Security policy definition Request filter Based on header values, request filters select requests on which the assigned security policy will be applied. Request filters can be set up on the Request filters tab while creating or editing a security rule. Filtering can be based on ICAP, HTTP or custom headers. The following parameters must be provided to create a filter condition: Header name: name of the header to look up. Match type: the value of the referred header must be equal to, contain, start with, or end with the provided value. Value: the value to match
121 If a header with the referred header name does not exist in the request, then this condition won't match. Filter parts A filter may consist of three parts: Host IP/Domain conditions Client IP conditions Generic conditions There is AND relation among the above parts of the filter
122 Host IP/Domain conditions Header name Match type Host Wildcard matching (glob) The Host header usually contains the requested URI. There is OR relation among entries in Host IP/Domain conditions. Client IP conditions Header name Match type X-Client-IP Wildcard matching (glob) The X-Client-IP header usually contains the IP of the machine from which the request was originally sent. There is OR relation among the Client IP conditions. Wildcard matching examples Example pattern Matches Does not match * , , [ab]cd acd, bcd cd, ecd abc abc cba, xyz Generic conditions Using generic conditions, filters can be set up to any headers
123 As an example Host IP/Domain and Client IP conditions could also be set up as generic conditions. There is AND relation among the generic conditions. Header references Filtering can be based on ICAP, HTTP or even custom headers. For an incomplete reference of possible headers consult the following sources: HTTP IANA Wikipedia ICAP: IETF Custom: Initially, it was recommended to begin naming custom headers with X-, however, according to RFC 6648, this recommendation has since been deprecated. Security policy A security policy consists of the SCAN settings and the ADVANCED settings. Scan settings The scan policy can be set up on the Scan tab while creating or editing a security rule. The following options are available: 1. ALLOW SCAN: enable or disable scanning of requests. Default is enabled. a. b. METADEFENDER CORE: MetaDefender Core type server profile to which requests are sent for scanning. Default is None. SCAN TIMEOUT: ICAP Server will try to get the scan results for the timeout defined here. If the timeout elaplses then the request gets blocked. Default is 0. i. ii. Valid range: (zero) means that there is no timeout: ICAP Server will wait for the results for any long time. When scanning is disabled, all requests will be accepted
124 Advanced settings Some default security behaviors of the system can be modified on the Advanced tab while creating or editing a security rule. The following options are available: 1. OVERRIDE SCAN RESULTS CLASSIFIED AS ALLOWED: enable or disable overriding the following default security behaviors all together. a. b. c. d. e. MULTIPART PARSING ERROR: Requests with multipart content are parsed for boundary and control header correctness. By default requests with mutlipart parsing error are rejected by MetaDefender ICAP Server. Enabling this option will accept such requests. (For further details about multipart content see RFC 1341 and RFC 2388.) DECODING ERROR: MetaDefender ICAP Server supports gzip, deflate, brotli and base64 encoding of request contents. By default requests with encoding error are rejected. Enabling this option will accept such requests. NOT SUPPORTED DECODING: MetaDefender ICAP Server supports gzip, deflate, brotli and base64 encoding only. By default requests with any other encoding are rejected by default. Enabling this option will accept such requests. CORE BUSY: By default MetaDefender ICAP Server rejects requests when none of the Cores of the applied server profile can accept the scan requests due to overload. Enabling this option scanning will be skipped and the request will be accepted when all Cores are busy. CORE RULE FILE SIZE LIMIT EXCEEDED: By default MetaDefender Core blocks a file that exceeds the file size limit configured for the Core rule (see Analysis workflow configuration and Security rule configuration chapters in MetaDefender Core v4 User Guide) applied for the ICAP Server security rule. Enabling this option results the oversized request to bypass scanning. Rule order Several security rules can be created that may target different requests from different hosts going to different URL. However, care must be taken how these rules are set up and ordered, as there is a first match and a no match policy. Specific rules should come first while generic rules should go at last
, then the request will be rejected.")
125 Order of evaluation of security rules for a match First match policy If there are more matching rules in the system, then the request will be accepted or rejected according to the security policy of the first matching rule in the list. No match policy If there is no matching rule in the system (or no rule at all), then the request will be rejected. The goal of the default security rule is to have a rule in the system that matches in the end. Deleting all security rules from the system results all requests being blocked. Security Rule Management The Security Rule Management screen lists the existing security rules in the system
126 Default security rule After installation a default security rule is created with the following parameters: Name Request filters Allow scan Applied core rule Advanced Default none Yes Automatic none The Default security rule matches any request. It will enforce scanning with automatically selected Core rule. It does not override any default advanced setting. Functions Besides listing existing security rules the Security Rule Management screen provides the following functions: Add new security rule Clone an existing security rule
127 Modify (and view) existing security rule's properties Delete existing security rules Use case examples Enable anti-malware test site for test clients The site is created to test anti-malware solutions. Under the URI eicar.org/download/eicar.com.txt there is a malware test file that is forbidden by MetaDefender ICAP Server by default: $ wget :06: txt Connecting to : connected. Proxy request sent, awaiting response Forbidden :06:03 ERROR 403: Forbidden. Create the following rule (in the actual test the client browser, the proxy and the MetaDefender ICAP Server is on the same machine, that is the reason for the Client IP setting ):
128 Filters Scan settings Place it before the Default rule. Now the request is served: $ wget :15: txt Connecting to : connected. Proxy request sent, awaiting response OK Length: 68 [application/octet-stream] Saving to: eicar.com.txt.3 100%[======================================>] K /s in 0s :15:56 (20.2 MB/s) - eicar.com.txt.3 saved [68/68]
129 4.3 ICAP response headers Besides the standard ICAP headers following response headers are used by the MetaDefender ICAP Server: Header name Description Example Note X- MetaDefender specific X-Blocked-Reason: It is available only if Blocked- custom header. Contains Infected the content was Reason the blocking reason of the scanned and some content. violations were found. X-ICAP- Contains the applied X-ICAP-Profile: Proxy It is available only if Profile workflow's name. the file was scanned. X- Contains the one word X-Response-Info: This header is Response- description of the action the Allowed available in all Info ICAP server applied on the X-Response-Info: responses sent by request. Blocked the ICAP server. X-Response-Info: Options X- Contains the blocking X-Response-Desc: The header is Response- reason. Infected available in all Desc X-Response-Desc: "blocked" responses. Encrypted Archive In case of the content was scanned and some violations were found, the returned string is equivalent to X-Blocked- Reason's value. X-Virus-ID
130 Header name Description Example Note Contains a short description X-Virus-ID: EICAR Test The header is of the threat that was found String available only if the in the content. If multiple X-Virus-ID: Encrypted content was threats were found, only the Archive scanned and some first one is returned. violations were found. X- Contains the description of X-Infection-Found: The header is Infection- the threat that was found in Type=0; Resolution=0; present only if the Found the content. If multiple Threat=EICAR Test content was threats were found, only the String; scanned and some first one is returned. X-Infection-Found: violations were The value is a semicolon separated list with three parameters: Type=2; Resolution=0; Threat=Encrypted Archive; found. Type 0: Infection has been found 2: Container violation has been found Resolution: 0: The suspicious content was not repaired Threat: Threat name X- Contains the detailed X-Violations-Found: 2 The header is Violations- description of the violations test.zip present only if the Found that were found. If the EICAR Test String content was scanned content was an 0 scanned and some archive, the scan results for 0 violations were the contained files too are \eicar.txt found
131 Header name Description Example Note listed. If multiple threats were found for a single file, only the first one is returned. EICAR Test String 0 0 The structure of the header value is the following: The first line contains the number of the reported violations. The following lines contain the details. Filename Threat name ProblemID (currently 0 returned for all threats) ResolutionID: 0: File was not repaired 1: File was repaired 2: Violating part was removed X-Include Contains the list of X-Include: X-Client-IP The header is requested headers, that the present only in ICAP clients should add to Options responses. the requests, if the information is available. 4.4 Web Proxy Integrations MetaDefender Core can be integrated with any client that implements the standard ICAP interface, via the MetaDefender ICAP Server. MetaDefender ICAP Server is compatible with any client that implements the standard ICAP interface. Moreover, MetaDefender ICAP Server supports ICAP clients, that were tested by the development team. The supported ICAP clients are listed in section Supported ICAP Clients below
132 ICAP URL Mode URL Example Request Modification Mode (REQMOD, OPTIONS) icap://<ip address>:<port> /OMSScanReq-AV e.g, icap:// :1344 /OMSScanReq-AV Response Modification Mode (RESPMOD, OPTIONS) icap://<ip address>:<port> /OMSScanResp-AV e.g, icap:// :1344 /OMSScanResp-AV Supported ICAP Clients ARA network JAGUAR BlueCoat ProxySG F5 BIG IP McAfee Web Gateway Squid FortiGate ARA network JAGUAR5000 Configuration via Web-based manager In your browser log into Jaguar's Web Administration Go to the Configuration page From the menu on the left, click on Others under the Protocol group From the top menu, select ICAP Make sure that Send Client Address checkbox is checked 6. Apply changes


133 Click on the ICAP Profile button on the bottom of the page Add a new profile Type in "icap://<ip>:<port>/omsscanreq-av" to Vectoring Point 1 Type in "icap://<ip>:<port>/omsscanresp-av " to Vectoring Point 3 Apply changes Scanning HTTPS Content Go to the Configuration page From the menu on the left, select SSL under the Protocol group 3. Check the Enable SSL checkbox
 - Blue Coat is reusing connections to the ICAP server, so it is highly recommended to enable persistent connections on")
134 Check the Support SSL intercepting checkbox Upload root certificate Upload root key Apply changes and restart the device BlueCoat ProxySG Prerequisite 3. Configuring MetaDefender ICAP Server Enable persistent connections (recommended) - Blue Coat is reusing connections to the ICAP server, so it is highly recommended to enable persistent connections on the ICAP side or the Blue Coat might detect some ICAP connection drop errors under high load. ProxySG Management Console The ProxySG configuration should be done from the ProxySG Management Console interface. Below is the minimum configuration required for MetaDefender ICAP Serverscan ICAP integration with ProxySG. Please refer to the ProxySG manual for advanced proxy configuration. Open a web browser and load the ProxySG Management Console. (Please refer to the ProxySG manual for details about how to open the ProxySG Management Console.) The ProxySG configuration should be done from the ProxySG Management Console interface. Below is the minimum configuration required for MetaDefender Core ICAP integration with ProxySG. Please refer to the ProxySG manual for advanced proxy configuration. Open a web browser and load the ProxySG Management Console. (e.g. address>:8082 Please refer to the ProxySG manual for details about how to open the ProxySG Management Console.)
135 Disable Automatic Cache Refresh Click on the 'Configuration' tab, and navigate to 'Proxy Settings'->'HTTP Proxy' Select the 'Freshness' tab and select the 'Disable refreshing' option Select the 'Acceleration Profile' tab and uncheck the following options a. b. c. d. Pipeline embedded objects in client request Pipeline redirects for client request Pipeline embedded objects in prefetch request Pipeline redirects for prefetch request 4. Click 'Apply' to save these settings Adding REQMOD Service (Upload Mode) Within the 'Configuration' tab, navigate to 'External Services'->'ICAP' Click 'New' Enter a service name for the Metascan service (in this example we use 'MetascanReqmod') and click 'OK' In the services list, select 'MetascanReqmod' and click 'Edit' Update the following values a. In ICAP Service i. ii. Set Service URL to 'icap://<metascan Server>/OMSScanReq-AV' Select 'Use vendor's "virus found" page' b. In ICAP Service Ports i. ii. Check 'This service supports plain ICAP connections Set the 'Plain ICAP port' value to your Metascan's ICAP port (1344 by default) c. In ICAP v1.0 Options i. ii. Check 'Request modification' Check 'Send Client address' 6. Click 'OK' 7. Click 'Apply' to save the configuration
136 Adding RESPMOD Service (Download Mode) Within the 'Configuration' tab, navigate to 'External Services'->'ICAP' Click 'New' Enter a service name for the Metascan service (in this example we use 'MetascanRespmod') and click 'OK' In the services list, select 'MetascanReqmod' and click 'Edit' Update the following values a. In ICAP Service i. ii. Set Service URL to 'icap://<metascan Server>/OMSScanResp-AV' Select 'Use vendor's "virus found" page' b. In ICAP Service Ports i. ii. Check 'This service supports plain ICAP connections Set the 'Plain ICAP port' value to your Metascan's ICAP port (1344 by default) c. In ICAP v1.0 Options i. ii. Check 'Response modification' Check 'Send Client address' Click 'OK' Click 'Apply' to save the configuration Create MetaDefender REQMOD Policy Within the 'Configuration' tab, navigate to 'Policy'->'Visual Policy Manager' Click the 'Launch' button In the 'BlueCoat Visual Policy Manager' window, navigate to 'Policy'->'Add Web Content Layer' Enter a layer name (in this example we use 'MetaDefender ICAP Server ReqMod') and click 'OK' In the newly created 'MetaDefender ICAP Server ReqMod' tab, right click on 'Use Default Caching' and choose 'Set...' 6. In the 'Set Action Object' window, click 'New' and select 'Set ICAP Request Service...'
137 7. In the 'Add ICAP Request Service Object' window, set the following values a. b. Set 'name' to 'MetaDefender ICAP Server Request Service' In 'Available services', select 'MetascanReqMod' and click 'Add' 8. Click 'OK' to finish and 'Apply' to save Create MetaDefender RESPMOD Policy Within the 'Configuration' tab, navigate to 'Policy'->'Visual Policy Manager' Click the 'Launch' button In the 'BlueCoat Visual Policy Manager' window, navigate to 'Policy'->'Add Web Content Layer' Enter a layer name (in this example we use 'MetaDefender ICAP Server RespMod') and click 'OK' In the newly created 'MetaDefender ICAP Server RespMod' tab, right click on 'Use Default Caching' and choose 'Set...' In the 'Set Action Object' window, click 'New' and select 'Set ICAP Response Service...' In the 'Add ICAP Response Service Object' window, set the following values a. b. Set 'name' to 'MetaDefender ICAP Server Response Service' In 'Available services', select 'MetascanRespMod' and click 'Add' 8. Click 'OK' to finish and 'Apply' to save Configure Bluecoat SSL refer to Configure Bluecoat SSL Bypassing MetaDefender ICAP Server temporarily This guide describes how to enable and disable ICAP server on BlueCoat proxy. This documentation is assuming that MetaDefender ICAP Server is already configured and working properly. Enable MetaDefender ICAP Server To enable MetaDefender ICAP Server on BlueCoat: 1. Open the BlueCoat Management Console
 Click")
138 Go to "Configure" tab > "Advanced configuration" button. In the left side menu, go to "Policy" > "Visual Policy Manager" Click "Launch" In the VPM window, right click on the service you want to enable tab (typically "ICAP Respmod" or "ICAP Reqmod") Click "Enable layer". The tab color should turn black. 7. Click "Install policy Disable MetaDefender ICAP Server To disable ICAP server on BlueCoat: Open the BlueCoat Management Console. Go to "Configure" tab > "Advanced configuration" button. In the left side menu, go to "Policy" > "Visual Policy Manager" Click "Launch" In the VPM window, right click on the service you want to disable tab (typically "ICAP Respmod" or "ICAP Reqmod") Click "Disable layer". The tab color should turn red. 7. Click "Install policy"
. See: Disable BlueCoat caching Step-by-step guide Use the following syntax to check if an object is in cache: https://<proxyip>:8082/ce/info/<protocol name, e.g. http>/<url without the protocol specification, e.")
139 Check cached objects properties This article describes how to check if an object is cached by BlueCoat and its current properties. Prerequisites ICAP is setup with BlueCoat. BlueCoat caching is enabled (default). See: Disable BlueCoat caching Step-by-step guide Use the following syntax to check if an object is in cache: name, e.g. http>/<url without the protocol specification, e.g. without Example: The check if the following object is in the cache: Enter the following in the browser: /docviewer.css If the object is in the cache, you will obtain a table providing details on the cached object such as: Related articles Error rendering macro 'contentbylabel' : parameters should not be empty
140 Configure Bluecoat SSL Enabling Bluecoat To Intercept SSL traffic By default SSL (HTTPS) connections are not intercepted by Bluecoat and therefore data in them are not scanned by the MetaDefender ICAP Server. If you would like to scan files which were sent using secure connection, then you can optionally configure Bluecoat to decrypt SSL connections. How To Configure Please refer to Bluecoat documentation. Limitations If the ICAP server is not connected directly to Bluecoat or it is not in a private network, then the connection between Bluecoat and ICAP won't be secure anymore and the decrypted data could be in danger. ( /SGOS%20Administration%20Guide_1.pdf "Securing access to an ICAP Server") Valid SSL certificates are needed for Bluecoat and user experience could be altered by certification notifications. How to overcome certificate issues When creating a keyring and certificate explained in the Bluecoat documentation please give attention to that the Common name "must match the ProxySG name or IP address that the client expects" After the keyring and the certificate is ready go to Statics Advanced SSL Download a ProxySG Certificate as a CA certificate in ProxySG Management Console Select the previously created certificate and download/install it to the browser in use This certificate should be set under Proxy Settings SSL Proxy and under the SSLInterception which was created during configuring SSL interception Data Trickling Overview Blue Coat ProxySG appliances implement Data Trickling to improve the user experience during ICAP scanning. Internet Content Adaptation Protocol (ICAP) is the protocol used by Blue Coat ProxySG and ProxyAV appliances, as well as some third party partner appliances, to perform
141 scanning of objects to detect viruses, worms, spyware, and Trojans. Data Trickling is a mechanism implemented by Blue Coat ProxySG appliances performing ICAP scanning that slowly delivers, or trickles, data to the client as it is being scanned. By trickling data, users do not experience the timeouts sometimes associated with waiting for large objects to be scanned, or when scanning is delayed by high loads on content servers or upstream bandwidth limitations. How does Data Trickling work? Data Trickling is designed to prevent the timeouts that can sometimes be associated with patience pages. To prevent such timeouts, Data Trickling trickles or transmits at a very slow rate bytes to the client at the beginning of the scan or near the very end. Because the ProxySG appliance begins serving content without waiting for the ICAP scan result, timeouts do not occur. However, to maintain security, the full object is not delivered until the results of the content scan are complete (and the object is determined to not be infected). Two types of Data Trickling are available on Blue Coat ProxySG appliances trickle from start and trickle at end. Trickle from start In trickle from start mode, the ProxySG appliance buffers a small amount of the beginning of the response body. As the ICAP server continues to scan the response, the ProxySG appliance allows one byte per second to the client. After the ICAP server completes its scan, if the object is deemed to be clean (no response modification is required), the ProxySG appliance sends the rest of the object bytes to the client at the best speed allowed by the connection. If the object is deemed to be malicious, the ProxySG appliance terminates the connection and the remainder of the response object. Trickling from the start is the more secure Data Trickling option because the client receives only a small amount of data pending the outcome of the virus scan. Trickle at end In trickle at end mode, the ProxySG appliance sends the response to the client at the best speed allowed by the connection, except for the last 16KB of data. As the ICAP server performs the content scan, the ProxySG appliance allows one byte per second to the client. After the ICAP server completes its scan, if the object is deemed to be clean (no response modification is required), the ProxySG appliance sends the rest of the object bytes to the client at the best speed allowed by the connection. This method is more user-friendly than trickle at start. This is because users tend to be more patient when they notice that 99% of the object is downloaded versus 1%, and are less likely to perform a connection restart. However, network administrators might perceive this method as the less secure method, as a majority of the object is delivered before the results of the ICAP scan
142 Step-by-step guide To enable data trickling: Open the BlueCoat Management Console. Go to "Configuration" tab > "Advanced configuration" button. Enter credentials if prompted. In the Advanced configuration menu, go to "Configuration" tab > "External Services" > "ICAP". Click the "ICAP Feedback" tab. In the "ICAP Feedback for Interactive Traffic" section: a. b. Check "Provide feedback after X seconds" checkbox Set the number of seconds to the time you want to wait for ICAP to respond before starting trickling 8 seconds is a usually a good timing, long enough for average file sizes to be fully scanned by ICAP, short enough for browsers to not timeout before trickling starts. c. Check the "Trickle object data from start" or "Trickle object data at end" depending on the trickling type you want (see "How does Data Trickling work" section). "From start" is the most secure. "At end" is the most user friendly. 7. In the "ICAP Feedback for Non-Interactive Traffic" section: a. b. Check "Provide feedback after X seconds" checkbox Set the number of seconds to the time you want to wait for ICAP to respond before starting trickling 5 seconds is a usually a good timing for non-interactive traffic c. Check the "Trickle object data from start" or "Trickle object data at end" depending on the trickling type you want (see "How does Data Trickling work" section). "From start" is the most secure. "At end" is the most user friendly. More info
143 Disable BlueCoat caching Step-by-step guide To prevent the transmission of stale content or other issues caused by object caching, you can use either cache(no) or bypass_cache(yes) in content policy language (CPL). For a comparison of cache(no) and bypass_cache(yes), see KB1772. This sample provides instructions for disabling object caching for specific URLs by adding a policy rule in the Web Access Layer In the Management Console, select Configuration > Policy > Visual Policy Manger, and then click Launch. From the Visual Policy Manager (VPM) dialog box, select Policy > Add Web Access Layer. The Add New Layer dialog box appears. In the Add New Layer dialog box, name the layer to reflect the purpose of the layer, such as "Web Access Layer (bypass cache)," then click OK. Right click the Destination field and select Set from the drop-down list. In the Set Destination Object dialog box, click New > Request URL, and enter the URL you want to exclude from the cache. Click Add, then OK. Right click on Action and select Set > Bypass Cache. Then, click OK. Click Install policy to apply the new policy. To use CPL code for the same policy rules, add the following CPL code in the local policy file or in a VPM CPL Policy Layer: <Proxy> url.domain=< url> bypass_cache(yes) In the example above, < url> is the URL you want to exclude from caching. Source: Related articles Error rendering macro 'contentbylabel' : parameters should not be empty
 When prompted, enter your user name and password and click \"Ok\".")
144 Process Only Specific File Types Step-by-step guide Open the BlueCoat management console using a web browser (default URL: proxy IP>:8082/) When prompted, enter your user name and password and click "Ok". In the BlueCoat management console, click on the "Configure" tab) 4. On the "Configuration" page, click on the "Advanced configuration" button


145 5. In the management console menu, go to Policy -> Visual Policy Manager. 6. Click "Launch" to start the Visual Policy Manager. 7. In the Visual Policy Manager, click on the tab where you set the ICAP rule you plan to add file type filtering on. In these instructions, the ICAP layer is named "Metascan ICAP RespMod". The tab name on your installation might be different. The window you see should look similar to the screenshot below


146 8. Right click the "Destination" cell of the ICAP rule (line where the "Action" is set to your ICAP service) and click "Set". 9. In the "Set Destination Object", select "New" and click "Apparent Data Type"
 and select the file types you want forwarded to the ICAP server. 4.3.0 147")
147 10. In the "Add Apparent Data Type Object" window, change the "Name" value to whatever you want (optional) and select the file types you want forwarded to the ICAP server

148 11. Click "Ok" twice to get back to the Visual Policy Manager. 12. In the "Visual Policy Manager" window, click "Install policy" to apply the new configuration

149 4.4.3 F5 BIG IP Prerequisite Big-IP Management Console Configuring the F5 BIG IP Appliance Creating a custom client-side ICAP profile Creating a pool of ICAP servers Creating an internal virtual server for forwarding requests to an ICAP server Creating a custom Request Adapt profile Creating a custom HTTP profile Creating a pool to process HTTP traffic Creating an HTTP virtual server for enabling request adaptation Configuring the REQMOD (Request Modification) service Configuring REQMOD and RESPMOD Services Configuring Service Down Actions Bypass ICAP server on service down Transfer content to different pool member Throughput limitation by license The simplest way to integrate MetaDefender ICAP Server with F5 BIG IP is to use the iapps framework of F5. The iapps technology was released in F5 s v11, so the description in this page is more generic
150 For details about the MetaDefender ICAP Server iapp template and about how to use it, see ICAP Server iapp template. Prerequisite 3. Configuring MetaDefender ICAP Server Big-IP Management Console The F5 Big-IP configuration should be done from the F5 Big-IP Management Console interface. Below is the minimum configuration required for MetaDefender ICAP Server integration with F5 Big-IP. Please refer to the F5 Big-IP manual for advanced configuration. Open a web browser and load the Big-IP Management Console. (Please refer to the Big-IP manual for details about how to open the Big-IP Management Console.) MetaDefender Core via MetaDefender ICAP Server can be used to scan all files being uploaded to the F5 BIG IP server with all of the engines in MetaDefender Core to make sure that no malware is able to get to the web servers behind the Big IP server. This guide describes the basic steps to getting MetaDefender ICAP Server working with your F5 BIG IP server. Configuring the F5 BIG IP Appliance The following configuration steps should be done from the F5 BIG IP Management Console interface. The steps below describe the minimum configuration required for MetaDefender ICAP Server integration with F5 BIG IP. Please refer to the F5 BIG IP manual for advanced configuration. 1. Open a web browser and load the BIG IP Management Console. (Please refer to the BIG IP manual for details about how to open the BIG IP Management Console.) Creating a custom client-side ICAP profile You create this ICAP profile when you want to use an ICAP server to wrap an HTTP request in an ICAP message before the BIG-IP system sends the request to a pool of web servers. The profile specifies the HTTP request-header values that the ICAP server uses for the ICAP message.important: You can use macro expansion for all ICAP header values. For example, if an ICAP header value contains ${SERVER_IP}, the BIG-IP system replaces the macro with the IP address of the ICAP server selected from the pool assigned to the internal virtual server. If an ICAP header value contains ${SERVER_PORT}, the BIG-IP system replaces the macro with the port of the ICAP server selected from the pool assigned to the internal virtual server. For example, you can set the URI value in an ICAP profile to icap://${server_ip}:${server_port}/omsscanreq-av


151 1. On the Main tab, click Local Traffic > Profiles > Services > ICAP Click Create. In the Name field, type a unique name for the profile. For the Parent Profile setting, retain the default value, icap. On the right side of the screen, select the Custom check box. In the URI field, type a URI in this format: icap://hostname:port/path. For example, using macro expansion, you can set the URI value to:icap://${server_ip}:${server_port} /OMSScanReq-AV. In the Preview Length field, type a length or retain the default value 0. This value defines the amount of the HTTP request or response that the BIG-IP system offers to the ICAP server when sending the request or response to the server for adaptation. This value should not exceed the length of the preview that the ICAP server has indicated it will accept. 8. Leave empty for "Header From", "Host", "Referer", "User Agent" fields
152 9. Click Finished. After you create the ICAP profile, you can assign it to an internal virtual server so that the HTTP request that the BIG-IP system sends to an ICAP server is wrapped in an ICAP message, according to the settings you specified in the ICAP profile. Creating a pool of ICAP servers You perform this task to create a pool of ICAP servers that perform content adaptation on HTTP requests On the Main tab, click Local Traffic > Pools. The Pool List screen opens. Click Create. The New Pool screen opens. In the Name field, type a unique name for the pool. For the Health Monitors setting, from the Available list, select a monitor other than http(s), and click << to move the monitor to the Active list. From the Load Balancing Method list, select how the system distributes traffic to members of this pool. The default is Round Robin. For the Priority Group Activation setting, specify how to handle priority groups: Select Disabled to disable priority groups. This is the default option. Select Less than, and in the Available Members field type the minimum number of members that must remain available in each priority group in order for traffic to remain confined to that group. 7. Using the New Members setting, add each resource that you want to include in the pool: a. b. c. d. Either type an IP address in the Address field, or select a node address from the Node List. Type a port number in the Service Port field, or select a service name from the list. To specify a priority group, type a priority number in the Priority field. Click Add. 8. Click Finished. The pool of ICAP load balancing servers appears in the Pools list. Creating an internal virtual server for forwarding requests to an ICAP server A virtual server of type internal provides a destination that a standard type of virtual server can use when forwarding HTTP requests slated for ICAP-based content adaptation
153 On the Main tab, click Local Traffic > Virtual Servers. The Virtual Server List screen opens. Click the Create button. The New Virtual Server screen opens. In the Name field, type a unique name for the virtual server. In the Description field, type a description of the virtual server. For example: This virtual server ensures HTTP request modification through the use of the service_name ICAP service.. From the Type list, select Internal. For the State setting, verify that the value is set to Enabled. From the Configuration list, select Advanced. From the ICAP Profile list, select the ICAP profile that you previously created for handling HTTP requests. From the Default Pool list, select the pool of ICAP servers that you previously created. Click Finished. After you perform this task, a standard type of virtual server can forward HTTP requests to an internal type of virtual server. The internal virtual server then sends the request to a pool of ICAP servers, before sending the request back to the standard virtual server for forwarding to the pool of web servers. Creating a custom Request Adapt profile You create a Request Adapt type of profile when you want a standard HTTP virtual server to forward HTTP requests to an internal virtual server that references a pool of ICAP servers. A Request Adapt type of profile instructs the HTTP virtual server to send an HTTP request to a named internal virtual server for possible request modification On the Main tab, click Local Traffic > Profiles > Services > Request Adapt. Click Create. In the Name field, type a unique name for the profile. For the Parent Profile setting, retain the default value, requestadapt. On the right side of the screen, click the Custom check box. For the Enabled setting, retain the default value, Enabled. When you set this value to Enabled, the BIG-IP system forwards HTTP requests to the specified internal virtual server for adaptation. 7. From the Internal Virtual Name list, select the name of the internal virtual server that you previously created for forwarding HTTP requests to the pool of icap servers
154 In the Preview Size field, type a numeric value. This specifies the maximum size of the preview buffer. This buffer holds a copy of the HTTP request header and the data sent to the internal virtual server, in case the adaptation server reports that no adaptation is needed. Setting the preview size to 0 disables buffering of the request and should only be done if the adaptation server always returns a modified HTTP request or the original HTTP request. In the Timeout field, type a numeric value, in seconds. If the internal virtual server does not return a result within the specified time, a timeout error occurs. To disable the timeout, use the value 0. From the Service Down Action list, select an action for the BIG-IP system to take if the internal virtual server returns an error: Select Ignore to instruct the BIG-IP system to ignore the error and send the unmodified HTTP request to an HTTP server in the HTTP server pool. Select Drop to instruct the BIG-IP system to drop the connection. Select Reset to instruct the BIG-IP system to reset the connection. 11. Click Finished. After you perform this task, the BIG-IP system contains a Request Adapt profile that a standard HTTP virtual server can use to forward an HTTP request to an internal virtual server for ICAP traffic. Creating a custom HTTP profile An HTTP profile defines the way that you want the BIG-IP system to manage HTTP traffic. Note: Other HTTP profile types (HTTP Compression and Web Acceleration) enable you to configure compression and cache settings, as required. Use of these profile types is optional On the Main tab, click Local Traffic > Profiles > Services > HTTP. The HTTP profile list screen opens. Click Create. The New HTTP Profile screen opens. In the Name field, type a unique name for the profile. From the Parent Profile list, select http. Select the Custom check box. Modify the settings, as required. Click Finished. The custom HTTP profile now appears in the HTTP profile list screen
155 Creating a pool to process HTTP traffic You can create a pool of web servers to process HTTP requests On the Main tab, click Local Traffic > Pools. The Pool List screen opens. Click Create. The New Pool screen opens. In the Name field, type a unique name for the pool. For the Health Monitors setting, from the Available list, select a monitor other than http(s), and click << to move the monitor to the Active list. From the Load Balancing Method list, select how the system distributes traffic to members of this pool. The default is Round Robin. For the Priority Group Activation setting, specify how to handle priority groups: Select Disabled to disable priority groups. This is the default option. Select Less than, and in the Available Members field type the minimum number of members that must remain available in each priority group in order for traffic to remain confined to that group. 7. Using the New Members setting, add each resource that you want to include in the pool: a. b. c. d. Type an IP address in the Address field, or select a node address from the Node List. Type 80 in the Service Port field, or select HTTP from the list. (Optional) Type a priority number in the Priority field. Click Add. 8. Click Finished. The new pool appears in the Pools list. Creating an HTTP virtual server for enabling request adaptation You perform this task to create a standard virtual server that can forward an HTTP request to an internal virtual server. The internal virtual server then sends the request to a pool of ICAP servers before the BIG-IP system sends the request to the web server On the Main tab, click Local Traffic > Virtual Servers. The Virtual Server List screen opens. Click the Create button. The New Virtual Server screen opens. 3. In the Name field, type a unique name for the virtual server
156 For the Destination setting, in the Address field, type the IP address that you want to use as a destination for client traffic destined for a pool of HTTP web servers.the IP address you type must be available and not in the loopback network. In the Service Port field, type 80, or select HTTP from the list. From the Configuration list, select Advanced. From the HTTP Profile list, select the name of the HTTP profile that you created previously. From the Request Adapt Profile list, select the name of the Request Adapt profile that you previously created. From the Source Address Translation list, select Auto Map. From the Default Pool list, select the name of the HTTP server pool that you previously created. Click Finished. Configuring the REQMOD (Request Modification) service In order to configure F5 BIG-IP LTM to only forward HTTP requests to the MetaDefender Core ICAP server, follow the steps described below. In the case you want to configure F5 BIG-IP LTM to forward both HTTP requests and responses, refer to the "Configuring REQMOD and RESPMOD Services" section Open a Web browser and follow the instructions from the page: /12.html Update the REQMOD ICAP service profile. a. b. c. d. Go to Local Traffic > Profiles > Services > ICAP. In the list that appears select your ICAP Request mod service. Set Preview Length to 0 and make sure the checkbox next to it is checked. Click Update to apply the changes. 3. Update the Request Adapt profile. a. b. c. Go to Local Traffic > Profiles > Services > Request Adapt. In the list that appears select your request adapt service. Set Preview Size to 0 and make sure the checkbox next to it is checked. d. Click Update to apply the changes
157 Configuring REQMOD and RESPMOD Services In order to configure F5 BIG-IP LTM to forward both HTTP requests and responses to the MetaDefender Core ICAP server, follow the steps described below. In the case you want to configure F5 BIG-IP LTM to only forward HTTP responses, refer to the "Configuring REQMOD Service" section Open a Web browser and follow the instructions from the page: /13.html Update your REQMOD ICAP service profile. a. b. c. d. Go to Local Traffic > Profiles > Services > ICAP. In the list that appears select your ICAP Request mod service. Set Preview Length to 0 and make sure the checkbox next to it is checked. Click Update to apply the changes. 3. Update your RESPMOD ICAP service profile. a. b. c. d. Go back to Local Traffic > Profiles > Services > ICAP. In the list that appears select your ICAP Response mod service. Set Preview Length to 0 and make sure the checkbox next to it is checked. Click Update to apply the changes. 4. Update your Request Adapt profile. a. b. c. d. Go to Local Traffic > Profiles > Services > Request Adapt. In the list that appears select your request adapt service. Set Preview Size to 0 and make sure the checkbox next to it is checked. Click Update to apply the changes. 5. Update Response Adapt service profile (only if RESPMOD is used) a. b. c. d. Go to Local Traffic > Profiles > Services > Response Adapt. In the list that appears select your response adapt service. Set Preview Size to 0 and make sure the checkbox next to it is checked. Click Update to apply the changes. Configuring Service Down Actions If you followed the steps described in "Configuring REQMOD Service" or "Configuring REQMOD and RESPMOD Services". Big-IP will be configured to drop all connections when the ICAP service is down
158 F5 can be configured to forward HTTP data to the web server/web client in the case the ICAP server is unrechable. If you are using an ICAP server pool that contains more than one MetaDefender ICAP Server, F5 can also be configured to forward the HTTP content to a different pool member. Bypass ICAP server on service down Note that bypassing ICAP on service down may lower your organisation's security as content will be forwarded without being scanned Open the Request adapt profile ( Profiles > Services > Request Adapt ) Set Service Down Action to Ignore. Click the "Update" button to apply the changes. Transfer content to different pool member If you are using an ICAP server pool that contains more than one MetaDefender ICAP Server, you can also configure Big-IP to send the HTTP content to a different ICAP pool member Open your ICAP services pool properties ("Pools" > "Pool List"). Set the "Configuration" list to "Advanced". Set the Action on Service Down property to Reselect. Click the "Update" button to apply the changes Throughput limitation by license If you experience slow download/upload through F5 then there is a chance that your throughput is limited by F5 license. How to check the maximum throughput allowed by license: 1. SSH into F5: On Windows open PuTTY then type the IP of the F5 device, and click Open

159 Use the default login: admin/admin Type tmsh and press enter Type "show /sys license detail grep perf" to see performance limitations by license To exit from tmsh type "quit" and press enter, to quit from PuTTY type "exit" then press enter F5 BIG IP and Metadefender ICAP Server Getting Started Guide MetaDefender Core via MetaDefender ICAP Server can be used to scan all files being uploaded to the F5 BIG IP server with all of the engines in MetaDefender Core to make sure that no malware is able to get to the web servers behind the Big IP server. This guide describes the basic steps to getting MetaDefender ICAP Server working with your F5 BIG IP server

160 Sample Deployment Diagram System Requirements The following systems are required to set up MetaDefender ICAP Server with an F5 BIG IP appliance BIG IP appliance using LTM MetaDefender ICAP Server MetaDefender Core Configuring MetaDefender ICAP Server For installation and configuration quick guidelines see: 1. Quick Start with MetaDefender ICAP Server. For detailed instructions see Configuring MetaDefender ICAP Server. 2. Installing or Upgrading MetaDefender ICAP Server and
161 Note on MetaDefender ICAP Server Licensing MetaDefender ICAP Server must have a valid license, including licensing for the appropriate number of remote clients, to function correctly. For license configuration details see 2.4. MetaDefender ICAP Server Licensing. Configuring the F5 BIG IP Appliance The following configuration steps should be done from the F5 BIG IP Management Console interface. The steps below describe the minimum configuration required for MetaDefender ICAP Server integration with F5 BIG IP. Please refer to the F5 BIG IP manual for advanced configuration. 1. Open a web browser and load the BIG IP Management Console. (Please refer to the BIG IP manual for details about how to open the BIG IP Management Console.) Creating a custom client-side ICAP profile You create this ICAP profile when you want to use an ICAP server to wrap an HTTP request in an ICAP message before the BIG-IP system sends the request to a pool of web servers. The profile specifies the HTTP request-header values that the ICAP server uses for the ICAP message.important: You can use macro expansion for all ICAP header values. For example, if an ICAP header value contains ${SERVER_IP}, the BIG-IP system replaces the macro with the IP address of the ICAP server selected from the pool assigned to the internal virtual server. If an ICAP header value contains ${SERVER_PORT}, the BIG-IP system replaces the macro with the port of the ICAP server selected from the pool assigned to the internal virtual server. For example, you can set the URI value in an ICAP profile to icap://${server_ip}:${server_port}/virusscan On the Main tab, click Local Traffic > Profiles > Services > ICAP. Click Create. In the Name field, type a unique name for the profile. For the Parent Profile setting, retain the default value, icap. On the right side of the screen, select the Custom check box. 6. In the URI field, type a URI in this format: icap://hostname:port/path. For example, using macro expansion, you can set the URI value to:icap://${server_ip}:${server_port} /virusscan
162 In the Preview Length field, type a length or retain the default value 0. This value defines the amount of the HTTP request or response that the BIG-IP system offers to the ICAP server when sending the request or response to the server for adaptation. This value should not exceed the length of the preview that the ICAP server has indicated it will accept. In the Header From field, type a value for the From: ICAP header. In the Host field, type a value for the Host: ICAP header. In the Referer field, type a value for the Referer: ICAP header. In the User Agent field, type a value for the User-Agent: ICAP header. Click Finished. After you create the ICAP profile, you can assign it to an internal virtual server so that the HTTP request that the BIG-IP system sends to an ICAP server is wrapped in an ICAP message, according to the settings you specified in the ICAP profile. Creating a pool of ICAP servers You perform this task to create a pool of ICAP servers that perform content adaptation on HTTP requests On the Main tab, click Local Traffic > Pools. The Pool List screen opens. Click Create. The New Pool screen opens. In the Name field, type a unique name for the pool. For the Health Monitors setting, from the Available list, select a monitor other than http(s), and click << to move the monitor to the Active list. From the Load Balancing Method list, select how the system distributes traffic to members of this pool. The default is Round Robin. For the Priority Group Activation setting, specify how to handle priority groups: Select Disabled to disable priority groups. This is the default option. Select Less than, and in the Available Members field type the minimum number of members that must remain available in each priority group in order for traffic to remain confined to that group. 7. Using the New Members setting, add each resource that you want to include in the pool: a. Either type an IP address in the Address field, or select a node address from the Node List. b. Type a port number in the Service Port field, or select a service name from the list
163 c. d. To specify a priority group, type a priority number in the Priority field. Click Add. 8. Click Finished. The pool of ICAP load balancing servers appears in the Pools list. Creating an internal virtual server for forwarding requests to an ICAP server A virtual server of type internal provides a destination that a standard type of virtual server can use when forwarding HTTP requests slated for ICAP-based content adaptation On the Main tab, click Local Traffic > Virtual Servers. The Virtual Server List screen opens. Click the Create button. The New Virtual Server screen opens. In the Name field, type a unique name for the virtual server. In the Description field, type a description of the virtual server. For example: This virtual server ensures HTTP request modification through the use of the service_name ICAP service.. From the Type list, select Internal. For the State setting, verify that the value is set to Enabled. From the Configuration list, select Advanced. From the ICAP Profile list, select the ICAP profile that you previously created for handling HTTP requests. From the Default Pool list, select the pool of ICAP servers that you previously created. Click Finished. After you perform this task, a standard type of virtual server can forward HTTP requests to an internal type of virtual server. The internal virtual server then sends the request to a pool of ICAP servers, before sending the request back to the standard virtual server for forwarding to the pool of web servers. Creating a custom Request Adapt profile You create a Request Adapt type of profile when you want a standard HTTP virtual server to forward HTTP requests to an internal virtual server that references a pool of ICAP servers. A Request Adapt type of profile instructs the HTTP virtual server to send an HTTP request to a named internal virtual server for possible request modification. 1. On the Main tab, click Local Traffic > Profiles > Services > Request Adapt
164 Click Create. In the Name field, type a unique name for the profile. For the Parent Profile setting, retain the default value, requestadapt. On the right side of the screen, click the Custom check box. For the Enabled setting, retain the default value, Enabled. When you set this value to Enabled, the BIG-IP system forwards HTTP requests to the specified internal virtual server for adaptation. From the Internal Virtual Name list, select the name of the internal virtual server that you previously created for forwarding HTTP requests to the pool of icap servers. In the Preview Size field, type a numeric value. This specifies the maximum size of the preview buffer. This buffer holds a copy of the HTTP request header and the data sent to the internal virtual server, in case the adaptation server reports that no adaptation is needed. Setting the preview size to 0 disables buffering of the request and should only be done if the adaptation server always returns a modified HTTP request or the original HTTP request. In the Timeout field, type a numeric value, in seconds. If the internal virtual server does not return a result within the specified time, a timeout error occurs. To disable the timeout, use the value 0. From the Service Down Action list, select an action for the BIG-IP system to take if the internal virtual server returns an error: Select Ignore to instruct the BIG-IP system to ignore the error and send the unmodified HTTP request to an HTTP server in the HTTP server pool. Select Drop to instruct the BIG-IP system to drop the connection. Select Reset to instruct the BIG-IP system to reset the connection. 11. Click Finished. After you perform this task, the BIG-IP system contains a Request Adapt profile that a standard HTTP virtual server can use to forward an HTTP request to an internal virtual server for ICAP traffic. Creating a custom HTTP profile An HTTP profile defines the way that you want the BIG-IP system to manage HTTP traffic. Note: Other HTTP profile types (HTTP Compression and Web Acceleration) enable you to configure compression and cache settings, as required. Use of these profile types is optional. 1. On the Main tab, click Local Traffic > Profiles > Services > HTTP. The HTTP profile list screen opens
165 Click Create. The New HTTP Profile screen opens. In the Name field, type a unique name for the profile. From the Parent Profile list, select http. Select the Custom check box. Modify the settings, as required. Click Finished. The custom HTTP profile now appears in the HTTP profile list screen. Creating a pool to process HTTP traffic You can create a pool of web servers to process HTTP requests On the Main tab, click Local Traffic > Pools. The Pool List screen opens. Click Create. The New Pool screen opens. In the Name field, type a unique name for the pool. For the Health Monitors setting, from the Available list, select a monitor other than http(s), and click << to move the monitor to the Active list. From the Load Balancing Method list, select how the system distributes traffic to members of this pool. The default is Round Robin. For the Priority Group Activation setting, specify how to handle priority groups: Select Disabled to disable priority groups. This is the default option. Select Less than, and in the Available Members field type the minimum number of members that must remain available in each priority group in order for traffic to remain confined to that group. 7. Using the New Members setting, add each resource that you want to include in the pool: a. b. c. d. Type an IP address in the Address field, or select a node address from the Node List. Type 80 in the Service Port field, or select HTTP from the list. (Optional) Type a priority number in the Priority field. Click Add. 8. Click Finished. The new pool appears in the Pools list
166 Creating an HTTP virtual server for enabling request adaptation You perform this task to create a standard virtual server that can forward an HTTP request to an internal virtual server. The internal virtual server then sends the request to a pool of ICAP servers before the BIG-IP system sends the request to the web server On the Main tab, click Local Traffic > Virtual Servers. The Virtual Server List screen opens. Click the Create button. The New Virtual Server screen opens. In the Name field, type a unique name for the virtual server. For the Destination setting, in the Address field, type the IP address that you want to use as a destination for client traffic destined for a pool of HTTP web servers.the IP address you type must be available and not in the loopback network. In the Service Port field, type 80, or select HTTP from the list. From the Configuration list, select Advanced. From the HTTP Profile list, select the name of the HTTP profile that you created previously. From the Request Adapt Profile list, select the name of the Request Adapt profile that you previously created. From the Source Address Translation list, select Auto Map. From the Default Pool list, select the name of the HTTP server pool that you previously created. Click Finished. Configuring the REQMOD (Request Modification) service In order to configure F5 BIG-IP LTM to only forward HTTP requests to the MetaDefender Core ICAP server, follow the steps described below. In the case you want to configure F5 BIG-IP LTM to forward both HTTP requests and responses, refer to the "Configuring REQMOD and RESPMOD Services" section Open a Web browser and follow the instructions from the page: /12.html Update the REQMOD ICAP service profile. a. Go to Local Traffic > Profiles > Services > ICAP
167 b. c. d. In the list that appears select your ICAP Request mod service. Set Preview Length to 0 and make sure the checkbox next to it is checked. Click Update to apply the changes. 3. Update the Request Adapt profile. a. b. c. d. Go to Local Traffic > Profiles > Services > Request Adapt. In the list that appears select your request adapt service. Set Preview Size to 0 and make sure the checkbox next to it is checked. Click Update to apply the changes. Configuring REQMOD and RESPMOD Services In order to configure F5 BIG-IP LTM to forward both HTTP requests and responses to the MetaDefender Core ICAP server, follow the steps described below. In the case you want to configure F5 BIG-IP LTM to only forward HTTP responses, refer to the "Configuring REQMOD Service" section Open a Web browser and follow the instructions from the page: /13.html Update your REQMOD ICAP service profile. a. b. c. d. Go to Local Traffic > Profiles > Services > ICAP. In the list that appears select your ICAP Request mod service. Set Preview Length to 0 and make sure the checkbox next to it is checked. Click Update to apply the changes. 3. Update your RESPMOD ICAP service profile. a. b. c. d. Go back to Local Traffic > Profiles > Services > ICAP. In the list that appears select your ICAP Response mod service. Set Preview Length to 0 and make sure the checkbox next to it is checked. Click Update to apply the changes. 4. Update your Request Adapt profile. a. b. c. Go to Local Traffic > Profiles > Services > Request Adapt. In the list that appears select your request adapt service. Set Preview Size to 0 and make sure the checkbox next to it is checked. d. Click Update to apply the changes
168 5. Update Response Adapt service profile (only if RESPMOD is used) a. b. c. d. Go to Local Traffic > Profiles > Services > Response Adapt. In the list that appears select your response adapt service. Set Preview Size to 0 and make sure the checkbox next to it is checked. Click Update to apply the changes. Configuring Service Down Actions If you followed the steps described in "Configuring REQMOD Service" or "Configuring REQMOD and RESPMOD Services". Big-IP will be configured to drop all connections when the ICAP service is down. F5 can be configured to forward HTTP data to the web server/web client in the case the ICAP server is unrechable. If you are using an ICAP server pool that contains more than one MetaDefender ICAP Server, F5 can also be configured to forward the HTTP content to a different pool member. Bypass ICAP server on service down Note that bypassing ICAP on service down may lower your organisation's security as content will be forwarded without being scanned Open the Request adapt profile ( Profiles > Services > Request Adapt ) Set Service Down Action to Ignore. Click the "Update" button to apply the changes. Transfer content to different pool member If you are using an ICAP server pool that contains more than one MetaDefender ICAP Server, you can also configure Big-IP to send the HTTP content to a different ICAP pool member Open your ICAP services pool properties ("Pools" > "Pool List"). Set the "Configuration" list to "Advanced". Set the Action on Service Down property to Reselect. Click the "Update" button to apply the changes F5 BIG IP SSL configuration To be able to scan data transmitted using SSL connection you have to take similar steps as listed in F5 BIG IP and Metascan Getting Started Guide. The only difference is that you should setup a HTTPS pool and virtual server instead of plain HTTP
169 Please check the following links to be able to setup HTTPS connection handling: Managing client-side HTTPS traffic using a self-signed certificate Managing client and server HTTPS traffic using a self-signed certificate Managing client-side HTTPS traffic using a CA-signed certificate ICAP Server iapp template iapps iapps in a nutshell Benefits for ICAP Server ICAP Server iapp template Getting the template Downloading the template Importing the template into F5 BIG IP Creating an ICAP Server application service Basic configuration Assigning request and response adapt profiles Testing the configuration The iapps technology was released in F5 s v11. For cases when iapps can not be used please see the generic ingtegration guide: F5 BIG IP. iapps iapps in a nutshell iapps is a user-customizable framework for deploying applications that enables templatizing sets of functionality on an F5 gear. Automate the process of adding virtual servers or build a custom iapp to manage your irules inventory. [ F5-1] iapps are powerful tools. Used by roughly one third of all F5 customers, they perform input validation and apply complex business logic for configuring a wide variety of applications. They hide complexity, sometimes driving hundreds of configuration parameters with just a handful of input values. They also provide deployment guidance, reducing the need for documentation and training. It is helpful to understand the difference between an iapp and a wizard. A wizard

170 is usually a script with a GUI. It is a tool that accepts a set of user inputs and performs a onetime procedure. When run twice, a wizard performs exactly the same steps during its second run as it did during its first. Although an iapp is also a script with a GUI, it behaves differently on re-entry. Unlike a wizard, an iapp maintains a relationship to the configuration that it generates. [ F5-2] iapps have 5 critical properties: [ F5-2] iapps always act atomically. The result of deployment is always either the entire intended configuration or none at all. iapp-driven configuration objects are marked so the iapp can track them throughout its lifecycle. A visualization of these configuration objects is presented in the popular TMUI Component View. iapps protect the configuration from accidental changes. iapp-driven elements may not be changed via the UI or CLI except through the iapp. iapps support re-entry. Since the iapp framework tracks the configuration objects that it manages, it can be intelligent about which elements are touched during reconfiguration. iapps automatically perform cleanup on deletion. The housekeeping is automatic, and the iapp author does not need to (and is not allowed to) write any delete-time code. There is an analogy between iapps and irules that help understanding iapps better. F5 products support a scripting language based on TCL. This language allows an administrator to tell their BIG-IP to intercept, inspect, transform, direct and track inbound or outbound application traffic. An irule is the bit of code that contains the set of instructions the system uses to process data flowing through it, either in the header or payload of a packet. This technology allows our customers to solve real-time application issues, security vulnerabilities, etc that are unique to their environment or are time sensitive. [ F5-3] [ F5-3] An iapp is like irules, but for the management plane. Again, there is a scripting language that administrators can build instructions the system will use. But instead of describing how to process traffic, in the case of iapp, it is used to describe the user interface and how the system will act on information gathered from the user. The bit of code that contains these instructions is
171 referred to as an iapp or iapp template. A system administrator can use F5-provided iapp templates installed on their BIG-IP to configure a service for a new application. They will be presented with the text and input fields defined by the iapp author. Once complete, their answers are submitted, and the template implements the configuration. First an application service object (ASO) is created that ties together all the configuration objects which are created, like virtual servers and profiles. Each object created by the iapp is then marked with the ASO to identify their membership in the application for future management and reporting. [ F5-3] Benefits for ICAP Server From MetaDefender ICAP Server's perspective iapps is an exceptionally powerful tool to perform integration to F5 BIG IP in a quick and easy way, with no deeper knowledge about both BIG IP and ICAP Server. ICAP Server iapp template Getting the template Starting with version X.Y the opswat_metadefender_icap iapp template is bundled into F5 and may not need downloading and importing. Downloading the template The opswat_metadefender_icap iapp template can be downloaded from /OPSWAT/F5-iApp. Importing the template into F5 BIG IP Description Screenshot 1 Login to F5 using an account with administrative privileges

172 Description Screenshot 2 From the left side menu select Main > iapps > Templates and click the Import... button on the top of the Template List

173 Description Screenshot 3 Click the Choose file button and select the file containing the MetaDefender ICAP Server iapp template
174 Description Screenshot 4 Click the Upload button and wait for the file being uploaded
175 Description Screenshot 5 Once the file gets uploaded the opswat_metadefender_icap template appears in the list (in a position defined by the current ordering of the list)
176 Description Screenshot Creating an ICAP Server application service Once the opswat_metadefender_icap iapp template is imported, it can be used to create new application services. Description Screenshot 1 From the left side menu select Main > iapps > Applicaton Services and click the Create... button (or click the icon next to Application Services)
177 Description Screenshot 2 From the Template list select opswat_metadefender_icap

178 Description Screenshot 3 The fields of the New Application Service... window are populated according to the selected template

179 Description Screenshot Basic configuration In this section we will create a basic configuration that works, but may not be adequate in a specific production environment. Do NOT select HTTP monitor for the ICAP pool When selecting an HTTP monitor for the ICAP pool there will be a lot of "GET /" HTTP requests towards ICAP which will be displayed as a Bad Request in the ICAP hstory
180 Description Screenshot 1 Provide the Name for this application service. 2 Provide the IP address (and Port) of the MetaDefender ICAP Server. If an ICAP server node has previously been created then it can also be selected here
 can be added here. 3 Click the Finished button. 4.3.0 181")
181 Description Screenshot If there are multiple ICAP servers, then any lot (at least one) can be added here. 3 Click the Finished button
182 Description Screenshot 4 The configuration is created and displayed in the next screen. Please note the Metadefender_ICAP_Request and Metadefender_ICAP_Response profiles created. These profiles

183 Description Screenshot are needed to be assigned to a virtual server (see in the next section) so that content adaptation can work. Assigning request and response adapt profiles As a final step the request and response adapt profiles created in the previous section are needed to be assigned to a virtual server so that content adaptation can work

184 Creating virtual servers besides creating ICAP virtual servers automatically by the ICAP Server iapp is, however, not in the scope of this document. Description Screenshot 1 From the left side menu select Main > Local Traffic > Virtual Servers. The list of virtual servers is displayed. 2 From the list select the virtual server to which content adaptation needs to be configured. The properties of the virtual server are displayed. Select Advanced for Configuration
185 Description Screenshot 3 Scroll down and look for Request Adapt Profile and Response Adapt Profile. Select the Metadefender_ICAP_Request and Metadefender_ICAP_Response profiles based on whether both requests and responses, only one, or non of them needs to be sent to the ICAP Server

186 Description Screenshot 4 Scroll further down and click the Update button to commit the changes

187 Description Screenshot Testing the configuration To test the configuration point a browser to the IP or DNS address of the virtual server and observe how the traffic is handled by the ICAP Server. Description Screenshot 1 Obtain the IP address of the virtual server from the configuration

188 Description Screenshot 2 Point a browser to the web pages of the virtual server and generate traffic
189 Description Screenshot 3 Observe the traffic in MetaDefender ICAP Server
190 Description Screenshot McAfee Web Gateway The current documentation is based on McAfee Web Gateway version 7.7. Prerequisites McAfee Web Gateway is installed and license is activated MetaDefender ICAP Server is started and configured with "Use persistent connections " option enabled. For details please check 3. Configuring MetaDefender ICAP Server

191 Configure McAfee Web Gateway to use MetaDefender ICAP Server In your browser navigate to the McAfee Web Gateway's user interface. By default it is accessible via address>:4711 or address>:4712. Default user /password combination is admin/webgateway Choose Policy Under the Rule Sets tab select Add Rule Set from Library Select ICAP Client ICAP Client from the rule set list and click OK


192 5. Select the newly created ICAP Client under Rule Sets and click on Edit... next to ReqMod server

193 6. In the Edit List (ICAP Server) window under List content double-click on the first item. In the new Edit ICAP Server window change the URI for the MetaDefender ICAP Server. It should look like icap://<icap IP>:<ICAP port>/omsscanreq-av. Click OK to close the Edit ICAP Server window and click OK again to close the ReqMod server editor window Repeat steps 5-6 to set the RespMod server. The URI for MetaDefender ICAP Server should be icap://<icap IP>:<ICAP port>/omsscanresp-av After everything is configured click Save Changes in the top-right corner. McAfee is now configured to use MetaDefender ICAP Server. Enabling SSL Scanner If you want to inspect contents in HTTPS connections with MetaDefender ICAP Server you should enable SSL Scanner in Mcafee Web Gateway In your browser navigate to the McAfee Web Gateway's user interface. By default it is accessible via address>:4711 or address>:4712. Default user /password combination is admin/webgateway Choose Policy Under Rule Sets select the SSL Scanner rule which is disabled by default

194 4. Check Enable option and click Save Changes. McAfee is now configured to decrypt HTTPS traffic and send it to MetaDefender ICAP Server unencrypted Troubleshooting To use the Mcafee Web Console, you need to enable java in your browser and add the Web Console's url to the trusted sites in Java Config. If you see a McAfee Web Gateway malware detection page instead of a MetaDefender ICAP Server block page then you should disable Anti-Malware scanning. This can be done under Policy Rule Sets Gateway Anti-Malware Gateway Anti-Malware Settings There are notifications or even non-working web pages after enabling SSL Scanner: you should download and install the SSL certificate used by Web Gateway to your browser. You can get the certificate under Policy Settings SSL Client Context with CA Default CA. Click Export... next to Certificate Authority and import the created file to your browser's trusted root certificates If you see " NoIcapServerAvailable" errors: MetaDefender ICAP Server should be configured to use persistent connections. Please check 3. Configuring MetaDefender ICAP Server Squid Basic Configuration Squid configuration should be done by modifying squid.conf (e.g, /etc/squid3/squid.conf). Below is an example of a simplified version of configuration for Squid. For more detailed documentation, please refer to the Squid manual
195 1. Enable acl localnet. Search for acl localnet section, uncomment all acl localnet lines. Below is an example of how the configuration might look: acl localnet src /8 acl localnet src /12 # RFC1918 possible internal network acl localnet src /16 # RFC1918 possible internal network acl localnet src fc00::/7 # RFC 4193 local private network range acl localnet src fe80::/10 # RFC 4291 link-local (directly plugged) machines acl SSL_ports port 443 acl Safe_ports port 80 acl Safe_ports port 21 acl Safe_ports port 443 acl Safe_ports port 70 acl Safe_ports port 210 acl Safe_ports port acl Safe_ports port 280 acl Safe_ports port 488 acl Safe_ports port 591 acl Safe_ports port 777 acl CONNECT method CONNECT # http # ftp # https # gopher # wais # unregistered ports # http-mgmt # gss-http # filemaker # multiling http 2. Allow localnet and localhost access by adding the following lines. (under the "Recommended minimum Access Permission configuration" section) http_port 3128 http_access allow http_access allow http_access deny localnet localhost all 3. Enable ICAP and set the Preview Size to 0. (these values don't exist, so you simply add them anywhere in the file) icap_enable icap_send_client_ip on on
196 icap_preview_enable on icap_preview_size 0 icap_service_failure_limit -1 Enable ReqMod (upload mode)...again, these don't exist, so add them anywhere icap_service metascan_req reqmod_precache bypass=0 icap://<metadefender ICAP Server>:1344/OMSScanReq-AV adaptation_access metascan_req allow all Enable RespMod (download mode) again, these don't exist, so add them anywhere icap_service metascan_resp respmod_precache bypass=0 icap://<metadefender ICAP Server>:1344/OMSScanResp-AV adaptation_access metascan_resp allow all 4. Persistent connections By default, Squid is using persistent connections to the MetaDefender ICAP Server, this feature can be controlled explicitly by the following directive: icap_persistent_connections on/off If persistent connections are enabled in Squid, the same setting should be applied to the ICAP side or Squid might report some ICAP errors. See 3. Configuring MetaDefender ICAP Server. 5. Restart Squid to apply the new configuration. If you are using Squid 3.1 there is a bug in Squid that drops the connection to the ICAP server. You will notice messages in Squid's cache.log file similar to the following:
197 essential ICAP service is down after an options fetch failure: icap://<metadefender ICAP Server>:1344/OMSScanReq- AV [down,!opt] This may cause you to get Squid error messages when trying to access websites. To fix this, either upgrade to Squid 3.2 or higher, or add icap_persistent_connections off to your squid.conf file. Scanning HTTPS content Learn how to configure Squid to scan HTTPS content below. This allows Squid to send HTTPS content to the MetaDefender ICAP Server for scanning purposes. Requirements Version: Tested with Squid has to be compiled with SSL support. For further information, please see: Configuration Tell Squid to listen on the following ports: http_port 3128 ssl-bump generate-host-certificates=on dynamic_cert_mem_cache_size=4mb cert=<squidfolder>\etc\ssl\myc.pem In addition, the following lines have to be inserted: sslcrtd_program <SQUIDFOLDER>\lib\squid\ssl_crtd.exe -s <SQUIDFOLDER>\var\cache\squid_ssldb -M 4MB ssl_bump stare ssl_bump bump all all Certificate Generate a new root certificate for Squid: openssl.exe req -new -newkey rsa:1024 -days nodes -x509 - keyout myc.pem -out myc.pem

198 After generating a new certificate, the certificate storage should be reinitialized by deleting the <SQUIDFOLDER>\var\cache\squid_ssldb folder and running: <SQUIDFOLDER>\lib\squid\ssl_crtd.exe -c -s <SQUIDFOLDER>\var\cache\squid_ssldb The certificate has to be installed as a root certificate in the browser. Squid has to be restarted after the changes FortiGate This documentation is based on FortiGate documentation using web-based manager and CLI. For different version of FortiGate or missing information, refer to FortiGate user guides. Configuration via Web-Based Manager Enabling ICAP feature ICAP does not appear by default in the web-based manager, it has to be enabled by going to System Feature Select and enabling ICAP. You may need to refresh the page in order to see the changes. Adding ICAP server and profile 1. Add ICAP server a. Select Security Profiles ICAP Servers. b. Create new or edit an existing entry

199 i. The IP address and port should be the ones used by MetaDefender ICAP Server 2. Add ICAP profile a. b. c. d. Select Security Profiles ICAP. Create new or edit an existing entry. Select the ' Enable Request Processing' check-box, select your server's name from the drop-down list and in the ' Path' field, type in ' OMSScanReq-AV'. Select the ' Enable Response Processing' check-box, select your server's name from the drop-down list and in the ' Path' field, type in ' OMSScanResp-AV'. e. Apply the changes
200 3. Apply the ICAP profile in your policy/policies a. b. c. Select Policy&Objects IPv4 Policy Explicit Proxy Policy. Create new or edit an existing policy In the section ' Security Profiles', switch on ICAP and select the previously created profile. Configuration via CLI 1. Add ICAP server Add ICAP server via CLI config icap server edit <icap_server_name> set ip-version {4 6} [default: 4] set ip-address <server_ipv4> set ip6-address <server_ipv6> set max-connections <int> [default: 100] set port <port_int> [default: 1344] end The example shown above in the web-based manager would look like this in the CLI: Add concrate ICAP server via CLI config icap server edit my_icap_server set ip-address end 2. Add ICAP profile Add ICAP profile via CLI config icap profile edit <icap_profile_name> set replacemsg-group <grp_name>
201 set request {enable disable} [The following commands are enabled if request is set to 'enable'] set request-failure {error bypass} set request-path <path> set request-server <icap_server> set response {enable disable} [The following commands are enabled if response is set to 'enable'] set response-failure {error bypass} set response-path <path> set response-server <icap_server> set streaming-content-bypass {enable disable} end The example shown above in the web-based manager would look like this in the CLI: Add concrate ICAP profile via CLI config icap profile edit my_icap_profile set request enable set request-failure error set request-path OMSScanReq-AV set request-server my_icap_server set response enable set response-failure error set response-path OMSScanResp-AV set response-server my_icap_server set streaming-content-bypass disable end 3. Apply the ICAP profile policy (policy can be replaced by explicit-proxy-policy when setting ICAP for an Explicit Proxy Policy) Apply ICAP profile via CLI config firewall policy [or policy6 if IPv6 is used] edit <index_int> set icap-profile <icap_profile_name> end The example shown above in the web-based manager would look like this in the CLI: Apply concrate ICAP profile via CLI

202 config firewall policy edit 1 set icap-profile my_icap_profile end If you want to disable the ICAP profile for a given policy you should write Disable ICAP profile via CLI config firewall policy [or policy6 if IPv6 is used] edit <index_int> set icap-profile "" end Scanning HTTPS content To be able to inspect and scan SSL/SSH traffic you have to enable it in Fortigate. After enabling this option you should download the certificate used by Fortigate and install/import it to the browsers which communicate with Fortigate. Otherwise you might see SSL/security related notifications or errors, or even not working web pages. The certificate can be downloaded under Security Profiles SSL/SSH Inspection Enable SSL inception via GUI 1. Navigate to Policy&Objects and select the policy you would like to enable SSL inception to (for example an Explicit Proxy Policy)

203 2. 3. In the Edit page of the selected policy locate the Security Profiles section Turn SSL/SSH Inspection on and set it to deep-inspection Enable SSL inspection via CLI The steps shown above would like this via CLI: Apply deep ssl inspection to an Explicit Proxy Policy config firewall explicit-proxy-policy edit 1 set ssl-ssh-profile deep-inspection end Resources Other FortiGate documentation FortiOS Handbook - The Complete Guide to FortiOS FortiOS CLI Reference 4.5 Other Integration This page is informational only
204 Some next-generation firewall solutions are listed here that according to their documentation implement the ICAP interface and as so are expected to be compatible with MetaDefender ICAP Server. For the comprehensive list of ICAP clients supported by MetaDefender ICAP Server see: [ICAP] 4.4 Web Proxy Integrations. Next Generation Firewalls: A Next-Generation Firewall (NGFW) is a hardware or a software based network security platform that is a part of the third generation of firewall technology. NGFWs can prevent sophisticated attacks by enforcing security policies at the application level as well as at the port and protocol levels. NGFWs typically combine a traditional firewall with other network device filtering functionalities, such as an application firewall using in-line deep packet inspection (DPI), and an intrusion prevention system (IPS). Most modern day NGFWs include a proxy with the ability to perform HTTPS decryption and to forward traffic through an Internet Content Adaptation Protocol (ICAP) connection to an external server or device for inspection (typically on a specified ICAP port). This allows administrators to take some of the strain off of the NGFW and free up resources, enabling the NGFW to focus on on things that only it can do. MetaDefender ICAP Server leverages ICAP to offload specific Internet based content from the firewall and focus on preventing known and unknown threats from entering your corporate network. Any firewall that supports ICAP can be integrated with MetaDefender Core via MetaDefender ICAP Server, since ICAP is a generic wrapper protocol to process HTTP traffic. Device or appliance specific implementation will, however, most likely require extensive testing before use in production. By combining a next generation firewall with MetaDefender ICAP Server, organizations can benefit from a consolidated and integrated platform that can protect their network traffic, while ensuring that the appropriate information security policy is applied on both incoming and outgoing web traffic. The table below summarizes support details for leading next generation firewalls. Category Product Supported Quick Integration Guide Next Generation Firewalls ( Fortinet - TESTED FortiGate NGFWs) FortiGate

205 CheckPoint NOT SUPPORTED not available Palo Alto Networks NOT SUPPORTED not available 4.6 HTTP Header Handling In this page, we document HTTP header that MetaDefender ICAP Server is using for logging and scanning. Filename Flowchart
206 Details The steps below detail how MetaDefender ICAP Server parses HTTP information from contentdisposition. 1. Check if filename* parameter is present a. b. Get the value of the parameter Look for the last " ' " character in the value (see Grammar of filename*'s value) i. ii. If no " ' " character is present then the format considered to be invalid (no filename or extension is returned) If " ' " is found then the text after it is considered as the filename (not decoded) c. Extension is considered to be the substring after the last "." in the filename 2. If filename* is not present then look for filename a. b. Get the value of the parameter Check if the first char is a " " " (quote mark) i. ii. If we start with a quote mark then the filename will be the substring between the opening and closing quote mark (if no closing quote mark is present we consider it as an invalid and no filename or extension is returned) Otherwise the whole value is considered as the filename c. Extension is considered to be the substring after the last "." in the filename 3. If none of the parameters are present, then give it a try with name a. If name parameter is present then the filename will be the parameter's value (between quote mark) and the extension will be empty 4. If none of the above succeeded or the extension contains special characters then the filename and extension parsing is failed in this step. Good examples The following table includes good Content-Disposition examples. Parameter format example Filename Extension filename=*utf8''test%20test.a.b.c test%20test.a.b.c c filename="test.txt" test.txt txt
207 Parameter format example Filename Extension filename=test.txt test.txt txt filename="test a.txt"; filename*=utf8'en'test%20a.txt test%20a.txt txt filename = test.txt test.txt txt name="test" test Bad examples The following table includes bad Content-Disposition examples. Parameter format examle Error filename=*utf8test.txt No " ' " char filename="test.txt No closing quote mark filename=test.t?x Special character in extension name=test No quote marks Parse from URL Parsing is made using the URL via the GET HTTP method. This method receives the text after the last "/" in the URL path until the first "?" character or until the first "#" character if "?" is not present, or until the end of the URL is neither is present. The extension is considered to be the substring after the last "." character. If the extension is empty or contains special characters, it is considered a failure. Good examples The following table includes good URL examples. URL Filename Extension /a/b/c/test.txt test.txt txt
208 URL Filename Extension /test.a.b test.a.b b /a/test.php?get=x.txt test.php php /a/test.php#abc test.php php /a/b/test.php?abc&d=b&g#hjk test.php php Bad examples The following table includes bad URL examples. URL Error /test No extension /test/? Empty part between the last "/" and "?" Additional Details The following parameters are handled case insensitively: filename, filename*. It means that FILENAME, FiLeNaMe* etc. will be also found. Optional whitespaces are handled in the Content-Disposition header. So both "filename=test. txt" and "filename = test.txt" is supported now
209 5. Troubleshooting MetaDefender ICAP Server 5.1 How to create support package 5.2 How to read the MetaDefender ICAP Server log 5.3 Inaccessible Web Management Console 5.4 Startup failure 5.5 Can't view scan details 5.6 Resetting user passwords 5.1 How to create support package A support package contains essential information regarding the operating system and OPSWAT software found on the machine. Security and privacy concerns The contents of the generated package may contain sensitive information that may require special handling. Linux To create a package you must start the script found under /usr/bin/mdicapsrv-collectsupport-data.sh. As the script processes the necessary information, the script generates the support package output. The package files is a tar.gz archive with the following name: mdicapsrv-<version>-support-<timestamp>.tar.gz Where the timestamp is the date when the package was generated. Example:
210 mdicapsrv support tar.gz The generated package will be placed in the same location as the script that was called. Windows To create a package you must start the script found under the installation directory of the product, default this is C:\Program Files\Metadefender ICAP Server\mdicapsrv-collectsupport-data.bat. As the script processes the necessary information, the script generates the support package output. The package files is a zip archive with the following name: mdicapsrv-<version>-support-<timestamp>.zip Where the timestamp is the date when the package was generated. Example: mdicapsrv support zip The generated package will be placed in the same location as the script that was called. Content of the created package The support package contains the following elements: Relative path Type Description config directory The configuration files of OPSWAT software found on the machine config/config. copy file (binary) Config database without user data log directory The log files of OPSWAT software found on the machine os.info file (text) Operating system information hw.info file (text) Hardware information
211 Relative path Type Description network.info file (text) Network information files.info file (text) OPSWAT software directory information You are recommended to check the content of the generated package to make sure it does not contain any confidential information. 5.2 How to read the MetaDefender ICAP Server log Linux Files Format Severity levels of log entries Windows Linux The log files are plain text files that can be opened with any text editor. Files The MetaDefender ICAP Server generates a log file under /var/log/mdicapsrv named mdicapsrv.log. Format In the log, each line represents a log message sent by the server. Depending on the log file, the format of the line is as follows: [LEVEL] TIMESTAMP (COMPONENT) MESSAGE [msgid: MESSAGE ID] Example:
212 [INFO ] :41:37.099: (common.update) Package successfully downloaded, packagedir='/tmp/downloader-data/updates /db/clamav_1_linux_2omcap' [msgid: 671 Where the different values are: LEVEL : the severity of the message TIMESTAMP : The date value when the log entry was sent COMPONENT : which component sent the entry MESSAGE : the verbose string of the entry's message MESSAGE ID : the unique ID of this log entry Severity levels of log entries Depending on the reason for the log entry, there are different types of severity levels. Based on the configuration, the following levels are possible: DUMP : The most verbose severity level, these entries are for debuggers only. DEBUG : Debuggers severity level, mostly used by support issues. INFO : Information from the software, such as scan results. WARNING : A problem occurred needs investigation and OPSWAT support must be contacted, however the product is supposed to be operational. ERROR : Software error happened, please contact support if the issue is persist. Software functionality may be downgraded in these cases. Windows On Windows systems logging is done via Event Log. MetaDefender ICAP Server logs can be found under Windows Logs / Application and are labelled with Metadefender ICAP source. 5.3 Inaccessible Web Management Console Connection refused or browser is waiting The Web Management Console can not be accessed from browser. You get an error message (connection refused) or your browser is waiting for reply
213 Solution Please make sure your computer can access the MetaDefender ICAP Server IP address. Please make sure you entered the correct URL into your browser. Please make sure you opened the firewall port on the MetaDefender ICAP Server server for the Web Management Console. Consult your Linux Distribution manual on how to configure a firewall in your distribution. Invalid license The Web Management Console can not be accessed from browser. You get the following message: The problem is that: The MetaDefender ICAP Server license is not valid (not licensed at all or maximum client number is reached) The Web Management Console is accessed via a Proxy server or other ICAP client
214 Solution Try accessing the Web Management Console directly from the machine that hosts the ICAP Server or with no Proxy connection. 5.4 Startup failure Could not create temporary directory MetaDefender ICAP Server requires temporary directories and files for its operation. If the temporary directory can not be created then the ICAP Server will fail to start with Could not create temporary directory message in the logs. Example log message on CentOS 7: [ERROR ] :58:12.731: (common.base) Error in Service, shutdown.., error='could not create temporary directory: /home/mdicapsrv/temp' [msgid: 8] Consider the following: Proper access rights are configured on the temporary directory root (see the tempdirectory entry in MetaDefender ICAP Server configuration file) There is appropriate amount of free disk space for temporary files on the partition where temporary directory root is configured to a. In case of abnormal termination of ICAP Server (crash, power supply problems etc.) there is a chance that temporary files remain under the temporary directory root. These remaining temporary files require manual cleanup. 5.5 Can't view scan details The View scan details link on Dashboard > ICAP history > Request details points to the scan details on the MetaDefender Core instance where the actual scanning took place. For further details see 4.1. Dashboard
215 Symptoms Dashboard instead of scan details The View scan details link leads to the Dashboard on the referenced Core instead of the scan details. Reason The View scan details link works with MetaDefender Core version (or later) only. Connection refused or browser is waiting The Web Management Console can not be accessed from the browser. You get an error message (connection refused) or your browser is waiting for reply. Reason View scan details links stop working after the referenced Core is uninstalled or migrated to a new address. Page not found The browser displays a page not found error, however everything seems to be configured properly. Reason View scan details links use the IP addresses configured at the Core inventory. If these IP addresses are not accessible from the machine where the actual browsing happens, then the details page can not be displayed. 5.6 Resetting user passwords Admin account Prerequisites Password reset steps General accounts Currently there is no dedicated functionality in MetaDefender ICAP Server's Web Management Console to reset user passwords. Workarounds exist, however
216 Admin account Prerequisites The workaround requires the following: Shell access to the MetaDefender ICAP Server Read/write access to the configuration database (tipically /var/lib/mdicapsrv /config.db.sqlite on Linux and C:\Program Files\OPSWAT\Metadefender ICAP Server\data\config.db.sqlite on Windows) An SQLite client application (e.g. sqlite3 from installed locally on the server A utility to calculate SHA-256 hash values (e.g. sha256sum on Linux and CertUtil on Windows) installed locally on the server Do not use online tools to calculate the hash value as it would result in the disclosure of the clear text password. Password reset steps Do not use the password, salt and hash values of the examples below in a production environment Stop MetaDefender ICAP Server Connect to the database Connect as a user that has read and write permissions on the database (tipically root on Linux and Administrator on Windows). Using unprivileged accounts may give unexpected results. Linux example (sqlite3) # sqlite3 /var/lib/mdicapsrv/config.db.sqlite
217 Windows example (sqlite3) > sqlite3.exe "C:\Program Files\OPSWAT\Metadefender ICAP Server\data\config.db.sqlite" 3. Query the settings of the admin user Example (sqlite3) sqlite> SELECT settings FROM users WHERE name="admin"; 4. Save the result settings string for later use Example bb46fd499421b38026a42c7ae0504c0cd8a097360","salt":"2ad530aa e93552ccba"} 5. Take the salt part from the settings string ( 2ad530aa e93552ccba in the example above) and append it with the new password ( NewPassword123 in the examples below) Example 2ad530aa e93552ccbaNewPassword Calculate the hash of the salted new password Linux example $ echo 2ad530aa e93552ccbaNewPassword123 sha256sum - ece2b0dd63f31a6571c a219d36143af3f60660f fe57c9 6a - Windows example > copy con saltedpassword.txt
218 2ad530aa e93552ccbaNewPassword123^Z 1 file(s) copied. > powershell get-filehash -algorithm sha256 saltedpassword.txt Algorithm Hash Path SHA256 ECE2B0DD63F31A6571C A219D36143AF3F60660F FE57C9 6A C:\saltedpassword.txt 7. The result is the salted hash value of the new password Example ece2b0dd63f31a6571c a219d36143af3f60660f fe57c9 6a 8. Replace the password part in the settings string with the salted hash value of the new password Example {" ":"admin@localhost","password":"ece2b0dd63f31a6571c a219d36143af3f60660f fe57c96a","salt":"2ad530aa e93552ccba"} 9. Update the database and set the new settings value for the user Do not use the password and salt values of the example below in a production environment! Example (sqlite3) sqlite> UPDATE users SET settings='{" ":" admin@localhost","password":" ece2b0dd63f31a6571c a219d36143af3f60660f fe57c
219 6a","salt":"2ad530aa e93552ccba"}' WHERE name = " admin"; 10. Quit the SQLite client and start MetaDefender ICAP Server General accounts The above workaround works for any kind of accounts. Due to its complexity it is, however, not recommended for any other accounts but admin. For general unprivileged accounts it is much simpler to delete then re-create the account
220 6. Release Notes Version Important features: Introduced welcome wizard Batch scanning functionality of MetaDefender Core is used when handling multipart requests Enhancement and new features: Added wildcard (globbing) support for Host and Client IP matching in Security rules Added support for Layer 7 load balanced Core Added an option for skipping scanning parts in a multipart request where the Content- Disposition header does not contain a filename parameter Fixed issues: Windows event log source was changed to "Metadefender ICAP Server" from the incorrect "Metadefender ICAP" Support package didn't remove every temporary file when cleaning up Version Fixed issues: Results were missing from the ICAP history Version New features: Parallelized processing of multipart requests Fixed issues: Central Management connectivity fix Version New features:
221 Re-interpreted, fresh look and feel Central Management connectivity Version New features: Support deflate encoding / compression Configurable timeout for request scans Do not send oversized requests to Core Display IPs that are counted for license Search for keywords in ICAP history URIs Display blocked requests on the chart Fixed issues: Read-only users can't view inventory Version Fixed issues: Option to capture traffic of bad requests Option to use more permissive parsing Version New features: Core load balancing and high availability Option to override blocking oversized files Detailed error messages in block page Detailed error messages in ICAP history Version Fixed issues: License option for unlimited number of clients
222 Version Fixed issues: Blocking page is not configurable Version Fixed issues: Upgrade clears all data Version New features: Standalone product offering Support for multiple Linux distributions Web based user interface for management, configuration and monitoring Role based user management with multiple admin users and Active Directory integration Multiple ICAP security policies with filters and advanced scan configuration Different policy filter settings based on source client, destination host, or any other header Multi-part (MIME) sanitization Support for base64, brotli and gzip encoding
223 7. Legal Copyright Export Classification EAR99 Copyright DISCLAIMER OF WARRANTY OPSWAT Inc. makes no representation or warranties, either express or implied by or with respect to anything in this document, and shall not be liable for any implied warranties of merchantability or fitness for a particular purpose or for any indirect special or consequential damages. COPYRIGHT NOTICE OPSWAT, OESIS, Metascan, Metadefender, AppRemover and the OPSWAT logo are trademarks and registered trademarks of OPSWAT, Inc. All other trademarks, trade names and images mentioned and/or used herein belong to their respective owners. No part of this publication may be reproduced, stored in a retrieval system or transmitted, in any form or by any means (photocopying, recording or otherwise) without prior written consent of OPSWAT Inc. No patent liability is assumed with respect to the use of the information contained herein. While every precaution has been taken in the preparation of this publication, OPSWAT Inc. assumes no responsibility for errors or omissions. This publication and features described herein are subject to change without notice. Export Classification EAR99 EAR99 (Export Administration Regulation 99) is an export classification category regulated by the U.S. Department of Commerce that covers most commercial items exported out of the U.S. OPSWAT s software is designated as EAR99, and there are no export restrictions other than embargoed countries and persons
224 8. Knowledge Base Articles Page:How to upgrade from ICAP Server to a newer ICAP Server v4 release Page:Installing ICAP Server on Debian 9 How to upgrade from ICAP Server to a newer ICAP Server v4 release MetaDefender ICAP Server v4.0.0 release contains an issue which can cause configuration data loss during upgrade. This issue applies to Windows deployments only. On Linux the upgrade can be performed on the traditional way, with no data loss. To upgrade from v4.0.0, please perform the followings: 1. Stop the ICAP Server service using the following command: net stop mdicapsrv 2. Check the data folder under MetaDefender ICAP Server installation folder ( <INSTALLATION DIRECTORY>\data, usually C:\Program Files\OPSWAT\MetaDefender ICAP Server\data ). If there is any *.war or *.shm files that exists in this folder, this means that the services are still running. Please be sure to stop the services correctly (no mdicapsrv.exe process is running) Copy the content of your installation folder to a safe place. < INSTALLATION DIRECTORY>\data Uninstall MetaDefender ICAP Server v Remove content of < INSTALLATION DIRECTORY>\data Install the latest version of the MetaDefender ICAP Server. folder. Stop the ICAP Server service again using the following command: folder from the net stop mdicapsrv
225 Replace the data folder with the files from Step 3 to < INSTALLATION DIRECTORY>\data (keeping your data backup untouched) Run the following command: <INSTALLATION DIRECTORY>\mdicapsrv-upgrade-db.exe Restart the ICAP Server service using the following command: net start mdicapsrv 11. Login to the web management interface and check if your configuration and scan history is untouched. If you need any further help to upgrade from this version, we encourage you to contact OPSWAT support for assistance. This article applies to MetaDefender ICAP v4 This article was last updated on CN Installing ICAP Server on Debian 9 Symptom When you install ICAP Server on Debian 9 you may get the following error message: dpkg: dependency problems prevent configuration of mdicapsrv: mdicapsrv depends on libssll.o.o (>= 1.0.0); however: Package libssll.0.0 is not installed. Reason By default, Debian 9 is installed with libssl For compatibility reasons OPSWAT products require libssl libssl1.0.0 is, however, only available in Debian 8 repositories, and is not available for Debian 9. Resolution To install libssl1.0.0 on Debian 9 from a Debian 8 repository perform the following steps:

226 Step Description Screenshot / Example 1 Open debian.org /jessie/libssl in your browser 2 In the Downloads section at the bottom of the page select your server's architecture

227 Step Description Screenshot / Example 3 Select a mirror ( ftp.cz.debian.org /debian/ in the example) and download the package # wget 1+deb8u7_amd64.deb 4 Install the downloaded package # dpkg i libssll.o.o_1.o.lt 1+deb8u7_amd64.deb
2016 OPSWAT, Inc. All rights reserved. OPSWAT, MetadefenderTM and the OPSWAT logo are trademarks of OPSWAT, Inc.All other trademarks, trade names,
 2016 OPSWAT, Inc. All rights reserved. OPSWAT, MetadefenderTM and the OPSWAT logo are trademarks of OPSWAT, Inc.All other trademarks, trade names, service marks, service names, and images mentioned and/or
MetaDefender Core v4.10.0
 MetaDefender Core v4.10.0 2018 OPSWAT, Inc. All rights reserved. OPSWAT, MetadefenderTM and the OPSWAT logo are trademarks of OPSWAT, Inc. All other trademarks, trade names, service marks, service names,
Metadefender Core v4.8.2
 Metadefender Core v4.8.2 2017 OPSWAT, Inc. All rights reserved. OPSWAT, MetadefenderTM and the OPSWAT logo are trademarks of OPSWAT, Inc.All other trademarks, trade names, service marks, service names,
Metadefender Core v4.6.2
 Metadefender Core v4.6.2 2017 OPSWAT, Inc. All rights reserved. OPSWAT, MetadefenderTM and the OPSWAT logo are trademarks of OPSWAT, Inc.All other trademarks, trade names, service marks, service names,
VMware Identity Manager Connector Installation and Configuration (Legacy Mode)
") VMware Identity Manager Connector Installation and Configuration (Legacy Mode) VMware Identity Manager This document supports the version of each product listed and supports all subsequent versions until
VMware Identity Manager Connector Installation and Configuration (Legacy Mode) VMware Identity Manager This document supports the version of each product listed and supports all subsequent versions until
VMware AirWatch Content Gateway for Linux. VMware Workspace ONE UEM 1811 Unified Access Gateway
 VMware AirWatch Content Gateway for Linux VMware Workspace ONE UEM 1811 Unified Access Gateway You can find the most up-to-date technical documentation on the VMware website at: https://docs.vmware.com/
Installing SmartSense on HDP
 1 Installing SmartSense on HDP Date of Publish: 2018-07-12 http://docs.hortonworks.com Contents SmartSense installation... 3 SmartSense system requirements... 3 Operating system, JDK, and browser requirements...3
VMware Identity Manager Cloud Deployment. DEC 2017 VMware AirWatch 9.2 VMware Identity Manager
 VMware Identity Manager Cloud Deployment DEC 2017 VMware AirWatch 9.2 VMware Identity Manager You can find the most up-to-date technical documentation on the VMware website at: https://docs.vmware.com/
VMware AirWatch Content Gateway Guide for Linux For Linux
 VMware AirWatch Content Gateway Guide for Linux For Linux Workspace ONE UEM v9.7 Have documentation feedback? Submit a Documentation Feedback support ticket using the Support Wizard on support.air-watch.com.
VMware Identity Manager Cloud Deployment. Modified on 01 OCT 2017 VMware Identity Manager
 VMware Identity Manager Cloud Deployment Modified on 01 OCT 2017 VMware Identity Manager You can find the most up-to-date technical documentation on the VMware Web site at: https://docs.vmware.com/ The
VMware AirWatch Content Gateway Guide For Linux
 VMware AirWatch Content Gateway Guide For Linux AirWatch v9.2 Have documentation feedback? Submit a Documentation Feedback support ticket using the Support Wizard on support.air-watch.com. This product
Installing and Configuring VMware Identity Manager Connector (Windows) OCT 2018 VMware Identity Manager VMware Identity Manager 3.
 OCT 2018 VMware Identity Manager VMware Identity Manager 3.") Installing and Configuring VMware Identity Manager Connector 2018.8.1.0 (Windows) OCT 2018 VMware Identity Manager VMware Identity Manager 3.3 You can find the most up-to-date technical documentation on
Installing and Configuring VMware Identity Manager Connector 2018.8.1.0 (Windows) OCT 2018 VMware Identity Manager VMware Identity Manager 3.3 You can find the most up-to-date technical documentation on
VMware AirWatch Cloud Connector Guide ACC Installation and Integration
 VMware AirWatch Cloud Connector Guide ACC Installation and Integration Workspace ONE UEM v1810 Have documentation feedback? Submit a Documentation Feedback support ticket using the Support Wizard on support.air-watch.com.
Install and upgrade Qlik Sense. Qlik Sense 3.0 Copyright QlikTech International AB. All rights reserved.
 Install and upgrade Qlik Sense Qlik Sense 3.0 Copyright 1993-2016 QlikTech International AB. All rights reserved. Copyright 1993-2016 QlikTech International AB. All rights reserved. Qlik, QlikTech, Qlik
Product Guide. McAfee Plugins for Microsoft Threat Management Gateway Software
 Product Guide McAfee Plugins for Microsoft Threat Management Gateway 1.4.0 Software COPYRIGHT Copyright 2011 McAfee, Inc. All Rights Reserved. No part of this publication may be reproduced, transmitted,
Sophos Mobile Control SaaS startup guide. Product version: 6.1
 Sophos Mobile Control SaaS startup guide Product version: 6.1 Document date: September 2016 Contents 1 About this guide...4 2 About Sophos Mobile Control...5 3 What are the key steps?...7 4 Change your
NetBackup Collection Quick Start Guide
 NetBackup Collection Quick Start Guide This whitepaper is intended for IT professionals, IT managers, and IT personnel responsible for the planning, setup, and/or administration of Veritas Information
CloudLink SecureVM. Administration Guide. Version 4.0 P/N REV 01
 CloudLink SecureVM Version 4.0 Administration Guide P/N 302-002-056 REV 01 Copyright 2015 EMC Corporation. All rights reserved. Published June 2015 EMC believes the information in this publication is accurate
NGFW Security Management Center
 NGFW Security Management Center Release Notes 6.3.4 Revision A Contents About this release on page 2 System requirements on page 2 Build version on page 3 Compatibility on page 5 New features on page 5
Installing and Configuring vcloud Connector
 Installing and Configuring vcloud Connector vcloud Connector 2.6.0 This document supports the version of each product listed and supports all subsequent versions until the document is replaced by a new
Privileged Identity App Launcher and Session Recording
 Privileged Identity App Launcher and Session Recording 2018 Bomgar Corporation. All rights reserved worldwide. BOMGAR and the BOMGAR logo are trademarks of Bomgar Corporation; other trademarks shown are
Ansible Tower Quick Setup Guide
 Ansible Tower Quick Setup Guide Release Ansible Tower 2.4.5 Red Hat, Inc. Jun 06, 2017 CONTENTS 1 Quick Start 2 2 Login as a Superuser 3 3 Import a License 4 4 Examine the Tower Dashboard 6 5 The Setup
Deploying VMware Identity Manager in the DMZ. JULY 2018 VMware Identity Manager 3.2
 Deploying VMware Identity Manager in the DMZ JULY 2018 VMware Identity Manager 3.2 You can find the most up-to-date technical documentation on the VMware website at: https://docs.vmware.com/ If you have
VMware Workspace ONE UEM VMware AirWatch Cloud Connector
 VMware AirWatch Cloud Connector VMware Workspace ONE UEM 1811 You can find the most up-to-date technical documentation on the VMware website at: https://docs.vmware.com/ If you have comments about this
Stonesoft Management Center. Release Notes Revision A
 Stonesoft Management Center Release Notes 5.10.2 Revision A Table of contents 1 About this release...3 System requirements... 3 Build version...4 Compatibility... 5 2 New features...6 3 Enhancements...
NGFW Security Management Center
 NGFW Security Management Center Release Notes 6.5.3 Revision A Contents About this release on page 2 System requirements on page 2 Build number and checksums on page 4 Compatibility on page 5 New features
Deploying VMware Identity Manager in the DMZ. SEPT 2018 VMware Identity Manager 3.3
 Deploying VMware Identity Manager in the DMZ SEPT 2018 VMware Identity Manager 3.3 You can find the most up-to-date technical documentation on the VMware website at: https://docs.vmware.com/ If you have
Enterprise Steam Installation and Setup
 Enterprise Steam Installation and Setup Release H2O.ai Mar 01, 2017 CONTENTS 1 Installing Enterprise Steam 3 1.1 Obtaining the License Key........................................ 3 1.2 Ubuntu Installation............................................
SafeConsole On-Prem Install Guide. version DataLocker Inc. July, SafeConsole. Reference for SafeConsole OnPrem
 version 5.2.2 DataLocker Inc. July, 2017 SafeConsole Reference for SafeConsole OnPrem 1 Contents Introduction................................................ 2 How do the devices become managed by SafeConsole?....................
VIRTUAL GPU LICENSE SERVER VERSION AND 5.1.0
 VIRTUAL GPU LICENSE SERVER VERSION 2018.06 AND 5.1.0 DU-07754-001 _v6.0 through 6.2 July 2018 User Guide TABLE OF CONTENTS Chapter 1. Introduction to the NVIDIA vgpu Software License Server... 1 1.1. Overview
NGFW Security Management Center
 NGFW Security Management Center Release Notes 6.3.7 Revision A Contents About this release on page 2 System requirements on page 2 Build version on page 3 Compatibility on page 5 New features on page 5
StreamSets Control Hub Installation Guide
 StreamSets Control Hub Installation Guide Version 3.2.1 2018, StreamSets, Inc. All rights reserved. Table of Contents 2 Table of Contents Chapter 1: What's New...1 What's New in 3.2.1... 2 What's New in
Metadefender Core v3.14.2
 Metadefender Core v3.14.2 2017 OPSWAT, Inc. All rights reserved. OPSWAT, MetadefenderTM and the OPSWAT logo are trademarks of OPSWAT, Inc.All other trademarks, trade names, service marks, service names,
Installation Guide. McAfee Web Gateway. for Riverbed Services Platform
 Installation Guide McAfee Web Gateway for Riverbed Services Platform COPYRIGHT Copyright 2010 McAfee, Inc. All Rights Reserved. No part of this publication may be reproduced, transmitted, transcribed,
KeyNexus Hyper-V Deployment Guide
 v1.0 09/2018 . Copyright Notice Copyright 2018 KeyNexus Inc. All rights reserved. Information in this document is subject to change without notice. The software described in this document is furnished
NGFW Security Management Center
 NGFW Security Management Center Release Notes 6.3.5 Revision A Contents About this release on page 2 System requirements on page 2 Build version on page 3 Compatibility on page 5 New features on page 5
akkadian Global Directory 3.0 System Administration Guide
 akkadian Global Directory 3.0 System Administration Guide Updated July 19 th, 2016 Copyright and Trademarks: I. Copyright: This website and its content is copyright 2014 Akkadian Labs. All rights reserved.
Installation on Windows Server 2008
 USER GUIDE MADCAP PULSE 4 Installation on Windows Server 2008 Copyright 2018 MadCap Software. All rights reserved. Information in this document is subject to change without notice. The software described
McAfee Firewall Enterprise epolicy Orchestrator Extension
 Integration Guide Revision A McAfee Firewall Enterprise epolicy Orchestrator Extension COPYRIGHT Copyright 2012 McAfee, Inc. Do not copy without permission. TRADEMARK ATTRIBUTIONS McAfee, the McAfee logo,
VMware AirWatch Content Gateway Guide for Windows
 VMware AirWatch Content Gateway Guide for Windows AirWatch v9.3 Have documentation feedback? Submit a Documentation Feedback support ticket using the Support Wizard on support.air-watch.com. This product
Transport Gateway Installation / Registration / Configuration
 CHAPTER 4 Transport Gateway Installation / Registration / Configuration This chapter covers the following areas: Transport Gateway requirements. Security Considerations When Using a Transport Gateway.
Metadefender Core v3.14.2
 Metadefender Core v3.14.2 2017 OPSWAT, Inc. All rights reserved. OPSWAT, MetadefenderTM and the OPSWAT logo are trademarks of OPSWAT, Inc.All other trademarks, trade names, service marks, service names,
NGFW Security Management Center
 NGFW Security Management Center Release Notes 6.2.4 Revision A Contents About this release on page 2 System requirements on page 2 Build version on page 3 Compatibility on page 4 New features on page 5
Stonesoft Management Center. Release Notes Revision A
 Stonesoft Management Center Release Notes 6.1.3 Revision A Contents About this release on page 2 System requirements on page 2 Build version on page 3 Compatibility on page 4 New features on page 5 Enhancements
VMware AirWatch Content Gateway for Windows. VMware Workspace ONE UEM 1811 Unified Access Gateway
 VMware AirWatch Content Gateway for Windows VMware Workspace ONE UEM 1811 Unified Access Gateway You can find the most up-to-date technical documentation on the VMware website at: https://docs.vmware.com/
VMware AirWatch Content Gateway Guide for Windows
 VMware AirWatch Content Gateway Guide for Windows AirWatch v9.2 Have documentation feedback? Submit a Documentation Feedback support ticket using the Support Wizard on support.air-watch.com. This product
VMware Enterprise Systems Connector Installation and Configuration. JULY 2018 VMware Identity Manager 3.2 VMware Identity Manager VMware AirWatch 9.
 VMware Enterprise Systems Connector Installation and Configuration JULY 2018 VMware Identity Manager 3.2 VMware Identity Manager VMware AirWatch 9.3 You can find the most up-to-date technical documentation
Ekran System v.5.2 Deployment Guide
 Ekran System v.5.2 Deployment Guide Table of Contents About... 6 System Requirements... 7 Program Structure... 9 Deployment Process... 10 Server and Database... 11 About... 11 Database Types Comparison...
Installation Guide for Pulse on Windows Server 2012
 USER GUIDE MADCAP PULSE 4 Installation Guide for Pulse on Windows Server 2012 Copyright 2018 MadCap Software. All rights reserved. Information in this document is subject to change without notice. The
Oracle Enterprise Manager. 1 Before You Install. System Monitoring Plug-in for Oracle Unified Directory User's Guide Release 1.0
 Oracle Enterprise Manager System Monitoring Plug-in for Oracle Unified Directory User's Guide Release 1.0 E24476-01 October 2011 The System Monitoring Plug-In for Oracle Unified Directory extends Oracle
Automation Anywhere Enterprise 10 LTS
 Automation Anywhere Enterprise 10 LTS Document Version: 1.3 Installation Guide Date of Publication: 15 th November, 2016 Update(s) to this document edition: Table of Contents 1. Client Prerequisites Processor
Sophos Mobile. startup guide. Product Version: 8.1
 Sophos Mobile startup guide Product Version: 8.1 Contents About this guide... 1 Sophos Mobile licenses... 2 Trial licenses...2 Upgrade trial licenses to full licenses... 2 Update licenses... 2 What are
Deployment Guide. 3.1 For Windows For Linux Docker image Windows Installation Installation...
 TABLE OF CONTENTS 1 About Guide...1 2 System Requirements...2 3 Package...3 3.1 For Windows... 3 3.2 For Linux... 3 3.3 Docker image... 4 4 Windows Installation...5 4.1 Installation... 5 4.1.1 Install
VMware AirWatch Content Gateway Guide for Windows
 VMware AirWatch Content Gateway Guide for Windows Workspace ONE UEM v1810 Have documentation feedback? Submit a Documentation Feedback support ticket using the Support Wizard on support.air-watch.com.
GUIDE. MetaDefender Kiosk Deployment Guide
 GUIDE MetaDefender Kiosk Deployment Guide 1 SECTION 1.0 Recommended Deployment of MetaDefender Kiosk(s) OPSWAT s MetaDefender Kiosk product is deployed by organizations to scan portable media and detect
McAfee Security Management Center
 Data Sheet McAfee Security Management Center Unified management for next-generation devices Key advantages: Single pane of glass across the management lifecycle for McAfee next generation devices. Scalability
TIBCO Spotfire Automation Services
 TIBCO Spotfire Automation Services Software Release 7.9 May 2017 Two-Second Advantage 2 Important Information SOME TIBCO SOFTWARE EMBEDS OR BUNDLES OTHER TIBCO SOFTWARE. USE OF SUCH EMBEDDED OR BUNDLED
Identity Policies. Identity Policy Overview. Establishing User Identity through Active Authentication
 You can use identity policies to collect user identity information from connections. You can then view usage based on user identity in the dashboards, and configure access control based on user or user
NGFW Security Management Center
 NGFW Security Management Center Release Notes 6.3.2 Revision A Contents About this release on page 2 System requirements on page 2 Build version on page 3 Compatibility on page 5 New features on page 5
Sophos Mobile as a Service
 startup guide Product Version: 8 Contents About this guide... 1 What are the key steps?... 2 Change your password... 3 Change your login name... 4 Activate Mobile Advanced licenses...5 Check your licenses...6
Metadefender Core v3.13.1
 Metadefender Core v3.13.1 2017 OPSWAT, Inc. All rights reserved. OPSWAT, MetadefenderTM and the OPSWAT logo are trademarks of OPSWAT, Inc.All other trademarks, trade names, service marks, service names,
Stonesoft Management Center. Release Notes Revision A
 Stonesoft Management Center Release Notes 5.10.5 Revision A Table of contents 1 About this release...3 System requirements... 3 Build version...4 Compatibility... 5 2 New features...6 3 Enhancements...
FieldView. Management Suite
 FieldView The FieldView Management Suite (FMS) system allows administrators to view the status of remote FieldView System endpoints, create and apply system configurations, and manage and apply remote
NGFW Security Management Center
 NGFW Security Management Center Release Notes 6.4.3 Revision A Contents About this release on page 2 System requirements on page 2 Build version on page 3 Compatibility on page 4 New features on page 5
UC for Enterprise (UCE) NEC Centralized Authentication Service (NEC CAS)
 NEC Centralized Authentication Service (NEC CAS)") UC for Enterprise (UCE) NEC Centralized Authentication Service (NEC CAS) Installation Guide NEC NEC Corporation October 2010 NDA-30362, Revision 15 Liability Disclaimer NEC Corporation reserves the right
UC for Enterprise (UCE) NEC Centralized Authentication Service (NEC CAS) Installation Guide NEC NEC Corporation October 2010 NDA-30362, Revision 15 Liability Disclaimer NEC Corporation reserves the right
BIG-IP Access Policy Manager : Secure Web Gateway. Version 13.0
 BIG-IP Access Policy Manager : Secure Web Gateway Version 13.0 Table of Contents Table of Contents BIG-IP APM Secure Web Gateway Overview...9 About APM Secure Web Gateway... 9 About APM benefits for web
Bomgar Vault Server Installation Guide
 Bomgar Vault 17.2.1 Server Installation Guide 2017 Bomgar Corporation. All rights reserved worldwide. BOMGAR and the BOMGAR logo are trademarks of Bomgar Corporation; other trademarks shown are the property
SGOS on KVM Deployment Guide
 SGOS on KVM Deployment Guide Guide Revision: 8/18/2017 2 SGOS on KVM Deployment Guide SGOS on KVM Deployment Guide 3 Legal Notice Copyright 2017 Symantec Corp. All rights reserved. Symantec, the Symantec
8.0 Help for Community Managers Release Notes System Requirements Administering Jive for Office... 6
 for Office Contents 2 Contents 8.0 Help for Community Managers... 3 Release Notes... 4 System Requirements... 5 Administering Jive for Office... 6 Getting Set Up...6 Installing the Extended API JAR File...6
Sophos Mobile SaaS startup guide. Product version: 7.1
 Sophos Mobile SaaS startup guide Product version: 7.1 Contents 1 About this guide...4 2 What are the key steps?...5 3 Change your password...6 4 Change your login name...7 5 Activate SMC Advanced licenses...8
VIRTUAL GPU LICENSE SERVER VERSION , , AND 5.1.0
 VIRTUAL GPU LICENSE SERVER VERSION 2018.10, 2018.06, AND 5.1.0 DU-07754-001 _v7.0 through 7.2 March 2019 User Guide TABLE OF CONTENTS Chapter 1. Introduction to the NVIDIA vgpu Software License Server...
NGFW Security Management Center
 NGFW Security Management Center Release Notes 6.3.0 Revision A Contents About this release on page 2 System requirements on page 2 Build version on page 3 Compatibility on page 5 New features on page 5
SafeConsole On-Prem Install Guide
 SafeConsole On-Prem Install Guide This guide applies to SafeConsole 5.0.5 Introduction This guide describes how to install a new SafeConsole server on Windows using the SafeConsole installer. As an option,
Setting Up Resources in VMware Identity Manager (On Premises) Modified on 30 AUG 2017 VMware AirWatch 9.1.1
 Modified on 30 AUG 2017 VMware AirWatch 9.1.1") Setting Up Resources in VMware Identity Manager (On Premises) Modified on 30 AUG 2017 VMware AirWatch 9.1.1 Setting Up Resources in VMware Identity Manager (On Premises) You can find the most up-to-date
Setting Up Resources in VMware Identity Manager (On Premises) Modified on 30 AUG 2017 VMware AirWatch 9.1.1 Setting Up Resources in VMware Identity Manager (On Premises) You can find the most up-to-date
VMware Enterprise Systems Connector Installation and Configuration
 VMware Enterprise Systems Connector Installation and Configuration Modified APR 2018 VMware Identity Manager 3.1 VMware Identity Manager VMware AirWatch 9.2 You can find the most up-to-date technical documentation
Sophos Mobile. super administrator guide. Product Version: 8
 Sophos Mobile super administrator guide Product Version: 8 Contents About this guide... 1 Document conventions... 1 Super administrator... 2 Super administrator tasks...2 Super administrator customer...
Version Installation Guide. 1 Bocada Installation Guide
 Version 19.4 Installation Guide 1 Bocada Installation Guide Copyright 2019 Bocada LLC. All Rights Reserved. Bocada and BackupReport are registered trademarks of Bocada LLC. Vision, Prism, vpconnect, and
McAfee Endpoint Security Threat Prevention Installation Guide - Linux
 McAfee Endpoint Security 10.5.1 - Threat Prevention Installation Guide - Linux COPYRIGHT Copyright 2018 McAfee, LLC TRADEMARK ATTRIBUTIONS McAfee and the McAfee logo, McAfee Active Protection, epolicy
VMware vfabric Data Director Installation Guide
 VMware vfabric Data Director Installation Guide vfabric Data Director 1.0.1 This document supports the version of each product listed and supports all subsequent versions until the document is replaced
QuickStart Guide for Managing Computers. Version
 QuickStart Guide for Managing Computers Version 10.2.0 copyright 2002-2018 Jamf. All rights reserved. Jamf has made all efforts to ensure that this guide is accurate. Jamf 100 Washington Ave S Suite 1100
Stonesoft Management Center. Release Notes Revision B
 Stonesoft Management Center Release Notes 6.1.0 Revision B Table of contents 1 About this release...3 System requirements... 3 Build version...4 Compatibility... 5 2 New features...6 3 Enhancements...
Configuration Guide. BlackBerry UEM Cloud
 Configuration Guide BlackBerry UEM Cloud Published: 2018-04-18 SWD-20180411125526296 Contents About this guide... 7 Getting started... 8 Configuring BlackBerry UEM Cloud for the first time... 8 Administrator
SafeConsole On-Prem Install Guide
 version 5.4 DataLocker Inc. December, 2018 Reference for SafeConsole OnPrem 1 Contents Introduction................................................ 3 How do the devices become managed by SafeConsole?....................
QuickStart Guide for Managing Computers. Version
 QuickStart Guide for Managing Computers Version 10.6.0 copyright 2002-2018 Jamf. All rights reserved. Jamf has made all efforts to ensure that this guide is accurate. Jamf 100 Washington Ave S Suite 1100
MetaDefender Vault 1.2.5
 MetaDefender Vault 1.2.5 2018 OPSWAT, Inc. All rights reserved. OPSWAT, MetadefenderTM and the OPSWAT logo are trademarks of OPSWAT, Inc. All other trademarks, trade names, service marks, service names,
VMware AirWatch Content Gateway Guide for Windows
 VMware AirWatch Content Gateway Guide for Windows AirWatch v9.1 Have documentation feedback? Submit a Documentation Feedback support ticket using the Support Wizard on support.air-watch.com. This product
McAfee epo Deep Command
 Quick Start Guide McAfee epo Deep Command version 2.4.1 This Quick Start Guide provides high level instructions for setting up McAfee epo Deep Command 2.4.1. For detailed instructions, refer to the McAfee
VMware Tunnel Guide Deploying the VMware Tunnel for your AirWatch environment
 VMware Tunnel Guide Deploying the VMware Tunnel for your AirWatch environment AirWatch v9.3 Have documentation feedback? Submit a Documentation Feedback support ticket using the Support Wizard on support.air-watch.com.
NGFW Security Management Center
 NGFW Security Management Center Release Notes 6.4.0 Revision B Contents About this release on page 2 System requirements on page 2 Build version on page 3 Compatibility on page 4 New features on page 5
Support Visit mysupport.mcafee.com to find product documentation, announcements, and support.
 Release Notes McAfee Web Gateway version 7.1.0.3 This document provides information about the McAfee Web Gateway version 7.1.0.3 appliance software. You can find more information at the following locations:
RED IM Integration with Bomgar Privileged Access
 RED IM Integration with Bomgar Privileged Access 2018 Bomgar Corporation. All rights reserved worldwide. BOMGAR and the BOMGAR logo are trademarks of Bomgar Corporation; other trademarks shown are the
NGFW Security Management Center
 NGFW Security Management Center Release Notes 6.3.3 Revision A Contents About this release on page 2 System requirements on page 2 Build version on page 3 Compatibility on page 5 New features on page 5
Installing or Upgrading ANM Virtual Appliance
 CHAPTER 2 This chapter describes how to deploy Cisco ANM Virtual Appliance 4.3 (new installation) and how to upgrade from ANM software version 4.1 or 4.2 to software version 4.3. This chapter includes
Aspera Connect Windows XP, 2003, Vista, 2008, 7. Document Version: 1
 Aspera Connect 2.6.3 Windows XP, 2003, Vista, 2008, 7 Document Version: 1 2 Contents Contents Introduction... 3 Setting Up... 4 Upgrading from a Previous Version...4 Installation... 4 Set Up Network Environment...
Connectware Manager Getting Started Guide
 Connectware Manager Getting Started Guide 90000699_B 2004, 2005 Digi International Inc. Digi, Digi International, the Digi logo, the Digi Connectware log, the Making Device Networking Easy logo, Digi
Using vrealize Operations Tenant App as a Service Provider
 Using vrealize Operations Tenant App as a Service Provider Using vrealize Operations Tenant App as a Service Provider You can find the most up-to-date technical documentation on the VMware Web site at:
Dell EMC License Manager Version 1.5 User's Guide
 Dell EMC License Manager Version 1.5 User's Guide Notes, cautions, and warnings NOTE: A NOTE indicates important information that helps you make better use of your product. CAUTION: A CAUTION indicates
Sophos Mobile Control Administrator guide. Product version: 5.1
 Sophos Mobile Control Administrator guide Product version: 5.1 Document date: June 2015 Contents 1 About Sophos Mobile Control...5 1.1 Sophos Mobile Control on premise and as a Service...5 1.2 About this
Sophos Mobile Control SaaS startup guide. Product version: 7
 Sophos Mobile Control SaaS startup guide Product version: 7 Contents 1 About this guide...4 2 About Sophos Mobile Control...5 3 What are the key steps?...7 4 Change your password...8 5 Change your login
Dell License Manager Version 1.2 User s Guide
 Dell License Manager Version 1.2 User s Guide Notes, Cautions, and Warnings NOTE: A NOTE indicates important information that helps you make better use of your computer. CAUTION: A CAUTION indicates either