FCC RF Radiation Exposure Statement. Interference Information
|
|
|
- Clyde Haynes
- 5 years ago
- Views:
Transcription


1 IP Phone IP110
2 Interference Information This device complies with Part 15 of the FCC Rules. Operation is subject to the following two conditions: (1) This device may not cause harmful interference; and (2) This device must accept any interference received, including interference that may cause undesired operation. Privacy of communications may not be ensured when using this phone. This equipment has been tested and found to comply with the limits for a Class B digital device, pursuant to Part 15 of the FCC Rules. These limits are designed to provide reasonable protection against harmful interference in a residential installation. This equipment generates, uses, and can radiate radio frequency energy and, if not installed and used in accordance with the instructions, may cause harmful interference to radio communications. However, there is no guarantee that interference will not occur in a particular installation. If this equipment does cause harmful interference to radio or television reception, which can be determined by turning the equipment off and on, the user is encouraged to try to correct the interference by one or more of the following measures: Reorient or relocate the receiving antenna (that is, the antenna for radio or television that is receiving the interference). Reorient or relocate and increase the separation between the telecommunications equipment and Receiver. Connect the telecommunications equipment into an outlet on a circuit different from that to which the receiving antenna is connected. If these measures do not eliminate the interference, please consult your dealer or an experienced radio/television technician for additional suggestions. Also, the Federal Communications Commission has prepared a helpful booklet, How To Identify and Resolve Radio/TV Interference Problems. This booklet is available from the U.S. Government Printing Office, Washington, D.C Please specify stock number when ordering copies. Warning: The changes or modifications not expressly approved by the party responsible for compliance could void the user s authority to operate the equipment. The RCA IP110 phone is dedicated to business environment use. It is a full-featured and a flexible SIP solution. It is compatible with most IP PBX and VoIP providers. Please read through the administrator s guide before installing your phone. FCC RF Radiation Exposure Statement This equipment complies with FCC RF radiation exposure limits set forth for an uncontrolled environment. This equipment should be installed and operated with a minimum distance of 20 centimeters between the radiator and your body. This transmitter must not be co-located or operated in conjunction with any other antenna or transmitter. This is a class B device, in a domestic environment; this product may cause radio interference, in which case the user may be required to take adequate measures. To avoid the potential effects on the environment and human health as a result of the presence of hazardous substances in electrical and electronic equipment, end users of electrical and electronic equipment should understand the meaning of the crossed-out wheeled bin symbol. Do not dispose of WEEE as unsorted municipal waste and have to collect such WEEE separately. 2
3 Table of Contents Getting Started 5 Packing List 5 Assembling IP110 6 Configuration and Registration 7 Basic Configuration via Web Page 7 Account Settings 8 Basic Configuration using phone keypad 9 Overview 11 LEDs 12 Icons 12 User Interface 13 User levels 15 Administrator Mode 15 Reboot 16 Customizing Your Phone 16 General Settings 16 Phone Status 16 Time and Date 17 Keypad Lock 18 Audio Settings 18 Volume 18 Ring Tones 19 Codec Selection 19 Contact Management 20 Edit/Add/Delete Contacts 21 Basic Call Functions 23 Outgoing calls 23 Call Devices 23 Call Methods 23 Send Key configuration 24 Hot Line 24 Anonymous call 25 Dial Plan 26 Incoming calls 27 DND 28 Call Forward 28 Auto Answer 29 3 Call log 30 Accessing Call log 30 Accessing Missed Calls list 30 Accessing Dial Calls list 30 Call list items management 30 During an Active Call 31 Mute 31 Call Hold 31 Call Waiting 31 Handling a waiting call 31 Call Waiting Configuration 32 Call Transfer 32 3-way Conference 33 Voic 33 Voic settings 33 Retrieving your Voic messages 33 Advanced Functions 34 Account Setting 34 Network Settings 35 Advanced Network Settings 35 VLAN 35 HTTPS X 36 Reset to Factory 36 Firmware Update and Autoprovisioning 37 Decryption 37 System Export 38 Keys configuration 38 Send Key configuration 38 Programmable keys 39 Line keys Configuration 40 Line 40 Speed Dial 41 Confernce 41 Forward 41 Transfer 41 Hold 42
4 Table of Contents DND 42 Call Return 42 Pick Up 42 Call Park 43 Voice Mail 43 Prefix 43 Redial 43 Trouble shooting 44 Appendix A. 46 Line Key configuration menu 46 Memory Key configuration menu 47 Service 48 Warranty 49 4

5 Getting Started Packing List The following components are included in your package: IP110 Handset & Handset Cord AC Adapter Ethernet Cable Quick Start Guide Setting up your IP110 This section introduces how to set up the phone with the components in the packing list: Connecting the Handset Cord Connecting to the Network and Power. Connecting the Handset and Headset (not included) 5
6 Connect Network and Power Connect the phone to AC Power directly using the included power adapter. Note: If inline power is provided, do not install AC adapter. Make sure the Ethernet cable and switch/hub are PoE compliant. The LAN Port can also be connected to Hub/Switch/IP PBX or other internet devices. The phone can also share the network connection with other network devices such as a PC. Connect the phone s PC port to the computer s network port using an Ethernet cable. Power Socket PC Headset Network Socket Handset Press here to release stand 6
7 Configuration and Registration Some simple configurations are needed to get your phone ready for making calls: network and account information must be correct. If you are not an administrator, please contact your internet administrator or service provider for more details. Telephone Features and your VoIP Service Provider Not all phone features are available with all VoIP service providers. Please make sure all features are properly configured with the service provider before installing the IP110. Basic Configuration via Web Page The IP110 features an embedded web server to help administrators and users configure, manage and use their phone in an intuitive and simple manner. The phone s web server can be accessed with any web browser. Press the OK button when the phone is in idle mode to find out your IP110 s IP address. Enter it (for example into the address bar of your web browser. The default administrator s login name and password are admin/admin. Network Settings Click on NETWORK[INTERNET PORT (WAN) Settings. DHCP: By default the phone attempts to contact a DHCP Server in your network in order to obtain its valid network settings, e.g. IP address, subnet mask, gateway, DNS server, etc. Static IP Address: If your phone cannot contact a DHCP Server for any reason, you need to enter the network settings manually via Static IP Address. Please contact your network administrator for more details. 7

8 Account Settings The phone attempts to register to the SIP server using the account data provided by automatic or manual initialization. Click on ACCOUNT[ACCOUNT SETTINGS. Select Account to Account 1. You will find the following parameters: Field Account Active Label Display Name Register Name User Name User Password SIP Server SIP Server Port Description You can choose to Enable or Disable this account. The name shown on the LCD screen. What the phone will display on the other phone s Caller ID. This may be overridden by data at the service provider. Register name, provided by your service provider. User name, provided by your service provider. User password provided by your service provider. SIP server address provided by your service provider. SIP server port provided by your service provider. The default is
 require an authentication, a correct password is needed. Make sure you are using the appropriate input method or enter the password via the web user interface.")
9 Fill the fields and press the SAVE button. The phone will try to register to the SIP server. If all accounts registering fail, the phone will display No Service by default. Note: Should the IP PBX (SIP Server) require an authentication, a correct password is needed. Make sure you are using the appropriate input method or enter the password via the web user interface. Basic Configuration using phone keypad You will need admin privileges to perform this and other configurations. By default the phone will be in user mode, so you will need to perform a simple procedure to switch to admin mode. 9
10 Change phone to admin mode: Press MENU/BACK[7. User Type. Press the RIGHT navigation key until you see admin on the screen. Then press the DOWN key to be prompted for the password. It is admin by default. Type and press OK. Network Settings: Press MENU/BACK[3. SETTINGS[2. ADVANCED[OK. Enter the admin password, and choose NETWORK->WAN PORT or VLAN or WEB TYPE or 802.1x Settings to enter the internet relating configuration page. Account Settings: Press MENU/BACK[3. SETTINGS[2. ADVANCED[OK. Enter the admin password, and choose ACCOUNTS[OK to configure the account settings. Enter the following parameters: Field Activation Label Display Name Register Name User Name Password SIP Server Description Enable/disable the account What the phone will display on the other phone s Caller ID. This may be overridden by data at the service provider. The local phone name showing on the other phone when calling Register name provided by your service provider. User name provided by your service provider. Account password provided by your service provider. SIP server address provided by your service provider. Press the UP and DOWN buttons to scroll through the parameter list and fill in proper information. Press the OK button to confirm. Note: The active User Type is shown with an * on the left of display when you enter MENU/ BACK[7. User Type MENU/BACK, like this: <*user > Once you finish all admin related tasks you should change back to user mode with the same procedure. 10


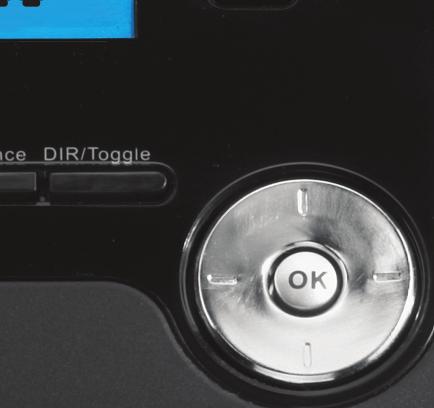


11 Overview 2 Lines Menu/Back Hold/DND Conference DIR/Toggle Mute/Cancel Volume Up Volume Dow Speaker Voic Call Transfer Headset 11
12 LEDs Line Keys LED Status Steady blue Blinking blue Description The line is open There is an incoming call to the account, or there is a call on hold Off The phone is in idle status whatever registered / unregistered Power Indication LED LED Status Steady blue Blinking blue Slow blinking blue Off Description You have new messages or new missed calls There is an incoming call or a call is muted The network is not available or SIP server failure IDLE MODE Icons The IP110 displays icons on its LCD, you can refer to the following table for their meanings: Icon 2aB 123 Description Flashes when the internet is disconnected MISSED CALLS CALL IN CALL OUT Input method: all letters and numbers Input method: numbers 12
13 Icon abc ABC Description Input method: multi-lingual letters in lower case Input method: multi-lingual letters in upper case CALL MUTE VOIC CALL FORWARD AUTO ANSWER DND In HANDSET mode In HEADSET mode In SPEAKER mode Keypad Lock User Interface There are two ways to customize specific options on your phone: - Using the keypad and display of the phone. - Using the Web user interface in an Internet browser from your PC; please refer to Configuration and Registration to get into the Web interface. 13
14 PHONE OPTIONS PHONE UI WEB UI Status IP 4 4 MAC 4 4 Firmware 4 4 Network 4 4 Phone 4 Accounts 4 4 Call Features Forward 4 4 Call Waiting 4 4 Function Keys 4 4 Send Key 4 4 Hot Line 4 4 Anonym Call 4 4 DND 4 4 Logs Setting 4 4 Basic Phone Functions Language 4 Time & Date 4 4 Ring Tone 4 4 Phone Volume 4 Advanced Phone Functions Accounts 4 4 Network 4 4 Reset Factory 4 Set Password 4 4 Set AES Key 4 4 Auto Provision 4 4 Other Features Messages 4 History 4 4 Directory 4 4 User Mode 4 Note: 1) The above table only indicates most of phone functions rather than all of them. Please refer to next chapters for more details. 2) Some functions are password protected. In this case when you are prompted for a password make sure to introduce one in accordance with active User Type The default administrator password is admin. 14
15 Maintenance Tasks User levels The phone allows three modes to configure the phone: - User Mode - VAR mode - Administrator Mode Administrator mode grants unlimited access to the phone configuration on both Web and Phone interface. User Mode is not able to access the settings on the Phone interface such as: Accounts, Network, Reset to Factory, other advance phone settings. VAR mode grants access to subset of Administrator functions (Login and password are var/var). Administrator Mode Administrator mode grants unlimited access to the phone configuration on both the web and the phone user interface. The administrator/user password is used to access: Web interface. The advanced settings of the phone, such as Network, Account and Reset to Factory settings via the phone interface. The default administrator password for the phone interface is admin. The user name for the web interface access is admin and the password is admin. To change the administrator password via Phone interface: 1) Make sure active User Type is admin 2) Press MENU/BACK[3. SETTINGs[2. Advanced 3) You are prompted to enter the required password. 4) Scroll to Set Password option, then press OK button. 5) You are prompted to enter the Current PWD, New PWD and Confirm PWD, Press DIR/TOGGLE to change the input method. 6) Press OK button to confirm the change, or MENU to return to previous menu. To change the administrator password via Web interface: Go to SECURITY[PASSWORD 15

16 Reboot You should reboot the phone when you are asked to, e.g. after applying specific changes to phone configuration. To reboot via Web interface: 1) Go to SYSTEM[UPGRADE. 2) Click REBOOT button. Note: Please do not power off during reboot, or it may cause a flash memory error. Customizing Your Phone General Settings Phone Status You can view the status of your phone using the phone interface or the web interface. This option allows you to review: - IP address - MAC (Machine Access Control) address -Firmware version -Network: MAC, LAN, Netmask, Gateway, DNS, etc -Phone: Model, Hardware, Firmware, Product ID and MAC -Accounts: The status of the two SIP accounts To check the Phone Status via phone interface: Press OK button to check the IP. Use the navigation keys to check the other information. To view the Phone Status via web interface: Open a web browser and input the IP Address of the phone. Enter login and password (default login and password are admin and admin). Select STATUS [HARDWARE STATUS. 16
17 Time and Date Time and date are displayed on the idle screen. By default the date and time of the phone are configured manually, but you can set to obtain them from a preconfigured SNTP server, if needed. Please contact your system administrator if the time or date is incorrect. To change Time and Date via the Phone interface: Press MENU [3. SETTINGS[1. BASIC[1. TIME & DATE[OK. If SNTP is chosen, the phone will automatically get the time from an NTP Server. Use the UP and DOWN navigation keys to select the specific options and change parameters to meet your needs. You can set Time Zone, NTP Server1, and DST respectively. By default GMT+0 and automatic DST are configured. If Manual is chosen, the time can be set manually. Use the UP and DOWN navigation keys to select the option and enter the specific date and time. Press the OK button to save your changes. Or press MENU/BACK key to return to the previous screen. To set time format via the Phone interface: Press MENU/BACK[3.Settings [1.BASIC [1.TIME & DATE [3.TIME & DATE [OK. Use the LEFT and RIGHT navigation keys to choose a preferred time format: 12 hour or 24 hour. Press the OK button to save the changes and return to the previous screen. Note: By default date and time setting is set to Manual. 17
18 Keypad Lock You can lock the menu key of your phone to protect it from unauthorized use. When the menu key is locked, you can t access the menu of the phone. To enable the lock via Phone interface: Press MENU/BACK [3. SETTINGS[2. ADVANCED, enter the password of current user type, and then press OK button. Scroll down to Keypad Lock and press OK. Use the LEFT or RIGHT navigation keys to change to MENU KEY. Press OK button to active the change, or MENU button to return to the previous screen. The icon will be displayed on the top right corner of the idle screen. To unlock the phone via Phone interface: Press MENU key, you are prompted for the password. Enter the password of current user type, and then press OK button, you can enter the main menu and the keylock function is disabled as well. To enable keypad lock via Web interface: Choose Phone Preference web page to change the Keyboard lock option. Audio Settings Volume Handset, speaker, headset and ringer volumes can be adjusted independently. To adjust the volume in idle mode: Press MENU/BACK[3. SETTINGS[1. BASIC. Scroll to 3. Phone Volume, and press OK button. Select the item you wish to adjust and use VOLUME UP and VOLUME DOWN or LEFT and RIGHT navigation keys to increase or decrease volume. Press OK button to save volume change or MENU key to cancel. To adjust ring volume you can also press VOLUME UP and VOLUME DOWN when the phone is in idle status. To adjust the volume when you are in an active call: When handset/headset/speaker mode is activated, press VOLUME UP or VOLUME DOWN to adjust the volume. Note: The volume can only be adjusted via Phone interface. 18

19 Ring Tones There are seven unique ring tones on the IP110. To select Ring Tone Type via Phone interface: Press MENU/BACK[3. SETTINGS[1. BASIC[OK. Scroll to 2. RING TONE, and press OK button. Use the UP and DOWN navigation keys to select your selection. A sample of each tone will be played. Press OK button to save the change or MENU/BACK to cancel. Codec Selection The IP110 supports the following voice codecs: -PCM u-law, PCM a-law, G.729, G.722, G.726, ilbc, ilbd-20 You can enable/disable the desired codecs via Web interface. Please contact your System Administrator for more details about the codecs. To enable/disable the codecs via web interface: Choose ACCOUNT[ACCOUNT SETTINGS (Account 1/Account2) Select the desired codecs in Codecs section. Click Save button to save the change. PCM U-LAW PCM A-LAW Note: Codec Selection can only be done via Web interface. 19
20 Contact Management Edit/Add/Delete Contacts The IP110 features a 300 entry phonebook and 10 speed dial keys. With the phonebook you can add, edit, delete, dial, search for a contact or create groups of contacts. The phonebook also includes a Blacklist feature to block unwanted calls. To add a contact via Phone interface: Press DIR/TOGGLE and the OK button Or MENU/BACK[6. DIRECTORY[1. DIRECTORY. Press OK button to enter into the Contacts list, press UP navigation key to select the ADD option, Press the OK button, and enter a Name for your contact. Then press the DOWN navigation key to enter phone number of the contact via the keypad. Use the DIR/TOGGLE key to select between numeric and upper/lower case alphanumeric modes. Press the DOWN navigation key to select if you would like this contact to be associated with a specific VoIP account on this phone. The default is Auto. Press DOWN navigation key to set and choose a special ring tone for the contact. If you want to assign this contact to a group, use the DOWN navigation key to select the group. Press OK button to add the contact, or the MENU/BACK key to cancel the change. 20
21 To add a Group via Phone interface: Press DIR/TOGGLE and OK button or MENU/BACK[6.DIRECTORY[1.DIRECTORY. Use the LEFT and RIGHT navigation keys to choose AddGroup, press the OK button to enter to the Add Group page. Enter the group name and choose a ring tone to be associated with this group. Press OK button to save. To configure the speed dial keys via Phone Interface: Press MENU/BACK[2. FEATURE[2. FUNCTION KEYS [2. MEMORY KEYS Use the UP and DOWN navigation keys to select the key on which you want to store a contact number, press the OK key to confirm Use the RIGHT and LEFT navigation keys to select Speed Dial, then use the UP and DOWN keys to select Account if you want to assign this speed dial keys to a specific account. Use the UP and DOWN navigation keys to select Value, enter the desired number and press OK key to confirm. To use a Speed Dial key, simply hold DOWN the desired key for 2 seconds. The IP110 will automatically begin dialing that selection. To edit/delete a contact via Phone interface: Press DIR/TOGGLE [1. DIRECTORY or MENU/BACK[6. DIRECTORY [1. DIRECTORY Use the UP and DOWN navigation key to select the contact list (e.g. 1.Contacts) and press the OK button. Use the UP and DOWN navigation key to select the contact you want to edit or delete, then press LEFT/RIGHT navigation keys to select Edit or Del and press the OK button. John Smith If you select Edit, you will be able to change the Name, Numbers, Account, Ringtone and Group of the selected contact. Make the desired changes, press the OK button, or press MENU return to previous menu. If you select Del, the phone will ask if you are sure you wish to delete this contact. Press OK again, and the contact will be deleted. 21
22 To move a contact to the Blacklist via Phone interface: If you add a contact to the blacklist your phone will automatically reject all calls from this contact. Press DIR/TOGGLE [1. DIRECTORY or MENU/BACK[6. DIRECTORY[1. DIRECTORY Use the Up or DOWN navigation key to select the contact list (e.g. 1.Contacts) and press the OK button. Use the Up or DOWN navigation key to select the contact you want to move to blacklist, then press LEFT or RIGHT navigation keys to select M2B. John Smith M2B Press the OK button, or press MENU to return to previous menu. A warning message will ask for confirmation to move the contact to the Blacklist. Press the OK button to confirm the operation, or press the MENU button to return to the directory. To move a contact from Call Log to Contacts via Phone interface: Press MENU/BACK[5. HISTORY, or use the LEFT key shortcut Use the navigation keys to select a record, then press the DIR/TOGGLE key to enter the edit page. From here you can give the contact a name, add additional phone numbers, change the account association or give a VIP ringtone to the contact. Press the OK key to save the contact. To search a contact via Phone interface: Press DIR/TOGGLE [1. DIRECTORY Or MENU/BACK[6. DIRECTORY [ 1. DIRECTORY Use the Up or DOWN navigation key to select the contact list (e.g. 1.Contacts) and press the OK button. Press a key on the dial pad to enter the search mode. Enter the contact name to be searched for and press the OK button. Contact list will be searched for matching records. 22
23 Basic Call Functions Outgoing calls Call Devices You can make a phone call via the following devices: Pick up the handset, icon will be shown on the screen. Press the SPEAKER button, and this icon will be shown on the screen. Press HEADSET button if a headset is connected to the headset Port. This icon will be shown on the screen. Pressing the HEADSET button again will hang up the headset. Note: You can dial the number first, and then choose the device you will use for your call. Call Methods There are several ways to initiate a call: 1. Press an available Line button and dial the number you want to call, or 2. Dial a number and press the SPEAKER button, the HEADSET button or pick up the handset, or 3. Go to Directory, use the navigation keys to select the desired contact, or 4. Press the LEFT navigation key to enter the call log interface, then use the navigation keys to make your selection (press LEFT/RIGHT button to choose All Calls, Dialed Calls, Received Calls, Missed Calls and Forwarded Calls) or 5. Press the UP navigation key to enter the Dialed Calls interface, then choose a record to dial out or 6. Press and hold a key on the dial pad that has been set as speed dial key. To terminate a call you can: 1. Press the MENU/BACK key or 2. If you are in handset mode, replace the handset on hook or 3. If you are in speakerphone mode, press the speaker key 23
24 Send Key configuration Admin can set a specific button ( # or * ) as the send key. If this feature is enabled, once you ve dialed the desired number, you can press this send key to call your correspondent immediately. To set the send key via the IP phone interface: 1) Make sure active User Type is admin or var. 2) Press MENU/BACK [ 2. FEATURES[ 4. SEND Key to enter the configuration page. 1. Send Key: <*# > 3) Press the LEFT/RIGHT navigation keys to choose a button that you want to use as the send key: #, *, or disable this option. Note that currently active option has an * on the left. 4) Press the OK button to save the changes, or MENU to cancel. Hot Line Hot Line allows your phone to dial a number automatically if it has been off hook for a specified time period and no keys have been pressed. Both destination number and timeout can be configured. The service is enabled if Hot Line Number has been configured. To set the hot line number via the IP phone interface: Press MENU/BACK[2. FEATURES [3. HOT LINE to enter the configuration page. ( if the active user type is admin or var, press MENU/BACK [2. FEATURES [5. HOT LINE ) Enter the hot line number and press UP or DOWN navigation key to select HotLine Delay. Set the Hot Line Delay (default is 4 seconds), then press the OK button to save the changes. 24
25 Anonymous call Anonymous call, also known as Caller ID restriction, allows a user to request the network to hide their identity when they are performing outgoing calls. The IP110 supports Permanent Caller ID restriction, meaning that while enabled all calls will request to be anonymous and the user will need to disable the feature if they want their identity to be transmitted. This service can be performed locally or by sending an activation code to the network, depending on your network. Additionally the IP110 allows users to automatically reject anonymous incoming calls. These services can be managed through both phone and Web interfaces. To set Anonymous call via phone interface: 1) Press MENU/BACK[2. FEATURES [4. ANONYM CALL to enter the configuration page. ( if the active user type is admin or var, press MENU/BACK [ 2. FEATURES[6. ANONYM CALL ) 2) Use LEFT or RIGHT navigation keys to select the account to be anonymous. 3) Press DOWN navigation key to display Block CID, then press LEFT or RIGHT navigation keys to enable/disable the anonymous call function. 4) If you want to perform this function locally, press OK to save your changes. 5) If your user type is admin and you would like to activate this function in your service provider please press DOWN key and enter the Anonym On Code and Anonym Off Code. Whenever you enable/disable the anonymous call function on your phone, it will automatically send these codes to the server. 6) Press OK to save your changes, or MENU to cancel. 25
26 To set Anonymous call rejection using phone interface: 1) Press MENU/BACK[2. Features [ 4. Anonym Call to enter the configuration page. 2) Press the UP or DOWN navigation keys to enter the Rejection page (if the active user type is admin or var, press MENU/BACK [ 2. FEATURES [ 6. ANONYM CALL ). 3) Press RIGHT or LEFT navigation keys to enable/disable Anonymous Call Rejection function. 4) If your user type is admin and you would like to use your service provider to get this service, please press the DOWN key and enter the Rejection On Code and Rejection Off Code. Whenever you enable/disable the Rejection option on your IP phone, it will automatically send these codes to the server. 5) Press OK to save your changes, or MENU to cancel. Note: To manage Anonymous Calls and Rejection codes you need to have admin or var rights. Check active User Type before attempting to configure using phone interface. Dial Plan A dial plan establishes the expected number and pattern of digits for a telephone number. This includes country codes, access codes, area codes and all combinations of dialed digits. Dial plans can be used for least cost routing, dialing convenience or to prevent users from calling specific numbers or groups of numbers. Dial plans require admin or var privilege. The entire dial plan is enclosed in brackets (). Each dial plan is pipe seperated ( ). The dial plan can include the digits 0 to 9, * and #. x represents any digit from 0 to 9. Repetition (i.e. x.) represents any digit (x) repeated 0 or more times. Big letter T means to dial the numbers immediately after the dial plan sequence is matched (e.g. 1234T). Square brackets [] are for digit matching. For example, [578] xxx will match any four digit sequence starting with either 5, 7 or 8. [5-8]xxx will match any four digit sequence starting with 5, 6, 7 or 8. 26
27 Here is a dial plan example: (111T [0-4] xxxxxxxxt) 111T This will dial 111 immediately after you entered the third digit. [0-4]xxxxxxxxT Any 9-digit number starting with 0,1,2,3 or 4 will be dialed out immediately after you enter the 9th digit. To create a Dial Plan in the web interface, use the following fields: -Dial Plan: Enter the dial plan here -DP Enable: To enable or disable the dial plan -Dial Plan tmo: Timeout before phone converts the dialed number according to dial plan (if enabled) -Dial End tmo: Timeout before phone makes the call after the last digit of the number is entered -Dial End tmo Enable: To enable or disable the Dial End timeout. -Hook Off tmo: Timeout for the unit to go back to standby mode after the handset is off hook -Hook Off tmo Enable: To enable or disable the Hook Off timeout Incoming calls Answering an incoming call 1) Lift the handset or press the SPEAKER button to answer using the speakerphone, or press the HEADSET button to answer using the headset. 2) If you are already talking on the phone, press the corresponding LINE key or OK button to answer the new call. During the conversation, you can alternate between handset, headset and speakerphone by pressing the corresponding buttons or picking up the handset. Rejecting an incoming call Press the MUTE/CANCEL key to reject an incoming call directly. 27
28 DND When DND function is enabled, the phone will display the DND icon and all incoming calls will be rejected. You can find a record of all the calls that were rejected in the incoming call record of the Call History. Pressing HOLD/DND in idle mode will activate or deactivate the DND function. To configure the DND function via Phone interface: 1) Go to MENU/BACK[2. FEATURES[5. DND to enter the configuration interface. 2) Use the RIGHT or LEFT navigation keys to choose Enable/Disable. 3) Press the OK button to save the changes. 4) Choose DND option again to deactivate DND mode. You can also DND function using DND Codes if your IPPBX or server provides this function: 1) If your user type is admin go to MENU/BACK[2. FEATURES[5. DND to enter the configuration interface. 2) Set the DND On Code and the DND Off Code by pressing UP or DOWN navigation keys, then press the OK button to save the changes. 3) When you select to enable/disable the DND function it will send these codes to the server, and the server will turn on/off the DND function. In this case, any calls addressed to the phone s extension will be rejected by the server automatically, and will not be included in the Call Log. Note: When DND is locally enabled, the corresponding icon will be shown in the display. CALL FORWARD This feature allows you to divert an incoming call to another phone number like a cell phone or voice mailbox. The following CALL FORWARDing events can be configured: - Always: Incoming calls are immediately forwarded. - Busy: Incoming calls are immediately forwarded when the phone is busy. - No Answer: Incoming calls are forwarded when the phone is not answered after a specific time period. To configure CALL FORWARD via Phone interface: 1) Go to MENU/BACK[2. FEATURES[1. FORWARD. You can also press the DOWN navigation button to enable/disable CALL FORWARD when the phone is in idle mode. 28
29 2) There are 3 options: Always, Busy and No Answer. Select using 1, 2 or 3. 3) Enter the phone number to which calls will be forwarded. For No Answer you can also select the No Answer timeout pressing the DOWN navigation key. 4) If you prefer the server to perform this function, please enter the On Code and Off Code options. When you choose to enable the call forward function via your IP phone it will send the corresponding code to the server, which will take care of forwarding your calls. In this case, forwarded calls will not be stored in the Call Log. 5) Press the OK button to save changes. Notes: 1. While an incoming call is ringing, if you press CALL TRANSFER you can dynamically forward the call to a desired number. 2. You can quickly enable/disable Forward by pressing DOWN key from idle mode. Forward type and target number will be the last ones configured using the menu. 3. Only admin/var can set the On/off codes. Make sure the right User Type is active. 4. When CALL FORWARD is enabled, the corresponding icon will be shown on the display 5. FWD To will be displayed on the idle screen after an incoming call was forwarded. Users can press the MUTE/CANCEL button to clear the message. Auto Answer Auto Answer allows an incoming call to be answered without requiring any action by the user. This function is set on a per account basis. This function can only be enabled/disabled by admins or vars. To set Auto Answer via the IP phone interface: 1) Make sure active User type is var or admin. 2) Press MENU/BACK[3. SETTINGS[2. ADVANCED, enter the password and press OK button. 3) Then choose 1. ACCOUNTS[LINE X to enter the configuration page, use the UP and DOWN navigation keys to choose Auto Answer option. 4) Use the LEFT or RIGHT navigation keys to enable or disable the auto answer function. The default is Disable. 5) Press the OK button to save the changes. To set Auto Answer via Web interface: 1) Go to ACCOUNT[ACCOUNT SETTINGS page 2) Go to BASIC [AUTO ANSWER option. 3) Select Enabled or Disabled in the pull-down menu, click Save button to save the change. 29
30 Call log The IP110 can store up to 100 calls in its Call log. There are 5 different lists: All calls Forwarded calls Missed calls Received calls Dialed calls The call logs can be accessed through the web interface (Contact[Phone Call Info). In the next paragraphs we will explain how to access them from the phone interface. Accessing Call log You can access the Call Log by pressing the LEFT navigation key from idle mode. You will be in the All Calls list, where calls are sorted sequentially, and each call is marked with the corresponding icon. To change list type, use the RIGHT nagivation key. Note the icons at the top of the screen which indicate the list you are on. Accessing Missed Calls list You can access the Missed Calls list by pressing the LEFT navigation key from idle mode to reach the Call Log and then RIGHT navigation key twice as explained above. When you are in the Missed Calls list you should see the icon on the screen. Accessing Dial Calls list You can access the Dialed calls list directly by pressing the UP navigation key from idle mode. You can also access this list by pressing LEFT navigation key to enter the Call Log, and then LEFT navigation key again. When you are in the Dialed Calls list you should see Call list items management When you are in a call list, you can: 1) Dial the current entry by pressing the OK key, or 2) Store it in the Directory by pressing the DIR/TOGGLE key, or 3) Delete it using the MUTE/CANCEL key icon on the screen. 30
31 During an Active Call Mute This function allows you to mute the microphone of your phone during a call; you cannot be heard by the other party. You can still hear all other parties while mute is enabled. To mute/resume the conversation: Press MUTE/CANCEL button during a conversation to mute the current call. The icon will be shown on the LCD, and the power indication LED will blink. Press MUTE/CANCEL again to unmute the call. Call Hold This call function allows you to place an active call on hold. In this case your IP PBX might play a melody or message to the other party while waiting. Other calls can be received and made while having a call on hold. To hold/resume a call: Press HOLD/DND button to put your active call on hold. If there is only one call on hold, press HOLD/DND button again to retrieve the call. If there is more than one call on hold, press the UP/DOWN navigation keys to select the desired call, then press HOLD/DND button again to retrieve the call. Call Waiting This call feature allows your phone to accept incoming calls even when you are currently on a call. Handling a waiting call By default Call Waiting is enabled, and when an incoming call is received during another active call a short tone will be played. In this situation, user can: 1) Accept the second call using the OK key. The first one will be put on hold automatically. Or 2) Reject the call using MUTE/CANCEL button 3) Ignore the incoming call 31
32 Call Waiting Configuration To configure Call Waiting via Phone interface: 1) Make sure active User Type is admin or var 2) Press MENU/BACK[2. FEATURES[2. CALL WAITING. 3) Use the LEFT or RIGHT navigation keys to enable/disable the call waiting feature. 4) Use the navigation keys to enable/disable the Play Tone option. This option is used to define whether to play a short tone when there is an incoming call during an active call. 5) Press the OK button to save the changes, or MENU/BACK to return to the previous menu. Call Transfer This call function allows your phone to transfer an active call to another phone : Blind Transfer, Attended Transfer and Semi-Attend Transfer are supported. To make a Blind Transfer via phone interface (no prior announcement of the call): 1) Press the CALL TRANSFER button during an active call, placing the call on hold. 2) Dial the second phone number and press the CALL TRANSFER button to complete the transfer. To make an Attended Transfer via phone interface (with prior announcement): 1) Press the CALL TRANSFER button during an active call, putting the call on hold. 2) Dial the second phone number. 3) When the call is answered, press the CALL TRANSFER button to complete the transfer. To make a Semi-Attended Transfer via phone interface (no prior announcement of the call): 1) Press the CALL TRANSDER button during an active call, putting the call on hold. 2) Dial the second phone number. 3) While third party s phone is ringing, press the CALL TRANSFER button or hang up. Note: Make sure that the service provider you have registered with supports this function. 32
33 3-way Conference Your IP110 can establish a three-party conference by using both lines. To establish a conference via the phone interface: 1) Once a call has been connected with the 1st caller, press the CONFERENCE button, placing 1st caller on hold. 2) Dial 2nd party number. 3) Once connected with the 2nd party, press the CONFERENCE button to establish the conference. 4) Hang up to disconnect all parties. Voic Your voic messages, stored in your local or hosted VoIP telephony system, can be accessed from your phone. New voice messages can be indicated both acoustically and visually as described below: 33 The idle screen will indicate the new voice messages. The VOIC button backlight will be on. The LED of the phone will turn solid blue. Voic settings To configure the voic code via Phone interface: 1) If your user type is admin go to MENU/BACK[4. MESSAGEs[ 2. SET VOICE MAIL. 2) Use the navigation keys to select the Line you want to set, enter the number to connect to your system voic . You can press DIR/TOGGLE to choose the proper input method. 3) Press the OK button to save the changes, or press MENU/BACK to return to the previous menu. Note: Please contact your system administrator for the voic code. Different systems have different codes. To configure voic settings using the Web interface: 1) Go to ACCOUNT[ACCOUNT SETTINGS and set voic number. Retrieving your voic messages To check your voic status via the Phone interface: 1) Press MENU/BACK[4. MESSAGES[1. VIEW VOICE MAIL. 2) You can view your messages (new and old messages).
34 To listen to your new messages via the Phone interface: 1) Press the VOIC button directly. 2) You may be prompted to enter the password which is needed to connect to your VoIP telephony system. 3) Your voice mailbox is connected and you are able to listen to your new and old voic s. Note: Before retrieving a new VOIC , please make sure that the connecting code has been set on the phone. If you have more than one account set on the phone, when pressing the VOIC button you will be calling the active account mailbox. Advanced Functions Account Setting Please refer to Configuration and Registration chapter for the basic account setting information. The following table lists the parameters in Advanced Account Setting section of the web interface. Field Name Description Local SIP Port Local SIP port. The default value is DTMF Type Select DTMF type. Session Timer This toggles the Session Timer on or off. Session Initiation Protocol (SIP). This extension allows for a periodic refresh of SIP sessions through a re-invite or UPDATE request. The refresh allows both user agents and proxies to determine if the SIP session is still active. Voice Encryption (SRTP) Voice Encryption (SRTP) ptime(ms) The time between two RTP packets of the current used codec SIP Server Type The type of SIP Server 34
35 You can only configure these settings via Web interface: 1) Go to ACCOUNT [ ACCOUNT SETTINGS. 2) Select desired account. 3) Make desired selections in Advanced section. Check with your system administrator or service provider for more information. Network Settings Please refer to chapter Configuration and Registration for the Basic Network WAN setting information. In the next paragraphs we will describe other Network related settings. Advanced Network Settings VLAN VLAN is a group of hosts with a common set of requirements that communicate as if they were attached to the Broadcast domain, regardless of their physical location. The IP110 supports 802.1p and q packet tagging. VLAN ID and Priority can be set via phone or web interface. To configure VLAN settings via Phone interface: 1) Make sure the active User Type is admin or var 2) Press MENU/BACK[3. SETTINGS[2. ADVANCED. 3) Enter the password required, scroll to Network option, press OK button and select VLAN, then press OK to enter. 4) Choose WAN Port and press OK button to enter. 5) Use the LEFT or RIGHT navigation keys to choose and set the VLAN Status; input the VID Number, Priority. 6) Press OK button to save the settings, or MENU/BACK to return to VLAN menu. To configure VLAN settings via Web interface: Choose NETWORK[ADVANCED. Perform necessary changes. Check with your system administrator for more information. 35
36 HTTPS The IP110 supports HTTPS (Hypertext Transfer Protocol over Secure Socket Layer). Adding SSL layer under HTTP, adds a security layer to HTTP. Admins can set this transmission mode via web page. To configure HTTPS settings via Web interface: Go to NETWORK[ADVANCED, choose Web Server option. In the pull-down menu of Type field, choose the transmission mode, then click the CONFIRM button to save the changes X IEEE 802.1X is an IEEE Standard for port-based Network Access Control (PNAC). It is part of the IEEE group of networking protocols. It provides an authentication mechanism to devices wishing to attach to a LAN, either establishing a point-to-point connection or preventing it if authentication fails. It is used for securing wireless 802.1x access points and is based on the Extensible Authentication Protocol (EAP). This IP phone supports 802.1X. For the details, please consult your system administrator or technical support. Reset to Factory You should reset the phone only when the phone configuration has been changed and the phone is no longer functioning anymore. To maintain the configuration of the phone, please see a network administrator or service provider for assistance. To reset to factory via phone interface: 1) Make sure active User Type is admin or var. 2) Press MENU/BACK[3. Settings[2. Advanced. 3) You are prompted to enter the required password. 4) Scroll to Reset Factory option, then press OK button. 5) You are prompted to confirm the change, press OK to reset to factory settings, or MENU/BACK to return to previous menu. It will take a few minutes to reset, please do not power off during resetting, or it will cause flash memory error. Note: If you perform a factory reset, current settings including contact list, call history, account settings, etc will be lost. Your phone will have to be configured manually or reprovisioned. 36
37 Firmware Update and Autoprovisioning The phone is delivered with pre-installed firmware. To update the phone s firmware, please contact your system administrator. You can only update the firmware via Web interface. To update the firmware manually via Web interface: Choose SYSTEM[UPGRADE; select the firmware file in your local computer. Click UPGRADE button to update the new firmware. Please do not power off during updates. To update the firmware and configuration automatically, you can use auto provisioning. Note: Please check with your network administrator for the Autoprovisioning guide. To launch Autoprovisioning using web interface: Go to SYSTEM[PROVISIONING Settings Set Auto Provision via phone interface: 1) Go to MENU/BACK[3. SETTINGS[2. ADVANCED 2) You are prompted to enter password 3) Scroll to 7. Auto Provision and press OK button. Enter the URL, User Name and Password (optional). Click OK key to save the changes and reboot the phone. Note: Any power interruption during the subsequent process will most likely lead to a flash memory error. As a result the system may not initiate. The procedure can be only conducted in Administrator Mode. The upgrade priority is first the DHCP option field, then the preconfigured URL field. Decryption Your IP110 supports configuration file encryption for provisioning. In case encryption is used, AES key needs to be configured on the phone. Set AES key via Web interface: Go to SYSTEM[PROVISIONING Settings Note: You can ask your system administrator for the decrypt password. 37
38 Set AES Key via phone interface: Go to MENU/BACK[3. SETTINGS[2. ADVANCED[6. Set AES Key. Enter the Common AES and the MAC-oriented option. Press the OK button to save the changes. System Log Export To help with troubleshooting, users can export the system log and send it to the network administrator for diagnosis. To enable the system log capture via phone interface: 1) Make sure the active User Type is admin 2) PRESS [ 2. FEATURES [8. LOGS SETTING 3) Use the LEFT and RIGHT navigation keys to choose ENABLE 4) Press the OK button to save the changes 5) Reboot the phone To enable the system log capture via web interface: 1) Go to SYSTEM [LOG SETTINGS 2) Change the Print Enable to Enable 3) Press the SAVE button. 4) After the Log Settings is saved successfully, reboot the phone To export the system log via web interface: When the desired data is collected, follow these steps to export the system log. 1) Go to SYSTEM [ LOG SETTINGS in the web interface 2) Press the EXPORT button 3) After the log file is created successfully, press the link SAVE IT LOCALLY to download the log file. Keys configuration Send Key configuration Admins can set a specific button ( # or * ) as the send key. If this feature is enabled, once you ve dialed the desired number, you can press this send key to call your correspondent immediately. Please check Send Key configuration in Basic Calls chapter for a complete description. 38
39 Programmable keys The keys from 0-9 (memory keys) on the keypad are editable. Users can customize specific features for these keys according to their needs. (The keys are only available when the phone is in idle mode). This function can only be set via the Web interface: PHONE[FUNCTION keys (Memory Key) Configuration of function keys for idle mode is: - Up key: access to dialed list - DOWN key: access to CALL FORWARD - LEFT key: access to call log - RIGHT key: access to account switch - OK key: access to status - DND key: access to DND - Line keys Configuration The phone has 2 line keys to which functions can be assigned out of a list of functions. The following list shows the functions you can set on the Line keys. The next paragraphs provide a description for each function. The default configuration for each key is Line. - Line - Speed Dial - Conference - Forward - Transfer - Hold - DND - Call Return - Pick Up - Call Park - Voic - Prefix - Redial Note: Many of those features require IP PBX or service provider support and hence must be configured in the server first in order to work on your phone. Contact your system administrator or Technical support for more details. In addition, please note that not all the servers support the above-mentioned features. 39
40 Line The most frequent use for the line keys is assigning them one of two possible user accounts for call management. To assign the key as a Line via the web interface: Go to PHONE[FUNCTION Keys (Line Key) Speed Dial You can configure the key as a simplified speed dial key. This key function allows you to easily access the most frequently dialed numbers. To assign the key as a Speed Dial via the web interface: Go to PHONE[FUNCTION Keys (Line Key) Conference You can configure the Line key to be used as a conference key while remaining in the current call. This key allows a user on a call to conference another party while remaining in the conference. To assign the key as Conference via the web interface: Go to PHONE[FUNCTION Keys (Line Key) Forward Two use cases can be considered for this function. If a key is configured as Forward key: When you press this key during an incoming call, you will be able to divert this call directly. Depending on your configuration you will be prompted to enter target number, or stored value will be used. This function can be used, for example, to divert certain calls to your voic When you press it in idle status the IP phone will enter the forward interface. In this case you will be able to enable CF and set the phone number to which calls must be forwarded if it had not been set previously. Forward type will be the latest used. By pressing the key again CF will be disabled. To assign the key as Forward via the web interface: Go to PHONE[FUNCTION Keys (Line Key) 40
This is the first edition based on firmware version 61. The topics provided in this guide include: Chapter 1 Overview. Chapter 2 Getting Started
 About This Guide Thank you for choosing the SIP-T65P IP phone, an exquisitely designed SIP IP phone. This unit provides business telephony features such as Call Hold, Call Transfer, Busy Lamp Field, Shared
About This Guide Declaration of Conformity CE Mark Warning WEEE Warning
 About This Guide Thank you for choosing this Enterprise IP Phone which is especially designed for power users in the office environment. It features fashion and sleek design, abundant telephony applications,
GIGABIT COLOR IP PHONE
 GIGABIT COLOR IP PHONE USER GUIDE UC842 Version:1.0.3.59 Nanjing Hanlong Technology Co., Ltd 86-25-84608050 support@hanlongtek.com Notices Information Notices Information Copyright Copyright 2005-2013
Enterprise IP Phone SIP-T19 E2 & T19P E2
 Enterprise IP Phone SIP-T19 E2 & T19P E2 Quick Start Guide(V80.10) www.yealink.com Applies to firmware version 53.80.0.10 or later. Packaging Contents The following items are included in your package.
WELL SIP-T18. English user manual
 JOYCE ČR, s.r.o., Venhudova 6, 614 00 Brno, ČR, IČ: 25317571, DIČ: CZ25317571, Tel.: +420 539 088 010 Fax: +420 539 088 000, E-mail: joyce@joyce.cz, Web: www.joyce.cz, www.joyce-energie.cz WELL SIP-T18
AC1200M/MS. User Manual
 AC1200M/MS User Manual Table of Contents User Manual... 1 1 Preface... 1 2 LED Indicators and Connectors... 1 2.1 LED Indicators... 1 2.2 Hardware Installation... 2 3 Voice Prompt (AC1200MS)... 2 4 User
Yealink SIP-T42G IP Phone
 Yealink SIP-T42G IP Phone User Guide Version 1 E Mark Warning This device is marked with the CE mark in compliance with EC Directives 2014/35/EU and 2014/30/EU. Part 15 FCC Rules Any Changes or modifications
UCx Feature Guide for Infinity phones
 UCx Feature Guide for Infinity phones Date: 23 August 2018 Version: 1.4 System: UCx Release: 6.0 Phone models: E-MetroTel will provide support for the following Infinity IP phones, as long as the phones
Interference Information
 1 Interference Information This device complies with Part 15 of the FCC Rules. Operation is subject to the following two conditions: (1) This device may not cause harmful interference; and (2) This device
This device is marked with the CE mark in compliance with EC Directives 2006/95/EC and 2004/108/EC.
 Copyright 2015 YEALINK NETWORK TECHNOLOGY CO., LTD. Copyright 2015 Yealink Network Technology CO., LTD. All rights reserved. No parts of this publication may be reproduced or transmitted in any form or
This device is marked with the CE mark in compliance with EC Directives 2006/95/EC and 2004/108/EC.
 Copyright 2012 YEALINK NETWORK TECHNOLOGY Copyright 2012 Yealink Network Technology CO., LTD. All rights reserved. No parts of this publication may be reproduced or transmitted in any form or by any means,
SIP Communicator Spitfire S300 User Guide
 SIP Communicator Spitfire S300 User Guide 1 TABLE OF CONTENTS Handset Description Page 3 Keypad Lock Page 6 Directory Page 6 Adding an Entry. Page 6 Edit or Delete an Entry Page 7 Black List Page 7 Dialing
FCC RF Radiation Exposure Statement. Interference Information
 IP Phone IP115/125 Interference Information This device complies with Part 15 of the FCC Rules. Operation is subject to the following two conditions: (1) This device may not cause harmful interference;
Gigabit Business IP Phone
 Gigabit Business IP Phone ZIP 47G ZIP 47G Quick Start Guide WWW.ZULTYS.COM Packaging Contents The following items are included in your package. If you find anything missing, contact your system administrator.
Copyright 2014 YEALINK NETWORK TECHNOLOGY CO., LTD.
 Copyright 2014 YEALINK NETWORK TECHNOLOGY CO., LTD. Copyright 2014 Yealink Network Technology CO., LTD. All rights reserved. No parts of this publication may be reproduced or transmitted in any form or
This device is marked with the CE mark in compliance with EC Directives 2006/95/EC and 2004/108/EC.
 Copyright 2013 YEALINK NETWORK TECHNOLOGY CO., LTD. Copyright 2013 Yealink Network Technology CO., LTD. All rights reserved. No parts of this publication may be reproduced or transmitted in any form or
About This Guide Declaration of Conformity CE Mark Warning WEEE Warning
 About This Guide Thank you for choosing this Enterprise IP Phone which is especially designed for power users in the office environment. It features fashion and sleek design, abundant telephony applications,
This device is marked with the CE mark in compliance with EC Directives 2006/95/EC and 2004/108/EC.
 T1 9P&T1 9 Us ergui de i Copyright 2013 YEALINK NETWORK TECHNOLOGY CO., LTD Copyright 2013 Yealink Network Technology CO., LTD. All rights reserved. No parts of this publication may be reproduced or transmitted
The VWRT510&WRT500 High Speed Router User s Guide
 The VWRT510&WRT500 High Speed Router User s Guide The page 1 of 53 Table of Contents 1 Preface... 4 2 LED Indicators and Connectors... 5 2.1 LED Indicators... 6 2.2 Hardware Installation... 7 3 Voice Prompt...
Ultra-elegant IP Phone
 Ultra-elegant IP Phone SIP-T40P Quick Start Guide (V8010) wwwyealinkcom Applies to firmware version 5480010 later Packaging Contents The following items are included in your package If you find anything
-PAGE INTENTIONALLY LEFT BLANK-
 Allworx Phone Guide -PAGE INTENTIONALLY LEFT BLANK- Table of Contents 1 GETTING STARTED...1 1.1 WHAT IS IN THE BOX?...1 1.2 CONNECTING THE PHONE...1 2 ADJUSTING YOUR PHONE...2 2.1 ADJUST THE ANGLE OF THE
This device is marked with the CE mark in compliance with EC Directives 2006/95/EC and 2004/108/EC.
 Copyright 2014 YEALINK NETWORK TECHNOLOGY CO., LTD. Copyright 2014 Yealink Network Technology CO., LTD. All rights reserved. No parts of this publication may be reproduced or transmitted in any form or
Icon Instructions... 6 LED Instructions
 ... 4... 5... 5 Icon Instructions... 6 LED Instructions... 7... 8... 8 Backlight... 8 Language... 8 Time and Date... 9... 10 Volume... 10 Ring Tones... 10... 11 Directory... 11 Local Directory... 11...
2757 VoIP Phone Users Guide
 2757 VoIP Phone Users Guide Rev. 1.0 Table of Contents 1 Introduction... 5 1.1 Package Contents... 5 1.2 Features... 5 1.3 Basic Setup... 6 2 Network Setup... 8 2.1 Static IP Address... 8 2-2 PPPoE...11
Notices Information. Htek IP Phones UC912E User Manual
 Notices Information Htek IP Phones UC912E User Manual Version 2.0.4.4.45 Jun.2018 1 Notices Information Notices Information Copyright Copyright 2005-2018 Nanjing Hanlong Technology CO., LTD. All rights
BTK-A21 Bluetooth Headset User Manual
 BTK-A21 Bluetooth Headset User Manual Thank you for purchasing the Mini Bluetooth Headset BTK-A21, we hope you will be delighted with its operation. Please read this user's guide to get started, and to
PLEASE READ. This user manual is from the manufacturer Jive Communications may not support some features discussed in this document.
 PLEASE READ This user manual is from the manufacturer Jive Communications may not support some features discussed in this document. Please see our online documentation or contact us for a complete list
Ultra-elegant IP Phone SIP-T41S
 Ultra-elegant IP Phone SIP-T41S Quick Start Guide (V811) wwwyealinkcom Packaging Contents The following items are included in your package If you find anything missing, contact your system administrat
Displaying Information on LCD screen... 6 Icon Instructions... 7
 ... 4... 5... 5 Displaying Information on LCD screen... 6 Icon Instructions... 7... 8... 8 Turning handset On/Off... 8 Locking/Unlocking Keypad... 8 Backlight... 8 Language... 8 Time and Date... 9... 10
Yealink T20P IP User Guide
 Yealink T20P IP User Guide 1 Introducing your Yealink T20P IP Phone The T20P features a 2 line LCD display and 5 functions, where basic business feature requirements are the main requirements. An Overview
PLEASE READ. This user manual is from the manufacturer Jive Communications may not support some features discussed in this document.
 PLEASE READ This user manual is from the manufacturer Jive Communications may not support some features discussed in this document. Please see our online documentation or contact us for a complete list
TPGBizPhone. Standard T42G IP Phone User Guide
 TPGBizPhone Standard T42G IP Phone User Guide Contents Overview... 5 Hardware Component Instructions... 5 Icon Instructions... 6 LED Instructions... 7 Customising Your Phone... 8 General Settings... 8
TPGBizPhone. Cordless W52P IP DECT Phone User Guide
 TPGBizPhone Cordless W52P IP DECT Phone User Guide Contents Overview... 5 Hardware Component Instructions... 5 Displaying information on LCD screen... 6 Icon Instructions... 7 Customising Your Phone...
Phone Information. IP2061 Quick Reference Guide. ICON Voice Networks REV 1.0. ICON Voice Networks
 Phone Information Extension Number: Passcode / Voice Mail Access Code: IP Address: MAC Address: Serial Number: REV 1.0 IP2061 Quick Reference Guide ICON Voice Networks 8001 Jetstar Drive Irving, TX 75063
Federal Communications Commission (FCC) Statement
 Statement") FCC Information This device complies with Part 15 of the FCC rules. Operation is subject to the following two conditions: (1) this device may not cause harmful interference, and (2) this device must accept
FCC Information This device complies with Part 15 of the FCC rules. Operation is subject to the following two conditions: (1) this device may not cause harmful interference, and (2) this device must accept
Notices Information. Htek IP Phones UC924E User Manual
 Notices Information Htek IP Phones UC924E User Manual Version 2.0.4.4.29 Mar. 2018 1 Notices Information Notices Information Copyright Copyright 2005-2018 Nanjing Hanlong Technology CO., LTD. All rights
Notices Information. Htek IP Phones UC912 User Manual
 Notices Information Htek IP Phones UC912 User Manual Version 2.0.4.4.29 Mar. 2018 1 Notices Information Notices Information Copyright Copyright 2005-2018 Nanjing Hanlong Technology CO., LTD. All rights
/ / UC912P Usermanual 1
 // UC912P Usermanual 1 Notices Information Notices Information Copyright Copyright 2005-2017 Nanjing Hanlong Technology CO., LTD. All rights reserved. Nanjing Hanlong Technology CO., LTD. owns all the
Yealink SIP-T46G IP Phone
 Yealink SIP-T46G IP Phone User Guide Version 1 Table of Contents CE Mark Warning This device is marked with the CE mark in compliance with EC Directives 2014/35/EU, 2014/30/EU. Part 15 FCC Rules Any Changes
Packaging Contents. The following components are included in your W52P/W52H IP DECT phone packages
 W52P User Guide Packaging Contents The following components are included in your W52P/W52H IP DECT phone packages W52P Package! 1 Base Station! 1 Handset! 1 Charge Cradle! 2 Power Adapters (one for the
Notices Information. Copyright. Safety cautions. WEEE Warning. Copyright XonTel All rights reserved.
 XonTel S23P Notices Information Copyright Copyright 2005-2017 XonTel All rights reserved. XonTel owns all the right to revise and change this document at any time. And all the illustrations and instructions
This device is marked with the CE mark in compliance with EC Directives 2014/35/EU and 2014/30/EU.
 Copyright Copyright 2017 YEALINK(XIAMEN) NETWORK TECHNOLOGY CO., LTD. Copyright 2017 Yealink(Xiamen) Network Technology CO., LTD. All rights reserved. No parts of this publication may be reproduced or
Ultra-elegant Gigabit IP Phone
 Ultra-elegant Gigabit IP Phone SIP-T42G Quick Start Guide(V73.40) www.yealink.com Applies to firmware version 29.73.0.40 or later. EHS36 Packaging Contents The following items are included in your package.
Copyright. Warranty. Declaration of Conformity. CE Mark Warning. Industry Canada (IC) Part 15 FCC Rules
 Part 15 FCC Rules") Copyright Copyright 2017 YEALINK(XIAMEN) NETWORK TECHNOLOGY CO., LTD. Copyright 2017 Yealink(Xiamen) Network Technology CO., LTD. All rights reserved. No parts of this publication may be reproduced or
Copyright Copyright 2017 YEALINK(XIAMEN) NETWORK TECHNOLOGY CO., LTD. Copyright 2017 Yealink(Xiamen) Network Technology CO., LTD. All rights reserved. No parts of this publication may be reproduced or
Blue Eagle BT-900 Headset
 Blue Eagle BT-900 Headset This device is utilizing Bluetooth wireless technology. Any device that you want to work with this headset must be compatible with Bluetooth technology that supports Bluetooth
Grandstream Networks, Inc. DP750/DP720 DECT Cordless IP Phones User Guide
 Grandstream Networks, Inc. DP750/DP720 DECT Cordless IP Phones User Guide Figure 35: Rebooting the Base Station Reset DP720 Handset The users can reset the new settings made on the handset after performing
TPGBizPhone. Cordless W56P IP DECT Phone User Guide
 TPGBizPhone Cordless W56P IP DECT Phone User Guide Contents Overview... 5 Hardware Component Instructions... 5 Displaying information on LCD screen... 6 LED Instructions... 7 Icon Instructions... 7 Customising
TPG BizPhone. Premium T48G IP Phone User Guide
 TPG BizPhone Premium T48G IP Phone User Guide Contents Overview... 5 Hardware Component Instructions... 5 Icon Instructions... 6 LED Instructions... 7 Touch Screen Display... 8 Navigating Menu and Fields...
PLEASE READ. This user manual is from the manufacturer Jive Communications may not support some features discussed in this document.
 PLEASE READ This user manual is from the manufacturer Jive Communications may not support some features discussed in this document. Please see our online documentation or contact us for a complete list
Security SSID Selection: Broadcast SSID:
 69 Security SSID Selection: Broadcast SSID: WMM: Encryption: Select the SSID that the security settings will apply to. If Disabled, then the device will not be broadcasting the SSID. Therefore it will
Notices Information. Htek IP Phones UC926E User Manual
 Notices Information Htek IP Phones UC926E User Manual Version 2.0.4.4.24 Feb. 2018 1 Notices Information Notices Information Copyright Copyright 2005-2018 Nanjing Hanlong Technology CO., LTD. All rights
Icon Instructions LED Instructions Touch Screen Display Navigating Menus and Fields Entering Data and Editing Fields
 ... 4... 5... 5 Icon Instructions... 6 LED Instructions... 7 Touch Screen Display... 8 Navigating Menus and Fields... 10 Entering Data and Editing Fields... 11... 12 General Settings... 12 Backlight...
Vox Centrex Yealink T29 UserGuide
 Vox Centrex Yealink T29 UserGuide Monique Verto Supreme November 2015 TABLE OF CONTENTS Handset Description Page 2 Keypad Lock Page 5 Directory Page 5 Adding an Entry. Page 5 Edit or Delete an Entry..
YEALINK T41G DESCRIPTION
 YEALINK T41G THE SIP-T41P IS A FEATURE-RICH SIP PHONE FOR BUSINESS. THE 3-LINE IPPHONE HAS BEEN DESIGNED BY PURSUING EASE OF USE IN EVEN THE TINIESTDETAILS. DELIVERING A SUPERB SOUND QUALITY AS WELL AS
This device is marked with the CE mark in compliance with EC Directives 2006/95/EC and 2004/108/EC.
 Copyright 2015 YEALINK NETWORK TECHNOLOGY CO., LTD. Copyright 2015 Yealink Network Technology CO., LTD. All rights reserved. No parts of this publication may be reproduced or transmitted in any form or
Accessibility Features for the Cisco Unified SIP Phone 3905
 s for the Cisco Unified SIP Phone 3905 First Published: 2012-10-28 Last Modified: 2017-08-09 The Cisco Unified SIP Phone 3905 provides accessibility features for the blind, and the visually, hearing, and
Supertooth One Users manual
 Supertooth One Users manual Bluetooth Handsfree Kit For Bluetooth Mobile Phones A. Product Description SUPERTOOTH ONE is a Bluetooth handsfree kit that supports headset or handsfree profile phones. Its
This device is marked with the CE mark in compliance with EC Directives 2006/95/EC and 2004/108/EC.
 Copyright 2015 YEALINK NETWORK TECHNOLOGY CO., LTD. Copyright 2015 Yealink Network Technology CO., LTD. All rights reserved. No parts of this publication may be reproduced or transmitted in any form or
Notices Information. Htek IP Phones UC923 User Manual
 Notices Information Htek IP Phones UC923 User Manual Version 2.0.4.4.29 Mar. 2018 1 Notices Information Notices Information Copyright Copyright 2005-2018 Nanjing Hanlong Technology CO., LTD. All rights
This device is marked with the CE mark in compliance with EC Directives 2006/95/EC and 2004/108/EC.
 Copyright 2014 YEALINK NETWORK TECHNOLOGY CO., LTD. Copyright 2014 Yealink Network Technology CO., LTD. All rights reserved. No parts of this publication may be reproduced or transmitted in any form or
Claranet Hosted Voice v Yealink W60P... Error! Bookmark not defined. Phone Installation... Error! Bookmark not defined.
 Claranet Hosted Voice V2 Yealink T46S User Guide All Rights Reserved 2010 Claranet Contents Claranet Hosted Voice v2 Claranet Hosted Voice v2... 1... 1 Yealink W60P... Error! Bookmark not defined. Phone
Cisco Model SPA 303 Quick Start Guide
 Cisco Model SPA 303 Quick Start Guide Welcome Thank you for choosing the Cisco Small Business IP phone. This guide describes how to install your phone and how to perform some basic tasks. 1 Installing
User Manual Gemtek WiMAX Modem
 User Manual Gemtek WiMAX Modem WIXS-177 CONTENTS Chapter 1 Overview...1-1 1.1. Indoor CPE... 1-1 1.2. Outdoor CPE... 1-2 Chapter 2 WEB-GUI...2-3 2.1. System Configuration Login... 2-3 2.2. System Logout...
Polycom SoundPoint IP 450
 Polycom SoundPoint IP 450 User Guide For training/documentation, please visit us @ http://customertraining.verizonbusiness.com or call 1 800 662 1049 2009 Verizon. All Rights Reserved. The Verizon and
Yealink W52 Cordless Phone
 Yealink W52 Cordless Phone Owner's Manual Version 1 CE Mark Warning This device is marked with the CE mark in compliance with EC Directives 1999/5/EC (R&TTE). This device complies with the following standards:
IP Commander for ios VoIP User Manual
 IP Commander for ios VoIP User Manual Copyright 2014, All Rights Reserved. Ver: R09 D/C: 103-0326 Table of Content 1. INTRODUCTION...4 2. GETTING STARTED...4 2.1 TUNING ON COMMUNICATOR AND CONNECTING IPAD...
Ultra-elegant Gigabit IP Phone
 Ultra-elegant Gigabit IP Phone SIP-T48G Quick Start Guide(V80.95) www.usaphone.com 856.761.1000 Applies to firmware version 35.80.0.80 or later. Packaging Contents The following items are included in your
Yealink W52P User Guide
 ImpactConnect Hosted PBX Yealink W52P User Guide Table of Contents Table of Contents Getting Started... Packaging Contents... Connecting the W52P Base Station... Setting up the W52P Handset... Setting
Copyright 2013 YEALINK NETWORK TECHNOLOGY CO., LTD.
 Copyright 2013 YEALINK NETWORK TECHNOLOGY CO., LTD. Copyright 2013 Yealink Network Technology CO., LTD. All rights reserved. No parts of this publication may be reproduced or transmitted in any form or
This device is marked with the CE mark in compliance with EC Directives 2006/95/EC and 2004/108/EC.
 Copyright 2015 YEALINK NETWORK TECHNOLOGY CO., LTD Copyright 2015 Yealink Network Technology CO., LTD. All rights reserved. No parts of this publication may be reproduced or transmitted in any form or
Setup & Information Guide Zultys 37G VoIP Phones
 Setup & Information Guide Zultys 37G VoIP Phones Contents Phone Installation... 3 Prerequisites... 3 Assembling Your Phone... 3 Connecting Your Phone... 4 First Phone Setup... 5 Understanding Your Phone...
AudioCodes C450HD IP Phone with Microsoft Skype for Business
 AudioCodes C450HD IP Phone with Microsoft Skype for Business Quick Guide 1. Before Installing Congratulations on purchasing your AudioCodes C450HD IP Phone! Note: Skype for Business (SfB) also applies
Allworx Phone Guide 9212
 Allworx Phone Guide 9212 No part of this publication may be reproduced, stored in a retrieval system, or transmitted, in any form or by any means, electronic, mechanical, photocopy, recording, or otherwise
WELL SIP-T32G user English manual
 JOYCE ČR, s.r.o., Venhudova 6, 614 00 Brno, ČR, IČ: 25317571, DIČ: CZ25317571, Tel.: +420 539 088 010 Fax: +420 539 088 000, E-mail: joyce@joyce.cz, Web: www.joyce.cz, www.joyce-energie.cz WELL SIP-T32G
Ultra-elegant Gigabit IP Phone
 Ultra-elegant Gigabit IP Phone SIP-T48G Quick Start Guide (V8060) wwwyealinkcom Applies to firmware version 3580060 or later Packaging Contents The following items are included in your package If you find
WP4X0 User Guide WP410 WP480G- WP490G
 WP4X0 User Guide WP410 WP480G- WP490G 2016-2017 This guide for the end user provides the basic information on how to connect and use your WP4X0. Updated: April 2017 WMS version: 3.84 Packing list Phone
XonTel XT-23G User manual
 XonTel XT-23G User manual Notices Information Copyright XonTel owns all the right to revise and change this document at any time. And all the illustrations and instructions in this paper are subject to
HKBN Unified Communications T61P SIP Phone User Guide
 HKBN Unified Communications T61P SIP Phone User Guide Contents Getting Start of Phone... 2 Phone Package... 2 Assembling the phone... 2 SIP Phone Button... 4 SIP Phone Screen Display... 5 Icon Instruction...
Light Mesh AP. User s Guide. 2009/2/20 v1.0 draft
 Light Mesh AP User s Guide 2009/2/20 v1.0 draft i FCC Certifications This equipment has been tested and found to comply with the limits for a Class B digital device, pursuant to Part 15 of the FCC Rules.
1. Instruction. 1.1 Summary. 1.2 Features. 1.3 Technical Data
 1. Instruction 1.1 Summary The W1D is a wireless Skype phone which is composed of one base and one handset. The base is a high quality speakerphone, ideal for conference calls. The handset has blue backlighted
Yealink T46 IP phone. A guide to using your phone with Cloud Voice
 Yealink T46 IP phone A guide to using your phone with Cloud Voice 2 What s in this guide General info Need help? If you have any problems with your phone, call us on 0800 389 0537 and we ll be happy to
PLEASE READ. This user manual is from the manufacturer Jive Communications may not support some features discussed in this document.
 PLEASE READ This user manual is from the manufacturer Jive Communications may not support some features discussed in this document. Please see our online documentation or contact us for a complete list
CMDR_Commander Key Phone W52P User Guide_GD_42095
 CMDR_Commander Key Phone W52P User Guide_GD_42095 i CMDR_Commander Key Phone W52P User Guide_GD_42095 ii Getting Started CMDR_Commander Key Phone W52P User Guide_GD_42095 iii About This Guide... ii In
Ultra-elegant Gigabit IP Phone SIP-T48S
 Ultra-elegant Gigabit IP Phone SIP-T48S Quick Start Guide (V8120) wwwyealinkcom Applies to firmware version 6681015 or later Packaging Contents The following items are included in your package If you find
Ultra-elegant Gigabit IP Phone SIP-T48S
 Ultra-elegant Gigabit IP Phone SIP-T48S Quick Start Guide (V8220) wwwyealinkcom Applies to firmware version 6682010 or later Packaging Contents The following items are included in your package If you find
WELL SIP-T22P User manual
 JOYCE ČR, s.r.o., Venhudova 6, 614 00 Brno, ČR, IČ: 25317571, DIČ: CZ25317571, Tel.: +420 539 088 010 Fax: +420 539 088 000, E-mail: joyce@joyce.cz, Web: www.joyce.cz, www.joyce-energie.cz WELL SIP-T22P
Telstra IP Telephony - Telstra IP Video Phone Feature Guide
 1. The Touch screen Your phone has a touch-sensitive screen. To access features or obtain information, tap the menu items, arrow keys, soft keys (the keys along the bottom of the touch screen) and field
Content. Contact CQ Simple Contact Sales Overview of CQ Interface Hardware Software...
 CQ400 User Guide Content Contents Contact CQ Simple... 4 Contact Sales... 4 1. Overview of CQ400... 5 1.1 Interface... 6 1.2 Hardware... 6 1.3 Software... 6 1.4 Network... 7 1.5 Management and Maintenance...
Ultra-elegant Gigabit IP Phone SIP-T46S
 Ultra-elegant Gigabit IP Phone SIP-T46S Quick Start Guide(V81.20) www.yealink.com Applies to firmware version 66.81.0.15 or later. Packaging Contents The following items are included in your package. If
AVAYA 9601 SIP DESKPHONE INSTRUCTIONS
 AVAYA 9601 SIP DESKPHONE INSTRUCTIONS The following table provides button/feature descriptions for the 9601 deskphone. Name Description 1 Message Waiting Indicator An illuminated red light in the upper
IP Telephone User Guide
 IP Telephone LIP-6830 SIP (Session Initiation Protocol) Broadworks Please read this manual carefully before operating your set. Retain it for future reference. LGN6830-1219SBUG-01.01 June 07 Regulatory
SP-R50P IP Phone User Manual 12/ 05/ 2014
 SP-R50P IP Phone User Manual 12/ 05/ 2014 1 Contents 1. Overview... 5 1.1. Introduction...5 1.2. Features... 6 1.3. Keypad...8 1.4. Icons introduction... 10 2. Installation...11 2.1. Check package contents...
AM4000D Outdoor CPE User Manual
 AM4000D Outdoor CPE User Manual Page 1 Table of contents 1. OVERVIEW... 4 1.1. USER INTERFACE SPECIFICATION... 4 1.2. LTE INTERFACE SPECIFICATION... 4 2. GETTINGSTARTED... 4 2.1. PACKING LIST AND CPE UNIT...
Allworx Phone Guide 9202E
 Allworx Phone Guide 9202E No part of this publication may be reproduced, stored in a retrieval system, or transmitted in any form or by any means, electronic, mechanical, photocopy, recording, or otherwise
Telephone User Instructions
 Telephone User Instructions Telephone User Guide 1 Contents Contents 1. Key Panel... 3 1. Making and Receiving calls... 5 1.1 Incoming calls... 5 1.2 Outgoing calls... 5 1.3 Re-dial... 5 1.4 Callers List...
Polycom SoundPoint IP 320/330
 Polycom SoundPoint IP 320/330 User Guide For training/documentation, please visit us @ http://customertraining.verizonbusiness.com or call 1 800 662 1049 2009 Verizon. All Rights Reserved. The Verizon
Verizon One Talk DECT IP Phone
 Quick reference guide Verizon One Talk DECT IP Phone W60B Base Station and W56HV Handset verizonwireless.com/support/one-talk/ 10660898_One_Talk_W60B_Quick_Reference_Guide_f1a_sb.indd 1 Basic call features
Cisco Small Business Model SPA 303g
 Cisco Small Business Model SPA 303g User Guide Version 1 Table of Contents Getting Started... 6 About This Document... 6 Organization... 7 Overview of the Cisco Small Business 300 Series IP Phones... 8
EIP 7012 Essence VoIP Phone Administration Guide Version 1.0B
 Essence Technology EIP 7012 Essence VoIP Phone Administration Guide Version 1.0B Table of Contents 1 Introduction... 1 1.1 Hardware Overview... 1 1.2 Software Overview... 1 2 Keypad interface for IP Phone
Hosted Phone Quick Start Guide. Get the most out of our Hosted Phone service with these handy instructions for the Polycom VVX phone.
 Hosted Phone Quick Start Guide Get the most out of our Hosted Phone service with these handy instructions for the Polycom VVX 300-310 phone. 1 Contents Equipment......................................................................