Reset the device Power on/standby time Battery Black screen Can t use Thumbnail function Can t see subtitle through
|
|
|
- Hilary Dean
- 6 years ago
- Views:
Transcription
1
2 Index Introduction... 4 Package Contents... 4 Product Overview... 5 Panel Front side... 5 Panel Back side... 5 Remote Control... 6 Connect... 7 Setup... 8 Initial setup... 8 Setup Menu... 9 Multimedia Jukebox Playback the media files in the external DVD-ROM or USB storage The first page Movie Music Photo Thumbnail preview Slide show with Music Zoom in and pan the focus Rotating the photo All Edit the media files Rename Delete DVD-ROM Network player Setup the IP Address Setup the IP Address for PC manually Check the computer name and the workgroup for PC Setup the share folder on PC Browse and play the media on your PC My Shortcuts UPnP player The setup for Windows XP Windows Media Player 11 Setup (on Windows XP/Vista) Import the media files on Windows Media Player Browse through UPnP Maintenance
3 Reset the device Power on/standby time Battery Black screen Can t use Thumbnail function Can t see subtitle through UPnP playback Can t playback the video Connect DVI to HDMI converter Smooth playback through Ethernet/Wireless LAN TV Overscan issue Video/Audio codec support for ZP Specification Important Safety Instruction
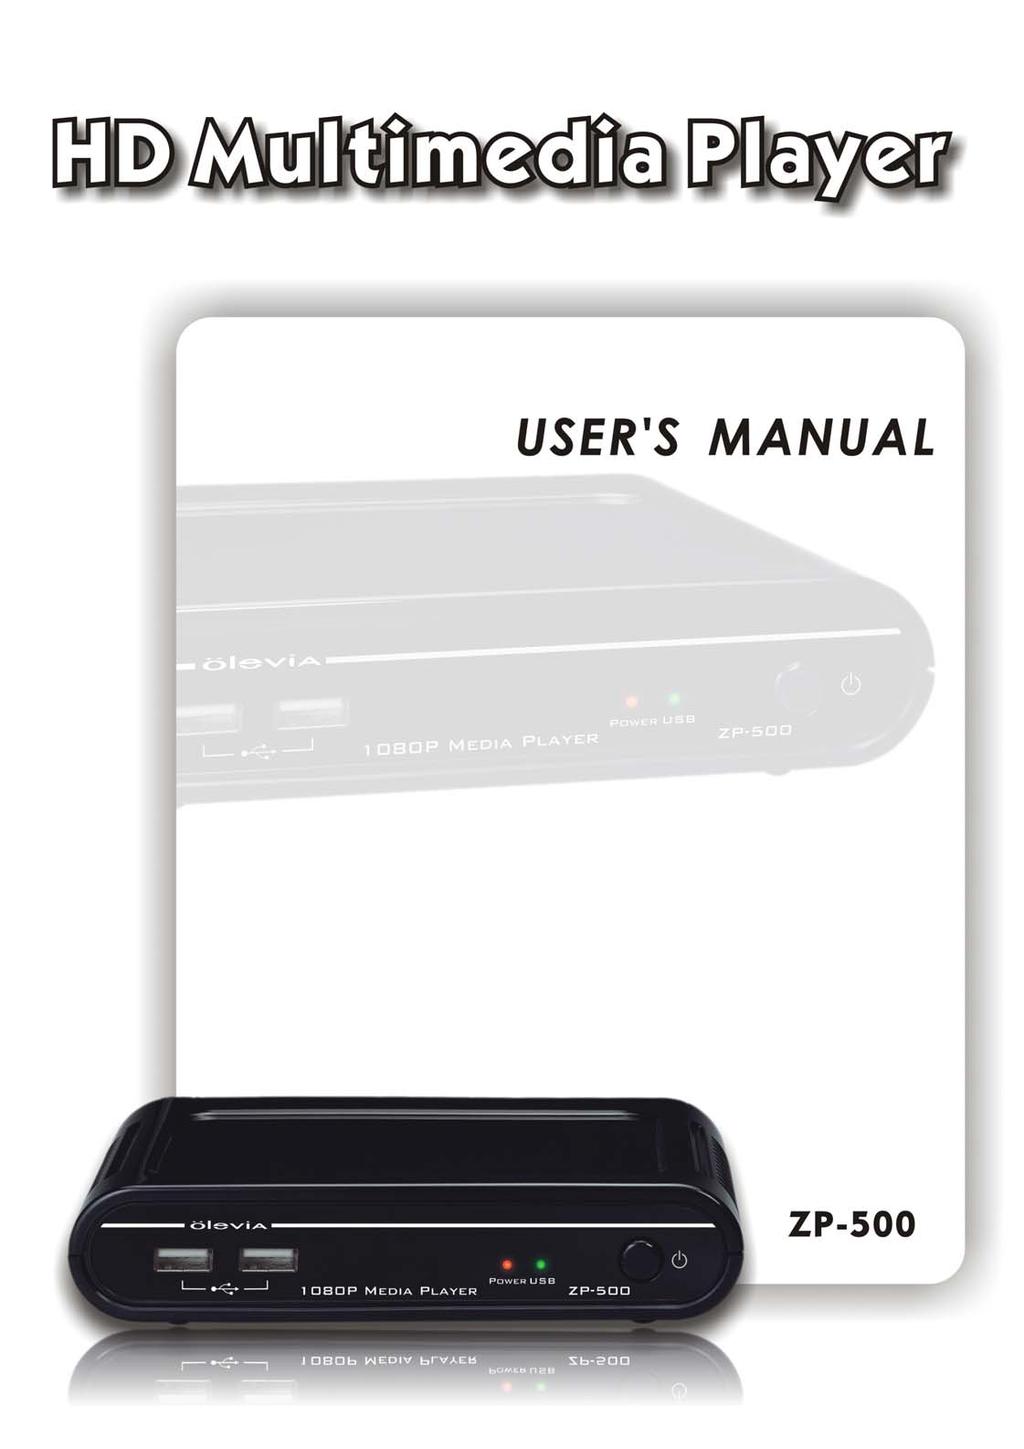
4 Introduction ZP-500 is a powerful media player which truly decodes, playback and outputs High Definition 1080p in the market. Through the USB 2.0 port and the HDMI interface, ZP-500 playbacks the HD MPEG2, HD VC-1, HD AVC/H.264 movie or transport stream from the USB flash drive or hard disk drive to HDTV screen. The Network function allows you to browse the video file in your PC, NAS which is in your room and play it on TV in the living room. Feature Highlight: Decode and output High Definition 1080p video and Photo. Support Mainstream formats of HD video including MPEG-2, VC-1, H.264/AVC and RMVB HD. Within the next generation interface HDMI 1.3 output. Ethernet port supports Network player function. High performance video playback. Experience fluent playback control like Zoom out/in, Pan the picture, Fast Forward, Fast Reverse, Slow-motion. Fully supports the subtitle format. Dynamically change the subtitle display by remote control. Photo playback via HD. Supports Up to 4 mega-pixel photo files, 16X Zoom in, 3-direction rotation. Slide show mode with 8 kinds of transition effect. Background music playback is supported. Rich types of music file. The playback function includes Fast Forward, Fast Reverse, Repeat, Shuffle and Shuffle Repeat. Within USB 2.0 port, plug-and-play the USB Flash Drive, USB Mobile Hard Disk Drive, USB Card Reader, USB DVD-ROM, USB Wi-Fi Dongle. Supports all most all formats of HDD and has the most interchangeability. Easy to use and intuitive control. Change to setup menu at any time even in media playing to provide the fluent control. Package Contents Please check the parts in the package. Contact the distributor if something is missing. 1. One ZP-500 HD Media Player 2. One power adapter (Model: SYS W3U) 3. One remote control unit 4. Two AAA batteries 5. One mini jack to RCA YPbPr cable 6. One RCA cable 7. One quick installation guide 8. One user s manual 9. One warranty card 4
5 Product Overview Panel Front side LED/button/connector: (1) USB port: These two USB 2.0 type A sockets are for the external USB Flash Disk, USB Mass Storage, USB DVD-ROM or USB Wi-Fi Dongle. (2) IR sensor: It receives the command from remote control unit. Do not block the port. (3) Power indicator: It lights on when the power is plugged in. (4) USB indicator: It lights when the USB Storage is plugged in and ready. It may take 5 seconds to ready when the USB storage is plugged in. (5) POWER STANDBY: Press it to standby or wake up this player. Panel Back side Video connection: Please select one below to connect the TV set. HDMI output: This port is to connect with HDMI receiver or HDMI TV set. YPbPr: This port is for the YPbPr input of TV set. Us the bundled phone jack to RCA jack cable to connect. VIDEO (CVBS): This port is for the CVBS input of TV set. AUDIO L/R: These ports are the analog stereo audio channels to the input of TV set. If the HDMI is connected, then you don t need to connect AUDIO L/R. S/PDIF: This is the TOSLINK digital output for audio. Ethernet port: This is the Ethernet port for the sharing through Local Network. DC IN: It connects the DC input of the Power Adapter. The power requirement is 12Vdc, 1.5 A.

6 Remote Control MUTE: Mute POWER: Power on/suspend MUSIC: Hotkey to view the music file PHOTO: Hotkey to view the photo file MOVIE: Hotkey to view the movie file RED / GREEN / YELLOW / BLUE: Special function Function key Video playback DVD Menu File browser Network function Red Open DVD Menu None Refresh Green Toggle audio track Edit Edit Yellow Switch the subtitle Switch to None Thumbnail Blue Change the Angle Back to home Back to home : UP : LEFT : RIGHT : DOWN ENTER: ENTER RETURN: go up one folder/exit the current menu MENU: open System Setup page EDIT: Delete, Rename the folders and the files. INFO: Display the information during playback 1 PAUSE/STEP: Number key 1, Pause and step in frame by frame 2 PLAY: Number key 2, Playback 3 STOP: Number key 3, Stop 4 SLOW: Number key 4, Slow motion 5 PREV: Number key 5, Previous file/section 6 NEXT: Number key 6, Next file/section 7 REPEAT: Number key 7, 1/ALL repeat 8 FR: Number key 8, Fast Reverse 9 FF: Number key 9, Fast Forward 0 ZOOM +/-: Number key 0, Zoon In/Fit Resolution: Change resolution for the video output. VOLUME +/-: increase/decrease volume 6
7 Connect There are three ways shown below to connect this player to your TV set. Please choose one to apply. Basic connection: Power Cord: Connect the DC input in the device. Audio cable output: Connect the cables to TV set. CVBS video output (NTSC or PAL): Connect to TV set. Advanced connection: Power Cord: Connect the DC input in the device. Audio cable output: Connect the cables to TV set. Component video cable for HD video output (720p, 1080i): Connect the phone jack to RCA cable and then connect the RCA cable to the YPbPr input of TV set. HDMI connection: Power Cord: Connect the DC input in the device. HDMI output (Up to 1080p): Connect to HDMI input of TV set. The HDMI port sends digital video and audio signal through the cable. In this configuration, the audio output must be set to LPCM 2CH. Please refer to the section of Audio setting. *HDMI output to HDMI receiver: Connect HDMI input to the HDMI receiver, and then connects another HDMI cable from the receiver to TV set like ZP HDMI receiver ---- HDMI TV set. In this configuration, the multichannel audio can be enabled and decoded by the HDMI receiver. Please set the audio output to HDMI+SPDIF (RAW). Refer to the section of Audio setting for the further instruction. SPDIF connection: Either Basic/Advanced connection or HDMI connection can apply SPDIF connection. This connection provides 5.1 audio data to the SPDIF receiver, and then the receiver decodes it into 5.1 audio outputs. TOSLINK cable: Connect the optical cable from this port to the SPDIF input of the audio receiver. When connecting SPDIF, the connection of AUDIO R/L isn t required. Multichannel audio setting: To obtain the multichannel audio via SPDIF, setup the audio output to SPDIF Only (RAW). Network connection: Choose either Ethernet cable or USB Wi-Fi dongle for the network connection. 7
8 Setup Please check the battery of Remote Control first, and then start the initial setup. Initial setup When plugged in the power at the first time, after the booting logo, the setup page should display to start the initial setting. The first item is the menu language. Please setup the menu language for OSD. Use button to select the language and press ENTER to confirm. Note: Before beginning this process, if you want to connect HDMI, please connect it first and then start the configuration. The second item is to choose the resolution of the video output according to your TV set and the connection between this play and TV set. For HDMI TV set, the device detects the available resolution of your TV set and lists them on screen. In the list of resolution, the available option is in white characters and the unsupported one is in dark characters. We recommend you to select the option HDMI Auto which enables the maximum resolution on your TV set. For YPbPr output, the supported resolution is up to 1080i so select 1080i 50Hz for PAL TV set or 1080i 60Hz for NTSC TV set for the maximum resolution. For TV set that doesn t support HD input, select NTSC or PAL for the SD video. For CVBS output, choose NTSC for NTSC TV set or PAL for PAL TV set. Note: The CVBS is always output SD video no matter which resolution is chosen. 8
9 The final item is to setup the aspect ratio for your TV set. If your TV set is 4:3 then you can choose Pan Scan 4:3 or Letter Box 4:3. If you have wide-screen TV then you can choose 16:9. Use button to select one and press ENTER to confirm. The initial setting can be configured anytime in the setup menu. Please refer to the setup menu. Setup Menu You can press MENU to open the setup menu. Use key to select different pages among System, Video, Audio, Photo and NET. Use key to select different item to setup. Press ENTER to open detail setting for configuration. 9
10 The menu structure and options are listed below. 1.System Select this option to open the detail setting for the system. Menu Language: Select the OSD language among English, Chinese Traditional, Español, Franҫais, Deutsch, Italiano, Dutch, Pyccкий and Chinese Simplified. Subtitle Encoding: Select the encoding for subtitle file, file name and folder name display from Unicode (UTF8), Chinese Simplified (GBK), and Chinese Traditional (BIG5). Please select the right code to display or the garbage characters may appear on OSD. Subtitle Font Size: Select the Font size for the subtitle. The available options are Big, Middle, and Small. The default setting is Middle. If the format of font is idx + sub or it is the subtitle in DVD Video/ISO/IFO, the font size option here won t be applied. Screen Saver: Select to turn off/no the screen saver. The default setting is on which displays icon randomly on screen after 5 minutes idle. When using the device on the plasma TV, it is recommended to turn on screen saver Restore Default: Select this option to reset the setting to factory default. Firmware Update: Select this option to apply the new firmware. For latest firmware, please contact OLEVIA service department. Please check the System Info for current firmware vision to see if the device needs to upgrade. The upgrade procedure is below. 1. Prepare an empty flash disk. Plug it into PC and copy all firmware files to its root directory. 2. Plug it into this device. 3. Open the Firmware Update option in the configure menu. Press it and select OK to continue. 4. Wait for 5 minutes. Do not unplug the power during the upgrade procedure. When the upgrade is completed, it will reboot and return to the main screen. 10

11 System Info: It displays the firmware version including system version, audio-firmware version video-firmware version and the TV system of this device. 2.Video Select this option to open the detail setting for video display. Aspect Ratio: Select one among these options Pan Scan 4:3, Letter Box 4:3, 16:9. Pan Scan 4:3: Select for a full-height picture with both sides cut. Letter Box 4:3: Select for the wide screen display with black bands on the upper and lower parts of the TV screen. 16:9: Select this for a wide screen 16:9 TV. TV System: Select the resolution for the TV picture. This page is the same as the one in the initial setup. Entering this page and you can see the available resolution. Choose one to change the resolution. The possible resolution for each TV system is listed below. Select the right resolution according to the capability of your TV set. TV System & Resolution Standard Definition High Definition NTSC NTSC, 480p 720p@60Hz, 1080i@60Hz, 1080p@60Hz PAL PAL, 576p 720p@50Hz, 1080i@50Hz, 1080p@50Hz Only HDMI and YPbPr connection can output HD TV picture. Refer to the details below. HDMI Connection: When the HDMI is connected, this device can detect the available resolution of TV set. After entering the video setup page, the available resolution will be shown in white character and the negative one will be in dark character. HDMI Auto: When HDMI is connected, you can choose this option to use the maximum resolution of TV set. If it is in dark character and can t be selected, re-plug the HDMI cable and re-enter this page to try again. YPbPr: The maximum resolution of YPbPr is 1080i. Select 50 Hz or 60 Hz according to TV system. CVBS: The SD video will always output from this port no matter what resolution you selected. Note: When connecting LCD monitor via DVI to HDMI converter, the player will detect the support resolution of LCD monitor. Only the supported resolution (white characters) can be selected. 11
12 3.Photo Select this option to open the detail setting for the photo display. Slide Show Timing: Choose from these options Off, 2 Seconds, 5 Seconds, 10 Seconds, 30 Seconds, 1 Minutes and 2 Minutes. It decides the waiting time before changing to the next photo while viewing photos. Transition Effect: Choose from these options Off, Cross Fade, Left to Right, Top to Bottom, Waterfall, Snake, Dissolve, Strip Left Down and All Effect Shuffle. It decides the transition effect for changing photos. 4.Audio Select this option to open the detail setting for the audio playback. There are four kinds of digital audio output, and can be roughly divided into two categories HDMI+SPDIF and SPDIF. For the HDMI+SPDIF, it is recommended to connect HDMI output to HDMI receiver or TV set. For the SPDIF Only, it is recommended to connect SPDIF receiver. HDMI+SPDIF (LPCM 2CH): When connecting the HDMI to TV set directly, select this option for the correct audio. The audio will be encoded to LPCM format and sent to the TV set. HDMI+SPDIF (RAW): When connecting to the HDMI receiver, select this option for the multichannel audio. The RAW data of the audio will be sent to the HDMI receiver for decoding. SPDIF Only (LPCM 2CH): When connecting to the SPDIF receiver, select this option to output the LPCM 2CH audio. SPDIF Only (RAW): Select this option for the multichannel audio. The RAW data of audio will be sent through SPDIF. Note: For HDMI TV Set + HDMI receiver: Select HDMI+SPDIF (LPCM 2CH) or HDMI+SPDIF (RAW). For HDMI TV set + SPDIF receiver: Select SPDIF Only (LPCM 2CH) or SPDIF Only (RAW). For HDMI TV set only: Select HDMI+SPDIF (LPCM 2CH) to output the correct sound. 5.Net Setup the IP Address of the player for the network sharing. Connection: Choose to use either onboard Ethernet or external Wireless LAN to connect the network. Only one interface is enabled at the same time. Both kinds of connection can use the network function on this player. Wired LAN setup: the available options are Cancel, DHCP IP (AUTO) and FIX IP (MANUAL). Select Cancel to discard the changes, DHCP IP (AUTO) to get the IP Address, or FIX IP (MANUAL) to setup the IP Address manually. For selecting the DHCP IP, the IP Address should show in the field after DHCP Renew window. For the FIX IP, the IP Address, Subnet Mask, Default Gateway and DNS server IP Address fields are required filling in. MAC Address: The MAC Address of this player is showed in this field. 12
13 Wireless LAN setup: Before configuring the WLAN network, insert the USB n Wi-Fi Dongle. To setup the WLAN connection, you will go through the steps below. In each step, setup and press ENTER to continue or press RETURN to previous step. Profile WLAN mode WLAN Setup Security Setup IP Setup Infra AP Get SSID (Scan WLAN) Enter the key DHCP FIX IP OK Connection Profile Peer to Peer Ad Hoc 1. Setup SSID 2. Security Enter the key FIX IP OK Profile: Choose one profile to edit or apply. The saved profile can be applied later. To apply the profile, choose it and press blue key to apply. In the first setting, choose Connection 1 and press ENTER key to continue. Connection: Select either to use Infrastructure (AP) or Peer to Peer (Ad Hoc). The Infrastructure mode requires an Access Point to access and the Ad Hoc mode is for the dongle to dongle network. The procedure divides into two ways here. Infrastructure AP Mode: Get SSID: select one SSID which is the network name for AP and then press Enter to continue. Signal Strength: in this page, you can find the signal strength for every SSID. Adjust the position, angle of the dongle or AP to get the high signal strength. 13

14 Security setup: If the key is required for accessing AP, use the virtual keyboard on the monitor to input the key. The key must be the same as the setting on your AP. IP Setup: Choose to use DHCP IP or FIX IP. Generally, you select DHCP IP. If FIX IP is required, use the virtual keyboard to input the IP Address. Test Connection: In the final step, press ENTER to save the setting. The player will try this connection and report the status. If it works then the setup is completed. Peer to Peer Ad Hoc mode: SSID: Use the default SSID or enter a new SSID. Security: Select None for No encryption or WEP for WEP encryption. Press blue key to continue. Enter the key: If choose WEP, use virtual keyboard to input the key. For WEP key, the length of password could be 10 or 26 hex digits. The other Dongle associating to this Peer-to-Peer network must use the same key. Note: Only the personal encryption modes are supported including WEP-Open, WPA-PSK, and WPA2-PSK. Note: For the security season, this dongle only supports 11n data rate (Phy 300 Mbps) with no wireless encryption or AES encryption. In the other encryption like WEP-Open, WPA-PSK-TKIP or WPA2-PSK-TKIP mode, the data rate could only reach 11g (54 Mbps) mode. We recommend setting AES algorithm like WPA-PSK-AES or WPA2-PSK-AES to encrypt the WLAN. Note: For the Ad Hoc wireless network, the dongle supports 11 b/g modes (Phy 54 Mbps Max.). Support Dongle: ZW-N290 1T2R n USB dongle. 14

15 Multimedia Jukebox Playback the media files in the external DVD-ROM or USB storage You can playback the movies, music and photos in the connected USB storage via this device. Plug in the USB storage, and then press the three buttons MUSIC, PHOTO, MOVIE to enter the interface and playback the media files. In the interface, select USB and then press ENTER to browse the media files. When plugging in the USB Mass Storage device, USB card reader or USB flash disk into this device, wait for 5 seconds, and you can see the message on screen USB detected You can browse this device now. Then you can continue to browse the USB device. If the USB storage device is unplugged, the USB LED on the player will be off, and the following message will show on screen: USB Removed: The USB device has been removed. You cannot browse it anymore. When selecting USB, the following message may pop up. Please follow the instructions to continue. USB Storage is not detected. Please plug in the USB Storage and try again. Please wait about 5 seconds till the USB indicator lights if you already plug in the USB Storage. The first page When powering on the player at the first time, the browser window with three options will be always there for you to choose. Select DVD to browse or playback the external DVD-ROM, USB to browse and play the USB storage, NET or UPNP to browse the folders in PC. Select Setup for system setup of the player. The tab in the top will filter the files such as All for all files, Movies for movie files, Photo for picture files and Music for music files. 15
16 Movie Press MOVIE button to enter the interface. In the interface, you can use arrow keys to move and highlight the file titles. Press ENTER to open the folder or file title, or press RETURN key to return to the previous folder. After entering this page, you can select the USB icon, folder, or files to browse. The right panel will show preview of the highlighted title. Press the file title and it starts to playback the video. When the movie begins to play, the four key Red, Green, Yellow, Blue will be showed in the top of the TV screen. Red, Green, Yellow, Blue: When playing the video files supporting DVD menu such as ISO/IFO file, you can press red key for Menu, green key for Audio, yellow key for Subtitle and blue key for Angle., : Press Play key to play file. Press Pause key to hold the playing. Press Play key again to continue playing. REPEAT: When playing the media, press to switch the repeat modes among the following modes, Repeat Title to repeat the current file, Repeat ALL to repeat all files in the directory, Repeat Chapter to repeat current chapter in VOB/IFO/ISO file, or Repeat Off to turn off the repeat mode., : Jump to the previous or next file. While playing VOB/ISO/IFO video files, press it to jump to the previous/next chapter. If there is no chapter in this file, the Ban sign will show on screen. Press it again : Ban sign. When pressing the irrelevant button, it will be blocked and shows this sign on screen., : Press to play fast forward or fast reverse. Press it again to switch the rate among 1.5X, 2X, 4X, 8X, 16X, and 32X. SLOW: While playing the video, press the button to play slow motion. Press again to toggle among the speeds 3/4X, 1/2X, 1/4X, 1/8X, 1/16X and 1X (normal speed) 16

17 ZOOM +, -: Press + to enlarge the video to 2X, 3X, 4X, 8X. Press - to recover the video to 8X, 4X, 3X, 2X, 1X and Zoom-out. When zoom the video, you can use the direction key to change the visible picture of the whole video. Note: if the edge of the video is cut in the TV screen, press the Zoom - to fit the screen. VOLUME +, -: Press volume keys to control the volume. RETURN: Press it to go up one folder in the browse window. Repeat: While playing the movie, press the key to loop the repeat mode among Title, Chapter, All and off. Title is to repeat the current file. Chapter is to repeat the current chapter in the title such as VOB, ISO and IFO format. All is to play every file in the current directory. INFO: During the playing, press this key to pop up the DVD menu, and press it again to change to the video information. For DVD menu, you can press the color key to toggle the respective function. Green key: In the browser, press it to edit the file name. You can rename or delete the file. Please refer to the edit section for details. Blue key: In the browser, press it to go to the root directory. Yellow key: While playing ISO/IFO file which supports DVD menu, you can press it to switch the language of the subtitle. When playing the other formats of video file, you can press it to change the subtitle code among OFF for turning off the subtitle, BIG5 for the traditional Chinese, and GBK for the simplified Chinese. When finishing the current video file, it will continue to play the next file in the directory to the last file. You can also use REPEAT key (All, Chapter, Title) to repeat the current file or all files in the directory during the playback. You can also use the playback control while playing the video. If you press INFO key, the video information will show on screen. Subtitle: This device supports the subtitle file including the formats of srt, sub, smi, idx+sub and ssa. 17

18 Please change the file name of subtitle file as the same as the video file and put them in the same folder. This device detects and applies the subtitle file automatically. If you have multiple formats of subtitle file with the same file name in the same folder, this device will show the menu for you to select one to play. Use the direction key to select one and press ENTER to apply. Music Press the MUSIC button to enter the interface. Navigate to highlight the file and press ENTER to playback the file. When the file is highlighted, the right panel shows the tag information about the file including artist, title, album, genre and track. It will continue to play next file till the last file. You can also use the playback control while playing the video., : Press Play key to playback. Press Pause key to hold the playback. Press Play key again to continue playing. REPEAT: When playing the media, press to switch the repeat modes among the following modes: Repeat Off: turn off the repeat mode. Repeat Track: repeat the highlighted music file. Repeat All: repeat to play all music files in the folder. Shuffle Repeat: repeat the randomly select music file in the folder to playback. Shuffle Only: randomly select music file in the folder to playback. INFO: During the playing, press this key to pop up the audio information. The information includes Index current song No. / Total song No, playback time, and the music title. The music title will scroll automatically if it is too long to fit the field., : Press to leap forward or backward 6 files. 18
19 , : Press to play fast forward or fast reverse. Press it again to switch the rate among 2X, 4X, 8X, 16X, and 32X. When switching to FF 2X, the playback still comes with audio. VOLUME +, -: Press volume keys to control the volume. RETURN: Press it to go up one folder in the browse window. Green key: In the browser, press it to edit the file name. You can rename or delete the file. Please refer to the edit section for details. Yellow key: If the tag of the song is in garbage code or broken character, press this key to show the information. Blue key: In the browser, press it to go to the root directory. : Ban sign. When pressing the irrelevant button, it will be blocked and shows this sign on screen. Photo Press the PHOTO button to enter the interface. Navigate to highlight the file and press ENTER to playback the file. When the file is highlighted, the right panel shows the detail information about the file. It will continue to play next file till the last file. You can also use the playback control while viewing photo., : Press Play key to playback. Press Pause key to hold the playback. Press Play key again to continue playing. REPEAT: When playing the media, press to switch the repeat modes among the following modes, Repeat All to repeat all files in the directory or Repeat Off to turn off the repeat mode. VOLUME +, -: Press volume keys to control the volume. RETURN: Press it to go up one folder in the browse window. Green key: In the browser, press it to edit the file name. You can rename or delete the file. Please refer to the edit section for details. 19

20 Yellow key: In the photo browser, press this key to switch to thumbnail preview. Blue key: In the browser, press it to go to the root directory. : Ban sign. When pressing the irrelevant button, it will be blocked and shows this sign on screen. Thumbnail preview When browsing the photo files, you can select the thumbnail view to browse the photo files. In the browser, change the top-tab to Photo and then enter the folder to browse the photos. Press the yellow key to switch to thumbnail mode. Use the direction keys to highlight the photo and press ENTER to play. In the thumbnail window, press the yellow key again to return to the file list. Note: The thumbnail function only applies under Photo tab and browsing photo files. Slide show with Music Before viewing the photo, you can enter the Music interface to playback Music files first. Don t press Stop key but press Photo key to enter Photo interface and start viewing photo files. The photo will show and change with music playing in the background. The second way is to put music files in the same folder with photo files. When playing photo files, the device will also play music files to start as slide show. Zoom in and pan the focus When viewing the photos, press + to zoom in and then - to change back. You can switch the rate between 2X, 4X, 8X and 16X. When zoom-in to the photo, press arrow keys to move the focus on the photo. You can see the overview window in the bottom right corner to indicate the current focus. 20

21 Rotating the photo When viewing the photos, press arrow keys to rotate from 90 to 180 or 270 degree. However, if you zoom in the photo then you cannot rotate the photo. All If the browse interface is already opened, press keys to navigate to All category to browse all files including Movies, Music and Photo. Navigate to highlight the file and press ENTER to playback the file. When the file is highlighted, the right panel shows the detail information about the file. It will continue to play next file which is in the same kind of media till the last file. You can also use the playback control while playing the media files. Please refer to the section of video, music and photo playback. 21

22 Edit the media files In the browser window, press the EDIT key to open the edit window. You can rename or delete the files in the browser. If you don t want to continue, select Return or press Return key on the remote control. Rename Choose Rename and the keyboard will be pop-up for entering new name. Use the arrow key to highlight the key and press ENTER to input the character. When the input is complete, navigate to highlight the OK button and then press ENTER. Delete Choose the Delete and the confirm window will pop up. Select OK to delete the file or Return to cancel. 22
23 DVD-ROM The external USB DVD-ROM is supported. Plug in the USB external DVD-ROM into the USB port in front of the player. If the DVD disc is loaded in the DVD-ROM, the Disc detected window pops up for selection. DVD-VIDEO: if the DVD-VIDEO is loaded in the DVD-ROM, the available options would be Play, Browse and Return. Select Play to play DVD-VIDEO with full DVD option including DVD-Menu, subtitle, angle and multilingual audio. Select Browse to browse the DVD-VIDEO as the data disk. Select Return to return to previous page. Refer to the section of video playback for the operation. DVD-Data: if the data DVD or data CD is loaded, the available option would be Browse and Return. Select Browse to browse the data DVD as the external USB Flash disk and Return to the previous page. Refer to the section of video playback for the operation. Video CD: if the Video-CD is loaded, it will be detected as the data CD. The select-window and the operation are the same as browsing DVD-data in the above. To play the video, browse the VCD to find the.dat file to play. 23

24 Eject button: Press green key on the remote control to eject the DVD-loader. Network player This player features an Ethernet port to allow it to browse and play the media files in the other PC via Ethernet or Wireless LAN. With a few settings and the network connection, you can sit down in the living room and watch the TV to operate this device, to browse and playback the Video, Music and photo on your computer even it s in your study room. The network topology is like below. For the Wireless LAN connection, plug in the optional USB Wi-Fi dongle to apply the network function. Refer to the setup chapter for setup WLAN. Desktop PC LAN ZP-500 WLAN/LAN Residential Gateway WAN Internet 24
 to setup an IP Address in the same IP domain of PC. Please refer to the setup section for details.")
25 Setup the IP Address Before using this function, you have to connect the Ethernet port to your network. For the network with a DHCP server such as a residential gateway, you can select DHCP IP (AUTO). If you connect this device to your PC directly, you can select the FIX IP (MANUAL) to setup an IP Address in the same IP domain of PC. Please refer to the setup section for details. Setup the IP Address for PC manually If you connect the player to PC directly or don t have a DHCP server, you need to configure the IP Address for the Ethernet port of PC. The procedure blew will walk you through the steps of the setting. We take the setting of Windows XP for example. First, double-click on the Network icon on the task bar. When the setup window shows, click Properties button to continue. 25


26 Choose the Internet Protocol (TCP/IP) and then click Properties button to continue. Click Use the following IP address and input the IP Address. The Static IP Address for the PC should be in the same domain as the one of the player. For example, setup for PC and then setup for the device. Please refer to the setup section for the setting of the player. 26

27 Check the computer name and the workgroup for PC In the beginning, you need to check the computer name and the workgroup of your PC. The computer name and the workgroup are exposed in the LAN for being browsed and accessed. Right click on the My Computer icon and select the Properties to continue. 27

28 Select the tab Computer Name in the pop up window, and then check the Full computer name and the Workgroup. The computer name and the workgroup can be found by the other PC to browse and access. For the simplest network environment, we recommend choosing WORKGROUP as your workgroup. The workgroup and the computer can be found by the player in the procedure later. If you want to change the computer name or workgroup, click the Change.. button to the next step. After clicking the Change.. button, the change window shows. Input the new computer name and the workgroup in the respective fields and then click OK. 28


29 When applying the new computer name and the new workgroup, the system will remind you to restart the system to take effect. Confirm it in the next two windows. The PC will restart. 29

30 Setup the share folder on PC Now you can choose the folder to be shared. The shared folder can be accessed by the player or other PC in the LAN. In order to browse the media files on your PC from the player, you have to put the files in the folder and then make it to be a shared folder. Right click on the folder and select Sharing and Security to continue. 30

31 In the next window, select Sharing tab and check the option Share this folder on the network and then click OK to apply. You can select multiple folders to share. Browse and play the media on your PC Now you can browse the folder on your player. Select NET in the first page. The scanned workgroup will be showed in the list. In our example, the /My Shortcuts/ and /WORKGROUP/ are displayed in the list. The /My Shortcuts/ is empty now because not set yet, so choose /WORKGROUP/. After entering the workgroup, you may find multiple computer names in the network depend on your network environment. Choose the one to continue. Red Key: in the network list, press it to refresh the list. Blue Key: press it to return to the first page. 31

32 Generally you have an account name and password for login your PC. In the pop up window, enter the User ID (Account name) and password for login. Press ENTER key and the keyboard screen pops up. Green Key: When you want to re-enter the User ID and the Password, press the key to pop up the window again to input them. In the virtual keyboard, navigate the highlighted key on the keyboard and press ENTER key to input. When finished, select OK and press ENTER key to enter. After entering User ID, navigate the highlighted block to password field and input it via the same steps. 32
33 When the User ID and password are inputted, select OK to login and browse the file. For the frequent PC for sharing, select OK & Save to My Shortcuts to login and also add this account in the shortcut. When entering the folder, select the file to browse. The Network Speed will be showed in the right panel. The operation of playback is the same as the precious section. Please refer it for the operation. Red Key: Press it on the remote control to refresh the file list. Green Key: Press it to edit the file. You can rename or delete the file. Please refer to the previous section for the details. Blue Key: Press it to return to the first page. 33

34 My Shortcuts If you add the shortcut in the previous step, you can select the shortcut to login the PC. Select /My Shortcuts/ and then you can see the shortcut you have set. Choose it to enter without re-entering the User ID and Password. If you haven t set up the shortcut yet, you can add it manually. Press the green key to enter the edit window. In the edit window of my shortcut, there are 3 actions can be taken. You can add a shortcut or modify a shortcut or delete the shortcut. The Modify and the Delete function can only be performed when at least one shortcut exists. After choosing the Add or Edit function, the edit window shows. Select the field to input the value. For adding a shortcut, the User ID, Password and Specified File IP are required. Select the field to open the virtual keyboard to input. Enter the IP Address: When entering the IP Address, just use the number key on the RCU to enter. No virtual keyboard pops for entering in these fields of IP Address. 34

35 Detail window: When adding a new shortcut or modifying a shortcut, select Detail block to open more fields to input. There are extra fields including Label, Domain and Host Name for enter or modify. Enter it if it is required in your network environment. Multiple accounts for login: For the advanced user, he may hope to login the PC with more than one account with different priorities. For example, the administrator account for himself to login PC and the user account for the player to just browse and play the file. In this case, please refer to Windows help to add multiple accounts in Windows. 35

36 UPnP player Besides the network player function in the previous section, this player also supports the UPnP player function for easier usage. The device can read the media library on the UPnP media server. The Music, Pictures and Video files on the server will be classified automatically so you can find the right kind of media files easily. In this manual, we use Windows Media Player 11 as the UPnP media server. First we will learn how to enable the UPnP function in Windows XP, and configure the Media Player 11 to add the device, and then use the player to view the media files. Note: For media player, the UPnP is only supported at version 11 or above in the future. The setup for Windows XP The UPnP User Interface isn t installed in the fresh Windows XP. You need to install it manually. 1. Open the Control Panel, find the Add or Remove Programs and open it. 2. In the panel, click Add/Remove Windows Components. 3. In the Windows Components Wizard, select Networking Services and click Details In the Networking Services, check the Internet Gateway Device Discovery and Control Client and UPnP User Interface and click OK to continue. 5. The installation will process automatically. When done, continue to the next phase. 36

37 After the installation of UPnP User Interface, you need to check if the related services running in the background. Open the Control Panel, and Administrative Tools, and then the Services. Find the items below in the Services and change their Startup Type to Automatic to make sure they run in the system background. Check item: Windows Media Player Network Sharing Service HTTP SSL Universal Plug and Play Device Host SSDP Discovery Service Note: For Windows Vista, the above procedure isn t required. 37


38 Windows Media Player 11 Setup (on Windows XP/Vista) Before configuring Media Player, make sure the network is setup and passing through Ethernet or WLAN to this computer. Open the Media Player 11, and click the button Library, Media Sharing. In the pop-up window, check the item Share my media and click OK. Now look at the TV screen to operate the player, go to the first page and enter UPNP. You should be able to see your computer in the list. Please continue to the next step to setup the Media Player. 38

, and then operate the player to browse the UPNP.")
39 The player should appear in the below window. Click OK to finish. If not, please operate the player to enter UPNP again and it should display. If the player is still missing in the window, click Settings and check the option Allow new devices and computers automatically (not recommended), and then operate the player to browse the UPNP. The player should be able to view the category in the UPnP media server now. 39
40 Import the media files on Windows Media Player 11 Click the button Library, Add to library on Windows Media Player 11 to add the media information into its database. The media files on the PC will be sorted by the Media Player 11. Please refer to Windows help for more setting. Browse through UPnP During the setup of Windows Media Player, we already browse the UPNP server on this player. Now, select the name of your computer in the list. The media files on your computer are sorted into Music, Pictures, Playlists and Video. To watch the video files, select Video to continue. You can see that the video files are sorted into Folders, Rating, Series and etc. Select one to browse and play the video. 40
41 Maintenance Reset the device You can press MENU to open the setup menu. To Reset the device, navigate to Setup menu and select Restore Default and press ENTER. Please refer to setup section for the details. Power on/standby time The device needs sometime to power on. The time costs are listed below. Plug in the power -> power on and ready to use: it takes about 15 seconds. Power on status -> Standby mode by pressing the power button: it takes about 15 seconds. Standby mode -> power on mode by pressing the power button: it takes about 8 seconds. In this short time, the remote control unit and the power button are not functional. Battery When the distance of remote control is dropped dramatically, please replace the new battery for the remote control. Black screen If you get black screen while starting to play Movie or Photo files, please check the connection from TV to the device and the resolution. For YPbPr, the maximum resolution is 1080i. Press resolution key to change the resolution until the screen displays. For HDMI connection, select HDMI Auto to detect the resolution of TV set automatically. For CVBS, it always output SD 480i/576i so you can change to CVBS to check the setting of player. 41
42 Can t use Thumbnail function Check the tab in the top. The thumbnail function can only be toggled under Photo tab. The second point is to make sure to enter the folder and browse the photo files, and then press the yellow key for thumbnail view. If browsing photos through UPnP function, the thumbnail function can t be enabled. Please try to use Network player function to browse the photos. Can t see subtitle through UPnP playback The file of subtitle isn t supported by UPnP media server, and therefore the external subtitle file can t be loaded while watching video though UPnP function. Please try to use Network player function to play video with subtitle file. Can t playback the video If you found some video files can t be playback by this device and reported the invalid format message, please use the free PC software MediaInfo to check the video codec with the codec table in the manual. If it is not in the table then the player can t support it. Pease visit the URL to download the software Connect DVI to HDMI converter When using the DVI to HDMI converter to connect the player, some LCD monitors could only accept the SD video. This player detects the support format of the LCD player and locks the HD option if the monitor doesn t support it. In this case, the player output SD video to the monitor. Smooth playback through Ethernet/Wireless LAN For the Ethernet connection, check if use at least 10/100 Mbps Ethernet switching Hub and the 10/100 Ethernet adapter on PC. For Wi-Fi Dongle, we recommend using Infrastructure (AP) mode and NO or WPA/WPA2-PSK_AES for the maximum data rate. In the other mode such as encrypted with WEP, TKIP algorithm, or use Ad Hoc as the radio mode, the data rate is only up to 54 Mbps ( g). TV Overscan issue Some video can t be watched as full frame on TV set. The edges on the both sides may be outside the TV screen. In such case, press the Zoom - key to zoom out the video to fit the screen. 42
43 Video/Audio codec support for ZP-500 Codec Feature Others File container MPEG-1 DAT, MPG MPEG Movie Video MPEG-2 Up to 1080p DivX 3/4/5/6 Divx Divx HD Divx HD Plus MPEG-4 Visual MPEG-4 MPEG-4 SP/ASP Xvid Real Video Real Video 8, 9, 10 Up to ISO IFO VOB MPG MPEG TS TP DIVX AVI MKV AVI MKV MP4 RM RMVB AVC H.264 H.264 H.264 TS AVI MKV Movie Audio WMV/VC-1 WMV9 VC-1, MOV MPEG-4 Visual AVC/H.264 FLV Dolby Digital DD AC3 7.1 audio channel DTS pass-through via DTS 7.1 audio channel HDMI/SPDIF TS WMV AVI MKV ASP MOV FLV MPEG I MPEG I Layer 1,2,3 (2CH) MPEG II MPEG II Layer 1,2 43
44 (Multi-Channel) Real Audio RA1/RA-cook/RA-lossless MPEG-4 HE AACv2 LPCM 7.1 audio channel MPEG-1 Layer 3 MP3 2 channels, 8~320kbps, VBR M3U (MP3 list) supported MP3 WMA WMA (2CH) WMA ver. 9.1, CBR up to 320kbps, VBR up to 256kbps ASF WMA WAV LPCM, ADPCM WAV MUSIC AAC MPEG-2/4 LC/HE profile AAC+ ver 1/2 UP to 288 kbps itune M4A AAC MP4 M4A OGG Vorbis OGG FLAC FLAC JPEG Photo BMP, PNG, GIF, TIF, Up to 40 M-pixel with unlimited resolution Baseline JPEG JPG JPEG TIFF Specification Specification Model name ZP-500 Disc format FAT16/FAT32/NTFS/UDF/EXT3 Subtitle Chinese Traditional/Chinese Simplified/UTF8 Resolution 1080p Aspect ratio Pan Scan 4:3 / Letterbox 4:3 /16:9 Interface Video CVBS, YPbPr, HDMI 1.3 Audio AUDIO L/R, S/PDIF, TOSLINK USB USB 2.0, 5V~1000mA For External HDD, Flash Disk, USB DVD-ROM, USB Wi-Fi Dongle Ethernet 10/100 Mbps RJ-45, SAMBA client, UPnP Optional Wi-Fi ZW-N290 1T2R 11n USB dongle, SAMBA client, UPnP dongle Playback MOVIE Video MPEG-1 (DAT / MPG / MPEG) MPEG-2 (MPG / MPEG / VOB / ISO / IFO / TS / TP) 44
45 MPEG-4 (MP4 / AVI / MOV) DivX 3/4/5/6, Xvid (AVI / MKV) H.264 AVC (TS / AVI / MKV / MOV) VC-1 (TS / AVI / MKV / WMV) WMV 9 (WMV) Real Video 8/9/10 (RM / RMVB), up to 720@30p FLV (FLV) MOVIE Audio Dolby Digital AC3, DTS pass-through, MPEG-I Layer 1/2/3, MPEG-II Layer 1/2 multichannel, Real Audio, MPEG-4 HE AACv2, LPCM Support 7.1 audio channels MOVIE Subtitle srt, sub, smi, *idx+sub, ssa, DVD subtitle, DivX subtitle MUSIC MP3, WMA, WAV, ASF, AAC, OGG Vorbis, FLAC, itune M4A(AAC), M3U(Playlist) PHOTO JPG(40-mega pixel without limitation of resolution, Baseline), BMP, PNG, GIF, TIF, TIFF Housing Power rating 12V 1.5A Power consumption Operation: 4.8 W (USB device consumption not included) Standby: 1 W Size 101 x 146 x 30.6 mm (L x W x H) Operation 40 Celsius temperature Button ZP-520 Power *: When playing the HD video, the display position of the subtitle could be in the higher part of the TV picture. Only the subtitle format idx + sub can maintain the same position as playing in the SD video. We recommend using this kind of subtitle format. 45
46 Important Safety Instruction Please review the following safety precautions. If this is the first time to use ZP-320, then read this manual before installing or using this product. If the product is not functioning properly, please contact Olevia Service Dept. WARNING! RISK OF ELECTRICAL SHOCK DO NOT OPEN WARNING: TO REDUCE THE RISK OF ELECTRICAL SHOCK DO NOT REMOVE THE COVER NO USER-SERVICEABLE PARTS ARE INSIDE REFER SERVICING TO QUALIFIED PERSONNEL The lightening symbol in a triangle is used to alert you to the presence of dangerous voltages inside the product may be sufficient to constitute a risk of electric shock to anyone opening the case. It is also used to indicate improper installation or handling of the receiver that could damage the electrical system in the receiver or in other equipment attached to the receiver. The exclamation point in a triangle is used to alert you to important operating and maintenance instructions. Failure to follow these instructions could result in injury to you or damage to the receiver. Be careful with electricity: Power outlet: To prevent electric shock, make sure to connect the power adapter only to a power source that operates at 12V,1.5A. Power overloading: Avoid overloading electrical outlets or extension cords, which otherwise could result in electric shock or fire. Lightening: For protection from lightening, or when the product is left unattended for a long period, disconnect it from the power source. Protect other equipment: Unplug the product before connecting any other equipment. Connect all equipment to the product before plugging any power adaptor to the power source. Also follow these precautions: Ventilation: Do not block the ventilation slots on the product, or place any heavy object on top of it. Blocking the airflow could damage the product. Arrange components so that air can flow freely 46
47 around the product. Ensure that there is adequate ventilation if the product is placed in a stand. Put the product in a properly ventilated area, away from direct sunlight or any source of heat. Overheating: Avoid stacking the product on top of a hot component such as a power amplifier. Risk of Fire: Do not place the product on top of any easily combustible material, such as carpet or fabric. Proper Connections: Make sure all cables and equipment are connected to the product as described in this manual. Object Entry: To avoid electric shock, never stick anything in the slots on the case or remove the cover. Water Exposure: To reduce the risk of fire or electric shock, do not expose the product to rain or moisture. 47
UPnP player The setup for Windows XP Windows Media Player 11 Setup (on Windows XP/Vista) Import the media files on Windows Media
 Import the media files on Windows Media") Index Introduction... 4 Package Contents...4 Product Overview... 5 Panel Front side... 5 Panel Back side... 5 Remote Control... 6 Connect... 7 Setup... 8 Initial setup... 8 Setup Menu... 9 Multimedia Jukebox...
Index Introduction... 4 Package Contents...4 Product Overview... 5 Panel Front side... 5 Panel Back side... 5 Remote Control... 6 Connect... 7 Setup... 8 Initial setup... 8 Setup Menu... 9 Multimedia Jukebox...
 Register your product and get support at www.philips.com/welcome HMP3000 EN User manual Contents 1 Trademark notice 5 English 2 Connect and play 7 3 Control and play 11 4 Options 13 Video options 13 Audio
Always there to help you. Register your product and get support at HMP5000. Question? Contact Philips.
 Always there to help you Register your product and get support at www.philips.com/welcome Question? Contact Philips HMP5000 User manual Contents 1 Control and play 2 11 Troubleshooting 20 12 Specification
MICRO 2+ USER MANUAL
 MICRO2+ USER MANUAL Wintal MICRO2+ USER MANUAL Contents BRIEF INTRODUCTION... 1 FEATURE... 1 BASIC PERFORMANCE... 1 PRODUCT DETAILS... 2 PACKING LIST... 2 FRONT VIEW... 2 BACK VIEW... 3 REMOTE CONTROL...
Directory. Product overview. Connecting your media player. Specification. Interface. Explanation of the remote control. Connector Indication
 License Notice and Trademark Acknowledgement. Manufactured under license from Dolby Laboratories. Dolby and the double-d symbol are trademarks of Dolby Laboratories. Manufactured under license under U.S.
Contents V1.0. ONE Product Introduction TWO Activating media player THREE Getting started with the Media Player...08 FOUR FAQ...
 Contents V1.0 ONE Product Introduction...02 Package contents...02 Features...02 Product specifications...03 Remote control guide...04 Touch buttons & connection ports...05 TWO Activating media player...06
Register your product and get support at HMP3008. EN User manual 7 ZH-CN 9
 Register your product and get support at www.philips.com/welcome HMP3008 EN User manual 7 ZH-CN 9 EN Please refer to the safety information before using the product. ZH-CN Trademark notice HDMI, the HDMI
Power Source Warning
 Safety Instructions This product has been engineered and manufactured to assure your personal safety. However, improper use can result in potential electric shock or fire hazards. In order not to defeat
MP60 TABLE OF CONTENTS. HD Media Player
 INSTRUCTION L MANUAL TABLE OF CONTENTS MP60 HD Media Player 1. Caution 2. Features and Specifications 3. Unit and Accessories 4. Functions of Buttons on the Remote Control 5. Media Player s Connections
HD Streaming Box CL3BS USER MANUAL
 HD Streaming Box CL3BS USER MANUAL Safety caution Do not place on uneven or unstable surface. Refer to qualified personnel if the device is damaged Do not expose to liquids, rain, and moisture Do not install
Bollo NMP-SE Networked Full-HD 1080P Media Player User s Manual
 Bollo NMP-SE Networked Full-HD 1080P Media Player User s Manual Shenzhen HD-Horizon Technology Co., Ltd. http://www.hdhorizon.com I. Interface DC 12V: DC 12V Power Supply POWER: Power Switch USB/LAN: USB
Fusion HD. Quick Start Guide. Nixeus Technology, Inc. Version 1.1
 Fusion HD Quick Start Guide Version 1.1 About This Guide This Quick Start Guide gives you the information for you to setup your unit and enjoy viewing your multimedia files. The user manual will describe
VC-HD8 Manual v2 July 2016
 VC-HD8 Manual v2 July 2016 Contents 1. What is the VC-HD8?... 4 2. Supported Media Formats... 4 3. In the Box... 5 4. Setup Instructions... 6 5. Remote Control... 8 6. Settings Options... 9 7. Additional
Media Player MP-2020 Specification Sheet MP Media Player for 2.5 Hard disk Specification Sheet
 MP-2020 Media Player for 2.5 Hard disk Specification Sheet 2009.10.28-1 - Table of Contents 1.0 Overview... 3 1.1.0 Features... 3 2.0 Box Contents... 4 3.0 Hardware Specification... 4 3.1.0 Assembly Viewing...
PPbox User s Manual. (Model: DHP-3020B)
") PPbox User s Manual (Model: DHP-3020B) Version: 1.1 Date: June 30, 2008 Table of Contents 1 Overview...3 2 Physical Details...4 3 Install PPbox...4 4 Using PPbox...6 5 Client Utility...12 6 Web Management...14
PPbox User s Manual (Model: DHP-3020B) Version: 1.1 Date: June 30, 2008 Table of Contents 1 Overview...3 2 Physical Details...4 3 Install PPbox...4 4 Using PPbox...6 5 Client Utility...12 6 Web Management...14
Contents V1.0. ONE Introduction TWO Installation and Instructions...06 THREE FAQ...14
 Contents V1.0 ONE Introduction...02 1.1 Features...02 1.2 Specification...03 1.3 Package Contents...03 1.4 Remote Control Guide...04 1.5 Connection Chart...05 TWO Installation and Instructions...06 2.1
Manual v2.1 July 2017
 VC-HD6 Manual v2.1 July 2017 Contents Contents... 3 1. What is the VC-HD?... 4 2. Supported Media Formats... 4 3. In the Box... 5 4. Setup Instructions... 6 5. Remote Control... 9 6. Settings Options...
User s Manual. (Model Name: ishow / DHP-2010C)
") (Model Name: ishow / DHP-2010C) Version: 2.2 Date: September 22, 2008 Table of Contents 1 Overview... 3 2 Quick Start... 5 3 Client Utility... 12 4 Web Management... 17 5. Introduction to ishow Remote
(Model Name: ishow / DHP-2010C) Version: 2.2 Date: September 22, 2008 Table of Contents 1 Overview... 3 2 Quick Start... 5 3 Client Utility... 12 4 Web Management... 17 5. Introduction to ishow Remote
Table of Contents 1.SAFETY INSTRUCTIONS BOXED CONTENTS PRODUCT REVIEW HARDWARE SPECIFICATIONS BASIC SETUP...
 User Manual VER1.0 Table of Contents 1.SAFETY INSTRUCTIONS...4 2.BOXED CONTENTS...5 3.PRODUCT REVIEW...5 4.HARDWARE SPECIFICATIONS...8 5.BASIC SETUP...9 5.1 AV CABLE...10 5.2 HD CABLE... 11 5.3 NETWORK/RJ45/
4K Android Streaming Box with Fly Mouse
 General information Connect this 4K Android streaming box to your TV and stream movies, update your Facebook, show pictures or plan a gaming night with friends all on your TV screen. This super versatile
Home Multimedia Center. FANTEC HDMI-miniTV. User s Manual
 Home Multimedia Center FANTEC HDMI-miniTV User s Manual Table of Contents 1. Introduction... 3 1.1 Preface... 3 1.2 Packing List... 3 1.3 Caution... 3 1.4 Connection... 5 1.5 First Time Usage... 7 2. About
4K DVB-T2 / DVB-S2 Android Streaming Box with Fly Mouse
 General information Connect this DVB-T2/S2 4K Android streaming box to your TV and stream movies, update your Facebook, show pictures or plan a gaming night with friends all on your TV screen. This super
NID- 7006A. Memory Powered by Android TM OS 4.1
 THE NEW GENERATION IN TECHNOLOGY NID- 7006A Core TM 7 Tablet PC with 8GB Built- In Memory Powered by Android TM OS 4.1 Basic Introduction... 1 Quick Start... 1 Battery management and charging... 1 Boot
HD Media Player. User Manual MPC1080P-1/MPC1080P-10
 HD Media Player User Manual MPC1080P-1/MPC1080P-10 Content 2 2 2 2 4 6 7 7 8 8 9 9 10 10 10 10 11 I. Main Features I.I. Applications I.II. Display format I.III. Supported Languages II. Remote Control III.
Wireless-B. User Guide. Media Link for Music. GHz b WML11B/WMLS11B. A Division of Cisco Systems, Inc. WIRELESS. Model No.
 A Division of Cisco Systems, Inc. GHz 2.4 802.11b WIRELESS Wireless-B Media Link for Music User Guide Model No. WML11B/WMLS11B Copyright and Trademarks Linksys is a registered trademark or trademark of
Register your product and get support at SPE9010 SPE9015 SPE9020 SPE9025 SPE9030. EN Multimedia Hard Disk
 Register your product and get support at www.philips.com/welcome SPE9010 SPE9015 SPE9020 SPE9025 SPE9030 EN Multimedia Hard Disk 1 Contents Contents... 2 Your Multimedia Hard Disk... 3 What s in the box...3
USER MANUAL High Definition HDD Multimedia Player BM Feature. Installation Guide. Management Guide
 USER MANUAL High Definition HDD Multimedia Player BM 3030 Feature Installation Guide Management Guide CONTENTS 1. Before You Get Started...... 3 1.1 SAFTY INSTRUCTION.....3 1.2 TAKE A LOOK TO THE MEDIA
Zunidata Systems Inc.
 Zunidata Systems Inc. Model: MB222 Digital Signage Media Box User Manual Version: 0.3 Date: 2013/09/30 Content Declaration... 2 Product Instruction... 2 RS-232 Pin Define..3 RS-232 Cable (optional)....3
Trademarks: all other products and brand names are trademarks and/or registered trademarks of their respective holders.
 Trademarks: all other products and brand names are trademarks and/or registered trademarks of their respective holders. The information contained in this document has been created with the utmost care.
Introduction About the Remote Control... 2 Parts and Functions... 4 Quick Start... 5 Using the AV Playback Function Setup Menu...
 User Manual V1.0 CONTENTS Introduction... 1 Features...1 System Requirements...1 About the Remote Control... 2 Parts and Functions... 4 Quick Start... 5 Using the AV Playback Function... 6 Connecting
High Definition AD Players. Universal User s Manual. L Series and PF Series
 High Definition AD Players Universal User s Manual L Series and PF Series Cautions 1. Do not install and use the unit in moisture, high temperature, outdoor, and closed environment. 2. Please turn off
USER GUIDE. HD Media Box
 USER GUIDE HD Media Box HD Media Box is a HD media player which can read flash drive, external HDD and SD/MMC card, decode the content included, and then output via HDMI / AV on your TV or monitors. It
Unplug D 920. User Manual. 151 NE State Hwy 300, Ste A Belfair, WA
 Unplug D 920 User Manual 151 NE State Hwy 300, Ste A Belfair, WA 98528 360.464.2119 www.boxlight.com 1. Overview... 4 2. Quick Start... 7 3. Windows Client Utility... 10 3.1 Starting Program... 10 3.2
Wireless HDMI Display Receiver User s Manual
 Wireless HDMI Display Receiver User s Manual Contents 1. Package Contents ------------------------------------------------------------------------------3 2. Before you start ------------------------------------------------------------------------------4
Contents. Introduction Use as External USB HDD Access PC via Network Use as Multimedia Player...28
 Contents Introduction...3 Specifications... 3 Precautions... 4 System Requirements... 4 Package Content... 4 Product Overview... 5 1. Use as External USB HDD...7 1.1 Insert Hard Disk... 7 1.2 Format Built-in
Ultra High Brightness Professional Monitor User Manual
 Manual Version UHBA1.0 Safety Instructions Please keep the display away from any heat sources. Place the display in a stable and well-ventilated place. Please handle with care as product contains glass.
SAMSUNG SOC FOR ICOMPEL CONTENT COMMANDER
 SETUP GUIDE SAMSUNG SOC INSTRUCTIONS FOR ICOMPEL CONTENT COMMANDER SAMSUNG SOC FOR ICOMPEL CONTENT COMMANDER 24/7 AT OR VISIT BLACKBOX.COM TABLE OF CONTENTS 1. INSTALLATION... 3 1.1 Setup...3 1.2 Downloading
Wireless Presentation Adaptor User s Manual
 Wireless Presentation Adaptor User s Manual (Model Name: WP-920) Version: 6.0 Date: March 29, 2012 1 Table of Contents 1. Overview... 4 2. Quick Start... 7 3. Windows Client Utility... 11 3.1 Starting
Contents V1.0. ONE Simple Explanation of Operation TWO Accessories THREE Menu Guide...05 FOUR FAQ...19
 Contents V1.0 ONE Simple Explanation of Operation...02 1.1 Front Panel...02 1.2 Back View...02 1.3 Remote Control...03 TWO Accessories...04 2.1 Accessories...04 THREE Menu Guide...05 3.1 Start up screen...05
KM-31BK. HD-Multimedia Player & Recorder.
 KM-31BK HD-Multimedia Player & Recorder www.kingwin.com 1 1. Introduction 1.1 Preface Dear Customer, Thank you for purchasing KM-31BK. In the digital age, this product is a great home entertainment system.
USER GUIDE. FOR iphone/ipad. Compatibility: Apple ios 5.1 or higher
 USER GUIDE FOR iphone/ipad Compatibility: Apple ios 5.1 or higher 1. Overview... 4 2. Install and Set Up... 4 2.1. Charge your Power Connect... 4 2.2. Charge your iphone battery with Power Connect... 5
Micca Speck G2 User s Manual
 Micca Speck G2 User s Manual Got a Question or Need Help? Email our technical support team at: support@miccatron.com for personalized assistance with the setup and use of this product. Please visit our
Main function 4.3 TFT Screen, Resolution 480*272
 Main function 4.3 TFT Screen, Resolution 480*272 Support APE, FLAC, MP3, WMA, OGG, WAV etc. music play. Support TF card, capacity support 128MB~8GB Support MPEG-4(AVI), RM, RMVB, FLV, 3GP, MPG, VOB, MP4,
TBF-100HD User Manual
 TBF-100HD User Manual High Definition Digital Terrestrial Receiver USB PVR-Ready Default PIN: 2010 Precautions Clean with a dry cloth only. Do not block any of the ventilation openings. When placed in
POS Android Digital Advertising Display (Network) Hardware User Manual
 Hardware User Manual") POS Android Digital Advertising Display (Network) Hardware User Manual Manual Version POSW3.0 Safety Instructions Please keep the display away from any heat sources. Place the display in a stable and well-ventilated
POS Android Digital Advertising Display (Network) Hardware User Manual Manual Version POSW3.0 Safety Instructions Please keep the display away from any heat sources. Place the display in a stable and well-ventilated
Overview 1. Foreword 2. Warnings
 Overview 1. Foreword Thank you for choosing our product. Please read this manual carefully before using the product. Specifications and software updates may be subject to change without notice. Some pictures
FOR FURTHER ASSISTANCE, PLEASE CALL:
 USER MANUAL Welcome Thank you for choosing TeeVee. To set up your TeeVee box and enjoy all of the features available with your device, please review the user manual. Follow all steps before using this
IMPORTANT SAFETY INSTRUCTIONS. When using this electronic device, basic precautions should always be taken, including the following:
 IMPORTANT SAFETY INSTRUCTIONS When using this electronic device, basic precautions should always be taken, including the following: 1. Read all instructions before using the product. 2. Do not use this
10.1 HD Memory View Instruction Manual
 10.1 HD Memory View Instruction Manual Cautions Precautions and maintenance For indoor use only To avoid risk of fire or electric shock, do not expose the unit to moisture or condensation. To avoid overheating,
USER MANUAL Digital Screen
 USER MANUAL Digital Screen FDBF20BK Cautions Precautions and Maintenance For indoor use only To avoid risk of fire or electric shock do not expose the unit to moisture or condensation. To avoid overheating,
AMP-1033FD. Full HD Media Player. User Manual
 AMP-1033FD Full HD Media Player User Manual Content Introduction.......2 Warning......2 Chapter I Product Specification.....3 1.1 Function List......3 1.2 Parameters List. 5 1.3 Functional Feature...7
Contents V1.0. ONE Simple Explanation of Operation TWO Accessories THREE Menu Guide...05 FOUR FAQ...19
 Contents V1.0 ONE Simple Explanation of Operation...02 1.1 Front Panel...02 1.2 Back View...02 1.3 Remote Control...03 TWO Accessories...04 2.1 Accessories...04 THREE Menu Guide...05 3.1 Start up screen...05
MP75. HD Media Player
 INSTRUCTION MANUAL MP75 HD Media Player TABLE OF CONTENTS 1. Caution 2 2. Features and Specifications 3 3. Unit and Accessories 4 4. Functions of Buttons on the Remote Control 4 5. Media Player s Connections
Blackbird 4K Multi Format HDMI Converter with 4K Scaler
 Blackbird 4K Multi Format HDMI Converter with 4K Scaler P/N 30918 User's Manual SAFETY WARNINGS AND GUIDELINES Please read this entire manual before using this device, paying extra attention to these safety
MS30 USER MANUAL. Content
 MS30 USER MANUAL Content BRIEF INTRODUCTION... 2 FEATURE... 2 BASIC PERFORMANCE... 2 SPECIFICATION... 3 PRODUCT DETAILS... 5 PACKING LIST... 5 FRONT VIEW... 5 SIDE VIEW... 6 BACK VIEW... 7 REMOTE CONTROL...
1. MEDIA 1.1. INTERNAL HARD DISK Drive Installation
 1 User Manual PRECAUTIONS We strongly recommend reading the points below before operating this product. Back up the data periodically to another safe media. Under no circumstances there is any liability
ADPF10XN Instruction Manual
 ADPF10XN Instruction Manual 1 ADPF10XN Digital Photo Frame User Guide Thank you for purchasing the ADPF10XN 10.4 digital photo frame (DPF). Before operating your new digital photo frame please carefully
XEMIO-950 MP5 PLAYER / 4GB MEMORY / TOUCH SCREEN. For information and support,
 XEMIO-950 MP5 PLAYER / 4GB MEMORY / TOUCH SCREEN For information and support, www.lenco.eu To the customer: Thank you for purchasing this MP5 player. When opening the box for the first time, please check
FANTEC FULL HD Media Player. Table of content
 Table of content 1. Introduction...2 1.1 Preface... 2 1.2 Packing List... 3 1.3 Cautions... 4 1.4 Connection... 6 1.5 Power On / Off... 9 2. Remote control...9 3. System Start-up... 11 3.1 TV Mode... 11
Digital Signage Management Software
 Digital Signage Management Software Key Features: Web-based User-friendly Multi-Company Support Cloud-Service Support Easy Installation Introduction DS100 Digital Signage Solution is a complete solution
MyHome delivers all the media files stored in your computer through D7 and your home entertainment system. Watch your digital movies, enjoy your
 MyHome delivers all the media files stored in your computer through D7 and your home entertainment system. Watch your digital movies, enjoy your music and view your photos, all from the comfort of your
Contents. 1. Verify the package contents
 Bullet VERSION 1.3 This installation guide provides basic instructions for installing the PLC-325PW/ PLC-335PW on your network and then configure Android, ios App and PC software to view the camera. For
INSTALLATION & CONFIGURATION MANUAL. resi-linx RL-IP1000 HD IP Streaming Server
 INSTALLATION & CONFIGURATION MANUAL resi-linx RL-IP1000 HD IP Streaming Server TABLE OF CONTENTS SAFETY PRECAUTIONS...2 PACKAGE CONTENTS...2 PRODUCT DESCRIPTION...3 SPECIFICATIONS...4 INSTALLATION, UNPACKING
Chapter 1: Introduction. Chapter 2: Getting Started
 Chapter 1: Introduction Media Player 200 is a Digital Media Player that includes a connector for a USB storage device and card reader. The Media Player 200 connects to your home entertainment center allowing
CWF-901SP Smart Player
 CWF-90SP Smart Player Operation Manual CWF-90SP Safety Precautions Please read all instructions before attempting to unpack or install or operate this equipment, and before connecting the power supply.
iq DIGITAL PICTURE FRAME iq Digital Picture Frame DPF701SB USER GUIDE
 iq Digital Picture Frame DPF701SB USER GUIDE 1 Table of Contents Important Safety Precautions... 3 Cleaning the LCD Screen... 3 Cleaning the Digital Picture Frame... 3 Introduction... 4 What s in the Box...
PRESTIGIO LIBRETTO. e-book Reader PER307.
 PRESTIGIO LIBRETTO e-book Reader PER307 www.prestigio.com Table of Contents Disclaimer 3 Introduction 3 Package Content 3 Getting Started 4 Charging the Reader 5 Power On/Off, Reset Device, Insert MicroSD
Point of View SmartTV-500 Center - Android 4.2. General notices for use...2 Disclaimer...2 Box Contents...2
 Point of View SmartTV-500 Center - Android 4.2 English Table of Contents General notices for use...2 Disclaimer...2 Box Contents...2 1.0 Product basics...3 1.1 Buttons and connections... 3 1.2 Connecting
PU-160ETH. Ethernet and USB to HDMI Converter. Operation Manual PU-160ETH
 PU-160ETH Ethernet and USB to HDMI Converter Operation Manual PU-160ETH Trademark Acknowledgments All products or service names mentioned in this document may be trademarks of the companies with which
Multi-Media Player (Automatic HD Player) User manual HD-1080K12. Movie Photo Music
 User manual HD-1080K12. Movie Photo Music") R Multi-Media Player (Automatic HD Player) HD-1080K12 User manual HD-1080K12 is a high performance 1080p Full HD media player. OS belong to Linux operate system. Movie Photo Music Version:05. 17.01 http://www.meicheng.com.tw
R Multi-Media Player (Automatic HD Player) HD-1080K12 User manual HD-1080K12 is a high performance 1080p Full HD media player. OS belong to Linux operate system. Movie Photo Music Version:05. 17.01 http://www.meicheng.com.tw
NID Memory Powered by Android TM OS 4.1
 THE NEW GENERATION IN TECHNOLOGY NID- 7007 Core TM 7 Tablet PC with 8GB Built- In Memory Powered by Android TM OS 4.1 i TABLE OF CONTENTS 1 OUTLOOK DESCRIPTION... 1 2 POWER BUTTON USAGE... 1 3 TOUCH-SCREEN
Table of Contents. Manual Overview
 Table of Contents Manual Overview D-Link reserves the right to revise this publication and to make changes in the content hereof without obligation to notify any person or organization of such revisions
Network Digital Menu Board Hardware User Manual
 Network Digital Menu Board Hardware User Manual Manual Version DMA1 Safety Instructions Please keep the display away from any heat sources. Place the display in a stable and well-ventilated place. Please
Multi Analog Video To HDMI UHD. 4Kx2K Scaler. With USB Media Player
 Multi Analog Video To HDMI UHD 4Kx2K Scaler With USB Media Player User Manual 1. Introduction ALL TO HDMI 4K CONVERTER BOX converts CVBS, YPbPr, VGA, HDMI and USB media to 720p and 1080p high definition
user manual v
 user manual v1.3 2016 TABLE OF CONTENTS 1. INTRODUCTION 1.1. Important safety information 1.2. Precautions 2. PRODUCT OVERVIEW 3. GET STARTED 3.1. Gift-box Contents 3.2. Installation Requirements 3.3.
Archives About ARCHOS TV+ General Questions I have installed a firmware/plug-in/game file on my Archos TV+ but it is not recognized by the device. You
 About ARCHOS TV+ General Questions I have installed a firmware/plug-in/game file on my Archos TV+ but it is not recognized by the device. You may have not correctly copied your file on the device. If it
USE THE EMERGENCY LOADING PROCEDURE ONLY
 Med8er V3.0.4 update 14 June 2010 RTD1073-128M-HMC-M03I-20100613-v7.0.7.r4282.QA20100402_SANJIA_ENGLISH_RC18 USE THE EMERGENCY LOADING PROCEDURE ONLY Emergency Recovery Procedure Download the Mede8er V3.0.4
Wireless Presentation Adaptor User s Manual
 Wireless Presentation Adaptor User s Manual (Model Name: WPS-Speedy) Version: 1.5 Date: Sep. 24, 2010 1 Table of Contents 1. Overview... 4 2. Quick Start... 6 3. Windows Client Utility... 10 3.1 Starting
Contents V1.1. ONE Introduction TWO Activating the Media Player...08 THREE FAQ...17
 Contents V1.1 ONE Introduction...02 1.1 Features...02 1.2 Specification...03 1.3 Package Contents...03 1.4 Remote Control Guide...04 1.5 Introducing the Unit...05 1.6 Connection Diagram for YPbPr...06
CONTENTS CHAPTER I: BEFORE USE I. BEFORE USE
 I. BEFORE USE Foreword 1. Features 2. Accessories 3. Product Safety Information 4. Illustrations and Functions II. FAST OPERATION 1. Startup 2. Shutdown 3. Lock 4. Reset 5. Pause 6. Music File Select 7.
Android TV BOX User Manual. Android TV BOX. 3D-HD 1080P x 2 4K X 2K
 Android TV BOX User Manual Android TV BOX 3D 4K X 2K 4K 3D-HD 1080P x 2 Preface Thank you very much for purchasing our TV box. To approach an in-depth understanding of the system and get started using
SmartView Versa+ User Manual. Table of contents
 Table of contents Overview... 1 What s in the box?... 2 Getting to know your SmartView Versa+.. 3 Getting started... 5 Inserting the battery... 5 Charging the battery... 6 Install SD card... 7 Install
SD CARD DVD/VCD/CD/MP3/DIVX/MPEG-4 XO1525 USB MOD D200P. User s Manual
 USB SD CARD DVD/VCD/CD/MP3/DIVX/MPEG-4 XO1525 MOD D200P User s Manual 9.1 Rear Panel Connections: 19 BEFORE USING: To ensure the safety of the products during transportation, The internal mechanism was
TV1 Digital Player User s Manual
 TV1 Digital Player User s Manual Note: Screen shots taken in this manual may appear different on the player itself. Table of Content: Computer System requirements... 1 Notes... 2 Product Introduction...
My Media Hub Quick Start Guide for USB Devices. Sharing media content with the Fetch Box from a USB device
 My Media Hub Quick Start Guide for USB Devices Sharing media content with the Fetch Box from a USB device What s inside Welcome to your My Media Hub 3 Supported media file formats 4 Getting Started 5 Play
User Guide and Install Manual
 digi-mod HD-4797 www.digi-modbyzycast.com HD-4797 4-Input HD Digital Modulator with HDMI Loop Through and IR User Guide and Install Manual TABLE OF CONTENTS SAFETY PRECAUTIONS...2 PACKAGE CONTENTS...2
User Guide and Install Manual
 digi-mod HD-1605 www.digi-modbyzycast.com HD-1605 Single Input DVB-T HD Digital Modulator with Delayed Audio Output User Guide and Install Manual TABLE OF CONTENTS SAFETY PRECAUTIONS...2 PACKAGE CONTENTS...2
fire or electric shock.
 USER MANUAL 1. End User License Agreement Please read this Agreement before using this product. You promise: 1.Do not dismantle this product for unwarrantable reason. 2.Do not read and renovate firmware
Con-To-Go. Media Content Box ADSM User Guide
 Con-To-Go Media Content Box ADSM003-0 User Guide Index Description & Feature... 02 Specification... 03 Product Overview... 04 Remote Control Getting Started... 06... 07 User Interface... 16 Question/Troubleshooting...
IMPECCA DFM-1512 USER S MANUAL
 IMPECCA DFM-1512 USER S MANUAL Table of Contents Introduction... 3 Installing your Unit... 3 Connecting to a computer... 4 Using Your Remote Control... 5 Using Your Digital Photo Frame... 6 Browsing Images...
CDL-160ETH. Ethernet and USB to HDMI Converter. Operation Manual CDL-160ETH
 CDL-160ETH Ethernet and USB to HDMI Converter Operation Manual CDL-160ETH Disclaimers The information in this manual has been carefully checked and is believed to be accurate. Cypress Technology assumes
Table of Contents User Manual page 1
 Table of Contents User Manual page 1 Table of Contents 1. Introduction... 6 1.1. Minimum System Requirements... 7 1.2. Supported Formats... 7 1.3. Box Content... 8 1.4. Languages... 8 1.5. Views of the...
High Definition LCD Digital Signage Display
 High Definition LCD Digital Signage Display User Manual Applicable Models L/PFxxH7(Android Version) MxxSA Cautions 1. Do Not install and use the unit in moisture, high temperature, outdoor and closed environment.
Quick Start Guide V4
 Quick Start Guide V4 MED500X High Definition Multimedia Player INDEX page 1 page 2 page 3 page 4 page 5 page 6 page 7 page 8 page 9 page10 page11 page12 page13 page14 page15 page16 page17 page18 page19
Table of Contents User Manual page 1
 Table of Contents User Manual page 1 Table of Contents 1. Introduction... 6 1.1. Minimum System Requirements... 7 1.2. Supported Formats... 7 1.3. Box Content... 8 1.4. Languages... 8 1.5. Views of the
P Digital Media Player for 3.5 SATA Hard Drives
 Digital Media Player for 3.5 SATA Hard Drives User Manual Firmware: 20080515_MPT_35_00 Date: May 22, 2008 Version: v1.1 The diagrams and images contained in this manual may not fully represent the product
Table of Contents. Page ii
 Table of Contents Chapter 1 Introduction 1 Features... 1 Safety Instructions... 1 Package Contents... 2 Physical Details... 3 Chapter 2 Setup 5 Overview... 5 Using the Windows Wizard... 5 Chapter 3 Web-Based
ZOTAC ZBOX User s Manual
 ZOTAC ZBOX User s Manual No part of this manual, including the products and software described in it, may be reproduced, transmitted, transcribed, stored in a retrieval system, or translated into any language
WF-2402 Quick Installation Guide
 WF-2402 Quick Installation Guide Netis 150Mbps Wireless-N Broadband Router 1. Check Your Package Contents The following items should be found in your package: 150Mbps Wireless-N Broadband Router Power
My Media Hub Quick Start Guide for Windows or Mac
 My Media Hub Quick Start Guide for Windows or Mac What s inside Welcome to your My Media Hub Getting Started 4 Sharing media over a home network 5 Set up Windows Media Player 7 Set up a Twonky Media Server