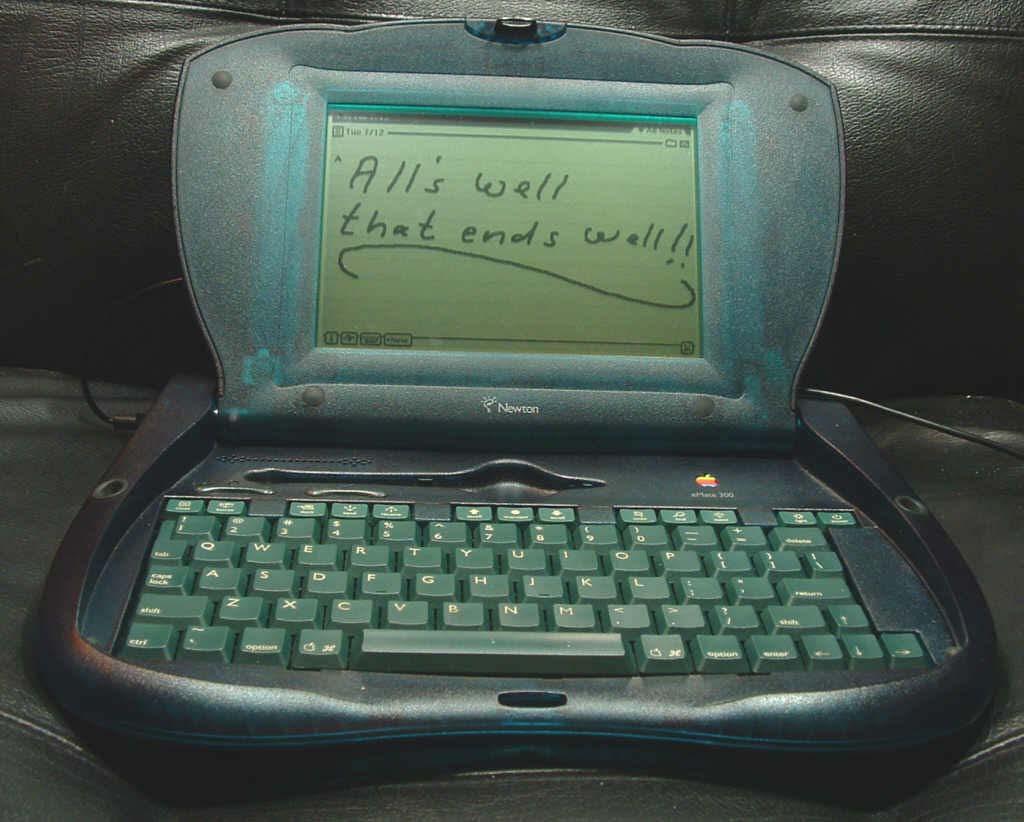
Live emate repair at WWNC.
|
|
|
- Brianne Newton
- 6 years ago
- Views:
Transcription
1 Live emate repair at WWNC Frank Gründel
2 A word about me Frank Gründel alias Frank Gruendel Approx. 45 years old Married to an amazing wife One child Hardware developer for 15 years Software developer (java, C, C++, NewtonScript) since 1996
3 Downloads This presentation (PowerPoint): LiveeMateRepair.pptppt This presentation (zipped web page): LiveeMateRepair.zip emate disassembly instructions: emate_disassemble.html Hinge repair instructions: emate-hinge.html
4 A word about me I started Newton hardware rebuilds and repairs in 2000 when someone needed a Newton 2000 battery rebuilt The rebuild instructions were the first page of An increasing number of people seem to think that I know a lot about Newton hardware...
5 A word about me I started Newton hardware rebuilds and repairs in 2000 when someone needed a Newton 2000 battery rebuilt The rebuild instructions were the first page of An increasing number of people seem to think that I know a lot about Newton hardware... which is the reason I am here today!
6 Ground rules
7 Ground rules I have never before spoken in front of an audience
8 Ground rules I have never before spoken in front of an audience and English is not my native language
9 Ground rules I have never before spoken in front of an audience and English is not my native language so please be gentle!
10 A word on tools Do not use cheap or dull, old tools Magnetize all tools, especially screwdrivers Screws like to hide in carpets...
11 You will need: A medium size flat-blade screwdriver A pair of tweezers A pointed plastic letter opener or similar tool A soldering station (not absolutely necessary)

12 You will also need: A Phillips size 0 screwdriver Torx 8 and Torx 10 screwdrivers
13 The problem The display ribbon cable is punctured by a hinge spring This is a severe design flaw of the emate It will affect EVERY emate unless caught in time

14 The defect Horizontal lines are missing on parts of the screen Often there is no response to pen taps The screen opens much more easily than before
15 How to start Slide the contrast and volume sliders a couple of times to get a feel for them. You will be testing them for proper engagement after the mainboard has been put back in If the hinges are not fixed yet, always remove the main logic board first If the hinges are fixed and you only want to remove the display, watch out for the pushbutton plunger!
16 Keyboard removal Not required for hinge or cable repair No need to disassemble anything first Using a flat-blade screwdriver, pry up the keyboard in three places (below the right-hand side of the space bar and (on both sides) below the Option and Enter keys) When putting the keyboard back in, do not press on the keys
17 Starting the disassembly If there is a card installed, remove it If the AC adapter is plugged in, unplug it Label all screws and other parts Make sure the small parts are kept in order (egg carton, sticky tape, )
")
 Take")
18 Disassembly Step 1: Battery Remove the battery access door (Torx 8) Note the orientation of the connector (red to the back) Take the battery out


19 Disassembly Step 2: Case Using a toothpick or pointed plastic tool, pry out 4 round and 1 oval rubber screw plugs Remove 5 screws (Torx 10)
20 Disassembly Step 3: Case Ground yourself out on something to discharge any static electricity (metal bedpost, metal door,...) Split the base, starting at the handle Unlock 4 catches (flat-blade screwdriver) and remove the bottom part of the case Remove the infrared lens and the green rubber part in the handle
21 Disassembly Step 4: Mainboard Unsolder the speaker and backlight wires (not absolutely necessary, but recommended). Note how they are routed in their notches and how the backlight wires are routed between the notch and the solder joints Unlock the screen cable connector by pushing the black locking tabs towards the cable Pull the screen cable out
22 Disassembly Step 5: Mainboard Remove the 5 screws that are marked by a white bell symbol (Phillips size 0) Gently push the port cover assembly outwards and lift up the mainboard
23 Disassembly Step 6: Mainboard Push the card release button in, slide the mainboard to the right and fold it down onto the keyboard area. Pick it up by its edges and do not touch the delicate components
24 Disassembly Step 7: Mainboard Remove the pushbutton plunger and the charge LED lens
25 Disassembly Step 8: Mainboard If you decided to leave the wires soldered, unscrew the speaker case Unlock the keyboard cables and put the mainboard in an antistatic bag (or wrap it in aluminum foil). If you decided to leave the wires soldered, this will not be possible until the backlight wire connector in the screen case is disconnected
26 Disassembly Step 9: Mainboard Remove the port cover assembly (Phillips size 0) Remove the card slot bezel (Phillips size 0)


27 Surprise How are the springs?

 Using the Torx 8 screwdriver again, remove the")
28 Disassembly Step 10: Screen Open the emate so that the lid lies completely flat Remove the 4 rubber screw plugs (pointed plastic tool, pointing away from the screen) Using the Torx 8 screwdriver again, remove the 4 screws


29 Disassembly Step 11: Screen The bezel is held by 12 catches Unlock the 4 catches at the bottom (flat- blade screwdriver)

30 Disassembly Step 12: Screen Unlock the remaining catches, working towards the top Remove the bezel Don't close the lid with the bezel removed or you'll damage the lid's position detection pushbutton switch
 Disconnect the backlight connector Put something like a soft cloth on the")
31 Disassembly Step 13: Screen Remove the 2 screws at the top of the display and the bottom screw of the right- hand hinge (Phillips size 0) Disconnect the backlight connector Put something like a soft cloth on the keyboard
32 Disassembly Step 14: Screen Lift the display assembly off its posts and put it face- down on the keyboard Unlock the connector by pushing the black locking tabs towards the cable Pull the cable out and put the display unit away. Only touch it at its edges
33 Disassembly Step 15: Hinges Remove the top screw of the left-hand hinge (Phillips size 0) and take out the shielding clip Remove the remaining two hinge screws (Phillips size 0)
34 Disassembly Step 16: Hinges Provided the pushbutton plunger has been removed, tilt the lid upright and push it away from you Note how the screen cable and the backlight wires pass around their left and right hinge posts. Better yet, make sketches
.")
 and remove the hinges Remove the")
35 Disassembly Step 17: Hinges Flip the case over and loosen the black screws of both hinges (Phillips size 0).. Do not remove them Remove the remaining 4 hinge screws (Phillips size 0) and remove the hinges Remove the ribbon cable
36 Fix the hinges Hinge fix demonstration is tedious, boring and beyond the scope of this presentation Of the 99 ways to put a hinge back together, only one is correct If you are not willing to risk taking the hinges apart, the minimum preventative maintenance that should be done at this point is to apply some oil or grease to the springs
37 Fix the cable Fixing the ribbon cable is possible, but requires the skill and the equipment to solder under a microscope (I can do this for you) New cables are available (a review can be found in the hardware section of
38 Reassembly Step 1: Hinges Be aware that left and right hinges are not alike (they are marked "L" and "R") Since the emate is currently upside down, the hinge marked "L" will actually be on the right side All hinge screws have blue thread lock material on them. Be aware that there are identical screws without it. Do not accidentally use these screws for the hinges
39 Reassembly Step 2: Hinges Thread the ribbon cable through the slit from the keyboard side and put the left hinge (marked "R") back in. Make sure the cable passes correctly around the hinge axis and is correctly routed around the screw post on the other side Put the right hinge (marked "L") back in. Fasten the hinges with two screws each (Phillips size 0)


40 Reassembly Step 3: Hinges Remove the black middle screws of both hinges and put wave washers beneath them Reinsert and tighten the screws This is by far the most important step of all, so... DO NOT FORGET IT!!!
41 Reassembly Step 4: Hinges Flip the emate around and adjust the hinges in a way that the ends point upwards Clip the screen case bottom over the axes Reinsert and tighten the bottom screw of the left-hand hinge and the top screw of the right- hand hinge (Phillips size 0, no built-in washer) and clip the shielding clip back onto the left hinge
42 Reassembly Step 5: Hinges The backlight wires must pass behind the cylindrical hinge post. If you decided to leave the wires soldered, this won't be possible until the mainboard is back in place Again, make sure that the ribbon cable curls correctly around the hinge post and is not pinched
43 Reassembly Step 6: Hinges Put the shielding foil end over the shielding clip Reinsert and tighten the top screw of the left- hand hinge. Use a screw with a "built-in washer" and blue thread lock on it Ground yourself out
44 Reassembly Step 7: Screen Put something soft on the keyboard and put the display unit upside-down on it. Touch the display only at its edges Insert the screen cable into the connector Do not forget to lock the connector
45 Reassembly Step 8: Screen Flip the display unit over and push it onto its 4 posts Do NOT press on the screen, only press where the posts are
46 Reassembly Step 9: Screen Fasten the cable by inserting and tightening the bottom screw of the right-hand hinge (Phillips size 0). Use the last screw with thread lock on it Put the two screws back in at the top of the display (Phillips size 0) Reconnect the backlight connector. If you decided to leave the wires soldered, this won't be possible until the mainboard is back in place
47 Reassembly Step 10: Screen Tilt the bezel upwards at the edge facing you and push it in the top four catches Work your way down, engaging two catches on each side and four at the bottom If you are confident you have done everything correctly so far, put the 4 bezel screws (Torx 8) and their rubber screen caps back in. Use the caps with the larger diameter
48 Reassembly Step 11: Mainboard Close the lid Reattach the card slot and the port door assemblies back in (Phillips size 0) Make sure to screw counterclockwise first until you hear a click, then tighten the screws, otherwise they will cut a new thread into their post, each time enlarging the hole and weakening the screw's grip
49 Reassembly Step 12: Mainboard If you decided to leave the wires soldered, screw the speaker case back on and thread the backlight wires past the right-hand hinge while holding the mainboard upright at the right-hand side of the emate You may need to use all four hands to complete this step

50 Reassembly Step 13: Mainboard Ground yourself out once again Put the main logic board upside-down onto the keyboard area. Avoid touching its delicate components
 and buttons (case) all the way to the")
51 Reassembly Step 14: Mainboard Plug the keyboard ribbon cables into their connectors, and slide the connector tabs closed Slide the contrast and volume sliders (mainboard( mainboard) and buttons (case) all the way to the left


52 Reassembly Step 15: Mainboard Check that the display cable is lodged against its guides and not twisted. Avoid trapping the end of the cable under the mainboard as you install it Put the lid switch button and the charge LED lens back in
53 Reassembly Step 16: Mainboard Align the mainboard so that it is tilted upwards at the right-hand side Slide it to the left, threading the card release button in first Gently bend the port door assembly outwards and push the mainboard down at the right-hand edge, making sure the backlight and speaker wires are routed correctly through their notches

54 Reassembly Step 17: Mainboard Make sure the backlight and speaker wires aren't pinched between the case and the mainboard and that they are long enough to be soldered back on Check the board is seated flat and screw the five mainboard screws back in using the bell icons as a reference
55 Reassembly Step 18: Mainboard The bottom left-hand screw will make you think that the mainboard is misaligned, but it isn't. This is a minor flaw in the emate design Open the lid slightly and test the contrast and volume sliders. They should move with a slight resistance Insert and eject a PC card to ensure that the mechanism is OK. Similarly, slide the port door in both directions to test its freedom of movement


56 Reassembly Step 19: Mainboard If the backlight and speaker wires were unsoldered, resolder them. The black wires are soldered to the left-hand solder pad, and the red wires to the right-hand pad Make sure the wires are correctly routed through their notches


57 Reassembly Step 20: Mainboard Push the display cable into its connector and lock the connector Slide the keyboard ribbon cables back under the 2 cm, plastic, horizontal retention bar as shown Flip the emate around
58 Reassembly Step 21: Quick Test Slide the contrast and the volume sliders to the center position Say something nice to your favorite deity Plug the AC adapter in. The emate should now power up Check that pen input is recognized and that backlight, contrast slider and volume slider work. Close the lid slowly, the emate should shut off when the lid is almost closed. If it doesn t, the pushbutton plunger is probably missing.

59 Reassembly Step 22: Case Power the emate off, close the lid, remove the AC adapter and flip the emate over Put the green rubber handle part back in with the notch pointing upwards Put the infrared lens back in
60 Reassembly Step 23: Case Hold the bottom part of the case so that the edge facing you points down and slide it towards you into the bottom two catches Engage one catch on each side. These are often a bit stubborn and need additional persuasion Screw the bottom 5 screws in (Torx 10), again turning them counterclockwise first until you hear a click. Do not accidentally use a battery cover screw, these are extremely difficult to remove if misused as case screws
61 Reassembly Step 24: Case Plug in the battery pack in so that the red wire is toward the back Fasten the battery cover with the remaining two screws, again using the Torx 8 screwdriver If you have any parts left at this point, you have a problem
62 That's it
63 That's it Thanks for your patience!
64 Q & A
65 Downloads This presentation (PowerPoint): LiveeMateRepair.pptppt This presentation (zipped web page): LiveeMateRepair.zip emate disassembly instructions: emate_disassemble.html Hinge repair instructions: emate-hinge.html
To connect the AC adapter:
 Replacing the AC Adapter Replacing the AC Adapter 3 Plug the power cord into a wall outlet. The power indicator turns on. To connect the AC adapter: Connect the power cord to the AC adapter. Power indicator
Removing and Replacing Parts
 Removing and Replacing Parts Preparing to Work Inside the Computer Recommended Tools Screw Identification System Components Hard Drive Fixed Optical Drive Media Bay Devices Memory Modules Mini PCI Card
Retina MacBook 2017 Upper Case Assembly
 Retina MacBook 2017 Upper Case Assembly Replacement Replace the upper case assembly (including the integrated keyboard) on the Retina MacBook 2017. Written By: Tobias Isakeit ifixit CC BY-NC-SA www.ifixit.com
MacBook Pro 17" Models A1151 A1212 A1229 and A1261 Display Inverter Replacement
 MacBook Pro 17" Models A1151 A1212 A1229 and A1261 Display Inverter Replacement Written By: Andrew Bookholt ifixit CC BY-NC-SA www.ifixit.com Page 1 of 17 INTRODUCTION Backlight not working? Use this guide
Gateway Profile 4 service guide
 Gateway Profile 4 service guide Customizing Troubleshooting Contents Replacing Components in Your Gateway Profile 4.................. 1 About this guide.....................................................
HP Compaq 6730b Display Replacement
 Here is a HP Compaq 6730b with a cracked LCD after having been dropped. This is a straight forward repair. Written By: oldturkey03 ifixit CC BY-NC-SA www.ifixit.com Page 1 of 11 INTRODUCTION This laptop
MacBook Core 2 Duo Clutch Cover
 MacBook Core 2 Duo Clutch Cover Replacement Replace the clutch cover on your MacBook Core 2 Duo. Written By: Ben Eisenman ifixit CC BY-NC-SA www.ifixit.com Page 1 of 29 INTRODUCTION Replace the curved
iphone 6s Front Panel Replacement
 iphone 6s Front Panel Replacement Note: DIY at your own risk. New beginner must be careful, screens got problems mostly due to wrong installation process. INTRODUCTION Use this guide to replace a cracked
Retina MacBook 2016 Display Assembly
 Retina MacBook 2016 Display Assembly Replacement Replace the display assembly on the Retina MacBook 2016. Written By: Adam O'Camb ifixit CC BY-NC-SA www.ifixit.com Page 1 of 20 INTRODUCTION Use this guide
OLPC XO-4 Touch Touchpad Controller Replacement
 OLPC XO-4 Touch Touchpad Controller Replacement This guide will walk through replacing a touchpad. Written By: Theodore Tsanakas ifixit CC BY-NC-SA www.ifixit.com Page 1 of 13 INTRODUCTION Use this guide
Written By: senordingdong
 Installation of the UniMac V4 adapter into the Apple imac Intel 17". This enables the usage of non OEM LCD panels, and offers an otherwise unavailable Full HD upgrade. This used for repair of the common
Written By: Sam Lionheart
 iphone SE Display Assembly Replacement Replace the cracked or broken screen on your iphone SE. Written By: Sam Lionheart ifixit CC BY-NC-SA www.ifixit.com Page 1 of 26 INTRODUCTION Use this guide to replace
OLPC XO-4 Touch Mouse Buttons Controller Replacement
 OLPC XO-4 Touch Mouse Buttons Controller Replacement This guide will show you how to replace the mouse buttons controller. Written By: Michael Kellerman ifixit CC BY-NC-SA www.ifixit.com Page 1 of 12 INTRODUCTION
Acer Aspire 7736Z-4809 LCD Module Replacement
 Acer Aspire 7736Z-4809 LCD Module Replacement The monitor does not work properly. Replacing the LCD module may solve this problem. Written By: Pnithan Jantarakolica ifixit CC BY-NC-SA www.ifixit.com Page
imac Intel 27" Retina 5K Display CPU Replacement
 imac Intel 27" Retina 5K Display CPU Replacement Replace or upgrade the CPU in your imac Intel 27" Retina 5K Display. Written By: Sam Lionheart ifixit CC BY-NC-SA www.ifixit.com Page 1 of 36 INTRODUCTION
Toshiba Satellite A105-S4011 Touchpad
 Toshiba Satellite A105-S4011 Touchpad Replacement This guide will instruct you on how to remove the current touchpad from this laptop and how to reinstall another. This is a straightforward process and
Written By: Sam Lionheart
 iphone 5s Earpiece Speaker Replacement Replace the earpiece speaker in an iphone 5s. Written By: Sam Lionheart ifixit CC BY-NC-SA www.ifixit.com Page 1 of 22 INTRODUCTION Use this guide to replace a broken
Dell Latitude C800 Service Manual
 Dell Latitude C800 Service Manual Dell Latitude C800 Service Manual Before You Begin Preparing to Work Inside the Computer Recommended Tools Screw Identification Removing and Replacing Parts System Components
Written By: Sam Lionheart
 iphone SE Logic Board Replacement Use this guide to replace a faulty logic board in your iphone SE. Written By: Sam Lionheart ifixit CC BY-NC-SA www.ifixit.com Page 1 of 27 INTRODUCTION Use this guide
MacBook Pro 13" Touch Bar Late 2016 Display Assembly Replacement
 MacBook Pro 13" Touch Bar Late 2016 Display Assembly Replacement Replace the Display Assembly in your MacBook Pro 13" Touch Bar Late 2016. Written By: Dominik Schnabelrauch ifixit CC BY-NC-SA www.ifixit.com
imac Intel 21.5" EMC 2889 Blade SSD
 imac Intel 21.5" EMC 2889 Blade SSD Replacement Replace the blade SSD in your imac Intel 21.5" EMC 2889. Written By: Jeff Suovanen ifixit CC BY-NC-SA www.ifixit.com Page 1 of 37 INTRODUCTION Use this guide
OnePlus 5 Screen and Digitizer Assembly Replacement
 OnePlus 5 Screen and Digitizer Assembly Replacement Follow this guide to replace the screen and digitizer for the OnePlus 5. This replaces the screen as well as the frame it is attached to. Written By:
WEASEL N/B MAINTENANCE
 2. System Assembly & Disassembly 2.1 System View 2.1.1 Front View ❶ Microphone Connector ❷ Audio Input Connector ❸ Audio Output Connector ❹ Top Cover Latch ❹ ❶ ❸ ❷ 2.1.2 Left-Side View ❶ VGA Port ❷ S-Video
Written By: Sam Lionheart
 iphone SE SIM Eject Lever Replacement Replace the SIM eject lever in an iphone SE. Written By: Sam Lionheart ifixit CC BY-NC-SA www.ifixit.com Page 1 of 22 INTRODUCTION Is your SIM card getting stuck in
imac Intel 21.5" Retina 4K Display (2017) RAM
 RAM") imac Intel 21.5" Retina 4K Display (2017) RAM Replacement Learn how to replace or upgrade the RAM in your 2017 Retina 4K imac. Written By: Evan Noronha ifixit CC BY-NC-SA www.ifixit.com Page 1 of 38 INTRODUCTION
imac Intel 21.5" Retina 4K Display (2017) RAM Replacement Learn how to replace or upgrade the RAM in your 2017 Retina 4K imac. Written By: Evan Noronha ifixit CC BY-NC-SA www.ifixit.com Page 1 of 38 INTRODUCTION
Dell Inspiron Teardown
 Dell Inspiron 15-7559 Teardown This guide will demonstrate how to take apart the Dell Inspiron 15-7559. Written By: Trenton Greevebiester ifixit CC BY-NC-SA www.ifixit.com Page 1 of 18 INTRODUCTION This
Retina MacBook 2015 Display Assembly
 Retina MacBook 2015 Display Assembly Replacement Replace the display assembly on the Retina MacBook 2015. Written By: Geoff Wacker ifixit CC BY-NC-SA www.ifixit.com Page 1 of 22 INTRODUCTION Use this guide
Retina MacBook 2017 Logic Board Replacement
 Retina MacBook 2017 Logic Board Replacement Replace the logic board in the Retina MacBook 2017. Written By: Tobias Isakeit ifixit CC BY-NC-SA www.ifixit.com Page 1 of 22 INTRODUCTION Use this guide to
MacBook Pro 17" Models A1151 A1212 A1229 and A1261 LCD Replacement
 MacBook Pro 17" Models A1151 A1212 A1229 and A1261 LCD Replacement Escrito por: Andrew Bookholt ifixit CC BY-NC-SA es.ifixit.com Página 1 de 21 INTRODUCCIÓN Use this guide to replace just the LCD rather
Written By: Sam Lionheart
 iphone 5s Lightning Connector Replacement Remove the Lightning connector/headphone jack assembly from your iphone 5s. Written By: Sam Lionheart ifixit CC BY-NC-SA www.ifixit.com Page 1 of 26 INTRODUCTION
Dell Inspiron XPS and Inspiron 9100 Service Manual
 Dell Inspiron XPS and Inspiron 9100 Service Manual Dell Inspiron XPS and Inspiron 9100 Service Manual Before You Begin Memory Module, Mini PCI Card, and Devices System Components Subwoofer Bluetooth Card
Written By: John Sutton
 Replacing the fan on your HP g7-2275 dx. Written By: John Sutton ifixit CC BY-NC-SA www.ifixit.com Page 1 of 20 INTRODUCTION Laptop cooking your lap? This guide will walk you through replacing your fan.
ibook G4 14" 933 MHz-1.33 GHz Hard Drive
 ibook G4 14" 933 MHz-1.33 GHz Hard Drive Replacement Written By: irobot ifixit CC BY-NC-SA www.ifixit.com Page 1 of 25 INTRODUCTION You can install hard drives up to 9.5mm thick. TOOLS: Coin (1) Phillips
Retina MacBook 2017 USB-C Port Replacement
 Retina MacBook 2017 USB-C Port Replacement Replace a loose, worn, or failed USB-C port in the Retina MacBook 2017. Written By: Tobias Isakeit ifixit CC BY-NC-SA www.ifixit.com Page 1 of 17 INTRODUCTION
Written By: Walter Galan
 iphone 5s Display Assembly Replacement Replace the cracked or broken screen on your iphone 5s. Written By: Walter Galan ifixit CC BY-NC-SA www.ifixit.com Page 1 of 26 INTRODUCTION Use this guide to replace
apple Service Source ibook ibook (Opaque 16 VRAM), ibook (32 VRAM) November 6, Apple Computer, Inc. All rights reserved.
, ibook (32 VRAM) November 6, Apple Computer, Inc. All rights reserved.") apple Service Source ibook ibook (Opaque 16 VRAM), ibook (32 VRAM) November 6, 2002 2002 Apple Computer, Inc. All rights reserved. apple Service Source Take Apart ibook (Opaque 16 VRAM), ibook (32 VRAM)
apple Service Source ibook ibook (Opaque 16 VRAM), ibook (32 VRAM) November 6, 2002 2002 Apple Computer, Inc. All rights reserved. apple Service Source Take Apart ibook (Opaque 16 VRAM), ibook (32 VRAM)
Moto G4 LCD Screen and Digitizer Assembly Replacement
 Moto G4 LCD Screen and Digitizer Assembly Replacement Replace a cracked or faulty display as a complete assembly, including the surrounding frame/chassis. Written By: Richard Gonzalez ifixit CC BY-NC-SA
TIVO UPGRADE INSTRUCTIONS (c) , Adberg Consulting LLC. All rights reserved.
 , Adberg Consulting LLC. All rights reserved.") TIVO UPGRADE INSTRUCTIONS (c) 2001-2003, Adberg Consulting LLC. All rights reserved. Instructions for Series 1 DirecTV/TiVo GXCEBOT TWO-DRIVE REPLACE upgrade Color instructions are also available at http://www.weaknees.com/upgrade_instructions.php
TIVO UPGRADE INSTRUCTIONS (c) 2001-2003, Adberg Consulting LLC. All rights reserved. Instructions for Series 1 DirecTV/TiVo GXCEBOT TWO-DRIVE REPLACE upgrade Color instructions are also available at http://www.weaknees.com/upgrade_instructions.php
imac Intel 27" Retina 5K Display SATA Cable
 imac Intel 27" Retina 5K Display SATA Cable Replacement Written By: Dozuki System 2017 guides.crucial.com Page 1 of 32 INTRODUCTION Use this guide to replace the SATA cable on the back of the logic board
imac Intel 27" EMC 2639 Hard Drive
 imac Intel 27" EMC 2639 Hard Drive Replacement Replace the Hard Drive in your imac Intel 27" EMC 2639. Written By: Walter Galan ifixit CC BY-NC-SA www.ifixit.com Page 1 of 26 INTRODUCTION Replacing the
Replacing the Gateway M275 Keyboard
 Replacing the Gateway M275 Keyboard This package includes a replacement keyboard for your Gateway M275 notebook and these printed instructions. Tools you need You need a small Phillips screwdriver and
MacBook Pro 15" Core Duo Model A1150 Keyboard Replacement
 MacBook Pro 15" Core Duo Model A1150 Keyboard Replacement Written By: irobot ifixit CC BY-NC-SA www.ifixit.com Page 1 of 16 INTRODUCTION This guide shows the hidden screws you must remove when replacing
ipad Mini Wi-Fi Front Facing Camera Replacement
 ipad Mini Wi-Fi Front Facing Camera Replacement Replace the Front Facing Camera in your ipad Mini Wi-Fi. Written By: Andrew Optimus Goldberg ifixit CC BY-NC-SA www.ifixit.com Page 1 of 42 INTRODUCTION
Retina MacBook 2017 Trackpad Assembly
 Retina MacBook 2017 Trackpad Assembly Replacement Replace the trackpad assembly on the Retina MacBook 2017. Written By: Tobias Isakeit ifixit CC BY-NC-SA www.ifixit.com Page 1 of 13 INTRODUCTION Use this
PowerBook G4 Aluminum 12" GHz Left Clutch Hinge Replacement
 PowerBook G4 Aluminum 12" 1-1.5 GHz Left Clutch Hinge Replacement Written By: Matthew Newsom ifixit CC BY-NC-SA www.ifixit.com Page 1 of 50 INTRODUCTION Replace a broken clutch hinge to make your display
PowerBook G4 Aluminum 12" GHz Modem Replacement
 PowerBook G4 Aluminum 12" 1-1.5 GHz Modem Replacement Written By: irobot ifixit CC BY-NC-SA www.ifixit.com Page 1 of 15 INTRODUCTION 56k internal modem, standard on all models. TOOLS: Coin (1) Phillips
Dell Inspiron N5110 Service Manual
 Dell Inspiron N5110 Service Manual Regulatory model: P17F Regulatory type: P17F001 Notes, Cautions, and Warnings NOTE: A NOTE indicates important information that helps you make better use of your computer.
Dell Inspiron 1525 Upper Case Replacement
 Dell Inspiron 1525 Upper Case Replacement Replace the upper case on a Dell Inspiron 1525. Written By: Miroslav Djuric ifixit CC BY-NC-SA www.ifixit.com Page 1 of 13 INTRODUCTION Use this guide to help
Toshiba Satellite A210 Motherboard
 Toshiba Satellite A210 Motherboard Replacement In this guide you will learn how to properly remove the Motherboard. Written By: Devin ifixit CC BY-NC-SA www.ifixit.com Page 1 of 12 INTRODUCTION Before
MacBook Pro 15" Core 2 Duo Models A1226 and A1260 SSD Dual Drive Installation
 MacBook Pro 15" Core 2 Duo Models A1226 and A1260 SSD Dual Drive Installation Use this guide to install a second hard drive in place of the optical drive. Written By: Dozuki System 2017 guides.crucial.com
Retina MacBook 2015 Lower Case Assembly Removal
 Retina MacBook 2015 Lower Case Assembly Removal Separate the lower case assembly. Written By: Geoff Wacker ifixit CC BY-NC-SA www.ifixit.com Page 1 of 16 INTRODUCTION Prerequisite-only guide for separating
PowerBook G4 Aluminum 12" GHz Display Data Cable Replacement
 PowerBook G4 Aluminum 12" 1-1.5 GHz Display Data Cable Replacement Written By: Matthew Newsom ifixit CC BY-NC-SA www.ifixit.com Page 1 of 47 INTRODUCTION Replace a damaged display data cable to restore
imac Intel 21.5" EMC 2638 RAM Replacement
 imac Intel 21.5" EMC 2638 RAM Replacement Replace the RAM in your imac Intel 21.5" EMC 2638. Written By: Walter Galan ifixit CC BY-NC-SA www.ifixit.com Page 1 of 33 INTRODUCTION Use this guide to replace
iphone 6 Plus Front Facing Camera and Sensor Assembly Replacement
 iphone 6 Plus Front Facing Camera and Sensor Assembly Replacement Replace the Front-Facing Camera and Sensor Assembly in your iphone 6 Plus. Written By: Walter Galan ifixit CC BY-NC-SA www.ifixit.com Page
Canon PowerShot S500 Flash Assembly Replacement
 Canon PowerShot S500 Flash Assembly Replacement Replace the Flash Assembly in your Canon PowerShot S500. Written By: Nathan Balcom ifixit CC BY-NC-SA www.ifixit.com Page 1 of 22 INTRODUCTION This guide
Written By: Evan Noronha
 iphone 6s Speaker Assembly Replacement Remove the speaker assembly in an iphone 6s to replace the speaker or NFC antenna. Written By: Evan Noronha ifixit CC BY-NC-SA www.ifixit.com Page 1 of 28 INTRODUCTION
Toshiba Satellite A215 S4697 Screen
 Toshiba Satellite A215 S4697 Screen Replacement When your computer screen is cracked or does not work anymore, it may need a new screen. Written By: Carlos ifixit CC BY-NC-SA www.ifixit.com Page 1 of 15
iphone 7 Power and Volume Control Cable Replacement
 iphone 7 Power and Volume Control Cable Replacement Replace the power and volume control cable in an iphone 7. Written By: Scott Havard ifixit CC BY-NC-SA www.ifixit.com Page 1 of 37 INTRODUCTION Use this
ibook G3 14" Top Shield Replacement
 Written By: irobot ifixit CC BY-NC-SA www.ifixit.com Page 1 of 18 INTRODUCTION The metallic top shield protects the logic board from electromagnetic interference. TOOLS: Coin (1) Paper Clip (1) Phillips
Packard Bell. EasyNote BU Series. Disassembly Guide
 Packard Bell EasyNote BU Series Disassembly Guide Table of Contents Overview...3 Technician Notes...3 Disassembly Instructions...3 Reassembly Instructions...3 Required Tools...3 Battery...4 Memory...4
MacBook Core 2 Duo Display Replacement
 MacBook Core 2 Duo Display Replacement Written By: irobot ifixit CC BY-NC-SA www.ifixit.com Page 1 of 23 INTRODUCTION Change out the entire display assembly, including the inverter, Airport antennas, hinges
Sony NEX-7 Screen Replacement
 Sony NEX-7 Screen Replacement If your camera's screen is broken or non functioning, this guide will show you how you can replace the screen. Written By: Jay Miley ifixit CC BY-NC-SA www.ifixit.com Page
Written By: Sam Lionheart
 iphone 6 Plus SIM Eject Lever Replacement Replace the SIM eject lever in an iphone 6 Plus. Written By: Sam Lionheart ifixit CC BY-NC-SA www.ifixit.com Page 1 of 18 INTRODUCTION Is your SIM card getting
apple Service Source ibook G4 (14.1 LCD) October 22, Apple Computer, Inc. All rights reserved.
 October 22, Apple Computer, Inc. All rights reserved.") apple Service Source ibook G4 (14.1 LCD) October 22, 2003 2003 Apple Computer, Inc. All rights reserved. apple Service Source Take Apart ibook G4 (14.1 LCD) 2003 Apple Computer, Inc. All rights reserved.
apple Service Source ibook G4 (14.1 LCD) October 22, 2003 2003 Apple Computer, Inc. All rights reserved. apple Service Source Take Apart ibook G4 (14.1 LCD) 2003 Apple Computer, Inc. All rights reserved.
MacBook Pro 15" Core 2 Duo Models A1226 and A1260 Display Assembly Replacement
 MacBook Pro 15" Core 2 Duo Models A1226 and A1260 Display Assembly Replacement Written By: Walter Galan ifixit CC BY-NC-SA www.ifixit.com Page 1 of 13 INTRODUCTION Change out the entire display assembly,
Toshiba Satellite L305-S5946 Power Jack Replacement
 Toshiba Satellite L305-S5946 Power Jack Replacement Replace the power jack in your Toshiba Satellite L305-S5946. Written By: Michael Erberich ifixit CC BY-NC-SA www.ifixit.com Page 1 of 16 INTRODUCTION
MacBook Pro 15" Core 2 Duo Models A1226 and A1260 SSD Installation
 MacBook Pro 15" Core 2 Duo Models A1226 and A1260 SSD Installation Written By: Dozuki System 2017 guides.crucial.com Page 1 of 10 INTRODUCTION You can install hard drives up to 9.5mm thick. Some drive
imac Intel 21.5" EMC 2544 SSD Replacement
 imac Intel 21.5" EMC 2544 SSD Replacement Replace the SSD in your imac Intel 21.5" EMC 2544. Written By: Dozuki System 2017 guides.crucial.com Page 1 of 34 INTRODUCTION Use this guide to replace the SSD.
Apple PowerBook G4 17
 Apple PowerBook G4 17 PRAM Battery Installation Manual Your computer is a static-sensitive device. It is susceptible to invisible damage if not protected during installation. We recommend proper grounding
imac Intel 27" EMC 2546 SSD Replacement
 imac Intel 27" EMC 2546 SSD Replacement Remove your imac's SSD, or the SSD portion of your imac's Fusion Drive. Written By: Dozuki System 2017 guides.crucial.com Page 1 of 33 INTRODUCTION If your imac
ibook G3 14" Hard Drive Replacement
 Written By: irobot ifixit CC BY-NC-SA www.ifixit.com Page 1 of 20 INTRODUCTION How to remove the hard drive and its bracket from your computer. TOOLS: Coin (1) Paper Clip (1) Phillips #00 Screwdriver (1)
Written By: Ben Eisenman
 iphone 3GS Rear Panel Replacement Replace a broken rear case on your iphone 3GS. Written By: Ben Eisenman ifixit CC BY-NC-SA www.ifixit.com Page 1 of 22 INTRODUCTION The plastic rear half of the iphone.
Written By: Evan Noronha
 iphone 6s Power Button Cover Replacement Replace a faulty power button cover in an iphone 6s. Written By: Evan Noronha ifixit CC BY-NC-SA www.ifixit.com Page 1 of 36 INTRODUCTION Use this guide to remove
Written By: Walter Galan
 iphone 6 Plus Front Panel Replacement Replace the Front Panel in your iphone 6 Plus. Written By: Walter Galan ifixit CC BY-NC-SA www.ifixit.com Page 1 of 27 INTRODUCTION Use this guide to strip and replace
Apple 3.5 Drive External Floppy Drive
 Apple 3.5 Drive External Floppy Drive Teardown This guide will show the disassembly down to the bare internal drive and other components of the Apple 3.5 Drive. Written By: rockinkat ifixit CC BY-NC-SA
Manual 04 - Logic Board
 Manual 04 - Logic Board Written By: Josh Patterson 2017 guides.cellphonesandbox.com Page 1 of 16 TOOLS: Technician Starter Package (1) 2017 guides.cellphonesandbox.com Page 2 of 16 Step 1 Removal 1 - Battery
How to add a Second Drive to a Mac mini (2012) using the OWC Data Doubler SSD/2.5 Installation Kit
 using the OWC Data Doubler SSD/2.5 Installation Kit") Instructional Video Series How to add a Second Drive to a Mac mini (2012) using the OWC Data Doubler SSD/2.5 Installation Kit Skill Level: Challenging Time to Complete: Approximately 45 Minutes Required
Instructional Video Series How to add a Second Drive to a Mac mini (2012) using the OWC Data Doubler SSD/2.5 Installation Kit Skill Level: Challenging Time to Complete: Approximately 45 Minutes Required
iphone 6 Plus 5GHz Wi-Fi Antenna Replacement
 iphone 6 Plus 5GHz Wi-Fi Antenna Replacement Replace the 5GHz Wi-Fi antenna in your iphone 6 Plus. Written By: Walter Galan ifixit CC BY-NC-SA www.ifixit.com Page 1 of 19 INTRODUCTION Use this guide to
ipod Classic Headphone Jack & Hold Switch Replacement
 ipod Classic Headphone Jack & Hold Switch Replacement Replace Headphone Jack & Hold Switch to fix no audio and/or no unlock Written By: irobot ifixit CC BY-NC-SA www.ifixit.com Page 1 of 22 INTRODUCTION
PowerBook G4 Aluminum 12" GHz Logic Board Replacement
 PowerBook G4 Aluminum 12" 1-1.5 GHz Logic Board Replacement Written By: irobot ifixit CC BY-NC-SA www.ifixit.com Page 1 of 32 INTRODUCTION This motherboard includes all ports except the DC-In board. TOOLS:
Archos 605 WiFi Battery Replacement
 Archos 605 WiFi Battery Replacement Replacing the battery on the Archos 605 WiFi requires patience. The most interesting part is that the Archos may come on at any time if the power button is pressed.
Canon EOS Rebel T2i Top Cover Replacement
 Canon EOS Rebel T2i Top Cover Replacement Replacing the top piece of a Canon T2i (550D). In my case, I had a broken hot-shoe, but as most controls on this camera are built into the same part, this repair
Written By: Allie Menard
 Written By: Allie Menard ifixit CC BY-NC-SA www.ifixit.com Page 1 of 20 TOOLS: Paper Clip (1) Phillips #00 Screwdriver (1) Phillips #1 Screwdriver (1) Spudger (1) Tweezers (1) ifixit CC BY-NC-SA www.ifixit.com
apple Service Source PowerBook G4 Updated 8 July Apple Computer, Inc. All rights reserved.
 apple Service Source PowerBook G4 Updated 8 July 2003 2003 Apple Computer, Inc. All rights reserved. apple Service Source Take Apart PowerBook G4 2003 Apple Computer, Inc. All rights reserved. apple PowerBook
Written By: Scott Havard
 iphone 7 Plus Taptic Engine Replacement Replace the Taptic Engine in an iphone 7 Plus. Written By: Scott Havard ifixit CC BY-NC-SA www.ifixit.com Page 1 of 16 INTRODUCTION The Taptic Engine produces your
ASUS D550MA-DS01 Motherboard
 ASUS D550MA-DS01 Motherboard Replacement This guide will show you how to remove the motherboard from the laptop. Steps included in this process are removing the screws, disconnecting cables, and removing
Dell XPS L702X Service Manual
 Dell XPS L702X Service Manual Regulatory model: P09E series Regulatory type: P09E002 Notes, Cautions, and Warnings NOTE: A NOTE indicates important information that helps you make better use of your computer.
Written By: Evan Noronha
 iphone 6s Logic Board Replacement Replace the logic board in an iphone 6s. Written By: Evan Noronha ifixit CC BY-NC-SA www.ifixit.com Page 1 of 26 INTRODUCTION Follow the steps in this guide to replace
Written By: Walter Galan
 imac Intel 17" Power Supply Replacement Written By: Walter Galan ifixit CC BY-NC-SA www.ifixit.com Page 1 of 18 INTRODUCTION Power hungry? Keep those electrons flowing by replacing your power supply. TOOLS:
Manual 01 - Display Assembly
 Manual 01 - Display Assembly Written By: James Linder 2017 guides.cellphonesandbox.com Page 1 of 24 INTRODUCTION Don't have time to fix your phone? Click HERE to sell us your broken phone instead! TOOLS:
PowerBook G3 Pismo I/O EMI Shield Replacement
 PowerBook G3 Pismo I/O EMI Shield Replacement Written By: irobot ifixit CC BY-NC-SA www.ifixit.com Page 1 of 23 INTRODUCTION A thin metal shield resides above the ports that protects from electromagnetic
Written By: Walter Galan
 imac Intel 21.5" EMC 2428 CPU Replacement Replace the CPU in your imac Intel 21.5" EMC 2428. Written By: Walter Galan ifixit CC BY-NC-SA www.ifixit.com Page 1 of 33 INTRODUCTION Use this guide to upgrade
MacBook Pro 13" Function Keys Late 2016 Trackpad Replacement
 MacBook Pro 13" Function Keys Late 2016 Trackpad Replacement Remove or replace the trackpad in your non-touch Bar MacBook Pro (13-inch, 2016, Two Thunderbolt 3 ports). Written By: Jeff Suovanen ifixit
ibook G4 12" 800 MHz-1.2 GHz RJ-11 Board
 ibook G4 12" 800 MHz-1.2 GHz RJ-11 Board Replacement Written By: irobot ifixit CC BY-NC-SA www.ifixit.com Page 1 of 24 INTRODUCTION The standard telephone jack port for connecting to the 56k internal modem.
Replacing the Gateway 200ARC Keyboard
 Replacing the Gateway 200ARC Keyboard Replacing the Gateway 200ARC Keyboard This package includes a replacement keyboard for your Gateway 200ARC notebook and these printed instructions. Tools you need
ipod Classic Click Wheel Replacement Written By: irobot ifixit CC BY-NC-SA Page 1 of 25
 ipod Classic Click Wheel Replacement Written By: irobot ifixit CC BY-NC-SA www.ifixit.com Page 1 of 25 INTRODUCTION The click wheel receives the feedback of your fingers and transmits it to the logic board.
ibook G3 Clamshell Hard Drive Replacement
 ibook G3 Clamshell Hard Drive Replacement Written By: irobot ifixit CC BY-NC-SA www.ifixit.com Page 1 of 22 INTRODUCTION You can install hard drives up to 9mm thick. TOOLS: 5mm Nut Driver (1) Coin (1)
imac Intel 21.5" EMC 2389 Stand Replacement
 imac Intel 21.5" EMC 2389 Stand Replacement Replace a broken or cosmetically unappealing stand on the imac 2389 21.5 Written By: Aaron Cooke ifixit CC BY-NC-SA www.ifixit.com Page 1 of 30 INTRODUCTION
Power Supply, 17-inch
 apple imac G5 Power Supply, 17-inch Replacement Instructions Follow the instructions in this sheet carefully. Failure to follow these instructions could damage your equipment and void its warranty. Note:
Dell Latitude V710/V740 Service Manual
 Dell Latitude V710/V740 Service Manual Dell Latitude V710/V740 Service Manual Before You Begin Preparing to Work Inside the Computer Recommended Tools Computer Orientation Screw Identification System Components