Before proceeding with this tutorial, you should have a basic understanding of HTML, CSS, JavaScript, TypeScript, and Document Object Model (DOM).
|
|
|
- Dylan Peters
- 5 years ago
- Views:
Transcription
1 i
2 About the Tutorial Angular 4 is a JavaScript framework for building web applications and apps in JavaScript, html, and TypeScript, which is a superset of JavaScript. Angular provides built-in features for animation, http service, and materials which in turn has features such as autocomplete, navigation, toolbar, menus, etc. The code is written in TypeScript, which compiles to JavaScript and displays the same in the browser. Audience This tutorial is designed for software programmers who want to learn the basics of Angular 4 and its programming concepts in a simple and easy manner. This tutorial will give you enough understanding on the various functionalities of Angular 4 with suitable examples. Prerequisites Before proceeding with this tutorial, you should have a basic understanding of HTML, CSS, JavaScript, TypeScript, and Document Object Model (DOM). Copyright & Disclaimer Copyright 2017 by Tutorials Point (I) Pvt. Ltd. All the content and graphics published in this e-book are the property of Tutorials Point (I) Pvt. Ltd. The user of this e-book is prohibited to reuse, retain, copy, distribute or republish any contents or a part of contents of this e-book in any manner without written consent of the publisher. We strive to update the contents of our website and tutorials as timely and as precisely as possible, however, the contents may contain inaccuracies or errors. Tutorials Point (I) Pvt. Ltd. provides no guarantee regarding the accuracy, timeliness or completeness of our website or its contents including this tutorial. If you discover any errors on our website or in this tutorial, please notify us at contact@tutorialspoint.com i
3 Table of Contents About the Tutorial...i Audience...i Prerequisites...i Copyright & Disclaimer...i Table of Contents... ii 1. Angular 4 Overview...1 Why Angular4 and Not Angular3? Angular 4 Environment Setup Angular 4 Project Setup Angular 4 Components Angular 4 Module Angular 4 Data Binding Angular 4 Event Binding Angular 4 Templates Angular 4 Directives How to Create Custom Directives? Angular 4 Pipes How to Create a Custom Pipe? Angular 4 Routing Angular 4 Services Angular 4 Http Service Angular 4 Forms Template Driven Form Model Driven Form Form Validation Angular 4 Animations ii
4 16. Angular 4 Materials Angular 4 CLI Angular 4 Examples iii
5 1. Angular 4 Overview Angular 4 There are three major releases of Angular. The first version that was released is Angular1, which is also called AngularJS. Angular1 was followed by Angular2, which came in with a lot of changes when compared to Angular1. The structure of Angular is based on the components/services architecture. AngularJS was based on the model view controller. Angular 4 released in March 2017 proves to be a major breakthrough and is the latest release from the Angular team after Angular2. Angular 4 is almost the same as Angular 2. It has a backward compatibility with Angular 2. Projects developed in Angular 2 will work without any issues with Angular 4. Let us now see the new features and the changes made in Angular 4. Why Angular4 and Not Angular3? The Angular team faced some versioning issues internally with their modules and due to the conflict they had to move on and release the next version of Angular the Angular4. Let us now see the new features added to Angular 4: ngif Angular2 supported only the if condition. However, Angular 4 supports the if else condition as well. Let us see how it works using the ng-template. <span *ngif="isavailable; else condition1">condition is valid.</span> <ng-template #condition1>condition is invalid</ng-template> as keyword in for loop With the help of as keyword you can store the value as shown below: <div *ngfor="let i of months slice:0:5 as total"> Months: {{i Total: {{total.length </div> The variable total stores the output of the slice using the as keyword. Animation Package Animation in Angular 4 is available as a separate package and needs to be imported In Angular2, it was available It is still kept the same for its backward compatibility aspect. 1
6 Template Angular 4 uses <ng-template> as the tag instead of <template>; the latter was used in Angular2. The reason Angular 4 changed <template> to <ng-template> is because of the name conflict of the <template> tag with the html <template> standard tag. It will deprecate completely going ahead. This is one of the major changes in Angular 4. TypeScript 2.2 Angular 4 is updated to a recent version of TypeScript, which is 2.2. This helps improve the speed and gives better type checking in the project. Pipe Title Case Angular 4 has added a new pipe title case, which changes the first letter of each word into uppercase. <div> </div> <h2>{{ 'Angular 4 titlecase' titlecase </h2> The above line of code generates the following output Angular 4 Titlecase. Http Search Parameters Search parameters to the http get api is simplified. We do not need to call URLSearchParams for the same as was being done in Angular2. Smaller and Faster Apps Angular 4 applications are smaller and faster when compared to Angular2. It uses the TypeScript version 2.2, the latest version which makes the final compilation small in size. 2

7 2. Angular 4 Environment Setup Angular 4 In this chapter, we will discuss the Environment Setup required for Angular 4. To install Angular 4, we require the following: Nodejs Npm Angular CLI IDE for writing your code Nodejs has to be greater than 4 and npm has to be greater than 3. Nodejs To check if nodejs is installed on your system, type node v in the terminal. This will help you see the version of nodejs currently installed on your system. C:\>node v v If it does not print anything, install nodejs on your system. To install nodejs, go the homepage of nodejs and install the package based on your OS. The homepage of nodejs will look like the following: 3
8 Based on your OS, install the required package. Once nodejs is installed, npm will also get installed along with it. To check if npm is installed or not, type npm v in the terminal. It should display the version of the npm. C:\>npm v Angular 4 installations are very simple with the help of angular CLI. Visit the homepage of angular to get the reference of the command. Type npm install to install angular cli on your system. 4

9 You will get the above installation in your terminal, once Angular CLI is installed. You can use any IDE of your choice, i.e., WebStorm, Atom, Visual Studio Code, etc. The details of the project setup is explained in the next chapter. 5

10 3. Angular 4 Project Setup Angular 4 AngularJS is based on the model view controller, whereas Angular 2 is based on the components structure. Angular 4 works on the same structure as Angular2 but is faster when compared to Angular2. Angular4 uses TypeScript 2.1 version whereas Angular 2 uses TypeScript version 1.8. This brings a lot of difference in the performance. To install Angular 4, the Angular team came up with Angular CLI which eases the installation. You need to run through a few commands to install Angular 4. Go to this site to install Angular CLI. To get started with the installation, we first need to make sure we have nodejs and npm installed with the latest version. The npm package gets installed along with nodejs. Go to the nodejs site 6

11 The latest version of Nodejs v is recommended for users. Users who already have nodejs greater than 4 can skip the above process. Once nodejs is installed, you can check the version of node in the command line using the command, node v, as shown below: The command prompt shows v Once nodejs is installed, npm will also get installed along with it. 7
12 To check the version of npm, type command npm v in the terminal. It will display the version of npm as shown below. The version of npm is Now that we have nodejs and npm installed, let us run the angular cli commands to install Angular 4. You will see the following commands on the webpage: npm install //command to install angular 4 ng new Angular 4-app // name of the project cd my-dream-app ng serve 8

13 Let us start with the first command in the command line and see how it works. To start with, we will create an empty directory wherein, we will run the Angular CLI command. Enter the above command to install Angular 4. The installation process will start and will take a few minutes to complete. 9
14 Once the above command to install is complete, the following Command Prompt appears: We have created an empty folder ProjectA4 and installed the Angular CLI command. We have also used -g to install Angular CLI globally. Now, you can create your Angular 4 project in any directory or folder and you don t have to install Angular CLI project wise, as it is installed on your system globally and you can make use of it from any directory. Let us now check whether Angular CLI is installed or not. To check the installation, run the following command in the terminal: ng -v 10
15 We get version, which is at present The node version running is and also the OS details. The above details tell us that we have installed angular cli successfully and now we are ready to commence with our project. We have now installed Angular 4. Let us now create our first project in Angular 4. To create a project in Angular 4, we will use the following command: ng new projectname We will name the project ng new Angular 4-app. Let us now run the above command in the command line. 11

16 The project Angular 4-app is created successfully. It installs all the required packages necessary for our project to run in Angular 4. Let us now switch to the project created, which is in the directory Angular 4-app. Change the directory in the command line - cd Angular 4-app. We will use Visual Studio Code IDE for working with Angular 4; you can use any IDE, i.e., Atom, WebStorm, etc. To download Visual Studio Code, go to and click Download for Windows. 12

17 Click Download for Windows for installing the IDE and run the setup to start using IDE. The Editor looks as follows: We have not started any project in it. Let us now take the project we have created using angular-cli. 13
18 We will consider the Angular 4-app project. Let us open the Angular 4-app and see how the folder structure looks like. 14

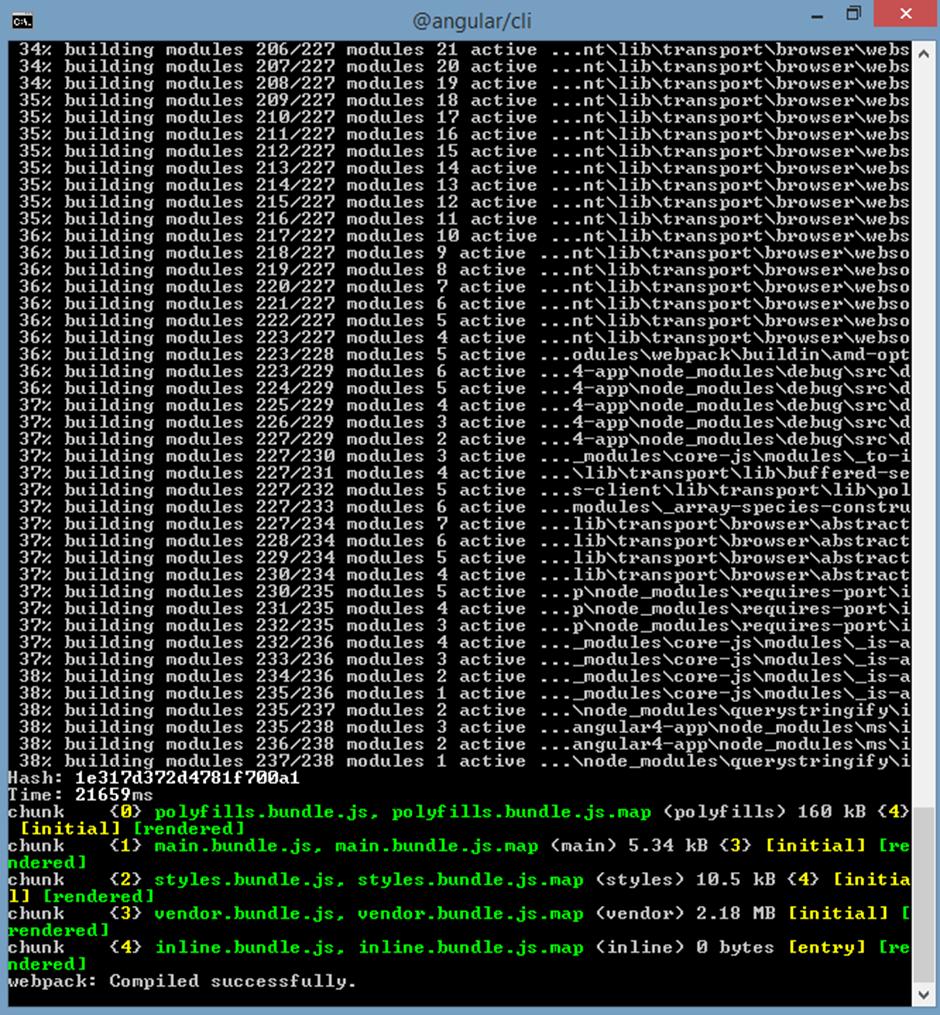
19 Now that we have the file structure for our project, let us compile our project with the following command: ng serve 15
20 The ng serve command builds the application and starts the web server. The web server starts on port Type the url in the browser and see the output. Once the project is compiled, you will receive the following output: 16
21 17
22 Once you run in the browser, you will be directed to the following screen: Let us now make some changes to display the following content: Welcome to Angular 4 project We have made changes in the files app.component.html and app.component.ts. We will discuss more about this in our subsequent chapters. Let us complete the project setup. If you see we have used port 4200, which is the default port that angular cli makes use of while compiling. You can change the port if you wish using the following command: ng serve --host port
23 The Angular 4 app folder has the following folder structure: e2e - end to end test folder. Mainly e2e is used for integration testing and helps ensure the application works fine. node_modules - The npm package installed is node_modules. You can open the folder and see the packages available. src This folder is where we will work on the project using Angular 4. The Angular 4 app folder has the following file structure:.angular-cli.json - It basically holds the project name, version of cli, etc..editorconfig - This is the config file for the editor..gitignore - A.gitignore file should be committed into the repository, in order to share the ignore rules with any other users that clone the repository. karma.conf.js - This is used for unit testing via the protractor. All the informat ion required for the project is provided in karma.conf.js file. package.json - The package.json file tells which libraries will be installed into node_modules when you run npm install. At present, if you open the file in the editor, you will get the following modules added in it. "@angular/animations": "^4.0.0", "@angular/common": "^4.0.0", "@angular/compiler": "^4.0.0", "@angular/core": "^4.0.0", "@angular/forms": "^4.0.0", "@angular/http": "^4.0.0", "@angular/platform-browser": "^4.0.0", "@angular/platform-browser-dynamic": "^4.0.0", "@angular/router": "^4.0.0", In case you need to add more libraries, you can add those over here and run the npm install command. protractor.conf.js - This is the testing configuration required for the application. tsconfig.json - This basically contains the compiler options required during compilation. tslint.json - This is the config file with rules to be considered while compiling. 19
24 The src folder is the main folder, which internally has a different file structure. app It contains the files described below. These files are installed by angular-cli by default. app.module.ts - If you open the file, you will see that the code has reference to different libraries, which are imported. Angular-cli has used these default libraries for the import angular/core, platform-browser. The names itself explain the usage of the libraries. They are imported and saved into variables such as declarations, imports, providers, and bootstrap. import { BrowserModule from '@angular/platform-browser'; import { NgModule from '@angular/core'; import { AppComponent from ) declarations: [ ], AppComponent imports: [ ], BrowserModule providers: [], bootstrap: [AppComponent] export class AppModule { declarations - In declarations, the reference to the components is stored. The Appcomponent is the default component that is created whenever a new project is initiated. We will learn about creating new components in a different section. imports - This will have the modules imported as shown above. At present, BrowserModule is part of the imports which is imported providers - This will have reference to the services created. The service will be disc ussed in a subsequent chapter. bootstrap - This has reference to the default component created, i.e., AppComponent. 20
25 app.component.css - You can write your css structure over here. Right now, we have added the background color to the div as shown below..divdetails{ background-color: #ccc; app.component.html - The html code will be available in this file. <!--The content below is only a placeholder and can be replaced. --> <div class="divdetails"> <div style="text-align:center"> <h1> Welcome to {{title! </h1> <img width="300" src="data:image/svg+xml;base64,pd94bwwgdmvyc2lvbj0ims4wiiblbmnvzgluzz0idxrmltgi Pz4NCjwhLS0gR2VuZXJhdG9yOiBBZG9iZSBJbGx1c3RyYXRvciAxOS4xLjAsIFNWRyBFeHBvcnQgUGx 1Zy1JbiAuIFNWRyBWZXJzaW9uOiA2LjAwIEJ1aWxkIDApICAtLT4NCjxzdmcgdmVyc2lvbj0iMS4xIi BpZD0iTGF5ZXJfMSIgeG1sbnM9Imh0dHA6Ly93d3cudzMub3JnLzIwMDAvc3ZnIiB4bWxuczp4bGlua z0iahr0cdovl3d3dy53my5vcmcvmtk5os94bgluayiged0imhb4iib5psiwchgidqojihzpzxdcb3g9 IjAgMCAyNTAgMjUwIiBzdHlsZT0iZW5hYmxlLWJhY2tncm91bmQ6bmV3IDAgMCAyNTAgMjUwOyIgeG1 sonnwywnlpsjwcmvzzxj2zsi+dqo8c3r5bgugdhlwzt0idgv4 dc9jc3mipg0kcs5zddb7zmlsbdojre QwMDMxO30NCgkuc3Qxe2ZpbGw6I0MzMDAyRjt9DQoJLnN0MntmaWxsOiNGRkZGRkY7fQ0KPC9zdHlsZ T4NCjxnPg0KCTxwb2x5Z29uIGNsYXNzPSJzdDAiIHBvaW50cz0iMTI1LDMwIDEyNSwzMCAxMjUsMzAg MzEuOSw2My4yIDQ2LjEsMTg2LjMgMTI1LDIzMCAxMjUsMjMwIDEyNSwyMzAgMjAzLjksMTg2LjMgMjE 4LjEsNjMuMiAJIi8+DQoJPHBvbHlnb24gY2xhc3M9InN0MSIgcG9pbnRzPSIxMjUsMzAgMTI1LDUyLj IgMTI1LDUyLjEgMTI1LDE1My40IDEyNSwxNTMuNCAxMjUsMjMwIDEyNSwyMzAgMjAzLjksMTg2LjMgM je4ljesnjmumiaxmjusmzagcsivpg0kctxwyxroignsyxnzpsjzddiiigq9ik0xmjusntiumuw2ni44 LDE4Mi42aDBoMjEuN2gwbDExLjctMjkuMmg0OS40bDExLjcsMjkuMmgwaDIxLjdoMEwxMjUsNTIuMUw xmjusntiumuwxmjusntiumuwxmjusntiumq0kcqlmmti1lduyljf6ie0xndismtm1ljrimta4bde3lt QwLjlMMTQyLDEzNS40eiIvPg0KPC9nPg0KPC9zdmc+DQo="> </div> <h2>here are some links to help you start: </h2> <ul> <li> <h2><a target="_blank" href=" of Heroes</a></h2> </li> <li> <h2><a target="_blank" href=" - cli/wiki">cli Documentation</a></h2> </li> 21
26 <li> <h2><a target="_blank" href=" blog</a></h2> </li> </ul> </div> This is the default html code currently available with the project creation. app.component.spec.ts - These are automatically generated files which contain unit tests for source component. app.component.ts - The class for the component is defined over here. You can do the processing of the html structure in the.ts file. The processing will include activities such as connecting to the database, interacting with other components, routing, services, etc. The structure of the file is as follows: import { Component from selector: 'app-root', templateurl: './app.component.html', styleurls: ['./app.component.css'] ) export class AppComponent { title = 'app'; Assets You can save your images, js files in this folder. Environment This folder has the details for the production or the dev environment. The folder contains two files. environment.prod.ts environment.ts Both the files have details of whether the final file should be compiled in the production environment or the dev environment. 22
27 The additional file structure of Angular 4 app folder includes the following: favicon.ico This is a file that is usually found in the root directory of a website. index.html This is the file which is displayed in the browser. <!doctype html> <html lang="en"> <head> <meta charset="utf-8"> <title>http Search Param</title> <base href="/"> <link href=" rel="stylesheet"> <link href=" Roboto+Mono" rel="stylesheet"> <link href="styles.c7c7b8bf22964ff954d3.bundle.css" rel="stylesheet"> <meta name="viewport" content="width=device-width, initial-scale=1"> <link rel="icon" type="image/x-icon" href="favicon.ico"> </head> <body> <app-root></app-root> </body> </html> The body has <app-root></app-root>. This is the selector which is used in app.component.ts file and will display the details from app.component.html file. main.ts main.ts is the file from where we start our project development. It starts with import ing the basic module which we need. Right now if you see angular/core, angular/platformbrowser-dynamic, app.module and environment is imported by default during angular-cli installation and project setup. import { enableprodmode from '@angular/core'; import { platformbrowserdynamic from '@angular/platform-browser-dynamic'; import { AppModule from './app/app.module'; import { environment from './environments/environment'; 23
.")
28 if (environment.production) { enableprodmode(); platformbrowserdynamic().bootstrapmodule(appmodule); The platformbrowserdynamic().bootstrapmodule(appmodule) has the parent module reference AppModule. Hence, when it executes in the browser, the file that is called is index.html. Index.html internally refers to main.ts which calls the parent module, i.e., AppModule when the following code executes: platformbrowserdynamic().bootstrapmodule(appmodule); When AppModule is called, it calls app.module.ts which further calls the AppComponent based on the boostrap as follows: bootstrap: [AppComponent] In app.component.ts, there is a selector: app-root which is used in the index.html file. This will display the contents present in app.component.html. The following will be displayed in the browser: polyfill.ts This is mainly used for backward compatibility. styles.css This is the style file required for the project. test.ts Here, the unit test cases for testing the project will be handled. 24
29 tsconfig.app.json This is used during compilation, it has the config details that need to be used to run the application. tsconfig.spec.json This helps maintain the details for testing. typings.d.ts It is used to manage the TypeScript definition. The final file structure looks as follows: 25
30 4. Angular 4 Components Angular 4 Major part of the development with Angular 4 is done in the components. Components are basically classes that interact with the.html file of the component, which gets displayed on the browser. We have seen the file structure in one of our previous chapters. The file structure has the app component and it consists of the following files: app.component.css app.component.html app.component.spec.ts app.component.ts app.module.ts The above files were created by default when we created new project using the angularcli command. If you open up the app.module.ts file, it has some libraries which are imported and also a declarative which is assigned the appcomponent as follows: import { BrowserModule from '@angular/platform-browser'; import { NgModule from '@angular/core'; import { AppComponent from declarations: [ AppComponent ], imports: [ BrowserModule ], providers: [], bootstrap: [AppComponent] ) export class AppModule { The declarations include the AppComponent variable, which we have already imported. This becomes the parent component. 26
31 Now, angular-cli has a command to create your own component. However, the app component which is created by default will always remain the parent and the next components created will form the child components. Let us now run the command to create the component. ng g component new-cmp When you run the above command in the command line, you will receive the following output: C:\projectA4\Angular 4-app>ng g component new-cmp installing component create src\app\new-cmp\new-cmp.component.css create src\app\new-cmp\new-cmp.component.html create src\app\new-cmp\new-cmp.component.spec.ts create src\app\new-cmp\new-cmp.component.ts update src\app\app.module.ts Now, if we go and check the file structure, we will get the new-cmp new folder created under the src/app folder. The following files are created in the new-cmp folder: new-cmp.component.css - css file for the new component is created. new-cmp.component.html - html file is created. new-cmp.component.spec.ts - this can be used for unit testing. new-cmp.component.ts - here, we can define the module, properties, etc. Changes are added to the app.module.ts file as follows: import { BrowserModule from '@angular/platform-browser'; import { NgModule from '@angular/core'; import { AppComponent from './app.component'; import { NewCmpComponent from './new-cmp/new-cmp.component'; // includes the new-cmp component we created 27
32 @NgModule({ declarations: [ AppComponent, NewCmpComponent // here it is added in declarations and will behave as a child component ], imports: [ ], BrowserModule providers: [], bootstrap: [AppComponent] //for bootstrap the AppComponent the main app component is given. ) export class AppModule { The new-cmp.component.ts file is generated as follows: import { Component, OnInit from '@angular/core'; // here angular/core is // this is a declarator which starts sign. The component word marked in bold needs to be the same. selector: 'app-new-cmp', // templateurl: './new-cmp.component.html', // reference to the html file created in the new component. ) styleurls: ['./new-cmp.component.css'] export class NewCmpComponent implements OnInit { // reference to the style file. constructor() { ngoninit() { 28
33 If you see the above new-cmp.component.ts file, it creates a new class called NewCmpComponent, which implements OnInit.In, which has a constructor and a method called ngoninit(). ngoninit is called by default when the class is executed. Let us check how the flow works. Now, the app component, which is created by default becomes the parent component. Any component added later becomes the child component. When we hit the url in the browser, it first executes the index.ht ml file which is shown below: <!doctype html> <html lang="en"> <head> <meta charset="utf-8"> <title>angular 4App</title> <base href="/"> <meta name="viewport" content="width=device-width, initial-scale=1"> <link rel="icon" type="image/x-icon" href="favicon.ico"> </head> <body> <app-root></app-root> </body> </html> The above is the normal html file and we do not see anything that is printed in the browser. Take a look at the tag in the body section. <app-root></app-root> This is the root tag created by the Angular by default. This tag has the reference in the main.ts file. import { enableprodmode from '@angular/core'; import { platformbrowserdynamic from '@angular/platform-browser-dynamic'; import { AppModule from './app/app.module'; import { environment from './environments/environment'; 29
34 if (environment.production) { enableprodmode(); platformbrowserdynamic().bootstrapmodule(appmodule); AppModule is imported from the app of the main parent module, and the same is given to the bootstrap Module, which makes the appmodule load. Let us now see the app.module.ts file: import { BrowserModule from '@angular/platform-browser'; import { NgModule from '@angular/core'; import { AppComponent from './app.component'; import { NewCmpComponent from declarations: [ AppComponent, NewCmpComponent ], imports: [ BrowserModule ], providers: [], bootstrap: [AppComponent] ) export class AppModule { Here, the AppComponent is the name given, i.e., the variable to store the reference of the app. Component.ts and the same is given to the bootstrap. Let us now see the app.component.ts file. 30
35 import { Component from selector: 'app-root', templateurl: './app.component.html', styleurls: ['./app.component.css'] ) export class AppComponent { title = 'Angular 4 Project!'; Angular core is imported and referred as the Component and the same is used in the Declarator as selector: 'app-root', templateurl: './app.component.html', styleurls: ['./app.component.css'] ) In the declarator reference to the selector, templateurl and styleurl are given. The selector here is nothing but the tag which is placed in the index.html file that we saw above. The class AppComponent has a variable called title, which is displayed in the browser. uses the templateurl called app.component.html which is as follows: <!--The content below is only a placeholder and can be replaced. --> <div style="text-align:center"> <h1> Welcome to {{title. </h1> </div> It has just the html code and the variable title in curly brackets. It gets replaced with the value, which is present in the app.component.ts file. This is called binding. We will discuss the concept of binding in a subsequent chapter. Now that we have created a new component called new-cmp. The same gets included in the app.module.ts file, when the command is run for creating a new component. app.module.ts has a reference to the new component created. 31
36 Let us now check the new files created in new-cmp. new-cmp.component.ts import { Component, OnInit from selector: 'app-new-cmp', templateurl: './new-cmp.component.html', styleurls: ['./new-cmp.component.css'] ) export class NewCmpComponent implements OnInit { constructor() { ngoninit() { Here, we have to import the core too. The reference of the component is used in the declarator. The declarator has the selector called app-new-cmp and the templateurl and styleurl. The.html called new-cmp.component.html is as follows: <p> new-cmp works! </p> As seen above, we have the html code, i.e., the p tag. The style file is empty as we do not need any styling at present. But when we run the project, we do not see anything related to the new component getting displayed in the browser. Let us now add something and the same can be seen in the browser later. 32
37 The selector, i.e., app-new-cmp needs to be added in the app.component.html file as follows: <!--The content below is only a placeholder and can be replaced.--> <div style="text-align:center"> <h1> Welcome to {{title. </h1> </div> <app-new-cmp></app-new-cmp> When the <app-new-cmp></app-new-cmp> tag is added, all that is present in the.html file of the new component created will get displayed on the browser along with the parent component data. Let us see the new component.html file and the new-cmp.component.ts file. new-cmp.component.ts import { Component, OnInit from selector: 'app-new-cmp', templateurl: './new-cmp.component.html', styleurls: ['./new-cmp.component.css'] ) export class NewCmpComponent implements OnInit { newcomponent = "Entered in new component created"; constructor() { ngoninit() { In the class, we have added one variable called new component and the value is Entered in new component created. The above variable is bound in the.new-cmp.component.html file as follows: 33
38 <p> {{newcomponent </p> <p> new-cmp works! </p> Now since we have included the <app-new-cmp></app-new-cmp> selector in the app. component.html which is the.html of the parent c omponent, the content present in the new component.html file (new-cmp.component.html) gets displayed on the browser as follows: Similarly, we can create components and link the same using the selector in the app.component.html file as per our requirements. 34
39 5. Angular 4 Module Angular 4 Module in Angular refers to a place where you can group the components, directives, pipes, and services, which are related to the application. In case you are developing a website, the header, footer, left, center and the right section become part of a module. To define module, we can use the NgModule. When you create a new project using the Angular cli command, the ngmodule is created in the app.module.ts file by default and it looks as follows: import { BrowserModule from '@angular/platform-browser'; import { NgModule from '@angular/core'; import { AppComponent from declarations: [ AppComponent ], imports: [ BrowserModule ], providers: [], bootstrap: [AppComponent] ) export class AppModule { The NgModule needs to be imported as follows: import { NgModule from '@angular/core'; 35
40 The structure for the ngmodule is as shown declarations: [ AppComponent ], imports: [ BrowserModule ], providers: [], bootstrap: [AppComponent] ) It starts and contains an object which has declarations, import s, providers and bootstrap. Declaration It is an array of components created. If any new component gets created, it will be imported first and the reference will be included in declarations as shown below: declarations: [ AppComponent, NewCmpComponent ] Import It is an array of modules required to be used in the application. It can also be used by the components in the Declaration array. For example, right now in we see the Browser Module imported. In case your application needs forms, you can include the module as follows: import { FormsModule The import in will be like the following: imports: [ BrowserModule, FormsModule ] 36
41 Providers This will include the services created. Bootstrap This includes the main app component for starting the execution. 37
42 6. Angular 4 Data Binding Angular 4 Data Binding is available right from AngularJS, Angular 2 and is now available in Angular 4 as well. We use curly braces for data binding - {{; this process is called interpolation. We have already seen in our previous examples how we declared the value to the variable title and the same is printed in the browser. The variable in the app.component.html file is referred as {{title and the value of title is initialized in the app.component.ts file and in app.component.html, the value is displayed. Let us now create a dropdown of months in the browser. To do that, we have created an array of months in app.component.ts as follows: import { Component from selector: 'app-root', templateurl: './app.component.html', styleurls: ['./app.component.css'] ) export class AppComponent { title = 'Angular 4 Project!'; // declared array of months. months = ["January", "Feburary", "March", "April", "May", "June", "July", "August", "September", "October", "November", "December"]; The month s array that is shown above is to be displayed in a dropdown in the browser. For this, we will use the following line of code: <!--The content below is only a placeholder and can be replaced. --> <div style="text-align:center"> <h1> Welcome to {{title. </h1> </div> <div> Months : 38

43 <select> <option *ngfor="let i of months">{{i</option> </select> </div> We have created the normal select tag with option. In option, we have used the for loop. The for loop is used to iterate over the months array, which in turn will create the option tag with the value present in the months. The syntax for in Angular is *ngfor = let I of months and to get the value of months we are displaying it in {{i. The two curly brackets help with data binding. You declare the variables in your app.component.ts file and the same will be replaced using the curly brackets. Let us see the output of the above month s array in the browser. The variable that is set in the app.component.ts can be bound with the app.component.html using the curly brackets; for example, {{. Let us now display the data in the browser based on condition. Here, we have added a variable and assigned the value as true. Using the if statement, we can hide/show the content to be displayed. Example import { Component from selector: 'app-root', templateurl: './app.component.html', styleurls: ['./app.component.css'] ) export class AppComponent { title = 'Angular 4 Project!'; //array of months. 39
![months = ["January", "February", "March", "April", "May", "June", "July", "August", "September", "October", "November", "December"]; isavailable = true; //variable is set to true <!](/docs-images/88/114606883/images/44-0.jpg "--The content below is only a placeholder and can be replaced. --> <div style=\"text-align:center\"> <h1> Welcome to {{title.")
44 months = ["January", "February", "March", "April", "May", "June", "July", "August", "September", "October", "November", "December"]; isavailable = true; //variable is set to true <!--The content below is only a placeholder and can be replaced. --> <div style="text-align:center"> <h1> Welcome to {{title. </h1> </div> <div> Months : <select> <option *ngfor="let i of months">{{i</option> </select> </div> <br/> <div> <span *ngif="isavailable">condition is valid.</span> //over here based on if condition the text condition is valid is displayed. If the value of isavailable is set to false it will not display the text. </div> Output 40
45 Let us try the above example using the IF THEN ELSE condition. Example import { Component from selector: 'app-root', templateurl: './app.component.html', styleurls: ['./app.component.css'] ) export class AppComponent { title = 'Angular 4 Project!'; //array of months. months = ["January", "February", "March", "April", "May", "June", "July", "August", "September", "October", "November", "December"]; isavailable = false; In this case, we have made the isavailable variable as false. To print the else condition, we will have to create the ng-template as follows: <ng-template #condition1>condition is invalid</ng -template> 41
46 The full code looks like this: <!--The content below is only a placeholder and can be replaced. --> <div style="text-align:center"> <h1> Welcome to {{title. </h1> </div> <div> Months : <select> <option *ngfor="let i of months">{{i</option> </select> </div> <br/> <div> <span *ngif="isavailable; else condition1">condition is valid.</span> <ng-template #condition1>condition is invalid</ng-template> </div> If is used with the else condition and the variable used is condition1. The same is assigned as an id to the ng-template, and when the available variable is set to false the text Condition is invalid is displayed. The following screenshot shows the display in the browser. 42
47 Let us now use the if then else condition. import { Component from selector: 'app-root', templateurl: './app.component.html', styleurls: ['./app.component.css'] ) export class AppComponent { title = 'Angular 4 Project!'; //array of months. months = ["January", "February", "March", "April", "May", "June", "July", "August", "September", "October", "November", "December"]; isavailable = true; Now, we will make the variable isavailable as true. In the html, the condition is written in the following way: <!--The content below is only a placeholder and can be replaced. --> <div style="text-align:center"> <h1> Welcome to {{title. </h1> </div> <div> Months : <select> <option *ngfor="let i of months">{{i</option> </select> </div> <br/> <div> 43

48 <span *ngif="isavailable; then condition1 else condition2">condition is valid.</span> <ng-template #condition1>condition is valid</ng-template> <ng-template #condition2>condition is invalid</ng-template> </div> If the variable is true, then condition1, else condition2. Now, two templates are created with id #condition1 and #condition2. The display in the browser is as follows: 44
49 7. Angular 4 Event Binding Angular 4 In this chapter, we will discuss how Event Binding works in Angular 4. When a user interacts with an application in the form of a keyboard movement, a mouse click, or a mouseover, it generates an event. These events need to be handled to perform some kind of action. This is where event binding comes into picture. Let us consider an example to understand this better. app.component.html <!--The content below is only a placeholder and can be replaced. --> <div style="text-align:center"> <h1> Welcome to {{title. </h1> </div> <div> Months : <select> <option *ngfor="let i of months">{{i</option> </select> </div> <br/> <div> <span *ngif="isavailable; then condition1 else condition2">condition is valid.</span> <ng-template #condition1>condition is valid</ng -template> <ng-template #condition2>condition is invalid</ng-template> </div> <button (click)="myclickfunction($event)">click Me</button> In the app.component.html file, we have defined a button and added a function to it using the click event. 45
50 Following is the syntax to define a button and add a function to it. (click)="myclickfunction($event)" The function is defined in the.ts file: app.component.ts. import { Component from selector: 'app-root', templateurl: './app.component.html', styleurls: ['./app.component.css'] ) export class AppComponent { title = 'Angular 4 Project!'; //array of months. months = ["January", "Feburary", "March", "April", "May", "June", "July", "August", "September", "October", "November", "December"]; isavailable = true; myclickfunction(event) { //just added console.log which will display the event details in browser on click of the button. alert("button is clicked"); console.log(event); Upon clicking the button, the control will come to the function myclickfunction and a dialog box will appear, which displays the Button is clicked as shown in the following screenshot: 46
51 Let us now add the change event to the dropdown. The following line of code will help you add the change event to the dropdown: <!--The content below is only a placeholder and can be replaced. --> <div style="text-align:center"> <h1> Welcome to {{title. </h1> </div> <div> Months : <select (change)="changemonths($event)"> <option *ngfor="let i of months">{{i</option> </select> </div> <br/> <div> <span *ngif="isavailable; then condition1 else condition2">condition is valid.</span> <ng-template #condition1>condition is valid</ng -template> <ng-template #condition2>condition is invalid</ng-template> </div> <button (click)="myclickfunction($event)">click Me</button> 47
![The function is declared in the app.component.ts file: import { Component from '@angular/core'; @Component({ selector: 'app-root', templateurl: './app.component.html', styleurls: ['./app.component.css'] ) export class AppComponent { title = 'Angular 4 Project!](/docs-images/88/114606883/images/52-0.jpg "'; //array of months.")
52 The function is declared in the app.component.ts file: import { Component from selector: 'app-root', templateurl: './app.component.html', styleurls: ['./app.component.css'] ) export class AppComponent { title = 'Angular 4 Project!'; //array of months. months = ["January", "Feburary", "March", "April", "May", "June", "July", "August", "September", "October", "November", "December"]; isavailable = true; myclickfunction(event) { alert("button is clicked"); console.log(event); changemonths(event) { console.log("changed month from the Dropdown" ); console.log(event); The console message Changed month from the Dropdown is displayed in the console along with the event. 48
53 Let us add an alert message in app.component.ts when the value from the dropdown is changed as shown below: import { Component from selector: 'app-root', templateurl: './app.component.html', styleurls: ['./app.component.css'] ) export class AppComponent { title = 'Angular 4 Project!'; //array of months. months = ["January", "February", "March", "April", "May", "June", "July", "August", "September", "October", "November", "December"]; isavailable = true; myclickfunction(event) { //just added console.log which will display the event details in browser on click of the button. alert("button is clicked"); console.log(event); changemonths(event) { alert("changed month from the Dropdown"); 49
54 When the value in dropdown is changed, a dialog box will appear and the following message will be displayed - Changed month from the Dropdown. 50
55 8. Angular 4 Templates Angular 4 Angular 4 uses the <ng-template> as the tag instead of <template> which is used in Angular2. The reason Angular 4 changed <template> to <ng-template> is because there is a name conflict between the <template> tag and the html <template> standard tag. It will deprecate completely going ahead. This is one of the major changes in Angular 4. Let us now use the template along with the if else condition and see the output. app.component.html <!--The content below is only a placeholder and can be replaced. --> <div style="text-align:center"> <h1> Welcome to {{title. </h1> </div> <div> Months : <select (change)="changemonths($event)" name="month"> <option *ngfor="let i of months">{{i</option> </select> </div> <br/> <div> <span *ngif="isavailable;then condition1 else condition2">condition is valid.</span> <ng-template #condition1>condition is valid from template</ng-template> <ng-template #condition2>condition is invalid from template</ng-template> </div> <button (click)="myclickfunction($event)">click Me</button> For the Span tag, we have added the if statement with the else condition and will call template condition1, else condition2. 51
56 The templates are to be called as follows: <ng-template #condition1>condition is valid from template</ng -template> <ng-template #condition2>condition is invalid from template</ng-template> If the condition is true, then the condition1 template is called, otherwise condition2. app.component.ts import { Component from selector: 'app-root', templateurl: './app.component.html', styleurls: ['./app.component.css'] ) export class AppComponent { title = 'Angular 4 Project!'; //array of months. months = ["January", "February", "March", "April", "May", "June", "July", "August", "September", "October", "November", "December"]; isavailable = false; myclickfunction(event) { this.isavailable = false; changemonths(event) { alert("changed month from the Dropdown"); console.log(event); 52
57 The output in the browser is as follows: The variable isavailable is false so the condition2 template is printed. If you click the button, the respective template will be called. If you inspect the browser, you will see that you never get the span tag in the dom. The following example will help you understand the same. If you inspect the browser, you will see that the dom does not have the span tag. It has the Condition is invalid from template in the dom. The following line of code in html will help us get the span tag in the dom. <!--The content below is only a placeholder and can be replaced. --> <div style="text-align:center"> <h1> Welcome to {{title. </h1> </div> <div> Months : <select (change)="changemonths($event)" name="month"> <option *ngfor="let i of months">{{i</option> </select> 53

58 </div> <br/> <div> <span *ngif="isavailable; else condition2">condition is valid.</span> <ng-template #condition1>condition is valid from template</ng-template> <ng-template #condition2>condition is invalid from template</ng-template> </div> <button (click)="myclickfunction($event)">click Me</button> If we remove the then condition, we get the Condition is valid message in the browser and the span tag is also available in the dom. For example, in app.component.ts, we have made the isavailable variable as true. 54
59 9. Angular 4 Directives Angular 4 Directives in Angular is a js class, which is declared We have 3 directives in Angular. The directives are listed below: Component Directives These form the main class having details of how the component should be processed, instantiated and used at runtime. Structural Directives A structure directive basically deals with manipulating the dom elements. Structural directives have a * sign before the directive. For example, *ngif and *ngfor. Attribute Directives Attribute directives deal with changing the look and behavior of the dom element. You can create your own directives as shown below. How to Create Custom Directives? In this section, we will discuss about Custom Directives to be used in components. Custom directives are created by us and are not standard. Let us see how to create the custom directive. We will create the directive using the command line. The command to create the directive using the command line is: ng g directive nameofthedirective e.g ng g directive changetext This is how it appears in the command line: C:\projectA4\Angular 4-app>ng g directive changetext installing directive create src\app\change-text.directive.spec.ts create src\app\change-text.directive.ts update src\app\app.module.ts 55
60 The above files, i.e., change-text.directive.spec.ts and change-text.directive.ts get created and the app.module.ts file is updated. app.module.ts import { BrowserModule from '@angular/platform-browser'; import { NgModule from '@angular/core'; import { AppComponent from './app.component'; import { NewCmpComponent from './new-cmp/new-cmp.component'; import { ChangeTextDirective from declarations: [ AppComponent, NewCmpComponent, ChangeTextDirective ], imports: [ BrowserModule ], providers: [], bootstrap: [AppComponent] ) export class AppModule { The ChangeTextDirective class is included in the declarations in the above file. The class is also imported from the file given below. 56
61 change-text. directive import { Directive from selector: '[changetext]' ) export class ChangeTextDirective { constructor() { The above file has a directive and it also has a selector property. Whatever we define in the selector, the same has to match in the view, where we assign the custom directive. In the app.component.html view, let us add the directive as follows: <div style="text-align:center"> <span changetext >Welcome to {{title.</span> </div> We will write the changes in change-text.directive.ts file as follows: change-text.directive.ts import { Directive, ElementRef from selector: '[changetext]' ) export class ChangeTextDirective { constructor(element: ElementRef) { console.log(element); "; Element.nativeElement.innerText="Text is changed by changetext Directive. 57
62 In the above file, there is a class called ChangeTextDirective and a constructor, which takes the element of type ElementRef, which is mandatory. The element has all the details to which the Change Text directive is applied. We have added the console.log element. The output of the same can be seen in the browser console. The text of the element is also changed as shown above. Now, the browser will show the following. 58
63 10. Angular 4 Pipes Angular 4 In this chapter, we will discuss what are Pipes in Angular 4. Pipes were earlier called filters in Angular1 and called pipes in Angular 2 and 4. The character is used to transform data. Following is the syntax for the same: {{ Welcome to Angular 4 lowercase It takes integers, strings, arrays, and date as input separated with to be converted in the format as required and display the same in the browser. Let us consider a few examples using pipes. Here, we want to display the text given to uppercase. This can be done using pipes as follows: In the app.component.ts file, we have defined the title variable: app.component.ts import { Component from selector: 'app-root', templateurl: './app.component.html', styleurls: ['./app.component.css'] ) export class AppComponent { title = 'Angular 4 Project!'; The following line of code goes into the app.component.html file. <b>{{title uppercase</b><br/> <b>{{title lowercase</b> 59

64 The browser appears as shown in the following screenshot : Angular 4 provides some built-in pipes. The pipes are listed below: Lowercasepipe Uppercasepipe Datepipe Currencypipe Jsonpipe Percentpipe Decimalpipe Slicepipe We have already seen the lowercase and uppercase pipes. Let us now see how the other pipes work. The following line of code will help us define the required variables in app.component.ts file: import { Component from selector: 'app-root', templateurl: './app.component.html', styleurls: ['./app.component.css'] ) 60
65 export class AppComponent { title = 'Angular 4 Project!'; todaydate = new Date(); jsonval = {name:'rox', age:'25', address:{a1:'mumbai', a2:'karnataka'; months = ["Jan", "Feb", "Mar", "April", "May", "Jun", "July", "Aug", "Sept", "Oct", "Nov", "Dec"]; We will use the pipes in the app.component.html file. <!--The content below is only a placeholder and can be replaced. --> <div style="width:100%;"> <div style="width:40%;float:left;border:solid 1px black;"> <h1>uppercase Pipe</h1> <b>{{title uppercase</b><br/> <h1>lowercase Pipe</h1> <b>{{title lowercase</b> <h1>currency Pipe</h1> <b>{{ currency:"usd"</b><br/> <b>{{ currency:"usd":true</b> //Boolean true is used to get the sign of the currency. <h1>date pipe</h1> <b>{{todaydate date:'d/m/y'</b><br/> <b>{{todaydate date:'shorttime'</b> <h1>decimal Pipe</h1> <b>{{ number: '3.4-4' </b> // 3 is for main integer, 4-4 are for integers to be displayed. </div> <div style="width:40%;float:left;border:solid 1px black;"> <h1>json Pipe</h1> 61
66 <b>{{ jsonval json </b> <h1>percent Pipe</h1> <b>{{ percent</b> <h1>slice Pipe</h1> <b>{{months slice:2:6</b> // here 2 and 6 refers to the start and the end index </div> </div> 62
67 The following screenshots show the output for each pipe: 63
68 How to Create a Custom Pipe? To create a custom pipe, we have created a new ts file. Here, we want to create the sqrt custom pipe. We have given the same name to the file and it looks as follows: app.sqrt.ts import {Pipe, PipeTransform from ({ ) name : 'sqrt' 64
69 export class SqrtPipe implements PipeTransform { transform(val : number) : number { return Math.sqrt(val); To create a custom pipe, we have to import Pipe and Pipe Transform from Angular/core. In directive, we have to give the name to our pipe, which will be used in our.html file. Since, we are creating the sqrt pipe, we will name it sqrt. As we proceed further, we have to create the class and the class name is SqrtPipe. This class will implement the PipeTransform. The transform method defined in the class will take argument as the number and will return the number after taking the square root. Since we have created a new file, we need to add the same in app.module.ts. This is done as follows: import { BrowserModule from '@angular/platform-browser'; import { NgModule from '@angular/core'; import { AppComponent from './app.component'; import { NewCmpComponent from './new-cmp/new-cmp.component'; import { ChangeTextDirective from './change-text.directive'; import { SqrtPipe from declarations: [ SqrtPipe, AppComponent, NewCmpComponent, ChangeTextDirective ], imports: [ BrowserModule ], providers: [], bootstrap: [AppComponent] ) export class AppModule { 65

70 We have created the app.sqrt.ts class. We have to import the same in app.module.ts and specify the path of the file. It also has to be included in the declarations as shown above. Let us now see the call made to the sqrt pipe in the app.component.html file. <h1>custom Pipe</h1> <b>square root of 25 is: {{25 sqrt</b><br/> <b>square root of 729 is: {{729 sqrt</b> The output looks as follows: 66
71 11. Angular 4 Routing Angular 4 Routing basically means navigating between pages. You have seen many sites with links that direct you to a new page. This can be achieved using routing. Here the pages that we are referring to will be in the form of components. We have already seen how to create a component. Let us now create a component and see how to use routing with it. In the main parent component app.module.ts, we have to now include the router module as shown below: import { BrowserModule from '@angular/platform-browser'; import { NgModule from '@angular/core'; import { RouterModule from '@angular/router'; import { AppComponent from './app.component'; import { NewCmpComponent from './new-cmp/new-cmp.component'; import { ChangeTextDirective from './change-text.directive'; import { SqrtPipe from declarations: [ SqrtPipe, AppComponent, NewCmpComponent, ChangeTextDirective ], imports: [ BrowserModule, RouterModule.forRoot([ { path: 'new-cmp', component: NewCmpComponent ]) ], providers: [], bootstrap: [AppComponent] ) 67
72 export class AppModule { import { RouterModule from '@angular/router' Here, the RouterModule is imported from angular/router. The module is included in the imports as shown below: RouterModule.forRoot([ ] ]) { path: 'new-cmp', component: NewCmpComponent RouterModule refers to the forroot which takes an input as an array, which in turn has the object of the path and the component. Path is the name of the router and component is the name of the class, i.e., the component created. Let us now see the component created file: New-cmp.component.ts import { Component, OnInit from selector: 'app-new-cmp', templateurl: './new-cmp.component.html', styleurls: ['./new-cmp.component.css'] ) export class NewCmpComponent implements OnInit { newcomponent = "Entered in new component created"; constructor() { ngoninit() { 68
73 The highlighted class is mentioned in the imports of the main module. New-cmp.component.html <p> {{newcomponent </p> <p> new-cmp works! </p> Now, we need the above content from the html file to be displayed whenever required or clicked from the main module. For this, we need to add the router details in the app.component.html. <h1>custom Pipe</h1> <b>square root of 25 is: {{25 sqrt</b><br/> <b>square root of 729 is: {{729 sqrt</b> <br /> <br /> <br /> <a routerlink = "new-cmp">new component</a> <br /> <br/> <router-outlet></router-outlet> In the above code, we have created the anchor link tag and given routerlink as newcmp. This is referred in app.module.ts as the path. When a user clicks new component, the page should display the content. For this, we need the following tag - <router-outlet> </router-outlet>. The above tag ensures that the content in the new-cmp.component.html will be displayed on the page when a user clicks new component. Let us now see how the output is displayed on the browser. 69
74 When a user clicks New component, you will see the following in the browser. 70
75 The url contains Here, the new-cmp gets appended to the original url, which is the path given in the app.module.ts and the router-link in the app.component.html. When a user clicks New component, the page is not refreshed and the contents are shown to the user without any reloading. Only a particular piece of the site code will be reloaded when clicked. This feature helps when we have heavy content on the page and needs to be loaded based on the user interaction. The feature also gives a good user experience as the page is not reloaded. 71
76 12. Angular 4 Services Angular 4 In this chapter, we will discuss the services in Angular 4. We might come across a situation where we need some code to be used everywhere on the page. It can be for data connection that needs to be shared across components, etc. Services help us achieve that. With services, we can access methods and properties across other components in the entire project. To create a service, we need to make use of the command line. The command for the same is: C:\projectA4\Angular 4-app>ng g service myservice installing service create src\app\myservice.service.spec.ts create src\app\myservice.service.ts WARNING Service is generated but not provided, it must be provided to be used C:\projectA4\Angular 4-app> 72

77 The files are created in the app folder as follows: Following are the files created at the bottom - myservice.service.specs.ts and myservice.service.ts. 73
78 myservice.service.ts import { Injectable from export class MyserviceService { constructor() { Here, the Injectable module is imported from It contains method and a class called MyserviceService. We will create our service function in this class. Before creating a new service, we need to include the service created in the main parent app.module.ts. import { BrowserModule from '@angular/platform-browser'; import { NgModule from '@angular/core'; import { RouterModule from '@angular/router'; import { AppComponent from './app.component'; import { MyserviceService from './myservice.service'; import { NewCmpComponent from './new-cmp/new-cmp.component'; import { ChangeTextDirective from './change-text.directive'; import { SqrtPipe from declarations: [ SqrtPipe, AppComponent, NewCmpComponent, ChangeTextDirective ], imports: [ BrowserModule, RouterModule.forRoot([ 74
79 { path: 'new-cmp', component: NewCmpComponent ]) ], providers: [MyserviceService], bootstrap: [AppComponent] ) export class AppModule { We have imported the Service with the class name and the same class is used in the providers. Let us now switch back to the service class and create a service function. In the service class, we will create a function which will display today s date. We can use the same function in the main parent component app.component.ts and also in the new component new-cmp.component.ts that we created in the previous chapter. Let us now see how the function looks in the service and how to use it in components. import { Injectable from export class MyserviceService { constructor() { showtodaydate() { let ndate = new Date(); return ndate; In the above service file, we have created a function showtodaydate. Now we will return the new Date () created. Let us see how we can access this function in the component class. 75
80 app.component.ts import { Component from '@angular/core'; import { MyserviceService from selector: 'app-root', templateurl: './app.component.html', styleurls: ['./app.component.css'] ) export class AppComponent { title = 'Angular 4 Project!'; todaydate; constructor(private myservice: MyserviceService) { ngoninit() { this.todaydate = this.myservice.showtodaydate(); The ngoninit function gets called by default in any component created. The date is fetched from the service as shown above. To fetch more details of the service, we need to first include the service in the component ts file. We will display the date in the.html file as shown below: {{todaydate <app-new-cmp></app-new-cmp> // data to be displayed to user from the new component class. 76
81 Let us now see how to use the service in the new component created. import { Component, OnInit from '@angular/core'; import { MyserviceService from selector: 'app-new-cmp', templateurl: './new-cmp.component.html', styleurls: ['./new-cmp.component.css'] ) export class NewCmpComponent implements OnInit { todaydate; newcomponent = "Entered in new component created"; constructor(private myservice: MyserviceService) { ngoninit() { this.todaydate = this.myservice.showtodaydate(); In the new component that we have created, we need to first import the service that we want and access the methods and properties of the same. Please see the code highlighted. The todaydate is displayed in the component html as follows: <p> {{newcomponent </p> <p> Today's Date : {{todaydate </p> The selector of the new component is used in the app.component.html file. The contents from the above html file will be displayed in the browser as shown below: 77

82 If you change the property of the service in any component, the same is changed in other components too. Let us now see how this works. We will define one variable in the service and use it in the parent and the new component. We will again change the property in the parent component and will see if the same is changed in the new component or not. In myservice.service.ts, we have created a property and used the same in other parent and new component. import { Injectable from export class MyserviceService { serviceproperty = "Service Created"; constructor() { showtodaydate() { let ndate = new Date(); return ndate; 78
83 Let us now use the serviceproperty variable in other components. In app.component.ts, we are accessing the variable as follows: import { Component from '@angular/core'; import { MyserviceService from './myservice.ser selector: 'app-root', templateurl: './app.component.html', styleurls: ['./app.component.css'] ) export class AppComponent { title = 'Angular 4 Project!'; todaydate; componentproperty; constructor(private myservice: MyserviceService) { ngoninit() { this.todaydate = this.myservice.showtodaydate(); console.log(this.myservice.serviceproperty); this.myservice.serviceproperty = "component created"; // value is changed. this.componentproperty = this.myservice.serviceproperty; We will now fetch the variable and work on the console.log. In the next line, we will change the value of the variable to component created. We will do the same in newcmp.component.ts. import { Component, OnInit from '@angular/core'; import { MyserviceService from selector: 'app-new-cmp', templateurl: './new-cmp.component.html', styleurls: ['./new-cmp.component.css'] ) 79
; this.newcomponentproperty = this.myservice.serviceproperty; In the above component, we are not changing anything but directly assigning the property to the component property.")
84 export class NewCmpComponent implements OnInit { todaydate; newcomponentproperty; newcomponent = "Entered in newcomponent"; constructor(private myservice: MyserviceService) { ngoninit() { this.todaydate = this.myservice.showtodaydate(); this.newcomponentproperty = this.myservice.serviceproperty; In the above component, we are not changing anything but directly assigning the property to the component property. Now when you execute it in the browser, the service property will be changed since the value of it is changed in app.component.ts and the same will be displayed for the newcmp.component.ts. Also check the value in the console before it is changed. 80
85 13. Angular 4 Http Service Angular 4 Http Service will help us fetch external data, post to it, etc. We need to import the http module to make use of the http service. Let us consider an example to understand how to make use of the http service. To start using the http service, we need to import the module in app.module.ts as shown below: import { BrowserModule from '@angular/platform-browser'; import { NgModule from '@angular/core'; import { BrowserAnimationsModule from '@angular/platform -browser/animations'; import { HttpModule from '@angular/http'; import { AppComponent from declarations: [ AppComponent ], imports: [ BrowserModule, BrowserAnimationsModule, HttpModule ], providers: [], bootstrap: [AppComponent] ) export class AppModule { If you see the highlighted code, we have imported the HttpModule p and the same is also added in the imports array. Let us now use the http service in the app.component.ts. import { Component from '@angular/core'; import { Http from '@angular/http'; import 'rxjs/add/operator/map'; 81
86 @Component({ selector: 'app-root', templateurl: './app.component.html', styleurls: ['./app.component.css'] ) export class AppComponent { constructor(private http: Http) { ngoninit() { this.http.get(" map( (response) => response.json() ). subscribe( (data) => console.log(data) ) Let us understand the code highlighted above. We need to import http to make use of the service, which is done as follows: import { Http from '@angular/http'; In the class AppComponent, a constructor is created and the private variable http of type Http. To fetch the data, we need to use the get API available with http as follows: this.http.get(); It takes the url to be fetched as the parameter as shown in the code. We will use the test url - to fetch the json data. Two operations are performed on the fetched url data map and subscribe. The Map method helps to convert the data to json format. To use the map, we need to import the same as shown below: import 'rxjs/add/operator/map'; 82
87 Once the map is done, the subscribe will log the output in the console as shown in the browser: If you see, the json objects are displayed in the console. The objects can be displayed in the browser too. For the objects to be displayed in the browser, update the codes in app.component.html and app.component.ts as follows: import { Component from '@angular/core'; import { Http from '@angular/http'; import selector: 'app-root', templateurl: './app.component.html', styleurls: ['./app.component.css'] ) export class AppComponent { constructor(private http: Http) { httpdata; 83
88 ngoninit() { this.http.get(" map( (response) => response.json() ). subscribe( (data) => { this.displaydata(data); ) displaydata(data) { this.httpdata = data; In app.component.ts, using the subscribe method we will call the display data method and pass the data fetched as the parameter to it. In the display data method, we will store the data in a variable httpdata. The data is displayed in the browser using for over this httpdata variable, which is done in the app.component.html file. <ul *ngfor = "let data of httpdata"> </ul> <li>name : {{data.name Address: {{data.address.city</li> The json object is as follows: { "id": 1, "name": "Leanne Graham", "username": "Bret", " ": "Sincere@april.biz", "address": { "street": "Kulas Light", "suite": "Apt. 556", "city": "Gwenborough", 84

89 "zipcode": " ", "geo": { "lat": " ", "lng": " ", "phone": " x56442", "website": "hildegard.org", "company": { "name": "Romaguera-Crona", "catchphrase": "Multi-layered client-server neural-net", "bs": "harness real-time e-markets" The object has properties such as id, name, username, , and address that internally has street, city, etc. and other details related to phone, website, and company. Using the for loop, we will display the name and the city details in the browser as shown in the app.component.html file. This is how the display is shown in the browser: 85
90 Let us now add the search parameter, which will filter based on specific data. We need to fetch the data based on the search param passed. Following are the changes done in app.component.html and app.component.ts files: app.component.ts import { Component from '@angular/core'; import { Http from '@angular/http'; import selector: 'app-root', templateurl: './app.component.html', styleurls: ['./app.component.css'] ) export class AppComponent { title = 'app'; searchparam = 2; jsondata; name; constructor(private http: Http) { ngoninit() { this.http.get(" map( ). (response) => response.json() subscribe( ) (data) => this.converttoarray(data) converttoarray(data) { console.log(data); this.name = data[0].name; 86
91 For the get api, we will add the search param id = this.searchparam. The searchparam is equal to 2. We need the details of id=2 from the json file. app.component.html {{name This is how the browser is displayed: We have consoled the data in the browser, which is received from the http. The same is displayed in the browser console. The name from the json with id=2 is displayed in the browser. 87
92 14. Angular 4 Forms Angular 4 In this chapter, we will see how forms are used in Angular 4. We will discuss two ways of working with forms - template driven form and model driven forms. Template Driven Form With a template driven form, most of the work is done in the template; and with the model driven form, most of the work is done in the component class. Let us now consider working on the Template driven form. We will create a simple login form and add the id, password and submit the button in the form. To start with, we need to import to FormsModule which is done in app.module.ts as follows: import { BrowserModule from '@angular/platform-browser'; import { NgModule from '@angular/core'; import { RouterModule from '@angular/router'; import { HttpModule from '@angular/http'; import { FormsModule from '@angular/forms'; import { AppComponent from './app.component'; import { MyserviceService from './myservice.service'; import { NewCmpComponent from './new-cmp/new-cmp.component'; import { ChangeTextDirective from './change-text.directive'; import { SqrtPipe from declarations: [ SqrtPipe, AppComponent, NewCmpComponent, ChangeTextDirective ], imports: [ BrowserModule, HttpModule, FormsModule, RouterModule.forRoot([ 88
93 { path: 'new-cmp', component: NewCmpComponent ]) ], providers: [MyserviceService], bootstrap: [AppComponent] ) export class AppModule { So in app.module.ts, we have imported the FormsModule and the same is added in the imports array as shown in the highlighted code. Let us now create our form in the app.component.html file. <form #userlogin="ngform" (ngsubmit) = "onclicksubmit(userlogin.value)" > <input type="text" name=" id" placeholder=" id" ngmodel> <br/> <input type="password" name="passwd" placeholder="passwd" ngmodel> <br/> <input type="submit" value="submit"> </form> We have created a simple form with input tags having id, password and the submit button. We have assigned type, name, and placeholder to it. In template driven forms, we need to create the model form controls by adding the ngmodel directive and the name attribute. Thus, wherever we want Angular to access our data from forms, add ngmodel to that tag as shown above. Now, if we have to read the id and passwd, we need to add the ngmodel across it. If you see, we have also added the ngform to the #userlogin. The ngform directive needs to be added to the form template that we have created. We have also added function onclicksubmit and assigned userlogin.value to it. 89
94 Let us now create the function in the app.component.ts and fetch the values entered in the form. import { Component from '@angular/core'; import { MyserviceService from selector: 'app-root', templateurl: './app.component.html', styleurls: ['./app.component.css'] ) export class AppComponent { title = 'Angular 4 Project!'; todaydate; componentproperty; constructor(private myservice: MyserviceService) { ngoninit() { this.todaydate = this.myservice.showtodaydate(); onclicksubmit(data) { alert("entered id : " + data. id); In the above app.component.ts file, we have defined the function onclicksubmit. When you click on the form submit button, the control will come to the above function. This is how the browser is displayed: 90
95 The form looks like as shown below. Let us enter the data in it and in the submit function, the id is already entered. The id is displayed at the bottom as shown in the above screenshot. Model Driven Form In the model driven form, we need to import the ReactiveFormsModule and use the same in the imports array. There is a change which goes in app.module.ts. import { BrowserModule from '@angular/platform-browser'; import { NgModule from '@angular/core'; import { RouterModule from '@angular/router'; import { HttpModule from '@angular/http'; import { ReactiveFormsModule from '@angular/forms'; import { AppComponent from './app.component'; import { MyserviceService from './myservice.service'; import { NewCmpComponent from './new-cmp/new-cmp.component'; import { ChangeTextDirective from './change-text.directive'; import { SqrtPipe from declarations: [ SqrtPipe, AppComponent, NewCmpComponent, ChangeTextDirective ], imports: [ BrowserModule, HttpModule, 91
96 ReactiveFormsModule, RouterModule.forRoot([ { path: 'new-cmp', component: NewCmpComponent ]) ], providers: [MyserviceService], bootstrap: [AppComponent] ) export class AppModule { In app.component.ts, we need to import a few modules for the model driven form. For example, import { FormGroup, FormControl from '@angular/forms'. import { Component from '@angular/core'; import { MyserviceService from './myservice.service'; import { FormGroup, FormControl from selector: 'app-root', templateurl: './app.component.html', styleurls: ['./app.component.css'] ) export class AppComponent { title = 'Angular 4 Project!'; todaydate; componentproperty; id; formdata; constructor(private myservice: MyserviceService) { 92
97 ngoninit() { this.todaydate = this.myservice.showtodaydate(); this.formdata = new FormGroup({ id: new FormControl("angular@gmail.com"), passwd: new FormControl("abcd1234") ); onclicksubmit(data) { this. id = data. id; The variable formdata is initialized at the start of the class and the same is initialized with FormGroup as shown above. The variables id and passwd are initialized with default values to be displayed in the form. You can keep it blank in case you want to. This is how the values will be seen in the form UI. We have used formdata to initialize the form values; we need to use the same in the form UI app.component.html. <div> <form [formgroup]="formdata" (ngsubmit) = "onclicksubmit(formdata.value)" > <input type="text" class="fortextbox" name=" id" placeholder=" id" formcontrolname=" id"> <br/> <input type="password" class="fortextbox" name="passwd" placeholder="passwd" formcontrolname="passwd"> <br/> <input type="submit" class="forsubmit" value="log In"> </form> </div> <p> entered is : {{ id 93
98 </p> In the.html file, we have used formgroup in square bracket for the form; for example, [formgroup]= formdata. On submit, the function is called onclicksubmit for which formdata.value is passed. The input tag formcontrolname is used. It is given a value that we have used in the app.component.ts file. On clicking submit, the control will pass to the function onclicksubmit, which is defined in the app.component.ts file. On clicking Login, the value will be displayed as shown in the above screenshot. Form Validation Let us now discuss form validation using model driven form. You can use the built-in form validation or also use the custom validation approach. We will use both the approaches in the form. We will continue with the same example that we created in one of our previous sections. With Angular 4, we need to import Validators as shown below: import { FormGroup, FormControl, Validators from '@angular/forms' Angular has built-in validators such as mandatory field, minlength, maxlength, and pattern. These are to be accessed using the Validators module. You can just add validators or an array of validators required to tell Angular if a particular field is mandatory. Let us now try the same on one of the input textboxes, i.e., id. For the id, we have added the following validation parameters: Required Pattern matching This is how a code undergoes validation in app.component.ts. 94
99 import { Component from '@angular/core'; import { FormGroup, FormControl, Validators from selector: 'app-root', templateurl: './app.component.html', styleurls: ['./app.component.css'] ) export class AppComponent { title = 'Angular 4 Project!'; todaydate; componentproperty; id; formdata; ngoninit() { this.formdata = new FormGroup({ id: new FormControl("", Validators.compose([ ])), passwd: new FormControl("") ); onclicksubmit(data) { this. id = data. id; In Validators.compose, you can add the list of things you want to validate on the input field. Right now, we have added the required and the pattern matching parameters to take only valid . In the app.component.html, the submit button is disabled if any of the form inputs are not valid. This is done as follows: 95
100 <div> <form [formgroup]="formdata" (ngsubmit) = "onclicksubmit(formdata.value)" > <input type="text" class="fortextbox" name=" id" placeholder=" id" formcontrolname=" id"> <br/> <input type="password" class="fortextbox" name="passwd" place holder="passwd" formcontrolname="passwd"> <br/> <input type="submit" [disabled]="!formdata.valid" class="forsubmit" value="log In"> </form> </div> <p> </p> entered is : {{ id For the submit button, we have added disabled in the square bracket, which is given value -!formdata.valid. Thus, if the formdata.valid is not valid, the button will remain disabled and the user will not be able to submit it. Let us see the how this works in the browser: In the above case, the id entered is invalid, hence the login button is disabled. Let us now try entering the valid id and see the difference. Now, the id entered is valid. Thus, we can see the login button is enabled and the user will be able to submit it. With this, the id entered is displayed at the bottom. 96
101 Let us now try custom validation with the same form. For custom validation, we can define our own custom function and add the required details in it. We will now see an example for the same. import { Component from '@angular/core'; import { FormGroup, FormControl, Validators from selector: 'app-root', templateurl: './app.component.html', styleurls: ['./app.component.css'] ) export class AppComponent { title = 'Angular 4 Project!'; todaydate; componentproperty; id; formdata; ngoninit() { this.formdata = new FormGroup({ id: new FormControl("", Validators.compose([ ])), passwd: new FormControl("", this.passwordvalidation) ); passwordvalidation(formcontrol) { if (formcontrol.value.length < 5) { return {"passwd" : true; onclicksubmit(data) { 97
. In the function that we have created, we will check if the length of the characters entered is appropriate.")
102 this. id = data. id; In the above example, we have created a function password validation and the same is used in a previous section in the formcontrol - passwd: new FormControl("", this.passwordvalidation). In the function that we have created, we will check if the length of the characters entered is appropriate. If the characters are less than five, it will return with the passwd true as shown above - return {"passwd" : true;. If the characters are more than five, it will consider it as valid and the login will be enabled. Let us now see how this is displayed in the browser: We have entered only three characters in the password and the login is disabled. To enable login, we need more than five characters. Let us now enter a valid length of characters and check. The login is enabled as both the id and the password are valid. The is displayed at the bottom as we log in. 98
103 15. Angular 4 Animations Angular 4 Animations add a lot of interaction between the html elements. Animation was also available with Angular2. The difference with Angular 4 is that animation is no more a part of library, but is a separate package that needs to be imported in app.module.ts. To start with, we need to import the library as follows: import { BrowserAnimationsModule from '@angular/platform -browser/animations'; The BrowserAnimationsModule needs to be added to the import array in app.module.ts as shown below: app.module.ts import { BrowserModule from '@angular/platform-browser'; import { NgModule from '@angular/core'; import { BrowserAnimationsModule from '@angular/platform -browser/animations'; import { AppComponent from declarations: [ AppComponent ], imports: [ BrowserModule, BrowserAnimationsModule ], providers: [], bootstrap: [AppComponent] ) export class AppModule { 99
104 In app.component.html, we have added the html elements, which are to be animated. <div> <button (click)="animate()">click Me</button> <div = "state" class="rotate"><img src="assets/images/img.png" width="100" height="100"></div> </div> For the main div, we have added a button and a div with an image. There is a click event for which the animate function is called. And for the div, directive is added and given the value as state. Let us now see the app.component.ts where the animation is defined. import { Component from '@angular/core'; import { trigger, state, style, transition, animate from selector: 'app-root', templateurl: './app.component.html', styleurls: ['./app.component.css'], styles:[` div{ margin: 0 auto; text-align: center; width:200px;.rotate{ width:100px; height:100px; border:solid 1px red; `], animations: [ trigger('myanimation',[ state('smaller',style({ transform : 'translatey(100px)' )), state('larger',style({ 100
105 transform : 'translatey(0px)' ]) )), transition('smaller <=> larger',animate('300ms ease-in')) ] ) export class AppComponent { state: string = "smaller"; animate() { this.state= this.state == 'larger'? 'smaller' : 'larger'; We have to import the animation function that is to be used in the.ts file as shown above. import { trigger, state, style, transition, animate from '@angular/animations'; Here we have imported trigger, state, style, transition, and animate Now, we will add the animations property to () decorator: animations: [ trigger('myanimation',[ state('smaller',style({ transform : 'translatey(100px)' )), state('larger',style({ transform : 'translatey(0px)' )), transition('smaller <=> larger',animate('300ms ease-in')) ]) ] Trigger defines the start of the animation. The first param to it is the name of the animation to be given to the html tag to which the animation needs to be applied. The second param are the functions we have imported - state, transition, etc. 101
106 The state function involves the animation steps, which the element will transition between. Right now we have defined two states, smaller and larger. For smaller state, we have given the style transform:translatey(100px) and transform:translatey(0px). Transition function adds animation to the html element. The first argument takes the states, i.e., start and end; the second argument accepts the animate function. The animate function allows you to define the length, delay, and easing of a transition. Let us now see the.html file to see how the transition function works: <div> <button (click)="animate()">click Me</button> <div [@myanimation] = "state" class="rotate"><img src="assets/images/img.png" width="100" height="100"></div> </div> There is a style property added in directive, which centrally aligns the div. Let us consider the following example to understand the same: styles:[` div{ margin: 0 auto; text-align: center; width:200px;.rotate{ width:100px; height:100px; border:solid 1px red; `], Here, a special character [``] is used to add styles to the html element, if any. For the div, we have given the animation name defined in the app.component.ts file. 102

107 On the click of a button it calls the animate function, which is defined in the app.component.ts file as follows: export class AppComponent { state: string = "smaller"; animate() { this.state= this.state == larger? 'smaller' : 'larger'; The state variable is defined and is given the default value as smaller. The animate function changes the state on click. If the state is larger, it will convert to smaller; and if smaller, it will convert to larger. This is how the output in the browser ( will look like: Upon clicking the Click Me button, the position of the image is changed as shown in the following screenshot: 103

108 The transform function is applied in the y direction, which is changed from 0 to 100px when the Click Me button is clicked. The image is stored in the assets/images folder. 104
109 16. Angular 4 Materials Angular 4 Materials offer a lot of built-in modules for your project. Features such as autocomplete, datepicker, slider, menus, grids, and toolbar are available for use with materials in Angular 4. To use materials, we need to import the package. Angular 2 also has all the above features but they are available as part of module. Angular 4 has come up with a separate This helps the user to import the required materials. To start using materials, you need to install two packages - materials and cdk. Material components depend on the animation module for advanced features, hence you need the animation package for the same, The package has already been updated in the previous chapter. npm Let us now see the are installed. { "name": "angularstart", "version": "0.0.0", "license": "MIT", "scripts": { "ng": "ng", "start": "ng serve", "build": "ng build", "test": "ng test", "lint": "ng lint", "e2e": "ng e2e", "private": true, "dependencies": { "@angular/animations": "^4.0.0", "@angular/cdk": "^2.0.0-beta.8", "@angular/common": "^4.0.0", "@angular/compiler": "^4.0.0", "@angular/core": "^4.0.0", "@angular/forms": "^4.0.0", 105
110 "^4.0.0", "^2.0.0-beta.8", "^4.0.0", "^4.0.0", "^4.0.0", "core-js": "^2.4.1", "rxjs": "^5.1.0", "zone.js": "^0.8.4", "devdependencies": { "@angular/cli": "1.2.0", "@angular/compiler-cli": "^4.0.0", "@angular/language-service": "^4.0.0", "@types/jasmine": "~2.5.53", "@types/jasminewd2": "~2.0.2", "@types/node": "~6.0.60", "codelyzer": "~3.0.1", "jasmine-core": "~2.6.2", "jasmine-spec-reporter": "~4.1.0", "karma": "~1.7.0", "karma-chrome-launcher": "~2.1.1", "karma-cli": "~1.0.1", "karma-coverage-istanbul-reporter": "^1.2.1", "karma-jasmine": "~1.1.0", "karma-jasmine-html-reporter": "^0.2.2", "protractor": "~5.1.2", "ts-node": "~3.0.4", "tslint": "~5.3.2", "typescript": "~2.3.3" We have highlighted the packages that are installed to work with materials. 106
111 We will now import the modules in the parent module - app.module.ts as shown below. import { BrowserModule from '@angular/platform-browser'; import { NgModule from '@angular/core'; import { BrowserAnimationsModule from '@angular/platform -browser/animations'; import { MdButtonModule, MdMenuModule, MdSidenavModule from '@angular/material'; import { FormsModule from '@angular/forms'; import { AppComponent from declarations: [ AppComponent ], imports: [ BrowserModule, BrowserAnimationsModule, MdButtonModule, MdMenuModule, FormsModule, MdSidenavModule ], providers: [], bootstrap: [AppComponent] ) export class AppModule { In the above file, we have imported the following modules import { MdButtonModule, MdMenuModule, MdSidenavModule from '@angular/material'; 107
112 And the same is used in the imports array as shown below: imports: [ BrowserModule, BrowserAnimationsModule, MdButtonModule, MdMenuModule, FormsModule, MdSidenavModule ] The app.component.ts is as shown below: import { Component from selector: 'app-root', templateurl: './app.component.html', styleurls: ['./app.component.css'] ) export class AppComponent { mydata: Array<any>; constructor() { Let us now add the material in app.component.html. <button md-button [mdmenutriggerfor]="menu">menu</button> <md-menu #menu="mdmenu"> <button md-menu-item>file</button> <button md-menu-item>save As</button> </md-menu> 108
113 <md-sidenav-container class="example-container"> <md-sidenav #sidenav class="example-sidenav"> Angular 4 </md-sidenav> <div class="example-sidenav-content"> <button type="button" md-button (click)="sidenav.open()"> Open sidenav </button> </div> </md-sidenav-container> In the above file, we have added Menu and SideNav. Menu To add menu, <md-menu></md-menu> is used. The file and Save As items are added to the button under md-menu. There is a main button added Menu. The reference of the same is given the <md- menu> by using [mdmenutriggerfor]= menu and using the menu with # in <md-menu>. SideNav To add sidenav, we need <md-sidenav-container></md-sidenav-container>. <mdsidenav></md-sidenav> is added as a child to the container. There is another div added, which triggers the sidenav by using (click)= sidenav.open(). Following is the display of the menu and the sidenav in the browser: 109

114 Upon clicking opensidenav, it shows the side bar as shown below: 110

115 Upon clicking Menu, you will get two items File and Save As as shown below: Let us now add a datepicker using materials. To add a datepicker, we need to import the modules required to show the datepicker. In app.module.ts, we have imported the following module as shown below for datepicker. import { BrowserModule from '@angular/platform-browser'; import { NgModule from '@angular/core'; import { BrowserAnimationsModule from '@angular/platform-browser/animations'; import { MdDatepickerModule, MdInputModule, MdNativeDateModule from '@angular/material'; import { FormsModule from '@angular/forms'; import { AppComponent from declarations: [ AppComponent ], imports: [ BrowserModule, BrowserAnimationsModule, 111
116 FormsModule, MdDatepickerModule, MdInputModule, MdNativeDateModule ], providers: [], bootstrap: [AppComponent] ) export class AppModule { Here, we have imported modules such as MdDatepickerModule, MdInputModule, and MdNativeDateModule. Now, the app.component.ts is as shown below: import { Component from selector: 'app-root', templateurl: './app.component.html', styleurls: ['./app.component.css'] ) export class AppComponent { mydata: Array<any>; constructor() { 112

117 The app.component.html is as shown below: <md-input-container> <input mdinput [mddatepicker]="picker" placeholder="choose a date"> <button mdsuffix [mddatepickertoggle]="picker"></button> </md-input-container> <md-datepicker #picker></md-datepicker> This is how the datepicker is displayed in the browser: 113
118 17. Angular 4 CLI Angular 4 Angular CLI makes it easy to start with any Angular project. Angular CLI comes with commands that help us create and start on our project very fast. Let us now go through the commands available to create a project, a component and services, change the port, etc. To work with Angular CLI, we need to have it installed on our system. Let us use the following command for the same: npm install To create a new project, we can run the following command in the command line and the project will be created. ng new PROJECT-NAME cd PROJECT-NAME ng serve // ng serve // will compile and you can see the output of your project in the browser: is the default port used when a new project is created. You can change the port with the following command: ng serve --host port 4201 The following table lists down a few important commands required while working with Angular 4 projects. Component Directive Pipe Service Module ng g component new-component ng g directive new-directive ng g pipe new-pipe ng g service new-service ng g module my-module Whenever a new module, a component, or a service is created, the reference of the same is updated in the parent module app.module.ts. 114
119 18. Angular 4 Examples Angular 4 In this chapter, we will discuss a few examples related to Angular 4. To begin with, we have created an example which shows a login form with input as username and password. Upon entering the correct values, it will enter inside and show another form wherein, you can enter the customer details. In addition, we have created four components - header, footer, userlogin and mainpage. The components are created using the following command: ng g component header C:\ngexamples\aexamples>ng g component header installing component create src\app\header\header.component.css create src\app\header\header.component.html create src\app\header\header.component.spec.ts create src\app\header\header.component.ts update src\app\app.module.ts ng g component footer C:\ngexamples\aexamples>ng g component footer installing component create src\app\footer\footer.component.css create src\app\footer\footer.component.html create src\app\footer\footer.component.spec.ts create src\app\footer\footer.component.ts update src\app\app.module.ts ng g component userlogin C:\ngexamples\aexamples>ng g component userlogin installing component create src\app\userlogin\userlogin.component.css create src\app\userlogin\userlogin.component.html create src\app\userlogin\userlogin.component.spec.ts 115
120 create src\app\userlogin\userlogin.component.ts update src\app\app.module.ts ng g component mainpage C:\ngexamples\aexamples>ng g component mainpage installing component create src\app\mainpage\mainpage.component.css create src\app\mainpage\mainpage.component.html create src\app\mainpage\mainpage.component.spec.ts create src\app\mainpage\mainpage.component.ts update src\app\app.module.ts In the app.module.ts, the parent module has all the components added when created. The file looks as follows: import { BrowserModule from '@angular/platform-browser'; import { NgModule from '@angular/core'; import { ReactiveFormsModule from '@angular/forms'; import { RouterModule, Routes froms '@angular/router'; import { BrowserAnimationsModule from '@angular/platform -browser/animations'; import {MdTableModule from '@angular/material'; import {HttpModule from "@angular/http"; import {MdInputModule from '@angular/material'; import { AppComponent from './app.component'; import { HeaderComponent from './header/header.component'; import { FooterComponent from './footer/footer.component'; import { UserloginComponent from './userlogin/userlogin.component'; import { MainpageComponent from './mainpage/mainpage.component'; const approutes: Routes = [ { path: '', component: UserloginComponent, { 116
121 path: 'app-mainpage', component: MainpageComponent declarations: [ AppComponent, HeaderComponent, FooterComponent, UserloginComponent, MainpageComponent ], imports: [ BrowserModule, ReactiveFormsModule, RouterModule.forRoot(appRoutes), BrowserAnimationsModule, HttpModule, MdTableModule, MdInputModule ], providers: [], bootstrap: [AppComponent] ) export class AppModule { The components created above are added: import { HeaderComponent from './header/header.component'; import { FooterComponent from './footer/footer.component'; import { UserloginComponent from './userlogin/userlogin.component'; import { MainpageComponent from './mainpage/mainpage.component'; 117
122 The components are added in the declarations too: declarations: [ AppComponent, HeaderComponent, FooterComponent, UserloginComponent, MainpageComponent ], In the parent app.component.html, we have added the main structure of the file that will be seen by the user. <div class="mainpage"> <app-header></app-header> <router-outlet></router-outlet> <app-footer></app-footer> </div> We have created a div and added <app-header></app-header>, <routeroutlet></router-outlet> and <app-footer></app-footer>. The <router-outlet></router-outlet> is used for navigation between one page to another. Here, the pages are login-form and once it is successful it will redirect to the mainpage, i.e., the customer form. To get the login-form first and later get the mainpage.component.html, done in app.module.ts as shown below: the changes are import { BrowserModule from '@angular/platform-browser'; import { NgModule from '@angular/core'; import { ReactiveFormsModule from '@angular/forms'; import { RouterModule, Routes from '@angular/router'; import { BrowserAnimationsModule from '@angular/platform -browser/animations'; import {MdTableModule from '@angular/material'; import {HttpModule from "@angular/http"; import {MdInputModule from '@angular/material'; import { AppComponent from './app.component'; import { HeaderComponent from './header/header.component'; import { FooterComponent from './footer/footer.component'; import { UserloginComponent from './userlogin/userlogin.component'; import { MainpageComponent from './mainpage/mainpage.component'; 118
123 const approutes: Routes = [ { path: '', component: UserloginComponent, { path: 'app-mainpage', component: MainpageComponent declarations: [ AppComponent, HeaderComponent, FooterComponent, UserloginComponent, MainpageComponent ], imports: [ BrowserModule, ReactiveFormsModule, RouterModule.forRoot(appRoutes), BrowserAnimationsModule, HttpModule, MdTableModule, MdInputModule ], providers: [], bootstrap: [AppComponent] ) export class AppModule { 119
124 We have imported RouterModule and Routes In imports, the RouterModules takes approutes as the param which is defined above as: const approutes: Routes = [ { path: '', component: UserloginComponent, { path: 'app-mainpage', component: MainpageComponent ]; Routes take the array of components and by default the userlogincomponent is called. In userlogin.component.ts, we have imported the router and navigated to mainpage.component.ht ml based on the condition as shown below: import { Component, OnInit from '@angular/core'; import { FormGroup, FormControl, Validators from '@angular/forms'; import { Router from selector: 'app-userlogin', templateurl: './userlogin.component.html', styleurls: ['./userlogin.component.css'] ) export class UserloginComponent implements OnInit { formdata; constructor(private router: Router) { ngoninit() { this.formdata = new FormGroup({ uname: new FormControl("", Validators.compose([ Validators.required, Validators.minLength(6) ])), passwd: new FormControl("", this.passwordvalidation) ); 120
125 passwordvalidation(formcontrol) { if (formcontrol.value.length < 5) { return {"passwd" : true; onclicksubmit(data) { console.log(data.uname); if (data.uname=="systemadmin" && data.passwd=="admin123") { alert("login Successful"); this.router.navigate(['app-mainpage']) else { alert("invalid Login"); return false; Following is the.ts file for app.component.ts. Only the default details are present in it. import { Component from selector: 'app-root', templateurl: './app.component.html', styleurls: ['./app.component.css'] ) export class AppComponent { title = 'app'; 121
126 Let us now display the details of each of the components files. To start with, we will first take the header component. For the new component, four files are created header.component.ts, header.component.html, header.component.css, and header.component.spec.ts. header.component.ts import { Component, OnInit from selector: 'app-header', templateurl: './header.component.html', styleurls: ['./header.component.css'] ) export class HeaderComponent implements OnInit { constructor() { ngoninit() { header.component.html <div > <hr /> </div> We have not added any css. This makes the header.component.css file empty. Also, the header.compoent.spec.ts file is empty as the test cases are not considered here. For the header, we will draw a horizontal line. A logo or any other detail can be added to make the header look more creative. Let us now consider creating a footer component. For the footer component, footer.component.ts, footer.component.html, footer.component.spec.ts and footer.component.css files are created. 122
127 footer.component.ts import { Component, OnInit from selector: 'app-footer', templateurl: './footer.component.html', styleurls: ['./footer.component.css'] ) export class FooterComponent implements OnInit { constructor() { ngoninit() { footer.component.html <hr/> As we have not added any css, the footer.component.css file is empty. Also, the footer.compoent.spec.ts file is empty as the test cases are not considered here. For the footer, we will just draw a horizontal line as shown in the.html file. Let us now see how the userlogin component works. The following files for userlogin component created are userlogin.component.css, userlogin.component.html, userlogin.component.ts, and userlogin.component.spec.ts. The details of the files are as follows: userlogin.component.html <div class="form_container"> <form [formgroup]="formdata" (ngsubmit) = "onclicksubmit(formdata.value)" > <header>login</header> <label>username <span>*</span></label> <input type="text" name="uname" formcontrolname="uname"/> <div class="help">at least 6 character</div> <label>password <span>*</span></label> 123
128 <input type="password" class="fortextbox" name="passwd" formcontrolname="passwd"/> <div class="help">use upper and lowercase lettes as well</div> <button [disabled]="!formdata.valid" value="login">login</button> </form> </div> Here, we have created form with two input controls Username and Password. This is a model driven form approach and the details of the same are explained in Chapter 14 - Forms. We consider the username and password mandatory, hence the validation for the same is added in the ts. Upon clicking the submit button, the control is passed to the onclicksubmit, which is defined in the ts file. userlogin.component.ts import { Component, OnInit from '@angular/core'; import { FormGroup, FormControl, Validators from '@angular/forms'; import { Router from ) selector: 'app-userlogin', templateurl: './userlogin.component.html', styleurls: ['./userlogin.component.css'] export class UserloginComponent implements OnInit { formdata; constructor(private router: Router) { ngoninit() { this.formdata = new FormGroup({ uname: new FormControl("", Validators.compose([ Validators.required, Validators.minLength(6) ])), passwd: new FormControl("", this.passwordvalidation) ); passwordvalidation(formcontrol) { 124
129 if (formcontrol.value.length < 5) { return {"passwd" : true; onclicksubmit(data) { console.log(data.uname); if (data.uname=="systemadmin" && data.passwd=="admin123") { alert("login Successful"); this.router.navigate(['app-mainpage']) For the formcontrol and validation, the modules are imported as shown below: import { FormGroup, FormControl, Validators from '@angular/forms'; We need a router to navigate to a different component when the user and password are correct. For this, the router is imported as shown below: import { Router from '@angular/router'; In ngoninit, the validation for the form is done. We need the username to be more than six characters and the field is mandatory. The same condition applies to password too. Upon clicking submit, we can check if the username is systemadmin and the password is admin123. If yes, a dialog box appears that shows Login Successful and the router navigates to the app-mainpage, which is the selector of the mainpage component. There is css added for the form in userlogin.component.css file:.form_container{ margin : 0 auto; width:600px; form { background: white; width: 500px; 125
130 box-shadow: 0px 0px 20px rgba(0, 0, 0, 0.7); font-family: lato; position: relative; color: #333; border-radius: 10px; form header { background: #FF3838; padding: 30px 20px; color: white; font-size: 1.2em; font-weight: 600; border-radius: 10px 10px 0 0; form label { margin-left: 20px; display: inline-block; margin-top: 30px; margin-bottom: 5px; position: relative; form label span { color: #FF3838; font-size: 2em; position: absolute; left: 2.3em; top: -10px; form input { display: block; width: 50%; margin-left: 20px; padding: 5px 20px; font-size: 1em; border-radius: 3px; outline: none; border: 1px solid #ccc; 126
131 form.help { margin-left: 20px; font-size: 0.8em; color: #777; form button { position: relative; margin-top: 30px; margin-bottom: 30px; left: 50%; transform: translate(-50%, 0); font-family: inherit; color: white; background: #FF3838; outline: none; border: none; padding: 5px 15px; font-size: 1.3em; font-weight: 400; border-radius: 3px; box-shadow: 0px 0px 10px rgba(51, 51, 51, 0.4); cursor: pointer; transition: all 0.15s ease-in-out; form button:hover { background: #ff5252; The userlogin.component.spec.ts file is empty as there no test cases right now. 127
132 Let us now discuss how the mainpage component works. The files created for mainpage component are mainpage.component.ts, mainpage.component.html, mainpage.component.css, and mainpage.component.spect.ts. mainpage.component.ts import { Component, OnInit, ViewChild from '@angular/core'; import { FormGroup, FormControl, Validators from '@angular/forms'; import {Http, Response, Headers, RequestOptions from "@angular/http"; import selector: 'app-mainpage', templateurl: './mainpage.component.html', styleurls: ['./mainpage.component.css'] ) export class MainpageComponent implements OnInit { formdata; cutomerdata; constructor(private http: Http) { statectrl: FormControl; ngoninit() { this.formdata = new FormGroup({ fname: new FormControl("", Validators.compose([ Validators.required, Validators.minLength(3) ])), lname: new FormControl("", Validators.compose([ Validators.required, Validators.minLength(3) ])), address:new FormControl(""), phoneno:new FormControl("") ); 128
133 onclicksubmit(data) { document.getelementbyid("custtable").style.display=""; this.cutomerdata = []; for (var prop in data) { this.cutomerdata.push(data[prop]); console.log(this.cutomerdata); We have created a customer form with firstname, lastname, address and phone number. The validation of the same is done with the ngoninit function. Upon clicking submit, the control comes to the function onclicksubmit. Here, the table which is used to display the entered details is made visible. The customerdata is converted from json to array so that we can use the same in ngfor on the table, which is done in the.html file as shown below. mainpage.component.html <div class="form_container"> <form [formgroup]="formdata" (ngsubmit) = "onclicksubmit(formdata.value)" > <header>customer Details</header> <label>firstname <span>*</span></label> <input type="text" name="fname" formcontrolname="fname"/> <label>lastname <span>*</span></label> <input type="text" name="lname" formcontrolname="lname"/> <label>address <span></span></label> <input type="text" name="address" formcontrolname="address"/> <label>phone No <span></span></label> <input type="text" name="phoneno" formcontrolname= "phoneno"/> <button [disabled]="!formdata.valid" value="submit">submit</button> </form> </div> <br/> <div id="custtable" style="display:none;margin:0 auto;"> <table> <tr> <td>firstname</td> 129

134 <td>lastname</td> <td>address</td> <td>phone No</td> </tr> <tr><td *ngfor="let data of cutomerdata"><h5>{{data</h5></td></tr> </table> </div> Here, the first div has the customer details and the second div has the table, which will show the entered details. The display of the userlogin and the customer details is as shown below. This is the page with login form and header and footer. 130
IN4MATX 133: User Interface Software
 IN4MATX 133: User Interface Software Lecture 13: Components in Angular Professor Daniel A. Epstein TA Jamshir Goorabian TA Simion Padurean 1 Notes Important: please put your name/email/id in the readme.txt
By the end of this Angular 6 tutorial, you'll learn by building a real world example application:
 Throughout this Angular 6 tutorial, we'll learn to build a full-stack example web application with Angular 6, the latest version of Angular The most popular framework/platform for building mobile and desktop
Introduction to. Angular. Prof. Dr.-Ing. Thomas Wiedemann.
 EwA - Web based systems Introduction to Angular Prof. Dr.-Ing. Thomas Wiedemann email: wiedem@informatik.htw-dresden.de HOCHSCHULE FÜR TECHNIK UND WIRTSCHAFT DRESDEN (FH) Fachbereich Informatik/Mathematik
Lab 1 - Introduction to Angular
 Lab 1 - Introduction to Angular In this lab we will build a Hello World style Angular component. The key focus is to learn how to install all the required code and use them from the browser. We wont get
Advantages: simple, quick to get started, perfect for simple forms, don t need to know how form model objects work
 1 Forms 1.1 Introduction You cannot enter data in an application without forms. AngularJS allowed the user to create forms quickly, using the NgModel directive to bind the input element to the data in
One Framework. Angular
 One Framework. Angular Web 2.0 Marc Dangschat Introduction AngularJS (1) released in 2009 Angular (2) released October Short: ng Framework TypeScript, JavaScript, Dart MIT license
Setting up an Angular 4 MEAN Stack (Tutorial)
") Setting up an Angular 4 MEAN Stack (Tutorial) MEAN4 Stack, MongoDB, Express.js, Angular4, Node.js6.11.4 Installed https://coursetro.com/posts/code/84/setting-up-an-angular-4-mean-stack-(tutorial) Node.js
Setting up an Angular 4 MEAN Stack (Tutorial) MEAN4 Stack, MongoDB, Express.js, Angular4, Node.js6.11.4 Installed https://coursetro.com/posts/code/84/setting-up-an-angular-4-mean-stack-(tutorial) Node.js
Angular 2 Programming
 Course Overview Angular 2 is the next iteration of the AngularJS framework. It promises better performance. It uses TypeScript programming language for type safe programming. Overall you should see better
AngulAr 4 Pocket Primer
 Angular 4 Pocket Primer LICENSE, DISCLAIMER OF LIABILITY, AND LIMITED WARRANTY By purchasing or using this book and disc (the Work ), you agree that this license grants permission to use the contents contained
Decoupled Drupal with Angular
 Decoupled Drupal with Angular Agenda Introduction Short intro on Drupal What is decoupled and choosing the right architecture Introduction to Angular Setting up Angular development environment Demo Application
Chapter 1 - Development Setup of Angular
 Chapter 1 - Development Setup of Angular Objectives Key objectives of this chapter Angular Files and Dependencies Node.js Node package manager (npm) package.json Semantic version numbers Installing Angular
Angular 2: What s new? Jonas Bandi, IvoryCode GmbH
 Angular 2: What s new? Jonas Bandi, IvoryCode GmbH Once upon a time the world was peacefully creating applications with AngularJS but change was lurking in the maze of a mailing list https://groups.google.com/forum/#!search/misko$20hevery$20may$2022$202013/polymer-dev/4rsyakmbtek/uyny3900wpij
Integrating Angular with ASP.NET Core RESTful Services. Dan Wahlin
 Integrating Angular with ASP.NET Core RESTful Services Dan Wahlin Dan Wahlin https://blog.codewithdan.com @DanWahlin Get the Content: http://codewithdan.me/angular-aspnet-core Agenda The Big Picture Creating
ANGULAR2 OVERVIEW. The Big Picture. Getting Started. Modules and Components. Declarative Template Syntax. Forms
 FORMS IN ANGULAR Hello Cluj. I m Alex Lakatos, a Mozilla volunteer which helps other people volunteer. I want to talk to you today about Angular forms. What s a form you ask? A form creates a cohesive,
Upgrading to Ionic 3 APPENDIX D. Angular 4
 APPENDIX D Upgrading to Ionic 3 As this book was being printed, Ionic received another major upgrade. Unlike the quantum leap from Ionic 1 to Ionic 2, this upgrade is less dramatic. With that being said,
About the Tutorial. Audience. Prerequisites. Copyright & Disclaimer. Meteor
 About the Tutorial Meteor is a full-stack JavaScript platform for building web and mobile apps. Meteor makes it easier to create real-time apps, since it alone offers a full ecosystem to work with, instead
ANGULAR 2.X,4.X + TYPESRCIPT by Sindhu
 ANGULAR 2.X,4.X + TYPESRCIPT by Sindhu GETTING STARTED WITH TYPESCRIPT Installing TypeScript Compiling the code Building a simple demo. UNDERSTANDING CLASSES Building a class Adding properties Demo of
Angular 4 Training Course Content
 CHAPTER 1: INTRODUCTION TO ANGULAR 4 Angular 4 Training Course Content What is Angular 4? Central Features of the Angular Framework Why Angular? Scope and Goal of Angular Angular 4 vs Angular 2 vs. AngularJS
About the Tutorial. Audience. Prerequisites. Copyright & Disclaimer. Laravel
 About the Tutorial Laravel is a powerful MVC PHP framework, designed for developers who need a simple and elegant toolkit to create full-featured web applications. Laravel was created by Taylor Otwell.
This tutorial has been prepared for beginners to help them understand the simple but effective SEO characteristics.
 About the Tutorial Search Engine Optimization (SEO) is the activity of optimizing web pages or whole sites in order to make them search engine friendly, thus getting higher positions in search results.
Hands on Angular Framework
 FACULTY OF AUTOMATION AND COMPUTER SCIENCE COMPUTER SCIENCE DEPARTMENT Hands on Angular Framework Ioan Salomie Tudor Cioara Ionut Anghel Marcel Antal Teodor Petrican Claudia Daniela Pop Dorin Moldovan
"Charting the Course... Comprehensive Angular. Course Summary
 Description Course Summary Angular is a powerful client-side JavaScript framework from Google that supports simple, maintainable, responsive, and modular applications. It uses modern web platform capabilities
About the Tutorial. Audience. Prerequisites. Copyright & Disclaimer. WordPress
 About the Tutorial WordPress is an open source Content Management System (CMS), which allows the users to build dynamic websites and blog. WordPress is the most popular blogging system on the web and allows
Sample Copy. Not For Distribution.
 Angular 2 Interview Questions and Answers With Typescript and Angular 4 i Publishing-in-support-of, EDUCREATION PUBLISHING RZ 94, Sector - 6, Dwarka, New Delhi - 110075 Shubham Vihar, Mangla, Bilaspur,
Front End. Presentation Layer. UI (User Interface) User <==> Data access layer
 User <==> Data access layer") Angular 2 S1ngS1ng Front End UI (User Interface) User Data access layer Presentation Layer Architecture Conventional VS SPA Angular 1 Framework! Framework! Framework! MVVM (MV*) Modulization Two-way
Angular 2 S1ngS1ng Front End UI (User Interface) User Data access layer Presentation Layer Architecture Conventional VS SPA Angular 1 Framework! Framework! Framework! MVVM (MV*) Modulization Two-way
Chapter 1 - Model Driven Forms
 Chapter 1 - Model Driven Forms Objectives This chapter includes the following model driven forms topics: Setup FormGroup initialization FormControl object Validation SubForms 1.1 Model Driven Forms Overview
Learn to Build Awesome Apps with Angular 2
 Learn to Build Awesome Apps with Angular 2 Strong grasp on how to construct a single feature in Angular 2 Agenda The Demo Application The Angular 2 Big Picture The Angular CLI Components Templates Services
Quick.JS Documentation
 Quick.JS Documentation Release v0.6.1-beta Michael Krause Jul 22, 2017 Contents 1 Installing and Setting Up 1 1.1 Installation................................................ 1 1.2 Setup...................................................
a Very Short Introduction to AngularJS
 a Very Short Introduction to AngularJS Lecture 11 CGS 3066 Fall 2016 November 8, 2016 Frameworks Advanced JavaScript programming (especially the complex handling of browser differences), can often be very
About the Tutorial. Audience. Prerequisites. Copyright & Disclaimer ASP.NET WP
 i About the Tutorial This tutorial will give you a fair idea on how to get started with ASP.NET Web pages. Microsoft ASP.NET Web Pages is a free Web development technology that is designed to deliver the
Learn to Build Awesome Apps with Angular 2
 Learn to Build Awesome Apps with Angular 2 Strong grasp on how to construct and compose features in Angular 2 Agenda Review Challenge Component Driven Architecture Template Driven Forms Server Communication
ANGULARJS INTERVIEW QUESTIONS
 ANGULARJS INTERVIEW QUESTIONS http://www.tutorialspoint.com/angularjs/angularjs_interview_questions.htm Copyright tutorialspoint.com Dear readers, these AngularJS Interview Questions have been designed
This tutorial discusses the basics of PouchDB along with relevant examples for easy understanding.
 About this Tutorial PouchDBis an open source in-browser database API written in JavaScript. It ismodelled after CouchDB a NoSQL database that powers npm. Using this API, we can build applications that
Advanced Angular & Angular 6 Preview. Bibhas Bhattacharya
 Advanced Angular & Angular 6 Preview Bibhas Bhattacharya Agenda Lazy loading modules Using Bootstrap with Angular Publish/subscribe with the RxJS Subject API What's new in Angular 6 Lazy Loading Modules
About the Tutorial. Audience. Prerequisites. Copyright & Disclaimer. Joomla
 About the Tutorial Joomla is an open source Content Management System (CMS), which is used to build websites and online applications. It is free and extendable which is separated into frontend templates
Code Editor. The Code Editor is made up of the following areas: Toolbar. Editable Area Output Panel Status Bar Outline. Toolbar
 Code Editor Wakanda s Code Editor is a powerful editor where you can write your JavaScript code for events and functions in datastore classes, attributes, Pages, widgets, and much more. Besides JavaScript,
This tutorial has been prepared for beginners to help them understand the basic functionalities of Gulp.
 About the Tutorial Gulp is a task runner that uses Node.js as a platform. It purely uses the JavaScript code and helps to run front-end tasks and large-scale web applications. Gulp builds system automated
Cross-Platform Mobile-Entwicklung mit dem Ionic Framework
 Cross-Platform Mobile-Entwicklung mit dem Ionic Framework Robin Nunkesser 6. Februar 2018 Grundlagen Hintergrund 2013 von Drifty entwickelt Setzt auf Cordova und AngularJS auf Versionssprung von ionic
Angular 4 Syllabus. Module 1: Introduction. Module 2: AngularJS to Angular 4. Module 3: Introduction to Typescript
 Angular 4 Syllabus Module 1: Introduction Course Objectives Course Outline What is Angular Why use Angular Module 2: AngularJS to Angular 4 What s Changed Semantic Versioning Module 3: Introduction to
Comprehensive AngularJS Programming (5 Days)
") www.peaklearningllc.com S103 Comprehensive AngularJS Programming (5 Days) The AngularJS framework augments applications with the "model-view-controller" pattern which makes applications easier to develop
www.peaklearningllc.com S103 Comprehensive AngularJS Programming (5 Days) The AngularJS framework augments applications with the "model-view-controller" pattern which makes applications easier to develop
This tutorial provides a basic understanding of how to generate professional reports using Pentaho Report Designer.
 About the Tutorial Pentaho Reporting is a suite (collection of tools) for creating relational and analytical reports. It can be used to transform data into meaningful information. Pentaho allows generating
"Charting the Course... Comprehensive Angular 5. Course Summary
 Course Summary Description Comprehensive Angular teaches students the skills and best practices they need to design, build, test, and deploy applications that provide rich end-user experiences similar
About the Tutorial. Audience. Prerequisites. Copyright & Disclaimer. RichFaces
 1 About the Tutorial RichFaces is a component library developed by JBoss, which provides in-built AJAX support to JSF application. It reduces all the redundant codes that the developer has to write to
As we design and build out our HTML pages, there are some basics that we may follow for each page, site, and application.
 Extra notes - Client-side Design and Development Dr Nick Hayward HTML - Basics A brief introduction to some of the basics of HTML. Contents Intro element add some metadata define a base address
In this tutorial, we are going to learn how to use the various features available in Flexbox.
 About the Tutorial Flexbox (flexible box) is a layout mode of CSS3. Using this mode, you can easily create layouts for complex applications and web pages. Flexbox layout gives complete control over the
Extending VMware vcloud Director User Interface Using Portal Extensibility Ticketing Example
 VMware vcloud Architecture Toolkit for Service Providers Extending VMware vcloud Director User Interface Using Portal Extensibility Ticketing Example Version 2.9 April 2018 Kelby Valenti 2018 VMware, Inc.
This tutorial is designed for all Java enthusiasts who want to learn document type detection and content extraction using Apache Tika.
 About the Tutorial This tutorial provides a basic understanding of Apache Tika library, the file formats it supports, as well as content and metadata extraction using Apache Tika. Audience This tutorial
Understanding this structure is pretty straightforward, but nonetheless crucial to working with HTML, CSS, and JavaScript.
 Extra notes - Markup Languages Dr Nick Hayward HTML - DOM Intro A brief introduction to HTML's document object model, or DOM. Contents Intro What is DOM? Some useful elements DOM basics - an example References
Study Guide 2 - HTML and CSS - Chap. 6,8,10,11,12 Name - Alexia Bernardo
 Study Guide 2 - HTML and CSS - Chap. 6,8,10,11,12 Name - Alexia Bernardo Note: We skipped Study Guide 1. If you d like to review it, I place a copy here: https:// people.rit.edu/~nbbigm/studyguides/sg-1.docx
Exercise 1. Bluemix and the Cloud Foundry command-line interface (CLI)
") V10.1 Student Exercises EXempty Exercise 1. Bluemix and the Cloud Foundry command-line interface (CLI) What this exercise is about In this exercise, you sign on to Bluemix and create an application. You
V10.1 Student Exercises EXempty Exercise 1. Bluemix and the Cloud Foundry command-line interface (CLI) What this exercise is about In this exercise, you sign on to Bluemix and create an application. You
This tutorial is designed for software programmers who would like to learn the basics of ASP.NET Core from scratch.
 About the Tutorial is the new web framework from Microsoft. is the framework you want to use for web development with.net. At the end this tutorial, you will have everything you need to start using and
PHP WITH ANGULAR CURRICULUM. What you will Be Able to Achieve During This Course
 PHP WITH ANGULAR CURRICULUM What you will Be Able to Achieve During This Course This course will enable you to build real-world, dynamic web sites. If you've built websites using plain HTML, you realize
Getting Started with ReactJS
 Getting Started with ReactJS By Juned Laliwala About this ReactJS e-book. Basic Understanding of ReactJS Concept of JSX Use of Refs and Keys Practical Demonstrations Animation in ReactJS @2016 Attune World
This tutorial is designed for those who would like to understand the basics of i-mode in simple and easy steps.
 About the Tutorial NTT DoCoMo's i-mode is a mobile internet service popular in Japan. i-mode was invented by a team led by Mari Matsunaga in February 1999 at NTT DoCoMo. This tutorial explains the basic
Microsoft Excel is a spreadsheet tool capable of performing calculations, analyzing data and integrating information from different programs.
 About the Tutorial Microsoft Excel is a commercial spreadsheet application, written and distributed by Microsoft for Microsoft Windows and Mac OS X. At the time of writing this tutorial the Microsoft excel
Before proceeding with this tutorial, readers should have a basic understanding of HTML, CSS, and JavaScript.
 About the Tutorial VueJS is a progressive JavaScript framework used to develop interactive web interfaces. Focus is more on the view part, which is the front end. It is very easy to integrate with other
About the Tutorial. Audience. Prerequisites. Copyright & Disclaimer
 About the Tutorial PyCharm is the most popular IDE for Python, and includes great features such as excellent code completion and inspection with advanced debugger and support for web programming and various
About the Tutorial. Audience. Prerequisites. Copyright & Disclaimer. Drupal
 About the Tutorial is a free and open source Content Management System (CMS) that allows organizing, managing and publishing your content. This reliable and secure CMS is built on PHP based environment
Parrot is a virtual machine designed to efficiently compile and execute bytecode for interpreted languages.
 Aboutthe Tutorial Parrot is a virtual machine designed to efficiently compile and execute bytecode for interpreted languages. Parrot is going to change the way you see PERL! Audience This tutorial has
Client Side JavaScript and AJAX
 Client Side JavaScript and AJAX Client side javascript is JavaScript that runs in the browsers of people using your site. So far all the JavaScript code we've written runs on our node.js server. This is
django-baton Documentation
 django-baton Documentation Release 1.0.7 abidibo Nov 13, 2017 Contents 1 Features 3 2 Getting started 5 2.1 Installation................................................ 5 2.2 Configuration...............................................
About the Tutorial. Audience. Prerequisites. Copyright & Disclaimer. Haskell Programming
 About the Tutorial Haskell is a widely used purely functional language. Functional programming is based on mathematical functions. Besides Haskell, some of the other popular languages that follow Functional
AngularJS Introduction
 AngularJS Introduction Mendel Rosenblum AngularJS JavaScript framework for writing web applications Handles: DOM manipulation, input validation, server communication, URL management, etc. Considered opinionated
This tutorial will show you, how to use RSpec to test your code when building applications with Ruby.
 About the Tutorial RSpec is a unit test framework for the Ruby programming language. RSpec is different than traditional xunit frameworks like JUnit because RSpec is a Behavior driven development tool.
AngularJS AN INTRODUCTION. Introduction to the AngularJS framework
 AngularJS AN INTRODUCTION Introduction to the AngularJS framework AngularJS Javascript framework for writing frontend web apps DOM manipulation, input validation, server communication, URL management,
CREATING A WEBSITE USING CSS. Mrs. Procopio CTEC6 MYP1
 CREATING A WEBSITE USING CSS Mrs. Procopio CTEC6 MYP1 HTML VS. CSS HTML Hypertext Markup Language CSS Cascading Style Sheet HTML VS. CSS HTML is used to define the structure and content of a webpage. CSS
Mobile App Development
 Mobile App Development NativeScript e Angular 2+ filippo Filippo Matteo Riggio CTO @ Sviluppatore Full-Stack e Mobile Scenario Scenario Nativo WebView-ed Soluzioni cross - from web to native Swift - Objective
Programmazione Web a.a. 2017/2018 HTML5
 Programmazione Web a.a. 2017/2018 HTML5 PhD Ing.Antonino Raucea antonino.raucea@dieei.unict.it 1 Introduzione HTML HTML is the standard markup language for creating Web pages. HTML stands for Hyper Text
This tutorial explains the key concepts of Web Dynpro with relevant screenshots for better understanding.
 About the Tutorial SAP Web Dynpro is a standard SAP UI technology to develop web applications using graphical tools and development environment integrated with ABAP workbench. The use of graphical tools
Front-End UI: Bootstrap
 Responsive Web Design BootStrap Front-End UI: Bootstrap Responsive Design and Grid System Imran Ihsan Assistant Professor, Department of Computer Science Air University, Islamabad, Pakistan www.imranihsan.com
Data Visualization (CIS/DSC 468)
") Data Visualization (CIS/DSC 468) Web Programming Dr. David Koop Definition of Visualization Computer-based visualization systems provide visual representations of datasets designed to help people carry
Data Visualization (CIS/DSC 468) Web Programming Dr. David Koop Definition of Visualization Computer-based visualization systems provide visual representations of datasets designed to help people carry
Make a Website. A complex guide to building a website through continuing the fundamentals of HTML & CSS. Created by Michael Parekh 1
 Make a Website A complex guide to building a website through continuing the fundamentals of HTML & CSS. Created by Michael Parekh 1 Overview Course outcome: You'll build four simple websites using web
IN4MATX 133: User Interface Software
 IN4MATX 133: User Interface Software Lecture 7: Package Management & TypeScript Professor Daniel A. Epstein TA Jamshir Goorabian TA Simion Padurean 1 A1 Make sure you Push as well as Committing! Need to
PHP + ANGULAR4 CURRICULUM 6 WEEKS
 PHP + ANGULAR4 CURRICULUM 6 WEEKS Hands-On Training In this course, you develop PHP scripts to perform a variety to takes, culminating in the development of a full database-driven Web page. Exercises include:
About the Tutorial. Audience. Prerequisites. Copyright & Disclaimer
 i About the Tutorial Eclipse is an integrated development environment (IDE) for Java and other programming languages like C, C++, PHP, and Ruby etc. Development environment provided by Eclipse includes
FRONT END WEB. {< Course Details >}
 FRONT END WEB {< Course Details >} centers@acadgild.com www.acadgild.com 90360 10796 css { } HTML JS { ; } centers@acadgild.com www.acadgild.com 90360 10796 Brief About the Course Our Front end development
About the Tutorial. Audience. Prerequisites. Disclaimer & Copyright DAX
 About the Tutorial DAX (Data Analysis Expressions) is a formula language that helps you create new information from the data that already exists in your Data Model. DAX formulas enable you to perform data
Static Webpage Development
 Dear Student, Based upon your enquiry we are pleased to send you the course curriculum for PHP Given below is the brief description for the course you are looking for: - Static Webpage Development Introduction
The Structure of the Web. Jim and Matthew
 The Structure of the Web Jim and Matthew Workshop Structure 1. 2. 3. 4. 5. 6. 7. What is a browser? HTML CSS Javascript LUNCH Clients and Servers (creating a live website) Build your Own Website Workshop
Dart is an open-source general-purpose programming language. It is originally developed by Google and later approved as a standard by ECMA.
 About the Tutorial Dart is an open-source general-purpose programming language. It is originally developed by Google and later approved as a standard by ECMA. Dart is a new programming language meant for
Introduction to AngularJS
 CHAPTER 1 Introduction to AngularJS Google s AngularJS is an all-inclusive JavaScript model-view-controller (MVC) framework that makes it very easy to quickly build applications that run well on any desktop
International Research Journal of Engineering and Technology (IRJET) e-issn: Volume: 05 Issue: 05 May p-issn:
 e-issn: Volume: 05 Issue: 05 May p-issn:") IONIC FRAMEWORK Priyanka Chaudhary Student, Department of computer science, ABESIT, Ghaziabad ---------------------------------------------------------------------***---------------------------------------------------------------------
IONIC FRAMEWORK Priyanka Chaudhary Student, Department of computer science, ABESIT, Ghaziabad ---------------------------------------------------------------------***---------------------------------------------------------------------
Dreamweaver Basics Workshop
 Dreamweaver Basics Workshop Robert Rector idesign Lab - Fall 2013 What is Dreamweaver? o Dreamweaver is a web development tool o Dreamweaver is an HTML and CSS editor o Dreamweaver features a WYSIWIG (What
AGENDA. EMBEDDING FONTS [ Font Files & CSS font-family ] :: Online Font Converter :: ADD font-family css code to style.css
![AGENDA. EMBEDDING FONTS [ Font Files & CSS font-family ] :: Online Font Converter :: ADD font-family css code to style.css](/thumbs/83/88078174.jpg "AGENDA. EMBEDDING FONTS [ Font Files & CSS font-family ] :: Online Font Converter :: ADD font-family css code to style.css") CLASS :: 12 05.04 2018 3 Hours AGENDA CREATE A WORKS PAGE [ HTML ] :: Open index.html :: Save As works.html :: Edit works.html to modify header, 3 divisions for works, then add your content :: Edit index.html
CLASS :: 12 05.04 2018 3 Hours AGENDA CREATE A WORKS PAGE [ HTML ] :: Open index.html :: Save As works.html :: Edit works.html to modify header, 3 divisions for works, then add your content :: Edit index.html
This is a brief tutorial that explains how to make use of Sqoop in Hadoop ecosystem.
 About the Tutorial Sqoop is a tool designed to transfer data between Hadoop and relational database servers. It is used to import data from relational databases such as MySQL, Oracle to Hadoop HDFS, and
Introduction to TypeScript
 AngularJS and TypeScript SPA Development, http://www.iproduct.org/ Introduction to TypeScript e-mail: tiliev@iproduct.org web: http://www.iproduct.org Oracle, Java and JavaScript are trademarks or registered
This tutorial explains how you can use Gradle as a build automation tool for Java as well as Groovy projects.
 About the Tutorial Gradle is an open source, advanced general purpose build management system. It is built on ANT, Maven, and lvy repositories. It supports Groovy based Domain Specific Language (DSL) over
ANGULARJS - MOCK TEST ANGULARJS MOCK TEST II
 http://www.tutorialspoint.com ANGULARJS - MOCK TEST Copyright tutorialspoint.com This section presents you various set of Mock Tests related to AngularJS Framework. You can download these sample mock tests
"Charting the Course... Comprehensive Angular 6 Course Summary
 Course Summary Description Build applications with the user experience of a desktop application and the ease of deployment of a web application using Angular. Start from scratch by learning the JavaScript
Angular 2 and TypeScript Web Application Development
 Angular 2 and TypeScript Web Application Development Course code: IJ -19 Course domain: Software Engineering Number of modules: 1 Duration of the course: 40 study 1 hours Sofia, 2016 Copyright 2003-2016
Objective % Select and utilize tools to design and develop websites.
 Objective 207.02 8% Select and utilize tools to design and develop websites. Hypertext Markup Language (HTML) Basic framework for all web design. Written using tags that a web browser uses to interpret
Squiz Matrix User Manual Library
 Squiz Matrix User Manual Library The Squiz Matrix User Manual Library is a prime resource for all up-to-date manuals about Squiz's flagship CMS The EES Installation Guide Show Version Info Off This guide
BEAWebLogic. Portal. Tutorials Getting Started with WebLogic Portal
 BEAWebLogic Portal Tutorials Getting Started with WebLogic Portal Version 10.2 February 2008 Contents 1. Introduction Introduction............................................................ 1-1 2. Setting
AngularJS Fundamentals
 AngularJS Fundamentals by Jeremy Zerr Blog: http://www.jeremyzerr.com LinkedIn: http://www.linkedin.com/in/jrzerr Twitter: http://www.twitter.com/jrzerr What is AngularJS Open Source Javascript MVC/MVVM
Scalable Vector Graphics commonly known as SVG is a XML based format to draw vector images. It is used to draw twodimentional vector images.
 About the Tutorial Scalable Vector Graphics commonly known as SVG is a XML based format to draw vector images. It is used to draw twodimentional vector images. This tutorial will teach you basics of SVG.
P a g e 1. Danish Technological Institute. Scripting and Web Languages Online Course k Scripting and Web Languages
 P a g e 1 Online Course k72853 Scripting and Web Languages P a g e 2 Title Estimated Duration (hrs) JsRender Fundamentals 2 Advanced JsRender Features 3 JavaScript SPA: Getting Started with SPA in Visual
AGENDA. HTML CODING YOUR HOMEPAGE [ Part IV ] :: NAVIGATION <nav> :: CSS CODING FOR HOMEPAGE [ <nav> & child elements ] CLASS :: 13.
![AGENDA. HTML CODING YOUR HOMEPAGE [ Part IV ] :: NAVIGATION <nav> :: CSS CODING FOR HOMEPAGE [ <nav> & child elements ] CLASS :: 13.](/thumbs/89/100176654.jpg "AGENDA. HTML CODING YOUR HOMEPAGE [ Part IV ] :: NAVIGATION <nav> :: CSS CODING FOR HOMEPAGE [ <nav> & child elements ] CLASS :: 13.") :: DIGITAL IMAGING FUNDAMENTALS :: CLASS NOTES CLASS :: 13 04.26 2017 3 Hours AGENDA HTML CODING YOUR HOMEPAGE [ Part IV ] :: NAVIGATION home works
:: DIGITAL IMAGING FUNDAMENTALS :: CLASS NOTES CLASS :: 13 04.26 2017 3 Hours AGENDA HTML CODING YOUR HOMEPAGE [ Part IV ] :: NAVIGATION home works
Angular from the Beginning
 from the Beginning EMEA PUG Challenge, Prague Introduction Robert Prediger 25 years experience in PROGRESS 17 years experience in web development 8 years experience in Node.js robert.prediger@web4biz.de
welcome to BOILERCAMP HOW TO WEB DEV
 welcome to BOILERCAMP HOW TO WEB DEV Introduction / Project Overview The Plan Personal Website/Blog Schedule Introduction / Project Overview HTML / CSS Client-side JavaScript Lunch Node.js / Express.js
Ionic Tutorial. For Cross Platform Mobile Software Development
 About Ionic Tutorial For Cross Platform Mobile Software Development This Tutorial is for setting up a basic hybrid mobile application using the Ionic framework. The setup will be shown for both Mac and