Simple Print.
|
|
|
- Marion Burns
- 5 years ago
- Views:
Transcription
1 SharePoint Knowledge Base Solution Accelerator for SharePoint 2010 Release 1.5 (SA05) Overview System Requirements Installation Configuration Using KB Accelerator Licensing and Activation System Requirements System Requirements for SharePoint Knowledge Base Solution Accelerator R1.5 or Newer for SharePoint 2010 Operating System - Windows Server 2008 Server - Microsoft Windows SharePoint Foundation 2010 or Microsoft Office SharePoint Server 2010 Browser - Internet Explorer 8 or newer Because KB Accelerator is an application that is built on top of SharePoint, many questions related to system requirements are actually SharePoint questions. For information about SharePoint 2010, read the following Microsoft links. SharePoint Server 2010 SharePoint Foundation 2010 System Requirements for SharePoint Hardware and Software Requirements for SharePoint Server SharePoint Server 2010 Library - Hardware and Software Requirements for SharePoint Foundation SharePoint Foundation 2010 Library Installation About the Setup Program Installing the Knowledge Base Solution Accelerator Manually Installing or Uninstalling the Knowledge Base Solution Accelerator Manually Activating the Product for a Site Collection Creating the Knowledge Base Administration Site (Bamboo KB Admin Site Template) Choosing a Knowledge Base Client Site Template Creating the Knowledge Base Client Site (Bamboo KB Client Site Template) Upgrading the Knowledge Base Solution Accelerator Uninstalling the Knowledge Base Solution Accelerator Locating the Error Log File(s) Installed Files and Code Access Security About the Setup Program Before you begin the installation, make sure that you have access to the server and that your account has the appropriate administrative privileges to install applications. You must be a farm administrator in order to run the install. The Setup program provides links to the various installation components for the SharePoint Knowledge Base Solution Accelerator. These components include the Bamboo Web License Manager as well as the Quick Start Guide. To access the Setup program: 1. Unzip the contents of the product download. Be sure that all files and subfolders are selected to be extracted.
2 2. The folder hierarchy contains a file at the root of the extraction folder named Setup.bat. It also contains the following folders: \SA05.KBAccelerator.wsp: Contains the solution deployment file for manual installation of the SharePoint Knowledge Base Solution Accelerator. The file is located under the \cab subfolder. \HW55.BambooNavigators.wsp: Contains the solution deployment file for manual installation of the SharePoint Navigators Web Part. The file is located under the \cab subfolder. \Bamboo.Core.wsp: Contains the solution deployment file for manual installation of the Bambo Core. The file is located under the \cab subfolder. \Bamboo.Web.Licensing.wsp: Contains the solution deployment file for manual installation of the Bambo Web License Manager. The file is located under the \cab subfolder. The Bamboo Web License Manager is not required for 30-day trials. \misc: Contains the site template files for the KB Admin and KB Client sites. The site templates are automatically installed when you install the SharePoint Knowledge Base Solution Accelerator component. However, you can manually upload these template files to the Site Template Gallery through STSADM by double-clicking the Bamboo.AddSiteTemplates.bat file included in the \misc folder. Note: If you install these templates from the Setup screen, the templates will not show in the Site Template Gallery even though you can still create sites based on them. These templates are installed using STSADM and, if needed, must be removed using STSADM. If you upload these templates manually, then you can manage them from the Site Template Gallery just as you would any other site template. \docs: Contains an HTML-based version of the Quick Start Guide. \res: Contains resource files for the Setup program. 3. Find the Setup.bat file located at the root of the extraction folder. 4. Double-click this file to launch the Setup page. 5. The Setup page contains links to the product components under the Components header in the left margin. Click a link to view a description of the component in the right text area of the page. Click the Install button to install the component. Installing SharePoint Knowledge Base Solution Accelerator Click the links below for more information: Recommendations for a Successful Installation Installing KB Accelerator Recommendations for a Successful Installation Follow these guidelines for a successful installation: 1. Make sure that your system meets the requirements outlined System Requirements. 2. The person performing the installation needs the required permissions for the installation. This person should be a: farm administrator local administrator site collection administrator 3. Stop the World Wide Web Publishing Service (W3SVC) by navigating to Start > Administrative Tools > Services. Read KB.12464: Installation Best Practices for more information. Installing KB Accelerator To install the SharePoint Knowledge Base Solution Accelerator from the Setup program: 1. Stop the World Wide Web Publishing Service (W3SVC) before installing KB Accelerator. From the Start menu, click Administrative Tools > Services. Right-click on World Wide Web Publishing Service and select Stop. 2. On the SharePoint server, download the self-extracting.exe from the Bamboo storefront and save it to a local folder. 3. Double-click the SA05.R*.*.SP2010.SL.EXE file. The contents of the.exe will be extracted to the same folder as the.exe file. 4. Double-click the Setup.bat file to launch the Setup screen. From the Setup screen, select the SharePoint Knowledge Base Solution Accelerator


3 component. Click Install. 5. Click Next to begin the installation. 6. The setup wizard performs a system check prior to the installation. All the system checks must be completed successfully in order to proceed with the installation. After the checks have completed, click Next. If the system check displays an error, click the link for more information and to resolve the error. Then click Previous to return to the previous screen in the installation wizard. Click Next to run the system check again. 7. Read the end-user software license agreement and accept the terms, then click Next.


4 8. Select the Web application(s) where you want to install KB Accelerator. Click Next. The Automatically activate features option is selected by default. To manually activate the features, uncheck the box and read Manually Activating the SharePoint Knowledge Base Solution Accelerator for a Site Collection. 9. The setup wizard installs the product components, including the three Knowledge Base site templates. After the components are installed, click Next. Review the summary to make sure that the installation was successful. Click Close.

. From the Start menu, click Administrative Tools > Services.")

5 10. Reset Internet Information Services (IIS). To reset IIS using IIS Manager: Go to Start > Administrative Tools > IIS Manager. In the Connections pane on the left, expand and select the node for the server you want to restart. In the Actions pane on the right, select Restart. To reset IIS using command-line utility (must be a member of the Administrators group on the local computer): Go to Start and click Run. In the Open box, type cmd and click OK. At the command prompt, type iisreset /noforce computername and press Enter. 11. Restart the World Wide Web Publishing Service (W3SVC). From the Start menu, click Administrative Tools > Services. Right-click on World Wide Web Publishing Service and select Start. 12. SharePoint Knowledge Base Solution Accelerator has installed successfully. Installing the Knowledge Base Site Templates The Knowledge Base Site Templates are installed with the other KB Accelerator components through the Setup program process described in the section above. If you want to install the site templates manually using STSADM: 1. Make sure that you are a member of the Administrators group on the local computer. 2. Open the product download folder and double-click the misc folder. 3. Double-click the Bamboo.AddSiteTemplates.bat file. 4. A command prompt window automatically displays and runs the upload of the site templates using STSADM.

6 Installing the Bamboo Web License Manager For information on installing the Bamboo Web License Manager and activating the license, read Licensing and Activation. Troubleshooting Installation Use the information in the sections below to help you troubleshoot installation problems. For information about deploying a solution in SharePoint, read these Microsoft articles: Deploy Solution Packages (SharePoint Foundation 2010) Deploy Solution Packages (SharePoint Server 2010) Locating the Error Log File(s) If you have problems installing KB Accelerator, refer to the error logs located on the SharePoint server in <drive>:\windows\temp\bamboosolutions\bsc_bamboo_%processid.log World Wide Web Publishing Service If you are having problems installing KB Accelerator, make sure you have stopped the World Wide Web Publishing Service before installing the product and restarted it after installing KB Accelerator. To stop or restart the World Wide Web Publishing Service: From the Start menu, click Administrative Tools > Services. Right-click on World Wide Web Publishing Service and select Stop or Start. For more information about the World Wide Web Publishing Service, read this Microsoft article on the IIS World Wide Web Publishing Service. Restarting IIS Make sure you restart Internet Information Services (IIS) after you install KB Accelerator. To reset IIS using IIS Manager: Go to Start > Administrative Tools > IIS Manager. In the Connections pane on the left, expand and select the node for the server you want to restart. In the Actions pane on the right, select Restart. To reset IIS using command-line utility (must be a member of the Administrators group on the local computer): Go to Start and click Run. In the Open box, type cmd and click OK. At the command prompt, type iisreset /noforce computername and press Enter. For more information about IIS, read the following Microsoft article on Internet Information Services (IIS) 7.0. Contacting Support If you still have problems with the installation, contact Support. Manually Installing or Uninstalling the Knowledge Base Solution Accelerator Components Use the following stsadm.exe command lines to manually install and uninstall the SharePoint Knowledge Base Solution Accelerator components from the Command Prompt. Stsadm.exe is located in: <drive>:\program Files\Common Files\Microsoft Shared\web server extensions\12\bin\

7 Manually Installing the SharePoint Knowledge Base Solution Accelerator Components 1. Add the solution to the SharePoint Solution Store: stsadm.exe -o addsolution -filename <drive>:\sa05.rx.x.sp2010.sl\sa05.kbaccelerator.wsp\cab\bamboo.kbaccelerator.wsp NOTE: The -filename path is the path where the product download ZIP file exists on the SharePoint server. 2. Deploy the solution for a Web application: Stsadm.exe -o deploysolution -name <drive>:\sa05.rx.x.sp2010.sl\sa05.kbaccelerator.wsp\cab\bamboo.kbaccelerator.wsp -immediate -url [WebApplicationUri] -allowgacdeployment -allowcaspolicies 3. Execute the job: stsadm.exe -o execadmsvcjobs NOTE: If you have multiple Web front ends, then you must run this command on each front-end server. 4. Repeat these steps to install the HW55.BambooNavigators.wsp component. Manually Uninstalling the SharePoint Knowledge Base Solution Accelerator Components 1. Retract the solution from a Web application: stsadm.exe -o retractsolution -name SA05.Rx.x.SP2010.SL\SA05.KBAccelerator.wsp\cab\Bamboo.KBAccelerator.wsp -immediate -url [WebApplicationUri] 2. Execute the job: stsadm.exe -o execadmsvcjobs NOTE: If you have multiple Web front ends, then you must run this command on each front-end server. 3. Delete the solution from the SharePoint Solution Store, only after the solution is retracted from all Web applications and the retract job is executed on each Web front end: stsadm.exe -o deletesolution -name Bamboo.KBAccelerator.wsp 4. Repeat these steps to uninstall the HW55.BambooNavigators.wsp component. Manually Activating the Knowledge Base Solution Accelerator Components By default, necessary activations are handled automatically at the site collection level when KB Accelerator is installed. If you opt out of the automatic activation, or if you need to activate a feature manually for any reason, follow the steps below. You must be a Site Collection Administrator to perform these steps. To manually activate (or deactivate) the features: 1. Install the KB Accelerator components on the SharePoint server. 2. From the top-level site, navigate to Site Actions > Site Settings > Site Collection Administration > Site Collection Features.


8 3. Click Activate (or Deactivate) to activate (or deactivate) the following features for the entire site collection: Bamboo KB Admin Site Template Bamboo KB Client Site Template - Meeting Workspace Bamboo KB Client Site Template - Team Site Bamboo Knowledge Base Accelerator Bamboo Navigators Web Parts Creating the Knowledge Base Administration Site (Bamboo KB Admin Site Template) You must have the appropriate permissions to create sites within your SharePoint site collection in order to create the Bamboo KB Admin site. 1. From the top-level site, select Site Actions > Site Settings > Site Administration > Sites and Workspaces, or select Site Actions > New Site.

9 2. Click Create. 3. Under Blank & Custom, select the Bamboo KB Admin Site Template. 4. Give the site a Title and a Web Site Address. 5. Click Create and wait while the KB Admin site is created.

10 Configuring the Bamboo KB Admin Site Template The KB Admin site provides the following features: Use the KB Picture Library to upload images, if necessary. Answer pending questions in Pending Questions. In Article Control, create new articles and manage existing ones. Use Category Control to create and manage categories for your KB articles. Approve and manage comments on articles with Comment Control. For more information about the lists, libraries and other content contained in the KB Admin site template, read About the KB Accelerator Sites, Lists and Web Parts. Read Configuring the Bamboo KB Admin Web Parts to configure the KB Admin site. Choosing a Bamboo KB Client Site Template There are two KB Client site templates to choose from: KB Client Site Template - Team Site: a Bamboo KB Client site based on a standard SharePoint team site KB Client Site Template - Meeting Workspace: a Bamboo KB Client site based on a standard SharePoint meeting workspace There are only minor differences in the configuration of the two site templates. Choose the one that is best for your SharePoint environment. The Bamboo KB Client Site Template - Team Site displays the navigation on the left in the Quick Launch bar. The Bamboo KB Client Site Template - Meeting Workspace displays the navigation using tabs via SharePoint Navigators on the top of the page.


11 Modifying the Site Navigation KB Client Site Template - Team Site: You can change the order in which the links are displayed as well as the names of the links for the Home, Search, Ask a Question and Tag Cloud links. It is recommended that you do not change the order of the Home link. Do not change the site paths. To edit the links, go to Site Actions > Site Settings > Look and Feel > Quick Launch. Click next to the item you want to edit in order to make your changes. KB Client Site Template - Meeting Workspace: Use the SharePoint Navigators List to change the order of the tabs. Access the list by selecting Site Actions > View All Site Content > Bamboo Navigators. You can change the names of the tabs. Do not change the site paths of the tabs. See the SharePoint Navigators online documentation for more information.

12 Creating the Knowledge Base Client Site (Bamboo KB Client Site Template) You must have appropriate permissions to create sites within your SharePoint site collection in order to create the Bamboo KB Client site. 1. From the top-level site, click Site Actions > Settings 7 Site Administration > Sites and Workspaces, or select Site Actions > New Site. 2. Click Create.


13 3. Under Blank & Custom, choose the KB Client site template: Bamboo KB Client Site Template - Meeting Workspace Bamboo KB Client Site Template - Team Site Read Choosing a Bamboo KB Client Site Template to determine which template to use. 4. Give the site a Title and a Web Site Address. 5. Click Create and wait while the KB Client site is created. Bamboo KB Client Site Template - Team Site
14 Bamboo KB Client Site Template - Meeting Workspace Configuring the Bamboo KB Client Site Template The KB Client site provides the following features: Use the Search option to search KB articles. Select Ask a Question to submit a new question. Use the Tag Cloud to assign tags to articles. For more information about the lists, libraries and other content contained in the KB Client site template, read About the KB Accelerator Sites, Lists and Web Parts. See Configuring the Bamboo KB Client Web Parts to configure the KB Client site. Upgrading the Knowledge Base Solution Accelerator KB Accelerator can be migrated from SharePoint 2007 to SharePoint Please see KB.12630: How to Migrate Bamboo Products From SharePoint 2007 to SharePoint 2010 for more information. Uninstalling the SharePoint Knowledge Base Solution Accelerator components To uninstall the SharePoint Knowledge Base Solution Accelerator components: 1. Stop the World Wide Web Publishing Service (W3SVC). From the Start menu, click Administrative Tools > Services. Right-click on World Wide Web Publishing Service and select Stop. 2. Double-click the Setup.bat program included in the product download ZIP file. 3. From the Setup program, click the SharePoint Knowledge Base Solution Accelerator component, then click Install. 4. Click Next and allow the program to perform the system checks again. Click Next. 5. Select Remove All and click Next. Wait while the components are uninstalled.
 If you encounter any errors while installing or using KB Accelerator, refer to the error logs located on the SharePoint")

15 6. Click Next and review the summary to make sure that the product was uninstalled successfully. 7. Restart the World Wide Web Publishing Service. Locating the Error Log File(s) If you encounter any errors while installing or using KB Accelerator, refer to the error logs located on the SharePoint server in: <drive>:\windows\temp\bamboosolutions\bsc_bamboo_%processid.log The error log contains details of any failures that may have occurred during the product installation. It can contain helpful information that allows you to selectively correct problems in order to later re-run the installation successfully.
16 Installed Files The table below lists the files and where they are installed as part of KB Accelerator's installation package. Each product has a Bamboo.ProductName.Core.dll. This core.dll contains shared assemblies such as Bamboo.Logging.dll, Bamboo.Licensing.dll and Bamboo.Provisioning.dll. All Bamboo products use these shared assemblies, which are installed under the Bamboo.ProductName.Core.dll in the GAC. Each product's Core.dll contains these shared assemblies so that each product can be removed or rolled back without affecting other Bamboo products. For example, if both KB Accelerator and the Calendar Plus Web Part are installed in the same farm, the Calendar Plus Web Part can be uninstalled or rolled back and KB Accelerator will continue to function without any issues. Filename Type Purpose Bamboo.KBAccelerator.dll Assembly Solution Accelerator Assembly installed in the Bin Bamboo.KBAccelerator.Core.dll Assembly Solution Accelerator Assembly installed in the GAC Bamboo.KBEventReceiver.dll Assembly Solution Accelerator Assembly installed in the GAC Bamboo.Telerik.Config.dll Assembly Web Part Assembly installed in the GAC Telerik.Web.UI.dll Assembly Web Part Assembly installed in the GAC Bamboo.KBAcceleratorPack.dll Assembly Solution Accelerator Assembly installed in the GAC Bamboo.KBAcceleratorPack.Core.dll Assembly Solution Accelerator Assembly installed in the GAC Bamboo.Navigators.dll Assembly Web Part Assembly installed in the GAC Bamboo.Navigators.Core.dll Assembly Merged Assembly installed in the GAC Bamboo.UI.Licensing.dll Assembly Web Part Assembly installed in the GAC Bamboo.UI.Licensing.Core.dll Assembly Web Part Assembly installed in the GAC Bamboo.Logging.dll Assembly Web Part Assembly installed in the GAC Bamboo.Provisioning.dll Assembly Web Part Assembly installed in the GAC Bamboo.RussellMason.Web.Application.dll Assembly Web Part Assembly installed in the GAC SA05.KBAccelerator.wsp HW55.BambooNavigators.wsp Bamboo.Core.wsp Bamboo.Web.Licensing.wsp In case you need to install this Solution Accelerator manually. In case you need to install this Web Part manually. In case you need to install this component manually. In case you need to install this component manually. Updating the web.config File The installation process also updates the web.config file. If you cannot install the Solution Accelerator using the automated process and plan to install it manually, add the following to your web.config file: <SafeControl Assembly="Bamboo.Navigators, Version= , Culture=neutral, PublicKeyToken=2cc91efae2d531be" Namespace="Bamboo.WebParts" TypeName="*" Safe="True" SafeAgainstScript="True" /> <SafeControl Assembly="Bamboo.KBAccelerator, Version= , Culture=neutral, PublicKeyToken=2cc91efae2d531be" Namespace="Bamboo.WebParts" TypeName="*" Safe="True" SafeAgainstScript="True" /> Code Access Security The following PermissionSet and CodeGroup markup may be installed by wppackager. Class Name Version Public Key Blob StrongNameMembershipCondition Bamboo.KBAccelerator 1 0x C71722AEBE6ADF12BF1FF2828C9DC20BFB StrongNameMembershipCondition Bamboo.Licensing A76FDA645D3FCF461C428E EABE802951AF If you must install KB Accelerator manually, the following security in order to implement a custom security policy file: Permission System.Web.AspNetHostingPermission System.Security.Permissions.FileIOPermission System.Security.Permissions.RegistryPermission System.Security.Permissions.ReflectionPermission SecurityPermission SharePointPermission Custom Setting Level="Medium" Unrestricted="true" Unrestricted="true" Flags="3" Unrestricted="true" ObjectModel="True"
17 UnsafeSaveOnGet="True" Impersonate="True" WebPartPermission System.Security.Permissions.EnvironmentPermission Connections="True" Read="TEMP;TMP;USERNAME;OS;COMPUTERNAME" To set up your own custom security policies, refer to the following links for more information: Bamboo Solutions FAQ (opens in a PDF) Security and Protection for SharePoint Server 2010 Security and Protection for SharePoint Foundation 2010 Configuration Security Trimming About the Knowledge Base Solution Accelerator Sites, Lists and Web Parts Using Relative Paths Configuring the Bamboo KB Admin Web Parts Configuring the Bamboo KB Client Web Parts Localizing KB Accelerator Security Trimming In general, users should follow SharePoint security trimming when setting up user permissions. For example, for the Bamboo KB Articles list, if the KB Administrator wants users on the client side to be able to only read the articles, then the Administrator should set the client group with read-only access. Read the following Microsoft TechNet articles for more information: User Permissions and Permission Levels in SharePoint Foundation 2010 User Permissions and Permission Levels in SharePoint Server 2010 To configure anonymous access to a KB site (Admin or Client), read the following Microsoft TechNet article: Configure Anonymous Access (Office SharePoint Server) About the Knowledge Base Solution Accelerator Sites, Lists and Web Parts For more information about configuring KB Accelerator, read Configuring the Bamboo KB Admin Web Parts and Configuring the Bamboo KB Client Web Parts. Bamboo KB Admin Site For the Bamboo KB Admin site, the following lists and Web Parts are used. All of the Web pages for the Web Parts are stored in the Site Pages Document Library. Name Type Description Configuration Bamboo KB Configuration List List Designates the name of your server and the address from which s will be sent KB Picture Library Library Stores all pictures uploaded during article creation Bamboo Article Questions and Answers List A discussion board list that stores all questions from the KB Client site and answers from the KB Admin site through the Answer Questions link on the Quick Launch bar. Bamboo KB Article View Counts List Determines the number of views for each article in the Knowledge Base. Do not modify this list. Bamboo KB Articles List Stores all articles created for the Knowledge Base. Uses content approval to restrict articles from being published before they are reviewed or approved. Articles are published to the KB Client when the Status column is set to Publish. The Status column must be set manually and does not require the Content Approval Status to be set to Approved in order to publish the item. The Content Approval feature in this instance is meant to be a KB Administrator reviewing tool only. Bamboo KB Categories List Stores the categories used to organize the Knowledge Base. Bamboo KB Ratings and Comments List Stores all ratings and comments for each article submitted by KB Client users along with a status (i.e. Submitted, Rejected, Published) so the KB Admin can review the submitted comments and determine which comments are posted to the KB Client site. Bamboo KB Tag Cloud List Stores all tags created for article association, the number of times Required N/A N/A No. Do not modify this list. N/A N/A N/A N/A
18 the tag has been used and in which articles it has been associated. Bamboo KB Answer Questions Web Part Allows KB Administrators to post the answer to end-user questions in the Bamboo Article Questions and Answers discussion board while at the same time ing the answer to the end user. Bamboo Category Search Web Part Allows KB Administrators to search article categories using specific criteria. Bamboo KB Search Web Part Allows KB Administrators to search articles or comments and ratings to determine their existence, their publishing status and article content approval status. Bamboo KB Tree View Web Part Displays the category tree on the Home page for navigating the Knowledge Base as well as the Most Popular Articles list and the Latest Additions list. Required Required Required Required Bamboo KB Client Site All of the Web Parts used in the KB Client sites (both Team Site and Meeting Workspace sites) need to be configured to point to lists in the KB Admin site. The KB Client site uses lists from the KB Admin site. For the Bamboo KB Client site, the following Web Parts are used: Using Relative Paths Name Type Description Configuration Bamboo KB Ask Question Web Part Allows users to enter and submit a question to KB Administrators. Bamboo KB Display Article Web Part Allows the article content to be displayed in a user-friendly format that includes the ability to print and the article. Bamboo KB Search Web Part Allows users to search for specific article content or ratings and comments. Bamboo KB Tree View Web Part Displays the category tree on the Home page for navigating the Knowledge Base as well as the Most Popular Articles list and the Latest Additions list. Bamboo KB Tag Cloud Web Part Displays a list of top tags (i.e. articles with the most views that SharePoint Navigators (Meeting Workspace site template only) Bamboo Navigators (Meeting Workspace site template only) Web Part List have these tags associated with them) in a tag cloud on the Tag Cloud tab. Used for the tabs on the Meeting Workspace site template only. Used to create the tabs in the Meeting Workspace site template only. This list is pre-populated with data. Required Required Required Required Required Optional Optional Use the table below to determine how your relative paths will appear. Use relative paths, not absolute paths, when configuring the KB Admin and KB Client sites. Site Path Is Equivalent To Top Site (Root Site) Subsite (Current Web Site) Configuring the Bamboo KB Admin Web Parts /SiteDirectory/KBAdmin/ or ~/SiteDirectory/KBAdmin/ Lists/Discussion%20Board/ or./lists/discussion%20board/ Board/_blank The Web Parts and lists in the KB Admin site require little configuration. The lists in the KB Admin Site are used in the KB Client Site Template - Meeting Workspace and KB Client Site Template - Team Site. There are six Web Parts and lists to be configured: 1. KB Configuration List 2. Bamboo KB Tree View Web Part 3. Bamboo KB Answer Questions Web Part 4. Bamboo KB Search Web Part for Searching Articles 5. Bamboo KB Category Search Web Part 6. Bamboo KB Search Web Part for Searching Ratings and Comments


19 Configuring the KB Configuration List To configure the KB Configuration List: 1. From the KB Admin site, select Site Actions > View All Site Content. 2. Under Lists, select Bamboo KB Configuration List. 3. Edit the KB Default Settings by selecting Edit from the drop-down list, or use the ribbon by selecting Item > Edit Item.
.")
 E-mail Integration (SharePoint Server 2010)")


20 4. Enter the following information: In the SMTP Server Name field, enter the name of the SMTP server for sending . In From Account, enter the address that you want displayed in the From field of the . This address must be in the correct address format (i.e. Leave the Auto Archive Date field blank. This field is reserved for an upcoming feature. For information on configuring STMP settings in SharePoint, read the following Microsoft TechNet articles: Integration (SharePoint Foundation 2010) Integration (SharePoint Server 2010) 5. Click Save. Configuring the Bamboo KB Tree View Web Part To configure the Bamboo KB Tree View Web Part: 1. Click the KB Admin site Home tab. 2. Edit the Web Part by clicking the arrow located next to the Web Part title bar and selecting Edit Web Part, or use the ribbon to edit the page. 3. Configure the Web Part: Enter the site URL for the Bamboo KB Admin site: This field is already populated for you with the relative path URL. See Using Relative Paths for more information on the syntax for relative paths. Select a Display List: This field is already preselected for you with the Bamboo KB Articles list. Select Default View: Select the list view you would like displayed in the Most Popular Articles list and the Latest Additions list. Show Tree View: Toggles showing the category for navigating the Knowledge Base content. Show Edit Buttons: Toggles showing the Edit button for each article in the Most Popular Articles list and the Latest Additions list. Show Delete Check Boxes: Toggles showing the check boxes used for selecting and deleting articles in the Most Popular Articles list and the Latest


21 Additions list. Show Most Popular Articles: Toggles showing the Most Popular Articles list, which shows articles that have had the most views. Show Latest Additions: Toggles showing the Latest Additions list, which shows the articles that were recently added to the Knowledge Base. Show All Articles: Select this option to show the All Articles list, which displays all articles in the Knowledge Base with paging according to the Records per Page value. When you select a category in the tree, the All Articles list shows all articles for that category and all of its subcategories. Records per Page: Enter the number of articles you want listed at a time in the Most Popular Articles list, Latest Additions list and the All Articles list. Enter the URL to the page that contains the Bamboo Display Article Web Part for displaying article content: This field is used for the KB Client site only. Make sure that you enter a relative path for the URL. Select a Language: Select this option to set the language used on the user interface of this Web Part. See Customizing the Translation Settings for more information. 4. Click Apply and then OK to save your changes. Configuring the Bamboo KB Answer Questions Web Part The Bamboo KB Answer Questions Web Part is located by clicking the Answer Questions link under the Pending Question header on the left-hand navigation bar in the Bamboo KB Admin site Home page. To configure the Bamboo KB Answer Questions Web Part: 1. From the Quick Launch bar, click the Answer Questions link. 2. Edit the Web Part by clicking the arrow located next to the Web Part title bar and selecting Edit Web Part, or use the ribbon to edit the page.


22 3. Configure the Web Part: Select a Question and Answer List: This is preconfigured to point to the Bamboo Article Questions and Answers discussion board list. Select a Configuration List: Choose a list such as the Bamboo KB Configuration List. Select Picture Library: This is preconfigured to point to the KB Picture Library. This setting allows you to include images in your response back to the end user and/or the discussion board. These images can be inserted directly into your response and no longer have to be uploaded to a Picture Library before you can reference them. Show Answer Question Buttons: Toggles showing the Answer Question button next to the question. Show Delete Check Boxes: Toggles showing the check boxes used for selecting and deleting questions in the list. Use SMTP Secure Authentication Connection: Select this option to enter in credentials for SMTP authentication. User ID: Enter in the user ID. Password: Enter in the password for the user ID. Port: Enter in the port number. For information on configuring STMP settings in SharePoint, read the following Microsoft TechNet articles: Integration (SharePoint Foundation 2010) Integration (SharePoint Server 2010) Records per Page: Enter the number of questions you want to display at a time in the KB Answer Questions Web Part. Select a Language: Select this option to set the language used on the user interface of this Web Part. See Customizing the Translation Settings for more information. 4. Click Apply and then OK to save your changes. Configuring the Bamboo KB Search Web Part for Searching Articles The Bamboo KB Search Web Part for Searching Articles is used to search for KB articles. It is not preconfigured. The Web Part is located by clicking the Manage Articles link under Article Control on the left-hand navigation bar in the Bamboo KB Admin site Home page. 1. From the Quick Launch bar, click the Manage Articles link.


23 2. Edit the Web Part by clicking the arrow located in the top right corner of the Bamboo KB Search Web Part title bar and selecting Edit Web Part, or use the ribbon to edit the page. 3. Configure the Web Part: Enter the site URL for the Bamboo KB Admin site: Enter the relative path to the KB Admin site, then click Test Connection. If it is successful, then click to populate the Select a List drop-down box with the lists from the KB Admin site. See Using Relative Paths for more information on the syntax for relative paths. Enter the URL to the page that contains the Bamboo Display Article Web Part for displaying article content: This field is used for the KB Client site only. Make sure that the relative path is used. Select a List: Select the Bamboo KB Articles List. Available Columns/Search Columns: Select the columns from the list that you want to display to the end user for search criteria. Select Search Operator: Select whether the search performed is an AND search or an OR search. Select a View to Display Search Results: Select a view for the search results, such as the KB Admin Search Results. Show Edit Buttons: Toggles showing the Edit button for each article in the search results list. Show Delete Check Boxes: Toggles showing the check boxes used for selecting articles to delete from the search results list. Show Column Header: Toggles showing the column headings in the search results list. Show Maximum Age: Toggles showing the Maximum Age drop-down list to search by in the search criteria. Keep Search Criteria with Search Results Page: Toggles keeping the search criteria with the search results. Show Default Value for Search Columns: Toggles displaying the default values for the columns you selected for entering search criteria. Show Print Button: Toggles showing the print button for users to print the search results. Include Key Word Search: Select this option to include keywords in the search. Select a Language: Select this option to set the language used on the user interface of this Web Part. See Customizing the Translation Settings for more information. 4. Click Apply and then OK to save your changes.

24 Configuring the Bamboo KB Category Search Web Part The Bamboo KB Category Search Web Part is used to search categories in order to help organize the Knowledge Base. It is not preconfigured. The Web Part is located by clicking the Manage Categories link under Category Control on the left-hand navigation bar in the Bamboo KB Admin site Home page.


25 1. From the Quick Launch bar, click the Manage Categories link. 2. Edit the Web Part by clicking the arrow located in the top right corner of the Bamboo KB Category Search Web Part title bar and selecting Edit Web Part, or use the ribbon to edit the page. 3. Configure the Web Part according to the fields listed above for the KB Search Web Part for Searching Articles, only select the Bamboo KB Categories list for the Select a List drop-down list. 4. Click Apply and then OK to save your changes.

26 Configuring the Bamboo Search Web Part for Searching Ratings and Comments The Bamboo KB Search Web Part for Searching Ratings and Comments is used to search ratings and comments submitted by Knowledge Base end users. It is not preconfigured. The Web Part is located by clicking the Approve & Manage link under Comment Control on the Bamboo KB Admin site Home page.


27 1. From the Quick Launch bar, click the Approve & Manage link. 2. Edit the Web Part by clicking the arrow located in the top right corner of the Bamboo KB Search Web Part for Ratings and Comments title bar and selecting Edit Web Part, or use the ribbon to edit the page. 3. Configure the Web Part according to the fields listed above for the KB Search Web Part for Searching Articles, only select the Bamboo KB Ratings and Comments list for the Select a List drop-down list. 4. Click Apply and then OK to save your changes.

28 Configuring the Bamboo KB Client Web Parts The Web Parts in the KB Client Site Template - Meeting Workspace and KB Client Site Template - Team Site need to be configured to point to the lists in the KB Admin site. There are 5 Web Parts to be configured: 1. Bamboo KB Tree View Web Part 2. Bamboo KB Search Web Part 3. Bamboo KB Ask Question Web Part 4. Bamboo KB Display Article Web Part 5. Bamboo KB Tag Cloud Web Part


29 Configuring the Bamboo KB Tree View Web Part To configure the Bamboo KB Tree View Web Part: 1. Navigate to the Bamboo KB Tree View Web Part Home page. Do one of the following: For the KB Client Site Template - Team Site only: From the Quick Launch bar, click the Home link. For the KB Client Site Template - Meeting Workspace only: Click the Home tab. 2. Edit the page by selecting Site Actions > Edit Page, or use the ribbon by selecting Edit > Edit Page. Click Edit on the top right of the Bamboo KB Tree View Web Part. Then select Edit Web Part. 3. Configure the Web Part. Enter the site URL for the Bamboo KB Admin site: Enter the relative path to the KB Admin site and click See Using Relative Paths for more information on the syntax for relative paths. Select a Display List: Select the Bamboo KB Articles list. to populate the options for the fields. Select Default View: Select the list view that you want to be displayed in the Most Popular Articles list and the Latest Additions list. The Summary View is recommended. Show Edit Buttons: This option is not available to end users. Show Delete Check Boxes: This option is not available to end users. Show Tree View: Toggles showing the category for navigating the Knowledge Base content. Show Most Popular Articles: Toggles showing the Most Popular Articles list, which shows articles that have had the most views. Show Latest Additions: Toggles showing the Latest Additions list, which shows the articles that were recently added to the Knowledge Base. Show All Articles: Select this option to show the All Articles list, which displays all articles in the Knowledge Base with paging according to the Records per Page value. When you select a category in the tree, the All Articles list shows all articles for that category and all of its subcategories. Records per Page: Enter the number of articles you want listed at a time in the Most Popular Articles list, Latest Additions list and the All Articles list. Enter the URL to the page that contains the Bamboo Display Article Web Part for displaying article content: Makre sure to use the relative path: /Your_KBClient_Site_URL/SitePages/Display%20Page.aspx Select a Language: Select this option to set the language used on the user interface of this Web Part. See Customizing the Translation Settings for more information. 4. Click Apply and then OK to save your changes.

30 Configuring the Bamboo KB Search Web Part To search for articles, you need to configure the Bamboo KB Search Web Part. 1. Do one of the following: For the KB Client Site Template - Team Site only: From the Quick Launch bar, click the Search link. For the KB Client Site Template - Meeting Workspace only: Click the Search tab. 2. Edit the page by selecting Site Actions > Edit Page, or use the ribbon by selecting Edit > Edit Page. Click Edit on the top right of the Bamboo KB Search Web Part. Then select Edit Web Part. 3. Configure the Web Part. Enter the site URL for the Bamboo KB Admin site: Enter the relative path to the KB Admin site, then click Test Connection. If it is successful, a Connection Successful message is displayed. Click to populate the Select a List drop-down box with the lists from the KB Admin site. See Using Relative Paths for more information on the syntax for relative paths. Enter the URL to the page that contains the Bamboo Display Article Web Part for displaying article content: Make sure the relative path is used: /Your_KBClient_Site_URL/SitePages/Display%20Page.aspx Select a List: Select the Bamboo KB Articles list. Available Columns/Search Columns: Select the columns from that list that you want to display to the end user for search criteria. Select Search Operator: Select whether the search performed is an AND search or an OR search. Select a View to Display Search Results: Select the Summary View. Show Edit Buttons: This option is not available to end users. Show Delete Check Boxes: This option is not available to end users. Show Column Header: Toggles showing the column headings in the search results list. Show Maximum Age: Toggles showing the Maximum Age drop-down list to search by in the search criteria. Keep Search Criteria with Search Results Page: Toggles keeping the search criteria with the search results. Show Default Value for Search Columns: Toggles displaying the default values for the columns you selected for entering search criteria. Show Print Button: Toggles showing the print button for users to print the search results. Include Key Word Search: Toggles showing the keywords used in the article search. Select a Language: Select this option to set the language used on the user interface of this Web Part. See Customizing the Translation Settings for more information. 4. Click Apply and then OK to save your changes.

31 Configuring the Bamboo KB Ask Question Web Part To configure the Bamboo KB Ask Question Web Part: 1. Do one of the following: For KB Client Site Template - Team Site only: From the Quick Launch bar, click the Ask a Question link. For KB Client Site Template - Meeting Workspace only: Click the Ask a Question tab 2. Edit the page by selecting Site Actions > Edit Page, or use the ribbon by selecting Edit > Edit Page. Click Edit on the top right of the Bamboo KB Ask Question Web Part. Then select Edit Web Part.


32 3. Configure the Web Part. Enter the site URL for the Bamboo KB Admin site: Enter the relative path to the KB Admin site, then click to populate the Select a Question and Answer List drop-down box with the lists from the KB Admin site. See Using Relative Paths for more information on the syntax for relative paths. Select a Question and Answer List: Select the Bamboo Article Questions and Answers list. Header Text: Enter the text that you want to display at the top of the Web Part to help users understand how you will respond to their questions. Select a Language: Select this option to set the language used on the user interface of this Web Part. See Customizing the Translation Settings for more information. 4. Click Apply and then OK to save your changes. Configuring the Bamboo KB Display Article Web Part Configure the Bamboo KB Display Article Web Part: 1. Access the Bamboo KB Display Article Web Part at the following URL. Make sure that you use relative paths. (See Using Relative Paths for more information on the syntax for relative paths.) You can also access the /Display%20Page.aspx from the Site Pages Documents Library Edit the page by selecting Site Actions > Edit Page, or use the ribbon by selecting Edit > Edit Page. Click Edit on the top right of the Bamboo KB Display Article Web Part. Then select Edit Web Part. 3. Configure the Web Part:
 Select the KB Articles List: Select the Bamboo KB Articles List.")

33 Enter the site URL for the Bamboo KB Admin site: Enter the URL to the KB Admin site, then click to populate the drop-down boxes below with the lists from the KB Admin site. Make sure to use a relative path. (See Using Relative Paths for more information on the syntax for relative paths.) Select the KB Articles List: Select the Bamboo KB Articles List. Select the KB Article View Count List: Select the Bamboo KB Article View Counts List. Select the KB Configuration List: Select the Bamboo KB Configuration List. Select the KB Rating and Comments List: Select the Bamboo KB Rating and Comments List. Custom Related Article Information: Create a tabbed section following the article content for custom article information such as Review Date, Article Categories or custom columns of your choice. Place your custom information on separate custom-named tabs. Section Name: Enter in the name of the custom-related article information section. Tab 1 Title: Enter in the name of the first tab. Tab 2 Title: Enter in the name of the second tab. Tab 3 Title: Enter in the name of the third tab. Available Columns: Select the column data you want to display in a tab. Select a tab name in the Display Columns list box, then click the single right arrow button to move the available column under the tab in the Display Columns list box. Use the Shift+Click or CTRL+Click keys to select multiple columns in the Available Columns list box. Use the double right arrow button to move all available columns to the selected tab in the Display Columns list box. Display Columns: Lists the selected columns and their respective tabs. Use the up and down arrow buttons to move the columns up or down within a tab. To add or remove a column from one tab to another, you must select the column, click the left arrow button to remove it from its current tab, then select the new tab, select the column in the Available Columns list box and click the right arrow button. For example, based on this configuration: the custom related article information looks like this: Use SMTP Secure Authentication Connection: Select this check box to enter in credentials for SMTP authentication.
 E-mail Integration (SharePoint Server 2010)")
34 User ID: Enter in the user ID. Password: Enter in the password for the user ID. Port: Enter in the port number. For information on configuring STMP settings in SharePoint, read the following Microsoft TechNet articles: Integration (SharePoint Foundation 2010) Integration (SharePoint Server 2010) Records per Page: Enter in the number of records to be displayed at a time in the Related Articles, Article Attachments and Related External Links boxes. Allow Article Rating: Select this option to show the Article Rating and Comments box at the bottom of the article content so that users may submit their rating and comment on each article. If you select this box, you must select the rating system to use: Numerical or Star. Numerical Rating or Star Rating: The Allow Article Rating check box must be selected in order to select one of these options. Select the Numerical Rating option to display a number rating system at the bottom of an article. Select the Star Rating option to display a graphical 5-star-based rating system at the bottom of an article. Hide Article Keyword(s) in Article Title Bar: Select this check box to hide the article keyword(s) from the title bar of the article. Select a Language: Select this option to set the language used on the user interface of this Web Part. See Customizing the Translation Settings for more information. 4. Click Apply and then OK to save your changes. Configuring the Bamboo KB Tag Cloud Web Part The Bamboo KB Tag Cloud Web Part is used to allow users to locate articles that have been viewed the most times by selecting a most-commonly-used key word (i.e. tag) from the tag cloud. The tag cloud is the list of tags displayed in the Web Part. Some tags have a larger or smaller font size indicating how often articles with that associated tag have been viewed.

35 To configure the Bamboo KB Tag Cloud Web Part : 1. Click the Tag Cloud tab (for the KB Client Site - Meeting Workspace) or the Tag Cloud link (for the KB Client Site - Team Site). 2. Edit the page by selecting Site Actions > Edit Page, or use the ribbon by selecting Edit > Edit Page. Click Edit on the top right of the Bamboo KB Tag Cloud Web Part. Then select Edit Web Part. 3. Configure the Web Part: Enter the site URL for the Bamboo KB Admin site: This field is already populated for you with the relative-path URL. Select the KB Articles List: This field is already preselected for you with the Bamboo KB Articles List. Select the KB Tag Cloud List: This field is already preselected for you with the Bamboo KB Tag Cloud List. Enter the URL to the page that contains the Bamboo Display Article Web Part for displaying article content: This field is used for the KB Client site only. Make sure that the path is relative. Tag Format: Click to select a font type, style, color, background color, alignment, decoration, etc. in the dialog box. Number of Top Tags to Display: Enter the number of tags you want to display in the tag cloud. In the example screenshot above, only 20 of the most viewed (i.e. top) tags will be displayed in the tag cloud. Show Drop-Down Filter Menu: Select this check box to show a filter drop-down box that allows users to locate tags in the cloud by first letter of the tag name. Number of Related Articles to Display: Enter the number of related articles you want displayed after selecting a tag in the cloud. Select a Language: Select this option to set the language used on the user interface of this Web Part. See Customizing the Translation Settings for more information. 4. Click Apply and then OK to save your changes.

36 Localizing Bamboo Products Bamboo products can display user interface and tool pane text in your local language. To change the language a product displays, perform the steps described below. Click a link below for detailed information about each step. 1. Customize a language file. 2. Select the customized language file in the product configuration. Customizing Language Files There are four language files included with Bamboo products: 1031.German.xml 1033.English.xml 1034.Spanish.xml 1036.French.xml These files are located in the wpresources folder. This folder may be located under the following paths: \\servername\drive\inetpub\wwwroot\wss\virtualdirectories\port\wpresources\[product] \\servername\drive\program Files\Common Files\Microsoft Shared\web server extensions\wpresources\[product] The German, Spanish and French files have not yet been translated; they are still in English. Edit these files directly to provide your own translation of the product user interface and tool pane text. To make sure that these files are not overwritten when you upgrade the product, copy the default file for the language you want to the wpresources folder and rename it, for example: CompanyName.1036.French.xml. If you do not rename the files you modify, these files will be overwritten when the product is upgraded. To create language files for languages other than German, English, Spanish, or French, copy one of the existing language files and rename it. Then edit the file to provide your own translation. The installation program will not remove or overwrite translation files you have created if they are named differently from the default resource files included with the product. However, product upgrades may require that you modify custom translation files to include new resource strings that were added for the new product version. The product will display the missing resource string IDs after an upgrade is completed. Copy these resource string IDs from a default language file to your custom translation file and make the appropriate changes for your language. Selecting a New Language File for a Product The instructions below for changing language file settings apply to Bamboo products with settings configured in the Web Part tool pane or Web Part Settings pop-up page. Changing Language Settings in the Web Part Tool Pane 1. Click the edit drop-down arrow on the Web Part title bar and select Edit Web Part.


![Click the [Product] Settings button in the Web Part tool pane. 3.](/docs-images/80/82325845/images/37-3.jpg "Click Language Settings in the Web Part Settings page and select the")

37 2. In the Language settings section of the Web Part tool pane, select the language file you want to use. 3. Click Apply and then OK in the Web Part tool pane to apply your changes. Changing Language Settings in the Web Part Settings Pop-up Page 1. From the Web Part, click the edit drop-down arrow on the Web Part title bar and select Modify Shared Web Part. 2. Click the [Product] Settings button in the Web Part tool pane. 3. Click Language Settings in the Web Part Settings page and select the language file you want to use. 4. Click the Save & Close button to save the Web Part settings. 5. Click Apply and then OK in the Web Part tool pane to apply your changes. Using KB Accelerator Using the Bamboo KB Admin Site Using the Bamboo KB Client Site


38 Using the Bamboo KB Admin Site Use the Bamboo KB Admin site to create new articles, manage existing articles, approve and manage article comments, answer end-user questions, manage images, and create and manage Knowledge Base article categories. The KB Admin site must be configured before it can be used. Read Configuring the Bamboo KB Admin Web Parts for information on configuring the KB Admin site. Access the lists, libraries and discussion boards used in the KB Admin site by selecting Site Actions > View All Site Content and selecting the desired item. The Web pages are stored in the Site Pages Document Library. Click the links below for more information on each section. Pictures (to upload article-related images) Pending Questions (to answer questions submitted by end users) Article Control (to create and edit articles) Category Control (to create and edit article categories) Comment Control (to approve and manage comments on articles) Tag Cloud (to create and edit tags) Pictures Use the KB Picture Library link under Pictures to upload and manage images for articles. The KB Picture Library is a standard SharePoint picture library. To access the picture library, select KB Picture Library under Pictures. To upload a new image: 1. From the KB Admin site Home page, click KB Picture Library. 2. Click Upload and choose whether you want to upload one or multiple images. Select the file to be uploaded.


39 3. Use the form to update the image properties, if necessary. Click Save. 4. The image is now in the KB Picture Library. To manage images: 1. From the KB Admin site Home page, click KB Picture Library. 2. Use the toolbar to manage the picture library: New: Adds a new folder to the picture library to help you organize your images. Upload: Uploads one or multiple images to the picture library. Actions: Use this button to perform the following actions: edit images in an image editor, delete images, download images to your computer, insert images in an or document, view images in a slide show, open the files with Windows Explorer, connect to Outlook, view RSS feeds or set up alerts on this page. Settings: Creates a new column or view; manages picture library settings.

40 Pending Questions Click the Answer Questions link under Pending Questions to answer questions submitted by end users. This link uses the Bamboo Article Questions and Answers discussion board list. To edit or modify the list, edit the list settings. To do this, navigate to the list by selecting Site Actions > View All Site Content > Discussion Boards > Bamboo Article Questions and Answers. Use the ribbon to edit the list settings by selecting List > List Settings. This page is blank until a user submits a question. To answer a question: 1. From the KB Admin site Home page, click Answer Questions. 2. Click Answer Question for the question that you want to answer. 3. In the Answer Question! section, type in your answer in the Answer box. Use the formatting options at the top to format text, images and more. Use Design to edit in rich text format. Use HTML to edit in source code. Click Preview to view how the answer will appear when it is submitted.


41 4. Click Send Answer to User to the answer directly to the user. Click Answer Question to display the answer on the page with the question. To view replies: 1. From the KB Admin site Home page, click Answer Questions. 2. Click View Replies. A question has one or more replies if there is a number greater than 0 under Number of Replies. 3. Click View Properties to edit a reply or a question. Click Reply to reply to the thread. Article Control Use the links under Article Control to create new articles and manage and edit existing articles.
42 The Create New Article link uses the Bamboo KB Articles List. To edit the columns used in the list, or to modify the options available in the list such as for Article Type, edit the list settings. To do this, navigate to the list by selecting Site Actions > View All Site Content > Lists > Bamboo KB Articles. Use the ribbon to edit the list settings by selecting List > List Settings. To create a new article: 1. From the KB Admin site Home page, click Create New Article. 2. Create the new article. Article Title: Enter in the name of the article. Relate Articles: Select any related articles, if applicable. Article Keywords: Choose keywords that you want to be associated with the article. Article Type: Select the kind of article. This list is prepopulated with options. Relate External Links: Enter in any related links to this article, if necessary. Article Status: Choose the status of the article, such as Draft or Publish. Review Date: Enter in a date, or use the calendar icon to select a review date. Article Category: Choose one or multiple categories for the article. Article Text: Enter in the text for the article. Use the formatting options at the top to format text, images and more. Use Design to edit in rich text format. Use HTML to edit in source code. Click Preview to view how the article will appear when it is published. Tag Term: Choose tags to be applied to the article. 3. Click Save.

43 To edit articles: 1. Click Manage Articles. 2. Use the search options to enter in your search criteria. Click Search. 3. Click Edit to edit the article, then click Edit Item in the ribbon to make your changes. Click Save.


44 Category Control Use the Add New Category and Manage Categories links under Category Control to add new categories and manage or edit existing categories. The Add New Category link uses the Bamboo KB Categories List. The list is prepopulated with data that you can modify. To edit the columns used in the list, edit the list settings. To do this, navigate to the list by selecting Site Actions > View All Site Content > Lists > Bamboo KB Categories. Use the ribbon to edit the list settings by selecting List > List Settings. To add a new category: 1. From the KB Admin site Home page, click Add New Category. 2. Enter in the name of the new category; a parent category (such as Announcements & News or Articles, Tips & Tricks) to be associated with the category, if desired; and an image URL, if necessary. 3. Click Save. 4. The new category is displayed on the page.


45 To manage categories: 1. From the KB Admin site Home page, click Manage Categories. 2. Enter in your search criteria and click Search. 3. Click Edit to edit a category, then use the ribbon to edit the item by selecting Edit Item. 4. Make your changes and click Close. Comment Control Use the Approve & Manage link under Comment Control to approve and manage comments on articles.


46 The Approve & Manage link uses the Bamboo KB Rating and Comments List. To edit the columns used in the list, edit the list settings. To do this, navigate to the list by selecting Site Actions > View All Site Content > Lists > Bamboo KB Ratings and Comments. Use the ribbon to edit the list settings by selecting List > List Settings. To manage comments: 1. From the KB Admin site Home page, click Approve & Manage. 2. Enter in your search criteria and click Search. 3. To edit the comment, click Edit, then use the ribbon to edit the comment by clicking Edit Item. Use Article ID to assign a different ID to the comment. Change the Rating using the drop-down list. Modify the Comments in the rich text editor. Use the formatting toolbar to format your text. Change the Status of the comment to Submitted, Rejected or Published. Associate the comment to another Article Title using the drop-down list. 4. Make your changes and click Save. Tag Cloud Use the Bamboo Tag Cloud list to create and edit tags for articles.

47 To add a new tag: 1. From the KB Admin site, select Site Actions > View All Site Content > Lists > Bamboo Tag Cloud List. 2. Click Add New Item or use the ribbon to add a new tag. 3. Use the ribbon to edit an existing tag. Using the Bamboo KB Client Site The Bamboo KB Client site enables end users to search for articles and content, print or articles, submit questions to Knowledge Base Administrators, rate and comment on articles, and view the most popular and most viewed articles. You must configure the Bamboo KB Client site before you can begin using it. Read Configuring the Bamboo KB Client Web Parts for information on configuring the KB Client site. Before you can use the Bamboo KB Client site, you must create articles in the Bamboo KB Admin site. Read Using the Bamboo KB Admin Site for information on using the Bamboo KB Admin iste. There are two client site templates to choose from: the KB Client Site Template - Team Site and the KB Client Site Template - Meeting Workspace. Read Choosing a Bamboo KB Client Site Template to decide which template is best for your organization's needs. Click the links below for more information on each section. Home (to locate articles and to view the most popular and most recently added articles) Ask a Question (to submit questions to Knowledge Base Administrators) Search (to search for articles using specific search criteria) Tag Cloud (to view specific articles using tag terms) Home The Home page displays a tree view of articles that allow users to search for articles. The sections for Most Popular Articles, Latest Additions and All Articles can be hidden. The tree view can also be hidden. To hide one or all of these options, edit the Web Part. In the configuration tool pane, uncheck the options that you want to hide. Click Apply and then OK to save your changes.


48 To view any of the articles in the Most Popular Articles, Latest Additions and All Articles sections, simply click the article title to view it. The article's title and content are displayed. Keywords associated with the article are displayed above the article title. On the right side of the page, view when the article was created and last modified as well as who last modified the article. See how many times the article has been viweed and what the article rating is. You can also print or the article. Underneath the article, you can rate the article and submit comments. You can also view related external links associated with the article. Under Additional Article Details, you can view the article type, tag terms associated with the article, the date that the article was last reviewed, and the categories associated with the article. Use the tree view to view articles by expanding or collapsing the categories to view subcategories. The Most Popular Articles, Latest Additions and All Articles sections then display that category's most popular articles, most recently added articles and all articles.

49 Ask a Question The Ask a Question! page allows users to submit questions to Knowledge Base Administrators, who can then review the questions and respond to them. Read Using the Bamboo KB Admin Site for more information on answering questions. You can modify the instructions that appear on this page according to your organization's needs. For more information, read Configuring the Bamboo KB Client Web Parts. To submit a question: 1. From the KB Client site Home page, click Ask a Question! 2. Fill out the form with your name, address, subject and question. 3. Click Submit Question. The question is submitted to the Knowledge Base Administrators through the Pending Questions section in the KB Admin site. The Knowledge Base Administrator can the reply to the question directly to the user from this section. For more information, read Using the Bamboo KB Admin Site. Search

50 The Search page lets users search for articles using specific search criteria. To search for an article: 1. From the KB Client site Home page, click Search. 2. Enter in your search criteria and click Search. 3. Click the article title to view the article. Tag Cloud The Tag Cloud page allows users to search for articles using tag terms. Users can select the most viewed articles by selecting the largest tag term in the tag cloud. Tags must be created in the KB Admin site. See Using the Bamboo KB Admin Site for more information. Use the drop-down list to search for specific tags. Click a tag to view all articles associated with that tag.


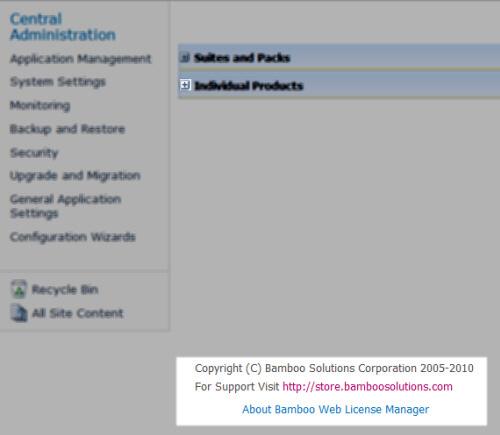
51 A larger tag size indicates a greater number of articles associated with that tag. Licensing SharePoint Knowledge Base Solution Accelerator For product trials, no license is required. A separate license key is required for each Web front-end server. For more information about Bamboo's licensing, read our Licensing Frequently Asked Questions. Once purchased, the product licensing is controlled through a separate license key and activation program installed on the server where SharePoint Central Administration is installed. To license KB Accelerator, you must: 1. Install the Bamboo Web License Manager on the SharePoint server where SharePoint Central Administration is installed (just install one time not for each product that you install). 2. License and activate KB Accelerator using the Bamboo Web License Manager. Locate KB Accelerator, enter in your license key(s) and activate the product on the servers you want the product to run all from one place. You can activate the license online or via . You can also use the Bamboo Web License Manager to check the licensing status of Bamboo products you installed to determine whether a product trial will soon expire or whether the product has been deactivated or not. You must be a machine and SharePoint farm administrator to install and run the Bamboo Web License Manager. Installing the Bamboo Web License Manager 1. On the server where SharePoint Central Administration is installed, click the Bamboo Web License Manager component button from the Setup program screen, then click Install. 2. Click Next to continue. 3. The program performs some system checks to determine whether your server is ready for installation. Click Next to continue. 4. Agree to the end-user software license agreement. Click Next to continue. 5. The program is restricted to only install the Bamboo Web License Manager on the server where it detects the SharePoint Central Administration has been installed. This Web application already should be selected for you as well as the Automatically activate features check box. Click Next to continue. 6. The Bamboo Web License Manager is then installed on the server. Click Next to view the summary log and make sure the installation was successful. 7. Click Close. For troubleshooting and additional information, see the Knowledge Base or log into My Bamboo. Licensing and Activating KB Accelerator 1. Open SharePoint Central Administration. Make sure you have the proper access rights to log in. 2. Under the Bamboo Solutions Corporation section, click Manage My License Keys. Note: If you have not yet installed any Bamboo products, the Web License Manager does not show any products. 3. Expand the Suites and Packs section. Click SharePoint Knowledge Base Components Pack to view the license status or click the drop-down arrow to Activate/Deactivate or view the Status.


 link.")
52 4. Do one of the following: If you want to activate KB Accelerator without viewing the status, click Activate/Deactivate from the drop-down. If you are viewing the licensing status, then click Status to activate or deactivate the license. 5. Do one of the following: To activate online, type or copy and paste the license key into the field provided and click Activate. To activate by , enter the license key and select Activate by , then click Activate. 6. If you choose to activate by , click the address and send the license key and machine key to Bamboo Support. Our Support Team will reply with an activation key that you then type into the boxes provided. Then click Activate. 7. KB Accelerator has now been activated and is ready for use. 8. Optional Step: Click the Choose License Server(s) link. This page allows you to select all the Web front-end servers you may want to install Bamboo products on. However, this is optional. Please read the license servers page to determine your selections. Click OK after you have made your selections. For more information about the Bamboo Web License Manager, click About Bamboo Web License Manager at the bottom of the page.
53
Simple Print.
 SharePoint Knowledge Base Solution Accelerator for SharePoint 2007 Release 1.5 (SA05) Overview System Requirements Installation Configuration Licensing and Activation Additional Resources System Requirements
Workflow Conductor for SharePoint 2007
 Workflow Conductor for SharePoint 2007 Release 1.6 (SA08) Overview System Requirements Installing Workflow Conductor Configuring Workflow Conductor Using Workflow Conductor Studio Managing Workflows Licensing
List Collection 3.0. User Guide
 List Collection 3.0 User Guide Copyright Copyright 2008-2017 BoostSolutions Co., Ltd. All rights reserved. All materials contained in this publication are protected by Copyright and no part of this publication
SharePoint Password Change & Expiration 3.0 User Guide
 SharePoint Password Change & Expiration 3.0 User Guide Copyright Copyright 2008-2017 BoostSolutions Co., Ltd. All rights reserved. All materials contained in this publication are protected by Copyright
List2PDF Installation Guide This guide describes the steps required to install BlueBridge List2PDF for Microsoft SharePoint 2013.
 This guide describes the steps required to install BlueBridge List2PDF for Microsoft SharePoint 2013. Table Of Contents 1. Installation Guide... 3 2. Installation... 4 2.1 Preparing the Installation...
Excel Import 3.0. User Guide
 Excel Import 3.0 User Guide Excel Import 3.0 User Guide Page 1 Copyright Copyright 2008-2017 BoostSolutions Co., Ltd. All rights reserved. All materials contained in this publication are protected by Copyright
PDF Converter 1.0 User Guide
 PDF Converter 1.0 User Guide Copyright Copyright 2008-2013 BoostSolutions Co., Ltd. All rights reserved. All materials contained in this publication are protected by Copyright and no part of this publication
PDF Converter 1.0 User Guide
 PDF Converter 1.0 User Guide Copyright Copyright 2008-2017 BoostSolutions Co., Ltd. All rights reserved. All materials contained in this publication are protected by Copyright and no part of this publication
Cross-Site Lookup 4.0 User Guide
 Cross-Site Lookup 4.0 User Guide BoostSolutions Copyright Copyright 2008-2013 BoostSolutions Co., Ltd. All rights reserved. All materials contained in this publication are protected by Copyright and no
Collection Column 1.0 User Guide
 Collection Column 1.0 User Guide Collection Column 1.0 User Guide Page 1 Copyright Copyright 2008-2015 BoostSolutions Co., Ltd. All rights reserved. All materials contained in this publication are protected
SharePoint List Sync 1.0 User Guide
 SharePoint List Sync 1.0 User Guide Copyright Copyright 2008-2017 BoostSolutions Co., Ltd. All rights reserved. All materials contained in this publication are protected by Copyright and no part of this
Permission Workflow 4.0 User Guide (2013)
") Permission Workflow 4.0 User Guide (2013) Copyright Copyright 2008-2013 BoostSolutions Co., Ltd. All rights reserved. All materials contained in this publication are protected by Copyright and no part
Permission Workflow 4.0 User Guide (2013) Copyright Copyright 2008-2013 BoostSolutions Co., Ltd. All rights reserved. All materials contained in this publication are protected by Copyright and no part
Permission by Rule 4.0 User Guide
 Permission by Rule 4.0 User Guide Copyright Copyright 2008-2017 BoostSolutions Co., Ltd. All rights reserved. All materials contained in this publication are protected by Copyright and no part of this
Permission Report 1.0 User Guide (2013)
") Permission Report 1.0 User Guide (2013) Copyright Copyright 2008-2013 BoostSolutions Co., Ltd. All rights reserved. All materials contained in this publication are protected by Copyright and no part of
Permission Report 1.0 User Guide (2013) Copyright Copyright 2008-2013 BoostSolutions Co., Ltd. All rights reserved. All materials contained in this publication are protected by Copyright and no part of
MediaRich ECM for SharePoint 2007 & 2010 Manual Installation for Farm Deployment And multiple Web Front Ends - Procedure
 MediaRich ECM for SharePoint 2007 & 2010 Manual Installation for Farm Deployment And multiple Web Front Ends - Procedure 2003-2011 Automated Media Processing Solutions, Inc. dba Equilibrium. All Rights
Data Connector 2.0 User Guide
 Data Connector 2.0 User Guide Copyright Copyright 2008-2013 BoostSolutions Co., Ltd. All rights reserved. All materials contained in this publication are protected by Copyright Law and no part of this
Cascaded Lookup 5.0 User Guide
 Cascaded Lookup 5.0 User Guide Copyright Copyright 2008-2013 BoostSolutions Co., Ltd. All rights reserved. All material contained in this publication is protected by Copyright and no part of this publication
Permission Workflow 4.0 User Guide
 Permission Workflow 4.0 User Guide Copyright Copyright 2008-2013 BoostSolutions Co., Ltd. All rights reserved. All materials contained in this publication are protected by Copyright and no part of this
AD Self Service 2.0 User Guide
 AD Self Service 2.0 User Guide Copyright Copyright 2008-2013 BoostSolutions Co., Ltd. All rights reserved. All materials contained in this publication are protected by Copyright. No part of this publication
Data Connector 2.0 User Guide
 Data Connector 2.0 User Guide Copyright Copyright 2008-2017 BoostSolutions Co., Ltd. All rights reserved. All materials contained in this publication are protected by Copyright Law and no part of this
Choice Indicator 1.0 User Guide
 Choice Indicator 1.0 User Guide Copyright Copyright 2008-2017 BoostSolutions Co., Ltd. All rights reserved. All materials contained in this publication are protected by Copyright and no part of this publication
Calendar Rollup 3.0 User Guide
 Calendar Rollup 3.0 User Guide Calendar Rollup 3.0 User Guide Page 1 Copyright Copyright 2008-2017 BoostSolutions Co., Ltd. All rights reserved. All materials contained in this publication are protected
Advanced RSS Viewer Installation Guide. Version 1.0.0
 Advanced RSS Viewer Installation Guide Version 1.0.0 Notice This document is a proprietary product of FireArrow and is protected by copyright laws and international treaty. Information in this manual is
Permission Report 1.0 User Guide
 Permission Report 1.0 User Guide Copyright Copyright 2008-2013 BoostSolutions Co., Ltd. All rights reserved. All materials contained in this publication are protected by Copyright and no part of this publication
FireArrow Cross Site Lookup Installation Guide. Version 1.0.0
 FireArrow Cross Site Lookup Installation Guide Version 1.0.0 Notice This document is a proprietary product of FireArrow and is protected by copyright laws and international treaty. Information in this
Document Maker 1.0 User Guide
 Document Maker 1.0 User Guide Copyright Copyright 2008-2013 BoostSolutions Co., Ltd. All rights reserved. All materials contained in this publication are protected by Copyright and no part of this publication
MarkLogic Server. Connector for SharePoint Administrator s Guide. MarkLogic 9 May, Copyright 2017 MarkLogic Corporation. All rights reserved.
 Connector for SharePoint Administrator s Guide 1 MarkLogic 9 May, 2017 Last Revised: 9.0-1, May, 2017 Copyright 2017 MarkLogic Corporation. All rights reserved. Table of Contents Table of Contents Connector
Document Viewer 2.0 User Guide
 Document Viewer 2.0 User Guide Document Viewer 2.0 User Guide Page 1 Copyright Copyright 2008-2017 BoostSolutions Co., Ltd. All rights reserved. All materials contained in this publication are protected
RichText Boost 1.0 User Guide
 RichText Boost 1.0 User Guide Copyright Copyright 2008-2017 BoostSolutions Co., Ltd. All rights reserved. All materials contained in this publication are protected by Copyright and no part of this publication
Column/View Permission User Guide
 Column/View Permission User Guide Column/View Permission User Guide Page 1 Copyright Copyright 2008-2017 BoostSolutions Co., Ltd. All rights reserved. All materials contained in this publication are protected
Bulk Zip & Unzip 2.0 User Guide
 Bulk Zip & Unzip 2.0 User Guide Bulk Zip & Unzip 2.0 User Guide Page 1 Copyright Copyright 2008-2017 BoostSolutions Co., Ltd. All rights reserved. All materials contained in this publication is protected
AD Administration 1.0 User Guide
 AD Administration 1.0 User Guide Copyright Copyright 2008-2017 BoostSolutions Co., Ltd. All rights reserved. All materials contained in this publication are protected by Copyright Law and no part of this
Column View Permission 4.0 User Guide
 Column View Permission 4.0 User Guide Provided by BOOSTSOLUSTIONS Copyright Copyright 2008-2012 BoostSolutions Co., Ltd. All rights reserved. All materials contained in this publication are protected by
List Transfer 2.0 User Guide
 List Transfer 2.0 User Guide Copyright Copyright 2008-2017 BoostSolutions Co., Ltd. All rights reserved. All materials contained in this publication are protected by Copyright Law and no part of this publication
Adlib PDF SharePoint Workflow Connector Guide PRODUCT VERSION: 2.1
 Adlib PDF SharePoint Workflow Connector Guide PRODUCT VERSION: 2.1 REVISION DATE: January 2013 Copyright 2013 Adlib This manual, and the Adlib products to which it refers, is furnished under license and
Search for Dynamics v Installation Guide
 Search for Dynamics v1.4.3.1 Installation Guide SharePoint 2013 and 2016 Contents Chapter 1: Prerequisites... 3 Chapter 2: Install Search for Dynamics... 4 Install SharePoint Components...4 Install Permissive
Lightning Conductor Web Part 2013 Manual 2 Last update: October 24, 2014 Lightning Tools
 Lightning Conductor Web Part 2013 Manual 2 Last update: October 24, 2014 Lightning Tools Table of Contents Installing the Lightning Conductor 2013 Web Part... 2 Uploading the Lightning Conductor solution
User Manual. ARK for SharePoint-2007
 User Manual ARK for SharePoint-2007 Table of Contents 1 About ARKSP (Admin Report Kit for SharePoint) 1 1.1 About ARKSP 1 1.2 Who can use ARKSP? 1 1.3 System Requirements 2 1.4 How to activate the software?
Wiki Installation Guide Guide to installing the BlueBridge Wiki Extensions for Microsoft SharePoint 2013
 Guide to installing the BlueBridge Wiki Extensions for Microsoft SharePoint 2013 Table Of Contents 1. BlueBridge Wiki Extensions Installation Guide... 3 2. Installation... 4 2.1 Preparing the Installation...
EMC SourceOne for Microsoft SharePoint Version 6.7
 EMC SourceOne for Microsoft SharePoint Version 6.7 Installation Guide 300-012-747 REV A01 EMC Corporation Corporate Headquarters: Hopkinton, MA 01748-9103 1-508-435-1000 www.emc.com Copyright 2011 EMC
Microsoft Windows SharePoint Services
 Microsoft Windows SharePoint Services SITE ADMIN USER TRAINING 1 Introduction What is Microsoft Windows SharePoint Services? Windows SharePoint Services (referred to generically as SharePoint) is a tool
Adlib PDF SharePoint Workflow Connector Guide PRODUCT VERSION: 5.3
 Adlib PDF SharePoint Workflow Connector Guide PRODUCT VERSION: 5.3 REVISION DATE: June 2015 Copyright 2015 Adlib This manual, and the Adlib products to which it refers, is furnished under license and may
Aspose.Words for SharePoint Documentation
 Aspose.Words for SharePoint Documentation Introducing Aspose.Words for SharePoint Does your organization base a corporate document depository on Windows SharePoint Services or Microsoft Office SharePoint
MacroView ClauseBank Version 8.2
 MacroView ClauseBank Version 8.2 Effective: April 2016 MacroView Business Technology Pty Limited ACN 081 117 777 ABN 29 081 117 777 Level 12, 171 Clarence Street Sydney NSW 2000 Australia GPO Box 5149
Adlib PDF SharePoint Workflow Connector Guide PRODUCT VERSION: 5.2
 Adlib PDF SharePoint Workflow Connector Guide PRODUCT VERSION: 5.2 REVISION DATE: August 2014 Copyright 2014 Adlib This manual, and the Adlib products to which it refers, is furnished under license and
BindTuning Installations Instructions, Setup Guide. RECAP Setup Guide
 BindTuning Installations Instructions, Setup Guide RECAP Setup Guide This documentation was developed by, and is property of Bind Lda, Portugal. As with any software product that constantly evolves, our
Adding the Telerik ASP.NET 2.0 RadMenu Control to MOSS 2007 Publishing Sites
 Adding the Telerik ASP.NET 2.0 RadMenu Control to MOSS 2007 Publishing Sites Forward With the release of Windows SharePoint Services (WSS) v3 and Microsoft Office SharePoint Server (MOSS) 2007, Microsoft
Zetadocs for Microsoft Dynamics SharePoint Extensions Installation Guide
 Zetadocs for Microsoft Dynamics SharePoint Extensions Installation Guide Version history Version: 18/11/2009 Equisys plc Equisys House 32 Southwark Bridge Road London SE1 9EU United Kingdom Tel + 44 (0)20
EMC Documentum Connector for Microsoft SharePoint Farm Solution
 EMC Documentum Connector for Microsoft SharePoint Farm Solution Version 7.2 Installation Guide EMC Corporation Corporate Headquarters Hopkinton, MA 01748-9103 1-508-435-1000 www.emc.com Legal Notice Copyright
Rehmani Consulting, Inc. VisualSP 2013 Installation Procedure. SharePoint-Videos.com
 Rehmani Consulting, Inc. VisualSP 2013 Installation Procedure SharePoint-Videos.com info@sharepointelearning.com 630-786-7026 Contents Contents... 1 Introduction... 2 Take inventory of VisualSP files...
Contents. Common Site Operations. Home actions. Using SharePoint
 This is a companion document to About Share-Point. That document describes the features of a SharePoint website in as much detail as possible with an emphasis on the relationships between features. This
TechNet Home > Products & Technologies > Desktop Products & Technologies > Microsoft Office > SharePoint Portal Server 2003 > Deploy
 TechNet Home > Products & Technologies > Desktop Products & Technologies > Microsoft Office > SharePoint Portal Server 2003 > Deploy Reference: http://www.microsoft.com/technet/prodtechnol/office/sps2003/deploy/spst2003.mspx?pf=true
Version 6.1 Release Notes and Installation Guide
 Version 6.1 Release Notes and Copyright 2013 Metalogix International. All Rights Reserved. This software is protected by copyright law and international treaties. Unauthorized reproduction or distribution
Colligo Manager 5.4 SP3. User Guide
 5.4 SP3 User Guide Contents Enterprise Email Management for SharePoint 2010 1 Benefits 1 Key Features 1 Platforms Supported 1 Installing and Activating Colligo Email Manager 2 Checking for Updates 4 Updating
Installation/Configuration Guide
 Energy reduction Fax Servers Solutions Integration: SharePoint FAQ Guide v.1.3 Installation/Configuration Guide Achieve more with less Connectivity Web Part deployment SharePoint configuration for Fax
Colligo Engage Outlook App 7.1. Connected Mode - User Guide
 7.1 Connected Mode - User Guide Contents Colligo Engage Outlook App 1 Benefits 1 Key Features 1 Platforms Supported 1 Installing and Activating Colligo Engage Outlook App 2 Checking for Updates 3 Updating
Connect Install Guide
 Connect Install Guide Version 3.2 Publication Date: December 16, 2013 Copyright Metalogix International GmbH 2008-2013. All Rights Reserved. This software is protected by copyright law and international
Colligo Engage Outlook App 7.1. Offline Mode - User Guide
 Colligo Engage Outlook App 7.1 Offline Mode - User Guide Contents Colligo Engage Outlook App 1 Benefits 1 Key Features 1 Platforms Supported 1 Installing and Activating Colligo Engage Outlook App 3 Checking
SharePoint Online for Site Administrators
 SharePoint Online for Site Administrators Contents SharePoint Online for Site Administrators... 1 Access Your Office 365 SharePoint Website... 2 Make a New Subsite... 4 Permissions... 5 Edit the members
Workspace Administrator Help File
 Workspace Administrator Help File Table of Contents HotDocs Workspace Help File... 1 Getting Started with Workspace... 3 What is HotDocs Workspace?... 3 Getting Started with Workspace... 3 To access Workspace...
Mastering Microsoft SharePoint
 Mastering Microsoft SharePoint Foundation 2010 Callahan WILEY Wiley Publishing, Inc. Contents Introduction xxi Part l Preparing for Microsoft SharePoint Foundation 2010 1 Chapter 1 SharePoint Foundation
ImageNow Interact for Microsoft SharePoint Installation, Setup, and User Guide
 ImageNow Interact for Microsoft SharePoint Installation, Setup, and User Guide Version: 6.6.x Written by: Product Documentation, R&D Date: ImageNow and CaptureNow are registered trademarks of Perceptive
DocAve Content Shield v2.2 for SharePoint
 DocAve Content Shield v2.2 for SharePoint User Guide For SharePoint 2010 Revision A Issued August 2012 1 Table of Contents Table of Contents... 2 About DocAve Content Shield for SharePoint... 4 Complementary
Zimbra Connector for Microsoft Outlook User Guide. Zimbra Collaboration
 Zimbra Connector for Microsoft Outlook User Guide Zimbra Collaboration 8.8.11 Table of Contents Legal Notices............................................................................... 1 1. Introduction..............................................................................
Veritas Enterprise Vault Setting up SharePoint Server Archiving 12.2
 Veritas Enterprise Vault Setting up SharePoint Server Archiving 12.2 Veritas Enterprise Vault: Setting up SharePoint Server Archiving Last updated: 2017-08-10. Legal Notice Copyright 2017 Veritas Technologies
FileLoader for SharePoint
 Administrator s Guide FileLoader for SharePoint v. 2.0 Last Updated 6 September 2012 Contents Preface 3 FileLoader Users... 3 Getting Started with FileLoader 4 Configuring Connections to SharePoint 8
Content Matrix. Evaluation Guide. February 12,
 Content Matrix Evaluation Guide February 12, 2018 www.metalogix.com info@metalogix.com 202.609.9100 Copyright International GmbH, 2002-2018 All rights reserved. No part or section of the contents of this
VMware AirWatch Database Migration Guide A sample procedure for migrating your AirWatch database
 VMware AirWatch Database Migration Guide A sample procedure for migrating your AirWatch database For multiple versions Have documentation feedback? Submit a Documentation Feedback support ticket using
EMC Documentum Content Services for SharePoint
 EMC Documentum Content Services for SharePoint Version 5.3 SP5 Installation and Administration Guide P/N 300-005-756-A01 EMC Corporation Corporate Headquarters: Hopkinton, MA 01748-9103 1-508-435-1000
StoragePoint Advanced Installation Guide
 A StoragePoint January 16, 2018 www.metalogix.com info@metalogix.com 202.609.9100 Copyright 2018 Copyright Metalogix International GmbH All rights reserved. No part or section of the contents of this material
DocAve Content Shield v2.2 for SharePoint
 DocAve Content Shield v2.2 for SharePoint User Guide For SharePoint 2007 Revision A Issued August 2012 1 Table of Contents Table of Contents... 2 About DocAve Content Shield for SharePoint... 4 Complementary
Dashboards SharePoint Installation Guide SAP BusinessObjects 4.1
 Dashboards SharePoint Installation Guide SAP BusinessObjects 4.1 Copyright 2011 SAP AG. All rights reserved.sap, R/3, SAP NetWeaver, Duet, PartnerEdge, ByDesign, SAP BusinessObjects Explorer, StreamWork,
Colligo Manager for Outlook User Guide. User Guide
 Colligo Email Manager for Outlook User Guide User Guide Contents About This Guide... 5 Audience... 5 Requirements... 5 Terminology... 5 Colligo Technical Support... 5 Installation... 6 EXE Installation...
Virto SharePoint Forms Designer for Office 365. Installation and User Guide
 Virto SharePoint Forms Designer for Office 365 Installation and User Guide 2 Table of Contents KEY FEATURES... 3 SYSTEM REQUIREMENTS... 3 INSTALLING VIRTO SHAREPOINT FORMS FOR OFFICE 365...3 LICENSE ACTIVATION...4
SharePoint 2010 Tutorial
 SharePoint 2010 Tutorial TABLE OF CONTENTS Introduction... 1 Basic Navigation... 2 Navigation Buttons & Bars... 3 Ribbon... 4 Library Ribbon... 6 Recycle Bin... 7 Permission Levels & Groups... 8 Create
Installation and Configuration Manual
 Installation and Configuration Manual IMPORTANT YOU MUST READ AND AGREE TO THE TERMS AND CONDITIONS OF THE LICENSE BEFORE CONTINUING WITH THIS PROGRAM INSTALL. CIRRUS SOFT LTD End-User License Agreement
VisualSP 2010 Help Items
 Rehmani Consulting, Inc. VisualSP 2010 Help Items http://www.visualsp.com vsp-support@visualsp.com 630-786-7026 Doc Rev 6.2 for VSP 4.7.0.4 Contents Contents... 2 Introduction... 3 VisualSP 2010 Help Ribbon
Important notice regarding accounts used for installation and configuration
 System Requirements Operating System Nintex Reporting 2008 can be installed on Microsoft Windows Server 2003 or 2008 (32 and 64 bit supported for both OS versions). Browser Client Microsoft Internet Explorer
Zetadocs for NAV Installation Guide. Equisys Ltd
 2 Table of Contents 4 Deployment Scenarios Overview Zetadocs Express 4 Zetadocs Delivery Essentials 4 Zetadocs Capture Essentials 4 Deployment Environments 4 6 Express Installation 1. Installing the Zetadocs
KWizCom Custom Actions
 KWizCom Corporation KWizCom Custom Actions Admin Guide Copyright 2005-2015 KWizCom Corporation. All rights reserved. KWizCom Custom Actions Admin Guide Company Headquarters 95 Mural Street, Suite 600 Richmond
DocAve for Salesforce 2.1
 DocAve for Salesforce 2.1 This document is intended for anyone wishing to familiarize themselves with the user interface and basic functionality of AvePoint s DocAve for Salesforce tool. System Requirements
USER GUIDE MADCAP FLARE SharePoint
 USER GUIDE MADCAP FLARE 2018 SharePoint Copyright 2018 MadCap Software. All rights reserved. Information in this document is subject to change without notice. The software described in this document is
Search as you type web part for SharePoint List Columns
 Search as you type web part for SharePoint List Columns Enterprise Edition MetaDataSys Inc Web: http://www.metadatasys.com Email:info@metadatasys.com January 2011 Page 1 Contents Description of the Web
Document Version th November Company Name: Address: Project Name: Server Name: Server Location:
 Company Name: Address: Project Name: Server Name: Server Location: IQ Prepared By: Name / Title / Representing Signature / Date Document Release date 18 th November 2013 Page 1 of 20 Contents 1. Objective...
Installation and Configuration Manual
 Installation and Configuration Manual IMPORTANT YOU MUST READ AND AGREE TO THE TERMS AND CONDITIONS OF THE LICENSE BEFORE CONTINUING WITH THIS PROGRAM INSTALL. CIRRUS SOFT LTD End-User License Agreement
Quick Start Installation Guide
 Quick Start Installation Guide Copyright 2004-2012 Automated Media Processing Solutions, Inc. dba Equilibrium.All rights reserved. U.S. Patent Numbers 6,792,575 and 6,964,009 for the automated content
Content Matrix Organizer
 Content Matrix Organizer User Guide February 05, 2018 www.metalogix.com info@metalogix.com 202.609.9100 Copyright 2018 Copyright International GmbH All rights reserved. No part or section of the contents
Index A Access data formats, 215 exporting data from, to SharePoint, forms and reports changing table used by form, 213 creating, cont
 Index A Access data formats, 215 exporting data from, to SharePoint, 215 217 forms and reports changing table used by form, 213 creating, 237 245 controlling availability of, 252 259 data connection to,
PRO: Designing and Developing Microsoft SharePoint 2010 Applications
 PRO: Designing and Developing Microsoft SharePoint 2010 Applications Number: 70-576 Passing Score: 700 Time Limit: 120 min File Version: 1.0 http://www.gratisexam.com/ Exam A QUESTION 1 You are helping
Virto Active Directory Service for SharePoint. Release Installation and User Guide
 Virto Active Directory Service for SharePoint Release 4.1.2 Installation and User Guide 2 Table of Contents OVERVIEW... 3 SYSTEM REQUIREMENTS... 4 OPERATING SYSTEM... 4 SERVER... 4 BROWSER... 5 INSTALLATION...
ControlPoint. Advanced Installation Guide. September 07,
 ControlPoint Advanced Installation Guide September 07, 2017 www.metalogix.com info@metalogix.com 202.609.9100 Copyright International GmbH., 2008-2017 All rights reserved. No part or section of the contents
SPAR. Installation Guide. Workflow for SharePoint. ITLAQ Technologies
 SPAR Workflow for SharePoint 0 ITLAQ Technologies www.itlaq.com Table of Contents I. System Requirements...2 II. Install SPARK Workflow on your environment...2 III. Obtain SPARK Workflow License...7 IV.
Vizit 6 Installation Guide
 Vizit 6 Installation Guide Contents Running the Solution Installer... 3 Installation Requirements... 3 The Solution Installer... 3 Activating your License... 7 Online Activation... 7 Offline Activation...
Zetadocs for Microsoft Dynamics NAV Installation Guide
 Zetadocs for Microsoft Dynamics NAV Installation Guide Version history Version: 4.1 International Published: 01/06/2011 Equisys plc Equisys House 32 Southwark Bridge Road London SE1 9EU United Kingdom
GRS Enterprise Synchronization Tool
 GRS Enterprise Synchronization Tool Last Revised: Thursday, April 05, 2018 Page i TABLE OF CONTENTS Anchor End User Guide... Error! Bookmark not defined. Last Revised: Monday, March 12, 2018... 1 Table
Hands-On Introduction to Queens College Web Sites
 Hands-On Introduction to Queens College Web Sites This handout accompanies training workshops for Queens College Content Editors who will manage and maintain the web content in their areas. Overview of
DocAve 6 Administrator
 DocAve 6 Administrator User Guide Service Pack 2, Cumulative Update 2 Revision F Issued June 2013 DocAve 6: Archiver 1 Table of Contents Table of Contents... 2 About DocAve Administrator for SharePoint...
Anchor User Guide. Presented by: Last Revised: August 07, 2017
 Anchor User Guide Presented by: Last Revised: August 07, 2017 TABLE OF CONTENTS GETTING STARTED... 1 How to Log In to the Web Portal... 1 How to Manage Account Settings... 2 How to Configure Two-Step Authentication...
Coveo Platform 6.5. Microsoft SharePoint Connector Guide
 Coveo Platform 6.5 Microsoft SharePoint Connector Guide Notice The content in this document represents the current view of Coveo as of the date of publication. Because Coveo continually responds to changing
Virto Html5 Bulk File Upload for Microsoft SharePoint Release User and Installation Guide
 Virto Html5 Bulk File Upload for Microsoft SharePoint Release 1.6.0 User and Installation Guide 2 Table of Contents Contents Table of Contents... 2 Features List... 3 System/Developer Requirements... 3