Dell Security Management Server. Installation and Migration Guide v10.0
|
|
|
- Jeffery Maxwell
- 5 years ago
- Views:
Transcription
1 Dell Security Management Server
2 Notes, cautions, and warnings NOTE: A NOTE indicates important information that helps you make better use of your product. CAUTION: A CAUTION indicates either potential damage to hardware or loss of data and tells you how to avoid the problem. WARNING: A WARNING indicates a potential for property damage, personal injury, or death Dell Inc. All rights reserved.dell, EMC, and other trademarks are trademarks of Dell Inc. or its subsidiaries. Other trademarks may be trademarks of their respective owners. Registered trademarks and trademarks used in the Dell Encryption, Endpoint Security Suite Enterprise, and Data Guardian suite of documents: Dell and the Dell logo, Dell Precision, OptiPlex, ControlVault, Latitude, XPS, and KACE are trademarks of Dell Inc. Cylance, CylancePROTECT, and the Cylance logo are registered trademarks of Cylance, Inc. in the U.S. and other countries. McAfee and the McAfee logo are trademarks or registered trademarks of McAfee, Inc. in the US and other countries. Intel, Pentium, Intel Core Inside Duo, Itanium, and Xeon are registered trademarks of Intel Corporation in the U.S. and other countries. Adobe, Acrobat, and Flash are registered trademarks of Adobe Systems Incorporated. Authen tec and Eikon are registered trademarks of Authen tec. AMD is a registered trademark of Advanced Micro Devices, Inc. Microsoft, Windows, and Windows Server, Internet Explorer, Windows Vista, Windows 7, Windows 10, Active Directory, Access, BitLocker, BitLocker To Go, Excel, Hyper-V, Outlook, PowerPoint, Word, OneDrive, SQL Server, and Visual C++ are either trademarks or registered trademarks of Microsoft Corporation in the United States and/or other countries. VMware is a registered trademark or trademark of VMware, Inc. in the United States or other countries. Box is a registered trademark of Box. Dropbox is a service mark of Dropbox, Inc. Google, Android, Google Chrome, Gmail, and Google Play are either trademarks or registered trademarks of Google Inc. in the United States and other countries. Apple, App Store, Apple Remote Desktop, Boot Camp, FileVault, ipad, iphone, ipod, ipod touch, ipod shuffle, and ipod nano, Macintosh, and Safari are either servicemarks, trademarks, or registered trademarks of Apple, Inc. in the United States and/or other countries. EnCase and Guidance Software are either trademarks or registered trademarks of Guidance Software. Entrust is a registered trademark of Entrust, Inc. in the United States and other countries. Mozilla Firefox is a registered trademark of Mozilla Foundation in the United States and/or other countries. ios is a trademark or registered trademark of Cisco Systems, Inc. in the United States and certain other countries and is used under license. Oracle and Java are registered trademarks of Oracle and/or its affiliates. Travelstar is a registered trademark of HGST, Inc. in the United States and other countries. UNIX is a registered trademark of The Open Group. VALIDITY is a trademark of Validity Sensors, Inc. in the United States and other countries. VeriSign and other related marks are the trademarks or registered trademarks of VeriSign, Inc. or its affiliates or subsidiaries in the U.S. and other countries and licensed to Symantec Corporation. KVM on IP is a registered trademark of Video Products. Yahoo! is a registered trademark of Yahoo! Inc. Bing is a registered trademark of Microsoft Inc. Ask is a registered trademark of IAC Publishing, LLC. Other names may be trademarks of their respective owners. Installation and Migration Guide Rev. A01
3 Contents 1 Introduction...5 About Security Management Server...5 Contact Dell ProSupport Requirements and Architecture...6 Security Management Server Architecture Design... 6 Requirements...7 Hardware...8 Software...9 Language Support for Remote Management Console Pre-Installation Configuration...13 Configuration Before You Begin Installation or Upgrade/Migration...16 New Installation...16 Install Back End Server and New Database Install Back End Server with Existing Database...32 Install Front End Server...47 Upgrade/Migration Before You Begin Upgrade/Migration Upgrade/Migrate Back End Server(s)...59 Upgrade/Migrate Front End Server(s) Disconnected Mode Installation...69 Install Security Management Server in Disconnected Mode...72 Uninstall Security Management Server Post-Installation Configuration DMZ Mode Configuration Server Configuration Tool Add New or Updated Certificates...76 Import Dell Manager Certificate...78 Import SSL/TLS Certificate BETA...79 Configure settings for Server SSL Certificate...79 Configure SMTP settings Change Database Name, Location, or Credentials Migrate the Database Administrative Tasks Assign Dell Administrator Role...82 Log in with Dell Administrator Role...82 Upload Client Access License...82 Contents 3
4 Commit Policies...82 Configure Dell Compliance Reporter Perform Back ups Security Management Server Backups SQL Server Backups PostgreSQL Server Backups Ports SQL Server Best Practices Certificates...87 Create a Self-Signed Certificate and Generate a Certificate Signing Request Generate a New Key Pair and a Self-Signed Certificate Request a Signed Certificate from a Certificate Authority...88 Import a Root Certificate...89 Example Method to Request a Certificate Export a Certificate to.pfx Using the Certificate Management Console...93 Add a Trusted Signing Cert to the Security Server when an Untrusted Certificate was used for SSL Contents
5 1 Introduction About Security Management Server The Security Management Server has the following features: Centralized management of devices, users, and security policy Centralized compliance auditing and reporting Separation of administrative duties Role-based security policy creation and management Distributes security policies when clients connect Administrator-assisted device recovery Trusted paths for communication between components Unique encryption key generation and automatic secure key escrow Contact Dell ProSupport Call , extension for 24x7 phone support for your Dell product. Additionally, online support for Dell products is available at dell.com/support. Online support includes drivers, manuals, technical advisories, FAQs, and emerging issues. Be sure to help us quickly connect you to the right technical expert by having your Service Tag or Express Service Code available when you call. For phone numbers outside of the United States, see Dell ProSupport International Phone Numbers. Introduction 5
6 Requirements and Architecture 2 This section details hardware and software requirements and architecture design recommendations for Dell Security Management Server implementation. Security Management Server Architecture Design The Dell Encryption, Endpoint Security Suite Enterprise, and Data Guardian solutions are highly scalable products, based on the number of endpoints targeted for encryption in your organization. Architecture Components Below are suggested hardware configurations that suit most environments. Security Management Server OS: MS Windows 2012R2 Standard (x64), or greater Virtual/Physical Machine CPU: 4 Core(s) RAM: GB Drive C: 50 GB (Free Space) Proxy Server OS: MS Windows 2012R2 Standard (x64), or greater Virtual/Physical Machine CPU: 2 Core(s) RAM: 8.00 GB Drive C: 20 GB (Free Space) SQL Server Hardware Specs CPU: 4 Core(s) RAM: GB Drive C: GB (Free Space) Below is a basic deployment for the Dell Security Management Server. 6 Requirements and Architecture

7 NOTE: If the organization has more than 20,000 endpoints, please contact Dell ProSupport for assistance. Requirements The hardware and software prerequisites for installing the Security Management Server software are included below. Before beginning installation, ensure that all patches and updates are applied to the servers used for installation. Requirements and Architecture 7
8 Hardware The following table details the minimum hardware requirements for Security Management Server see Security Management Server Architecture Design for additional information about scaling based on the size of your deployment. Hardware Requirements Processor Modern Quad-Core CPU (1.5 GHz+) RAM 16GB Free Disk Space 20GB of free disk space NOTE: Up to 10GB may be consumed for a local event database stored within PostgreSQL Network Card 10/100/1000 or better Miscellaneous IPv4 or IPv6 or Hybrid IPv4/IPv6 environment required Virtualization The Security Management Server can be installed in a virtual environment. Only the following environments are recommended. Security Management Server v10.0 has been validated on the following platforms. Hyper-V Server installed as a Full or Core installation or as a role in Windows Server 2012 and Windows Server Hyper-V Server 64-bit x86 CPU required Host computer with at least two cores 8 GB RAM minimum recommended Hardware must conform to minimum Hyper-V requirements 4 GB minimum RAM for dedicated image resource Must be run as a Generation 1 Virtual Machine See for more information Security Management Server v10.0 has been validated with VMware ESXi 5.5, VMware ESXi 6.0, and VMware ESXi 6.5. NOTE: When running VMware ESXi and Windows Server 2012 R2 or Windows Server 2016, VMXNET3 Ethernet Adapters are recommended. VMware ESXi bit x86 CPU required 8 Requirements and Architecture
9 Host computer with at least two cores 8 GB RAM minimum recommended See for a complete list of supported Host Operating Systems Hardware must conform to minimum VMware requirements 4 GB minimum RAM for dedicated image resource See for more information VMware ESXi bit x86 CPU required Host computer with at least two cores 8 GB RAM minimum recommended See for a complete list of supported Host Operating Systems Hardware must conform to minimum VMware requirements 4 GB minimum RAM for dedicated image resource See for more information VMware ESXi bit x86 CPU required Host computer with at least two cores 8 GB RAM minimum recommended See for a complete list of supported Host Operating Systems Hardware must conform to minimum VMware requirements 4 GB minimum RAM for dedicated image resource See for more information NOTE: The SQL Server database hosting the Security Management Server should be run on a separate computer. SQL Server In larger environments, it is highly recommended that the SQL Database server run on a redundant system, such as a SQL Cluster, to ensure availability and data continuity. It is also recommended to perform daily full backups with transactional logging enabled to ensure that any newly generated keys through user/device activation are recoverable. Database maintenance tasks should include rebuilding database indexes and collecting statistics. Software The following table details the software requirements for the Security Management Server and proxy server. NOTE: Due to the sensitive nature of the data that the Security Management Server holds, and to align with the rule of least privilege, Dell recommends installation of the Security Management Server on its own dedicated operating system or to be a part of an application server that has limited roles and rights enabled to help ensure a secure environment. This includes not installing the Security Management Server on privileged infrastructure servers. See identity/ad-ds/plan/security-best-practices/implementing-least-privilege-administrative-models for more information about implementing the least privilege rule. NOTE: Universal Account Control (UAC) must be disabled when installing in a protected directory. After disabling UAC, the server must be rebooted for this change to take effect. NOTE: Registry locations for Policy Proxy (if installed): HKLM\SOFTWARE\Wow6432Node\Dell NOTE: Registry location for Windows servers: HKLM\SOFTWARE\Dell Requirements and Architecture 9
10 Prerequisites Visual C Redistributable Package If not installed, the installer will install it for you. Visual C Redistributable Package If not installed, the installer will install it for you. Visual C Redistributable Package If not installed, the installer will install it for you..net Framework Version 3.5 SP1.NET Framework Version 4.5 Microsoft has published security updates for.net Framework Version 4.5. SQL Native Client 2012 If using SQL Server 2012 or SQL Server If not installed, the installer will install it for you. Security Management Server - Back End Server and Dell Front End Server Windows Server 2008 R2 SP0-SP1 64-bit - Standard Edition - Enterprise Edition Windows Server 2012 R2 - Standard Edition - Datacenter Edition Windows Server Standard Edition - Datacenter Edition LDAP Repository Active Directory 2008 R2 Active Directory 2012 Active Directory 2016 Management Console and Compliance Reporter Internet Explorer 11.x or later Mozilla Firefox 41.x or later Google Chrome 46.x or later NOTE: Your browser must accept cookies. Recommended Virtual Environments for Security Management Server Components 10 Requirements and Architecture
11 The Security Management Server can be installed in a virtual environment. Dell currently supports hosting the Dell Security Management Server or Dell Security Management Server Virtual within a cloud-hosted Infrastructure as a Service (IaaS) environment, such as Amazon Web Services, Azure, and several other vendors. Support for these environments is limited to the functionality of the Security Management Server. The administration and security of these virtual machines will be up to the administrator of the IaaS solution. Additional infrastructure requirements. Additional infrastructure requirements, such as Active Directory and SQL Server, are still required for proper functionality. Database NOTE: The SQL Server database hosting the Security Management Server should be run on a separate computer. SQL Server 2008 R2 - Standard Edition / Enterprise Edition SQL Server Standard Edition / Business Intelligence / Enterprise Edition SQL Server Standard Edition / Business Intelligence / Enterprise Edition SQL Server Standard Edition / Enterprise Edition NOTE: Express Editions are not supported for production environments. Express Editions may be used in POC and evaluations only. NOTE: Below are the requirements for SQL permissions. The current user performing the installation and the services must have local administrator rights. Type Action Scenario SQL Privilege Required Back end Upgrade By definition, upgrades already have DB and Login/User established Back end Restore Install Restore involves an existing DB and login. db_owner db_owner Back end New Install Use existing DB db_owner Back end New Install Create new DB dbcreator, db_owner Back end New Install Use existing login db_owner Back end New Install Create new login securityadmin Back end Uninstall NA NA Proxy Front end Any NA NA NOTE: If User Account Control (UAC) is enabled, you must disable it before installation on Windows Server 2008 R2 when installing in C:\Program Files. The server must be rebooted for this change to take effect. During installation, Windows or SQL Authentication credentials are required to set up the database. Regardless of which type of credentials are used, the account must have the appropriate privileges for the action being performed. The previous table details the privileges required for each type of installation. Additionally, the account used to create and setup the database must have its default schema set to dbo. These privileges are only required during installation to setup the database. Once the Security Management Server is installed the account used to manage SQL access can be restricted to the db_owner and public roles. If you are uncertain about access privileges or connectivity to the database, ask your database administrator to confirm these before you begin installation. Language Support for Remote Management Console The Management Console is Multilingual User Interface (MUI) compliant and supporst the following languages: Requirements and Architecture 11
12 Language Support EN - English ES - Spanish FR - French IT - Italian JA - Japanese KO - Korean PT-BR - Portuguese, Brazilian PT-PT - Portuguese, Portugal (Iberian) DE - German 12 Requirements and Architecture
13 Pre-Installation Configuration 3 Before you begin, read the Security Management Server Technical Advisories for any current workarounds or known issues related to Security Management Server. The pre-installation configuration of the server(s) where you intend to install the Security Management Server is very important. Pay special attention to this section to ensure a smooth installation of the Security Management Server. Configuration 1 If enabled, turn off Internet Explorer Enhanced Security Configuration (ESC). Add the Dell Server URL to Trusted Sites in the browser security options. Reboot the server. 2 Open the following ports for each component: Internal: Active Directory communication: TCP/389 communication (optional): 25 To Front End (if needed): Communication from external Policy Proxy to Message Broker: STOMP/61613 Communication to back end Security Server: HTTPS/8443 Communication to back end Core Server: HTTPS/8888 Communication to RMI ports Communication to back end Device Server: HTTP(S)/ If your Security Management Server is v7.7 or later. If your Dell Server is pre-v7.7, HTTP(S)/8081. Beacon server: HTTP/8446 (If using Data Guardian) External (if needed): SQL database: TCP/1433 Management Console: HTTPS/8443 LDAP: TCP/389/636 (local domain controller), TCP/3268/3269 (global catalog), TCP/135/ (RPC) Compatibility Server: TCP/1099 Compliance Reporter: HTTP(S)/8084 (automatically configured at installation) Identity Server: HTTPS/8445 Core Server: HTTPS/8888 (8888 is automatically configured at installation) Pre-Installation Configuration 13
14 Device Server: HTTP(S)/8443 (Security Management Server v7.7 or later) or HTTP(S)/8081 (Pre-v7.7 Dell Server) Key Server: TCP/8050 Policy Proxy: TCP/8000 Security Server: HTTPS/8443 Client Authentication: HTTPS/8449 (If using Server Encryption) Client communication, if using Advanced Threat Prevention: HTTPS/TCP/443 Create Dell Server Database 3 These instructions are optional. The installer creates a database for you if one does not already exist. If you would prefer to set up a database before you install Security Management Server, follow the instructions below to create the SQL database and SQL user in SQL Management Studio. When you install Security Management Server, follow the instructions in Install Back End Server with Existing Database. The Security Management Server is prepared for both SQL and Windows authentication. The default authentication method is SQL authentication. After you create the database, create a Dell database user with db_owner rights. The db_owner may assign permissions, back up and restore the database, create and delete objects, and manage user accounts and roles without any restrictions. Additionally, ensure that this user has permissions/privileges to run stored procedures. When using a non-default SQL Server instance, after Security Management Server installation, you must specify the dynamic port of the instance on the Database tab of the Server Configuration Tool. For more information, see Server Configuration Tool. As an alternative, enable the SQL Server Browser service and ensure that UDP port 1434 is open. For more information, see msdn.microsoft.com/en-us/library/hh510203(v=sql.120).aspx. The expected non-default coalition supported for your SQL database or SQL instance is "SQL_Latin1_General_CP1_CI_AS" collation. To create the SQL database and SQL user in SQL Management Studio, choose one: Install Visual C /2013/2015 Redistributable Packages 4 If not already installed, install Visual C , 2013, and 2015 Redistributable Packages. If desired, you can allow the Security Management Server installer to install these components. Windows Server 2008 R2 - Install.NET Framework If not already installed, install.net Framework 4.5. Windows Server 2008 R2 - Install SQL Native Client If using SQL Server 2012 or SQL Server 2016, install SQL Native Client If desired, you can allow the Security Management Server installer to install this component. Optional 7 For a new installation - copy your Product Key (the name of the file is EnterpriseServerInstallKey.ini) to C:\Windows to automatically populate the 32-character Product Key in the Security Management Server installer. 14 Pre-Installation Configuration
15 The pre-installation configuration of the server is complete. Continue to. Pre-Installation Configuration 15
16 4 The chapter provides instructions for the following: New Installation - To install a new Security Management Server. Upgrade/Migration - To upgrade from an existing, functional Enterprise Server v9.2 or later. Uninstall Security Management Server - To remove the current installation, if necessary. If your installation must include more than one main server (back end), contact your Dell ProSupport representative. Before You Begin Installation or Upgrade/Migration Before you begin, ensure that applicable Pre-Installation Configuration steps are complete. Read the Security Management Server Technical Advisories for any current workarounds or known issues related to Security Management Server installation. To shorten installation time on Server 2016, add the following exclusions to Windows Defender: C:\Program Files\Dell\Enterprise Edition C:\Windows\Installer The file path from which the installer is run Dell recommends that database best practices are used for the Dell Server database and that Dell software is included in your organization's disaster recovery plan. If you intend to deploy Dell components in the DMZ, ensure that they are properly protected against attacks. For production, Dell strongly recommends installing the SQL Server on a dedicated server. It is best practice to install the back end server before installing and configuring a front end server. Installation log files are located in this directory: C:\Users\<LoggedOnUser>\AppData\Local\Temp New Installation Choose one of two options for back end server installation: Install Back End Server and New Database - To install a new Security Management Server and a new database. Install Back End Server with Existing Database - To install a new Security Management Server and connect to a SQL database created during Pre-Installation Configuration or an existing SQL database that is v9.x or later, when the schema version matches the Security Management Server version to be installed. A v9.2 or later database must be migrated to the latest schema with the latest version of Server Configuration Tool. For instructions on database migration with the Server Configuration Tool, see Migrate the Database. To obtain the latest Server Configuration Tool, or to migrate a pre-v9.2 database, contact Dell ProSupport for assistance. NOTE: If you have a functional Enterprise Server v9.2 or later, refer to instructions in Upgrade/Migrate Back End Server(s). 16
17 If you install a front end server, perform this installation after back end server installation: Install Front End Server - To install a front end server to communicate with a back end server. Install Back End Server and New Database 1 In the Dell installation media, navigate to the Security Management Server directory. Unzip (DO NOT copy/paste or drag/drop) Security Management Server-x64 to the root directory of the server where you are installing Security Management Server. Copying/ pasting or dragging/dropping produces errors and an unsuccessful installation. 2 Double-click setup.exe. 3 Select the language for installation, then click OK. 4 If prerequisites are not already installed, a message displays to inform you of which prerequisites will be installed. Click Install. 5 In the Welcome dialog, click Next. 17
18 6 Read the license agreement, accept the terms, then click Next. 7 If you optionally copied your EnterpriseServerInstallKey.ini file to C:\Windows as explained in Pre-Installation Configuration, click Next. If not, enter the 32-character Product Key and then click Next. The Product Key is located in the EnterpriseServerInstallKey.ini file. 18

19 8 Select Back End Install and click Next. 9 To install the Security Management Server to the default location of C:\Program Files\Dell, click Next. Otherwise, click Change to select another location, then click Next. 19

20 10 To select a location for backup configuration files to be stored, click Change, navigate to the desired folder, then click Next. Dell recommends that you select a remote network location or external drive for backup. After installation, any changes to configuration files, including changes made with the Server Configuration Tool, must be manually backed up in these folders. Configuration files are an important part of the total information used to manually restore the Dell Server, if necessary. 20
21 NOTE: The folder structure created by the installer during this installation step (example shown below) must remain unchanged. 11 You have a choice of digital certificate types to use. It is highly recommended that you use a digital certificate from a trusted certificate authority. Select option "a" or "b" below: a To use an existing certificate that was purchased from a CA authority, select Import an existing certificate and click Next. Click Browse to enter the path to the certificate. Enter the password associated with this certificate. The key store file must be.p12 or pfx. See Exporting a Certificate to.pfx Using the Certificate Management Console for instructions. Click Next. 21
22 NOTE: To use this setting, the exported CA certificate being imported must have the full trust chain. If unsure, re-export the CA certificate and ensure that the following options are selected in the "Certificate Export Wizard": Personal Information Exchange - PKCS#12 (.PFX) Include all certificates in the certification path if possible Export all extended properties b OR To create a self-signed certificate, select Create a self signed certificate and import it to key store and click Next. At the Create Self-Signed Certificate dialog, enter the following information: Fully qualified computer name (example: computername.domain.com) Organization Organizational Unit (example: Security) City State (full name) Country: Two-letter country abbreviation Click Next. NOTE: The certificate expires in 10 years, by default. 22
23 12 For Server Encryption, you have a choice of digital certificate types to use. It is highly recommended that you use a digital certificate from a trusted certificate authority. Select option "a" or "b" below: a To use an existing certificate that was purchased from a CA authority, select Import an existing certificate and click Next. Click Browse to enter the path to the certificate. 23
24 Enter the password associated with this certificate. The key store file must be.p12 or pfx. See Exporting a Certificate to.pfx Using the Certificate Management Console for instructions. Click Next. NOTE: To use this setting, the exported CA certificate being imported must have the full trust chain. If unsure, re-export the CA certificate and ensure that the following options are selected in the "Certificate Export Wizard": Personal Information Exchange - PKCS#12 (.PFX) Include all certificates in the certification path if possible Export all extended properties b OR To create a self-signed certificate, select Create a self signed certificate and import it to key store and click Next. At the Create Self-Signed Certificate dialog, enter the following information: Fully qualified computer name (example: computername.domain.com) Organization Organizational Unit (example: Security) City State (full name) Country: Two-letter country abbreviation Click Next. NOTE: The certificate expires in 10 years, by default. 24
25 13 From the Back End Server Install Setup dialog, you can view or edit hostnames and ports. To accept the default hostnames and ports, in the Back End Server Install Setup dialog, click Next. If you are using a front end server, select Works with Front End to communicate with clients internally in your network or externally in the DMZ and enter the front end Security Server hostname (for example, server.domain.com). To view or edit hostnames, click Edit Hostnames. Edit hostnames only if necessary. Dell recommends using the defaults. NOTE: A hostname cannot contain an underscore character ("_"). 25
26 When finished, click OK. To view or edit Ports, click Edit Ports. Edit ports only if necessary. Dell recommends using the defaults. When finished, click OK. 26
27 14 To create a new database, follow these steps: a b Click Browse to select the server on which to install the database. Select the authentication method for the installer to use to set up the Dell Servery database. After installation, the installed product does not use the credentials specified here. Windows authentication credentials of current user If you choose Windows Authentication, the same credentials that were used to log in to Windows are used for authentication (User Name and Password are not editable). Ensure that the account has system administrator rights and the ability to manage the SQL Server. 27

28 OR SQL server authentication using the credentials below If you use SQL authentication, the SQL account used must have system administrator rights on the SQL Server. c d e The installer must authenticate to the SQL Server with these permissions: create database, add user, assign permissions. Identify the database catalog: Enter the name for a new database catalog. You are prompted in the next dialog to create the new catalog. Click Next. To confirm that you want the installer to create a database, click Yes. To return to the previous screen to make changes, click No. 15 Select the authentication method for the product to use. This step connects an account to the product. 28

29 Windows authentication Select Windows authentication using the credentials below, enter the credentials for the product to use, and click Next. Ensure that the account has system administrator rights and the ability to manage the SQL Server. The user account must have the SQL Server permissions Default Schema: dbo and Database Role Membership: dbo_owner, public. These credentials are also used by Dell services as they work with the Security Management Server. OR SQL Server authentication Select SQL server authentication using the credentials below, enter the SQL Server credentials for the Dell services to use as they engage with the Security Management Server, and click Next. The user account must have the SQL Server permissions Default Schema: dbo and Database Role Membership: dbo_owner, public. 29
30 16 In the Ready to Install the Program dialog, click Install. A progress dialog displays status throughout the installation process. 30
31 17 When the installation is completed, click Finish. Back End Server installation tasks are complete. Dell Services are restarted at the end of installation. It is not necessary to reboot the Dell Server. 31
32 Install Back End Server with Existing Database NOTE: If you have a functional Dell Server v9.2 or later, refer to instructions in Upgrade/Migrate Back End Server(s). You can install a new Security Management Server and connect to a SQL database created during Pre-Installation Configuration or an existing SQL database that is v9.x or later, when the schema version matches the Security Management Server version to be installed. The user account from which the installation is performed must have database owner privileges for the SQL database. If you are uncertain about access privileges or connectivity to the database, ask your database administrator to confirm these before you begin installation. If the existing database has previously been installed with Security Management Server, before you begin installation, ensure that the database, configuration files, and the secretkeystore are backed up and accessible from the server on which you are installing Security Management Server. Access to these files is necessary to configure Security Management Server and the existing database. The folder structure created by the installer during installation (example shown below) must remain unchanged. 1 In the Dell installation media, navigate to the Security Management Server directory. Unzip (DO NOT copy/paste or drag/drop) Security Management Server-x64 to the root directory of the server where you are installing the Security Management Server. Copying/pasting or dragging/dropping produces errors and an unsuccessful installation. 2 Double-click setup.exe. 3 Select the language for installation, then click OK. 4 If prerequisites are not already installed, a message displays to inform you of which prerequisites will be installed. Click Install. 32
33 5 In the Welcome dialog, click Next. 6 Read the license agreement, accept the terms, then click Next. 33
34 7 If you optionally copied your EnterpriseServerInstallKey.ini file to C:\Windows as explained in Pre-Installation Configuration, click Next. If not, enter the 32-character Product Key and then click Next. The Product Key is located in the EnterpriseServerInstallKey.ini file. 8 Select Back End Install and Recovery Installation, and click Next. 34
35 9 To install the Security Management Server to the default location of C:\Program Files\Dell, click Next. Otherwise, click Change to select a different location, then click Next. 10 To select a location for backup configuration recovery files to be stored, click Change, navigate to the desired folder, then click Next. Dell recommends that you select a remote network location or external drive for backup. 35
36 After installation, any changes to configuration files, including changes made with the Server Configuration Tool, must be manually backed up in these folders. Configuration files are an important part of the total information used to manually restore the Dell Server. NOTE: The folder structure created by the installer during installation (example shown below) must remain unchanged. 11 You have a choice of digital certificate types to use. It is highly recommended that you use a digital certificate from a trusted certificate authority. Select option "a" or "b" below: a To use an existing certificate that was purchased from a CA authority, select Import an existing certificate and click Next. 36
37 Click Browse to enter the path to the certificate. Enter the password associated with this certificate. The key store file must be.p12 or pfx. SeeExporting a Certificate to.pfx Using the Certificate Management Console for instructions. Click Next. NOTE: To use this setting, the exported CA certificate being imported must have the full trust chain. If unsure, re-export the CA certificate and ensure that the following options are selected in the "Certificate Export Wizard": Personal Information Exchange - PKCS#12 (.PFX) Include all certificates in the certification path if possible Export all extended properties 37
38 b OR To create a self-signed certificate, select Create a self signed certificate and import it to key store and click Next. At the Create Self-Signed Certificate dialog, enter the following information: Fully qualified computer name (example: computername.domain.com) Organization Organizational Unit (example: Security) City State (full name) Country: Two-letter country abbreviation Click Next. NOTE: The certificate expires in 10 years, by default. 38

39 12 From the Back End Server Install Setup dialog, you can view or edit hostnames and ports. To accept the default hostnames and ports, in the Back End Server Install Setup dialog, click Next. If you are using a front end server, select Works with Front End to communicate with clients internally in your network or externally in the DMZ and enter the front end Security Server hostname (for example, server.domain.com). To view or edit hostnames, click Edit Hostnames. Edit hostnames only if necessary. Dell recommends using the defaults. NOTE: A hostname cannot contain an underscore character ("_"). 39
40 When finished, click OK. To view or edit Ports, click Edit Ports. Edit ports only if necessary. Dell recommends using the defaults. When finished, click OK. 40

41 13 Specify the authentication method for the installer to use. a b Click Browse to select the server where the database resides. Select the authentication type. Windows authentication credentials of current user If you choose Windows Authentication, the same credentials that were used to log in to Windows are used for authentication (User Name and Passwordare not editable). Ensure that the account has system administrator rights and the ability to manage the SQL Server. 41

42 c d OR SQL server authentication using the credentials below If you use SQL authentication, the SQL account used must have system administrator rights on the SQL Server. The installer must authenticate to the SQL Server with these permissions: create database, add user, assign permissions. Click Browse to select the name of the existing database catalog. Click Next. 14 If the Existing Database Error dialog displays, select the appropriate option. If the installer detects a problem with the database, an Existing Database Error dialog displays. The options in the dialog depend on the circumstances: The database schema is from a previous version. (Refer to step a.) The database already has a database schema that matches the version currently being installed. (Refer to step b.) a When the database schema is from a previous version, select Exit Installer to end this installation. Next, you must back up the database. 42

43 The following options MUST be used only with the help of Dell ProSupport: b c The Migrate this database to the current schema option is used to recover a good database from a failed server implementation. This option uses the recovery files in the \Backup folder to reconnect to the database, and then migrates the database to the current schema. This option should only be used after first trying to re-install the correct version of Security Management Server, then running the latest installer to upgrade. The Proceed without migrating the database option installs the Security Management Server files without completely configuring the database. Database configuration must be completed later, manually, using the Server Configuration tool and requires further manual changes. When the database schema already has the current version's schema, but is not connected to a Security Management Server backend, it is considered a Recovery. If Recovery Installation was not selected in this step, this dialog appears: Select Recovery Install Mode to continue the installation with the selected database. Select Select a New Database to choose a different database. Select Exit Installer to end this installation. Click Next. 43

44 15 Select the authentication method for the product to use. This is the account that the product uses to engage with the database and Dell services. To use Windows authentication Select Windows authentication using the credentials below, enter the credentials for the account that the product can use, then click Next. Ensure that the account has system administrator rights and the ability to manage the SQL Server. The user account must have the SQL Server permissions Default Schema: dbo and Database Role Membership: dbo_owner, public. OR To use SQL Server authentication Select SQL server authentication using the credentials below, enter the SQL Server credentials, then click Next. The user account must have the SQL Server permissions Default Schema: dbo and Database Role Membership: dbo_owner, public. 44
45 16 In the Ready to Install the Program dialog, click Install. A progress dialog displays status throughout the installation process. 45
46 When the installation is completed, click Finish. Back end server installation tasks are complete. Dell Services are restarted at the end of installation. It is not necessary to reboot the server. 46
47 Install Front End Server Front end server installation provides a front end (DMZ mode) option for use with Security Management Server. If you intend to deploy Dell components in the DMZ, ensure that they are properly protected against attacks. NOTE: The Beacon service is installed as part of this installation to support Data Guardian callback beacon, which inserts a callback beacon into every file protected by Data Guardian when allowing or enforcing Protected Office Documents within the environment. This allows communication between any device in any location and the front end server. Ensure that necessary network security is configured before using the callback beacon. To perform this installation, you need the fully qualified hostname of the DMZ server. 1 In the Dell installation media, navigate to the Security Management Server directory. Unzip (DO NOT copy/paste or drag/drop) Security Management Server-x64 to the root directory of the server where you are installing Security Management Server. Copying/ pasting or dragging/dropping produces errors and an unsuccessful installation. 2 Double-click setup.exe. 3 Select the language for installation, then click OK. 4 If prerequisites are not already installed, a message displays to inform you of which prerequisites will be installed. Click Install. 5 Click Next in the Welcome dialog. 47
48 6 Read the license agreement, accept the terms, then click Next. 7 If you optionally copied your EnterpriseServerInstallKey.ini file to C:\Windows as explained in Pre-Installation Configuration, click Next. If not, enter the 32-character Product Key and then click Next. The Product Key is located in the EnterpriseServerInstallKey.ini file. 48
49 8 Select Front End Install and click Next. 9 To install the front end server to the default location of C:\Program Files\Dell, click Next. Otherwise, click Change to select another location, then click Next. 49

50 10 You have a choice of digital certificate types to use. NOTE: It is highly recommended that you use a digital certificate from a trusted certificate authority. Select option "a" or "b" below: a To use an existing certificate that was purchased from a CA authority, select Import an existing certificate and click Next. Click Browse to enter the path to the certificate. 50

51 Enter the password associated with this certificate. The key store file must be.p12 or pfx. SeeExporting a Certificate to.pfx Using the Certificate Management Console for instructions. Click Next. NOTE: To use this setting, the exported CA certificate being imported must have the full trust chain. If unsure, re-export the CA certificate and ensure that the following options are selected in the "Certificate Export Wizard": Personal Information Exchange - PKCS#12 (.PFX) Include all certificates in the certification path if possible Export all extended properties b To create a self-signed certificate, select Create a self signed certificate and import it to key store and click Next. At the Create Self-Signed Certificate dialog, enter the following information: Fully qualified computer name (example: computername.domain.com) Organization Organizational Unit (example: Security) City State (full name) Country: Two-letter country abbreviation Click Next. NOTE: The certificate expires in 10 years, by default. 51
52 11 In the Front End Server Setup dialog, enter the fully qualified hostname or DNS alias of the back end server, select Dell Security Management Server, and click Next. 12 From the Front End Server Install Setup dialog, you can view or edit hostnames and ports. To accept the default hostnames and ports, in the Front End Server Install Setup dialog, click Next. 52
. Deselect a proxy only if certain that you do not want to configure it for installation.")
53 To view or edit hostnames, in the Front End Server Setup dialog, click Edit Hostnames. Edit hostnames only if necessary. Dell recommends using the defaults. NOTE: A hostname cannot contain an underscore character ("_"). Deselect a proxy only if certain that you do not want to configure it for installation. If you deselect a proxy in this dialog, it is not installed. When finished, click OK. 53
54 To view or edit Ports, in the Front End Server Setup dialog, click either Edit External Facing Ports or Edit Internal Connecting Ports. Edit ports only if necessary. Dell recommends using the defaults. If you deselect a proxy in the Edit Front End Host Names dialog, its port does not display in the External Ports or Internal Ports dialogs. When finished, click OK. 54


55 13 In the Ready to Install the Program dialog, click Install. 55
56 A progress dialog displays status throughout the installation process. 14 When the installation is completed, click Finish. 56
57 Front End Server installation tasks are complete. Upgrade/Migration You can upgrade Enterprise Server v9.2 and later to Security Management Server v9.x. If your Dell Server version is older than v9.2, you must first upgrade to v9.2 then upgrade to v9.x. Before You Begin Upgrade/Migration Before you begin, ensure that all Pre-Installation Configuration is complete. Read the Security Management Server Technical Advisories for any current workarounds or known issues related to Security Management Server installation. The user account from which the installation is performed must have database owner privileges for the SQL database. If you are uncertain about access privileges or connectivity to the database, ask your database administrator to confirm these before you begin installation. Dell recommends that database best practices are used for the Dell Server database and that Dell software is included in your organization's disaster recovery plan. If you intend to deploy Dell components in the DMZ, ensure that they are properly protected against attacks. For production, Dell recommends installing the SQL Server on a dedicated server. To leverage full capabilities of policies, Dell recommends updating to the most current versions of both the Security Management Server and Clients. Security Management Server v9.x supports: Encryption Enterprise: Windows clients v7.x/8.x 57
58 Mac clients v7.x/8.x SED clients v8.x Authentication v8.x BitLocker Manager v7.2x+ and v8.x Data Guardian v1.x Endpoint Security Suite Pro v1.x Endpoint Security Suite Enterprisev1.x Upgrade/Migration from Security Management Server v9.2 or later. (When migrating from pre-v9.2 Security Management Server, contact Dell ProSupport for assistance.) When upgrading/migrating your Security Management Server to a version that includes new policies that are introduced in that version, commit updated policy after upgrade/migration, to ensure that your preferred policy settings are implemented for the new policies, rather than default values. In general, our recommended upgrade path is to upgrade/migrate the Security Management Server and its components, followed by Client installation/upgrade. Apply Policy Changes 1 As a Dell administrator, log in to the Management Console. 2 In the left menu, click Management > Commit. 3 In Comment enter a description of the change. 4 Click Commit Policies. 5 When the commit is complete, log off the Management Console. Ensure that Dell Services are running 6 From the Windows Start menu, click Start > Run. Type services.msc and click OK. When Services opens, navigate to each Dell Service and, if necessary, click Start the service. Back Up the Existing Installation 7 Back up your entire existing installation to an alternate location. The backup should include the SQL database, secretkeystore, and configuration files. Several files from your existing installation are needed after the upgrade/migration process is complete. NOTE: The folder structure created by the installer during installation (example shown below) must remain unchanged 58
59 Upgrade/Migrate Back End Server(s) 1 In the Dell installation media, navigate to the Security Management Server directory. Unzip (NOT copy/paste or drag/drop) Security Management Server-x64 to the root directory of the server where you are installing Security Management Server. Copying/pasting or dragging/dropping produces errors and an unsuccessful installation. 2 Double-click setup.exe. 3 Select the language for installation, then click OK. 4 In the Welcome dialog, click Next. 5 Read the license agreement, accept the terms, then click Next. 59

60 6 To select a location for backup configuration files to be stored, click Change, navigate to the desired folder, and click Next. Dell recommends that you select a remote network location or external drive for backup. The folder structure created by the installer during installation (example shown below) must remain unchanged. 60

61 7 When the installer properly locates the existing database, the dialog is filled out for you. To connect to the existing database, specify the authentication method to use. After installation, the installed product does not use credentials specified here. a Select the database authentication type: Windows authentication credentials of current user 61
62 b If you choose Windows Authentication, the same credentials that were used to log in to Windows are used for authentication (User Name and Password are not editable). Ensure that the account has system administrator rights and the ability to manage the SQL Server. The user account must have the SQL Server permissions Default Schema: dbo and Database Role Membership: dbo_owner, public. OR SQL server authentication using the credentials below If you use SQL authentication, the SQL account used must have system administrator rights on the SQL Server. The installer must authenticate to the SQL Server with these permissions: create database, add user, assign permissions. Click Next. 8 If the Service Runtime Account Information dialog is not pre-populated, specify the authentication method for the product to use after installation. a b Select the authentication type. Enter the user name and password of the domain service account that Dell services will use to access the SQL Server, and click Next. The user account must be in the format DOMAIN\Username and have the SQL Server permissions Default Schema: dbo and Database Role Membership: dbo_owner, public. 9 If the database is not backed up, you must back it up before continuing the installation. Database upgrade cannot be rolled back. Only after the database is backed up, select Yes, the database has been backed up, and click Next. 62

63 10 Click Install to begin the installation. A progress dialog displays status throughout the upgrade process. 63
64 11 When the installation is completed, click Finish. Dell Services are restarted at the end of migration. It is not necessary to reboot the Dell Server. The installer performs steps for you. It is a Best Practice to check these values to ensure the changes have been made properly. 12 In your backed up installation, copy/paste: <Compatibility Server install dir>\conf\secretkeystore to the new installation: <Compatibility Server install dir>\conf\secretkeystore 64


65 13 In the new installation, open <Compatibility Server install dir>\conf\server_config.xml and replace the server.pass value with the value from the backed up <Compatibility Server install dir>\conf\server_config.xml, as follows: Instructions for server.pass: If you know the password, refer to the example server_config.xml file and make the following changes: Edit the KeyName from CFG_KEY value to none. Enter the plain text password and enclose it between <value> </value>, which in this example is <value>changeit</value> When the Security Management Server starts, the plain text password is hashed, and the hashed value replaces the plain text. Known Password If you do not know the password, cut and paste the section similar to the section shown in Figure 4-2 from the backed up <Compatibility Server install dir>\conf\server_config.xml file into the corresponding section in the new server_config.xml file. Unknown Password Save and close the file. NOTE: Do not attempt to change the Security Management Server password by editing the server.pass value in server_config.xml at any other time. If you change this value, you lose access to the database. Back end server migration tasks are complete. 65


66 Upgrade/Migrate Front End Server(s) NOTE: Beginning with v9.5, the Beacon Service is installed as part of this upgrade using the default hostname and port The Beacon Service supports Data Guardian callback beacon, which inserts a callback beacon into every file protected by Data Guardian when allowing or enforcing Protected Office Documents within the environment. This allows communication between any device in any location and the front end server. Ensure that necessary network security is configured before using the callback beacon. 1 In the Dell installation media, navigate to the Security Management Server directory. Unzip (NOT copy/paste or drag/drop) Security Management Server-x64 to the root directory of the server where you are installing Security Management Server. Copying/pasting or dragging/dropping produces errors and an unsuccessful installation. 2 Double-click setup.exe. 3 Select the language for installation, then click OK. 4 If prerequisites are not already installed, a message displays to inform you of which prerequisites will be installed. Click Install. 5 In the Welcome dialog, click Next. 66
67 6 Read the license agreement, accept the terms, then click Next. 7 In the Ready to Install the Program dialog, click Install. 67
68 A progress dialog displays status throughout the installation process. 8 When the installation is completed, click Finish. 68
69 9 Set up the back end server to communicate with the front end server. a On the back end server, go to <Security Server install dir>\conf\ and open the application.properties file. b Locate publicdns.server.host and set the name to an externally resolvable hostname. c Locate publicdns.server.port and set the port (the default is 8443). Dell Services are restarted at the end of installation. It is not necessary to reboot the Dell Server until Post-Installation Configuration tasks are complete. Disconnected Mode Installation Disconnected mode isolates Security Management Server from the Internet and an unsecured LAN or other network. After Security Management Server is installed in Disconnected mode, it remains in Disconnected mode and cannot be changed back to Connected mode. Security Management Server is installed in Disconnected mode at the command line. The following table lists the available switches. Switch Meaning /v Pass variables to the.msi inside the *.exe /s Silent mode The following table lists available display options. Option Meaning /q No Progress dialog, restarts itself after process completion /qb /qn Progress dialog with Cancel button No user interface 69
70 The following table details the parameters available for the installation. These parameters can be specified at the command line or called from a file by using the property: INSTALL_VALUES_FILE=\"<file_path>\" " Parameters AGREE_TO_LICENSE=Yes - This value must be "Yes." PRODUCT_SN=xxxxx - Optional if you have the license information in the standard location; otherwise, enter it here. INSTALLDIR=<path> - Optional. BACKUPDIR=<path> - This is where the recovery files are stored. NOTE: The folder structure created by the installer during this installation step (example shown below) must remain unchanged. AIRGAP=1 - This value must be "1" to install Security Management Server in Disconnected mode. SSL_TYPE=n - Where n is 1 to import an existing certificate that was purchased from a CA authority and 2 to create a self-signed certificate. The SSL_TYPE value determines which SSL properties are required. The following are required with SSL_TYPE=1: SSL_CERT_PASSWORD=xxxxx SSL_CERT_PATH=xxxxx The following are required with SSL_TYPE=2: SSL_CITYNAME SSL_DOMAINNAME SSL_ORGNAME SSL_UNITNAME SSL_COUNTRY - Optional, default = "US" SSL_STATENAME SSOS_TYPE=n - Where n is 1 to import an existing certificate that was purchased from a CA authority and 2 to create a self-signed certificate. The SSOS_TYPE value determines which SSOS properties are required. The following are required with SSOS_TYPE=1: SSOS_CERT_PASSWORD=xxxxx SSOS_CERT_PATH=xxxxx The following are required with SSOS_TYPE=2: SSOS_CITYNAME SSOS_DOMAINNAME SSOS_ORGNAME SSOS_UNITNAME SSOS_COUNTRY - Optional, default = "US" SSOS_STATENAME 70
71 Parameters DISPLAY_SQLSERVER - This value is parsed to get SQL Server instance and port information. Example: DISPLAY_SQLSERVER=SQL_server\Server_instance, port IS_AUTO_CREATE_SQLSERVER=FALSE - Optional. The default value is FALSE, which means that the database is not created. The database must already exist on server. To create a new database, set this value to TRUE. IS_SQLSERVER_AUTHENTICATION=0 - Optional. The default value is 0, which specifies that Windows authentication credentials of the current logged on user are used to authenticate to the SQL Server. To use SQL authentication, set this value to 1. NOTE: The installer must authenticate to the SQL server with these permissions: create database, add user, assign permissions. The credentials are install-time credentials, not run-time credentials. If SQL authentication is used, the following are required: IS_SQLSERVER_USERNAME IS_SQLSERVER_PASSWORD EE_SQLSERVER_AUTHENTICATION - Required. Specify the authentication method for the product to use. This step connects an account to the product. These credentials are also used by Dell services as they engage with the Security Management Server. To use Windows authentication, set this value to 0. To use SQL authentication, set the value to 1. NOTE: Ensure that the account has system administrator rights and the ability to manage the SQL server. The user account must have the SQL server permissions Default Schema: dbo and Database Role Membership: dbo_owner, public. SQL_EE_USERNAME - Required. With Windows authentication, use this format: DOMAIN\Username. With SQL authentication, specify the user name. SQL_EE_PASSWORD - Required. Specify the password associated with the Windows or SQL user name. If SQL authentication is used (EE_SQLSERVER_AUTHENTICATION=1) the following are valid: RUNAS_KEYSERVER_USER - Set the Key Server "run as" Windows user name in this format: Domain\User. This must be a Windows user account. RUNAS_KEYSERVER_PSWD - Set Key Server "run as" Windows password associated with the Windows user account. SQL_ADD_LOGIN=T - Optional. The default is null (this login is not added). When the value is set to T, if the SQL_EE_USERNAME is not a login or user for the database, the installer attempts to add the user's SQL authentication credentials and set privileges to allow the credentials to be used by the product. Following are hostname parameters. Edit hostnames only if necessary. Dell recommends using the defaults. Format must be server.domain.com. NOTE: A hostname cannot contain an underscore character ("_"). CORESERVERHOST - Optional. Core Server hostname. RMIHOST - Optional. Compatibility Server hostname. REPORTERHOST - Optional. Compliance Reporter hostname. DEVICEHOST - Optional. Device Server hostname. KEYSERVERHOST - Optional. Key Server hostname. 71
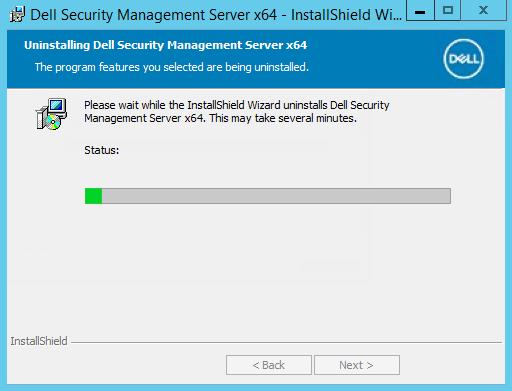
72 Parameters TIGAHOST - Optional. Security Server hostname. SMTP_HOST - Optional. SMTP hostname. ACTIVEMQHOST - Optional. Message Broker hostname. Following are port parameters. Edit ports only if necessary. Dell recommends using the defaults SERVERPORT_CLIENTAUTH - Optional. REPORTERPORT - Optional. DEVICEPORT - Optional. KEYSERVERPORT - Optional. GKPORT - Optional. TIGAPORT - Optional. SMTP_PORT - Optional. ACTIVEMQ_TCP - Optional. ACTIVEMQ_STOMP - Optional. Install Security Management Server in Disconnected Mode The following example installs Security Management Server in silent mode with a progress dialog, using installation parameters listed in the file, C:\mysetups\eeoptions.txt\" " Setup.exe /s /v"/qb INSTALL_VALUES_FILE=\"C:\mysetups\eeoptions.txt\" " Uninstall Security Management Server 1 In the Dell installation media, navigate to the Security Management Server directory. Unzip (DO NOT copy/paste or drag/drop) Security Management Server-x64 to the root directory of the server where you are uninstalling Security Management Server. Copying/pasting or dragging/dropping produces errors and an unsuccessful installation. 2 Double-click setup.exe. 3 In the Welcome dialog, click Next. 72

73 4 In the Remove the Program dialog, click Remove. A progress dialog displays status throughout the uninstallation process. 73
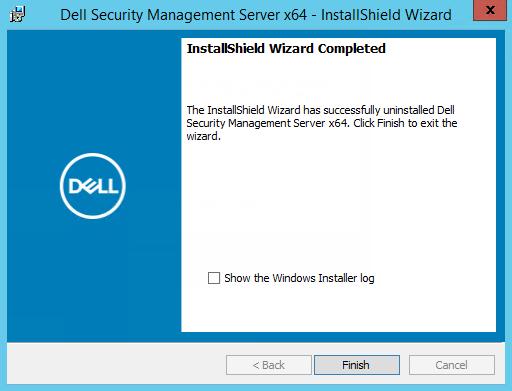
74 5 When the uninstallation is completed, click Finish. 74
75 5 Post-Installation Configuration Read the Security Management Server Technical Advisories for current workarounds or known issues related to Security Management Server configuration. Whether you are installing the Security Management Server for the first time or are upgrading an existing installation, some components of your environment must be configured. DMZ Mode Configuration If the Security Server is deployed in a DMZ and a private network, and only the DMZ server has a domain certificate from a trusted Certificate Authority (CA), some manual steps are needed to add the trusted certificate into the Java keystore of the private network Security Server. If a trusted certificate is being used, disregard this section. NOTE: Dell highly recommends the use of domain certificates from a trusted Certificate Authority for both DMZ and private network servers. For information about updating the certificate for Dell Encryption with an existing certificate in the Microsoft keystore, see Server Configuration Tool When configurations to your environment become necessary after you have completed your installation, use the Server Configuration Tool to make the changes. The Server Configuration Tool allows you to: Add New or Updated Certificates Import Dell Manager Certificate Import Identity Certificate Configure settings for Server SSL Certificate Configure SMTP settings for Data Guardian or Services Change Database Name, Location, or Credentials Migrate the Database The Dell Core Server and Compatibility Server cannot run simultaneously with the Server Configuration Tool. Stop the Core Server service and Compatibility Server service in Services (Start > Run. Type services.msc) prior to starting the Server Configuration Tool. To launch the Server Configuration Tool, go to Start > Dell > Run Server Configuration Tool. The Server Configuration Tool logs to C:\Program Files\Dell\Enterprise Edition\Server Configuration Tool\Logs. Post-Installation Configuration 75
76 Add New or Updated Certificates You have a choice of which type of certificates to use - self-signed or signed: Self-signed certificates are signed by their own creator. Self-signed certificates are appropriate for pilots, POCs, etc. For a production environment, Dell recommends public CA-signed or domain-signed certificates. Signed (public CA-signed or domain-signed) certificates are signed by a public CA or a domain. In the case of certificates that are signed by a public certificate authority (CA), the certificate of the signing CA will, usually, already exist in the Microsoft certificate store and therefore, the chain of trust is automatically established. For domain CA-signed certificates, if the workstation has been joined to the domain, the signing CA certificate from the domain will have been added to the workstation's Microsoft certificate store, thereby also creating a chain of trust. The components that are affected by certificate configuration: Java Services (for instance, Device Server, and so on).net Applications (Core Server) Validation of smart cards used for Preboot Authentication (Security Server) Importing of private encryption keys to be used for signing policy bundles being sent to Dell Manager. Dell Manager performs SSL validation for managed Encryption clients with self-encrypting drives, or BitLocker Manager. Client Workstations: Workstations running BitLocker Manager Workstations running Encryption Enterprise (Windows) Workstations running Endpoint Security Suite Enterprise Information regarding which type of certificates to use: Preboot Authentication using smart cards requires SSL validation with the Security Server. Dell Manager performs SSL validation when connecting to the Dell Core Server. For these types of connections, the signing CA will need to be in the keystore (either the Java keystore or the Microsoft keystore, depending on which Dell Server component is being discussed). If self-signed certificates are chosen, the following options are available: Validation of smart cards used for Preboot Authentication: Import the "Root Agency" signing certificate and full chain of trust into the Security Server Java keystore. The full chain of trust must be imported. Dell Manager: Insert the "Root Agency" signing certificate (from the self-signed certificate generated) into the workstation's "Trusted Root Certification Authorities" (for "local computer") in the Microsoft keystore. Modify the behavior of Server-side SSL validation. To turn off Server-side SSL trust validation, select Disable Trust Chain Check on the Settings tab. There are two methods to create a certificate - Express and Advanced. Choose one method: Express - Choose this method to generate a self-signed certificate for all components. This is the easiest method, but self-signed certificates are appropriate only for pilots, POCs, etc. For a production environment, Dell recommends public CA-signed or domainsigned certificates. Advanced - Choose this method to configure each component separately. Express 1 From the top menu, select Actions > Configure Certificates. 76 Post-Installation Configuration
77 2 When the Configuration Wizard launches, select Express and click Next. The information from the self-signed certificate that was created when installing the Security Management Server is used, if available. 3 From the top menu, select Configuration > Save. If prompted, confirm the save. Certficate set up is complete. The rest of this section details the Advanced method of creating a certificate. Advanced There are two paths to create a certificate - Generate Self-Signed Certificate and Use Current Settings. Choose one path: Path 1 - Generate Self-Signed Certificate Path 2 - Use Current Settings Path 1 - Generate Self-Signed Certificate 1 From the top menu, select Actions > Configure Certificates. 2 When the Configuration Wizard launches, select Advanced and click Next. 3 Select Generate Self-Signed Certificate and click Next. The information from the self-signed certificate that was created when installing the Security Management Server is used, if available. 4 From the top menu, select Configuration > Save. If prompted, confirm the save. Certficate set up is complete. The rest of this section details the other method of creating a certificate. Path 2 - Use Current Settings 1 From the top menu, select Actions > Configure Certificates. 2 When the Configuration Wizard launches, select Advanced and click Next. 3 Select Use Current Settings and click Next. 4 At the Compatibility Server SSL Certificate window, select Generate Self-Signed Certificate and click Next. The information from the self-signed certificate that was created when installing the Security Management Serveris used, if available. Click Next. 5 At the Core Server SSL Certificate window, select one of the following: Select Certificate - Select this option to use an existing certificate. Click Next. Browse to the location of the existing certificate, enter the password associated with the existing certificate, and click Next. Click Finish when complete. Generate Self-Signed Certificate - The information from the self-signed certificate that was created when installing the Security Management Server is used, if available. If you select this option, the Message Security Certificate window does not display (the window does display if you select option Use Current Settings) and the certificate created for the Dell Compatibility Server is used. Verify that the fully qualified computer name is correct. Click Next. A warning message displays, telling you that a certificate by the same name already exists. When asked if you would like to use it, click Yes. Click Finish when complete. Use Current Settings - Select this option to change a setting on a certificate anytime after the initial configuration of the Security Management Server. Selecting this option leaves your already configured certificate in place. Selecting this option advances you to the Message Security Certificate window. Post-Installation Configuration 77
78 At the Message Security Certificate, select one of the following: Select Certificate - Select this option to use an existing certificate. Click Next. Browse to the location of the existing certificate, enter the password associated with the existing certificate, and click Next. Click Finish when complete. Generate Self-Signed Certificate - The information from the self-signed certificate that was created when installing the Security Management Server is used, if available. Click Next. Click Finish when complete. Certificate set up is complete. When changes are complete: 1 From the top menu, select Configuration > Save. If prompted, confirm the save. 2 Close the Dell Serverr Configuration Tool. 3 Click Start > Run. Type services.msc and click OK. When Services opens, navigate to each Dell Service and click Start the service. Import Dell Manager Certificate If your deployment includes Security Management Server remotely-managed clients with Encryption Management Agents, you must import your newly created (or existing) certificate. The Dell Manager certificate is used as a vehicle to protect the private key which is used to sign the policy bundles being sent to Security Management Server remotely-managed clients and Encryption Management Agent. This certificate can be independent of any of the other certificates. Additionally, if this key is compromised it can be replaced with a new key, and Dell Manager will request a new public key if it cannot decrypt the policy bundles. 1 Open the Microsoft Management Console. 2 Click File > Add/Remove Snap-in. 3 Click Add. 4 At the Add Standalone Snap-in window, select Certificates and click Add. 5 Select Computer Account and click Next. 6 At the Select Computer window, select Local computer (the computer this console is running on) and click Finish. 7 Click Close. 8 Click OK. 9 In the Console Root folder, expand Certificates (Local Computer). 10 Go to the Personal folder and locate the desired certificate. 11 Highlight the desired certificate, right-click All Tasks > Export. 12 When the Certificate Export wizard opens, click Next. 13 Select Yes, export the private key and click Next. 14 Select Personal Information Exchange - PKCS #12 (.PFX) and then select the sub-options Include all certificates in the certification path if possible and Export all extended properties. Click Next. 15 Enter and confirm a password. This can be any password of your choosing. Choose a password that is easy for you to remember, but no one else. Click Next. 16 Click Browse to browse to the location of where you would like to save the file. 17 In File Name, enter a name to save the file as. Click Save. 18 Click Next. 78 Post-Installation Configuration
79 19 Click Finish. 20 A message stating that the export was successful displays. Close the MMC. 21 Go back to the Dell Server Configuration Tool. 22 From the top menu, select Actions > Import DM certificate. 23 Navigate to the location where the exported file was saved. Select the file and click Open. 24 Enter the password associated with this file and click OK. The Dell Manager certificate import is now complete. When changes are complete: 1 From the top menu, select Configuration > Save. If prompted, confirm the save. 2 Close the Dell Server Configuration Tool. 3 Click Start > Run. Type services.msc and click OK. When Services opens, navigate to each Dell Service and click Start the service. Import SSL/TLS Certificate BETA If your deployment includes Server Encryption, you must import your newly created (or existing) certificate. The SSL/TLS Certificate BETA protects the private key which is used to sign the policy bundles being sent to client servers. 1 From the top menu, select Actions > Import SSL/TLS Certificate BETA. 2 Browse to select a certificate and click Next. 3 At the Certificate Password prompt, enter the password associated with the existing certificate. 4 In the Windows Account Dialog, choose one option: a b To change the credentials associated with the identity certificate, select Use different Windows account credentials with the identity certificate. To continue using the credentials of the account that is logged on, click Next. 5 From the top menu, select Configuration > Save. If prompted, confirm the save. Configure settings for Server SSL Certificate In the Server Configuration Tool, click the Settings tab. Dell Manager: To turn off Server-side Dell Manager SSL trust validation, select Disable Trust Chain Check. SCEP: If using Mobile Edition, enter the URL of the server hosting SCEP. NOTE: As of v9.8, Mobile Edition is no longer supported. When changes are complete: 1 From the top menu, select Configuration > Save. If prompted, confirm the save. 2 Close the Dell Server Configuration Tool. 3 Click Start > Run. Type services.msc and click OK. When Services opens, navigate to each Dell Service and click Start the service. Post-Installation Configuration 79
80 Configure SMTP settings In the Server Configuration Tool, click the SMTP tab. This tab configures SMTP settings for Data Guardian, Product Bulletins, notifications, and Advanced Threat Prevention Threat Relay messages. When configuration changes are complete, restart the Security Server service. The Security Server service must be restarted in order for the settings to be updated. Enter the following information: 1 In Host Name, enter the FQDN of your SMTP server, such as smtpservername.domain.com. 2 In User Name, enter the user name to log in to the mail server. The format can be DOMAIN\jdoe, jdoe, or whatever form your organization requires. 3 In Password, enter the Password associated with this user name. 4 In From Address, enter the address that the will originate from. This may be the same as the account for the user name (jdoe@domain.com), but it can also be another account that the specified user name has access to send for (CloudRegistration@domain.com). 5 In Port, enter the Port number (typically 25). 6 In theauthentication menu, select either True or False. NOTE: The username and password should be left blank if authentication is set to false. When changes are complete: 1 From the top menu, select Configuration > Save. If prompted, confirm the save. 2 Close the Dell Server Configuration Tool. 3 Click Start > Run. Type services.msc and click OK. When Services opens, navigate to each Dell Service and click Start the service. Change Database Name, Location, or Credentials In the Server Configuration Tool, click the Database tab. 1 In Server Name, enter the fully qualified domain name (if there is an instance name, include it) of the server hosting the database. For example, SQLTest.domain.com\DellDB. Dell recommends using a fully qualified domain name, although an IP address may be used. 2 InServer Portt, enter the port number. When using a non-default SQL Server instance, you must specify the dynamic port of the instance in Port:. As an alternative, enable the SQL Server Browser service and ensure that UDP port 1434 is open. For more information, see 3 In Database, enter the name of the database. 4 In Authentication:, select either Windows Authentication or SQL Server Authentication. If you choose Windows Authentication, the same credentials that were used to log in to Windows is used for authentication (User Name and Password are not editable). 5 In User Name:, enter the appropriate user name associated with this database. 6 In Password:, enter the password for the user name listed in User Name. 7 From the top menu, select Configuration > Save. If prompted, confirm the save. 80 Post-Installation Configuration
81 8 To test the database configuration, from the top menu, select Actions > Test Database Configuration. The Configuration Wizard launches. 9 At the Configuration Test window, read the test information and click Next. 10 If you chose Windows Authentication in the Database tab, you can optionally enter alternate credentials to allow the use of the same credentials used to run the Security Management Server. Click Next. 11 At the Test Configuration window, the results of the Test Connection Settings, Compatibility Test, and the Database Migrated Test display. 12 Click Finish. NOTE: If either the SQL database or SQL instance is configured with a non-default collation, the non-default collation must be caseinsensitive. For a list of collations and case sensitivity, see When changes are complete: 1 From the top menu, select Configuration > Save. If prompted, confirm the save. 2 Close the Dell Server Configuration Tool. 3 Click Start > Run. Type services.msc and click OK. When Services opens, navigate to each Dell Service and click Start the service. Migrate the Database You can migrate a v9.2 or later database to the latest schema with the latest upgrade of the server. In the Server Configuration Tool, click the Database tab. 1 If you have not yet backed up your existing Dell Server database, do so now. 2 From the top menu, select Actions > Migrate Database. The Configuration Wizard launches. 3 At the Migrate Enterprise Database window, a warning displays. Confirm that you have either backed up the entire database or confirm that a backup does not need to be made of your existing database. Click Next. At the Migrating Database window, informational messages display the status of the migration. When complete, check for errors. 4 Click Finish. NOTE: An error message identified by, signifies that a database task has failed and corrective action needs to be taken before the database can be properly migrated. Click Finish, correct the database errors, and reinitiate the instructions in this section. When migration is complete: 1 From the top menu, select Configuration > Save. If prompted, confirm the save. 2 Close the Dell Server Configuration Tool. 3 Click Start > Run. Type services.msc and click OK. When Services opens, navigate to each Dell Service and click Start the service. Post-Installation Configuration 81
82 6 Administrative Tasks Assign Dell Administrator Role 1 As a Security Management Server Virtual administrator, log in to the Management Console: The default credentials are superadmin/changeit. 2 In the left pane, click Populations > Domains. 3 Click a domain to add a user to. 4 On the Domain Detail page, click the Members tab. 5 Click Add User. 6 Enter a filter to search the user name by Common Name, Universal Principal Name, or samaccountname. The wild card character is *. A Common Name, Universal Principal Name, and samaccountname must be defined in the enterprise directory server for every user. If a user is a member of a Domain or Group but does not display in the Domain or Group Members list in the Management, ensure that all three names are properly defined for the user in the enterprise directory server. The query will automatically search by common name, then UPN, and then samaccount name until a match is found. 7 Select users from the Directory User List to add to the Domain. Use <Shift><click> or <Ctrl><click> to select multiple users. 8 Click Add. 9 From the menu bar, click the Details & Actions tab of the specified user. 10 Scroll across the menu bar, and select the Admin tab. 11 Select the administrator roles to add to this user. 12 Click Save. Log in with Dell Administrator Role 1 Log out of the Management Console. 2 Log in to the Management Console and log in with Domain user credentials. Upload Client Access License You received Client Access Licenses separately from the installation files, either at the initial purchase or later if you added additional Client Access Licenses. 1 In the left pane, click Management. 2 Click License Management. 3 Click Choose File to locate and select the Client License file. Commit Policies Commit policies when installation is completed. To commit polices after installation or, later, after policy modifications are saved, follow these steps: 1 In the left pane, click Management > Commit. 2 In Comment, enter a description of the change. 82 Administrative Tasks
83 3 Click Commit Policies. Configure Dell Compliance Reporter 1 In the left pane, click Compliance Reporter. 2 When Dell Compliance Reporter launches, log in using the default credentials of superadmin/changeit. Perform Back ups For the purposes of disaster recovery, ensure the following locations are backed up weekly, with nightly differentials. For more information on planning for disaster recovery, refer tohttp:// For more information on backing up compliance reporter data, refer to Security Management Server Backups On a regular basis, back up the files that are stored in the location you selected for configuration file backup during installation (step 10 on page 27) or upgrade/migration (step 6 on page 68). Weekly backups of this data are acceptable, since it should rarely change and can be manually reconfigured if needed. The most critical files store information necessary to connect to the database: <Installation folder>\enterprise Edition\Compatibility Server\conf\server_config.xml <Installation folder>\enterprise Edition\Compatibility Server\conf\secretKeyStore <Installation folder>\enterprise Edition\Compatibility Server\conf\gkconfig.xml SQL Server Backups Perform nightly full backups with transactional logging enabled, and perform differential database backups every 3-4 hours. If a backup database is available, then the recommendation would be that transaction logs and/or log shipping tasks be performed in 15-minute intervals (or shorter intervals if possible). As always, Dell recommends database best practices are used for the Dell Server database and that Dell software is included in your organization's disaster recovery plan. For additional information on SQL Server best practices, see the following list, which should be implemented when Dell Security is installed if not already implemented. PostgreSQL Server Backups Audit events are stored in the PostgreSQL Server, which should be routinely backed up. For backup instructions, refer to Dell recommends that database best practices are used for the PostgreSQL database and that Dell software is included in your organization's disaster recovery plan. Administrative Tasks 83
84 7 Ports The following table describes each component and its function. Name Default Port Description Compliance Reporter HTTP(S)/ 8084 Provides an extensive view of the environment for auditing and compliance reporting. Management Console Core Server Device Server Security Server Compatibility Server Message Broker Service Key Server Policy Proxy HTTP(S)/ 8443 HTTPS/ 8888 HTTPS/ 8081 HTTPS/ 8443 TCP/ 1099 TCP/ and STOMP/ TCP/ 8050 TCP/ 8000 Administration console and control center for the entire enterprise deployment. Manages policy flow, licenses, and registration for Preboot Authentication, SED Management, BitLocker Manager, Threat Protection, and Advanced Threat Prevention. Processes inventory data for use by Compliance Reporter and the Management Console. Collects and stores authentication data. Controls role-based access. Supports activations and password recovery. A component of the Security Management Server. Required for Encryption Enterprise (Windows and Mac) Communicates with Policy Proxy; manages forensic key retrievals, activations of clients, Data Guardian, SED-PBA communication, and Active Directory for authentication or reconciliation, including identity validation for authentication into the Remote Management Console. Requires SQL database access. A service for managing the enterprise architecture. Collects and stores initial inventory data during activation and policy data during migrations. Processes data based on user groups. Handles communication between services of the Dell Server. Stages policy information created by the Compatibility Server for Policy Proxy queuing. Requires SQL database access. Negotiates, authenticates, and encrypts a client connection using Kerberos APIs. Requires SQL database access to pull the key data. Provides a network-based communication path to deliver security policy updates and inventory updates. 84 Ports
85 Name Default Port Description LDAP TCP/ 389/636 (local domain controller), 3268/3269 (global catalog) Port This port is used for requesting information from the local domain controller. LDAP requests sent to port 389 can be used to search for objects only within the global catalog's home domain. However, the requesting application can obtain all of the attributes for those objects. For example, a request to port 389 could be used to obtain a user's department. Microsoft SQL Database Client Authentication TCP/ 135/ (RPC) TCP/ 1433 HTTPS/ 8449 Port This port is used for queries specifically targeted for the global catalog. LDAP requests sent to port 3268 can be used to search for objects in the entire forest. However, only the attributes marked for replication to the global catalog can be returned. For example, a user's department could not be returned using port 3268 since this attribute is not replicated to the global catalog. The default SQL Server port is 1433, and client ports are assigned a random value between 1024 and Allows client servers to authenticate with Dell Server. Required for Server Encryption. Callback beacon HTTP/TCP 8446 Allows a callback beacon to be inserted into each protected Office file, when running Data Guardian Protected Office mode. Ports 85
86 8 SQL Server Best Practices The following list explains SQL Server best practices, which should be implemented when Dell security is installed if not already implemented. 1 Ensure the NTFS block size where the data file and log file reside is 64 KB. SQL Server extents (basic unit of SQL storage) are 64 KB. For more information, search Microsoft's TechNet articles for "Understanding Pages and Extents." Microsoft SQL Server 2008 R As a general guideline, set the maximum amount of SQL Server memory to 80 percent of the installed memory. For more information, search Microsoft's TechNet articles for Server Memory Server Configuration Options. Microsoft SQL Server 2008 R2 - Microsoft SQL Server Microsoft SQL Server Microsoft SQL Server Set -t1222 on the instance startup properties to ensure deadlock information is captured if one occurs. For more information, search Microsoft's TechNet articles for "Trace Flags (Transact-SQL)." Microsoft SQL Server 2008 R2 - Microsoft SQL Server Microsoft SQL Server Microsoft SQL Server Ensure that all Indexes are covered by a weekly maintenance job to rebuild the indexes. 86 SQL Server Best Practices
87 9 Certificates This chapter explains how to obtain certificates for use with Security Management Server. For information on how to configure to configure SmartCard Authentication, see sln303783/dell-data-protection-sed-management-smartcard-setup-guide?lang=en. For information about the minimum requirements to request SSL/TLS certificates for use by the Dell Data Security server, see For information about updating the certificate for Dell Encryption with an existing certificate in the Microsoft keystore, see Create a Self-Signed Certificate and Generate a Certificate Signing Request This section details the steps to create a self-signed certificate for the Java-based components. This process cannot be used to create a self-signed certificate for.net-based components. Dell recommends a self-signed certificate only in a non-production environment. If your organization requires an SSL server certificate, or you need to create a certificate for other reasons, this section describes the process to create a java keystore using Keytool. If your organization plans to use smart cards for authentication, you need to use Keytool to import the full certificate chain of trust that are used in the smart card user's certificate. Keytool creates private keys that are passed in the format of a Certificate Signing Request (CSR) to a Certificate Authority (CA), such as VeriSign or Entrust. The CA will then, based on this CSR, create a server certificate that it signs. The server certificate is then downloaded to a file along with the signing authority certificate. The certificates are then imported into the cacerts file. Generate a New Key Pair and a Self-Signed Certificate 1 Navigate to the conf directory of Compliance Reporter, Security Server, or Device Server. 2 Back up the default certificate database: Click Start > Run, and type move cacerts cacerts.old. 3 Add Keytool to the system path. Type the following command in a command prompt: set path=%path%;<dell Java Install Dir>\bin 4 To generate a certificate, run Keytool as shown: keytool -genkey -keyalg RSA -sigalg SHA1withRSA -alias Dell -keystore.\cacerts 5 Enter the following information as the Keytool prompts for it. Certificates 87

88 NOTE: Back up configuration files before editing them. Only change the specified parameters. Changing other data in these files, including tags, can cause system corruption and failure. Dell cannot guarantee that problems resulting from unauthorized changes to these files can be solved without reinstalling the Security Management Server. Keystore password: Enter a password (unsupported characters are <>;&" '), and set the variable in the component conf file to the same value, as follows: <Compliance Reporter install dir>\conf\eserver.properties. Set the value eserver.keystore.password = <Device Server install dir>\conf\application.properties. Set the value keystore.password = <Security Server install dir>\conf\application.properties. Set the value keystore.password = Fully Qualified Server Name: Enter the fully qualified name of the server where the component you are working with is installed. This fully qualified name includes the hostname and the domain name (example, server.domain.com). Organizational unit: Enter the appropriate value (example, Security). Organization: Enter the appropriate value (example, Dell). City or locality: Enter the appropriate value (example, Dallas). State or province: Enter the unabbreviated state or province name (example, Texas). Two-letter country code. The utility prompts for confirmation that the information is correct. If so, type yes. If not, type no. The Keytool displays each value entered previously. Click Enter to accept the value or change the value and click Enter. Key password for alias: If you do not enter another password here, this password defaults to the Keystore password. Request a Signed Certificate from a Certificate Authority Use this procedure to generate a Certificate Signing Request (CSR) for the self-signed certificate created in Generate a New Key Pair and a Self-Signed Certificate. 1 Substitute the same value used previously for <certificatealias>: keytool -certreq -sigalg SHA1withRSA -alias <certificate-alias> -keystore.\cacerts -file <csr-filename> For example, keytool -certreq -sigalg SHA1withRSA -alias sslkey -keystore.\cacerts -file Dell.csr The.csr file contains a BEGIN/END pair to use during the creation of the certificate on the CA. Example.CSR File 2 Follow your organizational process for acquiring an SSL server certificate from a Certificate Authority. Send the contents of the <csrfilename> for signing. 88 Certificates
89 NOTE: There are several methods to request a valid certificate. An example method is shown in Example Method to Request a Certificate. 3 When the signed certificate is received, store it in a file. 4 As a best practice, back up this certificate in case an error occurs during the import process. This backup prevents having to start the process over. Import a Root Certificate If the root certificate Certificate Authority is Verisign (but not Verisign Test), skip to the next procedure and import the signed certificate. The Certificate Authority root certificate validates signed certificates. 1 Do one of the following: Download the Certificate Authority root certificate, and store it in a file. Obtain the enterprise directory server root certificate. 2 Do one of the following: If you are enabling SSL for Compliance Reporter, Security Server, or Device Server, change to the component conf directory. If you are enabling SSL between the Security Management Server and the enterprise directory server, change to <Dell install dir> \Java Runtimes\jre1.x.x_xx\lib\security (the default password for JRE cacerts is changeit). 3 Run Keytool as follows to install the root certificate: keytool -import -trustcacerts -alias <ca-cert-alias> -keystore.\cacerts -file <ca-certfilename> For example, keytool -import -alias Entrust -keystore.\cacerts -file.\entrust.cer Example Method to Request a Certificate An example method to request a certificate is to use a web browser to access the Microsoft CA Server, which is set up internally by your organization. 1 Navigate to the Microsoft CA Server. The IP address is supplied by your organization. 2 Select Request a certificate and click Next. Microsoft Certificate Services Certificates 89


90 3 Select Advanced Request and click Next. Choose Request Type 4 Select the option to Submit a certificate request using a base64 encode PKCS #10 file and click Next. Advanced Certificate Request 90 Certificates


91 5 Paste in the contents of the CSR request in the text box. Select a certificate template of Web Server and click Submit. Submit a Saved Request 6 Save the certificate. Select DER encoded and click Download CA certificate. Download CA Certificate Certificates 91

92 7 Save the certificate. Select DER encoded and click Download CA certification path. Download CA Certification Path 8 Import the converted signing authority certificate. Return to the command prompt. Type: keytool -import -trustcacerts -file <csr-filename> -keystore cacerts 9 Now that the signing authority certificate has been imported, the server certificate can be imported (the chain of trust can be established). Type: keytool -import -alias sslkey -file <csr-filename> -keystore cacerts Use the alias of the self-signed certificate to pair the CSR request with the server certificate. 92 Certificates
Dell Data Security. Security Management Server Installation and Migration Guide v9.10
 Dell Data Security Security Management Server Installation and Migration Guide v9.10 Notes, cautions, and warnings NOTE: A NOTE indicates important information that helps you make better use of your product.
Dell Data Security Console. User Guide v10.0
 Dell Data Security Console User Guide v10.0 Notes, cautions, and warnings NOTE: A NOTE indicates important information that helps you make better use of your product. CAUTION: A CAUTION indicates either
Dell Data Security Console. User Guide v2.0
 Dell Data Security Console User Guide v2.0 Notes, cautions, and warnings NOTE: A NOTE indicates important information that helps you make better use of your product. CAUTION: A CAUTION indicates either
Dell Data Security. Admin Utilities
 Dell Data Security Notes, cautions, and warnings NOTE: A NOTE indicates important information that helps you make better use of your product. CAUTION: A CAUTION indicates either potential damage to hardware
Dell Encryption. Admin Utilities
 Dell Encryption Notes, cautions, and warnings NOTE: A NOTE indicates important information that helps you make better use of your product. CAUTION: A CAUTION indicates either potential damage to hardware
Dell Data Security. CREDActivate Usage Guide
 Dell Data Security Notes, cautions, and warnings NOTE: A NOTE indicates important information that helps you make better use of your product. CAUTION: A CAUTION indicates either potential damage to hardware
Dell Data Security. Getting Started with Dell Data Security v9.10
 Dell Data Security Notes, cautions, and warnings NOTE: A NOTE indicates important information that helps you make better use of your product. CAUTION: A CAUTION indicates either potential damage to hardware
Dell Data Security. Security Management Server Virtual - Quick Start and Installation Guide v9.9
 Dell Data Security Security Management Server Virtual - Quick Start and Installation Guide v9.9 Notes, cautions, and warnings NOTE: A NOTE indicates important information that helps you make better use
Dell Security Management Server Virtual. Quick Start and Installation Guide v10.0
 Dell Security Management Server Virtual Notes, cautions, and warnings NOTE: A NOTE indicates important information that helps you make better use of your product. CAUTION: A CAUTION indicates either potential
Dell Encryption. System Requirements v8.17.2
 Dell Encryption System v8.17.2 Notes, cautions, and warnings A NOTE indicates important information that helps you make better use of your product. CAUTION: A CAUTION indicates either potential damage
Dell Data Security. Security Management Server Virtual - Quick Start and Installation Guide v9.11
 Dell Data Security Security Management Server Virtual - Quick Start and Installation Guide v9.11 Notes, cautions, and warnings NOTE: A NOTE indicates important information that helps you make better use
Dell Security Management Server Virtual. Quick Start and Installation Guide v9.11
 Dell Security Management Server Virtual Quick Start and Installation Guide v9.11 Notes, cautions, and warnings NOTE: A NOTE indicates important information that helps you make better use of your product.
Dell Data Protection Endpoint Security Suite Enterprise. Endpoint Security Suite Enterprise Support for VDI v1.3
 Dell Data Protection Endpoint Security Suite Enterprise Endpoint Security Suite Enterprise Support for VDI v1.3 Legend CAUTION: A CAUTION icon indicates potential damage to hardware or loss of data if
Dell Data Security. Advanced Threat Prevention Quick Start Guide v1.7.1
 Dell Data Security Advanced Threat Prevention Quick Start Guide v1.7.1 Notes, cautions, and warnings NOTE: A NOTE indicates important information that helps you make better use of your product. CAUTION:
Veritas Desktop and Laptop Option 9.2 Compatibility Matrix
 Veritas Desktop and Laptop Option 9.2 Compatibility Matrix Copyright (c) 2018 Veritas Technologies LLC. All rights reserved. Veritas and the Veritas Logo are trademarks or registered trademarks of Veritas
KYOCERA Net Admin Installation Guide
 KYOCERA Net Admin Guide Legal Notes Unauthorized reproduction of all or part of this guide is prohibited. The information in this guide is subject to change without notice. We cannot be held liable for
Veritas Backup Exec Quick Installation Guide
 Veritas Backup Exec Quick Installation Guide Legal Notice Copyright 2017 Veritas Technologies LLC. All rights reserved. Veritas and the Veritas Logo are trademarks or registered trademarks of Veritas Technologies
CaliberRDM. Installation Guide
 CaliberRDM Installation Guide Borland Software Corporation 4 Hutton Centre Dr., Suite 900 Santa Ana, CA 92707 Copyright 2010 Micro Focus (IP) Limited. All Rights Reserved. CaliberRDM contains derivative
Veritas Desktop and Laptop Option 9.3 Software Compatibility List
 Veritas Desktop and Laptop Option 9.3 Software Compatibility List Copyright (c) 2018 Veritas Technologies LLC. All rights reserved. Veritas and the Veritas Logo are trademarks or registered trademarks
Edge Device Manager Quick Start Guide. Version R15
 Edge Device Manager Quick Start Guide Version R15 Notes, cautions, and warnings NOTE: A NOTE indicates important information that helps you make better use of your product. CAUTION: A CAUTION indicates
Dell Endpoint Security Suite Enterprise for Linux. Administrator Guide v1.0
 Dell Endpoint Security Suite Enterprise for Linu Administrator Guide v1.0 Notes, cautions, and warnings NOTE: A NOTE indicates important information that helps you make better use of your product. CAUTION:
VMware Horizon JMP Server Installation and Setup Guide. 13 DEC 2018 VMware Horizon 7 7.7
 VMware Horizon JMP Server Installation and Setup Guide 13 DEC 2018 VMware Horizon 7 7.7 You can find the most up-to-date technical documentation on the VMware website at: https://docs.vmware.com/ If you
Dell Encryption. Recovery Guide v8.18/v1.8/v1.6
 Dell Encryption Recovery Guide v8.18/v1.8/v1.6 Notes, cautions, and warnings NOTE: A NOTE indicates important information that helps you make better use of your product. CAUTION: A CAUTION indicates either
Veritas Desktop and Laptop Option Software Compatibility List
 Veritas Desktop and Laptop Option 9.3.1 Software Compatibility List Copyright (c) 2018 Veritas Technologies LLC. All rights reserved. Veritas and the Veritas Logo are trademarks or registered trademarks
Veritas Desktop and Laptop Option 9.0 Compatibility Matrix
 Veritas Desktop and Laptop Option 9.0 Compatibility Matrix Copyright (c) 2016 Veritas Technologies LLC. All rights reserved. Veritas and the Veritas Logo are trademarks or registered trademarks of Veritas
Install and upgrade Qlik Sense. Qlik Sense 3.0 Copyright QlikTech International AB. All rights reserved.
 Install and upgrade Qlik Sense Qlik Sense 3.0 Copyright 1993-2016 QlikTech International AB. All rights reserved. Copyright 1993-2016 QlikTech International AB. All rights reserved. Qlik, QlikTech, Qlik
Bomgar Vault Server Installation Guide
 Bomgar Vault 17.2.1 Server Installation Guide 2017 Bomgar Corporation. All rights reserved worldwide. BOMGAR and the BOMGAR logo are trademarks of Bomgar Corporation; other trademarks shown are the property
Veritas Desktop and Laptop Option 9.2
 1. Veritas Desktop and Laptop Option 9.2 Quick Reference Guide for DLO Installation and Configuration 24-Jan-2018 Veritas Desktop and Laptop Option: Quick Reference Guide for DLO Installation and Configuration.
McAfee epolicy Orchestrator Installation Guide
 McAfee epolicy Orchestrator 5.10.0 Installation Guide COPYRIGHT Copyright 2018 McAfee, LLC TRADEMARK ATTRIBUTIONS McAfee and the McAfee logo, McAfee Active Protection, epolicy Orchestrator, McAfee epo,
SC-T35/SC-T45/SC-T46/SC-T47 ViewSonic Device Manager User Guide
 SC-T35/SC-T45/SC-T46/SC-T47 ViewSonic Device Manager User Guide Copyright and Trademark Statements 2014 ViewSonic Computer Corp. All rights reserved. This document contains proprietary information that
Storage Manager 2018 R1. Installation Guide
 Storage Manager 2018 R1 Installation Guide Notes, Cautions, and Warnings NOTE: A NOTE indicates important information that helps you make better use of your product. CAUTION: A CAUTION indicates either
Installation Guide for Pulse on Windows Server 2012
 USER GUIDE MADCAP PULSE 4 Installation Guide for Pulse on Windows Server 2012 Copyright 2018 MadCap Software. All rights reserved. Information in this document is subject to change without notice. The
ImageAssist Static. User's Guide for Single Platform
 ImageAssist Static User's Guide for Single Platform Notes, cautions, and warnings NOTE: A NOTE indicates important information that helps you make better use of your product. CAUTION: A CAUTION indicates
Veritas Desktop and Laptop Option 9.3
 1. Veritas Desktop and Laptop Option 9.3 Quick Reference Guide for DLO Installation and Configuration 22-Jun-18 Veritas Desktop and Laptop Option: Quick Reference Guide for DLO Installation and Configuration.
Veritas Desktop and Laptop Option 9.3.1
 1. Veritas Desktop and Laptop Option 9.3.1 Quick Reference Guide for DLO Installation and Configuration 12-Nov-18 Veritas Desktop and Laptop Option: Quick Reference Guide for DLO Installation and Configuration.
 Trend Micro Incorporated reserves the right to make changes to this document and to the products described herein without notice. Before installing and using the product, please review the readme files,
Dell Data Guardian. Windows, Mac, Mobile, and Web User Guide v1.6/1.3
 Dell Data Guardian Windows, Mac, Mobile, and Web User Guide v1.6/1.3 Notes, cautions, and warnings A NOTE indicates important information that helps you make better use of your product. CAUTION: A CAUTION
VMware Identity Manager Connector Installation and Configuration (Legacy Mode)
") VMware Identity Manager Connector Installation and Configuration (Legacy Mode) VMware Identity Manager This document supports the version of each product listed and supports all subsequent versions until
VMware Identity Manager Connector Installation and Configuration (Legacy Mode) VMware Identity Manager This document supports the version of each product listed and supports all subsequent versions until
Version Installation Guide. 1 Bocada Installation Guide
 Version 19.4 Installation Guide 1 Bocada Installation Guide Copyright 2019 Bocada LLC. All Rights Reserved. Bocada and BackupReport are registered trademarks of Bocada LLC. Vision, Prism, vpconnect, and
Install and upgrade Qlik Sense. Qlik Sense 3.2 Copyright QlikTech International AB. All rights reserved.
 Install and upgrade Qlik Sense Qlik Sense 3.2 Copyright 1993-2017 QlikTech International AB. All rights reserved. Copyright 1993-2017 QlikTech International AB. All rights reserved. Qlik, QlikTech, Qlik
VMware Enterprise Systems Connector Installation and Configuration. JULY 2018 VMware Identity Manager 3.2 VMware Identity Manager VMware AirWatch 9.
 VMware Enterprise Systems Connector Installation and Configuration JULY 2018 VMware Identity Manager 3.2 VMware Identity Manager VMware AirWatch 9.3 You can find the most up-to-date technical documentation
KYOCERA Device Manager Installation and Upgrade Guide
 KYOCERA Device Manager Installation and Upgrade Guide Legal Notes Unauthorized reproduction of all or part of this guide is prohibited. The information in this guide is subject to change without notice.
VMware AirWatch Cloud Connector Guide ACC Installation and Integration
 VMware AirWatch Cloud Connector Guide ACC Installation and Integration Workspace ONE UEM v1810 Have documentation feedback? Submit a Documentation Feedback support ticket using the Support Wizard on support.air-watch.com.
 Trend Micro Incorporated reserves the right to make changes to this document and to the products described herein without notice. Before installing and using the product, please review the readme files,
Dell Data Protection Security Tools. Installation Guide v1.12
 Dell Data Protection Security Tools Installation Guide v1.12 Notes, cautions, and warnings NOTE: A NOTE indicates important information that helps you make better use of your product. CAUTION: A CAUTION
Dell Wyse Management Suite. Version 1.0 Quick Start Guide
 Dell Wyse Management Suite Version 1.0 Quick Start Guide Notes, cautions, and warnings NOTE: A NOTE indicates important information that helps you make better use of your product. CAUTION: A CAUTION indicates
KYOCERA Device Manager Installation and Upgrade Guide
 KYOCERA Device Manager Installation and Upgrade Guide Legal Notes Unauthorized reproduction of all or part of this guide is prohibited. The information in this guide is subject to change without notice.
 Trend Micro Incorporated reserves the right to make changes to this document and to the products described herein without notice. Before installing and using the product, please review the readme files,
TECHNICAL WHITE PAPER AUGUST 2017 REVIEWER S GUIDE FOR VIEW IN VMWARE HORIZON 7: INSTALLATION AND CONFIGURATION. VMware Horizon 7 version 7.
 TECHNICAL WHITE PAPER AUGUST 2017 REVIEWER S GUIDE FOR VIEW IN VMWARE HORIZON 7: INSTALLATION AND CONFIGURATION VMware Horizon 7 version 7.x Table of Contents Introduction.... 3 JMP Next-Generation Desktop
McAfee EMM Best Practices Document Upgrading your High Availability EMM installation
 McAfee EMM Best Practices Document Upgrading your High Availability EMM installation For use with EMM 9.x and 10.x versions McAfee Support Enterprise Mobility Management (EMM) Document Rev. 2.2 Page 2
Dell Encryption Enterprise for Mac. Technical Advisories v10.1
 Dell Encryption Enterprise for Mac Technical Advisories v10.1 Notes, cautions, and warnings NOTE: A NOTE indicates important information that helps you make better use of your product. CAUTION: A CAUTION
VMware Workspace ONE UEM VMware AirWatch Cloud Connector
 VMware AirWatch Cloud Connector VMware Workspace ONE UEM 1811 You can find the most up-to-date technical documentation on the VMware website at: https://docs.vmware.com/ If you have comments about this
VMware App Volumes Installation Guide. VMware App Volumes 2.13
 VMware App Volumes Installation Guide VMware App Volumes 2.13 You can find the most up-to-date technical documentation on the VMware website at: https://docs.vmware.com/ If you have comments about this
VMware Horizon JMP Server Installation and Setup Guide. Modified on 19 JUN 2018 VMware Horizon 7 7.5
 VMware Horizon JMP Server Installation and Setup Guide Modified on 19 JUN 2018 VMware Horizon 7 7.5 You can find the most up-to-date technical documentation on the VMware website at: https://docs.vmware.com/
Dell Storage Compellent Integration Tools for VMware
 Dell Storage Compellent Integration Tools for VMware Version 4.0 Administrator s Guide Notes, Cautions, and Warnings NOTE: A NOTE indicates important information that helps you make better use of your
BCPro Installation Instructions Code No. LIT Software Release 3.0 Issued September 2017
 Code No. LIT-12011910 Software Release 3.0 Issued September 2017 Welcome...2 Summary of Changes...2 Related Documentation...2 Installation Overview...2 Prerequisite Software Checklist for Installation
OpenManage Integration for VMware vcenter Using the vsphere Client Quick Install Guide Version 2.0
 OpenManage Integration for VMware vcenter Using the vsphere Client Quick Install Guide Version 2.0 Notes, Cautions, and Warnings NOTE: A NOTE indicates important information that helps you make better
Shavlik Protect. Upgrade Guide
 Shavlik Protect Upgrade Guide Copyright and Trademarks Copyright Copyright 2009 2014 LANDESK Software, Inc. All rights reserved. This product is protected by copyright and intellectual property laws in
Installing and Configuring VMware Identity Manager Connector (Windows) OCT 2018 VMware Identity Manager VMware Identity Manager 3.
 OCT 2018 VMware Identity Manager VMware Identity Manager 3.") Installing and Configuring VMware Identity Manager Connector 2018.8.1.0 (Windows) OCT 2018 VMware Identity Manager VMware Identity Manager 3.3 You can find the most up-to-date technical documentation on
Installing and Configuring VMware Identity Manager Connector 2018.8.1.0 (Windows) OCT 2018 VMware Identity Manager VMware Identity Manager 3.3 You can find the most up-to-date technical documentation on
Installation on Windows Server 2008
 USER GUIDE MADCAP PULSE 4 Installation on Windows Server 2008 Copyright 2018 MadCap Software. All rights reserved. Information in this document is subject to change without notice. The software described
Dell Repository Manager Business Client Version 2.1 User s Guide
 Dell Repository Manager Business Client Version 2.1 User s Guide Notes, cautions, and warnings NOTE: A NOTE indicates important information that helps you make better use of your computer. CAUTION: A CAUTION
Installing and Configuring vcenter Multi-Hypervisor Manager
 Installing and Configuring vcenter Multi-Hypervisor Manager vcenter Server 5.1 vcenter Multi-Hypervisor Manager 1.1.2 This document supports the version of each product listed and supports all subsequent
Setup Guide. Before Setting Up. Installation. Start-up/Shutdown
 Setup Guide Before Setting Up Installation Start-up/Shutdown For information not in this manual, refer to the HTML/PDF files on the supplied CD-ROM. Read this manual carefully before you use this product
McAfee Network Security Platform 9.2
 McAfee Network Security Platform 9.2 (9.2.7.9-9.2.7.17 Manager-Virtual IPS Release Notes) Contents About this release New features Enhancements Resolved issues Installation instructions Known issues Product
Ensure that the server where you install the Primary Server software meets the following requirements: Item Requirements Additional Details
 ZENworks 11 SP4 System July 2015 The following sections provide the Novell ZENworks 11 SP4 requirements for hardware and software: Section 1, Primary Server, on page 1 Section 2, Managed Device, on page
Oracle Fusion Middleware. 1 Introduction. 1.1 Supported Functionality and Intended Use. 1.2 Limitations
 Oracle Fusion Middleware Installation Notes for Oracle Business Intelligence Mobile App Designer Trial Edition 11g Release 1 (11.1.1) E49297-01 September 2013 Welcome to Installation Notes for Oracle Business
NBC-IG Installation Guide. Version 7.2
 Installation Guide Version 7.2 2017 Nuance Business Connect 7.2 Installation Guide Document Revision History Revision Date August 8, 2017 Revision List Updated supported SQL Server versions June 14, 2017
Acronis Files Advanced 8.5
 Acronis Files Advanced 8.5 ADMINISTRATION GUIDE Revision: 4/11/2019 Table of contents 1 Introduction...6 2 Quick Start...7 2.1 Installation... 7 2.2 Initial Setup... 9 3 Mobile Access... 15 3.1.1 Configuring
Acronis and Acronis Secure Zone are registered trademarks of Acronis International GmbH.
 1 Copyright Acronis International GmbH, 2002-2015 Copyright Statement Copyright Acronis International GmbH, 2002-2015. All rights reserved. Acronis and Acronis Secure Zone are registered trademarks of
Dell Storage Integration Tools for VMware
 Dell Storage Integration Tools for VMware Version 4.1 Administrator s Guide Notes, cautions, and warnings NOTE: A NOTE indicates important information that helps you make better use of your product. CAUTION:
Netwrix Auditor for Active Directory
 Netwrix Auditor for Active Directory Quick-Start Guide Version: 8.0 4/22/2016 Legal Notice The information in this publication is furnished for information use only, and does not constitute a commitment
VMware Mirage Web Manager Guide
 Mirage 5.3 This document supports the version of each product listed and supports all subsequent versions until the document is replaced by a new edition. To check for more recent editions of this document,
ControlPoint. Advanced Installation Guide. September 07,
 ControlPoint Advanced Installation Guide September 07, 2017 www.metalogix.com info@metalogix.com 202.609.9100 Copyright International GmbH., 2008-2017 All rights reserved. No part or section of the contents
Dell Encryption Enterprise for Mac. Administrator Guide v8.18
 Dell Encryption Enterprise for Mac Administrator Guide v8.18 Notes, cautions, and warnings A NOTE indicates important information that helps you make better use of your product. CAUTION: A CAUTION indicates
Perceptive TransForm E-Forms Manager 8.x. Installation and Configuration Guide March 1, 2012
 Perceptive TransForm E-Forms Manager 8.x Installation and Configuration Guide March 1, 2012 Table of Contents 1 Introduction... 3 1.1 Intended Audience... 3 1.2 Related Resources and Documentation... 3
LifeSize Control Installation Guide
 LifeSize Control Installation Guide January 2009 Copyright Notice 2005-2009 LifeSize Communications Inc, and its licensors. All rights reserved. LifeSize Communications has made every effort to ensure
HySecure Quick Start Guide. HySecure 5.0
 HySecure Quick Start Guide HySecure 5.0 Last Updated: 25 May 2017 2012-2017 Propalms Technologies Private Limited. All rights reserved. The information contained in this document represents the current
Synchronizer Quick Installation Guide
 Synchronizer Quick Installation Guide Version 5.7 September 2015 1 Synchronizer Installation This document provides simplified instructions for installing Synchronizer. Synchronizer performs all the administrative
Enterprise Vault.cloud CloudLink Google Account Synchronization Guide. CloudLink to 4.0.3
 Enterprise Vault.cloud CloudLink Google Account Synchronization Guide CloudLink 4.0.1 to 4.0.3 Enterprise Vault.cloud: CloudLink Google Account Synchronization Guide Last updated: 2018-06-08. Legal Notice
UC for Enterprise (UCE) NEC Centralized Authentication Service (NEC CAS)
 NEC Centralized Authentication Service (NEC CAS)") UC for Enterprise (UCE) NEC Centralized Authentication Service (NEC CAS) Installation Guide NEC NEC Corporation October 2010 NDA-30362, Revision 15 Liability Disclaimer NEC Corporation reserves the right
UC for Enterprise (UCE) NEC Centralized Authentication Service (NEC CAS) Installation Guide NEC NEC Corporation October 2010 NDA-30362, Revision 15 Liability Disclaimer NEC Corporation reserves the right
Dell Data Guardian. Data Guardian User Guide v1.5/1.2
 Dell Data Guardian Data Guardian User Guide v1.5/1.2 Notes, cautions, and warnings A NOTE indicates important information that helps you make better use of your product. CAUTION: A CAUTION indicates either
Upgrade Guide. SuccessMaker 11
 11 Document last updated July 12, 2018 Copyright 2018 Pearson Education, Inc. or one or more of its direct or indirect affiliates. All rights reserved. Pearson and are registered trademarks, in the U.S.
akkadian Global Directory 3.0 System Administration Guide
 akkadian Global Directory 3.0 System Administration Guide Updated July 19 th, 2016 Copyright and Trademarks: I. Copyright: This website and its content is copyright 2014 Akkadian Labs. All rights reserved.
VMware Identity Manager Cloud Deployment. DEC 2017 VMware AirWatch 9.2 VMware Identity Manager
 VMware Identity Manager Cloud Deployment DEC 2017 VMware AirWatch 9.2 VMware Identity Manager You can find the most up-to-date technical documentation on the VMware website at: https://docs.vmware.com/
Dell Repository Manager Business Client Version 2.2 User s Guide
 Dell Repository Manager Business Client Version 2.2 User s Guide Notes, cautions, and warnings NOTE: A NOTE indicates important information that helps you make better use of your computer. CAUTION: A CAUTION
VMware Identity Manager Cloud Deployment. Modified on 01 OCT 2017 VMware Identity Manager
 VMware Identity Manager Cloud Deployment Modified on 01 OCT 2017 VMware Identity Manager You can find the most up-to-date technical documentation on the VMware Web site at: https://docs.vmware.com/ The
SymantecTM Desktop and Laptop Option 8.0 SP4 Compatibility Matrix Version 1.1
 SymantecTM Desktop and Laptop Option 8.0 SP4 Compatibility Matrix Version 1.1 Created on 14 September 2016 Copyright 2016 Symantec Corporation. All rights reserved. Symantec, the Symantec Logo, and Backup
Dell Storage Manager 2016 R3 Installation Guide
 Dell Storage Manager 2016 R3 Installation Guide Notes, Cautions, and Warnings NOTE: A NOTE indicates important information that helps you make better use of your product. CAUTION: A CAUTION indicates either
Dell Wyse Management Suite. Version 1.1 Deployment Guide
 Dell Wyse Management Suite Version 1.1 Deployment Guide Notes, cautions, and warnings NOTE: A NOTE indicates important information that helps you make better use of your product. CAUTION: A CAUTION indicates
USER GUIDE. CTERA Agent for Windows. June 2016 Version 5.5
 USER GUIDE CTERA Agent for Windows June 2016 Version 5.5 Copyright 2009-2016 CTERA Networks Ltd. All rights reserved. No part of this document may be reproduced in any form or by any means without written
Fiery Network Controller for Xerox WorkCentre 7800 Series. Welcome
 Fiery Network Controller for Xerox WorkCentre 7800 Series Welcome 2013 Electronics For Imaging, Inc. The information in this publication is covered under Legal Notices for this product. 45109462 17 January
Senstar Symphony. 7.2 Installation Guide
 Senstar Symphony 7.2 Installation Guide Contents Contents Introduction... 3 Symphony Server...3 Symphony Client... 3 Xnet... 3... 4 Symphony Server requirements...4 Symphony Client requirements...4 Symphony
Dell Endpoint Security Suite Enterprise for Mac. Technical Advisories v2.1
 Dell Endpoint Security Suite Enterprise for Mac Technical Advisories v2.1 Notes, cautions, and warnings NOTE: A NOTE indicates important information that helps you make better use of your product. CAUTION:
Installation Guide. McAfee epolicy Orchestrator Software. Draft for Beta
 Installation Guide McAfee epolicy Orchestrator 5.1.0 Software COPYRIGHT Copyright 2013 McAfee, Inc. Do not copy without permission. TRADEMARK ATTRIBUTIONS McAfee, the McAfee logo, McAfee Active Protection,
Installing Dell OpenManage Essentials
 This technical white paper describes how to install OpenManage Essentials. OME Engineering Team This document is for informational purposes only and may contain typographical errors and technical inaccuracies.
Dell EMC SupportAssist Enterprise Version 1.0 User's Guide
 Dell EMC SupportAssist Enterprise Version 1.0 User's Guide Notes, cautions, and warnings NOTE: A NOTE indicates important information that helps you make better use of your product. CAUTION: A CAUTION
OpenManage Integration for VMware vcenter Quick Installation Guide for vsphere Web Client Version 3.2
 OpenManage Integration for VMware vcenter Quick Installation Guide for vsphere Web Client Version 3.2 Notes, cautions, and warnings NOTE: A NOTE indicates important information that helps you make better
Deploying VMware Identity Manager in the DMZ. SEPT 2018 VMware Identity Manager 3.3
 Deploying VMware Identity Manager in the DMZ SEPT 2018 VMware Identity Manager 3.3 You can find the most up-to-date technical documentation on the VMware website at: https://docs.vmware.com/ If you have
Sage 200c Professional. System Requirements and Prerequisites
 Sage 200c Professional System Requirements and Prerequisites Copyright statement Sage (UK) Limited, 2018. All rights reserved. If this documentation includes advice or information relating to any matter
Privileged Identity App Launcher and Session Recording
 Privileged Identity App Launcher and Session Recording 2018 Bomgar Corporation. All rights reserved worldwide. BOMGAR and the BOMGAR logo are trademarks of Bomgar Corporation; other trademarks shown are