GETTING STARTED WITH. chapter
|
|
|
- Colin May
- 6 years ago
- Views:
Transcription
1 _01_Rev4.qxd 6/27/07 1:39 PM Page 1 chapter 1 GETTING STARTED WITH ADOBE FLASH CS3 1. Understand the Adobe Flash CS3 workspace 2. Open a document and play a movie 3. Create and save a movie 4. Work with the Timeline 5. Distribute an Adobe Flash movie 6. Plan an application or a Web site ADOBE FLASH CS3 1-1

2 _01_Rev4.qxd 6/27/07 1:40 PM Page 2 chapter 1 GETTING STARTED WITH ADOBE FLASH CS3 Introduction Adobe Flash CS3 Professional is a development tool that allows you to create compelling interactive experiences, often by using animation. You can use Flash to create entire Web sites, including e-commerce, entertainment, education, and personal use sites. In addition, Flash can be used to create applications, such as games and simulations, that can be delivered over the Web and on DVDs. They can even be scaled to be displayed on mobile devices, such as cell phones. While it is known as a tool for creating complex animations for the Web, Flash also has excellent drawing tools and tools for creating interactive controls, such as navigation buttons and menus. Furthermore, Flash provides the ability to incorporate sounds and video easily into an application. Flash has become the standard for both professional and casual applications and Web developers. Flash is popular because the program is optimized for the Web. Web developers need to provide high-impact experiences for the user, to make sites come alive and turn them from static text and pictures to dynamic, interactive experiences. The problem has been that incorporating high-quality graphics and motion into a Web site can dramatically increase the download time and frustrate viewers as they wait for an image to appear or for an animation to play. Flash directly addresses this problem by allowing developers to use vector images, which reduce the size of graphic files. Vector images appeal to designers because they are scalable, which means they can be resized and reshaped without distortion. For example, you could easily have an object, such as an airplane, become smaller as it moves across the screen without having to create the plane in different sizes. In addition, Flash provides for streaming content over the Internet. Instead of waiting for the entire contents of a Web page to load, the viewer sees a continuous display of images. Streaming allows the movie to start playing when the Web site is opened, and it continues as frames of the movie are delivered to the viewer s computer. Another reason Flash has become a standard is that it is made by Adobe. Adobe makes other programs, such as Dreamweaver, Fireworks, Photoshop, and Illustrator. Together these products can be used to create compelling interactive Web sites and applications. The programs are bundled in various ways in Creative Suite (CS3) products that provide common user interfaces and integration features. 1-2


3 _01_Rev4.qxd 6/27/07 1:40 PM Page 3 Tools You ll Use 1-3

4 _01_Rev4.qxd 6/27/07 1:40 PM Page 4 LESSON 1 UNDERSTAND THE ADOBE FLASH CS3 WORKSPACE What You ll Do In this lesson, you will learn about the development workspace in Adobe Flash and how to change Flash settings to customize your workspace. FLASH 1-4 Organizing the Flash Workspace As a designer, one of the most important things for you to do is to organize your workspace that is, to decide what to have displayed on the screen and how to arrange the various tools and panels. Because Flash is such a powerful program with many tools, your workspace may become cluttered. Fortunately, it is easy to customize the workspace to display only the tools needed at any particular time. The development process in Flash operates according to a movie metaphor: you create scenes on a stage; these scenes run in frames on a Timeline. As you work in Flash, you create a movie by arranging objects (such as graphics and text) on the stage, and then animating the objects using the Timeline. You can play the movie on the stage, as you are working on it, by using the movie controls (start, stop, rewind, and so on). When you start Flash, three basic parts of the workspace are displayed: a menu bar that organizes commands within menus, a stage where objects are placed, and a Timeline used to organize and control the objects on the stage. In addition, one or more panels may be displayed. Panels, such as the Tools panel, are used when working with objects and features of the movie. Figure 1 shows a typical Flash workspace. Stage The stage contains all of the objects (such as drawings) that are part of the movie that will be seen by your viewers. It shows how the objects behave within the movie and how they interact with each other. You can resize the stage and change the background color applied to it. You can draw objects directly on the stage or drag them from the Library panel to the stage. You can also import objects developed in another program directly to the stage. You can specify the size of the stage, which will be the size of the area within your browser window that displays the movie. The gray area surrounding the stage is the Pasteboard. You can place objects on the Getting Started with Adobe Flash CS3

5 _01_Rev4.qxd 6/27/07 1:40 PM Page 5 Pasteboard as you are creating a movie. However, neither the Pasteboard nor the objects on it will appear when the movie is played in a browser or the Flash Player. Timeline The Timeline is used to organize and control the movie s contents by specifying when each object appears on the stage. The Timeline is critical to the creation of movies, because a movie is merely a series of still images that appear over time. The images are contained within frames, which are segments of the Timeline. Frames in a Flash movie are similar to frames in a motion picture. When a Flash movie is played, a playhead moves from frame to frame in the Timeline, causing the contents of each frame to appear on the stage in a linear sequence. The Timeline indicates where you are at any time within the movie and allows you to insert, delete, select, and move frames. It shows the animation in your movie and the layers that contain objects. Layers help to organize the objects on the stage. You can draw and edit objects on one layer without affecting objects on other layers. Layers are a way to stack objects so they can overlap and give a 3-D appearance on the stage. Panels Panels are used to view, organize, and modify objects and features in a movie. The most commonly used panels are the Tools panel, the Properties panel (also called the Property inspector), and the Library panel. For example, the Property inspector is used Tools panel FIGURE 1 A typical Flash workspace Menu bar Playhead Color and Swatches panels grouped Library panel Drawing, paint, editing, and selection tools -Stage- View tools Color tools Options Properties panel (Property inspector) Document properties button Pasteboard Lesson 1 Understand the Adobe Flash CS3 Workspace FLASH 1-5

6 _01_Rev4.qxd 6/27/07 1:40 PM Page 6 to change the properties of an object, such as the fill color of a circle. The Property inspector is context sensitive, so that if you are working with text it displays the appropriate options, such as font and font size. You can control which panels are displayed individually or you can choose to display panel sets. Panel sets are groups of the most commonly used panels. In addition, you can control how a panel is displayed. That is, you can expand a panel to show all of its features or collapse it to show only the title bar. Tools panel The Tools panel contains a set of tools used to draw and edit graphics and text. It is divided into four sections. Tools Includes draw, paint, text, and selection tools, which are used to create lines, shapes, illustrations, and text. The selection tools are used to select objects so that they can be modified in several ways. View Includes the Zoom tool and the Hand tool, which are used to zoom in on and out of parts of the stage and to pan the stage window, respectively. Colors Includes tools and icons used to change the stroke (border of an object) and fill (area inside an object) colors. Options Includes options for selected tools, such as allowing you to choose the size of the brush when using the Brush tool. Although several panels open automatically when you start Flash, you may choose to FLASH 1-6 display them only when they are needed. This keeps your workspace from becoming too cluttered. Panels are floating windows, meaning that you can move them around the workspace. This allows you to group (dock) panels together as a way to organize them in the workspace. You can also make room in the workspace by collapsing panels so only their title bars are displayed. You use the Window menu on the menu bar to display and hide panels. Arranging panels can be a bit tricky. It s easy to start moving panels around and find that the workspace is cluttered with panels arranged in unintended ways. Stand-alone panel FIGURE 2 Arranging panels Floating panel While you cannot use the Flash Undo feature in the Edit menu to undo a panel move, you can always close a panel or choose the Default option from the Workspace command in the Windows menu. This command displays the default panel arrangement, which is a good starting position when working with Flash. If you choose to rearrange panels, first decide if you want a panel to be grouped (docked) with another panel, stacked above or below another panel, a floating panel, or simply a stand-alone panel. An example of each of these is shown in Figure 2. Title bar Grouped panels Stacked panels Getting Started with Adobe Flash CS3

7 _01_Rev4.qxd 6/27/07 1:40 PM Page 7 The key to any rearrangement of panels is the blue drop zone that appears when a panel is being moved. The drop zone is the area to which the panel can move and is indicated by either a blue line or a rectangle with a blue border. A single blue line indicates the position for stacking a panel above or below another panel. A rectangle with a blue border indicates the position for grouping panels. If you move a panel without using a drop zone, the panel becomes a floating panel and is neither grouped nor stacked with other panels. To move a panel, you drag the panel by its tab until the desired blue drop zone appears, then you release the mouse button. (Note: Dragging a panel by its tab moves only that panel. To move a grouped panel, you must drag the group by its title bar.) Figure 3 shows the Library panel being grouped with the Color and Swatches panels. Notice the rectangle with the blue border that surrounds the Color panel. This indicates the drop zone for the Library panel and the other panels included in the group. Figure 4 shows the Library panel being ungrouped and stacked below the Color and Swatches panels. The blue line indicates the drop zone for the Library panel and shows where it will be stacked. FIGURE 3 Grouping the Library panel Rectangle with blue border Lesson 1 Understand the Adobe Flash CS3 Workspace FLASH 1-7
8 _01_Rev4.qxd 6/27/07 1:40 PM Page 8 In addition to moving panels, you can collapse them so that only the title bar appears, and then you can expand them to display the entire panel. The Collapse button is located in the upper-right corner of each panel, as shown in Figure 4. The Collapse button is a toggle button, which means it changes or FIGURE 4 Ungrouping the Library panel toggles between two states. When clicked, the Collapse button changes to theexpand button. One other way to collapse some panels is with the Collapse to Icons button, also shown in Figure 4. Finally, if you want to close a panel, you can use the Close button, as shown in Figure 4. Collapse to Icons button Close button Collapse button Blue line indicating the drop zone Regardless of how you decide to customize your development workspace, the stage and the menu bar are always displayed. Usually, you display the Timeline, Tools panel, Library panel, Property inspector, and one or more other panels. When you start a new Flash document (movie), you can set the document properties, such as the size of the window (stage) the movie will play in, the background color, and the speed of the movie in frames per second. You can change these settings using the Document Properties dialog box, which can be displayed using the Document command on the Modify menu. You can also change the settings using the Property inspector. To increase the size of the stage so that the objects on the stage can be more easily edited, you can change the magnification setting using commands on the View menu or by using the View tools in the Tools panel. QUICKTIP When working with panels, you can collapse, move, and close them as suits your working style. Settings for an object are not lost if you close or collapse a panel. If, at any time the panels have become confusing, simply return to the Default workspace and open panels as needed. FLASH 1-8 Getting Started with Adobe Flash CS3

9 _01_Rev4.qxd 6/27/07 1:40 PM Page 9 Start Adobe Flash and work with Panels FIGURE 5 The Open/Create screen 1. Start the Adobe Flash CS3 program. The Adobe Flash CS3 Open/Create screen appears, as shown in Figure 5. This screen allows you to open a recent document or create a new Flash file. 2. Click Flash File (ActionScript 3.0) under Create New. 3. Click Window on the menu bar, point to Workspace, then click Default. 4. Click Window on the menu bar, then note the panels with check marks indicating they are displayed. Use the check marks to identify the panels. TIP The Swatches panel may be grouped with the Color panel. 5. With the Windows menu still displayed, click Hide Panels. 6. Click Window on the menu bar, then click Color. 7. Click Window on the menu bar, then click Library. 8. Click Window on the menu bar, point to Properties, then click Properties. 9. Point to the far left of the workspace until the Tools panel is displayed. When the Tools panel is hidden, it can be displayed by pointing to the far left of the workspace. When you move the mouse away from the Tools panel, it hides again. 10.Click the Library tab, then drag the panel to the stage as a floating panel. (continued) Lesson 1 Understand the Adobe Flash CS3 Workspace FLASH 1-9
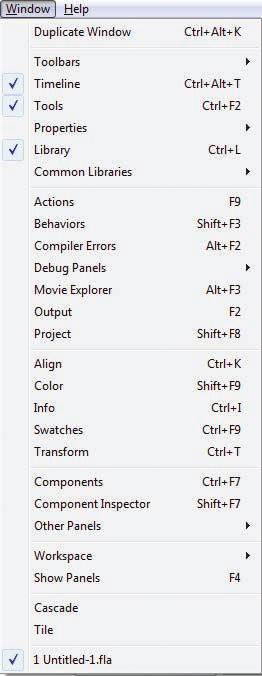
10 _01_Rev4.qxd 6/27/07 1:40 PM Page Click the Library tab, drag the panel to on top of the Color tab, then when a rectangle with a blue border appears, release the mouse button. The Library panel is grouped with the Color and Swatches panels, as shown in Figure Click the Collapse to Icons button in the upper-right corner of the grouped panels, as shown in Figure Click the Color panel icon to display the grouped panels with the Color panel active, then click the Color panel icon again to collapse the panel. 14.Click the Expand Dock button in the upper-right corner of the grouped panels to expand the panel group. 15.Click the Library tab, drag the Library panel below the Color and Swatches panels until the blue line appears, then release the mouse button. Note: Mac users will not see a blue line. Rather, the tabs switch position as they are dragged. 16.Click the Properties panel Collapse button in the title bar, as shown in Figure 6, to collapse the panel. 17.Click the Properties panel Expand button in the title bar to expand the panel. 18. Click the Properties panel Close button to close the panel. 19.Click Window on the menu bar, point to Properties, then click Properties. 20.Click Window on the menu bar, point to Workspace, then click Default. The default workspace is displayed. You started Flash and configured the workspace by hiding, moving, and displaying selected panels. FIGURE 6 Library panel grouped with the Color and Swatches panels Title bar Collapse button Collapse to Icons button Grouped panels Understanding your workspace Organizing the Flash workspace is like organizing your desktop. You may work more efficiently if you have many of the most commonly used items in view and ready to use. Alternately, you may work better if your workspace is relatively uncluttered, giving you more free desk space. Fortunately, Flash makes it easy for you to decide which items to display and how they are arranged while you work. For example, to toggle the Main toolbar, click Window on the menu bar, point to Toolbars, then click Main. You should become familiar with quickly opening, collapsing, expanding, and closing the various windows, toolbars, and panels in Flash, and experimenting with different layouts and screen resolutions to find the workspace that works best for you. FLASH 1-10 Getting Started with Adobe Flash CS3
11 _01_Rev4.qxd 6/27/07 1:40 PM Page 11 FIGURE 7 Document Properties dialog box Change the Document Properties FIGURE 8 Completed changes to Document properties 1. Click the Document properties button in the Property inspector to display the Document Properties dialog box. 2. Click inside the Title text box, then type My workspace. 3. Click inside the Description text box, then type This is a typical workspace setup. TIP Text entered into the Title and Description text boxes, which are actually fields, can be used by Web-based search engines to display files developed using Flash. 4. Double-click the number in the width text box, type 400, double-click the number in the height text box, then type Click the Background color swatch, then click the blue color swatch in the far-left column of the color palette. 6. Review the remaining default values shown in Figure 7, then click OK. 7. Drag the scroll bars at the bottom and the right of the stage to center the stage. 8. Click View on the menu bar, point to Magnification, then click Fit in Window. Your screen should resemble Figure Click File on the menu bar, then click Save. 10. Navigate to the drive and folder where your data files are stored, type workspace for the file - name, then click Save. TIP Click Browse Folders to open the Navigation pane if it is not open. 11.Click File on the menu bar, then click Close. You set the document properties including the size of the stage and background color, then set the magnification and saved the document. Lesson 1 Understand the Adobe Flash CS3 Workspace FLASH 1-11
12 _01_Rev4.qxd 6/27/07 1:40 PM Page 12 LESSON 2 OPEN A DOCUMENT AND PLAY A MOVIE What You ll Do In this lesson, you will open a Flash document (movie) and then preview, test, and save the movie. Opening a Movie in Flash Flash files are called documents and have an.fla file extension. If you have created a movie in Flash and saved it with the name mymovie, the filename will be mymovie.fla. Files with the.fla file extension can only be opened using Flash. After they are opened, you can edit and resave them. Another file format for Flash movies is the Flash Player (.swf) format. These files are created from Flash movies using the Publish command. Flash.swf movies can be played in a browser without the Flash program, but the Flash Player must be installed on the computer. Flash Players are pre-installed on almost all computers. For those that do not have the player, it can be downloaded free from the Adobe Web site, Because.swf files cannot be edited in the Flash program, you should preview them on the stage and test them before you publish them. Be sure to keep the original.fla file so that you can make changes at a later date. Previewing a Movie After opening a Flash movie, you can preview it within the workspace in several ways. When you preview a movie, you play the frames by directing the playhead to move through the Timeline, and you watch the movement on the stage. Control menu commands (and keyboard shortcuts) Figure 9 shows the Control menu commands, which resemble common DVD-type options: Play ([Enter] (Win) or [return] (Mac)) begins playing the movie frame by frame, from the location of the playhead to the end of the movie. For example, if the playhead is on Frame 5 and the last frame is Frame 40, choosing the Play command will play Frames 5 40 of the movie. FLASH 1-12 Getting Started with Adobe Flash CS3
![1-4283-1963-8_01_Rev4.qxd 6/27/07 1:40 PM Page 13 QUICKTIP When a movie starts, the Play command changes to a Stop command. You can also stop the movie by pressing [Enter] (Win) or [return] (Mac).](/docs-images/74/71347321/images/13-0.jpg "Rewind ([Ctrl] [Alt] [R] (Win)) or [option] [R] (Mac) moves the playhead to Frame 1. Step Forward (.) moves the playhead forward one frame at a time.")

13 _01_Rev4.qxd 6/27/07 1:40 PM Page 13 QUICKTIP When a movie starts, the Play command changes to a Stop command. You can also stop the movie by pressing [Enter] (Win) or [return] (Mac). Rewind ([Ctrl] [Alt] [R] (Win)) or [option] [R] (Mac) moves the playhead to Frame 1. Step Forward (.) moves the playhead forward one frame at a time. Step Backward (,) moves the playhead backward one frame at a time. You can turn on the Loop Playback setting to allow the movie to continue playing repeatedly. A check mark next to the Loop FIGURE 9 Control menu commands Playback command on the Control menu indicates that the feature is turned on. To turn off this feature, click the Loop Playback command. Controller You can also preview a movie using the Controller. To display the Controller, click the Controller option on the Toolbars command of the Window menu. QUICKTIP The decision of which controls to use (the Control menu, keyboard shortcuts, or the Controller) is a matter of personal preference. Testing a Movie When you play a movie within the Flash workspace, some interactive functions (such as buttons that are used to jump from one part of the movie to another) do not work. To preview the full functionality of a movie you need to play it using a Flash Player. You can use the Test Movie command on the Control menu to test the movie using a Flash Player. QUICKTIP You can drag the Playhead in the Timeline to play frames and display their contents on the stage. This process, called "scrubbing," provides a quick way to view parts of the movie. DVD-type commands Documents, Movies, and Applications As you work in Flash, you are creating a document. When you save your work as an.fla file, you are saving the document. This is consistent with other Adobe products such as Photoshop that use the word document to refer to work created in that progam. In addition, because Flash uses a movie metaphor with a stage, Timeline, frames, animations, and so on, the work done in Flash is often referred to as a movie. So, the phrase Flash document and the phrase Flash movie are synonymous. Applications are products, such as games, that have been developed using Flash. Applications usually contain multiple Flash documents or movies that are linked. Lesson 2 Open a Document and Play a Movie FLASH 1-13
14 _01_Rev4.qxd 6/27/07 1:40 PM Page 14 Open and play a movie using the Control menu and the Controller 1. Open fl1_1.fla from the drive and folder where your Data Files are stored, then save it as demomovie.fla. 2. Click View on the menu bar, point to Magnification, then click Fit in Window. 3. Click Control on the menu bar, then click Play. Notice how the playhead moves across the Timeline as the blue circle moves from the left to the right, as shown in Figure Click Control on the menu bar, then click Rewind. 5. Press [Enter] (Win) or [return] (Mac) to play the movie, then press [Enter] (Win) or [return] (Mac) again to stop the movie before it ends. 6. Click Window on the menu bar, point to Toolbars, then click Controller. 7. Use all the buttons on the Controller to preview the movie, then close the Controller. 8. Point to the Playhead in the Timeline, then click and drag the Playhead back and forth to view the contents of the frames and view the movie. You opened a Flash movie and previewed it, using various controls. FIGURE 10 Playhead moving across Timeline Playhead FLASH 1-14 Getting Started with Adobe Flash CS3

15 _01_Rev4.qxd 6/27/07 1:40 PM Page 15 Menu bar may replace application menu bar when player is open FIGURE 11 Flash Player window Test a movie 1. Click Control on the menu bar, then click Test Movie to view the movie in the Flash Player window, as shown in Figure Click Control on the menu bar of the Flash Player window (Win) or application menu bar (Mac), then review the available commands. 3. Click File on the menu bar of the Flash Player window (Win) or application menu bar (Mac), then click Close to close the Flash Player window. 4. Navigate to the drive and folder where you saved the movie and notice the demomovie.swf file that has been created, then close the dialog box. TIP When you test a movie, Flash automatically creates a file that has an.swf extension in the folder where your movie is stored and then plays the movie in the Flash Player. 5. Click File on the menu bar, then click Close, to close the demomovie.fla document, saving changes if prompted. You tested a movie in the Flash Player window and closed the Flash document. Using the Flash Player To view a Flash movie on the Web, your computer needs to have the Flash Player installed. An important feature of multimedia players, such as Flash Player, is the ability to decompress a file that has been compressed to give it a small file size that can be delivered more quickly over the Internet. In addition to Adobe, companies such as Apple, Microsoft, and RealNetworks create players that allow applications, developed with their and other company s products, to be viewed on the Web. The multimedia players are distributed free and can be downloaded from the company s Web site. The Flash Player is created by Adobe and is available at Lesson 2 Open a Document and Play a Movie FLASH 1-15
16 _01_Rev4.qxd 6/27/07 1:40 PM Page 16 LESSON 13 What You ll Do In this lesson, you will create a Flash movie that will include a simple animation, and then you will save the movie. FLASH 1-16 CREATE AND SAVE A MOVIE Creating a Flash Movie Flash movies are created by placing objects (graphics, text, sounds, photos, and so on) on the stage, editing these objects (for example, changing their brightness), animating the objects, and adding interactivity with buttons and menus. You can create graphic objects in Flash using the drawing tools, or you can create them in another program, such as Adobe Fireworks, Illustrator, or Photoshop, and then import them into a Flash movie. In addition, you can acquire clip art and stock photographs and import them into a movie. When objects are placed on the stage, they are automatically placed in a layer and in the currently selected frame of the Timeline. Figure 12 shows a movie that has an oval object created in Flash. Notice that the playhead is on Frame 1 of the movie. The object placed on the stage appears in Frame 1 and appears on the stage when the playback head is on Frame 1. The dot in Frame 1 on the Timeline indicates that this frame is a keyframe. The concept of keyframes is critical to understanding how Flash works. A keyframe indicates that there is a change in the movie, such as the start or end of an animation, or the playing of a sound. A keyframe is automatically designated in frame 1 of every layer. In addition, you can designate any frame to be a keyframe. The oval object in Figure 12 was created using the Oval tool. To create an oval or a rectangle, you select the desired tool and then drag the pointer over an area on the stage. Note: Flash groups the Oval and Rectangle tools using one button. To display a menu of the tools available, click and hold the rectangle (or oval) button in the Tools panel until the menu opens, and then click the tool you want to use. If you want to draw a perfect circle or square, press and hold [Shift] after the tool is selected, and then drag the pointer. If you make a mistake, you can click Edit on the menu bar, and then click Undo. To edit an object, you must first select it. You can use the Selection tool to select an entire object or group of objects. You drag the Selection Getting Started with Adobe Flash CS3

17 _01_Rev4.qxd 6/27/07 1:40 PM Page 17 tool pointer around the entire object to make a marquee selection. An object that has been selected displays a dot pattern or a blue border. Creating an Animation Figure 13 shows another movie that has 40 frames, as specified in the Timeline. The arrow in the Timeline indicates a motion animation that starts in Frame 1 and ends in Frame 40. In this case, the object will move from left to right across the stage. The movement of the object is caused by having the object in different places on the stage in different frames of the movie. In this case, Frame 20 will display the object midway through the animation. A basic motion animation requires two keyframes. The first keyframe sets the starting position of the object, and the second keyframe sets the ending position of the object. The number of frames between the two keyframes determines the length of the animation. For example, if the starting keyframe is Frame 1 and the ending keyframe is Frame 40, the object will be animated for 40 frames. Once the two keyframes are set, Flash automatically fills in the frames between them, with a process called motion tweening. Adding an Effect to an Object In addition to animating the location of an object (or objects), you can also animate an object s appearance; for example, its shape, color, brightness, or transparency. The color of the circle on the left of the stage in Figure 13 has been lightened using the Brightness effect on the Property inspector. When the movie is played, the color of the circle will start out light and then become darker as it moves to the right. FIGURE 12 Oval object in Frame 1 FIGURE 13 Motion animation Arrow indicates motion animation The brightness of the object has been changed Object on the stage is in Frame 1 on the Timeline Lesson 3 Create and Save a Movie FLASH 1-17
 as the new document to create, then save the movie as tween. 3. Click View on the menu bar, point to Magnification, then click Fit in Window.")

18 _01_Rev4.qxd 6/27/07 1:40 PM Page 18 Create objects using drawing tools FIGURE 14 Object Drawing option FIGURE 15 Drawing a circle 1. Click File on the menu bar, then click New. 2. Click OK in the New Document window to choose Flash File (ActiveScript 3.0) as the new document to create, then save the movie as tween. 3. Click View on the menu bar, point to Magnification, then click Fit in Window. 4. Click and hold the Rectangle tool (or the Oval tool if it is displayed) on the Tools panel to display the list of tools, as shown in Figure 14, then click the Oval tool. 5. Verify that the Object Drawing option in the Options panel is deselected, as shown in Figure Click the Fill color tool color swatch on the Tools panel, then, if necessary, click the red color swatch in the left column of the color palette. 7. Click the Stroke color tool color swatch on the Tools panel, then, if necessary, click the black color swatch in the left column of the color palette. 8. Press and hold [Shift], then drag the Oval tool on the stage to draw the circle, as shown in Figure 15. Pressing and holding [Shift] creates a circle. 9. Click the Selection tool on the Tools panel, then drag a marquee selection around the object to select it, as shown in Figure 16. The object appears covered with a dot pattern. You created an object using the Oval tool and then selected the object using the Selection tool. Object Drawing option is not selected FIGURE 16 Creating a marquee selection FLASH 1-18 Getting Started with Adobe Flash CS3

19 _01_Rev4.qxd 6/27/07 1:40 PM Page 19 Indicates the active frame FIGURE 17 The circle on the right side of the stage Create basic animation 1. Click Insert on the menu bar, point to Timeline, then click Create Motion Tween. A blue border surrounds the object. 2. Click Frame 40 on Layer 1 on the Timeline. 3. Click Insert on the menu bar, point to Timeline, then click Keyframe. A second keyframe is defined in Frame 40, and Frames 1 40 appear shaded. 4. Click and then drag the circle to the right side of the stage, as shown in Figure Press [Enter] to play the movie. The playhead moves through the Timeline in Frames 1 40, and the circle moves across the stage. You created a basic motion tween animation by inserting a keyframe and changing the location of an object. Change the brightness Using options and shortcuts There is often more than one way to complete a particular function when using Flash. For example, if you want to change the font for text you have typed, you can use Text menu options or the Property inspector. In addition, Flash provides context menus that are relevant to the current selection. For example, if you point to a graphic and right-click (Win) or [control] click (Mac), a menu appears with graphicrelated commands, such as distort and smooth. Shortcut keys are also available for many of the most common commands, such as [Ctrl] [Z] (Win) or [Z] (Mac) for Undo. 1. Click Window on the menu bar, point to Properties, then verify that Properties is checked. 2. Click Frame 1 on Layer 1, then click the circle. 3. Click the Color Styles list arrow in the Property inspector, then click Brightness. 4. Click the % list arrow, then drag the slider up to 70%. 5. Click anywhere on a blank area of the Property inspector to close the slider if necessary. 6. Play the movie, then save your work. The circle becomes brighter as it moves across the stage. You used the Property inspector to change the brightness of the object in one of the keyframes. Lesson 3 Create and Save a Movie FLASH 1-19

20 _01_Rev4.qxd 6/27/07 1:40 PM Page 20 LESSON 4 WORK WITH THE TIMELINE What You ll Do In this lesson, you will add another layer, allowing you to create an additional animation, and you will use the Timeline to help organize your movie. FLASH 1-20 Understanding the Timeline The Timeline organizes and controls a movie s contents over time. By learning how to read the information provided in the Timeline, you can determine and change what will be happening in a movie, frame by frame. You can determine which objects are animated, what types of animations are being used, when the various objects will appear in a movie, which objects will appear on top of others, and how fast the movie will play. Features of the Timeline are shown in Figure 18 and explained in this lesson. Using Layers Each new Flash movie contains one layer, named Layer 1. Layers are like transparent sheets of acetate that are stacked on top of each other. This is shown in Figure 19, which also shows how the stacked objects appear on the stage. Each layer can contain one or more objects. You can add layers using the Layer command on the Insert menu or by clicking the Insert Layer icon on the Timeline. Placing objects on different layers helps avoid accidentally making changes in one object while editing another. When you add a new layer, Flash stacks it on top of the other layer(s) in the Timeline. The stacking order of the layers in the Timeline is important because objects on the stage appear in the same stacking order. For example, if you have two overlapping objects, and the top layer has a drawing of a tree and the bottom layer has a drawing of a house, the tree appears as though it is in front of the house. You can change the stacking order of layers simply by dragging them up or down in the list of layers. You can name layers, hide them so their contents do not appear on the stage, and lock them so that they cannot be edited. Using Frames The Timeline is made up of individual segments called frames. The content of each layer is displayed in frames as the playhead moves over them while the movie plays. Frames are numbered in increments of five for easy reference, while colors and symbols Getting Started with Adobe Flash CS3


21 _01_Rev4.qxd 6/27/07 1:40 PM Page 21 are used to indicate the type of frame (for example, keyframe or motion animation). The upper-right corner of the Timeline contains a Frame View icon. Clicking this icon displays a menu that provides different views of the Timeline, showing more frames or showing thumbnails of the objects on a layer, for example. The status bar at the bottom of the Timeline indicates the current frame (the frame that the playhead is currently on), the frame rate (frames per second), and the elapsed time from Frame 1 to the current frame. Using the Playhead The playhead indicates which frame is playing. You can manually move the playhead by dragging it left or right. This makes it easier to locate a frame that you may want to edit. Dragging the playhead also allows you to do a quick check of the movie without having to play it. Understanding Scenes When you create a movie, Scene 1 appears in the Timeline. You can add scenes to a movie at any time. Scenes are a way to organize long movies. For example, a movie created for a Web site could be divided into several scenes: an introduction, a home page, and content pages. Each scene has its own Timeline. You can insert new scenes by using the Insert menu. Scenes can be given descriptive names, which will help you find them easily if you need to edit a particular scene. The number of scenes is limited only by the computer s memory. There are some drawbacks to using scenes, including potentially larger file sizes and longer download times for the viewer. FIGURE 18 Elements of the timeline Frame View icon FIGURE 19 The concept of layers Layers Playhead Current frame Frame rate Elapsed time Frames Status bar On layer 1 On layer 2 On layer 3 Lesson 4 Work with the Timeline FLASH 1-21

22 _01_Rev4.qxd 6/27/07 1:40 PM Page 22 Working with the Timeline Figure 20 shows the Timeline of a movie created in Lesson 3 with a second object, a square at the top of the stage. By studying the Timeline, you can learn several things about this movie. First, the second object is placed on its own layer, Layer 2. Second, the layer has a motion animation (indicated by the arrow and blue background in the frames). Third, the animation runs from Frame 1 to Frame 40. Fourth, if the objects intersect during the animation, the square will be on top of the circle, because the layer it is placed on (Layer 2) is above the layer that the circle is placed on (Layer 1). Fifth, the frame rate is set to 12, which means that the movie will play 12 frames per second. Sixth, the playhead is at Frame 1, which causes the contents for both layers of Frame 1 to be displayed on the stage. QUICKTIP You can adjust the height of the Timeline by positioning the mouse over the bottom edge, then dragging the border up or down. FIGURE 20 The Timeline of a movie with a second object FLASH 1-22 Getting Started with Adobe Flash CS3

23 _01_Rev4.qxd 6/27/07 1:40 PM Page 23 FIGURE 21 Drawing a square Add a layer 1. Save tween.fla as layers.fla. 2. Click Frame 1 on Layer Click Insert on the menu bar, point to Timeline, then click Layer. A new layer Layer 2 appears at the top of the Timeline. You added a layer to the Timeline. Create a second animation FIGURE 22 Positioning the square at the bottom of the stage 1. Click Frame 1 on Layer Select the Rectangle tool on the Tools panel, press and hold [Shift], then draw a square resembling the dimensions and position of the square, shown in Figure Click the Selection tool on the Tools panel, then drag a marquee around the square to select the object. 4. Click Insert on the menu bar, point to Timeline, then click Create Motion Tween. 5. Click Frame 40 on Layer 2, click Insert on the menu bar, point to Timeline, then click Keyframe. 6. Drag the square to the bottom of the stage, as shown in Figure 22, then play the movie. The square appears on top if the two objects intersect. You drew an object and used it to create a second animation. Lesson 4 Work with the Timeline FLASH 1-23

24 _01_Rev4.qxd 6/27/07 1:40 PM Page 24 Work with layers and view features in the Timeline 1. Click Layer 2 on the Timeline, then drag it below Layer 1. Layer 2 is now the bottom layer. 2. Play the movie and notice how the square appears beneath the circle if the objects intersect. 3. Click Layer 2 on the Timeline, then drag it above Layer Play the movie and notice how the square appears above the circle if they intersect. 5. Click the Frame View icon on the end of the Timeline to display the menu. 6. Click Tiny to display more frames and notice how the frames in the Timeline change. 7. Click the Frame View icon, then click Short, as shown in Figure Click the Frame View icon, click Preview, then note the object thumbnails that appear on the Timeline. 9. Click the Frame View icon, then click Normal. You changed the order of the layers, the display of frames, and the size of the Timeline. FIGURE 23 Changing the view of the Timeline Bar used to change the size of the Timeline Frame View icon FLASH 1-24 Getting Started with Adobe Flash CS3


25 _01_Rev4.qxd 6/27/07 1:40 PM Page 25 New frame rate FIGURE 24 Changing the frame rate Getting Help Flash provides a comprehensive Help feature that can be very useful when first learning the program. You can access Help by clicking commands on the Help menu. The Help feature includes the Flash manual, which is organized by topic and can be accessed through the index or by using a keyword search. In addition, the Help menu contains samples and tutorials that cover basic Flash features. Modify the frame rate 1. Double-click the Frame Rate icon on the bottom of the Timeline to open the Document Properties dialog box. 2. Double-click 12, type 3 in the Frame rate text box, then compare your Document Properties dialog box to Figure Click on a blank area of the stage, then click OK. 4. Play the movie and notice that the speed of the movie changes. TIP The letters fps stand for frames per second. Frames per second is the unit of measurement for movies. 5. Verify the Properties panel is displayed. If not, click Window, Properties, Properties. Notice the Properties panel provides information about the stage, including size and background color. 6. Click the Size button in the Properties panel to display the Document Properties dialog box. This is a way to open the dialog box without using the Modify menu. 7. Change the frame rate to 18, then repeat Steps 3 and Change the frame rate to 12 in the Properties panel. 9. Click Frame 20 on the Timeline and notice the position of the objects on the stage. 10 Drag the playhead left and right to display specific frames. 11.Save your work. You changed the frame rate of the movie and used the playhead to display the contents of frames. Lesson 4 Work with the Timeline FLASH 1-25
26 _01_Rev4.qxd 6/27/07 1:40 PM Page 26 LESSON 5 What You ll Do In this lesson, you will prepare a movie for distribution in various formats. DISTRIBUTE AN ADOBE FLASH MOVIE Distributing Movies When you develop Flash movies, the program saves them in a file format (.fla) that only users who have the Flash program installed on their computers can view. Usually, Flash movies are viewed on the Web as part of a Web site or directly from a viewer s computer using the Flash Player. Flash files (.fla) cannot be viewed on the Web using a Web browser. They must be converted into a Flash Player file (.swf) so that the Web browser knows the type of file to play (.swf) and the program needed to play the file (Flash Player). In addition, the HTML code needs to be created that instructs the Web browser to play the swf file. Fortunately, Flash generates both the swf and HTML files when you use the publish feature of Flash. The process for publishing a Flash movie is to create and save a movie and then click the Publish command on the File menu. You can also specify various settings, such as dimensions for the window in which the movie plays in the browser, before publishing the movie. Publishing a movie creates three files: an HTML file, a Flash Player (.swf) file, and a JavaScript file. The JavaScript file is needed to detect the Flash Player when viewers use certain browsers. Both the HTML and swf files retain the same name as the Flash movie file, but with different file extensions:.html the HTML document.swf the Flash Player file For example, publishing a movie named layers.fla generates layers.html and layers.swf. The HTML document contains the code that the browser interprets to display the movie on the Web. The code also specifies which Flash Player movie the browser should play. Sample HTML code referencing a Flash Player movie is shown in Figure 25. If you are familiar with HTML code, you will recognize this as a complete HTML document. Even if you are FLASH 1-26 Getting Started with Adobe Flash CS3
27 _01_Rev4.qxd 6/27/07 1:40 PM Page 27 not familiar with HTML code, you might recognize the code, as seen in Figure 25, that the browser uses to display the Flash movie. For example, the movie value is set to layers.swf; the background color is set to white (#ffffff is the code for white), and the display dimensions (determined by the size of the stage) are set to 550x400. Flash provides several other ways to distribute your movies that may or may not involve delivery on the Web. You can create a standalone movie called a projector. Projector files, such as Windows.exe files, maintain the movie s interactivity. Alternately, you can create self-running movies, such as QuickTime.mov files, that are not interactive. You can play projector and non-interactive files directly from a computer, or you can incorporate them into an application, such as a game, that is downloaded or delivered on a CD or DVD. In addition, Flash provides features for creating movies specifically for mobile devices, such as cell phones. FIGURE 25 Sample HTML code Code specifying the Flash Player movie that the browser will play.swf file extension indicates a Flash Player file Code specifies color Code specifies size Lesson 5 Distribute a Flash Movie FLASH 1-27


28 _01_Rev4.qxd 6/27/07 1:41 PM Page 28 Publish a movie for distribution on the Web FIGURE 26 The three layers files after publishing the movie 1. Verify layers.fla is open. 2. Click File on the menu bar, then click Publish. The files are automatically generated and saved in the same folder as the Flash document. 3. Use your file management program to navigate to the drive and folder where you save your work, then be sure All Files is selected as the File type to display. 4. Notice the three files that begin with layers, as shown in Figure 26. Layers.fla, the Flash movie; layers.swf, the Flash Player file; and layers.html, the HTML document; and the JScript file appear in the window. 5. Double-click layers.html to play the movie in the browser. TIP Click the browser button on the taskbar if the movie does not open automatically in your browser. Notice the animation takes up only a portion of the browser window, as shown in Figure 27. This is because the stage size is set to 550x440, which is smaller than the browser window. 6. Close the browser. You used the Publish command to create an HTML document and a Flash Player file, then you displayed the HTML document in a Web browser. Your files may be listed in a different order FIGURE 27 The animation played in a browser window FLASH 1-28 Getting Started with Adobe Flash CS3
29 _01_Rev4.qxd 6/27/07 1:41 PM Page 29 Create a projector file FIGURE 28 The Flash Player window playing the Flash Player movie 1. Return to Flash, click File on the menu bar, then click Publish Settings to open the Publish Settings dialog box. 2. Verify the Formats tab is selected. Notice the various file formats that can be generated automatically when you publish a Flash document. 3. Click the Windows Projector (.exe) (Win) or Macintosh Projector (Mac) check box. 4. Click Publish, then click OK. 5. Navigate to the drive and folder where you save your work, then be sure All Files is selected as the File type to display. 6. Double-click layers.exe (Win), or layers (Mac), then notice that the application plays in the Flash Player window, as shown in Figure 28. In this case, the Flash Player window is sized to the dimensions of the stage. (Note: You must have the Flash Player installed to view the movie.) 7. Close the Flash Player window. 8. Close layers.fla in Flash, saving your changes if prompted. You created and displayed a stand-alone projector file. Lesson 5 Distribute a Flash Movie FLASH 1-29
30 _01_Rev4.qxd 6/27/07 1:41 PM Page 30 LESSON 6 PLAN AN APPLICATION OR A WEB SITE What You ll Do In this lesson, you will learn how to plan a Flash application. You will also learn about the guidelines for screen design and the interactive design of Web pages. Planning an Application or a Web site Flash can be used to develop animations (movies) that are part of a product, such as a game or educational tutorial, and delivered on CD, DVD, or a mobile device. You can use Flash to create enhancements to Web pages, such as animated logos and interactive navigation buttons. You can also use Flash to create entire Web sites. No matter what the application, the first step is planning. Often, the temptation is to jump right into the program and start developing movies. The problem is that this invariably results in a more time-consuming process at best; and wasted effort, resources, and money at worst. The larger in scope and the more complex the project is, the more critical the planning process becomes. Planning an application or an entire Web site should involve the following steps: Step 1: Stating the Purpose (Goals). What, specifically, do we want to accomplish? Determining the goals is a critical step in planning because goals guide the development process, keep the team members on track, and provide a way to evaluate the application or Web site, both during and after its development. Step 2: Identifying the Target Audience. Who will use the application or Web site? Understanding the potential viewers helps in developing an application or a Web site FLASH 1-30 Getting Started with Adobe Flash CS3
31 _01_Rev4.qxd 6/27/07 1:41 PM Page 31 that can address their needs. For example, children respond to exploration and surprise, so having a dog wag its tail when the mouse pointer rolls over it might appeal to this audience. Step 3: Determining the Treatment. What is the look and feel? The treatment is how the application or Web site will be presented to the user, including the tone, approach, and emphasis. Tone. Will the application or Web site be humorous, serious, light, heavy, formal, or informal? The tone of a site can often be used to make a statement, projecting a progressive, high-tech, well-funded corporate image, for instance. Approach. How much direction will be provided to the user? An interactive game might focus on exploration, while an informational Web site might provide lots of direction, such as menus. Emphasis. How much emphasis will be placed on the various multimedia elements? For example, a company may want to develop an informational application or Web site that shows the features of its new product line, including animated demonstrations of how each product works. The budget might not allow for the expense of creating the animations, so the emphasis would shift to still pictures with text descriptions. Step 4: Developing the Specifications and Storyboard. What precisely does the application or Web site include and how does it work? The specifications state what will be included in each screen, including the arrangement of each element and the functionality of each object (for example, what happens when you click the button labeled Skip Intro). Specifications should include the following: Playback System. The choice of what configuration to target for playback is critical, especially Internet connection speed, browser versions, screen resolution, and plug-ins. Elements to Include. The specifications should include details about the various elements that are to be included in the site. What are the dimensions for the animations, and what is the frame rate? What are the sizes of the various objects such as photos, buttons, and so on? What fonts, font sizes, and font formatting will be used? Should video or sound be included? Functionality. The specifications should include the way the program reacts to an action by the user, such as a mouse click. For example, clicking a door (object) might cause a doorbell to ring (sound), the door Rich Media Content and Accessibility Flash provides the tools that allow you to create compelling applications and Web sites by incorporating rich media content, such as animations, sound, and video. Generally, incorporating rich media enhances the user s experience. However, accessibility becomes an issue for those persons who have visual, hearing, or mobility impairments, or have a cognitive disability. Designers need to utilize techniques that help ensure accessibility, such as providing consistency throughout the applications and Web site in navigation and layout, labeling graphics, captioning audio content, and providing keyboard access. Lesson 6 Plan a Web Site FLASH 1-31
 and the interactivity (how the user navigates through the site).")
32 _01_Rev4.qxd 6/27/07 1:41 PM Page 32 to open (an animation), an exit the program message to appear (text), or an entirely new screen to be displayed. User Interface. The user interface involves designing the appearance of objects (how each object is arranged on the screen) and the interactivity (how the user navigates through the site). A flowchart is a visual representation of how the contents in an application or a Web site are organized and how various screens are linked. It provides a guide for the developer and helps to identify problems with the navigation scheme before work begins. Figure 29 shows a simple flowchart illustrating the site organization and links. FIGURE 29 Sample Flowchart A storyboard shows the layout of the various screens. It describes the contents and illustrates how text, graphics, animation, and other screen elements will be positioned. It also indicates the navigation process, such as menus and buttons. Figure 30 shows a storyboard. The exact content (such as a specific photo) does not have to be decided, but it is important to show where text, graphics, photos, buttons, and other elements, will be placed. Thus, the storyboard includes placeholders for the various elements. Using Screen Design Guidelines The following screen design guidelines are used by application and Web developers. The implementation of these guidelines is affected by the goals of the site, the intended audience, and the content. Balance Balance in screen design refers to the distribution of optical weight in the layout. Optical weight is the ability of an object to attract the viewer s eye, as determined by the object s size, shape, color, and so on. Figure 30 shows a fairly wellbalanced layout, especially if the logo has as much optical weight as the text description. In general, a balanced design is more appealing to a viewer. However, for a game application or entertainment site, a balanced layout may not be desired. FIGURE 30 Sample Storyboard FLASH 1-32 Getting Started with Adobe Flash CS3

33 _01_Rev4.qxd 6/27/07 1:41 PM Page 33 Unity Intra-screen unity has to do with how the various screen objects relate and how they all fit in. For example, a children s game might only use cartoon characterizations of animals for all the objects including navigation buttons and sound control buttons, as well as the on-screen characters. Unity helps the screen objects reinforce each other. Inter-screen unity refers to the design that viewers encounter as they navigate from one screen to another, and it provides consistency throughout the site. For example, all navigation buttons are located in the same place on each screen. Movement Movement refers to the way the viewer s eyes move through the objects on the screen. Different types of objects and various animation techniques can be used to draw the viewer to a location on the screen. For example, a photo of a waterfall may cause the viewer's eyes to follow the flow of the water down, especially if the waterfall is animated. The designer could then place an object, such as a logo or link, below the waterfall. Using Interactive Design Guidelines In addition to screen design guidelines, interactive guidelines determine the interactivity of the site. The following guidelines are not absolute rules but are affected by the goals of the site, the intended audience, and the content: Make it simple, easy to understand, and easy to use so that viewers do not have to spend time learning what the site is about and what they need to do. Build in consistency in the navigation scheme. Help the users know where they are in the site and help them avoid getting lost. Provide feedback. Users need to know when an action, such as clicking a button, has been completed. Changing its color or shape, or adding a sound can indicate this. Give the user control. Allow the user to skip long introductions; provide controls for starting, stopping, and rewinding animations, video, and audio; and provide controls for adjusting audio. Project Management Developing Web sites or any extensive application, such as a game, involves project management. A project plan needs to be developed that provides the project scope and identifies the milestones, including analyzing, designing, building, testing, and launching. Personnel and resource needs are identified, budgets built, tasks assigned, and schedules developed. Successful projects are a team effort relying on the close collaboration of designers, developers, project managers, graphic artists, programmers, testers, and others. Adobe provides various product suites, such as their Creative Suite 3 (CS3) Web Collection series, that include programs such as Flash, Dreamweaver, Fireworks, Photoshop, and Illustrator. These are the primary tools needed to develop interactive applications and Web sites. These programs are designed for easy integration. So, a graphic artist can use Photoshop to develop an image that can easily be imported into Flash and used by an animator. In addition, other tools in the suites, such as Adobe Bridge and Adobe Version Cue, help ensure efficient workflow when working in a team environment. Lesson 6 Plan a Web Site FLASH 1-33

34 _01_Rev4.qxd 6/27/07 1:41 PM Page 34 The Flash Workflow Process After the planning process, you are ready to start work on the Flash documents. Following are steps that can be used as guidelines in a general workflow process suggested by Adobe. Step 1: Create and/or acquire the elements to be used in the application. The elements include text, photos, drawings, video, and audio. The elements become the raw material for the graphics, animations, menus, buttons, and content that populate the application and provide the interactivity. You can use the various Flash drawing and text tools to create your own images and text content; or, you can use another program, such as Adobe Photoshop, to develop the elements, and then import them into Flash. Alternately, you can acquire stock clip art and photographs. You can produce video and audio content in-house and import it into Flash or you can acquire these elements from a third party. Step 2: Arrange the elements and create the animations. Arrange the elements (objects) on the Stage and in the Timeline to define when and how they appear in your application. Once the elements are available, you can create the various animations called for in the specifications. Step 3: Apply special effects. Flash provides innumerable special effects that can be applied to the various media elements and animations. These include graphic and text filters, such as drop shadows, blurs, glows, and bevels. In addition, there are effects for sounds and animations such as fade-ins and fade-outs, acceleration and deceleration, and morphing. Step 4: Create the interactivity. Flash provides a scripting feature, ActionScript, which allows you to develop programming code to control how the media elements behave, including how various objects respond to user interactions, such as clicking buttons and rolling over images. Step 5: Test and publish the application. Testing should be done throughout the development process, including using the Test Movie feature in the Control menu to test the movie using the Flash Player and to publish the movie in order to test it in a browser. Using the Flash Help Feature Flash provides a comprehensive Help feature that can be very useful when first learning the program. You can access the Help panel from the Help menu. The Help feature is organized by categories, including Using Flash, which have several topics such as Getting Started and Workspace overview. In addition, you can use the Help search feature to search for topics related to keywords, such as Timeline. Other resources not affiliated with Adobe are available through the Web. You may find some by searching the Web for Flash resources. FLASH 1-34 Getting Started with Adobe Flash CS3


35 _01_Rev4.qxd 6/27/07 1:41 PM Page 35 FIGURE 31 The Flash Help categories FIGURE 32 The Flash Help Search feature Use Flash Help 1. Start a new Flash document. 2. Click Help on the menu bar, then click Flash Help. 3. Click Using Flash to expand the category, as shown in Figure 31, then click Workspace. 4. Click The Timeline, then click About the Timeline. 5. Read through the text in About the Timeline. 6. Click Using Flash to collapse the list. 7. Click in the Search text box, then type panel, as shown in Figure Click Search, then click Customize the workspace. 9. Read the article Customize the workspace. 10.Close the Help panel and exit the Flash program. You used the Flash Help feature to access information on the Timeline and the workspace. Lesson 6 Plan a Web Site FLASH 1-35
36 _01_Rev4.qxd 6/27/07 1:41 PM Page 36 SKILLS REVIEW Start Flash, open a movie, and set the movie properties and magnification. 1. Start Flash, open fl1_2.fla, then save it as skillsdemo1. 2. Display the Document Properties dialog box, add a title, Animated Objects, then add a description, A review of skills learned in Chapter Change the movie window dimensions to width: 550 px and height: 450 px. 4. Change the background color to blue. (Hint: Select the blue color swatch in the left column of the color palette.) 5. Close the Document Properties dialog box. 6. Change the magnification to 50% using the View menu (Hint: Click View, point to Magnification, then click 50%.). 7. Change the magnification to Fit in Window. Close, display, and collapse panels. 1. Hide all panels. 2. Display the Property inspector, the Align panel, and the Library panel. 3. Group the Library and Align panels. 4. Ungroup the Library panel from the Align panel and position it below the Align panel. 5. Collapse the Property inspector and Library panels. 6. Close the Library panel to remove it from the screen. 7. Expand the Property inspector. 8. Display the Default workspace. Play and test a movie. 1. Drag the playhead to view the contents of each frame. Use the commands in the Control menu to play and rewind the movie. 2. Press [Enter] (Win) or [return] (Mac) to play and stop the movie. 3. Use the Controller to rewind, play, stop, and start the movie. 4. Test the movie in the Flash Player window, then close the test movie window. Create an object, create a basic animation, and apply an effect. 1. Insert a new layer above the heading layer, then select Frame 1 of the new layer. 2. Draw a red circle in the lower-left corner of the stage, approximately the same size as the green ball. 3. Select the circle, then create a Motion Tween to animate the circle so that it moves across the screen from left to right, beginning in Frame 1 and ending in Frame 60. (Hint: Add a keyframe in the ending frame.) 4. Use the Selection Tool to select the circle (if necessary), then change the brightness from 0% to 60%, in the last frame of the animation. 5. Play the movie, then rewind it. Add a layer, change the frame rate, and change the view of the Timeline. 1. Add a new layer above layer 3, select Frame 1, then create a second circle in the lower-right corner of the stage that s approximately the same size as the circle you created in the lower-left corner of the stage. 2. Create a Motion Tween to animate the circle so that it moves across the screen from right to left beginning in Frame 1 and ending in Frame Use the Selection Tool to select the circle, then change the brightness from 0% to 60% in the last frame of the animation. 4. Play the movie. 5. Change the frame rate to 8 frames per second, play the movie, then change the frame rate to 12. FLASH 1-36 Getting Started with Adobe Flash CS3

37 _01_Rev4.qxd 6/27/07 1:41 PM Page 37 SKILLS REVIEW (CONTINUED) 6. Change the view of the Timeline to display more frames. 7. Change the view of the Timeline to display a preview of the object thumbnails. 8. Change the view of the Timeline to display the Normal view. 9. Use the playhead to display each frame, then compare your screens to Figure Save the movie. FIGURE 33 Completed Skills Review Publish a movie. 1. Click File on the menu bar, then click Publish. 2. Open your browser, then open skillsdemo1.html. TIP Be sure All Files is selected as the File type to display. 3. View the movie, then close your browser. Create a projector file. 1. Display the Publish Settings dialog box. 2. Select the appropriate projector setting for your operating system and remove all of the other settings. 3. Publish the movie. 4. Navigate to the drive and folder where you save your work, then open the skillsdemo1 projector file. 5. View the movie, then close the Flash Player window. 6. Save and close the Flash document. 7. Exit Flash. Getting Started with Adobe Flash CS3 FLASH 1-37

38 _01_Rev4.qxd 6/27/07 1:41 PM Page 38 PROJECT BUILDER 1 A friend cannot decide whether to sign up for a class in Flash or Dreamweaver. You help her decide by showing her what you already know about Flash. Since you think she d enjoy a class in Flash, you decide to show her how easy it is to create a simple animation. You decide to animate three objects. The first object enters the stage from the left side and moves to the middle of the stage. The second object starts at the middle of the stage covering the first object and moves to the right and off the stage. The third object moves from above the stage to below it. All three objects intersect at the middle of the stage. 1. Open a Flash document, then save it as demonstration. 2. Change the view to 50%. 3. Use the tools on the Tools panel to create a simple shape or design, and place it off the left side of the stage, halfway down the stage. 4. Select the object and insert a motion tween. 5. Insert a keyframe in Frame 20, then move the object to the middle of the stage. 6. Insert a new layer, then select Frame 20 of the layer and insert a keyframe. 7. Create another object that is a different shape and that is slightly larger than the first object and that covers the first object, then select the object and insert a motion tween for the object. 8. Insert a keyframe in Frame 40, then move the object to the right side off the stage. FLASH Insert a new layer, then select Frame 1 of the layer. 10. Draw an object off the top of the stage, about midway across the stage. 11. Animate the object to move straight down and off the bottom of the stage for 40 frames. FIGURE 34 Sample completed Project Builder Change the brightness of the object to 70% in Frame Add a background color. 14. Preview the movie and test it. 15. Save the movie, then compare it to the example shown in Figure 34. Getting Started with Adobe Flash CS3

39 _01_Rev4.qxd 6/27/07 1:41 PM Page 39 PROJECT BUILDER 2 You ve been asked to develop a simple movie about recycling for a day care center. For this project, you will add two animations to an existing movie. You will show three objects that appear on the screen at different times, and then move each object to a recycle bin at different times. You can create the objects using any of the Tools on the Tools panel. FIGURE 35 Sample completed Project Builder 2 1. Open fl1_3.fla, then save it as recycle. 2. Play the movie and study the Timeline to familiarize yourself with the movie s current settings. Currently, there are no animations. 3. Insert a new layer above Layer 2, insert a keyframe in Frame 10 of the new layer, then draw a small object in the upper-left corner of the stage. 4. Create a motion animation that moves the object to the recycle bin. (Note: The object may appear outside the recycle bin.) 5. Insert a new layer above the top layer, insert a keyframe in Frame 20, draw a small object in the upper-center of the stage, then create a motion animation that moves the object to the recycle bin. 6. Insert a new layer above the top layer, insert a keyframe in Frame 30, draw a small object in the upper-right corner of the stage, then create a motion animation that moves the object to the recycle bin. 7. Move Layer 1 to the top of all the layers. 8. Play the movie and compare it to Figure Save the movie. This figure shows the animated objects with outlines of their positions during the animations. Your completed project will not show these outlines Getting Started with Adobe Flash CS3 FLASH 1-39

40 _01_Rev4.qxd 6/27/07 1:41 PM Page 40 DESIGN PROJECT Figure 36 shows the home page of a Web site. Study the figure and answer the following questions. For each question, indicate how you determined your answer. FIGURE 36 Design Project 1. Connect to the Internet, then go to www. argosycruises.com. 2. Open a document in a word processor or open a new Flash document, save the file as dpc1, then answer the following questions. (Hint: Use the Flash Text tool.) Whose Web site is this? What is the goal(s) of the site? Who is the target audience? What treatment (look and feel) is used? What are the design layout guidelines being used (balance, movement, etc.)? How can animation enhance this page? Do you think this is an effective design for the company, its products, and its target audience? Why, or why not? What suggestions would you make to improve on the design, and why? FLASH 1-40 Getting Started with Adobe Flash CS3

41 _01_Rev4.qxd 6/27/07 1:41 PM Page 41 PORTFOLIO PROJECT There are numerous companies in the business of developing Web sites for others. Many of these companies use Flash as one of their primary development tools. These companies promote themselves through their own Web sites and usually provide online portfolios with samples of their work. Log onto the Internet, then use your favorite search engine (use keywords such as Flash developers and Flash animators) to locate three of these companies, and generate the following information for each one. A sample is shown in Figure Would you want to work for this company? Why, or why not? 10. Would you recommend this company to another company that was looking to enhance its Web site? Why, or why not? FIGURE 37 Portfolio Project 1. Company name: 2. Contact information (address, phone, and so on): 3. Web site URL: 4. Company mission: 5. Services provided: 6. Sample list of clients: 7. Describe three ways they seem to have used Flash in their own sites. Were these effective? Why, or why not? 8. Describe three applications of Flash that they include in their portfolios (or showcases or samples). Were these effective? Why, or why not? Getting Started with Adobe Flash CS3 FLASH 1-41

42 _01_Rev4.qxd 6/27/07 1:41 PM Page 42
chapter 1. Create symbols and instances 2. Work with Libraries 3. Create buttons 4. Assign actions to frames and buttons AND INTERACTIVITY
 1-4283-1963-8_03_Rev3.qxd 6/27/07 9:04 PM Page 1 chapter 3 WORKING WITH SYMBOLS AND INTERACTIVITY ADOBE FLASH CS3 1. Create symbols and instances 2. Work with Libraries 3. Create buttons 4. Assign actions
Adobe Flash CS4 Part 1: Introduction to Flash
 CALIFORNIA STATE UNIVERSITY, LOS ANGELES INFORMATION TECHNOLOGY SERVICES Adobe Flash CS4 Part 1: Introduction to Flash Fall 2010, Version 1.0 Table of Contents Introduction...3 Downloading the Data Files...3
ITEC185. Introduction to Digital Media
 ITEC185 Introduction to Digital Media ADOBE ILLUSTRATOR CC 2015 What is Adobe Illustrator? Adobe Illustrator is a program used by both artists and graphic designers to create vector images. These images
Exploring the Flash MX 2004 Workspace
 1 Chapter Exploring the Flash MX 2004 Workspace COPYRIGHTED MATERIAL This first chapter is a warm-up to prepare you for your Flash MX 2004 adventure. It provides a quick introduction to Flash, and is a
For detailed instructions, click the links below. To ask questions, request features, or report problems, visit feedback.photoshop.com.
 Workspace basics For detailed instructions, click the links below. To ask questions, request features, or report problems, visit feedback.photoshop.com. You create and manipulate your documents and files
Adobe Flash CS4 Part 4: Interactivity
 CALIFORNIA STATE UNIVERSITY, LOS ANGELES INFORMATION TECHNOLOGY SERVICES Adobe Flash CS4 Part 4: Interactivity Fall 2010, Version 1.0 Table of Contents Introduction... 2 Downloading the Data Files... 2
The Macromedia Flash Workspace
 Activity 5.1 Worksheet The Macromedia Flash Workspace Student Name: Date: Identify the Stage, workspace, Timeline, layers, panels, Tools panel, and Property inspector. The Macromedia Flash Workspace 5-35
-Remember to always hit Command + S every time you make a change to your project going forward.
 -Open Animate -Under Create New - Select ActionScript 3.0 -Choose Classic as the Design type located in the upper right corner -Animate workspace shows a toolbar, timeline, stage, and window tabs -From
2Understanding the. Interface. The Document Window 13. If you are new to Flash 8, don t skip this chapter. Although you might be
 2Understanding the Interface The Document Window 13 The Timeline 14 The Layer Controls 15 If you are new to Flash 8, don t skip this chapter. Although you might be tempted to jump right in with the hands-on
Using Flash Animation Basics
 Using Flash Contents Using Flash... 1 Animation Basics... 1 Exercise 1. Creating a Symbol... 2 Exercise 2. Working with Layers... 4 Exercise 3. Using the Timeline... 6 Exercise 4. Previewing an animation...
Introduction to Multimedia. Adobe Animate CC. Lab Manual
 Introduction to Multimedia Adobe Animate CC Lab Manual 2017-18 Semester 1 Table of Contents A. Introduction p. 1 About Animate Understanding the Workspace of Animate B. Getting Started with Animate....
The playhead, shown as a vertical red beam, passes each frame when a movie plays back, much like movie fi lm passing in front of a projector bulb.
 The project: AIRPLANE I will show you a completed version of this project.. Introducing keyframes and the Timeline One of the most important panels in the Flash workspace is the Timeline, which is where
How to create an animated face
 Adobe Flash CS4 Activity 5.1 guide How to create an animated face This activity walks you step by step through the process of creating a simple animation by using Adobe Flash CS4. You use drawing tools
Camtasia Studio 5.0 PART I. The Basics
 Camtasia Studio 5.0 Techsmith s Camtasia Studio software is a video screenshot creation utility that makes it easy to create video tutorials of an on screen action. This handout is designed to get you
Flash Domain 4: Building Rich Media Elements Using Flash CS5
 Flash Domain 4: Building Rich Media Elements Using Flash CS5 Adobe Creative Suite 5 ACA Certification Preparation: Featuring Dreamweaver, Flash, and Photoshop 1 Objectives Make rich media content development
How to add video effects
 How to add video effects You can use effects to add a creative flair to your movie or to fix exposure or color problems, edit sound, or manipulate images. Adobe Premiere Elements comes with preset effects
1. Multimedia authoring is the process of creating a multimedia production:
 Chapter 8 1. Multimedia authoring is the process of creating a multimedia production: Creating/assembling/sequencing media elements Adding interactivity Testing (Alpha/Beta) Packaging Distributing to end
Chapter 1. Getting to Know Illustrator
 Chapter 1 Getting to Know Illustrator Exploring the Illustrator Workspace The arrangement of windows and panels that you see on your monitor is called the workspace. The Illustrator workspace features
PUBLISHING FLASH. Lesson Overview
 PUBLISHING FLASH Lesson Overview In this lesson, you ll learn how to do the following: Test a Flash document Understand the Bandwidth Profiler Change publish settings for a document Understand the difference
Using Adobe Photoshop
 Using Adobe Photoshop 2 In this section we ll look at some essential things you need to know in order to use Photoshop effectively. First of all, we ll take a look at customising Photoshop s settings and
Adobe Illustrator CS Design Professional GETTING STARTED WITH ILLUSTRATOR
 Adobe Illustrator CS Design Professional GETTING STARTED WITH ILLUSTRATOR Chapter Lessons Create a new document Explore the Illustrator window Create basic shapes Apply fill and stroke colors to objects
The Fundamentals. Document Basics
 3 The Fundamentals Opening a Program... 3 Similarities in All Programs... 3 It's On Now What?...4 Making things easier to see.. 4 Adjusting Text Size.....4 My Computer. 4 Control Panel... 5 Accessibility
Introduction to PowerPoint
 L E S S O N 1 Introduction to PowerPoint Lesson objectives Suggested teaching time To become familiar with PowerPoint's presentation capabilities, you will: 40-50 minutes a b c Start the program, open
Working with Images and Multimedia
 CHAPTER Working with Images and Multimedia You can make your web page more interesting by adding multimedia elements. You can download the files featured in this chapter from www.digitalfamily.com/tyv.
HYPERSTUDIO TOOLS. THE GRAPHIC TOOL Use this tool to select graphics to edit. SPRAY PAINT CAN Scatter lots of tiny dots with this tool.
 THE BROWSE TOOL Us it to go through the stack and click on buttons THE BUTTON TOOL Use this tool to select buttons to edit.. RECTANGLE TOOL This tool lets you capture a rectangular area to copy, cut, move,
Getting Started with. PowerPoint 2010
 Getting Started with 13 PowerPoint 2010 You can use PowerPoint to create presentations for almost any occasion, such as a business meeting, government forum, school project or lecture, church function,
SETTING UP A. chapter
 1-4283-1960-3_03_Rev2.qxd 5/18/07 8:24 PM Page 1 chapter 3 SETTING UP A DOCUMENT 1. Create a new document. 2. Create master pages. 3. Apply master pages to document pages. 4. Place text and thread text.
Inserting Information into PowerPoint
 LESSON 6 6.1 Inserting Information into PowerPoint After completing this lesson, you will be able to: Change the layout of a slide. Insert a clip art image. Scale an image. Insert and format a table. Insert
Getting Started. Microsoft QUICK Source 7
 Microsoft QUICK Windows Source 7 Getting Started The Windows 7 Desktop u v w x u Icon links to a program, file, or folder that is stored on the desktop. v Shortcut Icon links to a program, file, or folder
EXPLORING THE. chapter. 1. Explore the InDesign workspace. 2. Change document views. 3. Navigate through a document. 4. Use InDesign Help.
 1-4283-1960-3_01_Rev.qxd 5/14/07 5:36 PM Page 1 chapter 1 EXPLORING THE INDESIGN WORKSPACE 1. Explore the InDesign workspace. 2. Change document views. 3. Navigate through a document. 4. Use InDesign Help.
The Timeline records the actions in each Frame. It also allows multiple independent images and actions through Layers.
 Using Flash to Create Animated Environments Objectives: Understand the capabilities of Flash Gain a general overview of features and tools Understand layers, text, graphics, animation and buttons Import
Animating the Page IN THIS CHAPTER. Timelines and Frames
 e r ch02.fm Page 41 Friday, September 17, 1999 10:45 AM c h a p t 2 Animating the Page IN THIS CHAPTER Timelines and Frames Movement Tweening Shape Tweening Fading Recap Advanced Projects You have totally
What is Publisher, anyway?
 What is Publisher, anyway? Microsoft Publisher designed for users who need to create and personalize publications such as marketing materials, business stationery, signage, newsletters and other items
Using Adobe Photoshop
 Using Adobe Photoshop 2 In this section we ll look at some essential things you need to know in order to use Photoshop effectively. First of all, we ll take a look at customising Photoshop s settings and
Using advanced DVD authoring techniques with Encore
 Adobe Encore CS4 Project 8 guide Using advanced DVD authoring techniques with Encore This guide shows you how to use Adobe Encore CS4 to build customized menus, buttons, text, and graphics by using Encore
Drawing shapes and lines
 Fine F Fi i Handmade H d d Ch Chocolates l Hours Mon Sat 10am 6pm In this demonstration of Adobe Illustrator CS6, you will be introduced to new and exciting application features, like gradients on a stroke
Using Help Contents Index Back 1
 Using Online Help Using Help Contents Index Back 1 Using Online Help About the built-in help features Adobe Reader 6.0 offers many built-in features to assist you while you work, including the Help window
Photoshop Fundamentals
 Lesson 3 Photoshop Fundamentals Photoshop Fundamentals How to Navigate your Document Zooming in and out To zoom in and out on your Photoshop document, hold down the Command key (Ctrl on Win) and press
HO-FL1: INTRODUCTION TO FLASH
 HO-FL1: INTRODUCTION TO FLASH Introduction Flash is software authoring package for creating scalable, interactive animations (or movies) for inclusion in web pages. It can be used to create animated graphics,
Adobe Flash CS4 Part 2: Working with Symbols
 CALIFORNIA STATE UNIVERSITY, LOS ANGELES INFORMATION TECHNOLOGY SERVICES Adobe Flash CS4 Part 2: Working with Symbols Fall 2010, Version 1.0 Table of Contents Introduction...2 Downloading the Data Files...2
animation, and what interface elements the Flash editor contains to help you create and control your animation.
 e r ch02.fm Page 43 Wednesday, November 15, 2000 8:52 AM c h a p t 2 Animating the Page IN THIS CHAPTER Timelines and Frames Movement Tweening Shape Tweening Fading Recap Advanced Projects You have totally
Interface. 2. Interface Photoshop CS/ImageReady CS for the Web H O T
 2. Interface Photoshop CS/ImageReady CS for the Web H O T 2. Interface The Welcome Screen Interface Overview Using the Toolbox Using Palettes Using the Options Bar Creating a Tool Preset Resetting Tools
11 EDITING VIDEO. Lesson overview
 11 EDITING VIDEO Lesson overview In this lesson, you ll learn how to do the following: Create a video timeline in Photoshop. Add media to a video group in the Timeline panel. Add motion to still images.
Interface. 2. Interface Adobe InDesign CS2 H O T
 2. Interface Adobe InDesign CS2 H O T 2 Interface The Welcome Screen Interface Overview The Toolbox Toolbox Fly-Out Menus InDesign Palettes Collapsing and Grouping Palettes Moving and Resizing Docked or
Introduction to Microsoft PowerPoint 2000
 Introduction to Microsoft PowerPoint 2000 TABLE OF CONTENTS Accessing PowerPoint 2000... 3 Starting a Presentation... 3 About the Editing Screen in Normal Screen View... 4 About Menu Displays in PowerPoint
Using Online Help. About the built-in help features Using Help Using the How To window Using other assistance features
 Using Online Help About the built-in help features Using Help Using the How To window Using other assistance features About the built-in help features Adobe Reader 6.0 offers many built-in features to
Microsoft PowerPoint 2013 Beginning
 Microsoft PowerPoint 2013 Beginning PowerPoint Presentations on the Web... 2 Starting PowerPoint... 2 Opening a Presentation... 2 File Tab... 3 Quick Access Toolbar... 3 The Ribbon... 4 Keyboard Shortcuts...
If you have been using CorelDRAW, you may have turned off this opening screen. If so, skip to step 5.
 Opening CorelDRAW If you have been using CorelDRAW, you may have turned off this opening screen. If so, skip to step 5. 1. When CorelDRAW is loaded, a new section is created on the Start Menu. To open
Adobe Animate Basics
 Adobe Animate Basics What is Adobe Animate? Adobe Animate, formerly known as Adobe Flash, is a multimedia authoring and computer animation program. Animate can be used to design vector graphics and animation,
Macromedia Flash. ( Macromedia Flash) : - - Flash. Flash. 10. ( Frame ) . Motion Tween. . Flash
 : - - Flash. Flash. 10. ( Frame ) . Motion Tween. . Flash") Macromedia Flash ( Macromedia Flash).... : 233 - Ram - 16 64 600 - - Flash. Flash... Flash... Flash player Flash.. Flash Flash. Flash. Tweening 10. ( Frame ). Flash (10 1 ). Motion Tween :. Flash. Flash
Macromedia Flash ( Macromedia Flash).... : 233 - Ram - 16 64 600 - - Flash. Flash... Flash... Flash player Flash.. Flash Flash. Flash. Tweening 10. ( Frame ). Flash (10 1 ). Motion Tween :. Flash. Flash
CHAPTER 1. Interface Overview 3 CHAPTER 2. Menus 17 CHAPTER 3. Toolbars and Tools 33 CHAPTER 4. Timelines and Screens 61 CHAPTER 5.
 FLASH WORKSPACE CHAPTER 1 Interface Overview 3 CHAPTER 2 Menus 17 CHAPTER 3 Toolbars and Tools 33 CHAPTER 4 Timelines and Screens 61 CHAPTER 5 Panels 69 CHAPTER 6 Preferences and Printing 93 COPYRIGHTED
Session 7 MS Word. Graphics. Inserting Clipart, and Graphics Modify graphics Position graphics
 Session 7 MS Word Graphics Inserting Clipart, and Graphics Modify graphics Position graphics Table of Contents Session 7 Working with Graphics... 1 The Toolbar... 1 Drawing Toolbar... 1 Picture Toolbar...
Part 1: Basics. Page Sorter:
 Part 1: Basics Page Sorter: The Page Sorter displays all the pages in an open file as thumbnails and automatically updates as you add content. The page sorter can do the following. Display Pages Create
Introduction to Microsoft Office PowerPoint 2010
 Introduction to Microsoft Office PowerPoint 2010 TABLE OF CONTENTS Open PowerPoint 2010... 1 About the Editing Screen... 1 Create a Title Slide... 6 Save Your Presentation... 6 Create a New Slide... 7
How to draw and create shapes
 Adobe Flash Professional Guide How to draw and create shapes You can add artwork to your Adobe Flash Professional documents in two ways: You can import images or draw original artwork in Flash by using
Flash offers a way to simplify your work, using symbols. A symbol can be
 Chapter 7 Heavy Symbolism In This Chapter Exploring types of symbols Making symbols Creating instances Flash offers a way to simplify your work, using symbols. A symbol can be any object or combination
Sample Hands-On-Training Chapter Review Copy Only Contact Information Notice of Rights Notice of Liability Trademarks
 Sample Hands-On-Training Chapter Review Copy Only Copyright 2000-2003 by lynda.com, Inc. All Rights Reserved. Reproduction and Distribution Strictly Prohibited. This electronically distributed Hands-On-Training
Microsoft Office Publisher
 Microsoft Office 2007- Publisher Opening Microsoft Publisher Using the Start Menu, click on All Programs and navigate to the Microsoft Office folder. Click on Microsoft Office Publisher 2007. Choosing
How to lay out a web page with CSS
 How to lay out a web page with CSS You can use table design features in Adobe Dreamweaver CS3 to create a simple page layout. However, a more powerful technique is to use Cascading Style Sheets (CSS).
Animating Layers with Timelines
 Animating Layers with Timelines Dynamic HTML, or DHTML, refers to the combination of HTML with a scripting language that allows you to change style or positioning properties of HTML elements. Timelines,
4 TRANSFORMING OBJECTS
 4 TRANSFORMING OBJECTS Lesson overview In this lesson, you ll learn how to do the following: Add, edit, rename, and reorder artboards in an existing document. Navigate artboards. Select individual objects,
Working with Symbols and Instances
 Chapter 3 Working with Symbols and Instances Learning Objectives After completing this chapter, you will be able to: Create new symbols Edit the symbols and instances Create and edit button symbols Import
POWERPOINT 2003 OVERVIEW DISCLAIMER:
 DISCLAIMER: POWERPOINT 2003 This reference guide is meant for experienced Microsoft Office users. It provides a list of quick tips and shortcuts for familiar features. This guide does NOT replace training
SNOWFLAKES PHOTO BORDER - PHOTOSHOP CS6 / CC
 Photo Effects: Snowflakes Photo Border (Photoshop CS6 / CC) SNOWFLAKES PHOTO BORDER - PHOTOSHOP CS6 / CC In this Photoshop tutorial, we ll learn how to create a simple and fun snowflakes photo border,
OnPoint s Guide to MimioStudio 9
 1 OnPoint s Guide to MimioStudio 9 Getting started with MimioStudio 9 Mimio Studio 9 Notebook Overview.... 2 MimioStudio 9 Notebook...... 3 MimioStudio 9 ActivityWizard.. 4 MimioStudio 9 Tools Overview......
TABLE OF CONTENTS TABLE OF CONTENTS... 1 INTRODUCTION... 2 USING WORD S MENUS... 3 USING WORD S TOOLBARS... 5 TASK PANE... 9
 TABLE OF CONTENTS TABLE OF CONTENTS... 1 INTRODUCTION... 2 USING WORD S MENUS... 3 DEFINITIONS... 3 WHY WOULD YOU USE THIS?... 3 STEP BY STEP... 3 USING WORD S TOOLBARS... 5 DEFINITIONS... 5 WHY WOULD
Adobe Flash CS5. Creating a web banner. Garvin Ling Juan Santa Cruz Bruno Venegas
 Adobe Flash CS5 Creating a web banner Garvin Ling Juan Santa Cruz Bruno Venegas Introduction In this tutorial, you will be guided through a step-by-step process on how to create your very own animated
Overview of Adobe Fireworks CS6
 Overview of Adobe Fireworks CS6 Lesson topics: Work with the Adobe Fireworks CS6 workspace: tools, Document windows, menus, and panels. Customize the workspace. Change the magnification of a document.
How to create interactive documents
 Adobe InDesign Guide How to create interactive documents You can use Adobe InDesign to create dynamic web content or interactive documents. InDesign supports export to web-ready HTML or interactive PDF.
Understanding the Interface
 2. Understanding the Interface Adobe Photoshop CS2 for the Web H O T 2 Understanding the Interface The Welcome Screen Interface Overview Customizing Palette Locations Saving Custom Palette Locations Customizing
How to lay out a web page with CSS
 Activity 2.6 guide How to lay out a web page with CSS You can use table design features in Adobe Dreamweaver CS4 to create a simple page layout. However, a more powerful technique is to use Cascading Style
SMART Meeting Pro 4.2 personal license USER S GUIDE
 smarttech.com/docfeedback/170973 SMART Meeting Pro 4.2 personal license USER S GUIDE Product registration If you register your SMART product, we ll notify you of new features and software upgrades. Register
Welcome to the world of Flash, one of today s hottest applications for
 Chapter 1: Getting Started with Flash 9 In This Chapter Creating and saving new documents Getting familiar with the workspace and tools Managing your workspace and panels Thinking about FLA and SWF file
Application of Skills: Microsoft PowerPoint 2013 Tutorial
 Application of Skills: Microsoft PowerPoint 2013 Tutorial Throughout this tutorial, you will progress through a series of steps to create a presentation about yourself. You will continue to add to this
Table of Contents. Chapter 2. Looking at the Work Area
 Table of Contents... 1 Opening a PDF file in the work area... 2 Working with Acrobat tools and toolbars... 4 Working with Acrobat task buttons... 13 Working with the navigation pane... 14 Review... 18
POWERPOINT BASICS: MICROSOFT OFFICE 2010
 POWERPOINT BASICS: MICROSOFT OFFICE 2010 GETTING STARTED PAGE 02 Prerequisites What You Will Learn USING MICROSOFT POWERPOINT PAGE 03 Microsoft PowerPoint Components SIMPLE TASKS IN MICROSOFT POWERPOINT
[Not for Circulation] This document provides a variety of shortcuts for working in PowerPoint 2007.
![[Not for Circulation] This document provides a variety of shortcuts for working in PowerPoint 2007.](/thumbs/72/67772637.jpg "[Not for Circulation] This document provides a variety of shortcuts for working in PowerPoint 2007.") PowerPoint Shortcuts This document provides a variety of shortcuts for working in PowerPoint 2007. Using Slides from Other Presentations To add a slide from an existing presentation to the current presentation,
PowerPoint Shortcuts This document provides a variety of shortcuts for working in PowerPoint 2007. Using Slides from Other Presentations To add a slide from an existing presentation to the current presentation,
Adobe Photoshop Sh S.K. Sublania and Sh. Naresh Chand
 Adobe Photoshop Sh S.K. Sublania and Sh. Naresh Chand Photoshop is the software for image processing. With this you can manipulate your pictures, either scanned or otherwise inserted to a great extant.
CLEAR TOOL... 7 BASIC NAVIGATION... 7 PAGE SORTER... 7
 Interwrite Workspace WHAT IS WORKSPACE?...2 INSTALLATION...2 SETUP...2 CONNECTING DEVICES... 2 NAMING DEVICES... 3 CALIBRATING DEVICES... 3 THE PEN...3 INTERACTIVE MODE...4 THE TOOLBAR...4 MOVING THE TOOLBAR...
A QUICK TOUR OF ADOBE ILLUSTRATOR CC (2018 RELEASE)
") A QUICK TOUR OF ADOBE ILLUSTRATOR CC (2018 RELEASE) Lesson overview In this interactive demonstration of Adobe Illustrator CC (2018 release), you ll get an overview of the main features of the application.
A QUICK TOUR OF ADOBE ILLUSTRATOR CC (2018 RELEASE) Lesson overview In this interactive demonstration of Adobe Illustrator CC (2018 release), you ll get an overview of the main features of the application.
How to set up a local root folder and site structure
 Activity 2.1 guide How to set up a local root folder and site structure The first thing to do when creating a new website with Adobe Dreamweaver CS3 is to define a site and identify a root folder where
SMART Meeting Pro PE 4.1 software
 Help us make this document better smarttech.com/feedback/170973 SMART Meeting Pro PE 4.1 software USER S GUIDE Product registration If you register your SMART product, we ll notify you of new features
Apple is rightfully proud of the user interface design incorporated into
 Customizing OS X Apple is rightfully proud of the user interface design incorporated into the Macintosh OS X family of operating systems. The interface is easy to use, and it s also easy to customize so
Interactive Powerpoint. Jessica Stenzel Hunter Singleton
 Interactive Powerpoint Jessica Stenzel Hunter Singleton Table of Contents iii Table of Contents Table of Contents... iii Introduction... 1 Basics of Powerpoint... 3 How to Insert Shapes... 3 How to Insert
The Library is displayed as a window, and its contents are accessed by dragging and dropping onto the Stage.
 FLASH FREQUENTLY ASKED QUESTIONS - What is the Library? The Library is an area in which you store all content used in a Flash movie. In Flash terminology, each piece of content stored in the Library is
Press the Plus + key to zoom in. Press the Minus - key to zoom out. Scroll the mouse wheel away from you to zoom in; towards you to zoom out.
 Navigate Around the Map Interactive maps provide many choices for displaying information, searching for more details, and moving around the map. Most navigation uses the mouse, but at times you may also
Quick Guide for Photoshop CC Basics April 2016 Training:
 Photoshop CC Basics Creating a New File 1. Click File > New 2. Keep Default Photoshop Size selected in the Preset drop-down list. 3. Click OK. Showing Rulers 1. On the Menu bar, click View. 2. Click Rulers.
Using Microsoft Word. Working With Objects
 Using Microsoft Word Many Word documents will require elements that were created in programs other than Word, such as the picture to the right. Nontext elements in a document are referred to as Objects
the digital darkroom essential skills Chris Neylon
 the digital darkroom Chris Neylon essential skills ~ Set up the computer, monitor and software preferences for effective digital image editing. ~ Gain familiarity with the Photoshop interface. ~ Review
PowerPoint Intermediate 2010
 PowerPoint Intermediate 2010 I. Creating a Slide Master A. Using the design feature of PowerPoint essentially sets up similar formatting for all of your slides within a presentation. However, there are
Chapter 9 Slide Shows
 Impress Guide Chapter 9 Slide Shows Transitions, animations, and more Copyright This document is Copyright 2007 2011 by its contributors as listed below. You may distribute it and/or modify it under the
Step 1: Create A New Photoshop Document
 Snowflakes Photo Border In this Photoshop tutorial, we ll learn how to create a simple snowflakes photo border, which can be a fun finishing touch for photos of family and friends during the holidays,
Adobe photoshop Using Masks for Illustration Effects
 Adobe photoshop Using Masks for Illustration Effects PS Preview Overview In this exercise you ll see a more illustrative use of Photoshop. You ll combine existing photos with digital art created from scratch
ORGANIZING YOUR ARTWORK WITH LAYERS
 9 ORGANIZING YOUR ARTWORK WITH LAYERS Lesson overview In this lesson, you ll learn how to do the following: Work with the Layers panel. Create, rearrange, and lock layers and sublayers. Move objects between
FLASH ANIMATION TUTORIAL
 FLASH ANIMATION TUTORIAL This tutorial will show you how to make a simple flash animation using basic graphic elements and sounds. It will also work as the display page for your Bullet Movie soundtrack
Microsoft PowerPoint 2007 Tutorial
 Microsoft PowerPoint 2007 Tutorial Prepared By:- Mohammad Murtaza Khan I. T. Expert Sindh Judicial Academy Contents Getting Started... 5 Presentations... 5 Microsoft Office Button... 5 Ribbon... 6 Quick
Microsoft PowerPoint 2007 Beginning
 Microsoft PowerPoint 2007 Beginning Educational Technology Center PowerPoint Presentations on the Web... 2 Starting PowerPoint... 2 Opening a Presentation... 2 Microsoft Office Button... 3 Quick Access
WORK AREA. Lesson overview
 1 GETTING TO KNOW THE WORK AREA Lesson overview In this lesson, you ll learn how to do the following: Open image files in Adobe Photoshop. Select and use tools in the Tools panel. Set options for a selected
Flash Domain 2: Identifying Rich Media Design Elements
 Flash Domain 2: Identifying Rich Media Design Elements Adobe Creative Suite 5 ACA Certification Preparation: Featuring Dreamweaver, Flash, and Photoshop 1 Objectives Identify general and Flash-specific
Photoshop tutorial: Final Product in Photoshop:
 Disclaimer: There are many, many ways to approach web design. This tutorial is neither the most cutting-edge nor most efficient. Instead, this tutorial is set-up to show you as many functions in Photoshop