MontegoTM DDL. Eight-Channel Surround Sound Card Featuring Dolby Digital Live.
|
|
|
- Victoria Chapman
- 5 years ago
- Views:
Transcription

1 MontegoTM DDL Eight-Channel Surround Sound Card Featuring Dolby Digital Live
2 Notices Montego DDL Users Guide Version 5 Software and documentation copyright Voyetra Turtle Beach, Inc. All rights reserved. No part of this publication may be reproduced or transmitted by any means or in any form without prior written consent from Voyetra Turtle Beach, Inc. ( VTB ). In no event will VTB be liable for direct, indirect, special, exemplary, incidental, or consequential damages resulting from any defect or omission in this manual, even if advised of the possibility of such damages. In the interest of continued product development, VTB reserves the right to make improvements to this manual and the products it describes at any time, without notices or obligation. Turtle Beach, the Turtle Beach Logo, Montego DDL, AudioSurgeon, MusicWrite, Recording Station, Ear Force and Record Producer are trademarks of VTB. Voyetra is a registered trademark of VTB. Dolby and the Double D symbol are registered trademarks of Dolby Labs. Windows and Windows XP Media Center are registered trademarks of Microsoft Corporation. Pentium is a registered trademark of Intel Corporation. All other trademarks are the properties of their respective companies and are hereby acknowledged. Use of this software is subject to the terms and conditions of the End-User Software License Agreement. Montego DDL is a product of: Voyetra Turtle Beach, Inc. 150 Clearbrook Road, Ste. 162, Elmsford, NY USA Technical support Montego DDL FAQ and Knowledge Base: Go to the Turtle Beach web site ( and click on Support then Knowledge Base. Scroll down to the M" section and click on Montego DDL. This will bring up the list of articles. The FTP Files Download Area in the Support section will contain the latest driver releases for Montego DDL available for download. Tech Support: support@turtlebeach.com Many issues can be resolved via . Please allow up to 2 3 business days for a response. Please include your name, product name, and product ID/serial number. Fax Tech Support: Fax a description of your problem to the above number, and please be sure to include your name, product name, and product ID/serial number. ii User s Guide
3 CONTENTS INTRODUCING MONTEGO DDL 5 INSTALLATION CD 6 Program Suite...6 CONNECTORS 9 INSTALLATION 10 System Requirements Installing the Montego DDL Sound Card Installing the Drivers and Software Installing the Windows XP Media Center Control Panel Optimizing Playback Performance in Windows 2000 and XP Uninstalling Montego DDL CHECKING MONTEGO DDL AFTER INSTALLATION 14 Launching the Montego DDL Control Panel Checking the Speaker Configuration No Speaker Sound Sound Playing on the Wrong Speakers Turtle Beach Play3D Demo USING THE MONTEGO DDL 17 Playing digital music with Windows Media Player Listening to Digital Music Using the Equalizer Using Environment Effects Changing Speaker Positions Sound FX Key Shifter Center Canceller Voice Changer Listening to Music from CDs Listening to Stereo Music in Surround Sound (2000/XP Only) Listening to DVDs in Surround Sound Using the Digital Output in Vista Listening to Multi-Channel Audio with Dolby Digital Live Listening to 3D Game Audio USING EAR FORCE SURROUND SOUND HEADPHONES 23 MONTEGO DDL CONTROL PANEL 24 Using the Control Panel Presets SPEAKERS TAB 25 Speaker Options Button ( ) Speaker Configurations Testing the Speaker Configuration Volume Section Individual Speaker Volumes Settings Summary S/PDIF Settings GRAPHIC EQUALIZER TAB 31 User Defined Presets EFFECTS TAB 32 Speaker Position Environments Sound FX Voice Changer Montego DDL iii
4 Key Shifter Voice Canceller MIXER TAB 34 Playback Settings Record Settings Note on Selecting Record Source in Windows Vista WINDOWS XP MEDIA CENTER CONTROL INTERFACE 39 Using the Media Center Control Interface Mixer Screen Speakers Screen LIMITED WARRANTY 41 iv User s Guide
5 INTRODUCING MONTEGO DDL Montego DDL represents the latest generation in multi-channel PC audio. Key features include: Dolby Digital Live (DDL) real-time encoder converts PC audio (e.g. games, MP3, WMA, WAV, etc.) into a 5.1 channel Dolby Digital audio stream that is transmitted through the optical S/PDIF output to a home theater A/V receiver or digital speakers. Optical S/PDIF input and output for playback and recording of digital audio at resolutions of up to 24 bits/ 96kHz in Windows XP (16 bit/48khz playback and recording for Windows Vista). S/PDIF output allows for pass-through of Dolby Digital and DTS multi-channel DVD sound to external A/V receivers and digital speaker systems. Selectable 2, 4, 6 or 8 analog line output channels for a wide variety of multi-channel options supporting up to 7.1 speaker configurations. Converts stereo sound sources to multi-channel format for listening to 2-channel digital music or movies on Quad, 5.1 and 7.1 speaker systems Supports Game Surround Sound APIs such as HRTF-based 3D positional audio, DirectSound 3D and A3D for an immersive gaming experience. External mic/line inputs for recording external analog sound sources and CD/aux inputs for recording internal analog sound sources at 16 bit/48khz resolution. 10 Band EQ with presets Environment effects for concert hall realism. Digital sound effects processing. Whether you re playing PC games, watching DVD movies, using voice applications, listening to music or even recording your own, the Turtle Beach Montego DDL handles it all. Montego DDL 5
 A convenient utility for controlling the Montego DDL audio features.")

6 INSTALLATION CD The Montego DDL CD includes the following components: PROGRAM SUITE Montego DDL Drivers Montego DDL Control Panel Software Software Suite Adobe Acrobat Reader PDF Reference Manuals Audio drivers for Windows 2000/XP/Media Center Edition/Vista (64-bit O/S not supported) A convenient utility for controlling the Montego DDL audio features. A versatile suite of music software, described in the next section. A limited version for use with the reference manuals. PDF versions of software reference manuals that can be viewed and printed with the Adobe Acrobat program included on the CD. The Montego DDL CD includes the following programs for controlling Montego DDL and working with digital audio, CD audio and MIDI music files: MONTEGO DDL CONTROL PANEL Use the Montego Control Panel to control the Montego DDL s functions, as described in detail in a later section of this manual. Clicking the Turtle Beach icon in the System tray activates a menu from where you can launch the Montego Control Panel. You can also launch the Montego Control Panel by clicking Start All Programs Turtle Beach Montego DDL Run Montego DDL Control Panel. WINDOWS MEDIA CENTER CONTROL PANEL Use the Montego Control Panel to control the Montego DDL s functions when using Windows Media Center Edition. The Montego DDL Windows XP Media Center Control Interface is designed for use with the Microsoft Windows XP Media Center edition Operating System. This control panel lets you adjust Montego DDL settings using the Windows XP Media Center remote control without having to leave the Media Center environment. 3DPLAY DEMO Use the 3DPlay Demo program to hear demos of the HRTF and 5.1 surround-sound features. Clicking the Turtle Beach icon in the System tray activates a menu from where you can launch the 3DPlay Demo. You can also launch this program by clicking Start Programs Turtle Beach Montego DDL Demo Files 3D Player Demo. 6 User s Guide


7 3D FLYING HELICOPTER GAME Use this program to hear HRTF 3D sound effects by navigating the helicopter flight pattern. Launch this program by clicking Start All Programs Turtle Beach Montego DDL Demo Files Helicopter Demo MULTI-CHANNEL AUDIO DEMO Launch this program by clicking Start All Programs Turtle Beach Montego DDL Demo Files Multi-channel Audio Demo Click on the [Music] and [Sound Effect] menu items to hear music and sounds that show the HRTF audio effects. Press Stop to end the demos. Press [HRTF] to launch the Helicopter Battle Game demo described below. HELICOPTER BATTLE GAME Use this program to hear HRTF 3D sound effects by navigating the helicopter flight pattern and firing missiles. Launch this program by clicking on the [HRTF] menu item in the Multi-channel Audio Demo (see above screen). ROCK WAR GAME Use this program to hear HRTF 3D sound effects by blasting asteroids as they fly by. Launch this program by clicking Start All Programs Turtle Beach Montego DDL Demo Files Rock War Game Montego DDL 7


8 VOYETRA MUSIC SOFTWARE DEMOS The following programs may be installed from the Montego DDL Setup screen by clicking Voyetra Products program name. Then click on the Install button from the program s sub menu. After installing the program, launch it from the Start Programs menu: AUDIOSURGEON LE Take your digital music to the next level! This limited edition version of Voyetra s powerful digital audio editor program lets you record songs to your PC hard drive, then view the music as a graphical waveform showing every peak and valley in the sound so you can zoom-in and edit the file. It's the perfect companion to any music jukebox program and for anyone who listens to digital music on a PC, portable or network audio player. For information on how to upgrade to the full version with additional features, visit MUSICWRITE DEMO RECORD PRODUCER DEMO RECORDING STATION A powerful music notation program that's easy to use! This demo version of Voyetra s powerful music notation program lets you compose music in a way that s easy to understand. Select a staff, select the instruments and you re on your way! It s never been easier to go from creative inspiration to great sheet music. All of your musical creations can be viewed, printed and played back with ease. With Songwriter you can keep your focus on what s important your music! This demo version will run for 30 days, after which time you may purchase the licensed version from our web site To purchase a USB MIDI interface for connecting your MIDI music keyboard, visit Compose and edit music with your MIDI keyboard! This demo version of Voyetra s powerful sequencing program turns your MIDI-equipped PC into a desktop music production studio. Record your song using MIDI and digital audio tracks, edit every nuance, then play it back for others to enjoy! Whether you are a keyboard prodigy or can barely play a note, let Record Producer unleash the songwriter within you! This demo version will run for 30 days, after which time you may purchase the licensed version from our web site To purchase a USB MIDI interface for connecting your MIDI music keyboard, visit An easy-to-use, MIDI and digital audio recording studio Record up to 10 MIDI tracks with your MIDI keyboard to create songs with multiple MIDI instruments. Record 2 digital audio tracks to add vocals or acoustic instruments. Import MIDI files and create your own variations. For the latest updates, as well as user tips, Knowledge Base articles and information on other Turtle Beach and Voyetra products, please visit and 8 User s Guide
 Use Surround Out for rear channel powered speakers in 4, 5.1 and 7.1 channel analog playback modes.")
 S/PDIF Digital In Use Rear Out for powered speakers placed directly behind the listener in 7.1 playback mode.")
9 CONNECTORS Connector Front Out (Channels 1 & 2) Function Stereo, 4, 6 and 8 channel speaker configurations are selected from the Montego Control Panel Speakers Tab. Use Front Out for stereo playback on powered speakers or headphones. Surround Out (Channels 3 & 4) Use Surround Out for rear channel powered speakers in 4, 5.1 and 7.1 channel analog playback modes. Center/LFE(Chan nels 5 & 6) Use Center/LFE Out for powered center and sub-woofer speakers in 5.1 or 7.1 playback modes. Rear Out (Channels 7 & 8) S/PDIF Digital In Use Rear Out for powered speakers placed directly behind the listener in 7.1 playback mode. Optical S/PDIF input for recording digital audio from external sources. Settings are in the Speakers Tab. S/PDIF Digital Out Microphone Input (Monaural) Line-In L/R CD L/R In (Stereo) Aux L/R In (Stereo) Optical S/PDIF output for playback of digital audio. Allows for pass-through of Dolby Digital and DTS multi-channel DVD sound to external A/V receivers or digital speaker systems. Accepts condenser or dynamic microphones. To activate an additional 20dB boost on the mic gain, access the Mixer tab in the Control Panel. Press the button under the Mic volume slider and check the Microphone Boost option. Accepts line-level sources, such as CD players, cassette players, etc.. Accepts analog audio from an internal CD drive. Windows XP utilizes digital audio transfer to the sound card from the PCI bus, so this connection is not required. Pin 1 - Left (white) Pin 2 - Ground (black) Pin 3 - Ground (black) Pin 4 - Right (red) Accepts internal analog audio from a second CD or DVD (not available in Vista). Pin 1 - Left (white) Pin 2 - Ground (black) Pin 3 - Ground (black) Pin 4 - Right (red) Using a MIDI keyboard with your Montego DDL music system requires a USB MIDI interface, available at the Turtle Beach Web Site Montego DDL 9
10 INSTALLATION SYSTEM REQUIREMENTS Before proceeding with the installation, please make sure that your system meets the following minimum specifications for use with the Montego DDL: PC RAM Hard Drive Display Operating Systems CD-ROM Drive Speakers Pentium 800 MHz / compatible or higher with one available PCI expansion slot 128 MB system RAM Approximately 100 MB free space is required during the driver / application installation process. Additional space required for software applications installation. 800x600 High Color (16-bit) Windows 2000 Professional, XP or Media Center Edition, Vista Quad-Speed CD-ROM or DVD-ROM drive required for software installation. A DVD drive, a compatible software DVD player application, and a high quality 5.1 Surround speaker system (five powered speakers plus a powered subwoofer) are required for playing back Dolby Digital (AC-3) audio from DVD movies with the Montego DDL. Montego DDL works with powered 2-speaker, 4-speaker, 5.1 and 7.1 speaker setups, or with headphones. The Dolby Digital Live output requires an external A/V receiver or digital speakers with a Dolby Digital Decoder. REPLACING A PRE-INSTALLED SOUND CARD OR AN AUDIO CHIP ON THE MOTHERBOARD IMPORTANT! Never remove or install cards from your PC while it s powered on! Always turn off your PC before proceeding with any work inside the case. If you re replacing a sound card that s already installed in your PC, or if your motherboard includes a sound chip, first disable the drivers for the old sound card or sound chip on your motherboard before installing your Montego DDL sound card. This will help avoid any possible conflicts between the Montego DDL sound card drivers and the older drivers. Generally, drivers can be disabled by clicking Start Control Panel System Hardware Device Manager scroll down to Sound, Video and Game Controllers Right click on the device name Click Disable from the pop-up menu. Alternatively, drivers can typically be removed from the Add/Remove Programs option, located in the Windows Control Panel, accessed as described above. However, you should consult the PC or motherboard manufacturer's documentation for complete instructions, as the uninstall procedure may differ with each manufacturer. IMPORTANT! Read the warranty information included with your PC before you open its case to remove the old sound card and/or install the Montego DDL. Turtle Beach cannot be held responsible for loss of warranty coverage or other damages incurred as a result of modifications to your PC. INSTALLING THE MONTEGO DDL SOUND CARD 1. Turn off your PC, unplug its power cord and disconnect any external peripherals. Remove your PC s cover. 2. If you re replacing a sound card that s already in your PC unscrew its bracket and gently rock the card out of its PCI slot to remove it from your PC. 10 User s Guide
11 3. Locate a free PCI expansion slot that s furthest away from the video card and power supply. Remove the metal slot rear cover by unscrewing its securing screw. Save the screw to secure the sound card to the chassis later. 4. Before removing the Montego DDL sound card from its protective bag, touch the PC chassis to discharge any static electricity build-up from your body. Hold the card by its edges to avoid touching the gold edge connectors or components 5. With a gentle back-and-forth rocking motion, press the gold-striped edge connector on the Montego DDL sound card firmly into the PCI slot until it snaps into place. Secure its rear metal bracket to the chassis with the screw you removed in the previous step. Remove the rear bracket Gently install the sound card 6. If you re using Windows 2000 and want to connect the analog CD audio output, refer to the next section. Otherwise, you can now replace the PC s cover, reconnect the power cord and peripherals. OPTIONAL: INSTALLING THE ANALOG CD-ROM AUDIO CABLE FOR WINDOWS 2000 If you re installing Montego DDL in a PC running Windows XP or Media Center Edition or Vista, please skip this section. The analog CD connector is not used in Windows XP or Media Center Edition because the digital CD audio signal is sent directly through the PCI bus in digital format by default. In Windows 2000, the CD signal may also be set to digital mode, making the analog CD connector unnecessary if this option is selected. To configure Windows 2000 for digital CD audio operation: 1. Open the Device Manager by right-clicking the My Computer icon on your desktop. 2. Click Properties Hardware Tab Device Manager. 3. Expand DVD/CD-ROM Drives by clicking the + symbol in front of it. Then doubleclick on the CD-DVD ROM drive selection. 4. Select the Properties Tab and put a check mark in the option labeled Enable Digital CD Audio for this CD ROM Device. 5. Click OK. All CD-ROM drives that adhere to the MPC-2 (Multimedia PC) standard have an MPC-2 jack. Connect the MPC-2 connector to your CD-ROM drive's analog CD audio output. (The cable to connect this analog signal should have been provided with your CD-ROM drive and is not included with Montego DDL.) Then attach the connector to the CD Audio header on the Montego DDL. The CD audio cable should be plugged into the CD-ROM drive first; then the other end of the cable should be plugged into the appropriate connector on the Montego DDL sound card. Montego DDL 11


12 INSTALLING THE DRIVERS AND SOFTWARE 1. Connect your powered speakers, microphone, and any other audio peripherals to the appropriate inputs and outputs on the Montego DDL 2. Power-on your PC. After Windows boots, if the Found New Hardware Wizard is displayed, click on the Cancel button to end this process. It is important that you click on Cancel to properly install your sound card drivers! 3. Insert the Montego DDL CD into the CD ROM drive. If the installation menu does not appear within 30 seconds, click on the My Computer icon, double-click on the CD-ROM drive folder to open it, and double-click SETUP.EXE to run the setup program from the CD. 4. When the Montego DDL installation menu appears, select Montego DDL Driver Setup. Then select Montego DDL Drivers Setup from the next menu list. 5. This installation procedure will install the Montego DDL drivers, Control Panel and surround-sound programs. When the install is completed, you will be prompted to reboot the PC. 6. After rebooting, you may again run the setup program from the CD to install the Voyetra demo programs, if you wish. If the following dialog box appears, explaining that the software has not passed Windows Logo testing or does not have a Digital Signature, click "Continue Anyway" or "Yes" (depending on the operating system). Windows XP Windows Vista Please wait for the system to reboot to properly complete the installation! 12 User s Guide

13 While preparing for reboot, the PC may appear to be temporarily "frozen". Do not interrupt the computer at this time. Wait a few minutes for the installation to complete. The wait time will vary depending on the speed of your PC. INSTALLING THE WINDOWS XP MEDIA CENTER CONTROL PANEL You may skip this section if you re not installing Montego DDL in a Windows XP Media Center PC. 1. From the Montego DDL installation menu, select Install Montego DDL Applications. 2. Select Install Control Panel for XP Media Center Edition. Then follow the instructions that appear during the install, selecting the options that best match your audio setup. For instructions on how to use the Montego DDL control panel for Windows XP Media Center, please see the later section in this manual entitled Windows XP Media Center Control Interface. OPTIMIZING PLAYBACK PERFORMANCE IN WINDOWS 2000 AND XP For optimum performance, adjust the System Hardware Acceleration and Sample Rate Conversion Quality to Full and Best in the Advanced Audio Properties Window by clicking Start Control Panel Sounds and Audio Devices Audio Tab Sound Playback Advanced Button Performance Tab. UNINSTALLING MONTEGO DDL If you should ever need to uninstall your Montego DDL sound card, click Start All Programs Turtle Beach Montego DDL Uninstall Montego DDL. This will uninstall the drivers and applications from your hard drive. After running the uninstall procedure, turn off the PC, remove the Montego DDL sound card, then reboot your PC. Montego DDL 13

14 CHECKING MONTEGO DDL AFTER INSTALLATION LAUNCHING THE MONTEGO DDL CONTROL PANEL After running the software installation procedure from the Montego DDL CD, the Turtle Beach palm tree icon should appear in the Windows Systray at the bottom right of your PC screen. Clicking on this icon will bring up a menu from where you can launch the Montego DDL Control Panel. You can also launch the Montego DDL Control Panel by clicking Start All Programs Turtle Beach Montego DDL Run Montego DDL Control Panel. Before continuing with this section, make sure your speakers are plugged into the Montego DDL outputs and are powered on. For details on how to connect the speakers, see the Control Panel Speakers Tab section later in this manual. CHECKING THE SPEAKER CONFIGURATION After your speakers are connected and powered on, check if they re set up properly as follows: 1. Launch the Control Panel either by clicking the Turtle Beach palm tree icon in the bottom right Start Menu or by selecting Start All Programs Turtle Beach Montego DDL Run Montego DDL Control Panel. 2. In the Control Panel Speakers Tab, click on the Speaker Configuration pull-down menu and select the type of speakers you re using. 3. Click on each speaker icon to play a test signal and make sure that the correct speaker is playing the test sound. For example, if you click the front left speaker icon, you should hear the test signal say Front Left in the front left speaker. 4. In Windows Vista, when changing the Speaker Configuration, a User Account Control window will appear asking for permission for the Turtle Beach Audio Configuration Tool this is an operating system security feature that is new to Windows Vista. When Vista s User Account Control is enabled, in order for the Montego DDL Control Panel to make the Speaker Configuration change you desire, you have to click Continue on the User Account Control dialog that appears. Since the Montego DDL Control Panel is scheduled to run automatically following the installation of the driver, this prompt will be seen when the desktop is loading OK must be clicked to allow the Montego DDL Control Panel to set the default 5.1 speaker configuration. NO SPEAKER SOUND If you don t hear any sound, check the following: Check that the speakers are turned on. Make sure you re not using passive speakers that require an amplifier. The Montego DDL analog outputs can only drive powered speakers, not passive speakers. 14 User s Guide

15 Check that the speakers are properly connected to the Montego DDL analog outputs. See the Control Panel Speakers Tab section in this manual for details. If the speakers have an integrated volume control or mute button, check that they are properly set. The Master Volume on the Speakers Tab should be at least half-way up and the Mute button should be off, so the sound is not muted. The individual speaker volumes to the right of the Master Volume should be set to about 75% towards the right. This can be easily done by pressing the Reset button at the bottom of the volume section. (Windows XP Only) The Wave Volume slider in the Mixer Tab should be turned up and the Mute button should be off, so the Wave sound is not muted. In Windows XP: Click Start Control Panel Sounds and Audio Devices Audio and check that the Sound Playback and Sound Recording devices are set to Turtle Beach Montego DDL Device, as shown in the illustration. If not, select Montego DDL from the drop down menus and click Apply. If the Montego DDL does not appear in the list, the drivers were not installed properly from the CD, so try uninstalling and reinstalling from the CD. In Windows Vista: If you are using standard PC speaker or headphones, click Start > Control Panel > Sound and check that Speakers Audio Advantage Montego DDL Device is set as the Default Playback Device, as shown in the illustration. If you are using a TOSLINK cable to connect Montego DDL to an external digital decoder (such as your home theater 5.1 receiver), then select Digital Output Audio Advantage Montego DDL Device as the Default Playback Device. SOUND PLAYING ON THE WRONG SPEAKERS If you hear sound from the wrong speakers, for example, if you click the Front Left speaker icon and hear Front Left emanating from the Front Right speaker, check the following: Check that the Speaker Position feature is disabled in the Effects Tab. This feature lets you change the position of each speaker, which could cause the sound to emanate from different speakers if the blue speaker icons are moved from their standard position. Check that the speakers are connected properly. If you are using a mini to RCA adapter to connect the speakers, try swapping the left and right RCA plugs to correct the problem. If the Center/LFE speakers are swapped, click the button next to the Speaker Configuration pull-down menu and check the Center/Bass Output Swap option. Montego DDL 15

16 TURTLE BEACH PLAY3D DEMO The Play3D Demo makes it easy to try multi-channel positional audio with stereo or multi-channel speakers. Launch the Play3D Demo either by clicking Start All Programs Turtle Beach Montego DDL Demo Files 3D Player Demo or by clicking on the Turtle Beach icon in the Start Tray on the bottom right of your PC Screen and selecting Demo from the pop-up menu. Click on the Play button to hear the Sound Source selected in the top group. Each source presents a different type of sound to demonstrate positional audio. Clicking the first button in the Moving Path section lets you move the sound manually, while clicking the other buttons in this group lets you hear the sound move automatically. When listening with 5.1 speakers, try moving the sound manually from speaker to speaker to hear the surround effect. This is especially effective with the Turtle Beach Ear Force 5.1 surround headphones. The Environment buttons let you hear different reverberation settings, which are available in the Environments section on the Montego DDL Control Panel Effects Tab. To end the demo, click Stop. To shut down the program, click Exit. 16 User s Guide


17 USING THE MONTEGO DDL PLAYING DIGITAL MUSIC WITH WINDOWS MEDIA PLAYER Once you ve confirmed that the speakers are operating properly, launch Windows Media Player and play some music files from your digital song library. If you don t hear any sound even though Media Player indicates the song is playing: Check that Media Player s volume control is turned up. In Windows 2000/XP, Check that Media Player is configured to play from the Montego DDL by clicking Tools on the Windows Media Player menu. Then select Options Devices Speakers Properties. The selection under Audio device to use should be set to DirectSound: Turtle Beach Montego DDL Device. If it isn t, then select this option, then press Apply OK at the bottom of the window. Close the options window and try Media Player again to see if it corrects the problem. Set the Master Volume on the Speakers Tab to a comfortable level. If it seems like the volume is too low, click the Montego DDL Control Panel Mixer Tab and adjust the Wave volume in the Playback Mixer. LISTENING TO DIGITAL MUSIC Here are some interesting ways to enjoy your digital music library. To begin, launch Windows Media Player and play one of your favorite songs from your digital song library. From the Speakers Tab, select a Speaker Configuration to match the speakers or headphones you ve set up with the Montego DDL, then adjust the Master Volume and Wave volume (in 2000/XP, you can use the Mixer Tab) to a comfortable listening level. Now try the following: USING THE EQUALIZER Click on the Equalizer Tab, click the Enable EQ button, then click the Equalizer Presets to hear the effect of each one. When you re done, click the Flat setting or Enable EQ to restore an unaltered tone. USING ENVIRONMENT EFFECTS Click the Effects Tab. Make sure the Speaker Position and all three Sound FX settings are not enabled, so these will have no effect. Click on the Environments Enable, then click on the pull-down menu and select Living Room from the list. Click the Large, Medium and Small Environment Size buttons to hear how it changes the intensity of the effect. Try some other environment settings from the pull-down menu to hear how they sound. CHANGING SPEAKER POSITIONS In the Effects Tab, disable Environments and Enable the Speaker Position section. Click one of the Rotate buttons and change the speed slider from slow to fast to hear the effect of sound spinning around. Click Random to hear the sound moving in random positions. The speed control works on this effect as well. Now, click Manual, then click Reset to return the blue speaker icons to their normal position. Now, click on one of the blue speaker icons and drag it to a different position to note how it sounds. You can also move the speaker positions when using multi-channel speaker configurations. When you re done, click the Enable button to disable the Speaker Position effect. Montego DDL 17

18 SOUND FX Whenever a Sound Effect has been Enabled, the Settings Summary in the Speakers Tab indicates which effect has been turned on. This lets you easily see if the sound is being modified by the effects, without having to search the Control Panel tabs. KEY SHIFTER The Key Shifter in the Effects Tab lets you change the key of a digital song file while it s playing without changing the speed of the song playback. To try this effect, play a song with Windows Media Player and click the Enable button on the Key Shifter feature to turn it on. Then notice how moving the slider shifts the pitch down and up from the original. When you re done, click the Enable button again to turn off the effect. CENTER CANCELLER The Center Canceller in the Effects Tab removes the center channel in a song. Since the vocals are typically panned to the center, this effect may be used to reduce vocals in a song. Use Windows Media Player to play a song with voice in the center, click the Enable button in the Center Canceller section, then move the slider to the right + side and notice how the center channel is cancelled. When you re done, click the Enable button again to turn off the effect. VOICE CHANGER NOTE: Microphones differ in Impedance, so volume levels may vary drastically. If a mic is sensitive and the input volume is set too high, the mic will feedback, which may damage your speakers. Always start using a low volume setting and gradually increase it until you achieve the desired level. The Voice Changer effect lets you alter the microphone input signal by adding an echo/reverb effect or by changing the pitch up or down. To try this, insert a microphone into the mic input jack and turn up the Microphone volume in the Mixer Tab so that you can hear your voice on the speakers when you speak into the mic. Then, select Microphone as a recording source in the Record Settings in the Mixer Tab and turn up the recording level slider to the maximum setting. Now, click the Enable button on the Voice Changer in the Effects tab and select Mic Echo. Moving the slider from left to right should introduce an echo when you speak into the mic. The amount of echo can be adjusted with the Record Level slider in the Mixer Tab. Now select Voice Morph in the Voice Changer pull-down menu and move the slider from left to right. Notice how the pitch shifts down when the slider is towards the left, and shifts up as it is moved towards the right. There will be a slight delay in the effect from when you speak, due to the time it takes for the signal processor to modify the digital audio stream from the microphone. When you re done, click the Enable button again to turn off the effect. Under Vista, if Voice Morph or Mic Echo is enabled but doesn t seem to be working, make sure that the Microphone is set as the default Recording Device in the Vista Recording Devices dialog box. LISTENING TO MUSIC FROM CDS To listen to an audio CD from your PC s CD ROM drive: 1. Insert the CD into the CD ROM Tray. Windows will prompt you whether or not you want to Rip the CD to your hard drive or play the CD with Media Player. Select Play CD with Media Player. 2. The CD volume will be controlled by the CD volume in the Mixer Tab of the Montego DDL Control Panel. If you re using Windows XP or Vista, then the CD audio will be in digital format and can be modified by the Equalizer and Environments effects. 18 User s Guide

19 If your CD ROM drive is using the analog CD connector on the Montego DDL, then the CD audio is analog and will not be affected by the Equalizer, Environments or other effects settings. IF THERE S NO SOUND WHEN PLAYING A CD IN THE PC S CD ROM DRIVE: Check that the Enable digital CD audio for this CD-ROM Device option is enabled in the CD drive s Properties settings (using Windows XP or 2000). Access this by clicking Start Control Panel System Hardware Tab Device Manager DVD/CD ROM Drives Right click on the name of the CD drive in question Click Properties Select Properties Tab. LISTENING TO STEREO MUSIC IN SURROUND SOUND (2000/XP ONLY) When listening to stereo in 4, 5.1 and 7.1 speaker configurations, the stereo signal will be sent to the Front speakers and the Environment-processed sound will be sent to the Surround speakers. In these Speaker Configuration modes, the Stereo-to-Multi-speaker indicator in the Settings Summary will light up to indicate that stereo music is being sent to all speakers, not just the two front speakers. When listening to Stereo on multi-speakers, try this: Select the 4, 5.1 or 7.1 speaker configuration that matches your speaker system. Turn on the Multichannel to Subwoofer option by clicking the button next to the Speaker Configuration pull-down menu in the Speaker Tab. This will send the low-frequency portion of the stereo signal to the sub-woofer output so you can hear deeper bass and control the level with the sub-woofer volume in the Speakers Tab. Enable the Environments in the Effects Tab and select an Environment from the pull-down menu. This sends the stereo signal processed by reverb to the surround speakers. You can adjust the amount of this effect with the Surround speaker volume controls in the Speaker Tab. Turn on the Speaker Position feature to position the surround and front speakers. Use the Equalizer to alter the tone to suit the genre of music you re listening to. For different surround sound effects, try adjusting the balance of Front, Surround, Center and LFE speaker levels with the Volume Controls in the Speakers Tab. When you ve found some settings that you like, save them as Presets by clicking Preset Save at the top left of the Montego Control Panel. You can then easily return to any setting by clicking on Preset and then the name under which it was saved. SPEAKER POSITIONING & MULTI-SPEAKER SETTINGS UNDER VISTA Under Vista, the settings on the Speakers and Effects tabs of the Montego DDL Control Panel function a little differently. For example, selecting 5.1 Speakers on the Speakers tab enables all 6 analog speakers so that the audio from 6 channel sources can be heard in the proper output channels, but does not automatically mix stereo audio to all of the speakers (that is, a stereo file will only be heard from the Front Left and Right speakers). In order to mix and match the number of audio channels with the number of active speakers, the Speaker Positioning (on the Effects tab) must be enabled this will expose a new control specific to Montego DDL 19
.")
20 Vista that allows you to tune the speaker mix. This is best explained with a couple of examples. If you wanted to listen to stereo MP3 files played through all speakers of a 7.1 speaker system, enable 7.1 Speakers on the Main tab, then enable the Speaker Positioning on the Effects tab and choose Stereo Sources from the Speaker Mix Tuned For drop-down menu (shown below). The virtual speakers can be dragged around to alter the room sound, and the individual volume sliders on the Main tab can also be used to adjust the overall volume of each of the channels. Another example: if you are using stereo headphones and want to hear all channels of an 8 channel audio source in a more spatially correct manner than can normally be produced in stereo headphones, enable Headphones on the Speakers tab, then enable the Speaker Positioning on the Effects tab and choose 7.1 Sources from the Speaker Mix Tuned For drop-down menu. Once 7.1 Sources has been enabled, adjust the speaker icons to create a better sense of space (i.e., move the front channels closer, move the surround channels further away, etc). Most simply put, when Speaker Positioning is enabled, the Speaker setting on the Speakers tab controls how many physical speaker channels are open, and the Speaker Mix Tuned For dropdown menu controls what the number of channels the source audio has. Whereas in 2000/XP, the Speakers tab s Settings Summary area always displays Stereo-to-Multi Speaker when Speaker Positioning is enabled, in Vista, the Setting Summary area will show the current setting from the Speaker Mix Tuned For drop-down menu: Stereo Mix to Analog Speakers 7.1 Channel Mix to Analog Speakers 20 User s Guide
21 This allows for large number of flexible settings (NOTE: The amount of speakers shown on the Speaker Positioning window will always shown which value is greater the number of source channels or the number of active physical speakers). The stereo-to-surround feature is more dramatic when using 5.1 surround headphones, such as the Turtle Beach Ear Force HPA2 surround sound headphones, available at LISTENING TO DVDS IN SURROUND SOUND Watching DVDs on your PC requires DVD software, such as Cyberlink PowerDVD or InterVideo WinDVD, that plays DVDs with 5.1 surround sound output. This software is usually included with the DVD player installed on your PC. Typically, these programs provide an audio option tab that lets you set the audio playback format. From this tab, you should set the audio playback format to 5.1 surround so that the DVD audio will play on all 6 channels of your multi-channel system. Multi-channel DVD audio is encoded in either Dolby Digital or DTS, both of which compress 5.1 channels of audio into a single digital audio stream. When using the analog outputs to play DVD multi-channel sound, the decoding of the Dolby Digital or DTS signal is accomplished with a software decoder that is included with your DVD software player. When using the S/PDIF digital output to play DVD multi-channel sound, the digital audio signal is split into 5.1 channels by a decoder chip inside the digital speaker system or A/V receiver in your home theater system. LISTENING WITH THE ANALOG AUDIO OUTPUTS To use analog 5.1 speakers for playing DVD audio, select 5.1 Speakers from the Speaker Configuration Tab and click the Reset button under the volume sliders to set the levels to about 75%. If the Settings Summary indicates that the Graphic Equalizer, Speaker Position, Environments, Key Shifter or Center Canceller are enabled, disable all of them. Once you hear the DVD in unaltered 5.1 surround sound, you can go back and use these enhancements to suit your taste. Adjust the individual 5.1 channel levels with the volume controls on the Speakers Tab. LISTENING WITH THE DIGITAL AUDIO OUTPUT To use the digital audio output for playing DVD audio, connect the S/PDIF Digital Output to your digital speakers or an A/V receiver using a TOSLINK optical cable (available at Note that the digital speaker system or A/V receiver must have an integrated Dolby Digital Decoder to process the digital 5.1 signal into 6 analog channels to drive the 5.1 speakers. Set the S/PDIF settings pull-down menu to S/PDIF Out 48kHz, to transmit the digital signal. Note that when the digital output is enabled, you can see a red light inside the digital optical output or at the end of the optical cable plugged into the digital output. USING THE DIGITAL OUTPUT IN VISTA For proper Dolby Digital or DTS pass-thru to an external decoder (such as an A/V receiver), the S/PDIF setting on the Speakers tab of the Montego DDL Control Panel should be set to 48 khz ; additionally, you must set the Digital Output as your default playback device in the Vista Sound Control Panel. Click Start Control Panel Sound and select Digital Output Turtle Beach Montego DDL Device as the Default Playback Device. Note that the Digital Output will be automatically selected in the Vista Media Center Setup Wizard if TOSLINK is selected as your speaker connection type. Also note that in this setting, the S/PDIF Output functions strictly as a pass-thru Environment effects, EQ and Montego DDL Control Panel Volume Controls don t have any effect on the audio. Montego DDL 21
22 LISTENING TO MULTI-CHANNEL AUDIO WITH DOLBY DIGITAL LIVE The Dolby Digital Live feature encodes multi-channel audio from PC games and other 3D digital audio sources into a 5.1 Dolby Digital signal that can be transmitted to an external digital speaker system or A/V receiver with a Dolby Decoder. This enables you to play 3D audio on the same system used for playing DVD audio. Without the Digital Dolby feature, the 3D sounds played on your PC cannot be connected to a digital speaker or home theater system. Instead, they must be connected via the Montego DDL s analog multichannel outputs. With Dolby Digital Live, the PC audio and Dolby Digital audio signals for DVD playback can both be played on the same digital input of your A/V receiver or digital speakers. Thus, rather than use a set of analog connections for PC audio and a digital connection for DVD audio, the Dolby Digital Live feature lets you use one simple digital audio connection for both DVD and PC audio multi-channel sound. When the Dolby Digital Live feature is enabled, via the S/PDIF Settings pull-down menu, the analog speaker outputs are disabled. LISTENING TO 3D GAME AUDIO When playing games that use EAX2, A3D1 or DirectSound3D, the Montego DDL surround sound processor converts the 3D positional sounds into HRTF positional audio so that the 3D effects of the game can be heard in headphones or stereo speakers. When using Dolby Digital Live to drive digital speakers via the S/PDIF output, the 3D positional audio from the game will be converted to 5.1 positional audio on the speakers, to create a realistic and immersive gaming experience. USING DDL MODES IN VISTA Due to changes in the way the hardware works in Vista, there are now 2 DDL modes to choose from - "DDL 5.1 Encoding" and "DDL Stereo Encoding". The end result of both modes is the same encoded 5.1 Dolby Digital Live output from the S/PDIF output. The use for each depends on what type of audio is being played. In XP/2000, when DDL mode is selected, stereo audio is upmixed so that it is sent to all speakers (not just the Front Left and Right), and 5.1 audio is encoded intact into a Dolby Digital stream. Under Vista, the upmixing required the creation of the new "DDL Stereo Encoding" setting this is what should be used to allow stereo sources to be pushed out in DDL mode to all 6 channels of a 5.1 system. For audio sources that have discrete multi-channel audio (such as most popular PC games), the "DDL 5.1 Encoding" setting should be chosen to ensure that the placement of each of the 6 audio channels is correct in the encoded DDL output. NOTE: When DDL modes are used, the Windows Vista Playback Devices windows should have Speakers (not Digital Output ) selected as the default Playback Device, even though the S/PDIF connection is being used. 22 User s Guide


23 USING EAR FORCE SURROUND SOUND HEADPHONES Turtle Beach Ear Force headphones are a perfect add-on for the Montego DDL. Be sure to check them out at The optional Turtle Beach Ear Force surround-sound headphones let you experience surround-sound without having to set-up a 5.1 speaker system. Currently, two models are available: The Ear Force HPA2 includes an amplifier unit that boosts the output level of the 5.1 output signals to provide head-shaking bass. The Ear Force X-52 are passive headphones that plug directly into the Montego DDL 5.1 channel outputs and fold into a portable unit. Each model includes a removable microphone compatible with the Montego DDL microphone input. Each model includes four speakers in each ear cup for reproducing Front, Surround, Center and Sub audio signals from the Montego DDL 5.1 analog outputs, providing a realistic surround-sound experience without the need for a 5.1 speaker system. Ear Force HPA2 with Amplifier Ear Force X-52 portable multispeaker headphones To connect either model of the Ear Force headphones to the analog outputs, insert the colored jacks on the headphone cable into the matching plugs on the Montego DDL bracket (Green = Front, Black = Surround, Orange = Center/Sub, Pink = Microphone). When placing the headphones over your ears, be sure to place the cable/mic side on the left ear so that the front and rear speakers will be correctly positioned. Montego DDL 23

 of your PC audio system.")


24 MONTEGO DDL CONTROL PANEL The Control Panel lets you access all of the Montego DDL audio features. You can launch the control panel from the Turtle Beach palm tree icon located on the right side of the Windows Start menu or by clicking Start All Programs Turtle Beach Montego DDL Run Montego DDL Control Panel. The control panel includes a set of tabs which, when clicked, activate various controls for accessing Montego s features. SPEAKERS TAB EQUALIZER TAB This Tab is used for setting the speaker and S/PDIF configurations. EFFECTS TAB This Tab lets you modify the frequency response (i.e. tone) of your PC audio system. MIXER TAB (WINDOWS XP VERSION) This Tab lets you control speaker positions, add Environments for concert hall effects, and modify the audio with sound effects processors. This Tab lets you set the volume for all of the playback and recording sources. USING THE CONTROL PANEL PRESETS SAVING AND RESTORING PRESETS The Control Panel lets you save the Tab settings as presets for easy recall. Once you ve set the controls for a particular configuration, click on the Preset button, then click Save to call up the Save Preset dialog. Select a category from the Preset Category menu, type in a name, then press OK. To restore a saved preset, click the Preset button and select the category name followed by the preset name. IMPORTING AND EXPORTING PRESETS You can also share presets with other users with the import/export feature. To Export a preset, click Preset Export, then enter a name in the Save As dialog box. To Import a preset, click Preset Import and select the preset from the Open dialog box that appears. Whenever a preset has been changed, an asterisk will appear on the right side of the name displayed at the top of the Control Panel, indicating that the preset has been edited from the original version. 24 User s Guide

 The Speaker Options button, located to the right of the speaker configuration pull-down menu, will only appear in 4, 5.1, and 7.1 channel speaker configurations.")
25 SPEAKERS TAB The Speakers Tab is divided into the following sections: Speaker Configuration lets you test speaker operation and select speaker configuration modes. Volume sets the master volume and individual speaker volumes. Settings Summary indicates the status of important control panel settings. S/PDIF Settings sets the digital output configurations and selects the Dolby Digital Live feature. When S/PDIF Out is enabled, the analog speaker outputs are disabled. SPEAKER OPTIONS BUTTON ( ) The Speaker Options button, located to the right of the speaker configuration pull-down menu, will only appear in 4, 5.1, and 7.1 channel speaker configurations. Clicking this button activates the Speaker Options dialog with the following settings: Multi-channel to Subwoofer: When this option is checked, a submix of all channels is sent to the Sub-woofer output. This feature should be enabled when listening to a stereo source with multispeakers so the bass signals from the stereo source will be routed to the LFE output. When playing a DVD with 5.1 channel output, this option should be disabled, since the DVD 5.1 signal includes a separate sub-woofer channel and a sub-mix is not necessary. Center/Bass Swap: When this option is checked, the Center and Bass output channels are swapped. This feature is useful when using 5.1 and 7.1 speaker systems with center/lfe stereo jacks that do not match the configuration of the Montego s center/lfe output jack. Surround/Rear Output Swap: When this option is checked, the Surround and Rear speaker channels are swapped. Montego DDL 25


 2")
 4")
26 SPEAKER CONFIGURATIONS The Speaker Configuration pull-down menu sets the following speaker modes: Headphones (2-speakers) 2 Speakers (Stereo) 4 speakers (Quad) 26 User s Guide
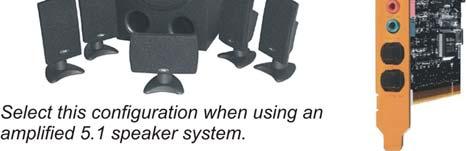


27 5.1 Speakers (5.1 Surround) 5.1 Headphones (5.1 Surround) 7.1 speakers (7.1 Surround) Montego DDL 27


28 TESTING THE SPEAKER CONFIGURATION After selecting the speaker configuration to match your speaker system, you can check if the speakers are properly connected by clicking on the speaker icon to play a test signal on that speaker. The buttons at the bottom of the speaker configuration illustration, labeled Test and Loop, operate as follows: Test: When this button is clicked, the test signal automatically advances to the next speaker so that all of the speakers in a configuration are played once. Loop: When this button is enabled, if the Test button is clicked, the test signal will continuously play in sequential order on all speakers until the Test button is turned off. If the Loop button is enabled with the Test button off, clicking a speaker will repetitively play the test signal on that speaker until the Loop button is turned off. VOLUME SECTION Master Volume: Controls the volume of all speakers. Pan: Controls L/R balance. Mute: Mutes all outputs when lit. INDIVIDUAL SPEAKER VOLUMES The volume controls for each speaker in the selected configuration are located to the right of the Master Volume slider. The number of sliders will depend on the speaker configuration (2 sliders for stereo, 4 sliders for quad, etc.). Lock Button: Click the Lock button, located at the bottom of the section, to make the L/R slider pairs move together when adjusting the levels. Reset Button: Click the Reset button to return all of the speaker levels to their default settings. SETTINGS SUMMARY This section summarizes the major control panel settings into a convenient list.: Stereo to Multi-Speaker: Indicates that a stereo source will be routed to all of the speakers when the Speaker Configuration is set to either 4, 5.1 or 7.1 speaker modes. This will occur whenever the Speaker Position or Environments in the Effects Tab are enabled. To listen to a stereo source with two speakers when using 4, 5.1 or 7.1 speakers, set the Speaker Configuration to 2 Speaker. (For more information about this feature under Vista, please see the earlier section entitled Listening to Stereo Music in Surround Sound ) Graphic Equalizer: Indicates that the Equalizer is enabled, therefore the speaker frequency response may be modified from its flat setting by the Equalizer. Speaker Position: Indicates that the speaker icons positions in the Speaker Position section of the Effects Tab have been moved. If you find that the sound is not emanating from the speaker being tested, and this LED is on, check the Speaker Position settings to see if the speaker signal has been panned to a different location. (For more information about this feature under Vista, please see the earlier section entitled Listening to Stereo Music in Surround Sound ) Environments: Indicates that the Environments in the Effects Tab are enabled, which adds a reverberation or concert hall effect to the sound. Key Shifter: Indicates that the Pitch Shifter in the Effects Tab is enabled, therefore the digital audio output might be altered by this effect. 28 User s Guide


29 Center Canceller: Indicates that the Center Canceller effect in the Effects Tab is enabled, which removes audio signals that are panned to the center of a stereo source. This is typically used to remove the voice from a song. Voice Changer: Indicates that the Voice Changer effect in the Effects Tab is enabled, therefore the mic input might be altered. S/PDIF SETTINGS The S/PDIF digital input and output connectors may be used to interface with external S/PDIF devices, such as digital speakers, A/V receivers, DVD players and other home theater and professional audio devices. The digital input and output signals are connected to external devices using fiber optic TOSLINK cables, available at the Turtle Beach web site ( or at most consumer electronics retailers. The S/PDIF Digital Output may be used to connect a 5.1 / 7.1 digital speaker system or an A/V receiver with digital inputs. When using this mode, select one of the S/PDIF output modes in the pull-down menu, as described below. When the S/PDIF signal is active, you should see a red light inside the digital output connector or at the end of the TOSLINK cable inserted into the digital output connector. When using Dolby Digital Live, all of the PC s audio signals are transmitted in digital rather than analog format, providing the highest quality signal possible. This configuration may be used for listening to stereo, multi-channel 3-D games, multi-channel audio and playback of Dolby Digital 5.1 audio from DVDs. The S/PDIF Pull-down menu lets you select the following S/PDIF output modes: S/PDIF Out Off: S/PDIF output is turned off, so there is no digital signal. Note that whenever S/PDIF is turned on, a red light will be emitted from the S/PDIF output on the rear bracket. S/PDIF Out 44.1kHz: Digital audio is transmitted in S/PDIF format at 44.1kHz sample rate. S/PDIF Out 48kHz: Digital audio is transmitted in S/PDIF format at 48kHz sample rate. S/PDIF Out 96kHz: Digital audio is transmitted in S/PDIF format at 96kHz sample rate. (not available in Vista) S/PDIF In to Out: The S/PDIF input is routed to the S/PDIF output, allowing you to monitor the S/PDIF input on the digital speaker system or A/V receiver connected to the S/PDIF output. DDL 5.1 Encoding: PC audio is converted to Dolby Digital Live format so that it may be played as a multi-channel 5.1 signal on digital speaker systems or A/V home theater receivers with Dolby Digital decoders. DDL Stereo Encoding (Vista only): Allows Stereo PC audio sources to be pushed out in DDL mode to all 6 channels of a 5.1 system. For more information about this feature, please see Note on DDL Modes in Vista in an earlier section of this manual. Montego DDL 29
: Clicking this button activates a dialog box with the following controls: Reverse S/PDIF-In Format: Check this option when the transmitting device is sending S/PDIF data")
30 When S/PDIF Out is enabled, the analog speaker outputs are disabled. S/PDIF Options Button ( ): Clicking this button activates a dialog box with the following controls: Reverse S/PDIF-In Format: Check this option when the transmitting device is sending S/PDIF data with an inverted phase, which sometimes can cause the S/PDIF input to incorrectly sense the digital signal. Validity Check: When this option is checked, the S/PDIF input will ignore the Validity Bit on the incoming S/PDIF signal. When the Validity bit is set by the transmitting device, the Montego DDL will not play the S/PDIF audio stream if this option is not checked. 30 User s Guide
 positions.")

31 GRAPHIC EQUALIZER TAB The Graphic Equalizer provides 10 frequency bands that can be boost or cut to tailor the system frequency response, or tone. Two rows of buttons at the top of the slider bank provides quick access to eight equalizer presets. The Flat setting returns the sliders to their zero (i.e unmodified) positions. USER DEFINED PRESETS Once you ve set your own arrangement of sliders, the setting can be saved as a User Defined Preset by clicking the Add button, entering a name for the preset then clicking OK. The name will then be added to the list in the pull-down menu. To retrieve a preset from the list, click the User Defined button, then select a preset from the pull-down menu. To delete a preset from the list: Select the preset from the list, press the Delete Button and you will be prompted whether or not you would like to delete the current preset. The selected preset will then be removed from the list. Montego DDL 31

32 EFFECTS TAB SPEAKER POSITION This section lets you change the position of speakers configured in the Speakers Tab by clicking and moving the blue virtual speaker icons in the illustration. The number of blue speaker icons will match the number of speakers in the Speaker Configuration setting on the Speakers Tab (e.g. a setting of 5.1 speakers will show 6 blue icons, while a stereo or headphone setting will show two icons.) When used with the stereo or headphones speaker configuration, the speakers are positioned with a virtual speaker position mode, which uses HRTF (Head Related Transfer Function) digital signal processing to modify the apparent position of the speaker sound. This effect can, for example, provide a simulated speaker widening effect when listening with headphones or stereo speakers. The buttons in this section function as follows: Enable: The speaker positioning effect is enabled by clicking on this button. Rotate: Clicking either of these two buttons will cause the virtual speaker positions to move in a clockwise or counterclockwise rotation, with a rotation speed set by the slider. Click the Manual button to stop the rotation. Manual: Clicking this button allows you to move the virtual speaker positions manually by clicking and dragging the blue speaker icons to different positions. Random: Clicking this button allows you to move the virtual speaker positions in a random mode with the speed set by the Rotate speed slider. Reset: Clicking this button sets the virtual speakers back to their default position. Speaker Mix Tuned For drop-down menu (Vista only): When Speaker Positioning is enabled in Vista, this menu allows you to mix and match the number of input and output channels. For more information about this, please refer to the Speaker Positioning & Multi-Speaker settings under Vista section of this manual. 32 User s Guide
33 ENVIRONMENTS When the Environments Enable button is on, clicking on the pull-down menu lets you select from a list of reverberation settings. The Environment Size buttons set the depth of this effect. These settings can be very effective when listening to stereo music in multi-speaker mode by creating reverb in the surround channels. SOUND FX VOICE CHANGER When activated by pressing the Enable button, this effect alters the microphone input signal by adding an echo/reverb effect or by changing the pitch up or down. Note that these effects only operate on the microphone input. To try this effect: 2. Insert a microphone into the mic input jack and turn up the Microphone volume in the Mixer Tab so that you can hear your voice on the speakers when you speak into the mic. 3. Select Microphone as a recording source in the Record Settings in the Mixer Tab, and turn up the recording level slider to the maximum setting. 4. Click the Enable button on the Voice Changer in the Effects tab, and select Mic Echo in the Voice Changer pull-down menu. Moving the slider from left to right should introduce an echo when you speak into the mic. The amount of echo can be adjusted with the Record Level slider in the Mixer Tab. 5. Now select Voice Morph in the Voice Changer pull-down menu. Moving the slider from left to right shifts the pitch of your voice down when the slider is moved towards the left and up as it is moved towards the right. There will be a slight delay in the effect from when you speak, due to the time it takes for the signal processor to modify the digital audio stream from the microphone. In Vista, if Voice Morph or Mic Echo is enabled but doesn t seem to be working, make sure that the Microphone is set as the default Recording Device in the Vista Recording Devices dialog box. KEY SHIFTER When activated by pressing the Enable button, this effect changes the pitch of a digital audio file as it plays which is very useful to play or sing along with a song in a different key than the original. Note that this effect does not alter the original file, it only alters the audio in real-time as it plays. Moving the slider to the left (-) will drop the pitch, while moving it to the right (+) will raise the pitch. VOICE CANCELLER When activated by pressing the Enable button, the level of sounds that are panned in the center of a stereo signal are reduced. Since many songs place the voice in the center, the effect is essentially a voice canceller, that may be used to remove any signal panned to the center of the mix, including vocals. Note that this effect only works on digital inputs and does not work on analog signals, such as the line input. Since the effect operates by subtracting the left and right stereo signals, any sound that s in both the Left and Right channels (i.e. panned to the center) will be reduced. When the slider control is in the far left position, there will be no alteration in the sound. As it is moved to the right, the center signal is attenuated. Environments should be disabled when using the Voice Canceller feature. Montego DDL 33


34 MIXER TAB Mixer Tab in Windows 2000/XP Mixer Tab in Windows Vista PLAYBACK SETTINGS The Playback mixer provides an array of volume, mute and pan controls for balancing the sound sources when listening with headphones or speakers. Each slider controls a specific source of sound on the PC, including: Wave (not available in Vista): Sets the playback level of the PC s digital audio sources, such as MP3 files, Windows sounds, etc. The combination of the WAVE slider setting and the Master Volume slider setting will determine the overall volume of these sounds. Use the Pan control to balance the left and right signals SW Synth (Software MIDI Synthesizer) (not available in Vista): Sets the volume of the Windows MIDI software synthesizer. Use the Pan control to balance the left and right signals. 34 User s Guide

35 Microphone: Sets the volume of the microphone input. Since the microphone is a mono input, it does not have a pan control. The Microphone Options Button, labeled, activates a dialog box with an option to boost the microphone volume by +20dB. CD Player: Sets the volume for the CD ROM audio. Line In: Sets the volume of the signal plugged into the Line input jack. Use the Pan control to balance the left and right signals. Master Volume: Sets the volume of all playback sources. This slider, along with the associated Pan and Mute controls, is identical to the Master Volume in the Speakers Tab. Montego DDL 35
36 The following signal flow diagram illustrates how these inputs are connected in the playback mixer in Windows 2000/XP. Note that the mixer output is routed to both the Front output for monitoring the input signals and the Record input for recording a mix of the input signals (as described in the next section.) 36 User s Guide
37 RECORD SETTINGS Audio recording can be accomplished with a program such as Audio Surgeon LE (included on the Montego DDL installation CD), Windows Recorder (in the Accessories section of the Start All Programs list), or other digital audio recording software. The record source is selected by clicking the Record Source pull-down menu in the Record Settings section of the Mixer tab. After selecting a record source, the recording level may be adjusted with the volume control located above the record source pull-down menu. The VU meter indicates the recording level. When recording, set the recording level so that the VU meters do not enter the red zone, other than during short audio peaks. The Record Source Pull-down Menu allows the following inputs to be used as a recording source: S/PDIF In: Selects the digital audio S/PDIF input. Since the signal is in digital format, the volume control does not function when S/PDIF is selected. The digital volume level is already optimized by the transmitting source and cannot be adjusted. o o To record S/PDIF at the 96kHz sample rate, the 96kHz S/PDIF Out setting must be enabled (2000/XP only). To record any other S/PDIF rate, the Dolby Digital Live mode must disabled and S/PDIF out should either be disabled or set to 44.1kHz or 48kHz. Microphone: Selects the mic input as a record source. If the microphone recording level is too low, boost the volume by clicking the options button ( ) below the microphone volume slider in the playback mixer to set the Microphone Boost option. CD Player: Selects the internal analog CD player input as a record source. Aux (not available in Vista): Selects the Aux internal analog connection as a record source. Line In (not available in Vista): Selects the Line Input as a record source. Wave (not available in Vista): Selects the Wave digital audio as a record source. Stereo Mix (not available in Vista): Selects the output of the playback mixer as a record source. This may be used to combine audio sources into a single stereo source for recording. For example, the microphone and WAV signals may be mixed together and recorded from this source. NOTE ON SELECTING RECORD SOURCE IN WINDOWS VISTA Due to changes in Windows Vista, the Montego DDL Control Panel s Mixer tab alone cannot select the recording source. In Vista, the Record Source slider instead is labeled Record Level because it can only control the recording input s level. An additional step must be taken to select the recording source in Windows Vista. To select the record source, right-click on the speaker icon in the Taskbar System Tray (in the lower right-hand corner of the screen) and select Recording Devices. When the Recording Devices dialog window appears, it will display the available recording sources for the Montego DDL. To choose a record source, simply click on the item in the list, and then click the Set Default button. Montego DDL 37
38 The following diagram illustrates the signal flow for the recording input path in Windows 2000/XP. Note that the volume sliders in the Playback Mixer do not affect the recording level of the source selected as a Record Source unless they are recorded from the Stereo Mix source, which is the output of the Playback Mixer: 38 User s Guide
39 WINDOWS XP MEDIA CENTER CONTROL INTERFACE The Montego DDL Windows XP Media Center Control Interface is designed for use with the Microsoft Windows XP Media Center edition Operating System. This control panel lets you adjust Montego DDL settings using the Windows XP Media Center remote control without having to leave the Media Center environment. If you do not have the Microsoft Windows XP Media Center edition Operating System installed on your computer you will not be able to access this control interface. USING THE MEDIA CENTER CONTROL INTERFACE 1. From the Microsoft Windows XP Media Center interface navigate to the More Programs option and select Enter on your remote control. 2. From the More Programs screen select the Montego DDL option and select Enter on your remote control to open the Montego DDL Windows XP Media Center Interface. 3. Navigate the Montego DDL Windows XP Media Center Interface the same as you would any page found in Windows XP Media Center. Use the Up, Down, Left, and Right navigational buttons on your remote control to move the green highlighting to any of the selectable options. TO PRESS A BUTTON: Navigate the green highlighting to the desired button and press the Enter button on your remote control to make your selection. TO MANIPULATE THE VOLUME SLIDERS: Navigate by moving the green highlighting to the desired volume control and then press the Enter button on the remote control to highlight the volume indicator. Once the volume indicator is selected you can move the value up or down by using the Up, Down, Left and Right navigational buttons on the remote control. Once you are done, press the Enter button to deselect the volume indicator. TO EXIT THE MONTEGO DDL WINDOWS XP MEDIA CENTER INTERFACE: Press the Back button on the remote control until you reach the desired Media Center page. You can also press any of the Quick Launch buttons on your remote control to jump to a new page if available. Montego DDL 39


40 MIXER SCREEN This screen emulates the Mixer Tab in the Montego DDL Control Panel, allowing you to set the volume levels of different sound sources with the Media Center remote control. SPEAKERS SCREEN This screen emulates the Speakers Tab in the Montego DDL Control Panel, allowing you to set the speaker configurations and set the speaker volumes 40 User s Guide
Ear Force AK-R8 User s Guide
 Ear Force AK-R8 User s Guide Table of Contents Introducing the Ear Force AK-R8...1 Audio Advantage SRM...2 Getting Started...4 Package Contents... 4 Installation CD... 5 Software Suite... 5 Voyetra Demo
Introducing the SoundWave 7.1 PCI. The SoundWave 7.1 PCI transforms your PC into a home theater system with multi-channel surround sound.
 SoundWave 7.1 PCI Quick Installation Guide Introducing the SoundWave 7.1 PCI The SoundWave 7.1 PCI transforms your PC into a home theater system with multi-channel surround sound. Features Compliant with
PX5 Presets Manager Users Guide
 PX5 Presets Manager PX5 Presets Manager Users Guide Table of Contents Introducing the PX5 Presets Manager... 2 Downloading the PX5 Presets Manager Software... 2 Installing the Software... 2 Setting up
SoundWave 7.1 PCI Quick Installation Guide
 SoundWave 7.1 PCI Quick Installation Guide Introducing the SoundWave 7.1 PCI The SoundWave 7.1 PCI transforms your PC into a home theater system with multi-channel surround sound. Features Compliant with
User s Guide Model No.: SB1570
 User s Guide Model No.: SB1570 Introduction Congratulations on your purchase of Creative's latest audio revolution, Sound Blaster Audigy Fx! With cutting edge technology from the leaders in PC audio, Sound
How to use this manual
 How to use this manual This document is designed to provide you with direct access to vital product knowledge. You can resize the document window or print this document, access linked web sites and get
E3360 First Edition August Xonar D2X. Audio Card. Quick Installation Guide
 E3360 First Edition August 2007 Xonar D2X Audio Card Quick Installation Guide 1.1 Installation requirements To ensure a successful installation of the Xonar D2X audio card, your computer must meet the
 $ERXW
$ERXW The SoundWave 5.1 PCI transforms your PC into a home theater system with multi-channel surround sound.
 Introduction 04-0359G SoundWave 5.1 PCI Installation Guide The SoundWave 5.1 PCI transforms your PC into a home theater system with multi-channel surround sound. Features and Benefits Customize Internet
Xonar U Channel USB Audio Card. User Guide
 Xonar U5 5.1-Channel USB Audio Card User Guide E11117 Revised Edition v2 November 2015 Copyright 2015 ASUSTeK COMPUTER INC. All Rights Reserved. No part of this manual, including the products and software
CMI8768/8768+ User Manual
 C-Media Electronics Inc. CMI8768/8768+ Advanced Driver Software Architecture TM Enhanced by Dolby Digital Live and C-Media Xear 3D TM Sound Technology User Manual Revision: 1.0 Rev. Date: May. 25, 2004
Quick Start Guide. Quick Start Guide - 0
 Quick Start Guide 0404 Quick Start Guide - 0 1- Introduction Creative Professional Thank you for purchasing the E-MU 0404 Digital Audio System. We ve designed this E-MU Product to be logical, intuitive
Intel Core 2 Duo or AMD processor equivalent (2.0 GHz or faster processor recommended)
") Introduction Thank you for purchasing Creative's high performance audio solution, Sound Blaster Audigy 5/Rx Sound Card! High Definition Digital Audio Entertainment Featuring 24-bit/192 khz audio playback,
Introduction Thank you for purchasing Creative's high performance audio solution, Sound Blaster Audigy 5/Rx Sound Card! High Definition Digital Audio Entertainment Featuring 24-bit/192 khz audio playback,
Bravo Presets Manager Users Guide
 Bravo Presets Manager Bravo Presets Manager Users Guide Table of Contents Introducing the Bravo Presets Manager... 2 Downloading the Bravo Presets Manager Software... 2 Installing the Software... 2 Setting
The USB SoundWave 7.1 is a portable sound controller that simulates 7.1-channel sound to headphones or 2-channel speakers.
 Introduction USB SoundWave 7.1 Quick Installation Guide The USB SoundWave 7.1 is a portable sound controller that simulates 7.1-channel sound to headphones or 2-channel speakers. Features and Benefits
PCIe Audio Card Model: SD-PEX63081
 SD-PEX63081 1 PCIe Audio Card Model: SD-PEX63081 User Manual Ver. 2.00 Chipset: CMedia CM8828, CM9882A SD-PEX63081 2 Product Introduction This Multi-Channel PCI-Express Sound Card is a versatile 24bit
How to use this manual
 How to use this manual This document is designed to provide you with direct access to vital product knowledge. You can resize the document window or print this document, access linked web sites and get
Sonic Studio. User Manual
 Sonic Studio User Manual DE157 First Edition October 2014 Copyright 2014 ASUSTeK COMPUTER INC. All Rights Reserved. No part of this manual, including the products and software described in it, may be reproduced,
Pentium-class computer with one available PCI slot Windows 7 / Vista / 2003 / XP / 2000, (32/64 bit) DirectX 8.1 above is required
 DirectX 8.1 above is required") MANUAL DN-33700 Features Full-duplex playback and recording Full-duplex 8CH DAC/2CH ADC Support 48/44.1 KHz sampling rate for playback and recording Supports the latest Dolby Digital EX and DTS ES 6.1/7.1
MANUAL DN-33700 Features Full-duplex playback and recording Full-duplex 8CH DAC/2CH ADC Support 48/44.1 KHz sampling rate for playback and recording Supports the latest Dolby Digital EX and DTS ES 6.1/7.1
Realtek Audio Utility User Guide
 Realtek Audio Utility User Guide DE118 Rev. 3 The Realtek audio CODEC provides 8-channel audio capability to deliver the ultimate audio experience on your computer. The sofftware provides Jack-sensing
Summary Product Contents Specifications System Requirements Product Photography. Sound Blaster Audigy 2 ZS Platinum Pro
 Recording and production excellence for the home-studio. The is the ultimate 7.1 studio solution for musicians and audio enthusiasts. It supports ASIO 2.0 and SoundFont 2.1 and can record up to 6 simultaneous
The Hard Disk Sampler Tool Kit! GIGAStation. Owner s Manual.
 The Hard Disk Sampler Tool Kit! GIGAStation Owner s Manual www.egosys.net All rights to this document are reserved. No part of this document may be copied reproduced, or distributed in any form or by any
PXR 1506 / WATT MIXER AMPLIFIER
 PXR 1506 / 1508 150-WATT MIXER AMPLIFIER Operating Manual www.peavey.com ENGLISH PXR 1506 / 1508 150-Watt, 8-Channel Mixer Amplifier Designed with the latest Peavey technology, the PXR 1506 / 1508 powered
User sguide ModelNo.:SB1560
 User sguide ModelNo.:SB1560 Introduction Congratulations on your purchase of Sound Blaster Omni Surround 5.1 USB Sound Card! Featuring SBX Pro Studio technology, this USB audio solution will give you an
END USER WARRANTY. For technical support inquiries, contact your nearest dealer or visit online technical support at
 END USER WARRANTY EGO SYSTEMS, INC. warrants the return policy to its original purchaser as follows: All EGO SYSTEMS INC. s products, under normal use, will be free from fault as long as the purchaser
7.1 Sound Card RF-71SDCD. User Guide
 7.1 Sound Card RF-71SDCD User Guide Rocketfish RF-71SDCD 7.1 Sound Card Contents Introduction...2 Sound card components...3 Setting up the sound card...4 Connecting the speakers...8 Connecting peripherals...
Multimedia. User Guide
 Multimedia User Guide Copyright 2007 Hewlett-Packard Development Company, L.P. Windows is a U.S. registered trademark of Microsoft Corporation. The information contained herein is subject to change without
Turtle Beach Montego A3DXstream. 64 Voice PCI Accelerator
 1 Turtle Beach Montego A3DXstream 64 Voice PCI Accelerator 2 TURTLE BEACH SYSTEMS This documentation and the accompanying software are copyright 1998 by Voyetra Technologies Inc. All rights reserved. No
SoundWave Pro 2000 Quick Installation Guide
 SoundWave Pro 2000 Quick Installation Guide Introducing the SoundWave Pro 2000 The SoundWave Pro 2000 is a high performance multimedia sound card which takes full advantage of the PCI bus architecture,
Xonar D-KARA. PCI 5.1 Karaoke Audio Card. User Manual
 Xonar D-KARA PCI 5.1 Karaoke Audio Card User Manual E11120 Revised Edition V2 November 2015 Copyright 2015 ASUSTeK Computer Inc. All Rights Reserved. No part of this manual, including the products and
4-in/6-out USB Recording Interface. User s Guide
 4-in/6-out USB Recording Interface User s Guide - Copyright 2007 Revision 1, June 2007 www.esi-audio.com INDEX 1. Introduction... 4 1.1 What s in the box... 4 1.2 Key Features... 4 2. Description of U46
LifeView FlyTV Platinum Gold Series Installation Guide with PowerCinema 3
 LifeView FlyTV Platinum Gold Series Installation Guide with PowerCinema 3 P/N: ************* Ver: 3.20.000.0 Date: 2004-05-20 Copyright and Trademark Notice 2003 by Animation Technologies Inc. All rights
SoundWave Pro PCI Quick Installation Guide
 SoundWave Pro PCI Quick Installation Guide Introducing the SoundWave Pro PCI The SoundWave Pro PCI uses bus mastering technology to take full advantage of the PCI bus architecture, while maintaining compatibility
Turtle Beach Montego II. User s Guide
 1 Turtle Beach Montego II User s Guide 2 TURTLE BEACH SYSTEMS This documentation and the accompanying software are copyright 1999 by Voyetra Turtle Beach, Inc. All rights reserved. No part of this publication
Multimedia. User Guide
 Multimedia User Guide Copyright 2006 Hewlett-Packard Development Company, L.P. Microsoft and Windows are U.S. registered trademarks of Microsoft Corporation. The information contained herein is subject
SoundWave Pro PCI Quick Installation Guide
 SoundWave Pro PCI Quick Installation Guide Introducing the SoundWave Pro PCI The SoundWave Pro PCI provides 3D sound effects and supports DirectSound 3D TM, MPU-401, GM and is fully compatible with Sound
7.1 Virtual Surround Sound Effect Gaming Headset. User Manual TNIEXPRESS.COM 10/1/2016
 2016 7.1 Virtual Surround Sound Effect Gaming Headset User Manual TNIEXPRESS.COM 10/1/2016 Software User Guide TNIEXPRESS.COM SOMiC G909 7.1 Virtual Sound Effect Gaming Headset Software Installation for
Check the contents of the package
 Read this first! UA-4FX Owner s Manual Copyright 2005 ROLAND CORPORATION All rights reserved. No part of this publication may be reproduced in any form without the written permission of ROLAND CORPORATION.
Steps to test Windows Audio
 Steps to test Windows Audio Step 1: Testing for an audio signal Use this process to find out if Windows can detect an audio signal from the microphone or from the line-in port. NOTE:If you are testing
The USB SoundWave 7.1 Digital is a portable sound card that brings a home theater atmosphere to notebook or desktop computers.
 Introduction USB SoundWave 7.1 Digital Quick Installation Guide The USB SoundWave 7.1 Digital is a portable sound card that brings a home theater atmosphere to notebook or desktop computers. Features and
English G H. Package Contents. Hardware Requirements. Technical Specifications. Device Overview. MSI DS502 GAMING HEADSET User Guide
 Package Contents MSI DS502 GAMING HEADSET User Guide Hardware Requirements PC with USB port Windows 8.1/8/7/XP English Technical Specifications Headphones * Drivers : Ø40mm * Sensitivity (S.P.L) : 105
7.1 Channel Sound Card - PCI Express, 24-bit, 192KHz
 7.1 Channel Sound Card - PCI Express, 24-bit, 192KHz Product ID: PEXSOUND7CH With this 7.1-channel PCIe sound card, you can create a high-quality home theatre sound system. It offers SPDIF input and output
Multimedia User Guide
 Multimedia User Guide Copyright 2007 Hewlett-Packard Development Company, L.P. Windows is a U.S. registered trademark of Microsoft Corporation. The information contained herein is subject to change without
Sono 61. English User Guide
 Sono 61 English User Guide 1 Introduction.............................................................. 3 ProKeys Sono 61 Features............................................... 4 What s in the Box?.......................................................
ENGLISH. Matrox Parhelia. Matrox Millennium P750. User Guide
 Matrox Millennium P650 User Guide 10818-301-0210 2005.02.28 ENGLISH Matrox Parhelia Matrox Millennium P750 Hardware installation This section describes how to install your Matrox card. If your Matrox graphics
5 Channel Low Profile PCI Sound Card 24 Bits
 5 Channel Low Profile PCI Sound Card 24 Bits PCISOUND5LP DE: Bedienungsanleitung - de.startech.com FR: Guide de l'utilisateur - fr.startech.com ES: Guía del usuario - es.startech.com IT: Guida per l'uso
Owner s Manual DA-300USB D/A CONVERTER. Appendix. Contents. You can print more than one page of a PDF onto a single sheet of paper.
 DA-300USB D/A CONVERTER Owner s Manual You can print more than one page of a PDF onto a single sheet of paper. Front panel Display Rear panel Contents Accessories 3 Features 4 High quality sound 4 High
Multimedia. User Guide
 Multimedia User Guide Copyright 2007 Hewlett-Packard Development Company, L.P. Windows is a U.S. registered trademark of Microsoft Corporation. The information contained herein is subject to change without
Aud-X 5.1 Help.
 Aud-X 5.1 Help www.aud-x.com Overview Aud-X has been engineered as 5.1 channel surround sound CODEC, and is dedicated for the use with Xvid/Divx based movies. It is of course also possible to compress
User Manual. Creative Sound Blaster Extigy. How to use this manual
 How to use this manual User Manual Creative Sound Blaster Extigy Information in this document is subject to change without notice and does not represent a commitment on the part of Creative Technology
SB1500 / SB1502 Gaming Sound Card SB1506. User s Guide
 SB1500 / SB1502 Gaming Sound Card SB1506 User s Guide Introduction Congratulations on your purchase of Creative's latest audio revolution, Sound Blaster Z-Series! With cutting edge technology from the
PJP-25UR Conference Microphone Speaker
 PJP-25UR Conference Microphone Speaker User's Manual Contents INTRODUCTION Introduction...2 Controls and Functions...3 PREPARATION Connection...5 Check the following before connecting this unit to the
Multimedia. User Guide
 Multimedia User Guide Copyright 2006 Hewlett-Packard Development Company, L.P. Microsoft and Windows are U.S. registered trademarks of Microsoft Corporation. The information contained herein is subject
Product information C: Installation
 Product information A: Analog inputs and outputs B: Digital S/PDIF input and output C: Internal analog inputs C A B Installation Before installation: When you have an onboard soundcard, please disable
24-bit USB Audio Interface with S/PDIF I/O. User s Guide
 24-bit USB Audio Interface with S/PDIF I/O User s Guide - Copyright 2008-2018 Revision 5, June 2018 www.esi-audio.com INDEX 1. Introduction... 4 1.1 Key Features... 4 2. Description of... 4 2.1 Front Panel...
Quick Start XLe Source Expansion Kit
 Quick Start XLe Source Expansion Kit Caution: Before touching the supplied audio card, ground yourself by touching an unpainted metal surface. While working on your computer you should periodically touch
USB SoundWave Optical 5.1 Quick Installation Guide
 USB SoundWave Optical 5.1 Quick Installation Guide Introducing the USB SoundWave Optical The USB SoundWave Optical 5.1 transforms your PC into a home theatre system with multi-channel surround sound. Features
LBP-810 Laser Printer
 LBP-810 Laser Printer Getting Started Guide IMPORTANT: Read this manual carefully before using your printer. Save this manual for future reference. Copyright Copyright 2001 Canon Inc. All information in
Easy Setup Guide. 1 Preparation. English. AV Receiver. Accessories. Cables required for connections
 UA Preparation Accessories AV Receiver Check that the following accessories are supplied with the product. Remote control Batteries (AAA, R0, UM-4) (x) Easy Setup Guide English YPAO microphone AM antenna
Easy Setup Guide. 1 Preparation. English. AV Receiver. Accessories. Cables required for connections
 UA 1 Preparation AV Receiver Accessories Check that the following accessories are supplied with the product. Remote control Batteries (AAA, R0, UM-4) (x2) Easy Setup Guide English Insert the batteries
EasyStart. The MR Recorders support multiple recording formats, bit.192 khz
 EasyStart MR 1 / MR 1000 Main Features The hand held MR 1 provides high quality 1 bit/2.8 MHz recording and playback in a shirt pocket portable package perfect for location recording, broadcast journalism,
Wireless Gaming Headphones with XBOX Live Chat and Dolby 5.1 Channel Surround Sound. Operating Instructions
 EAR FORCE X4 R Wireless Gaming Headphones with XBOX Live Chat and Dolby 5.1 Channel Surround Sound R R Operating Instructions For more products, accessories and our product support knowledge base, please
Quickstart Guide (English)
") Quickstart Guide (English) Introduction 1. Make sure all items listed in the Box Contents are included in the box. Look in the box under the foam sheet for the speaker stand rubber feet, speaker stand
Quickstart Guide (English) Introduction 1. Make sure all items listed in the Box Contents are included in the box. Look in the box under the foam sheet for the speaker stand rubber feet, speaker stand
EXPERIENCE GUIDE KRATOS S5 CUSTOMIZABLE 2.1 USB AUDIO GAMING SPEAKERS WITH RGB LIGHTING
 EXPERIENCE GUIDE KRATOS S5 CUSTOMIZABLE 2.1 USB AUDIO GAMING SPEAKERS WITH RGB LIGHTING INTRODUCING POWERFUL AUDIO WITH BRILLIANT HIGHS AND DEEP RUMBLING BASS Engineered for superb gaming audio performance,
FlyTV MCE Installation Guide Animation Technologies Inc.
 FlyTV MCE Installation Guide Animation Technologies Inc. www.lifeview.com Ver: 1.0 Copyright and Trademark Notice Copyright 2005 by Animation Technologies Inc. All rights reserved. Specifications and
How to work with audio
 How to work with audio At least half of your movie s impact comes from its use of sound. Adobe Premiere Elements provides the tools, such as the Audio Mixer and the Audio Meters, to create a high-quality
1. Before adjusting sound quality
 1. Before adjusting sound quality Functions available when the optional 5.1 ch decoder/av matrix unit is connected The following table shows the finer audio adjustments that can be performed when the optional
CDL-160ETH. Ethernet and USB to HDMI Converter. Operation Manual CDL-160ETH
 CDL-160ETH Ethernet and USB to HDMI Converter Operation Manual CDL-160ETH Disclaimers The information in this manual has been carefully checked and is believed to be accurate. Cypress Technology assumes
Software Installation Audacity Recording Software
 USB Turntable (ittusb) Software Installation Audacity Recording Software Table of Contents General Software Notes... 2 Audacity Software Installation... 3 Before Starting the Software... 3 Software Configuration...
Getting Started Guide
 Getting Started Guide The only warranties for HP products and services are set forth in the express statements accompanying such products and services. Nothing herein should be construed as constituting
ipod Hi-Fi User s Guide
 ipod Hi-Fi User s Guide K Apple Computer, Inc. 2006 Apple Computer, Inc. All rights reserved. Apple, the Apple logo, AirMac, and ipod are trademarks of Apple Computer, Inc., registered in the U.S. and
ENGLISH. Matrox M-Series. M9120 M9120 Plus LP M9125 M9140 LP. User Guide
 ENGLISH Matrox M-Series M9120 M9120 Plus LP M9125 M9140 LP User Guide 20070-301-0100 2008.05.13 Overview Thank you for purchasing a Matrox M-Series graphics card. This product is a high-performance graphics
User s Guide. PSC805 Aurilium 5.1 External Audio Processor Plus PSA2
 User s Guide PSC805 Aurilium 5.1 External Audio Processor Plus PSA2 Philips Sound Solutions May 2003 Software End User License Agreement ATTENTION: THIS SOFTWARE IS SUBJECT TO THE LICENSE TERMS DESCRIBED
High Quality 4-in / 4-out PCIe Audio Interface. User s Guide
 High Quality 4-in / 4-out PCIe Audio Interface User s Guide - Copyright 2008 Revision 1, December 2008 www.esi-audio.com INDEX 1. Introduction... 4 2. Description of... 4 2.1 PCIe card connectors... 4
PJP-25UR Conference Microphone Speaker
 PJP-25UR Conference Microphone Speaker User's Manual Contents INTRODUCTION Introduction...2 Controls and Functions...3 PREPARATION Connection...5 Check the following before connecting this unit to the
ipod shuffle User Guide
 ipod shuffle User Guide 2 Contents Chapter 1 3 About ipod shuffle Chapter 2 4 ipod shuffle Basics 4 ipod shuffle at a Glance 5 Using the ipod shuffle Controls 6 Connecting and Disconnecting ipod shuffle
CDL-160ETH. Ethernet and USB to HDMI Converter. Operation Manual CDL-160ETH
 CDL-160ETH Ethernet and USB to HDMI Converter Operation Manual CDL-160ETH Disclaimers The information in this manual has been carefully checked and is believed to be accurate. Cypress Technology assumes
User sguide ModelNo.:GH0240
 User sguide ModelNo.:GH0240 Congratulations! Thank you for choosing the Sound Blaster Tactic3D Fury headset. Connect it to your computer and you are about to experience the legendary audio quality of Sound
Blaze Audio Karaoke Sing-n-Burn
 Blaze Audio Karaoke Sing-n-Burn Manual Copyright 2005 by Singing Electrons, Inc. Contents 1.0 Getting Started...3 1.1 Welcome to Karaoke Sing-n-Burn!...3 1.2 Features...3 1.3 Learning to Use Karaoke Sing-n-Burn...3
USB Display Adapter User s Manual. 1. Introduction
 1. Introduction This USB Display Adapter enables you to connect one more monitor, LCD or projector to a computer with a USB 2.0 port. For desktop users adding an extra monitor via USB connection is easier
16-Track Digital Recorder Quick Loop Sampler Parametric EQ and Dynamics Pro Quality Effects Sound Clip Recorder Optional CD-RW Drive
 16-Track Digital Recorder Quick Loop Sampler Parametric EQ and Dynamics Pro Quality Effects Sound Clip Recorder Optional CD-RW Drive Professional Digital Music Production Made Quick and Easy The AW16G
Welcome Installation Authorization The T-Pain Engine: Quick Start Interface Sound Check... 10
 CONTENTS Welcome... 5 Installation... 5 Authorization... 6 The T-Pain Engine: Quick Start... 8 Interface... 8 Sound Check... 10 The T-Pain Engine: First Steps... 11 Beat... 11 Vocals... 14 FX... 15 Mixdown...
Multimedia User Guide
 Multimedia User Guide Copyright 2008 Hewlett-Packard Development Company, L.P. Windows is a U.S. registered trademark of Microsoft Corporation. Product notice This user guide describes features that are
Garageband Basics. What is GarageBand?
 Garageband Basics What is GarageBand? GarageBand puts a complete music studio on your computer, so you can make your own music to share with the world. You can create songs, ringtones, podcasts, and other
Quick Setup Guide. Power Supply. JBL OnBeat Rumble Speaker Dock. AC Cord (varies by region)
") JBL OnBeat Rumble Quick Setup Guide Welcome Thank you for purchasing the JBL OnBeat Rumble speaker dock. This quick setup guide will show you how to connect and set up your dock. INCLUDED ITEMS JBL OnBeat
JBL OnBeat Rumble Quick Setup Guide Welcome Thank you for purchasing the JBL OnBeat Rumble speaker dock. This quick setup guide will show you how to connect and set up your dock. INCLUDED ITEMS JBL OnBeat
User guide. Käyttöohje
 User guide Bedienungsanleitung Guide d utilisation Manual del usuario Guia do utilizador Istruzioni d uso Gebruikersshandleiding Brugsanvisning Bruksanvisning Käyttöohje UK D F ES P I NL DK SE FIN 2 12
Nahimic Troubleshooting Instructions and Q&A The document applies to all MSI Notebook and Vortex product which supports Nahimic.
 Nahimic Troubleshooting Instructions and Q&A The document applies to all MSI Notebook and Vortex product which supports Nahimic. To know whether the product supports Nahimic or not, please visit MSI website
MIKE di Y gital USER GUIDE
 IKEY digital USER GUIDE UP CLOSE WITH MIKEY D. FEATURES 1 2 3 4 5 6 7 8 Recording Side Pivoting Head Sensitivity Selector Switch Sensitivity Switch Indicator Lights Connector for iphone or ipad Stereo
PU-160ETH. Ethernet and USB to HDMI Converter. Operation Manual PU-160ETH
 PU-160ETH Ethernet and USB to HDMI Converter Operation Manual PU-160ETH Trademark Acknowledgments All products or service names mentioned in this document may be trademarks of the companies with which
USB SoundWave Optical 5.1 Quick Installation Guide
 USB SoundWave Optical 5.1 Quick Installation Guide Introducing the USB SoundWave Optical The USB SoundWave Optical 5.1 transforms your PC into a home theatre system with multi-channel surround sound. Features
DSM PRO. Installation Manual. Copyright November DSM PRO Installation Manual Rev 2 Effective 5/24/05 1
 DSM PRO Installation Manual Copyright November 2003 DSM PRO Installation Manual Rev 2 Effective 5/24/05 1 DSM PRO CONNECTIONS TALKOVER LEVEL TALKOVER LEVEL DISPLAY SPEAKER VOLUME HEADSET VOLUME USB CABLE
Before starting the troubleshooting, make sure you have installed the latest version of audio driver and Nahimic on your notebook.
 Nahimic Troubleshooting Instructions and Q&A Please refer to the Troubleshooting Instructions to resolve the problem, if you encounter any audio problem listed below. Audio playback: Low volume, weak,
KeyStudio 49i. English. User Guide
 KeyStudio 49i English User Guide KeyStudio Table of 49i Contents User Guide 1 Introduction. 3 About this User Guide. 3 KeyStudio 49i Features. 4 Minimum System Requirements. 5 Standalone. 5 Bus-Powered.
2.0. Fender FUSE Compatible Products in this manual:
 Fender FUSE Compatible Products in this manual: Contents Firmware Update 2 Preset Editor 3 Pedal Effects 4 Rack Effects 5 Advanced Amplifier Settings 6 Preset Info Screen 7 Band Track Screens 8 Utility
5 Channel PCI Sound Adapter Card with AC97 3D Audio Effects
 5 Channel PCI Sound Adapter Card with AC97 3D Audio Effects PCISOUND5CH *actual product may vary from photos DE: Bedienungsanleitung - de.startech.com FR: Guide de l'utilisateur - fr.startech.com ES: Guía
User s Guide. Creative Desktop Wireless 9000 Pro
 User s Guide Creative Desktop Wireless 9000 Pro Information in this document is subject to change without notice and does not represent a commitment on the part of Creative Technology Ltd. No part of this
Amazing Audacity: Session 1
 Online 2012 Amazing Audacity: Session 1 Katie Wardrobe Midnight Music The Audacity Screen...3 Import audio (a song or SFX)...3 Before we start... 3 File formats... 3 What s the different between WAV and
READ ME FIRST Windows 95/98/Me/2000
 READ ME FIRST Windows 95/98/Me/2000 *DSL Equipment Installation Guide: Efficient Networks 5260 *Digital Subscriber Line Part Number: 52609x02 Version 1.2-A Table of Contents Follow Steps 1 through 8 to
Important Information
 STUDIO MANAGER for Owner s Manual Keep This Manual For Future Reference. E i Important Information Important Information Studio Manager Exclusion of Certain Liability Trademarks Copyright Manufacturer,
Courtesy of:discountcarstereo.com MB-HF. Hands-Free & Streaming Audio Install Guide for Mercedes
 Courtesy of:discountcarstereo.com MB-HF Hands-Free & Streaming Audio Install Guide for 1994-98 Mercedes Created September 3, 2016 Revised: March 23, 2019 Introduction: Safety comes first when you re on