Overview What is Azure Multi-Factor Authentication? How it Works Get started Choose where to deploy MFA in the cloud MFA on-premises MFA for O365
|
|
|
- Daisy Gregory
- 5 years ago
- Views:
Transcription
1 Table of Contents Overview What is Azure Multi-Factor Authentication? How it Works Get started Choose where to deploy MFA in the cloud MFA on-premises MFA for O365 users Security best practices How to Deploy and use Create an Auth Provider Configure settings Reports in MFA Azure MFA on-premises Manage users Assign licenses Enable or disable MFA User and device settings Integrate Federation Services Directories IIS web apps Remote Desktop Gateway Develop Building into Custom Apps (SDK) Troubleshoot FAQ Ask a question
2


 Something you have (a trusted device that is not easily duplicated, like a")


3 What is Azure Multi-Factor Authentication? 1/30/ min to read Edit on GitHub Two-step verification is a method of authentication that requires more than one verification method and adds a critical second layer of security to user sign-ins and transactions. It works by requiring any two or more of the following verification methods: Something you know (typically a password) Something you have (a trusted device that is not easily duplicated, like a phone) Something you are (biometrics) Azure Multi-Factor Authentication (MFA) is Microsoft's two-step verification solution. Azure MFA helps safeguard access to data and applications while meeting user demand for a simple sign-in process. It delivers strong authentication via a range of verification methods, including phone call, text message, or mobile app verification. Why use Azure Multi-Factor Authentication? Today, more than ever, people are increasingly connected. With smart phones, tablets, laptops, and PCs, people have several different options on how they are going to connect and stay connected at any time. People can access their accounts and applications from anywhere, which means that they can get more work done and serve their customers better. Azure Multi-Factor Authentication is an easy to use, scalable, and reliable solution that provides a second method of authentication so your users are always protected. Easy to use Scalable Always Protected Reliable Easy to Use - Azure Multi-Factor Authentication is simple to set up and use. The extra protection that comes with Azure Multi-Factor Authentication allows users to manage their own devices. Best of all, in many instances it can be set up with just a few simple clicks. Scalable - Azure Multi-Factor Authentication uses the power of the cloud and integrates with your on-premises AD and custom apps. This protection is even extended to your high-volume, mission-critical scenarios. Always Protected - Azure Multi-Factor Authentication provides strong authentication using the highest
4 industry standards. Reliable - We guarantee 99.9% availability of Azure Multi-Factor Authentication. The service is considered unavailable when it is unable to receive or process verification requests for the two-step verification. How Azure Multi-Factor Authentication works The security of two-step verification lies in its layered approach. Compromising multiple verification methods presents a significant challenge for attackers. Even if an attacker manages to learn your password, it is useless without also having possession of the trusted device. Should you lose the device, the person who finds it can't use it unless he or she also knows your password. Methods available for Multi-Factor Authentication When a user signs in, an additional verification request is sent to the user. The following are a list of methods that can be used for this second verification. VERIFICATION METHOD Phone call Text message Mobile app notification Verification code with mobile app DESCRIPTION A call is placed to a user s phone asking them to verify that they are signing. Press the # key to complete the verification process. This option is configurable and can be changed to a code that you specify. A text message is sent to a user s smart phone with a 6-digit code. Enter this code in to complete the verification process. A verification request is sent to a user s smart phone asking them complete the verification by selecting Verify from the mobile app. This occurs if app notification is the primary verification method. If they receive this notification when they are not signing in, they can report it as fraud. The mobile app on a user s device generates a verification code. This occurs if you selected a verification code as your primary verification method. For the mobile app verification methods, Azure Multi-Factor Authentication works with third-party authentication apps for smart phones. However, we recommend the Microsoft Authenticator app, which is available for Windows Phone, Android, and IOS.
5 Available versions of Azure Multi-Factor Authentication Azure Multi-Factor Authentication is available in three different versions. VERSION DESCRIPTION Multi-Factor Authentication for Office 365 Multi-Factor Authentication for Azure Administrators Azure Multi-Factor Authentication This version works exclusively with Office 365 applications and is managed from the Office 365 portal. So administrators can now help secure their Office 365 resources with two-step verification. This version is part of an Office 365 subscription. The same subset of two-step verification capabilities for Office 365 is available at no cost to all Azure administrators. Every administrative account of an Azure subscription can enable this functionality for additional protection. An administrator that wants to access Azure portal to create a VM or web site, manage storage, or use any other Azure service can add MFA to his administrator account. Also referred to as the "full" version, Azure Multi-Factor Authentication offers the richest set of capabilities. It provides additional configuration options via the Azure classic portal, advanced reporting, and support for a range of on-premises and cloud applications. Azure Multi-Factor Authentication comes as part of Azure Active Directory Premium and Enterprise Mobility Suite, and can be deployed either in the cloud or on premises. See below for other ways to get Azure Multi-Factor Authentication. Feature comparison of versions The following table provides a list of the features that are available in the various versions of Azure Multi-Factor Authentication. NOTE This comparison table discusses the features that are part of each version of Multi-Factor Authentication. If you have the full Azure Multi-Factor Authentication service, some features may not be available depending on whether you use MFA in the cloud or MFA on-premises. FEATURE MULTI-FACTOR AUTHENTICATION FOR OFFICE 365 MULTI-FACTOR AUTHENTICATION FOR AZURE ADMINISTRATORS AZURE MULTI-FACTOR AUTHENTICATION Protect admin accounts with MFA (Available only for Azure Administrator accounts) Mobile app as a second factor Phone call as a second factor SMS as a second factor App passwords for clients that don't support MFA
6 FEATURE MULTI-FACTOR AUTHENTICATION FOR OFFICE 365 MULTI-FACTOR AUTHENTICATION FOR AZURE ADMINISTRATORS AZURE MULTI-FACTOR AUTHENTICATION Admin control over verification methods PIN mode Fraud alert MFA Reports One-Time Bypass Custom greetings for phone calls Custom caller ID for phone calls Event Confirmation Trusted IPs Remember MFA for trusted devices MFA SDK MFA for on-premises applications requires Multi-Factor Auth provider and full Azure subscription How to get Azure Multi-Factor Authentication If you would like the full functionality offered by Azure Multi-Factor Authentication, there are several options: 1. Purchase Azure Multi-Factor Authentication licenses and assign them to your users. 2. Purchase licenses that have Azure Multi-Factor Authentication bundled within them such as Azure Active Directory Premium, Enterprise Mobility Suite, or Enterprise Cloud Suite and assign them to your users. 3. Create an Azure Multi-Factor Authentication Provider within an Azure subscription. When using an Azure Multi- Factor Authentication Provider, there are two usage models available that are billed through your Azure subscription: Per User. For enterprises that want to enable two-step verification for a fixed number of employees who regularly need authentication. Per Authentication. For enterprises that want to enable two-step verification for a large group of external users who infrequently need authentication. Azure Multi-Factor Authentication provides selectable verification methods for both cloud and server. This means that you can choose which methods are available for your users: phone call, text, app notification, or app codes. For more information, see selectable verification methods. For pricing details, see Azure MFA Pricing.
7 Next steps To get started with Azure Multi-Factor Authentication, your first step is to choose between MFA in the cloud or onpremises


8 How Azure Multi-Factor Authentication works 1/17/ min to read Edit on GitHub The security of multi-factor authentication lies in its layered approach. Compromising multiple authentication factors presents a significant challenge for attackers. Even if an attacker manages to learn the user's password, it is useless without also having possession of the trusted device. Should the user lose the device, the person who finds it won't be able to use it unless he or she also knows the user's password. Azure Multi-Factor Authentication helps safeguard access to data and applications while meeting user demand for a simple sign-in process. It provides additional security by requiring a second form of authentication and delivers strong authentication via a range of easy verification options: phone call text message mobile app notification allowing users to choose the method they prefer mobile app verification code 3rd party OATH tokens For additional information oh how it works see the following video.
9 Methods available for multi-factor authentication When a user signs in, an additional verification is sent to the user. The following are a list of methods that can be used for this second verification. VERIFICATION METHOD Phone Call DESCRIPTION A call is placed to a user s smart phone asking them to verify that they are signing in by pressing the # sign. This will complete the verification process. This option is configurable and can be changed to a code that you specify. Text Message A text message will be sent to a user s smart phone with a 6 digit code. Enter this code in to complete the verification process. Mobile App Notification Verification code with Mobile App A verification request will be sent to a user s smart phone asking them complete the verification by selecting Verify from the mobile app. This will occur if you selected app notification as your primary verification method. If they receive this when they are not signing in, they can choose to report it as fraud. A verification code will be sent to the mobile app that is running on a user s smart phone. This will occur if you selected a verification code as your primary verification method. Available versions of Azure Multi-Factor Authentication Azure Multi-Factor Authentication is available in three different versions. The table below describes each of these in more detail. VERSION Multi-Factor Authentication for Office 365 Multi-Factor Authentication for Azure Administrators DESCRIPTION This version works exclusively with Office 365 applications and is managed from the Office 365 portal. So administrators can now help secure their Office 365 resources by using multifactor authentication. This version comes with an Office 365 subscription. The same subset of Multi-Factor Authentication capabilities for Office 365 will be available at no cost to all Azure administrators. Every administrative account of a Azure subscription can now get additional protection by enabling this core multi-factor authentication functionality. So an administrator that wants to access Azure portal to create a VM, a web site, manage storage, mobile services or any other Azure Service can add multi-factor authentication to his administrator account.
10 VERSION Azure Multi-Factor Authentication DESCRIPTION Azure Multi-Factor Authentication offers the richest set of capabilities. Feature comparison of versions It provides additional configuration options via the Azure Management portal, advanced reporting, and support for a range of on-premises and cloud applications. Azure Multi- Factor Authentication can be purchased as a stand-alone license and is bundled within Azure Active Directory Premium and Enterprise Mobility Suite. It can also be purchased on a consumption basis by creating an Azure Multi-Factor Authentication Provider in an Azure subscription. The following table below provides a list of the features that are available in the various versions of Azure Multi- Factor Authentication. FEATURE MULTI-FACTOR AUTHENTICATION FOR OFFICE 365 (INCLUDED IN OFFICE 365 SKUS) MULTI-FACTOR AUTHENTICATION FOR AZURE ADMINISTRATORS (INCLUDED WITH AZURE SUBSCRIPTION) AZURE MULTI-FACTOR AUTHENTICATION (INCLUDED IN AZURE AD PREMIUM AND ENTERPRISE MOBILITY SUITE) Administrators can protect accounts with MFA * * (Available only for Azure Administrator accounts) * Mobile app as a second factor * * * Phone call as a second factor * * * SMS as a second factor * * * App passwords for clients that don't support MFA Admin control over authentication methods * * * * * * PIN mode * Fraud alert * MFA Reports * One-Time Bypass * Custom greetings for phone calls Customization of caller ID for phone calls * *
11 FEATURE MULTI-FACTOR AUTHENTICATION FOR OFFICE 365 (INCLUDED IN OFFICE 365 SKUS) MULTI-FACTOR AUTHENTICATION FOR AZURE ADMINISTRATORS (INCLUDED WITH AZURE SUBSCRIPTION) AZURE MULTI-FACTOR AUTHENTICATION (INCLUDED IN AZURE AD PREMIUM AND ENTERPRISE MOBILITY SUITE) Event Confirmation * Trusted IPs * Suspend MFA for remembered devices (Public Preview) * MFA SDK * MFA for on-premises applications using MFA server * How to get Azure Multi-Factor Authentication If you would like the full functionality offered by Azure Multi-Factor Authentication instead of just those provided for Office 365 users and Azure administrators, there are several options to get it: 1. Purchase Azure Multi-Factor Authentication licenses and assign them to your users. 2. Purchase licenses that have Azure Multi-Factor Authentication bundled within them such as Azure Active Directory Premium or Enterprise Mobility Suite and assign them to your users. 3. Create an Azure Multi-Factor Authentication Provider within an Azure subscription. If you don t already have an Azure subscription, you can sign up for an Azure trial subscription. Trial subscriptions will need to be converted to regular subscriptions prior to trial expiration. When using an Azure Multi-Factor Authentication Provider there are two usage models available that are billed through your Azure subscription: Per User. Generally for enterprises that want to enable multi-factor authentication for a fixed number of employees who regularly need authentication. Per Authentication. Generally for enterprises that want to enable multi-factor authentication for a large group of external users who infrequently need authentication. For pricing details see Azure MFA Pricing. Choose the per-seat or consumption-based model that works best for your organization. Then to get started see Getting Started
12 Choose the Azure Multi-Factor Authentication solution for you 1/25/ min to read Edit on GitHub Because there are several flavors of Azure Multi-Factor Authentication (MFA), we must answer a few questions to figure out which version is the proper one to use. Those questions are: What am I trying to secure Where are the users located What features do I need? The following sections provide guidance on determining each of these answers. What am I trying to secure? To determine the correct two-step verification solution, first we must answer the question of what are you trying to secure with a second method of authentication. Is it an application that is in Azure? Or a remote access system? By determining what we are trying to secure, we can answer the question of where Multi-Factor Authentication needs to be enabled. WHAT ARE YOU TRYING TO SECURE MFA IN THE CLOUD MFA SERVER First-party Microsoft apps SaaS apps in the app gallery Web applications published through Azure AD App Proxy IIS applications not published through Azure AD App Proxy Remote access such as VPN, RDG Where are the users located Next, looking at where our users are located helps to determine the correct solution to use, whether in the cloud or on-premises using the MFA Server. USER LOCATION MFA IN THE CLOUD MFA SERVER Azure Active Directory Azure AD and on-premises AD using federation with AD FS Azure AD and on-premises AD using DirSync, Azure AD Sync, Azure AD Connect - no password sync
13 USER LOCATION MFA IN THE CLOUD MFA SERVER Azure AD and on-premises AD using DirSync, Azure AD Sync, Azure AD Connect - with password sync On-premises Active Directory What features do I need? The following table is a comparison of the features that are available with Multi-Factor Authentication in the cloud and with the Multi-Factor Authentication Server. FEATURE MFA IN THE CLOUD MFA SERVER Mobile app notification as a second factor Mobile app verification code as a second factor Phone call as second factor One-way SMS as second factor Two-way SMS as second factor Hardware Tokens as second factor App passwords for Office 365 clients that don t support MFA Admin control over authentication methods PIN mode Fraud alert MFA Reports One-Time Bypass Custom greetings for phone calls Customizable caller ID for phone calls Trusted IPs Remember MFA for trusted devices Conditional access

14 FEATURE MFA IN THE CLOUD MFA SERVER Cache Now that we have determined whether to use cloud multi-factor authentication or the MFA Server on-premises, we can get started setting up and using Azure Multi-Factor Authentication. Select the icon that represents your scenario!

15 Getting started with Azure Multi-Factor Authentication in the cloud 1/17/ min to read Edit on GitHub This article walks through how to get started using Azure Multi-Factor Authentication in the cloud. NOTE The following documentation provides information on how to enable users using the Azure Classic Portal. If you are looking for information on how to set up Azure Multi-Factor Authentication for O365 users, see Set up multi-factor authentication for Office 365. Prerequisites The following prerequisites are required before you can enable Azure Multi-Factor Authentication for your users. 1. Sign up for an Azure subscription - If you do not already have an Azure subscription, you need to sign-up for one. If you are just starting out and using Azure MFA you can use a trial subscription 2. Create a Multi-Factor Auth Provider and assign it to your directory or assign licenses to users NOTE Licenses are available for users who have Azure MFA, Azure AD Premium, or Enterprise Mobility Suite (EMS). MFA is included in Azure AD Premium and the EMS. If you have enough licenses, you do not need to create an Auth Provider.
16 Turn on two-step verification for users To start requiring two-start verification on for a user, change the user's state from disabled to enabled. For more information on user states, see User States in Azure Multi-Factor Authentication Use the following procedure to enable MFA for your users. To turn on multi-factor authentication 1. Sign in to the Azure classic portal as an administrator. 2. On the left, click Active Directory. 3. Under Directory, select the directory for the user you wish to enable. 4. At the top, click Users. 5. At the bottom of the page, click Manage Multi-Factor Auth. A new browser tab opens. 6. Find the user that you wish to enable for two-step verification. You may need to change the view at the top. Ensure that the status is disabled. 7. Place a check in the box next to their name. 8. On the right, click Enable.
17 9. Click enable multi-factor auth. 10. Notice that the user's state has changed from disabled to enabled. After you have enabled your users, you should notify them via . The next time they try to sign in, they'll be asked to enroll their account for two-step verification. Once they start using two-step verification, they'll also need to set up app passwords to avoid being locked out of non-browser apps. Use PowerShell to automate turning on two-step verification To change the state using Azure AD PowerShell, you can use the following. You can change $st.state to equal one of the following states: Enabled Enforced Disabled IMPORTANT We discourage against moving users directly from the Disable state to the Enforced state. Non-browser-based apps will stop working because the user has not gone through MFA registration and obtained an app password. If you have non-browserbased apps and require app passwords, we recommend that you go from a Disabled state to Enabled. This allows users to register and obtain their app passwords. After that, you can move them to Enforced. Using PowerShell would be an option for bulk enabling users. Currently there is no bulk enable feature in the Azure portal and you need to select each user individually. This can be quite a task if you have many users. By creating a PowerShell script using the following, you can loop through a list of users and enable them.
18 $st = New-Object -TypeName Microsoft.Online.Administration.StrongAuthenticationRequirement $st.relyingparty = "*" $st.state = Enabled $sta Set-MsolUser -UserPrincipalName bsimon@contoso.com -StrongAuthenticationRequirements $sta Here is an example: $users = "bsimon@contoso.com","jsmith@contoso.com","ljacobson@contoso.com" foreach ($user in $users) { $st = New-Object -TypeName Microsoft.Online.Administration.StrongAuthenticationRequirement $st.relyingparty = "*" $st.state = Enabled $sta Set-MsolUser -UserPrincipalName $user -StrongAuthenticationRequirements $sta } For more information, see User states in Azure Multi-Factor Authentication Next Steps Now that you have set up Azure Multi-Factor Authentication in the cloud, you can configure and set up your deployment. See Configuring Azure Multi-Factor Authentication for more details.

19 Getting started with the Azure Multi-Factor Authentication Server 1/17/ min to read Edit on GitHub Now that we have determined to use on-premises Multi-Factor Authentication Server, let s get going. This page covers a new installation of the server and setting it up with on-premises Active Directory. If you already have the PhoneFactor server installed and are looking to upgrade, see Upgrading to the Azure Multi-Factor Server or if you are looking for information on installing just the web service see Deploying the Azure Multi-Factor Authentication Server Mobile App Web Service. Download the Azure Multi-Factor Authentication Server There are two different ways that you can download the Azure Multi-Factor Authentication Server. Both are done via the Azure portal. The first is by managing the Multi-Factor Auth Provider directly. The second is via the service settings. The second option requires either a Multi-Factor Auth Provider or an Azure MFA, Azure AD Premium, or Enterprise Mobility Suite license. IMPORTANT These two options seem similar, but it is important to know which one to use. If your users have licenses that come with MFA, don't create a Multi-Factor Auth Provider to get to the server download. Instead, use option 2 to download the server from the service settings page. Option 1: Download Azure Multi-Factor Authentication Server from the Azure classic portal Use this download option if you already have a Multi-Factor Auth Provider because you pay for MFA on a perenabled user or per-authentication basis. 1. Sign in to the Azure classic portal as an administrator. 2. On the left, select Active Directory. 3. On the Active Directory page, click Multi-Factor Auth Providers 4. At the bottom click Manage. A new page opens. 5. Click Downloads. 6. Click the Download link above Generate Activation Credentials.
20 7. Save the download. Option 2: Download Azure Multi-Factor Authentication Server from the service settings Use this download option if you have Enterprise Mobility Suite, Azure AD Premium, or Enterprise Cloud Suite licenses. 1. Sign in to the Azure classic portal as an administrator. 2. On the left, select Active Directory. 3. Double-click your instance of Azure AD. 4. At the top click Configure 5. Scroll down to the multi-factor authentication section, and select Manage service settings 6. On the services settings page, at the bottom of the screen click Go to the portal. A new page opens.
21 7. Click Downloads. 8. Click the Download link above Generate Activation Credentials.
22 9. Save the download. Install and Configure the Azure Multi-Factor Authentication Server Now that you have downloaded the server you can install and configure it. Be sure that the server you are installing it on meets the following requirements: AZURE MULTI-FACTOR AUTHENTICATION SERVER REQUIREMENTS Hardware Software DESCRIPTION 200 MB of hard disk space x32 or x64 capable processor 1 GB or greater RAM Windows Server 2008 or greater if the host is a server OS Windows 7 or greater if the host is a client OS Microsoft.NET 4.0 Framework IIS 7.0 or greater if installing the user portal or web service SDK Azure Multi-Factor Authentication Server firewall requirements Each MFA server must be able to communicate on port 443 outbound to the following addresses: If outbound firewalls are restricted on port 443, open the following IP address ranges: IP SUBNET NETMASK IP RANGE / /

23 IP SUBNET NETMASK IP RANGE / If you aren't using the Event Confirmation feature, and users aren't using mobile apps to verify from devices on the corporate network, the IP addresses can be reduced to the following ranges: IP SUBNET NETMASK IP RANGE / / / To install and configure the Azure Multi-Factor Authentication server 1. Double-click the executable. This begins the installation. 2. On the Select Installation Folder screen, make sure that the folder is correct and click Next. 3. Once the installation is complete, click Finish. The configuration wizard launches. 4. On the configuration wizard welcome screen, check Skip using the Authentication Configuration Wizard and click Next. This closes the wizard and starts the server. 5. Back on the page that we downloaded the server from, click the Generate Activation Credentials button. Copy this information into the Azure MFA Server in the boxes provided and click Activate. The above steps show an express setup with the configuration wizard. You can rerun the authentication wizard by selecting it from the Tools menu on the server. Import users from Active Directory Now that the server is installed and configured you can quickly import users into the Azure MFA Server. 1. In the Azure MFA Server, on the left, select Users. 2. At the bottom, select Import from Active Directory.

24 3. Now you can either search for individual users or search the AD directory for OUs with users in them. In this case, we specify the users OU. 4. Highlight all the users on the right and click Import. You should receive a pop-up telling you that you were successful. Close the import window. Send users an Now that you have imported your users into the MFA Server, we recommend that you send an to inform them that they have been enrolled for two-step verification. The you send should be determined by how you configured your users for two-step verification. For example, if you were able to import your users' phone numbers from the company directory, the should include the default phone numbers so that users know what to expect. Similarly, if users phone numbers were not imported, or users are configured to use the mobile app, send them an that directs them to complete their account enrollment through a hyperlink to the Azure Multi-Factor Authentication User Portal. The content of the also varies depending on the method of verification that has been set for the user (phone call, SMS, or mobile app). For example, if the user is required to use a PIN when they authenticate, the tells them what their initial PIN has been set to. Users are required to change their PIN during their first verification. Configure and templates Click the icon on the left to set up the settings for sending these s. This is where you can enter the SMTP information of your mail server and send by checking the Send s to users check box.

25 On the Content tab, you can see the templates that are available to choose from. Depending on how you have configured your users to perform two-step verification, choose the template that best suits you. How the Azure Multi-Factor Authentication Server handles user data When you use the Multi-Factor Authentication (MFA) Server on-premises, a user s data is stored in the onpremises servers. No persistent user data is stored in the cloud. When the user performs a two-step verification,
26 the MFA Server sends data to the Azure MFA cloud service to perform the verification. When these authentication requests are sent to the cloud service, the following fields are sent in the request and logs so that they are available in the customer's authentication/usage reports. Some of the fields are optional so they can be enabled or disabled within the Multi-Factor Authentication Server. The communication from the MFA Server to the MFA cloud service uses SSL/TLS over port 443 outbound. These fields are: Unique ID - either username or internal MFA server ID First and last name (optional) address (optional) Phone number - when doing a voice call or SMS authentication Device token - when doing mobile app authentication Authentication mode Authentication result MFA Server name MFA Server IP Client IP if available In addition to the fields above, the verification result (success/denial) and reason for any denials is also stored with the authentication data and available through the authentication/usage reports. Next steps For additional information on advanced setup and configuration information, use the links in the following table: METHOD User Portal Active Directory Federation Service RADIUS Authentication IIS Authentication Windows Authentication LDAP Authentication Remote Desktop Gateway and Azure Multi-Factor Authentication Server using RADIUS Sync with Windows Server Active Directory DESCRIPTION Information on setup and configuring the User portal including deployment and user self-service. Information on setting up Azure Multi-Factor Authentication with AD FS. Information on setup and configuring the Azure MFA Server with RADIUS. Using RADIUS allows you to integrate various third-party systems with Azure MFA Server. Information on setup and configuring the Azure MFA Server with IIS. Using IIS allows you to integrate various third-party systems with Azure MFA Server. Information on setup and configuring the Azure MFA Server with Windows Authentication. Information on setup and configuring the Azure MFA Server with LDAP Authentication. Using LDAP allows you to integrate various third-party systems with Azure MFA Server. Information on setup and configuring the Azure MFA Server with Remote Desktop Gateway using RADIUS. Information on setup and configuring synchronization between Active Directory and the Azure MFA Server.
27 METHOD Deploying the Azure Multi-Factor Authentication Server Mobile App Web Service Advanced scenarios with Azure Multi-Factor Authentication and third-party VPNs DESCRIPTION Information on setup and configuring the Azure MFA server web service. Step-by-step configuration guides for Cisco, Citrix, and Juniper VPN appliances.


28 Security Best Practices for using Azure Multi-Factor Authentication with Azure AD accounts 1/17/ min to read Edit on GitHub When enhancing your authentication process, two-step verification is the preferred choice for most organizations. Azure Multi-Factor Authentication (MFA) enables companies to meet their security and compliance requirements while providing a simple sign-in experience for their users. This article covers some best practices that you should consider when planning for the adoption of Azure MFA. Best Practices for Azure Multi-Factor Authentication in the cloud To provide all your users with two-step verification, and take advantages of the extended features that Azure MFA offers, you need to enable Azure MFA for all your users. This is accomplished by using one of the following implementations: Azure AD Premium or the Enterprise Mobility Suite Multi-Factor Auth Provider Azure AD Premium/Enterprise Mobility Suite The first step for adopting Azure MFA in the cloud using Azure AD Premium or the Enterprise Mobility Suite is to assign licenses to your users. Azure Multi-Factor Authentication is part of these suites and as such your organization doesn't need anything additional to extend the two-step verification capability to all users. You only need to assign a license to a user, and then you can turn on MFA. When setting up Multi-Factor Authentication, consider the following: You do not need to create a Multi-Factor Auth Provider. Azure AD Premium and the Enterprise Mobility Suite both come with Azure Multi-Factor Authentication. Azure AD Connect is only a requirement if you are synchronizing your on-premises Active Directory environment with an Azure AD directory. If you use an Azure AD directory that is not synchronized with an onpremises instance of Active Directory, you do not need Azure AD Connect. Multi-Factor Auth Provider If you don't have Azure AD Premium or the Enterprise Mobility Suite, then the first step for adopting Azure MFA in the cloud is to create an MFA Auth Provider. Although MFA is available by default for global administrators who have Azure Active Directory, when you are deploying MFA for your organization you need to extend the two-step
29 verification capability to all users. To do that you need a Multi-Factor Auth Provider. When selecting the Auth Provider, you need to select a directory and consider the following: You do not need an Azure AD directory to create a Multi-Factor Auth Provider. However, you need to associate the Multi-Factor Auth Provider with an Azure AD directory if you want the following functionalities: Extend two-step verification to all your users Offer your global administrators additional features, such as the management portal, custom greetings, and reports. DirSync or AAD Sync are only required if you are synchronizing your on-premises Active Directory environment with an Azure AD directory. If you use an Azure AD directory that is not synchronized with an on-premises instance of Active Directory, you do not need DirSync or AAD Sync. Make sure to choose the right usage model for your business (per auth or per enabled user). Once you select the usage model, you can t change it. Per auth: charges you for each verification. Use this model if you want two-step verification for anyone that accesses a certain app, not for specific users. Per enabled user: charges you for each user that you enable for Azure MFA. Use this model if you have some users with Azure AD Premium or Enterprise Mobility Suite licenses, and some without. User Account When enabling Azure MFA for your users, user accounts can be in one of three core states: disabled, enabled, or enforced. Use the following guidelines to ensure you are using the most appropriate option for your deployment: When the user s state is set to disabled, that user is not performing two-step verification. This is the default state. When the user s state is set to enabled, it means that the user is enabled but has not completed the registration process. They will be prompted to complete the process at next sign-in. This setting doesn t affect non-browser apps. All apps continue to work until the registration process is completed. When the user s state is set to enforced, it means that the user may or may not have completed registration. If they have completed the registration process, then they are performing two-step verification. Otherwise, the user will be prompted to complete the registration process at next sign-in. This setting does affect non-browser apps. These apps will not work until app passwords are created and used. Use the User Notification Template available in the article Getting started with Azure Multi-Factor Authentication in the cloud to send an to your users regarding MFA adoption. Supportability Since most users are accustomed to using only passwords to authenticate, it is important that your company brings awareness to all users regarding this process. This awareness can reduce the likelihood that users will call your help desk for minor issues related to MFA. However, there are some scenarios where temporarily disabling MFA is necessary. Use the following guidelines to understand how to handle those scenarios: Make sure your technical support personnel are trained to handle scenarios where the mobile app or phone is not receiving a notification or phone call and for this reason the user is unable to sign in. Technical support can enable a one-time bypass option to allow a user to authenticate a single time by "bypassing" two-step verification. The bypass is temporary and expires after the specified number of seconds. If necessary, you can leverage the Trusted IPs capability in Azure MFA. This feature allows administrators of a managed or federated tenant the ability to bypass two-step verification for users that are signing in from the company s local intranet. The features are available for Azure AD tenants that have Azure AD Premium, Enterprise Mobility Suite, or Azure Multi-Factor Authentication licenses. Best Practices for Azure Multi-Factor Authentication on-premises If your company decided to leverage its own infrastructure to enable MFA, it is necessary to deploy an Azure Multi-


30 Factor Authentication Server on-premises. The MFA Server components are shown in the following diagram: *Not installed by default **Installed but not enabled by default Azure Multi-Factor Authentication Server can be used to secure cloud resources and on-premises resources that are accessed by Azure AD accounts. However this can only be accomplished by using federation. That is, you must have AD FS and have it federated with your Azure AD tenant. When setting up Multi-Factor Authentication Server, consider the following: If you are securing Azure AD resources using Active Directory Federation Services, then the first factor of authentication is performed on-premises using AD FS. The second factor is performed on-premises by honoring the claim. It is not a requirement that the Azure Multi-Factor Authentication Server be installed on your AD FS federation server. However, the Multi-Factor Authentication Adapter for AD FS must be installed on a Windows Server 2012 R2 running AD FS. You can install the server on a different computer, as long as it is a supported version, and install the AD FS adapter separately on your AD FS federation server. See the procedure below for instructions on installing the adapter separately. The Multi-Factor Authentication AD FS Adapter installation wizard creates a security group called PhoneFactor Admins in your Active Directory, and then adds your AD FS service account to this group. We recommend that you verify on your domain controller that the PhoneFactor Admins group is indeed created and that the AD FS service account is a member of this group. If necessary, add the AD FS service account to the PhoneFactor Admins group on your domain controller manually. User Portal This portal runs in an Internet Information Server (IIS) web site, which allows self-service capabilities and provides a full set of user administration capabilities. Use the following guidelines to configure this component: IIS 6 or greater is required ASP.NET v has to be installed and registered This server can be deployed in a perimeter network. App Passwords If your organization is federated using SSO with Azure AD and you are going to be using Azure MFA, then be aware of the following when using app passwords (remember that this only applies when federated (SSO) is used): The App Password is verified by Azure AD and therefore bypasses federation. Federation is only used when setting up App Password. For federated (SSO) users passwords are stored in the organizational id. If the user leaves the company, that info has to flow to organizational id using DirSync in real time. Account disable/deletion may take up to three hours to sync, delaying disable/deletion of App Password in Azure AD. On-premises Client Access Control settings are not honored by App Password. No on-premises authentication logging / auditing capability is available for App Password More end-user education is required for the Microsoft Lync 2013 client.
31 Certain advanced architectural designs may require using a combination of organizational username and passwords and app passwords when using two-step verification with clients, depending on where they authenticate. For clients that authenticate against an on-premises infrastructure, you would use an organizational username and password. For clients that authenticate against Azure AD, you would use the app password. By default, users cannot create app passwords. If your company requires that or if you need to allow users to create app password in some scenarios, ensure that the option Allow users to create app passwords to sign into non-browser applications is selected. Additional Considerations Use the list below to understand some additional considerations and best practices for each component that will be deployed on-premises: METHOD Active Directory Federation Service RADIUS Authentication IIS Authentication Windows Authentication LDAP Authentication Remote Desktop Gateway and Azure Multi-Factor Authentication Server using RADIUS Sync with Windows Server Active Directory Deploying the Azure Multi-Factor Authentication Server Mobile App Web Service Advanced VPN Configuration with Azure Multi-Factor Authentication DESCRIPTION Information on setting up Azure Multi-Factor Authentication with AD FS. Information on setup and configuring the Azure MFA Server with RADIUS. Information on setup and configuring the Azure MFA Server with IIS. Information on setup and configuring the Azure MFA Server with Windows Authentication. Information on setup and configuring the Azure MFA Server with LDAP Authentication. Information on setup and configuring the Azure MFA Server with Remote Desktop Gateway using RADIUS. Information on setup and configuring synchronization between Active Directory and the Azure MFA Server. Information on setup and configuring the Azure MFA server web service. Information on configuring Cisco ASA, Citrix Netscaler, and Juniper/Pulse Secure VPN appliances using LDAP or RADIUS. Additional Resources While this article highlights some best practices for Azure MFA, there are other resources that you can also use while planning your MFA deployment. The list below has some key articles that can assist you during this process: Reports in Azure Multi-Factor Authentication Setup experience for Azure Multi-Factor Authentication Azure Multi-Factor Authentication FAQ
.")
32 Getting started with an Azure Multi-Factor Auth Provider 1/17/ min to read Edit on GitHub Two-step verification is available by default for global administrators who have Azure Active Directory, and Office 365 users. However, if you wish to take advantage of advanced features then you should purchase the full version of Azure Multi-Factor Authentication (MFA). NOTE An Azure Multi-Factor Auth Provider is used to take advantage of features provided by the full version of Azure MFA. It is for users who do not have licenses through Azure MFA, Azure AD Premium, or EMS. Azure MFA, Azure AD Premium, and EMS include the full version of Azure MFA by default. If you have licenses, then you do not need an Azure Multi-Factor Auth Provider. An Azure Multi-Factor Auth provider is required to download the SDK. IMPORTANT To download the SDK, create an Azure Multi-Factor Auth Provider even if you have Azure MFA, AAD Premium, or EMS licenses. If you create an Azure Multi-Factor Auth Provider for this purpose and already have licenses, be sure to create the Provider with the Per Enabled User model. Then, link the Provider to the directory that contains the Azure MFA, Azure AD Premium, or EMS licenses. This ensures that you are only billed if you have more unique users using the SDK than the number of licenses you own. To create a Multi-Factor Auth Provider Use the following steps to create an Azure Multi-Factor Auth Provider. 1. Sign in to the Azure classic portal as an administrator. 2. On the left, select Active Directory. 3. On the Active Directory page, at the top, select Multi-Factor Authentication Providers. 4. At the bottom, click New. 5. Under App Services, select Multi-Factor Auth Provider

33 6. Select Quick Create. 7. Fill in the following fields and select Create. a. Name The name of the Multi-Factor Auth Provider. b. Usage Model Whether you want to enable individual users, or pay per verification. Choose one of two options: Per Authentication purchasing model that charges per authentication. Typically used for scenarios that use Azure Multi-Factor Authentication in a consumer-facing application. Per Enabled User purchasing model that charges per enabled user. Typically used for employee access to applications such as Office 365. Choose this option if you have some users that are already licensed for Azure MFA. c. Directory The Azure Active Directory tenant that the Multi-Factor Authentication Provider is associated with. Be aware of the following: You do not need an Azure AD directory to create a Multi-Factor Auth Provider. Leave the box blank if you are only planning to use the Azure Multi-Factor Authentication Server or SDK. The Multi-Factor Auth Provider must be associated with an Azure AD directory to take advantage of the advanced features. Azure AD Connect, AAD Sync, or DirSync are only a requirement if you are synchronizing your onpremises Active Directory environment with an Azure AD directory. If you only use an Azure AD directory that is not synchronized, then this is not required.

34 8. Once you click create, the Multi-Factor Authentication Provider is created and you should see a message stating: Successfully created Multi-Factor Authentication Provider. Click Ok.
35 Configuring Azure Multi-Factor Authentication 1/17/ min to read Edit on GitHub This article helps you manage Azure Multi-Factor Authentication now that you are up and running. It covers a variety of topics that help you to get the most out of Azure Multi-Factor Authentication. Not all of these features are available in every version of Azure Multi-Factor Authentication. The configuration for some of the features below is found in the Azure Multi-Factor Authentication Management Portal. There are two different ways that you can access the MFA management portal, which are both done via the Azure portal. The first is by managing a Multi-Factor Auth Provider if using consumption-based MFA. The second is via the MFA service settings. The second option requires either a Multi-Factor Auth Provider or an Azure MFA, Azure AD Premium or Enterprise Mobility Suite license. To access the MFA Management Portal via an Azure Multi-Factor Auth Provider, sign into the Azure portal as an administrator and select the Active Directory option. Click the Multi-Factor Auth Providers tab, then select your directory and click the Manage button at the bottom. To access the MFA Management Portal via the MFA Service Settings page, sign into the Azure portal as an administrator and select the Active Directory option. Click on your directory and then click the Configure tab. Under the multi-factor authentication section, select Manage service settings. At the bottom of the MFA Service Settings page, click the Go to the portal link. FEATURE DESCRIPTION WHAT IS COVERED Fraud alert One-time bypass Custom Voice Messages Caching Trusted IPs Fraud alert can be configured and set up so that your users can report fraudulent attempts to access their resources. A one-time bypass allows a user to authenticate a single time by "bypassing" multi-factor authentication. Custom voice messages allow you to use your own recordings or greetings with multi-factor authentication. Caching allows you to set a specific time period so that subsequent authentication attempts succeed automatically. Trusted IPs is a feature of multi-factor authentication that allows administrators of a managed or federated tenant the ability to bypass multi-factor authentication for users that are signing in from the company s local intranet. How to set up, configure and report fraud How to set up and configure a onetime bypass How to set up and configure custom greetings and messages How to set up and configure authentication caching. Configure and set up IP addresses that are exempt for multi-factor authentication
36 FEATURE DESCRIPTION WHAT IS COVERED App Passwords An app password allows an application that is not MFA-aware to bypass multifactor authentication and continue working. Information about app passwords. Remember Multi-Factor Authentication for remembered devices and browsers Allows you to remember devices for a set number of days after a user has successfully signed in using MFA. Information about enabling this feature and setting up the number of days. Selectable Verification Methods Allows you to choose the authentication methods that are available for users to use. Information about enabling or disabling specific authentication methods such as call or text messages. Fraud Alert Fraud alert can be configured and set up so that your users can report fraudulent attempts to access their resources. Users can report fraud either with the mobile app or through their phone. To set up and configure fraud alert 1. Log on to 2. Navigate to the MFA Management Portal per the instructions at the top of this page. 3. In the Azure Multi-Factor Authentication Management Portal, click Settings under the Configure section. 4. Under the Fraud Alert section of the Settings page, check the Allow users to submit Fraud Alerts checkbox. 5. If you want users to be blocked when fraud is reported, place a check in Block user when fraud is reported. 6. In the Code To Report Fraud During Initial Greeting textbox, enter a number code that can be used during call verification. If a user enters this code plus # instead of just the # sign, then a fraud alert will be reported. 7. At the bottom, click Save. NOTE Microsoft s default voice greetings instruct users to press 0# to submit a fraud alert. If you want to use a code other than 0, you should record and upload your own custom voice greetings with appropriate instructions.
37 To report fraud alert Fraud alert can be reported two ways. Either through the mobile app or through the phone. To report fraud alert with the mobile app 1. When a verification is sent to your phone, select it to start the Microsoft Authenticator app. 2. To report fraud, click the Cancel and Report Fraud. This brings up a box that says your organization's IT Support staff will be notified. 3. Click report fraud. 4. On the app, click Close.


38 To report fraud alert with the phone
39 1. When a verification call comes in to your phone, answer it. 2. To report fraud, enter the code that has been configured to correspond with reporting fraud via the phone and then the # sign. You will be notified that a fraud alert has been submitted. 3. End the call. To view the fraud report 1. Log on to 2. On the left, select Active Directory. 3. At the top select Multi-Factor Auth Providers. This brings up a list of your Multi-Factor Auth Providers. 4. If you have more than one Multi-Factor Auth Provider, select the one you wish to view the fraud alert report and click Manage at the bottom of the page. If you have only one, click Manage. This opens the Azure Multi- Factor Authentication Management Portal. 5. On the Azure Multi-Factor Authentication Management Portal, on the left, under View A Report, click Fraud Alert. 6. Specify the date range that you wish to view in the report. Also you can specify any specific usernames, phone numbers, and the user's status. 7. Click Run. This brings up a report similar to the one below. You can also click Export to CSV if you wish to export the report. One-time bypass A one-time bypass allows a user to authenticate a single time by "bypassing" multi-factor authentication. The bypass is temporary and expires after the specified number of seconds. So in situations where the mobile app or phone is not receiving a notification or phone-call, you can enable a one-time bypass so the user can access the desired resource. To create a one-time bypass 1. Log on to 2. Navigate to the MFA Management Portal per the instructions at the top of this page. 3. In the Azure Multi-Factor Authentication Management Portal, if you see the name of your tenant or Azure MFA Provider on the left with a + next to it, click the + see different MFA Server replication groups and the Azure Default group. Click on the appropriate group. 4. Under User Administration, click One-Time Bypass.
40 5. On the One-Time Bypass page, click New One-Time Bypass. 6. Enter the user s username, the number of seconds that the bypass will exist, the reason for the bypass and click Bypass. 7. At this point, the user must sign in before the one-time bypass expires. To view the one-time bypass report 1. Log on to 2. On the left, select Active Directory. 3. At the top select Multi-Factor Auth Providers. This brings up a list of your Multi-Factor Auth Providers. 4. If you have more than one Multi-Factor Auth Provider, select the one you wish to view the fraud alert report and click Manage at the bottom of the page. If you have only one, click Manage. This opens the Azure Multi-
41 Factor Authentication Management Portal. 5. On the Azure Multi-Factor Authentication Management Portal, on the left, under View A Report, click One-Time Bypass. 6. Specify the date range that you wish to view in the report. Also you can specify any specific usernames, phone numbers, and the user's status. 7. Click Run. This brings up a report similar to the one below. You can also click Export to CSV if you wish to export the report. Custom voice messages Custom voice messages allow you to use your own recordings or greetings with multi-factor authentication. These can be used in addition to or to replace the Microsoft records. Before you begin be aware of the following: The current supported file formats are.wav and.mp3. The file size limit is 5 MB. It is recommended that for Authentication messages that it be no longer than 20 seconds. Anything greater than this could cause the verification to fail because the user may not respond before the message finishes and the verification times out. To set up custom voice messages in Azure Multi-Factor Authentication 1. Create a custom voice message using one of the supported file formats. 2. Log on to 3. Navigate to the MFA Management Portal per the instructions at the top of this page. 4. In the Azure Multi-Factor Authentication Management Portal, click Voice Messages under the Configure section. 5. Under the Voice Messages section, click New Voice Message.
42 6. On the Configure: New Voice Messages page, click Manage Sound Files. 7. On the Configure: Sound Files page, click Upload Sound File.
43 8. On the Configure: Upload Sound File, click Browse and navigate to your voice message, click Open. 9. Add a Description and click Upload. 10. Once this completes, a message confirms that you have successfully uploaded the file. 11. On the left, click Voice Messages. 12. Under the Voice Messages section, click New Voice Message. 13. From the Language drop-down, select a language. 14. If this message is for a specific application, specify it in the Application box. 15. From the Message Type, select the message type to be overridden with our new custom message. 16. From the Sound File drop-down, select your sound file. 17. Click Create. A message confirms that you have successfully created a voice message.
44 Caching in Azure Multi-Factor Authentication Caching allows you to set a specific time period so that subsequent authentication attempts succeed automatically. This is primarily used when on-premises systems such as VPN send multiple verification requests while the first request is still in progress. This allows the subsequent requests to succeed automatically after the user succeeds the verification in progress. Note that caching is not intended to be used for sign-ins to Azure AD. To set up caching in Azure Multi-Factor Authentication 1. Log on to 2. Navigate to the MFA Management Portal per the instructions at the top of this page. 3. In the Azure Multi-Factor Authentication Management Portal, click Caching under the Configure section. 4. On the Configure caching page click New Cache 5. Select the Cache type and the cache seconds. Click create.
45 Trusted IPs Trusted IPs is a feature of multi-factor authentication that allows administrators of a managed or federated tenant the ability to bypass multi-factor authentication for users that are signing in from the company s local intranet. This feature is available with the full version of Azure Multi-Factor Authentication. (For details on how to get the full version of Azure Multi-Factor Authentication, see How to get Azure Multi-Factor Authentication.) TYPE OF AZURE AD TENANT Managed Federated AVAILABLE TRUSTED IP OPTIONS Specific IP address ranges Administrators can specify a range of IP addresses that can bypass multi-factor authentication for users that are signing in from the company s intranet. All Federated Users - All federated users who are signing-in from inside the organization will bypass multi-factor authentication using a claim issued by AD FS. Specific IP address ranges Administrators can specify a range of IP addresses that can bypass multi-factor authentication for users that are signing in from the company s intranet. This bypass only works from inside a company s intranet. So for example, if you only selected all federated users, and a user signs in from outside the company s intranet, that user has to authenticate using multi-factor authentication even if the user presents an AD FS claim. The following table describes when multi-factor authentication and app passwords are required inside your corpnet and outside your corpnet when Trusted IPs is enabled. TRUSTED IPS ENABLED Inside corpnet TRUSTED IPS DISABLED For browser flows, multi-factor authentication NOT required.
46 TRUSTED IPS ENABLED For rich client apps, regular passwords work if the user has not created any app passwords. Once an app password has been created, app passwords are required. Outside corpnet For rich client apps, app passwords required. TRUSTED IPS DISABLED For rich client apps, app passwords required For browser flows, multi-factor authentication required. For rich client apps, app passwords required. To enable Trusted IPs 1. Sign-in to the Azure classic portal. 2. On the left, click Active Directory. 3. Under, Directory click on the directory you wish to set up Trusted IPsing on. 4. On the Directory you have selected, click Configure. 5. In the multi-factor authentication section, click Manage service settings. 6. On the Service Settings page, under Trusted IPs, select either: For requests from federated users originating from my intranet All federated users who are signing in from the corporate network will bypass multi-factor authentication using a claim issued by AD FS. For requests from a specific range of public IPs enter the IP addresses in the boxes provided using CIDR notation. For example: xxx.xxx.xxx.0/24 for IP addresses in the range xxx.xxx.xxx.1 xxx.xxx.xxx.254, or xxx.xxx.xxx.xxx/32 for a single IP address. You can enter up to 50 IP address ranges. 7. Click save. 8. Once the updates have been applied, click close. App Passwords
47 In some apps, like Office 2010 or older and Apple Mail you can't use multi-factor authentication. To use these apps, you'll need to use "app passwords" in place of your traditional password. The app password allows the application to bypass multi-factor authentication and continue working. NOTE Modern Authentication for the Office 2013 Clients Office 2013 clients (including Outlook) now support new Authentication Protocols and can be enabled to support Multi- Factor Authentication. This means that once enabled, app passwords are not required for use with Office 2013 clients. For more information, see Office 2013 modern authentication public preview announced. Important things to know about app passwords The following is an important list of things that you should know about app passwords. Users can have multiple app passwords, which increases the surface area for theft. Since app passwords are hard to remember, it might encourage people to write this down. This is not recommended and should be discouraged because only one factor is required to login with app password. Apps which cache passwords and use it in on-premises scenarios might start failing since the app password isn't known outside of the organizational id. An example is Exchange s that are on-premises but the archived mail is in the cloud. The same password doesn't work. The actual password is automatically generated and is not supplied by the user. This is because the automatically generated password, is harder for an attacker to guess and is more secure. Currently there is a limit of 40 passwords per user. You will be prompted to delete one of your existing app passwords in order to create a new one. Once multi-factor authentication is enabled on a user's account, app passwords can be used with most nonbrowser clients such as Outlook and Lync, but administrative actions cannot be performed using app passwords through non-browser applications such as Windows PowerShell even if that user has an administrative account. Ensure you create a service account with a strong password to run PowerShell scripts and do not enable that account for multi-factor authentication. WARNING App passwords don't work in hybrid environments where clients communicate with both on-premises and cloud autodiscover endpoints. This is because domain passwords are required to authenticate on-premises and app passwords are required to authenticate with the cloud. Naming Guidance for App Passwords It is recommended that app password names should reflect the device on which they are used. For instance, if you have a laptop that has non-browser apps such as Outlook, Word, and Excel, you only need to create one app password named Laptop and use that app password in all of these applications. Although you can create separate passwords for all of these applications, it is not recommended. The recommend way is to use one app password per device.
 with Azure AD and you are going to be using Azure Multi-Factor Authentication, then the following is important information that you should be aware when using")
48 Federated (SSO) App Passwords Azure AD supports federation with on-premises Windows Server Active Directory Domain Services (AD DS). If your organization is federated(sso) with Azure AD and you are going to be using Azure Multi-Factor Authentication, then the following is important information that you should be aware when using app passwords. This applies only to federated(sso) customers. The App Password is verified by Azure AD and hence bypasses federation. Federation is only actively used when setting up App Password. For federated(sso) users, we never go to the Identity Provider (IdP) unlike the passive flow. The passwords are stored in the organizational id. If the user leaves the company, that info has to flow to organizational id using DirSync in real time. Account disable/deletion may take up to three hours to sync, delaying disable/deletion of App Password in Azure AD. On-premises Client Access Control settings are not honored by App Password No on-premises authentication logging / auditing capability is available for App Password More end-user education is required for the Microsoft Lync 2013 client. For the required steps, see How to change the password in your to the app password. Certain advanced architectural designs may require using a combination of organizational username and passwords and app passwords when using multi-factor authentication with clients, depending on where they authenticate. For clients that authenticate against an on-premise infrastructure, you would use an organizational username and password. For clients that authenticate against Azure AD, you would use the app password. For example, suppose you have an architecture that consists of the following: You are federating your on-premise instance of Active Directory with Azure AD You are using Exchange online You are using Lync that is specifically on-premise You are using Azure Multi-Factor Authentication In these instances, you must do the following:
49 When signing-in to Lync, use your organizations username and password. When attempting to access the address book via an Outlook client that connects to Exchange online, use an app password. Allowing app password creation By default, users cannot create app passwords. This feature must be enabled. To allow users the ability to create app passwords, use the following procedure. To enable users to create app passwords 1. Sign in to the Azure classic portal. 2. On the left, click Active Directory. 3. Under, Directory click on the directory for the user you wish to enable. 4. At the top, click Users. 5. At the bottom of the page, click Manage Multi-Factor Auth. 6. At the top of the multi-factor authentication page, click Service Settings. 7. Ensure that the radio button next to Allow users to create app passwords to sign into non-browser applications is selected. Creating app passwords Users can create app passwords during their initial registration. They are given an option at the end of the registration process that allows them to create them. Additionally users can also create app passwords later on by changing their settings in the Azure portal, the Office 365 portal or by To create app passwords in the Office 365 portal 1. Sign in to the Office 365 portal 2. In the top right corner, select the settings widget 3. On the left, select Additional Security Verification
50 4. On the right, select Update my phone numbers used for account security 5. On the proofup page, at the top, select app passwords 6. Click Create 7. Enter a name for the app password and click Next 8. Copy the app password to the clipboard and paste it into your app. To create app passwords in the Azure portal 1. Sign in to the Azure classic portal. 2. At the top, right-click on your user name and select Additional Security Verification. 3. On the proofup page, at the top, select app passwords 4. Click Create 5. Enter a name for the app password and click Next 6. Copy the app password to the clipboard and paste it into your app. To create app passwords if you do not have an Office 365 or Azure subscription 1. Sign in to 2. At the top, select profile.

51 3. Click on your user name and select Additional Security Verification. 4. On the proofup page, at the top, select app passwords 5. Click Create 6. Enter a name for the app password and click Next 7. Copy the app password to the clipboard and paste it into your app. Remember Multi-Factor Authentication for devices users trust Remembering Multi-Factor Authentication for devices and browsers that users trust is a free feature for all MFA users. It allows you to give users the option to by-pass MFA for a set number of days after performing a successful sign-in using MFA. This can enhance the usability for your users. However, since the users are allowed to remember MFA for trusted devices, this feature may reduce account security. To ensure account security, you should restore Multi-Factor Authentication for their devices for either of the following scenarios: If their corporate account has become compromised If a remembered device is lost or stolen NOTE This feature is implemented as a browser cookie cache. It doesn't work if your browser cookies are not enabled. How to enable/disable Remember multi-factor authentication 1. Sign in to the Azure classic portal. 2. On the left, click Active Directory. 3. Under Active Directory, click on the directory you wish to set up Remember Multi-Factor Authentication for devices. 4. On the Directory you have selected, click Configure. 5. In the multi-factor authentication section, click Manage service settings. 6. On the Service Settings page, under manage user device settings, select/unselect the Allow users to remember multi-factor authentication on devices they trust.
52 7. Set the number of days that you want to allow the suspension. The default is 14 days. 8. Click save. 9. Click close. Selectable Verification Methods On both the cloud and on-premises versions, you can choose which verification methods are available for your users. The table below provides a brief overview of each method. When your users enroll their accounts for MFA, they choose their preferred verification method out of the options that you enabled. The guidance for their enrollment process is covered in Set up my account for two-step verification METHOD Call to phone Text message to phone Notification through mobile app Verification code from mobile app DESCRIPTION Places an automated voice call to the Authentication phone. The user answers the call and presses # in the phone keypad to authenticate. This phone number is not synchronized to on-premises Active Directory. Sends a text message containing a verification code to the user. The user is prompted to either reply to the text message with the verification code or to enter the verification code into the sign-in interface. In this mode, the Microsoft Authenticator app prevents unauthorized access to accounts and stops fraudulent transactions. This is done using a push notification to your phone or registered device. Simply view the notification and if it is legitimate you tap Verify. Otherwise you may choose Deny or choose to deny and report the fraudulent notification. For information on reporting fraudulent notifications see How to use the Deny and Report Fraud Feature for Multi-Factor Authentication. The Microsoft Authenticator app is available for Windows Phone, Android, and IOS. In this mode, the Microsoft Authenticator app can be used as a software token to generate an OATH verification code. This verification code can then be entered along with the username and password to provide the second form of authentication. The Microsoft Authenticator app is available for Windows Phone, Android, and IOS. How to enable/disable authentication methods 1. Sign in to the Azure classic portal.
53 2. On the left, click Active Directory. 3. Under Active Directory, click on the directory you wish to enable or disable authentication methods. 4. On the Directory you have selected, click Configure. 5. In the multi-factor authentication section, click Manage service settings. 6. On the Service Settings page, under verification options, select/unselect the options you wish to use. 7. Click save. 8. Click close.
54 Reports in Azure Multi-Factor Authentication 1/23/ min to read Edit on GitHub Azure Multi-Factor Authentication provides several reports that can be used by you and your organization. These reports can be accessed through the Multi-Factor Authentication Management Portal, which requires that you have an Azure MFA Provider, or an Azure MFA, Azure AD Premium or Enterprise Mobility Suite license. The following is a list of the available reports. You can access reports through the Azure Management portal. NAME Usage Server Status Blocked User History Bypassed User History Fraud Alert Queued DESCRIPTION The usage reports display information on overall usage, user summary and user details. This report displays the status of Multi-Factor Authentication Servers associated with your account. These reports show the history of requests to block or unblock users. Shows the history of requests to bypass Multi-Factor Authentication for a user's phone number. Shows a history of fraud alerts submitted during the date range you specified. Lists reports queued for processing and their status. A link to download or view the report is provided when the report is complete. To view reports 1. Log on to 2. On the left, select Active Directory. 3. Select one of the following options: Option 1: Click the Multi-Factor Auth Providers tab. Select your MFA provider and click the Manage button at the bottom. Option 2: Select your directory and click the Configure tab. Under the multi-factor authentication section, select Manage service settings. At the bottom of the MFA Service Settings page, click the Go to the portal link. 4. In the Azure Multi-Factor Authentication Management Portal, you will see the View a Report section in the left navigation. From here you can select the reports described above.
55 Additional Resources For Users Azure Multi-Factor Authentication on MSDN

56 Deploy the user portal for the Azure Multi-Factor Authentication Server 1/17/ min to read Edit on GitHub The user portal allows the administrator to install and configure the Azure Multi-Factor Authentication User Portal. The user portal is an IIS web site that allows users to enroll in Azure Multi-Factor Authentication and maintain their accounts. A user may change their phone number, change their PIN, or choose to bypass two-step verification during their next sign-on. Users sign in to the User Portal using their normal username and password, then either complete a two-step verification call or answer security questions to complete their authentication. If user enrollment is allowed, users configure their phone number and PIN the first time they sign in to the user portal. User Portal Administrators may be set up and granted permission to add new users and update existing users. Deploy the user portal on the same server as the Azure Multi-Factor Authentication Server The following pre-requisites are required to install the users portal on the same server as the Azure Multi-Factor Authentication Server: IIS, including asp.net and IIS 6 meta base compatibility (for IIS 7 or higher) Logged in user must have admin rights for the computer and Domain if applicable. This is because the account needs permissions to create Active Directory security groups. To deploy the user portal
57 1. Within the Azure Multi-Factor Authentication Server, click the User Portal icon in the left menu, then click Install User Portal. 2. Click Next. 3. Click Next. 4. If the computer is domain-joined, and Active Directory is not configured to secure communication between the user portal and the Azure Multi-Factor Authentication service, then the Active Directory step is displayed. Click the Next button to automatically complete this configuration. 5. Click Next. 6. Click Next. 7. Click Close. 8. Open a web browser from any computer and navigate to the URL where the user portal was installed (e.g. Ensure that no certificate warnings or errors are displayed. Deploy the Azure Multi-Factor Authentication Server User Portal on a Separate Server To allow the Microsoft Authenticator app to communicate with the user portal, complete the following requirements: You must be using v6.0 or higher of the Azure Multi-Factor Authentication Server. The user portal must be installed on an Internet-facing web server running Microsoft Internet Information Services (IIS) 6.x, IIS 7.x or higher. When using IIS 6.x, ensure ASP.NET v is installed, registered, and set to Allowed. Required role services when using IIS 7.x or higher include ASP.NET and IIS 6 Metabase Compatibility. The user portal should be secured with an SSL certificate. The Azure Multi-Factor Authentication Web Service SDK must be installed in IIS 6.x, IIS 7.x or higher on the server where the Azure Multi-Factor Authentication Server is installed. The Azure Multi-Factor Authentication Web Service SDK must be secured with an SSL certificate.
58 The user portal must be able to connect to the Azure Multi-Factor Authentication Web Service SDK over SSL. The user portal must be able to authenticate to the Azure Multi-Factor Authentication Web Service SDK using the credentials of a service account in the "PhoneFactor Admins" security group. This service account and group exist in Active Directory if the Azure Multi-Factor Authentication Server is running on a domain-joined server. This service account and group exist locally on the Azure Multi-Factor Authentication Server if it is not joined to a domain. Installing the user portal on a server other than the Azure Multi-Factor Authentication Server requires the following three steps: 1. Install the web service SDK 2. Install the user portal 3. Configure the User Portal Settings in the Azure Multi-Factor Authentication Server Step 1: Install the web service SDK If the Azure Multi-Factor Authentication Web Service SDK is not already installed on the Azure Multi-Factor Authentication Server, go to that server and open the Azure Multi-Factor Authentication Server. Click the Web Service SDK icon, then Install Web Service SDK. Follow the instructions presented. The Web Service SDK must be secured with an SSL certificate. A self-signed certificate is okay for this purpose, but it must be imported into the Trusted Root Certification Authorities store of the Local Computer account on the server. Now the Web Service SDK can trust that certificate when initiating the SSL connection. Step 2: Install the user portal Before installing the user portal on a separate server, be aware of the following best practices: It is helpful to open a web browser on the Internet-facing web server and navigate to the URL of the Web Service SDK that was entered into the web.config file. If the browser can get to the web service successfully, it should prompt you for credentials. Enter the username and password that were entered into the web.config file exactly as it appears in the file. Ensure that no certificate warnings or errors are displayed.
59 If a reverse proxy or firewall is sitting in front of the user portal web server and performing SSL offloading, you can edit the user portal's web.config file and add the following key to the <appsettings> section so that the User Portal can use http instead of https: <add key="ssl_required" value="false"/> To install the user portal 1. Open Windows Explorer on the Azure Multi-Factor Authentication Server server and navigate to the folder where the Azure Multi-Factor Authentication Server is installed (e.g. C:\Program Files\Multi-Factor Authentication Server). Choose the 32-bit or 64-bit version of the MultiFactorAuthenticationUserPortalSetup installation file as appropriate for the server that User Portal will be installed on. Copy the installation file to the Internet-facing server. 2. On the Internet-facing web server, the setup file must be run with administrator rights. The easiest way to do this is to open a command prompt as an administrator and navigate to the location where the installation file was copied. 3. Run the MultiFactorAuthenticationUserPortalSetup64 install file, change the Site and Virtual Directory name if desired. 4. After finishing the install of the User Portal, browse to C:\inetpub\wwwroot\MultiFactorAuth (or appropriate directory based on the virtual directory name) and edit the web.config file. 5. Locate the USE_WEB_SERVICE_SDK key and change the value from false to true. Locate the WEB_SERVICE_SDK_AUTHENTICATION_USERNAME and WEB_SERVICE_SDK_AUTHENTICATION_PASSWORD keys and set the values to the username and password of the service account in the PhoneFactor Admins security group (see the Requirements section). Be sure to enter the Username and Password in between the quotation marks at the end of the line, (value= />). You should use a qualified username (e.g. domain\username or machine\username) 6. Locate the pfup_pfwssdk_pfwssdk setting and change the value from to the URL of the Web Service SDK that is running on the Azure Multi-Factor Authentication Server (e.g. Since SSL is used for this connection, refer to the Web Service SDK by server name, not IP address, since the SSL certificate was issued for the server name. If the server name does not resolve to an IP address from the Internet-facing server, add an entry to the hosts file on that server to map the name of the Azure Multi-Factor Authentication Server to its IP address. Save the web.config file after changes have been made. Go to Secure your resources using Azure Multi-Factor Authentication Server with AD FS for more details about editing the config file. 7. If the website that the user portal was installed under (e.g. Default Web Site) has not already been bound with a publicly signed certificate, install the certificate on the server, open IIS Manager, and bind the certificate to the website. 8. Open a web browser from any computer and navigate to the URL where User Portal was installed (e.g. Ensure that no certificate warnings or errors are displayed. Step 3: Configure the user portal settings in the Azure Multi-Factor Authentication Server Now that the user portal is installed, you need to configure the Azure Multi-Factor Authentication Server to work with the portal. Azure Multi-Factor Authentication server provides several options for the user portal. The following table provides a list of these options and an explanation of what they are used for. USER PORTAL SETTINGS User Portal URL DESCRIPTION Enter the URL of where the portal is being hosted.
60 USER PORTAL SETTINGS Primary authentication Allow users to log in Allow user enrollment Allow users to initiate One-Time Bypass Allow users to select method Allow users to select language Allow users to activate mobile app Use security questions for fallback Allow users to associate third-party OATH token Use OATH token for fallback Enable logging DESCRIPTION Specify the type of authentication to use when signing in to the portal. Either Windows, Radius, or LDAP authentication. Allow users to enter a username and password on the sign-in page for the User portal. If this is not selected, the boxes are grayed out. Allow a user to enroll in Multi-Factor Authentication by taking them to a setup screen that prompts them for additional information such as telephone number. Prompt for backup phone allows users to specify a secondary phone number. Prompt for third-party OATH token allows users to specify a third-party OATH token. Allow users to initiate a one-time bypass. If a user sets this up, it will take effect the next time the user signs in. Prompt for bypass seconds provides the user with a box so they can change the default of 300 seconds. Otherwise, the one-time bypass is only good for 300 seconds. Allow users to specify their primary contact method. This can be phone call, text message, mobile app, or OATH token. Allow users to change the language that is used for the phone call, text message, mobile app, or OATH token. Allow users to generate an activation code to complete the mobile app activation process that is used with the server. You can also set the number of devices they can activate the app on, between 1 and 10. Allow security questions in case two-step verification fails. You can specify the number of security questions that must be successfully answered. Allow users to specify a third-party OATH token. Allow for the use of an OATH token in case two-step verification is not successful. You can also specify the session timeout in minutes. Enable logging on the user portal. The log files are located at: C:\Program Files\Multi-Factor Authentication Server\Logs. The majority of these settings are visible to the user once they are enabled and signed in to the user portal.

61 To configure the user portal settings in the Azure Multi-Factor Authentication Server To configure the user portal settings in the Azure Multi-Factor Authentication Server 1. In the Azure Multi-Factor Authentication Server, click the User Portal icon. On the Settings tab, enter the URL to the user portal in the User Portal URL textbox. This URL is included in the s that are sent to users when they are imported into the Azure Multi-Factor Authentication Server if the functionality has been enabled. 2. Choose the settings that you want to use in the User Portal. For example, if users are allowed to control their authentication methods, ensure that Allow users to select method is checked, along with the methods they can choose from. 3. Click the Help link in the top right corner for help understanding any of the settings displayed.


62 Administrators tab This tab simply allows you to add users who will have administrative privileges. When adding an administrator, you can fine-tune the permissions that they receive. Click the Add button, select a user and their permissions, and then click Add.

63 Security Questions This tab allows you to specify the security questions that users will need answer if the Use security questions for fallback option is selected. Azure Multi-Factor Authentication Server comes with default questions that you can use. You can change the order or add your own questions. When adding your own questions, you can specify the language you would like those questions to appear in as well. SAML Use this tab to configure the user portal to accept claims from an identity provider using SAML. You can specify the timeout session, the verification certificate, and the Log out redirect URL.


64 Trusted IPs This tab allows you to specify either single IP addresses or IP address ranges that can be added so that users who sign in from one of these address don't have to complete two-step verification.
65 Self-Service User Enrollment If you want your users to sign in and enroll, you must select the Allow users to log in and Allow user enrollment options under the Settings tab. Remember that the settings you select affect the user sign-in experience. For example, when a user signs in to the user portal for the first time, they are then taken to the Azure Multi-Factor Authentication User Setup page. Depending on how you have configured Azure Multi-Factor Authentication, the user may be able to select their authentication method. If they select the Voice Call verification method or have been pre-configured to use that method, the page will prompt the user to enter their primary phone number and extension if applicable. They may also be allowed to enter a backup phone number. If the user is required to use a PIN when they authenticate, the page will also prompt them to create a PIN. After entering their phone number(s) and PIN (if applicable), the user clicks the Call Me Now to Authenticate button. Azure Multi-Factor Authentication will perform a phone call verification to the user s primary phone number. The user must answer the phone call and enter their PIN (if applicable) and press # to move on to the next step of the self-enrollment process. If the user selects the Text Message verification method or has been pre-configured to use that method, the page will prompt the user for their mobile phone number. If the user is required to use a PIN when they authenticate, the page will also prompt them to enter a PIN. After entering their phone number and PIN (if applicable), the user clicks the Text Me Now to Authenticate button. Azure Multi-Factor Authentication will perform an SMS verification to the user s mobile phone. The user receives the text message with a one-time-passcode (OTP), then replies to the message with that OTP plus their PIN (if applicable).
66 If the user selects the Mobile App verification method, the page will prompt the user to install the Microsoft Authenticator app on their device and generate an activation code. After installing the app, the user clicks the Generate Activation Code button. NOTE To use the Microsoft Authenticator app, the user must enable push notifications for their device. The page then displays an activation code and a URL along with a barcode picture. If the user is required to use a PIN when they authenticate, the page will also prompt them to enter a PIN. The user enters the activation code and URL into the Microsoft Authenticator app or uses the barcode scanner to scan the barcode picture and clicks the Activate button. After the activation is complete, the user clicks the Authenticate Me Now button. Azure Multi-Factor Authentication will perform a verification to the user s mobile app. The user must enter their PIN (if applicable) and press the Authenticate button in their mobile app to move on to the next step of the self-enrollment process. If the administrators have configured the Azure Multi-Factor Authentication Server to collect security questions and answers, the user is then taken to the Security Questions page. The user must select four security questions and provide answers to their selected questions.
67 The user self-enrollment is now complete and the user is signed in to the user portal. Users can sign back in to the user portal at any time in the future to change their phone numbers, PINs, authentication methods, and security questions if allowed by their administrators.
68 Advanced scenarios with Azure Multi-Factor Authentication and third-party VPN solutions 1/17/ min to read Edit on GitHub Azure Multi-Factor Authentication can be used to seamlessly connect with various third-party VPN solutions. This article focuses on Cisco ASA VPN appliance, Citrix NetScaler SSL VPN appliance, and the Juniper Networks Secure Access/Pulse Secure Connect Secure SSL VPN appliance. We created configuration guides for these three common appliances, but Multi-Factor Authentication Server can integrate with most systems that use RADIUS, LDAP, IIS, or claims-based authentication to AD FS. You can find more details in MFA Server configurations. Cisco ASA VPN appliance and Azure Multi-Factor Authentication Azure Multi-Factor Authentication seamlessly integrates with your Cisco ASA VPN appliance to provide additional security for Cisco AnyConnect VPN logins and portal access. This can be done using either the LDAP or RADIUS protocol. Select one of the following to download the detailed step-by-step configuration guides. CONFIGURATION GUIDE Cisco ASA with Anyconnect VPN and Azure MFA Configuration for LDAP Cisco ASA with Anyconnect VPN and Azure MFA Configuration for RADIUS DESCRIPTION Seamlessly integrate your Cisco ASA VPN appliance with Azure MFA using LDAP Seamlessly integrate your Cisco ASA VPN appliance with Azure MFA using RADIUS Citrix NetScaler SSL VPN and Azure Multi-Factor Authentication Azure Multi-Factor Authentication seamlessly integrates with your Citrix NetScaler SSL VPN appliance to provide additional security for Citrix NetScaler SSL VPN logins and portal access. This can be done using either the LDAP or RADIUS protocol. Select one of the following to download the detailed step-by-step configuration guides. CONFIGURATION GUIDE Citrix NetScaler SSL VPN and Azure MFA Configuration for LDAP Citrix NetScaler SSL VPN and Azure MFA Configuration for RADIUS DESCRIPTION Seamlessly integrate your Citrix NetScaler SSL VPN with Azure MFA appliance using LDAP Seamlessly integrate your Citrix NetScaler SSL VPN appliance with Azure MFA using RADIUS Juniper/Pulse Secure SSL VPN appliance and Azure Multi-Factor Authentication Azure Multi-Factor Authentication seamlessly integrates with your Juniper/Pulse Secure SSL VPN appliance to provide additional security for Juniper/Pulse Secure SSL VPN logins and portal access. This can be done using either the LDAP or RADIUS protocol. Select one of the following to download the detailed step-by-step configuration guides.
69 CONFIGURATION GUIDE Juniper/Pulse Secure SSL VPN and Azure MFA Configuration for LDAP Juniper/Pulse Secure SSL VPN and Azure MFA Configuration for RADIUS DESCRIPTION Seamlessly integrate your Juniper/Pulse Secure SSL VPN with Azure MFA appliance using LDAP Seamlessly integrate your Juniper/Pulse Secure SSL VPN appliance with Azure MFA using RADIUS
70 Getting started the MFA Server Mobile App Web Service 1/17/ min to read Edit on GitHub The Azure Multi-Factor Authentication App offers an additional out-of-band authentication option. Instead of placing an automated phone call or SMS to the user during login, Azure Multi-Factor Authentication pushes a notification to the Azure Multi-Factor Authentication App on the user s smartphone or tablet. The user simply taps Authenticate (or enters a PIN and taps Authenticate ) in the app to log in. In order to use the Azure Multi-Factor Authentication App, the following are required so that the app can successfully communicate with Mobile App Web Service: Please see Hardware and Software Requirements for hardware and software requirements You must be using v6.0 or higher of the Azure Multi-Factor Authentication Server Mobile App Web Service must be installed on an Internet-facing web server running Microsoft Internet Information Services (IIS) IIS 7.x or higher. For more information on IIS see IIS.NET. Ensure ASP.NET v is installed, registered and set to Allowed Required role services include ASP.NET and IIS 6 Metabase Compatibility Mobile App Web Service must be accessible via a public URL Mobile App Web Service must be secured with an SSL certificate. The Azure Multi-Factor Authentication Web Service SDK must be installed in IIS 7.x or higher on the server that the Azure Multi-Factor Authentication Server The Azure Multi-Factor Authentication Web Service SDK must be secured with an SSL certificate. Mobile App Web Service must be able to connect to the Azure Multi-Factor Authentication Web Service SDK over SSL Mobile App Web Service must be able to authenticate to the Azure Multi-Factor Authentication Web Service SDK using the credentials of a service account that is a member of a security group called PhoneFactor Admins. This service account and group exist in Active Directory if the Azure Multi-Factor Authentication Server is running on a domain-joined server. This service account and group exist locally on the Azure Multi- Factor Authentication Server if it is not joined to a domain. Installing the user portal on a server other than the Azure Multi-Factor Authentication Server requires the following three steps: 1. Install the web service SDK 2. Install the mobile app web service 3. Configure the mobile app settings in the Azure Multi-Factor Authentication Server 4. Activate the Azure Multi-Factor Authentication App for end users Install the web service SDK If the Azure Multi-Factor Authentication Web Service SDK is not already installed on the Azure Multi-Factor Authentication Server, go to that server and open the Azure Multi-Factor Authentication Server. Click the Web Service SDK icon, click the Install Web Service SDK button and follow the instructions presented. The Web Service SDK must be secured with an SSL certificate. A self-signed certificate is okay for this purpose, but it has to be imported into the Trusted Root Certification Authorities store of the Local Computer account on the User Portal web server so that it will trust that certificate when initiating the SSL connection.
71 Install the mobile app web service Before installing the mobile app web service, be aware of the following: If the Azure Multi-Factor Authentication User Portal is already installed on the Internet-facing server, the username, password and URL to the Web Service SDK can be copied from the User Portal s web.config file. It is helpful to open a web browser on the Internet-facing web server and navigate to the URL of the Web Service SDK that was entered into the web.config file. If the browser can get to the web service successfully, it should prompt you for credentials. Enter the username and password that were entered into the web.config file exactly as it appears in the file. Ensure that no certificate warnings or errors are displayed. If a reverse proxy or firewall is sitting in front of the Mobile App Web Service web server and performing SSL offloading, you can edit the Mobile App Web Service web.config file and add the following key to the section so that the Mobile App Web Service can use http instead of https. However SSL is still required from the Mobile App to the firewall/reverse proxy. To install the mobile app web service 1. Open Windows Explorer on the Azure Multi-Factor Authentication Server and navigate to the folder where the Azure Multi-Factor Authentication Server is installed (e.g. C:\Program Files\Azure Multi-Factor Authentication). Choose the 32-bit or 64-bit version of the Azure Multi-Factor AuthenticationPhoneAppWebServiceSetup installation file as appropriate for the server that Mobile App Web Service will be installed on. Copy the installation file to the Internet-facing server. 2. On the Internet-facing web server, the setup file must be run with administrator rights. The easiest way to do this is to open a command prompt as an administrator and navigate to the location where the installation file was copied. 3. Run the Multi-Factor AuthenticationMobileAppWebServiceSetup install file, change the Site if desired and change the Virtual directory to a short name such as PA. A short virtual directory name is recommended since users must enter the Mobile App Web Service URL into the mobile device during activation. 4. After finishing the install of the Azure Multi-Factor AuthenticationMobileAppWebServiceSetup, browse to
72 C:\inetpub\wwwroot\PA (or appropriate directory based on the virtual directory name) and edit the web.config file. 5. Locate the WEB_SERVICE_SDK_AUTHENTICATION_USERNAME and WEB_SERVICE_SDK_AUTHENTICATION_PASSWORD keys and set the values to the username and password of the service account that is a member of the PhoneFactor Admins security group (see the Requirements section above). This may be the same account being used as the Identity of the Azure Multi-Factor Authentication User Portal if that has been previously installed. Be sure to enter the Username and Password in between the quotation marks at the end of the line, (value= />). It is recommended to use a qualified username (e.g. domain\username or machine\username). 6. Locate the pfmobile App Web Service_pfwssdk_PfWsSdk setting and change the value from to the URL of the Web Service SDK that is running on the Azure Multi- Factor Authentication Server (e.g. Since SSL is used for this connection, you must reference the Web Service SDK by server name and not IP address since the SSL certificate will have been issued for the server name and the URL used must match the name on the certificate. If the server name does not resolve to an IP address from the Internet-facing server, add an entry to the hosts file on that server to map the name of the Azure Multi-Factor Authentication Server to its IP address. Save the web.config file after changes have been made. 7. If the website that Mobile App Web Service was installed under (e.g. Default Web Site) has not already been binded with a publicly-signed certificate, install the certificate on the server if not already installed, open IIS Manager and bind the certificate to the website. 8. Open a web browser from any computer and navigate to the URL where Mobile App Web Service was installed (e.g. ). Ensure that no certificate warnings or errors are displayed. Configure the mobile app settings in the Azure Multi-Factor Authentication Server Now that the mobile app web service is installed, you need to configure the Azure Multi-Factor Authentication Server to work with the portal. To configure the mobile app settings in the Azure Multi-Factor Authentication Server 1. In the Azure Multi-Factor Authentication Server, click on the User Portal icon. If users are allowed to control their authentication methods, on the Settings tab, under Allow users to select method, check Mobile App. Without this feature enabled, end users will be required to contact your Help Desk to complete activation for the Mobile App. 2. Check the Allow users to activate Mobile App box. 3. Check the Allow User Enrollment box. 4. Click the Mobile App icon. 5. Enter the URL being used with the virtual directory which was created when installing the Azure Multi- Factor AuthenticationMobileAppWebServiceSetup. An Account Name may be entered in the space provided. This company name will display in the mobile application. If left blank, the name of your Multi-Factor Auth Provider created in the Azure Management Portal will be displayed.
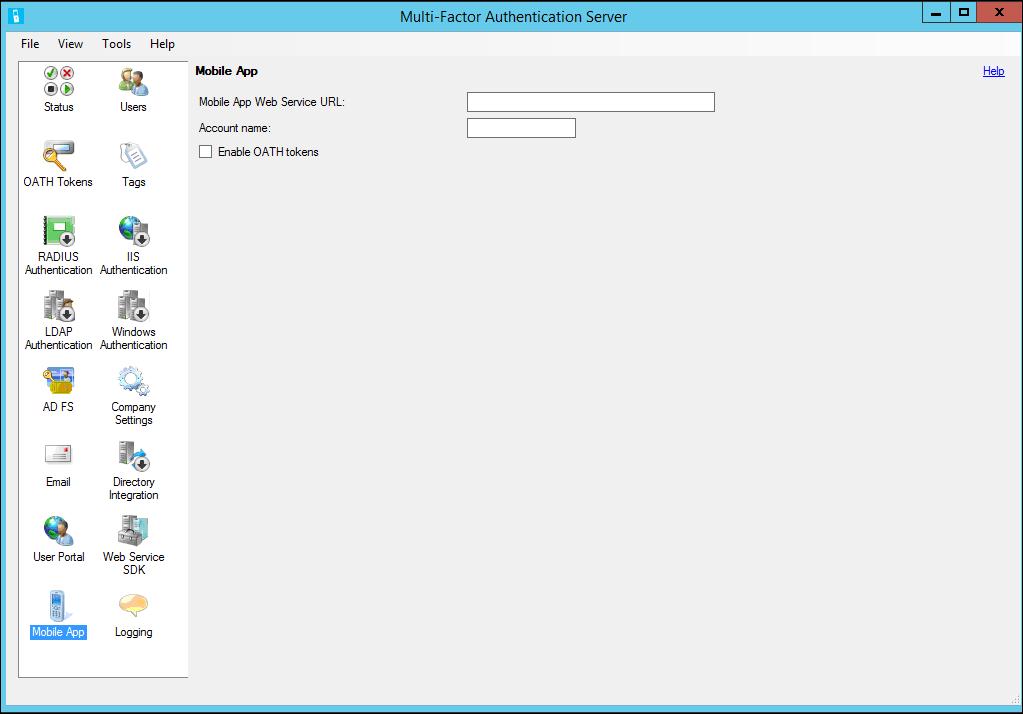
73
74 Windows Authentication and Azure Multi-Factor Authentication Server 1/17/ min to read Edit on GitHub The Windows Authentication section allows the administrator to enable and configure Windows authentication for one or more applications. The following is a list of things to keep in mind prior to setting up Windows Authentication. reboot is needed before the Azure Multi-Factor Authentication for Terminal Services will be in effect. If Require Azure Multi-Factor Authentication user match is checked and you are not in the user list, you will not be able to log into the machine after reboot. Trusted IPs is dependent on whether the application can provide the client IP with the authentication. Currently only Terminal Services is supported. NOTE This feature is not supported to secure Terminal Services on Windows Server 2012 R2. To secure an application with Windows Authentication, use the following procedure. 1. In the Azure Multi-Factor Authentication Server click the Windows Authentication icon. 2. Check the Enable Windows authentication checkbox. By default, this box is unchecked. 3. The Applications tab allows the administrator to configure one or more applications for Windows Authentication.
75 4. Select a server or application specify whether the server/application is enabled. Click OK. 5. Click Add button. 6. The Trusted IPs tab allows you to skip Azure Multi-Factor Authentication for Windows sessions originating from specific IPs. For example, if employees use the application from the office and from home, you may decide you don't want their phones ringing for Azure Multi-Factor Authentication while at the office. For this, you would specify the office subnet as Trusted IPs entry. 7. Click Add button. 8. Select Single IP if you would like to skip a single IP address. 9. Select IP Range if you would like to skip an entire IP range. Example Select Subnet if you would like to specify a range of IPs using subnet notation. Enter the subnet's starting IP and pick the appropriate netmask from the drop-down list. 11. Click the OK button.
76 Upgrading the PhoneFactor Agent to Azure Multi- Factor Authentication Server 1/17/ min to read Edit on GitHub Upgrading from the PhoneFactor Agent v5.x or older to the Azure Multi-Factor Authentication Server requires the PhoneFactor Agent and affiliated components to be uninstalled before the Multi-Factor Authentication Server and its affiliated components can be installed. To upgrade the PhoneFactor Agent to Azure Multi-Factor Authentication Server 1. First, back up the PhoneFactor data file. The default installation location is C:\Program Files\PhoneFactor\Data\Phonefactor.pfdata. 2. If the User Portal is installed: 1. Navigate to the install folder and back up the web.config file. The default installation location is C:\inetpub\wwwroot\PhoneFactor. 2. If you have added custom themes to the portal, back up your custom folder below the C:\inetpub\wwwroot\PhoneFactor\App_Themes directory. 3. Uninstall the User Portal either through the PhoneFactor Agent (only available if installed on the same server as the PhoneFactor Agent) or through Windows Programs and Features. 3. If the Mobile App Web Service is installed: a. Go to the install folder and back up the web.config file. The default installation location is C:\inetpub\wwwroot\PhoneFactorPhoneAppWebService. b. Uninstall the Mobile App Web Service through Windows Programs and Features. 4. If the Web Service SDK is installed, uninstall it either through the PhoneFactor Agent or through Windows Programs and Features. 5. Uninstall the PhoneFactor Agent through Windows Programs and Features. 6. Install the Multi-Factor Authentication Server. Note that the installation path is picked up from the registry from the previous PhoneFactor Agent installation so it should install in the same location (e.g. C:\Program Files\PhoneFactor). New installations will have a different default install path (e.g. C:\Program Files\Multi-Factor Authentication Server). The data file left by the previous PhoneFactor Agent should be upgraded during installation, so your users and settings should still be there after installing the new Multi-Factor Authentication Server. 7. If prompted, activate the Multi-Factor Authentication Server and ensure it is assigned to the correct replication group. 8. If the Web Service SDK was previously installed, install the new Web Service SDK through the Multi-Factor Authentication Server User Interface. Note that the default virtual directory name is now MultiFactorAuthWebServiceSdk instead of PhoneFactorWebServiceSdk. If you want to use the previous name, you must change the name of the virtual directory during installation. Otherwise, if you allow the install to use the new default name, you will have to change the URL in any applications that reference the Web Service SDK such as the User Portal and Mobile App Web Service to point at the correct location. 9. If the User Portal was previously installed on the PhoneFactor Agent Server, install the new Multi-Factor
77 Authentication User Portal through the Multi-Factor Authentication Server User Interface. Note that the default virtual directory name is now MultiFactorAuth instead of PhoneFactor. If you want to use the previous name, you must change the name of the virtual directory during installation. Otherwise, if you allow the install to use the new default name, you should click the User Portal icon in the Multi-Factor Authentication Server and update the User Portal URL on the Settings tab. 10. If the User Portal and/or Mobile App Web Service was previously installed on a different server from the PhoneFactor Agent: a. Go to the install location (e.g. C:\Program Files\PhoneFactor) and copy the appropriate installer(s) to the other server. There are 32-bit and 64-bit installers for both the User Portal and Mobile App Web Service. They are called MultiFactorAuthenticationUserPortalSetupXX.msi and MultiFactorAuthenticationMobileAppWebServiceSetupXX.msi respectively. b. To install the User Portal on the web server, open a command prompt as an administrator and run the MultiFactorAuthenticationUserPortalSetupXX.msi. Note that the default virtual directory name is now MultiFactorAuth instead of PhoneFactor. If you want to use the previous name, you must change the name of the virtual directory during installation. Otherwise, if you allow the install to use the new default name, you should click the User Portal icon in the Multi-Factor Authentication Server and update the User Portal URL on the Settings tab. Existing users will need to be informed of the new URL. c. Go to the User Portal install location (e.g. C:\inetpub\wwwroot\MultiFactorAuth) and edit the web.config file. Copy the values in the appsettings and applicationsettings sections from your original web.config file that was backed up prior to the upgrade into the new web.config file. If the new default virtual directory name was kept when installing the Web Service SDK, change the URL in the applicationsettings section to point to the correct location. If any other defaults were changed in the previous web.config file, apply those same changes to the new web.config file. d. To install the Mobile App Web Service on the web server, open a command prompt as an administrator and run the MultiFactorAuthenticationMobileAppWebServiceSetupXX.msi. Note that the default virtual directory name is now MultiFactorAuthMobileAppWebService instead of PhoneFactorPhoneAppWebService. If you want to use the previous name, you must change the name of the virtual directory during installation. You may want to choose a shorter name to make it easy for end users to type in on their mobile devices. Otherwise, if you allow the install to use the new default name, you should click the Mobile App icon in the Multi-Factor Authentication Server and update the Mobile App Web Service URL. e. Go to the Mobile App Web Service install location (e.g. C:\inetpub\wwwroot\MultiFactorAuthMobileAppWebService) and edit the web.config file. Copy the values in the appsettings and applicationsettings sections from your original web.config file that was backed up prior to the upgrade into the new web.config file. If the new default virtual directory name was kept when installing the Web Service SDK, change the URL in the applicationsettings section to point to the correct location. If any other defaults were changed in the previous web.config file, apply those same changes to the new web.config file.
78 Assigning an Azure MFA, Azure AD Premium, or Enterprise Mobility license to users 1/17/ min to read Edit on GitHub If you have purchased Azure MFA, Azure AD Premium, or Enterprise Mobility Suite licenses, you do not need to create a Multi-Factor Auth provider. Once you assign the licenses to your users, you can begin enabling them for MFA. To assign a license 1. Sign in to the Azure classic portal as an administrator. 2. On the left, select Active Directory. 3. On the Active Directory page, double-click the directory that has the users you wish to enable. 4. At the top of the directory page, select Licenses. 5. On the Licenses page, select Azure Multi-Factor Authentication, Active Directory Premium, or Enterprise Mobility Suite. If you only have one, then it should be selected automatically. 6. At the bottom of the page, click Assign. 7. In the box that comes up, click next to the users or groups you want to assign licenses to. You should see a green check mark appear. 8. Click the check mark icon to save the changes.
79 9. You should see a message saying how many licenses were assigned and how many may have failed. Click Ok.
80 User States in Azure Multi-Factor Authentication 1/17/ min to read Edit on GitHub User accounts in Azure Multi-Factor Authentication have the following three distinct states: STATE DESCRIPTION NON-BROWSER APPS AFFECTED NOTES Disabled The default state for a new user not enrolled in multifactor authentication. No The user is not using multifactor authentication. Enabled The user has been enrolled in multi-factor authentication. No. They continue to work until the registration process is completed. The user is enabled but has not completed the registration process. They will be prompted to complete the process at next sign-in. Enforced The user has been enrolled and has completed the registration process for using multi-factor authentication. Yes. Apps require app passwords. The user may or may not have completed registration. If they have completed the registration process, then they are using multi-factor authentication. Otherwise, the user will be prompted to complete the process at next sign-in. Changing a user state A users state changes depending on whether or not it has been setup for MFA and whether the user has completed the process. When you turn MFA on for a user, the users state will change from disabled to enabled. Once the user, whose state has been changed to enabled, signs in and completes the process, their state will change to enforced. To view a user's state 1. Sign in to the Azure classic portal as an Administrator. 2. On the left, click Active Directory. 3. Under, Directory click on the directory for the user you wish to enable. 4. At the top, click Users. 5. At the bottom of the page, click Manage Multi-Factor Auth.
81 6. This will open a new browser tab. You will be able to view the users state. To change the state from disabled to enabled 1. Sign in to the Azure classic portal as an Administrator. 2. On the left, click Active Directory. 3. Under, Directory click on the directory for the user you wish to enable. 4. At the top, click Users. 5. At the bottom of the page, click Manage Multi-Factor Auth. 6. This will open a new browser tab. Find the user that you wish to enable for multi-factor authentication. You may need to change the view at the top. Ensure that the status is disabled.
82 7. Place a check in the box next to their name. 8. On the right, click Enable. 9. Click enable multi-factor auth. 10. You should notice the user's state has changed from disabled to enabled. 11. After you have enabled your users, it is recommended that you notify them via . It should also inform them how they can use their non-browser apps to avoid being locked out. To change the state from enabled/enforced to disabled 1. Sign in to the Azure classic portal as an Administrator. 2. On the left, click Active Directory.

83 3. Under, Directory click on the directory for the user you wish to enable. 4. At the top, click Users. 5. At the bottom of the page, click Manage Multi-Factor Auth. 6. This will open a new browser tab. Find the user that you wish to disable. You may need to change the view at the top. Ensure that the status is either enabled or enforced. 7. Place a check in the box next to their name. 8. On the right, click Disable. 9. You will be prompted to confirm this. Click Yes. 10. You should then see that it was successful. Click close.
84 Managing user settings with Azure Multi-Factor Authentication in the cloud 1/23/ min to read Edit on GitHub As an administrator, you can manage the following user and device settings. Require selected users to provide contact methods again Delete users existing app passwords Restore MFA on all suspended devices for a user This is helpful if a computer or device is lost or stolen or you need to remove a users access. Require selected users to provide contact methods again This setting will forces the user to complete the registration process again when he or she signs in. Be aware that non-browser apps will continue to work if the user has app passwords for them. You can delete the users app passwords by also selecting Delete all existing app passwords generated by the selected users. How to require users to provide contact methods again 1. Sign-in to the Azure classic portal. 2. On the left, click Active Directory. 3. Under, Directory click on the directory for the user you want to require to provide their contact method again. 4. At the top, click Users. 5. At the bottom of the page, click Manage Multi-Factor Auth. This will open the multi-factor authentication page. 6. Find the user that you wish to manage and place a check in the box located next to the name. You may need to change the view at the top. 7. This will bring up the Manage user settings link on the right. Click it. 8. Place a check in Require selected users to provide contact methods again. 9. Click save. 10. Click close Delete users existing app passwords
85 This deletes all of the app passwords that a user has created. Non-browser apps that were associated with these app passwords will cease to work until a new app password is created. How to delete users existing app passwords 1. Sign-in to the Azure classic portal. 2. On the left, click Active Directory. 3. Under, Directory click on the directory for the user you wish to delete app passwords for. 4. At the top, click Users. 5. At the bottom of the page, click Manage Multi-Factor Auth. This will open the multi-factor authentication page. 6. Find the user that you wish to manage and place a check in the box located next to the name. You may need to change the view at the top. 7. This will bring up the Manage user settings link on the right. Click it. 8. Place a check in Delete all existing app passwords generated by the selected users. 9. Click save. 10. Click close. Restore MFA on all remembered devices for a user Administrators have the ability to restore Multi-Factor Authentication on users devices and browsers. When doing this, this will remove the remember MFA from all of the user s devices and browsers and the user will be required to use MFA when signing in the next time. How to restore MFA on all suspended devices for a user 1. Sign-in to the Azure classic portal. 2. On the left, click Active Directory. 3. Under, Directory click on the directory for the user you wish to restore mfa on. 4. At the top, click Users. 5. At the bottom of the page, click Manage Multi-Factor Auth. This will open the multi-factor authentication page. 6. Find the user that you wish to manage and place a check in the box located next to the name. You may need to change the view at the top. 7. This will bring up the Manage user settings link on the right. Click it. 8. Place a check in Restore multi-factor authentication on all remembered devices
86 9. Click save. 10. Click close.

87 Getting started with Azure Multi-Factor Authentication and Active Directory Federation Services 1/23/ min to read Edit on GitHub If your organization has federated your on-premises Active Directory with Azure Active Directory using AD FS, there are two options for using Azure Multi-Factor Authentication. Secure cloud resources using Azure Multi-Factor Authentication or Active Directory Federation Services Secure cloud and on-premises resources using Azure Multi-Factor Authentication Server The following table summarizes the verification experience between securing resources with Azure Multi-Factor Authentication and AD FS VERIFICATION EXPERIENCE - BROWSE-BASED APPS Securing Azure AD resources using Azure Multi-Factor Authentication Securing Azure AD resources using Active Directory Federation Services VERIFICATION EXPERIENCE - NON-BROWSER-BASED APPS The first verification step is performed on-premises using AD FS. The second step is a phone-based method carried out using cloud authentication. The first verification step is performed on-premises using AD FS. The second step is performed on-premises by honoring the claim. Caveats with app passwords for federated users: App passwords are verified using cloud authentication, so they bypass federation. Federation is only actively used when setting up an app password. On-premises Client Access Control settings are not honored by app passwords. You lose on-premises authentication-logging capability for app passwords. Account disable/deletion may take up to three hours for directory sync, delaying disable/deletion of app passwords in the cloud identity. Next steps For information on setting up either Azure Multi-Factor Authentication or the Azure Multi-Factor Authentication Server with AD FS see the following articles: Secure cloud resources using Azure Multi-Factor Authentication and AD FS Secure cloud and on-premises resources using Azure Multi-Factor Authentication Server with Windows Server 2012 R2 AD FS Secure cloud and on-premises resources using Azure Multi-Factor Authentication Server with AD FS 2.0
88 Securing cloud resources with Azure Multi-Factor Authentication and AD FS 1/17/ min to read Edit on GitHub If your organization is federated with Azure Active Directory, use Azure Multi-Factor Authentication or Active Directory Federation Services to secure resources that are accessed by Azure AD. Use the following procedures to secure Azure Active Directory resources with either Azure Multi-Factor Authentication or Active Directory Federation Services. Secure Azure AD resources using AD FS To secure your cloud resource, first enable an account for users, then set up a claims rule. Follow this procedure to walk through the steps: 1. Use the steps outlined in Turn-on multi-factor authentication for users to enable an account. 2. Start the AD FS Management console. 3. Navigate to Relying Party Trusts and right-click on the Relying Party Trust. Select Edit Claim Rules 4. Click Add Rule 5. From the drop-down, select Send Claims Using a Custom Rule and click Next. 6. Enter a name for the claim rule. 7. Under Custom rule: add the following text: => issue(type = " Value = "
.")
89 Corresponding claim: <saml:attribute AttributeName="authnmethodsreferences" AttributeNamespace=" <saml:attributevalue> </saml:attribute> 8. Click OK then Finish. Close the AD FS Management console. Users then can complete signing in using the on-premises method (such as smartcard). Trusted IPs for federated users Trusted IPs allow administrators to by-pass two-step verification for specific IP addresses, or for federated users that have requests originating from within their own intranet. The following sections describe how to configure Azure Multi-Factor Authentication Trusted IPs with federated users and by-pass two-step verification when a request originates from within a federated users intranet. This is achieved by configuring AD FS to use a passthrough or filter an incoming claim template with the Inside Corporate Network claim type. This example uses Office 365 for our Relying Party Trusts. Configure the AD FS claims rules The first thing we need to do is to configure the AD FS claims. We will create two claims rules, one for the Inside Corporate Network claim type and an additional one for keeping our users signed in. 1. Open AD FS Management. 2. On the left, select Relying Party Trusts. 3. Right-click on Microsoft Office 365 Identity Platform and select Edit Claim Rules 4. On Issuance Transform Rules, click Add Rule.


90 5. On the Add Transform Claim Rule Wizard, select Pass Through or Filter an Incoming Claim from the dropdown and click Next. 6. In the box next to Claim rule name, give your rule a name. For example: InsideCorpNet. 7. From the drop-down, next to Incoming claim type, select Inside Corporate Network.

91 8. Click Finish. 9. On Issuance Transform Rules, click Add Rule. 10. On the Add Transform Claim Rule Wizard, select Send Claims Using a Custom Rule from the drop-down and click Next. 11. In the box under Claim rule name: enter Keep Users Signed In. 12. In the Custom rule box, enter: c:[type == " => issue(claim = c);

92 13. Click Finish. 14. Click Apply. 15. Click Ok. 16. Close AD FS Management. Configure Azure Multi-Factor Authentication Trusted IPs with Federated Users Now that the claims are in place, we can configure trusted IPs. 1. Sign in to the Azure classic portal. 2. On the left, click Active Directory. 3. Under Directory, select the directory where you want to set up trusted IPs. 4. On the Directory you have selected, click Configure. 5. In the multi-factor authentication section, click Manage service settings. 6. On the Service Settings page, under trusted IPs, select Skip multi-factor-authentication for requests from federated users on my intranet.
93 7. Click save. 8. Once the updates have been applied, click close. That s it! At this point, federated Office 365 users should only have to use MFA when a claim originates from outside the corporate intranet.
94 Secure cloud and on-premises resources using Azure Multi-Factor Authentication Server with AD FS 2.0 1/17/ min to read Edit on GitHub This article is for organizations that are federated with Azure Active Directory, and want to secure resources that are on-premises or in the cloud. Protect your resources by using the Azure Multi-Factor Authentication Server and configuring it to work with AD FS so that two-step verification is triggered for high value end points. This documentation covers using the Azure Multi-Factor Authentication Server with AD FS 2.0. Get more information on Securing cloud and on-premises resources using Azure Multi-Factor Authentication Server with Windows Server 2012 R2 AD FS. Secure AD FS 2.0 with a proxy To secure AD FS 2.0 with a proxy, install the Azure Multi-Factor Authentication Server on the ADFS proxy server and configure the Server. Configure IIS authentication 1. Within the Azure Multi-Factor Authentication Server, click the IIS Authentication icon in the left menu. 2. Click the Form-Based tab. 3. Click the Add button. 4. To detect username, password, and domain variables automatically, enter the Login URL (like within the Auto-Configure Form-Based Website dialog box and click OK. 5. Check the Require Azure Multi-Factor Authentication user match box if all users have been or will be imported into the Server and subject to two-step verification. If a significant number of users have not yet been imported into the Server and/or will be exempt from two-step verification, leave the box unchecked. For

95 additional information on this feature, see the help file. 6. If the page variables cannot be detected automatically, click the Specify Manually button in the Auto- Configure Form-Based Website dialog box. 7. In the Add Form-Based Website dialog box, enter the URL to the ADFS login page in the Submit URL field (like and enter an Application name (optional). The Application name appears in Azure Multi-Factor Authentication reports and may be displayed within SMS or Mobile App authentication messages. See the help file for more information on the Submit URL. 8. Set the Request format to POST or GET. 9. Enter the Username variable (ctl00$contentplaceholder1$usernametextbox) and Password variable (ctl00$contentplaceholder1$passwordtextbox). If your form-based login page displays a domain textbox, enter the Domain variable as well. You may need to navigate to the login page in a web browser, right-click on the page and select View Source to find the names of the input boxes within the login page. 10. Check the Require Azure Multi-Factor Authentication user match box if all users have been or will be imported into the Server and subject to two-step verification. If a significant number of users have not yet been imported into the Server and/or will be exempt from two-step verification, leave the box unchecked. 11. Click the Advanced button to review advanced settings. You can configure settings including the ability to select a custom denial page file, to cache successful authentications to the website using cookies, and to select how to authenticate the primary credentials. 12. Since the ADFS proxy server is not likely to be joined to the domain, you can use LDAP to connect to your domain controller for user import and pre-authentication. In the Advanced Form-Based Website dialog box, click the Primary Authentication tab and select LDAP Bind for the Pre-authentication Authentication type. 13. When complete, click the OK button to return to the Add Form-Based Website dialog box. See the help file for more information on the advanced settings. 14. Click the OK button to close the dialog box. 15. Once the URL and page variables have been detected or entered, the website data displays in the Form-Based panel. 16. Click the Native Module tab and select the server, the website that the ADFS proxy is running under (like Default Web Site ) or the ADFS proxy application (like ls under adfs ) to enable the IIS plug-in at the desired level. 17. Click the Enable IIS authentication box at the top of the screen. 18. The IIS authentication is now enabled. Configure directory integration You enabled IIS authentication, but to perform the pre-authentication to your Active Directory (AD) via LDAP you must configure the LDAP connection to the domain controller. 1. Click the Directory Integration icon. 2. On the Settings tab, select the Use specific LDAP configuration radio button.

96 3. Click the Edit button. 4. In the Edit LDAP Configuration dialog box, populate the fields with the information required to connect to the AD domain controller. Descriptions of the fields are included in the table below. This information is also included in the Azure Multi-Factor Authentication Server help file. 5. Test the LDAP connection by clicking the Test button. 6. If the LDAP connection test was successful, click the OK button. Configure company settings

97 1. Next, click the Company Settings icon and select the Username Resolution tab. 2. Select the Use LDAP unique identifier attribute for matching usernames radio button. 3. If users enter their username in domain\username format, the Server needs to be able to strip the domain off the username when it creates the LDAP query. That can be done through a registry setting. 4. Open the registry editor and go to HKEY_LOCAL_MACHINE/SOFTWARE/Wow6432Node/Positive Networks/PhoneFactor on a 64-bit server. If on a 32-bit server, take the Wow6432Node out of the path. Create a DWORD registry key called UsernameCxz_stripPrefixDomain and set the value to 1. Azure Multi- Factor Authentication is now securing the ADFS proxy. Ensure that users have been imported from Active Directory into the Server. See the Trusted IPs section if you would like to whitelist internal IP addresses so that two-step verification is not required when signing in to the website from those locations. AD FS 2.0 Direct without a proxy You can secure AD FS when the AD FS proxy is not used. Install the Azure Multi-Factor Authentication Server on the AD FS server and configure the Server per the following steps: 1. Within the Azure Multi-Factor Authentication Server, click the IIS Authentication icon in the left menu. 2. Click the HTTP tab. 3. Click the Add button. 4. In the Add Base URL dialogue box, enter the URL for the ADFS website where HTTP authentication is performed (like into the Base URL field. Then, enter an Application name (optional). The Application name appears in Azure Multi-Factor Authentication reports and may be displayed within SMS or Mobile App authentication messages. 5. If desired, adjust the Idle timeout and Maximum session times. 6. Check the Require Azure Multi-Factor Authentication user match box if all users have been or will be imported into the Server and subject to two-step verification. If a significant number of users have not yet been imported into the Server and/or will be exempt from two-step verification, leave the box unchecked. For additional information on this feature, see the help file.
, or the ADFS application (like ls under adfs ) to enable the IIS plug-in at the desired level. 10.")
98 7. Check the cookie cache box if desired. 8. Click the OK button. 9. Click the Native Module tab and select the server, the website (like Default Web Site ), or the ADFS application (like ls under adfs ) to enable the IIS plug-in at the desired level. 10. Click the Enable IIS authentication box at the top of the screen. Azure Multi-Factor Authentication is now securing ADFS. Ensure that users have been imported from Active Directory into the Server. See the Trusted IPs section if you would like to whitelist internal IP addresses so that two-step verification is not required when signing in to the website from those locations. Trusted IPs Trusted IPs allow users to bypass Azure Multi-Factor Authentication for website requests originating from specific IP addresses or subnets. For example, you may want to exempt users from two-step verification when they sign in from the office. For this, you would specify the office subnet as a Trusted IPs entry. To configure trusted IPs 1. In the IIS Authentication section, click the Trusted IPs tab. 2. Click the Add button. 3. When the Add Trusted IPs dialog box appears, select one of the Single IP, IP range, or Subnet radio buttons. 4. Enter the IP address, range of IP addresses, or subnet that should be whitelisted. If entering a subnet, select the appropriate Netmask and click the OK button. The trusted IP has now been added.
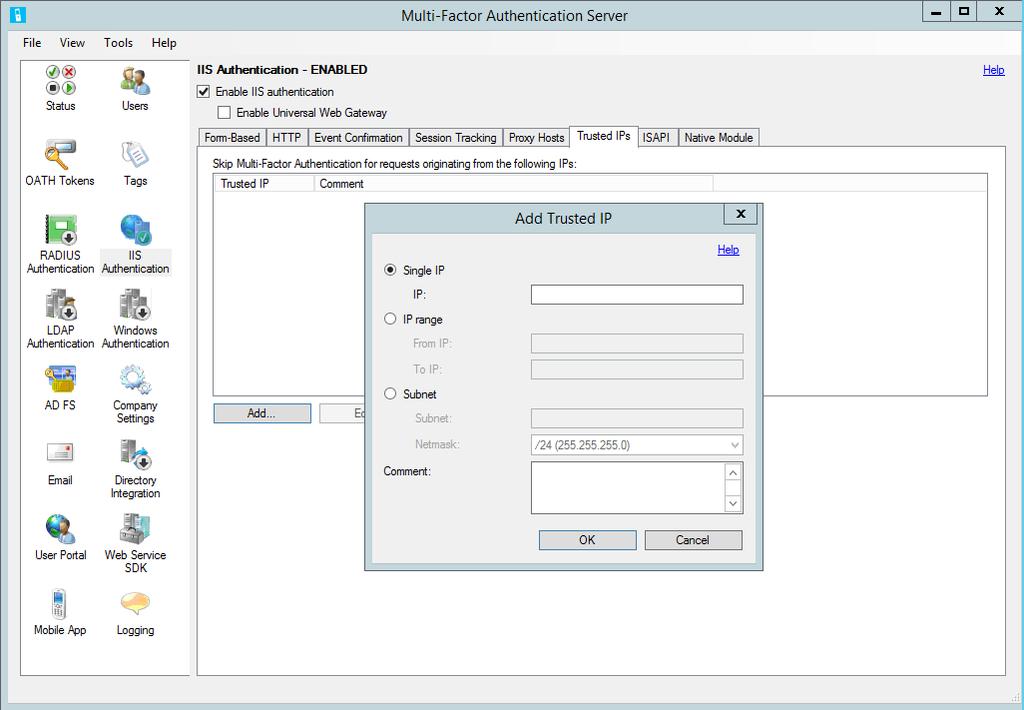
99
100 Secure your cloud and on-premises resources using Azure Multi-Factor Authentication Server with AD FS in Windows Server 2012 R2 1/17/ min to read Edit on GitHub If you use Active Directory Federation Services (AD FS) and want to secure cloud or on-premises resources, you can configure Azure Multi-Factor Authentication Server to work with AD FS. This configuration triggers two-step verification for high-value endpoints. In this article, we discuss using Azure Multi-Factor Authentication Server with AD FS in Windows Server 2012 R2. For more information, read about how to secure cloud and on-premises resources by using Azure Multi-Factor Authentication Server with AD FS 2.0. Secure Windows Server 2012 R2 AD FS with Azure Multi-Factor Authentication Server When you install Azure Multi-Factor Authentication Server, you have the following options: Install Azure Multi-Factor Authentication Server locally on the same server as AD FS Install the Azure Multi-Factor Authentication adapter locally on the AD FS server, and then install Multi-Factor Authentication Server on a different computer Before you begin, be aware of the following information: You are not required to install Azure Multi-Factor Authentication Server on your AD FS server. However, you must install the Multi-Factor Authentication adapter for AD FS on a Windows Server 2012 R2 that is running AD FS. You can install the server on a different computer if it is a supported version and you install the AD FS adapter separately on your AD FS federation server. See the following procedures to learn how to install the adapter separately. When the MFA Server AD FS adapter was designed, it was anticipated that AD FS could pass the name of the relying party to the adapter. Then, the relying party name could be used as an application name. However, this turned out not to be the case. If your organization is using text message or mobile app verification methods, the strings defined in Company Settings contain a placeholder, <$application_name$>. This placeholder is not automatically replaced when you use the AD FS adapter. We recommend that you remove the placeholder from the appropriate strings when you secure AD FS. The account that you use to sign in must have user rights to create security groups in your Active Directory service. The Multi-Factor Authentication AD FS adapter installation wizard creates a security group called PhoneFactor Admins in your instance of Active Directory. It then adds the AD FS service account of your federation service to this group. We recommend that you verify on your domain controller that the PhoneFactor Admins group is indeed created and that the AD FS service account is a member of this group. If necessary, manually add the AD FS service account to the PhoneFactor Admins group on your domain controller. For information about installing the Web Service SDK with the user portal, read about deploying the user portal for Azure Multi-Factor Authentication Server. Install Azure Multi-Factor Authentication Server locally on the AD FS server 1. Download and install Azure Multi-Factor Authentication Server on your AD FS server. For installation information, read about getting started with Azure Multi-Factor Authentication Server.


101 2. In the Azure Multi-Factor Authentication Server management console, click the AD FS icon, and then select the options Allow user enrollment and Allow users to select method. 3. Select any additional options you'd like to specify for your organization. 4. Click Install AD FS Adapter. 5. If the Active Directory window is displayed, that means two things. Your computer is joined to a domain, and the Active Directory configuration for securing communication between the AD FS adapter and the Multi-Factor Authentication service is incomplete. Click Next to automatically complete this configuration, or select the Skip automatic Active Directory configuration and configure settings manually check box, and then click Next. 6. If the Local Group windows is displayed, that means two things. Your computer is not joined to a domain, and the local group configuration for securing communication between the AD FS adapter and the Multi-Factor Authentication service is incomplete. Click Next to automatically complete this configuration, or select the Skip automatic Local Group configuration and configure settings manually check box, and then click Next. 7. In the installation wizard, click Next. Azure Multi-Factor Authentication Server creates the PhoneFactor Admins group and adds the AD FS service account to the PhoneFactor Admins group.

102 8. On the Launch Installer page, click Next. 9. In the Multi-Factor Authentication AD FS adapter installer, click Next. 10. Click Close when the installation is finished. 11. When the adapter has been installed, you must register it with AD FS. Open Windows PowerShell and run the following command: C:\Program Files\Multi-Factor Authentication Server\Register-MultiFactorAuthenticationAdfsAdapter.ps1 12. To use your newly registered adapter, edit the global authentication policy in AD FS. In the AD FS management console, go to the Authentication Policies node. In the Multi-factor Authentication section, click the Edit link next to the Global Settings section. In the Edit Global Authentication Policy window, select Multi- Factor Authentication as an additional authentication method, and then click OK. The adapter is registered as WindowsAzureMultiFactorAuthentication. Restart the AD FS service for the registration to take effect. At this point, Multi-Factor Authentication Server is set up to be an additional authentication provider to use with AD FS. Install a standalone instance of the AD FS adapter by using the Web Service SDK 1. Install the Web Service SDK on the server that is running Multi-Factor Authentication Server. 2. Copy the following files from the \Program Files\Multi-Factor Authentication Server directory to the server on which you plan to install the AD FS adapter:
103 MultiFactorAuthenticationAdfsAdapterSetup64.msi Register-MultiFactorAuthenticationAdfsAdapter.ps1 Unregister-MultiFactorAuthenticationAdfsAdapter.ps1 MultiFactorAuthenticationAdfsAdapter.config 3. Run the MultiFactorAuthenticationAdfsAdapterSetup64.msi installation file. 4. In the Multi-Factor Authentication AD FS adapter installer, click Next to start the installation. 5. Click Close when the installation is finished. Edit the MultiFactorAuthenticationAdfsAdapter.config file Follow these steps to edit the MultiFactorAuthenticationAdfsAdapter.config file: 1. Set the UseWebServiceSdk node to true. 2. Set the value for WebServiceSdkUrl to the URL of the Multi-Factor Authentication Web Service SDK. For example: Where certificatename is the name of your certificate. 3. Edit the Register-MultiFactorAuthenticationAdfsAdapter.ps1 script by adding -ConfigurationFilePath <path> to the end of the Register-AdfsAuthenticationProvider command, where <path> is the full path to the MultiFactorAuthenticationAdfsAdapter.config file. Configure the Web Service SDK with a username and password There are two options for configuring the Web Service SDK. The first is with a username and password, the second is with a client certificate. Follow these steps for the first option, or skip ahead for the second. 1. Set the value for WebServiceSdkUsername to an account that is a member of the PhoneFactor Admins security group. Use the <domain>\<user name> format. 2. Set the value for WebServiceSdkPassword to the appropriate account password. Configure the Web Service SDK with a client certificate If you don't want to use a username and password, follow these steps to configure the Web Service SDK with a client certificate. 1. Obtain a client certificate from a certificate authority for the server that is running the Web Service SDK. Learn how to obtain client certificates. 2. Import the client certificate to the local computer personal certificate store on the server that is running the Web Service SDK. Make sure that the certificate authority's public certificate is in Trusted Root Certificates certificate store. 3. Export the public and private keys of the client certificate to a.pfx file. 4. Export the public key in Base64 format to a.cer file. 5. In Server Manager, verify that the Web Server (IIS)\Web Server\Security\IIS Client Certificate Mapping Authentication feature is installed. If it is not installed, select Add Roles and Features to add this feature. 6. In IIS Manager, double-click Configuration Editor in the website that contains the Web Service SDK virtual directory. It is important to do this at the website level and not at the virtual directory level. 7. Go to the system.webserver/security/authentication/iisclientcertificatemappingauthentication section. 8. Set enabled to true. 9. Set onetoonecertificatemappingsenabled to true. 10. Click the... button next to onetoonemappings, and then click the Add link. 11. Open the Base64.cer file you exported earlier. Remove -----BEGIN CERTIFICATE-----, -----END CERTIFICATE-----, and any line breaks. Copy the resulting string. 12. Set certificate to the string copied in the preceding step.
104 13. Set enabled to true. 14. Set username to an account that is a member of the PhoneFactor Admins security group. Use the <domain>\ <user name> format. 15. Set the password to the appropriate account password, and then close Configuration Editor. 16. Click the Apply link. 17. In the Web Service SDK virtual directory, double-click Authentication. 18. Verify that ASP.NET Impersonation and Basic Authentication are set to Enabled, and that all other items are set to Disabled. 19. In the Web Service SDK virtual directory, double-click SSL Settings. 20. Set Client Certificates to Accept, and then click Apply. 21. Copy the.pfx file you exported earlier to the server that is running the AD FS adapter. 22. Import the.pfx file to the local computer personal certificate store. 23. Right-click and select Manage Private Keys, and then grant read access to the account you used to sign in to the AD FS service. 24. Open the client certificate and copy the thumbprint from the Details tab. 25. In the MultiFactorAuthenticationAdfsAdapter.config file, set WebServiceSdkCertificateThumbprint to the string copied in the previous step. Finally, to register the adapter, run the \Program Files\Multi-Factor Authentication Server\Register- MultiFactorAuthenticationAdfsAdapter.ps1 script in PowerShell. The adapter is registered as WindowsAzureMultiFactorAuthentication. Restart the AD FS service for the registration to take effect. Related topics For troubleshooting help, see the Azure Multi-Factor Authentication FAQs
105 LDAP Authentication and Azure Multi-Factor Authentication Server 1/17/ min to read Edit on GitHub By default, the Azure Multi-Factor Authentication Server is configured to import or synchronize users from Active Directory. However, it can be configured to bind to different LDAP directories, such as an ADAM directory, or specific Active Directory domain controller. When connected to a directory via LDAP, the Azure Multi-Factor Authentication Server can be configured to act as an LDAP proxy to perform authentications. It also allows for the use of LDAP bind as a RADIUS target, for pre-authentication of users with IIS Authentication, or for primary authentication in the Azure MFA user portal. To use Azure Multi-Factor Authentication as an LDAP proxy, insert the Azure Multi-Factor Authentication Server between the LDAP client (e.g. VPN appliance, application) and the LDAP directory server. The Azure Multi-Factor Authentication Server must be configured to communicate with both the client servers and the LDAP directory. In this configuration, the Azure Multi-Factor Authentication Server accepts LDAP requests from client servers and applications and forwards them to the target LDAP directory server to validate the primary credentials. If the response from the LDAP directory shows that they primary credentials are valid, Azure Multi-Factor Authentication performs a second identity verification and sends a response back to the LDAP client. The entire authentication succeeds only if both the LDAP server authentication and the second-step verification succeed. LDAP Authentication Configuration To configure LDAP authentication, install the Azure Multi-Factor Authentication Server on a Windows server. Use the following procedure: Add an LDAP client 1. In the Azure Multi-Factor Authentication Server select the LDAP Authentication icon in the left menu. 2. Check the Enable LDAP Authentication checkbox. 3. On the Clients tab, change the TCP port and SSL port if the Azure Multi-Factor Authentication LDAP service should bind to non-standard ports to listen for LDAP requests. 4. If you plan to use LDAPS from the client to the Azure Multi-Factor Authentication Server, an SSL certificate must be installed on the server that the Server is running on. Click the Browse button next to the SSL certificate box and select the installed certificate that will be used for the secure connection. 5. Click Add 6. In the Add LDAP Client dialog box, enter the IP address of the appliance, server, or application that will authenticate to the Server and an Application name (optional). The Application name appears in Azure Multi- Factor Authentication reports and may be displayed within SMS or Mobile App authentication messages. 7. Check the Require Azure Multi-Factor Authentication user match box if all users have been or will be imported into the Server and subject to two-step verification. If a significant number of users have not yet been imported into the Server and/or will be exempt from two-step verification, leave the box unchecked. See the help file for additional information on this feature. Repeat these steps to add additional LDAP clients. Configure the LDAP directory connection
106 When the Azure Multi-Factor Authentication is configured to receive LDAP authentications, it must proxy those authentications to the LDAP directory. Therefore, the Target tab only displays a single, grayed out option to use an LDAP target. 1. To configure the LDAP directory connection, click the Directory Integration icon. 2. On the Settings tab, select the Use specific LDAP configuration radio button. 3. Select Edit 4. In the Edit LDAP Configuration dialog box, populate the fields with the information required to connect to the LDAP directory. Descriptions of the fields are included in the Azure Multi-Factor Authentication Server help file. 5. Test the LDAP connection by clicking the Test button. 6. If the LDAP connection test was successful, click the OK button. 7. Click the Filters tab. The Server is pre-configured to load containers, security groups, and users from Active Directory. If binding to a different LDAP directory, you probably need to edit the filters displayed. Click the Help link for more information on filters. 8. Click the Attributes tab. The Server is pre-configured to map attributes from Active Directory. 9. If you're binding to a different LDAP directory or to change the pre-configured attribute mappings, click Edit 10. In the Edit Attributes dialog box, modify the LDAP attribute mappings for your directory. Attribute names can be typed in or selected by clicking the button next to each field. Click the Help link for more information on attributes. 11. Click the OK button. 12. Click the Company Settings icon and select the Username Resolution tab. 13. If you're connecting to Active Directory from a domain-joined server, leave the Use Windows security identifiers (SIDs) for matching usernames radio button selected. Otherwise, select the Use LDAP unique identifier attribute for matching usernames radio button. When the Use LDAP unique identifier attribute for matching usernames radio button is selected, the Azure Multi-Factor Authentication Server attempts to resolve each username to a unique identifier in the LDAP directory. An LDAP search is performed on the Username attributes defined in the Directory Integration -> Attributes tab.
107 When a user authenticates, the username is resolved to the unique identifier in the LDAP directory and the unique identifier is used for matching the user in the Azure Multi-Factor Authentication data file. This allows for caseinsensitive comparisons, as well as long and short username formats. After you complete these steps, the MFA Server begins listening on the configured ports for LDAP access requests from the configured clients, and is set to proxy those requests to the LDAP directory for authentication. LDAP Client Configuration To configure the LDAP client, use the guidelines: Configure your appliance, server, or application to authenticate via LDAP to the Azure Multi-Factor Authentication Server as though it were your LDAP directory. Use the same settings that you would normally use to connect directly to your LDAP directory, except for the server name or IP address, which will be that of the Azure Multi-Factor Authentication Server. Configure the LDAP timeout to seconds so that there is time to validate the user s credentials with the LDAP directory, perform the second-step verification, receive their response, and then respond to the LDAP access request. If using LDAPS, the appliance or server making the LDAP queries must trust the SSL certificate installed on the Azure Multi-Factor Authentication Server.
108 RADIUS Authentication and Azure Multi-Factor Authentication Server 1/17/ min to read Edit on GitHub The RADIUS Authentication section allows you to enable and configure RADIUS authentication for the Azure Multi- Factor Authentication Server. RADIUS is a standard protocol to accept authentication requests and to process those requests. The Azure Multi-Factor Authentication Server acts as a RADIUS server and is inserted between your RADIUS client (e.g. VPN appliance) and your authentication target, which could be Active Directory (AD), an LDAP directory or another RADIUS server, in order to add Azure Multi-Factor Authentication. For Azure Multi-Factor Authentication to function, you must configure the Azure Multi-Factor Authentication Server so that it can communicate with both the client servers and the authentication target. The Azure Multi-Factor Authentication Server accepts requests from a RADIUS client, validates credentials against the authentication target, adds Azure Multi-Factor Authentication, and sends a response back to the RADIUS client. The entire authentication will succeed only if the both the primary authentication and the Azure Multi-Factor Authentication succeed. NOTE The MFA Server only supports PAP (password authentication protocol) and MSCHAPv2 (Microsoft's Challenge-Handshake Authentication Protocol) RADIUS protocols when acting as a RADIUS server. Other protocols such as EAP (extensible authentication protocol) can be used when the MFA server acts as a RADIUS proxy to another RADIUS server which supports that protocol such as Microsoft NPS. When using other protocols in this configuration, one-way SMS and OATH tokens will not work since the MFA Server is not able to initiate a successful RADIUS Challenge response using that protocol.
109 RADIUS Authentication Configuration To configure RADIUS authentication, install the Azure Multi-Factor Authentication Server on a Windows server. If you have an Active Directory environment, the server should be joined to the domain inside the network. Use the following procedure to configure the Azure Multi-Factor Authentication Server: 1. Within the Azure Multi-Factor Authentication Server click the RADIUS Authentication icon in the left menu. 2. Check the Enable RADIUS authentication checkbox. 3. On the Clients tab change the Authentication port(s) and Accounting port(s) if the Azure Multi-Factor Authentication RADIUS service should bind to non-standard ports to listen for RADIUS requests from the clients that will be configured. 4. Click Add button. 5. In the Add RADIUS Client dialog box, enter the IP address of the appliance/server that will authenticate to the Azure Multi-Factor Authentication Server, an Application name (optional) and a Shared secret. The shared secret will need to be the same on both the Azure Multi-Factor Authentication Server and appliance/server. The Application name appears in Azure Multi-Factor Authentication reports and may be displayed within SMS or Mobile App authentication messages. 6. Check the Require Multi-Factor Authentication user match box if all users have been or will be imported into the Server and subject to multi-factor authentication. If a significant number of users have not yet been imported into the Server and/or will be exempt from multi-factor authentication, leave the box unchecked. See the help file for additional information on this feature. 7. Check the Enable fallback OATH token box if users will use the Azure Multi-Factor Authentication mobile app authentication and you want to use OATH passcodes as a fallback authentication to the out- of-band phone call, SMS or push notification. 8. Click the OK button. 9. You may repeat steps 4 through 8 to add additional RADIUS clients. 10. Click the Target tab. 11. If the Azure Multi-Factor Authentication Server is installed on a domain-joined server in an Active Directory environment, select Windows domain. 12. If users should be authenticated against an LDAP directory, select LDAP bind. When using LDAP bind, you must click the Directory Integration icon and edit the LDAP configuration on the Settings tab so that the Server can bind to your directory. Instructions for configuring LDAP can be found in the LDAP Proxy configuration guide. 13. If users should be authenticated against another RADIUS server, select RADIUS server(s). 14. Configure the server that the Server will proxy the RADIUS requests to by clicking the Add button. 15. In the Add RADIUS Server dialog box enter the IP address of the RADIUS server and a Shared secret. The shared secret will need to be the same on both the Azure Multi-Factor Authentication Server and RADIUS server. Change the Authentication port and Accounting port if different ports are used by the RADIUS server. 16. Click the OK button. 17. You must add the Azure Multi-Factor Authentication Server as a RADIUS client in the other RADIUS server so that it will process access requests sent to it from the Azure Multi-Factor Authentication Server. You must use the same shared secret configured in the Azure Multi-Factor Authentication Server. 18. You may repeat this step to add additional RADIUS servers and configure the order in which the Server should call them with the Move Up and Move Down buttons. This completes the Azure Multi-Factor Authentication Server configuration. The Server is now listening on the configured ports for RADIUS access requests from the configured clients. RADIUS Client Configuration To configure the RADIUS client, use the guidelines: Configure your appliance/server to authenticate via RADIUS to the Azure Multi-Factor Authentication Server s IP
110 address, which will act as the RADIUS server. Use the same shared secret that was configured above. Configure the RADIUS timeout to seconds so that there is time to validate the user s credentials, perform the multi-factor authentication, receive their response and then respond to the RADIUS access request.
111 Directory integration between Azure MFA Server and Active Directory 1/17/ min to read Edit on GitHub The Directory Integration section allows you to configure the server to integrate with Active Directory or another LDAP directory. It allows you to configure attributes to match the directory schema and set up automatic synchronization of users. Settings By default, the Azure Multi-Factor Authentication Server is configured to import or synchronize users from Active Directory. The tab allows you to override the default behavior and to bind to a different LDAP directory, an ADAM directory, or specific Active Directory domain controller. It also provides for the use of LDAP Authentication to proxy LDAP or for LDAP Bind as a RADIUS target, pre-authentication for IIS Authentication, or primary authentication for User Portal. The following table describes the individual settings. FEATURE Use Active Directory DESCRIPTION Select the Use Active Directory option to use Active Directory for importing and synchronization. This is the default setting. Note: The computer must be joined to a domain and you must be signed on with a domain account for Active Directory integration to work properly.
112 FEATURE Include trusted domains Use specific LDAP configuration Edit button Use attribute scope queries DESCRIPTION Check the Include Trusted Domains checkbox to have the agent attempt to connect to domains trusted by the current domain, another domain in the forest, or domains involved in a forest trust. When not importing or synchronizing users from any of the trusted domains, uncheck the checkbox to improve performance. The default is checked. Select the Use LDAP option to use the LDAP settings specified for importing and synchronization. Note: When Use LDAP is selected, the user interface changes references from Active Directory to LDAP. The Edit button allows the current LDAP configuration settings to modified. Indicates whether attribute scope queries should be used. Attribute scope queries allow for efficient directory searches qualifying records based on the entries in another record's attribute. The Azure Multi-Factor Authentication Server uses attribute scope queries to efficiently query the users that are a member of a security group. Note: There are some cases where attribute scope queries are supported, but shouldn't be used. For example, Active Directory can have issues with attribute scope queries when a security group contains members from more than one domain. In this case the checkbox should be unchecked. The following table describes the LDAP configuration settings. FEATURE Server Base DN DESCRIPTION Enter the hostname or IP address of the server running the LDAP directory. A backup server may also be specified separated by a semi-colon. Note: When Bind Type is SSL, a fully-qualified hostname is generally required. Enter the distinguished name of the base directory object from which all directory queries will start. For example, dc=abc,dc=com.
113 FEATURE Bind type - Queries DESCRIPTION Select the appropriate bind type for use when binding to search the LDAP directory. This is used for imports, synchronization, and username resolution. Anonymous - An anonymous bind will be performed. Bind DN and Bind Password will not be used. This will only work if the LDAP directory allows anonymous binding and permissions allow the querying of the appropriate records and attributes. Simple - Bind DN and Bind Password will be passed as plain text to bind to the LDAP directory. This should only be used for testing purposes to verify that the server can be reached and that the bind account has the appropriate access. It is recommended that SSL be used instead after the appropriate cert has been installed. SSL - Bind DN and Bind Password will be encrypted using SSL to bind to the LDAP directory. This requires that a cert be installed locally that the LDAP directory trusts. Windows - Bind Username and Bind Password will be used to securely connect to an Active Directory domain controller or ADAM directory. If Bind Username is left blank, the logged-on user's account will be used to bind. Bind type - Authentications Bind DN or Bind username Select the appropriate bind type for use when performing LDAP bind authentication. See the bind type descriptions under Bind type - Queries. For example, this allows for Anonymous bind to be used for queries while SSL bind is used to secure LDAP bind authentications. Enter the distinguished name of the user record for the account to use when binding to the LDAP directory. The bind distinguished name is only used when Bind Type is Simple or SSL. Enter the username of the Windows account to use when binding to the LDAP directory when Bind Type is Windows. If left blank, the logged-on user's account will be used to bind. Bind Password Enter the bind password for the Bind DN or username being used to bind to the LDAP directory. To configure the password for the Multi-Factor Auth Server AdSync Service, synchronization must be enabled and the service must be running on the local machine. The password will be saved in the Windows Stored Usernames and Passwords under the account the Multi-Factor Auth Server AdSync Service is running as. The password will also be saved under the account the Multi-Factor Auth Server user interface is running as and under the account the Multi-Factor Auth Server Service is running as. Note: Since the password is only stored in the local server's Windows Stored Usernames and Passwords, this step will need to be done on each Multi-Factor Auth Server that needs access to the password.
114 FEATURE Query size limit Test button DESCRIPTION Specify the size limit for the maximum number of users that a directory search will return. This limit should match the configuration on the LDAP directory. For large searches where paging is not supported, import and synchronization will attempt to retrieve users in batches. If the size limit specified here is larger than the limit configured on the LDAP directory, some users may be missed. Click the Test button to test binding to the LDAP server. Filters Note: The Use LDAP option does not need to be selected in order to test binding. This allows the binding to be tested prior to using the LDAP configuration. Filters allow you to set criteria to qualify records when performing a directory search. By setting the filter you can scope the objects you want to synchronize. Azure Multi-Factor Authentication has the following 3 options. Container filter - Specify the filter criteria used to qualify container records when performing a directory search. For Active Directory and ADAM, ( (objectclass=organizationalunit)(objectclass=container)) is generally used. For other LDAP directories, filter criteria that qualifies each type of container object should be used depending on the directory schema. Note: If left blank, ((objectclass=organizationalunit)(objectclass=container)) will be used by default. Security group filter - Specify the filter criteria used to qualify security group records when performing a directory search. For Active Directory and ADAM, (&(objectcategory=group) (grouptype: := )) is generally used. For other LDAP directories, filter criteria
) will be used by default. User filter - Specify the filter criteria used to qualify user records when performing a directory search.")
115 that qualifies each type of security group object should be used depending on the directory schema. Note: If left blank, (&(objectcategory=group)(grouptype: := )) will be used by default. User filter - Specify the filter criteria used to qualify user records when performing a directory search. For Active Directory and ADAM, (&(objectclass=user)(objectcategory=person)) is generally used. For other LDAP directories, (objectclass=inetorgperson) or something similar should be used depending on the directory schema. Note: If left blank, (&(objectcategory=person)(objectclass=user)) will be used by default. Attributes Attributes may be customized as necessary for a specific directory. This allows you to add custom attributes and fine tune the synchronization to only the attributes that you need. The value for each attribute field should be the name of the attribute as defined in the directory schema. Use the table below for additional information. FEATURE Unique identifier DESCRIPTION Enter the attribute name of the attribute that serves as the unique identifier of container, security group, and user records. In Active Directory, this is usually objectguid. In other LDAP implementations, it may be entryuuid or something similar. The default is objectguid.... (Select Attribute) buttons Each attribute field has a "..." button next to it that will display the Select Attribute dialog allowing an attribute to be selected from a list. Select Attribute dialog. Note: Attributes may be entered manually and are not required to match an attribute in the attribute list.
116 FEATURE Unique identifier type DESCRIPTION Select the type of the unique identifier attribute. In Active Directory, the objectguid attribute is of type GUID. In other LDAP implementations, it may be of type ASCII Byte Array or String. The default is GUID. Note: It is important to set this correctly since Synchronization Items are referenced by their Unique Identifier and the Unique Identifier Type is used to directly find the object in the directory. Setting this to String when the directory actually stores the value as a byte array of ASCII characters will prevent synchronization from functioning properly. Distinguished name Enter the attribute name of the attribute that contains the distinguished name for each record. In Active Directory, this is usually distinguishedname. In other LDAP implementations, it may be entrydn or something similar. The default is distinguishedname. Note: If an attribute containing just the distinguished name doesn't exist, the adspath attribute may be used. The "LDAP:///" portion of the path will be automatically stripped off leaving just the distinguished name of the object. Container name Enter the attribute name of the attribute that contains the name in a container record. The value of this attribute will be displayed in the Container Hierarchy when importing from Active Directory or adding synchronization items. The default is name. Note: If different containers use different attributes for their names, multiple container name attributes may be specified in separated by semi-colons. The first container name attribute found on a container object will be used to display its name. Security group name Users Username First name Last name Enter the attribute name of the attribute that contains the name in a security group record. The value of this attribute will be displayed in the Security Group list when importing from Active Directory or adding synchronization items. The default is name. The following attributes are used for searching for, displaying, importing, and synchronizing user information from the directory. Enter the attribute name of the attribute that contains the username in a user record. The value of this attribute will be used as the Multi-Factor Auth Server username. A second attribute may be specified as a backup to the first. The second attribute will only be used if the first attribute does not contain a value for the user. The defaults are userprincipalname and samaccountname. Enter the attribute name of the attribute that contains the first name in a user record. The default is givenname. Enter the attribute name of the attribute that contains the last name in a user record. The default is sn.
117 FEATURE address User group Description Voice call language SMS text language Phone app language OATH token language Phones Business Home Pager Mobile Fax IP phone DESCRIPTION Enter the attribute name of the attribute that contains the address in a user record. address will be used to send welcome and update s to the user. The default is mail. Enter the attribute name of the attribute that contains the user group in a user record. User group can be used to filter users in the agent and on reports in the Multi-Factor Auth Server Management Portal. Enter the attribute name of the attribute that contains the description in a user record. Description is only used for searching. The default is description. Enter the attribute name of the attribute that contains the short name of the language to use for voice calls for the user. Enter the attribute name of the attribute that contains the short name of the language to use for SMS text messages for the user. Enter the attribute name of the attribute that contains the short name of the language to use for phone app text messages for the user. Enter the attribute name of the attribute that contains the short name of the language to use for OATH token text messages for the user. The following attributes are used to import or synchronize user phone numbers. If an attribute name is not specified for phone type, the phone type will not be available when importing from Active Directory or adding synchronization items. Enter the attribute name of the attribute that contains the business phone number in a user record. The default is telephonenumber. Enter the attribute name of the attribute that contains the home phone number in a user record. The default is homephone. Enter the attribute name of the attribute that contains the pager number in a user record. The default is pager. Enter the attribute name of the attribute that contains the mobile phone number in a user record. The default is mobile. Enter the attribute name of the attribute that contains the fax number in a user record. The default is facsimiletelephonenumber. Enter the attribute name of the attribute that contains the IP phone number in a user record. The default is ipphone.

118 FEATURE Custom DESCRIPTION Enter the attribute name of the attribute that contains a custom phone number in a user record. The default is blank. Extension Enter the attribute name of the attribute that contains the phone number extension in a user record. The value of the extension field will be used as the extension to the primary phone number only. The default is blank. Note: If the Extension attribute is not specified, extensions can be included as part of the phone attribute. The extension should be preceded with an 'x' so it can be parsed. For example x890 would result in as the phone number and 890 as the extension. Restore Defaults button Click the Restore Defaults button to return all attributes back to their default value. The defaults should work properly with the normal Active Directory or ADAM schema. To edit attributes, simply click the edit button on the Attributes tab. This will bring up a windows that allows you to edit the attributes. Synchronization Synchronization keeps the Azure Multi-Factor user database synchronized with the users in Active Directory or another Lightweight Directory Access Protocol (LDAP) Lightweight Directory Access Protocol directory. The process is similar to importing users manually from Active Directory, but periodically polls for Active Directory user and security group changes to process. It also provides for disabling or removing users removed from a container or security group and removing users deleted from Active Directory.
119 The Multi-Factor Auth ADSync service is a Windows service that performs the periodic polling of Active Directory. This is not to be confused with Azure AD Sync or Azure AD Connect. the Multi-Factor Auth ADSync, although built on a similar code base, is specific to the Azure Multi-Factor Authentication Server. It is installed in a Stopped state and is started by the Multi-Factor Auth Server service when configured to run. If you have a multi-server Multi- Factor Auth Server configuration, the Multi-Factor Auth ADSync may only be run on a single server. The Multi-Factor Auth ADSync service uses the DirSync LDAP server extension provided by Microsoft to efficiently poll for changes. This DirSync control caller must have the "directory get changes" right and DS-Replication-Get- Changes extended control access right. By default, these rights are assigned to the Administrator and LocalSystem accounts on domain controllers. The Multi-Factor Auth AdSync service is configured to run as LocalSystem by default. Therefore it is simplest to run the service on a domain controller. The service can run as an account with lesser permissions if you configure it to always perform a full synchronization. This is less efficient, but requires less account privileges. If configured to use LDAP and the LDAP directory supports the DirSync control, then polling for user and security group changes will work the same as it does with Active Directory. If the LDAP directory does not support the DirSync control, then a full synchronization will be performed during each cycle. Use the table below for additional information on each of the individual settings on the Synchronization tab. FEATURE Enable synchronization with Active Directory DESCRIPTION When checked, the Multi-Factor Auth Server service will be started to periodically poll Active Directory for changes. Note: At least one Synchronization Item must be added and a Synchronize Now must be performed before the Multi-Factor Auth Server service will start processing changes.
120 FEATURE DESCRIPTION Synchronize every Specify the time interval the Multi-Factor Auth Server service will wait between polling and processing changes. Note: The interval specified is the time between the beginning of each cycle. If the time processing changes exceeds the interval, the service will poll again immediately. Remove users no longer in Active Directory Always perform a full synchronization When checked, the Multi-Factor Auth Server service will process Active Directory deleted user tombstones and remove the related Multi-Factor Auth Server user. When checked, the Multi-Factor Auth Server service will always perform a full synchronization. When unchecked, the Multi-Factor Auth Server service will perform an incremental synchronization by only querying users that have changed. The default is unchecked. Note: When unchecked, an incremental synchronization can only be performed when the directory supports the DirSync control and the account being used to bind to the directory has the appropriate permissions to perform DirSync incremental queries. If the account does not have the appropriate permissions or multiple domains are involved in the synchronization, perform a full synchronization is recommended. Require administrator approval when more than X users will be disabled or removed Synchronization items can be configured to disable or remove users who are no longer a member of the item's container or security group. As a safeguard, administrator approval can be required when the number of users to disable or remove exceeds a threshold. When checked, approval will be required for specified threshold. The default is 5 and the range is 1 to 999. Approval is facilitated by first sending an notification to administrators. The notification gives instructions for reviewing and approving the disabling and removal of users. When the Multi-Factor Auth Server user interface is launched, it will prompt for approval. The Synchronize Now button allows you to run a full synchronization for the synchronization items specified. A full synchronization is required whenever synchronization items are added, modified, removed, or reordered. It is also required before the Multi-Factor Auth AdSync service will be operational since it sets the starting point from which the service will poll for incremental changes. If changes have been made to synchronization items and a full synchronization has not been performed, you will be prompted to Synchronize Now when navigating to another section or when closing the user interface. The Remove button allows the administrator to delete one or more synchronization items from the Multi-Factor Auth Server synchronization item list. WARNING Once a synchronization item record has been removed, it cannot be recovered. You will need to re-add the synchronization item record if you deleted it by mistake. The synchronization item or synchronization items have been removed from Multi-Factor Auth Server. The Multi- Factor Auth Server service will no longer process the synchronization items.
121 The Move Up and Move Down buttons allow the administrator to change the order of the synchronization items. The order is important since the same user may be a member of more than one synchronization item (e.g. a container and a security group). The settings applied to the user during synchronization will come from the first synchronization item in the list to which the user is associated. Therefore, the synchronization items should be put in priority order. TIP A full synchronization should be performed after removing synchronization items. A full synchronization should be performed after ordering synchronization items. Click the Synchronize Now button to perform a full synchronization. Multi-Factor Auth Servers Additional Multi-Factor Auth Servers may be set up to serve as a backup RADIUS proxy, LDAP proxy, or for IIS Authentication. The Synchronization configuration will be shared among all of the agents. However, only one of these agents may have the Multi-Factor Auth Server service running. This tab allows you to select the Multi-Factor Auth Server that should be enabled for synchronization.
122 IIS Authentication 1/17/ min to read Edit on GitHub The IIS Authentication section of the Azure Multi-Factor Authentication Server allows you to enable and configure IIS authentication for integration with Microsoft IIS web applications. The Azure Multi-Factor Authentication Server installs a plug-in which can filter requests being made to the IIS web server in order to add Azure Multi-Factor Authentication. The IIS plug-in provides support for Form-Based Authentication and Integrated Windows HTTP Authentication. Trusted IPs can also be configured to exempt internal IP addresses from two-factor authentication. Using Form-Based IIS Authentication with Azure Multi-Factor Authentication Server To secure an IIS web application that uses form-based authentication, install the Azure Multi-Factor Authentication Server on the IIS web server and configure the Server per the following procedure. 1. Within the Azure Multi-Factor Authentication Server click the IIS Authentication icon in the left menu. 2. Click the Form-Based tab. 3. Click the Add button. 4. To detect username, password and domain variables automatically, enter the Login URL (e.g. within the Auto-Configure Form-Based Website dialog box and click OK. 5. Check the Require Multi-Factor Authentication user match box if all users have been or will be imported into the Server and subject to multi-factor authentication. If a significant number of users have not yet been imported into the Server and/or will be exempt from multi-factor authentication, leave the box unchecked. 6. If the page variables cannot be detected automatically, click the Specify Manually button in the Auto-
123 Configure Form-Based Website dialog box. 7. In the Add Form-Based Website dialog box, enter the URL to the login page in the Submit URL field and enter an Application name (optional). The Application name appears in Azure Multi-Factor Authentication reports and may be displayed within SMS or Mobile App authentication messages. See the help file for more information on the Submit URL. 8. Select the correct Request format. This is set to POST or GET for most web applications. 9. Enter the Username variable, Password variable and Domain variable (if it appears on the login page). You may need to navigate to the login page in a web browser, right-click on the page and select View Source to find the names of the input boxes within the page. 10. Check the Require Azure Multi-Factor Authentication user match box if all users have been or will be imported into the Server and subject to multi-factor authentication. If a significant number of users have not yet been imported into the Server and/or will be exempt from multi-factor authentication, leave the box unchecked. See the help file for additional information on this feature. 11. Click the Advanced button to review advanced settings, including the ability to select a custom denial page file, to cache successful authentications to the website for a period of time using cookies and to select whether to authenticate the primary credentials against the Windows Domain, an LDAP directory or a RADIUS server. When complete click the OK button to return to the Add Form-Based Website dialog box. See the help file for more information on the advanced settings. 12. Click the OK button. 13. Once the URL and page variables have been detected or entered, the website data will display in the Form- Based panel. 14. See the Enable IIS Plug-ins for Azure Multi-Factor Authentication Server section directly below to complete the IIS authentication configuration. Using Integrated Windows Authentication with Azure Multi-Factor Authentication Server To secure an IIS web application that uses Integrated Windows HTTP authentication, install the Azure Multi-Factor Authentication Server on the IIS web server and configure the Server per the following procedure. 1. Within the Azure Multi-Factor Authentication Server click the IIS Authentication icon in the left menu. 2. Click the HTTP tab. Click the Form-Based tab. 3. Click the Add button. 4. In the Add Base URL dialogue box, enter the URL for the website where HTTP authentication is performed (e.g. into the Base URL field and enter an Application name (optional). The Application name appears in Azure Multi-Factor Authentication reports and may be displayed within SMS or Mobile App authentication messages. 5. Adjust the Idle timeout and Maximum session times if the default is not sufficient. 6. Check the Require Multi-Factor Authentication user match box if all users have been or will be imported into the Server and subject to multi-factor authentication. If a significant number of users have not yet been imported into the Server and/or will be exempt from multi-factor authentication, leave the box unchecked. See the help file for additional information on this feature. 7. Check the cookie cache box if desired. 8. Click the OK button. 9. See the Enable IIS Plug-ins for Azure Multi-Factor Authentication Server section directly below to complete the IIS authentication configuration. Enable IIS Plug-ins for Azure Multi-Factor Authentication Server Once you have configured the Form-Based or HTTP authentication URLs and settings, you must select the locations where the Azure Multi-Factor Authentication IIS plug-ins should be loaded and enabled in IIS. Use the following
124 procedure: 1. If running on IIS 6, click the ISAPI tab and select the website that the web application is running under (e.g. Default Web Site) to enable the Azure Multi-Factor Authentication ISAPI filter plug-in for that site. 2. If running on IIS 7 or higher, click the Native Module tab and select the server, website(s) or application(s) to enable the IIS plug-in at the desired level(s). 3. Click the Enable IIS authentication box at the top of the screen. Azure Multi-Factor Authentication is now securing the selected IIS application. Ensure that users have been imported into the Server. See the Trusted IPs section below if you would like to whitelist internal IP addresses so that two- factor authentication is not required when logging into the website from those locations. Trusted IPs The Trusted IPs allows users to bypass Azure Multi-Factor Authentication for website requests originating from specific IP addresses or subnets. For example, you may want to exempt users from Azure Multi-Factor Authentication while logging in from the office. For this, you would specify the office subnet as an Trusted IPs entry. To configure Trusted IPs use the following procedure: 1. In the IIS Authentication section, click the Trusted IPs tab. 2. Click the Add button. 3. When the Add Trusted IPs dialog box appears, select the Single IP, IP range or Subnet radio button. 4. nter the IP address, range of IP addresses or subnet that should be whitelisted. If entering a subnet, select the appropriate Netmask and click the OK button. The whitelist has now been added.
125 Remote Desktop Gateway and Azure Multi-Factor Authentication Server using RADIUS 1/17/ min to read Edit on GitHub In many cases, Remote Desktop Gateway uses the local NPS to authenticate users. This document describes how to route RADIUS request out from the Remote Desktop Gateway (through the local NPS) to the Multi-Factor Authentication Server. The Multi-Factor Authentication Server should be installed on a separate server, which will then proxy the RADIUS request back to the NPS on the Remote Desktop Gateway Server. After NPS validates the username and password, it will return a response to the Multi-Factor Authentication Server which performs the second factor of authentication before returning a result to the gateway. Configure the RD Gateway The RD Gateway must be configured to send RADIUS authentication to an Azure Multi-Factor Authentication Server. Once RD Gateway has been installed, configured and is working, go into the RD Gateway properties. Go to the RD CAP Store tab and change it to use a Central server running NPS instead of Local server running NPS. Add one or more Azure Multi-Factor Authentication Servers as RADIUS servers and specify a shared secret for each server. Configure NPS The RD Gateway uses NPS to send the RADIUS request to Azure Multi-Factor Authentication. A timeout must be changed to prevent the RD Gateway from timing out before multi-factor authentication has completed. Use the following procedure to configure NPS. 1. In NPS, expand the RADIUS Clients and Server menu in the left column and click on Remote RADIUS Server Groups. Go into the properties of the TS GATEWAY SERVER GROUP. Edit the RADIUS Server(s) displayed and go to the Load Balancing tab. Change the Number of seconds without response before request is considered dropped and the Number of seconds between requests when server is identified as unavailable to seconds. Click on the Authentication/Account tab and ensure that the RADIUS ports specified match the ports that the Multi-Factor Authentication Server will be listening on. 2. NPS must also be configured to receive RADIUS authentications back from the Azure Multi-Factor Authentication Server. Click on RADIUS Clients in the left menu. Add the Azure Multi-Factor Authentication Server as a RADIUS client. Choose a Friendly name and specify a shared secret. 3. Expand the Policies section in the left navigation and click on Connection Request Policies. It should contain a Connection Request Policy called TS GATEWAY AUTHORIZATION POLICY that was created when RD Gateway was configured. This policy forwards RADIUS requests to the Multi-Factor Authentication Server. 4. Copy this policy to create a new one. In the new policy, add a condition that matches the Client Friendly Name with the Friendly name set in step 2 above for the Azure Multi-Factor Authentication Server RADIUS client. Change the Authentication Provider to Local Computer. This policy ensures that when a RADIUS request is received from the Azure Multi-Factor Authentication Server, the authentication occurs locally instead of sending a RADIUS request back to the Azure Multi-Factor Authentication Server which would result in a loop condition. To prevent the loop condition, this new policy must be ordered ABOVE the original policy that forwards to the Multi-Factor Authentication Server. Configure Azure Multi-Factor Authentication

126 The Azure Multi-Factor Authentication Server is configured as a RADIUS proxy between RD Gateway and NPS. It should be installed on a domain-joined server that is separate from the RD Gateway server. Use the following procedure to configure the Azure Multi-Factor Authentication Server. 1. Open the Azure Multi-Factor Authentication Server and click the RADIUS Authentication icon. Check the Enable RADIUS authentication checkbox. 2. On the Clients tab, ensure the ports match what is configured in NPS and click the Add button. Add the RD Gateway server IP address, application name (optional) and a shared secret. The shared secret will need to be the same on both the Azure Multi-Factor Authentication Server and RD Gateway. 3. Click the Target tab and choose the RADIUS server(s) radio button. 4. Click the Add button. Enter the IP address, shared secret and ports of the NPS server. Unless using a central NPS, the RADIUS client and RADIUS target will be the same. The shared secret must match the one setup in the RADIUS client section of the NPS server.
127 Building Multi-Factor Authentication into Custom Apps (SDK) 1/17/ min to read Edit on GitHub IMPORTANT To download the SDK, you need to create an Azure Multi-Factor Auth Provider even if you have Azure MFA, AAD Premium, or EMS licenses. If you create an Azure Multi-Factor Auth Provider for this purpose and already have licenses, make sure to create the Provider with the Per Enabled User model. Then, link the Provider to the directory that contains the Azure MFA, Azure AD Premium, or EMS licenses. This configuration ensures that you are only billed if you have more unique users using the SDK than the number of licenses you own. The Azure Multi-Factor Authentication Software Development Kit (SDK) lets you build two-step verification directly into the sign-in or transaction processes of applications in your Azure AD tenant. The Multi-Factor Authentication SDK is available for C#, Visual Basic (.NET), Java, Perl, PHP, and Ruby. The SDK provides a thin wrapper around two-step verification. It includes everything you need to write your code, including commented source code files, example files, and a detailed ReadMe file. Each SDK also includes a certificate and private key for encrypting transactions that are unique to your Multi-Factor Authentication Provider. As long as you have a provider, you can download the SDK in as many languages and formats as you need. The structure of the APIs in the Multi-Factor Authentication SDK is simple. Make a single function call to an API with the multi-factor option parameters (like verification mode) and user data (like the telephone number to call or the PIN number to validate). The APIs translate the function call into web services requests to the cloud-based Azure Multi-Factor Authentication Service. All calls must include a reference to the private certificate that is included in every SDK. Because the APIs do not have access to users registered in Azure Active Directory, you must provide user information in a file or database. Also, the APIs do not provide enrollment or user management features, so you need to build these processes into your application. Download the Azure Multi-Factor Authentication SDK Downloading the Azure Multi-Factor SDK requires an Azure Multi-Factor Auth Provider. This requires a full Azure subscription, even if Azure MFA, Azure AD Premium, or Enterprise Mobility Suite licenses are owned. To download the SDK, navigate to the Multi-Factor Management Portal. You can reach the portal either by managing the Multi- Factor Auth Provider directly, or by clicking the "Go to the portal" link on the MFA service settings page. To download the Azure Multi-Factor Authentication SDK from the Azure classic portal 1. Sign in to the Azure classic portal as an Administrator. 2. On the left, select Active Directory. 3. On the Active Directory page, at the top select Multi-Factor Auth Providers 4. At the bottom select Manage. A new page opens. 5. On the left, at the bottom, click SDK.
128 6. Select the language you want and click one the associated download links. 7. Save the download. To download the Azure Multi-Factor Authentication SDK via the service settings 1. Sign in to the Azure classic portal as an Administrator. 2. On the left, select Active Directory. 3. Double-click your instance of Azure AD. 4. At the top click Configure 5. Under multi-factor authentication, select Manage service settings

129 6. On the services settings page, at the bottom of the screen click Go to the portal. A new page opens.
Multi Factor Authentication & Self Password Reset
 Multi Factor Authentication & Self Password Reset Prepared by: Mohammad Asmayal Jawad https://ca.linkedin.com/in/asmayal August 14, 2017 Table of Contents Selectable Verification Methods... 2 Set up multi-factor
Azure Multi-Factor Authentication. Technical Note
 Azure Multi-Factor Authentication Technical Note UPDATED: 28 March 2018 Copyright Notices Copyright 2002-2018 KEMP Technologies, Inc. All rights reserved. KEMP Technologies and the KEMP Technologies logo
Office 365 and Azure Active Directory Identities In-depth
 Office 365 and Azure Active Directory Identities In-depth Jethro Seghers Program Director SkySync #ITDEVCONNECTIONS ITDEVCONNECTIONS.COM Agenda Introduction Identities Different forms of authentication
Centrify for Dropbox Deployment Guide
 CENTRIFY DEPLOYMENT GUIDE Centrify for Dropbox Deployment Guide Abstract Centrify provides mobile device management and single sign-on services that you can trust and count on as a critical component of
Guide to Deploying VMware Workspace ONE. VMware Identity Manager VMware AirWatch 9.1
 Guide to Deploying VMware Workspace ONE VMware Identity Manager 2.9.1 VMware AirWatch 9.1 Guide to Deploying VMware Workspace ONE You can find the most up-to-date technical documentation on the VMware
Guide to Deploying VMware Workspace ONE. DEC 2017 VMware AirWatch 9.2 VMware Identity Manager 3.1
 Guide to Deploying VMware Workspace ONE DEC 2017 VMware AirWatch 9.2 VMware Identity Manager 3.1 You can find the most up-to-date technical documentation on the VMware website at: https://docs.vmware.com/
VMWARE HORIZON CLOUD WITH VMWARE IDENTITY MANAGER QUICK START GUIDE WHITE PAPER MARCH 2018
 VMWARE HORIZON CLOUD WITH VMWARE IDENTITY MANAGER QUICK START GUIDE WHITE PAPER MARCH 2018 Table of Contents Introduction to Horizon Cloud with Manager.... 3 Benefits of Integration.... 3 Single Sign-On....3
DATACENTER MANAGEMENT Goodbye ADFS, Hello Modern Authentication! Osman Akagunduz
 Goodbye ADFS, Hello Modern Authentication! Osman Akagunduz Osman Akagunduz Consultant @ InSpark Microsoft Country Partner Of The Year Twitter: @Osman_Akagunduz What s in this session The role of Azure
Azure Multi-Factor Authentication: Who do you think you are?
 Azure Multi-Factor Authentication: Who do you think you are? Sander Berkouwer CTO at SCCT scct.nl Sander Berkouwer CTO at SCCT scct.nl Microsoft MVP Veeam Vanguard A little history Server Microsoft acquired
VMware Workspace ONE UEM VMware AirWatch Cloud Connector
 VMware AirWatch Cloud Connector VMware Workspace ONE UEM 1811 You can find the most up-to-date technical documentation on the VMware website at: https://docs.vmware.com/ If you have comments about this
Guide to Deploying VMware Workspace ONE with VMware Identity Manager. SEP 2018 VMware Workspace ONE
 Guide to Deploying VMware Workspace ONE with VMware Identity Manager SEP 2018 VMware Workspace ONE You can find the most up-to-date technical documentation on the VMware website at: https://docs.vmware.com/
Azure for On-Premises Administrators Practice Exercises
 Azure for On-Premises Administrators Practice Exercises Overview This course includes optional practical exercises where you can try out the techniques demonstrated in the course for yourself. This guide
Table of Contents. VMware AirWatch: Technology Partner Integration
 Table of Contents Lab Overview - HOL-1857-08-UEM - Workspace ONE UEM - Technology Partner Integration... 2 Lab Guidance... 3 Module 1 - F5 Integration with Workspace ONE UEM (30 min)... 9 Introduction...
VMware AirWatch Cloud Connector Guide ACC Installation and Integration
 VMware AirWatch Cloud Connector Guide ACC Installation and Integration Workspace ONE UEM v1810 Have documentation feedback? Submit a Documentation Feedback support ticket using the Support Wizard on support.air-watch.com.
VMware AirWatch - Workspace ONE, Single Sign-on and VMware Identity Manager
 VMware AirWatch - Workspace ONE, Single Sign-on and VMware Identity Table of Contents Lab Overview - HOL-1857-03-UEM - Workspace ONE UEM with App & Access Management... 2 Lab Guidance... 3 Module 1 - Workspace
User Guide. 3CX Enhanced Billing Codes. Version
 User Guide 3CX Enhanced Billing Codes Version 15.5.54 "Copyright VoIPTools, LLC 2011-2018" Information in this document is subject to change without notice. No part of this document may be reproduced or
Colligo Console. Administrator Guide
 Colligo Console Administrator Guide Contents About this guide... 6 Audience... 6 Requirements... 6 Colligo Technical Support... 6 Introduction... 7 Colligo Console Overview... 8 Colligo Console Home Page...
VMware Horizon Cloud Service on Microsoft Azure Administration Guide
 VMware Horizon Cloud Service on Microsoft Azure Administration Guide Modified on 03 APR 2018 VMware Horizon Cloud Service VMware Horizon Cloud Service on Microsoft Azure 1.5 You can find the most up-to-date
Installing and Configuring VMware Identity Manager Connector (Windows) OCT 2018 VMware Identity Manager VMware Identity Manager 3.
 OCT 2018 VMware Identity Manager VMware Identity Manager 3.") Installing and Configuring VMware Identity Manager Connector 2018.8.1.0 (Windows) OCT 2018 VMware Identity Manager VMware Identity Manager 3.3 You can find the most up-to-date technical documentation on
Installing and Configuring VMware Identity Manager Connector 2018.8.1.0 (Windows) OCT 2018 VMware Identity Manager VMware Identity Manager 3.3 You can find the most up-to-date technical documentation on
Premium Pro Enterprise Local Installation Guide for Database Installation on a desktop PC (Cloudscape)
") Premium Pro Enterprise Local Installation Guide for Database Installation on a desktop PC (Cloudscape) This guide is to be used if you intend on installing enterprise as a stand alone application on one
Premium Pro Enterprise Local Installation Guide for Database Installation on a desktop PC (Cloudscape) This guide is to be used if you intend on installing enterprise as a stand alone application on one
Setting Up Resources in VMware Identity Manager. VMware Identity Manager 2.8
 Setting Up Resources in VMware Identity Manager VMware Identity Manager 2.8 You can find the most up-to-date technical documentation on the VMware website at: https://docs.vmware.com/ If you have comments
Sync User Guide. Powered by Axient Anchor
 Sync Powered by Axient Anchor TABLE OF CONTENTS End... Error! Bookmark not defined. Last Revised: Wednesday, October 10, 2018... Error! Bookmark not defined. Table of Contents... 2 Getting Started... 7
Deploying VMware Workspace ONE Intelligent Hub. October 2018 VMware Workspace ONE
 Deploying VMware Workspace ONE Intelligent Hub October 2018 VMware Workspace ONE You can find the most up-to-date technical documentation on the VMware website at: https://docs.vmware.com/ If you have
User Guide. 3CX Enhanced Billing Codes. Version
 User Guide 3CX Enhanced Billing Codes Version 15.5.54 "Copyright VoIPTools, LLC 2011-2017" Information in this document is subject to change without notice. No part of this document may be reproduced or
VMware Workspace ONE Quick Configuration Guide. VMware AirWatch 9.1
 VMware Workspace ONE Quick Configuration Guide VMware AirWatch 9.1 A P R I L 2 0 1 7 V 2 Revision Table The following table lists revisions to this guide since the April 2017 release Date April 2017 June
GRS Enterprise Synchronization Tool
 GRS Enterprise Synchronization Tool Last Revised: Thursday, April 05, 2018 Page i TABLE OF CONTENTS Anchor End User Guide... Error! Bookmark not defined. Last Revised: Monday, March 12, 2018... 1 Table
Tech Dive: Microsoft Azure Identity Management and Office 365
 Tech Dive: Microsoft Azure Identity Management and Office 365 Tech Dive: Microsoft Azure Identity Management and Office 365 Microsoft Partner Confidential 2 Tech Dive: Microsoft Azure Identity Management
Course 20533B: Implementing Microsoft Azure Infrastructure Solutions
 Course 20533B: Implementing Microsoft Azure Infrastructure Solutions Course details Course Outline Module 1: Introduction to Azure This module explains cloud computing, and compares cloud computing and
ForeScout Extended Module for VMware AirWatch MDM
 ForeScout Extended Module for VMware AirWatch MDM Version 1.7.2 Table of Contents About the AirWatch MDM Integration... 4 Additional AirWatch Documentation... 4 About this Module... 4 How it Works... 5
Configuration Guide. BlackBerry UEM Cloud
 Configuration Guide BlackBerry UEM Cloud Published: 2018-04-18 SWD-20180411125526296 Contents About this guide... 7 Getting started... 8 Configuring BlackBerry UEM Cloud for the first time... 8 Administrator
Azure 209x Practical Exercises Overview
 Azure 209x Practical Exercises Overview This course includes optional exercises where you can try out the techniques demonstrated in the course for yourself. This guide lists the steps for the individual
Table of Contents HOL-1757-MBL-6
 Table of Contents Lab Overview - - VMware AirWatch: Technology Partner Integration... 2 Lab Guidance... 3 Module 1 - F5 Integration with AirWatch (30 min)... 8 Getting Started... 9 F5 BigIP Configuration...
VMware AirWatch: Directory and Certificate Authority
 Table of Contents Lab Overview - HOL-1857-06-UEM - VMware AirWatch: Directory and Certificate Authority Integration... 2 Lab Guidance... 3 Module 1 - Advanced AirWatch Configuration, AD Integration/Certificates
Developer s Guide to Azure RemoteApp Hybrid Collection Deployment
 Developer s Guide to Azure RemoteApp Hybrid Collection Deployment ABSTRACT I. II. ABSTRACT AZURE REMOTEAPP 1. What is Azure RemoteApp? 2. How It Works Behind the Scene 3. Advantages of Azure RemoteApp
Veriato Recon / 360. Version 9.0.3
 Veriato Recon / 360 Version 9.0.3 1/3/2018 Upgrade Guide January 3, 2018 Table of Contents Before You Begin... 1 What's New... 1 How the System Works... 1 Upgrade Support... 6 Update Antivirus Exclusions...
Enterprise Product Guide
 Enterprise Product Guide BlackBerry Enterprise Software April 2018 Published: 2018-06-06 SWD-20180606124626584 Contents BlackBerry enterprise products... 5 The BlackBerry Infrastructure...6 BlackBerry
Anchor User Guide. Presented by: Last Revised: August 07, 2017
 Anchor User Guide Presented by: Last Revised: August 07, 2017 TABLE OF CONTENTS GETTING STARTED... 1 How to Log In to the Web Portal... 1 How to Manage Account Settings... 2 How to Configure Two-Step Authentication...
StorageCraft Cloud Backup
 User Guide v1.3 (June 2017) StorageCraft Copyright Declaration StorageCraft ImageManager, StorageCraft ShadowProtect, StorageCraft Cloud, and StorageCraft Cloud Services, together with any associated logos,
Integrating AirWatch and VMware Identity Manager
 Integrating AirWatch and VMware Identity Manager VMware AirWatch 9.1.1 This document supports the version of each product listed and supports all subsequent versions until the document is replaced by a
How-to Guide: Tenable Nessus for Microsoft Azure. Last Updated: April 03, 2018
 How-to Guide: Tenable Nessus for Microsoft Azure Last Updated: April 03, 2018 Table of Contents How-to Guide: Tenable Nessus for Microsoft Azure 1 Introduction 3 Auditing the Microsoft Azure Cloud Environment
Yubico with Centrify for Mac - Deployment Guide
 CENTRIFY DEPLOYMENT GUIDE Yubico with Centrify for Mac - Deployment Guide Abstract Centrify provides mobile device management and single sign-on services that you can trust and count on as a critical component
AppController :21:56 UTC Citrix Systems, Inc. All rights reserved. Terms of Use Trademarks Privacy Statement
 AppController 2.6 2014-03-18 13:21:56 UTC 2014 Citrix Systems, Inc. All rights reserved. Terms of Use Trademarks Privacy Statement Contents AppController 2.6... 6 About This Release... 8 Getting Started...
VMware Workspace ONE UEM Integration with Apple School Manager
 VMware Workspace ONE UEM Integration with Apple School Manager VMware Workspace ONE UEM Integration with Apple School Manager VMware Workspace ONE UEM 1811 You can find the most up-to-date technical documentation
Deploying VMware Identity Manager in the DMZ. JULY 2018 VMware Identity Manager 3.2
 Deploying VMware Identity Manager in the DMZ JULY 2018 VMware Identity Manager 3.2 You can find the most up-to-date technical documentation on the VMware website at: https://docs.vmware.com/ If you have
Deploying VMware Identity Manager in the DMZ. SEPT 2018 VMware Identity Manager 3.3
 Deploying VMware Identity Manager in the DMZ SEPT 2018 VMware Identity Manager 3.3 You can find the most up-to-date technical documentation on the VMware website at: https://docs.vmware.com/ If you have
Release Note RM Neon. Contents
 RM Neon Contents About this Release Note... 2 About RM Neon... 2 What it does... 2 Components... 2 Data protection... 3 Requirements... 4 RM Unify... 4 Server... 4 Before you start... 5 Back up your servers...
Setting Up Resources in VMware Identity Manager (On Premises) Modified on 30 AUG 2017 VMware AirWatch 9.1.1
 Modified on 30 AUG 2017 VMware AirWatch 9.1.1") Setting Up Resources in VMware Identity Manager (On Premises) Modified on 30 AUG 2017 VMware AirWatch 9.1.1 Setting Up Resources in VMware Identity Manager (On Premises) You can find the most up-to-date
Setting Up Resources in VMware Identity Manager (On Premises) Modified on 30 AUG 2017 VMware AirWatch 9.1.1 Setting Up Resources in VMware Identity Manager (On Premises) You can find the most up-to-date
VMware Identity Manager Cloud Deployment. DEC 2017 VMware AirWatch 9.2 VMware Identity Manager
 VMware Identity Manager Cloud Deployment DEC 2017 VMware AirWatch 9.2 VMware Identity Manager You can find the most up-to-date technical documentation on the VMware website at: https://docs.vmware.com/
BlackBerry UEM Configuration Guide
 BlackBerry UEM Configuration Guide 12.9 2018-11-05Z 2 Contents Getting started... 7 Configuring BlackBerry UEM for the first time... 7 Configuration tasks for managing BlackBerry OS devices... 9 Administrator
Enterprise Access Gateway Management for Exostar s IAM Platform June 2018
 Enterprise Access Gateway Management for Exostar s IAM Platform June 2018 Copyright 2018 Exostar LLC All rights reserved. 1 Version Impacts Date Owner Enterprise Access Gateway (EAG) Guide Revised June
FAQ. General Information: Online Support:
 FAQ General Information: info@cionsystems.com Online Support: support@cionsystems.com CionSystems Inc. Mailing Address: 16625 Redmond Way, Ste M106 Redmond, WA. 98052 http://www.cionsystems.com Phone:
Configuration Guide. BlackBerry UEM. Version 12.9
 Configuration Guide BlackBerry UEM Version 12.9 Published: 2018-07-16 SWD-20180713083904821 Contents About this guide... 8 Getting started... 9 Configuring BlackBerry UEM for the first time...9 Configuration
VMware AirWatch Integration with Apple School Manager Integrate with Apple's School Manager to automatically enroll devices and manage classes
 VMware AirWatch Integration with Apple School Manager Integrate with Apple's School Manager to automatically enroll devices and manage classes Workspace ONE UEM v9.6 Have documentation feedback? Submit
Object of this document
 Publish applications using Azure AD Application Proxy It s imperative that I clear what application means in this context. A lot of people are confused application with mobile applications and other applications
OneLogin Integration User Guide
 OneLogin Integration User Guide Table of Contents OneLogin Account Setup... 2 Create Account with OneLogin... 2 Setup Application with OneLogin... 2 Setup Required in OneLogin: SSO and AD Connector...
Setting Up Resources in VMware Identity Manager
 Setting Up Resources in VMware Identity Manager VMware Identity Manager 2.7 This document supports the version of each product listed and supports all subsequent versions until the document is replaced
Notification Template Limitations. Bridge Limitations
 Oracle Cloud Known Issues for Oracle Identity Cloud Service Release 18.1.2 E55915-17 February 2018 Notification Template Limitations Note the following limitations with Oracle Identity Cloud Service notification
Single Sign-On Showdown
 Single Sign-On Showdown ADFS vs Pass-Through Authentication Max Fritz Solutions Architect SADA Systems #ITDEVCONNECTIONS Azure AD Identity Sync & Auth Timeline 2009 2012 DirSync becomes Azure AD Sync 2013
Splashtop Enterprise for IoT Devices - Quick Start Guide v1.0
 Introduction For information about different deployment choices, please see chapter 3 of the full Splashtop Center Administrator s Guide. Splashtop Enterprise for IoT Devices is comprised of three components:
VMware Enterprise Systems Connector Installation and Configuration. JULY 2018 VMware Identity Manager 3.2 VMware Identity Manager VMware AirWatch 9.
 VMware Enterprise Systems Connector Installation and Configuration JULY 2018 VMware Identity Manager 3.2 VMware Identity Manager VMware AirWatch 9.3 You can find the most up-to-date technical documentation
VMware AirWatch Integration with Apple School Manager Integrate with Apple's School Manager to automatically enroll devices and manage classes
 VMware AirWatch Integration with Apple School Manager Integrate with Apple's School Manager to automatically enroll devices and manage classes AirWatch v9.3 Have documentation feedback? Submit a Documentation
Installing and Configuring hopto Work. System Requirements Be sure you have these system requirements to install and use hopto Work.
 Installing and Configuring hopto Work To configure and install hopto Work on your Microsoft Windows server, you ll need to have Administrator status. Note: The recommended setup is that Active Directory
VMware Identity Manager Cloud Deployment. Modified on 01 OCT 2017 VMware Identity Manager
 VMware Identity Manager Cloud Deployment Modified on 01 OCT 2017 VMware Identity Manager You can find the most up-to-date technical documentation on the VMware Web site at: https://docs.vmware.com/ The
Edge Device Manager Quick Start Guide. Version R15
 Edge Device Manager Quick Start Guide Version R15 Notes, cautions, and warnings NOTE: A NOTE indicates important information that helps you make better use of your product. CAUTION: A CAUTION indicates
Installation Guide. 3CX CRM Plugin for Autotask. Version:
 Installation Guide 3CX CRM Plugin for Autotask Version: 15.5.76 "Copyright VoIPTools, LLC 2011-2018" Information in this document is subject to change without notice. No part of this document may be reproduced
Installation Guide. 3CX CRM Plugin for ConnectWise. Single Tenant Version
 Installation Guide 3CX CRM Plugin for ConnectWise Single Tenant Version "Copyright VoIPTools, LLC 2011-2016" Information in this document is subject to change without notice. No part of this document may
Getting Started New User. To begin, open the Multi-Factor Authentication Service in your inbox.
 Getting Started New User To begin, open the Multi-Factor Authentication Service email in your inbox. 1 1 Getting Started New User Click the link https://mfa.baptisthealth.net/portal. This link takes you
ForeScout Extended Module for MaaS360
 Version 1.8 Table of Contents About MaaS360 Integration... 4 Additional ForeScout MDM Documentation... 4 About this Module... 4 How it Works... 5 Continuous Query Refresh... 5 Offsite Device Management...
Centrify Identity Services for AWS
 F R E Q U E N T L Y A S K E D Q U E S T I O N S Centrify Identity Services for AWS Service Description and Capabilities What is included with Centrify Identity Services for AWS? Centrify Identity Services
DSS User Guide. End User Guide. - i -
 DSS User Guide End User Guide - i - DSS User Guide Table of Contents End User Guide... 1 Table of Contents... 2 Part 1: Getting Started... 1 How to Log in to the Web Portal... 1 How to Manage Account Settings...
User Guide. Version R94. English
 AuthAnvil User Guide Version R94 English March 8, 2017 Copyright Agreement The purchase and use of all Software and Services is subject to the Agreement as defined in Kaseya s Click-Accept EULATOS as updated
Deploying the hybrid solution
 Deployment Guide McAfee Web Protection Hybrid Deploying the hybrid solution A McAfee Web Protection license provides all components needed to set up McAfee Web Gateway and McAfee Web Gateway Cloud Service
VMware Identity Manager Connector Installation and Configuration (Legacy Mode)
") VMware Identity Manager Connector Installation and Configuration (Legacy Mode) VMware Identity Manager This document supports the version of each product listed and supports all subsequent versions until
VMware Identity Manager Connector Installation and Configuration (Legacy Mode) VMware Identity Manager This document supports the version of each product listed and supports all subsequent versions until
Authlogics for Azure and Office 365
 Authlogics for Azure and Office 365 Single Sign-On and Flexible MFA for the Microsoft Cloud Whitepaper Authlogics, 12 th Floor, Ocean House, The Ring, Bracknell, Berkshire, RG12 1AX, United Kingdom UK
Hybrid Identity de paraplu in de cloud
 EXPERTS LIVE SUMMER NIGHT Hybrid Identity de paraplu in de cloud Robbert van der Zwan TSP EM+S Netherlands EXPERTS LIVE SUMMER NIGHT Robbert van der Zwan Robbert works as an Enterprise Mobility and Security
Google Sync Integration Guide. VMware Workspace ONE UEM 1902
 Google Sync Integration Guide VMware Workspace ONE UEM 1902 You can find the most up-to-date technical documentation on the VMware website at: https://docs.vmware.com/ If you have comments about this documentation,
TIS/App Delivery Mobility Job Aid: Install and Configure Microsoft Outlook on Your Android Phone. Overview. Job Aid: Outlook for Mobile - Android
 TIS/App Delivery Mobility Job Aid: Install and Configure Microsoft Outlook on Your Android Phone Job Aid: Outlook for Mobile - Android Overview The job aid is for Colleagues that want to access Outlook
VMware Horizon Cloud Service on Microsoft Azure Administration Guide
 VMware Horizon Cloud Service on Microsoft Azure Administration Guide VMware Horizon Cloud Service VMware Horizon Cloud Service on Microsoft Azure 1.4 You can find the most up-to-date technical documentation
Vendor: Microsoft. Exam Code: Exam Name: Managing Office 365 Identities and Requirements. Version: Demo
 Vendor: Microsoft Exam Code: 70-346 Exam Name: Managing Office 365 Identities and Requirements Version: Demo Topic 1, Fabrikam, Inc OverView Fabrikam, inc is a financial services organization. Fabrikam
Setting Up Resources in VMware Identity Manager (SaaS) Modified 15 SEP 2017 VMware Identity Manager
 Modified 15 SEP 2017 VMware Identity Manager") Setting Up Resources in VMware Identity Manager (SaaS) Modified 15 SEP 2017 VMware Identity Manager Setting Up Resources in VMware Identity Manager (SaaS) You can find the most up-to-date technical documentation
Setting Up Resources in VMware Identity Manager (SaaS) Modified 15 SEP 2017 VMware Identity Manager Setting Up Resources in VMware Identity Manager (SaaS) You can find the most up-to-date technical documentation
How-to Guide: Tenable.io for Microsoft Azure. Last Updated: November 16, 2018
 How-to Guide: Tenable.io for Microsoft Azure Last Updated: November 16, 2018 Table of Contents How-to Guide: Tenable.io for Microsoft Azure 1 Introduction 3 Auditing the Microsoft Azure Cloud Environment
ForeScout Extended Module for MobileIron
 Version 1.8 Table of Contents About MobileIron Integration... 4 Additional MobileIron Documentation... 4 About this Module... 4 How it Works... 5 Continuous Query Refresh... 5 Offsite Device Management...
AT&T Business Messaging Account Management
 Account Management Administrator User Guide July 2016 1 Copyright 2016 AT&T Intellectual Property. All rights reserved. AT&T, the AT&T logo and all other AT&T marks contained herein are trademarks of AT&T
Installation on Windows Server 2008
 USER GUIDE MADCAP PULSE 4 Installation on Windows Server 2008 Copyright 2018 MadCap Software. All rights reserved. Information in this document is subject to change without notice. The software described
[ Sean TrimarcSecurity.com ]
![[ Sean TrimarcSecurity.com ]](/thumbs/89/100354259.jpg "[ Sean TrimarcSecurity.com ]") Securing the Microsoft Cloud (Office 365 & Azure AD) Sean Metcalf Founder, Trimarc Presenter bio Sean Metcalf Founder & CTO, Trimarc One of ~100 people globally who holds the Microsoft Certified Master
Securing the Microsoft Cloud (Office 365 & Azure AD) Sean Metcalf Founder, Trimarc Presenter bio Sean Metcalf Founder & CTO, Trimarc One of ~100 people globally who holds the Microsoft Certified Master
Course Outline 20742B
 Course Outline 20742B Module 1: Installing and configuring domain controllers This module describes the features of AD DS and how to install domain controllers (DCs). It also covers the considerations
Accessing CharityMaster data from another location
 Accessing CharityMaster data from another location When all of your computers are on the same Local Area Network (LAN), you can place the back end files (including your data and the Word templates) onto
NETWORKING AND ACTIVE DIRECTORY CONSIDERATIONS ON MICROSOFT AZURE FOR USE WITH VMWARE HORIZON CLOUD SERVICE. VMware Horizon Cloud Service
 TECHNICAL WHITE PAPER DECEMBER 2017 NETWORKING AND ACTIVE DIRECTORY CONSIDERATIONS ON MICROSOFT AZURE FOR USE WITH VMWARE HORIZON CLOUD SERVICE VMware Horizon Cloud Service Table of Contents Executive
 About chverstr@microsoft.com People-centric approach Devices Apps Data Enable your users Unify your environment Protect your data People-centric approach Devices Apps Data Enable your users Unify your
Lifespan Guide for installing and using Multi-Factor Authentication (MFA)
") Lifespan Guide for installing and using Multi-Factor Authentication (MFA) Registering for MFA for the First Time... 2 Using MFA... 7 Using one of your alternate MFA Methods... 7 Making an MFA response
Lifespan Guide for installing and using Multi-Factor Authentication (MFA) Registering for MFA for the First Time... 2 Using MFA... 7 Using one of your alternate MFA Methods... 7 Making an MFA response
Texas Division How to Login and Register for My IT Support and ServiceNow
 Texas Division How to Login and Register for My IT Support and ServiceNow Go to texas.mychiitsuppport.org. You'll see the screen below. My IT Support/ServiceNow is a national system and utilizes national
Planning for and Managing Devices in the Enterprise: Enterprise Mobility Suite (EMS) & On-Premises Tools
 & On-Premises Tools") Planning for and Managing Devices in the Enterprise: Enterprise Mobility Suite (EMS) & On-Premises Tools OD20398B; On-Demand, Video-based Course Description This course teaches IT professionals how to
Planning for and Managing Devices in the Enterprise: Enterprise Mobility Suite (EMS) & On-Premises Tools OD20398B; On-Demand, Video-based Course Description This course teaches IT professionals how to
Configuration Guide. BlackBerry UEM. Version 12.7 Maintenance Release 2
 Configuration Guide BlackBerry UEM Version 12.7 Maintenance Release 2 Published: 2017-12-04 SWD-20171130134721747 Contents About this guide... 8 Getting started... 9 Configuring BlackBerry UEM for the
VMware AirWatch Android Platform Guide
 VMware AirWatch Android Platform Guide Workspace ONE UEM v9.4 Have documentation feedback? Submit a Documentation Feedback support ticket using the Support Wizard on support.air-watch.com. This product
VPN Solutions for Zerto Virtual Replication to Azure. IPSec Configuration Guide
 VPN Solutions for Zerto Virtual Replication to Azure IPSec Configuration Guide VERSION 1.0 AUGUST 2017 Table of Contents 1. Overview... 2 1.1 Use Cases... 2 2. Proofs of Concept and Lab Usage... 2 2.1
RSA SecurID Access Configuration for Microsoft Office 365 STS (Secure Token Service)
") RSA SecurID Access Configuration for Microsoft Office 365 STS (Secure Token Service) Last Modified: April 17, 2017 RSA SecurID Access offers two methods to integrate with Microsoft Office 365. Both solutions
RSA SecurID Access Configuration for Microsoft Office 365 STS (Secure Token Service) Last Modified: April 17, 2017 RSA SecurID Access offers two methods to integrate with Microsoft Office 365. Both solutions
Local. Responsive. Reliable.
 Local. Responsive. Reliable. FAQs WHAT IS myvrb? myvrb is the new name of your online and mobile banking experience at Valley Republic Bank. While you will continue to access online and mobile banking
Setting Up Resources in VMware Identity Manager 3.1 (On Premises) Modified JUL 2018 VMware Identity Manager 3.1
 Modified JUL 2018 VMware Identity Manager 3.1") Setting Up Resources in VMware Identity Manager 3.1 (On Premises) Modified JUL 2018 VMware Identity Manager 3.1 You can find the most up-to-date technical documentation on the VMware website at: https://docs.vmware.com/
Setting Up Resources in VMware Identity Manager 3.1 (On Premises) Modified JUL 2018 VMware Identity Manager 3.1 You can find the most up-to-date technical documentation on the VMware website at: https://docs.vmware.com/
Welcome to ncrypted Cloud!... 4 Getting Started Register for ncrypted Cloud Getting Started Download ncrypted Cloud...
 Windows User Manual Welcome to ncrypted Cloud!... 4 Getting Started 1.1... 5 Register for ncrypted Cloud... 5 Getting Started 1.2... 7 Download ncrypted Cloud... 7 Getting Started 1.3... 9 Access ncrypted
ManageEngine ADSelfService Plus
 Comparison Document ManageEngine ADSelfService Plus Vs Azure AD Self-Service Password Reset (SSPR) ManageEngine ADSelfService Plus vs. Azure AD Self-Service Password Reset (SSPR) Password reset tickets