Adafruit nrf52 Pro Feather with Mynewt
|
|
|
- Whitney Atkinson
- 5 years ago
- Views:
Transcription
1 Adafruit nrf52 Pro Feather with Mynewt Created by lady ada Last updated on :33:18 PM UTC
2 Guide Contents Guide Contents Overview Bluetooth Certification Warning Device Pinout Special Notes Power Pins Analog Inputs PWM Outputs I2C Pins Assembly Header Options! Soldering in Plain Headers Prepare the header strip: Add the breakout board: And Solder! Soldering on Female Header Tape In Place Flip & Tack Solder And Solder! Native Installation (OS X) Install newt and newtmgr Binaries Install newt Install newtmgr Install an ARM Cross-Compiling Toolchain Optional: Install the OpenOCD Debugger Optional: Install Segger J-Link Drivers Optional: Install minicom Native Installation (Linux) Install newt and newtmgr Binaries Manual newt Installation Manual newtmgr Installation Install an ARM Cross-Compiling Toolchain Optional: Install the OpenOCD Debugger (Segger J-Link) Optional: Install Segger J-Link Drivers Optional: Install minicom Native Installation (Win) Cut auto-reset trace Newt Setup Go Path Install newtmgr Binaries ARM Cross-Compiler Apache Mynewt Tools Adafruit Industries Page 2 of 88
3 Standard Tools Adafruit Tools newt Installing newt Common newt Commands newt build <target_name> newt create-image <target_name> <version> newt load <target_name> newt size <target_name> newt target show newtmgr Installing newtmgr Connection Profiles Adding a Serial Connection Profile Listing Existing Profiles Test the Serial Connection Profile Common newtmgr Commands Display Scheduler Task Activity via 'taskstat' Uploading Application Images with newtmgr 1. Build the Target Application (newt build) 2. Sign and Version the Image (newt create-image) 3. Upload the Image (newtmgr image upload) 4. Test the Image Upload (newtmgr image test [hash]) 5. Reset to Perform the Test and Image Bank Switch (newtmgr reset) 6. Confirm the Image Switch (newtmgr image confirm) Display Internal Statistics List all Statistic Groups List all Values in a Statistic Group Adafruit Mynewt Manager Getting the Application Source Code Apache Mynewt Applications Create a New Project Create a Project Skeleton Download Project Dependencies Create a New Application Create a New Target 1. Set the Target's app Field 2. Set the Target's bsp Field 3. Set the build_profile Field 4. Test the Target Settings Final Project Structure Build and Flash the Target Sign the Build with a Version Number Flash the Image via a Segger J-Link Flash the Image via the Serial Port and newtmgr Adding Tasks Adafruit Industries Page 3 of 88
4 Declaring a task, priority and stack size Initializing a task Implementing the task handler Task Delays os_time_delay Example: Updating apps/first/src/main.c Checking Task Status Adding Shell Commands Adding shell support Adding a custom command handler Example: Updating apps/first/src/main.c Testing the Shell Command Adding Statistics Configuring Your App for Statistics Adding Stats to your main.c File: Accessing the Stats in Your Code Initializing the Stats Updating the Stats Values Incrementing Accessing Stats with the Console or newtmgr Console Access newtmgr Access Example: Adding Stats to apps/first/src/main.c Monitoring via netwmgr Monitoring via shell/console Adding BLE UART Support Mynewt Nimble (BLE Stack) Documentation Advanced Debugging GDB Debugging Starting the Debugger Displaying Values Basic Example Formatting Display Values Displaying an Array of Values Useful Mynewt/Nimble Structs and Fields Memory Manipulation Stack Manipulation Display the Stack Trace Display Stack Frame Details Displaying ARM Registers Working with Source Code Displaying a function Displaying code at a specific address Running an arbitrary function when halted at a breakpoint Command Line Debugging Adafruit Industries Page 4 of 88
5 Grep'ing Source Code Grep recursively for a partial string Grep recursively for an exact string Grep recursively for a string ignoring the case Grep recursively with specific file types Field Debugging Tips Debugging Crash Dumps Option 1: Debugging Crash Dumps with GDB Option 2: Debugging Crash Dumps with objdump Debugging Repeatable Crashes Adafruit_Mynewt Installing Adafruit_Mynewt Provided Apps Helper Modules External Content Mynewt Bootloader Build and Package Management Downloads Module Details Schematic Schematic (pre March ) Adafruit Industries Page 5 of 88


6 Overview The Adafruit Feather nrf52 Pro is our latest Bluetooth Low Energy board for advanced projects and users who want to use a fully open source Bluetooth Low Energy 5.0 stack. It has a native-bluetooth chip, the nrf52832, as well as built in USB Serial and battery charging! We have other boards in the Feather family, check'em out here. ( This is a special Feather - unlike the rest of the Feather family, this board is not for use with Arduino IDE. Instead, it is for use with Mynewt only! We have programmed it with the Mynewt bootloader and updated the hardware to add Adafruit Industries Page 6 of 88

7 an SWD connector and an additional DFU button. If you want to use the nrf52 with Arduino IDE please check out the Bluefruit nrf52 Feather which works out-of-the-box with our Arduino board support package. ( This Feather is for advanced users only, you will be interacting with the Mynewt RTOS rather than Arduino and you cannot easily go back-and-forth without an SWD programmer. This chip has twice the flash, SRAM and performance of the earlier nrf51-based modules, and can do a lot of heavy lifting. That extra processing power and memory means you can now run an RTOS for fast development of complex projects. This board was designed to work with the Apache Mynewt ( operating system, which is released by the Apache Foundation under the permissive and commercial-friendly Apache license. Apache Mynewt includes a number of professionally written networking stacks (BLE 5.0, OIC/OCF ( etc.), development tools, and professional project management features like a secure bootloader that allows you to cryptographically sign firmware images and verify them during device updates. Adafruit Industries Page 7 of 88


8 The Adafruit Feather nrf52 Pro ships pre-programmed with the Mynewt serial bootloader that allows you to flash firmware to the device directly from the command-line using the on-board USB Serial converter and the 'newtmgr' tool, so you can get started right away with no additional hardware required. For more advanced debugging, however, you can use a Segger J-Link and the on-board SWD debug connector, which gives you access to a more powerful set of development tools and options. We also have a custom Mynewt Manager ( application that we've written for ios that allows you to perform over the air firmware updates, and get live updates of the tasks running in the task manager, or to see any statistics generated by the internal reporting systems that are part of the OS. Adafruit Industries Page 8 of 88
9 Features: ARM Cortex M4F (with HW floating point acceleration) running at 64MHz 512KB flash and 64KB SRAM Built in USB Serial converter for fast and efficient programming and debugging Bluetooth Low Energy compatible 2.4GHz radio (Details available in the nrf52832 ( product specification) FCC / IC / TELEC certified module Up to +4dBm output power 1.7v to 3.3v operation with internal linear and DC/DC voltage regulators 19 GPIO, 8 x 12-bit ADC pins, up to 12 PWM outputs (3 PWM modules with 4 outputs each) Pin #17 red LED for general purpose blinking Power/enable pin Measures 2.0" x 0.9" x 0.28" (51mm x 23mm x 8mm) without headers soldered in Light as a (large?) feather grams 4 mounting holes Reset button SWD connector for debugging 100% open source firmware when used with Apache Mynewt ( Bluetooth Low Energy is the hottest new low-power, 2.4GHz spectrum wireless protocol. In particular, its the only wireless protocol that you can use with ios without needing special certification and it's supported by all modern smart phones. This makes it excellent for use in portable projects that will make use of an ios or Android phone or tablet. It also is supported in Mac OS X and Windows 8+. To make it easy to use for portable projects, we added a connector for any of our 3.7V Lithium polymer batteries and built in battery charging. You don't need a battery, it will run just fine straight from the micro USB connector. But, if you do have a battery, you can take it on the go, then plug in the USB to recharge. The Feather will automatically switch over to USB power when it's available. We also tied the battery thru a divider to an analog pin, so you can measure and monitor the battery voltage to detect when you need a recharge. The Power of Bluefruit LE The nrf52 Pro uses an nrf52832 chipset from Nordic, which can be used as both a main microcontroller and a bluetooth low energy interface. For most people, they'll be very happy to use the standard Nordic UART RX/TX connection profile - example code is provided! In this profile, the Bluefruit acts as a data pipe, that can 'transparently' transmit back and forth from your ios or Android device. You can use our ios App ( or Android App ( or write your own to communicate with the UART service ( The board is capable of much more than just sending strings over the air! Thanks to the Apache Mynewt operating system, you have full control over how the device behaves, including the ability to define and manipulate your own GATT Services and Characteristics ( or change the way that the device advertises itself for other Bluetooth Low Energy devices to see. Use the Bluefruit App to get your project started Using our Bluefruit ios App ( or Android App ( you can quickly get your project prototyped by using your ios or Android phone/tablet as a controller. This data can be read over BLE and processed directly by the nrf52 microcontroller Comes fully assembled and tested, with a USB Serial bootloader that lets you quickly use it from the command line. We Adafruit Industries Page 9 of 88
10 also toss in some header so you can solder it in and plug into a solderless breadboard. Lipoly battery ( and MicroUSB cable ( not included (but we do have lots of options in the shop if you'd like!) Bluetooth Certification Warning Because of complex and expensive Bluetooth SIG certification requirements, the nrf52 Pro doesn't ship with any default Bluetooth functionality on the post-production firmware, since at present the Mynewt BLE stack has not gone through the certification process with the Bluetooth SIG. We aren't able to ship BLE functionality out of the box without this certification. In order to use Mynewt in a production product, you will need to go through the certification process for your product, although you are free to develop locally with Mynewt in a test environment. The only Bluetooth Low Energy stack certified to run on the nrf52 modules with no additional work on your part is the Nordic SoftDevice, which is used in the Arduino variant of these boards and can be flashed onto the nrf52 Pro using your choice of ARM SWD debugger, such as the Segger J-Link ( (Adafruit bootloader and Nordic SD hex files are available here ( When the Mynewt stack is certified by the Bluetooth SIG (no ETA on if or when that will happen since it's a long and expensive process), Bluetooth functionality will be enabled on shipping devices, but at present only USB Serial is used in the default firmware on production devices, and the Nordic SD should be used in commercial products if you are not able to go through the certification process yourself. There are no HW restrictions on the nrf52 Pro boards, we simply have our hands tied on what we can ship and claim coming off the production line. UPDATE (Sept ): Runtime, one of the main contributors to the Mynewt core codebase, have contracted an external company to certify nimble (the Mynewt BLE stack). Once the certification process is completed, the results and certificate details will be posted here. Adafruit Industries Page 10 of 88

11 Device Pinout Adafruit Industries Page 11 of 88

12 Please note that the nrf52832 uses a USB serial adapter to RXD/TXD are with respect to the nrf52 Special Notes The following pins have some restrictions that need to be taken into account when using them: PIN_DFU / P0.20: If this pin is detected to be at GND level at startup, the board will enter a special serial bootloader mode and will not execute any user code, going straight into bootloader mode. If you wish to use this pin as a standard GPIO, make sure that it is pulled high with a pullup resistor so that your code will execute normally when the MCU starts up. P0.31 / A7: This pin is hard wired to a voltage-divider on the LIPO battery input, allow you to safely measure the LIPO battery level on your device. If possible, you should avoid using this pin as an input because you will lose the ability to read the battery voltage. You can use it as an output just make sure to switch the pin to analog input when you want to do the battery read, then back to output when toggling pins FRST/P0.22: Setting this pin to GND at startup will cause the device to perform a factory reset at startup, erasing and config data as well as the user sketch. At the next reset, you should enter serial bootloader mode by default, since no user sketch will be present. You can use this to recover 'bricked' boards, but if you don't wish to do this be careful not to have FRST low at startup. By default, a weak internal pull-up resistor is enabled on this pin Adafruit Industries Page 12 of 88
13 during the bootloader phase. Power Pins 3.3V Output: This two pins are connected to the output of the on board 3.3V regulator. They can be used to supply 3.3V power to external sensors, breakouts or Feather Wings. LIPO Input (VBAT): This is the voltage supply off the optional LIPO cell that can be connected via the JST PH connector. It is nominally ~ V. VREG Enable: This pin can be set to GND to disable the 3.3V output from the on board voltage regulator. By default it is set high via a pullup resistor. USB Power (VBUS): This is the voltage supply off USB connector, nominally V. Analog Inputs The 8 available analog inputs can be configured to generate 8, 10 or 12-bit data (or 14-bits with over-sampling), at speeds up to 200kHz (depending on the bit-width of the values generated), based on either an internal 0.6V reference or the external supply. The following default values are used: Default voltage range: 0-3.6V (uses the internal 0.6V reference with 1/6 gain) Default resolution: 10-bit ( ) Unlike digital functions, which can be remapped to any GPIO/digital pin, the ADC functionality is tied to specified pins, labelled as A* in the image above (A0, A1, etc.). PWM Outputs Any GPIO pin can be configured as a PWM output, using the dedicated PWM block. Three PWM modules can provide up to 12 PWM channels with individual frequency control in groups of up to four channels. Please note that DMA based PWM output is still a work in progress in the initial release of the nr52 BSP, and further improvements are planned here. I2C Pins I2C pins on the nrf52832 require external pullup resistors to function, which are not present on the Adafruit nrf52 Feather by default. You will need to supply external pullups to use these. All Adafruit I2C breakouts have appropriate pullups on them already, so this normally won't be an issue for you. Adafruit Industries Page 13 of 88


14 Assembly We ship Feathers fully tested but without headers attached - this gives you the most flexibility on choosing how to use and configure your Feather Header Options! Before you go gung-ho on soldering, there's a few options to consider! The first option is soldering in plain male headers, this lets you plug in the Feather into a solderless breadboard Adafruit Industries Page 14 of 88


15 Another option is to go with socket female headers. This won't let you plug the Feather into a breadboard but it will let you attach featherwings very easily Adafruit Industries Page 15 of 88


16 We also have 'slim' versions of the female headers, that are a little shorter and give a more compact shape Adafruit Industries Page 16 of 88


17 Finally, there's the "Stacking Header" option. This one is sort of the best-of-both-worlds. You get the ability to plug into a solderless breadboard and plug a featherwing on top. But its a little bulky Soldering in Plain Headers Adafruit Industries Page 17 of 88

18 Prepare the header strip: Cut the strip to length if necessary. It will be easier to solder if you insert it into a breadboard - long pins down Adafruit Industries Page 18 of 88


).")
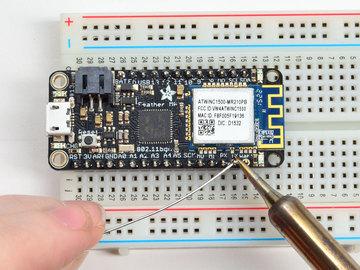
19 Add the breakout board: Place the breakout board over the pins so that the short pins poke through the breakout pads And Solder! Be sure to solder all pins for reliable electrical contact. (For tips on soldering, be sure to check out our Guide to Excellent Soldering ( Adafruit Industries Page 19 of 88


20 Solder the other strip as well. Adafruit Industries Page 20 of 88


21 You're done! Check your solder joints visually and continue onto the next steps Soldering on Female Header Tape In Place For sockets you'll want to tape them in place so when you flip over the board they don't fall out Adafruit Industries Page 21 of 88


22 Flip & Tack Solder After flipping over, solder one or two points on each strip, to 'tack' the header in place And Solder! Adafruit Industries Page 22 of 88


23 Be sure to solder all pins for reliable electrical contact. (For tips on soldering, be sure to check out our Guide to Excellent Soldering ( Adafruit Industries Page 23 of 88


24 You're done! Check your solder joints visually and continue onto the next steps Adafruit Industries Page 24 of 88
25 Native Installation (OS X) Mynewt relies on two command line utilities ( newt and newtmgr ), both of which are described elsewhere in this learning guide, as well as the presence of an ARM cross-compiling toolchain ( arm-none-eabi-gcc, etc.). Both of these need to be installed and available on your system to work with Mynewt projects. Install newt and newtmgr Binaries Binary versions of the command-line tools are available from Apache. Before you start, you will need to add the runtimeco/homebrew-mynewt 'tap' to brew, which can be done as follows: $ brew tap runtimeco/homebrew-mynewt $ brew update Install newt The full setup guide is available here: ( $ brew install mynewt-newt ==> Installing mynewt-newt from runtimeco/mynewt ==> Downloading ==> Downloading from ######################################################################## 100.0% ==> Pouring mynewt-newt sierra.bottle.tar.gz /usr/local/cellar/mynewt-newt/1.1.0: 3 files, 10.5MB You can test the install with: $newt version Apache Newt version: Install newtmgr The full setup guide is available here: ( $ brew install mynewt-newtmgr ==> Installing mynewt-newtmgr from runtimeco/mynewt ==> Downloading ==> Downloading from ######################################################################## 100.0% ==> Pouring mynewt-newtmgr sierra.bottle.tar.gz /usr/local/cellar/mynewt-newtmgr/1.1.0: 3 files, 17MB You can test the install with: Adafruit Industries Page 25 of 88
26 $ newtmgr help Newtmgr helps you manage remote devices running the Mynewt OS Usage: newtmgr [flags] newtmgr [command] Available Commands: config Read or write a config value on a device conn Manage newtmgr connection profiles crash Send a crash command to a device datetime Manage datetime on a device echo Send data to a device and display the echoed back data fs Access files on a device help Help about any command image Manage images on a device log Manage logs on a device mpstat Read mempool statistics from a device reset Perform a soft reset of a device run Run test procedures on a device stat Read statistics from a device taskstat Read task statistics from a device Flags: -c, --conn string connection profile to use -h, --help help for newtmgr -l, --loglevel string log level to use (default "info") --name string name of target BLE device; overrides profile setting -t, --timeout float timeout in seconds (partial seconds allowed) (default 10) -r, --tries int total number of tries in case of timeout (default 1) Use "newtmgr [command] --help" for more information about a command. Install an ARM Cross-Compiling Toolchain In order to build and debug ARM binaries, you will also need to install a cross-compiling toolchain targeting the ARM architecture. Thankfully, pre-built binaries are also available in brew (used to install newt and newtmgr), as described in the setup guide below: $ brew tap PX4/homebrew-px4 $ brew update $ brew install gcc-arm-none-eabi-49 You can test the installation with the following command (making sure that the version listed is 4.9!): $ arm-none-eabi-gcc --version arm-none-eabi-gcc (GNU Tools for ARM Embedded Processors) (release) [ARM/embedded-4_9-bran Copyright (C) 2014 Free Software Foundation, Inc. This is free software; see the source for copying conditions. There is NO warranty; not even for MERCHANTABILITY or FITNESS FOR A PARTICULAR PURPOSE. Adafruit Industries Page 26 of 88

27 Optional: Install the OpenOCD Debugger If you wish to debug or flash your projects with a Segger J-Link, you will also need to install the OpenOCD debug tool via the following steps: $ brew install openocd If you see one of these errors: Library not loaded: /usr/local/lib/libusb dylib Run: brew install libusb-compat Library not loaded: /usr/local/opt/libftdi/lib/libftdi1.2.dylib Run: brew install libftdi Library not loaded: /usr/local/lib/libhidapi.0.dylib Run: brew install hidapi Make sure you have at least version , which can be verified with the following command: $ openocd --version Open On-Chip Debugger Licensed under GNU GPL v2 For bug reports, read Optional: Install Segger J-Link Drivers If you wish to use the newt load or newt debug commands and a Segger J-Link, you will need to install the Segger J- Link drivers as well. You will need to go to the Segger J-Link Downloads page ( and download the 'J-Link Software and Documentation pack for MacOSX' installer: Once downloader, run the installer and the JLinkExe and related J-Link commands that Mynewt relies on will be available from the command-line. Optional: Install minicom Much of the interaction with your Mynewt device will happen over the serial port, including working with Shell-based commands on your device. A relatively easy to use command line application to work with serial port connections is minicom, which is used Adafruit Industries Page 27 of 88
28 throughout this learning guide. It can be installed from the command-line with the following command: $ brew install minicom You can establish a serial connection via minicom with the following command (adjusting the /dev/tty device name as appropriate): $ minicom -D /dev/tty.slab_usbtouart Adafruit Industries Page 28 of 88
29 Native Installation (Linux) Mynewt relies on two command line utilities ( newt and newtmgr ), both of which are described elsewhere in this learning guide, as well as the presence of an ARM cross-compiling toolchain ( arm-none-eabi-gcc, etc.). Both of these need to be installed and available on your system to work with Mynewt projects. Install newt and newtmgr Binaries Binary versions of the command-line tools are available from Apache. The full setup guide is available here: ( Manual newt Installation On most Debian-based systems, the easiest route will be to manually install the pre-built newt binary from the distribution package as follows: $ wget $ sudo dpkg -i newt_ _amd64.deb Manual newtmgr Installation Similarly, to install newtmgr you can run the following commands: $ wget $ sudo dpkg -i newtmgr_ _amd64.deb Install an ARM Cross-Compiling Toolchain In order to build and debug ARM binaries, you will also need to install a cross-compiling toolchain targeting the ARM architecture. Thankfully, pre-built binaries are available, as described in the setup guide below: $ sudo apt-get remove binutils-arm-none-eabi gcc-arm-none-eabi $ sudo add-apt-repository ppa:team-gcc-arm-embedded/ppa $ sudo apt-get update $ sudo apt-get install gcc-arm-none-eabi Optional: Install the OpenOCD Debugger (Segger J-Link) If you wish to debug or flash your projects with a Segger J-Link, you will also need to install the OpenOCD debug tool via the following steps: 1. Download the binary tarball for Linux ( $ wget 2. Change to the root directory: $ cd / 3. Untar the tarball and install into /usr/local/bin. You will need to replace ~/Downloads with the directory that the Adafruit Industries Page 29 of 88
30 tarball is downloaded to: $ sudo tar -xpf ~/Downloads/openocd-bin Linux.tgz Note: You must specify the -p option for the tar command. 4. Check the OpenOCD version you are using: $ which openocd /usr/local/bin/openocd $openocd -v Open On-Chip Debugger Licensed under GNU GPL v2 For bug reports, read You should see version: If you see any of these error messages: openocd: error while loading shared libraries: libhidapi-hidraw.so.0: cannot open shared object file: No such file or directory openocd: error while loading shared libraries: libusb-1.0.so.0: cannot open shared object file: No such file or directory run the following command to install the libraries: $ sudo apt-get install libhidapi-dev:i386 Optional: Install Segger J-Link Drivers If you wish to use the newt load or newt debug commands and a Segger J-Link, you will need to install the Segger J- Link drivers as well. On Ubuntu systems, you will need to go to the Segger J-Link Downloads page ( and download an appropriate binary package: For 32-bit systems download: J-Link Software and Documentation pack for Linux, DEB Installer, 32-bit For 64-bit systems download: J-Link Software and Documentation pack for Linux, DEB Installer, 64-bit Once you have the file on your system, install the package via dpkg as follows (varying the file for the version of architecture you are using): $ sudo dpkg -i JLink_Linux_V618a_x86_64.deb Selecting previously unselected package jlink. (Reading database files and directories currently installed.) Preparing to unpack JLink_Linux_V618a_x86_64.deb... Removing /opt/segger/jlink... /opt/segger/jlink not found (OK) Unpacking jlink (6.18.1)... Setting up jlink (6.18.1)... Adafruit Industries Page 30 of 88
31 Optional: Install minicom Much of the interaction with your Mynewt device will happen over the serial port, including working with Shell-based commands on your device. A relatively easy to use command line application to work with serial port connections is minicom, which is used throughout this learning guide. It can be installed from the command-line with the following command: $ sudo apt-get install minicom You can establish a serial connection via minicom with the following command (adjusting the /dev/tty device name as appropriate): $ sudo minicom -D /dev/ttyusb0 Adafruit Industries Page 31 of 88
. Both of these need to be installed and available on your system to work with Mynewt projects.")
32 Native Installation (Win) Mynewt relies on two command line utilities ( newt and newtmgr ), both of which are described elsewhere in this learning guide, as well as the presence of an ARM cross-compiling toolchain ( arm-none-eabi-gcc, etc.). Both of these need to be installed and available on your system to work with Mynewt projects. NOTE: The official Mynewt documention for setting devices up on Windows is available here: ( Cut auto-reset trace Windows serial has a somewhat annoying thing it does where it toggles the DTR/RTS lines when you open a serial port. This will make debugging impossible since you keep resetting the board. Before you continue you must cut the trace-jumper on the bottom of the board: Newt You can follow the instructions ( for installing newt on windows via mingw. You will need to install go ( Our guide on Mingw and git installation may be useful! ( Setup Go Path $ cd $HOME $ mkdir -p dev/go $ cd dev/go $ export GOPATH=`pwd` Adafruit Industries Page 32 of 88


33 Add the following export statements to your ~/.bash_profile file and source the file: export GOPATH=$HOME/dev/go export PATH=$GOPATH/bin:$PATH Download the newt package source and install the tool: Adafruit Industries Page 33 of 88
 version: 1.0.")
34 $cd $GOPATH $go get mynewt.apache.org/newt/newt $cd $GOPATH/src/mynewt.apache.org/newt $ls DISCLAIMER RELEASE_NOTES.md util INSTALLING.md build.sh viper LICENSE newt yaml NOTICE newtmgr README.md newtvm Check that the newt tool is installed and it is in your path: $ls $GOPATH/bin/newt ~/dev/go/bin/newt $which newt ~/dev/go/bin/newt $ newt version Apache Newt (incubating) version: dev (this version # may be different) Install newtmgr Binaries Binary versions of the command-line tools are available from Apache. You can follow their installation guide here. ( Download the latest binaries from Adafruit Industries Page 34 of 88


35 Uncompess and put it into your $GOPATH - ~/dev/go You can test it by running newtmgr from the shell ARM Cross-Compiler You will also need an cross-compiling toolchain for the ARM architecture, specifically GCC 4.9 ( since newt will call arm-none-eabi-gcc from the command line. For details on installing this see the official Mynewt documentation here: ( Adafruit Industries Page 35 of 88
36 NOTE: arm-none-eabi-gcc also needs to be available in the system PATH variable to work with newt! Adafruit Industries Page 36 of 88
37 Apache Mynewt Tools Standard Tools There are two main tools used to interact with Mynewt devices: 1. newt ( Build system and project management tool 2. newtmgr ( Field management tool for deployed devices Consult the dedicated tool pages for details on how to setup and use these two important tools. Adafruit Tools In addition to the default system tools, Adafruit maintains an ios app called Adafruit Mynewt Manager ( that can be useful to monitor and work with deployed devices via your mobile phone. Adafruit Industries Page 37 of 88
38 newt newt is a build and project management tool that hides most of the messy details of creating, building and debugging mynewt projects. With newt, you don't need to worry about makefiles, compiler flags, debug config settings, and library versions or updates. The details are elegantly hidden behind the easy to use 'newt' wrapper. For full details on newt and the entire command set see the official newt documentation ( Installing newt For details on installing the newt tool on your operating system of choice see: OS X Installation: ( Linux Installation: ( Windows Installation: ( Common newt Commands Please consult the official newt documentation ( for details on every command, but the most commonly used commands are detailed below: newt build <target_name> This command will build a firmware image for the specified target name, and will handle things like the makefile generation and any compiler parameters and file inclusions required by the target. Full documentation: ( $ newt build first Building target targets/first... Target successfully built: targets/first newt create-image <target_name> <version> This command assigns a version number to the image, and can also be used to optionally cryptographically sign images with an appropriate.pem key file. Full documentation: ( $ newt create-image first App image succesfully generated: [PATH]/bin/targets/first/app/apps/first/first.img newt load <target_name> This command will use a Segger J-Link (if you have one connected) to flash the version controlled.img file to the device. Make sure you run 'newt create-image' on the firmware image before loading it to the device, or the firmware will be rejected by the bootloader which verifies all firmware at startup! Adafruit Industries Page 38 of 88
39 Full documentation: ( $ newt load first Loading app image into slot 1 newt size <target_name> This command will give you detailed information on the flash and SRAM usage of your firmware, and can be helpful when debugging or when tight on space. Full documentation: ( $ newt size first Size of Application Image: app FLASH RAM *fill* 32 0 apps_first.a boot_bootutil.a boot_split.a crypto_mbedtls.a encoding_base64.a encoding_cborattr.a encoding_tinycbor.a hw_bsp_ada_feather_nrf52.a 64 0 hw_cmsis-core.a hw_drivers_uart_uart_hal.a hw_hal.a hw_mcu_nordic_nrf52xxx.a kernel_os.a libc_baselibc.a mgmt_imgmgr.a mgmt_mgmt.a mgmt_newtmgr.a mgmt_newtmgr_nmgr_os.a mgmt_newtmgr_transport_nmgr_shell.a sys_config.a sys_console_full.a sys_flash_map.a sys_log_full.a sys_mfg.a sys_reboot.a sys_shell.a sys_stats_full.a 32 5 sys_sysinit.a time_datetime.a util_crc.a util_mem.a first-sysinit-app.a libgcc.a objsize text data bss dec hex filename e230 [PATH]/bin/targets/first/app/apps/first/first.elf Adafruit Industries Page 39 of 88
40 newt target show This will give you a list of all targets defined in your project, and some basic details about them. Full documentation: ( $ newt target show targets/first app=apps/first bsp=@apache-mynewt-core/hw/bsp/ada_feather_nrf52 build_profile=debug targets/my_blinky_sim app=apps/blinky bsp=@apache-mynewt-core/hw/bsp/native build_profile=debug Adafruit Industries Page 40 of 88
41 newtmgr newtmgr is an image management tool that can be used to interact with the bootloader and images on the device. For full details on the newtmgr tool and the entire command set see the official newtmgr documentation ( Installing newtmgr For details on installing the newtmgr tool on your operating system of choice see: OS X Installation: ( Linux Installation: ( Windows Installation: ( Connection Profiles The newtmgr tool works with connection profiles, such as serial or ble, depending on how you wish to communicate with the device under test. Before you can use newtmgr you will need to setup at least one connection profile, as described below: Adding a Serial Connection Profile $ newtmgr conn add serial1 type=serial connstring=/dev/tty.slab_usbtouart Or, on windows: $ newtmgr conn add serial1 type=serial connstring=com14 Listing Existing Profiles You can get a list of all defined connection profiles via: $ newtmgr conn show Connection profiles: serial1: type=serial, connstring='/dev/tty.slab_usbtouart' Test the Serial Connection Profile You can test the connection profile with the ' image list ' command, which will list any application images present in flash memory: Adafruit Industries Page 41 of 88
42 $ newtmgr -c serial1 image list Images: slot=0 version: bootable: true flags: active confirmed hash: be52a255c25546dacc497d62faea a1c1916ce831697d40fc2c20689 Split status: N/A (0) The image shown above is the default image that the nrf52 Pro ships with Common newtmgr Commands The following commands are commonly used when doing day to day development and debugging with Mynewt based devices: Display Scheduler Task Activity via 'taskstat' You can also test the connection with newtmgr using the taskstat command, which will list some basic statistics about the tasks running in the task manager. Enter the following command: $ newtmgr -c serial1 taskstat Which should give you the following task statistics (output will vary depending on the Mynewt application that is running at the time): task pri tid runtime csw stksz stkuse last_checkin next_checkin ble_ll bleuart idle main Uploading Application Images with newtmgr If you don't have a Segger J-Link or similar debugger, the newtmgr tool can be used to upload an application image to the secondary bank of flash memory, and then switch application images during the next reset. This allows you to perform field updates over an inexpensive serial connection with no external HW required. 1. Build the Target Application ( newt build ) The first step is of course to build the target application that you wish to deploy. The default bleuart ( project is used in this case: Adafruit Industries Page 42 of 88
43 $ newt build bleuart Building target targets/bleuart... Target successfully built: targets/bleuart 2. Sign and Version the Image ( newt create-image ) You then need to 'sign' the image you just built with a version number and meta data used to validate the image when flashing, which is done via the create-image command: $ newt create-image bleuart App image succesfully generated: [PATH]/bin/targets/bleuart/app/apps/bleuart/bleuart.img Pay attention to the.img output filename since you will need this full path in the next step! 3. Upload the Image ( newtmgr image upload ) Now that we have a signed and versioned firmware image, we can copy the image to bank 1 of flash memory using the serial bootloader and the newtmgr tool: $ newtmgr -c serial1 image upload [PATH]/bin/targets/bleuart/app/apps/bleuart/bleuart.img Done At this point, you can see that there are two images stored on the device in two different flash banks, the original image that the board ships with, and the new image we just built, signed and uploaded: $ newtmgr -c serial1 image list Images: slot=0 version: bootable: true flags: active confirmed hash: be52a255c25546dacc497d62faea a1c1916ce831697d40fc2c20689 slot=1 version: bootable: true flags: hash: f68b3c26d378648cace2900db4145cd5ade6049ac5ec15a Split status: N/A (0) Pay attention to the 'flags' field, which indicates the state of images on the system. This value will change as we run through the update process. Adafruit Industries Page 43 of 88
44 4. Test the Image Upload ( newtmgr image test [hash] ) Now that the image has been uploaded successfully to the secondary bank of flash memory, we need to tell the system to 'test' the image during the next reset. What the test command will do is check the signature of the image, and then try to switch the two flash banks so that the old application (0.1.0) is in the secondary flash bank, and the new application (0.2.0) is in the primary bank. This happens at reset, and will cause a second delay as the flash writes are happening, so be sure to wait for the testing process to complete before interacting or interferring with the device! You can issue a test (and flash bank switch) request as follows, using the hash value from the image list command above: $ newtmgr -c serial1 image test f68b3c26d378648cace2900db4145cd5ade6049ac5ec15a Images: slot=0 version: bootable: true flags: active confirmed hash: be52a255c25546dacc497d62faea a1c1916ce831697d40fc2c20689 slot=1 version: bootable: true flags: pending hash: f68b3c26d378648cace2900db4145cd5ade6049ac5ec15a Split status: N/A (0) Notice that the image flag has been changed to PENDING, which means a test and flash bank switch is pending on the next reset! 5. Reset to Perform the Test and Image Bank Switch ( newtmgr reset ) For the flash bank switch and test procedure to complete, you must reset the device, which can be done from the command line as follows: $ newtmgr -c serial1 reset Done Be sure to wait at least 20 seconds after issuing the reset command, since the flash write takes seconds to complete and the device will appear unresponsive during the update process! If you run the image list command again you will see that the banks and flags values have changed, with version in the secondary bank and it's status set to 'confirmed': Adafruit Industries Page 44 of 88
45 $ newtmgr -c serial1 image list Images: slot=0 version: bootable: true flags: active hash: f68b3c26d378648cace2900db4145cd5ade6049ac5ec15a slot=1 version: bootable: true flags: confirmed hash: be52a255c25546dacc497d62faea a1c1916ce831697d40fc2c20689 Split status: N/A (0) 6. Confirm the Image Switch ( newtmgr image confirm ) The final step is to 'confirm' the image update process to make it permanent, which is done via the image confirm subcommand: $ newtmgr -c serial1 image confirm As of newtmgr the 'confirm' command will always return "Error: 1", but the confirm process does work, as verified with the image list command below! If you check the flags values again, you will see that version is now 'confirmed' and will continue to execute every time you reset the device: $ newtmgr -c serial1 image list Images: slot=0 version: bootable: true flags: active confirmed hash: f68b3c26d378648cace2900db4145cd5ade6049ac5ec15a slot=1 version: bootable: true flags: hash: be52a255c25546dacc497d62faea a1c1916ce831697d40fc2c20689 Split status: N/A (0) If you reset without confirming, the device will revert to the original (0.1.0) image! Note: You can optionally skip the 'test + reset' phase, and go directly to confirming an image after the upload is finished by using 'newtmgr -c serial1 confirm [hash]' with the hash of the image to finalize. This is a more dangerous choice, but the option is there if you wish to save some time. Adafruit Industries Page 45 of 88
46 Display Internal Statistics Mynewt has an internal statistics system that is very useful when debugging issues in the field or during development. You can defined individual statistics fields, and increment the values at appropriate moments, and access these from the command-line with the newtmgr stat command set. List all Statistic Groups $ newtmgr -c serial1 stat list stat groups: ble_att ble_gap ble_gattc ble_gatts ble_hs ble_l2cap ble_ll ble_ll_conn ble_phy ble_uart nffs_stats stat List all Values in a Statistic Group $ newtmgr -c serial1 stat ble_phy stat group: ble_phy 8310 phy_isrs 0 radio_state_errs 15 rx_aborts 0 rx_crc_err 0 rx_hw_err 0 rx_late 15 rx_starts 0 rx_valid tx_bytes 0 tx_fail 8295 tx_good 0 tx_hw_err 0 tx_late Adafruit Industries Page 46 of 88
47 Adafruit Mynewt Manager Please note that this app requires certain features to be available in the active firmware image, specifically BLE based newtmgr support. We suggest using the 'bleuart' app in Adafruit_Mynewt as a starting point for any app where you plan to use Adafruit Mynewt Manager! To make it easier to work with Mynewt based devices, Adafruit has published a free utility for ios (with Android support planned in the future) that can perform the following tasks: View live updates of the tasks present in the task scheduler View live updates of any statistics defined in the firmware Send BLE UART text in both directions if the BLE UART service is present Perform firmware updates over the air Getting the Application You can get the application from the Apple itunes App Store searching for 'Adafruit Mynewt' ( Adafruit Industries Page 47 of 88
48 Source Code The Swift source code for Adafruit Mynewt Manager is available on Github at the following URL: Adafruit Industries Page 48 of 88
49 Apache Mynewt Applications This section contains a guide on creating a progressively more complex application in Mynewt, starting with the absolute basics and adding useful features one by one. The individual pages can be references in isolation, but the example code builds up from one example to the next in chronological order. Create a New Project ( This page shows how to generate a new project, and add a custom application and build target to the project. Adding Tasks ( Add a custom task to the task scheduler Adding Shell Commands ( Add a custom shell command to the serial-based console Adding Statistics ( Add custom statistics to track the internal state of the system in an easy to monitor fashion Adafruit Industries Page 49 of 88
50 Create a New Project This page makes the following assumptions: 1. You have already installed the newt and newtmgr tools on your system (see the Native Installation pages in this learning guide for details) 2. The various build tools ( arm-none-eabi-gcc, etc.) are available from the command-line 3. You are using Mynewt version 1.1 for the tools and core codebase This project will have the following features: newtmgr support will be enabled over the serial port Shell support will be included, allowing you to enter commands over the serial connection Create a Project Skeleton The first thing to do is create a project skeleton via the following command: We'll use 'myproject' as a project name here, but you are free to change it to something else $ newt new myproject This should give you the following output: Downloading project skeleton from apache/mynewt-blinky... Installing skeleton in myproject... Project myproject successfully created. Download Project Dependencies Next download the project dependencies from the associated repos. Since this is a new project, only apache-mynewt-core will be downloaded: $ cd myproject $ newt install -v Depending on your system state, this should give you the following output: Adafruit Industries Page 50 of 88
51 $ newt install -v [apache-mynewt-core]: Downloading repository description Download successful! Downloading repository mynewt-core (branch: master; commit: mynewt_1_1_0_tag) at Cloning into '/var/folders/86/hb2vp14n5_5_yvdz_z8w9x_c0000gn/t/newt-repo '... remote: Counting objects: 65349, done. remote: Compressing objects: 100% (151/151), done. remote: Total (delta 130), reused 162 (delta 95), pack-reused Receiving objects: 100% (65349/65349), MiB 1.94 MiB/s, done. Resolving deltas: 100% (39656/39656), done. Will create new branch mynewt_1_1_0_tag from tag tags/mynewt_1_1_0_tag apache-mynewt-core successfully installed version none This should give you the following project structure:. LICENSE NOTICE README.md apps blinky pkg.yml src project.state project.yml repos apache-mynewt-core targets my_blinky_sim pkg.yml target.yml unittest pkg.yml target.yml Create a New Application Now that you have a project skeleton, you can start adding applications to it. A Mynewt app requires at least a main() function, a pkg.yml file, and a most of the time a syscfg.yml file, as well as a new 'app' folder where the files should be stored. To get started, create a new app folder as follows: $ mkdir apps/first We'll call this application 'first', but you can use any name you find appropriate Newt create the core apps/first/pkg.yml file with the following text (for example via $ nano apps/first/pkg.yml, or using your favorite text editor): Adafruit Industries Page 51 of 88
52 This file lists the external dependencies for your project pkg.name: apps/first pkg.type: app pkg.deps: - "@apache-mynewt-core/libc/baselibc" - "@apache-mynewt-core/kernel/os" - "@apache-mynewt-core/sys/sysinit" - "@apache-mynewt-core/sys/shell" - "@apache-mynewt-core/sys/console/full" - "@apache-mynewt-core/sys/log/full" - "@apache-mynewt-core/sys/stats/full" - "@apache-mynewt-core/hw/hal" - "@apache-mynewt-core/mgmt/imgmgr" - "@apache-mynewt-core/mgmt/newtmgr" - "@apache-mynewt-core/mgmt/newtmgr/transport/nmgr_shell" - "@apache-mynewt-core/boot/split" - "@apache-mynewt-core/boot/bootutil" Next create a apps/first/syscfg.yml file with the following content (for example $ nano apps/first/syscfg.yml ): This file contains config settings for your application to control what features and used or enabled during the build process syscfg.vals: # Use INFO log level to reduce code size. DEBUG is too large for nrf51. LOG_LEVEL: 1 REBOOT_LOG_CONSOLE: 1 # Enable the shell task. SHELL_TASK: 1 # Include names for statistics. STATS_NAMES: 1 # Enable shell commands. STATS_CLI: 1 LOG_CLI: 1 CONFIG_CLI: 1 # Enable newtmgr commands. STATS_NEWTMGR: 1 LOG_NEWTMGR: 1 CONFIG_NEWTMGR: 1 Finally create a apps/first/src/main.c file where the main source code will be stored: $ mkdir -p apps/first/src $ nano apps/first/src/main.c Adafruit Industries Page 52 of 88
53 ... and enter the following code: #include <assert.h> #include <string.h> #include "os/os.h" #include "bsp/bsp.h" #include "hal/hal_gpio.h" #include "sysinit/sysinit.h" int main(int argc, char **argv) { int rc; /* Initialize the OS */ sysinit(); /* Configure the LED GPIO as an output and HIGH (On) */ hal_gpio_init_out(led_blink_pin, 1); while (1) { /* Run the event queue to process background events */ os_eventq_run(os_eventq_dflt_get()); } } return rc; Create a New Target Next, you need to create a new target that points to your app via the following command: $ newt target create first Target targets/first successfully created... and then configure the new target with the following mandatory fields: 1. Set the Target's app Field Point the new target to the app we created above via: $ newt target set first app=apps/first Target targets/first successfully set target.app to apps/first 2. Set the Target's bsp Field Next set the bsp (board support package) for the new target, which indicates the HW that the app will be running on. If you are using the Adafruit nrf52 Pro Feather this should be: Adafruit Industries Page 53 of 88
54 $ newt target set first Target targets/first successfully set target.bsp 3. Set the build_profile Field Finally set the build profile for the new target ( debug or optimized ): $ newt target set first build_profile=debug Target targets/first successfully set target.build_profile to debug 4. Test the Target Settings You can review the target settings via the following command: 'my_blinky_sim' is an artifact of the default project creation process and can be ignored $ newt target show first targets/first app=apps/first bsp=@apache-mynewt-core/hw/bsp/ada_feather_nrf52 build_profile=debug targets/my_blinky_sim app=apps/blinky bsp=@apache-mynewt-core/hw/bsp/native build_profile=debug Final Project Structure The final project structure should look like this: apps/first LICENSE NOTICE README.md apps blinky pkg.yml src main.c pkg.yml project.yml src main.c syscfg.yml Build and Flash the Target Finally, you can build your target, pointing to the new application, and using the specified target BSP and build profile: Adafruit Industries Page 54 of 88
55 $ newt build first Building target targets/first Compiling repos/apache-mynewt-core/boot/bootutil/src/loader.c... Compiling repos/apache-mynewt-core/util/mem/src/mem.c... Archiving util_mem.a Linking [PATH]/bin/targets/first/app/apps/first/first.elf Target successfully built: targets/first Sign the Build with a Version Number You can prepare the image to be flashed to the device with a mandatory version number and signing details via the newt create-image command: $ newt create-image first App image succesfully generated: [PATH]/bin/targets/first/app/apps/first/first.img And finally you can flash the image via one of two methods: Flash the Image via a Segger J-Link With the J-Link connected to the nrf52, run the following command to flash the signed image: This command assumes that you have the Segger J-Link drivers installed on your system, as described in the Native Installation pages. $ newt load first Loading app image into slot 1 Flash the Image via the Serial Port and newtmgr For details on how to flash the image over newtmgr using only the serial port (no J-Link required), see Uploading Application Images with newtmgr ( Adafruit Industries Page 55 of 88
56 Adding Tasks The official Mynewt 'Task' documentation is available at: A task ( os_task ) in Mynewt is made up of a task handler function, a task 'stack' which provide the block of memory that will be used when executing the task, and a priority level. Since Mynewt is a multitasking environment, tasks are also assigned a priority level, and at any given time the highest priority task will run. When the highest priority task stops (waiting for an event, or when delayed in code) the next highest priority task will fire, and so on until the scheduler gets down to the lowest priority task, usually called 'idle' (which will be set by the kernel when the OS starts up). Declaring a task, priority and stack size In order to declare a task, you need to set the task's: priority stack size and the name of the task handler that will be run when the task is active. The task's priority can be from , where the higher the number the lower the priority. The stack size is in units of os_stack_t, which is usually a 32-bit value, meaning a stack size of 64 (as shown in the example below) is 256 bytes wide. The task handler has the following signature: void my_task_func(void *arg) /* Define task stack and task object */ #define MY_TASK_PRIO (OS_TASK_PRI_HIGHEST) #define MY_STACK_SIZE OS_STACK_ALIGN(64) struct os_task my_task; os_stack_t my_task_stack[my_stack_size]; Initializing a task To initialize the task, you need to call the sysinit() function then add your task to the os via: os_task_init. This normally takes place in the main loop, or in a dedicated function called inside main like init_tasks(). os_task_init has the following signature and parameters: os_task_init(struct os_task *t, const char *name, os_task_func_t func, void *arg, uint8_t prio, os_time_t sanity_itvl, os_stack_t *stack_bottom, uint16_t stack_size) struct os_task *t : A pointer to the os_task to initialize const char *name : The public name to associate with this task, which will be visible in the shell, newtmgr, and other reporting systems. os_task_funct_t func : The function to execute when this task is active, which will have the following signature: void Adafruit Industries Page 56 of 88
57 my_task_handler(void *arg) void *arg : Optional arguments to pass into the task handler uint8_t prio : The priority level for the task, lower = higher priority os_time_t sanity_itvl : The time at which this task should check in with the sanity task. OS_WAIT_FOREVER means never check in. os_stack_t *stack_bottom : A pointer to the bottom of a task's stack. uint16_t stack_size : The size of the task's stack (in os_stack_t units), which are usually 32-bits. The following examples initialises a task matching the values declared earlier in this document: /* This is the main function for the project */ int main(void) { int rc; /* Initialize OS */ os_init(); /* Initialize the task */ os_task_init(&my_task, "my_task", my_task_func, NULL, MY_TASK_PRIO, OS_WAIT_FOREVER, my_task_stack, MY_STACK_SIZE); /* Start the OS */ os_start(); /* os start should never return. If it does, this should be an error */ assert(0); } return rc; Implementing the task handler The last part of the system is the task handler, which will be called every time that the task is active (as determined by the scheduler). Task handlers are infinite loops that have an initial setup face, and then normally a while(1) loop that runs forever as long as the task is active. The following example initialises a GPIO pin as an output, setting the pin high. It then starts an infinite loop and toggles the LED every second, sleeping between 1s intervals so that other tasks can run: Note that there are two parts to the task handler. An initial chunk of code that will be run once when the task is initialized, then a 'while (1)' loop that will be run in repetition whenever the task has focus in the scheduler. Adafruit Industries Page 57 of 88
58 static void my_task_func(void *arg) { hal_gpio_init_out(led_blink_pin, 1); while (1) { /* Wait one second */ os_time_delay(os_ticks_per_sec * 1); } } /* Toggle the LED */ hal_gpio_toggle(led_blink_pin); Task Delays There are various ways that a task can be interrupted, such as delaying execution for a specific amount of time, waiting for an event on an event queue, waiting for a semaphore, etc. Delaying your tasks is important, because as long as your task is active, no tasks of lower priority will execute. As such, it's important to manage your tasks as efficiently as possible to ensure that clock cycles are available for other tasks in the system. os_time_delay The os_time_delay function is the easiest way to cause a delay in execution in your task. Simply specify a specific number of ticks, and the scheduler will mark this task as inactive for the indicated delay. Please note that os_time_delay uses system ticks, which may vary from one system to the next, so any delays should be based on the OS_TICKS_PER_SECOND macro to remain portable. Example: Updating apps/first/src/main.c A simple example of adding a blinky task handler to apps/first can be implemented by updating apps/first/src/main.c with the following code, and reflashing the firmware image: Adafruit Industries Page 58 of 88
59 #include <assert.h> #include <string.h> #include "os/os.h" #include "bsp/bsp.h" #include "hal/hal_gpio.h" #include "sysinit/sysinit.h" /* Define task stack and task object */ #define LED_TASK_PRIO (100) /* 1 = highest, 255 = lowest */ #define LED_STACK_SIZE OS_STACK_ALIGN(64) struct os_task led_task; os_stack_t led_task_stack[led_stack_size]; static void led_task_func(void *arg); int main(int argc, char **argv) { int rc; /* Initialize the task */ os_task_init(&led_task, "blinky", led_task_func, NULL, LED_TASK_PRIO, OS_WAIT_FOREVER, led_task_stack, LED_STACK_SIZE); /* Initialize the OS */ sysinit(); while (1) { /* Run the event queue to process background events */ os_eventq_run(os_eventq_dflt_get()); } } return rc; static void led_task_func(void *arg) { /* Configure the LED GPIO as an output and HIGH (On) */ hal_gpio_init_out(led_blink_pin, 1); while (1) { /* Wait one second */ os_time_delay(os_ticks_per_sec * 1); } } /* Toggle the LED */ hal_gpio_toggle(led_blink_pin); You can vary the blinky rate by adjusting the delay in 'os_time_delay' in the task handler Checking Task Status Adafruit Industries Page 59 of 88
60 You can verify the task status from the command line with the newtmgr taskstat command: $ newtmgr -c serial1 taskstat task pri tid runtime csw stksz stkuse last_checkin next_checkin blinky idle main Adafruit Industries Page 60 of 88
61 Adding Shell Commands The official Shell documentation can be seen here: Mynewt includes a 'Shell' library that allows you to add an extensible command-line style interface to your applications. You can implement custom commands that users can execute over a simple serial connection, and display formatted text back to the end users. Adding shell support To add shell support to your app, make sure the following pkg.deps are defined in your pkg.yml file: pkg.deps: - "@apache-mynewt-core/sys/console/full" - "@apache-mynewt-core/sys/shell" - "@apache-mynewt-core/sys/sysinit" And in the syscfg.vals section of syscfg.yml add the following: syscfg.vals: # Enable the shell task. SHELL_TASK: 1 Adding a custom command handler To add a new command handler use the following code snippets, placing the different sections at an appropriate place in your code: Adafruit Industries Page 61 of 88
62 #include "console/console.h" #include "shell/shell.h"... // Command handler prototype declaration static int shell_test_cmd(int argc, char **argv); // Shell command struct static struct shell_cmd shell_test_cmd_struct = {.sc_cmd = "test",.sc_cmd_func = shell_test_cmd };... // Implement your command handler static int shell_test_cmd(int argc, char **argv) { console_printf("test!\n"); return 0; }... // Call this before sysinit to register the command #if MYNEWT_VAL(SHELL_TASK) shell_cmd_register(&shell_test_cmd_struct); #endif Example: Updating apps/first/src/main.c You can update apps/first with a custom shell command using the following code in main.c: #include <assert.h> #include <string.h> #include "os/os.h" #include "bsp/bsp.h" #include "hal/hal_gpio.h" #include "sysinit/sysinit.h" #include "console/console.h" #include "shell/shell.h" /* Define task stack and task object */ #define LED_TASK_PRIO (100) /* 1 = highest, 255 = lowest */ #define LED_STACK_SIZE OS_STACK_ALIGN(64) struct os_task led_task; os_stack_t led_task_stack[led_stack_size]; /* LED task handler prototype declaration */ static void led_task_func(void *arg); /* Command handler prototype declaration */ static int shell_test_cmd(int argc, char **argv); /* Shell command struct */ Adafruit Industries Page 62 of 88
63 /* Shell command struct */ static struct shell_cmd shell_test_cmd_struct = {.sc_cmd = "test",.sc_cmd_func = shell_test_cmd }; int main(int argc, char **argv) { int rc; /* Initialize the task */ os_task_init(&led_task, "blinky", led_task_func, NULL, LED_TASK_PRIO, OS_WAIT_FOREVER, led_task_stack, LED_STACK_SIZE); /* Call this before sysinit to register the command */ #if MYNEWT_VAL(SHELL_TASK) shell_cmd_register(&shell_test_cmd_struct); #endif /* Initialize the OS */ sysinit(); while (1) { /* Run the event queue to process background events */ os_eventq_run(os_eventq_dflt_get()); } } return rc; /* Implement the 'test' command handler */ static int shell_test_cmd(int argc, char **argv) { console_printf("test!\n"); return 0; } static void led_task_func(void *arg) { /* Configure the LED GPIO as an output and HIGH (On) */ hal_gpio_init_out(led_blink_pin, 1); while (1) { /* Wait one second */ os_time_delay(os_ticks_per_sec * 1); } } /* Toggle the LED */ hal_gpio_toggle(led_blink_pin); Testing the Shell Command You can test the new 'test' shell command by connecting over serial: Adafruit Industries Page 63 of 88

64 $ minicom -D /dev/tty.slab_usbtouart Once connected you can send the ' help ' command to get a list of valid shell commands, and then then 'test' command which should display ' Test! ' in the shell: Adafruit Industries Page 64 of 88
65 Adding Statistics Full documentation on statistics is available here: Mynewt includes an internal statistics system where numeric values can be declared and incremented over time, then accessed as a debug and analysis tool. For example, every time a specific sensor is accessed, you can increment the sensor_reads statistic value by one (assigning whatever variable name you want), and when a specific bug or condition occurs you can check the value to see whether or how many times the sensor was accessed before the specific condition occurs. You can also use statistics to verify the number of bytes sent and received over a specific peripheral to make sure sensitive interrupt driven code is working well without having to stop the entire system. Configuring Your App for Statistics To enable statistics in your application, the following dependency needs to be present in pkg.yml : pkg.deps: - "@apache-mynewt-core/sys/stats" To save flash space internally, statistics are referenced by number by default. If you wish to preserve the full name of the individual statistics for easier debugging, then the following flag also needs to be added to the syscfg.yml file: syscfg.vals: # Include names for statistics. STATS_NAMES: 1 Optionally, if you wish to access statistics from the shell interface, you can also enable the ' stat ' command with the following flag in syscfg.yml : syscfg.vals: STATS_CLI: 1 Adding Stats to your main.c File: Stats requires the following header be present: #include <stats/stats.h> This will enable the use of the STATS* macros to define the stats layout, following the example below: STATS_SECT_START(my_stat_section) STATS_SECT_ENTRY(attempt_stat) STATS_SECT_ENTRY(error_stat) STATS_SECT_END Adafruit Industries Page 65 of 88
66 At compile time, this will resolve to the following structure: struct stats_my_stat_section { struct stats_hdr s_hdr; uint32_t sattempt_stat; uint32_t serror_stat; }; You will also need to provide names for each field, regardless of WHETHER you have enabled naming support via STATS_NAMES or not: Note that the field names need to match between the STATS_SECT_ENTRY name above and the STATS_NAME entry below! /* Define a few stats for querying */ STATS_NAME_START(my_stat_section) STATS_NAME(my_stat_section, attempt_stat) STATS_NAME(my_stat_section, error_stat) STATS_NAME_END(my_stat_section) At compile time, this will resolve to the following structure: struct stats_name_map g_stats_map_my_stat_section[] = { { builtin_offsetof (struct stats_my_stat_section, sattempt_stat), "attempt_stat" }, { builtin_offsetof (struct stats_my_stat_section, serror_stat), "error_stat" }, }; Accessing the Stats in Your Code You will need to declare a global variable somewhere to holds the stats data, using the model below: STATS_SECT_DECL(my_stat_section) g_mystat; If the global definition is is another file and you are referencing it elsewhere, you would declare this in the file where you will modify locally: extern STATS_SECT_DECL(my_stat_section) g_mystat; Initializing the Stats Before your stats can be used or accessed, they need to be initialised and registered. You can initialise your stats entry as follows: The stats_init() and stats_register() function calls should occur AFTER the sysinit(); function! Adafruit Industries Page 66 of 88
67 rc = stats_init( STATS_HDR(g_mystat), STATS_SIZE_INIT_PARMS(g_mystat, STATS_SIZE_32), STATS_NAME_INIT_PARMS(my_stat_section)); assert(rc == 0); For the stat size, you can use one of the following values: STATS_SIZE_16 -- stats are 16 bits (wraps at 65536) STATS_SIZE_32 -- stats are 32 bits (wraps at ) STATS_SIZE_64 -- stats are 64-bits You then need to register the stats entry so that you can access it, which is done via the following function call: NOTE: The name below is the name that you will use when accessing the stats via the console or via the newtmgr stat command rc = stats_register("my_stats", STATS_HDR(g_mystat)); assert(rc == 0); Updating the Stats Values Incrementing To increment the stats values, you can use the STATS_INC or STATS_INCN macros, as shown below: STATS_INC(g_mystat, attempt_stat); rc = do_task(); if(rc == ERR) { STATS_INC(g_mystat, error_stat); } To increment the value a specific number use STATIS_INCN : STATS_INCN(g_mystat, attempt_stat, 5); Accessing Stats with the Console or newtmgr Console Access Assuming that you have enabled named access to stats via STATS_NAME_ENABLE you can access your stats from the console via: stat my_stats This will give you something resembling the following output: Adafruit Industries Page 67 of 88
68 12274:attempt_stat: :error_stat: 0 If you don't have names enabled via STATS_NAME_ENABLE you would see something like this: stat my_stats 29149:s0: :s1: 0 newtmgr Access You can also access stats through newtmgr as follows: $ newtmgr -c serial1 stat my_stats Return Code = 0 Stats Name: my_stats attempt_stat: 0 error_stat: 0 Example: Adding Stats to apps/first/src/main.c You can extend apps/first with custom stats by updating apps/first/src/main.c with the following code: #include <assert.h> #include <string.h> #include "os/os.h" #include "bsp/bsp.h" #include "hal/hal_gpio.h" #include "sysinit/sysinit.h" #include "console/console.h" #include "shell/shell.h" #include "stats/stats.h" /* Define task stack and task object */ #define LED_TASK_PRIO (100) /* 1 = highest, 255 = lowest */ #define LED_STACK_SIZE OS_STACK_ALIGN(64) struct os_task led_task; os_stack_t led_task_stack[led_stack_size]; /* LED task handler prototype declaration */ static void led_task_func(void *arg); /* Command handler prototype declaration */ static int shell_test_cmd(int argc, char **argv); /* Shell command struct */ static struct shell_cmd shell_test_cmd_struct = {.sc_cmd = "test",.sc_cmd_func = shell_test_cmd }; /* Define a custom stats group for querying */ STATS_SECT_START(led_stat_section) Adafruit Industries Page 68 of 88
69 STATS_SECT_ENTRY(led_toggles) STATS_SECT_END /* Define a few stat name fields for querying */ STATS_NAME_START(led_stat_section) STATS_NAME(led_stat_section, led_toggles) STATS_NAME_END(led_stat_section) /* Add the global variable to access and increment stats */ STATS_SECT_DECL(led_stat_section) g_ledstats; int main(int argc, char **argv) { int rc; /* Initialize the task */ os_task_init(&led_task, "blinky", led_task_func, NULL, LED_TASK_PRIO, OS_WAIT_FOREVER, led_task_stack, LED_STACK_SIZE); /* Call this before sysinit to register the command */ #if MYNEWT_VAL(SHELL_TASK) shell_cmd_register(&shell_test_cmd_struct); #endif /* Initialize the OS */ sysinit(); /* Initialise the custom stats section */ rc = stats_init( STATS_HDR(g_ledstats), STATS_SIZE_INIT_PARMS(g_ledstats, STATS_SIZE_32), STATS_NAME_INIT_PARMS(led_stat_section)); assert(rc == 0); /* Then register the custom section with the stats system */ rc = stats_register("led_stats", STATS_HDR(g_ledstats)); assert(rc == 0); while (1) { /* Run the event queue to process background events */ os_eventq_run(os_eventq_dflt_get()); } } return rc; /* Implement the 'test' command handler */ static int shell_test_cmd(int argc, char **argv) { console_printf("test!\n"); return 0; } static void led_task_func(void *arg) { /* Configure the LED GPIO as an output and HIGH (On) */ Adafruit Industries Page 69 of 88
; } } /* Increment the LED stat */ STATS_INC(g_ledstats, led_toggles); Monitoring via netwmgr You can monitor the led_toggles value via newtmgr with the following")
70 /* Configure the LED GPIO as an output and HIGH (On) */ hal_gpio_init_out(led_blink_pin, 1); while (1) { /* Wait one second */ os_time_delay(os_ticks_per_sec * 1); /* Toggle the LED */ hal_gpio_toggle(led_blink_pin); } } /* Increment the LED stat */ STATS_INC(g_ledstats, led_toggles); Monitoring via netwmgr You can monitor the led_toggles value via newtmgr with the following command (where we can see that the LED had been toggled 11 times to far in this case): $ newtmgr -c serial1 stat led_stats stat group: led_stats 11 led_toggles Monitoring via shell/console Alternatively, you can connect to the shell (for example, via: $ minicom -D /dev/tty.usbtouart ) and run the stat led_stats command to get the same value(s): Adafruit Industries Page 70 of 88
71 Adding BLE UART Support The easiest way to add BLE UART support is using the bleuart helper module ( that is part of Adafruit_Mynewt ( an in house Mynewt project that we created during product development. If you wish to test a complete application that shows how to use BLE UART, you should start with the bleuart ( example application, which exposes shell commands to work with BLE UART, as well as tracks the TX and RX byte count via statistics, and works well with the Adafruit Mynewt Manager mobile application. This section will be expanded in the near future with details on working with BLE and BLE UART in Mynewt, but at the moment we only have example code that we've written to get you started. Mynewt Nimble (BLE Stack) Documentation Mynewt's open source Bluetooth Low Energy stack is called nimble. Full documentation on number can be found via the link below: Adafruit Industries Page 71 of 88
72 Advanced Debugging The pages in this section are for advanced users who need to debug remote or complex systems, and are aimed at giving you a head start solving specific problems: GDB Debugging ( General overview of common GDB debugging commands and suggestions on how to debug common problems via GDB Command Line Debugging ( Some common tricks to help debug issues from the command line Field Debugging Tips ( Advice on debugging crash dumps from devices in the field Adafruit Industries Page 72 of 88
73 GDB Debugging GDB debugging will require a Segger JLink for the GDB Server and debug port access The definitive guide to GDB is available here: ftp://ftp.gnu.org/old-gnu/manuals/gdb/html_chapter/gdb_toc.html Starting the Debugger You can start GDB (GNU Debugger) with newt with the following command, with a JLink connected to the target device: # Optionally build and flash the image $ newt build target_name $ newt create-image target_name $ newt load target_name # Start GDB $ newt debug target_name You can then start and stop code execution on the target MCU via: (gbd) monitor halt and (gbd) monitor go You can also start a fresh run of the code via: (gbd) monitor reset (gdb) c You can check if the OS is running by executing the following code, which will display the OS time counter: (gdb) p/d g_os_time Displaying Values To display the current state of a struct or global variable, use the print [name] (or p [name] ) command. Basic Example The example below halts the processor and then prints a struct instance named ble_phy_stats. > Tip: You can optionally enable pretty printing via set print pretty on Adafruit Industries Page 73 of 88
74 (gdb) monitor halt (gdb) set print pretty on (gdb) print ble_phy_stats $5 = { s_hdr = { s_name = 0x0, s_size = 0 '\000', s_cnt = 0 '\000', s_pad1 = 0, s_next = { stqe_next = 0x0 } }, sphy_isrs = 0, stx_good = 1, stx_fail = 0, stx_late = 0, stx_bytes = 27, srx_starts = 0, srx_aborts = 0, srx_valid = 0, srx_crc_err = 0, srx_late = 0, sno_bufs = 0, sradio_state_errs = 0, srx_hw_err = 0, stx_hw_err = 0 } Formatting Display Values You can also format the printed values with the following formatters: x Regard as integer and display as hexadecimal d Regard as integer and display as signed decimal u Regard as integer and display as unsigned decimal c Regard as integer and print as a char constant f Regard as float and print in floating point syntax t Print integer as binary a Print as an address (hex plus offset). Useful to discover where an address is located (ex. p/a 0x12345 yields $3 = 0x12345 <_initialize_vx+396> ) To print the BLE link layer stack ( g_ble_ll_stack ) in hex enter: (gdb) p/x g_ble_ll_stack $17 = {0xdeadbeef <repeats 22="" times="">, 0x , 0x304, 0xe000e100, 0x100, 0x20001be4, 0x0, 0xffff 0xffffffff, 0x , 0x19f14, 0x , 0x0, 0x20001e90, 0x , 0x , 0x354, 0xa0a3, 0x 0x , 0x20001e8c, 0x200021d8, 0x0, 0x9657, 0x4, 0xffffffff, 0xffffffff, 0x1fff8000, 0x0, 0xa897, 0x1fff8000, 0xffffffff, 0xffffffff, 0x1fff8000, 0x0, 0x0, 0x8, 0xde, 0x93c9, 0x0} Displaying an Array of Values You can display the contents of an array as follows: Adafruit Industries Page 74 of 88
75 (gdb) monitor halt (gdb) set print pretty on (gdb) print Useful Mynewt/Nimble Structs and Fields Some useful Mynewt or nimble fields to display can be seen below: ble_phy_stats - PHY stats for traffic tracking ble_ll_stats - Link layer stats ble_ll_conn_stats - Connection stats g_ble_ll_adv_sm - Advertising state machine g_ble_ll_stack - Link layer stack For example: (gdb) monitor halt (gdb) set print pretty on (gdb) p ble_phy_stats $16 = { s_hdr = { s_name = 0x0, s_size = 0 '\000', s_cnt = 0 '\000', s_pad1 = 0, s_next = { stqe_next = 0x0 } }, sphy_isrs = 0, stx_good = 1, stx_fail = 0, stx_late = 0, stx_bytes = 27, srx_starts = 0, srx_aborts = 0, srx_valid = 0, srx_crc_err = 0, srx_late = 0, sno_bufs = 0, sradio_state_errs = 0, srx_hw_err = 0, stx_hw_err = 0 } Memory Manipulation You can display the memory contents of a specific address via the x command. To see the main stack pointer location on an ARM chip, for example, run: (gdb) x 0 0x0: 0x You can also adjust the output size with the optional x/nfu flags: Adafruit Industries Page 75 of 88
76 n Indicates how much memory to display (in u units), default = 1 f Indicates the display format, where: s means null-terminated string i means machine instruction x Display as hexadecimal (default) d Display as signed decimal u Display as unsigned decimal c Print as a char constant f Print in floating point syntax t Print integer as binary u The unit size, which can be: b Bytes h Halfwords (two bytes) w Words (four bytes) g Giant worlds (eight bytes) > Note: Whenever you change the unit size ( u ), the updated value becomes > the system default and will be retained on future requests until it is > changed again. For example, to display the same 32-bit stack pointer at address 0 on an ARM processor as four individual bytes displayed as unsigned decimal values you would enter: (gdb) x/4ub 0 0x0: To display the 32-bit value in binary notation you would enter: (gdb) x/4tb 0 0x0: To display 4 'words' as 32-bit values in hex notation: (gdb) x/4xw 0 0x0: 0x x x x Stack Manipulation The following commands can be used to work with the stack such as producing a dump of the stack frames, or checking for stack overflow. Display the Stack Trace You can display a list of function calls up to the point where the MCU halted with the backtrace or bt command, which will dump individual stack frame records: Adafruit Industries Page 76 of 88
77 (gdb) bt #0 os_tick_idle (ticks=131072) at hal_os_tick.c:146 #1 0x000091f6 in os_idle_task (arg=<optimized out="">) at os.c:64 #2 0x in?? () Each line shows the frame number, and the function name and return address. In this case, the code has stopped at os_tick_idle in halostick.c, which was called from os_idle_task in os.c. Display Stack Frame Details You can display detailed information about a specific stack frame via the info frame [n] command: (gdb) info frame Stack level 0, frame at 0x20001e60: pc = 0x184aa in os_tick_idle (hal_os_tick.c:146); saved pc = 0x91f6 called by frame at 0x20001e80 source language c. Arglist at 0x20001e40, args: ticks= Locals at 0x20001e40, Previous frame's sp is 0x20001e60 Saved registers: r3 at 0x20001e48, r4 at 0x20001e4c, r5 at 0x20001e50, r6 at 0x20001e54, r7 at 0x20001e58, r8 at 0x20001 r9 at 0x20001e44, lr at 0x20001e5c To display the arguments for the current stack frame you can run: (gdb) info args ticks = To display the local variables (one per line) for the stack frame run (data may or may not be available depending on build setings): (gdb) info locals ocmp = <optimized out=""> Displaying ARM Registers You can also display a list of the ARM registers via info registers. The following example shows the same pc value seen above where we are halted at 0x184aa on os_tick_idle, and the stack pointer ( sp ) is at 0x20001e40, one 32 byte (0x20) stack frame away from the value seen earlier. Adafruit Industries Page 77 of 88
78 (gdb) info registers r0 0x r1 0x4000b r2 0xb4a5e r3 0x3fffef r4 0xffffffff r5 0xffffff r6 0x r7 0x r8 0xff r9 0x r10 0x1fff r11 0x0 0 r12 0x20 32 sp 0x20001e40 0x20001e40 <g_idle_task_stack+192> lr 0x pc 0x184aa 0x184aa <os_tick_idle+182> xpsr 0x MSP 0x PSP 0x20001e PRIMASK 0x1 1 BASEPRI 0x0 0 FAULTMASK 0x0 0 CONTROL 0x2 2 Working with Source Code You can display source code inside GDB with some basic commands. Displaying a function This will display the first 10 lines of the specified function: (gdb) list os_idle_task 39 #endif 40 #define MAX_IDLE_TICKS (600 * OS_TICKS_PER_SEC) /* 10 minutes */ void 43 os_idle_task(void *arg) 44 { 45 os_sr_t sr; 46 os_time_t now; 47 os_time_t iticks, sticks, cticks; 48 To display the next 10 lines enter: Adafruit Industries Page 78 of 88
79 (gdb) list 49 /* For now, idle task simply increments a counter to show it is running. */ 50 while (1) { 51 ++g_os_idle_ctr; 52 OS_ENTER_CRITICAL(sr); 53 now = os_time_get(); 54 sticks = os_sched_wakeup_ticks(now); 55 cticks = os_callout_wakeup_ticks(now); 56 iticks = min(sticks, cticks); 57 if (iticks < MIN_IDLE_TICKS) { 58 iticks = 0; > Tip: You can adjust the number of lines displayed via set listsize [count] Displaying code at a specific address If you wish to display the code at a specific address you can prefix the address with a * character as shown below: (gdb) list *0x00009e54 0x9e54 is in crash_device (crash_test.c:46). 41 if (!strcmp(how, "div0")) { val1 = 42; 44 val2 = 0; val3 = val1 / val2; 47 console_printf("42/0 = %d\n", val3); 48 } else if (!strcmp(how, "jump0")) { 49 ((void (*)(void))0)(); 50 } else if (!strcmp(how, "ref0")) { Running an arbitrary function when halted at a breakpoint When halted at a breakpoint, you can run a function via the call command. Tip via Håkon Alseth. > Make sure to include the parenthesis after the function name when issuing the call command, which will cause the device to go back to the halt state once the function has completed execution. Connect to the target using $ newt debug target_name or via some variation of the following code: arm-none-eabi-gdb _build/*.out (gdb) target remote :2331 (gdb) load Then run until you hit the BP, and at an appropriate moment execute the call command with your target function name: (gdb) mon reset (gdb) c <break somewhere="" in="" your="" code,="" optionally="" using="" ctrl+c=""> (gdb) call test_function() Adafruit Industries Page 79 of 88
80 Command Line Debugging The following tips and tricks can be used when debugging from the command line. Grep'ing Source Code The grep tool allows you to efficiently find references to strings in the current folder or recursively, such as looking for every reference to a specific function name or variable in your codebase. Grep recursively for a partial string To perform a recursive search for a partial string enter: $ grep -rn "./" -e "SEARCH_PATTERN" r means recursive n means show line numbers e is the string to search for ( SEARCH_PATTERN in this case) This will return a reference to any instance starting with SEARCH_PATTERN, including the specific line number. > NOTE: This search is case-sensitive. Adding the i flag will make the search case insensitive. Grep recursively for an exact string To perform a recursive search for an exact match of an entire string enter: $ grep -rnw "./" -e "SEARCH_PATTERN" w means whole word This will return a reference to any instances of SEARCH_PATTERN. Grep recursively for a string ignoring the case If you wish the search to be case insensitive you can also add the -i argument, as shown below: $ grep -rni "./" -e "SeArCh_PaTtErN" i means case insensitive (default is case sensitive searching) This would return 'SearchPattern' or 'SEARCHPATTERN' as valid matches. Grep recursively with specific file types If you wish to restrict your search to a specific file type, you can use the --include flag as follows: $ grep --include=\*.{c,h} -rnw "./" -e "SEARCH_PATTERN" Adafruit Industries Page 80 of 88
81 This will only search files ending in.c or.h You can also exclude certain file types with the --exclude flag: $ grep --exclude=*.o -rnw "./" -e "SEARCH_PATTERN" This will exclude all files ending in.o from the search. Adafruit Industries Page 81 of 88
82 Field Debugging Tips Debugging devices deployed remotely is always a challenge but this documentation gives some basic techniques to help debug issues remotely. Debugging Crash Dumps If a task crashes (enter the fault_handler etc.) it will normally generate a simple dump of the system registers, which can be useful to find the cause of the problem if you have the matching.elf file locally. This example uses the crash_test library from apache-mynewt-core to simulate various crash events locally via the crash command from shell: crash div0 6976:Unhandled interrupt (3), exception sp 0x2000a : r0:0x r1:0x000242bd r2:0x r3:0x a 6976: r4:0x r5:0x2000c002 r6:0x2000bffc r7:0x00025e : r8:0x0000d04d r9:0x c r10:0x r11:0x :r12:0x lr:0x00009e45 pc:0x00009e54 psr:0x :ICSR:0x HFSR:0x CFSR:0x :BFAR:0xe000ed38 MMFAR:0xe000ed34 In the example above we see the output of a divide by zero crash. The important register value is pc. Make a note of this address since your will use it in one of the debugging methods described below: Option 1: Debugging Crash Dumps with GDB If you have access to the matching app revision, build the target and deploy it to the device under test: $ newt build throughput $ newt create-image throughput $ newt load throughput To start GDB via the following command: $ newt debug throughput Please note that you will require a Segger J-Link to run the 'newt debug' command! This will start up the GDB server and connect to the device under test. See GDB Debugging ( for details on using GDB. Run the following commands from the GDB shell: Adafruit Industries Page 82 of 88
83 (gdb) monitor go (gdb) list *0x00009e54 0x9e54 is in crash_device (crash_test.c:46). 41 if (!strcmp(how, "div0")) { val1 = 42; 44 val2 = 0; val3 = val1 / val2; 47 console_printf("42/0 = %d\n", val3); 48 } else if (!strcmp(how, "jump0")) { 49 ((void (*)(void))0)(); 50 } else if (!strcmp(how, "ref0")) { You can see here that line 46 of crash_test.c caused the fault, which is where the divide by zero error occurs. Option 2: Debugging Crash Dumps with objdump If you have the.elf file but can't use GDB debugger you can see the code for the specified address from the command line using the objdump tool that is part of GCC. From the command-line (with GCC available as part of the system path) run the following command: Note: You must specify a --stop-address that is higher than the --start-address with this command, but you can increment the hex value by 1 byte to return only the line of code that caused the crash. You can play with the start and stop addresses to provide some context to the error. $ arm-none-eabi-objdump -S --start-address=0x00009e54 --stop-address=0x00009e55 bin/targets/throughput/ap bin/targets/throughput/app/apps/throughput/throughput.elf: file format elf32-littlearm Disassembly of section.text: 00009e54 <crash_device+0x1c>: if (!strcmp(how, "div0")) { val1 = 42; val2 = 0; val3 = val1 / val2; 9e54: fb93 f3f2 sdiv r3, r3, r2 Debugging Repeatable Crashes If you can repeat the crash scenario, you can find out the cause with the following sequence of events and two terminal windows: Run GDB with the following command: $ newt run <target-name> 0 Adafruit Industries Page 83 of 88
84 When GDB comes up type c and press enter. In a different shell, proceed to do whatever is required to cause the device to crash (such as sending a shell command, newtmgr cmd, etc.. If the device crashes, GDB should indicate such. You can then type the following commands in GDB to find out where is crashed: (gdb) bt (gdb) p *g_current_task Adafruit Industries Page 84 of 88
85 Adafruit_Mynewt Adafruit_Mynewt ( is a sample Mynewt project that we use internally for various projects and experiments. It isn't necessary to use this with the Adafruit Feather nrf52 Pro, but the repository contains a number of helper modules and apps, and can help you get started working with things like BLE UART and general Bluetooth Low Energy communication. Installing Adafruit_Mynewt To install and use the repo locally, first create a git clone of it using your favorite git IDE or from the command-line via: $ git clone git@github.com:adafruit/adafruit_mynewt.git Once the repository in installed locally, enter the Adafruit_Mynewt directory and install the Mynewt dependencies and libraries via: $ newt install -v NOTE: You only need to run this command once, since the mynewt core libraries are not part of the Adafruit_Mynewt repo itself and will be downloaded into the '/repos' folder by 'newt install' Provided Apps Not all of the apps includes in the /apps folder are useful to everyone, but the following may serve as a good starting point for you own applications of learning requirements: bleuart ( This example initialises the BLE stack, and includes a BLE UART service and shell commands and statistics support to interact with the BLE UART service. This is the application that ships with our boards off the assembly line. throughput ( This example can be used to test the throughput speed of BLE using BLE UART. It includes a shell command (' nustest ') to start and configure the throughput tests. Helper Modules The following modules are defined as part of Adafruit_Mynewt to make certain tasks easier to implement: adautil ( This module includes a number of helpers to facilitate working with UUIDs, config settings, data logs, timer timeouts, etc. bledis ( This module facilitates working with the Device Information Service (dis) bleuart ( This module facilitates working with the Nordic UART Service (nus AKA 'BLE UART') fifo ( This module provides a First In First Out (FIFO) buffer implementation that plays well with the internal scheduler and RTOS architecture Adafruit Industries Page 85 of 88
86 Adafruit Industries Page 86 of 88
87 External Content The following external content may be useful understanding some of the many features available in Apache Mynewt: Mynewt Bootloader Build and Package Management Adafruit Industries Page 87 of 88
: The core code for this device (hosted on Github) nrf52 Example Sketches (https://adafru.")
88 Downloads The following resources may be useful working with the Bluefruit nrf52 Feather: Adafruit_nRF52_Arduino ( The core code for this device (hosted on Github) nrf52 Example Sketches ( Browse the example code from the core repo on Github nrf52832 Product Specification ( Key technical documentation for the nrf52832 SoC EagleCAD PCB files on GitHub ( Module Details The Bluefruit nrf52 Feather uses the MDBT42Q module from Raytac. Details on the module, including FCC and other certifications are available in the document below: Schematic Schematic (pre March ) Adafruit Industries Last Updated: :33:17 PM UTC Page 88 of 88

89
Adafruit nrf52 Pro Feather with Mynewt
 Adafruit nrf52 Pro Feather with Mynewt Created by lady ada Last updated on 2017-11-23 12:05:49 AM UTC Guide Contents Guide Contents Overview Bluetooth Certification Warning Device Pinout Special Notes
Adafruit Feather nrf52840 Express
 Adafruit Feather nrf52840 Express PRODUCT ID: 4062 The Adafruit Feather nrf52840 Express is the new Feather family member with Bluetooth Low Energy and native USB support featuring the nrf52840! It's our
Adafruit HUZZAH32 - ESP32 Feather
 Adafruit HUZZAH32 - ESP32 Feather Created by lady ada Last updated on 2017-09-03 05:32:24 PM UTC Guide Contents Guide Contents Overview Pinouts Power Pins Logic pins Serial pins I2C & SPI pins GPIO & Analog
Adafruit Metro Mini. Created by lady ada. Last updated on :12:28 PM UTC
 Adafruit Metro Mini Created by lady ada Last updated on 2018-01-24 08:12:28 PM UTC Guide Contents Guide Contents Overview Pinouts USB & Serial converter Microcontroller & Crystal LEDs Power Pins & Regulators
Adafruit Feather 32u4 Basic Proto
 Adafruit Feather 32u4 Basic Proto Created by lady ada Last updated on 2018-05-27 09:32:48 PM UTC Guide Contents Guide Contents Overview Pinouts Power Pins Logic pins Other Pins! Assembly Header Options!
Introducting Itsy Bitsy 32u4
 Introducting Itsy Bitsy 32u4 Created by lady ada Last updated on 2018-01-03 05:47:20 AM UTC Guide Contents Guide Contents Overview Pinouts Which do you have? Power Pins Adafruit Pro Trinket LiIon/LiPoly
CircuitPython on the nrf52
 CircuitPython on the nrf52 Created by lady ada Last updated on 2018-09-04 01:27:38 PM UTC Guide Contents Guide Contents Overview Required Hardware nrf52840 Bootloader Disable Mass Storage on PCA10056 J-Link
Proper Debugging of ATSAMD21 Processors
 Proper Debugging of ATSAMD21 Processors Created by lady ada Last updated on 2017-06-08 06:47:17 PM UTC Guide Contents Guide Contents Overview Install Software Arduino IDE J-Link Software Atmel Studio 7
Adafruit Terminal Block Breakout FeatherWing
 Adafruit Terminal Block Breakout FeatherWing Created by lady ada Last updated on 2017-01-04 04:53:26 AM UTC Guide Contents Guide Contents Overview Pinouts Assembly Downloads Datasheets & Files Schematic
Adafruit DS3231 Precision RTC Breakout
 Adafruit DS3231 Precision RTC Breakout Created by lady ada Last updated on 2016-02-05 04:43:25 PM EST Guide Contents Guide Contents Overview Pinouts Power Pins: I2C Logic pins: Other Pins: Assembly Prepare
SiFive HiFive1 Getting Started Guide. c SiFive, Inc.
 SiFive HiFive1 Getting Started Guide c SiFive, Inc. January 3, 2017 2 SiFive HiFive1 Getting Started Guide 1.0.2 SiFive HiFive1Getting Started Guide Copyright Notice Copyright c 2017, SiFive Inc. All rights
Adafruit PowerBoost Charger
 Adafruit PowerBoost 500 + Charger Created by lady ada Last updated on 2017-06-01 04:08:36 PM UTC Guide Contents Guide Contents Overview Pinouts Power Pins Control Pins LEDs Battery and USB connection On/Off
Adafruit Powerboost 1000 Basic
 Adafruit Powerboost 1000 Basic Created by lady ada Last updated on 2018-08-22 03:42:57 PM UTC Guide Contents Guide Contents Overview Pinouts Power Pins Control Pins (https://adafru.it/dlz)leds Battery
Adafruit PowerBoost Charger
 Adafruit PowerBoost 500 + Charger Created by lady ada Last updated on 2015-10-21 12:44:24 PM EDT Guide Contents Guide Contents Overview Pinouts Power Pins Control Pins LEDs Battery and USB connection On/Off
HARDWARE REFERENCE IMM-NRF51822
 HARDWARE REFERENCE IMM-NRF51822 Micro-module Copyright 2014 I-SYST, all rights reserved. This document may not be reproduced in any form without, express written consent from I-SYST. Limited Warranty The
Adafruit VL53L0X Time of Flight Micro-LIDAR Distance Sensor Breakout
 Adafruit VL53L0X Time of Flight Micro-LIDAR Distance Sensor Breakout Created by lady ada Last updated on 2016-12-05 06:40:45 PM UTC Guide Contents Guide Contents Overview Sensing Capablities Pinouts Power
Adafruit Powerboost 1000C
 Adafruit Powerboost 1000C Created by lady ada Last updated on 2017-03-10 08:56:30 PM UTC Guide Contents Guide Contents Overview Pinouts Power Pins Control Pins LEDs Battery and USB connection Assembly
RN2483_Silica Documentation
 RN2483_Silica Documentation Release 0 Silica Dec 19, 2017 Contents 1 Embedded Vision NXP 3 2 INTRODUCTION 5 2.1 Development tools............................................ 6 i ii Version 1.00E Copyright
Bluefruit nrf52 Feather Learning Guide
 Bluefruit nrf52 Feather Learning Guide Created by Kevin Townsend Last updated on 2018-08-26 09:44:01 AM UTC Guide Contents Guide Contents Introduction nrf52832 Technical Details nrf51 or nrf52 Bluefruit
Adafruit HMC5883L Breakout - Triple-Axis Magnetometer Compass Sensor
 Adafruit HMC5883L Breakout - Triple-Axis Magnetometer Compass Sensor Created by lady ada Last updated on 2016-09-14 07:05:05 PM UTC Guide Contents Guide Contents Overview Pinouts Assembly Prepare the header
Adafruit I2S MEMS Microphone Breakout
 Adafruit I2S MEMS Microphone Breakout Created by lady ada Last updated on 2017-04-03 08:44:00 PM UTC Guide Contents Guide Contents Overview Assembly Prepare the header strip: Add the breakout board: And
ARDUINO PRIMO. Code: A000135
 ARDUINO PRIMO Code: A000135 Primo combines the processing power from the Nordic nrf52 processor, an Espressif ESP8266 for WiFi, as well as several onboard sensors and a battery charger. The nrf52 includes
Adafruit 1-Wire Thermocouple Amplifier - MAX31850K
 Adafruit 1-Wire Thermocouple Amplifier - MAX31850K Created by lady ada Last updated on 2018-08-22 03:40:09 PM UTC Guide Contents Guide Contents Overview Pinouts Power Pins Address Pins Data Pin Themocouple
Seeeduino LoRaWAN. Description
 Seeeduino LoRaWAN SKU 102010128 LoRaWAN Class A/C Ultra long range communication Ultra low power consumption Arduino programming (based on Arduino Zero bootloader) Embeded with lithim battery management
How to Become an IoT Developer (and Have Fun!) Justin Mclean Class Software.
 Justin Mclean Class Software.") How to Become an IoT Developer (and Have Fun!) Justin Mclean Class Software Email: justin@classsoftware.com Twitter: @justinmclean Who am I? Freelance Developer - programming for 25 years Incubator PMC
How to Become an IoT Developer (and Have Fun!) Justin Mclean Class Software Email: justin@classsoftware.com Twitter: @justinmclean Who am I? Freelance Developer - programming for 25 years Incubator PMC
Programming Microcontrollers using OpenOCD on a Raspberry Pi
 Programming Microcontrollers using OpenOCD on a Raspberry Pi Created by lady ada Last updated on 2017-07-14 05:18:55 AM UTC Guide Contents Guide Contents Overview OpenOCD Compiling OpenOCD Compiling OpenOCD
An Incubator Project in the Apache Software Foundation. 13 July 2016
 An Incubator Project in the Apache Software Foundation http://mynewt.apache.org/ 13 July 2016 Apache Mynewt Open Source OS for Constrained IoT MCU / Hardware independent ARM Cortex-M*, AVR, MIPS, more...
Use of ISP1507-AL Evaluation Boards
 Use of ISP1507-AL Evaluation Boards Application Note AN181103 Introduction Scope This document gives details on hardware and software for using and testing Insight SiP Bluetooth Low Energy module ISP1507-AL,
ARROW ARIS EDGE S3 Board User s Guide 21/02/2018
 ARROW ARIS EDGE S3 Board User s Guide All information contained in these materials, including products and product specifications, represents information on the product at the time of publication and is
Development Environment Embedded Linux Primer Ch 1&2
 Development Environment Embedded Linux Primer Ch 1&2 Topics 1) Systems: Host and Target 2) Host setup 3) Host-Target communication CMPT 433 Slides #3 Dr. B. Fraser 18-05-05 2 18-05-05 1 Host & Target Host
Bluefruit nrf52 Feather Learning Guide
 Bluefruit nrf52 Feather Learning Guide Created by Kevin Townsend Last updated on 2018-06-12 08:24:00 AM UTC Guide Contents Guide Contents Introduction nrf52832 Technical Details nrf51 or nrf52 Bluefruit
Adafruit MAX98357 I2S Class-D Mono Amp
 Adafruit MAX98357 I2S Class-D Mono Amp Created by lady ada Last updated on 2016-06-14 02:09:38 PM EDT Guide Contents Guide Contents Overview Pinouts Speaker Output Power Pins I2S Pins Other Pins Gain SD
Adafruit Feather M0 Basic Proto
 Adafruit Feather M0 Basic Proto Created by lady ada Last updated on 2018-04-18 05:38:12 AM UTC Guide Contents Guide Contents Overview Pinouts Power Pins Logic pins Other Pins! Assembly Header Options!
WAVETEK BLE-WT51822AA/AB. Revision History. Bluetooth low energy Module WT51822AA (256k) /AB (128k) (Bluetooth Low Energy BT4.0) PRODUCT SPECIFICATION
 /AB (128k) (Bluetooth Low Energy BT4.0) PRODUCT SPECIFICATION") Bluetooth low energy Module WT51822AA (256k) /AB (128k) (Bluetooth Low Energy BT4.0) PRODUCT SPECIFICATION Part number: BLE WT51822AA/AB Wavetek has developed a module which supports Bluetooth Low Energy
Bluetooth low energy Module WT51822AA (256k) /AB (128k) (Bluetooth Low Energy BT4.0) PRODUCT SPECIFICATION Part number: BLE WT51822AA/AB Wavetek has developed a module which supports Bluetooth Low Energy
Figure 26 CC Debugger Interface
 Figure 26 CC Debugger Interface Once the CC Debugger is set up with the status indicator LED showing green, you are ready to either read or write a hex file from the board, or to start debugging a project
SiFive Freedom E310 Arty FPGA Dev Kit Getting Started Guide. c SiFive, Inc.
 SiFive Freedom E310 Arty FPGA Dev Kit Getting Started Guide c SiFive, Inc. April 11, 2017 2 SiFive Freedom E310 Arty FPGA Dev Kit Getting Started Guide 1.0.6 SiFive Freedom E310 Arty FPGA Dev KitGetting
Building CircuitPython
 Building CircuitPython Created by Dan Halbert Last updated on 2018-05-18 03:47:12 AM UTC Guide Contents Guide Contents Introduction Linux Setup Install a Real or Virtual Linux Machine Native Linux Linux
Adafruit 1-Wire GPIO Breakout - DS2413
 Adafruit 1-Wire GPIO Breakout - DS2413 Created by Bill Earl Last updated on 2018-08-22 03:40:00 PM UTC Guide Contents Guide Contents Overview Assembly & Wiring Headers Position the Header And Solder! Wiring
VORAGO VA108x0 GCC IDE application note
 AN2015 VORAGO VA108x0 GCC IDE application note June 11, 2018 Version 1.0 VA10800/VA10820 Abstract ARM has provided support for the GCC (GNU C compiler) and GDB (GNU DeBug) tools such that it is now a very
Adafruit Feather M0 Basic Proto
 Adafruit Feather M0 Basic Proto Created by lady ada Last updated on 2016-09-21 01:20:46 AM UTC Guide Contents Guide Contents Overview Pinouts Power Pins Logic pins Other Pins! Assembly Header Options!
User s Guide IoT Microcontroller Development Kit
 User s Guide IoT Microcontroller Development Kit 1.0 Introduction 2 1.1 Features 2 1.2 Board Pictures 3 2.0 Hardware 4 2.1 Bill of Materials 4 2.2 Pin Map Diagram 5 2.3 Block Diagram 6 2.4 Board Revisions
Adafruit 1-Wire Thermocouple Amplifier - MAX31850K
 Adafruit 1-Wire Thermocouple Amplifier - MAX31850K Created by lady ada Last updated on 2015-04-09 03:45:15 PM EDT Guide Contents Guide Contents Overview Pinouts Power Pins Address Pins Data Pin Themocouple
ARROW ARIS EDGE Board User s Guide 27/09/2017
 ARROW ARIS EDGE Board User s Guide All information contained in these materials, including products and product specifications, represents information on the product at the time of publication and is subject
ARDUINO MEGA 2560 REV3 Code: A000067
 ARDUINO MEGA 2560 REV3 Code: A000067 The MEGA 2560 is designed for more complex projects. With 54 digital I/O pins, 16 analog inputs and a larger space for your sketch it is the recommended board for 3D
mbed Kit User Guide of NQ62x daughter board
 mbed Kit User Guide of NQ62x daughter board mbed Kit User Guide Sheet 1 of 10 Nov 17, 2016 Index: 1. Introduction... 4 1.1 Minimum Requirements... 4 2. Kit Content... 4 2.1 DELTA DFXE-SM001 mbed kit hardware
Arduino Dock 2. The Hardware
 Arduino Dock 2 The Arduino Dock 2 is our supercharged version of an Arduino Uno R3 board. These two boards share the same microcontroller, the ATmel ATmega328P microcontroller (MCU), and have identical
ARDUINO M0 PRO Code: A000111
 ARDUINO M0 PRO Code: A000111 The Arduino M0 Pro is an Arduino M0 with a step by step debugger With the new Arduino M0 Pro board, the more creative individual will have the potential to create one s most
Adafruit SHT31-D Temperature & Humidity Sensor Breakout
 Adafruit SHT31-D Temperature & Humidity Sensor Breakout Created by lady ada Last updated on 2016-09-16 07:45:55 PM UTC Guide Contents Guide Contents Overview Pinouts Power Pins: I2C Logic pins: Other Pins:
Arduino Uno. Arduino Uno R3 Front. Arduino Uno R2 Front
 Arduino Uno Arduino Uno R3 Front Arduino Uno R2 Front Arduino Uno SMD Arduino Uno R3 Back Arduino Uno Front Arduino Uno Back Overview The Arduino Uno is a microcontroller board based on the ATmega328 (datasheet).
ARDUINO MEGA ADK REV3 Code: A000069
 ARDUINO MEGA ADK REV3 Code: A000069 OVERVIEW The Arduino MEGA ADK is a microcontroller board based on the ATmega2560. It has a USB host interface to connect with Android based phones, based on the MAX3421e
ARDUINO UNO REV3 Code: A000066
 ARDUINO UNO REV3 Code: A000066 The UNO is the best board to get started with electronics and coding. If this is your first experience tinkering with the platform, the UNO is the most robust board you can
Hands-On Workshop: ARM mbed : From Rapid Prototyping to Production
 Hands-On Workshop: ARM mbed : From Rapid Prototyping to Production FTF-SDS-F0107 Michael Norman, Martin Kojtal A P R. 2 0 1 4 TM External Use Agenda What is mbed? mbed Hardware mbed Software mbed Tools
Use of ISP1807-LR Evaluation Boards
 Use of ISP1807-LR Evaluation Boards Application Note AN181104 Introduction Scope This document gives details on hardware and software for using and testing Insight SiP Bluetooth Low Energy module ISP1807-LR,
Getting Started with the LPC810
 Getting Started with the LPC810 Created by Kevin Townsend Last updated on 2018-08-22 03:34:52 PM UTC Guide Contents Guide Contents Introduction Setting up an ARM Toolchain Downloading the LPCXpresso IDE
ArduCAM CC3200 UNO board
 ArduCAM CC3200 UNO board User Guide Rev 1.2, Mar 2017 Table of Contents 1 Introduction... 2 2 Features... 3 3 Pin Definition... 4 4 Getting Started CC3200 with Energia... 5 4.1 Out of the Box Test... 5
Arduino ADK Rev.3 Board A000069
 Arduino ADK Rev.3 Board A000069 Overview The Arduino ADK is a microcontroller board based on the ATmega2560 (datasheet). It has a USB host interface to connect with Android based phones, based on the MAX3421e
Product Datasheet: DWM1001-DEV DWM1001 Module Development Board. Key Features and Benefits
 Product Datasheet: DWM1001-DEV DWM1001 Module Development Board Plug-and-Play Development Board for evaluating the performance of the Decawave DWM1001 module Easily assemble a fully wireless RTLS system,
Introducing the Adafruit nrf52840 Feather
 Introducing the Adafruit nrf52840 Feather Created by lady ada Last updated on 2019-01-04 10:36:40 PM UTC Guide Contents Guide Contents Overview Pinouts Special Notes Power Pins Analog Inputs PWM Outputs
ARDUINO UNO REV3 SMD Code: A The board everybody gets started with, based on the ATmega328 (SMD).
.") ARDUINO UNO REV3 SMD Code: A000073 The board everybody gets started with, based on the ATmega328 (SMD). The Arduino Uno SMD R3 is a microcontroller board based on the ATmega328. It has 14 digital input/output
ARDUINO UNO REV3 SMD Code: A000073 The board everybody gets started with, based on the ATmega328 (SMD). The Arduino Uno SMD R3 is a microcontroller board based on the ATmega328. It has 14 digital input/output
PBLN52832 DataSheet V Copyright c 2017 Prochild.
 PBLN52832 DataSheet V1.2.3 Copyright c 2017 Prochild. No part of this publication and modification may be reproduced without the prior written permission of the author. Revision History No Version Date
Table of Contents. 2. Using the ST-LINK/V2 in-circuit debugger/programmer Lab Board firmware update on Linux (debian / Ubuntu) 8
 8") www.totemmaker.net Table of Contents 1. Updating the Mini Lab firmware. 2 1.1. When is it required? 2 1.2. The MCU, STM32F030K6T. 2 1.3. The In-Circuit-Serial-Programming (ICSP) connector. 2 2. Using the
www.totemmaker.net Table of Contents 1. Updating the Mini Lab firmware. 2 1.1. When is it required? 2 1.2. The MCU, STM32F030K6T. 2 1.3. The In-Circuit-Serial-Programming (ICSP) connector. 2 2. Using the
Frequently Asked Questions
 Bluetooth low energy Module Frequently Asked Questions Rev. record 29-Sep.-2017> Ver.1.0 Release 1. General Q1-1: How to order the modules, evaluation boards (EVB) and evaluation kits (EVK)? A1-1: To order,
nrf51 Development Kit
 nrf51 Development Kit Developing with the MDK-ARM Microcontroller Development Kit User Guide v1.0 Copyright 2014 Nordic Semiconductor ASA. All rights reserved. Reproduction in whole or in part is prohibited
ARDUINO BOARD LINE UP
 Technical Specifications Pinout Diagrams Technical Comparison Board Name Processor Operating/Input Voltage CPU Speed Analog In/Out Digital IO/PWM USB UART 101 Intel Curie 3.3 V/ 7-12V 32MHz 6/0 14/4 Regular
Rephone Core 2G-AtmelSAMD21
 Rephone Core 2G-AtmelSAMD21 SKU 102040046 Introduction RePhone is one of the most unique and interesting development board platform that created by Seeed Studio, ever since its first show on the stage
Adafruit seesaw. Created by Dean Miller. Last updated on :30:23 AM UTC
 Adafruit seesaw Created by Dean Miller Last updated on 2018-03-17 12:30:23 AM UTC Guide Contents Guide Contents Overview Pinouts Power Pins: Logic Pins: GPIO Pins: Neopixel Pins: Address Pins: ADC Pins:
Lesson 6 Intel Galileo and Edison Prototype Development Platforms. Chapter-8 L06: "Internet of Things ", Raj Kamal, Publs.: McGraw-Hill Education
 Lesson 6 Intel Galileo and Edison Prototype Development Platforms 1 Intel Galileo Gen 2 Boards Based on the Intel Pentium architecture Includes features of single threaded, single core and 400 MHz constant
Adafruit PDM Microphone Breakout
 Adafruit PDM Microphone Breakout Created by lady ada Last updated on 2018-01-10 10:25:53 PM UTC Guide Contents Guide Contents Overview Pinouts Wiring & Test Available I2S Pins Install Library Downloads
Hardware Overview and Features
 Hardware Overview and Features Don t snap apart your LilyPad ProtoSnap Plus until you're ready to use the pieces in a project. If you leave the pieces attached to the board, you'll be able to prototype
HYDRA-X23/X23S. Power Application Controllers. PAC HYDRA-X User s Guide. Copyright 2014 Active-Semi, Inc.
 HYDRA-X23/X23S Power Application Controllers PAC5223 - HYDRA-X User s Guide www.active-semi.com Copyright 2014 Active-Semi, Inc. CONTENTS Contents...2 Overview...3 HYDRA-X23/X23S Body Resources...5 Header
Frequently Asked Questions
 Bluetooth low energy Module Frequently Asked Questions Table of contents 1. General Q1-1: How can I order the modules, evaluation boards (EVB) and evaluation kits (EVK)? Q1-2: What is Bluetooth low energy
BLE MODULE SPECIFICATIONS
 WIRELESS-TAG BLE MODULE SPECIFICATIONS nrf51-01/02/dk Bluetooth Low Energy (BLE) module of nrf51-01/02 is the next generation BLE module released by SEMITRION electronics. The modules use nrf51822 from
HYDRA-X10. Power Application Controllers TM. PAC HYDRA-X User s Guide. Copyright 2014 Active-Semi, Inc.
 HYDRA-X10 Power Application Controllers TM PAC5210 - HYDRA-X User s Guide www.active-semi.com Copyright 2014 Active-Semi, Inc. CONTENTS Contents...2 Overview...3 HYDRA-X10 Body Resources...5 Header Descriptions...5
Adafruit NFC/RFID on Raspberry Pi
 Adafruit NFC/RFID on Raspberry Pi Created by Kevin Townsend Last updated on 2018-08-22 03:31:24 PM UTC Guide Contents Guide Contents Overview Freeing UART on the Pi Step One: Run raspi-conf Step Two: Disable
INTRODUCTION HARDWARE
 Project Kit Table of Contents INTRODUCTION... 3 HARDWARE... 3 Hardware built-in micro:bit:... 3 Hardware included in this kit:... 4 CODE... 5 Pseudo Code:... 5 Coding Tools:... 5 Running Programs:... 8
Intel Galileo gen 2 Board
 Intel Galileo gen 2 Board The Arduino Intel Galileo board is a microcontroller board based on the Intel Quark SoC X1000, a 32- bit Intel Pentium -class system on a chip (SoC). It is the first board based
Introducing Pro Trinket
 Introducing Pro Trinket Created by lady ada Last updated on 2018-01-11 09:10:40 PM UTC Guide Contents Guide Contents Overview Guided Tour Pinouts Power Pins GPIO Pins Logic Level The Digital Only GPIO
Getting Started with Kinetis SDK (KSDK) v.1.2
 v.1.2") Freescale Semiconductor Document Number: KSDK12GSUG User's Guide Rev. 0, 4/2015 Getting Started with Kinetis SDK (KSDK) v.1.2 1 Overview Kinetis SDK (KSDK) is a Software Development Kit that provides comprehensive
Freescale Semiconductor Document Number: KSDK12GSUG User's Guide Rev. 0, 4/2015 Getting Started with Kinetis SDK (KSDK) v.1.2 1 Overview Kinetis SDK (KSDK) is a Software Development Kit that provides comprehensive
UM1853 User manual. STM32CubeF1 Nucleo demonstration firmware. Introduction
 User manual STM32CubeF1 Nucleo demonstration firmware Introduction STMCube initiative was originated by STMicroelectronics to ease developers life by reducing development efforts, time and cost. STM32Cube
Product Overview: DWM1001-DEV DWM1001 Module Development Board. Key Features and Benefits
 Product Overview: DWM1001-DEV DWM1001 Module Development Board Plug-and-Play Development Board for evaluating the performance of the Decawave DWM1001 module Easily assemble a fully wireless RTLS system,
EVE2 BLE Datasheet. The EVE Platform features standardized IO, common OS and drivers and ultra-low power consumption.
 Datasheet Main features Software Micro-kernel with scheduling, power and clock management Contiki OS Tickless design Drivers for peripherals Bluetooth 4.1 compliant low energy singlemode protocol stack
ARDUINO YÚN Code: A000008
 ARDUINO YÚN Code: A000008 Arduino YÚN is the perfect board to use when designing connected devices and, more in general, Internet of Things projects. It combines the power of Linux with the ease of use
Introducing Pro Trinket
 Introducing Pro Trinket Created by lady ada Last updated on 2016-03-14 06:28:05 PM EDT Guide Contents Guide Contents Overview Guided Tour Pinouts Power Pins GPIO Pins Logic Level The Digital Only GPIO
Learning development AVR-USB-Arduino project works by
 Learning development AVR-USB-Arduino project works by Hello!! First of all, Thanks very much for choosing DuinoThumb V2. This model is developed from the first model with many improvements. The main working
Kinetis SDK Freescale Freedom FRDM-KL03Z Platform User s Guide
 Freescale Semiconductor, Inc. KSDKKL03UG User s Guide Rev. 1.0.0, 09/2014 Kinetis SDK Freescale Freedom FRDM-KL03Z Platform User s Guide 1 Introduction This document describes the hardware and software
ARDUINO INDUSTRIAL 1 01 Code: A000126
 ARDUINO INDUSTRIAL 1 01 Code: A000126 The Industrial 101 is a small form-factor YUN designed for product integration. OVERVIEW: Arduino Industrial 101 is an Evaluation board for Arduino 101 LGA module.
Introducing Pro Trinket
 Introducing Pro Trinket Created by lady ada Last updated on 2016-04-11 12:29:41 PM EDT Guide Contents Guide Contents Overview Guided Tour Pinouts Power Pins GPIO Pins Logic Level The Digital Only GPIO
Adafruit PiUART - USB Console and Power Add-on for Raspberry Pi
 Adafruit PiUART - USB Console and Power Add-on for Raspberry Pi Created by lady ada Last updated on 2017-08-29 10:20:23 PM UTC Guide Contents Guide Contents Overview Pinouts Enabling Serial Console Option
XNUCLEO-F030R8, Improved STM32 NUCLEO Board
 XNUCLEO-F030R8, Improved STM32 NUCLEO Board STM32 Development Board, Supports Arduino, Compatible with NUCLEO-F030R8 XNUCLEO-F030R8 Features Compatible with NUCLEO-F030R8, onboard Cortex-M0 microcontroller
2.2" TFT Display. Created by lady ada. Last updated on :19:15 PM UTC
 2.2" TFT Display Created by lady ada Last updated on 2017-12-22 11:19:15 PM UTC Guide Contents Guide Contents Overview Pinouts Assembly Arduino Wiring Arduino UNO or Compatible Wiring Wiring for Other
Typical Applications: GHz Bluetooth low energy systems - Proprietary 2.4 GHz systems - Sports and leisure equipment - Mobile phone accessories,
 PTR5618 Coin-size Ultra Low Power Bluetooth Low Energy System on Module Embedded Cortex M4F 32 bit processor The PTR5618 ultra-low power Bluetooth Low Energy/ANT/2.4GHz Proprietary Multi-protocol modules
Gooligum Electronics 2015
 The Wombat Prototyping Board for Raspberry Pi Operation and Software Guide This prototyping board is intended to make it easy to experiment and try out ideas for building electronic devices that connect
Wireless Sensor Networks. FireFly 2.2 Datasheet
 2.2 Datasheet July 6, 2010 This page intentionally left blank. Contents 1. INTRODUCTION...1 Features...1 Applications...2 2. BLOCK DIAGRAM...3 3. HARDWARE CONNECTIONS...4 Power...5 Header 1 ( UARTS, I2C,
Adafruit Mini TFT " 160x80
 Adafruit Mini TFT - 0.96" 160x80 Created by lady ada Last updated on 2017-07-14 05:24:22 AM UTC Guide Contents Guide Contents Overview Pinouts Assembly Prepare the header strip: Add the board: And Solder!
Prototyping Module Datasheet
 Prototyping Module Datasheet Part Numbers: MPROTO100 rev 002 Zenseio LLC Updated: September 2016 Table of Contents Table of Contents Functional description PROTOTYPING MODULE OVERVIEW FEATURES BLOCK DIAGRAM
Hands-On with STM32 MCU Francesco Conti
 Hands-On with STM32 MCU Francesco Conti f.conti@unibo.it Calendar (Microcontroller Section) 07.04.2017: Power consumption; Low power States; Buses, Memory, GPIOs 20.04.2017 21.04.2017 Serial Interfaces
Adafruit BME280 Humidity + Barometric Pressure + Temperature Sensor Breakout
 Adafruit BME280 Humidity + Barometric Pressure + Temperature Sensor Breakout Created by lady ada Last updated on 2018-08-22 03:49:22 PM UTC Guide Contents Guide Contents Overview Pinouts Power Pins: SPI
RedBoard Hookup Guide
 Page 1 of 11 RedBoard Hookup Guide CONTRIBUTORS: JIMB0 Introduction The Redboard is an Arduino-compatible development platform that enables quick-and-easy project prototyping. It can interact with real-world
Adafruit TB A DC/Stepper Motor Driver Breakout Board
 Adafruit TB6612 1.2A DC/Stepper Motor Driver Breakout Board Created by lady ada Last updated on 2016-10-01 06:35:33 PM UTC Guide Contents Guide Contents Overview Pinouts Power Pins Signal in Pins Motor
MBN52832DK Rev A User Guide
 MBN52832DK Rev A User Guide Version: 0.1 Release Date: October 27, 2016 Murata reserves the right to make changes in specifications at anytime and without notice. The information furnished in this user