KOMPERNASS GMBH BURGSTRASSE 21. KH 5518/19 UK
|
|
|
- MargaretMargaret Mason
- 6 years ago
- Views:
Transcription
1 KOMPERNASS GMBH BURGSTRASSE 21 D BOCHUM KH 5518/19 UK V


2 Body fat, muscle mass and water analysis scales Instructions for use KH 5518 KH 5519
3


4 w q er t y u 1! i o o a KH 5518 w q er t y u 1! i o o a KH 5519
5 Index 1. Safety instructions Usage Technical data Scope of delivery Components and operating elements Display remote control unit Scales Preparing the scales for use Unpacking the components Inserting the batteries in the scales Inserting batteries in the display remote control unit Selecting a suitable location Prior to initial use Using the scales Measuring body weight only Measuring body weight, body fat, muscle mass and body water percentages as well as caloric requirement Important notes on measuring Comparison of current and previous measurements Display previous measurement results Using the guest mode (GUES) Maintaining the scales Replacing the batteries in the scales Replacing the batteries of the display remote control unit Troubleshooting/error messages The scales can not be turned on The display remote control unit can not be turned on The display screen is not functioning properly Error messages appear on the display screen Ld Err Measurement results seem unrealistic Other malfunctions Cleaning the scales Storing the scales Disposing of the scales Warranty & Customer Service Importer
6 ô Note: For the sake of simplicity, the body fat, muscle mass and water analysis scales will be called scales throughout these instructions for use. 1. Safety instructions Danger! Under no circumstances should you use the scales if you use a pacemaker, a respirator, an electrocardiograph or similar medical device! Use of the scales could prevent proper functioning of these devices! This could cause risk of death! If you are not sure whether or not you are allowed to use the scales: please consult your physician prior to use! Do not use the scales if you are pregnant. If you desire to reduce your body weight due to overweight or increase it due to underweight, you should always consult a doctor. Every treatment and diet should be only in reference to a doctor. Recommendations for diets or fitness programmes on the basis of the determined values should be given by a doctor or other qualified person. Do not attempt to interpret the data yourself. Please make sure no water or moisture can enter the scales or display remote control unit. Otherwise the scales and display remote control unit can be damaged beyond repair. This could also cause danger of electric shock! This appliance is not intended for use by children or other persons without assistance or supervision if their physical, sensory or mental capabilities prevent them from using it safely. Children should be supervised to ensure that they do not play with the appliance. Warning! Do not place the scales and display remote control unit in the immediate vicinity of heat sources such as ovens, heaters and other similar devices. Otherwise the scales and display remote control unit can be damaged beyond repair. The scales and display remote control unit can only be operated at temperatures between 10 and 40 Celsius. The scales should be kept within this temperature range even while not being used. Temperatures outside of this range can result in malfunctioning or long-term damages. Do not place a load of more than 180 kilograms on the scales! Otherwise the scales could be damaged beyond repair! The scales and the display remote control unit contain no user-serviceable parts. The warranty is void if the casings of the scales and/or display remote control unit are opened! For repairs, please contact our service partner nearest you. You will find the addresses of our service partners on the warranty card. You will find the warranty card with the scales. Careful! Battery acid could leak out, especially if the batteries are old. Therefore you should remove all batteries if you do not plan to use the scales and remote control unit for long periods of time. This protects the scales and display remote control unit from damages resulting from battery acid leakage. The remote control corresponds to the LED Class 1. ô Note: Avoid static charge or discharge because this could result in display errors or sudden switching off of the scales. 4
7 No liability will be taken and no guarantee will be made for damages resulting from opening the casings of scales and/or display remote control unit resulting from repair attempts not made by qualified experts resulting from using the scales and/or display remote control unit for purposes other than intended. 2. Usage The body fat, muscle mass and water analysis scales Balance KH 5518/KH 5519 are intended exclusively for measuring body weight, body fat, muscle mass and body water of people from seven years of age and a height of at least 100 centimeters measuring the approximate daily caloric requirements non-commercial use in private households. The body fat, muscle mass and water analysis scales Balance KH 5518/KH 5519 are not intended for use by those using medical devices including but not limited to pacemakers respirators or electrocardiographs. The body fat, muscle mass and water analysis scales Balance KH5518/KH5519 are not construed for professional use in hospitals or other medical facilities. ô Note: No liability will be assumed and no warranty granted for damages resulting from use of the scales and/or display remote control unit for purposes other than intended! 3. Technical data Power supply, scales: V AA Power supply, display remote control unit: V AAA Maximum load/maximum measurable weight: 180 kg/396 lb Minimum measurable weight: 3 kg/6.6 lb Tolerance < 30 kg: max. 300 g Tolerance > 30 kg: 1 % +/- 0,1 kg Measuring procedure: bioelectrical impedance analysis Increments for weight measurement: 0.1 kg/0.2 lb Fat percentage measurement: 5 65 % Increments for fat percentage measurement: 0,1 % Water percentage measurement: % Increments for water percentage measurement: 0,1 % Muscle mass percentage measurement: % Increments for muscle mass percentage measurement: 0,1 % Caloric requirements display: in kcal Increments for caloric requirements display: 100 kcal Height entry range: cm/3'03" 7'10" Age entry range: 7 99 years 10 memory locations for personal data Functions: Weight measurement only/ weight, body fat percentage, muscle mass percentage and body water percentage measurement/measurement of approximate daily caloric requirement/display of approximate fitness level 5
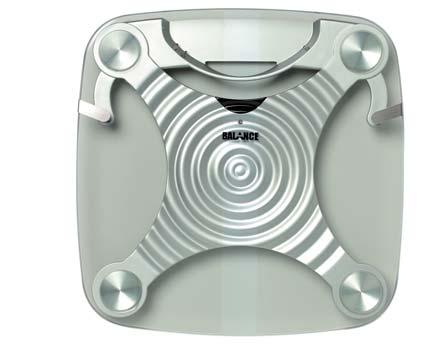
8 Measuring units adjustable: kg/lb, cm/inches Battery status indicator Overload indicator Error indicator Automatic shutoff of scales: after 30 seconds Automatic shutoff of display remote control unit: after 30 seconds Operating temperature: 10 C 40 C 4. Scope of delivery ' Body fat, muscle mass and water analysis scales ' Display remote control unit ' 4 AA/LR6/Mignon type batteries for scales ' 2 AAA/LR03/Micro type batteries for display remote control unit ' double-sided adhesive tape, 2 screws and rawl plugs for wall mounting of display remote control unit ' Wall Holder for the Display remote control unit ' Accompanying informational material ' These instructions for use ' Warranty card 5. Components and operating elements 5.1. Display remote control unit q Button (Down) w Button e Button (On/Off) r Button (Up) t Battery compartment y Infrared receiver u Wall Holder for the Display remote control unit 5.2. Scales i Scales on/off indicator o Sensor areas (dashed fields) a Battery compartment 1! Holder for display remote control unit 6
9 6. Preparing the scales for use 6.1. Unpacking the components 1 Carefully remove the scales from the packaging. Please make sure that the display remote control unit does not fall out of its holder on the scales. Do not drop the scale and display remote control unit! Otherwise they could be damaged beyond repair Inserting the batteries in the scales 2 Remove the protective plastic from the four included type AA/ Mignon batteries. 3 Carefully place the scales with the top facing down. Use a towel or other soft material between the scales and the floor to pad the scales and prevent the device from being scratched. The bottom of the scales with the battery compartment should now be facing you. 4 Take the cover off the battery compartment. Insert the four batteries in the battery compartment. Make sure that the batteries are facing the right direction with regards to polarity (+/ ) in the battery compartment. The right polarity is depicted on the inside of the battery compartment. 5 Place the cover back on the battery compartment and close it. Leave the scales lying upside down Inserting batteries in the display remote control unit 6 Push the display remote control unit out of its holder on the back of the scales. Be careful not to drop the display remote control unit. 7 Remove the protective plastic from the two included batteries of type AAA/Micro. 8 Place the display remote control unit face down. The back of the display remote control unit with the battery compartment should now be facing you. 9 Take the cover off the battery compartment. Insert the two AAA/Micro type batteries in the battery compartment. Make sure that the batteries are facing the right direction with regards to polarity (+/ ) in the battery compartment. The right polarity is depicted on the inside of the battery compartment. 10 Place the cover back on the battery compartment and close it. 11 Turn the scales over so that the top is facing you. The scales and the display remote control unit are now operational. 7. Selecting a suitable location Only place the scales on a level, flat, scratchproof, non-slip surface. 7
10 The display remote control can be assembled on a wall above the scales with or without a wall holder. This is an alternative should the scales only be used exclusively at one location. For the assembly of the wall holder / display remote control use either the double-sided adhesive tape or both of the supplied plugs and screws. Take note that there should be no impediments between the scales and the infrared receiver of the display remote control. Otherwise it could malfunctions with the display remote control. If you wish to secure the wall holder with the plugs and screws, with the assistance of the wall holder transfer the correct distance between the boreholes to the wall. Small drilling mistakes can be evened out with the help of the slotted holes. Danger! Please make sure no water or moisture can enter the scales or display remote control unit. Otherwise the scales and display remote control unit can be damaged beyond repair. This could also cause danger of electric shock! Warning! Do not place the scales and display remote control unit in the immediate vicinity of heat sources such as ovens, heaters and other similar devices. Otherwise the scales and display remote control unit can be damaged beyond repair. The scales and display remote control unit can only be operated at temperatures between 10 and 40 Celsius. The scales should be kept within this temperature range even while not being used. Temperatures outside of this range can result in malfunctioning or long-term damages. 8. Prior to initial use Before using the scales for the first time, you should enter your personal data. Ten memory locations are available for storing your personal data. To store your personal data: 1 Take the display remote control unit in your hand and press the on/off button once. Balance will be displayed moving across the screen. 2 Press and hold the i button until 1-10 is displayed on the screen. As soon as you release the i button, the number of one of the ten memory locations will be displayed on the screen. 3 You can choose one of the other ten memory locations by pressing the up and down buttons. 4 Press the i button as soon as the desired memory location is displayed on the screen. Now either lb or kg will blink on the display screen. 5 Press the up and down buttons to switch between weight display in kg and height display in cm according to the metric system and weight display in lb (pounds) and height display in feet and inches according to the British measurement system. Once the desired display mode (lb or kg) is displayed, press the i button. 8
11 6 Now the symbol for woman or the symbol for man will appear on the display screen. You can switch between the two symbols by pressing the up and down buttons. Select appropriate symbol by pressing the i button. 7 Age will be displayed and a number between 7 and 99 will blink on the screen. Choose the number corresponding to your age by pressing the up or down buttons. Upon entering an age between 7 and 17, the child symbol will be displayed on the lower right edge of the screen between 18 and 99, the adult symbol will be displayed on the lower right edge of the screen Once the number corresponding to your age appears in the display, press the i button. 8 The symbol for everyday physical strain will blink on the right side of the display screen. The symbol stands for people who primarily carry out their daily activities seated. This includes people who work sitting in an office or occupational drivers. stands for people who primarily carry out their daily activities standing or walking. This includes groups such as sales people or restaurant personnel. for people exposed to excessive physical strain. This includes many occupations with high physical exertion. for people exposed to extreme physical strain. In addition to serious athletes, this could include other occupations with extreme physical strain such as miners. Switch between the symbols by briefly pressing the up and down buttons. Select the symbol corresponding to the category which most accurately fits your everyday physical strain. Press the i button as soon as the appropriate symbol is displayed on the screen. ô Note: Most people tend to overestimate their actual daily physical strain. If you are having trouble deciding between two categories: select the category with lower amount of physical strain. 9 The height indicator blinks on the display screen. Press the up or down button to select a value corresponding to your height. Press the i button as soon as the appropriate value is displayed. 10 The number of the memory location, in which you stored your personal data, blinks on the screen. Now you can Or enter the personal data of other people in other memory locations. To do this select another memory location by pressing the up or down buttons. Subsequently repeat steps 4 to 10. end the process of entering personal data. Briefly press the on/off button once to turn off the display remote control unit. 9. Using the scales 9.1. Measuring body weight only To simply measure your current body weight: 1 Press the on/off button to turn on the display remote control unit. Balance and will appear on the display screen. 9
12 2 Lightly touch the top of the scales with your foot. The on/off indicator on the scales should be illuminated in red. After a few seconds the on/off indicator will turn green and 0.0 kg will appear in the display screen. To switch between display of the body weight in kg and lb (pounds/english measurement system): Briefly press the i button. Danger! Never stand on only one side of the scales. Always stand in the middle of the scales with both feet. First of all you stand on the right and left sensor areas. Otherwise the scales can tilt to the side and be damaged beyond repair. You could also fall! Please make sure that the surface of the scales is dry before you stand on it. Otherwise you could slip down! Warning! Do not place a load of more than 180 kilograms on the scales! Otherwise the scales could be damaged beyond repair! ô Note: Use the scales without clothes on if possible. This results in the most accurate measurements. Stand on the scales without shoes and socks on. Otherwise the measurements may be incorrect. 3 Stand on the scales. 4 Your body weight appears in the display screen. The body weight display can fluctuate while measurements are being taken. Therefore you should stand as still as possible. After a few seconds a blinking H will appear to the left of the weight display on the screen. The measuring process is complete when the H stops blinking. The weight displayed is your current body weight. 5 If you remain standing on the scales, the device will automatically shut off after 30 seconds. If you step down from the scales, 0.0 kg will appear again on the display screen after a few seconds. The scales are now ready for further body weight measurement. If no new body weight measurement is carried out within 30 seconds, then the scales will turn off automatically. The display remote control unit will turn off automatically after 30 seconds if no buttons are pressed Measuring body weight, body fat, muscle mass and body water percentages as well as caloric requirement Important notes on measuring Use the scales without clothes on if possible. This results in the most accurate measurements. Always stand on the scales without shoes and socks on. Otherwise it is not possible to measure body fat, body water, muscle mass and caloric requirement. Furthermore the displayed body weight will be higher than your actual body weight. Body weight, body fat and body water percentages are not subject to considerable fluctuation within a single day. These natural fluctuations can result in considerable differences between measurements taken at different times of the day. Therefore you should make sure to carry out measurements under the same conditions and at the same time of day. 10
13 Otherwise the measurements can not be compared. Differing measurement values could be related to differing conditions for measurement and not to actual changes. The most accurate and realistic measurement values can be obtained in the early evening. Furthermore you should always carry out measurement before mealtimes. Large discrepancies between the measured values and the actual values can be more likely for the following groups of people: children under seven years of age and with a height of less than 100 cm Women going through menopause High-performance/professional athletes People suffering a flu or fever People with swelling in their legs People with osteoporosis Dialysis patients Measurement of body fat, muscle mass and body water percentages as well as caloric requirement is not recommended for these groups of people due to expected false results. However, use of the scales does not represent a health risk for any of the above mentioned groups of people. To measure the body weight, the percentage of body fat, the percentage of muscle mass and the percentage of body water as well as your personal daily caloric requirement: 1 Press the on/off button to turn on the display remote control unit. Balance and will appear on the display screen. 2 Lightly touch the top of the scales with your foot. The on/off indicator on the scales should be illuminated in red. After a few seconds the on/off indicator will turn green and 0.0 kg will appear in the display screen. 3 Press the up button once appears on the display screen. Subsequently the number of one of the memory locations for personal data will blink on the screen. 4 Select the memory location of your own personal data by pressing the up or down button. Press the i button when the memory location number corresponding to your personal data is displayed on the screen. Danger! Never stand on only one side of the scales. Always stand in the middle of the scales with both feet. First of all you stand on the right and left sensor areas. Otherwise the scales can tilt to the side and be damaged beyond repair. You could also fall! Please make sure that the surface of the scales is dry before you stand on it. Otherwise you could slip down! Warning! Do not place a load of more than 180 kilograms on the scales! Otherwise the scales could be damaged beyond repair! 5 Stand on the scales. Make sure that your feet are on the scales sensor areas. All measurements will be carried out. 11
14 The body weight appears in the lower part of the display screen. The body weight display can fluctuate while measurements are being taken. Therefore you should stand as still as possible. After a few seconds a blinking H will appear to the left of the weight display on the screen. The measuring process is complete when the H stops blinking. The weight displayed is your current body weight. The following displays are possible: Under fat Healthy Over fat Obese Remain standing calmly on the scales. Four rotating zeros are displayed in the upper section of the display screen. This indicates that the measurement process for body fat, muscle mass and body water percentages as well as caloric requirement is being carried out. As soon as the measurement process is complete, the following information will appear in sequence in the upper section of the display screen: and the percentage of your body weight which is body fat and the percentage of your body weight which is body water and the percentage of your body weight which is muscle mass and your daily caloric requirement in kilocalories (kcal) Your body weight will continue to be displayed in the lower section of the display screen. The four values will continue to be displayed until the scales are automatically shut off. Your general health condition is depicted by a symbol in the lower left corner of the display screen. Fig. 1a: Display of body fat percentage and body weight Fig. 1b: Display of body water percentage and body weight Fig. 1c: Display of muscle mass percentage and body weight Fig. 1d: Display of daily caloric requirement and body weight The percentual displays of body fat, body water and muscle mass elements must be considered individually. The sum of the measured results can exceed 100 %, as the muscle and fat tissue elements also contain a water element. 12
15 ô Note: If you would like to track the development of your body fat, muscle mass and body water percentages over a period of time: Write down the displayed measurement results in a table after each measurement. We recommend comparing your measurement results with the tables in the accompanying informational material to gain a better understanding of the values. This informational material includes average values for body fat, body water and muscle mass percentages according to age and gender. 6 If you remain standing on the scales, the device will automatically shut off after 30 seconds. If you step down from the scales, 0.0 kg will appear again on the display screen after a few seconds. The scales are now ready for further body weight measurement Comparison of current and previous measurements You can compare all currently displayed measurements with the most recently measured results. ô Note: The comparison display does not function in guest mode, because no measurement values are stored in this mode. To compare the current measurement results with previous results: 1 Remain standing on the scales while the current measurement results are being displayed. 2 Press the i button once. The previous measurement result will blink on the display screen for comparison with the current result. Fig. 2: Current and previous body water percentage measurement in comparison 3 In order to display comparisons of current and previous measurement values for other measurement areas: Press the up or down button briefly. Each time you press one of these buttons, one of the measurement areas (body fat percentage, muscle mass percentage, body water percentage and caloric requirement) are displayed. The current measurement result is displayed for each measurement area and the previous measurement result blinks in the display screen Display previous measurement results To display your most recently measured results for weight body fat percentage muscle mass percentage body water percentage 1 Press the on/off button to turn on the display remote control unit. Balance and will appear on the display screen. 2 Press the down button once appears on the display screen. Subsequently the number of one of the memory locations for personal data will blink on the screen. 13
16 3 Select the memory location of your own personal data by pressing the up or down button. Press the i button when the memory location number corresponding to your personal data is displayed on the screen. 4 Your personal data will appear on the display screen. After a few seconds The body weight appears in the lower part of the display screen. and the percentage of body weight represented by body fat appears in the upper part of the display screen. 5 Press the up or down buttons to switch to the display of measurement results for the percentage of your body weight which is body water the percentage of your body weight which is muscle mass your daily caloric requirement in kilocalories (kcal) Your body weight will continue to be displayed in the lower section of the display screen. Your general health condition is depicted by a symbol in the lower left corner of the display screen. ô Note: Details pertaining to the display element are found in chapter 9.2. Measuring body weight, body fat, muscle mass and body water percentages as well as caloric requirement Using the guest mode (GUES) If all ten memory locations for personal data are already full or if you want to measure body weight, body fat percentage, muscle mass percentage and body water percentage as well as caloric requirement without storing personal data. To do this: 1 Press the on/off button to turn on the display remote control unit. Balance and will appear on the display screen. 2 Press the up button once appears on the display screen. Subsequently the number of one of the memory locations for personal data will blink on the screen. 3 Press the up or down button several times until GUES appears on the display screen. Subsequently press the i button. Either lb or kg should now be blinking in the display. 4 Carry out steps 5 to 9 from chapter 8. Prior to initial use. 5 Lightly touch the top of the scales with your foot. The on/off indicator on the scales should be illuminated in red. After a few seconds the on/off indicator will turn green and 0.0 kg will appear in the display screen. Danger! Never stand on only one side of the scales. Always stand in the middle of the scales with both feet. Then you stand on the right and left sensor areas. Otherwise the scales can tilt to the side and be damaged beyond repair. You could also fall! 14
17 Warning! Do not place a load of more than 180 kilograms on the scales! Otherwise the scales could be damaged beyond repair! 6 Stand on the scales. Make sure that your feet are on the scales sensor areas. All measurements will be carried out. For a detailed explanation of the measurement processes, refer to chapter 9.2. Measuring body weight, body fat, muscle mass and body water percentages as well as caloric requirement. 7 If you remain standing on the scales, the device will automatically shut off after 30 seconds. If you step down from the scales, 0.0 kg will appear again on the display screen after a few seconds. The scales are now ready for further body weight measurement Replacing the batteries of the display remote control unit If this symbol appears on the display screen: The batteries of the display remote control unit are almost empty. In this case, replace both batteries with new AAA/Micro type batteries. Inserting the batteries is described in chapter 6.3. Inserting batteries in the display remote control unit. 11. Troubleshooting/error messages The scales can not be turned on If you can not turn on the scales by placing light pressure on the top: If no new measurement is carried out within 30 seconds, then the scales will turn off automatically. The display remote control unit will turn off automatically after 30 seconds if no buttons are pressed. 10. Maintaining the scales Replacing the batteries in the scales If this symbol appears on the display screen: The batteries of the scales are almost empty. In this case, replace all four batteries with new AA/Mignon type batteries. Inserting the batteries is described in chapter 6.2. Inserting batteries in the scales. A B Check to make sure that the batteries have been properly inserted in the compartment on the bottom of the scales. Make sure that the batteries are facing the right direction with regards to polarity (+/ ) in the battery compartment. The right polarity is depicted on the inside of the battery compartment. Check to see if the batteries in the scales are empty. A warning symbol will appear on the display screen before the batteries are completely empty. This is also explained in chapter 10. Maintenance of the scales. Replace all four batteries with new AA/Mignon type batteries. 15
18 11.2. The display remote control unit can not be turned on If you can not turn on the display remote control unit by press the on/off button: A B Check to make sure that the batteries have been properly inserted in the compartment on the back of the display remote control unit. Make sure that the batteries are facing the right direction with regards to polarity (+/ ) in the battery compartment. The right polarity is depicted on the inside of the battery compartment. Check to see if the batteries in the display remote control unit are empty. A warning symbol will appear on the display screen before the batteries are completely empty. This is also explained in chapter 10. Maintenance of the scales. Replace the batteries with two new AAA/Micro type batteries The display screen is not functioning properly Error messages appear on the display screen Ld If this error message is displayed, then the weight on the scales exceeds 180 kg. The scales are not intended for weight exceeding 180 kg. Warning! Do not place a load of more than 180 kilograms on the scales! Otherwise the scales could be damaged beyond repair! Err If this error message is displayed, then the scales can not measure body fat, muscle mass and body water percentages. A Measurement will not function properly if you are wearing shoes or socks. Always take your shoes and socks off before standing on the scales. The scales contain sensitive electronic components. Therefore it is possible that the scales will not function properly if there are radio transmission devices in the immediate vicinity. This could include mobile phones, walkietalkies, CB devices, radio remote control units, other remote control units and microwave devices. If the display screen is not functioning properly, you should remove this type of device from the immediate vicinity of the scales. In most cases it should suffice to switch off the devices while the scales are being used. In cases of interference proceed as detailed in Section C of the following chapter. ô Note: Avoid static charge or discharge because this could result in display errors or sudden switching off of the scales. B C D Make sure that you have both feet on the sensor areas of the scales top surface. If measurement is still not possible: Step off the scales and wait until it automatically shuts off. Subsequently turn the scales on again and start the measurement process again. If measurement is still not possible: You should always carry out measurements with clean dry feet. In some rare cases however your feet could be too dry for the measurement functions to function properly. In order to exclude the possibility that this is the cause of the error message: Moisten your feet using a damp cloth. Subsequently carry out the measurement again. 16
19 This error message indicates that the display remote control unit can not establish a connection to the scales. Possible causes for this could be: A B C D The scales are turned off. Turn the scales on by gently touching the top of the scales with your foot. The display remote control unit is too far away from the scales. In this case, move closer to the scales with the display remote control unit. There is an obstacle between the infrared receiver on the display remote control unit and the scales. In this case, remove the obstacle. The display remote control unit is being held at an angle which hinders connection between the infrared receiver and the scales. In this case, hold the display remote control unit with the infrared receiver facing the scales Measurement results seem unrealistic If you doubt the correctness of the displayed measurement results: A Make sure you are carrying out the measurements correctly: Are you carrying out the measurement without clothes on and especially without shoes and socks on? Do you have both feet on the scales sensor areas whilst weighing? Are your feet dry and clean? Do you remain still on the scales until the measurement results are displayed? B If you have carried out the measurements correctly: Make sure that the stored personal data is correct. If errors were made when making the entries, it could result in false results. To do this: 1 Turn the display remote control unit on by pressing the on/off button. 2 Subsequently press the up or down button once briefly appears on the display screen. Subsequently the number of one of the memory locations for personal data will blink on the screen. 3 Select the memory location of your own personal data by pressing the up or down button. Press the i button when the memory location number corresponding to your personal data is displayed on the screen. 4 Make sure that the displayed data correctly corresponds to your personal data. If the displayed data contains errors, then you have to store your personal data again. The process of storing personal data is explained in chapter 8. Prior to initial use. C If the entered personal data contains no errors: Carry out measurements daily over a period of one week. If these measurement return similar results: Compare your measurement results with the average values in the tables in the accompanying informational material. Use the average values to determine whether there are large differences between these values and your own measurement results. If this is the case, please consult your physician to have the measurement results checked. 17
20 11.6. Other malfunctions Please refer to one of our service partners in your area if the malfunctions described in sections to can not be rectified as described or other malfunctions occur while using the scales and/or display remote control unit. You will find the addresses of our service partners on the warranty card. You will find the warranty card with the scales. 12. Cleaning the scales Clean the scales only using a mild cleanser and a damp cloth. If different people use the scales, then the top of the scales should be cleaned after each usage. You should use a disinfectant with fungicide to prevent the spread of athlete s foot. Clean the display remote control unit only using a slightly damp cloth. Please make sure no water or moisture can enter the scales or display remote control unit. Danger! If water or moisture seeps into the scales or the display remote control unit, they can be damaged beyond repair. This could also cause danger of electric shock! 13. Storing the scales If you are planning not to use the scales for a long period of time: 1 Remove all batteries from the battery compartments of the scales and the display remote control unit. Careful! Battery acid could leak out, especially if the batteries are old. Therefore you should remove all batteries if you do not plan to use the scales and remote control unit for long periods of time. This protects the scales and display remote control unit from damages resulting from battery acid leakage. 2 Place the display remote control unit in the holder on the scales. 3 Store the scales in a clean, dry place. Make sure that the scales can not fall from the storage place. Do not place any heavy or sharp objects on the scales. We suggest using the original packaging to store the scales. Warning! The scales and display remote control unit can only be operated at temperatures between 10 and 40 Celsius. The scales should be kept within this temperature range even while not being used. Temperatures outside of this range can result in malfunctioning or long-term damages. 18
21 14. Disposing of the scales Do not dispose of the scales and the display remote control unit in the household waste. Please contact those responsible for waste management in your city or community and ask how to properly dispose of electronic devices. ô Note: Remove the batteries before disposing of the scales or the display remote control unit. Do not dispose of the batteries in the household waste! Return the used batteries to an appropriate recycling collection center. Used batteries can usually be returned to the store in which they were bought. Dispose of the packaging materials in an environmentally responsible manner. 15. Warranty & Customer Service The warranty conditions and service address can be found on the enclosed warranty sheet. 16. Importer KOMPERNASS GMBH BURGSTRASSE 21 D BOCHUM 19
G L A N C E Scale Kale
 G L A N C E Scale Kale User Manual Bare Foot Things to note Use Glance Scale with bare foot, otherwise the scale cannot measure the fitness info accurately Hard Surface Place Glance Scale on a hard, flat
Garmin Index Smart Scale. Owner s Manual
 Garmin Index Smart Scale Owner s Manual September 2016 190-01959-00_0B All rights reserved. Under the copyright laws, this manual may not be copied, in whole or in part, without the written consent of
User Manual GBS-1269BT. Body Scale 4.0. version:1.0. Distributed by: Informed Clinical Sciences Corporation 1 Joy Street, Boston, USA MA 02108
 version:1.0 User Manual GBS-1269BT Body Scale 103 lbs Thank you very much for selecting the IC Sciences WeighWise Body Scale GBS-1269BT. TM 4.0 Please read the user manual carefully and thoroughly to ensure
Precision Health Scale Model UC-321P
 Precision Health Scale Model UC-321P Before Use Precautions... 1 Scale Components... 2 Display Symbols... 3 Installing (or Replacing) Batteries... 3 Operations Basic Measurement... 4 Memory Function...
1 Channel Strobe Controller ORDERCODE 40226
 1 Channel Strobe Controller ORDERCODE 40226 Congratulations! You have bought a great, innovative product from Showtec. The Showtec Strobe Controller brings excitement to any venue. Whether you want simple
Digital Night Vision Device Digital+ Series NV-440D3/NV-650D3/NV-760D3
 Digital Night Vision Device Digital+ Series NV-440D3/NV-650D3/NV-760D3 Instruction Manual Digital Night Vision Device Digital Series NV-440D3 / NV-650D3 / NV-760D3 Before using the device for the first
OV1001 Part No OV1001 HEIGHT ADJUSTABLE TABLE USER GUIDE
 OV1001 Part No. 23620 OV1001 HEIGHT ADJUSTABLE TABLE USER GUIDE PRODUCT OVERVIEW User Guide: OV1001 OV1001 HEIGHT ADJUSTABLE TABLE A healthier work environment starts with the option to sit or stand throughout
OV1000 Part No OV1000 HEIGHT ADJUSTABLE TABLE USER GUIDE
 OV1000 Part No. 23624 OV1000 HEIGHT ADJUSTABLE TABLE USER GUIDE PRODUCT OVERVIEW User Guide: OV1000 OV1000 HEIGHT ADJUSTABLE TABLE A healthier work environment starts with the option to sit or stand throughout
WheelAble. Be Spontaneous. User Manual
 WheelAble Be Spontaneous User Manual V. 1.0 2015 Table of Contents TABLE OF CONTENTS GENERAL... 3 Introduction... 3 Intended use... 3 EXPECTED Lifetime... 3 warranty... 3 SPARE PARTS ORDERS, COMPLAINTS...
LED Colour Flood 10W / 30W RGB LED floodlight. user manual
 LED Colour Flood 10W / 30W RGB LED floodlight user manual Musikhaus Thomann e.k. Treppendorf 30 96138 Burgebrach Germany Telephone: +49 (0) 9546 9223-0 E-mail: info@thomann.de Internet: www.thomann.de
Important Information KX-NTV150. Communication IP Camera. IP Video Doorphone. Model No. Model No. KX-NTV160
 Important Information Communication IP Camera Model No. KX-NTV150 IP Video Doorphone Model No. KX-NTV160 Thank you for purchasing this Panasonic product. Please read this Important Information carefully
INSTALLATION INSTRUCTIONS
 TS1000C TS700C INSTALLATION INSTRUCTIONS CONTENT: 1. Important safety instructions. 2. Specifications and main dimensions. 3. Parts included. 4. Installation. 5. RF remote system. 6. Feature functions
DC-D4213RX DC-D4213WRX
 Network Camera Quick Guide DC-D4213RX DC-D4213WRX Powered by Safety Precautions WARNING RISK OF ELECTRIC SHOCK DO NOT OPEN WARNING: TO REDUCE THE RISK OF ELECTRIC SHOCK, DO NOT REMOVE COVER (OR BACK).
Network Camera. Quick Guide DC-B1203X. Powered by
 Network Camera Quick Guide DC-B1203X Powered by Safety Precautions English WARNING RISK OF ELECTRIC SHOCK DO NOT OPEN WARNING: TO REDUCE THE RISK OF ELECTRIC SHOCK, DO NOT REMOVE COVER (OR BACK). NO USER-SERVICEABLE
Classic Weight Scale. Model UC-502
 Classic Weight Scale Model UC-502 Instruction Manual Original Manuel d instructions Traduction Manual de Instrucciones Traducción Manuale di Istruzioni Traduzione ITALIANO ESPAÑOL FRANÇAIS ENGLISH 使用手冊翻譯
Network Camera. Quick Guide DC-T3243HRX. Powered by
 Network Camera Quick Guide DC-T3243HRX Powered by Safety Precautions WARNING RISK OF ELECTRIC SHOCK DO NOT OPEN WARNING: TO REDUCE THE RISK OF ELECTRIC SHOCK, DO NOT REMOVE COVER (OR BACK). NO USER-SERVICEABLE
ft Aspen Fir Item # Commercial ITEM Lights
 7.57.5 ft Aspen Fir Item #142027 Commercial ITEM Lights PARTS LIST A. BOTTOM B. LOWER MIDDLE C. UPPER MIDDLE D. TOP E. TREE STAND NUMBER OF PERSONS RECOMMENDED FOR ASSEMBLY: 2 SKU 142027 7.5 ASPEN FIR
Network Camera. Quick Guide DC-D3C33HRX. Powered by
 Network Camera Quick Guide DC-D3C33HRX Powered by Safety Precautions Important Safeguards WARNING RISK OF ELECTRIC SHOCK DO NOT OPEN WARNING: TO REDUCE THE RISK OF ELECTRIC SHOCK, DO NOT REMOVE COVER (OR
DC-D3233RX-N / DC-D3233X-N
 Network Camera Quick Guide DC-D3233RX-N / DC-D3233X-N Powered by Safety Precautions Important Safeguards WARNING RISK OF ELECTRIC SHOCK DO NOT OPEN WARNING: TO REDUCE THE RISK OF ELECTRIC SHOCK, DO NOT
OWNER S MANUAL. Additional Camera Unit AC-CAM-210 Compatible with AC210 Baby Video Monitor TABLE OF CONTENTS
 OWNER S MANUAL Additional Camera Unit AC-CAM-210 Compatible with AC210 Baby Video Monitor TABLE OF CONTENTS WARNINGS...2 SETUP REQUIREMENTS... 3 Setting up the Camera... 4 Limited warranty...7 Technical
Kalenji Cardio Connect user manual
 Kalenji Cardio Connect user manual Heart rate logger + Geonaute Software analysis tool. Som 1. Introduction... P.3 2. Overall view... P.3 3. Start up... P.4 4. Connection to the chest belt... P.4 5. Recording
INSPECTION CAMERA MODEL NO: CIC2410 OPERATION & SAFETY INSTRUCTIONS PART NO: GC0116
 INSPECTION CAMERA MODEL NO: CIC2410 PART NO: 6470385 OPERATION & SAFETY INSTRUCTIONS GC0116 INTRODUCTION Thank you for purchasing this CLARKE Inspection Camera. Before attempting to use this product, please
PREFACE. Thank you for choosing Zen Space Desks. We hope your desk helps you find your zen when being used. Zen Space Desks Team
 INSTRUCTION MANUAL PREFACE We are thrilled that you have chosen Zen Space. Congratulations, you have selected one of the most advanced and sophisticated Power Adjustable Workstations available today. Our
DC-D2212R / DC-D2212WR
 Network Camera Quick Guide / DC-D2212WR Powered by Safety Precautions WARNING RISK OF ELECTRIC SHOCK DO NOT OPEN WARNING: TO REDUCE THE RISK OF ELECTRIC SHOCK, DO NOT REMOVE COVER (OR BACK). NO USER-SERVICEABLE
Contents -1- Please read the following safety warnings and precautions before using your device.
 Contents 1. Introduction 2. Battery Precautions 3. Getting Started 4. Installation Operation 5. Cable Connection 6. Bluetooth Connection 7. NFC Connection 8. Microphone Usage 9. LED Display Status 10.
Network Camera. Quick Guide DC-D4223RX / DC-D4223WRX / DC-D4233RX / DC-D4233WRX / DC-D4233HRX. Powered by
 Network Camera Quick Guide DC-D4223RX / DC-D4223WRX / DC-D4233RX / DC-D4233WRX / DC-D4233HRX Powered by Safety Precautions Important Safeguards WARNING RISK OF ELECTRIC SHOCK DO NOT OPEN WARNING: TO REDUCE
Achat 206 passive full-range speaker. user manual
 Achat 206 passive full-range speaker user manual Musikhaus Thomann Thomann GmbH Hans-Thomann-Straße 1 96138 Burgebrach Germany Telephone: +49 (0) 9546 9223-0 E-mail: info@thomann.de Internet: www.thomann.de
Network Camera. Quick Guide DC-D1223WX. Powered by
 Network Camera Quick Guide DC-D1223WX Powered by Safety Precautions WARNING RISK OF ELECTRIC SHOCK DO NOT OPEN WARNING: TO REDUCE THE RISK OF ELECTRIC SHOCK, DO NOT REMOVE COVER (OR BACK). NO USER-SERVICEABLE
Dialock DT Lite. Operating instructions...2. Operating instructions
 Operating instructions Dialock DT Lite Operating instructions... Operating instructions. Notes on these operating instructions. Contents and target group of the instructions It is essential to pay attention
Installation Instructions
 LUCCI Slim Line Fan Remote Control SKU# 210012 Rated Voltage 220-240V~ 50Hz Thank you for purchasing this quality Lucci product. To ensure correct function and safety, please read and follow all instructions
Bluetooth Smart Scale & Body Fat Monitor USER GUIDE
 Bluetooth Smart Scale & Body Fat Monitor USER GUIDE QUICK START GUIDE 1. Search for YUNMAI from the App Store, Google Play, or online at www.iyunmai.com/en/ app.html. Or scan the QR code below to download.
RF-Link 2.4GHz Digital Wireless Color Security/Baby Monitor. Model: ABM-4161 User's Manual
 RF-Link 2.4GHz Digital Wireless Color Security/Baby Monitor Model: ABM-4161 User's Manual 1 Package Content Camera x 1 Monitor x 1 Power Adapters x 2 Battery for Monitor ( 3.7V 1000mAH Li-ion ) x 1 User's
ENVIRONMENTAL PROTECTION
 ENVIRONMENTAL PROTECTION Do not dispose of this product with the normal household waste at the end of its life cycle. Return it to a collection point for the recycling of electrical and electronic devices.
DC-V3213XJ-4.3mm DC-V3213XJ-2.5mm
 Network Camera Quick Guide DC-V3213XJ-4.3mm DC-V3213XJ-2.5mm Powered by Safety Precautions WARNING RISK OF ELECTRIC SHOCK DO NOT OPEN WARNING: TO REDUCE THE RISK OF ELECTRIC SHOCK, DO NOT REMOVE COVER
ENGLISH TRUE WIRELESS EARPHONES OWNER S MANUAL
 TRUE WIRELESS EARPHONES OWNER S MANUAL INTRODUCTION Thank you for purchasing a pair of PSB Speakers M4U TW1 earphones. Producing natural musical dynamics and precisely imaged sound, these high fidelity
Classic Flanger effects pedal. user manual
 Classic Flanger effects pedal user manual Musikhaus Thomann Thomann GmbH Hans-Thomann-Straße 1 96138 Burgebrach Germany Telephone: +49 (0) 9546 9223-0 E-mail: info@thomann.de Internet: www.thomann.de 31.07.2015,
LSL250. Laser light! Do not stare into the beam or view directly with magnifiers. Class 2 laser EN :
 Lufkin LSL250 Professional rotary laser in extremely rugged design horizontal levelling even under tough conditions. Automatic rotary laser 635 nm, self-levelling range ± 5 horizontal, accuracy 1 mm /
Helpline No. UK/Northern Ireland Rep. Ireland Web Support Model Number 82069
 Introduction 1 Congratulations on choosing to buy a Tevion product. By doing so you now have the assurance and peace of mind that comes with purchasing a product made by one of Europe s leading manufacturers.
LED Pixel Rail 40 RGB LED strip. user manual
 LED Pixel Rail 40 RGB LED strip user manual Musikhaus Thomann Thomann GmbH Hans-Thomann-Straße 1 96138 Burgebrach Germany Telephone: +49 (0) 9546 9223-0 E-mail: info@thomann.de Internet: www.thomann.de
Corded Big Button Telephone with Speakerphone
 Instruction Manual Corded Big Button Telephone with Speakerphone L05CBIG10 Contents Safety First... 4 Unpacking... 6 Getting Started... 7 Locating the Base Unit...7 Wall Mounting (optional)... 8 Control
Activity meter. Operating Instructions. AM 1400 adevital Activity. with Bluetooth and data management in linked app
 Activity meter with Bluetooth and data management in linked app Operating Instructions AM 1400 adevital Activity Subject to technical changes as a result of product improvements. Operating Manual_AM1400_EN_131214_REV001
A GREATER GOODS BRAND
 A GREATER GOODS BRAND 1 2 3 Physical Features Measuring Units lb. kg pound kilogram Setting The Measuring Unit By pressing the UNIT button on the back of the scale, you can switch between lb. (pound) and
Octostrip ORDERCODE 42220
 Octostrip ORDERCODE 42220 Congratulations! You have bought a great, innovative product from Showtec. The Showtec LED Octostrip brings excitement to any venue. Whether you want simple plug-&-play action
Children s sing along cassette player
 Children s sing along cassette player Table of contents 5 Chapter 1 Intended use 6 Chapter 2 Safety information 6 Avoiding damage or malfunction 7 Permissible operation and storage temperatures 7 Protecting
A GREATER GOODS BRAND
 A GREATER GOODS BRAND 1 Symbol for THE OPERATION GUIDE MUST BE READ Symbol for TYPE BF APPLIED PARTS Symbol for MANUFACTURE DATE Symbol for SERIAL NUMBER Symbol for MANUFACTURER Symbol for DIRECT CURRENT
BLUETOOTH BATHROOM SCALE
 BLUETOOTH BATHROOM SCALE BLS-7361 Instruction Manual Sakar International, Inc. All rights reserved. Introduction The Bally Total Fitness BLS-7361 Bluetooth Bathroom Scale features the latest in digital
INSTRUCTION MANUAL. * Design and Specifications are subject to change without notice. ver. 1.0 PRINTED IN KOREA
 INSTRUCTION MANUAL * Design and Specifications are subject to change without notice. ver. 1.0 PRINTED IN KOREA INSTRUCTION MANUAL Thank you for purchasing this product. For proper usage and application,
Large Police Light 100W ORDERCODE 80361
 Large Police Light 100W ORDERCODE 80361 Congratulations! You have bought a great, innovative product from Showtec. The Showtec Large Police Light brings excitement to any venue. You can rely on Showtec,
APRC90AT manual Table of contents
 APRC90AT manual Table of contents 1. Safety o 1.1. Intended use o 1.2. Labels in this manual o 1.3. General safety instructions 2. Preparations for use o 2.1. Unpacking o 2.2. Package contents 3. Installation
INSTRUCTIONS FOR USE. RECHARGEABLE System for Hearing Aids
 INSTRUCTIONS FOR USE RECHARGEABLE System for Hearing Aids Limited Warranty ZPower s exclusive limited warranty is available at www.zpowerhearing.com. You may also obtain a copy of ZPower s Limited Warranty
User s Manual. Digital Baby Scales. Hopkins Featherweight Baby Scale # Hopkins Featherweight XL Baby Scale # # #688340
 Max=44s/2kg d=.1s/5g RECALL Digital Baby Scales User s Manual Hopkins Featherweight Baby Scale # Hopkins Featherweight XL Baby Scale #68834 Max=44s/2kg d=.1s/5g # ON/TARE LB/KG #68834 Table of Contents
ESV3000 ETDRS Illuminated Cabinet INSTRUCTION MANUAL
 ESV000 ETDRS Illuminated Cabinet INSTRUCTION MANUAL ACTUAL SIZE LETTER FOOT METER SIZE 0 0 80 24 24M 6 50 40 2 25 20 16 19 15 12 9.5 7.5 6 4.8 Developed by Lea Hyvärinen, M.D. FOR TESTING AT FEET ( METERS)
your private delight bedienungsanleitung user manual
 your private delight bedienungsanleitung user manual Warnings This appliance can be used by women aged 16 years and above and persons with reduced physical, sensory or mental capabilities or lack of experience
Achat 112 MA Achat 112 MA WH full-range speaker. user manual
 Achat 112 MA Achat 112 MA WH full-range speaker user manual Musikhaus Thomann Thomann GmbH Hans-Thomann-Straße 1 96138 Burgebrach Germany Telephone: +49 (0) 9546 9223-0 E-mail: info@thomann.de Internet:
ENVIRONMENTAL PROTECTION
 ENVIRONMENTAL PROTECTION Do not dispose of this product with the normal household waste at the end of its life cycle. Return it to a collection point for the recycling of electrical and electronic devices.
INSTALLATION GUIDE DM-20 English Version 1.10 EN DM20 V1.10A
 www.supremainc.com INSTALLATION GUIDE DM-20 English Version 1.10 EN 101.00.DM20 V1.10A Contents Safety Instructions... 3 Components... 4 Front Side... 5 Installation Example... 6 Dimensions... 7 Installation...
Flex Pro Series Assembly Guide
 ELECTRIC HEIGHT-ADJUSTED SIT TO STAND DESK Table of Contents CAUTION, USE & LIABILITY... 2 PARTS & HARDWARE LIST... 3 PARTS / COMPONENT DIAGRAMS... 3 ASSEMBLY INSTRUCTIONS... 5 BLUETOOTH... 10 TROUBLESHOOTING...
Operating Instructions
 Operating Instructions Zoom Lens Model No. ET-DLE085 Thank you for purchasing this Panasonic product. Please read these operating instructions and the projector operating instructions carefully, and then
Manual. Polaron SMPS Watt power supply for chargers. No. S2024. Copyright Graupner/SJ GmbH
 EN Manual Polaron SMPS 1500 1500 Watt power supply for chargers Copyright Graupner/SJ GmbH No. S2024 Index Introduction... 3 Service Centre... 3 Declaration of conformity... 3 Intended use... 4 Package
SKIVING MACHINE MAINTENANCE & INSTRUCTIONS MANUAL ASSK2. Allswage UK. Roebuck Street, West Bromwich, B70 6RB
 SKIVING MACHINE ASSK2 MAINTENANCE & INSTRUCTIONS MANUAL A. WARRANTY AND RESPONSIBILITY Warranty: It's the supplier's responsibility to guarantee the conformity of the product, assuring that it's manufactured
Swing-Arm Reading Lamp
 Guardian-Rho OPERATING INSTRUCTIONS Swing-Arm Reading Lamp MODEL: L5210 thank you Thank you for the purchase of this quality LLOYTRON product. Used carefully and in accordance with the instructions enclosed,
When using the scale, the following safety precautions should always be followed:
 INSTRUCTION MANUAL SAFETY PRECAUTIONS Please retain these instructions for future use. All safety messages are identified by the words WARNING and CAUTION. These words mean the following: WARNING CAUTION
BAM Labs Biometric Monitoring System. Instruction Manual
 BAM Labs Biometric Monitoring System Instruction Manual 2 Contents Customer Instructions...4 Intended Use...4 IMPORTANT SAFETY INSTRUCTIONS...5 WARNINGS...6 FCC Warning...7 LED Feedback...9 Connecting
Additional Camera Unit for Angelcare Monitors AC-CAM Compatible with models: AC517 - AC510 AC417 AC315 AC310
 OWNER S MANUAL Additional Camera Unit for Angelcare Monitors AC-CAM Compatible with models: AC517 - AC510 AC417 AC15 AC10 TABLE OF CONTENTS WARNINGS... SETUP REQUIREMENTS... Setting up the Camera... Instructions
Users Manual OPN Pocket Memory Scanner
 Users Manual OPN 2001 Pocket Memory Scanner CAUTION: This user s manual may be revised or withdrawn at any time without prior notice. Copyright 2006 Opticon Sensors Europe B.V. All rights reserved. This
Mk II 3DR MULTI-LINE LASER INSTRUCTION MANUAL
 Mk II 3DR MULTI-LINE LASER INSTRUCTION MANUAL SAFETY Read the following safety instructions before attempting to operate this product. Keep these instructions in a safe place or store in the carry case
BI20 OPERATING MANUAL LOCATING DEVICE TRT-BA-BI20-TC-002-EN
 BI20 EN OPERATING MANUAL LOCATING DEVICE TRT-BA-BI20-TC-002-EN Table of contents Notes regarding the operating manual... 1 You can download the current version of the operating manual and the EU declaration
7 Digital Photo Frame
 7 Digital Photo Frame Instruction manual L7DPF17 12 month manufacturer's warranty -------------------------------------------------------------------------- --------------------------------------------------------------------------
COMPACT LED DESK LAMP WITH LCD DISPLAY
 COMPACT LED DESK LAMP WITH LCD DISPLAY User manual, Operating- and safety instructions, Warranty conditions LED 12 MON Item no.: MROS501 Getting started and operation 1 180 1. Setting up Place the LED
DDC-6, DDC-12 LCD DMX controller. user manual
 DDC-6, DDC-12 LCD DMX controller user manual Musikhaus Thomann Thomann GmbH Hans-Thomann-Straße 1 96138 Burgebrach Germany Telephone: +49 (0) 9546 9223-0 E-mail: info@thomann.de Internet: www.thomann.de
INSTALLATION INSTRUCTIONS
 INSTALLATION INSTRUCTIONS PARTS REQUIRED efloat Parts A A (1) Top Frame (consists of two separate weldments) B (2) Legs C D (2) Feet (1) Smart Controller - 7.3 (186.2 mm) x 3.9" (100.4 mm) D E (1) Touchpad
PAR-WT50R-E PAR-WR51R-E
 Wireless Remote Controller and Receiver PAR-WT50R-E PAR-WR51R-E This manual explains installation of the PAR-WR51R-E wireless receiver and the PAR-WT50R-E wireless remote controller, and settings of these
OPERATING INSTRUCTIONS
 OPERATING INSTRUCTIONS SCOPE OF DELIVERY 1 Transmitter incl. lithium battery (3V, CR2032) 1 Chest strap (consisting of a transmitter and elastic strap) Item no. RUNBT1, type: TD00290 The elastic strap
ZTE MOBILE HOTSPOT QUICK START GUIDE
 ZTE MOBILE HOTSPOT QUICK START GUIDE INTRODUCTION Thank you for choosing Consumer Cellular! We know you re excited to use your new ZTE Mobile Hotspot, and this short guide will help you get familiar with
Colour Star Sky I DMX ORDERCODE 40341
 Colour Star Sky I DMX ORDERCODE 40341 Congratulations! You have bought a great, innovative product from Showtec. The Showtec Star Sky 1 brings excitement to any venue. You can rely on Showtec, for more
WEB CONNECT Manual BMI
 WEB CONNECT Manual BMI Content 1. Introduction 3 1.1 Proper use 3 1.2 Safety information 3 1.3 The body mass index (BMI) 5 1.4 Rules for weighing 5 2. Start-up operation 6 2.1 Description of the device
Starlit Dance Floor. User Manual
 Starlit Dance Floor User Manual Order codes: 500W Power Supply - LEDJ405 750W Power Supply - LEDJ427 1000W Power Supply - LEDJ428 1500W Power Supply - LEDJ429 White Remote Control Pack - LEDJ406 White
Network Camera. Quick Guide DC-S1283WRX. Powered by
 Network Camera Quick Guide DC-S1283WRX Powered by Safety Precautions Important Safeguards WARNING RISK OF ELECTRIC SHOCK DO NOT OPEN WARNING: TO REDUCE THE RISK OF ELECTRIC SHOCK, DO NOT REMOVE COVER (OR
VR 71. Installation instructions. Installation instructions. For the competent person GB, IE. Publisher/manufacturer Vaillant GmbH
 Installation instructions For the competent person Installation instructions VR 71 GB, IE Publisher/manufacturer Vaillant GmbH Berghauser Str. 40 D-42859 Remscheid Telefon 021 91 18 0 Telefax 021 91 18
AD-400. CD Player with USB/SD and FM Tuner. Item ref: UK User Manual
 AD-400 CD Player with USB/SD and FM Tuner Item ref: 952.982UK User Manual Caution: Please read this manual carefully before operating Damage caused by misuse is not covered by the warranty Introduction
xbrick Full-Colour 16 3W LED floodlight user manual
 xbrick Full-Colour 16 3W LED floodlight user manual Musikhaus Thomann e.k. Treppendorf 30 96138 Burgebrach Germany Telephone: +49 (9546) 9223-0 email: info@thomann.de Internet: www.thomann.de 15.11.2011
Antenna Distributor ORDERCODE D1444
 Antenna Distributor ORDERCODE D1444 Congratulations! You have bought a great, innovative product from DAP Audio. The DAP Audio TAS series bring excitement to any venue. Whether you want simple plug-&-play
MODEL C-HOMWA-1 CONNECTIVITY KIT, CONNEX (USB)
") MODEL C-HOMWA-1 CONNECTIVITY KIT, CONNEX (USB) User Instructions P/N UMC_HOMWA_1 Rev20170810 1 Model C-HOMWA-1 Thank you for your purchase of this Health o meter Professional product. Please read this
MODEL C-HOMWA-1 CONNECTIVITY KIT, CONNEX (USB) User Instructions P/N UMC_HOMWA_1 Rev20170810 1 Model C-HOMWA-1 Thank you for your purchase of this Health o meter Professional product. Please read this
INSTRUCTION MANUAL DISTRIBUTION UNIT. Please read this manual thoroughly before use, and keep it handy for future reference.
 INSTRUCTION MANUAL DISTRIBUTION UNIT Please read this manual thoroughly before use, and keep it handy for future reference. ISSUE 1 May 2006 LIMITATION OF LIABILITY THE INFORMATION IN THIS PUBLICATION
Vortex Series 2-leg Desk Assembly Guide
 ELECTRIC HEIGHT-ADJUSTED SIT TO STAND DESK Vortex Series 2-leg Desk Assembly Guide For desk with underframe Model No. AL4628-XX REV-1509A Table of Contents IMPORTANT SAFETY INSTRUCTIONS... 3 CAUTION, USE
Installation manual plugs and connectors with screw connection (16/32 A)
") EN Installation manual plugs and connectors with screw connection (16/32 60003213 Issue 04.2016 2016-04-01 Table of contents 1 About this manual 3 1.1 Structure of the warnings 3 1.2 Symbols used 4 1.3
EN Installation manual plugs and connectors with screw connection (16/32 60003213 Issue 04.2016 2016-04-01 Table of contents 1 About this manual 3 1.1 Structure of the warnings 3 1.2 Symbols used 4 1.3
User Manual. Geneva Sound System (Model S and Model S DAB)
") User Manual Geneva Sound System (Model S and Model S DAB) 1 IMPORTANT SAFETY INSTRUCTIONS English 1) Read, keep and follow these instructions. 2) Install in accordance with the manufacturer s instructions.
User Manual Geneva Sound System (Model S and Model S DAB) 1 IMPORTANT SAFETY INSTRUCTIONS English 1) Read, keep and follow these instructions. 2) Install in accordance with the manufacturer s instructions.
The ultimate multi-purpose digital scale Ideal for letters, parcels and large boxes
 The ultimate multi-purpose digital scale Ideal for letters, parcels and large boxes 0 ON/OFF UNIT HOLD ZERO HOLD INSTRUCTION MANUAL CONTENTS 03 Safety Precautions -Warnings -Cautions -Battery Installation
DPP Micro Reader. The DPP Micro Reader is maintenance-free, not configurable by the user and is operated with a single, multi-function button.
 Read this User Guide completely before using the product. Storage conditions: Store between -20 to 80 C (-4 to 176 F) DPP Micro Reader For use under Emergency Use Authorization (EUA) only. For In Vitro
Operating instructions
 www.lehmann-locks.com GB L033-A01 L033-A02 M300 L033-A01 / -A02 Operating instructions Contents Page General description / Technical data / Safety instructions... 2 Care and maintenance / Factory settings
Model SRV945-BT 24 X 36 Platform Scale App-Enabled Operating and Service Manual Part No.: MAN945-BT_ Page 1 of 16.
 Part No.: MAN945-BT_180417 Page 1 of 16 S by S Instruments, Inc. Model SRV945-BT Portable Platform Scale App Enabled Wireless Operating and Service Manual Part No.: MAN945-BT_180417 Page 2 of 16 TABLE
TA18 active subwoofer. user manual
 TA18 active subwoofer user manual Musikhaus Thomann e.k. Treppendorf 30 96138 Burgebrach Germany Telephone: +49 (0) 9546 9223-0 email: info@thomann.de Internet: www.thomann.de 30.11.2011 Table of contents
SPOTTER the multipurpose sensor
 SPOTTER the multipurpose sensor OVERVIEW Part of the Quirky + GE collection of smart products, Spotter is a multipurpose sensor that keeps you updated on what s going on at home from anywhere. Monitor
Always there to help you. Register your product and get support at AEA1000. Question? Contact Philips.
 Always there to help you Register your product and get support at www.philips.com/welcome Question? Contact Philips AEA1000 User manual Contents 1 Important 2 Important safety information 2 Notice 3 English
LED Commander 16/2 DMX controller. user manual
 LED Commander 16/2 DMX controller user manual Musikhaus Thomann Thomann GmbH Hans-Thomann-Strasse 1 96138 Burgebrach Germany Telephone: +49 (0) 9546 9223-0 E-mail: info@thomann.de Internet: www.thomann.de
DOWNLOAD THE FREE APP
 DOWNLOAD THE FREE APP Vitasigns makes health awareness easy with intelligent devices that support Smart Routines for you and those you love. Track your weight as part of your Smart Routine for health awareness.
Promopar ORDERCODE 30120
 Promopar ORDERCODE 30120 Congratulations! You have bought a great, innovative product from Showtec. The Showtec Promopar brings excitement to any venue. You can rely on Showtec, for more excellent lighting
RAINPROOF* COLOR CAMERA SECURITY SYSTEM
 RAINPROOF* COLOR CAMERA SECURITY SYSTEM Model 91202 ASSEMBLY AND OPERATING INSTRUCTIONS 3491 Mission Oaks Blvd., Camarillo, CA 93011 Visit our Web site at: http://www.harborfreight.com Copyright 2004 by
WIRELESS POWERLINK USER MANUAL
 WIRELESS POWERLINK USER MANUAL Contents General... 3 Wireless Powerlink... 3 Package Contents... 4 Disposal of Old electrical Devices... 6 Installation... 7 Pairing Function... 7 Connecting the Devices...
ELECTRONIC PULSE MASSAGER ZX-581 USER MANUAL. Care for Your Loved Ones facebook.com/nursalonline
 ELECTRONIC PULSE MASSAGER ZX-581 USER MANUAL Care for Your Loved Ones www.nursal.co/warranty facebook.com/nursalonline ACTIVATE YOUR 12 MONTH WARRANTY & GET EXCLUSIVE GIFT Register within 2 weeks after