Standard System Documentation
|
|
|
- Reginald Rose
- 6 years ago
- Views:
Transcription
1 Standard System Documentation SD-6Dec2017
2 CONTENTS 1. Standard Knowledgebase Guide Overview Staff Interface Admin Setup Menu End User Interface Default EUI Setup Legacy EUI Setup Groups and Teams Groups Teams Background Tables People, Employees and External Users Subtables Companies Table Departments Table Locations Table Global Process Tables Approval Management Approvals Table Approval Templates Table Approval Workflows Table Task Management Tasks Table Task Templates Table Task Workflows Table Task Steps Table Time Entries Table Service Catalog Services Table Contract Management Tables Contracts Table Clause Library Table Insurance Certificates Table Attachments Table Attachment Types Table Contract Tasks Table Contract Types Table Print Templates Table DocuSign Tables Overview DocuSign Users Table DocuSign Roles Table DocuSign Envelopes Table DocuSign Recipients Table Adobe Sign Tables and Setup Service Desk Operation Tables Alternative Knowledgebase for Service Operations Terminology Request Tables Overview Service Requests Table Incidents Table Problems Table Change Requests (RFC) Table Assets Table Models Table Purchase Requests Table Items Requested Table Items Table
3 Support Cases Table Project Management Tables Projects Table Project Types Table Purchase Orders (PO) Table Sales CRM Tables Leads Table Opportunities Table Products Table Products Quoted Table Campaigns Table Quotes Table Surveys Table Survey Types Table Survey Questions Table Document Management Table System Tables Calendars Table EUI Templates Table Replacement Variables Table Activity Log Table Currencies Table Chat Log Table
4 Standard Knowledgebase Guide This guide describes the out-of-the-box setup of the Standard Knowledgebase (KB). It divides the system into several large functional areas and then describes the tables that are used in those functional areas. The Agiloft Standard KB contains several modules pre-configured with our best practice setup and automation. Depending on selections made when a KB is created, some of these modules may be fully or partly hidden. Following is a general overview of what is included: Admin Setup Menu an overview of the Setup menu options End User Interface introduction to the end user interface Groups and Teams overview of managing user permissions and the default user roles. Background Tables background tables are used by multiple modules and store basic information about people, places, and organizations. Global Process Tables approvals, tasks, and time entries are used with several modules including contract management and service desk. Contract Management manage the contract lifecycle, including e-signature and approval workflows. Service Desk Operation create an internal or external helpdesk. Project Management organize projects and manage purchase orders. Sales Automation and CRM track and automate sales leads, opportunities, and quotes. Document Management Table - the Documents table holds records for published documents. System Tables includes tables that manage other automation and functions, including the EUI Templates Table and Replacement Variables Table Who Should Read This? This guide is primarily intended to be used by admin users or system designers who need structural information about the Standard Agiloft knowledgebase in order to customize it. 4
5 Overview This documentation includes basic information about the use cases and processes implemented in the standard system. The documentation include all system tables, some of which may be hidden by default in your system. To turn on a hidden table, go to Setup > Tables, select the Inactive Tables tab, then select the table and click Activate. To hide a table, select it in the Active Tables list an click Inactivate instead.the documentation is not all-inclusive, as the system is self-documenting in several areas. Look and Feel of Documentation vs. Your System The look and feel of Agiloft is easily customizable, with several default color schemes available. You can switch between the pre-built look and feel schemes in your system by going to Setup > Look and Feel > Manage Staff Schemes and choosing a different scheme. You can apply it just to the admin team or another specific team to test it before applying to all users. Of course, you can also modify anything in the default schemes to suit your preferences. Since the default schemes are often changed with each new release, our documentation uses a variety of schemes. The screenshots throughout this documentation come from various points in time and may include older default schemes as well as newer ones. Self-Documenting Areas of the Program Print Tables and Fields Documentation It is possible to export all table and field data from the system itself, and since this information changes frequently, this is a very useful option. To print out current information on the fields for all tables in the system, go to Setup > Tables and select Print Fields for all Tables: Choose the columns you wish to export, and run the export. This creates an excel spreadsheet with a worksheet for each table. 5


6 Print Rules Documentation Rules can be printed out from the system as well. The printout provides most of the information about the rule criteria and actions, though it does not explain the purpose of the rule. There are a few ways to print rules. For full details, the recommended method is: Go to Setup Tablename, then select the Rules tab. From here, sort the rules by Comment or priority to order them the way you want in the printout. Use the Select All button to select all the rules you want to print. Then hover over the Printer icon and choose Print All Fields: This prints comprehensive details to a single file that can be saved or printed. An alternative is to modify the view of the rule table to your satisfaction, then select all rules and hover over the print icon. From the Print menu shown above, choose Print/Download Table View to create a downloadable file that can be stored in Word or Excel or printed out. Print Group Permissions Documentation Group permission configuration can also be printed out in detail. For the more readable version, which goes down to the record level of detail, Go to Setup > Access > Manage Groups. Edit the group you want to document. Click on the Tables tab. 4. Sort the tables by clicking on the heading for Access and/or Left Pane to put the active tables at the top. 6

7 5. Select the groups you want to print and hover over the printer icon. You may not want to include those to which the group has no access. 6. Choose Print/Download Table View. Follow the instructions to save to your preferred format. For full details on field level and other menu permissions on one or more groups: Go to Setup > Access > Manage Groups. Select one or more groups. Hover over the printer icon and select one of the options: All Current Permissions will show all the permissions in screenshots, including the field level permissions, for all tables for the selected groups. All Permissions with History Log will include the log of changes at the bottom. History Log only will show permission changes tracked by the system. Groups permissions comparison report can be run after selecting two groups to show the differences between those two groups. These reports take a long time to generate and create long HTML documents that can be saved as documentation. 7

8 Staff Interface The Staff Interface is where internal company personnel can create and update records, interact with customers, manage their agendas, receive notifications and perform other work activities. The following topics provide an overview of the available features in the Staff Interface: Navigating the Left Pane Table View Views Instant Messaging Sending s from the Table View Creating Notes Sorting Records in Table Views Keyboard Shortcuts My Assigned Inbox Change Passwords Home Menu and Home Pages Mobile Interface 8
9 Left Pane The left pane is the primary navigation tool in the staff interface. You may see different menus depending on how your system is customized or due to your group permissions. Left pane menus can be collapsed and expanded by clicking on the menu names or using the minimize and maximize icons. To resize the width of the pane, drag it to the right or the left with the mouse; to hide it entirely, click the minimize icon on the Home menu. At any time, you can return to the Home Page even when the left pane is closed, by clicking the company logo at the upper left of the screen. 9
, or expand the Home")
10 Left pane main menus: 1. Home: Click the Home link to access Staff Home page(s), or expand the Home menu to view Dashboards, My Profile, and Preferences. 10
11 Setup: The Setup menu directs you to a page containing links and descriptions of all knowledgebase setup options, such as Tables, Rules, Access, System, etc. Only users in an administrator group see this tab. Communications: Provides links to correspondence shortcuts, including Inbox and Sent s. My Assigned: Dependent on teams and group permissions, this menu contains the global Inbox, All My Assigned Records, and separate inboxes for each table. You can enable counting for inbox records in user preferences, under assigned to them. a. b. c. d. Home > Preferences, so users can see in the left pane how many records are Tables: Expand the Tables menu to show a list of tables in the knowledgebase. Click the arrow to next to each table name to show additional options, including: Subtables: If the table contains subtables and the user clicks on the subtable link, then only the records in that subtable are displayed. Saved searches: Users can add favorite saved searches to be displayed just below the table label for one-click access. To add searches to the left pane, click on Saved Searches > Manage and check the box in the column to add the search to the left pane. Table setup menu: A setup menu option is visible to users with admin privileges so they can go directly to the Table setup wizard from the left pane. Charts and Reports 6. Last Opened: Shows the five records most recently opened, displayed as the first 25 characters of the field defined as the Summary field for the table. 7. Calendar: Expands to display a calendar of the current month. 8. Chat status: Displays the number of chats currently in progress, staff members online, and pending chat requests. 9. Messaging: Opens to broadcast message menu. 11
12 12
13 Admin Setup Menu This section gives basic information about some of the functions available through the administrator Setup menu. Licenses The Setup > License menu allows administrators to manage licenses, request new licenses, and view usage of current licenses. Assigned licenses may be automatically assigned to specific users based on the criteria of a saved search, and users may be terminated from a license if they leave the company. Access The Setup > Access menu allows administrators to manage group permissions, teams, and user authentication methods. For instance, it is used to configure authentication via Active Directory or LDAP, Single Sign-On, and SAML configuration, and to define hyperlink security settings. Import and Export The Setup > Import and Setup > Export wizards help administrators import and export data, or copies of their Knowledgebases. This involves defining the KB file's location, name, and format, along with settings for what data is to be exported/imported. Look & Feel Agiloft allows you to apply different colors, fonts and image schemes to different teams. The user's Primary Team sets their Look & Feel scheme. The Standard System Knowledgebase applies the same Look and Feel to all teams, but this is configurable under Setup > Look & Feel. This section is also used to define how required fields are displayed and the order of the tables in the left pane. Rules The Setup > Rules menu shows default and custom business rules from every table. Rules which run on a time-based schedule are prefixed "TB." In the Free Edition, time-based rules can only run once every 48 hours. All time-based rules are disabled by default in the Standard Knowledgebase template. To enable time-based 13
14 rules, go to Setup > Rules. Click the Edit icon next to the TB rule you want to enable. On the General tab of the rule dialog, scroll down to select Yes under Rule is enabled. Sync The Setup > Sync interface allows administrators to configure external system synchronization, and can also be used to transfer the structure of one KB to another. System The Setup > System menu allows administrators to set global variables and the KB Time Zone, the time standard used by all fields. Administrators can also configure the Activity Log, manage choice lists, edit page headers for the Knowledgebase, and configure SOAP/REST web services. Localization The Setup > Localization wizard assists administrators with translating text in the Knowledgebase to other languages. The wizard gives a breakdown of the system by table with red markings on tables that need translation. The administrator may download the text file containing all the relevant field names, input instructions, etc. After translating the file into the target language, use the wizard to upload the translation file. Integration Use the Setup > Integrations menu to configure third-party integrations like e-signature, remote desktop support, and connect to the Hosted Word API. 14

15 End User Interface Us ers accessing the system through an unlimited End User license are taken to a customizable End User Interface (EUI), a simplified interface with fewer options than the Staff Interface. The default EUI is HTML-based and can be modified through the out-of-the-box HTML templates provided in the EUI Templates table. For more details see the EUI Templates Table later in this collection. Note that you have a choice of end user interfaces. In addition to the customizable EUI, we offer a second simple end user interface, the Legacy EUI, which may be appropriate for customers who do not need the flexibility provided by access to the HTML. Both the EUI and the Legacy EUI can be configured to show different tabs, tables, and requests depending on the user's group membership and group permissions Access the EUI by logging in as an end user and selecting the End User interface radio button. Access the Legacy EUI from a Standard System KB login page by logging in as an end user and selecting the Staff interface radio button. As an admin user, Setup > End User Interface is where you can define the FAQ interface for both the custom EUI and Legacy EUI. By default, FAQs are available for both the Support Cases and Helpdesk Cases tables, filtered to records in which the Published field is set to Yes. 15
16 Default EUI Setup In our out-of-the-box setup, the EUI is configured primarily for users in the Guest, Internal Customer, Customer, Document Creator, and Contract Creator groups. The table below outlines the available functions and navigational tabs each user group sees when accessing the EUI. Groups Guest Internal Customer Customer Document Creator Contract Creator Default EUI Tabs FAQs (Support Case) Submit a Case (new Support Case) New User FAQs (Helpdesk Case) Submit a Case (new Helpdesk Case) My Cases (Helpdesk Case) My Profile FAQs (Support Case) Submit a Case (new Support Case) My Cases (Support Case) My Profile FAQs (Documents) Submit a Document My Documents My Profile Submit a Contract (new Contract) All Contracts My Contracts My Profile For more detailed information about working with the HTML-based end user interface, please review the End User Interface and related sections. 16
17 Legacy EUI Setup The Legacy EUI is defined by several major elements: My Profile, My Items, and FAQs. The My Items tab displays records for tables that a user has permission to view. To customize this tab, navigate to Setup > Look and Feel > Setup My Items and click Customize. Define a default search and view for each table that the user can see. The other tabs in the Legacy EUI are dynamically generated based on group permissions of the user logged in, and their visibility is determined by those permissions. If a user has Create Own permissions for a specific table, they see a New [Table Name] tab when they log in to the EUI. By default, Customers group members see the New Support Case tab, while Internal Customers group members see the New Helpdesk Case tab. The My Profile tab is visible if a user has view and edit permission for their own user record. FAQs are records in any table that are used to answer frequently asked questions. To customize your FAQs, go to Setup > End User Interface > Setup FAQs, and edit an existing entry or create a new one. FAQs are defined by saved searches which can be customized on an individual user basis. 17
18 Groups and Teams When you begin to customize the system, think about the different types of users and how their role affects the access they need. Agiloft users belong to teams and groups. Groups set the level of access to tables, records, and fields. Team settings affect other parts of the interface such as the color scheme, available views, and the default home page. Teams also define working groups of users and can receive s that go to every member of the team. Users in multiple groups receive the superset of those groups' access settings. Users can also belong to multiple teams, but must always have a Primary Team to set important defaults. For easier maintenance, we recommend keeping the number of groups relatively small. The next section describes the default groups. 18
19 Groups This table lists the default groups in the system and describes the general permissions of each. To see more information about a group's permissions, you can print out or save to a file the full details of that group's permission. Groups Type General description of access permissions Admin Staff The admin group has full configuration and record access permission for the system. Admin users can see and do everything that is possible in the system. The number of admin users should be as small as possible. Anonymous Staff This group is used to enable unregistered users to click on an hyperlink sent in an outbound in order to edit that record. It is used in conjunction with the Anonymous user. If all your users have user records in the system, you will not need this group. As a staff group member, the Anonymous user uses an assigned or floating license. Approver Staff This group holds people who can approve Contracts or Change Requests. Approvers will primarily interact with their Approval records, but they can also view change requests for which they are an approver. They can also view and edit Contracts for which they are an approver, and can view tables related to approving Contracts such as Approvals, Approval Templates, and Companies. Base Service Desk Change Manager Configuration Manager Contract Creator Staff Staff Staff End User This group has the base permissions that should apply to all more privileged groups dealing with the Service desk tables. Users in those groups should also be in the Base Service desk group. This group has full create/edit access to records in the Support Case, Service Request, Incident, Problem, and Task tables, and create/edit own access to Change Requests and Time Entries. It has full view access to Assets, Services, Companies, and Employees and can edit its own employee record, but has no other create or edit access in those tables. It can create/edit end users (external customers). It cannot delete records. This group is responsible for management of Change Request records and has full privileges on the Change Request table. Members can create, edit, and delete records in this table and will typically be Change Managers or Change Owners. They can also create task and approval workflows for Change Requests, and can edit Change Request related services. This group has full access to the Asset records and is responsible for creating, editing, and deleting those records. People responsible for working on and configuring Assets, managing Asset resources, and so on would typically be in this group. They might also be added to the Service Manager group if they are responsible for setting up change request workflows or services related to assets. For internal employees who can create contracts. 19
20 Contract Manager Contract Owner Customer Customer Manager Document Creator Document Manager Staff Staff End User Staff End User Staff This group has full access to the Contract table, Approvals table, Steps and Approval Workflow tables, and Companies table. They also have some access to End Users and Employees. They are responsible for creating, editing, and approving contracts for customers or the company. This group has a subset of the permissions that Contract Managers have. Its members are responsible for Contracts assigned to them, and have full permissions there, but can only view Contracts that they did not create or were not assigned to. They have all the other permissions necessary to allow them to use Contracts effectively. Unused unless providing external customer support. Then this group is used for end user customers, who can submit and view their own support cases. Customer Manager relevant if providing external customer support. Customer managers can view all support cases for their own company. Can create documents and edit their own customer of document table. People who can approve and publish documents. Document Reviewer Staff Can edit approvals for which they are the approver. Guest Internal customer End User End User This group may be used in hyperlinks to allow creation of new requests of any kind (such as leads, users, Incidents) without seeing the rest of the user interface Internal Customer in employee table, can create Service Requests, Purchase Requests, and report Incidents, as well as see their own Assets, edit some of their profile information, and view other employee contact information. They may also access Knowledge FAQs. Marketing Staff This group is responsible for coordinating and recording information about marketing campaigns and providing quotes to prospective customers. They have full access to: Campaign, Company, Lead, Opportunity, and Product tables. They have some access to Product Quoted, Quote, Tasks, Teams, Time Entry, People: End User, and People: Employee tables. Procurement Group Staff This group is responsible for managing the Purchase Request and Item tables. Sales Staff This group is responsible for recording information regarding sales efforts to specific companies as well as Purchase Orders made. They can also create and update Support Case records for the companies they represent. They have full access to: Company, Contract, Lead, Opportunity, and PO tables. Partial access to Campaign, Product, Product Quoted, Project, Quote, Support Case, Tasks, Teams, Time Entry, People: End Users. 20

21 Service Manager Staff For staff responsible for maintaining the Service Portfolio (Service table) and the Task Workflows/Templates table. Only Service Managers can create new Services. To print group permissions Go to Setup > Access > Manage Groups. Edit a group. Select the Tables tab. Sort by the Access column so that tables the group can see are on top, where Access is Yes. Check the box in the header row to select all tables. Hover over the printer icon and choose Print/Download Table View. This produces a printout showing the ownership of records in the table and the basic permissions for each table for the selected group. Copy/paste the page contents into a text editor to document the system permissions for each group. 21
22 Teams Teams serve a different purpose for customers/end users and for staff users. For end users, unless you need to provide multiple branded interfaces to different sets of users, or expect your end users to access the system in multiple languages, it is simplest to put them all in one team with the word 'customer' in the title, such as Customer Team or Internal Customer Team. If you need to provide a custom look and feel and customer branding to different sets of users, then you will need a separate customer team to go with each look and feel scheme. Teams can also be associated with a different default language, so it would make sense to have language-based customer teams if you were planning to run the program in a multi-lingual environment. For staff users, teams are used to identify the functional units to whom records may be assigned. You will want a staff team for each assignment group (sometimes called a Queue). Teams can be hierarchical, so you may set up a hierarchy such that you can send an to a mid-level team and the members of its subteams will receive the . Users have one primary team, which defines the look and feel they see and their default table views. They can be members of as many additional teams as needed, so they are CC'd on s and included in the assignment list for items assignable to those teams. 22
23 Controlling Date and Date/Time Field Display Format Teams also control the default date and time field display characteristics. A person's primary team defines whether a date field is displayed as mar :00 or 3/1/17 6:00 pm, for instance. These formats are set on the Format tab of the team. Individual date fields may be configured to always use a specific format, but if they use the "default" format, then the person's team definition determines the format shown to that user. Teams Table is Special The Teams table is a system table with some special hard-coded fields, such as the Working Hours and language fields, Formats for date fields, the team name, label, description, Team Leader, and some screen refresh options. It also has some custom fields that can be modified, and you can add your own custom fields to the teams table to manage any other information associated with your teams. If you edit the teams table setup, you will only be able to modify the custom fields and their layout options. Creating new teams and accessing all of their attributes is done through the Setup > Access > Manage Teams screen. Editing just the custom fields and adding users may also be done through the Teams tab on the left toolbar. 23
24 Managing Team Membership Team membership is controlled by two fields in the user record that are linked to the Teams Table: Primary Team (single choice), and Teams (multi-choice). We recommend adding a user's Primary Team to the multi-choice Teams field along with any additional teams. This way a user's entire team membership can be found in a single field, which makes searching and filtering easier. When you initially import users into the system, you can import their primary team and teams' values, with multiple comma separated values with no spaces. Once users are in the system, you may update team membership by editing specific users or by editing the team through the Teams tab, and looking up and importing users for the embedded Primary Team Members or Team Members tables shown on the Custom Fields tab for the Team. Looking up and selecting a user for either of these tables changes the linked field in the user's own user record to point to this team. Default Teams The teams shown below have been set up as the default teams for the application. You can delete any teams you do not need and you can rename any team to match your own company's naming conventions. You can of course also create any additional teams you need. This is best done by going to Setup > Access > Manage Teams and either editing a team or creating a new one there. Be sure to set the team's format for date/time fields to be consistent. Teams 1st Level Support Team 2nd Level Support Team Admin Team Backup and Storage Team Change Approver Team Change Management Team Compliance Team Configuration Management Team Contract Management Team Contract Owner Team Description First Level Support Team Second Level Support Team Used for system notifications about rule, and other errors Asset Backup and Storage Team Change Approver Team Change Team Compliance Team used in contract approvals Asset Team Contract Management Team For staff contract owners/buyers 24
25 Custom Applications Team Customer Team Database Team Desktop Applications Team Document Creator Team Document Management Team Document Reviewers Team Facilities Team Finance Team HR Team Internal Customer Team Knowledge Team Legal Team Marketing Team Network Operations Team Office Mgmt Team Professional Services Team Project Manager Team Purchasing Team Risk Team Sales Team Asset Software Team External Customer Team Asset Database Team Asset Desktop and Support Team Document Creator Team for internal end users. If using external users, then change the parent team. Team for Document Management People who have been identified to review documents. Facilities support team Finance team used in contract approvals Human Resources Team. Acts on new employee Service Request Tasks. Internal Customer Team Knowledge Team for publishing FAQs Legal Team approves contracts Marketing Team Asset Network Team Office management support team Used for assignment of customer projects Team for internal projects Purchasing Team responsible for purchase requests Risk team approves contracts Sales Team 25
26 Security Team Server Team Service Management Team System Administration Team Vendor Management Team Vendor Team Asset Security and Support and Change Team Asset Server Team This is the primary team for Service Managers Asset Sys Admin Team Vendor Management Team Container for external Vendors - used in Contract Management 26
27 Background Tables Background tables are those that contain mostly static data. They function as repositories of records and contain little to no associated business processes. The information stored in background tables is used to directly support other tables. Unlike the System tables which users will rarely interact with, records in background tables may still be created and updated often by staff users. The main background tables are detailed below: People, Employees and External Users Subtables Companies Table Departments Table Locations Table 27
28 People, Employees and External Users Subtables The two subtables (Employees and External Users) of the people table are used to store information about individuals, including any associated company or contact information. People may be external or internal to your company. It is important to put employees on the right Groups and Teams to control their access. In this document, the terms "contact," "user," and "people"/"person" are used interchangeably. People outside your company should generally go in the External Users table, while Employees should go into the Employees table. We recommend that all individuals be stored in the system as an Employee or an External User, even people who will not be able to access the system as a user. The External Users subtable stores external people who may or may not be users of the system. Each record includes fields to associate these users with companies, contracts, events, and other activities that relate to external users. The Employees subtable holds information about company employees, like home address and working hours, which the External Users table does not. LDAP or Active Directory authentication can be used to create and update users in the Employees subtable. As a background table, many other tables link to the information stored in one of the People subtables. Use Case for External Users External users may be created manually by guests and members of the Base ServiceDesk, Contract Manager, Customer Manager, Marketing, Project Manager, Sales, Business Admin, and Admin groups. They may also be created as the result of a conversion from a Lead or Contract record, or may be created as part of an import from another database. If a new external user is created (either directly or from a contract or contract party) and a login value is not entered, the system runs a rule to set the login to their address (if they have one) and sets a default, unique password, but blanks out the default team. This allows the user to be recognized if they respond to an from the system without actually giving them the ability to login to the system. This rule can be modified if you want such users to belong to a specific team so they can access the system through an end user portal. Self-registration is available so that users can create their own logins, using the limited-access "register" account. Records created by the login of "register" are added to the Customer group and the Customer Team by default. To create a link to permit self-registration, substitute the items in <brackets> below with the URL for your system, your KB Name, and the Exit URL you want to take users to: This will allow the user to enter their contact information and then will log them out. They will not be able to choose from a list of companies, but instead will type in a company name. To see how this hyperlink is constructed, see Hyperlink Keywords and Examples. When they save their user record, an is sent to the 1st Level Support Team informing them that a contact has self-registered and asking them to validate the user's access and link them to the appropriate existing company in the system. This template could be modified to send to anyone in your organization 28
29 responsible for vetting users. Use Case for Employees Employees may be created in a variety of ways. A user with permission to create employees can add new employee records They can be automatically created via sync with Active Directory or LDAP or the first time they log in using one of those authentication methods They may also be created from a SAML provider, such as Okta, when they first log into the system They are often imported during implementation from an Excel or.csv spreadsheet Once an employee is given access to the system, their user information can be modified in a variety of ways: An admin user can deactivate their access and update their information Sync with LDAP or AD can update information that has changed in some other system Scheduled import/updates from another backend system can update their information if it changes The user may modify any fields they are allowed to edit by clicking on My Profile in the Home section of the left pane It is good to develop your own procedure for deactivating an employee who has been terminated. We do not recommend deleting users who leave the company. Setting an empty value in either the Groups or the Primary team field will prevent the user from logging in, while preserving the history of what that user has done in the system. 29
30 Automation The default automation on the employee subtable includes the following actions: If you are using Adobe Sign for e-signature, and the value in the Adobe Sign Sender field is set to or changes to Yes, a user account is automatically created for the user at Adobe Sign, so that they can send envelopes under their own name. If the value in the Adobe Sign Sender field changes from Yes to No, that account is automatically disabled at Adobe Sign. See the Adobe Sign Tables and Setup section for more details. There is another rule that handles document approval generation when an employee is identified as a reviewer on the Documents table. The rule runs down to the employee and generates the approval record from there. 30
31 Ownership of People Records Employee and External User records are owned by the user whose login matches the Login field of the record. More simply, each Employee or External User owns their own record. 31
32 Companies Table This table holds information about companies that interact with your organization. It may include customers, vendors, prospects, or manufacturers, to name a few. Use Case for Companies Companies may be created by conversion from the Leads or Contracts table. Members of the Admin, Business Admin, Contract Manager, Contract Creator, Contract Owner, Marketing, Project Manager, and Sales groups may also create new company records. For contract management users, companies can be created with an action button when filling out a new contract record. The Company table contains mostly static data, and thus does not have any associated workflow actions. Company address information is stored in the Locations background table and displayed on the Locations and Contacts tab. A parent company may have several locations, e.g., a billing office, branch locations, and headquarters. Many other tables link to the information stored in the Companies table. The Related Records tab shows related tables for Support Cases, Contracts, Insurance Certificates, and Assets. When relevant, new Insurance Certificates are typically added from the Company record. An Insurance Certificate Owner is defined just above the Insurance Certificates related table. The Insurance Certificate Owner is notified fourteen days before one or more certificates is due to expire, provided that there is at least one active or pending contract. In the certificate record, the Main Contact is the primary contact at the vendor company. 32
33 Insurance certificates added to a company record are automatically linked to all contracts associated with the vendor company. See the Insurance Certificates Table for more information. Ownership of Companies Records in this table are "owned" by the individual assigned sales representative. Admins and members of the Contract Owner, Contract Manager, Marketing, Project Manager, and Sales groups can view and edit Companies. Most groups can view their own Company, and most internal users can view others' Companies. 33
34 Departments Table The Departments table stores information about any departments internal or external to the company. Each record typically stores the department name and a main contact, if applicable. Departments may be used to define distinct processes, contract types, services on a per department level, as needed. Use Case for Departments Department records may be created by members of the Admin and Business Admin groups. As a background table, other tables link to Departments, including the Employees subtable. Ownership of Departments Department records are owned by the user whose Login matches the Creator Login field in each Department record. More simply, a Department record is owned by the user who created it. 34
35 Locations Table The Locations table is used to store information on locations for Companies. Use Case for Locations Location records may be created by members of the Admin, Business Admin, Contract Creator, Contract Manager, and Sales groups. Each location can be linked to a parent company from the Companies table. Each Location holds a single address and can have multiple Location Types. Location records are created by conversion at certain points: When a new company is created from within a contract, a location is created in the background. When a lead is converted to an opportunity record, a location is created. People may be associated with locations. Ownership of Locations Location records are owned by the user who creates them. Specifically, a record is owned by the user whose Login matches the Creator Login field. 35
36 Global Process Tables The tables described below are used by several modules in the system to manage approvals and tasks, to provide a service catalogue used by the different request types, and to track time spent on requests or tasks. Tasks may be incorporated into other tables as well. In the out-of-the-box configuration they are linked to Service Requests, Projects, Assets, Support Cases, Change Requests, and External Users. Services define the service catalogue that is used by Service Requests, Change Requests, and Purchase Requests. Time Entries are incorporated into several of the default tables, including Service Requests, Problems, Change Requests, Incidents, Tasks, and Projects. Approvals can be incorporated into other process tables. Out-of-the-box examples of approvals are found within Contracts and Change Requests. Approval Management Task Management Service Catalog Services Table 36
37 Approval Management Three tables control the automated and ad hoc creation of approvals, which can be related to various processes within the system. Approvals in the out-of-the-box system are used within Change Requests, Contracts, and Documents. They can be added to other processes as needed. Approvals Table Approval Templates Table Approval Workflows Table 37
38 Approvals Table The Approvals table holds all of the approvals that are sent to users and approved or rejected by them. Each record in the table is an individual approval or rejection linked to a parent Change Request, Contract, or Document record. Approvals are generated automatically based on a workflow and its approval templates, and can also be created ad hoc by users with the appropriate privileges, either in addition to the predefined approvals or instead of them. Use Case for Contracts The process begins when the Create Approvals button is clicked in a contract record. Contract approval records can be created in two ways: From Approval Templates using a conversion action Manually on an ad hoc basis. For information on starting the approval process for a contract, refer to the Handling Approvals section. Each approval record stores the parent Contract ID, Approval Team, and Approver, the user who submitted the approval. On the History tab, the Date Approved/Rejected field captures and displays the timestamp of the approval. 38
39 Notes about the approval or rejection are entered into the Approval Notes field. When the record is saved, the notes are appended to the All Contract Approval Notes field and are visible from any approval linked to that Contract. Additionally, the notes are appended to the Approval Notes field in the parent contract record, located on the Approvals tab. Only Approvers and members of the specified Approval Team can Approve, Require Changes for, or Permanently Reject approval records. Users updating the Status to Permanently Rejected or Requires Change must enter Approval Notes. 39
 who will be assigned to review and approve the document. Click Submit for Approval to generate the approval records.")
40 Use Case for Documents To begin the approval process for documents, select Yes for Requires Approval on the Progress tab of a Document record. Select one or more Approver(s) who will be assigned to review and approve the document. Click Submit for Approval to generate the approval records. All Document approvals are created with a Status of Pending Approval. Document approvals are parallel, i.e. all document-related approval records are created with a Step Number of "1" through conversion. Notes added to document approvals are appended to the Approval Notes field in the parent document. For more information on approvals for documents, see the Document Management Table section. Use Case for Change Requests The default status for a new approval record is Queued. There are two main ways in which an approval is created for a change request. The first is by the change manager clicking a button on the Approvals tab: 40
41 This will generate all of the approvals for that workflow. If an approval template's Approval Usage field has a value of Conditional, then it is not created unless the condition is met. The other method is for a change manager to create an ad hoc approval using the Create Approvals checkbox in the change request on the Approvals tab: Note that this checkbox is only visible if the service was defined to permit ad hoc approvals and only until the approvals are launched. The approvers are not notified until the Change Manager launches the approval process, by clicking the Launch Approvals button. At that point, the lowest numbered approval record will be updated to Pending Approval and the Approver or the Approval Team (if the Approver field is blank) will be notified that the approval is due. If there are any concurrent approvals for a particular step, the approval record will be updated with those concurrent approvals. If an approval step is marked as Auto-Approved, the Approval will be updated to Approved and the Approver or the Approval Team will be notified of the auto-approval, unless the Notify for Auto-Approval field has a No value. This is a method of notifying someone about a change without requiring them to respond. The approver can approve the change by through a hotlink or click a Require Change or Reject hotlink to edit the Approval record directly and enter some comments and click the appropriate button. If editing the approval record directly, comments will be required if the approval record is rejected or marked as requiring changes. A validation rule requires that any individual who clicks one of the three buttons to approve, reject or require changes is a member of the Approval Team. Whenever the approval notes field is updated, a rule will copy the update into the linked Change Request's All Approval Notes append only field and the field in the approval will be blanked out. If the approver marks the approval as Requires Change, the linked change request will not be changed, but the Change Management team and Change Manager (if any) will be notified and they will decide whether any changes made require restarting the whole approval process or just carrying on from the rejected approval. If they want to start over, they will click a "Relaunch Approvals" button and that will first set all linked approvals to Queued and then launch the first step again. Otherwise they can set the "requires change" approval back to Pending approval for the process to carry on from there again. If the approval is marked Approved and there are no concurrent approvals, the next approval record in the sequence will be updated to Pending Approval and the Approver or Approval Team will be notified. If there are concurrent approvals, all concurrent approvals must be completed prior to the next approval step being updated to Pending Approval. The approver and the date approved will be updated to reflect whoever clicked the Approve button. If the approver marks the approval as Permanently Rejected, the linked change request will be updated to a status of Rejected and the Requester and Change Management Team notified. The user will be required to resubmit the change request if still required, with appropriate changes. All other approvals in the Change Request in a status of Queued or Pending Approval will be updated to Not Needed. If an approval is updated from a status of Pending Approval to Not Needed as a result of the above action, the Approver or Approval Team will be notified that their approval is no longer necessary. 41
42 Ownership of Approvals Approval records and Approval Template records are owned by the user who creates them. Specifically, a record is owned by the user whose Login matches the Creator Login field. 42
43 Approval Templates Table The Approval Templates table holds a record for each approval to be created as part of a standard Approval Workflow. It predefines the approval team or person and also controls whether the approval is conditional on some metadata criteria being met or is always generated. Each approval template can only be used by a single approval workflow, i.e., there is a one-to-many relationship between approval workflows and approval templates. Use Case Approval Templates can be created by users in the Admin, Business Admin, Contract Manager, Change Manager, and Service Manager groups. New approval template records are normally added from within an approval workflow record. Creating an approval template from the Approval Workflow table populates the link to the workflow. If an approval template is created directly from the Approval Template table, a linked Workflow Title should be manually selected. Each template contains information about which Workflow uses the approval template, whether the approval is Required or Conditional, and how the approval is assigned. The required fields are Approval Title, Assign Approval Based On, and Step Number. The approval template below is step #3 of the Server Updates Workflow, and is only generated for a particular change request if the Risk if Done of the change request is Category 2 - Significant or Medium. 43
44 The Related Records tab displays all other approval templates used in the same workflow. The Step Number and Approval Title for the approval are used when converting the template to an Approval record. 44
45 Required vs. Conditional Approvals In the Approval Usage field, the user sets whether the approval is Required or Conditional. Both required and conditional approvals are automatically generated when the Create Approvals button is clicked in the contract record or the Generate Approvals from Workflow button is clicked in the change request record. When Conditional is selected, the Condition field will appear. The user can then input a formula that is evaluated when approvals are generated. This formula can contain any number of conditions that can be linked together by operators such as "or", "and", "contains", etc. Typically the Condition is a search criterion based on some field value(s) in the contract or change request. Conditional approvals are only generated if the condition is met. Assigning Approvals Approvals can be assigned to teams or users based on fields in the Approval Template or other variable fields from the parent record such as Contract Owner, Requester Manager, Contract Department Head, or Change Manager, Change Requester, etc. If Fields in Approval Template is selected in the Assign Approval Based On field, the Approval Team and Approver fields are visible. The Approver field is filtered to members of the selected Approval Team. If, for an approval template for contracts, Person from Contract is selected, the Assign To field appears. The drop-down selection in this field shows a list of user fields from the Contract record, such as Contract Owner, Contract Requester, and Requester Manager. Admin Note: The selections in the Assign To field are linked from the Replacement Variables table. Refer to the Replacement Variables Table section for more information. Similarly, when Team from Contract is selected, a team can be chosen from the Assign To drop-down. For approval templates related to change requests, the options for Assign Approval Based On are Person from Change Request and Team from Change Request. Sequence of Approvals The sequence of approvals depends on the Step Numbers. Approvals are generated and ordered based on the Step Number order, and are triggered to Pending Approval from the lowest to the highest Step Number. To set up parallel Approvals, give the same Step Number to each Approval Template in a parallel step. All concurrent Approvals, or Approvals with the same step number, must be approved in order to trigger the next step. The automation that controls the triggering and ordering of approvals is managed from the Approval record, not the Approval Template. Fields in the approval record are used to determine if there are concurrent approvals and to define the Lowest Step Number. If the first step is a conditional approval marked Not 45
46 Needed, the lowest step number may not be 1. Automatic Approvals You can use an approval template simply as a notification rather than an approval. This is done by setting the Auto Approve? field to Yes. When the template is converted into an Approval record, a rule running on the Approval table automatically sets the approval's Status to Approved. If Notify for Auto-Approval is set to Yes, this rule also sends a custom notification message in place of the assignment notification. 46
47 Approval Workflows Table The Approval Workflows table predefines individual workflows for approval processes. A workflow consists of one or more Approval Templates, each of which defines a team or person to be the approver, the order in which the approval will be needed, and some other characteristics of the approval. The approval process can include a combination of parallel and sequential approval steps. Approval workflows are built out for Contracts, Change Requests, Service Requests and Documents. Use Case Approval workflow records may be created by members of the Admin, Contract Manager, Change Manager, and Service Manager groups. To create a new approval workflow Click New from the Approval Workflow table action bar or from within the Contract Type or Service record for a change request. 2. Set the Related To field based on the process for which the approval workflow will be used. This will cause the appropriate related fields to appear. ' 3. The next step is to add approval templates to the workflow by clicking New in the action bar of the Approval Templates related table. For more information on how to design the templates to get a mixture of sequential and parallel approvals, see the Sequence of Approvals section. 47
48 Required fields are marked by a red asterisk. These include the Workflow Title and which table the workflow is Used In. If the choice of table in the Related To field is Contracts, additional options allow the user to specify which Contract Types can use this workflow. When the workflow is selected for use in an approval process, the system will generate required Approval records based on the specified approval templates. Additional ad hoc approvals may be created directly from within the contract or change request if that method is supported, based on the service or contract type setup. Managing and Reusing Approval Workflows Approval workflows can be modified even if there are outstanding contracts using them. Since the approvals are generated up front as soon as the contract moves to Pending Approval, later modifications to the workflow and its templates will only have an impact if there are conditional approvals which are rechecked later in the process. A workflow can be cloned by using an action button. Clicking Clone Workflow will copy the workflow, and make a copy of each of its approval templates. The cloned Approval Templates will be automatically linked to the newly cloned Workflow record. Approval Workflow Statuses The approval workflow Status is either Active or Inactive. 48
49 An Active workflow appears in the Workflow Title drop-down menu from a Contract or Service record. Workflows with a Status of Inactive are no longer available for use in the approval process; inactive workflows do not appear in the drop-down menu as a possible approval process selection. Admin group members can change a workflow from Active to Inactive if needed. Ownership Workflow records are owned by the user who creates them. Specifically, a record is owned by the user whose Login matches the Creator Login field. 49
50 Task Management Like Approvals, the Tasks table is a global table that holds records that can be linked to and appear within the records in other tables. The Tasks table holds individual tasks. While it may be used for tasks of many different kinds, the system is currently set up to link tasks to Service Requests, Change Requests, and Projects, as well as to Assets, or to be completely independent of other tables. It is possible to modify the setup to relate tasks to records in any table and to show embedded tasks in any other table. Fields related to task generation and an embedded Tasks table, labeled Tasks, are shown in service requests and change requests for services that include tasks. Tasks and the fields for generating them are also shown within Projects and Assets. Projects allow the same methods of task generation as service requests. Assets allow single tasks to be created and linked to the asset, and show all tasks that have been created from other records, such as change requests or service requests, that relate to that asset. Linking Tasks to Other Tables Within the Tasks table, the field Related to indicates what type of record the task is associated with. If you need to use tasks within any additional tables, you can modify this field and add that table to the choice list. Then create a linked set of fields from that other table, and make these fields visibility dependent on the value in the Related to field just as we have done for the linked Service Request and Change Request fields. Then create a related table in the other table pointing to the Tasks table, and you will be able to generate tasks from there. This advanced functionality is best done after attending a training class or with our professional consulting team's assistance. Tasks Table Task Templates Table Task Workflows Table Task Steps Table Time Entries Table 50
51 Tasks Table The Tasks table is used within several other process tables to automate and track repeat or ad hoc tasks. Task Layout Task Details Tab Related Tasks Tab Related Info Tab Other Tabs Use Case Tasks Created from a Template Create an Ad Hoc/Manual Task New Task Automation Processing a Task Measuring Time for a Task Automation and Workflow Disabled Time Based Rules Task Layout We'll begin with an overview of the important fields on the Task layout. Task Details Tab The main task screen has fields for assigning the record, such as Task Type, Status, and Date Due. 51
52 It also includes an area for managing the related asset, if any, and a place to add working notes and to display all history of working notes: When working on an asset-related task, the technician can click one of the buttons shown above to update the Operational Status of the asset to reflect that it has been taken offline or brought back online. Some tasks may have Task Steps defined. These steps are set up in the task templates. Task steps will appear as checkboxes above the Working Notes field. There are no default rules enforcing that all checkboxes are checked before completing a task, but such a rule could be easily added. Related Tasks Tab The Related Tasks tab shows the prerequisite tasks, if any, and allows the current task to be related to prerequisite tasks within in the same parent record. It also shows any dependent tasks, that is, those for which this task is a prerequisite: 52
53 In the above example, we see a task that has two prerequisites already defined. The Trigger Condition defines whether this task will be set to Assigned only when both prerequisites are done, or as soon as any of them are done. Additional tasks associated with the same Service Request can be added to the prerequisites by selecting the task and clicking the Add to Prerequisites button. Either of these two tasks could be removed by selecting it in the Remove Task from Prerequisites field and clicking the Remove from Prerequisites button. The default Status for a task is Queued when it is created. Typically a rule will set the Task to Assigned when the tasks for a record are launched (see below for more details). Related Info Tab This tab shows details about the record linked to the task, which will typically be either a project, service request, or change request. It provides hyperlinks to get to the source request to see more information. 53
54 Other Tabs The Time tab allows time to be entered and shows all time entered for the task. Note that any time entered for the task will also be included in the request to which the task is linked. The s and History tabs hold the standard fields. Use Case Although Tasks may be linked to one of several other tables, they are typically created and processed in similar ways. Tasks created automatically from templates, or manually by users, and several automated actions occur when tasks are created by either method. Tasks Created from a Template Tasks are typically created when a user clicks a button to Generate Tasks from the record in which the tasks will be done, i.e. from within a Project, Service Request, or Change Request. Such tasks are generated from Task Templates that have been created previously and defined to be used for the particular project or service type. When generated from a template, they will be auto-assigned to the appropriate team or person based on the task template record. Note that currently, users are prevented from creating tasks whose task title has a comma, since this breaks some of the automation for prerequisite tasks. If a task is created with a comma, the comma is stripped out. Commas are also prevented in task template titles for the same reason. 54
55 Create an Ad Hoc/Manual Task Tasks can also be created manually outside of any other record or by clicking a button to create an ad hoc task from within one of the request records. In this case, the user will choose the Assigned Team and/or Assigned Person and may also set a Date Due, select prerequisite tasks, and so on. New Task Automation The following is a summary of the rules and validations that run when new tasks are created, either manually or from templates: When a task is created manually, if it is related to a Project whose status is Completed or Cancelled, the user is prevented from saving the task. If the Date Due is in the past when the task is created, the user is warned but allowed to correct or save the task. These actions are done by the rule: Create: All create validations. Next a rule called Create: All Creation Actions runs, and it performs several actions based on the record the task is related to. If the task template usage is Conditional, then the Status of the task is set to Conditional. Otherwise the default status is Queued. If the task was assigned to an individual from the related record, for instance the Change Manager or Project Manager, then the Assigned Team is set to that person's Primary Team. If no one was assigned at all due to some failure of the template, then the Assigned Team is set to the 1st Level Support Team. If the task is created in a Status of Assigned, then if the Assigned Person is not the creator and there is an assigned person, that person is ed, otherwise the assigned team is ed. If the task is for a change request and was generated as a single task, its sequence value is set to 1. If the task source is a task template that had prerequisite templates, then the corresponding tasks are set to be prerequisites. The prerequisites are then sorted and the one with the highest sequence value is set in another linked field called Highest Sequence. A rule called Create/Edit: Update Sequence based on Highest Sequence than runs to set the new task's sequence value to the highest sequence plus 1. Note that the Sequence field is purely informational. No automation is triggered based on the sequence, but it is there to provide a general idea of the order in which tasks will be triggered and completed. Processing a Task The person assigned to a task can add working notes to it, refer to the linked Service Request, Project, or Change Request from it, and ultimately complete the task. There are several default statuses: Queued, Conditional, Assigned, Completed, Not Needed, Failed, and Waiting for Others. 55
56 When the user completes the task, they change the Status to Completed and save the record. If there is no value in the Date Done field, the system will put the current date/time into the Date Done field. Alternatively, choose to enter a time in that field directly. The system allows the user to override the value in that field. While working on the task, the user may enter any time spent on the task in the Time Spent and Time Description fields, then click "Add Time" to convert them to Time Entries. When working on an asset, the Start Clock and End Clock buttons can be used to set the Actual Start Time and Actual End Time as needed. The user may also manually put values in these fields. When a task record is saved the rule called Edit: All Edit Actions (API enabled) is run. If the Status has changed to Completed, Failed, or Not Needed, the system updates the Dependent tasks by refreshing their Number of prerequisite tasks counts. If this was the last prerequisite, then that will trigger the next rule to assign the dependent tasks. The rule also sets the Assigned Person, if it is blank, to the person who completed the task. If the task is for a project, the project manager is notified of the task completion. If the working notes field was updated, the text is copied into the Running Notes field and blanked out. And if the task is related to a change request, the notes are also updated into the Change Request's running working notes. If the status has just changed to Assigned (by launching the tasks from the main record or by the prerequisite tasks having been completed), the Date Due is set based on specified criteria. If the task was an auto-completing task, then it is marked as Completed and the assignee notified. Otherwise, the assigned person or assigned team is notified that the task is now assigned. When a prerequisite task is completed, its dependent tasks are updated, and if all prerequisite tasks are now completed, then the rule called Edit: Assign tasks when number of completed prerequisites meets criteria (API) runs. This rule checks if the task was conditional, and if so, checks the condition to see if it is met. If the task is not conditional or its condition is met, then it sets the Status to Assigned. Otherwise, it sets the status to Not Needed. When all tasks for a particular record are completed or marked as failed or not needed, the person / team assigned to the main request is notified that all tasks are done. Measuring Time for a Task In addition to time that is manually entered, the system tracks two kind of elapsed time. The Working Hours to Complete field is set to the difference between the Date Created and Date Done, excluding the non-working hours of the assigned team and also excluding the time during which the Status was Queued, Conditional, or Not Needed. The Actual Working Hours field measures the time between the Actual Start Time and Actual End Time, excluding the non-working hours of the assigned team. These fields can be used in reports to see the average amounts of time tasks of specific types are taking. They can also be compared against the Template Number of Hours to Due Date value, which sets the expected working hours that should be needed for the task. 56
 Notify of upcoming task. It will notify the assigned person or team when the due date is one day away, once it is turned on. Currently it is disabled.")
57 Automation and Workflow There is a simple workflow for tasks that currently executes no actions: Disabled Time Based Rules There are two time based rules that are set up but not running. These are: TB: (DISABLED) Notify of upcoming task. It will notify the assigned person or team when the due date is one day away, once it is turned on. Currently it is disabled. There is a radio button at the bottom of the General tab in the table settings if this rule is desired. The schedule may need to be changed from every 10 years to something more useful. TB: (DISABLED) Set alert color to red if overdue. This sets the alert color to red when the date due has passed, so that views that use row coloring can show to users that the task is overdue. 57
58 Task Templates Table This table holds records that serve as templates for automatically generated tasks. Each Template record specifies a Task related to one of the other tables. Task Templates have a Related to field, just as tasks do, and they may be linked to a specific service, task workflow, or project type. Task Templates define the method of assignment, the expected number of working hours to complete, and any prerequisite tasks. Task Templates may be combined within a Task Workflow, or they may be independent of a workflow. They can be combined to form a set of "User Selected Tasks" linked to a service or project type, or a single task template may be linked to a service for a change request. Task Template Layout Use Case Automation and Workflow Cloning Task Templates Along with a Task Workflow Task Template Layout The next sections outline the important fields and options on each of the Task record layout tabs. Template Details Tab All the fields that users can fill out are on the Template Details tab: 58
59 The Task Title may not contain commas; this prevents errors when running the task automation rules. The Related To field links Task templates to Service Requests, Change Requests, or Projects. Task Usage may be Default or Conditional. If conditional, then a saved search condition based on metadata in the record where the task is generated should be defined. At the point where the task would be assigned, the condition is checked to see if it is met or not and the task's status is changed accordingly. The Number of Working Hours to Due date is used to set the task's Date Due once the status is marked Assigned, by adding the defined number of working hours (for the assigned team) to the current time. Assign Task Based On allows you to define a task template whose resulting task will be assigned to a person defined in the main record. The default of Assigned Team / Person lets you "hard code" the assigned team or person in the task template. A different value allows you to choose a variable that has been pre-configured in the Replacement Variables table. For instance, for a task related to a service request you will see these options: The choices in the Assign to field are set in the Replacement Variables table and can be edited there, or new fields added. 59
60 Note that if you set a task to be assigned in this way, but there is no value in the selected field for instance, there is no submitter manager defined in the service request-- then the task will not be properly assigned. As a backup, such tasks are assigned to the 1st level Support Team. The Choose a Task to Add field is used to select a task for the same workflow to be a prerequisite task to this one. The Prerequisite Task to Remove is used to remove a task that was previously defined as a prerequisite. These fields are used in conjunction with the action buttons to their right. Note that prerequisite task setup is only visible and enabled if the task template is linked to a Task Workflow and if the linked field Workflow Enable Task Prerequisites=Yes. Otherwise these fields will not be visible. At the bottom of the tab is the option to set up a task checklist. If Yes is selected, then you can add individual steps and define the order the checkboxes should use: To add steps, first check the Create New Checklist Item? checkbox, then fill out a Step Name and Step Number, then click Create Task Step. This is a handy way to provide a list of troubleshooting steps or a list of things to be done within a single task. 60
61 Related Information Tab This tab may show the record that contains this task template. If the template is part of a task workflow, the workflow will be listed. If it is linked to a particular service as a "User Selected Task", then the service name will be linked in: Use Case Task Templates are related to either the Project, Change Request, or Service Request tables using the "Related to" field at the top of the form. Whenever a Task Template is used to generate a Task, a conversion is done from the Task Template table to the Task table, mapping important information in the Task Template to the Task record that is generated. This Task record is linked to the Service Request, Project, or other table that spawned it, as well as being linked back to the source task template. Templates can be made inactive when they should no longer be used, and that will prevent them from being generated as tasks. When the Status is changed to Inactive, an edit rule called Edit: Other edit actions - unlink inactive task template, handle cloned templates will blank out any link to a task workflow, project type, or service will be eliminated so it will no longer appear as available in those services or new projects. Another rule prevents task titles from having commas in them, and if a comma is stripped out, provides a popup message alerting the creator that it has been stripped. Automation and Workflow The automation on the Task Template table is almost all designed to handle the conversion into tasks when triggered from elsewhere, rather than to manage a process within the Task Template itself. It is described in the appendix. In general, there are "flag" fields in the task template that get set to Yes to trigger conversion for each of the different main record types, and linked fields to the source records so that the new tasks that are triggered can be linked to the correct service request, project, or change request. In addition, the system tracks all service requests and projects for which a task template has been generated so that users are prevented from generating the same task for the same parent record. Since change request tasks must be generated multiple times, one for each asset, we cannot block this in the same way. 61
62 Cloning Task Templates Along with a Task Workflow Task workflows may be cloned and then modified, and when a task workflow is cloned, its task templates are also cloned and linked to the new workflow. Cloning reproduces all the elements of the original task template except any task steps. If task steps were involved in the task template, they will need to be recreated in the cloned template. 62
63 Task Workflows Table Task Workflows are used to create a set of task templates that may be organized to trigger all at once or in a specified sequence. They can be used in services such as Change Requests or Services Requests, and they are also used in Project Types. They essentially predefine the tasks that should be done for a particular request type. They are used in conjunction with the Task Generation Method of Predefined Task Workflow. Use Case Task workflows can be created by members of the Project Manager, Change Manager, Service Manager, and Admin groups. All except admin users may only edit the workflows related to their primary tables, so change managers can edit workflows related to change requests, while project managers can edit workflows related to project types. A task workflow can be created directly in the Task Workflows table or it can be launched from within a service for a change request or service request or from a project type record, using an action button: The advantage of doing it from a service record or project type record is that the Related to field will be populated automatically with the correct table: 63
64 Either way, the process of setting up a new task workflow involves naming it with a unique name, ensuring it is related to the correct table, adding a description, and then creating the task templates: Clicking the Create New Task Template button saves the workflow and then brings up the new task template screen. See Task Templates section for more information on how to create and fill out the task template form. Once the first template is created, if the Enable Prerequisite Tasks is set to Yes in the workflow, then additional templates may select the earlier ones as prerequisites. Prerequisite Task Handling Within a single task workflow, there may be multiple threads of dependent tasks with different prerequisites, and these threads may proceed independently. It is possible to launch two separate threads and bring them back into alignment by making their last tasks prerequisites of the next task, for instance. Task templates can be conditional, and if their condition is not met, then they will be marked as not needed when they would otherwise be assigned. When they are marked as not needed, their dependent tasks will be assigned. This is an important point: tasks that are dependent on conditional tasks are not prevented if the condition is not met. If they should be prevented, then they should also be made conditional based on the same condition 64
65 as their prerequisite task. Note that when tasks are launched for a project or a request using a Launch Tasks button, the Status of tasks will be changed to Assigned based on the following logic: The task status was Queued or Conditional; The task has no prerequisites and is either not conditional, or its condition is met; The task has some prerequisites but they are set to a status of Not Needed or Completed i.e. they are conditional and are not needed, or they have been removed and marked as not needed by a technician before the tasks are launched. Below is an example of a task workflow for employee termination: Here there are two tasks without prerequisites, ID62 and ID61, that will be assigned right away. The tasks with a sequence value of 2 will be assigned as soon as the Hold Exit interview is completed, so they might get assigned before ID62 is completed. The final task will be assigned as soon as the exit interview is completed and the support and tasks are reassigned. So it is conceivable that ID62, ID160 and ID63 are all in progress at the same time and any may be completed first. The ability to choose exactly which tasks must be finished before a task is assigned gives a flexible model for complex task workflows. The sequence number gives a general impression of the order of tasks, but it is not definitive and does not control any of the processing. It allows the tasks to be sorted more or less in order of assignment. Cloning a Task Workflow Workflows can also be cloned using the Clone Workflow button. The effect of cloning a workflow is to create a new workflow with the workflow title changed to prefix it with information that is was cloned, i.e. Cloned on 05/27/ :58 - General IT Project. The task templates are also cloned and linked to the new workflow. Note that task templates may only be linked to one workflow and are created independently for each workflow, since they may have a sequence and order within that workflow that would be different within a different workflow. 65
66 Task Steps Table Task Steps are used to define a multi-step process within a single task rather than creating several tasks. This makes sense especially when the same person is performing all the steps. Individual records are linked to a specific task template and can only be used in that template. Task Steps are simple records with a Step Number, Status, Title, Description and the Task Template it is used in. They appear within task records as a related table that are ordered based on the Step Number. A sample is shown below: Use Case Task steps are created from within a task template, as shown above in the task template section, or they can be created directly with the task template specified. There is no automation on this table. 66
67 Time Entries Table This table tracks time entries made by staff users. It can be related to records in any other table, and users are allowed to create time entries from any other table. By default, it is related to the Support Case, Service Request, Change Request, Project, Incident, Problem, and Task tables. Use Case Time entry records are used to track employee labor for billing or accounting reporting. Time entries are generally linked to Projects, Tasks, Support Cases, or Service Requests, but can be integrated in any table where a way of tracking employee time is useful. Time Entries can be created directly in the Time Entry table or from linked fields in other tables with rule automation to automatically convert the entries into a separate Time Entry record. The automatic conversion from simple fields is available from the Support Case, Service Request, Project, Task, and Change Request tables. We usually recommend creating time entries from another table, as default values for selected fields may be included in the record conversion mapping. This ensures greater accuracy and uniformity of data. If the Related To field of a time entry is left blank, a rule will update the field upon saving with the first non-empty field from the following list: Change Request ID, Service Request ID, Project ID, Support Case ID or Task ID. If all of the fields are blank (no related table is indicated), the Related To value is set to Employee Time. Admins and members of the Marketing, Project Manager, and Sales groups can view and edit their own time entries. Marketing, Project Manager, Support Manager, Support Staff, and Sales groups may view, but not edit, 67
68 all time entry records. No other groups have access to the table by default. Ownership of Time Entries Time Entry records are owned by the user who creates the record. Specifically, they are owned by user whose Name matches the Done By field. 68
69 Service Catalog Services Table The Services table is the source for the support operation's Service Catalog. It holds a record for each service that may be offered to end users through the service catalog. All services offered by the organization to end users should be managed here and this table's workflow is used to manage the approval process for a new service. Each service is offered through a different request type, such as a Service Request, Purchase Request, or Change Request. Each service is therefore associated with one of these three tables, and this association is defined in the Services field "Show in Table". Use Case There are two ways to request a particular service: one is to create a new request of the correct type, such as a Service Request, and then to pick the service category and then the service from the drop-down list of services. The second method is to use an internal hotlink such as "Request a Password Reset" which will take the user to a new record in the appropriate table with the Service automatically set to password reset. We have created some sample services. Naturally, your organization will want to create its own services, delete some of our sample services, or change the associations we have made for those services. For instance, the onboarding of new employees is currently managed through the Service Request table under the Service Category New Employee Setup. Some organizations may prefer to manage new employee setup through the Change Request table instead. Making this kind of change is a matter of modifying the service record and changing the field called "Show in Table" to point to the desired table. Since the Service Catalog is the backbone for many support operations, the Services table has several special fields that are pulled into the corresponding request to enable automation, escalation, and special field visibilities and dependencies based on the type of service. Note that in an effort to allow simplicity, we have not added a table to hold different SLAs, but instead have added simple SLA fields to the Services table. For organizations with a variety of complex SLAs based on multi-field criteria, it will make sense to create a separate table to manage all SLAs and then to pull in the appropriate SLA record for a particular service. Below is a picture of the first tab of the Services form. 69
70 Service Requests vs. Change Requests For some services, it may be unclear whether they should be offered through a service request or a change request. For instance, account provisioning, employee offboarding or onboarding, or simple application changes could theoretically go under either category. The system is constructed on the principle that service requests do not require approvals. They include only "pre-approved" services. Change requests may have approval workflows and complex approval processes. So if you do not require approvals for employee offboarding or simple application changes, they may be best handled as service requests, while if you require approvals for employee onboarding, it may make sense to put that service in the change request category. Of course, it is also possible to build out approvals for service requests if needed, but we like to use the approval question to help distinguish where a particular service should go. 70
71 Approvals and Tasks Related to Services Some services may have associated approval workflows or standard tasks or task workflows. These options are available from the additional tabs in the Service record: In the current version of the ITIL template, approvals are available out of the box only for Change Requests. Tasks are available for both Service Requests and Change Requests. Approvals for Change Requests There are three options for how to handle approvals for a change request, shown in the Approval Generation Method drop-down below: using a predefined approval workflow, manually created ad hoc approvals, or both: For a Predefined Workflow Only, users will select from existing approval workflows related to change requests. If none yet exist, they can use the button to create a new approval workflow on the fly. If they select Manually Created in Request Only then no further information is needed in the service record, and the users will be able to add the approvals manually within the individual change request. Approval View in the Change Request The selections made in the Service will result in different options appearing within the Change Request. In a Change Request based on a predefined workflow only, the user will see the workflow listed and a button 71
72 to generate the approval records. If the user has permission to edit the Approval Workflow Title field, then it will also be able to select a different workflow as needed: If both predefined and manual approval creation are permitted, the user will see an additional checkbox, Create Approvals, that can be expanded to add one or more ad hoc approvals: If only the manual approval creation is defined, then the user will just see the option to Create Approvals and will add any approvals needed. Note that if the Approval Required field in the service has a Yes value, at least one approval will need to be created and approved to move the change request forward to completion. Tasks for Change Requests The Tasks tab of the service allows the selection of a method for task generation. The available methods depend on the request type and they are different for service requests and change requests. Change Requests have two options for the task generation method: Predefined Task Workflow and CR Single Task from Template: 72
73 Change requests are typically associated with one or more assets. Task handling for change requests is therefore designed to create a task for each asset that has been associated with the request. If the user chooses 100 assets for a change request and generates tasks, whichever tasks are defined for the change request are created 100 times, one for each asset. The tasks are generated in this way by using a task template and pushing its details down through the asset records, so this necessitates restricting some of the other task generation options. Predefined Task Workflow - allows the selection and/or creation of a Task Workflow with predefined task templates arranged in a sequential or parallel order (see more details about configuring task workflows in the Task Workflows section): Note that if your workflow has 3 tasks, they will each be generated for each asset. The CR Single Task from Template option is more common for change requests involving numerous assets. Here you define a single task template to be used with the change request: 73
74 Note that a single task may have several predefined steps, presented as a checklist, to assist technicians in performing the task. See the sections on Task Templates and Task Steps below for more details on how to set this up. Below is an example of a task template that has been defined with specific steps: Here is how the setup above will appear in the task that is assigned and updated by the user doing the work: Using task steps within a single task makes good sense for a change request. While setting up the service, if the task template you want to use does not yet exist, the Create and Apply New Task Template button can be used to bring up the task template screen to define a new template, and once 74


75 saved, that template will be selected for the service you launched it from: In the actual change request, it is possible when using this task method to select more than this one task template to generate. Once having generated the default task, the user may select from other pre-defined tasks and generate them as well. Tasks for Service Requests For service requests, there are some different task generation options. There are three possible methods: Predefined Task Workflow this is the same as the usage in change requests, except that the tasks are not tied to assets and are just created once per request. With this choice in a service request's service, another field - Enable Ad Hoc Tasks appears, and if it has a Yes value, then in addition to the predefined tasks, the user may create additional tasks for a particular request. User Selected Tasks allows the service manager to create a set of possible tasks that will be displayed in a 75
76 service request as checkbox items, so the user may select which tasks are relevant for this particular service request and generate just those tasks: The Create Task Template button is used to create the potential tasks as templates. Ad hoc tasks may also be enabled for this type by selecting Yes for the Enable Ad Hoc Tasks? field shown above. The result of the service shown above in a given service request: The user checks the boxes for the desired tasks, then clicks Generate Task(s) to create the individual task records. These tasks, since they are all optional, are defined as parallel tasks without specific prerequisites. User Generated Ad Hoc Tasks this selection allows the user to create manual tasks in the service request without reference to any preexisting templates. In this case, the user will see a button in the service request to create a new task: 76

77 When creating an ad hoc task, you can make it sequential by selecting one or more prerequisite tasks. Service Catalog Management Note: Because the Services table has some special fields, several of them have onscreen explanations. These explanations are accessed in the input form by clicking on the underlined field labels. Once the Service Catalog is initially set up by creating the appropriate services in the Service table, new service items will be created by staff members only when a new service is planned or initiated. Existing services may naturally be modified as needed. Initial permissions are set so only users in the admin, Service Manager, and Change Manager groups can create/modify/delete services. Service records may be created in a state of Planned or Active. Once all active services have been set up during the initial system configuration, it may be desirable to edit the workflow to deselect the Creatable box for the Active State, so that future services must start in a status of Planned and go through an approval process. Temporarily inactive services should be placed in the Inactive state. Services no longer in use can be placed in the Retired state for record keeping. Ownership of Services Services are owned by the person who creates the service. Workflow Saved Searches Some of th e default saved searches provided are detailed below. Saved Search Name Service Pipeline Service Catalog Search Description Status is Planned Status is Active 77
78 Inactive Services Retired Services Planned Services Status is Inactive Status is Retired Status is Planned 78
79 Contract Management Tables The Contract Management system is designed with a variety of out-of-the-box approval processes. It is easy to eliminate or modify functions to better fit a desired business process. Some time-based rules are disabled by default and need to be enabled for the table to work correctly. To do this, go to the Rules tab of the Setup Contracts page, edit a rule with "(Disabled)" in the title, and click Yes in the "Rule is enabled" section at the bottom of the page. The Contract Management system is comprised of a few main tables with background tables playing a supporting role. This section describes how the default contract management system tables are configured. Contracts Table Clause Library Table Insurance Certificates Table Attachments Table Attachment Types Table Contract Tasks Table Contract Types Table Print Templates Table DocuSign Tables Overview DocuSign Users Table DocuSign Roles Table DocuSign Envelopes Table DocuSign Recipients Table Adobe Sign Tables and Setup 79
80 Contracts Table The Contracts table holds all contract records. It also controls the associated automation and notifications related to contracts. Part of a representative record is shown below. Required fields, marked with a red asterisk, include: Record Type, Internal Contract Owner, Contract Type, Days in Advance to Notify for Renewal, Contract Title, Contract Description, Contract Start Date, and Contract End Date. Staff Use Case This section covers the use case for power users. Each record in the table holds information about an individual contract including details about the contracting party, approval information, attached contract file and supporting documents, and renewal details. Create Contracts Contract records may be created by members of the Admin, Contract Creator, Contract Manager, and Contract Owner groups. Contracts may be created in one of two ways: Click New in the Contract table action bar 80
81 Use the Create Related Contract button on the Renewal / Related Contracts tab to create a renewal, subcontract, or amendment from the current contract. This button is available only if the contract is in a Status of Signed, Active, Expired, or Canceled. Creating a new contract with the Create Related Contract button will automatically link it to the current contract by populating the Parent Contract ID field in the newly created record. For a more detailed explanation of creation by this method, see the Handling Related Contracts and Renewals section. By default, contracts fall into one of four categories: Contracts Master Agreements Subcontracts Amendments The Record Type field in the common area indicates the contract's category. "Contract" is the default Record Type for newly created contracts. It can be used to indicate either a stand-alone contract or a contract that exists under a master agreement. In the latter case, the Parent Contract ID can be filled in upon creation of the contract. Subcontracts and Amendments will be linked to a parent contract automatically, if they are created by clicking the Create Related Contract button in the parent contract record. Below the Record Type are fields storing the Assigned Team and the Internal Contract Owner. The default Assigned Team is the Contract Manager Team. The Internal Contract Owner is the person responsible for overseeing the contract and ensuring timely renewals and approvals. The list of available owners is filtered to users who are in the Contract Owner Team or the Contract Manager Team. The default Internal Contract Owner is the user who creates the contract record, provided that user is in the Contract Manager or Contract Owner Team. Users in the Contract Manager or Admin group can manually change the Assigned Team and Internal Contract Owner if needed. Once the appropriate fields are filled in, the contract may be saved in a Status of Draft. The contract's Status field is changed automatically by the system at appropriate points in the workflow, generally when an action button is pressed or when some condition is met; however, users in the Admin group can manually override the Status if necessary. Information about the contract requester, external company involved, and locations related to the contract may be added by clicking the lookup icon next to those fields. If a desired Requester, Company, or Location does not exist, a record must first be created in order to link it to the Contract. 81
82 Creating companies and contacts during contract creation In the Contract Party Information section, users can find and link to an existing company, or create new ones as needed. To find an existing company record, use the lookup icon to search for the company. If the contract party isn't found, staff users can add a new company by selecting New Company. Enter the name and address information, then click Create Company. Both company and location records are created in the background, and linked to the new contract when the record refreshes. Similarly, you can create new entries in the people table if the main contact for the contract party is not an existing contact. Select New Contact, enter the information, and click Create Main Contact. Multiple contacts can be created in this way, and then the primary contact can be selected from the Main Contact drop-down. When contract requesters submit a new contract through the end user interface, they can enter new company and contact information, but they don't see the buttons to create new records. When a contract is submitted for review, Contract Managers can edit the contract party information, or click the button to confirm the new 82
83 company or contact and finish adding records. This setup is intended to prevent end users from creating duplicate companies with slightly different spellings and to ensure that contract managers have ownership and control of this data. Permissions can be changed easily to allow end users to use the buttons to create companies and contacts directly. Note that it is important for the contract managers to evaluate the new additions and either replace with existing data or click the buttons to create the appropriate background data. Otherwise, the linked data can't be used in print templates and s. Creating contract attachments from default print templates The Attachments tab shows all attached files related to the contract and provides the user with options to create and edit related attachments. For certain contract types, when the Document Source is set to Standard Template or Modified Template, the Print Template to Generate field appears. The Document Source can also be set to 3rd Party or Internal Other to indicate a document provided by the external contract party, or which has been internally generated but not from a template, respectively. The Print Template to Generate has a default value set based on the contract type, and there may be some visibility dependent fields that appear based on whether the print template uses any user-selected or optional clauses. For instance, the Customer Service Contract default template has some additional fields such as Governing Law Clause and some Optional Clauses that are selectable by the user: The Create and Attach action button is used to auto-generate a contract document from the MS Word print template specified in the Print Template to Generate field and stored in the Print Template File field. Clicking Create and Attach generates the document and creates an attachment record to hold the attached file. It also increments the Version Number field. If the Contract Party Information section is not properly filled out and linked to records, a validation action warns the user to finish creating new records before generating the attachment. Creating contracts and attachments from inbound s Attachments can be automatically generated from inbound s containing attached files. Files from inbound s are mapped to the Transitional Contract Files field in the contract, assigned a predetermined Attachment Title and Attachment Type value of Document Provided by Outside Party, and then converted into a new attachment record. The file is mapped into the Attached File field in the attachment record. If multiple files are attached to an inbound , each one is converted into a separate attachment record for that contract. 83
84 Working with Attachments The All Contract Attachments related table is also used to manually create and attach files to the contract, such as supporting documents, signed agreements, or other documents from the contract parties. Create attachments from within the contract record by clicking New on the related table's action bar. The Select Files drop-down on the action bar is used to operate on multiple selected attachments to update the fields to the far right in the table view. Add or Remove for the Approval Packet sets the Include in Approval Packet field to Yes or No. Add or Remove for the E-sign Packet changes the To Be esigned field to yes or no. And Set Status to Superseded sets the status for the selected attachment(s) to Superseded. Tracking insurance certificates The Attachments tab also holds a related table that can be used to track insurance certificates separately from other types of attachments. Certificates can be found directly in the Insurance Certificates table, and in related tables in both the Company and Contracts tables. 84

85 When you add an insurance certificate to a company record, it can be automatically linked to all pending or active contracts with that vendor by a daily time-based rule (disabled by default). To create a certificate from a contract record, click New on the related table action bar; the certificate will be automatically linked to the contract. You will need to look up the company vendor in the For Company Name field when creating certificates from a contract. The Insurance Certificate Owner (defined in the company record) is notified fourteen days before an insurance certificate's Expiration Date. When a certificate expires without being renewed, the Contract Managers of any related active contracts are notified on the date of the expiration. For more information about insurance certificates and related automation, see the Insurance Certificates Table section. 85
86 Another method for managing insurance certificates You may prefer to manage insurance certificates as contract attachments, instead of using the Insurance Certificates table. For example, if Contract Managers are responsible for renewing and maintaining insurance certificates, it may be best to use the Attachments table to hold the certificates, along with all other types of attached documents for contracts. Managing insurance certificates as contract attachments means the Contract Manager will receive notifications instead of the Internal Certificate Owner. If this method makes the most sense for your particular business, you can remove the default Insurance Certificates field from the contract layout. Then, go to the Attachment Type table and edit the record called Insurance Certificate. By default, this record's Status is Inactive; change the Status to Active to make it visible in the Attachments table. Handling Approvals Approvals for a contract are handled on the Approval tab. The order and nature of approvals depends on the Workflow selected on the Approvals tab. Selecting a Contract Type in the common area filters the available Workflow Title choices. For information on setting up the individual Workflows, refer to the Approval Workflows section. The order and nature of approvals depends on the Workflow Title selected on the Approvals tab. Selecting a Contract Type in the common area filters the available Workflow Title choices. For information on setting up the individual Workflows, refer to the Approvals Table section. To submit a contract for approval, first select the correct Workflow Title from the drop-down provided. Click Create Approvals to generate a set of Approval records in a Status of Queued. Once the records have been created, click Launch Approval Process to update the Status of the contract to Pending Approval and update the Status of the approval(s) with the lowest step number to Pending Approval. There may be more than one approval in the lowest step number for parallel approvals. The system automatically notifies the first approver in the sequence. A progress bar also appears in the common area to provide a quick visual reference of the approval process. 86
87 To advance the contract workflow, an approver will use one of three action buttons to change the Status of the approval record: Approve to send the contract to the next approver in the sequence. Require Changes to send the contract back to the contract manager to make changes. Permanently Reject if the contract requires significant changes. Both Require Changes and Permanently Reject require the user to enter notes in the Approval Notes field. These notes are appended to the Approval Notes field in the contract record and are also viewable from any other approval record linked to that contract. As each approval is approved, the system notifies the next approver in the sequence that a contract is pending their approval. A list of all approval records is displayed under the Approvals Needed section and automatically updated as approval records are modified. If a user who is not on the current approval team attempts to approve a contract, the system recognizes the error and prevents the user from completing the approval action. When all the required approvals are received by the system, the contract Status is automatically changed to 87
88 Approved. Adding notes and sending s Notes relevant to the general contract process are entered into the General Notes field on the Details tab, and notes pertaining to the approval process are entered into the Approval Notes field on the Approvals tab. s can be sent to Internal Contacts and External Party Contacts from the s tab. First choose the type of Recipient(s) (Internal Contacts, External Party Contacts, or External Party and Internal Contacts), then click the lookup icon to select the contacts to . Fill out the Subject and Text fields as needed, select any files to send with the , then click Send . The s sent from the contract will be shown below in the Communication History. 88
89 Related Contracts and Renewals Information about the renewal process is stored on the Renewal / Related Contracts tab. Fields for capturing the Renewal Notification Date and Days in Advance to Notify for Renewal are provided as a default. If relevant, information about the renewal contract or previous contract are automatically updated by the system. The Create Renewal Contract button is used to create a renewal contract. This will link the new contract to the previous one. This button is only visible when the contract's Status is Active, Canceled, Expired, or Signed. A new contract generated in this way can be edited before saving. If applicable, the system automatically links renewal contracts to any preceding contracts, creating a chain for auditability. Any assets linked to the preceding contract will be linked to the renewal contract as well. Users typically do not enter information into the Renewal Contract and Previous Contract Information fields manually. This tab is also used to create an amendment or subcontract of an existing contract. Select the type of record you wish to create, then click the Create Related Contract button. The new record will be linked to the current contract in a child relationship. 89

90 The Diagram icon is used to generate a diagram of any contracts related to this contract. For example, the diagram for a subcontract of a master agreement, with its own amendment, is shown here: Any direct children of the current contract are shown in the table in the Related Contracts and Amendments section. 90
91 Related assets Assets can be linked to individual contracts from the Assets tab. Assets must be added separately to the Assets table before they are available to attach to contracts. If you are not relating assets to contracts, you can simply remove this tab and its fields from the layout. Signing contracts with DocuSign or Adobe Sign A Signature tab appears to the right of the Assets tab. This tab contains fields for contract document signers, and contains all fields related to DocuSign and Adobe Sign. If you are not using either system, these fields can simply be removed from the layout. The Files to Sign field holds attached files from the Attachments table that have a To Be esigned value of Yes. The Refresh Files action button refreshes this field in case changes to the attachments were made in the same session under the contract's Attachments tab. 91
92 Fields under the Signers heading are used to populate the signature page of the contract's print templates and to identify the signers for either esignature program. Before using either DocuSign or Adobe Sign, you will need to configure the integration by going to Setup > Integration and choosing the appropriate platform. For DocuSign, you must sign up for a Docusign account directly with DocuSign. For Adobe Sign, Agiloft can set up the account and allow you to purchase envelopes directly without any long term contract. See the sections on DocuSign and Adobe Sign below for more details. Using Docusign Once the contract is ready to sign, use the Create DocuSign Envelope action button to create a DocuSign Envelope record and attach the files held in the Files to Sign field. This will also create a DocuSign Recipient record for each signer. These records are then shown in the related tables for DocuSign Envelopes and DocuSign Recipients on the Signature tab. Only users in the Admin and DocuSign Users groups can access the DocuSign fields on the Signature tab. For more information on DocuSign, refer to the detailed DocuSign User Manual at Using Adobe Sign Once ready to send for signature, click the Create Adobe Sign Envelope button. This will create an Adobe Sign Envelope and convert the signers into recipients. 92


93 Contract Processing This section covers the remaining Status changes not mentioned in the explanations above. Once a contract changes to a Status of Signed, the system automatically updates the contract to a Status of Active when the Contract Start Date occurs. Similarly, the Status is changed when the Contract End Date occurs. If the contract does not have an associated renewal contract, the Status is automatically set to Expired; if the contract does have a renewal, the Status is set to Renewed. If the contract is auto-renewing, the Contract End Date is increased by the Renewal Term in Months and the contract remains Active. To cancel a contract, click the Cancel Contract button in the common area. Additionally, users of the Admin group can manually change the contract status to Canceled. If the contract has a Status of Approved, the Mark as Signed button is visible in the common area. This button updates the contract Status to Signed. Turning Off Approvals Contract Management tables have Approval handling set up by default. The associated processes may be turned off in order to use Agiloft as a contract repository. To turn off Approvals, do the following: Edit field permissions to allow the Contract Manager Group to edit the Contract Status field in their own contracts and in others' contracts. Remove status-changing buttons from the layout: Submit for Approval and Mark as Signed. Remove the Approval tab and related fields from the layout. For help on configuring table layouts, please refer to the Administrator Reference Manual or online help. 93
94 End User Use Case This section covers the use case for end users in a Contract Management context. Members of the Contract Creator group are internal employees accessing the system via the end user interface. Contract creators, also called contract requesters, are users who submit requests for contracts but do not work on or manage the contract, once it is requested and submitted. Below is a representative home page for an end user in the Contract Creator group. Creating Contracts Users in the Contract Creator group may create contracts by clicking the Create a Contract Request link on the home page or by selecting New > Contract from the menu. A simplified contract form is presented to the end user. Many of the fields are hidden from the layout or restricted by field-level permissions. 94
95 In the Contract Party Information section, users can find and link to an existing company and contact, or create new ones as needed. Select New Company and then enter the name and address information. After the contract is submitted for review, Contract Managers can confirm the new company to finish adding a record. Similarly, end users can suggest a new company contact by filling out the fields in the Party Main Contact section of the form. Once the required information is filled in, the contract can be saved for later revisions. The contract requester can also press the Submit for Review button to request approval from a Contract Manager. Contract requesters can be contacted to update the submitted contract, but they are typically no longer involved in the approval process from this point forward. After the contract requester submits the contract for review, a contract manager decides whether to continue with the approval process or reject the contract request. 95
96 Working with Contracts At any time, the contract requester can view contracts they previously submitted by choosing View > My Contracts from the menu. Contract Creator group members can edit select fields in contracts they own. Certain fields such as Contract Amount, Contract Start Date, and Contract End Date (among others) are not editable by the contract requester if the contract's Status is Pending Approval, Approved, Signed, Active, Renewed, or Expired. This is to prevent changes to currently active or in process contracts. The contract requester can view all contracts they have permission to see by clicking on the All Contracts home page link or tab. Ownership of Contracts Records in this table are owned by the Contract Requester. Specifically, a record is owned by the user whose ID matches the number in the Requester ID field. By default, the Contract Requester is the user who created the contract record. Automation The Contracts table has several rules set up. Their actions have been described in the use cases above. Rules which are run based on a schedule (rather than those which are event-triggered) are identified by the prefix "TB", for time-based and are disabled by default. 96

97 Workflow The Contracts table has the following default workflow: Reports The Contracts table contains the following default Charts/Reports: 97
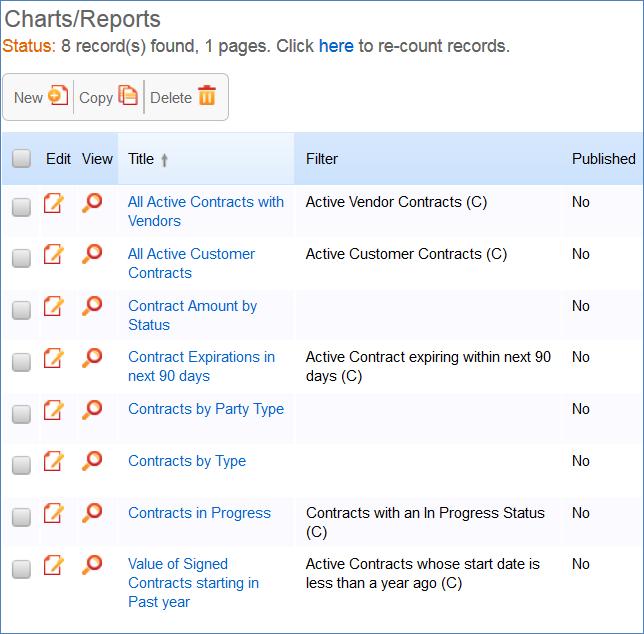
98 98
99 Clause Library Table This table holds clauses that can be referenced in print templates. There are many ways to use a clause library that vary in complexity. The out-of-the-box setup includes examples of several reasonably simple approaches. Overview There are different reasons for using a clause library to hold contract language rather than simply storing all text and variables in the Microsoft Word print template. Here are a few of them: If all source clauses are stored in a library, then if the clause text needs to be changed, it must only be changed in one place, and all print templates or records that use that clause will be updated for future contracts. Clauses may have specific conditions associated with them so that they are only used if some particular meta data exists in the contract. Note that it is also possible to add such conditions to print templates, so that this does not necessarily require a clause library. Workflow can be configured to handle changes to standard language, with approvals, statuses, and so on. Responsibility for maintaining and updating the clause can be assigned to a particular team or clause owner. Alternatively, print templates could also have approvals and statuses if language is managed directly in the print templates. With a clause library, users may be presented with a list of alternative clauses for particular sections or a list of optional clauses that they can select to construct a given contract. A simple version of such selection is built into the contract template to demonstrate these approaches. Some companies want to identify approvers who will need to review a contract based on a particular clause that is changed for a given contract. Approval information can be stored in the source clause to provide approval automation. This typically requires a more complex setup and is not included in the out-of-the-box Clause Library table. Our out-of-the-box setup is focused on providing the first four benefits. It provides a simple repository for clause language that can then be inserted into print templates, either automatically, or with some user selection. Use Case The clause library has several fields to assist in managing the use of language throughout your contracts. The key fields and their usage is as follows: 99

100 Clause Type - Categorizing clauses makes it possible to filter them if you want to allow users to select from alternative clauses for a specific section of the contract, for instance the termination provisions, or the indemnification provisions. Status - Statuses of Active, Planned, Pending Approval, and Retired or Cancelled can be used to filter available clauses and to indicate where they are in any approval workflow. Clause Usage - indicates how a clause may be used and can also be used as a filter to display optional clauses or user-selected clauses for users to choose, as opposed to conditional clauses that will be populated into the template automatically based on some predefined condition. Clause Priority - is used to sort a drop-down list of clauses that may be filtered and presented to the user. If you have four variants for indemnification, for instance, and you want to display them in a particular order, you would set the Clause Priority with the appropriate values (1 for the highest to appear on the list). Usage Details - this is a text description field to provide details on where and how this clause should be used. It is purely informational. Approval Team - can be used to define the approval team with responsibility for updating this clause. Clause Owner - can be used to indicate a specific person responsible for changes to the clause. Used by Print Templates - allows you to link a clause to the print templates that will use it, to have an audit trail of which templates will or should be updated if the clause language changes. 100

101 Clause Form Below is the default layout for the clause library form: Action Buttons on the Action Bar The action bar above the clause table has three special buttons under the Actions drop-down: The Clone Clause button can be used with one or more clauses to clone them and create a copy. The copies will map most of the field values and will add the date cloned to the clause title. This makes it easy to create copies of a clause for some purpose such as revision, and then to edit the resulting clause. The Insert Clause Number button adds MS Word code that results in auto-numbering in front of that clause when the clause is used in a print template. This is one method of managing clause numbering within your contracts. See below for more details. The Remove Clause Number button removes the MS Word code for auto-numbering from the selected clause(s). This is handy if you change your mind about the method to use for numbering. 101
102 HTML Field Conversion into MS Word The Clause Text field is an HTML based field and can use standard HTML formatting tags. To see all formatting options, click the Edit button below the clause text field to bring up the HTML editor. If you copy and paste clauses into the clause text field from a Microsoft office file such as MS Word or Excel, it is best to use the Cleanse HTML button to strip out some of the excess code that is typically inserted by Microsoft. This will give a cleaner result when the clause is inserted into a print template and converted back into MS Word. HTML text fields are treated in a special way in Microsoft Word. Depending on specific HTML field characteristics, content may be translated in the Word document to either the Normal or Normal(Web) formatting style. Including <p> codes in the paragraph results in the Normal(web) formatting. It is important to configure any print template in Word to set the same font, size, and spacing style for Normal (Web) as for Normal, or for whatever other main style is used in your template, for consistency. For instance, if your template has some hard coded text, followed by variables that point to specific HTML clauses, you would want to define Normal (Web) to look the same as the hard coded text style. Methods for Auto-Numbering Contract Paragraphs There is a challenge in dealing with HTML text within Word - the Normal (web) style typically eliminates any numbering or indenting style that was applied to the clause variable in the print template, leaving the clause text as plain text in the Normal (Web) style. One of the important decisions when using a clause library is deciding where and how to handle the numbering and style formatting. If your contracts included numbering schemes, these can be handled in the clauses themselves by inserting the MS Word codes for auto-numbering levels, which will be converted to auto-numbered paragraphs when the document is generated, or they may be handled in the print template, by inserting such codes or using a Word table, within certain limitations. In the standard implementation, we have examples of three kinds of numbering methods. These are managed in the following Print Templates: NDA Numbered Normal Style is defined to use unnumbered clauses and the Normal style itself is configured 102
103 in the template to use auto-numbering, so any clause included in the template will be numbered. This does not support subsection numbering. Default NDA for clauses with numbering is a template without any numbering that is used with a set of clauses that have the Word auto-numbering codes in the clause text field. Putting the numbering codes directly in the clauses permits numbered subsections with the clauses, and there is an example of this for the governing law clause. NDA clauses using table for numbering uses a Word table with two columns to hold the clauses. The first column has auto-numbering on and manages the number, and the second holds the clause text. The table shows no borders and is therefore invisible to users. This gives a nicely aligned look but can be a bit more challenging for users if they need to do a lot of editing of clauses and aren't familiar with working with Word tables. It does not support subsection numbering. Agiloft Hosted Agreement with Adobe Sign Tags includes a user selected Governing Law clause (in the contract), and up to four optional clauses selected by the user in the contract (these are put in the final section). It also includes Adobe Sign signature tabs as examples in how to insert such tags. Hosted Service Level Agreement Docusign Tags has the same Governing Law clause and optional clauses but uses Docusign (hidden) tags in the signing block instead of AdobeSign tags. The other templates do not use clauses from the clause library at all and are just hard coded examples of print templates with variables. The sample print templates listed above and the default clauses included in the standard system provide clear examples of the different methods possible. Using the Clause Library in Contract Print Templates The standard setup of the clause library assumes that clauses may be created for any language that may be used in one or more contract types and print templates. It may make sense to put most of your contract language into the print template and just use the clause library for user-selectable alternative text or optional text. The choice is yours. If you do not reuse language in multiple print templates, there is really not much advantage to storing it in the clause library. In that case it is simpler to just put your language directly in the print template, where it does not need to be translated back and forth between Word and HTML and where users looking at the print template can see exactly what will be produced. It is easy to provide conditions directly in the print template for alternative or conditional clauses. As you define your clauses, you can link them to the specific print templates where you plan to use them. Then they will appear within the print template in a related table of Clauses Included, for reference. Once the clauses are created, you can create a print template that inserts the conditions and the specific clauses you want. Please review Print Template Syntax Reference for details on the syntax to use to insert a clause into a print template. Allow Users to Select Alternate Clauses Sometimes, you may want contract managers to be able to select from multiple clause options. There are a few different ways to do this, depending on how many choices they will need to make. 103
104 If there are only a few user decisions, it may be simplest to add a link to the selected clauses within the contract record, filtered to the choices available. Then whichever clause is selected can be inserted into the print template. If there are many decisions, it may be easiest to just provide questions for the user to answer and then have conditions built into the print template based on the answers given. This makes maintenance of the print template more complex, but may make it easier for the users making the decisions. We have provided two examples of user selection in the out-of-the-box setup. Selecting from Alternative Clauses for Governing Law One is a linked set of alternative Governing Law clauses displayed in the contract on the Attachment tab for specific contact types that use this feature. The user can select which governing law clause to use, and that is inserted into the print template automatically. This is available for the contract types: Customer Service Contract and Vendor Subscription Service: Selecting Optional Clauses to Add to the Contract For the same contract types, the user may also select from any optional clauses that have been defined. We have four default optional clauses shown above in the Select Optional Clauses field. The user may select those he wants to add, and when the document is generated, those claues will be added under the section called Additional Terms. These basic approaches can be expanded upon for a given implementation, depending on the needs of your company. Conditional Clauses Based on Other Answers The sample templates also include conditional clauses based on the choice made for the Renewal Type field. If Evergreen is selected, one clause is used, and if a different value is selected, an alternative clause is used that provides both the start and end date of the contract. 104
105 More Complex Configurations If greater control is needed over changes made to clauses within a specific contract, this requires one or two extra tables. In that case, it is generally necessary to have a "Contract Clauses" table that auto-generates new records for each clause linked to a specific contract type, so the contract clause record itself is edited, and then the print template just inserts all the clauses from the table of Contract Clauses. For such implementations, we recommend that you contract with our professional services team for assistance. There are many variables in terms of requirements that help determine the optimal design. Workflow There is currently no automation built out in the clause library, but there are fields that could be used to route approvals for new language to the approval team or the clause owner. 105
106 Insurance Certificates Table This table holds insurance certificates linked as attachments to Companies and Contracts. Each record in the table represents one insurance certificate linked to a unique vendor company, but may be linked to one or more contracts. Use Case Insurance certificates can be created in one of three ways: From a Company record, using the related table on the Related Records tab (preferred) From a particular Contract record, using the related table on the Attachments tab From the Insurance Certificate table action bar New Insurance Certificates are created with a default Status of Valid. They may also have a Status of Expired or Contract Inactive. The Expiration Date and Main Contact are required fields. The Main Contact is the person at the vendor company from whom a replacement certificate can be requested. You can customize the Type of Certificate choice list as needed; the default options include Auto, Worker's Comp, Excess Liability, General Liability, etc. 106
107 Insurance certificates are primarily linked to vendor companies in the Company table. Once you add an insurance certificate to a vendor record, it can be linked to any contracts with that vendor. Insurance certificate records contain information about related contracts for reference, held in the Contracts field. A time based rule, disabled by default, is designed to update the Contracts linked field with all contracts for that vendor that are currently pending or active. As a result, insurance certificates are automatically displayed within those contracts. An Insurance Certificate Owner is defined in the company record just above the Insurance Certificates related table. The Insurance Certificate Owner is notified fourteen days before one or more certificates is due to expire. When the Expiration Date arrives, the certificate's Status is updated in one of two ways: If any of the associated contracts have a Status of Active, the system updates the certificate's Status to Expired and an notification is sent to all the Contract Owners about the expired insurance certificate. If none of the related contracts are Active, the system updates the certificate's Status to Contract Inactive. 107
108 Ownership Insurance Certificate records are owned by their creator. Specifically, an Insurance Certificate record is owned by the user whose Login matches the Creator Login field. Automation The Insurance Certificates table contains rules that send notifications about upcoming expiring certificates. 108
109 Attachments Table The Attachments table holds contract attachments such as generated contract documents, performance bonds, inbound documents, and signed agreements. Each record in the table represents one attachment that is linked to a contract. Each attachment contains information about the parent contract for reference, held on the Contract Info tab. Use Case Attachments can be created directly from the Attachments table, from a contract, or by inbound . Attachments can have a Status of Active, Expired, Contract Inactive, or Superseded. Creating Attachments from the Attachments Table To create a new attachment directly, click New from the Attachments table action bar. You can select the parent contract on the Contract Info tab using the lookup icon next to the Contract Title field. DocuSign users also see the Merged File field and the Merge Signature Block action button. When the Merge Signature Block action button is pressed, a DocuSign signature page is appended to the file in the Attached File field and the merged file is put into the Merged File field. The action button uses an attached file action and a MS Word template signature page. The signature page is specially formatted to include DocuSign tags. A rule then converts the file in the Merged File field into a new Attachment record and then resets the Merged File field to empty. 109
110 Creating Attachments from a Contract Attachments can be created directly from a particular contract on the Attachments tab of the contract record. To create an attachment Click New on the Attachments action bar. Fill out the form and Save the record, which automatically links it to the contract. Attachments can be created from a print template using the Create and Attach action button in the Contract. They can also be created by an action that runs on files attached to inbound s sent to the Contract table's inbound address. Ownership Attachment records are owned by their creator. Specifically, an Attachment record is owned by the user whose Login matches the Creator Login field. 110
111 Attachment Types Table The Attachment Types table is a background table that holds a record for each value to be displayed in the Attachment Type field within the Attachment record. It also defines any special fields to be displayed for this attachment type within the Attachment record. Use Case Attachment Types can be created and edited by admins and Contract Managers. The Attachment Type and Fields to Show fields are pulled into the Attachments table as a link to selected fields from another table. The values in Fields to Show are used by visibility dependency options to control visibility of certain fields in the Attachment records depending on the Attachment Type selected. The Sort Order field is used to determine the order of the drop-down list displayed in the Attachment Type field within Attachment records. Ownership Attachment Type records are owned by their creator. Specifically, an attachment type record is owned by the user whose Login matches the Creator Login field. 111
112 Contract Tasks Table The Contract Tasks table holds tasks for contracts. Use Case Contract Tasks can be created from a related table in a Contract record. If a Contract Task is created from a Contract, the link to the Contract is populated; otherwise a Contract should be selected. The default Status for new Contract Tasks is Planned. On creation, the Assigned Person is notified of the planned task, unless the assignee is the task's creator. If no Assigned Person is chosen, the Assigned Team is notified of the planned task and asked to assign someone. When the Advance Notification Date arrives, the Status changes to Pending. Any open Contract Tasks (those in a Status of Pending or Planned) for a canceled contract will be updated to a Status of Canceled. 112
113 Ownership Workflow records are owned by the user the task is assigned to. Specifically, a record is owned by the user whose ID matches the Assigned Person ID field. 113
114 Contract Types Table The Contract Types table is a background table used to populate the Contract Type field of a contract record. Each Contract Type record holds a value displayed as a choice in the Contract Type field. It also determines the default approval workflow for the contract, as well as the default print template for auto-generation of draft contract documents. Use Case Contract Types can be created and edited by admins and Contract Managers. The Contract Type, Contract Type ID, Has Print Template(s), Default Print Template ID, and Contract Type Default Workflow ID, Extra Fields to Show are pulled into the Contracts table as a link to selected fields from the Contract Type table. If the Has Print Template(s) field value is Yes, additional fields in the Contract record are visible: Print Template to Generate and Create and Attach (an action button). The Default Print Template ID field is used to determine the default value in the Print Template to Generate field. Selecting a Default Print Template Title in a Contract Type record creates a link to the print template and updates the Available for Contract Types field in the associated Print Template record. The Default Workflow Title field is used to set the value for the linked field in a Contract that pulls in the Workflow Title from the Workflow table. Selecting a Default Workflow Title in the Contract Type record creates a link to the workflow. 114
115 You can view all associated print templates and workflows on the Print Templates and Workflows tab of a contract type record. From here you can use the related table action bar to Unlink a print template or workflow from the contract type record if necessary. 115

116 Print Templates Table The Print Templates table is a background table that holds a record for each print template used by the Contracts table or other system tables. It also keeps track of the Version Number of the attached print template document, and defines which Contract Types can use the print template in the Available for Contract Types field. Use Case Print Templates can be created and edited by admins and Contract Managers. The ID, Title, Template File, and Version Number fields are pulled into the Contracts table as a link to selected fields from another table. These are filtered to print templates whose Available for Contract Types field contains the Contract Type selected in the current Contract record. If multiple print templates are available for a Contract Type, the default value for the Print Template to Generate in the Contract is matched to the Default Print Template Title and Print Template File fields of the selected Contract Type. An abbreviation field is used in the resulting file name, so it is useful to populate any new print templates with a reasonable abbreviation. Inserting Variables into Print Templates Print templates may include field variables from the table on which the template is run, as well as from any table in the system. For instance, a template might have the text $contract_start_date in the place where the start date of the contract should appear. It may also pull in clauses from the clause library without creating a link to that clause within the contract. A special syntax is used for fields and records that do not live in the main table from which the template is run: $field_from_other_table(clause,41,clause_text)is used to indicate that the Clause Text field, or clause_text, for record with ID 41 in the Clause table should be inserted into the print template at this 116
117 position. Conditional Text, Fields, and Content There are several ways to insert conditions into a print template to use alternative text or alternative values. These are described in the Print Template Syntax Reference. It is common to have print templates with optional or conditional sections that may or may not appear when the template is run, based on meta data in the contract. Numbering of Sections If the print template is using HTML text fields either from the contract, or from clauses in the clause library, and you need section numbering with the contract, there are some special challenges with deciding what kind of numbering methodology to use. Auto-numbering can be used within the HTML clause field itself, within the template, or within the style used in the conversion. In the standard implementation, we have examples of three kinds of numbering methods. These are managed in the following Print Templates: NDA Numbered Normal Style is defined to use unnumbered clauses and the Normal style itself is configured in the template to use auto-numbering, so any clause included in the template will be numbered. This does not support subsection numbering. Default NDA for clauses with numbering is a template without any numbering that is used with a set of clauses that have the Word auto-numbering codes in the clause text field. Putting the numbering codes directly in the clauses permits numbered subsections with the clauses, and there is an example of this for the governing law clause. NDA clauses using table for numbering uses a Word table with two columns to hold the clauses. The first column has auto-numbering on and manages the number, and the second holds the clause text. The table shows no borders and is therefore invisible to users. This gives a nicely aligned look but can be a bit more challenging for users if they need to do a lot of editing of clauses and aren't familiar with working with Word tables. It does not support subsection numbering. Agiloft Hosted Agreement with Adobe Sign Tags includes a user selected Governing Law clause (in the contract), and up to four optional clauses selected by the user in the contract (these are put in the final section). It also includes Adobe Sign signature tabs as examples in how to insert such tags. Hosted Service Level Agreement Docusign Tags has the same Governing Law clause and optional clauses but uses Docusign (hidden) tags in the signing block instead of AdobeSign tags. 117
118 For more information on how these print templates interact with a clause library, please read the Clause Library Table section. Ownership Print Template records are owned by their creator. Specifically, a Print Template record is owned by the user whose Login matches the Creator Login field. 118
119 DocuSign Tables Overview DocuSign is an e-signature provider offering secure electronic signatures for documents. Agiloft provides embedded integration with DocuSign, and has completed an extensive certification process by DocuSign to verify that the Agiloft API is compliant with all DocuSign and e-signing standards requirements. You will need to set up an account at DocuSign before configuring the Agiloft interface. Visit the DocuSign website at to read FAQs and whitepapers, watch How-To videos, and learn more about the e-sign infrastructure. To see more about the DocuSign solution, view FAQs. Turning on the DocuSign extension creates several tables, fields, and actions in Agiloft. The Agiloft template has been preconfigured with DocuSign to the extent possible without a DocuSign production account, so these tables and fields are already created for you. To use DocuSign with Agiloft, you will need a Business or Enterprise license for at least one DocuSign user. Anyone in Agiloft who will send a contract document for signature via DocuSign will need a corresponding DocuSign user account. A DocuSign administrator account will be needed to complete the initial configuration within Agiloft. For full details on how to complete the configuration of DocuSign to deploy it, please review the DocuSign Users Manual. The manual gives a full, detailed overview of how to use DocuSign and how it works. Use Case for Signing Contracts The system is currently configured to use DocuSign with Contracts. Note that DocuSign integration can be added to any table in Agiloft by creating a DocuSign action in that table to create an envelope and adding the DocuSign Envelope and DocuSign Recipients related tables to the other table. For contracts, the DocuSign process begins by pressing the Create DocuSign Envelope action button on the DocuSign tab of a contract record. This buttons runs a DocuSign action, and that action can be edited if you have a different preferred configuration of signers. It is currently set to use one internal signer and up to two external party signers. These fields are on the Details tab of the contract record and should be filled in during the contract process. When the button is used to create the envelope, the user may click a Create & Preview button in the Envelope record to go directly to the envelope in DocuSign and preview everything before clicking the Send button to launch the signature process. Further details of this process are provided in the Contracts Table section, and in the DocuSign Integration topic. Print Templates We have set up a few sample print templates with DocuSign tags to use as a guide for your own contract print templates. One template, simply a page with a tagged signature block, is on the Attachments table, and the others are in the Contracts table. The tagging process is fully discussed in the manual, but to see a sample document in the system, go to Print Templates and open the print template with the title "Hosted Service Level Agreement Docusign Tags". This template has DocuSign tags in the Signature area the tags are not visible unless you mouse over the text and apply a different text color. The tags are stored in white font color so they do not appear on the final 119
120 signed document. If you add more signers or change the basic signing configuration, you will need to create your own tagged signature blocks. 120

121 DocuSign Users Table This table holds a record for each Agiloft user who will send documents to DocuSign by creating the envelope and clicking the Send button. Each record must have a valid DocuSign login to enable sending. Use Case The DocuSign Administrator and DocuSign Users, or Senders, must be set up at the DocuSign website first. The user must also exist in the People/Employees table in Agiloft. To set up the DocuSign User in Agiloft, click New in the DocuSign Users action bar to bring up the screen below: Look up the user by typing their name or login into the fields and using the lookup tool. Full Name the user's Full Name in Agiloft must match the name input at DocuSign. DocuSign User Name ( ) must match the address input at DocuSign. DocuSign Password must match the password input at DocuSign and be manually filled in. Then click the Grant Access to DocuSign action button to finish adding the DocuSign user. DocuSign Users (senders) will have account records on both Agiloft and DocuSign. DocuSign Recipients (signers) are not required to have Agiloft or DocuSign account records. Every person who sends out documents for signature, called DocuSign Users in Agiloft and Users with Sender Permissions in DocuSign, must have a user record in the following places: The People/Employee table of Agiloft The DocuSign Users table The Users table of the company's account at DocuSign A successfully created DocuSign User record will look like the screenshot below: 121

122 At this point, the person is set up to send documents for e-signing through Agiloft and DocuSign. 122
123 DocuSign Roles Table This table is used to name the roles that will be assigned to Signers and people identified as Recipients in the Agiloft DocuSign Action which creates the DocuSign Envelope. It is prepopulated with four roles: Customer3, Customer2, Customer1, and Internal Signer. When choosing recipients from within the DocuSign Action wizard, the admin selects from this list for each recipient. The role name is used in the DocuSign tags that are added to the document to match a Signer to his role, and the role names must match exactly. New roles may be added as needed and applied to the Signers and the document tags. 123

124 DocuSign Envelopes Table This table holds the DocuSign Envelopes, which contain a link back to the Contract record from which they were created in the Linked Record field. The table also contains an embedded table of the DocuSign Recipients list and the Attached Documents field which holds the attached files to be reviewed/signed. By default, a DocuSign Envelope is created when a user clicks the Create DocuSign Envelope in the DocuSign Envelopes tab of a Contract record. The DocuSign Envelopes tab of a Contract is currently visible only to users in the admin and DocuSign Users groups. How the envelope and recipients are populated depends on the configuration of the action run by the Create DocuSign Envelope button, and it may be changed by updating the action. The Status of an Envelope is updated automatically based on its progress at DocuSign. Once it has been sent to DocuSign, it will have a Status of Created and will show the Envelope ID at DocuSign. As each Recipient signs, the Status of the Recipient record will be updated to Completed. More details on working with DocuSign Envelopes are provided in the section "Create a DocuSign Envelope" in the DocuSign Users Manual. Ownership DocuSign Envelope records are owned by the sender of the envelope. Specifically, records are owned by the user whose Login matches the Sender Login field. 124
125 DocuSign Recipients Table This table holds the Recipients for a particular DocuSign Envelope. They are linked to the DocuSign Envelope record and to the Contract record from which the Envelope was generated. The Recipient records are created automatically based on the configuration of the DocuSign Action that generates the DocuSign Envelope record. Recipients can also be added manually to a DocuSign Envelope if needed. The Send Order controls the order in which signatures are requested by DocuSign. Each Recipient should have a different Role Name for a given contract. The DocuSign Envelope and DocuSign Recipients tables are usually accessed from within a contract record. Ownership DocuSign Recipient records are owned by the user whose Login matches the Sender Login field. 125
126 Adobe Sign Tables and Setup We have pre-deployed the Adobe Sign integration in addition to the DocuSign integration so that new customers can take advantage of either esignature system, with minimal effort. There is a permission group called Adobe Sign User. Only people in that group and the admin group will be able to see and work with the Adobe Sign elements, by default. These include record visibility of the three Adobe Sign Tables discussed below, and the fields within the contract record for the Adobe Sign elements, including the button to generate the Adobe Sign Envelope from the contract. Agiloft is an Adobe Sign partner, and Agiloft customers may use the Adobe Sign integration without setting up a separate account or contract with Adobe Sign. Agiloft admin users may set up the Adobe Sign integration directly from the Setup menu, and may go there to purchase Adobe Sign envelopes from Agiloft as needed, with a minimum purchase of 25 envelopes. Setting Up an Adobe Sign Account To set up your own Adobe Sign account, go to Setup > Integration > Configure Adobe Sign to open the account form: Decision About Who Documents Come From There is an important decision to make about how documents will be sent for signature. Two sending models are available: 126
, but they can include the actual person who is sending them in the subject or content of the email.")
127 1. 2. You can use the Adobe Sign account main address for all sending. This is the "admin" account you are going to set up in just a moment. The s to signers will appear to come from that address (they actually come from echosign), but they can include the actual person who is sending them in the subject or content of the . This is currently the most reliable sending model, and unless you find the generic address objectionable, we recommend using this approach, for simplicity. You can create "sub-account" users for each user at your organization who will need to send a document for signature, and let them send under their own identity. We have an automated process to create such users for your account, but due to a current Adobe Sign limitation, this is not 100% reliable. The limitation is as follows: if a person has ever signed an Adobe Sign document or if their address is already associated with another Adobe Sign account, they cannot be automatically created via the integration API as a sub-account of your new Agiloft Adobe Sign account. Instead they are in a locked or pending status at Adobe Sign, and only the Adobe Support team can create this user in a usable status so they can send documents for signature. In the screenshot shown above, the option: "Choose an field from the People table to identify the sender" is used to define the account to use for sending. When a person tries to send a document for signature, the system looks at the value in the field defined here in the sender's user record to know what login ( ) to use for the sending at Adobe Sign. If you choose the field, then the system will try to send under the user's own address. You will need to make sure each user is created as a user in the Adobe Sign account, or their sending will be unsuccessful. If you prefer to have the documents sent under the admin account, then choose an field here that will hold the admin account in the user records for the users who you want to be able to send. We have provided a default field called Adobe Sign Sending Account in the people table. If you have an older Agiloft KB you can add such a field yourself: You can add the Adobe Sign admin address to this field (located on the history tab, it is only accessible to admin users) for all users who should be able to send documents for signature. Then when they send, the system will use the value in that field as the login for the sending. It is of course, also possible to set up some users as senders, and put their own address in that field, and then only use the admin account for those who cannot be successfully set up at Adobe Sign. Creating the Adobe Sign Account To set up an Adobe Sign account, click the Register a New Account button on the form shown above. This will bring up a form on an Agiloft server where you can choose the account type, define the address to use for the Adobe Sign account, and so on: If you are still in testing mode, you can create a development account and send practice envelopes at no cost. Once you are ready for production, you will deactivate the development account and create a new production account. The new account will need to use a different address, so plan on that from the beginning. Be sure to write down your account address and password for the new Adobe Sign account. Once you 127

128 finish filling out this form, you will be returned to your KB setup screen. Check the inbox for the account you entered as the Adobe Sign Account address. You will have received a verification from Adobe Sign. Click the link in that to verify your account. Back in the Agiloft setup screen, click on the Proceed with Account Setup button to refresh the screen with some additional options. Enter the Knowledge Base Server URL - this is the custom URL that is used as the hostname of the Agiloft server, i.e. When you have entered that URL and verified your Adobe Sign account, you can click the Grant Access to Adobe Sign Connect button. This will bring up an Adobe Sign login screen. Enter the credentials for your new account. You will be asked to allow access to Agiloft: Click the Allow Access button. Go back to the Setup screen and click the Grant Access to Adobe Sign Connect button again. The screen will refresh and you should see that access has been granted: Now you are ready to start using the integration, unless this is a production account. 128
129 Using a Production Adobe Sign Account If you have created a production account, you will need to buy envelopes before you start sending documents for signature. You will see two buttons on the integration setup screen: Manage Account - this button takes you to a view of your account showing the number of envelopes you have purchased and sent, and allows you to also buy envelopes from there. Buy Envelopes - this button brings up the purchase screen where you can enter a credit card to purchase envelopes: The current pricing tiers are shown on the purchase screen - the price per envelope depends on the volume purchased. The default minimum purchase is 25 envelopes unless you have special volume discounted pricing. Once you have purchased some envelopes you are ready to start sending contracts for signature. Adding and Removing Adobe Sign Users Automatically If you have chosen to have individual users send under their own Adobe Sign sub-account, you will need to update the users to create their Adobe Sign sub-account. There are two rule actions on the people table, similar to rule actions for DocuSign: 129
130 There is a field in the employee table called Adobe Sign Sender, which has a Yes/No value (default value is No). When a new employee is created in the system, if that field has a Yes value, the system will try to create the user at Adobe Sign. There is also an edit rule on the employee table that runs if the Adobe Sign Sender field just changed. It handles creation or removal of a user at Adobe Sign: So to create users at Adobe Sign, you just need to identify the users, and update that field (located on the History tab). Only admin users can modify that field. Naturally if you have not yet set up an Adobe Sign account, these actions will fail. Adobe Sign Tables The Adobe Sign Envelopes and Recipients tables are shown within the contracts table or any table in which an Adobe Sign action is configured. By default, Adobe Sign has been configured to work with the Contracts table. Adobe Sign Envelopes Table Purpose: This table holds the Adobe Sign Envelopes, which contain a link back to the Contract record from which they were created in the Linked Record field. The table also contains an embedded table of the Adobe Sign Recipients list and the Documents to Send field which holds the attached files to be reviewed/signed. Once the envelope has been previewed and sent, it will be given an Adobe Sign Envelope ID and one of the paid envelopes will be used. 130
131 Within the envelope, you will be able to see the recipients and their signing status as well: Signing may be set up to happen sequentially or in parallel. It is also possible to change the default reminder frequency and deadline before the envelope expires within the envelope record. As each signer responds, the Signed Documents will be updated with the latest version of the signed document, and an Audit Log file tracks all behavior within the system. The Send Reminder button can be used to send a reminder to any signer who has been notified but has not yet signed. The Cancel Envelope button can be used to cancel the signing altogether. Sign by Sender will add the sender's signature if he/she has been identified as one of the signers. 131
132 Adobe Sign Recipients Table Purpose: This table holds the Recipients for a particular Adobe Sign Envelope. They are linked to the Adobe Sign Envelope record and to the Contract record from which the Envelope was generated. The recipient records are created automatically based on the configuration of the Adobe Sign Action that generates the Adobe Sign Envelope record. Recipients can also be added manually to an Adobe Sign Envelope if needed. The Update Recipient at Adobe Sign button is used to modify the signer's contact details, in case of an error. This can only be used before the envelope is sent to the signer. Adobe Sign Statuses Table Purpose: This table holds some status values to provide users with a customizable list of statuses that may be more meaningful than the Adobe Sign default statuses. The status values appear within the envelopes and recipient records. It allows several statuses to be grouped under a status category such as Draft or Sent and provides some description about the meaning of some of the more obscure statuses. 132
133 133
134 Service Desk Operation Tables The system is prebuilt with the core functionality needed to manage a complex IT organization, including Service Request Management, Incident Management, Problem Management, Change Management, Asset Management, Purchase Management, Project Management, and more. The relationship between these tables was designed according to the basic principles of the ITIL framework. ITIL is a set of best practices intended to improve IT service while reducing failures and costs. Please review the differences listed above between this standard system and our specialized ITIL system to determine which starting point suites your needs. This system is not a complete ITIL system and it does include full SLA and OLA management. If you need that functionality, we recommend starting from the ITIL template. The general principal of the standard system setup is to point services that require no special approvals into the Service Request table and to point services that require approvals into the Change request table, keeping the workflows for each request type distinct and simple. Services such as New Employee Setup and Password Resets are therefore handled within Service Requests. We have also designed the system so that if a person has a problem with a printer, it does not require creating an incident, a problem, and a change request just to get a new ink cartridge installed. Some would interpret this as the "correct" ITIL process, and if you want to use the more extended process we have made it as easy as possible. From any record a button can be clicked to create the related records and map field values from the current record to avoid duplicate text entries when creating problems, change requests and incidents. We have prebuilt the relationships and functions that many companies may want, while trying not to force too much complexity on those who may prefer a nimbler and more efficient implementation. This is a rather difficult balancing act, and while we have done our best to get it right for the largest number of customers, the real power of the system is in how easy it is to change it to adapt to your company's specific preferences and needs. We offer guidance throughout this document on how to make changes to the critical relationships and behavior to suit your needs. 134
135 Alternative Knowledgebase for Service Operations Agiloft provides two starting points for managing service desk operations: this standard template, and a Pink Elephant-certified ITIL-based template. There are many similarities between the two systems, and the standard system does follow some of the ITIL best practices. But if you want a fully ITIL compliant system that supports more complex processes and additional features, we do recommend starting from the ITIL template. Please note that it is important to start with the best template - do seek our advice if you are not sure which is best for your needs! Here is a brief list of the some of the differences between the two templates: Standard KB Service Requests: Can include task workflows, no approvals Minimal SLA tracking Change Requests: Includes approval and task workflows Incidents: Simple structure, independent of service catalogue No SLA tracking Documents: Basic FAQ and internal document functionality with links from Service Requests, Incidents, and Problems ITIL KB Service Requests: Can include task and approval workflows Includes purchase request services Full SLA tracking with SLA targets and escalation OLA tracking Includes service cost tracking Change Requests: Includes approval and task workflows Calendar integration for scheduling changes Includes Change windows and freezes Includes baseline tracking Links to Release Management and Knowledge Management Includes configuration item diagrams to show relationships and impact of changes Incidents: Included in Service Catalogue Full SLA targets and tracking Links to Event Management and Knowledge Management Knowledge Articles: Full featured knowledge management, with links throughout the system Topic subscriptions by employees Automatic creation of articles from Service Request, Incident, Problem, Change Request, Configuration Item 135
136 SLA Management: Limited to single targets for services No OLA Management SLA Management: Full featured system with multiple SLA groups and Service-specific, CI-specific, and Team-specific SLAs available Integrated into all process tables OLA (Operational Level Agreement) Management included at the individual task level to measure performance of internal and external teams Event Management: Not included Release Management: Not included Service Catalogue and Portfolio: Includes basic service catalogue used within service requests, change requests and purchase requests Event Management: Included with ability to integrate with any event monitoring system Can automatically create and resolve incidents and update configuration item status Fully customizable event types and rules Release Management: Full featured system, with links to configuration items, change requests, and service requests Task and Approval workflows Service Catalogue and Portfolio: Includes workflow for service onboarding Full featured service catalogue(s) with user-friendly, catalogue-based end user interface Supports multiple service catalogue subsets for different users and roles Services in the catalogue are used in service requests (purchase requests are folded into service requests), change requests, and incidents 136
137 Terminology A note about terminology: We use the term end user to mean users who access the system through the end user interface, a simplified interface that allows them to create records of any kind, view any records made available to them, edit records defined as their own, and view any FAQs made available to them. These users cannot edit records defined as belonging to other people and they use the unlimited end user license. We use the expressions "End User" or "Customer" interchangeably in this document to refer to company employees whose main role in the system is to make requests on their own behalf or for someone else (typically their supervisor or supervisee). We use the term staff to indicate the people who are working on other people's issues they may be solvers, technical support staff, IT staff, approvers, developers, sales reps, managers, or any other types of users who access the system through the staff interface. "Technician" may also be used to refer to members of the IT organization or other teams that will be responsible for handling, creating, or responding to requests submitted by customers or other technicians. Both end users and staff users may be employees of your company. Staff users require their own named license or may share a concurrent staff license. This section describes the setup for the main process tables involved in running the support operation: Service Requests, Incidents, Problems, Change Requests, Assets, and Purchase Requests. 137

138 Request Tables Overview In defining the default table structure for the service desk operation, we had a few basic goals: To make it easy for end users, or customers, to know where to go to request what they need and to follow up on their requests To make the backend processing and workflows as simple and clear cut as possible for the technical users and approvers who must process the requests To make the system easy for administrators to understand and maintain so that changes may be easily made to one kind of request and how it is processed without affecting everything else The default setup aims to find a balance between all three of these goals. We have chosen to segment customer requests into a few distinct request types and tables illustrated in the diagram: The service catalog offers services to the end user that may be created in one of three tables: Service Requests, Purchase Requests, or Change Requests. Whether or not a particular group of users can request particular services can depend on their group permissions for instance, our default internal end users cannot directly create a Change Request, while technical users can. An end user may also submit an incident to report a problem or interruption to a business or technical service. If merited, that incident may lead to the creation of a Problem and a Change Request by technical staff. Service Requests and Change Requests may include a set of tasks that need to be completed before the request can be completed. The system may be configured so that end users simply create records directly in any of these tables and choose the appropriate service from the service catalog once in the record, or it may be set up to offer users a set of hotlinks to create requests for specific services without them needing to know what table will be used to store and process the requests until after they have created them. The separation of requests into these tables makes maintenance and processing simpler than if they were all in a single table, since the fields, form layouts, access permissions, workflows and rules can be specific to the 138
139 needs of the particular request type. The orange arrows in the diagram above show the predefined conversion paths a request may easily take, if a technician believes it is appropriate: a service request can, with a click of a button, generate an Incident or a Change Request, or can be linked to existing incidents or changes. Likewise, an Incident can generate or link to an existing Problem, while a Problem can generate or link to a Change Request. A Problem may be related to multiple Incidents and a Change Request may be related to multiple Problems, Service Requests, and (through Problems) Incidents. Naturally there are relationships within each of these tables to Users, Teams, Assets, and other essential components of the system. 139
 is created when an internal customer needs a new service, a standard, pre-approved change to an existing service, a password reset, or some other kind of assistance or")

140 Service Requests Table The Service Requests table holds all customer service requests. A service request (SR) is created when an internal customer needs a new service, a standard, pre-approved change to an existing service, a password reset, or some other kind of assistance or information. When the user needs to report an interruption in service or a problem with an existing service, an Incident should be created instead. We have chosen to separate service requests from incidents because these two kinds of request have rather different workflows and resolution criteria. An incident may often require the generation of a Problem and a Change Request, while Service Requests will generally be self-sufficient and relatively quick to resolve. The easy way to distinguish Service Requests from Incidents is to recognize that Service Requests are the kinds of things you will choose from a service catalog, such as application assistance, password resets, new employee setup, documentation or copying services, and so on. If a user creates a Service Request when he should have created an Incident, the technician may click the Save Changes and Copy to Incident button on the Related Records tab of the SR form to easily convert that Service Request into an Incident and have all the fields mapped appropriately. The Service Request table uses the same choice list of service categories as the Services table. A user creating a service request chooses the category of service from a drop-down, and then sees all the active services that belong to that category in a second drop-down list. The default service categories for service requests can be seen in the services table or by creating a SR record and opening the drop-down list. 140
141 Use case Service Requests may be created by telephone support staff or technicians on behalf of customers or by customers directly through the web interface or by inbound , should an inbound account be set up. End User Record Submission When a customer submits a Service Request, the contact information fields automatically populate based on the details in his/her User record. In the default setup, a request cannot be submitted on behalf of a user who has no user record in the system. This may easily be changed by modifying the linked fields from the User table to enable "non-source" values to be used. The user is required to select a service after selecting a service category. When the service is selected, the user will see a description of the service, any special instructions for that service, and any additional dependent fields defined to be visible for that service. He may then provide further information and click Save to save the form, after which he will receive an acknowledging receipt of the request. 141
142 Automatic Assignment of New Requests When a new request is saved, it is automatically assigned to a team based on the values in three fields pulled from other tables (Rule: All new Service Request actions, Action: Assign Service Request). The related service has a Responsible Team associated with it and a field called Give Service Team Priority over Asset Team that has Yes/No values. If a Asset was identified for the request, then there is also an Asset Responsible Team field that will be populated in the SR. The current assignment logic is: if the Service Request involves a specific Asset, then the request is assigned to the responsible team for that Asset, unless the Give Service Team Priority over Asset Team field is set to Yes. In this case, or If no Asset is defined, then it is assigned to the Responsible Team for the Service. If there is no Responsible Team for the Service, then it is assigned to the 1st Level Support Team. Naturally, this logic may easily be changed to suit your organization. You can simply set a default value such as the 1st Level Support Team or you may choose some other logic to use based on different fields. The current logic is implemented in the SR rule named "All New Service Request Actions" and may be modified there. Technician Record Submission If a technician creates the SR, he may choose an assigned team and assigned person from the drop-down fields, and his changes will not be overwritten the rule only assigns if the Assigned Team field is empty when the record is saved. New SRs are created in a Status of Open by default. During creation, a technician may change the Status to In Progress if they wish to indicate they are already starting work on it, or Closed if they were able to resolve the issue immediately and want to capture the request for reporting purposes. Automatic s Sent upon Submission If a Support Staff technician creates a record in a status of Closed an is sent to the customer telling them how to reopen the Service Request. This is sent by a workflow action and is displayed as a checkbox that can be turned off by technician users. This option is set in the workflow options, and can be modified. If the status is not Closed when saved, the rule named "All New Service Request Actions" will send the customer an acknowledgement and will also send an to either the Assigned Person, if there is one, or to the Assigned Team. Using Tasks for a Service Request Some services are defined to have a set of tasks that should be completed. The task method is defined in the service record as described above in Tasks for Service Requests. If tasks are associated with the service, they are manually generated by the technician responsible for the service request when ready, on the Tasks tab: 142

143 In the screenshot above, the user has generated two of the user-selected tasks by using the Generate Tasks button, and has also created an ad hoc task using the Create Ad Hoc Task button. For the user-selected tasks, the Generate Tasks button remains visible in case the user decides to check additional boxes after generating the first tasks. Validation prevents the same tasks from being created a second time for the same service request. Tasks are created with a status of Queued or Conditional. Conditional tasks are only needed if some particular field condition is met and are defined in the task template. A rule running on creation handles assignment. Once the tasks have been generated, the Launch Tasks button becomes visible. When the Launch Tasks button is clicked, all tasks that have no prerequisite tasks, or whose prerequisites have been marked as Not Needed, are set to a Status of Assigned, and the assigned team or person is notified with an . The Date Due is also set based on several criteria. Below is an example of tasks for a service request that were generated from a task workflow in which two of the tasks have prerequisite tasks: The Sequence field is used to indicate the general sequence of tasks. If all the tasks have a Sequence value of 1, this indicates that they are likely all parallel tasks triggered at the same time. If a task has one or more prerequisite tasks, its sequence value is automatically set to the highest sequence value of its prerequisite tasks plus 1. So if a task has prerequisites whose Sequence values are 1 and 4, it will be set to 5. This numbering is not functional, it is just descriptive of the general order in which the tasks are expected to be done. If there are tasks that have prerequisite tasks, those tasks remain in the Queued or Conditional status until all 143
144 of their prerequisites are completed. When they are completed, conditions are checked for the conditional tasks and the status is set to Assigned or Not Needed if the condition for a conditional task is not met. In the example above, the last two tasks are Queued waiting for their preceding tasks to be completed. The top two tasks were assigned at the same time, since they had no prerequisites. When tasks are used, two fields track the number of tasks and the number of completed tasks with a terminal status. When these two fields match, meaning that the final task has been completed, a rule notifies the assigned person, or assigned team if there is no assigned person, that the final task is done (Rule: Tasks Just Completed; Action: Notify Assigned team or person of completed tasks). Processing of Records If a technician working on a Service Request needs more information from the customer in order to take further action, she can set the status to Pending Customer. A workflow action will automatically send an to the customer requesting further information and including the content of the Additional Notes field, an append-only field that is used to communicate with the customer. The includes a hyperlink for the customer to click to edit the Service Request directly. If the technician needs to reassign the Service Request to a different team or person, he or she simply changes the Assigned Team and/or Assigned Person field and the system will the new assignee notifying them of the reassignment (Rule: Assigned team or person changed; Action: I: Notify team or person of new assignment). The Staff Only Notes field is an append-only field that holds technician working notes that are not visible to the customer. When the technician has completed work on the Service Request, they set the Status field to Closed and put the solution notes into the Solution field. This triggers a workflow to the customer that includes the content of the Solution field and tells the customer that the request has been completed. By default, no escalation rules are set up for the Service Request table. Reviewing for Knowledgebase and Standard Solution Inclusion When the Status is changed to Closed, additional required fields become visible at the bottom of the Working tab: The person closing the request is required to update the Standard Solution field and the Review for Knowledgebase fields. The Standard Solution defines a subset of requests that have a Resolution field value that may be reused in another request. Requests with a Yes in that field become available to the lookup next to the Resolution field: 144
145 That lookup searches for standard solutions and provides a button to import their Resolution field value into the request that is currently being edited. So it is helpful to mark useful responses in this way so they can be reused. The Review for Knowledgebase? field is used to create another subset of requests that should be considered for conversion into a Document FAQ. The conversion to a Knowledge Article may be done directly by the service technician using the Create Knowledge Article button shown above, or that button may be permission-controlled to be visible only to someone in a higher level group. There is a built-in report finding all service requests with a Yes value in the Review for Knowledgebase field and a Pending Review value in the Knowledge Document Status field. This report can be scheduled and mailed to a team responsible for creating new Knowledge Articles in the Documents table. Clicking the Create Knowledge Article button opens a new document record and maps fields from the request into fields in the new record. Additional fields can be filled out as well. When the document record is saved, a runs and updates the service request to set the Knowledge Document Status to a value of Created. That hides the create button so it will not be converted again. If upon reviewing the request, the reviewer determines it should not be converted, they can change that field to Not Needed so that the request will stop appearing on the reports of items to review. Reporting Time Spent Technicians may easily report the time they spend on handling service requests. There are two fields: Time Spent and Time Description, and an action button: Add Time, on the Working Notes tab of the layout. Entering values there will automatically create a new time entry record when the Add Time button is clicked. The time entry will show the work done by the technician and on the current date. 145
146 All the time entries for a request can be seen on the Time tab as well. If a technician needs to report time that was spent on a different day or by a different user, he may click the New button on the Time spent table to submit a time entry directly and change the date or "Done by" field. All time entered is totaled in the All Time Spent field, which can be used in reporting or billing. The Add Time action button converts the time fields into a Time Entry record and then blanks out the current values so they will be empty. Note that this same time entry methodology is used in the Incident, Problem, Change Request, and Task tables. Time spent on each type of request will be held in the Time Entries table, from which reports may easily be run for all kinds of time. Customer Updates If the customer updates the Service Request at any point, an notifies the assigned person, or assigned team if there is no assigned person, of the update. When the customer replies to the or edits a Service Request in a status of Pending Customer, the status changes to Updated by Customer (Rule: all customer update actions, Action: User Update Actions) and an notifies the assigned person, or the assigned team if assigned person is empty, that the customer has replied. The customer is able to update the Additional Notes field directly and replies are mapped to that same field. The closing to customers includes a hotlink back to the record if they wish to reopen it and instructs 146

147 them to explain why they are not satisfied with the solution. Clicking the hotlink will automatically change the "I Would Like To Reopen My Service Request" field to Yes, which in turn sets the Status of the Service Request to Reopened and notifies the assigned person (Rule: All customer update actions, Action: User Update Actions). Workflow Ownership Records in this table are "owned" by the individual customer. This means each record is associated with a particular login and no other "end user" employee will be able to edit that record. All technician users are able to edit any service request by default. Reporting and Statistics Several fields are included that are used for statistical reporting. The following fields may be of interest: Number of Assignees is auto-incremented each time the assigned person changes (Rule: Assigned team or person changed, Action: Notify team or person of new assignment) Number of Teams Assigned is incremented each time a different team is put in the Assigned Team field (Rule: Assigned team or person changed, Action: Notify team or person of new assignment) Number of Reopens is incremented each time a closed request is reopened by a customer Total Hours to Close elapsed time between Date Created and Date Closed, which is the default value 147
148 Working Hours to Close elapsed time between Date Created and Date Closed minus the non-working hours of the team in the Assigned Team field and the time during which the Status was Pending Customer, which is the default value Solved Within SLA yes/no field with default value of Yes, is set to No when the total hours to close is greater than the relevant SLA Hours to complete field, which is pulled in with the service and based on priority (Rule: Status Change Actions, Action: All status change actions) There are default reports measuring Total Time Spent by Service Category, Average time to close by service category and by person who closed, as well as averages for number of people assigned, number of teams assigned, number of reopens, and so on. With the field structures already there, it is easy to add reports to slice and dice the information the way you need it. 148
149 Incidents Table Incidents are used to report service problems and outages. They are interruptions to customer service. The objective is to return to the normal service as defined in an SLA as quickly as possible with minimal business impact. An example Incident for an end user might be: "I cannot access my ". What is the distinction between Service Request and Incident? Incidents are interruptions or degradations of an existing service that need to be rectified. They are problems that need to be solved, rather than a request for new service or a change to a functioning service, such as a new employee setup or new software application request. Incidents may result from underlying problems caused by misconfiguration or hardware failures, and an underlying problem may result in the submission of several incidents by end users. When this is the case, the underlying problem may be reported and managed in a separate Problem record. When an incident is caused by an underlying problem, the technician working on the incident can link the incident to an existing Problem record or convert it to create a new Problem record. They may also click the Save and Create Change Request if they wish. The Change Request table will keep track of Incidents that are converted onto it. Problems may require significant changes in order to be permanently resolved. In this case, the technician working on the Problem will link it to a new or existing Change Request. While a Problem may stay open until the Change is implemented, often a workaround is found to resolve the interruption in service for the customer. The system is set up to make it easy to generate and relate Incidents, Problems, and Changes, and to quickly and automatically propagate workarounds from problems into all related Incidents. 149
150 150
151 Use Case Incidents may be created by internal customers through the web portal or via , or by a technician taking a telephone call from a customer. They may also be created by network monitoring systems configured to send problem reports to the system through one of the standard APIs. A field in the Incident form specifies the reporting source, such as , web, or phone. A technician may also convert a Service Request to a new Incident via an action button in the SR form if a customer submitted a Service Request when they should really have submitted an Incident. See Details of Incident Rules in the Appendix for more details. End User Record Submission When a customer submits an Incident, the contact fields automatically populate based on the details in the User record. In the default setup, an Incident cannot be submitted on behalf of a user who has no user record in the system. This may easily be changed by modifying the linked fields from the User table to enable "non-source" values to be used. The customer selects a category for the Incident from the drop down list "I'm having a problem with...", such as ' ' or 'Access Problem', then describes the problem in more detail via the Summary and Description fields. The customer is also given two fields to describe the priority of the Incident: Impact and Urgency. Impact specifies how widespread the Incident is: A user whose desktop computer is malfunctioning would choose 'Affects Single User', whereas a critical server failure might be classified as 'Affects Company'. Urgency is a subjective measure of the criticality and time sensitivity of the Incident, and ranges from Low to Critical. Both Impact and Urgency are used to automatically determine the official Priority of the Incident, a field which is hidden from the end user and only editable by staff. See Incident Rules for the current logic used to set the Priority. Priority is only set by a rule if the staff user has not already manually set it. After providing the summary, description, category, impact, and urgency, the user clicks Finish and receives an automatic notification when the system creates the record. Technician Record Submission A technician creating an Incident sees additional information relating to the status of the Incident, including assignee and status fields. Unlike end-users, staff can see an additional section on the details tab for Asset Information that shows fields relating to a specific Asset. By default, Incidents are created with the "Problem Asset Identified?" field set to No, but if a staff person determines the Asset that is the root cause of the Incident, he or she may set this field to Yes and select a Asset via a linked field set. By default, Incidents without an Asset identified are assigned to the 1st Level Support Team. Technicians can also set the assigned team and assigned person manually via drop-down lists in the Work Status tab. If the Problem Asset has been identified, the staffer can set the field "Assign to Asset Responsible Team" to Yes and when the Incident is saved, a rule will detect the change and assign the team responsible for the Asset selected to the Incident. A technician may change the Assigned Team field later, as the rule will only set the Assigned Team at the time the Asset field changes to Yes. New Incidents are created in a status of Open by default. During creation, a technician may change the status to Assigned to indicate they have already started working on it, or Closed if they are able to resolve the issue over the phone and wants to capture the request for reporting purposes. 151
152 Automatic s Sent upon Submission If a Support Staff technician creates a record in a status of Closed an is sent to the customer telling them how to reopen the Incident. This is sent by a workflow action and is displayed as a checkbox that can be turned off by technician users. This option is set in the workflow options. If the status is not Closed when saved, the rule named "Incident - All Creation Actions" will send the customer an acknowledgement and will also send an to either the Assigned Person, if there is one, or to the Assigned Team if not. Processing of Records When a technician works on an Incident, if they needs more information from the customer in order to take further action, they can set the status to Pending Customer. A workflow action will automatically send an to the submitter requesting further information and including the content of the Additional Information field, an append-only field that is used to communicate with the submitter. The includes a hyperlink for the customer to click to edit the Incident directly. If the technician needs to reassign the Incident to a different team or person, they simply change the Assigned Team and/or Assigned Person field and the system will the new assignee notifying them of the reassignment (Rule: Incident Edit Actions, Action: I: Notification Actions). The Staff Only Notes field is an append-only field that holds technician working notes that are not visible to the customer. When the technician has completed work on the Incident, they set the Status field to Closed and put the solution notes into the Resolution field. This triggers a workflow to the customer that includes the content of the Resolution fields and tells the customer that the request has been completed. Relating Incidents to Problems If an incident has an underlying problem that needs to be addressed, the technician may quickly convert the Incident into a related Problem record. Or they may use the Linked Problem lookup to search for existing Problems that may be the cause of this incident, and if one is found, link the Incident to that Problem. When an Incident is linked to a new or existing Problem, the Incident may be automatically updated from the Problem record when a workaround or solution to the Problem is identified. Within the Problem record, a button may be pressed to copy the workaround for the problem into all related Incidents, set the Status of the Incident to Workaround Provided, and the customer and assigned rep. Another button may be pressed to populate the Problem's Solution into the related Incidents, set their Status to Closed, and the customers. 152
153 Reporting Time Spent Technician users may easily report the time they spend on handling Incidents. There are two fields and an action button for this purpose Time Spent, Time Description, and Add Time on the Working Notes tab of the layout. Entering values there will automatically create a new time entry record when the Add Time button is clicked. The time entry will show the work done by the technician and the current date. All the time entries for a request can be seen on the Time tab as well. If a technician needs to report time that was spent on a different day or by a different user, they may click the New button on the Time spent table to submit a time entry directly and change the date or "Done by" field. All time entered is totaled in the All Time Spent field, which can be used in reporting or billing. Note that this same time entry methodology is used in the Service Request, Problem, Change Request, and Task tables. Customer Updates If the customer updates the Incident at any point, an notifies the assigned person, or assigned team if no assigned person, of the update. When the customer replies to the or edits an Incident in a status of Pending Customer, the status 153

154 changes to Updated by Customer (Rule: Incident Customer Update Actions, Action: Submitter Update Actions) and an notifies the assigned person, or the assigned team if assigned person is empty, that the customer has replied. The customer is able to update the Additional Information field directly and any reply from the customer is mapped to that same field. The closing to customers includes a hotlink back to the record if they wish to reopen it and instructs them to explain why they are not satisfied with the solution. Clicking the hotlink will automatically change the "I Would Like To Reopen My Incident" field to Yes, which in turn sets the Status of the Incident to Reopened and notifies the assigned person (Rule: Incident Customer Update Actions, Action: Submitter Update Actions). Workflow Ownership Records in the Incident table are "owned" by the individual submitter. This means each record is associated with a particular employee login and no other "end user" employee will be able to edit that record. All technician users are able to edit any Incident by default. Reporting and Statistics Several fields are included that are used for statistical reporting. The following fields may be of interest: Number of Assignees is auto-incremented each time the assigned person changes (Rule: Incident Edit Actions, Action: Notification Actions) Number of Teams Assigned is incremented each time a different team is put in the Assigned Team field (Rule: Incident Edit Actions, Action: Notification Actions) Number of Reopens is incremented each time a closed request is reopened by a customer Total Hours to Close elapsed time between Date Created and Date Closed 154
155 Working Hours to Close elapsed time between Date Created and Date Closed minus the non-working hours of the team in the Assigned Team field and the time during which the Status was Pending Customer There are default reports measuring Total Time Spent by Type of Problem, Average time to close by Type of Problem and by person who closed, as well as averages for number of people assigned, number of teams assigned, number of reopens, and so on. With the field structures already there, it is easy to add reports to slice and dice the information the way you need it. 155
156 Problems Table Problems represent the root cause of one or more Incidents or possible Incidents. Resolving a problem means resolving/preventing related Incidents. Incident Management is concerned with restoring service as quickly as possible, whereas Problem Management is concerned with determining and eliminating root causes, which eliminates repeat problems. The primary objectives of Problem Management are to prevent Incidents from happening and to minimize the impact of Incidents that cannot be prevented. 156
157 157
158 Use case Problem Creation When an incident is determined to be based on an underlying Problem, first-response support technicians create a Problem record from the Incident, automatically creating a link between the Incident record and the Problem. The new problem record imports relevant information from the Incident, such as the linked Asset. Problems are also creatable independent of existing Incidents, such as in cases where a problem is discovered internally but no Incidents have been reported. Resolution of problems may require Changes to the system. Staff addressing the problem may determine that a shared Asset needs to be replaced or modified, and may therefore file a Change Request. When the problem is resolved, a technician updates the record with relevant information and closes the record, in turn prompting automation to begin closing procedures for related Incidents. If the problem cannot be resolved it may be classified as a Known Error and a permanent work-around supplied. This will also update the related Incidents. Processing of Records Once created, Problem records can be linked to Incidents from either the Problem record or from an Incident record. Priority, a measure of the Problem's urgency and relative importance, is set by default to the Priority of the spawning Incident, but can be changed at the time of creation. Problem Priority, a measure of impact and risk, particularly with regards to IT service operations, may be determined separately as part of Problem Classification procedures. Together Priority and Problem Priority help IT managers make factual decisions for scheduling and planning and help determine the category of related Change Requests. By default, new Problems have a Problem Priority of Standard (0), indicating no special review or authorization is needed. Diagnosis The Problem follows its own workflow separate from the Incident. Ops team members open the problem record in the default state of Pending Diagnosis to indicate that a diagnosis has yet to be determined, or Diagnosed if no further steps are required. A record may sit in a state of Pending Diagnosis for some time before staff actually begin to perform the diagnosis, so Start Clock and Stop Clock buttons let users indicate how much time was spent diagnosing a particular problem. As part of the diagnosis, technicians select the service involved based on existing Incident reports or based on the most likely service to be affected by the Problem. If a particular Asset is identified as the source of the problem's root cause, staff can quickly link the Problem to the Asset record. Once a diagnosis is supplied, staff will move the record into a state of Diagnosed and fill out the Root Cause description. They may suggest a temporary fix, or workaround, for the problem and related incidents if a permanent solution is not readily available. For example, use Printer B3 for now instead. While determining a workaround and/or permanent resolution, technicians can use Start and Stop Clock buttons to track the time spent determining workarounds and solutions for this Problem. 158
159 If at any time during the root cause diagnosis or determination of the proper solution staff need more information from a separate process, such as Incident details from first level support, the Problem record may be placed in a state of Pending More Information. If a Problem is deemed too risky or of lower priority than more imminent issues, it may be put in a status of Deferred to reflect no ongoing diagnosis or pending changes. Solution In most cases where a Problem's root cause deals with an Asset, a Change Request will be submitted to make the appropriate fixes to the Asset. Change Requests are creatable directly from the Problem record, instantly linking them. While a problem is waiting for a Change Request it can be put in the status of Pending Change. If the Change Request linked to a Problem is closed, the system will send an notification to the problem assignee so that the individual can take additional steps to close the Problem record if it was pending change for resolution. A problem whose root cause is known but for which there is no permanent resolution is considered a Known Error. Known Errors should have Workarounds to allow Incident Management to restore service as quickly as possible. The Update Incident with Workaround button allows staff working the Problem to quickly disseminate workaround information to linked Incidents with the click of a button. Clicking the button will post the workaround in all related incidents and change their status to Workaround Provided, which will also trigger an to both the end user and the assigned staff person of the Incident(s). A similar button is used to transfer the problem Solution to related Incidents. Clicking the Update Incidents with Solution button in the problem will populate the Solution field of the Problem into the Incident Solution field and set the status of the Incident to Closed, ing the customer. Once a permanent resolution is determined and implemented, staff users enter the description in the Resolution field and set the status to Resolved. If the resolution contains information that is useful outside of this problem's particular scope, the Add to Knowledgebase? field can be set to Yes to make the Resolution field available via FAQs. Ownership Problems are owned by the staff member who creates the Problem record. Since only internal staff will see Problem records, groups may share responsibilities between Incident Management and Problem Management and multiple individuals may share ownership over time. 159

160 Workflow 160
161 Change Requests (RFC) Table The Change Requests table is used for Change Management. A Change request is created when a change is needed to an asset or to any other business object that may require a set of approvals before the change can be completed. Once a change request is created, it can be assigned to the appropriate teams or individuals for one or many approvals. It can then be moved along in the process, from approval, to scheduling, to action by staff members actually making the change, to completion, testing, and release. Of course each organization has its own definition of types of change that may need to be managed in this way, but we have prepopulated the service catalog with a list of common change types. You can easily add your own change categories and types to the services table. Change Requests differ from Service Requests in that they are not visible by default to end users and typically follow a stricter set of procedures and approvals. Use Case Change Requests (CRs) may be directly created by technician users or may be created by conversion from a Service Request or a Problem, in which case they are linked back to the generating record. End User Record Submission By default, Change Requests are not visible to end users and cannot be created by them. This is defined by group permissions, and if you would like to allow end users to submit change requests, you can simply change the group permissions of the relevant groups to enable this. Technician Record Submission When a technician submits a Change Request, the Submitter contact information fields automatically populate based on the details in the user's record. In the default setup, a request cannot be submitted on behalf of a user who has no user record in the system. However, the creator can select a different person if needed. The user is required to select a service after selecting a service category. When the service is selected, the user will see a description of the service and any special instructions for that service. When a technician creates the CR they may choose the Change Management Team and the Change Manager from the drop-down fields. If they do not choose the team, when the record is saved, the request will be assigned to the Service Responsible team, if any, or to the Change Management Team, if there is no responsible team defined for the service. New CRs are created in the Status of Open by default. During creation, a technician may click the Submit for Review button to change the status to Pending Change Manager. The Change Request table pulls its services from linked entries in the Services table. A user creating a change request chooses the category of service from a drop-down, and then sees all the active services that belong to that category in a second drop-down list called Service Title. The default service categories for change requests 161
162 can be seen in the Assets table or by creating a CR record and opening the drop-down list. When the service is selected, several additional fields are pulled in with the service, including fields defining whether approvals are needed and the approval generation type. Once the main fields are filled in, the user navigates to the Assets tab. This allows the user to look up several assets. The assets can be filtered by first choosing an Asset Type and then clicking the Select Assets lookup. 162
163 Note that if no assets are involved in the change request, you are still required to select one because of the way tasks are managed in change requests. Use the No Asset Involved asset record with the Asset Type of None in this situation. This allows all task generation and other functionality to work as expected. Once the assets have been selected, to further process the change request, the user needs to click the Submit for Review button: This saves the change request, validates the required fields, sets some background fields that control visibility of the approval and task buttons, and sets the status to Pending Change Manager. 163
164 Automatic s Sent upon Submission If the status is not Closed when saved, the system sends the submitter an acknowledgement and will also send an to either the Change Manager, if there is one, or to the Change Manager Team (Rule: CR- All Creation Actions). Changing Assigned Team or Change Manager If a technician needs to reassign the Change Request to a different Change Management Team or Change Manager, they simply change the field(s) and the system will the new assignee notifying them of the reassignment (Rule: CR - Edit Actions (API Enabled), Action: Assignee Change Notifications). Managing the Approval Process Change requests can use different approval methods, discussed in the Approvals for Change Requests section above. Based on the approval method defined in the service record, approvals will typically be created and launched within the change request using buttons. If the change service does include approvals, then at least one approval record must be created and approved in order to proceed to generating and launching any tasks and moving the status forward. Once the request has been sent for review, if it was for a service that requires approvals, the change manager can review it and generate any needed approvals: Clicking the Generate Approval(s) button will generate the approvals based on the predefined approval workflow. If the change request service allows ad hoc approvals, options will be available to generate additional approvals as needed. Approvals are generated in a Status of Queued by default. Once the approvals are generated, new buttons appear: 164

165 When the change manager is ready for the approval process to start, she clicks the Launch Approval Process button, which will set all approvals with the lowest step number to Pending Approval. It will also update the Status of the Change Request to Pending Approval: When an approval's status is set to Pending Approval, the approval team and/or Approver are notified by . The approval process is controlled by the step numbers. Approvals with the same step number value are launched at the same time, when the approvals with the next lower step number are completed. This is a different model than in the task workflows, in which the sequence field is not functional. With approvals, the step number controls the process and there are no separate sequences or threads in the approval process. Another way in which approval generation is different from the handling of tasks is that conditional approvals are not created at all unless their condition is met at the time of generating the approval. Since these conditions generally depend on the meta data and fields in the change request, it is important to make any critical fields required to hold a value before getting to the point of generating approvals. The Recheck Conditional Approvals button does allow the technician to recheck the condition if after generating the first approvals, the meta data changes. But it is best to ensure that any needed meta data is filled out first. As the first approvals are completed, those with the next step number are set to Pending Approval and their 165
166 assignees notified. Any approval notes put into the approvals are copied up to the change request in the running All Approval Notes field. Two fields below the approvals table track the Number of Approvals Needed and the Number of Approvals Completed, and once those two numbers are equal and great than or equal to 1, the Status is changed to Approved and the Requester and the Change Management team are notified. Creating Tasks for the CR Tasks can be created for the CR before the approvals are done. The only requirement is that the user must first enter the Change Window Start Time and Change Window End Time, as the End Time will be used as the Date Due for the tasks: Depending on the task generation method, one or more tasks will be created for each selected asset. If the task generation method is CR Single Task from Template, then the predefined template will be shown: Here the default task template is the one called Upgrade Windows OS. Clicking the Generate Tasks button will generate one task for each of the selected assets. The user may then select another task to generate when that is done, if desired. They may also check the box for Create New Task to Generate? to create another task template that can be generated for all the selected assets. Checking that box will display fields to fill in for the ad hoc task: 166
167 Clicking the button to Create New Task to Generate will create a new Task Template, save the change request, and reopen it to edit, with the new task selected in the Task to Generate field. From here, you can click the Generate Tasks button again to add the Task to this CR for each Asset that is selected. Launching Tasks Tasks may not be launched until any approval process is completed. This is to ensure that no work is started without approval. Once the approval has been received, click the Launch Tasks button to set the first tasks, those with no prerequisite or with any prerequisites completed or not needed, to a status of Assigned. It will also set the Status of the Change Request to In Progress, if it is not already in that status. See the Task Templates and Task sections above for more details on how tasks are launched and processed. Completing the Change Request When all tasks are completed, the Change Manager is notified. Based on whether the tasks were all completed or whether some of them failed, the change manager will then set the Status of the Change Request to Completed or Completed with Failures. Validation prevents the user from choosing Completed as the status if there are tasks whose status is Failed. Changing the status to Completed or Completed with Failures will send an to the Requester informing him that the change is completed. Working Notes The Work Notes field is updated from the running working notes for all of the related Tasks. 167
168 Related Records and Removing Tasks During the working process, some tasks may be removed as not needed by the change manager. The action bar above the Tasks table in the change request includes a button to remove one or more tasks: This changes the status of the selected tasks to Not Needed and they move into the Inactive Tasks table shown on the Inactive Tasks tab: From this area, if it turns out that the task actually is needed, the change manager can select one or more tasks and click the Reassign Task to set their status to Assigned and move them back into the active Tasks table. 168
169 Parent-Child Change Request Structure Previously we used parent-child change requests to manage multiple changes to assets. That possibility is still available but the fields for relating parent and child change requests have been removed from the layout, since that was a more cumbersome process. If there is a need to relate change requests in a parent child structure, this logic can be used again. Reporting Time Spent Technician users may easily report the time they spend on handling change requests. There are two fields and an action button: Time Spent, Time Description, and Add Time on the Work Notes tab of the layout. Entering values there will automatically create a new time entry record when the Add Time button is clicked. The time entry will show the work done by the technician and on the current date. All the time entries for a request can be seen on the Time tab as well. If a technician needs to report time that was spent on a different day or by a different user, they may click the New button on the Time spent table to submit a time entry directly and change the date or "Done by" field. All time entered is totaled in the All Time Spent field, which can be used in reporting or billing. Note that this same time entry methodology is used in the Incident, Problem, Service Request, and Task tables. 169

170 Workflow The workflow is used to send the when the change request is completed. Otherwise, it controls the state transitions, as shown in the screenshot below: Ownership Records in the Change Request table are owned by the person whose login matches the Creator Login field. Reporting and Statistics Forward Schedule of Change The Forward Schedule of Change represents approved changes and the proposed implementation dates. More generally, it is a list of Change Requests set to occur in the future. Functionally it might include CRs with restricted criteria, such as approved changes only, but by default the Forward Schedule of Change simply shows all Change Requests that are not in a status of Completed, Completed with Failures, or Canceled. The Forward Schedule of Change is a saved search available from the vertical navigation menu under the Change Request table name. Change Requests are listed in order of Requested Date of Completion. This search is also used in a structured HTML report of the same name. The report groups the CRs by requested date of completion (by week) and shows summary data, including the sum of the Estimated Time to Complete for all records. The report can be configured to be sent in a weekly to the Change Management team. Accomplished Change Accomplished Change is the complement to the Forward Schedule of Change and by default shows all completed Change Requests, sorted by Date Closed. 170
171 Assets Table The Assets table holds records containing information about your company's Assets. It may include assets that are in inventory and not in service, as well as all assets that are in service. Use Case Asset Creation Staff may add a Asset manually to the system by creating a new record, or integrated Discovery systems may create Asset records automatically with specified attributes. Assets have type-specific attribute fields (Manufacturer, Model, Serial Number, etc.) and relationships to other Assets, Service Requests, Problems, Change Requests and Contracts. Related Service Requests, Problems, and Incidents are displayed as lists of records within an Asset, so the history of a given Asset is readily available. Assets may also be related to other assets in an upstream and downstream embedded table. Record Creation Assets may be created independently or when selecting Assets in Change Request and Contract records. Asset Name and Asset Type are required fields. Ownership Asset ownership is defined as the user whose Login matches the User Login field in the Asset record. Processing of Records Assets follow a lifecycle workflow from ordering through retirement. There are no business rules associated with the Asset table. Assets are created in the state of Installed by default. Assets that are requested but not immediately available might be created in a state of On Order, moved to In Stock when the Asset is received, Pending Install while Operations is tasked with installing the Asset, and finally Installed. Installed Assets can change to In Maintenance for repairs and Retired or Stolen when the Asset is no longer in use. 171

172 Workflow 172
173 Models Table This table controls the basic asset information that may be used within an individual asset. It holds records that define details of the Asset Type, Asset Subtype, Manufacturer, specific model numbers, and so on. Assets then link in the model on which that item is based to prepopulate all of that information for a single Asset. Use Case Models can be created and edited by members of the admin, admin import, and configuration manager groups. It is expected that the Configuration Managers will be responsible for maintaining model information. The model form contains the following fields: The list of Asset Types and Asset Subtypes are related in a hierarchical dependency. The Latest Unit Price gives an idea of the latest pricing for the model. Rules could be set up to push the latest price paid in a purchase into this record to keep it updated as model purchases are made. 173
174 Assets Use of Models Models are pulled into Assets, as shown below. When setting up a new asset, the user selects the Asset Type, and then the Asset Subtype, and then chooses a matching Model Name/Number from the available models. The models are filtered based on Asset Type and Asset Subtype, and once selected, their details are pulled into the Asset record: Automation There is no automation on the Models table. It is purely a background table. 174
175 Purchase Requests Table Overview Purchase Requests are used to enable an end user to request new equipment, software, or furniture. A single purchase request can include multiple requested items, which are selected from a list of available items. Example Use case An employee end-user needs a new laptop. The user logs in and creates a new Purchase Request from the end user interface (EUI). They specify who it's for, the type of purchase by Service Category, the business justification for the request, etc. Lastly they select the item(s) they are requesting via a Related Table to the Items Requested table, which in turn draws from the Items table. The user may also select from Assets in stock that matches the type of purchase they chose. The end user's manager, receives an that a new request needs approval. The manager can approve or reject directly from hotlinks in the or edit the record manually from the staff interface. As a supervisor, the manager changes the Supervisor Approved field to either Yes or No. A rule running on edits will then change the status to Supervisor Approved or Supervisor Rejected. If the request is approved, a notification will be sent to the Purchasing Team. Members of the Procurement Team receive an stating that a new Purchase Request is awaiting their approval. Members of the Procurement Group will see some additional fields in the Purchase Request record, including a Procurement Group Approved field similar in function to the Supervisor Approved field. They will also see another Yes/No choice field called "All Items Received?" When the recipient/requestor has been satisfied, the Procurement Group changes the status to Fulfilled. 175

176 Relationship Diagram Record Creation Internal customers can create Purchase Requests from the EUI. Members of the Purchasing team can create records on behalf of other users. Upon creation, a rule sends s to the Requestor the Requestor's Supervisor, and the Purchasing Team notifying them of the new Purchase Request. Processing of Records Once created, Purchase Requests follow a two-stage approval process. The creation s sent to the Requestor's Manager and the Purchasing Team lets them know that their approval is required and provides a link in the to edit the record. A supervisor can edit the Supervisor Approved? field to yes or no, and the Purchasing Team edits the Procurement Group Approved field to yes or no. Rules validate these changes and move the Purchase Request to the appropriate status, such as Supervisor Approved when the supervisor changes the field to Yes. Once fully approved, Purchase Requests are Ordered, Received, and Fulfilled. Ordered and Received are used if the requested items are not immediately available, and changing the All Items Received? field to Yes will move the request into the status of Received. Purchase Requests can move to a status of Fulfilled any time after approval. 176

177 Workflow Purchase Requests have a two-stage approval process, first by the Supervisor and secondly by Procurement staff. Once approved, Purchase Requests can move to Ordered/Received states or directly to Fulfilled. Ownership Purchase Requests are owned by the user whose Login matches the Creator Login field in the Purchase Request. 177

178 Items Requested Table Use case The Items Requested table acts as an intermediary table for the Purchase Request and Item tables. When users request items as part of a Purchase Request, they are creating new Item Requested records. These records represent the Items selected and their quantity for a particular Purchase Request. Relationship Diagram Workflow These records have no workflow and instead follow the Purchase Request record they are linked to. Record Creation From a Purchase Request record (see Purchase Request Use Case), a user creates new Item Requested records for each Item desired in the embedded table view. After selecting the Type of Purchase in the Purchase Request record, clicking New from the Purchase Request linked Items related table presents the user with the new Item Requested form, filtered to items that fall under the selected Purchase Request Type of Purchase. The Item Requested form has three major sections: Item Requested details, linked Purchase Request Information, and an area to select a matching Asset. The requestor selects an item from the Item Name drop-down box, which is filtered to show only items in the Type of Purchase category chosen in the Purchase Request record. 178
179 The Purchase Request Information fields are automatically populated with data from the Purchase Request this Item Requested was created from and represents the link to the Purchase Request. The Asset section allows the user or fulfilling staffer to select an existing Asset from the Asset table. The Assets available for selection are filtered to only in-stock Assets that match the Type of Item for this Item Requested. The Asset fields link the Item Requested to a physical, tracked asset rather than just the template description (Item), enabling greater control and accurate record keeping. Clicking the Assign to Requestor button will automatically update the selected asset by linking that Asset's "User" fields to the same Contact linked here as the Requestor That is, the button will assign the Asset selected to the person requesting the item. Processing of Records Once created, Item Requested records remain unchanged and stay linked to the Purchase Request. Since the Item Requested records are maintained separately from the Item records they were spawned from, they retain data that might change over time, such as Unit Price. Thus, even when Items change, Purchase Requests will always show Item data as it was at the time of the Purchase Request and reflect an accurate total. Ownership Item Requested records are owned by the Contact record whose Login matches the Creator Login field in the Item Requested. Since Items Requested are not maintained outside of a Purchase Request, the relevant ownership stems from the Purchase Request record. 179
180 Default Layout 180
181 Items Table The Item table stores information for each type of item that can be requested as part of a Purchase Request. The Item Requested table allows the user to select from the Item records in this table when creating a Purchase Request. Use Case Item records are created by internal procurement staff users to represent items that may be selected by end-users for Purchase Requests. For example, say the Dell Inspiron 2000 Desktop PC is the default model for IT staffers and all employees are set up with one when hired. Procurement staff in charge of maintaining Purchase Requests would create a single record in this Item table to represent the Dell Inspiron 2000 model with all relevant details, such as Make/Model, Unit Price, and descriptive text/choice fields. When users request a Dell Inspiron 2000, an Item Requested record is created from the Item record as a template and then linked to the Purchase Request. Record Processing Once created, Item records require little modification. By default, new Items are created as Active and not requiring Supervisor Approval. If a particular Item type is unavailable, no longer in use, or not ready for distribution, Procurement staff may set the Item's status to Inactive. Expensive or controlled Items can be toggled to require Supervisor Approval, which can act as a flag to apply approval processes when the Item is requested. Workflow Items are not associated with any status fields, but instead contain an Active/Inactive choice field to differentiate selectable Items from non-selectable Items. By default, inactive items are not available for Purchase Requests. The Item table does not have a Workflow State diagram. Ownership Items are owned by the user with the login in the Creator Login field. However, since Items are templates for Requested Items, ownership is less relevant to the individual and records will likely only be maintained by a Procurement Group or similar staff team. 181
182 Support Cases Table Purpose: This table is used to manage external customer support requests. It is set up to be accessed by the Customer group and the Base Technical Group. Use Case End User Record Submission Customers may create support cases using the tab in the end user interface or by sending an if they have an inbound address set up. When a customer submits a support case, the contact information fields automatically populate based on the details in his/her user record. If the user record doesn't contain a value in the Customer Name or fields, the customer will be required to enter a value in those fields manually. The Type of Issue is set by default to Question. If the customer changes it to Installation Issue or Bug, they will be required to fill out the Steps to Reproduce field. The case is assigned by default to the Support Team and the default status is Open. Technician Record Submission Staff members may also submit support cases on behalf of a customer, associating the customer with the case. If an internal staff user creates a case, they may assign it directly to an individual or a team other than the Support Team and may set its starting status to Open, Assigned, or Closed. When the record is created, s are sent to the customer acknowledging receipt of the support case and to the assigned team (or person) telling them the case has been assigned to them. If a Support Staff technician creates a record in a status of Closed an is sent to the customer telling them how to reopen their case. Workflow actions send these s automatically, but staff users can override them if given permission to override workflow actions. Processing of Records When a technician works on a case, if they need more information from the customer in order to take further action, they can set the status to Sent to Customer. This will automatically send an to the customer requesting further information and include the content of the Additional Notes field, an append-only field that is used to communicate with the customer. The includes a hyperlink for the customer to click to login to edit the case directly. When the customer edits the case or replies to the , the status changes to Updated by Customer and an notifies the assigned person that the customer has replied. The customer is able to update the 182

183 Additional Notes field directly and any text from an reply to a system maps to that same field. If the customer updates the case at any point, an notifies the assigned person of the update. If the technician needs to reassign the case to someone else, they simply change the Assigned Person field to that person's name and the system will the new assignee notifying them of the reassignment. The Staff Only Notes field holds working notes that should not be visible to the customer. When the technician has completed work on the case, they set the Status field to Closed and puts the solution notes into the Solution field. This triggers an to the customer that includes the content of the Solution field and tells the customer that the work is done. This closing gives the customer a hotlink back to the record if they wish to reopen it and instructs them to explain why they are not satisfied with the solution. Clicking the hotlink will automatically change the "I Would Like To Reopen My Ticket" field to Yes, which in turn sets the Status of the ticket to Reopened and notifies the assigned person. By default, no escalation rules are set up for the Support Case table. Ownership Records in this table are owned by the individual customer. This means each record is associated with a particular customer login and no other customers will be able to edit that record, though members of the Customer Manager group can view all records submitted by other people at their company. 183
184 Project Management Tables Project tables can be used to track both internal and external project types. The Purchase Orders (POs) table manages purchase order documents for external projects in the Projects table. These tables are summarized in the following topics: Projects Table Project Types Table Purchase Orders (PO) Table 184
185 Projects Table Purpose: This table holds records for project management activities. It is currently optimized for companies providing consulting services to their clients, and allows them to manage their billable and unbillable hours, work authorizations, and overall project status. It also accommodates internal project management instead. Use Case Members of the Admin or Project Manager groups may manually create Project records. Projects are creatable only in the Planned, Assigned, Work in Progress, and Awaiting Customer Feedback states. Only members of the Project Manager and admin Groups may edit others' Project records, but Sales and Support Staff (Base ServiceDesk group) may view their own Project records. The user who created the Project is automatically set as the Project Manager, and will get notifications pertaining to the Project's status, such as when all tasks are completed or the hours spent on the project have exceeded what was authorized. Project CCs can be specified who will also receive notice when the Project is completed. The information on the "Contact Information" tab will be filled out with the information of the Project Manager's Manager, provided by the Employee record of the Project Manager. Project records are divided into two broad categories: Internal and Client-Related. These categories are further divided by type. The tasks that are automatically generated by a project depend on the type selected. For each Project type there may be task workflows or user selected task templates defined. These will result in certain tasks being automatically generated. The exact selection of tasks that will be generated can be specified on the Tasks tab of the Project record. Ad-hoc tasks can also be created using an action button on that tab. Additional fields are visible when a Project's Category is Client-Related. These fields hold information about customer contracts, contact details, and authorized hours. 185
186 Time spent on the project is tracked on the Time / Billing tab. It includes a small form to enter time spent and a related table of time entries for this project. Time entries can be searched for in the related table and linked to the project manually. 186

187 Workflow Ownership Records in this table are owned by the Employee designated as the Project Manager. 187

188 Project Types Table Purpose: This is a background table that holds the Project Types referenced by the Projects table. It allows the creation of new Project Types by Project Managers and other users without Admin group privileges. Project Types define the task generation method, if any, and if task workflows will be used, they are defined in the project type record: In addition to Predefined Task Workflows, project types may use Users Selected Tasks or User Generated Ad Hoc Tasks as the task generation methods. 188
189 The differences between these methods is discussed in more detail in the Tasks for Service Requests section above, and the same options available for Service Requests apply to Projects. The methodology for setting up task workflows and the way in which the prerequisite tasks are handled is discussed above in the Task Workflows Table section and in the Task Templates section. 189

190 Purchase Orders (PO) Table Purpose: The Purchase Order table tracks authorized billable hours for a project. It is shown as a related table within the Project table. It could easily be linked to Support Cases or Quotes or other tables within the system. Use Case PO records are creatable manually via the web form, from within Project records in the related table, or via mass import. Only members of the Project Manager, Marketing, Sales and admin Groups may create or import records. PO records are creatable in any workflow state. Only members of the Project Manager, Marketing, Sales and admin Groups may edit records, but Support Staff may view all PO records. Ownership Records in this table are owned by an Employee, generally the one who created the record. Each record is associated with a particular Employee login. 190
191 Sales CRM Tables The tables below are used to manage your customer relationships and support your sales team. These include: Leads Table Opportunities Table Products Table Products Quoted Table Campaigns Table Quotes Table Surveys Table Survey Types Table Survey Questions Table 191
192 Leads Table Purpose: This table is used as the initial point of entry for sales leads. Leads may self-register at your website or may be imported from a lead generation program. The initial qualification is done in this table, which contains all the fields desirable for managing sales. Once a lead is qualified, it may either be fully worked in this table, or converted into a contact, an opportunity, and a company/account record, and the sales process may be managed in those records. Use Case Record Creation Leads can be created directly using the web form, or, once an inbound address is set up, via . New leads may start out as Qualified, Uncontacted, Contacted, or Left Message in the workflow. The Leads table is set up by default to allow those in the Guest group to create records, allowing "click to register" lead generation hotlinks, and the embedding of the lead creation form in a web page. Naturally leads may also be imported from a spreadsheet from a lead generation program. Processing of Records Admins and members of the Sales and Marketing groups can create, view, and edit Leads. No other groups have access to the table by default. When a lead's status changes to Converted, Agiloft converts the information in the record into three new records in the three other tables: Company, Opportunity, and Contact. This order of creation is important because both the Opportunity and Contact records will contain links to the original Company via the new record. If the Company record is not created first, the Contact and Opportunity records will be unlinked and orphaned, disabling reporting features. Data fields containing information relevant to the company, such as address and billing address, company website, industry, annual revenue and number of employees, map to the Company record. Sales-specific data fields, such as key requirements, earliest and latest possible close date, and sales actions taken, map to the Opportunity record. All data from the lead referencing a specific person at the company map into a new Contact containing the individual's desk and cell phone numbers, address, preferences, and so on. 192

193 Ownership Records in this table are owned by the individual assigned sales rep, so each record is associated with a particular user login. Only members of the Sales, Marketing and admin groups can view or edit Leads. 193

194 Opportunities Table Purpose: This table tracks sales opportunity information and contract information when an opportunity becomes a sale. Use Case Most Opportunity records are created from Leads via a Conversion rule. Members of the Admin, Marketing or Sales groups may create records manually. Opportunity records track possible sales. On the Deal Info tab, sales staff can rate the opportunity, estimate the value and probability of the sale, and indicate the prospect's Key Requirements and Positive Factors in the appropriate fields. The Related Records tab shows other people linked to the Opportunity, as well as Quotes or Contracts that are linked to the current record. Admins and members of the Sales, Business Admin, and Marketing groups can create, view and edit Opportunities. Members of the Project Manager and Service Manager groups may view all Opportunities. No other groups have access to the table by default. Workflow 194
195 Ownership Records in this table are owned by the individual assigned sales rep, so each record is associated with a particular user login from the Contacts table. 195
196 Products Table The Products table holds products that your company sells and the product values are pulled into Opportunities and Products Quoted. Use Case Creating Product Records Product records can be created directly using the web form. Product records need to be created before they are available in any of the other tables such as Products Quoted. Processing Records Admin users and members of the Sales group can create and edit Products. View access is limited to members of the Marketing, Sales and Service Manager and Support Staff groups. No other groups have access to the table by default. Products are categorized by the type, e.g. Part, Software or Service. Products that are no longer needed can be marked Inactive and will not appear in drop down lists when quoting a product. 196
197 Ownership Records in this table are owned by the user who creates them. Reports The Products table contains the following default Charts/Reports: 197
198 Products Quoted Table The Products Quoted table holds the specific products associated with a quote. Use Case Creating Product Quote Records Product Quotes are created from the Quote table. As a Quote is created, either independently or from the Opportunities table, each added item or product creates a Products Quoted record. Processing Records Admins and members of the Sales and Marketing group can create, view and edit Products Quoted. Only Admins and Sales are allowed to edit quoted products created by other Sales or Marketing members. No other groups have access to the table by default. When a product is added to a Quote record and saved, the Total Price is updated by a calculation based on the Unit Price, Number of Units and Discount Percentage. When the quantity of an item in a quote is changed, the Total Price of the quoted product is updated. 198
199 Ownership Records in this table are owned by the person who created the associated Quote. Specifically, a record is owned by the user whose Full Name matches the Quote Prepared By field. Reports The Products Quoted table contains the following default Charts/Reports: 199
200 Campaigns Table Every sales process involves a marketing aspect. A key marketing capability is tracking and measuring multichannel campaigns, including , partner website, print advertising, purchased lists, newsletters, trade shows, search engine, radio, and TV. Use Case The effectiveness of a campaign created by members of the Marketing group can be seen through its association with a Lead or an Opportunity. After creating a campaign, members of the Sales, Sales Manager or Marketing groups can choose that campaign in a Lead or Opportunity record by selecting a Campaign Name from a choice list created from Planned, Launched or Ongoing campaigns. Creating Campaign Records Campaigns can be created directly using the web form. New campaigns may only start out as Planned or Launched in the workflow. 200
201 Processing Records Admin users and members of the Marketing group can create and edit Campaigns. Members of the Sales and Sales Manager groups have view access. No other groups have access to the table by default. Marketing Campaigns marketing tracking has been set up by default on the Leads and People tables. This works in conjunction with the Campaign table, which contains many statistical fields to track the results of a sent related to that campaign. A marketing staff person sets up a Campaign to track results for a particular . An template may be created on the Leads and/or the People tables. Once the recipients are selected, mouse over the icon and click Send With the window open, select Insert > Populate from template, then locate the desired marketing template and import it. On the Options tab of the dialog, the sender chooses the Campaign Name to use for tracking: When the is sent out, all responses are captured by a service running in the background and the results are compiled in the related campaign as responses are received: 201

202 If there were links in the and any recipients clicked them, then new records are automatically created in the Clicks table for each link clicked, and these are also shown in the campaign record: Further documentation about how the campaign statistics are created and how to set up this functionality or modify it, please see Marketing. This functionality can easily be turned on for additional custom tables other than Leads and People. Ownership Campaign records owned by the user who creates them. 202

203 Workflow The Campaigns table has the following default workflow: Reports The Campaigns table contains the following default Charts/Reports: 203
204 Quotes Table The Quotes table is used to create purchase quotes for prospects or existing customers. It can be used independently, or within the Opportunities table. If you use Quotes as your primary way of indicating potential sales value, Agiloft offers preconfigured reports for the Quotes table that will forecast your sales over the next period and will report on past success rates. If you do not use Quotes, you can run these kinds of reports from the Opportunities table instead, using fields such as estimated Sale Value, Probability of Sale, and Expected Close Date to track the value of potential sales. 204

205 Use Case Creating Quote Records A quote record is created with a default Status of Prepared. Upon saving the record, the quote is attached as a PDF to the record through an Attachment action. If a new quote is saved with a status of Sent to Customer, the quote is ed to the prospect. Processing Records If the record is created and the Status is Prepared, the status can be changed to any one of the following states: Sent to customer, Expired, Revised, and Purchase Completed. If the status is changed to Sent to Customer at any time, a quote with the attached PDF will be ed to the prospect. Ownership Quotes are owned by the Sales Rep who prepares them. Specifically, a Quote is owned by the user whose Full Name matches the name in the Quote Prepared By field. Workflow The Quotes table has the following default workflow: 205
206 Workflow Automation A: Attach Quote as PDF E: prospect attached quote These actions occur when a Quote is created in a Status of Sent to Customer or when the Status changes from any value to Sent to Customer Reports The Quotes table contains the following default Charts/Reports: 206
207 Surveys Table This table is used to collect customer feedback for Support or Service Requests or to send surveys on any subject to customers. Use Case Surveys are typically generated through a hyperlink in an to a customer requesting their feedback. When the user clicks on the hyperlink, it will log them into the knowledgebase as a Guest and take them directly to a new Survey record, without giving them access to anything else. As part of the link, the Support 207
208 Case ID or Service Request ID and Survey Type may be populated in the Survey record, linking the Survey to the case that generated the and to the person who completes the survey. Currently there is no rule in either the Support or Service Request tables that automatically generates a survey . However, the template is present in both tables. This functionality can be enabled through an action in a time-based or update rule. Guidance on how to manually create the hyperlink URL can be found in the Hyperlinks section in the Administrator Manual. Below is a sample hyperlink. This link will log the user into a new Survey record, set the Survey Type to Demo Follow-up, the Text ID field to 4, the Visitor ID field to and set the Exit URL and Cancel URL using an account with Guest permissions: Ownership Records in this table are owned by the customer to whom the survey is sent, so each record is associated with a particular user from the People table. 208
209 Survey Types Table This table contains templates that can be used to generate individual surveys. Use Case The Survey Types table is a special table used in the Survey table. Records in this table display Survey Types as templates for Surveys. Each template contains a number of Survey Questions and relationships between those questions that describe whether they are required as well as any dependencies on other questions. Ownership Records in this table are owned by the person who submits them. 209
210 Survey Questions Table This table is used to generate and store the questions that are to be pulled into Survey Types. Use Case These records represent the pool of questions available to be made into a survey from the Survey Types table. The Edit Question button in the record opens a wizard to assist in creating the question. On the General tab, the wizard allows the text of the question itself to be defined, as well as the type of response, which can be any of the field data types used in Agiloft. Various aspects of the question's presentation can be set here as well, and the question can be named if desired. Naming the question makes it searchable, but uses more resources on the server. Ownership Records are owned by the user whose Login matches the Creator Login for the record. 210
211 Document Management Table The Documents table can be used to manage the creation and publication of documents of various types, from marketing collateral to employee procedure manuals. A light-weight parallel publication approval process is included. Examples of documents that may be covered: FAQs, official memos, published company policies, user manuals, newsletters, press releases, and so on. The table may be used to manage documents that are accessed only through Agiloft, though the records in this table, or documents that are published at the company website, intranet or printed and distributed. Access to the documents is controlled through permissions based on a choice field within the record. Documents Table Use Case Submitting Records End Users An end user belonging to the Document Creator team can create a document through the EUI. Action buttons will be provided to the end user to move the document through the workflow. When a user submits a document for review, the contact information fields are automatically populated based on the details in the user's record - including the user's department. A direct link to the Department will be auto-populated based on the submitter's department. The record will be created in a default status of Draft. After supplying the required information and uploading a document, the user will click the Submit for Review button to begin the review process. The status of the record will be updated to Pending Document Manager. If the user is not prepared to submit the record immediately, they can save the record and make further updates. Submitting Records Technicians Staff users in the Document Management, Admin and Document Creator groups can submit documents. Support Staff members may also convert to create a new FAQ Document from an Incident or Service Request. Only Admins and Document Managers can update the status of a Document record manually. All other groups will use Action Buttons to move the document through the workflow. The record will be created in a default status of Draft. After supplying the required information and uploading a document, the user will click the Submit for Review button to begin the review process. If the user is not prepared to submit the record immediately, they can save the record and make further updates. 211
212 Processing Records When a document record is submitted, the Document Management Team is assigned by default and notified. A Document Manager reviews the document for content and formatting, and to determine if the document requires additional review. If there are any issues with the initial document, the Document Manager clicks Return to Submitter to send the document back to Draft status. A rule then notifies the Submitter that the document requires revision. The user makes appropriate updates to the document and record, then clicks Submit for Approval again. Handling Approvals The Requires Approval field on the Progress tab determines whether approvals are needed before publication. If the document does not require approval by document Approver(s), the Document Manager clicks the Publish without Approval action button. The Submitter is notified that the document has been published. If the Requires Approval field is set to Yes, a validation rule notifies the Document Manager that approval is required if the Document Manager attempts to publish without approvals. Selecting Approvers and Creating Approvals If the document requires approvals by Approver(s), the Document Manager will select the appropriate approvers by adding approver names under the Potential Reviewers heading on the Progress tab. This field is a link to a single field (Full Name) with multiple values enabled in the Employee table, displayed as a multiple value box with a pop-up selection list and filtered to people on the Document Reviewers Team. 212
213 After selecting the appropriate Approver(s), the Document Manager clicks Submit for Approval, or manually changes the Status of the record to Pending Approval. A validation rule checks to see if the Document Manager has actually added approvers to the form. When the record is saved, an approval record is created for each approver by a conversion process from the approver's Employee record. A linked record action updates the Last Document ID field in the Employee record. When the system detects a change in the Last Document ID field it performs a data conversion action, using the employee record to create an Approval record. The approval record is linked to the document record through the mapping of Last Document ID field to the linked Document set in the approval record. Additional approvers can be added during the approval process; automation rules and actions will prevent the creation of multiple approval records for existing approvers. The default Approval Status for new approval records is Pending Approval. When an approval record is created, the approver is automatically notified that they have a document to review and approve. In the Approval record, the linked field set from the document record includes a hyperlink to the document using the view only source field display option for the Document(s) field under the Attachment heading. The approver can click the link to open the document, allowing the approver to mark up the document which can then be uploaded to the approval record. Approvers are not able to upload the document to the source record. All updates to the document will be done by the Submitter, the Document Manager or an admin. Approving, Requiring Changes for, and Rejecting Documents The approver may approve, reject, or require changes for the document and provide Approval Notes. Approving When an approver clicks Approve, the Status of the approval is updated to Approved. Approval Notes are not required in order to approve. Requiring Changes In order to mark a document as requiring changes, the approver must enter an explanation in the Approval Notes field. Any other approvers for the document are notified that a change is required, and so if they have already approved, they may need to re-approve once changes are complete. Another to the Document Manager explains that a change has been requested, and the Document Manager will need to make changes and re-send the document for approval. Permanently Rejecting In order to mark a document as permanently rejected, the approver must enter an explanation in the Approval Notes field. Upon permanently rejecting, the Status of the approval is set to Permanently Rejected, and the Status of the document is set to Canceled. The document may not be re-submitted for approval. 213
214 Publishing Documents Once all approvals are completed and the value of the field Total Number Still Awaiting Approval is 0, a rule sets the Status of the document to Ready for Publication. Both the Submitter and Document Manager are ed that the document is ready for publication. The Document Manager can then attach the final approved document to the Published Files field and update the Status to Published. A validation rule checks again to see if there are still any pending approvals. Once the Document is published, an notification is sent to the Submitter. 214
215 215

216 Workflow 216
217 System Tables System tables provide background functions and work with other process tables. These tables are summarized in the following topics. Calendars Table EUI Templates Table Replacement Variables Table Activity Log Table Currencies Table Chat Log Table 217
218 Calendars Table Purpose: This table contains event records displayed in the Calendar block in the left pane, or using a normal table view. Special Use Case The Calendar table is a special table used in the Staff Interface Calendar pane feature. Records in this table display as events in the Calendars for the individuals and groups that they reference. Calendar records are mostly static and do not have any default associated workflow, rules, setup, saved searches or charts. The Calendar pane is only available to Staff users, and cannot be made available to End Users. By default, only members of the Admin, Project Manager and Support Staff groups may create Calendar records, and Project Manager and Support Staff may only view their own. No other groups have access to view Calendar entries by default, so other staff groups using the Calendar pane must be individually activated or given view and edit permissions. Records in this table are owned by their creators, and are linked to the creator's login. 218
219 EUI Templates Table Purpose: This table contains HTML files used in creating a customized End User portal. It has sample files that can be used, and you may create your own html files and upload the html content to records in this table to serve up the pages. Special Use Case The EUI Templates table is a special table used for storing HTML files used in changing the presentation of the Agiloft end user interface. Since these files undergo little or no change during their lifetimes, no workflows, rules, or actions are associated with them, and no charts, reports or saved searches exist for this table. EUI and Documents Table When the Documents Table is enabled, the EUI can be configured to allow access by end users to the table. In order to enable this, the main.php and menu.htm files need to be edited so that all references to global.menu.file and global.home.file are globoal.menu-doc.file and global.home-doc.file, respectively. These references can be found in '#ew_include("$ewtext.get('')")' calls in those html pages. 219
220 Replacement Variables Table The Replacement Variables table is a background table that can be used to support any of the process tables, such as Approvals, Contracts, Projects, or Tasks. Replacement Variable records store a variable chain used to pull in values from a linked field relationship. Generally, these variables are copied into template records, such as in the Approval Templates table, and then used to dynamically assign records or set other field values when a process table record is generated from a template. Use Case Replacement Variables are used by Approval Templates to generate Approval records for contracts, change requests, documents, or service requests. To create a Replacement Variable that will be used in Approvals, set Used In Field to the value Approval Assigned To. The value in the List Value field will shows up in the Assign To drop-down in an Approval Template. Last, create a variable chain from the Approvals table to the appropriate field variable. For example, $contact_id.requester_name finds the name of the Requester in the linked Contract record, while $contract_id.requester_id.manager_name finds the Requester's manager. Caution: The Variable should be a variable chain that starts from the Approval record not from the Approval Template! Admin Note: The values "Task Assigned To" and "Other" do not link to any automation in the default setup, but they can be deployed and used with minor modifications to Task Templates or other template table. To use a Replacement Variable in an Approval Template, staff users can create an Approval Template and set Assign Approval Based On to the value Person from Contract. The user can then select a value for the Assign To dropdown, which contains a link to all Replacement Variable records for which Used in Field is Approval Assigned To. 220
221 Activity Log Table Purpose: The Activity Log table is a special table used by Agiloft administrators to monitor events such as Logins and modifications to the Knowledgebase. Use Case Activity Log records are created by the Agiloft system. No group has permission to manually create records in this table.the Activity Log table is hidden from the left pane and only available from the Setup > Tables menu. Only the Admin group has access to the table by default; the table must first be activated by the Admin group to appear in the left pane.the Activity Log provides a system-wide history of changes based on pre-defined criteria. By default, the system tracks all logins, all deletions, and certain admin activities that have occurred in the past month. The activity log may be configured to capture other information by creating a new Audit Rule record through the Setup > System > Configure Activity Log menu. Both the items tracked and log duration are configurable for each Activity Log configuration record. Ownership Records in this table are created by the system. Ownership cannot be assigned. 221

222 Reports The Activity Log table contains the following default Chart/Reports: 222
Agiloft ITIL Guide 2017 Agiloft Inc. ID-17Nov2017
 Agiloft ITIL Guide ID-17Nov2017 CONTENTS 1. General ITIL Overview................................................... 4 2. Groups and Teams...................................................... 12 2.1 Groups............................................................
Unit 1: Working With Tables
 Unit 1: Working With Tables Unit Overview This unit covers the basics of working with Tables and the Table wizard. It does not include working with fields, which is covered in Units 3 and 4. It is divided
Unit 7: Working with
 Unit 7: Working with Email Questions Covered What kinds of inbound and outbound email are possible in Agiloft? How do we configure the system to send outbound email and receive inbound email? Why set up
Unit 6: Groups, Teams, and Managing Users
 Unit 6: Groups, Teams, and Managing Users >*-*ÿ qrc Company O U O «h-r '.4 OL-O, 1 Questions Covered What is the difference between a group and a team? How are groups and teams created and managed? What
Unit 10: Advanced Actions
 Unit 10: Advanced Actions Questions Covered What other action types are available? How can we communicate with users without sending an email? How can we clone a record, mapping just the fields we want?
Vector Issue Tracker and License Manager - Administrator s Guide. Configuring and Maintaining Vector Issue Tracker and License Manager
 Vector Issue Tracker and License Manager - Administrator s Guide Configuring and Maintaining Vector Issue Tracker and License Manager Copyright Vector Networks Limited, MetaQuest Software Inc. and NetSupport
EMS WEB APP Configuration Guide
 EMS WEB APP Configuration Guide V44.1 Last Updated: August 14, 2018 EMS Software emssoftware.com/help 800.440.3994 2018 EMS Software, LLC. All Rights Reserved. Table of Contents CHAPTER 1: EMS Web App
Unit 8: Working with Actions
 Unit 8: Working with Actions Questions Covered What are actions? How are actions triggered? Where can we access actions to create or edit them? How do we automate the sending of email notifications? How
Microsoft Windows SharePoint Services
 Microsoft Windows SharePoint Services SITE ADMIN USER TRAINING 1 Introduction What is Microsoft Windows SharePoint Services? Windows SharePoint Services (referred to generically as SharePoint) is a tool
Using the isupport Customer Profile Screen
 Using the isupport Customer Profile Screen The Customer Profile screen (accessed via the Desktop menu) enables you to record customer information that can be used in all isupport functionality. Note that
Learning Series. Volume 8: Service Design and Business Processes
 Learning Series Volume 8: Service Design and Business Processes NOTICES ServicePRO Learning Series Edition November 2014 HelpSTAR and ServicePRO are registered trademarks of Help Desk Technology International
12/05/2017. Geneva ServiceNow Security Management
 12/05/2017 Security Management Contents... 3 Security Incident Response...3 Security Incident Response overview... 3 Get started with Security Incident Response... 6 Security incident creation... 40 Security
Sugar Corporate 6.4 Administration Guide
 Sugar Corporate 6.4 Administration Guide Sugar Corporate 6.4 Administration Guide Admin Wizard Users Sugar Connect System Email Developer Tools Products and Quotes Bug Tracker Forecasts Contract Types
HPE Intelligent Management Center v7.3
 HPE Intelligent Management Center v7.3 Service Operation Manager Administrator Guide Abstract This guide contains comprehensive conceptual information for network administrators and other personnel who
Unit 3: Local Fields
 Unit 3: Local Fields Text Fields Questions Covered What are fields and how do we define them? How can we change the kinds of data we are collecting? What are the different data types available and how
Web Client User Guide
 ImageTag, Inc. 2016 Contents Introduction... 2 Logging Into Your KwikTag Client... 3 KwikTag Tabs and Your Landing Page... 4 Drawers Tab Features and Functions... 7 My Lists... 7 The KwikTag Library...
Create and Manage Partner Portals
 Create and Manage Partner Portals Salesforce, Summer 18 @salesforcedocs Last updated: June 20, 2018 Copyright 2000 2018 salesforce.com, inc. All rights reserved. Salesforce is a registered trademark of
sforce Web Services Enterprise API sforce Object Query Language sforce Custom Objects... 40
 Release Notes Winter 04 Major Announcements Dashboards... 2 Workflow Automation... 8 Advanced Page Layout Wizard... 12 Dynamic Page Layouts and Field-Level Security... 14 Team-Based Account Management...
HarePoint HelpDesk for SharePoint. User Guide
 HarePoint HelpDesk for SharePoint For SharePoint Server 2016, SharePoint Server 2013, SharePoint Foundation 2013, SharePoint Server 2010, SharePoint Foundation 2010 User Guide Product version: 16.2.0.0
Managing Your Website with Convert Community. My MU Health and My MU Health Nursing
 Managing Your Website with Convert Community My MU Health and My MU Health Nursing Managing Your Website with Convert Community LOGGING IN... 4 LOG IN TO CONVERT COMMUNITY... 4 LOG OFF CORRECTLY... 4 GETTING
Comodo One Software Version 3.16
 rat Comodo One Software Version 3.16 Service Desk Staff Guide Guide Version 4.6.112817 Comodo Security Solutions 1255 Broad Street Clifton, NJ 07013 Table of Contents 1 Introduction to Service Desk Module...3
TREENO ELECTRONIC DOCUMENT MANAGEMENT. Administration Guide
 TREENO ELECTRONIC DOCUMENT MANAGEMENT Administration Guide February 2012 Contents Introduction... 8 About This Guide... 9 About Treeno... 9 Managing Security... 10 Treeno Security Overview... 10 Administrator
Welcome to the Investor Experience
 Welcome to the Investor Experience Welcome to the Black Diamond Investor Experience, a platform that allows advisors to customize how they present information to their clients. This document provides important
Case Management Implementation Guide
 Case Management Implementation Guide Salesforce, Winter 18 @salesforcedocs Last updated: November 30, 2017 Copyright 2000 2017 salesforce.com, inc. All rights reserved. Salesforce is a registered trademark
Comodo One Software Version 3.26
 rat Comodo One Software Version 3.26 Service Desk Staff Guide Guide Version 4.16.101018 Comodo Security Solutions 1255 Broad Street Clifton, NJ 07013 Table of Contents 1 Introduction to Service Desk Module...3
Bpm online customer service. User guide
 Bpm online customer service User guide User guide Contents 1. Bpm online customer service overview... 6 2. Bpm online interface... 8 2.1. Bpm'online interface overview... 9 2.2. The command line... 12
Comodo One Software Version 3.18
 rat Comodo One Software Version 3.18 Service Desk Staff Guide Guide Version 4.8.122817 Comodo Security Solutions 1255 Broad Street Clifton, NJ 07013 Table of Contents 1 Introduction to Service Desk Module...
Service Desk Staff Guide. Software version 4.16 Guide version ITarian 1255 Broad Street Clifton, NJ 07013
 Service Desk Staff Guide Software version 4.16 Guide version 4.16.110618 ITarian 1255 Broad Street Clifton, NJ 07013 Table of Contents 1 Introduction to Service Desk Module...3 1.1 Quick Start...5 1.2
Style Report Enterprise Edition
 INTRODUCTION Style Report Enterprise Edition Welcome to Style Report Enterprise Edition! Style Report is a report design and interactive analysis package that allows you to explore, analyze, monitor, report,
MyFloridaMarketPlace. equote Training State Agencies
 MyFloridaMarketPlace equote Training State Agencies 1 What is an equote When to use an equote Benefits Creating an equote Managing equotes Awarding & Viewing Results Resources Agenda What is an equote
Workflow Templates in Compliance 360 Version 2018
 Workflow Templates in Compliance 360 Version 2018 Workflow Templates 5 Workflow Elements 6 Workflow Teams 6 Workflow Template Changes 6 Create or Edit a Workflow Template 8 Import and Export Workflow Templates
User Guide. Version
 User Guide Version 0.19 2-11-2008 StormPro Max User Guide Page 1 of 69 5/10/2008 Table of Contents 1. Overview... 4 1.1 Definition of StormPro Max Terms... 4 2. Accessing StormPro Max... 5 3. Navigating
12/05/2017. Customer Service Management
 12/05/2017 Contents...3 Get started with... 3 Activate Customer Service... 5 Set up associated entities... 6 Set up communication channels... 16 Track and analyze Customer Service case data... 40 Create
Tyler Dashboard. User Guide Version 5.8. For more information, visit
 Tyler Dashboard User Guide Version 5.8 For more information, visit www.tylertech.com. TABLE OF CONTENTS Tyler Dashboard... 4 Tyler Dashboard Features... 4 Tyler Dashboard Ribbon... 4 User Views... 5 Tools...
AN INTRODUCTION TO OUTLOOK WEB ACCESS (OWA)
") INFORMATION TECHNOLOGY SERVICES AN INTRODUCTION TO OUTLOOK WEB ACCESS (OWA) The Prince William County School Division does not discriminate in employment or in its educational programs and activities against
INFORMATION TECHNOLOGY SERVICES AN INTRODUCTION TO OUTLOOK WEB ACCESS (OWA) The Prince William County School Division does not discriminate in employment or in its educational programs and activities against
TABLE OF CONTENTS CHAPTER
 TABLE OF CONTENTS CHAPTER 1...1 A QUICK OVERVIEW OF THE MICROSOFT EXCHANGE CLIENT...1 BASIC CONCEPTS AND FEATURES...1 STARTING THE MICROSOFT EXCHANGE CLIENT...1 SETTING OPTIONS FOR YOUR MESSAGES...3 LOOKING
Task Management User Guide
 Task Management User Guide Version 18 April 2018 Contents About This Guide... 5 Tasks Overview... 5 Create a Project for Task Management... 5 Project Templates Overview... 5 Add a Project Template...
HP ALM Overview. Exercise Outline. Administration and Customization Lab Guide
 HP ALM 11.00 Administration and Customization Lab Guide Overview This Lab Guide contains the exercises for Administration and Customization of HP ALM 11 Essentials training. The labs are designed to enhance
Salesforce Enterprise Edition Upgrade Guide
 Salesforce Enterprise Edition Upgrade Guide Salesforce, Spring 16 @salesforcedocs Last updated: February 11, 2016 Copyright 2000 2016 salesforce.com, inc. All rights reserved. Salesforce is a registered
Configuring isupport Change Functionality
 Configuring isupport Change Functionality Change functionality is available if you have the Service Desk version of isupport. Use Change functionality to record and track requests related to services and
Oracle. Service Cloud Knowledge Advanced User Guide
 Oracle Service Cloud Release November 2016 Oracle Service Cloud Part Number: E80589-02 Copyright 2015, 2016, Oracle and/or its affiliates. All rights reserved Authors: The Knowledge Information Development
The Guide. A basic guide for setting up your Samanage application
 The Guide A basic guide for setting up your Samanage application Table of Contents Introduction.............................................................. 3 Contacting Samanage for Assistance.........................................
USER MANUAL. TapCRM TABLE OF CONTENTS. Version: 1.4
 USER MANUAL TABLE OF CONTENTS Introduction... 1 Benefits of TapCRM... 1 Prerequisites... 1 Installation & Configuration... 2 TapCRM Plug-in Installation... 2 Front Side Instructions... 9 Contact Us...
Bpm online sales. Team Package User Guide
 Bpm online sales Team Package User Guide User guide Contents 1. Bpm online sales overview... 6 2. Bpm online interface... 8 2.1. Bpm'online interface overview... 9 2.2. Bpm online home page... 12 2.3.
KYOCERA Net Admin User Guide
 KYOCERA Net Admin User Guide Legal Notes Unauthorized reproduction of all or part of this guide is prohibited. The information in this guide is subject to change without notice. We cannot be held liable
Introduction...5. Chapter 1. Installing System Installing Server and ELMA Designer... 7
 Chapter 1 Contents Installing System Contents Introduction...5 Chapter 1. Installing System... 6 1.1. Installing Server and ELMA Designer... 7 1.2. Verifying ELMA Server and ELMA Designer Installation...
Office 365: . Accessing and Logging In. Mail
 Office 365: Email This class will introduce you to Office 365 and cover the email components found in Outlook on the Web. For more information about the Microsoft Outlook desktop client, register for a
Getting Started with the Aloha Community Template for Salesforce Identity
 Getting Started with the Aloha Community Template for Salesforce Identity Salesforce, Winter 18 @salesforcedocs Last updated: November 30, 2017 Copyright 2000 2017 salesforce.com, inc. All rights reserved.
Learning Portal AE: Customization and Configuration in Microsoft Dynamics CRM 2016 Hands-On-Lab
 2 Learning Portal 80729AE: Customization and Configuration in Microsoft Dynamics Hands-On-Lab 80729AE: Customization and Configuration in Microsoft Dynamics Table of Contents 80729AE: Customization and
Administrator Manual. Last Updated: 15 March 2012 Manual Version:
 Administrator Manual Last Updated: 15 March 2012 Manual Version: 1.6 http://www.helpdeskpilot.com Copyright Information Under the copyright laws, this manual may not be copied, in whole or in part. Your
Business Insight Authoring
 Business Insight Authoring Getting Started Guide ImageNow Version: 6.7.x Written by: Product Documentation, R&D Date: August 2016 2014 Perceptive Software. All rights reserved CaptureNow, ImageNow, Interact,
Luxor CRM 2.0. Getting Started Guide
 Luxor CRM 2.0 Getting Started Guide This Guide is Copyright 2009 Luxor Corporation. All Rights Reserved. Luxor CRM 2.0 is a registered trademark of the Luxor Corporation. Microsoft Outlook and Microsoft
RightNow eservice Center 5.5 New Administrator s Survival Guide
 RightNow eservice Center 5.5 New Administrator s Survival Guide Table of Contents You may click on each line below to go to that section of this document. OVERVIEW...3 HELPFUL RESOURCES...4 GAINING FAMILIARITY
Working with Groups, Roles, and Users. Selectica, Inc. Selectica Contract Performance Management System
 Selectica, Inc. Selectica Contract Performance Management System Copyright 2008 Selectica, Inc. 1740 Technology Drive, Suite 450 San Jose, CA 95110 http://www.selectica.com World rights reserved. You cannot
TREENO ELECTRONIC DOCUMENT MANAGEMENT
 TREENO ELECTRONIC DOCUMENT MANAGEMENT User Guide February 2012 Contents Introduction... 5 About This Guide... 5 About Treeno... 6 Navigating Treeno EDM... 7 Logging in to Treeno EDM... 7 Changing Your
User Help. Fabasoft Cloud
 User Help Fabasoft Cloud Copyright Fabasoft R&D GmbH, Linz, Austria, 2019. All rights reserved. All hardware and software names used are registered trade names and/or registered trademarks of the respective
Kaseya 2. User Guide. for VSA 6.3
 Kaseya 2 InfoCenter User Guide for VSA 6.3 September 25, 2013 Agreement The purchase and use of all Software and Services is subject to the Agreement as defined in Kaseya s Click-Accept EULA as updated
Jabber Messenger Online Help
 Jabber Messenger 3.2.1 Online Help Table Of Contents Welcome... 1 Welcome... 1 What's New in this Release?... 2 Getting Started... 3 Logging In... 3 Creating a New Account... 6 Using Jabber Messenger...
QQWebAgent and QQMarketing Dashboard Quick Start Guide
 QQWebAgent and QQMarketing Dashboard Quick Start Guide Contents Implementing QQWebAgent on Your Web Site... 3 What You Need to Do... 3 Instructions for Web Designers, Webmasters or Web Hosting Provider...
ReadyTalk for Marketo User Guide
 ReadyTalk for Marketo User Guide Revised 11/24/2015 Contents Configuring ReadyTalk & Marketo... 3 Setting Up Your Event in ReadyTalk... 5 Setting Up Your Event in Marketo... 7 Creating a New Program...
Comodo One Software Version 3.8
 rat Comodo One Software Version 3.8 Service Desk Administrator Guide Guide Version 4.0.051917 Comodo Security Solutions 1255 Broad Street Clifton, NJ 07013 Table of Contents 1 Introduction to Service Desk
Set Up and Maintain Sales Tools
 Set Up and Maintain Sales Tools Salesforce, Spring 16 @salesforcedocs Last updated: February 18, 2016 Copyright 2000 2016 salesforce.com, inc. All rights reserved. Salesforce is a registered trademark
Customer Relationship Management Software Version 1.0. Administrator Guide Guide Version ITarian 1255 Broad Street Clifton, NJ 07013
 Customer Relationship Management Software Version 1.0 Administrator Guide Guide Version 1.0.111218 ITarian 1255 Broad Street Clifton, NJ 07013 Table of Contents 1. Introduction to CRM...5 1.1.Open the
AiM Overview and Basic Navigation User Guide
 AiM Overview and Basic Navigation User Guide East Carolina University Department of Facilities Services Version 2.0 May 2017 1 AIM OVERVIEW AND BASIC NAVIGATION USER GUIDE Welcome to AiM! AiM, "Intelligence
Entropy Software General Administration & Configuration
 Entropy Software General Administration & Configuration V1.02 1 of 34 Contents 1. Customising your Entropy system... 4 1.1 Entering or editing your Organisation s name into Entropy... 4 1.2 Adding a Watermark...
Tasks. User Guide 4.12
 Tasks User Guide 4.12 ABOUT NORTHWOODS CONSULTING PARTNERS Northwoods Consulting Partners, Inc., founded in 1999, is a privately-held software development and services company headquartered in Dublin,
Table Of Contents. iii
 Table Of Contents Welcome... 1 Using the Content Repository... 3 Content Repository Overview... 3 Description... 3 Repository File Types... 4 Working with the Repository... 6 Content Repository Interface...
ForeScout Extended Module for Tenable Vulnerability Management
 ForeScout Extended Module for Tenable Vulnerability Management Version 2.7.1 Table of Contents About Tenable Vulnerability Management Module... 4 Compatible Tenable Vulnerability Products... 4 About Support
A Guide to Quark Author Web Edition 2015
 A Guide to Quark Author Web Edition 2015 CONTENTS Contents Getting Started...4 About Quark Author - Web Edition...4 Smart documents...4 Introduction to the Quark Author - Web Edition User Guide...4 Quark
Unit 2: Managing Views
 Unit 2: Managing Views 1 Questions Covered How do we define the information displayed in the table view? How do we change what information is displayed? How can we highlight the records of interest? How
Learn how to login to Sitefinity and what possible errors you can get if you do not have proper permissions.
 USER GUIDE This guide is intended for users of all levels of expertise. The guide describes in detail Sitefinity user interface - from logging to completing a project. Use it to learn how to create pages
Salesforce Lead Management Implementation Guide
 Salesforce Lead Management Implementation Guide Salesforce, Winter 16 @salesforcedocs Last updated: October 1, 2015 Copyright 2000 2015 salesforce.com, inc. All rights reserved. Salesforce is a registered
Desk Tracker User Guide
 Desk Tracker User Guide Compendium Library Services LLC PO Box 82 Bellvue, CO 80512 Phone: (970) 472-7979 Email: info@compendiumlib.com Web: www.compendiumlib.com Contents Terms. 2 Basic Use. 2 Reports.
Oracle. Service Cloud Using Knowledge Advanced
 Oracle Service Cloud Release August 2016 Oracle Service Cloud Part Number: Part Number: E77681-03 Copyright 2015, 2016, Oracle and/or its affiliates. All rights reserved Authors: The Knowledge Information
Munis. Using Munis Version For more information, visit
 Munis Using Munis Version 11.2 For more information, visit www.tylertech.com. TABLE OF CONTENTS Using Munis... 3 Favorites... 5 Munis Permissions and Security... 7 Munis Menus... 7 Standard Screen Features...
Oracle. Service Cloud Knowledge Advanced User Guide
 Oracle Service Cloud Release May 2017 Oracle Service Cloud Part Number: E84078-03 Copyright 2015, 2016, 2017, Oracle and/or its affiliates. All rights reserved Authors: The Knowledge Information Development
Contents. Common Site Operations. Home actions. Using SharePoint
 This is a companion document to About Share-Point. That document describes the features of a SharePoint website in as much detail as possible with an emphasis on the relationships between features. This
Comodo Customer Relationship Management Software Version 1.0
 Comodo Customer Relationship Management Software Version 1.0 Administrator Guide Guide Version 1.0.082417 Comodo Security Solutions 1255 Broad Street Clifton, NJ 07013 Table of Contents 1. Introduction
SharePoint: Fundamentals
 SharePoint: Fundamentals This class will introduce you to SharePoint and cover components available to end users in a typical SharePoint site. To access SharePoint, you will need to log into Office 365.
User Guide. Trade Finance Global. For customers using Guarantees. October nordea.com/cm OR tradefinance Name of document 5/8 2015/V1
 User Guide Trade Finance Global For customers using Guarantees October 2015 nordea.com/cm OR tradefinance Name of document 2015/V1 5/8 Table of Contents 1 Trade Finance Global (TFG) - Introduction... 4
Customer Relationship Management Software Version 1.0
 Customer Relationship Management Software Version 1.0 Administrator Guide Guide Version 1.0.111218 Comodo Security Solutions 1255 Broad Street Clifton, NJ 07013 Table of Contents 1. Introduction to CRM...5
Customizing and Administering Project Server Access
 WEB Customizing and Administering Project Server Access In this chapter Creating and Deleting Users from Project Server 2 Managing User Groups Project Server User Security 4 Using Categories to Control
USER MANUAL. SalesPort Salesforce Customer Portal for WordPress (Lightning Mode) TABLE OF CONTENTS. Version: 3.1.0
 TABLE OF CONTENTS. Version: 3.1.0") USER MANUAL TABLE OF CONTENTS Introduction...1 Benefits of Customer Portal...1 Prerequisites...1 Installation...2 Salesforce App Installation... 2 Salesforce Lightning... 2 WordPress Manual Plug-in installation...
USER MANUAL TABLE OF CONTENTS Introduction...1 Benefits of Customer Portal...1 Prerequisites...1 Installation...2 Salesforce App Installation... 2 Salesforce Lightning... 2 WordPress Manual Plug-in installation...
SharePoint: Fundamentals
 SharePoint: Fundamentals This class will introduce you to SharePoint and cover components available to end users in a typical SharePoint site. To access SharePoint, you will need to log into Office 365.
SharePoint User Manual
 SharePoint User Manual Developed By The CCAP SharePoint Team Revision: 10/2009 TABLE OF CONTENTS SECTION 1... 5 ABOUT SHAREPOINT... 5 1. WHAT IS MICROSOFT OFFICE SHAREPOINT SERVER (MOSS OR SHAREPOINT)?...
Administrator Manual. Last Updated: 15 March 2012 Manual Version:
 Administrator Manual Last Updated: 15 March 2012 Manual Version: 1.6 http://www.happyfox.com Copyright Information Under the copyright laws, this manual may not be copied, in whole or in part. Your rights
ZENworks Reporting System Reference. January 2017
 ZENworks Reporting System Reference January 2017 Legal Notices For information about legal notices, trademarks, disclaimers, warranties, export and other use restrictions, U.S. Government rights, patent
Remote Support 19.1 Web Rep Console
 Remote Support 19.1 Web Rep Console 2003-2019 BeyondTrust Corporation. All Rights Reserved. BEYONDTRUST, its logo, and JUMP are trademarks of BeyondTrust Corporation. Other trademarks are the property
System Administrator Guide
 System Administrator Guide System Administrator 2 Contents Purpose... 4 Table Admin... 5 Configure System Tables... 6 Navigate System Tables... 7 Filters... 7 Sort Columns... 9 Display Controls... 9 Common
Ge#ng Started Guide New Users and Starter Edi/on
 Ge#ng Started Guide New Users and Starter Edi/on Goal Thank you for taking the time to use Viewpath as your project management solution. Our goal in providing this guide is to help streamline the process
Administrator Manual
 Administrator Manual CURA Technical Support Email: cura_support@mindscope.com Phone: 1.888.322.2362 x 55 Administrator Manual Page 1 Table of Contents The Setup Module... 3 Skills... 3 Adding or Modifying
User Guide. Product: GreenFolders. Version: 3.8
 User Guide Product: GreenFolders Version: 3.8 Release Date: October 2014 GreenFolders 3.8 User Guide Introduction Table of Contents 1 Introduction... 6 2 General Information... 7 2.1 Login Procedure...
SharePoint 2010 Tutorial
 SharePoint 2010 Tutorial TABLE OF CONTENTS Introduction... 1 Basic Navigation... 2 Navigation Buttons & Bars... 3 Ribbon... 4 Library Ribbon... 6 Recycle Bin... 7 Permission Levels & Groups... 8 Create
Microsoft Office Outlook 101
 Microsoft Office Outlook 101 Open Outlook Find the Outlook icon on your desktop and double-click (If there is no icon, go to the start menu, All Programs, folder named Microsoft Office, double-click Outlook)
MICROSOFT OFFICE OUTLOOK 101
 MICROSOFT OFFICE OUTLOOK 101 Open Outlook Find the Outlook icon on your desktop and double-click (If there is no icon, go to the start menu, All Programs, folder named Microsoft Office, double-click Outlook)
GroupLink s everything HelpDesk v Release Notes, Public Release December 20, 2018
 everything HelpDesk v11.5.1 Release Notes, Public Release December 20, 2018 everything HelpDesk v11.5.1 is the latest and greatest version of ehd. This minor release was engineered to deliver small bug
Icon Directory. Action Icons. Icon Name Description
 Icon Directory The icons found on the various MasterControl pages are listed according to their general location on a given page. For instance, Action Icons usually are found in columns headed "Action".
ReadyTalk for HubSpot User Guide
 ReadyTalk for HubSpot User Guide Revised March 2016 2 Contents Overview... 3 Configuring ReadyTalk & HubSpot... 4 Configure Sync for Additional Webinar Data... 6 How to Setup the Sync for Additional Webinar
This document contains information that will help you to create and send graphically-rich and compelling HTML s through the Create Wizard.
 This document contains information that will help you to create and send graphically-rich and compelling HTML emails through the Create Email Wizard. or warranty by AT&T and is subject to change. 1 Contents
SureClose Product Line
 SureClose Product Line Release Notes 3.7 June 21, 2013 SureClose 3.7 Release Notes June 2013 1 Table of Contents Overview... 4 Post-Installation Considerations... 4 Features and Functionality... 6 New