Nessus Network Monitor 5.4 User Guide. Last Updated: February 20, 2018
|
|
|
- Jonah Allen
- 6 years ago
- Views:
Transcription


1 Nessus Network Monitor 5.4 User Guide Last Updated: February 20, 2018
2 Table of Contents Nessus Network Monitor 5.4 User Guide 1 Welcome to Nessus Network Monitor 8 NNM Workflow 9 System Requirements 10 Hardware Requirements 11 Software Requirements 13 Licensing Requirements 16 Download NNM 17 Install NNM 18 Install NNM on Linux 19 Install NNM on Windows 21 Install NNM on macos 28 Upgrade NNM 31 Upgrade NNM on Linux 32 Upgrade NNM on Windows 33 Upgrade NNM on macos 34 Set up NNM 35 Configure NNM 36 Register NNM Offline via the NNM Interface 38 Register NNM Offline via the CLI 40 Configure High Performance Mode 42 Remove NNM 43 Copyright Tenable Network Security, Inc. All rights reserved. Tenable Network Security, Nessus, SecurityCenter Continuous View, Passive Vulnerability Scanner, and Log Correlation Engine are registered trademarks of Tenable Network Security, Inc. All other products or services are trademarks of their respective owners.
3 Remove NNM from Linux 44 Remove NNM from Windows 45 Remove NNM from macos 46 NNM Features 47 NNM Navigation 48 Monitoring Page 50 Dashboards Section 54 Hosts Section 57 Vulnerabilities Section 62 Applications Section 63 Operating Systems Section 64 Connections Section 65 Mobile Devices Section 66 Results Page 67 Users Page 69 Configuration Page 70 NNM Settings Section 71 Feed Settings Section 81 Offline Update 82 Cloud Settings Section 84 Industrial Security Settings Section 85 Web Proxy Settings Section 86 Chart Settings Section 87 Settings Section 88 Copyright Tenable Network Security, Inc. All rights reserved. Tenable Network Security, Nessus, SecurityCenter Continuous View, Passive Vulnerability Scanner, and Log Correlation Engine are registered trademarks of Tenable Network Security, Inc. All other products or services are trademarks of their respective owners.
4 Plugin Settings Section 90 Nessus Scanner Settings Section 93 How To 94 Monitoring Page 95 Rearrange Charts 96 Set a Range for the Dashboards Section 97 Refresh a Chart 98 Remove a Chart from a Dashboard 99 Export Results 100 Filter Results 101 Launch a Nessus Scan 102 Delete a Vulnerability 103 Results Page 104 Upload a Report 105 Upload a Pcap 106 Filter Results 107 Delete Results 108 Users Page 109 Create a New User 110 Modify a User Account 111 Reset a Locked Account 112 Delete a User 113 Configuration Page 114 Configure the Performance Mode 115 Copyright Tenable Network Security, Inc. All rights reserved. Tenable Network Security, Nessus, SecurityCenter Continuous View, Passive Vulnerability Scanner, and Log Correlation Engine are registered trademarks of Tenable Network Security, Inc. All other products or services are trademarks of their respective owners.
5 Download New Vulnerability Plugins 117 Updating the NNM Management Interface 118 Configure NNM for use with Industrial Security 119 Create a Custom Chart 125 Delete a Chart 128 Create an Notification 129 Delete an Notification 131 Add a Plugin Field 132 Delete a Custom Plugin 133 Add a Nessus Scanner 134 Delete a Nessus Scanner 135 Additional Resources 136 Command Line Operations 137 Common Command Line Operations 138 Linux Command Line Operations 142 Windows Command Line Operations 146 macos Command Line Operations 148 Unknown or Customized Ports 150 Real-Time Traffic Analysis Configuration Theory 151 Focus Network 152 Detecting Server and Client Ports 153 Detecting Specific Server and Client Port Usage 154 Firewall Rules 156 Working with SecurityCenter CV 157 Copyright Tenable Network Security, Inc. All rights reserved. Tenable Network Security, Nessus, SecurityCenter Continuous View, Passive Vulnerability Scanner, and Log Correlation Engine are registered trademarks of Tenable Network Security, Inc. All other products or services are trademarks of their respective owners.
6 Selecting Rule Libraries and Filtering Rules 158 Detecting Encrypted and Interactive Sessions 159 Routes and Hop Distance 160 Alerting 161 Modules 162 Connection Analysis Module 163 SCADA/ICS Analysis Module 166 Internal NNM Plugin IDs 219 NNM Plugins 221 About NNM Plugins 222 NNM Fingerprinting 223 NNM Plugin Syntax 224 Network Client Detection 229 Pattern Matching 230 Time Dependent Plugins 233 Plugin Examples 235 NNM Real-Time Plugin Syntax 238 Real-Time Plugin Examples 240 NNM Corporate Policy Plugins 244 Detecting Custom Activity Prohibited by Policy 245 Detecting Confidential Data in Motion 248 Working with SecurityCenter CV 250 Managing Vulnerabilities 251 Syslog Messages 252 Copyright Tenable Network Security, Inc. All rights reserved. Tenable Network Security, Nessus, SecurityCenter Continuous View, Passive Vulnerability Scanner, and Log Correlation Engine are registered trademarks of Tenable Network Security, Inc. All other products or services are trademarks of their respective owners.
7 Standard Syslog Message Types 253 CEF Syslog Message Types 255 Custom SSL Certificates 256 Configure NNM for Certificates 258 Create a Custom CA and Server Certificate 259 Create NNM SSL Certificates for Login 261 Connect to NNM with a User Certificate 263 Copyright Tenable Network Security, Inc. All rights reserved. Tenable Network Security, Nessus, SecurityCenter Continuous View, Passive Vulnerability Scanner, and Log Correlation Engine are registered trademarks of Tenable Network Security, Inc. All other products or services are trademarks of their respective owners.
8 Welcome to Nessus Network Monitor This user guide describes the Tenable Nessus Network Monitor 5.4 (Patent 7,761,918 B2) architecture, installation, operation, and integration with SecurityCenter CV, Industrial Security, and Tenable.io, and export of data to third parties. Please any comments and suggestions to Tip: If you are new to NNM, see the Workflow. Passive vulnerability scanning is the process of monitoring network traffic at the packet layer to determine topology, clients, applications, and related security issues. NNM also profiles traffic and detects compromised systems. NNM can: Detect when systems are compromised with application intrusion detection. Highlight all interactive and encrypted network sessions. Detect when new hosts are added to a network. Track which systems are communicating on which ports. Detect which ports are served and which are browsed by each system. Detect the number of hops to each monitored host. Tip: For security purposes, Tenable does not recommend configuring NNM as internet facing software
9 NNM Workflow 1. Ensure that your setup meets the minimum system requirements: Hardware requirements Software requirements 2. Obtain the proper license or Activation Code for NNM for your configuration. Note: See special activation code instructions for integration withsecuritycenter, Industrial Security, or Tenable.io. 3. Follow the installation steps for your operating system: Linux Windows macos 4. Perform the initial configuration steps for NNM in the web interface. After configuration, NNM begins scanning immediately. Note: If you wish to register NNM offline or run NNM in High Performance mode, you must follow several additional configuration steps. 5. Create users in NNM and set administrative privileges as necessary. 6. You can view live scan results in dashboards on the Monitoring page and historical data in snapshots and reports on the Results page
10 System Requirements This section describes the following system requirements for NNM: Hardware Requirements Software Requirements Licensing Requirements
11 Hardware Requirements Enterprise networks can vary in performance, capacity, protocols, and overall activity. Resource requirements to consider for NNM deployments include raw network speed, the size of the network being monitored, and the configuration of NNM. The following chart outlines some basic hardware requirements for operating NNM: Version Installation scenario RAM Processor Hard Disk NNM managing up to 50,000 hosts * (**) 2 GB RAM (4 GB RAM recommended) 1 dual-core 2GHz CPU 20 GB HDD minimum NNM man- Memory: 4 GB RAM 1 dual-core 2 GHz CPU (2 20 GB HDD All Ver- aging more (8 GB RAM recom- dual-core recommended) minimum sions than 50,000 mended) hosts ** NNM running 16 GB RAM 10 CPUs with hyper-thread- 20 GB HDD in High Per- (HugePages ing enabled minimum formance memory: 2 GB) mode *The ability to monitor a given number of hosts depends on the bandwidth, memory, and processing power available to the system running NNM. **For optimal data collection, NNM must be connected to the network segment via a hub, spanned port, or network tap to have a full, continuous view of network traffic. Note: Please research your VM software vendor for comparative recommendations, as VMs typically see up to a 30% loss in efficiency compared to dedicated servers. High Performance Mode To run NNM in High Performance mode, a minimum of two of the following types of Intel NICs are required; one as a management interface and at least one as a monitoring interface:
12 e1000 (82540, 82545, 82546) e1000e (82571, 82574, 82583, ICH8.ICH10, PCH.PCH2) igb (82575, 82576, 82580, I210, I211, I350, I354, DH89xx) ixgbe (82598, 82599, X540, X550) i40e (X710, XL710)
13 Software Requirements The Nessus Network Monitor is available for the following platforms: Version Software Requirements Red Hat Linux ES 5 / CentOS 5 64-bit Red Hat Linux ES 6 / CentOS 6 64-bit Red Hat Linux ES 7 / CentOS 7 64-bit Mac OS X bit Microsoft Windows Vista, 7, 8, Server 2008, and Server Microsoft Visual C Redistributable Package High Performance mode only available on: CentOS 6.x 64-bit CentOS 7.x 64-bit Red Hat ES bit Red Hat ES 7.x 64-bit Linux kernel version Previous Versions Red Hat Linux ES 5 / CentOS 5 64-bit Red Hat Linux ES 6 / CentOS 6 64-bit Red Hat Linux ES 7 / CentOS 7 64-bit Mac OS X 10.8 and bit 5.1 Microsoft Windows Vista, 7, 8, Server 2008, and Server 2012 Microsoft Visual C Redistributable Package High Performance mode only available on: CentOS 6.x 64-bit CentOS 7.x 64-bit Red Hat ES bit
14 Version Software Requirements Red Hat ES 7.x 64-bit Linux kernel version Red Hat Linux ES 5 / CentOS 5 64-bit Red Hat Linux ES 6 / CentOS 6 64-bit Red Hat Linux ES 7 / CentOS 7 64-bit Mac OS X 10.8 and bit 4.4.x to 5.0 Microsoft Windows Vista, 7, 8, Server 2008, and Server 2012 High Performance mode only available on: CentOS 6.x 64-bit CentOS 7.x 64-bit Red Hat ES bit Red Hat ES 7.x 64-bit You can use ERSPAN to mirror traffic from one or more source ports on a virtual switch, physical switch, or router and send the traffic to a destination IP host running NNM. NNM supports the following ERSPAN virtual environments: VMware ERSPAN (Transparent Ethernet Bridging) Cisco ERSPAN (ERSPAN Type II) Tip: Refer to the Configuring Virtual Switches for Use with NNM document for details on configuring your virtual environment. High Performance Mode To run NNM in High Performance mode, you must enable HugePages support. HugePages is a performance feature of the Linux kernel and is necessary for the large memory pool allocation used for packet buffers. If your Linux kernel does not have HugePages configured, NNM automatically configures HugePages per the appropriate settings. Otherwise, if your Linux kernel has defined HugePages, refer to the Configuring HugePages instructions. The following virtual environments are supported for running NNM in High Performance mode:
15 VMware ESXi/ESX 5.5 VMXNET3 network adapter VMware ESXi/ESX
16 Licensing Requirements NNM Subscription An NNM subscription Activation Code is available that enables NNM to operate in Standalone mode. Use this mode to view results from an HTML interface enabled on the NNM server. Activation Code To obtain a Trial Activation Code for NNM, contact sales@tenable.com. Trial Activation Codes are handled the same way by NNM as full Activation Codes, except that Trial Activation Codes allow monitoring for only 30 days. During a trial of NNM, all features are available. SecurityCenter Continuous View SecurityCenter Continuous View includes NNM as part of a bundled license package with SecurityCenter. This license allows an unlimited number of NNM deployments to monitor an unlimited number of networks. SecurityCenter CV s IP view is constrained by the license with which it is purchased. Tenable.io Tenable.io pushes plugins down to NNM. Your Tenable.io licensing determines the number of NNM deployments. High Performance Mode NNM in High Performance Mode can be licensed in Standalone mode or bundled with SecurityCenter CV
17 Download NNM Steps 1. Access the Tenable Support Portal. 2. On the left side of the page, click Main Menu > Downloads. 3. Click Nessus Network Monitor. 4. Select the correct version for your operating system. After you accept the license agreement, a download begins. Note: To ensure binary compatibility, be sure to download the correct build for your operating environment. 4. Confirm the integrity of the installation package by comparing the downloaded MD5 checksum with the one listed in the product release notes
18 Install NNM This section describes how to perform an initial installation of NNM on the following platforms: Linux Windows macos
19 Install NNM on Linux Before You Begin These steps assume you have downloaded NNM and are running all commands with root privileges. To ensure audit record time stamp consistency between NNM and SecurityCenter CV, ensure the underlying OS makes use of NTP as described in the following document: Guide/sect-Date_and_Time_Configuration-Command_Line_Configuration-Network_Time_Protocol.html The software license agreement for NNM is located in the /opt/nnm/docs directory. It is also available online in the following location: Tip: Ensure that organizational and OS firewall rules permit access to port 8835 on the NNM server. Steps 1. Install the NNM.rpm file downloaded from the Tenable Support Portal on RedHat or CentOS with the following command. The specific filename varies depending on your platform and version. # rpm ivh NNM-5.x.x-esx.x86_64.rpm Preparing... ########################################### [100%] 1:NNM ########################################### [100%] [*] NNM installation completed. # The installation creates the /opt/nnm directory, which contains the NNM software, default plugins, and directory structure. 2. Start NNM for Red Hat and CentOS systems using the following command: # service nnm start 3. Navigate to address or hostname>:8835, which displays the NNM web
20 front end to log in for the first time. Refer to Configure NNM to complete the initial login
21 Install NNM on Windows Before You Begin These steps assume you have downloaded NNM and are running all programs as a local user with administrative privileges. To do so, when UAC is enabled, right-click on the installer program and select Run as Administrator. Additionally, you must ensure the latest version of Microsoft Visual C Redistributable Package is installed for your 64-bit platform and architecture. Be sure to stop any other programs on your system that utilize WinPcap. Steps 1. Double-click the.exe file downloaded from the Tenable Support Portal. The specific filename varies depending on your version. The InstallShield Wizard launches, which walks you through the installation process and required configuration steps
22 2. Click the Next button. The License Agreement screen appears

23 3. Agree to the terms to continue the installation process and use NNM. Tip: You can copy the text of the agreement into a separate document for reference, or you can click the Print button to print the agreement directly from this screen. 4. Click the Next button. The Customer Information screen appears. The User Name and Company Name fields are used to customize the installation, but are not related to any configuration options (e.g., for interfacing with SecurityCenter CV)

24 5. Click the Next button. The Choose Program Location screen appears, where you can verify the location in which the NNM binaries are installed
25 6. Click the Change button to specify a custom path. 7. Click the Next button. The Choose Data Location screen appears, where you can verify the location in which user data generated by NNM is stored
26 8. Click the Change button to specify a custom path. Tip: If you connect NNM to SecurityCenter CV, altering the data path disables SecurityCenter CV from retrieving reports. 9. Click the Next button. The Ready to Install the Program screen appears, where you can review and edit the information supplied on previous screens
27 10. Click the Install button. The Setup Status screen appears. If the most recent version of WinPcap is already installed on the system, the NNM installation process asks if you want to force or cancel installation of WinPcap. If it does not detect WinPcap, or detects and older version, a second installer launches to install or upgrade the software. Tip:Use the provided version of WinPcap or newer. NNM has been designed and tested using the supplied version of WinPcap. 11. Start NNM

28 Install NNM on macos Before You Begin These steps assume you have downloaded NNM and are running all programs as a root user or with equivalent privileges. Steps 1. Double-click the.dmg file downloaded from the Tenable Support Portal to mount the disk image NNM Install. The specific filename varies depending on your version. 2. Double-click the Install NNM.pkg file. The Install Tenable NNM window appears, which walks you through the installation process and any required configuration steps

29 3. Click the Continue button. The Software License Agreement screen appears. 4. Agree to the terms to continue the installation process and use NNM. Tip: You can copy the text of the agreement into a separate document for reference, or you can click the Print button to print the agreement directly from this screen. 4. Click Install to begin the installation. A window appears asking for authentication permission to install the software. 5. Click the Install Software button. A window appears, requesting permission to allow NNM to accept incoming network connections. If this option is denied, NNM is installed but functionality is severely reduced
30 6. When the identity dialog box appears, click Continue. Tip: Once the installation process is complete, eject the NNM install volume. Start and Stop NNM for macos 1. Access System Preferences > NNM.Preferences. The NNM.Preferences window appears. 2. Select the Start NNM or Stop NNM button. Tip: You can also issue a command from the terminal to manually start or stop NNM
31 Upgrade NNM This section describes how to upgrade an existing NNM instance on the following platforms: Linux Windows macos
32 Upgrade NNM on Linux Before You Begin These steps assume you have backed up your custom SSL certificates. They also assume that you are running all commands with root privileges. Additionally, if you have used an NNM RPM to install NNM previously, an upgrade retains configuration settings. You must transfer the NNM RPM package to the system on which it is being installed. Confirm the integrity of the installation package by comparing the download MD5 checksum with the one listed in the product release notes. Steps 1. Stop NNM with the following command: # service nnm stop 2. Install the NNM.rpm file downloaded from the Tenable Support Portal with the following command. The specific filename varies depending on your version: # rpm -Uvh NNM-5.x.x-esx.x86_64.rpm Preparing... ########################################### [100%] 1:NNM ########################################### [100%] [*] NNM installation completed. # 3. Once the upgrade is complete, start NNM with the following command: # service nnm start 4. Navigate to address or hostname>:8835, which displays the NNM web front end to log in. Tip: Ensure that organizational firewall rules permit access to port 8835 on the NNM server
33 Upgrade NNM on Windows Before You Begin These steps assume you have backed up your custom SSL certificates. They also assume that you are running all programs as a local user with administrative privileges. To do so, when UAC is enabled, right-click on the installer program and select Run as Administrator. Additionally, you must ensure the latest version of the Microsoft Visual C Redistributable Package is installed for your 64-bit platform and architecture. Be sure to stop any other programs on your system that are utilizing WinPcap. Steps 1. Stop the Tenable NNM Proxy Service from the Windows Services control panel. 2. Double-click the.exe file downloaded from the Tenable Support Portal. The specific filename varies depending on your platform and/or version. The InstallShield Wizard launches and begins the upgrade process. 3. Click the Next button. The automated upgrade process begins. Note: If the version of WinPcap is not at the appropriate level during the upgrade process, an upgrade window appears and begins the process of upgrading WinPcap. Failure to install the recommended version of WinPcap may result in errors with NNM monitoring. 4. When the upgrade is complete, start NNM. 5. Navigate to address or hostname>:8835 to display the NNM web front end to log in. Tip: Ensure that organizational firewall rules permit access to port 8835 on the NNM server
34 Upgrade NNM on macos Before You Begin These steps assume that you have backed up your custom SSL certificates and are running all programs with root privileges. Steps 1. Stop NNM. 2. Double-click the.dmg file downloaded from the Tenable Support Portal to mount the disk image NNM Install. The specific filename varies depending on your version. 3. Double-click the Install NNM.pkg file. The Install Tenable NNM window appears, which walks you through the upgrade process and any required configuration steps. 4. Click the Continue button. The Software License Agreement screen appears. 5. Agree to the terms to continue the installation process and use NNM. Tip: You can copy the text of the agreement into a separate document for reference, or you can click the Print button to print the agreement directly from this screen. 6. Click the Install button. A window appears asking for authentication permission to install the software. 7. Click the Install Software button. A window appears requesting permission to allow NNM to accept incoming network connections. If this option is denied, NNM is installed but functionality is severely reduced. 8. Click the Allow button
35 Set up NNM NNM configuration follows the same steps for all operating systems. This section provides instructions for the following: Configure NNM Register NNM Offline via the NNM Interface Register NNM Offline via the CLI Configure High Performance Mode
36 Configure NNM Steps 1. In a web browser, navigate to address or hostname>: Enter the the default username and password, which are both admin. 3. Click Sign In To Continue. 4. The Change Default Password screen of the Quick Setup window appears, where you can change the default password. The new password must meet the following minimum requirements: Minimum 5 characters long One capital letter One lowercase letter One numeric digit One special character from the following list:!@#$%^&*() 5. Click Next Step. The Set Activation Code screen appears. 6. In the Activation Code box, enter the appropriate text based on your setup: If NNM is acting as a standalone device, enter an Activation Code. If NNM is managed by Tenable.io, enter the text Cloud. Four configuration options appear: Cloud Host, Cloud Port, Cloud Key, and NNM Name. Refer to the Cloud Settings section for more information. If NNM is managed by SecurityCenter CV, enter the text SecurityCenter. -or- To register NNM offline, select the Register Offline check box and follow the Register NNM Offline instructions. 7. Click Next Step
37 The Monitoring Configuration screen appears. The Monitored Network Interfaces box displays the monitored interfaces identified by NNM. You can select one or more of the defined interfaces. The caret icon displays additional information about each interface. The Monitored Network IP Addresses and Ranges box displays the IP address ranges NNM monitors. The Excluded Network IP Addresses and Ranges box displays the IP address ranges NNM does not monitor. The Monitored Network IP Addresses and Ranges and Excluded Network IP Addresses and Ranges boxes accept both IPv4 and IPv6 CIDR address definitions. When using multiple addresses, separate the entries using commas or new lines. Note: Tenable Network Security does not recommend entering large ranges such as /0. Because this indicates to NNM that any and all network addresses belong in the network, performance may be severely impacted. Please only include addresses in your network, as each address undergoes in-depth processing. 8. Click Finish. The Monitoring page appears. Once NNM starts monitoring traffic, the page displays various high-level charts about the vulnerabilities, assets, connections, and bandwidth usage that NNM has detected, as well as real-time events that NNM has triggered
38 Register NNM Offline via the NNM Interface Steps 1. In Step 4 of the Initial Configuration, on the Quick Setup window, select the Register Offline check box. A challenge code and the Activation Key box appear. 2. Copy the challenge code and, in a web browser, navigate to 3. In the appropriate boxes, paste your challenge code and enter the Activation Code you received from Tenable. 4. Click Submit. The page generates a URL to download the NNM plugins tarball. Save this URL, as it is used every time you update your plugins. Additionally, a license key appears. 5. Copy the license key. 6. Navigate to the NNM interface
39 7. Paste the license key into the Activation Key box on the Quick Setup window. 8. Click the Next Step button. 9. Continue with Step 5 of the Initial Configuration instructions. Note: After configuring NNM, upload the plugins tarball in the Offline Update area of the Feed Settings section
40 Register NNM Offline via the CLI If your NNM installation cannot reach the Internet directly, use the following procedure to register and update plugins: 1. On the system running NNM, type the following command: Platform Red Hat Linux / CentOS Windows macos Command to Run # /opt/nnm/bin/nnm --challenge C:\Program Files\Tenable\NNM\nnm --challenge # /Library/NNM/bin/nnm --challenge This produces a challenge code similar to the following: 569ccd9ac72ab3a62a3115a945ef8e710c0d73b8 2. Go to 3. Paste the challenge code as well as the Activation Code you received previously from Tenable into the appropriate text boxes. This produces a URL that gives you direct access to the NNM plugins. 4. Save the URL as it is used every time you update your plugins. Additionally, a license key and the associated NNM.license file are produced. 5. Copy this file to the host running NNM in the appropriate directory. 6. Once the NNM.license file is copied, run the NNM --register-offline command to install the file: Platform Red Hat Linux / CentOS Windows Directory # /opt/nnm/bin/nnm --register-offline /path/to/nnm.license C:\Program Files\Tenable\NNM\nnm --register-offline "C:\path\to\NNM.license"
41 Platform macos Directory # /Library/NNM/bin/nnm --register-offline /path/to/nnm.license 7. To obtain the newest plugins, navigate to the URL provided in the previous step. You receive a TAR file (e.g., sc-passive.tar.gz). 8. Copy the file to NNM and then type the appropriate command for your platform: Platform Red Hat Linux / CentOS Windows macos Command # /opt/nnm/bin/nnm --update-plugins /path/to/sc-passive.tar.gz C:\Program Files\Tenable\NNM\nnm --update-plugins C:\path\to\sc-passive.tar.gz # /Library/NNM/bin/nnm --update-plugins /path/to/scpassive.tar.gz
42 Configure High Performance Mode Before You Begin The following steps are required to operate NNM in High Performance mode. Alternatively, a user with administrative privileges can enable High Performance mode via the UI. You must have a High Performance Activation Code in order to run NNM in High Performance mode. NNM uses multiple cores to process packets received from monitored interfaces. These are known as worker cores. The default number of worker cores is 8. This number can be changed using the configuration parameter Number Of Worker Cores. Note: If you set the Number Of Worker Cores parameter to 0, NNM automatically changes the value to the minimum number of worker cores needed to run NNM in High Performance mode. For example, suppose you have 20 available logical cores. Four of those cores are used by the system for internal processing and the kernel. If you want to use the 16 available cores for NNM, then you may change the value for the parameter Number Of Worker Cores to 16. Steps 1. Stop NNM with the following command: # service nnn stop 2. Enable High Performance mode with the following command: /opt/nnm/bin/nnm --config "Enable High Performance Mode" "1" 3. Confirm that the management network interface is different from the monitoring network interface that you configured initially. Note: If the configured monitored interface has bound IPv4 addresses, you cannot complete the Quick Setup Wizard to configure NNM because no usable NICs appear in the Monitored Network Interfaces list. 4. Start NNM with the following command: # service nnm start
43 Remove NNM The following instructions describe how to remove NNM from the following platforms: Linux Windows macos
44 Remove NNM from Linux Steps 1. Stop NNM with the following command: # service nnm stop 2. Determine the name of the RPM file with the following command: # rpm -qa grep nnm The name of the RPM file appears. 3. Remove the NNM RPM with the following command: # rpm -e <RPM name> 4. Some user-created and user-modified files are not removed with the -e command. Remove any remaining files with the following command: # rm -rf /opt/nnm NNM is removed
45 Remove NNM from Windows Steps 1. Depending on your version of Windows, in the Control Panel, under Programs, click one of the following: Programs and Features Add or Remove Programs 2. Select Tenable Nessus Network Monitor. 3. Click Change/Remove. The InstallShield Wizard appears. 4. Follow the directions in this wizard to completely remove NNM. 5. Select Yes to remove the NNM program and all its files, folders, and features from the system. -or- Select No to remove only the NNM program. All user-created files and relevant file folders remain on the system. 6. Restart your machine to complete the removal. 7. Follow the same instructions to remove WinPcap
46 Remove NNM from macos Steps 1. Stop NNM. 2. Delete the following directories (including subdirectories) and files with either sudo root or root privileges using the command line: # rm /Library/LaunchDaemons/com.tenablesecurity.nnm* # rm -r /Library/NNM # rm -r /Library/PreferencePanes/NNM* # rm -r /Applications/NNM NNM is removed from your macos system
47 NNM Features The NNM web interface allows NNM to monitor network traffic and report results without needing SecurityCenter CV or another third party tool to analyze the data. The web interface can be used on web browsers that support HTML5, including the following: Microsoft Internet Explorer 9 and later Firefox 24 and later Google Chrome 30 and later This section describes the following features in the NNM web interface: Navigation Monitoring Results Users Configuration

48 NNM Navigation The top navigation menu displays two main pages: Monitoring and Results. All of NNM s primary analysis tasks can be performed using these two pages. Click a page name to open that page. On the right side of the top navigation menu, you can see both the currently logged in user. icon and the username of the 1. Click the icon to display the Users and Configuration options, where you can make administrative changes to NNM. Note: The Users and Configuration pages are available only to users with administrative privileges. 2. Click the username to display a drop-down menu with three options: Change Password, Help The bell ( & Support, and Sign Out. ) icon toggles the Notification History box, which displays a list of notifications, successful or unsuccessful login attempts, errors, and system information generated by NNM. The color of the bell changes based on the nature of the notifications in the list. If there are no alerts, or all notifications are information alerts, then the bell is blue ( ). If there are error alerts in the notification list, then the bell is red ( ). The Notification History box displays up to 1,000 alerts. Once the limit is reached, no new alerts can be listed until old ones are cleared
49 To remove notifications individually, click the button to the right of the description of each event. Alternatively, click the Clear History button in the bottom right corner of the box to delete the entire notification history. Note: Notifications are not preserved between sessions. Unread notifications are removed from the list when the user logs out
50 Monitoring Page The Monitoring page provides a centralized view of vulnerabilities discovered by NNM. On this page, vulnerabilities may be viewed in several categories, including Dashboards, Hosts, Vulnerabilities, Applications, Operating Systems, Connections, and Mobile Devices. The results may also be exported in different formats for use in other programs. Across all of the viewable methods available on the Monitoring page, filter options are available to increase granularity when viewing results. Click the heading of a column to sort items within that section of the Monitoring page in ascending or descending order. The Actions drop-down menu allows you to export results, delete results, or launch a Nessus scan. Note: After deleting results, you must restart NNM to see the most up-to-date information. The Filter <section name> box allows for quick filtering based on entered text for the Monitoring page. To view a list of filterable plugin attributes, click the down arrow for any quick filter text field. Results display based on a match of Any or All entered fields. The search field contains example hints when empty, but if an incorrect filter value is entered, the field displays a red border. Note: The Filter <section name> box is not available in the Dashboards section. Tip: For instructions on performing the actions available on the Monitoring page, see the related How To section of this guide
51 Filter Text Name Bugtraq ID CPE CVE CVSS Base Score CVSS Temporal Score CVSS Temporal Vector CVSS Vector Description Filter the results of discovered vulnerabilities based on their Bugtraq identifications. Filter the results of discovered vulnerabilities based on their CPE identifiers. Filter the results of discovered vulnerabilities based on their CVE identifiers. Filter the results of discovered vulnerabilities based on the base CVSS score as reported by vulnerability plugins. Filter the results of discovered vulnerabilities based on the temporal CVSS score as reported by vulnerability plugins. Filter the results of discovered vulnerabilities based on the CVSS temporal vector as reported by vulnerability plugins. Filter the results of discovered vulnerabilities based on the CVSS vector as reported by vulnerability plugins
52 Name CVSS v3.0 Base Score CVSS v3.0 Temporal Score CVSS v3.0 Temporal Vector CVSS v3.0 Vector Host IAVA ID IAVB ID IAVT ID OSVDB ID Plugin Description Plugin Family Plugin ID Plugin Name Plugin Output Description Filter the results of discovered vulnerabilities based on the CVSS v3.0 base score as reported by vulnerability plugins. Filter the results of discovered vulnerabilities based on the temporal CVSS v3.0 score as reported by vulnerability plugins. Filter the results of discovered vulnerabilities based on the temporal CVSS v3.0 vector as reported by vulnerability plugins. Filter the results of discovered vulnerabilities based on the CVSS v3.0 vector as reported by vulnerability plugins. Filter the results of discovered vulnerabilities based on the discovered IP address of the device. Filter the results of discovered vulnerabilities based on the IAVA IDs of the vulnerabilities. Filter the results of discovered vulnerabilities based on the IAVB IDs of the vulnerabilities. Filter the results of discovered vulnerabilities based on the IAVT IDs of the vulnerabilities. Filter the results of discovered vulnerabilities based on the discovered OSVDB identifiers. Filter the results of discovered vulnerabilities based on text available in the descriptions of the vulnerabilities. Filter the results of discovered vulnerabilities based on a family of discovered vulnerabilities. Filter the results of discovered vulnerabilities based on the IDs of the plugins that identified the vulnerabilities. Filter the results of discovered vulnerabilities based on text available in the names of the plugins that identified the vulnerabilities. Filter the results of discovered vulnerabilities based on text contained in the output of the plugin that discovered the vulnerability
53 Name Port Protocol STIG Severity See Also Severity Solution Synopsis System Type VLAN ID Description Filter the results of discovered vulnerabilities based on the port on which the vulnerability was discovered. Filter the results of discovered vulnerabilities based on the detected protocol: tcp, udp, or icmp. Filter the results of discovered vulnerabilities based on STIG severity level of the plugin. Filter the results of discovered vulnerabilities based on the text available in the See Also field of the plugin. Filter the results of discovered vulnerabilities based on the identified severity. Filter the results of discovered vulnerabilities based on text available in the solution section of the plugin. Filter the results of discovered vulnerabilities based on text available in the synopsis section of the plugin. Filter the results of discovered vulnerabilities based on the system type of the device. Filter the results of discovered vulnerabilities based on the VLAN ID of the device
54 Dashboards Section The Dashboards section displays the contents of the vulnerability tab in a graphical layout. The default dashboard layout displays the following charts: Top 10 Hosts Top 10 Vulnerabilities Top 5 Applications Distribution by Operating System Top 10 Talkers Top 10 Mobile Devices Distribution of Mobile Devices by Operating System Top 10 Mobile Devices by Hardware Distribution of Mobile Applications by Application SCADA Vulnerability Distribution by Severity Top 10 SCADA Hosts SCADA Host Distribution by Protocol SCADA Host Distribution by System Type Client Connections Network Bandwidth by Byte Count Event Trending Note: Depending on your NNM configuration, some charts may not display. Drag-and-drop charts to rearrange them on the dashboard for the duration of your session. The Client Connections, Network Bandwidth by Byte Count, and Event Trending charts cannot be moved
55 The following table describes the options available in the Dashboards section: Option <click on the chart> Description Opens a Details section with more information about the data displayed in a chart. Note: You cannot click on the Top 10 Mobile Devices by Hardware chart. button button button Removes the chart from the Dashboards section for the duration of your session. Refreshes the chart. Provides options to Export Results, Delete Results, or Launch Scan. button Provides options to filter chart data based on a specified date range. Events Dashboard Click on the Event Trending chart to Access the Events dashboard. Alternatively, click on the Network Bandwidth by Byte Count chart to access the Events dashboard. The Events dashboard
56 displays a graphical representation of the number of maximum viewable real-time events as defined in the Realtime Events setting type in the NNM Settings section. The Event Details table can be customized by sorting columns, showing or hiding columns, filtering content by clicking View Active Filters, or by clicking underlined columns in the table
57 Hosts Section The Hosts section of the Monitoring page displays a list of the discovered hosts, the system type of the hosts, and a stacked bar chart. The chart is labeled and color-coded to indicate both the number and severity level of vulnerabilities detected on the host. Select a host from the list to display the host s attributes and discovered vulnerabilities. In the dropdown menu at the top of the section, select one of the following options to view relevant information. Vulnerabilities Vulnerabilities detected on this host appear in descending order of severity. The Vulnerabilities list displays the name of each vulnerability, the vulnerability family, and the number of vulnerabilities discovered. Select a vulnerability from the list to display vulnerability details including a synopsis, a description, a solution, plugin details, risk information, reference information, and affected hosts and services for the host
58 Applications Applications appear in descending order of severity. The Applications list displays the name and number of each application. Select an application from the list to display information about the application observed on this host. The list includes the name and number of discoveries, the affected port and protocol, the software and version, and the services available
59 Client Connections Hosts to which the selected host has connected are grouped by port. The Client Connections list displays information about connections from the selected host to other hosts, which port(s) were used, and, if known, the services. Click on a client connection to display a Connections sidebar that displays Host Details, a Client Connections diagram, and, where applicable, a Recent Sessions table
 were used, and, if known, the services.")
60 Server Connections Hosts that have connected to the selected host are grouped by port. The Server Connections list displays information about connections to the selected host from other hosts, which port(s) were used, and, if known, the services. Click on a server connection to display a Connections sidebar that displays Host Details, a Server Connections diagram, and, where applicable, a Recent Sessions table
61 - 61 -
62 Vulnerabilities Section The Vulnerabilities section of the Monitoring page provides a list of the vulnerabilities detected by NNM. Additionally, you can view a vulnerability's plugin family and the number of detected vulnerabilities. Select a vulnerability from the list to display vulnerability details including a synopsis, a description, a solution, plugin details, risk information, reference information, and affected hosts and services for the host
63 Applications Section The Applications section displays a list of discovered applications. Select an application to display a list of affected hosts. The list includes the name and number of discoveries, the affected port and protocol, the software and version, and the services available
64 Operating Systems Section The Operating Systems section displays a list of discovered operating systems. The summary page lists the severity, operating system name as detected, and the number of discoveries. Select an operating system name from the list to display the severity, the version of the operating system, and service as available
65 Connections Section The Connections section displays information in two tabs: The Client Connections tab displays a list of hosts. Click on a host to display connections from the selected host to other hosts, the port(s) used, and, if known, the services. Click on a client connection to display a Connections sidebar that displays Host Details, a Client Connections diagram, and, where applicable, a Recent Sessions table. The Server Connections tab displays a list of hosts. Click on a host to display connections to the selected host from other hosts, the port(s) used, and, if known, the services. Click on a server connection to display a Connections sidebar that displays Host Details, a Server Connections diagram, and, where applicable, a Recent Sessions table
66 Mobile Devices Section The Mobile Devices section displays a list of discovered mobile devices. The summary page displays the IP address, model, operating system, and last seen timestamp for each mobile device within the monitored network range. Select a device name from the list to display the device s list of vulnerabilities and a list of applications for the mobile device
67 Results Page The Results page contains snapshots of monitored data, results from Pcap files entered manually via the command line or the client UI, and uploaded NNM reports. The Monitoring Snapshots generate regularly based on the Report Frequency setting. They are stored until deleted or the Report Lifetime setting removes them. Select a result grouping to view it using the same analysis tools described in the Monitoring section of this user guide: Hosts Vulnerabilities Applications Operating Systems Connections Mobile Devices Additionally, to compare two snapshots, check the desired snapshot results and select the Diff Snapshots option from the Actions drop-down menu. Tip: For instructions on performing the actions available on the Results page, see the related How To section of this guide
68 - 68 -
69 Users Page The Users page provides a list of the available users on the NNM server. Additionally, you can view account configuration options for each user. This page is visible only to users with administrative privileges. Click on a user to edit the user's information. Tip: For instructions on performing the actions available on the Users page, see the related How To section of this guide
70 Configuration Page The Configuration page allows users with administrative privileges to configure NNM for their local environment. The following sections are available: NNM Settings Feed Settings Cloud Settings Web Proxy Settings Chart Settings Settings Plugin Settings Nessus Scanner Settings Tip: For instructions on performing the actions available on the Configuration page, see the related How To section of this guide
71 NNM Settings Section The NNM Settings section provides options for configuring the network settings for NNM This includes what network(s) are monitored or excluded, how to monitor those networks, and what network interfaces NNM has identified for monitoring. If your NNM is licensed to run in High Performance mode, you can also change the performance mode. Note: The Network Interfaces Settings view only shows network interfaces that don't have IP addresses assigned to them. As a result, if all interfaces have assigned IP addresses, in High Performance mode, the list is empty. Name Description ACAS Classification ACAS Support for ACAS banners may be enabled from the command line of the NNM server service using the /opt/nnm/bin/nnm --config
72 Name Description --add "ACAS Classification" "SECRET" command. SECRET may be replaced by UNCLASSIFIED, CONFIDENTIAL, TOP SECRET, or NOFORN. Once enabled, a drop-down menu for the ACAS option appears in the UI front end. Support for ACAS banners may be disabled from the command line of the NNM server using the /opt/nnm/bin/nnm --config -- delete "ACAS Classification" command from the binary directory on the server. Advanced Maximum Plugins Update Frequency Login Banner A text box in which you can specify the maximum frequency with which plugins update. A text box in which you can specify a login banner. Analysis Modules Enable SCADA/ICS Analysis Module Enable Connection Analysis Module A check box that, when selected, enables the SCADA/ICS Analysis Module. Click the caret button to the left of the setting name to display a list of individual module detections within the module. Click on individual module detections within the list to disable/enable them. Disabling a SCADA/ICS module detection enables the legacy PASL. See the SCADA/ICS Analysis Module for more information. A check box that, when selected, enables the Connection Analysis Module. Click the caret button to the left of the setting name to display a list of individual module detections within the module. Click on individual module detections within the list to disable/enable them. See the Connection Analysis Module for more information. DNS Query DNS Cache Lifetime Analysis Module A text box in which you can specify the amount of time NNM retains and stores a given host s DNS record, in seconds. By default, this option is set to (12 hours), but can be set to any value between 3600 and (48 hours)
73 Name DNS Query Time Interval DNS Queries per Interval Description A text box in which you can specify the delay between sets of DNS queries, in seconds. By default, this option is set to 5, but can be set to any value between 1 and 120. A text box in which you can specify the maximum number of concurrent DNS requests made at the time of the DNS Query, in seconds. By default, this option is set to 5, but can be set to any value between 0 and Setting this value to 0 disables this feature and prevents further DNS queries from being made. Database Enable Malformed Database Recovery A check box that, when selected, allows NNM to recover a malformed database. Memory Sessions Cache Size Packet Cache Size A text box in which you can specify the size, in megabytes, of the session table. Adjust the session size as needed for the local network. By default, this option is set to 50. A text box in which you can specify the maximum size, in megabytes, of the cache used to store the contents of the packets collected before processing. By default, this option is set to 128 MB with a maximum size of 512 MB. When the cache is full, any subsequent packets captured are dropped until space in the cache becomes available. Monitoring Monitored Network Interfaces A list of the network device(s) used for sniffing packets. Devices may be selected individually or in multiples. At least one interface must be selected from the list of available devices. Note: High Performance mode does not support e1000 NICs as monitored interfaces on VMs. If you are running NNM on a VM in High Performance mode and select an e1000 monitored interface, NNM automatically reverts to Standard mode. Monitored Network IP Addresses and A text box in which you can specify the network(s) monitored. The default setting is /0, which instructs NNM to monitor all IPv4-73 -
74 Name Ranges Description addresses. This should be changed to monitor only target networks; otherwise NNM may quickly become overwhelmed. Separate multiple addresses by commas. When monitoring VLAN networks, you must use the syntax vlan ipaddress/subnet. Example: /24,2001:DB8::/64, /22,vlan /16, /32 Excluded Network IP Addresses and Ranges A text box in which you can specify, in CIDR notation, any network(s) to specifically exclude from NNM monitoring. This option accepts both IPv4 and IPv6 addresses. Separate multiple addresses by commas. When excluding VLAN networks, you must use the syntax vlan ipaddress/subnet. If this text box is left blank, no addresses are excluded. Example: /24,2001:DB8::/64, /22,vlan /16, /32 Extended Packet Filter A text box in which you can specify a BPF primitive. The net, IP, IPv6, and VLAN primitives are not supported by this feature. Additionally, the protochain primitive is not supported on Windows platforms. Click here for further information about the available primitives. NNM Proxy NNM Restart Attempts NNM Restart Interval A text box in which you can specify the number of times the NNM proxy attempts to restart the NNM engine in the event the engine stops running. By default, this option is set to 10, but can be set to any value between 1 and 15. Once the restart attempt limit is reached, the proxy stops trying for 30 minutes. A text box in which you can specify the amount of time, in minutes, between NNM restart attempts. By default, this option is set to 10, but can be set to any value between 1 and NNM Web Server Enable SSL for Web A check box that, when selected, enables SSL protection for connections
75 Name Server Description to the web server. This check box is selected by default. Clearing the check box is not recommended, as it allows unencrypted traffic to be sent between a web browser and NNM. Custom SSL certificates may be installed in the /opt/nnm/var/nnm/ssl directory. Changes to this setting require that NNM be restarted. Note: Changing this option while NNM is running makes communication between the client and server either encrypted or unencrypted. If you select or clear the Enable SSL for Web Server check box, the Web Server automatically ends your current NNM session. Minimum Password Length NNM Web Server Address A text box in which you can specify the lowest number of characters a password may contain. By default, this option is set to 5, but can be set to any value between 5 and 32. A text box in which you can specify an IPv4 or IPv6 address on which the NNM web server listens. The default setting is , which instructs the web server to listen on all available IPv4 and 1Pv6 addresses. Note: Link-local addresses are not supported for IPv6 addresses. NNM Web Server Port A text box in which you can specify the NNM web server listening port. The default setting is 8835, but can be changed as appropriate for the local environment. Note: If you change the value in this field, the Web Server automatically ends your current NNM session. NNM Web Server Idle Session Timeout Enable SSL Client Certificate Authentication Enable Debug Logging for NNM Web Server A text box in which you can specify the number of minutes of inactivity before a web session becomes idle. By default, this option is set to 30, but can be set to any value between 5 and 60. A check box that, when selected, allows the web server to accept only SSL client certificates for user authentication. A check box that, when selected, allows the web server to include debug information in the logs for troubleshooting issues related to the web server. The logs become very large if this option is routinely enabled
76 Name Maximum User Login Attempts Max Sessions per User Enforce Complex Passwords Restrict Access to TLS 1.2 or higher Description A text box in which you can specify the number of times a user can enter an incorrect password in a 24 hour period before the user s account is locked. A text box in which you can specify the number of concurrent sessions a user can have running at one time. A check box that, when selected, forces the user s passwords to contain at least one uppercase character, one lowercase character, one digit, and one special character from the following:!@#$%^&*(). A check box that, when selected, forces the NNM Web server to use TLS 1.2 or higher communications. Plugins Enable Automatic Plugin Updates A check box that, when selected, allows NNM to update its plugins automatically from the Tenable website on a daily basis. If the NNM server is not connected to the Internet, it is recommended that you disable this option. Tip: When the HTML Client updates, the web browser needs to be refreshed to utilize the new client. In some cases, the web browser s cache must be deleted to view the new client. Process High Speed Plugins Only NNM is designed to find various protocols on non-standard ports. For example, NNM can easily find an Apache server running on a port other than 80. However, on a high traffic network, NNM can be run in High Performance mode, which allows it to focus certain plugins on specific ports. When High Performance mode is enabled and this check box is selected, any plugin that utilizes the keywords hs_dport or hs_ sport are executed only on traffic traversing the specified ports. Realtime Events Realtime Events File Size A text box in which you can specify the maximum amount of data from real-time events that is stored in one text file. The option must be specified in kilobytes, megabytes, or gigabytes by appending a K, M, or G, respectively, to the value
77 Name Log Realtime Events to Realtime Log File Description A check box that, when selected, allows NNM detected real-time events to be recorded to a log file in the following location: /opt/nnm/var/nnm/logs/realtime-logs-##.txt This option can be configured via the CLI. Enable Realtime Event Analysis Maximum Viewable Realtime Events Maximum Realtime Log Files A check box that, when selected, allows NNM to analyze real-time events. A text box in which you can specify the maximum number of most recent events cached by the NNM engine. This setting is in effect only when Realtime Event Analysis is enabled. A text box in which you can specify the maximum number of realtime log files written to the disk. Reports Report Threshold Report Lifetime Host Lifetime Report Frequency Knowledgebase A text box in which you can specify the number of times the encryption detection algorithm executes during a session. Once the threshold is reached, the algorithm no longer executes during the session. By default, this option is set to 3. A text box in which you can specify, in days, how long vulnerabilities and snapshot reports are cached. After the configured number of days is met, discovered vulnerabilities and snapshot reports are removed. This option can be set to a maximum value of 90 days. By default, this option is set to 7 and cannot be set higher than the Host Lifetime value. A text box in which you can specify, in days, how long hosts are cached. After the configured number of days is met, discovered hosts are removed. This option can be set to a maximum value of 365 days. By default, this option is set to 7 and cannot be set lower than the Report Lifetime value. A text box in which you can specify, in minutes, how often NNM writes a report. By default, this option is set to 15. SecurityCenter 4.6 and higher retrieve the NNM report every 15 minutes. A text box in which you can specify, in seconds, the maximum length of
78 Name Lifetime New Asset Discovery Interval Connections to Services Show Connections Known Hosts File Description time that a knowledgebase entry remains valid after its addition. By default, this option is set to A text box in which you can specify, in days, how long NNM monitors traffic before detecting new hosts. NNM listens to network traffic and attempts to discover when a new host has been added. To do this, NNM constantly compares a list of hosts that have generated traffic in the past to those currently generating traffic. If it finds a new host generating traffic, it issues a new host alert via the real-time log. For large networks, NNM can be configured to run for several days to gain knowledge about which hosts are active. This prevents NNM from issuing an alert for hosts that already exist. For large networks, Tenable recommends that NNM operate for at least two days before detecting new hosts. By default, this option is set to 2. A check box that, when selected, enables NNM to log which clients attempt to connect to servers on the network and to what port they attempt to connect. They indicate only that an attempt to connect was made, not whether the connection was successful. Events detected by NNM of this type are logged as NNM internal plugin ID 2. A check box that, when selected, instructs NNM to record clients in the focus network that attempt to connect to a server IP address and port and receive a positive response. The record contains the client IP address, the server IP address, and the server port that the client attempted to connect to. For example, if four different hosts within the focus network attempt to connect with a server IP over port 80 and received a positive response, then a list of those hosts are reported under NNM internal plugin ID 3 and port 80. Note: You can only configure this feature via the command line interface. A configuration parameter in which you can enter the location of the known-hosts.txt file. You must manually create the Known Hosts file. This feature supports a single row for each IP (IPv4 or IPv6). Hyphenated
79 Name Description ranges and CIDR notation are not supported. New host alerts no longer appear for the hosts listed in this file. Note: Blank rows are ignored, and invalid entries are noted in the NNM log file. If you make any changes to the Known Hosts file, you must restart NNM. Session Analysis Encrypted Sessions Dependency Plugins Encrypted Sessions Excluded Network Ranges Interactive Sessions Dependency Plugins Interactive Sessions Excluded Network Ranges A text box in which you can specify the Plugin IDs, separated by commas, used to detect encrypted traffic. A text box in which you can specify the IPv4 and IPv6 addresses and ports, in CIDR notation, excluded from monitoring for encrypted traffic. Example: /24,2001:DB8::/64, /22,vlan /16, /32 A text box in which you can specify the Plugin IDs, separated by commas, used to detect interactive sessions. A text box in which you can specify the IPv4 and IPv6 addresses and ports, in CIDR notation, excluded from monitoring for interactive sessions. Example: /24,2001:DB8::/64, /22,vlan /16, /32 Syslog Realtime Syslog Server List A text box in which you can specify the IPv4 or IPv6 address and port of a Syslog server to receive real-time events from NNM. Click Add to save the address. A local Syslog daemon is not required. Syslog items can be specified to Standard or CEF formats as well as UDP or TCP protocols. Example: :4567, :514,[2001:DB8::23B4]:514 Vulnerability Syslog Server List A text box in which you can specify the IPv4 or IPv6 address and port of a Syslog server to receive vulnerability data from NNM. Click Add to save
80 Name Description the address. A local Syslog daemon is not required. Syslog items can be specified to Standard or CEF formats as well as UDP or TCP protocols. Example: :4567, :514,[2001:DB8::23B4]:514 Note: While NNM may display multiple log events related to one connection, it sends only a single event to the remote Syslog server(s)
81 Feed Settings Section The Feed Settings section allows you to: Name Register Offline check box Activation Code Fetch Plugins From Offline Plugin Archive Host Address Description A check box that allows offline registration of NNM. Updates the activation code. The Activation Code only needs to be updated when it expires. A text field in which you can specify from where you wish to fetch plugins. Click Update to fetch the plugins. Uploads plugins to perform offline updates. Click Upload Archive to upload the archive. A text field in which you can specify a custom plugin feed host. Click Update to save the host
82 Offline Update The Offline Update allows a user with administrative privileges to manually update plugins when the NNM host cannot connect to the Internet. 1. Download the plugin update archive from Tenable. 2. Click Choose File. 3. Select the archive tarball to upload. 4. Click the Upload Archive button to send the file to the NNM host. 5. Click the Upload Archive button again to update the plugins. 6. If a new client is part of the update, you must refresh the web browser to see the updated client. The Custom Plugin Feed host is an alternate feed host. These are typically hosted on a local network to provide custom NNM plugins. When running Standalone NNM or NNM in High Performance mode as Managed by SecurityCenter or Managed by Tenable.io, you must enter an Activation Code before clicking the Update button. The button schedules a plugin update when NNM is running in Standalone mode. Additionally, when registering NNM in Offline mode, you need the Activation Code to obtain the Activation Key
83 - 83 -
84 Cloud Settings Section The Cloud Settings section provides options for configuring NNM to communicate with Tenable.io. Name Cloud Host Cloud Port Cloud Key Polling Frequency NNM Name Description The domain name or IP address of the Tenable.io server. The port of the Tenable.io server. The key used to link this instance of NNM to a Tenable.io account. The frequency, in seconds, with which NNM updates its status with Tenable.io and asks for a list of jobs. The unique name used to identify this instance of NNM on Tenable.io
85 Industrial Security Settings Section The Industrial Security Settings section provides options for configuring Industrial Security with NNM. See Configure NNM for use with Industrial Security for more information. Name Industrial Security Host Industrial Security Port Industrial Security Key Polling Frequency NNM Name Description The domain name or IP address of the Industrial Security server. The port of the Industrial Security server. The key used to link this instance of NNM to a Industrial Security account. The frequency, in seconds, with which NNM updates its status with Industrial Security and asks for a list of jobs. The unique name used to identify this instance of NNM on Industrial Security
86 Web Proxy Settings Section The Web Proxy Settings section configures the settings for a web proxy if one is needed for plugin updates. These settings include the proxy host IP address, port, username, password, and, if a custom agent string is needed, a user-agent field. Name Host Address Port Username Password User-Agent String Description The host address of the web proxy server. The port of the web proxy server. The username for the web proxy server. The password for the web proxy server. The user-agent string for the web proxy server
87 Chart Settings Section The Chart Settings section displays all charts available, provides options for creating and configuring charts, and allows the user to add or remove charts in the Dashboards section. In the Chart Settings section you can view: Chart Name Chart Type Chart Description Dashboard Family Option to view the chart in the Dashboard. Click the option to toggle between Yes and No. Click on a chart to edit the chart
88 Settings Section The Settings section provides options for configuring reporting for NNM, including the recipients of the notifications, what charts appear in notifications, and the time and frequency with which notifications are sent. In the Settings section, hover over an existing notification and click the paper airplane icon to send a report immediately. When you select SMTP Server in the Setting Type drop-down menu, the following options for configuring the SMTP server appear: Name Host Description The host or IP of the SMTP server (e.g., smtp.example.com). Port The port of the SMTP server (e.g., 25). From NNM Location Auth Method The name that appears in the "From" line of the report. The IP address or hostname of your NNM server. This works only if the user that receives the report can reach the NNM host. The method by which the SMTP server is authenticated. Supported methods are None, Plain, NTLM, Login, and CRAM-MD5. Note: If this option is set to None, the Username and Password fields are hidden. Username Password The username used to authenticate to the SMTP server. The password associated with the username, provided that a password is
89 Name Description required by the SMTP server
90 Plugin Settings Section The Plugin Settings section allows you to create custom plugins and also to enable and disable existing plugins and PASLs. The Plugin Settings section contains the following subsections: Plugin Management: displays a list of enabled and disabled plugins, respectively, the options to move plugins between those lists, and the option to delete custom plugins. PASL Management: displays a list] of enabled and disabled PASLs, respectively, and the options to move PASLs between those lists. Create Custom Plugin: displays options for creating custom plugins and creating new plugin fields. The following table provides a brief summary of each plugin field available for creating custom plugins: Custom Plugin Field ID Name Description Purpose The unique numeric ID of the plugin. The name of the plugin. The plugin name should start with the vendor name. The full text description of the vulnerability
91 Custom Plugin Field Synopsis Solution See Also Risk Plugin Output Family Dependency NoPlugin No Output Client Issue Plugin Type cve bid osvdb nid cpe Match Purpose A brief description of the plugin or vulnerability. Remediation information for the vulnerability. External references to additional information regarding the vulnerability. Info, Low, Medium, High, or Critical risk factor. Displays dynamic data in NNM plugin reports. The family to which the plugin belongs. Other dependencies required to trigger the custom plugin. Prevents a plugin from being evaluated if another plugin has already matched. For example, it may make sense to write a plugin that looks for a specific anonymous FTP vulnerability, but to disable it if another plugin that checked for anonymous FTP had already failed. For plugins that are written specifically to be used as part of a dependency with another plugin. When enabled, this keyword causes NNM not to report anything for any plugin. Indicates the vulnerability is located on the client side. Vuln, realtime, or realtimeonly plugin type. The CVE reference. The Bugtraq ID (BID) reference. The external reference (e.g., OSVDB, Secunie, MS Advisory). To track compatibility with the Nessus vulnerability scanner, Tenable associates NNM vulnerability checks with relevant Nessus vulnerability checks. Multiple Nessus IDs can be listed under one nid entry such as nid=10222, Filters the result of discovered vulnerabilities based on their CPE identifier. This keyword specifies a set of one or more simple ASCII patterns that must be
92 Custom Plugin Field Purpose present in order for the more complex pattern analysis to take place. The match keyword gives NNM significant performance and functionality. Regex Revision Raw Text Preview Specifies a complex regular expression search rule applied to the network session. The revision number associated with custom plugin. A preview of the custom plugin in raw text. An xample of a custom plugin created to find a IMAP Banner of Tenable Rocks is: id=79000 name=imap Banner description=an IMAP server is running on this port. Its banner is Tenable Rocks risk=none match=ok match=imap match=server ready regex=^.*ok.*imap.*tenable Rocks
93 Nessus Scanner Settings Section The Nessus Scanner Settings section provides a list of the available Nessus 6.4+ scanners and the ability to add, edit, or remove a Nessus scanner. Each Nessus scanner must be configured with the following parameters: Note: Nessus Professional 7 is not supported. Name Scanner Host Scanner Port Access Key Secret Key Description The domain name or IP address of the Nessus server. The port of the Nessus server. The first half of a Nessus API Key, which is used to authenticate with the Nessus REST API. The second half of a Nessus API Key, which is used to authenticate with the Nessus REST API. Note: For details on how to obtain an API Key (Access Key and Secret Key), refer to the Nessus user guide
94 How To This section includes step-by-step instructions for performing the actions available on each page within the NNM web interface: Monitoring Results Users Configuration
95 Monitoring Page The topics in this section explain how to perform the following actions available on the Monitoring page: Rearrange Charts Set a Range for the Dashboards Section Refresh a Chart Remove a Chart from a Dashboard Filter Results Export Results Launch a Nessus Scan Delete a Vulnerability Tip: For more information about the Monitoring page, see the related Features section of this guide
96 Rearrange Charts Steps 1. In the Dashboards section, select the heading of the chart you want to reposition. 2. Drag the chart to a different location on the dashboard. 3. Release the pointer. The chart moves and the dashboard configuration saves for the duration of your session. Note: You cannot move the Client Connections, Network Bandwidth by Byte Count, or Event Trending charts
97 Set a Range for the Dashboards Section Steps 1. In the Dashboards section, in the upper right corner, click the drop-down box. 2. In the drop-down menu, do one of the following: Select one of the preset time intervals. Select a start and end date from the available calendars and specify a time associated with each date. Manually enter dates in the two text boxes in YYYY/MM/DD format and specify a time associated with each date. All the charts on the page refresh to reflect the selected time interval
98 Refresh a Chart Steps 1. In the Dashboards section, in the upper right corner of the chart you want to refresh, click the button. The selected chart refreshes
99 Remove a Chart from a Dashboard Steps 1. In the Dashboards section, in the upper right corner of the chart you want to remove, click the button. The selected chart is removed from the dashboard for the duration of your session
100 Export Results Steps 1. Click Monitoring > Actions > Export Results. The Export Results screen appears. 2. Select the export format and chapter layout. 3. Click the Export button. An automatic download begins. You can save the report from the web browser. Note: On-the-fly filter results cannot be exported. If you want to export filter results, you must configure the filter(s) in the Filter Results window

101 Filter Results Steps 1. In the Hosts, Vulnerabilities, Applications, Operating Systems, Connections, or Mobile Devices section, in the upper right corner, click the Filter <section name> drop-down. 2. Type the criteria by which you want to filter results directly into the box. -or- Click the button in the box. The Filter Results window appears. 3. Configure the filter options as necessary. 4. Click the Apply Filters button. Note: On-the-fly filter results cannot be exported. If you want to export filter results, you must configure the filter(s) in the Filter Results window. Additionally, on-the-fly filter results are not stored when a user navigates to another page in NNM
102 Launch a Nessus Scan Steps 1. Click Monitoring > Actions > Launch Scan. -or- Click Assets or Vulnerabilites > select the check boxes for the assets you want to scan > Actions > Launch Scan. The Launch Basic Nessus Scan window appears. 2. Configure the scan options as necessary. 3. Click the Launch button. The scan opens in the Nessus interface. Refer to the Nessus user guide for further instructions. Note: To launch scans on Nessus 6.8.x or higher, NNM must be configured to restrict access to TLS 1.2 or higher. See the NNM Settings Section for more information
103 Delete a Vulnerability Steps To delete one vulnerability: 1. In the Vulnerabilities section, hover over the vulnerability you want to delete. 2. On the right side of the row, click the button. The vulnerability is deleted. To delete multiple vulnerabilities: 1. On the Vulnerabilities page, on the left side of the row for the vulnerability you want to delete, select the check box. Repeat this step for each vulnerability you want to delete. 2. Click Actions > Delete Vulerabilities. The vulnerabilities are deleted
104 Results Page The topics in this section explain how to perform the following actions available on the Results page: Upload a Report Upload a Pcap Filter Results Tip: For more information about the Results page, see the related Features section of this guide
105 Upload a Report Steps 1. Click Results > Upload > Report. The Upload Results window appears. 2. Select a file to upload. 3. Click the Upload Results button. The report appears in a new row at the top of the Listing Results list on the Results page
106 Upload a Pcap Before You Begin The maximum total file size for uploaded Pcaps is 100 MB. Running a Pcap pauses live monitoring. Steps 1. Click Results > Upload > Pcaps. The Upload Pcaps window appears. 2. Select one or more files to upload. 3. Click the Upload Pcap(s) button. A new row for the Pcap(s) appears at the top of the Listing Results list on the Results page
107 Filter Results Steps 1. On the Results page, in the upper right corner, click the Filter Results drop-down box. 2. Select Snapshot, Manual, or Pcap. The Listing Results list filters by the selected report type. Click Clear Filter to remove the filter from the list
108 Delete Results To delete one Result 1. On the Results page, hover over the result you wish to delete. 2. Click the button. A dialog box appears confirming your selection to delete the result. 3. Click the Delete button. The result is deleted. To delete multiple results: 1. On the left side of the row for the result you want to delete, select the check box. Repeat this step for each result you want to delete. 2. Click Actions > Delete Result. A dialog box appears confirming your selection to delete the results. 3. Click the Delete button. The resultss are deleted
109 Users Page In order to see the Users page, you must access NNM using an account with administrative privileges. The topics in this section explain how to perform the following actions available on the Users page: Create a New User Modify a User Account Reset a Locked Account Delete a User Tip: For more information about the Users page, see the related Features section of this guide

110 Create a New User Steps 1. On the Users page, in the upper right corner, click the New User button. The New User window appears. 2. In the Username field, enter a username for the user. 3. In the Password field, enter a password for the user. Note: The username is case sensitive and the password must conform to the NNM password policy. 4. In the Confirm Password field, enter the password for the user a second time. 5. If the new user should have administrative privileges, select the Administrator check box. Tip: When a user is created it authenticates with SSL Client Certificates. The user name must match the Common Name in the certificate. 6. Click the Create User button. The user saves and appears in the Users list

111 Modify a User Account Steps 1. On the Users page, select a user from the list. The Edit User <username> window appears. 2. Modify the properties as needed. 3. Click the Update button. Tip: To reset user account passwords via the command line, use the following command from the NNM binary directory: /opt/nnm/bin/nnm --users --chpasswd <username>
112 Reset a Locked Account Steps 1. Depending on your operating system, use the following command: Operating System Linux Windows macos Command # rm /opt/nnm/var/nnm/users/<locked account name>/hash.- lockedout del C:\ProgramData\Tenable\NNM\nnm\users\<locked_ account_name>\hash.lockedout # rm /Library/NNM/var/nnm/users/<locked account name>/hash.lockedout Tip: Alternatively, a user with administrative privileges can navigate to this directory and manually delete the hash.lockedout file. 2. After deleting the hash.lockedout file, if needed, a user with administrative privileges can follow the steps under Modify a User Account to reset the user's password
113 Delete a User Steps To delete one user: 1. On the Users page, hover over the user you want to delete. On the right side of the row, the button appears. 2. Click the button. A dialog box appears confirming your selection to delete the user. 3. Click the Delete button. The user is deleted. To delete multiple users: 1. On the Users page, on the left side of the row for the user you want to delete, select the check box. Repeat this step for each user you want to delete. 2. Click the Actions > Delete Users. A dialog box appears confirming your selection to delete the user. 3. Click the Delete button. The users are deleted
114 Configuration Page The topics in this section explain how to perform the following actions available on the Configuration page: Configure the Performance Mode Download New Vulnerability Plugins Create a Custom Chart Delete a Chart Create an Notification Delete an Notification Add a Plugin Field Delete a Custom Plugin Add a Nessus Scanner Delete a Nessus Scanner Tip: For more information about the Configuration page, see the related Features section of this guide
115 Configure the Performance Mode Before You Begin This option appears only when NNM is licensed to run in High Performance mode and the machine running NNM meets the hardware and software requirements for High Performance mode. By default, all instances of NNM run in Standard mode. NNM must restart when switching between performance modes. Steps 1. Click Configuration > NNM Settings. 2. Under the Performance Mode heading, click the Enable High Performance Mode box to toggle between Yes and No. If you select Yes, continue to step 3. If you select No, continue to step In the Number of Worker Cores drop-down menu, select the appropriate number of worker cores. Note: This option cannot be changed when NNM is already running in High Performance mode. 4. Click the Update button. A dialog box appears confirming your selection to change the performance mode. 5. Click the Confirm button. NNM restarts and the login screen appears. When the NNM server resumes, a notification appears indicating whether the configuration change was successful
116 Note: NNM may use a different number of cores than the number you select. Based on system constraints and your selection, NNM selects the closest number of worker cores that it can feasibly support. 6. Log in to NNM. The performance mode updates
117 Download New Vulnerability Plugins Before You Begin When NNM is registered in Standalone mode using an Activation code, plugins are updated automatically every 24 hours after the service is started. If SecurityCenter CV or Tenable.io is used to manage NNM, new plugins for NNM are automatically sent at scheduled intervals. Steps 1. Click Configuration > Feed Settings. 2. In the Feed Registration & Plugin Update heading, click the button. Tip: The plugins can also be updated by using the following command: # /opt/nnm/bin/nnm --update-plugins
118 Updating the NNM Management Interface On occasion, the NNM management interface must be updated to provide new or updated features. When managed by SecurityCenter or earlier, the NNM web server and interface do not update automatically by the plugins provided through SecurityCenter CV. Therefore, web components must be updated manually on each NNM instance. To manually update the plugins: 1. Download the latest plugins using the URL created during the offline registration process. 2. Log in to the NNM interface as a user with administrative privileges. 3. Navigate to the Configuration > Feed Settings. 4. In the Offline Update section, navigate to Browse. A dialog box appears. 5. Select the archive file to upload. 6. Click Upload Archive to send the file to the NNM host, which updates the plugins. 7. Stop and then restart NNM on the host. The new interface is available for use

119 Configure NNM for use with Industrial Security 1. Install Industrial Security using the following command: $ rpm -ivh /root/is rpm 2. In your browser, navigate to either of the following URLs and follow the prompts: Log in to Industrial Security with the default credentials (admin/admin)
120 4. In the Quick Setup dialog, change your password. 5. Click Next Step. 6. Register your copy of Industrial Security using the Activation Code you received from Tenable, Inc.. Tip: Alternatively, this can be done from the command line by using $ /opt/industrial-security/bin/industrial-security -a <ActivationCode> in Linux or C:> cd "C:\Program Files\Tenable\Industrial Security\" C:> industrial-security.exe -a <ActivationCode> in Windows. 7. Once activated, locate the Linking Key to connect one or more NNM sensors to Industrial Security
121 8. On the Industrial Security home page, click Settings. 9. Click the Sensor Configuration tab. 10. Locate and copy the IS Linking Key. The IS Linking Key is a 64-character hex string used to connect an NNM sensor to this Industrial Security host. 11. Install the NNM application using the following command: $ rpm -ivh /root/nnm rpm 12. In your browser, navigate to either of the following URLs and follow the prompts: -
. 14.")

122 13. Log in to NNM using the default credentials (admin/admin). 14. In the Quick Setup dialog, change your password. 15. Click Next Step. 16. In the Activation Code field, enter IndustrialSecurity. Additional fields appear
123 17. In the Industrial Security Host field, enter the IP address of the machine where you installed the Industrial Security application. 18. In the Industrial Security Key field, enter the Industrial Security Linking Key you located above. 19. In the NNM Name field, enter a name for the NNM host you're setting up. Tip: This is the name that appears in IS once a connection is established and identifies this specific sensor to differentiate between this host and other NNM sensors you may install elsewhere on your network. 20. Click Next Step
124 21. Click on the network interfaces you wish to monitor. 22. Enter the network ranges you wish to monitor on those interfaces. Note: To monitor all network ranges including VLAN support, enter /0, vlan /0, 0::/0, vlan 0::/0 23. Click Finish. A Setup Completed Succesfully notification appears and you return to the NNM Monitoring Dashboard. Tip: To validate your NNM sensor host and your Industrial Security application connection, return to the Industrial Security application, click Settings > Sensor Configuration and verify that the NNM Host is in the Sensors List

125 Create a Custom Chart Steps 1. Click Configuration > Chart Settings > Create Chart. The Create Chart window appears. 2. In the Name field, enter a name for the chart. Note: In this example, we are creating a chart that displays the top vulnerabilities for machines reporting associated BitTorrent activity. 3. In the Description field, enter a description for the chart. 4. In the Chart Type section, select the type of chart you want to display. 5. In the Dashboard Family section, enter a numeric value between 1 and 20 that represents the number of items returned for this chart

126 6. Click Top to add the value to the Current Chart Query section. 7. In the Category section, select a chart category. The selected category determines the type of items displayed on the chart, such as hosts, vulnerabilities, applications, operating systems, or connections. 8. In the Filters section, configure the options by which you want to filter the results. Note: In this example, we are creating a filter based on the Plugin ID This triggers when BitTorrent client activity is detected. 9. Click the + button to apply the rule to the chart. 10. In the Viewable section, select whether you want the chart to be viewable on the main dashboard. The configured options look like this: 11. Click the Create Chart button. The chart appears in the Dashboards section of the Monitoring page
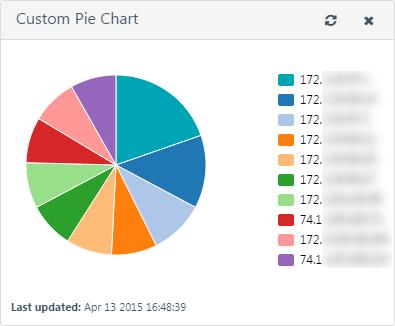
127
128 Delete a Chart Steps To delete one chart: 1. Click Configuration > Chart Settings section and hover over the chart you want to delete. 2. On the right side of the row, click the button. A dialog box appears confirming your selection to delete the chart. 3. Click the Delete button. The chart is deleted. To delete multiple charts: 1. Click Configuration > Chart Settings. 2. On the left side of the row for the chart you want to delete, select the check box. Repeat this step for each chart you want to delete. 3. Click Actions > Delete Charts. A dialog box appears confirming your selection to delete the charts. 4. Click the Delete button. The charts are deleted. Note: You cannot delete default charts
129 Create an Notification Steps 1. Click Settings > Create Notification. The Create Notification window appears. 2. In the Name field, enter a name for the notification. 3. In the Description field, enter a description for the notification. 4. Click the Next Step button. The Add Charts screen appears. 5. Select the check boxes that correspond to the charts you want to add to the notification. 6. Reorder the charts by clicking and dragging the appropriate button. 7. Click the Next Step button. The Schedule Notification screen appears. 8. Select the frequency, date, and time at which you want the notification to be sent. Depending on the option you select in the Frequency box, the following additional options appear: Frequency Once Options None Hourly Repeat Every - a drop-down box that includes options from 1 to 20 hours. Daily Repeat Every - a drop-down box that includes options from 1 to 20 days. Weekly Repeat Every - a drop-down box that includes options from 1 to 20 weeks. Repeat On - a multi-selectable list of the days of the week. Monthly Repeat Every - a drop-down box that includes options from 1 to 20 months
130 Frequency Options Repeat By - a drop-down box that includes the options Week of Month and Day of Month. Yearly Repeat Every - a drop-down box that includes options from 1 to 20 years. The Summary field updates automatically depending on your selection. 9. Click the Next Step button. The Add Recipients screen appears. 10. In the Recipients box, enter an address and click the button until you have added all desired recipients. 11. Click the Next Step button. The Review Notification screen appears, which displays a summary of your notification configuration. 12. Review the notification details. 13. Click the Finish button
131 Delete an Notification Steps To delete one notification: 1. Click Configuration > Settings section and hover over the notification you want to delete. 2. On the right side of the row, click the button. A dialog box appears confirming your selection to delete the notification. 3. Click the Delete button. The notification is deleted and the corresponding notifications are no longer sent. To delete multiple notifications: 1. Click Configuration > Settings section. 2. On the left side of the row for the notification you want to delete, select the check box. Repeat this step for each notification you want to delete. 3. Click Actions > Delete Notifications. A dialog box appears confirming your selection to delete the notifications. 4. Click the Delete button. The notifications are deleted and the corresponding notifications are no longer sent

132 Add a Plugin Field 1. Click Configuration > Plugin Settings > Setting Type > Create Custom Plugin > Add Plugin Field. The Add Plugin Field window appears. 2. In the Name field, enter a name for the plugin. 3. From the Value Type drop-down menu, select a value type for the plugin. 4. If you wish to allow duplicates of this plugin, select the Allow Duplicates check box. 5. If you wish to replace XML special characters, select the Replace XML Special Characters check box. 6. Click the Add button. The new plugin fields appear below the No Output check box
133 Delete a Custom Plugin 1. Click Configuration > Plugin Settings. 2. Select the custom plugin(s) that you want to delete. 3. Click Actions > Delete Custom Plugins. A dialog box appears confirming your selection to delete the custom plugins. You can delete only user-created plugins. 4. Click the Delete button. The custom plugins are deleted
134 Add a Nessus Scanner Steps 1. Click Configuration > Nessus Scanner Settings > Add Nessus Scanner. The Add Nessus Scanner window appears. 2. In the Scanner Host field, enter the domain name or IP address of the Nessus server. 3. In the Scanner Port field, enter the port of the Nessus server. 4. In the Access Key field, enter the first half of a Nessus API Key, which is used to authenticate with the Nessus REST API. 5. In the Secret Key field, enter the second half of a Nessus API Key, which is used to authenticate with the Nessus REST API. 6. Click the Add Nessus Scanner button. The Nessus scanner appears in the Nessus Scanner Settings section
135 Delete a Nessus Scanner Steps To delete one Nessus Scanner: 1. Click Configuration > Nessus Scanner Settings section and hover over the scanner you want to delete. 2. Click the button. A dialog box appears confirming your selection to delete the scanner. 3. Click the Delete button. The scanner is deleted. To delete multiple Nessus Scanners: 1. Click Configuration > Nessus Scanner Settings section. 2. On the left side of the row for the scanner you want to delete, select the check box. Repeat this step for each scanner you want to delete. 3. Click Actions > Delete Nessus Scanners. A dialog box appears confirming your selection to delete the scanners. 4. Click the Delete button. The scanners are deleted
136 Additional Resources This section describes the following information about NNM that is not included in the Features and How To sections: Command Line Operations Unknown or Customized Ports Real-Time Traffic Analysis Configuration Theory Modules Internal NNM Plugin IDs NNM Plugins Working with SecurityCenter Syslog Message Formats Custom SSL Certificates Configure NNM for Certificates
137 Command Line Operations The NNM engine provides many options to update and configure NNM from the command line in Linux, Windows, and macos. All command lines should be run by users with root or administrative privileges. Common Command Line Operations Linux Command Line Operations Windows Command Line Operations macos Command Line Operations
138 Common Command Line Operations NNM can be run from the command line to update plugins, perform configuration tasks, and analyze Pcap files to generate a report file for use with SecurityCenter CV or other programs. Running the NNM binary with the h option displays a list of available options. Note: You must stop NNM before running command line operations. NNM Binary Locations The NNM binary for Linux can be found in the following location: # /opt/nnm/bin/nnm The NNM binary for Windows can be found in the following location: C:\Program Files\Tenable\NNM\nnm.exe The NNM binary for macos can be found in the following location: # /Library/NNM/bin/nnm NNM Command Line Options Option -a <activation code> Purpose Enter the Activation Code to activate NNM to enable plugin updates and monitoring functions. If your NNM system is managed by SecurityCenter and is running in Standard mode, you can use the following command: -a SecurityCenter If your NNM system is managed by SecurityCenter and is running in High Performance mode, you can use the following command: -a SecurityCenter <activation code> If your NNM system is managed by Tenable.io and is running in Standard mode, you can use the following command: -a Cloud If your NNM system is managed by Tenable.io and is running in High Performance mode, you can use the following command: -a Cloud
139 Option Purpose <activation code> Before running the -a command for NNM that is managed by Tenable.io, you should first configure the Cloud Host, Cloud Port, Cloud Key, and NNM Name parameters. --config -- add "custom_paramater name" "parameter value" --config -- delete "custom_parameter name" --config -- list --config "parameter name" ["parameter value"] Add a custom configuration parameter for NNM or an NNM Proxy. The double quote characters are required, although single quotes may be used when special characters are required. The delete command may be used to remove custom configuration parameters. Lists the current NNM and NNM Proxy configuration parameters. Parameter values are listed to the left of the colon character and are case sensitive. The value of the parameter displays to the right of the colon character. Displays the defined parameter value. If a value is added at the end of the command, the parameter updates with the new setting. The double quote characters are required, although single quotes may be used when special characters are required. Note: While CLI changes to some parameters do not require restarting NNM for the change to take effect, you must restart NNM after changing the location of the realtime log file. -d debug mode -f packet_ dump_file Runs NNM in debug mode for troubleshooting purposes. This option causes the system to use more resources and should be enabled only when directed by a Tenable Support Technician. Replaces packet_dump_file with the path to the Pcap file you want NNM to process
140 Option Purpose Note: Windows does not support the pcapng format. -h Displays the command line options help file. -k Displays the NNM activation status. -L Displays a list of the license declarations. -l Displays a list of the plugin IDs that are loaded by NNM. -m Shows various aspects of memory usage during the processing of the NNM command. -p packet_ dump_file NNM --users --add NNM --users --chpasswd NNM --users --delete --registeroffline <license file> --update-plugins <plugins tarball> Replaces packet_dump_file with the local file name or path to file name to write the captured packets to a file. Adds a new user to NNM with the expected values of: ["username" "password" admin]: add new user. Expected values for admin flag are either: 1 - grant user administrative privileges, or 0 - don t grant user administrative privileges. Changes an NNM user's password. Removes a user from NNM. Registers NNM in offline mode when you insert the license file obtained from Tenable. If NNM is not running in offline mode, the tarball is optional. When no file is provided with this command, NNM contacts a plugin feed server to download plugins directly. When using NNM in offline mode, updating the plugins requires downloading a tarball from Tenable. When updating the plugins from the command line, this command is used to identify the file to use for updating the
141 Option Purpose plugins. -v Shows the version information about the installed instance of NNM
142 Linux Command Line Operations You must run all commands with root privileges. Start, Stop, or Restart NNM Action Start Command to Manage NNM # service nnm start then # ps aux grep nnm Stop Restart # service nnm stop # service nnm restart Once a day, as scheduled, if SecurityCenter CV has received new NNM plugins from Tenable, it installs them in the NNM plugin directory. NNM detects the change, automatically reloads, and begins using the new plugins. Real-time NNM data is communicated to the configured LCE server or Syslog server(s) in real-time. Configure HugePages Before You Begin These steps assume that your system meets the hardware and software requirements necessary for running NNM in High Performance mode. Steps 1. Ensure your HugePages settings are correct by using the following command: # grep Huge /proc/meminfo AnonHugePages: 0kB HugePages_Total: 1024 HugePages_Free:
143 HugePages_Rsvd: 0 HugePages_Surp: 0 Hugepagesize: 2048kB The Hugepagesize parameter is set to 2048 kb by default, but this option is configurable. NNM requires a minimum of 1024 HugePages that are at least 2048 kb in size. Note: In some cases, the HugePages_Free parameter may be set to 0, however, this does not necessarily indicate insufficient HugePage memory. 2. Reserve a certain amount of memory to be used as HugePages by using the following command to update the kernel parameter manually: /bin/echo 1024 > /sys/devices/system/node/node0/hugepages/hugepages- 2048kB/nr_hugepages The number of HugePages reserved by the kernel changes to 1024, and HugePages become available. Note: If the kernel does not have enough memory available to satisfy this request, the command may fail without notifying the user. After running this command, the HugePages configuration should be checked again using the command in step To ensure that your HugePages configuration persists across system reboots, refer to the following section that corresponds to your Linux kernel version. Linux Kernel Version 6 Update the persistent kernel configuration files using one of the following commands: In the /etc/sysctl.conf file, add the vm.nr_hugepages=1024 parameter and reload the kernel configuration with the sysctl -p command. Alternatively, you can reboot the system. -or- In the /etc/grub.conf file, on the kernel startup line, add the hugepages=1024 parameter and reboot the system. Linux Kernel Version 7 Update the persistent kernel configuration files using one of the following commands:
144 In the /etc/sysctl.conf file, add the vm.nr_hugepages=1024 parameter and reload the kernel configuration with the sysctl -p command. Alternatively, you can reboot the system. -or- In the /etc/sysconfig/grub file, on the kernel startup command (GRUB_CMDLINE_LINUX), add the hugepages=1024 parameter. Reload the kernel configuration with the grub2-mkconfig -o /etc/grub2 command and reboot the system. 4. Connect the file system to the HugePages subsystem using the following steps: a. Execute the /bin/mkdir -p /mnt/nnm_huge command. b. Execute the /bin/mount -t hugetlbfs nodev /mnt/nnm_huge command. c. Additionally, open the /etc/fstab file location and add the following record: nodev /mnt/nnm_huge hugetlbfs rw 0 0 File Locations NNM installs its files in the following locations: Path /opt/nnm /opt/nnm/bin /opt/nnm/docs /opt/nnm/var /opt/nnm/var/nnm db kb logs plugins Purpose Base directory. Location of the NNM and NNM Proxy executables, plus several helper tools for the NNM Proxy daemon. Contains the software license agreement for NNM. Contains the folders for NNM and the NNM-Proxy. Contains plugins, discovered vulnerabilities, log files, keys, and other miscellaneous items. Contains the database files related to the configuration, reports, and users for NNM. Stores the NNM knowledge base, if used. Contains NNM logs. Contains the NNM plugins delivered via SecurityCenter, Tenable.io,
145 Path Purpose the NNM Feed, or updated via the command line or web interface if NNM is running in Offline mode. Note: If SecurityCenter CV is used to manage the plugins, do not change this path from the default /opt/nnm/var/nnm. nnm-services reports scripts ssl users www /opt/nnm/var/nnmproxy logs A file NNM uses to map service names to ports. This file may be edited by the user. Plugin updates do not overwrite modifications to the file. Contains reports generated by NNM. This folder contains the.nessus file generated by default. Contains the files for the NNM Web server. Contains SSL certificates used by the proxy and web server for the SSL connection between itself and SecurityCenter CV or the web browser. Contains folders for user files and reports. Contains the files for the NNM web front-end. Parent folder for files used/created by the NNM proxy. Contains the NNM proxy and NNM proxy service logs
146 Windows Command Line Operations You must run all programs as a local user with administrative privileges. To do so, when UAC is enabled, right-click on the installer program and select Run as Administrator. Start or Stop NNM Action Start Stop Command to Manage NNM net start "Tenable NNM Proxy" net stop "Tenable NNM Proxy" Alternatively, NNM can be managed via the Services control panel utility. Under the list of services, find Tenable NNM Proxy Service. Right click on the service to provide a list of options for the services, including the ability to start or stop the Tenable NNM or Tenable NNM Proxy service. File Locations NNM installs its files in the following locations: Path C:\Program Files\Tenable\NNM C:\ProgramData\Tenable\NNM Purpose Contains NNM binaries and dependent libraries. Contains all data files consumed and output by NNM and NNM Proxy (e.g., configuration, plugins, logs, and reports). Note: This directory does not appear unless the Windows Hidden Files and Folders option is enabled. The following table contains the folder layout under C:\ProgramData\Tenable\NNM: Folder docs NNM Purpose Contains the software license agreement for NNM. Parent folder for NNM logs, reports, plugins, and scripts directories. Also contains the NNM-services file
147 Folder db kb logs plugins Purpose Contains the database files relating to the configuration, reports, and users for NNM. Stores the NNM knowledge base, if used. Contains NNM logs. Contains the NNM plugins delivered via SecurityCenter, Tenable.io, the NNM Feed, or updated via the command line or web interface if NNM is running in Offline mode. Note: Do not change this path from the default C:\ProgramData\Tenable\NNM\nnm if SecurityCenter CV is used to manage the plugins. nnm-services reports scripts ssl users www nnmproxy logs run A file NNM uses to map service names to ports. This file may be edited by the user. Plugin updates do not overwrite modifications to the file. Contains reports generated by NNM. This folder contains the.nessus file generated by default. Contains the files for the NNM Web server. Contains SSL certificates used by the proxy and web server for the SSL connection between itself and SecurityCenter CV or the web browser. Contains folders for user files and reports. Contains the files for the NNM web front-end. Parent folder for files used/created by the NNM proxy. Contains NNM proxy and NNM proxy service logs. Contains process ID temporary files
148 macos Command Line Operations You must run all programs as a root user or with equivalent privileges. Start or Stop NNM Action Start Stop Command to Manage NNM # launchctl load -w /Library/LaunchDaemons/com.tenablesecurity.nnm-proxy.plist # launchctl unload -w /Library/LaunchDaemons/com.tenablesecurity.nnm-proxy.plist File Locations NNM installs its files in the following locations: Path /Library/NNM /Library/NNM/docs /Library/NNM/bin /Library/NNM/var/nnm db kb logs plugins Purpose Base directory. Contains the NNM license agreement in various file formats. Location of the NNM and NNM Proxy executables, plus several helper tools for the NNM Proxy daemon. Contains plugins, discovered vulnerabilities, log files, keys, and other miscellaneous items. Contains the database files related to the configuration, reports, and users for NNM. Stores the NNM knowledge base, if used. Contains NNM logs. Contains the NNM plugins delivered via SecurityCenter, Tenable.io, the NNM Feed, or updated via the command line or web interface if NNM is running in Offline mode
149 Path Purpose Note: Do not change this path from the default /Library/NNM/var/nnm if SecurityCenter CV is used to manage the plugins. nnm-services reports scripts ssl users www /Library/NNM/var/nnmproxy logs A file NNM uses to map service names to ports. This file may be edited by the user. Plugin updates do not overwrite modifications to the file. Contains reports generated by NNM. This folder contains the.nessus file generated by default. Contains the files for the NNM Web server. Contains SSL certificates used by the proxy and web server for the SSL connection between itself and SecurityCenter CV or the web browser. Contains files and reports for NNM users. Contains the files for the NNM web front-end. Parent folder for files used/created by the NNM proxy. Contains the NNM proxy and NNM proxy service logs
150 Unknown or Customized Ports Many networks contain traffic on ports NNM defines as different traffic types or alternate ports. If the port is not defined, it displays as Unknown. The NNM-services file may be edited to either customize or add the port information to provide accurate reporting for ports on the network. For example, by default, there are two lines in the NNM-services file that define SMTP traffic. They read smtp 25/tcp and smtp 25/udp. If the organization routinely sends SMTP data over port 2525 those lines can be updated to read smtp 2525/tcp and smtp 2525/udp
151 Real-Time Traffic Analysis Configuration Theory This section describes how configuration options affect NNM operation and provides the following details on NNM architecture: Focus Network Detecting Server and Client Ports Detecting Specific Server and Client Port Usage Firewall Rules Working with SecurityCenter Selecting Rule Libraries and Filtering Rules Detecting Encrypted and Interactive Sessions Routes and Hop Distance Alerting

152 Focus Network When a focus network is specified via the networks keyword, only one side of a session must match in the list. For example, if you have a DMZ that is part of the focus network list, NNM reports on vulnerabilities of the web server there, but not on web clients visiting from outside the network. However, a web browser within the DMZ visiting the same web server is reported. In the diagram above, three sessions labeled A, B, and C are shown communicating to, from, and inside a focus network. In session A, NNM analyzes only those vulnerabilities observed on the server inside the focus network and does not report client side vulnerabilities. In session B, NNM ignores vulnerabilities on the destination server, but reports client side vulnerabilities. In session C, both client and server vulnerabilities are reported. There is another filter that NNM uses while looking for unique sessions. This is a dependency that requires the host to run a major service. These dependencies are defined by a list of NNM plugin IDs that identify SSL, FTP, and several dozen other services. Finally, the entire process of detecting these sessions can be filtered by specific network ranges and ports. For example, if a University ran a public FTP server that had thousands of downloads each hour, they may want to disable interactive sessions on port 21 on that FTP server. Similarly, disabling encryption detection on ports such as 22 and 443 also eliminates some noise for NNM
153 Detecting Server and Client Ports The method used by TCP connections to initiate communication is known as the three-way handshake. This method can be compared to how a common telephone conversation is initiated. If Bob calls Alice, he has effectively sent her, in TCP terms, a SYN packet. She may or may not answer. If Alice answers, she has effectively sent a SYN-ACK packet. The communication is still not established, since Bob may have hung up as she was answering. The communication is established when Bob replies to Alice, sending her an ACK. The NNM configuration option connections to services enables NNM to log network client to server activity. Whenever a system within the monitored network range tries to connect to a server over TCP, the connecting system emits a TCP SYN packet. If the port the client connects on is open, then the server responds with a TCP SYN/ACK packet. At this point, NNM records both the client address and the server port the client connects to. If the port on the server is not open, then the server does not respond with a TCP SYN/ACK packet. In this case, since NNM never sees a TCP SYN/ACK response from the server, NNM does not record the fact that the client tried to connect to the server port, since the port is not available to that client. The Connections to Services configuration parameter does not track how many times the connection was made. If the same host browses the same web server a million times, or browses a million different web servers once, the host is still marked as having browsed on port 80. This data is logged as NNM internal plugin ID 2. NNM detects many applications through plugin and protocol analysis. At a lower level, NNM also detects open ports and outbound ports in use on the monitored networks. By default, NNM detects any TCP server on the protected network if it sees a TCP SYN-ACK packet. In combination, the detection of server ports and client destination ports allows a network administrator to see who on their network is serving a particular protocol and who on their network is speaking that protocol
154 Detecting Specific Server and Client Port Usage The Show Connections configuration parameter keeps track of host communication within the focus network. When the Show Connections configuration parameter is enabled, if one of the hosts is in the defined focus network, NNM records the client, server, and server port every time a host connects to another host. It does not track the frequency or time stamp of the connections just that a connection was made. The Show Connections configuration parameter provides a greater level of detail than the Connections to Services configuration parameter. For example, if your IPv4 address is or your IPv6 address is 2001:DB8::AE59:3FC2 and you use the SSH service to connect to some_company.com, then the use of these options records the following: Show Connections some_company.com:ssh 2001:DB8::AE59:3FC2 -> some_company.com Connections to Services SSH 2001:DB8::AE59:3FC2 -> SSH Using the Connections to Services configuration parameter lets you know that the system at and 2001:DB8::AE59:3FC2 uses the SSH protocol. This information may be useful regardless of where the service is used. NNM does not log a session-by-session list of communications. Instead, it logs the relationship between the systems. For example, if system A is detected using the SSH protocol on port 22 connecting to system B, and both systems are within the focus network, NNM would log: System A browses on port 22 System B offers a service (listens) on port 22 System A communicates with System B on port
155 If system B were outside of the focus network, NNM would not record anything about the service system B offers, and would also log that system A browses outside of the focus network on port 22. NNM does not log how often a connection occurs, only that it occurred at least once. For connections outside of the focus network, NNM logs only which ports are browsed, not the actual destinations. Note: If logging session-by-session network events is a requirement for your network analysis, Tenable offers the LCE product, which can log firewall, web server, router, and sniffer logs
156 Firewall Rules If NNM is placed immediately behind a firewall such that all of the traffic presented to NNM flows through the firewall, then the list of served ports, client side ports, and the respective IP addresses of the users are readily available. Tools such as SecurityCenter CV s Vulnerability Analysis interface allow information about these ports (both client and server) to be browsed, sorted, and reported on. You can also view lists of IP addresses and networks using these client and server ports
157 Working with SecurityCenter CV When SecurityCenter CV manages multiple NNM sensors, users of SecurityCenter CV can analyze the aggregate types of open ports, browsed ports, and communication activity that occurs on the focus network. Since SecurityCenter CV has several different types of users and privileges, many different IT and network engineering accounts can be created across an enterprise so they can share and benefit from the information detected by NNM
158 Selecting Rule Libraries and Filtering Rules Tenable ships an encrypted library of passive vulnerability detection scripts. This file cannot be modified by the end users of NNM. However, if certain scripts must be disabled, they can be specified by the PASL ID and.pasl appended. For example, 1234.pasl, disables the PASL with the ID of 1234 on a single line in the disabled-scripts.txt file. If a plugin must be disabled, enter its ID on a single line in the disabled-plugins.txt file. If a plugin must be real-time enabled, enter its ID on a single line in the realtime-plugins.txt file. When adding NNM plugins to the disabled plugin list, be sure to leave an empty blank line after entering in the last plugin to be disabled. Failure to return to the next line can result in a non-functional disabled plugin list. Example: 1234 [return] If any of the referenced files do not exist, create them using the appropriate method for the operating system. The file locations are as follows: Operating System Linux Windows macos File Path /opt/nnm/var/nnm C:\ProgramData\Tenable\NNM\nnm /Library/NNM/var/nnm
159 Detecting Encrypted and Interactive Sessions NNM can be configured to detect both encrypted and interactive sessions. An encrypted session is a TCP or UDP session that contains sufficiently random payloads. An interactive session uses timing and statistical profiling of the packets in a session to determine if the session involves human input at a command line prompt. In both cases, NNM identifies these sessions for the given port and IP protocol. It then lists the detected interactive or encrypted session as vulnerabilities. NNM has a variety of plugins to recognize telnet, Secure Shell (SSH), Secure Socket Layer (SSL), and other protocols. Combined with the detection of the interactive and encryption algorithms, NNM may log multiple forms of identification for the detected sessions. For example, NNM may recognize not only an SSH service running on a high port as an encrypted session, but also recognize the version of SSH and determine any vulnerabilities associated with it
160 Routes and Hop Distance For active scans, one host can find the default route and an actual list of all routers between it and a target platform. To do this, it sends one packet after another with a slightly larger TTL (time to live) value. Each time a router receives a packet, it decrements the TTL value and sends it on. If a router receives a packet with a TTL value of one, it sends a message back to the originating server stating that the TTL has expired. The server sends packets to the target host with greater and greater TTL values and collects the IP addresses of the routers sending expiration messages in-between. Since NNM is entirely passive, it cannot send or elicit packets from the routers or target computers. It can however, record the TTL value of a target machine. The TTL value is an 8-bit field, which means it can contain a value between 0 and 255. Most machines use an initial TTL value of 32, 64, 128, or 255. Since there is a maximum of 16 hops between your host and any other host on the internet, NNM uses an algorithm to map any TTL to the number of hops. For example, if NNM sniffed a server sending a packet with a TTL of 126, it detects that 128 is two hops away. NNM does not know the IP address of the in-between routers. Note: Modern networks have many devices such as NAT firewalls, proxies, load balancers, intrusion prevention, routers, and VPNs that rewrite or reset the TTL value. In these cases, NNM may report inconsistent hop counts
161 Alerting When NNM detects a real-time event, it can: Send the event to a local log file. Send the event via Syslog to a log aggregator such as Tenable s LCE, an internal log aggregation server. Send the event to a third party security event management vendor. New Host Alerting You can configure NNM to detect when a new host has been added to the network. By default, NNM has no knowledge of your network s active hosts, so the first packets NNM sniffs trigger an alert. To avoid this, you can configure NNM to learn the network over a period of days. Once this period is over, any new traffic must be from a host that has not communicated during the initial training. To prevent NNM from triggering new host alerts on known hosts, you can create a known hosts file in the location to which the Known Hosts File configuration parameter is set. Each line of the Known Hosts File supports a single IPv4 or IPv6 address. Hyphenated ranges and CIDR notation are not supported. NNM must be restarted after creating or making any changes to the Known Hosts File. When NNM logs a new host, the Ethernet address saves in the message. When NNM is more than one hop away from the sniffed traffic, the Ethernet address is that of the local switch and not the actual host. If the scanner is deployed in the same collision domain as the sniffed server, then the Ethernet address is accurate. For DHCP networks, NNM often detects a new host. Tenable recommends deploying this feature on non-volatile networks such as DMZ. Users should also consider analyzing NNM new host alerts with SecurityCenter CV, which can sort real-time NNM events by networks
162 Modules NNM 5.4 includes analysis modules that analyze network traffic based on certain criteria. These modules modularize NNM detection capabilities and provide users the ability to enable or disable them. There are two analysis modules: SCADA/ICS Analysis Module: This module analyzes SCADA network traffic to discover SCADA assets and their vulnerabilities. In addition, the module provides deep visibility into the type of SCADA devices discovered. This module is enabled by default and can be disabled in environments that do not contain SCADA devices. Connection Analysis Module: This module reports connection duration and bandwidth information including for IPv6 and tunneled traffic. This module is disabled by default
163 Connection Analysis Module Module Detection ID Module Detection Name Module Detection Description Risk Factor 97 TCP Session Bandwidth (1-10 MB) 98 TCP Session Bandwidth ( MB) 99 TCP Session Bandwidth ( MB) 100 TCP Session Bandwidth (> 1 GB) NNM computes the bytes exchanged between each TCP endpoint when the session ends. The total bytes exchanged during the lifetime of this session is between 1 and 10 MB. NNM computes the bytes exchanged between each TCP endpoint when the session ends. The total bytes exchanged during the lifetime of this session is more than 10 MB but less than or equal to 100 MB. NNM computes the bytes exchanged between each TCP endpoint when the session ends. The total bytes exchanged during the lifetime of this session is more than 10 MB but less than or equal to 100 MB. NNM computes the bytes exchanged between each TCP endpoint when the session ends. The total bytes exchanged during the lifetime of this session is more than 1 GB. INFO INFO INFO INFO 101 TCP Session Dur- NNM computes the duration INFO
164 Module Detection ID Module Detection Name Module Detection Description Risk Factor ation (< 1 of each TCP session when the minute) session ends. This TCP session duration is less than 1 minute. 102 TCP Session Duration (1-15 minutes 103 TCP Session Duration (15-25 minutes) 104 TCP Session Duration (25-40 minutes) 105 TCP Session Duration (40-55 minutes) 106 TCP Session Duration ( minutes) NNM computes the duration of each TCP session when the session ends. This TCP session duration is between 1 minute and 15 minutes. NNM computes the duration of each TCP session when the session ends. This TCP session duration is more than 15 but less than or equal to 25 minutes. NNM computes the duration of each TCP session when the session ends. This TCP session duration is more than 25 but less than or equal to 40 minutes. NNM computes the duration of each TCP session when the session ends. This TCP session duration is more than 40 but less than or equal to 55 minutes. NNM computes the duration of each TCP session when the session ends. This TCP session duration is more than 55 but less than or equal to 100 minutes. INFO INFO INFO INFO INFO
165 Module Detection ID Module Detection Name Module Detection Description Risk Factor 107 TCP Session Duration (100 minutes - 24 hours) 108 TCP Session Duration (24-47 hours) 109 TCP Session Duration (> 47 hours) NNM computes the duration of each TCP session when the session ends. This TCP session duration is more than 100 minutes but less than or equal to 24 hours. NNM computes the duration of each TCP session when the session ends. This TCP session duration is more than 24 hours but less than or equal to 47 hours. NNM computes the duration of each TCP session when the session ends. This TCP session duration is more than 47 hours. INFO INFO INFO 110 UDP Activity UDP activity observed INFO 111 ICMP Activity ICMP activity observed INFO 112 IGMP Activity IGMP activity observed INFO
166 SCADA/ICS Analysis Module Module Detection ID Module Detection Name Module Detection Description Risk Factor Legacy PASL ID Used in pvs_core/report/report.h 21 Siemens S7 Server Detection 22 Siemens S7 Client Detection 23 COTP Server Detection S7 is a Siemens proprietary communications protocol. The S7 communications protocol is used extensively in the Siemens S7 software and device product line including the S7-200, S7-300, and S7-400 programmable logic controllers (PLCs). S7 can be encapsulated in several different protocols including PROFIBUS, MPI, and TCP. The S7 traffic detected here is encapsulated in TCP using TPKT and COTP. S7 is a Siemens proprietary communications protocol. The S7 communications protocol is used extensively in the Siemens S7 software and device product line including the S7-200, S7-300, and S7-400 programmable logic controllers (PLCs). S7 can be encapsulated in several different protocols including PROFIBUS, MPI, and TCP. The S7 traffic detected here is encapsulated in TCP using TPKT and COTP. The Connection-Oriented Transport Protocol (COTP) is an Open INFO 7160 INFO 7159 INFO
167 Module Detection ID Module Detection Name Module Detection Description Risk Factor Legacy PASL ID Systems Interconnection (OSI) transport layer protocol. COTP is defined in ISO In this instance, COTP is being transported via TCP using TPKT. 24 COTP Client Detection The Connection-Oriented Transport Protocol (COTP) is an Open Systems Interconnection (OSI) transport layer protocol. COTP is defined in ISO In this instance, COTP is being transported via TCP using TPKT. INFO Siemens S7-200 Series PLC Detection 26 Siemens S7-300 Series PLC Detection 27 Siemens S7-400 Series PLC Detection A Siemens S7-200 Series PLC has been detected. The Siemens S7-200 Series is a family of PLCs which supports the manufacturer's own proprietary S7 protocol. A Siemens S7-300 Series PLC has been detected. The Siemens S7-300 Series is a family of PLCs which supports the manufacturer's own proprietary S7 protocol. A Siemens S7-400 Series PLC has been detected. The Siemens S7-400 Series is a family of PLCs which supports the manufacturer's own proprietary S7 protocol. INFO 7193 INFO 7194 INFO Siemens S Ser- A Siemens S Series PLC has INFO
168 Module Detection ID Module Detection Name Module Detection Description Risk Factor Legacy PASL ID ies PLC Detection been detected. The Siemens S Series is a family of PLCs which supports the manufacturer's own proprietary S7 protocol. 29 Siemens S Series PLC Detection A Siemens S Series PLC has been detected. The Siemens S Series is a family of PLCs which supports the manufacturer's own proprietary S7 protocol. INFO TPKT Client Detection ISO Transport Service on top of TCP (TPKT) is defined in RFCs 1006 and Open Systems Interconnection (OSI) protocols as defined by the International Organization for Standardization (ISO) can be encapsulated in TCP using TPKT. TPKT emulates the OSI protocol Transport Service Access Point (TSAP). TCP port 102 is reserved for hosts which implement TPKT; however, it is not required that port 102 be used for all connections. One example of a protocol that uses TPKT but does not use port 102 is Microsoft's Remote Desktop Protocol (RDP) which uses TCP port TPKT Server Detection ISO Transport Service on top of TCP (TPKT) is defined in RFCs INFO 7155 INFO
169 Module Detection ID Module Detection Name Module Detection Description Risk Factor Legacy PASL ID 1006 and Open Systems Interconnection (OSI) protocols as defined by the International Organization for Standardization (ISO) can be encapsulated in TCP using TPKT. TPKT emulates the OSI protocol Transport Service Access Point (TSAP). TCP port 102 is reserved for hosts which implement TPKT; however, it is not required that port 102 be used for all connections. One example of a protocol that uses TPKT but does not use port 102 is Microsoft's Remote Desktop Protocol (RDP) which uses TCP port Siemens S7-300 Series PLC CPU Firmware <= DoS 33 MODBUS/TCP Device Identification Object Detection Siemens S7-300 PLC central processing units (CPUs) contain an unspecified flaw that may allow a remote attacker to use a specially crafted packet to cause the device to enter defect mode until a cold restart is performed. MODBUS Device Identification objects provide information related to the physical and functional properties of a device. Objects in the Basic Device Identification include vendor name, product code, and revision number. Objects in the Regular Device Identification category include HIGH 7225 INFO
170 Module Detection ID Module Detection Name Module Detection Description Risk Factor Legacy PASL ID the Basic Device Identification category objects in addition to vendor URL, product name, model name, and user application name. 34 Schneider Electric Modicon Quantum PLC Detection 35 Schneider Electric Modicon M340 PLC Detection 36 Schneider Electric Modicon Premium PLC Detection A Schneider Electric Modicon Quantum PLC has been detected. The Schneider Electric Modicon Quantum is a large programmable logic controller (PLC) for process applications and high availability solutions. A Schneider Electric Modicon M340 PLC has been detected. The Schneider Electric Modicon M340 is a compact programmable logic controller (PLC) suitable for a wide range of automation applications. The Modicon M340 is sometimes deployed in conjunction with the Modicon Premium and Modicon Quantum PLCs. A Schneider Electric Modicon Premium PLC has been detected. The Schneider Electric Modicon Premium is a large programmable logic controller (PLC) for discrete or process applications and high availability solutions. INFO 7149 INFO 7150 INFO
171 Module Detection ID Module Detection Name Module Detection Description Risk Factor Legacy PASL ID 37 Multiple Schneider Electric Modicon PLC Modules Directory Traversal 38 Multiple Schneider Electric Modicon M340 Ethernet Modules Remote Denial of Service 39 MODBUS/TCP 'Return Query Data' Function Code Detection (SCADA) Schneider Electric Ethernet modules for Modicon M340, Modicon Quantum, and Modicon Premium PLCs in addition to Modicon Momentum, Modicon TSX Micro, and Modicon STB modules that provide HTTP services contain a directory traversal vulnerability. Attackers can remotely bypass web server authentication thereby achieving unauthenticated administrative access and control of the device. Certain Schneider Electric Modicon M340 Programmable Logic Controller (PLC) Ethernet modules contain a vulnerability that allows remote, authenticated users to crash the Ethernet module via specially crafted FTP traffic. This vulnerability has been demonstrated using the FileZilla FTP client. Affected M340 Ethernet modules are the BMXNOE0100, BMXNOE0110, and BMXP The MODBUS/TCP client has sent a MODBUS server a Return Query Data request. The Return Query Data request, function code 8 (0x08) and subfunction code 0 (0x00), will cause the target server to echo the request sent CRITICAL 7154 MEDIUM 7161 INFO
172 Module Detection ID Module Detection Name Module Detection Description Risk Factor Legacy PASL ID to it. This function is typically implemented only in serial devices. 40 MODBUS/TCP 'Restart Communications' Function Code Detection (SCADA) 41 MODBUS/TCP 'Force Listen Mode' Function Code Detection (SCADA) 42 MODBUS/TCP 'Clear Counters and Diagnostic Register' Function Code Detection (SCADA) The MODBUS/TCP client has sent a MODBUS server a Restart Communications request. The Restart Communications request, function code 8 (0x08) and subfunction code 1 (0x01), will cause the target server to reinitialize and restart its communication port. This function is typically implemented only in serial devices. The MODBUS/TCP client has sent a MODBUS server a Force Listen Mode request. The Force Listen Mode request, function code 8 (0x08) and subfunction code 4 (0x04), will cause the target server into listen-only mode; i.e., it will not send any responses. This function is typically implemented only in serial devices. The MODBUS/TCP client has sent a MODBUS server a Clear Counters and Diagnostic Register request. The Clear Counters and Diagnostic Register request, function code 8 (0x08) and subfunction code 10 (0x0A), will cause the target server to clear INFO 7100 INFO 7101 INGO
173 Module Detection ID Module Detection Name Module Detection Description Risk Factor Legacy PASL ID its counters and the diagnostic register. This function is typically implemented only in serial devices. 43 MODBUS/TCP 'Report Server ID' Function Code Detection (SCADA) 44 MODBUS/TCP 'CANopen' Function Code Detection (SCADA) 45 MODBUS/TCP 'Device Identification' Function Code Detection (SCADA) 46 MODBUS/TCP Server Detection The MODBUS/TCP client has sent a MODBUS server a Report Server ID request. The Report Server ID request, function code 17 (0x11), will cause the target server to respond with the server ID, run indicator status, and other information. This function is typically implemented only in serial devices. The MODBUS/TCP client is transporting the CANopen protocol. Function code 43 (0x2B) and subfunction code 13 (0x0D) indicate that the CANopen protocol is encapsulated in MODBUS. The MODBUS/TCP client has sent a MODBUS server a Device Identification request. The Device Identification request, function code 43 (0x2B) and subfunction code 14 (0x0E), will cause the target server to return device identification information. A MODBUS/TCP server (also known as a MODBUS/TCP slave) has been detected. MODBUS/TCP is a SCADA protocol widely used INFO 7103 INFO 7104 INFO 7105 INFO
174 Module Detection ID Module Detection Name Module Detection Description Risk Factor Legacy PASL ID in industrial manufacturing and other industries. 47 MODBUS/TCP Client Detection 48 DNP3/TCP Master Detection 49 DNP3/TCP 'Cold Restart' Function Code Detection (SCADA) 50 DNP3/TCP 'Warm Restart' Function Code Detection (SCADA) 51 DNP3/TCP 'Stop Application' Function Code Detection (SCADA) A MODBUS/TCP client (also known as a MODBUS/TCP master) has been detected. MODBUS/TCP is a SCADA protocol widely used in industrial manufacturing and other industries. A DNP3/TCP master has been detected. DNP3 is a communications protocol used in SCADA systems primarily in the electric utility industry. The DNP3/TCP master has sent an outstation the Cold Restart command. The Cold Restart command, function code 13 (0x0D), will cause the target outstation to perform a cold restart. The DNP3/TCP master has sent an outstation the Warm Restart command. The Warm Restart command, function code 14 (0x0E), will cause the target outstation to perform a warm restart. The DNP3/TCP master has sent an outstation the Stop Application command. The Stop Application command, function code 18 INFO 7091 INFO 7089 INFO 7094 INFO 7095 INFO
175 Module Detection ID Module Detection Name Module Detection Description Risk Factor Legacy PASL ID (0x12), will cause the target outstation to stop an application. 52 DNP3/TCP 'Disable Unsolicited Messages' Function Code Detection (SCADA 53 Progea Movicon Client Detection via TCP 54 Progea Movicon Server Detection via TCP 55 Progea Movicon Client Detection via HTTP The DNP3/TCP master has sent an outstation the Disable Unsolicited Messages command. The Disable Unsolicited Messages command, function code 21 (0x15), will cause the target outstation to stop sending unsolicited messages. A Progea Movicon Client has been detected. Progea Movicon is SCADA/HMI software for industrial automation, remote control, and building automation. A Progea Movicon Server has been detected. Progea Movicon is SCADA/HMI software for industrial automation, remote control, and building automation. A Progea Movicon Client has been detected. Progea Movicon is SCADA/HMI software for industrial automation, remote control, and building automation. Movicon Clients use a proprietary communications protocol to access real-time data from Movicon Servers. This proprietary communications protocol may use TCP, UDP, or HTTP as a transport protocol. The Movicon Client INFO 7097 INFO 7119 INFO 7121 INFO
176 Module Detection ID Module Detection Name Module Detection Description Risk Factor Legacy PASL ID detected is using HTTP as a transport protocol. 56 Progea Movicon Server Detection via HTTP 57 Progea Movicon Client Detection via UDP 58 Progea Movicon Server Detection via UDP A Progea Movicon Server has been detected. Progea Movicon is SCADA/HMI software for industrial automation, remote control, and building automation. Movicon Clients use a proprietary communications protocol to access real-time data from Movicon Servers. This proprietary communications protocol may use TCP, UDP, or HTTP as a transport protocol. The Movicon Server detected is using HTTP as a transport protocol. A Progea Movicon Client has been detected. Progea Movicon is SCADA/HMI software for industrial automation, remote control, and building automation. Movicon Clients use a proprietary communications protocol to access real-time data from Movicon Servers. This proprietary communications protocol may use TCP, UDP, or HTTP as a transport protocol. The Movicon Client detected is using UDP as a transport protocol. A Progea Movicon Server has been detected. Progea Movicon is INFO 7123 INFO 7124 INFO
177 Module Detection ID Module Detection Name Module Detection Description Risk Factor Legacy PASL ID SCADA/HMI software for industrial automation, remote control, and building automation. Movicon Clients use a proprietary communications protocol to access real-time data from Movicon Servers. This proprietary communications protocol may use TCP, UDP, or HTTP as a transport protocol. The Movicon Server detected is using UDP as a transport protocol. 59 Progea Movicon < 11.4 Build 1150 Information Disclosure Vulnerability 60 Progea Movicon < 11.3 Memory Corruption Vulnerability The detected version of Progea Movicon contains an information disclosure vulnerability. This vulnerability is related to the TCPUploader module which could allow a remote and unauthenticated user to obtain OS version information. The detected version of Progea Movicon contains a memory corruption vulnerability. This vulnerability can be exploited by sending a specially crafted HTTP POST request to the Movicon OPC server. The specially crafted HTTP POST will cause the application to read out-of-bounds memory resulting in a denial of service. MEDIUM 7128 HIGH Progea Movicon < 11.2 The detected version of Progea CRITICAL
178 Module Detection ID Module Detection Name Module Detection Description Risk Factor Legacy PASL ID Build 1086 Multiple Movicon is affected by multiple Vulnerabilities vulnerabilities: There is a remote heap-based buffer overflow vulnerability related to erroneous parsing of the Content-Length HTTP request header. (CVE ) A remote heap-based buffer overflow vulnerability exists related to HTTP requests. (CVE ) A remote denial of service vulnerability exists related to an EIDP packet with too large of a size field. The specially crafted EIDP packet will cause the application to crash, and there is the possibility of arbitrary code execution. (CVE ) 62 Accuenergy Acuvim II AXM-NET 3.04 Multiple Vulnerabilities Accuenergy Acuvim II AXM-NET module containing multiple vulnerabilities has been detected: The Accuenergy Acuvim AXM-NET Ethernet module contains an authentication bypass vulnerability which can be exploited remotely by accessing a specific web server URL. An attacker could modify the network settings of the AXM-NET module, but would not have access to the settings for the Acuvim II power meter. (CVE ) The Accuenergy Acuvim AXM-NET Ethernet module contains a pass- HIGH
179 Module Detection ID Module Detection Name Module Detection Description Risk Factor Legacy PASL ID word disclosure vulnerability related to JavaScript password validation. An authenticated attacker could modify the network settings of the AXM-NET module, but would not have access to the settings for the Acuvim II power meter. (CVE ) 63 Rockwell Automation/Allen-Bradley MicroLogix 1400 Detection 64 Rockwell Automation/Allen-Bradley MicroLogix 1400 Series A <= 7 and Series B <= DNP3 Remote DoS A Rockwell Automation/Allen- Bradley MicroLogix 1400 PLC has been detected. The MicroLogix 1400 is a PLC which supports EtherNet/IP, DNP3/TCP, Modbus/TCP, Modbus/RTU, and DNP3/ASCII. Rockwell Automation/Allen-Bradley MicroLogix 1400 programmable logic controllers (PLCs) contain a denial of service vulnerability related to the DNP3 protocol stack. Successful exploitation of this vulnerability results in the PLC becoming nonresponsive, and recovery requires a power cycle. This vulnerability can be exploited by sending a series of malformed DNP3 packets to the MicroLogix 1400's DNP3 interface. The MicroLogix 1400's DNP3 interface can be either a serial or Ethernet port. Note that DNP3 is disabled INFO 7146 HIGH
180 Module Detection ID Module Detection Name Module Detection Description Risk Factor Legacy PASL ID by default in MicroLogix 1400 PLCs and that this vulnerability can be exploited only in devices that have DNP3 enabled. 65 Rockwell Automation/Allen-Bradley MicroLogix 1100 Detection 66 Rockwell Automation/Allen-Bradley MicroLogix 1000 Detection 67 Rockwell Automation/Allen-Bradley CompactLogix 1768 Detection A Rockwell Automation/Allen- Bradley MicroLogix 1100 PLC has been detected. The MicroLogix 1100 is a PLC which supports serial and networked communication over a built-in RS- 232/RS-485 combo port and Ethernet peer-to-peer commnications over its built-in EtherNet/IP port. A Rockwell Automation/Allen- Bradley MicroLogix 1000 PLC has been detected. The MicroLogix 1000 is a PLC which supports serial and networked communication over a built-in RS- 232/RS-485 combo port. The MicroLogix 1000 can also support Ethernet peer-to-peer commnications when outfitted with the 1761-NET-ENI communications module, which supports Ether- Net/IP. A Rockwell Automation/Allen- Bradley CompactLogix 1768 PLC has been detected. The CompactLogix 1768 is a PLC which supports EtherNet/IP and serial communications. INFO 7188 INFO 7189 INFO
181 Module Detection ID Module Detection Name Module Detection Description Risk Factor Legacy PASL ID 68 Rockwell Automation/Allen-Bradley CompactLogix 1769 L23x/L3x Detection 69 Rockwell Automation/Allen-Bradley CompactLogix Series Detection 70 Rockwell Automation/Allen-Bradley MicroLogix 1400 SNMP Remote Privilege Escalation 71 Schneider Electric Modicon TSX Micro PLC Detection A Rockwell Automation/Allen- Bradley CompactLogix 1769 L23x/L3x PLC has been detected. The CompactLogix 1769 L23x/L3x is a PLC which supports integrated serial, EtherNet/IP and ControlNet communications, as well as modular extensibility for DeviceNet support. A Rockwell Automation/Allen- Bradley CompactLogix Series PLC has been detected. The CompactLogix Series is a PLC which supports Ether- Net/IP communications. Rockwell Automation/Allen-Bradley MicroLogix 1400 programmable logic controllers (PLCs) contain an undocumented, hi gh privileged SNMP community string. This may allow an unauthorized remote attacker to make changes to the device's configuration or update the firmware. A Schneider Electric Modicon TSX Micro PLC has been detected. The Schneider Electric Modicon TSX Micro is a compact, modular programmable logic controller (PLC) for OEM machine builders and infrastructure. INFO 7191 INFO 7192 MEDIUM 7221 INFO
182 Module Detection ID Module Detection Name Module Detection Description Risk Factor Legacy PASL ID 72 Ethernet Industrial Protocol (Ether- Net/IP) Implicit Message Detection 73 Ethernet Industrial Protocol (Ether- Net/IP) Client Explicit Message Detection EtherNet/IP is a communications protocol used in industrial automation applications. EtherNet/IP implements the Common Industrial Protocol (CIP) at the session and application layers and uses TCP as a transport protocol for CIP explicit messages and UDP as a transport protocol for CIP implicit messages. CIP explicit messages are typically used to transmit configuration, diagnostic, and event data. CIP implicit messages are used for realtime I/O data transfer. An EtherNet/IP implicit message has been detected. EtherNet/IP is a communications protocol used in industrial automation applications. EtherNet/IP implements the Common Industrial Protocol (CIP) at the session and application layers and uses TCP as a transport protocol for CIP explicit messages and UDP as a transport protocol for CIP implicit messages. CIP explicit messages are typically used to transmit configuration, diagnostic, and event data. CIP implicit messages are used for realtime I/O data transfer. An EtherNet/IP explicit message has been detected. INFO 7113 INFO
183 Module Detection ID Module Detection Name Module Detection Description Risk Factor Legacy PASL ID 74 Ethernet Industrial Protocol (Ether- Net/IP) Server Explicit Message Detection 75 Common Industrial Protocol (CIP) Identity Object Detection 76 Rockwell Automation/Allen-Bradley MicroLogix 1100 L16xxx < HTTP Remote DoS EtherNet/IP is a communications protocol used in industrial automation applications. EtherNet/IP implements the Common Industrial Protocol (CIP) at the session and application layers and uses TCP as a transport protocol for CIP explicit messages and UDP as a transport protocol for CIP implicit messages. CIP explicit messages are typically used to transmit configuration, diagnostic, and event data. CIP implicit messages are used for realtime I/O data transfer. An EtherNet/IP explicit message has been detected. The Common Industrial Protocol (CIP) Identity Object provides identification of and general information about a CIP-enabled device. The CIP I dentity Object detected provides the following information: Vendor ID, Device Type, Product Code, Revision, and Product Name. Rockwell Automation MicroLogix 1100 PLCs contain an unspecified flaw in the password mechanism that may allow a remote denial of service. The issue is only present when the HTTP server is enabled. This may allow a remote attacker INFO 7115 INFO 7144 HIGH
184 Module Detection ID Module Detection Name Module Detection Description Risk Factor Legacy PASL ID to cause the program to crash. 77 Rockwell Automation/Allen-Bradley MicroLogix L32xxx Series A < / Series B <= HTTP Remote DoS 78 WellinTech KingSCADA Client Detection via TCP 79 WellinTech KingSCADA Server Detection via TCP Rockwell Automation MicroLogix 1400 PLCs contain an unspecified flaw in the password mechanism that may allow a remote denial of service. The issue is only present when the HTTP server is enabled. This may allow a remote attacker to cause the program to crash. WellinTech KingSCADA is SCADA/HMI software for industrial automation. KingSCADA is found in the transportation, aerospace, electric power, oil and gas, petrochemical, and other industries. KingSCADA Clients use a proprietary communications protocol to access real-time data from KingSCADA Servers. A KingSCADA Client using this proprietary communications protocol has been detected. WellinTech KingSCADA is SCADA/HMI software for industrial automation. KingSCADA is found in several industries including transportation, aerospace, electric power, oil and gas, and petrochemical. KingSCADA Clients use a proprietary communications protocol to access real-time data from KingSCADA HIGH 7199 INFO 7118 INFO
185 Module Detection ID Module Detection Name Module Detection Description Risk Factor Legacy PASL ID Servers. A KingSCADA Server using this proprietary communications protocol has been detected. 80 DNP3/TCP Outstation Detection 81 BACnet/IP Protocol Detection 82 BACnet Device Object Detection A DNP3/TCP outstation has been detected. DNP3 is a communications protocol used in SCADA systems primarily in the electric utility industry. BACnet is a communications protocol for building automation and control. BACnet applications include heating, ventilating, airconditioning control, lighting control, access control and fire detection systems. There are several options for BACnet data link and physical layers. BACnet/IP (the protocol detected here) uses IP and UDP as a virtual data link layer. Each BACnet device has an associated Device object. Device objects contain properties that represent the physical and funct ional properties of a device. Device object properties include application software version, firmware version, model name, object identifier, object name, vendor name, and vendor identifier. INFO 7090 INFO 7110 INFO
186 Module Detection ID Module Detection Name Module Detection Description Risk Factor Legacy PASL ID 83 WellinTech KingView Client Detection 84 WellinTech KingView Server Detection 85 Synchrophaser (IEEE C37.118) Client Detection via TCP WellinTech KingView is SCADA/HMI software for industrial automation. KingView is found in the transportation, aerospace, electric power, oil and gas, petrochemical, and other industries. KingView Clients use a proprietary communications protocol to access real-time data from KingView Servers. A KingView Client using this proprietary communications protocol has been detected. WellinTech KingView is SCADA/HMI software for industrial automation. KingView is found in several industries including transportation, aerospace, electric power, oil and gas, and petrochemical. KingView Servers use a proprietary communications protocol to access real-time data from KingView Servers. A KingView Server using this proprietary communications protocol has been detected. The remote client is using the Synchrophaser Protocol (IEEE C37.118) over TCP. The Synchrophaser Protocol is used by supervisory clients to remotely configure, monitor and received data from synchrophaser INFO 7131 INFO 7132 INFO
187 Module Detection ID Module Detection Name Module Detection Description Risk Factor Legacy PASL ID devices. A synchrophaser device is used to monitor, measure and analyze electrical flows at key intersections of the bulk electric grid (such as substations). 86 Synchrophaser (IEEE C37.118) Server Detection via TCP 87 Synchrophaser (IEEE C37.118) Client Detection via UDP 88 Synchrophaser (IEEE C37.118) Server Detection via UDP The remote server is using the Synchrophaser Protocol (IEEE C37.118) over TCP. The Synchrophaser Protocol is used by synchrophaser devices to report data and receive remote configuration commands from management clients. A synchrophaser device is used to monitor, measure and analyze electrical flows at key intersections of the bulk electric grid (such as substations). The remote client is using the Synchrophaser Protocol (IEEE C37.118) over UDP. The Synchrophaser Protocol is used by supervisory clients to remotely configure, monitor and received data from synchrophaser devices. A synchrophaser device is used to monitor, measure and analyze electrical flows at key intersections of the bulk electric grid (such as substations). The remote server is using the Synchrophaser Protocol (IEEE INFO 7217 INFO 7218 INFO
188 Module Detection ID Module Detection Name Module Detection Description Risk Factor Legacy PASL ID C37.118) over UDP. The Synchrophaser Protocol is used by synchrophaser devices to report data and receive remote configuration commands from management clients. A synchrophaser device is used to monitor, measure and analyze electrical flows at key intersections of the bulk electric grid (such as substations). 89 DNP3/TCP Protocol Detection 90 MODBUS/TCP Protocol Detection 91 Ethernet/IP Protocol Detection Distributed Network Protocol (DNP3/TCP) has been detected. DNP3 is a communications protocol used in SCADA systems primarily in the electric utility industry. The detected variant of DNP3, or DNP3/TCP, is encapsulated within TCP for delivery over IP networks. The Modbus/TCP protocol has been detected. Modbus is a SCADA protocol used in industrial manufacturing and other industries. The detected variant of Modbus, or Modbus/TCP, is encapsulated within TCP for delivery over IP networks. The Ethernet Industrial Protocol (EtherNet/IP) has been detected. EtherNet/IP is a communications protocol used in industrial auto- INFO 7226 INFO 7227 INFO
189 Module Detection ID Module Detection Name Module Detection Description Risk Factor Legacy PASL ID mation applications. EtherNet/IP implements the Common Industrial Protocol (CIP) at the session and application layers and uses TCP as a transport protocol for CIP explicit messages and UDP as a transport protocol for CIP implicit messages. CIP explicit messages are typically used to transmit configuration, diagnostic, and event data. CIP implicit messages are used for realtime I/O data transfer. 92 IEC Protocol Detection 93 Siemens S7 Protocol Detection The IEC protocol has been detected. IEC is a Supervisory Control and Data Acquisition (SCADA) protocol used in the power, petrochemical, water treatment, and oil and gas production industries. IEC is often used in power systems as a SCADA protocol between control stations and substations. IEC is based on IEC but uses TCP/IP instead of serial communications. The Siemens S7 protocol has been detected. S7 is a proprietary communications protocol developed by Siemens that runs between programmable logic con- INFO 7229 INFO
190 Module Detection ID Module Detection Name Module Detection Description Risk Factor Legacy PASL ID trollers (PLCs) of the Siemens S7 family. It is used for PLC programming, exchanging data between PLCs, accessing PLC data from SCADA (supervisory control and data acquisition) systems, and for diagnostic purposes. 94 IEC Server Detection 95 IEC Client Detection IEC is a Supervisory Control and Data Acquisition (SCADA) protocol used in the power, petrochemical, water treatment, and oil and gas production industries. IEC is often used in power systems as a SCADA protocol between control stations and substations. IEC is based on IEC but uses TCP/IP instead of serial. IEC is a Supervisory Control and Data Acquisition (SCADA) protocol used in the power, petrochemical, water treatment, and oil and gas production industries. IEC is often used in power systems as a SCADA protocol between control stations and substations. IEC is based on IEC but uses TCP/IP instead of serial. INFO 7139 INFO
191 Module Detection ID Module Detection Name Module Detection Description Risk Factor Legacy PASL ID 96 Saia Burgess Controls PCD Controllers Hard- Coded FTP Credentials Vulnerability One or more of the following SBC controllers was detected to be running a version of firmware earlier than : PCD1.M0xx0 PCD1.M2xx0 PCD2.M5xx0 PCD3.Mxxx0 PCD7.D4xxxT5F PCD7.D4xxxWTPF PCD7.D4xxxV PCD7.D4xxxD Firmware versions prior to are implemented with hard-coded FTP credentials. An attacker who exploits this vulnerability would have administrative access to the target device and resources. HIGH MODBUS/TCP 'Illegal The MODBUS/TCP server has INFO N/A Function Code' Excep- sent a MODBUS client a response tion Code Detection with an Illegal Function Code (SCADA) exception. This means that the function code of the query from the client is not an allowable action for the server. 115 MODBUS/TCP 'Illegal The MODBUS/TCP server has INFO N/A Data Address' Excep- sent a MODBUS client a response tion Code Detection with an Illegal Data Address (SCADA) exception. The data address received in the query is not an allowable address for the server
192 Module Detection ID Module Detection Name Module Detection Description Risk Factor Legacy PASL ID 116 MODBUS/TCP 'Illegal The MODBUS/TCP server has INFO N/A Data Value' Exception sent a MODBUS client a response Code Detection with an Illegal Data Value excep- (SCADA) tion. A value contained in the query data field is not an allowable value for server. 117 MODBUS/TCP 'Server The MODBUS/TCP server has INFO N/A Device Failure' Excep- sent a MODBUS client a response tion Code Detection with a Server Device Failure excep- (SCADA) tion. An unrecoverable error occurred while the server was attempting to perform the requested action. 118 MODBUS/TCP 'Server The MODBUS/TCP server has INFO N/A Device Busy' Excep- sent a MODBUS client a response tion Code Detection with a Service Device Busy excep- (SCADA) tion. Specialized use in conjunction with programming commands. The server is engaged in processing a log-duration program command. The client should retransmit the message later when the server is free. 119 MODBUS/TCP The MODBUS/TCP server has INFO N/A 'Memory Parity Error' sent a MODBUS client a response Exception Code Detec- with a Memory Parity Error excep- tion (SCADA) tion. Specialized use in conjunction with function codes 20 and 21 and reference type 6, to indicate that the extended file area failed to pass a consistency check
193 Module Detection ID Module Detection Name Module Detection Description Risk Factor Legacy PASL ID 120 MODBUS/TCP 'Gate- The MODBUS/TCP server has INFO N/A way Path Unavailable' sent a MODBUS client a response Exception Code Detec- with a Gateway Path Unavailable tion (SCADA) exception. Specialized use in conjunction with gateways, indicates that the gateway was unable to allocate an internal communication path from the input port to the output port for processing the request. Usually means that the gateway is misconfigured or overloaded. 121 MODBUS/TCP 'Gate- The MODBUS/TCP server has INFO N/A way Target Device sent a MODBUS client a response Failed to Respond' with a Gateway Target Device Exception Code Detec- Failed to Respond exception. Spe- tion (SCADA) cialized use in conjunction with gateways, indicates that no response was obtained from the target device. Usually means that the device is not present on the network. 122 Ethernet/IP CIP List The Ethernet/IP CIP (Common INFO N/A Identity Device Detec- Industrial Protocol) List Identity tion Response command provides identification of and general information about an Ethernet/IP-enabled device. 123 Ethernet/IP CIP The Ethernet/IP CIP (Common INFO N/A SendRRData Get Industrial Protocol) SendRRData Attribute All Device command Get Attribute All Device Identity Response Identity response provides identification of and general inform
194 Module Detection ID Module Detection Name Module Detection Description Risk Factor Legacy PASL ID ation about an Ethernet/IPenabled device. 124 DNP3/TCP 'Write' The DNP3/TCP master has sent INFO N/A Function Code Detec- an outstation the Write com- tion (SCADA) mand. The Write command, function code 2 (0x02), is a Transfer control function used to store control information at the outstation. 125 DNP3/TCP 'Select' The DNP3/TCP master has sent INFO N/A Function Code Detec- an outstation the Select com- tion (SCADA) mand. The Select command, function code 3 (0x03), is used to select, or arm points to be operated on. 126 DNP3/TCP 'Operate' The DNP3/TCP master has sent INFO N/A Function Code Detec- an outstation the Operate com- tion (SCADA) mand. The Operate command, function code 4 (0x04), is used to set or produce the output actions on the points previously selected. 127 DNP3/TCP 'Direct The DNP3/TCP master has sent INFO N/A Operate' Function an outstation the Direct Operate Code Detection command. The Direct Operate (SCADA) command, function code 5 (0x05), lacks the security feature of SBO. Direct operate forces selected points to execute the specified action without a verification check of the selected outstations
195 Module Detection ID Module Detection Name Module Detection Description Risk Factor Legacy PASL ID 128 DNP3/TCP 'Direct The DNP3/TCP master has sent INFO N/A Operate/No an outstation the Direct Oper- Response' Function ate/no Response command. The Code Detection Direct Operate/No Response com- (SCADA) mand, function code 6 (0x06), lacks the security feature of SBO. Direct operate forces selected points to execute the specified action without a verification check of the selected outstations. 129 DNP3/TCP 'Enable The DNP3/TCP master has sent INFO N/A Unsolicited Messages' an outstation the 'Enable Unso- Function Code Detec- licited Messages' command. The tion (SCADA) Enable Unsolicited Messages command, function code 20 (0x14), enables spontaneous reporting of the specified objects. 130 Rockwell Auto- A Rockwell Automation/Allen- INFO N/A mation/allen-bradley Bradley 1756 ControlLogix Con ControlLogix troller PLC has been detected. Controller Detection The 1756 ControlLogix Controller is a scalable controller solution that is capable of addressing many I/O points. 131 Rockwell Auto- A Rockwell Automation/Allen- INFO N/A mation/allen-bradley Bradley 1756 ControlLogix Com ControlLogix munication Module com- Communication Mod- munication adapter has been ule Detection detected. This 1756 ControlLogix Communication Module is used to add Ethernet/IP communication capabilities to a PLC
196 Module Detection ID Module Detection Name Module Detection Description Risk Factor Legacy PASL ID Used in pvs_core/report/report.h 133 Siemens SIMATIC S7 Siemens SIMATIC S pro- HIGH N/A 1500 Firmware < grammable logic controllers Multiple Vul- (PLCs) prior to firmware version nerabilities are vulnerable to a Denial of Service (DoS) condition (STOP mode transition) via a specially crafted packet to TCP port 102. An attacker can also bypass a replay protection mechanism via packets on TCP port 102." 134 Siemens SIMATIC S7 Siemens SIMATIC S pro- HIGH N/A 1500 Firmware < grammable logic controllers Multiple Vul- (PLCs) prior to firmware version nerabilities 1.5 have multiple vulnerabilities that may allow attackers to perform Denial of Service (DoS) attacks with specially crafted HTTP(S), ISO-TSAP, or Profinet network packets. The web server may also be vulnerable to crosssite request forgery (CSRF), cross-site scripting (XSS), header injection, open redirect attacks, and privilege escalation. 135 Siemens SIMATIC S7 Siemens SIMATIC S pro- HIGH N/A 1500 Firmware < grammable logic controllers DoS Vulnerability (PLCs) prior to firmware version 1.6 are vulnerable to a Denial of Service (DoS) via crafted TCP packets. Successful exploitation
197 Module Detection ID Module Detection Name Module Detection Description Risk Factor Legacy PASL ID causes the CPU to automatically restart and remain in the \"STOP\" mode. The CPU would then need to be manually put in the \"RUN\" mode to restore operations. 136 Siemens SIMATIC S7 Siemens SIMATIC S7 400 pro- HIGH N/A 400 Firmware < grammable logic controllers Denial of Service (PLCs) versions and for Vulnerability specific model families are vulnerable to a Denial of Service (DoS) via specially crafted packets. Successful exploitation causes the CPU to default into defect mode and the PLC will need to be manually reset to return to normal operation. SIMATIC V5 PN CPUs are also vulnerable but no update exists as this version has reached end-oflife and has been discontinued. 137 Siemens SIMATIC CP Siemens SIMATIC CP and CRITICAL N/A 343-1, CP CP Advanced Com- Authentication Bypass munication Processors with firm- Vulnerability ware versions lower than 3.2.9, CP Advanced with firmware less than , and CP Lean with firmware less than 3.1.1, have a flaw that allows an unauthenticated remote user with access to port 102/TCP to perform administrative actions, if the CPs configuration is stored
198 Module Detection ID Module Detection Name Module Detection Description Risk Factor Legacy PASL ID on its corresponding CPU. 138 Siemens SIMATIC S7 Siemens SIMATIC S7 400 CP MEDIUM N/A 400 Firmware < Advanced devices with firmware Multiple Vul- versions lower than have a nerabilities web server vulnerability that may allow remote attackers to perform actions with the permissions of an authenticated user. The web server also delivers cookies without the \"secure\" flag. 139 Siemens S Ser- Siemens S PLC central pro- HIGH N/A ies PLC CPU < 4.0 Mul- cessing units (CPUs) prior to ver- tiple Vulnerabilities sion 4.0 are vulnerable to crosssite request forgery (CSRF) via the web interface. An attacker may also be able to perform a Denial of Server (DoS) attack with specially crafted HTTP(S), ISO-TSAP, or Profinet network packets. Due to low entropy in its random number generator, the integrated web server s authentication method (port 80/tcp and port 443/tcp) could allow attackers to hijack web sessions over the network if the session token can be predicted. 140 Siemens S Ser- Siemens S PLC central pro- HIGH N/A ies PLC CPU < 4.0 Mul- cessing units (CPUs) prior to 4.0 tiple DoS are vulnerable to a Denial of Ser- Vulnerabilities vice (DoS) condition via specially
199 Module Detection ID Module Detection Name Module Detection Description Risk Factor Legacy PASL ID crafted packets on port 161/udp (SNMP) and port 102/tcp (ISO_ TSAP). 141 Siemens S Ser- Siemens S PLC central pro- CRITICAL N/A ies PLC CPU CA Cer- cessing units (CPUs) contain a tificate Default flaw that would allow an attacker Hardcoded Private to intercept and decrypt encryp- Key ted traffic from any other S PLC device through a man-inthe-middle (MiTM) attack using the SLL private key of one device. 142 Siemens S Ser- Siemens S PLC central pro- HIGH N/A ies PLC CPU User Pro- cessing units (CPUs) contain a gram Block Protection flaw that flaw that may allow a Remote Bypass remote attacker to circumvent user program block protection. 143 Siemens S Ser- Siemens S PLC central pro- MEDIUM N/A ies PLC CPU Recorded cessing units (CPUs) contain a Frame Command Exe- flaw that could allow an attacker cution Replay to trigger CPU functions by record and playback of legitimate network communication. 144 Siemens S Ser- Siemens S PLC central pro- MEDIUM N/A ies PLC CPU Web cessing units (CPUs) contain a Server Network flaw that could allow an attacker Request Saturation to place the controller in the Remote DoS stop/defect state by causing a communication error. 145 Siemens Devices A wide variety of Siemens devices MEDIUM N/A Using Profinet DCP are vulnerable to a Denial of Ser- Multiple DoS Vul- vice (DoS) condition via specially
200 Module Detection ID Module Detection Name Module Detection Description Risk Factor Legacy PASL ID nerabilities crafted PROFINET DCP network packets. 146 Siemens S7-400 CPU A vulnerability in SIEMENS HIGH N/A Packet Handling SIMATIC S7-400 PN CPUs (V6 and Remote DoS V7) could allow a remote attacker to cause a Denial of Service condition by sending specially crafted packets to port 80/TCP. 147 Siemens S7-400 CPU A vulnerability in SIEMENS MEDIUM N/A Protection-level 2 SIMATIC S7-400 PN CPUs (all ver- Configuration Unspe- sions including V7) could allow a cified Remote Cre- remote attacker to obtain cre- dential Disclosure dentials from the PLC if protection-level 2 is configured on the affected devices. 148 Siemens SCALANCE X- The web server on Siemens HIGH N/A 300 Switches HTTP SCALANCE X-300 switches with Request Handling firmware before 4.0 allows Remote DoS remote attackers to cause a denial of service (reboot) via malformed HTTP requests. 149 Siemens SCALANCE X- The FTP server on Siemens MEDIUM N/A 300 Switches FTP SCALANCE X-300 switches with Server Network firmware before 4.0 allows Packet Handling remote authenticated users to Remote DoS cause a denial of service (reboot) via crafted FTP packets. 150 Siemens SCALANCE X- A Siemens SCALANCE X-300 INFO N/A 300 Product Family product family switch has been Switch Detection detected. The SCALANCE X-300 product family are managed
201 Module Detection ID Module Detection Name Module Detection Description Risk Factor Legacy PASL ID industrial ethernet switches. 151 Siemens S7-300 CPU Siemens S7-300 central pro- HIGH N/A Packet Handling cessing units (CPUs) before ver- Remote DoS sion 3.X.14 have a vulnerability which could allow a remote attacker to cause a Denial of Service condition by sending specially crafted packets to port 80/TCP. 152 Siemens S7-300 CPU Siemens S7-300 central pro- MEDIUM N/A Protection-level 2 cessing units (CPUs) for all ver- Configuration Unspe- sions including version cified Remote Cre- have a vulnerability which could dential Disclosure allow a remote attacker to obtain credentials from the PLC if protection-level 2 is configured on the affected devices. 153 Siemens 44x-1 RNA CP Siemens 44x-1 RNA Com- HIGH N/A Remote Admin- munication Processors (CP), for istrative Action Exe- all versions prior to 1.4.1, has a cution flaw that can allow an unauthenticated remote attacker to perform adminstrative actions if network access to port 102/TCP is available and the configuration file for the CP is stored on the RNA's CPU. 154 Siemens S7 Com- The S7 master has sent an S7 INFO N/A munication Setup slave a Communication Setup Request request. The Communication Setup request is used to establish an S7 session
202 Module Detection ID Module Detection Name Module Detection Description Risk Factor Legacy PASL ID 155 Siemens S7 Read SZL The S7 master has sent an S7 INFO N/A Request slave a Read SZL request. The SZL Read request is used for retrieving system status information. 156 Siemens S7 Read SZL The S7 slave has sent an S7 mas- INFO N/A Response ter a Read SZL response. The SZL Read response contains system status information. 157 Siemens S7 Read Vari- The S7 master has sent an S7 INFO N/A able Request slave a Read Variable request. The Read Variable request is used to query values on the slave such as counters, flags, timers, and other values in memory. 158 Siemens S7 Read Vari- The S7 slave has sent an S7 mas- INFO N/A able Response ter a Read Variable response. The Read Variable response contains the data requested by the master such as counters, flags, timers, and other values in memory. 159 Siemens S7 Write Vari- The S7 master has sent an S7 INFO N/A able Request slave a Write Variable request. The Write Variable request is used to set values on the slave such as counters, flags, timers, and other values in memory. 160 Siemens S7 Write Vari- The S7 slave has sent an S7 mas- INFO N/A able Response ter a Write Variable response. The Write Variable response is used to indicate the status of the Write Variable request
203 Module Detection ID Module Detection Name Module Detection Description Risk Factor Legacy PASL ID 161 Siemens S7 PLC Hot The S7 master has sent an S7 INFO N/A Start Request slave a PLC Hot Start request. The Hot Start command is used to restart the PLC without clearing data in memory. 162 Siemens S7 PLC Cold The S7 master has sent an S7 INFO N/A Start Request slave a PLC Cold Start request. The Cold Start command is used to restart the PLC and clearing memory. 163 Siemens S7 Start The S7 master has sent an S7 INFO N/A Upload Request slave a Start Upload request. A Start Upload request is used to begin a data transfer from the slave to the master and identifies the filename which specifies which blocks will be uploaded. 164 Siemens S7 Upload The S7 Master has sent an S7 INFO N/A Block Job Request slave an Upload Block Job request. The Upload Block Job request is sent by the master to request the next block of data. 165 Siemens S7 Upload The S7 slave has sent an S7 mas- INFO N/A Block Data Message ter an Upload Block Data Message. The Upload Block Data message is sent in response to an Upload Block Job request and contains the requested block of data. 166 Siemens S7 End The S7 master has sent an S7 INFO N/A Upload Request slave an End Upload request mes
204 Module Detection ID Module Detection Name Module Detection Description Risk Factor Legacy PASL ID sage. The End Upload request is sent to finish the upload. 167 Siemens S7 Start The S7 master has sent an S7 INFO N/A Download Request slave a Start Download Request. A Start Download request is used to begin a data transfer from the master to the slave and identifies the filename which specifies which blocks will be downloaded. 168 Siemens S7 Download The S7 slave has sent an S7 mas- INFO N/A Block Job Request ter a Download Block Job request. The Download Block Job request is sent by the slave to request the next block of data. 169 Siemens S7 Download The S7 master has sent an S7 INFO N/A Block Data Message slave a Download Block Data message. The Download Block Data message is sent in response to a Download Block Job request and contains the requested block of data. 170 Siemens S7 End Down- The S7 master has sent an S7 INFO N/A loadrequest slave an End Download request message. The End Download request is sent to finish the download. 171 Siemens S7 Set Pass- The S7 master has sent an S7 INFO N/A word Request slave a Set Password request. The Set Password request sends the encoded password to the slave to login
205 Module Detection ID Module Detection Name Module Detection Description Risk Factor Legacy PASL ID 172 Profinet IO Protocol Profinet is an open standard INFO N/A Detection SCADA protocol for the control, monitoring, and diagnostic analysis of industrial equipment in automation networks. 173 Siemens SIMATIC KP8 The Siemens SIMATIC KP8 HMI INFO N/A HMI Detection has a Profinet interface, 8 shortstroke keys, and is configurable with Step 7 V5.5 and later. 174 Siemens SIMATIC The Siemens SIMATIC KTP700 HMI INFO N/A KTP700 HMI Detection has a Profinet interface, a 7 inch TFT display, and is configurable with WinCC Basic V13/Step7 Basic v Siemens S Ver- Version information for a INFO N/A sion Information Siemens S SIMATIC PLC Detected was detected via HTTP management console. 176 HTTP Server Detected An industrial web server is run- INFO N/A on Industrial Network ning on this port. 177 HTTP Client Detected A web client has connected to a INFO N/A on Industrial Network web server on an industrial network. 178 HTTP Protocol Detec- The HTTP protocol was detected INFO N/A ted on Industrial Net- on an industrial network. work 179 Siemens TIA Portal The TIA Portal software is used to INFO N/A Detected manage Siemens PLCs. 180 Siemens S A request to change a device INFO N/A Device State Change state was sent via the HTTP pro
206 Module Detection ID Module Detection Name Module Detection Description Risk Factor Legacy PASL ID Request Detected tocol. This requires administrative access to the S HTTP server. 181 Siemens S A request to change a device INFO N/A Device State Change state was sent via the HTTP pro- Request Detected tocol. This requires administrative access to the S HTTP server. 183 OPC UA Client Detec- An OPC UA Server has been detec- INFO N/A tion via Binary ted. OPC UA is a platform-independent standard through which various systems and devices can communicate by sending messages between clients and servers over various networks. It supports robust, secure communication that assures the identity of clients and servers and resists attacks. The three supported methods of communication are Binary, SOAP/HTTP, and Binary via SOAP/HTTP. 184 OPC UA Server Detec- An OPC UA Server has been detec- INFO N/A tion via Binary ted. OPC UA is a platform-independent standard through which various systems and devices can communicate by sending messages between clients and servers over various networks. It supports robust, secure communication that assures the iden
207 Module Detection ID Module Detection Name Module Detection Description Risk Factor Legacy PASL ID tity of clients and servers and resists attacks. The three supported methods of communication are Binary, SOAP/HTTP, and Binary via SOAP/HTTP. 185 OPC UA Client Detec- An OPC UA Client has been detec- INFO N/A tion via HTTPS ted. OPC UA is a platform-independent standard through which various systems and devices can communicate by sending messages between clients and servers over various networks. It supports robust, secure communication that assures the identity of clients and servers and resists attacks. The three supported methods of communication are Binary, SOAP/HTTP, and Binary via SOAP/HTTP. 186 OPC UA Server Detec- An OPC UA Server has been detec- INFO N/A tion via HTTPS ted. OPC UA is a platform-independent standard through which various systems and devices can communicate by sending messages between clients and servers over various networks. It supports robust, secure communication that assures the identity of clients and servers and resists attacks. The three supported methods of communication are Binary,
208 Module Detection ID Module Detection Name Module Detection Description Risk Factor Legacy PASL ID SOAP/HTTP, and Binary via SOAP/HTTP. 187 OPC UA Client Error An OPC UA Client has INFO N/A Detection encountered an error. OPC UA is a platform-independent standard through which various systems and devices can communicate by sending messages between clients and servers over various networks. It supports robust, secure communication that assures the identity of clients and servers and resists attacks. 188 OPC UA Server Error An OPC UA Server has INFO N/A Detection encountered an error. OPC UA is a platform-independent standard through which various systems and devices can communicate by sending messages between clients and servers over various networks. It supports robust, secure communication that assures the identity of clients and servers and resists attacks. 189 OPC UA Client Mes- An OPC UA Client Message has INFO N/A sage Type Detection been detected. OPC UA is a platform-independent standard through which various systems and devices can communicate by sending messages between clients and servers over various networks. It supports robust, secure
209 Module Detection ID Module Detection Name Module Detection Description Risk Factor Legacy PASL ID communication that assures the identity of clients and servers and resists attacks. 190 OPC UA Server Mes- An OPC UA Server Message has INFO N/A sage Type Detection been detected. OPC UA is a platform-independent standard through which various systems and devices can communicate by sending messages between clients and servers over various networks. It supports robust, secure communication that assures the identity of clients and servers and resists attacks. 191 Schneider Electric A Schneider Electric Modicon TSX INFO N/A Modicon TSX Premium Ethernet Com- Premium Ethernet munication Module has been Communication Mod- detected. The Schneider Electric ule Detection Modicon TSX Premium Ethernet Communication Module provides ethernet connectivity for the TSX Premium PLC, SNMP capability for management, and Modbus TCP/IP capability. 192 Rockwell Auto- Rockwell Automation/Allen-Brad- INFO N/A mation/allen-bradley ley 1734 POINT I/O Com POINT I/O Com- munication Module munication Module communication adapter has been Detection detected. The 1734 POINT I/O Communication Module is used to add Ethernet/IP communication capabilities to
210 Module Detection ID Module Detection Name Module Detection Description Risk Factor Legacy PASL ID POINT I/O input and output field modules. 193 Rockwell Auto- Rockwell Automation/Allen-Brad- INFO N/A mation/allen-bradley ley 1794 FLEX I/O Communication 1794 FLEX I/O Com- Module communication adapter munication Module has been detected. The 1794 FLEX Detection I/O Communication Module is used to add Ethernet/IP communication capabilities to 1794 FLEX I/O input and output field modules. 194 Rockwell Auto- Rockwell Automation/Allen-Brad- INFO N/A mation/allen-bradley ley PanelView Plus 6 Human PanelView Plus 6 Machine Interface has been detec- Human Machine Inter- ted. The PanelView Plus 6 HMI is face used to monitor, control, and display status information graphically for industrial processes. 195 Rockwell Auto- Rockwell Automation/Allen-Brad- INFO N/A mation/allen-bradley ley PanelView Plus Human PanelView Plus Machine Interface has been detec- Human Machine Inter- ted. The PanelView Plus 7 Stand- face ard HMI is used to monitor, control, and display status information graphically for industrial processes in a standard ICS environment. 196 Rockwell Auto- Rockwell Automation/Allen-Brad- INFO N/A mation/allen-bradley ley PanelView Plus Human PanelView Plus Machine Interface has been detec- Human Machine Inter- ted. The PanelView Plus 7 Per- face formance HMI is used to monitor,
211 Module Detection ID Module Detection Name Module Detection Description Risk Factor Legacy PASL ID control, and display status information graphically for industrial processes in a performanceintensive ICS environment. 197 Rockwell Auto- Rockwell Automation/Allen-Brad- INFO N/A mation/allen-bradley ley SoftLogix 5800 Controller has SoftLogix 5800 Con- been detected. The SoftLogix troller 5800 takes the control functions normally found in dedicated programmable logic controllers, encapsulates those functions in software and runs them on a commercial operating system. 198 Mettler-Toledo IND- Mettler-Toledo IND-ETHIP Com- INFO N/A ETHIP Com- munications Adapter has been munications Adapter detected. The Mettler-Toledo IND-ETHIP is a communications adapter that adds Ethernet/IP connectivity. 199 Endress and Hauser Endress and Hauser Proline Pro- INFO N/A Proline Promass Cori- mass Coriolis Flowmeter has olis Flowmeter been detected. The device uses the Coriolis principle (a change in fluid flow causes changes in the frequency, phase shift or amplitude of vibrations) to measures the mass flow rate of a fluid traveling through a tube. 200 Festo CPX-FB36 Com- Festo CPX-FB36 Communications INFO N/A munications Adapter Adapter has been detected. This adapter adds Ethernet/IP and Modbus/TCP support to Festo
212 Module Detection ID Module Detection Name Module Detection Description Risk Factor Legacy PASL ID CPX terminals. 201 Emerson Micro Emerson Micro Motion 5700 Cori- N/A INFO Motion 5700 Coriolis olis Field Mount Transmitter has Field Mount Trans- been detected. This device is a mitter combination Coriolis mass flow meter and communications adapter for transmitting mass flow data to monitoring stations over Ethernet/IP, Modbus/TCP and PROFINET. 202 Prosoft Technology Prosoft Technology RLX2 Com- INFO N/A RLX2 Com- munications Adapter has been munications Adapter detected. The RLX2 family of communications adapters secure wireless connectivity in industrial environments. 203 Siemens S7 PLC Stop The S7 master has sent an S7 INFO N/A Request slave a PLC Stop request. The PLC Stop request sets the Run state of the device to stopped. 204 Siemens S7 Message The S7 master has sent an S7 INFO N/A Service Request slave a Message Service Request. The Message Service request is used to subscribe events on the PLC. 205 Siemens S7 Diagnostic The S7 slave has pushed a Dia- INFO N/A Message Push gnostic message to an S7 master. The Diagnostic message is used to notify the S7 master of events that occur on the PLC. 206 Siemens S7 Alarm The S7 slave has pushed an INFO N/A
213 Module Detection ID Module Detection Name Module Detection Description Risk Factor Legacy PASL ID Indication Message Alarm Indication message to an Push S7 master. The Alarm Indication message is used to provide information to the S7 master about an alarm that has occurred on the PLC. 207 Siemens S7 Alarm The S7 master has sent an S7 INFO N/A Query Request slave an Alarm Query request. The Alarm Query request is used to get the status of an alarm block on the PLC. 208 Modicon M340 BMX A Schneider Electric Modicon INFO N/A NOR Ethernet/Serial M340 BMX xvnor Ethernet/Serial RTU Module Detection Communications Module has been detected. 209 Modicon M340 BMX A Schneider Electric Modicon INFO N/A NOE Network Module M340 BMX NOE Network Module Detection has been detected. The Schneider Electric Modicon M340 BMX NOE adds Ethernet communications capabilities to the Schneider Electric Modicon M340 PLC. Communications Module adds Ethernet and Serial communications capabilities to the Schneider Electric Modicon M340 PLC, along with support for a variety of industrial control protocols such as Modbus, ModbusTCP, CANopen, IEC /104, and DNP Accuenergy Acuvim II he Accuenergy Acuvim II is a rev- INFO N/A
214 Module Detection ID Module Detection Name Module Detection Description Risk Factor Legacy PASL ID Detection enue-grade power meter. These meters are found in power distribution and plant automation systems. The AXM-NET is an optional communications module for the Acuvim II which provides web server, , and MODBUS/TCP capabilities. 211 SNMP System Descrip- Device object and its properties INFO N/A tion Response Detec- detected through the SNMP Sys- tion tem Description response. 212 SNMP Object ID Device object and its properties INFO N/A Response Detection detected through the SNMP Object ID response. 213 SNMP Custom OID Device object and its properties INFO N/A Response Detection detected through the SNMP Custom OID response. 214 Siemens S7 Comm An S7 Comm Plus Client has been INFO N/A Plus Client Detection detected. S7 Comm Plus is a proprietary communications protocol developed by Siemens that runs between programmable logic controllers (PLCs) of the Siemens S7 family. It is used for PLC programming, exchanging data between PLCs, accessing PLC data from SCADA (supervisory control and data acquisition) systems, and for diagnostic purposes. 215 Siemens S7 Comm An S7 Comm Plus Server has INFO N/A
215 Module Detection ID Module Detection Name Module Detection Description Risk Factor Legacy PASL ID Plus Server Detection been detected. S7 Comm Plus is a proprietary communications protocol developed by Siemens that runs between programmable logic controllers (PLCs) of the Siemens S7 family. It is used for PLC programming, exchanging data between PLCs, accessing PLC data from SCADA (supervisory control and data acquisition) systems, and for diagnostic purposes. 216 Siemens S7 Comm The Siemens S7 Comm Plus pro- INFO N/A Plus Protocol Detec- tocol has been detected. S7 tion Comm Plus is a proprietary communications protocol developed by Siemens that runs between programmable logic controllers (PLCs) of the Siemens S7 family. It is used for PLC programming, exchanging data between PLCs, accessing PLC data from SCADA (supervisory control and data acquisition) systems, and for diagnostic purposes. 217 Siemens SIMATIC The Siemens SIMATIC KP1200 HMI INFO N/A KP1200 HMI Detection has a Profinet interface, key operation, a 12 inch widescreen TFT display, and is configurable using WinCC Comfort V11 and later. 218 Ethernet/IP CIP The Ethernet/IP CIP (Common INFO N/A SendUnitData Get Industrial Protocol) SendUnitData
216 Module Detection ID Module Detection Name Module Detection Description Risk Factor Legacy PASL ID Attribute List Device Get Attribute List Device Identity Identity Response response provides identification of and general information about an Ethernet/IP-enabled device. 219 Siemens EP 200SP A Siemens ET 200SP Series PLC INFO N/A PLC Series Detection has been detetected. The Siemens ET 200SP Series is a family of PLCs which supports the manufacturer's own proprietary S7 protocol, supports the Profinet protocol, Profinet IO Isochronous Real-Time protocol, and can be configured as a Profinet IO Controller or Profinet IO Device. 220 Profinet IO UDP Mes- A Profinet IO UDP message with INFO N/A sage with Device device information was detected. Information Detection The Profinet IO Read response with the I&M0 block (Identification and Maintenance) is typically sent by an IO Device in response to a request from an IO Controller, and contains the order id, serial number, hardware version, and software version. 221 Siemens S7-300 Denial of Service Vulnerability Siemens S7-300 central processing units (CPUs) with Profinet support less than version and without Profinet support less than version have a vulnerability which could allow a MEDIUM N /A
217 Module Detection ID Module Detection Name Module Detection Description Risk Factor Legacy PASL ID remote attacker to cause a Denial of Service condition. The attack involves sending specially crafted packets to 102/TCP and could cause the device to go into defect mode. A cold restart is required to recover the system. 222 Siemens SINAMICS The Siemens SINAMICS G110M PN INFO N/A G110M PN Drive Detec- Drive has been detected. This tion device is a variable speed drive with a high degree of protection, has a modular design, comprised of a Control Unit and Power Module and is designed to be used as a drive integrated in SIMOGEAR geared motors and SIMOTICS GP motors. 223 Siemens SINAMICS The Siemens SINAMICS G120C PN INFO N/A G120C PN Drive Detec- Drive has been detected. This tion device is a built-in inverter. 224 Siemens SINAMICS The Siemens SINAMICS G120 INFO N/A G120 CU230P-2 Drive CU230P-2 has been detected. Detection This is a Control Unit that has been optimized for pumps and fans. It can be operated with all power units of the PM240 and PM250 series. 225 Siemens SINAMICS The Siemens SINAMICS G120D INFO N/A G120D CU240D-2 PN CU240D-2 PN has been detected. Drive Detection This is a distributed converter with encoder evaluation
218 Module Detection ID Module Detection Name Module Detection Description Risk Factor Legacy PASL ID 226 Siemens SINAMICS The Siemens SINAMICS G120D INFO N/A G120D CU240D-2 PN-F CU240D-2 PN-F has been detec- Drive Detection ted. This is a distributed converter with encoder evaluation. 227 Siemens SINAMICS The Siemens SINAMICS G120 INFO N/A G120 CU240E-2 PN CU240E-2 PN has been detected. Drive Detection 228 Siemens SINAMICS The Siemens SINAMICS G120 INFO N/A G120 CU240E-2 PN-F CU240E-2 PN-F has been detec- Drive Detection ted. 229 Siemens SINAMICS The Siemens SINAMICS G120D INFO N/A G120D CU250D-2 PN CU250D-2 PN has been detected. Drive Detection This is a distributed converter with encoder evaluation and basic positioner EPos. 230 Siemens SINAMICS The Siemens SINAMICS G120 INFO N/A G120 CU250S-2 CU250S-2 VECTOR has been detec- VECTOR Drive Detec- ted. tion 231 Siemens SIMOCODE- The Siemens SIMOCODEproV EIP INFO N/A prov EIP Detection has been detected. This is a motor management system
219 Internal NNM Plugin IDs Each vulnerability and real-time check NNM performs has a unique associated ID. NNM IDs are within the range 0 to Internal NNM IDs Some of NNM s checks, such as detecting open ports, are built in. The following chart lists some of the more commonly encountered internal checks and describes what they mean: NNM ID Name Description 0 Detection of Open Port 1 Operating System Fingerprint NNM has observed a SYN-ACK leave from a server. NNM has observed enough traffic about a server to guess the operating system. 2 Service Connection NNM has observed browsing traffic from a host. 3 Internal Client Trusted Connections 4 Internal Interactive Session 5 Outbound Interactive Sessions 6 Inbound Interactive Sessions 7 Internal Encrypted Session 8 Outbound Encrypted Session 9 Inbound Encrypted Session NNM has logged a unique network session of source IP, destination IP, and destination port. NNM has detected one or more interactive network sessions between two hosts within your focus network. NNM has detected one or more interactive network sessions originating from within your focus network and destined for one or more addresses on the Internet. NNM has detected one or more interactive network sessions originating from one or more addresses on the Internet to this address within your focus network. NNM has detected one or more encrypted network sessions between two hosts within your focus network. NNM has detected one or more encrypted network sessions originating from within your focus network and destined for one or more addresses on the Internet. NNM has detected one or more encrypted network sessions originating from one or more addresses on the Inter
220 NNM ID Name Description net to this address within your focus network. 12 Number of Hops NNM logs the number of hops away each host is located. 14 Accepts External Connections 15 Internal Server Trusted Connections 16 Outbound External Connection NNM detects an external connection to this host. Specific IP addresses are not reported by this plugin, but it does track the destination port and protocol used. You can view full connection details in the real-time event log. This is the opposite of plugin 16, which reports on outbound connections. NNM has logged a unique network session of source IP, destination IP, and destination port. Specific IP addresses are not reported by this plugin, but it does track which destination port and protocol was used. You can view full connection details in the real-time event log. This is the opposite of plugin 14, which reports on inbound connections. NNM has detected an external connection from this host. 17 TCP Session NNM identifies TCP sessions and reports the start time, number of bytes of data downloaded during, and end time of these sessions. This plugin is reported at the end of each TCP session. 18 IP Protocol Detection NNM detects all IP protocols. 19 VLAN ID Reporting NNM reports all observed VLAN tags per host. 20 IPv6 Tunneling NNM identifies and processes tunneled IPv6 traffic
221 NNM Plugins This section provides the following information about NNM plugins: Vulnerability and Passive Fingerprinting NNM Fingerprinting NNM Plugin Syntax NNM Real-Time Plugin Syntax and Examples NNM Corporate Policy Plugins
222 About NNM Plugins NNM has two sources of plugin information: the.prmx and.prm plugin libraries in the plugins directory. Tenable distributes its passive vulnerability plugin database in an encrypted format. The encrypted file is named tenable_plugins.prmx and, if necessary, can be updated daily. NNM plugins written by the customer or third parties have the.prm extension. Tenable has also implemented passive fingerprinting technology based on the open-source SinFP tool. With permission from the author, Tenable includes the database of passive operating system fingerprints for the fingerprinting technology in this distribution of NNM. Writing Custom Plugins NNM customers can write their own passive plugins, which are added into the plugins directory in the NNM installation directory. The plugin must end with a.prm extension to be visible by NNM. You must restart NNM if: You add a new custom plugin to the plugins directory. NNM does not fire the plugin until you restart. You delete a.prm file manually from the plugins directory. NNM continues to fire the plugin until you restart
223 NNM Fingerprinting Tenable uses a hybrid approach to operating system fingerprinting. Primarily, plugins are used to detect and identify the OS of a host. If this is not possible, NNM uses detected packets to identify the OS. NNM has the ability to guess the operating system of a host by looking at the packets it generates. Specific combinations of TCP packet entries, such as the window size and initial time-to-live (TTL) values, allow NNM to predict the operating system generating the traffic. These unique TCP values are present when a server makes or responds to a TCP request. All TCP traffic is initiated with a SYN packet. If the server accepts the connection, it sends a response known as a SYN-ACK packet. If the server cannot or will not communicate, it sends a reset (RST) packet. When a server sends a SYN packet, NNM applies these list of operating system fingerprints and attempts to determine the operating system type. Tenable Network Security has permission to re-distribute the passive operating fingerprints from the author of SinFP open source project
224 NNM Plugin Syntax Plugins NNM plugins allow spaces and comment fields that start with a number (#) sign. Each plugin must be separated with the word NEXT on a single line. Create a.prm file in the plugins directory to make it available for use. You must restart NNM to use new custom plugins. Plugin Keywords There are several keywords available for writing passive vulnerability plugins for NNM. Some of these keywords are mandatory and some are optional. In the table below, mandatory keywords are highlighted in blue. Name bid bmatch clientissue cve dependency Description Tenable assigns SecurityFocus Bugtraq IDs (BID) to NNM plugins. This allows a user reading a report generated by NNM to link to more information available at Multiple Bugtraq entries can be entered on one line if separated by commas. This is the same as match but can look for any type of data. A bmatch must always have an even number of alphanumeric characters. If a vulnerability is determined in a network client such as a web browser or an tool, a server port is associated with the reported vulnerability. Tenable also assigns Common Vulnerability and Exposure (CVE) tags to each NNM plugin. This allows a user reading a report generated by NNM to link to more information available at Multiple CVE entries can be entered on one line if separated by commas. This is the opposite of noplugin. Instead of specifying another plugin that has failed, this keyword specifies which plugin must succeed. This keyword specifies a NNM ID that should exist to evaluate the plugin. In addition, this plugin can take the form of dependency=ephemeralserver-port, which means the evaluated server must have an open port above port
225 Name dport Exploitability: canvas core cvsstemporal metasploit family hs_dport hs_sport id match name Description This is the same as sport, but for destination ports. Displays exploitability factors for the selected vulnerability. For example, if the vulnerability is exploitable via both Canvas and Core and has a unique CVSS temporal score, the following tags may be displayed in the plugin output: CANVAS : D2ExploitPack CORE : true CVSSTEMPORAL : CVSS2#E:F/RL:OF/RC:C Each Tenable plugin for NNM is included in a family. This designation allows Tenable to group NNM plugins into easily managed sets that can be reported on individually. This is the same as hs_sport except for destination ports. Normally, when NNM runs its plugins, they are either free ranging looking for matches on any port, or fixed to specific ports with the sport or dport keywords. In very high speed networks, many plugins have a fallback port, known as a high-speed port, which focuses the plugin only on one specific port. In High Performance mode, the performance of a NNM plugin with an hs_sport keyword is exactly the same as if the plugin was written with the sport keyword. Each NNM plugin needs a unique rule ID. Tenable assigns these 16 bit numbers within the overall NNM range of valid entries. A list of the current NNM plugin IDs can be found on the Tenable website. This keyword specifies a set of one or more simple ASCII patterns that must be present in order for the more complex pattern analysis to take place. The match keyword gives NNM a lot of its performance and functionality. With this keyword, if it does not see a simple pattern, the entire plugin does not match. This is the name of the vulnerability NNM has detected. Though multiple NNM plugins can have the same name, it is not encouraged
226 Name nid nooutput noplugin pbmatch plugin_output pmatch pregex pregexi protocol_id regex regexi Description To track compatibility with the Nessus vulnerability scanner, Tenable associates NNM vulnerability checks with relevant Nessus vulnerability checks. Multiple Nessus IDs can be listed under one nid entry such as nid=10222, For plugins that are written specifically to be used as part of a dependency with another plugin, the nooutput keyword causes NNM not to report anything for any plugin with this keyword enabled. This keyword prevents a plugin from being evaluated if another plugin has already matched. For example, it may make sense to write a plugin that looks for a specific anonymous FTP vulnerability, but disable it if another plugin that checked for anonymous FTP has already failed. This is the same as bmatch except for binary data on the previous side of the reconstructed network session. This keyword displays dynamic data for a given vulnerability or event. The dynamic data is usually represented using %L or %P, and its value is obtained from the regular expressions defined using regex, regexi, pregex, or pregexi. This keyword is the same as match but is applied against the previous packet on the other side of the reconstructed network session. This is the same as regex except the regular expression is applied to the previous side of the reconstructed network session. This is the same as pregex except the pattern matching is not case sensitive. This keyword is used to specify the protocol number of the protocol causing the plugin to fire. This keyword specifies a complex regular expression search rule applied to the network session. This is the same as regex except the pattern matching is not case sensitive
227 Name risk seealso solution sport stripped_description timed-dependency udp Description All NNM plugins need a risk setting. Risks are classified as INFO, LOW, MEDIUM, HIGH, and CRITICAL. An INFO risk is an informational vulnerability such as client or server detection. A LOW risk is an informational vulnerability such as an active port or service. A MEDIUM risk is something that may be exploitable or discloses information. A HIGH risk is something that is easily exploitable. A CRITICAL risk is something that is very easily exploitable and allows for malicious attacks. If one or more URLs are available, this keyword can be used to display them. Multiple URLs can be specified on one line if separated by commas. Example entries for this include CERT advisories and vendor information websites. If a solution is available, it can be described here. The report section highlights the solution with different text. This setting applies the NNM plugin to just one port. For example, you may wish to write a SNMP plugin that just looks for activity on port 162. However, for detection of off-port services like a web server running on port 8080, a sport field is not used in the plugin. This field describes on one line the nature of the detected vulnerability. This data is printed out by NNM when printing the vulnerability report. Macros are available that allow the printing of matched network traffic such as banner information and are discussed in the examples below. For line breaks, the characters \n can be used to invoke a new line. This keyword slightly modifies the functionality of the noplugin and dependency keywords such that the evaluation must have occurred within the last N seconds. This keyword specifies that plugins are to be based on the UDP protocol rather than TCP protocol. Tip: In addition to tcp or udp, the following protocols are supported: sctp, icmp, igmp, ipip, egp, pup, idp, tp, rsvp, gre, pim, esp, ah, mtp, encap, comp, raw or other. Related Information
228 Network Client Detection Pattern Matching Time Dependent Plugins Plugin Examples
229 Network Client Detection Match patterns that begin with the ^ symbol mean at least one line in the packet payload must begin with the following pattern. Match patterns that begin with the! symbol indicate that the string must NOT match anything in the packet payload. In this case, the! and ^ symbols are combined to indicate that NNM should not evaluate any packet whose payload contains a line starting with the pattern Received:. The ^ is more expensive to evaluate than the > symbol. So, while both match patterns ^<pattern> and ><pattern> would find <pattern> at the beginning of a packet payload, the use of > is more desirable as it is less costly. Use ^ when looking for the occurrence of a string at the beginning of a line, but not at the beginning of the packet payload. In the latter case, use the > character instead. id=79526 hs_dport=25 clientissue name=buffer overflow in multiple IMAP clients description=the remote client is Mozilla 1.3 or 1.4a which is vulnerable to a boundary condition error whereby a malicious IMAP server may be able to crash or execute code on the client. solution=upgrade to either or 1.4a risk=high match=^from: match=^to: match=^date: match=^user-agent: Mozilla match=!^received: regex=^user-agent: Mozilla/.* \(.*rv:(1\.3 1\.4a)
230 Pattern Matching NNM Can Match "Previous" Packets NNM allows matching on patterns in the current packet as well as patterns in the previous packet in the current session. This plugin shows how we can make use of this feature to determine if a Unix password file is sent by a web server: id=79175 name=password file obtained by HTTP (GET) family=generic sport=80 description=it seems that a Unix password file was sent by the remote web server when the following request was made :\n%p\nwe saw : \n%l pmatch=>get / pmatch=http/1. match=root match=daemon match=bin regex=root:.*:0:0:.*:.* Here we see match patterns for a root entry in a Unix password file. We also see pmatch patterns that match against a packet that makes an HTTP GET request to a web server. The match patterns apply the current packet in a session and the pmatch patterns apply to the packet that was captured immediately before the one in the current session. To explain this visually, we are looking for occurrences of the following: GET / HTTP/1.* 1) client > server:port 80 Contents of password file: root:.*:0:0:.*:.* 2) client < server:port 80 Our match pattern would focus on the contents in packet 2) and our pmatch pattern would focus on packet 1) payload contents. NNM Can Match Binary Data
231 NNM also allows matching against binary patterns. Here is an example plugin that makes use of binary pattern matching to detect the usage of the well-known community string public in SNMPv1 response packets (The # is used to denote a comment): ### # SNMPv1 response # # Matches on the following: # 0x30 - ASN.1 header # 0x02 0x01 0x00 - (integer) (byte length) (SNMP version - 1) # 0x04 0x06 public - (string) (byte length) (community string - "public") # 0xa2 - message type - RESPONSE # 0x02 0x01 0x00 - (integer) (byte length) (error status - 0) # 0x02 0x01 0x00 - (integer) (byte length) (error index - 0) ### id=71975 udp sport=161 name=snmp public community string description=the remote host is running an SNMPv1 server that uses a well-known community string - public bmatch=>0:30 bmatch=>2: bmatch=>5: c6963a2 bmatch= Binary match patterns take the following form: bmatch=[<>[off]:]<hex> Binary match starts at <off> th offset of the packet or at the last <offset> of the packet, depending on the use of > (start) or < (end). <hex> is a hex string we look for. bmatch=<:ffffffff This matches any packet whose last four bytes are set to 0xFFFFFFFF. bmatch=>4: This matches any packet that contains the string AAAA (0x in hex) starting at its fourth byte. bmatch= abcdef5 This matches any packet that contains the hex string above
232 Negative Matches NNM plugins can also be negated. Here are two examples: pmatch=!pattern pbmatch=>0:! In each of these cases, the plugin does not match if the patterns contained in these not statements are present. For example, in the first pmatch statement, if the pattern named pattern is present, then the plugin does not match. In the second statement, the binary pattern of AAA (the letter A in ASCII hex is 0x41) only matches if it does not present the first three characters
233 Time Dependent Plugins The last plugin example shows some more advanced features of the NNM plugin language that allows a plugin to be time dependent as well as make use of the evaluation of other plugins. The plugin shows how NNM detects an anonymous FTP server. Use the NEXT keyword to separate plugins in the plugin file. id=79200 nooutput hs_sport=21 name=anonymous FTP (login: ftp) pmatch=^user ftp match=^331 NEXT # id=79201 dependency=79200 timed-dependency=5 hs_sport=21 name=anonymous FTP enabled description=the remote FTP server has anonymous access enabled. risk=low pmatch=^pass match=^230 Since we want to detect an anonymous FTP server, we must look for the following traffic pattern: USER ftp 1) FTP client > FTP server 331 Guest login ok,... 2) FTP client < FTP server PASS joe@fake.com 3) FTP client > FTP server 230 Logged in 4) FTP client < FTP server
234 Here we cannot use a single plugin to detect this entire session. So, instead we use two plugins: the first plugin looks for packets 1) and 2) and the second plugin looks for packets 3) and 4). A review of the above plugin shows that plugin matches 1) and 2) in the session by keying on the patterns USER ftp and the 331 return code. Plugin matches on 3) and 4) by keying on the patterns PASS and the 230 return code. Notice that plugin contains the following field: dependency= This field indicates the plugin must evaluate successfully before plugin may be evaluated. To complete the plugin for the anonymous FTP session, we must ensure both plugins are evaluating the same FTP session. To do this, we attach a time dependency to plugin The field timedependency=5 indicates that plugin must evaluate successfully in the last five seconds for to evaluate. This way, we can ensure that both plugins evaluate the same FTP session
235 Plugin Examples Basic Example This plugin illustrates the basic concepts of NNM plugin writing: id=79873 nid=11414 hs_sport=143 name=imap Banner description=an IMAP server is running on this port. Its banner is :\n %L risk=none match=ok match=imap match=server ready regex=^.*ok.*imap.*server ready This example uses the following fields: id - A unique number assigned to this plugin. nid - The Nessus ID of the corresponding Nessus NASL script. hs_sport - The source port to key on if High Performance mode is enabled. name - The name of the plugin. description - A description of the problem or service. match - The set of match patterns that must be found in the payload of the packet before the regular expression can be evaluated. regex - The regular expression to apply to the packet payload. Tip: The description contains the %L macro. If this plugin evaluates successfully, then the string pattern in the payload that matched the regular expression is stored in %L and prints out at report time. Complex Example id=79004 nid=
236 cve=cve bid=1144 hs_sport=143 name=atrium Mercur Mailserver description=the remote imap server is Mercur Mailserver There is a flaw in this server (present up to version ) which allow any authenticated user to read any file on the system. This includes other user mailboxes, or any system file. Warning : this flaw has not been actually checked but was deduced from the server banner solution=there was no solution ready when this vulnerability was written; Please contact the vendor for updates that address this vulnerability. risk=high match=>* OK match=mercur match=imap4-server regex=^\* OK.*MERCUR IMAP4-Server.*v3\.20\..*$ Tip: The first match pattern makes use of the > symbol. The > symbol indicates that the subsequent string must be at the beginning of the packet payload. Use of the > symbol is encouraged where possible as it is an inexpensive operation. Case-Insensitive Example There is a tool called SmartDownLoader that uploads and downloads large files. Unfortunately, versions 0.1 through 1.3 use the capitalization SmartDownloader, versions 1.4 through 2.7 use smartdownloader and versions 2.8 through current use SMARTdownloader. Searching for the various combinations of this text with purely the regex command would cause us to use a statement that looks like this: regex=[ss][mm][aa][rr][tt][dd]own[ll]oader However, with the regexi command, the search string is much less complex and less prone to creating an error: regexi=smartdownloader By using regexi, we can more quickly match on all three versions as well as future permutations of the string smartdownloader. In a case such as this, regexi is the logical choice
237 id=79910 dependency=1442 hs_sport=6789 name=smartdownloader Detection description=the remote host is running SmartDownLoader, a tool for performing rudimentary uploads and downloads of large binary files. solution=ensure that this application is in keeping with Corporate policies and guidelines risk=medium family=peertopeer match=ownloader regexi=smartdownloader Above is a complete example NNM plugin using the regexi keyword. The use of the match keyword searching for the string ownloader is not a typo. By searching for network sessions that have this string in them first, NNM can avoid invoking the expensive regexi search algorithm unless the ownloader pattern is present
238 NNM Real-Time Plugin Syntax Real-Time Plugin Model NNM real-time plugins are exactly the same as NNM vulnerability plugins with two exceptions: They can occur multiple times. Their occurrence may not be recorded as a vulnerability. For example, an attacker may attempt to retrieve the source code for a Perl script from an Apache web server. If NNM observes this event, it would be logical to send a real-time alert. It would also be logical to mark that the Apache server is potentially vulnerable to some sort of Perl script source code download. In other cases, it may be more logical to just log the attempt as an event, but not a vulnerability. For example, a login failure over FTP is an event that may be worth logging, but does not indicate a vulnerability. As the real-time plugins are written, there are two keywords that indicate to NNM that these are not regular vulnerability plugins. These are the real-time and realtimeonly keywords. In the previous example, the FTP user login failure would be marked as a realtimeonly event because we would like real-time alerting, but not a new entry into the vulnerability database. Real-Time Plugin Keywords Name real-time realtimeonly track-session Description If a plugin has this keyword, then NNM will generate a SYSLOG message or real-time log file entry the first time this plugin matches. This prevents vulnerabilities that are worm related from causing millions of events. For example, the plugins for the Sasser worm generate only one event. Output from plugins with this keyword will show up in the vulnerability report. If a plugin has this keyword, then NNM will generate a SYSLOG message or real-time log file entry each time the plugin evaluates successfully. These plugins never show up in the report file. This keyword will cause the contents of a session to be reported (via SYSLOG or the real-time log file) a specified number of times after the plugin containing this keyword was matched. This is an excellent way to discover what a hacker did next or possibly what the contents of a retrieved
239 Name Description file were real-time. triggerdependency Normally if a plugin has multiple dependencies, then all of those dependencies must be successful for the current plugin to evaluate. However, the trigger-dependency keyword allows a plugin to be evaluated as long as at least one of its dependencies is successful
240 Real-Time Plugin Examples Failed Telnet Login Plugin The easiest way to learn about NNM real-time plugins is to evaluate some of those included by Tenable. Below is a plugin that detects a failed Telnet login to a FreeBSD server. # Look for failed logins into an FreeBSD telnet server id=79400 hs_sport=23 dependency=1903 realtimeonly name=failed login attempt description=nnm detected a failed login attempt to a telnet server risk=low match=login incorrect This plugin has many of the same features as a vulnerability plugin. The ID of the plugin is The high-speed port is 23. We need to be dependent on plugin 1903 (which detects a Telnet service). The realtimeonly keyword tells NNM that if it observes this pattern, then it should alert on the activity, but not record any vulnerability. Under SecurityCenter CV, events from NNM are recorded alongside other IDS tools. Finger User List Enumeration Plugin The finger daemon is an older Internet protocol that allowed system users to query remote servers to get information about a user on that box. There have been several security holes in this protocol that allowed an attacker to elicit user and system information that could be useful to attackers. id=79500 dependency=1277 hs_sport=79 track-session=10 realtimeonly name=app Subversion - Successful finger query to multiple users description=a response from a known finger daemon was observed which indicated that the attacker was able to retrieve a list of three or more valid user names. risk=high
241 match=directory: match=directory: match=directory: This plugin looks for these patterns only on systems where a working finger daemon has been identified (dependency #1277). However, the addition of the track-session keyword means that if this plugin is launched with a value of 10, the session data from the next 10 packets is tracked and logged in either the SYSLOG or real-time log file. During a normal finger query, if only one valid user is queried, then only one home directory is returned. However, many of the exploits for finger involve querying for users such as NULL,.., or 0. This causes vulnerable finger daemons to return a listing of all users. In that case, this plugin would be activated because of the multiple Directory: matches. Unix Password File Download Web Server Plugin This plugin below looks for any download from a web server that does not look like HTML traffic, but does look like the contents of a generic Unix password file. id=79300 dependency=1442 hs_sport=80 track-session=10 realtimeonly name=web Subversion - /etc/passwd file obtained description=a file which looks like a Linux /etc/passwd file was downloaded from a web server. risk=high match=!<html> match=!<html> match=^root:x:0:0:root:/root:/bin/bash match=^bin:x:1:1:bin: match=^daemon:x:2:2:daemon: The plugin is dependent on NNM ID 1442, which detects web servers. In the match statements, we attempt to ignore any traffic that contains valid HTML tags, but also has lines that start with common Unix password file entries. Generic Buffer Overflow Detection on Windows Plugin

242 One of NNM s strongest intrusion detection features is its ability to recognize specific services, and then to look for traffic occurring on those services that should never occur unless they have been compromised. Since NNM can keep track of both sides of a conversation and make decisions based on the content of each, it is ideal to look for Unix and Windows command shells occurring in services that should not have those command shells in them. Here is an example plugin: # look for Windows error when a user tries to # switch to a drive that doesn't exist id=79201 include=services.inc trigger-dependency track-session=10 realtimeonly name=successful shell attack detected - Failed cd command description=the results of an unsuccessful attempt to change drives on a Windows machine occurred in a TCP session normally used for a standard service. This may indicate a successful compromise of this service has occurred. risk=high pmatch=!>get pregexi=cd match=!>550 match=^the system cannot find the match=specified. This plugin uses the include keyword that identifies a file that lists several dozen NNM IDs, which identify well known services such as HTTP, DNS, and NTP. The plugin is not evaluated unless the target host is running one of those services. The keyword trigger-dependency is needed to ensure the plugin is evaluated even if there is only one match in the services.inc file. Otherwise, NNM evaluates this plugin only if the target host was running all NNM IDs present in the services.inc file. The trigger-dependency keyword says that at least one NNM ID must be specified by one or more dependency or include rules must be present. Finally, the logic of plugin detection looks for the following type of response on a Windows system:
PVS 5.1 User Guide. Last Updated: October 10, 2016
 PVS 5.1 User Guide Last Updated: October 10, 2016 Table of Contents PVS 5.1 User Guide 1 Welcome to PVS 1 Getting Started with PVS 2 PVS Workflow 3 Hardware Requirements 4 Software Requirements 6 Licensing
PVS 4.4 User Guide. Revision April, 2016
 PVS 4.4 User Guide Revision 2 18 April, 2016 PVS 4.4 User Guide 1 About PVS 1 Getting Started with PVS 2 Hardware Requirements 3 Software Requirements 5 Licensing Requirements 6 Install, Upgrade, Configure,
Tenable.io User Guide. Last Revised: November 03, 2017
 Tenable.io User Guide Last Revised: November 03, 2017 Table of Contents Tenable.io User Guide 1 Getting Started with Tenable.io 10 Tenable.io Workflow 12 System Requirements 15 Scanners and Agents 16 Link
ForeScout Extended Module for Tenable Vulnerability Management
 ForeScout Extended Module for Tenable Vulnerability Management Version 2.7.1 Table of Contents About Tenable Vulnerability Management Module... 4 Compatible Tenable Vulnerability Products... 4 About Support
Tenable.sc-Tenable.io Upgrade Assistant Guide, Version 2.0. Last Revised: January 16, 2019
 Tenable.sc-Tenable.io Upgrade Assistant Guide, Version 2.0 Last Revised: January 16, 2019 Table of Contents Welcome to the Tenable.sc-Tenable.io Upgrade Assistant 3 Get Started 4 Environment Requirements
Host Identity Sources
 The following topics provide information on host identity sources: Overview: Host Data Collection, on page 1 Determining Which Host Operating Systems the System Can Detect, on page 2 Identifying Host Operating
ForeScout Extended Module for Qualys VM
 ForeScout Extended Module for Qualys VM Version 1.2.1 Table of Contents About the Qualys VM Integration... 3 Additional Qualys VM Documentation... 3 About This Module... 3 Components... 4 Considerations...
KeyNexus Hyper-V Deployment Guide
 v1.0 09/2018 . Copyright Notice Copyright 2018 KeyNexus Inc. All rights reserved. Information in this document is subject to change without notice. The software described in this document is furnished
USER GUIDE. CTERA Agent for Windows. June 2016 Version 5.5
 USER GUIDE CTERA Agent for Windows June 2016 Version 5.5 Copyright 2009-2016 CTERA Networks Ltd. All rights reserved. No part of this document may be reproduced in any form or by any means without written
Managing NCS User Accounts
 7 CHAPTER The Administration enables you to schedule tasks, administer accounts, and configure local and external authentication and authorization. Also, set logging options, configure mail servers, and
Tenable Appliance 4.8.x User Guide. Last Updated: December 12, 2018
 Tenable Appliance 4.8.x User Guide Last Updated: December 12, 2018 Table of Contents Welcome to Tenable Appliance 6 System Requirements and Installation 8 Tenable VM Appliance Installation 9 VM Image Prerequisites
IMC inode Intelligent Client v7.0 (E0106) Copyright (c) Hewlett-Packard Development Company, L.P. and its licensors.
 Copyright (c) Hewlett-Packard Development Company, L.P. and its licensors.") IMC inode Intelligent Client v7.0 (E0106) Copyright (c) 2011-2014 Hewlett-Packard Development Company, L.P. and its licensors. Table of Contents 1. What's New in this Release 2. Problems Fixed in this
IMC inode Intelligent Client v7.0 (E0106) Copyright (c) 2011-2014 Hewlett-Packard Development Company, L.P. and its licensors. Table of Contents 1. What's New in this Release 2. Problems Fixed in this
Managing WCS User Accounts
 7 CHAPTER This chapter describes how to configure global email parameters and manage WCS user accounts. It contains these sections: Adding WCS User Accounts, page 7-2 Viewing or Editing User Information,
July 18, (Revision 3)
") 3D Tool 2.0 User Guide July 18, 2011 (Revision 3) Copyright 2011. Tenable Network Security, Inc. All rights reserved. Tenable Network Security and Nessus are registered trademarks of Tenable Network Security,
3D Tool 2.0 User Guide July 18, 2011 (Revision 3) Copyright 2011. Tenable Network Security, Inc. All rights reserved. Tenable Network Security and Nessus are registered trademarks of Tenable Network Security,
Network Performance Analysis Solution. User Guide
 Network Performance Analysis Solution User Guide Copyr ight Copyright 2017 Colasoft. All rights reserved. Information in this document is subject to change without notice. No part of this document may
Managing WCS User Accounts
 CHAPTER 7 This chapter describes how to configure global e-mail parameters and manage WCS user accounts. It contains these sections: Adding WCS User Accounts, page 7-1 Viewing or Editing User Information,
ForeScout Extended Module for ServiceNow
 ForeScout Extended Module for ServiceNow Version 1.2 Table of Contents About ServiceNow Integration... 4 Use Cases... 4 Asset Identification... 4 Asset Inventory True-up... 5 Additional ServiceNow Documentation...
VMware vcloud Air User's Guide
 vcloud Air This document supports the version of each product listed and supports all subsequent versions until the document is replaced by a new edition. To check for more recent editions of this document,
Version 2.3 User Guide
 V Mware vcloud Usage Meter Version 2.3 User Guide 2012 VMware, Inc. All rights reserved. This product is protected by U.S. and international copyright and intellectual property laws. This product is covered
Nessus 7.0 User Guide. Last Updated: February 05, 2018
 Nessus 7.0 User Guide Last Updated: February 05, 2018 Table of Contents Welcome to Nessus 7.0 10 Nessus Workflow 13 Navigating Nessus 14 System Requirements 15 Hardware Requirements 16 Software Requirements
NetExtender for SSL-VPN
 NetExtender for SSL-VPN Document Scope This document describes how to plan, design, implement, and manage the NetExtender feature in a SonicWALL SSL-VPN Environment. This document contains the following
D-Link Central WiFiManager Configuration Guide
 Table of Contents D-Link Central WiFiManager Configuration Guide Introduction... 3 System Requirements... 3 Access Point Requirement... 3 Latest CWM Modules... 3 Scenario 1 - Basic Setup... 4 1.1. Install
ForeScout Extended Module for MaaS360
 Version 1.8 Table of Contents About MaaS360 Integration... 4 Additional ForeScout MDM Documentation... 4 About this Module... 4 How it Works... 5 Continuous Query Refresh... 5 Offsite Device Management...
How-to Guide: Tenable Applications for Splunk. Last Revised: August 21, 2018
 How-to Guide: Tenable Applications for Splunk Last Revised: August 21, 2018 Table of Contents Overview 3 Components 4 Tenable Add-on (TA-tenable) 5 Source and Source Types 6 CIM Mapping 7 Tenable App for
Forescout. eyeextend for Palo Alto Networks Wildfire. Configuration Guide. Version 2.2
 Forescout Version 2.2 Contact Information Forescout Technologies, Inc. 190 West Tasman Drive San Jose, CA 95134 USA https://www.forescout.com/support/ Toll-Free (US): 1.866.377.8771 Tel (Intl): 1.408.213.3191
Nessus 6.8 User Guide. Last Updated: November 28, 2017
 Nessus 6.8 User Guide Last Updated: November 28, 2017 Table of Contents Nessus 6.8 User Guide 1 Welcome to Nessus 10 Nessus Workflow 13 About Nessus Plugins 14 System Requirements 16 Hardware Requirements
Entrust. Discovery 2.4. Administration Guide. Document issue: 3.0. Date of issue: June 2014
 Entrust Discovery 2.4 Administration Guide Document issue: 3.0 Date of issue: June 2014 Copyright 2010-2014 Entrust. All rights reserved. Entrust is a trademark or a registered trademark of Entrust, Inc.
ForeScout Extended Module for VMware AirWatch MDM
 ForeScout Extended Module for VMware AirWatch MDM Version 1.7.2 Table of Contents About the AirWatch MDM Integration... 4 Additional AirWatch Documentation... 4 About this Module... 4 How it Works... 5
ForeScout Extended Module for ServiceNow
 ForeScout Extended Module for ServiceNow Version 1.1.0 Table of Contents About this Integration... 4 Use Cases... 4 Asset Identification... 4 Asset Inventory True-up... 5 Additional ServiceNow Documentation...
HySecure Quick Start Guide. HySecure 5.0
 HySecure Quick Start Guide HySecure 5.0 Last Updated: 25 May 2017 2012-2017 Propalms Technologies Private Limited. All rights reserved. The information contained in this document represents the current
NGFW Security Management Center
 NGFW Security Management Center Release Notes 6.4.3 Revision A Contents About this release on page 2 System requirements on page 2 Build version on page 3 Compatibility on page 4 New features on page 5
NGFW Security Management Center
 NGFW Security Management Center Release Notes 6.4.4 Revision A Contents About this release on page 2 System requirements on page 2 Build version on page 3 Compatibility on page 5 New features on page 5
ForeScout CounterACT. (AWS) Plugin. Configuration Guide. Version 1.3
 Plugin. Configuration Guide. Version 1.3") ForeScout CounterACT Hybrid Cloud Module: Amazon Web Services (AWS) Plugin Version 1.3 Table of Contents Amazon Web Services Plugin Overview... 4 Use Cases... 5 Providing Consolidated Visibility... 5 Dynamic
ForeScout CounterACT Hybrid Cloud Module: Amazon Web Services (AWS) Plugin Version 1.3 Table of Contents Amazon Web Services Plugin Overview... 4 Use Cases... 5 Providing Consolidated Visibility... 5 Dynamic
Web Console Setup & User Guide. Version 7.1
 Web Console Setup & User Guide Version 7.1 1 Contents Page Number Chapter 1 - Installation and Access 3 Server Setup Client Setup Windows Client Setup Mac Client Setup Linux Client Setup Interoperation
IMC Network Traffic Analyzer 7.1 (E0301P04) Copyright (c) 2015 Hewlett-Packard Development Company, L.P. All Rights Reserved.
 Copyright (c) 2015 Hewlett-Packard Development Company, L.P. All Rights Reserved.") Network Traffic Analyzer 7.1 (E0301P04) Copyright (c) 2015 Hewlett-Packard Development Company, L.P. All Rights Reserved. Table of Contents 1. What's New in this Release 2. Problems Fixed in this Release
Network Traffic Analyzer 7.1 (E0301P04) Copyright (c) 2015 Hewlett-Packard Development Company, L.P. All Rights Reserved. Table of Contents 1. What's New in this Release 2. Problems Fixed in this Release
NGFW Security Management Center
 NGFW Security Management Center Release Notes 6.4.7 Revision A Contents About this release on page 2 System requirements on page 2 Build version on page 3 Compatibility on page 5 New features on page 5
How-to Guide: Tenable.io for Microsoft Azure. Last Updated: November 16, 2018
 How-to Guide: Tenable.io for Microsoft Azure Last Updated: November 16, 2018 Table of Contents How-to Guide: Tenable.io for Microsoft Azure 1 Introduction 3 Auditing the Microsoft Azure Cloud Environment
UDP Director Virtual Edition Installation and Configuration Guide (for Stealthwatch System v6.9.0)
") UDP Director Virtual Edition Installation and Configuration Guide (for Stealthwatch System v6.9.0) Installation and Configuration Guide: UDP Director VE v6.9.0 2016 Cisco Systems, Inc. All rights reserved.
UDP Director Virtual Edition Installation and Configuration Guide (for Stealthwatch System v6.9.0) Installation and Configuration Guide: UDP Director VE v6.9.0 2016 Cisco Systems, Inc. All rights reserved.
Cisco Unified Serviceability
 Cisco Unified Serviceability Introduction, page 1 Installation, page 5 Introduction This document uses the following abbreviations to identify administration differences for these Cisco products: Unified
NGFW Security Management Center
 NGFW Security Management Center Release Notes 6.3.4 Revision A Contents About this release on page 2 System requirements on page 2 Build version on page 3 Compatibility on page 5 New features on page 5
NMS300 Network Management System Application
 NMS300 Network Management System Application Quick Start Guide October 2013 202-11288-02 350 East Plumeria Drive San Jose, CA 95134 USA Support Thank you for purchasing this NETGEAR product. After installing
LCE Splunk Client 4.6 User Manual. Last Revised: March 27, 2018
 LCE Splunk Client 4.6 User Manual Last Revised: March 27, 2018 Table of Contents Getting Started with the LCE Splunk Client 3 Standards and Conventions 4 Install, Configure, and Remove 5 Download an LCE
Backup App V7. Quick Start Guide for Windows
 Backup App V7 Quick Start Guide for Windows Revision History Date Descriptions Type of modification 30 Jun 2016 First Draft New 25 Nov 2016 Added Restore Options to Ch 8 Restoring Data; Combined Technical
IMC Network Traffic Analyzer 7.2 (E0401P04) Copyright 2016 Hewlett Packard Enterprise Development LP
 Copyright 2016 Hewlett Packard Enterprise Development LP") Network Traffic Analyzer 7.2 (E0401P04) Copyright 2016 Hewlett Packard Enterprise Development LP Table of Contents 1. What's New in this Release 2. Problems Fixed in this Release 3. Software Distribution
Network Traffic Analyzer 7.2 (E0401P04) Copyright 2016 Hewlett Packard Enterprise Development LP Table of Contents 1. What's New in this Release 2. Problems Fixed in this Release 3. Software Distribution
Foundstone 7.0 Patch 6 Release Notes
 Foundstone 7.0 Patch 6 Release Notes These release notes describe the changes and updates for Foundstone 7.0, patch 6. This application installs only the patch needed to update the Foundstone system. Foundstone
Remote Support 19.1 Web Rep Console
 Remote Support 19.1 Web Rep Console 2003-2019 BeyondTrust Corporation. All Rights Reserved. BEYONDTRUST, its logo, and JUMP are trademarks of BeyondTrust Corporation. Other trademarks are the property
Eucalyptus User Console Guide
 Eucalyptus 3.4.1 User Console Guide 2013-12-11 Eucalyptus Systems Eucalyptus Contents 2 Contents User Console Overview...5 Install the Eucalyptus User Console...6 Install on Centos / RHEL 6.3...6 Configure
ForeScout CounterACT. Controller Plugin. Configuration Guide. Version 1.0
 ForeScout CounterACT Network Module: Centralized Network Controller Plugin Version 1.0 Table of Contents About the Centralized Network Controller Integration... 4 About This Plugin... 4 How It Works...
Network Performance Analysis System. User Guide
 Network Performance Analysis System User Guide Copyrig ht Copyright 2018 Colasoft. All rights reserved. Information in this document is subject to change without notice. No part of this document may be
Transport Gateway Installation / Registration / Configuration
 CHAPTER 4 Transport Gateway Installation / Registration / Configuration This chapter covers the following areas: Transport Gateway requirements. Security Considerations When Using a Transport Gateway.
Stonesoft Management Center. Release Notes for Version 5.6.1
 Stonesoft Management Center Release Notes for Version 5.6.1 Updated: January 9, 2014 Table of Contents What s New... 3 Fixes... 3 System Requirements... 6 Basic Management System Hardware Requirements...
SecurityCenter 5.2 Guide
 SecurityCenter 5.2 Guide Revision 1.1 Thursday, December 17, 2015 SecurityCenter 5.2 Guide 1 Introduction 14 System Requirements 14 Recommended Minimum Hardware Requirements 14 Network Interfaces 15 Disk
UDP Director Virtual Edition
 UDP Director Virtual Edition (also known as FlowReplicator VE) Installation and Configuration Guide (for StealthWatch System v6.7.0) Installation and Configuration Guide: UDP Director VE v6.7.0 2015 Lancope,
Online Help StruxureWare Data Center Expert
 Online Help StruxureWare Data Center Expert Version 7.2.7 What's New in StruxureWare Data Center Expert 7.2.x Learn more about the new features available in the StruxureWare Data Center Expert 7.2.x release.
Installing and Configuring vcloud Connector
 Installing and Configuring vcloud Connector vcloud Connector 2.6.0 This document supports the version of each product listed and supports all subsequent versions until the document is replaced by a new
vrealize Suite Lifecycle Manager 1.0 Installation and Management vrealize Suite 2017
 vrealize Suite Lifecycle Manager 1.0 Installation and Management vrealize Suite 2017 vrealize Suite Lifecycle Manager 1.0 Installation and Management You can find the most up-to-date technical documentation
Tenable for Palo Alto Networks
 How-To Guide Tenable for Palo Alto Networks Introduction This document describes how to deploy Tenable SecurityCenter and Nessus for integration with Palo Alto Networks next-generation firewalls (NGFW).
Installation Guide. EventTracker Enterprise. Install Guide Centre Park Drive Publication Date: Aug 03, U.S. Toll Free:
 EventTracker Enterprise Install Guide 8815 Centre Park Drive Publication Date: Aug 03, 2010 Columbia MD 21045 U.S. Toll Free: 877.333.1433 Abstract The purpose of this document is to help users install
VMware AirWatch Content Gateway for Linux. VMware Workspace ONE UEM 1811 Unified Access Gateway
 VMware AirWatch Content Gateway for Linux VMware Workspace ONE UEM 1811 Unified Access Gateway You can find the most up-to-date technical documentation on the VMware website at: https://docs.vmware.com/
ForeScout Extended Module for MobileIron
 Version 1.8 Table of Contents About MobileIron Integration... 4 Additional MobileIron Documentation... 4 About this Module... 4 How it Works... 5 Continuous Query Refresh... 5 Offsite Device Management...
October J. Polycom Cloud Services Portal
 October 2018 3725-42461-001J Polycom Cloud Services Portal Copyright 2018, Polycom, Inc. All rights reserved. No part of this document may be reproduced, translated into another language or format, or
VMware Identity Manager Connector Installation and Configuration (Legacy Mode)
") VMware Identity Manager Connector Installation and Configuration (Legacy Mode) VMware Identity Manager This document supports the version of each product listed and supports all subsequent versions until
VMware Identity Manager Connector Installation and Configuration (Legacy Mode) VMware Identity Manager This document supports the version of each product listed and supports all subsequent versions until
This guide details the deployment and initial configuration necessary to maximize the value of JetAdvantage Insights.
 HP JetAdvantage Insights Deployment Guide This guide details the deployment and initial configuration necessary to maximize the value of JetAdvantage Insights. 1. Overview HP JetAdvantage Insights provides
User s Manual. Version 5
 User s Manual Version 5 Copyright 2017 Safeway. All rights reserved. No part of this publication may be reproduced, transmitted, transcribed, stored in a retrieval system, or translated into any language,
Intrusion Detection and Prevention IDP 4.1r4 Release Notes
 Intrusion Detection and Prevention IDP 4.1r4 Release Notes Build 4.1.134028 September 22, 2009 Revision 02 Contents Overview...2 Supported Hardware...2 Changed Features...2 IDP OS Directory Structure...2
Forescout. eyeextend for IBM BigFix. Configuration Guide. Version 1.2
 Forescout Version 1.2 Contact Information Forescout Technologies, Inc. 190 West Tasman Drive San Jose, CA 95134 USA https://www.forescout.com/support/ Toll-Free (US): 1.866.377.8771 Tel (Intl): 1.408.213.3191
Rapid Recovery License Portal Version User Guide
 Rapid Recovery License Portal Version 6.1.0 User Guide 2017 Quest Software Inc. ALL RIGHTS RESERVED. This guide contains proprietary information protected by copyright. The software described in this guide
Altova LicenseServer. User and Reference Manual
 User and Reference Manual User & Reference Manual All rights reserved. No parts of this work may be reproduced in any form or by any means - graphic, electronic, or mechanical, including photocopying,
Upgrading the Cisco APIC-EM Deployment
 Review the following sections in this chapter for information about upgrading to the latest Cisco APIC-EM version and verification. Using the GUI to Upgrade Cisco APIC-EM, page 1 Using the CLI to Upgrade
Ekran System v.5.2 Deployment Guide
 Ekran System v.5.2 Deployment Guide Table of Contents About... 6 System Requirements... 7 Program Structure... 9 Deployment Process... 10 Server and Database... 11 About... 11 Database Types Comparison...
The following topics describe how to configure correlation policies and rules.
 The following topics describe how to configure correlation policies and rules. Introduction to and Rules, page 1 Configuring, page 2 Configuring Correlation Rules, page 5 Configuring Correlation Response
NGFW Security Management Center
 NGFW Security Management Center Release Notes 6.3.7 Revision A Contents About this release on page 2 System requirements on page 2 Build version on page 3 Compatibility on page 5 New features on page 5
Deployment Guide Installing WhatsUp Gold Distributed Edition to Central and Remote Sites
 Deployment Guide Installing WhatsUp Gold Distributed Edition to Central and Remote Sites This guide provides information about installing and configuring WhatsUp Gold Central and Remote Sites. Contents
Realms and Identity Policies
 The following topics describe realms and identity policies: Introduction:, page 1 Creating a Realm, page 5 Creating an Identity Policy, page 11 Creating an Identity Rule, page 15 Managing Realms, page
 Trend Micro Incorporated reserves the right to make changes to this document and to the products described herein without notice. Before installing and using the product, please review the readme files,
 Trend Micro Incorporated reserves the right to make changes to this document and to the products described herein without notice. Before installing and using the product, please review the readme files,
 Trend Micro Incorporated reserves the right to make changes to this document and to the products described herein without notice. Before installing and using the product, please review the readme files,
Version 1.26 Installation Guide for SaaS Uila Deployment
 Version 1.26 Installation Guide for SaaS Uila Deployment Table of Contents Introduction... 2 Scope and Purpose... 2 Architecture Overview... 2 Virtual Architecture... 2 Getting Started... 3 System Requirements...
SecurityCenter 5.5.x User Guide. Last Revised: June 19, 2018
 SecurityCenter 5.5.x User Guide Last Revised: June 19, 2018 Table of Contents Welcome to SecurityCenter 10 Getting Started Workflow 11 Hardware Requirements 15 System Requirements 18 Web Browser Requirements
Deploy the ExtraHop Discover Appliance with VMware
 Deploy the ExtraHop Discover Appliance with VMware Published: 2018-07-17 The ExtraHop virtual appliance can help you to monitor the performance of your applications across internal networks, the public
CA Agile Central Administrator Guide. CA Agile Central On-Premises
 CA Agile Central Administrator Guide CA Agile Central On-Premises 2018.1 Table of Contents Overview... 3 Server Requirements...3 Browser Requirements...3 Access Help and WSAPI...4 Time Zone...5 Architectural
2016 OPSWAT, Inc. All rights reserved. OPSWAT, MetadefenderTM and the OPSWAT logo are trademarks of OPSWAT, Inc.All other trademarks, trade names,
 2016 OPSWAT, Inc. All rights reserved. OPSWAT, MetadefenderTM and the OPSWAT logo are trademarks of OPSWAT, Inc.All other trademarks, trade names, service marks, service names, and images mentioned and/or
Sophos Mobile. startup guide. Product Version: 8.1
 Sophos Mobile startup guide Product Version: 8.1 Contents About this guide... 1 Sophos Mobile licenses... 2 Trial licenses...2 Upgrade trial licenses to full licenses... 2 Update licenses... 2 What are
ForeScout Extended Module for Palo Alto Networks Next Generation Firewall
 ForeScout Extended Module for Palo Alto Networks Next Generation Firewall Version 1.2 Table of Contents About the Palo Alto Networks Next-Generation Firewall Integration... 4 Use Cases... 4 Roll-out Dynamic
Release Notes. NetBrain Integrated Edition 7.0
 NetBrain Integrated Edition 7.0 Release Notes Version 7.0b1 Last Updated 2017-11-22 Copyright 2004-2017 NetBrain Technologies, Inc. All rights reserved. Contents 1. Highlights... 3 2. Feature Summary...
KYOCERA Net Viewer User Guide
 KYOCERA Net Viewer User Guide Legal Notes Unauthorized reproduction of all or part of this guide is prohibited. The information in this guide is subject to change without notice. We cannot be held liable
SpaceShuttle User guide v3
 SpaceShuttle User guide v3 1.Get Started with SpaceShuttle p2 1.1 For Windows p2 How to download and install Aspera Connect p2 1.2 For Mac p4 How to download and install Aspera Connect p4 2. Accessing
Sophos Mobile as a Service
 startup guide Product Version: 8 Contents About this guide... 1 What are the key steps?... 2 Change your password... 3 Change your login name... 4 Activate Mobile Advanced licenses...5 Check your licenses...6
Veriato Recon / 360. Version 9.0.3
 Veriato Recon / 360 Version 9.0.3 1/3/2018 Upgrade Guide January 3, 2018 Table of Contents Before You Begin... 1 What's New... 1 How the System Works... 1 Upgrade Support... 6 Update Antivirus Exclusions...
VMware AirWatch Content Gateway Guide for Linux For Linux
 VMware AirWatch Content Gateway Guide for Linux For Linux Workspace ONE UEM v9.7 Have documentation feedback? Submit a Documentation Feedback support ticket using the Support Wizard on support.air-watch.com.
User Identity Sources
 The following topics describe Firepower System user identity sources, which are sources for user awareness. These users can be controlled with identity and access control policies: About, on page 1 The
IPMI Configuration Guide
 IPMI Configuration Guide 1. Introduction of IPMI Server Manager... 2 2. IPMI Server Manager GUI Overview... 3 1 1. Introduction of IPMI Server Manager IPMI Server Manager allows remote access of computers
Media Server Installation & Administration Guide
 Media Server Installation & Administration Guide Smarter Surveillance for a Safer World On-Net Surveillance Systems, Inc. One Blue Hill Plaza, 7 th Floor, PO Box 1555 Pearl River, NY 10965 Phone: (845)
vcloud Director User's Guide 04 OCT 2018 vcloud Director 9.5
 vcloud Director User's Guide 04 OCT 2018 vcloud Director 9.5 You can find the most up-to-date technical documentation on the VMware website at: https://docs.vmware.com/ If you have comments about this
Viewing System Status, page 404. Backing Up and Restoring a Configuration, page 416. Managing Certificates for Authentication, page 418
 This chapter describes how to maintain the configuration and firmware, reboot or reset the security appliance, manage the security license and digital certificates, and configure other features to help
Dell Storage Manager 2016 R3 Installation Guide
 Dell Storage Manager 2016 R3 Installation Guide Notes, Cautions, and Warnings NOTE: A NOTE indicates important information that helps you make better use of your product. CAUTION: A CAUTION indicates either
Using vrealize Operations Tenant App as a Service Provider
 Using vrealize Operations Tenant App as a Service Provider Using vrealize Operations Tenant App as a Service Provider You can find the most up-to-date technical documentation on the VMware Web site at:
2018 XDT Pty Ltd Unit 2, 10 Westall Rd, Clayton VIC 3169 Australia Phone +61 (0) Fax
 Fax") Release 7 rev.388 2018 XDT Pty Ltd Unit 2, 10 Westall Rd, Clayton VIC 3169 Australia Phone +61 (0)3 9549-1122 Fax 9549-1199 http://www.catapultsoft.com 1 Table of contents 1 Table of contents... 2 2 About
Release 7 rev.388 2018 XDT Pty Ltd Unit 2, 10 Westall Rd, Clayton VIC 3169 Australia Phone +61 (0)3 9549-1122 Fax 9549-1199 http://www.catapultsoft.com 1 Table of contents 1 Table of contents... 2 2 About
NGFW Security Management Center
 NGFW Security Management Center Release Notes 6.5.3 Revision A Contents About this release on page 2 System requirements on page 2 Build number and checksums on page 4 Compatibility on page 5 New features
Sophos Mobile. super administrator guide. Product Version: 8
 Sophos Mobile super administrator guide Product Version: 8 Contents About this guide... 1 Document conventions... 1 Super administrator... 2 Super administrator tasks...2 Super administrator customer...