Quick Installation for Luowice Wireless IP Camera.
|
|
|
- Crystal Paul
- 5 years ago
- Views:
Transcription


1 Quick Installation for Luowice Wireless IP Camera
2 1 Camera Panel Assemble the Camera Configure the Camera with Your Phone LAN Mode (Network cable is needed.)a with Your Phone Basic Settings of the Camera On Phone Audio Adjusting: Turn On Audio Function And Intercom Function Audio Setting Check Videos Recorded On The SD Card Change Password When It Shows Wrong Password Or Forget the Password Set Up Motion Detection & Alert Set Up APP Alert Push Time Setting (If the camera's time isn t same as your time zone or your phone time) Backup Recorded Videos Stored on the SD Card to Your Phone Instruction for Camera Setting on the PC Client Default Setting of PC Client Add Cameras to the PC Client Two-Way Audio via PC Pan & Tilt Function Video Record on the SD Card Playback Videos Stored on the SD Card Video Record on Your Computer s Disk Playback Videos Recorded on Your Computer Backup Recorded Videos Stored on the SD Card to Your Computer To Install/Replace SD Card FTP Setting Hotspot Mode (To Pair the Camera with Your Phone When There Is No Network Cable Port on Your Local Router for Configuration) System Setting FAQ...53


 If you have configured the camera to a phone before, and want to reconfigure it, please")
 7.")
 8.")

3 For further information, software downloads, Please refer to: For tech support, please contact us via Phone: , Service Time: 6. Reset Button (Keep pressing the button for around 10 seconds and the camera will be back to factory setting.) If you have configured the camera to a phone before, and want to reconfigure it, please keep pressing the reset button until you hear a sound sent by the camera. Then you can reconfigure the camera again. ) 7. Network Cable Interface (If you Wi-Fi network is not stable, you can connect the camera to your local router with a network cable to gain more stable signal transmission.) 8. SD Card Slot 9. Power Interface Camera can be placed horizontally on anyplace you want. And it can be mounted on the wall or the ceiling. To mount it on the wall or the ceiling, please screw the bracket firmly to the camera and adjust the bracket to an angle that meets your installation requirements. 1. Led Light (shows red lights at night) 2. Lens 3. Photosensitive Sensor 4. Microphone 5. Antenna


4 Please note that the camera s antenna has been screwed to the camera firmly before shipping. Please confirm that the antenna is in 90 degree to the camera to gain best signal transmission. Please avoid the Antenna and the camera to be in a straight line. 3 Configure the Camera with Your Phone And then click the UID on the Device on LAN list. And the UID will appear on the UID area of the Add Camera page. Note: If you cannot find the camera, please scan the QR code on the camera to get it. Or you can also insert the UID directly if you can not get the UID after scanning the QR Code. Video Instruction of LAN Mode is Available from: LAN Mode (Network cable is needed.) Note: The camera and the phone have to be in the same network. Otherwise you can not find the camera via LAN on the phone. Step 1. Please kindly plug the camera in power and the camera will rotate automatically. Then you will hear the sound "Deng Deng" in a while. And the voice will disappear once you finish the "WIFi Setting". Then please kindly connect the camera to your local router. Open the APP and click Add Camera on the main page. Please kindly click Search Camera from LAN on the Add Camera page. Confirm the UID on the Device on LAN list is the same with the UID on the Label of the camera. (You can find the label on the back of the camera.) 03 04


5 Step 2. The default name of the camera on the APP is Camera. If you want to change it, please kindly change the name of the camera before click Done. Then click Done and the camera will show Online on the main page. Click the Setting button on the main page to enter the Camera Setting page. Then click Wi-Fi Setting to enter the Wi-Fi Setting page. Click Wi-Fi manager to search applicable Wi-Fi. Step 3. And then click on the Wi-Fi you chose. Input the Wi-Fi Password and click Apply. Then the APP will be back to the main page and the camera shall show Online. Disconnect the network cable from the camera and your local router. Now you can take the camera to anywhere within your local Wi-Fi range to install it. And you can remote view the camera or playback the recorded videos wirelessly from anywhere at anytime. Note: 1. Make sure your local router name and password without any space and special characters such as ~, `,?,,,, #, $, ), <, *, =, +, &,, :, ;, /,etc. Otherwise the WIFI Setting will fail. Cause the camera can t recognize special characters automatically. If your local router name or password with special characters or space, then you have to change your router password or name and configure the 'Wi-Fi Setting' again. 2. If the 'Current Wi-Fi' list have shown your local WIFI and the camera still can't work wirelessly, please press the reset button for 10 seconds and configure the 'Wi-Fi Setting' again 3. If you have checked the above steps and the camera still can't work wirelessly, you can connect the camera with your local router via network and the camera will work with wire. 4. If your local Wi-Fi network is not stable, you can keep connecting the camera with your local router via network cable to gain more stable signal transmission

then click the icon, and the Position Preset interface will appear. And then click 1 click Setup.")
click any place on the interface to exit the Position Preset interface.")
when you want to move the view from a preset position to another preset position, for example, from position 1 to position 2, just simply click on 2, and then")

6 Lens Adjusting: Mirror/Flip. Mirror will make the view swap from left to right and vice versa; Flip will make the view upside down and vice versa. When you install the camera under a roof or on a wall where there is restriction on space, you may need this function to get a right view of the camera. Operation: a)first, please kindly move your finger on the default interface from left/right, up/down to choose a position that you want to set up as a preset position. b)then click the icon, and the Position Preset interface will appear. And then click 1 click Setup. Then there shall be indication shown as Default setting successes. And the chosen position will be set up as position 1 successfully. c)click any place on the interface to exit the Position Preset interface. And then finger move the default interface to choose positions to set up as position 2, position 3, And set up preset positions following step 1), step 2) above. d)when you want to move the view from a preset position to another preset position, for example, from position 1 to position 2, just simply click on 2, and then click Call, then the view will move to position 2 precisely. Note: 1. When you are operating the position preset function and the camera live view interface is frozen or the position preset function isn t applicable, you can adjust the camera lens by hand as follow. 2. When you are adjusting the position of the camera s lens, please avoid the camera's LED light touching the camera s plastic cover Position Preset: This function allows you to set up specific position to adjust the lens precisely
7 Exit The Live View: Click the icon, and you will exit the camera view then. You can choose the HD or SD resolution based on your need. Note:Please kindly note that the Zoom/Focus function and the is not applicable for this camera

8 4.2 Audio Setting 4.3 Check Videos Recorded On The SD Card 11 12
 Default password: admin b) Please keep the password within 15 letters and avoid using special characters such as #, *, &,~, `,?,,,, #, $, ), <, *, =, +, &,, :, ;, /,etc.")
9 4.4 Change Password Operation: Please kindly click Change Password on the main menu interface. And insert the relevant information. And then click Done and the password will be changed successfully. Note: a) Default password: admin b) Please keep the password within 15 letters and avoid using special characters such as #, *, &,~, `,?,,,, #, $, ), <, *, =, +, &,, :, ;, /,etc. c) If the APP always indicates 'Wrong password'. Please kindly follow the following steps to re-enter the camera's password. Operation: Come to the camera list interface and click the 'Edit' -' icon' - 'icon' -'re-enter the camera's new password' - 'Done'. And please note if your password is correct, it can not be modified after clicking the setting icon When It Shows Wrong Password Or Forget the Password 13 14

10 When you forget the password, please: Click Edit - Click the icon - Click Delete. And click Delete on the pop-out page to confirm deleting the camera. 4.5 Set Up Motion Detection & Alert Step 1. Activate Motion Detection Function Operation: Please kindly click Alarm Setting on the main menu interface. And move the icon to the right side to activate the motion detection function. And then choose a sensitivity level (Low/Medium/High) based on your need. And click Back and the setting will be saved. Note: The camera is very sensitive to the lightning change. In order to avoid false motion detection report, the medium sensitivity level is recommended. Then please keep pressing the reset button of the camera for seconds to get it back to factory setting. And then configure the camera to your local Wi-Fi network again following the instruction on (3 Configure the Camera with Your Phone, P. 03.) 15 16
11 Step 2. Set Up Alarm Setting Operation: Please kindly click Action with Alarm. And move the icon to the right side to activate the functions you want to have. And click Back and the setting will be saved. Note: a) Alarm Notification:Push notification to phone (text only, without pictures or videos attached). b) Alarm SD REC: Motion-triggered video recording stored on the SD card preinstalled in the camera. c) Alarm with Pictures: Sending motion-triggered snapshot of moving items to your account. d) Save Snapshots on FTP Server: Saving motion-triggered snapshots on your FTP Server. e) Save Video on FTP Server: Saving motion-triggered video on your FTP Server. f ) Snapshot Number: The default snapshot number is 1. You can choose from 1/2/3 based on your need

12 Step 3. Set Up Alert Video Instruction for Alert Setting is Available from: Operation: please kindly click Setting on the main menu interface. And then insert the relevant information in the pop-out page. Then click Test to check whether the setting works. After confirming the setting works well, click Save and the setting will be successful
13 Operation: Please make user s POP&IMAP have been enabled. Then get the SMTP Server information from the account you want to use as Sender. And if you use a gmail account as Sender, the SMTP Server should be smtp.gmail.com. And if this doesn t work when you test the alert, you can visit this website ( and follow the manual (Get an IP Address for Gmail SMTP Server) to get an ip address for the SMTP Server on your computer. b) User Name: the address you use as Sender. c) Password: the password of your address. For gmail & yahoo, you need to use the app password. And you can visit this website ( ) and follow the manual (Generate app password for Gmail Account Server) to generate an App password for gmail. d) Send To: the address you want to use as a receiver of the alert. e) Sender: the same as the address you insert in User Name.User Name: the address you use as Sender. f) Subject: the name you want to use as the title of the alert. If the subject can not be saved, please kindly change it to another subject and try to save again until it is saved successfully. g) Sometimes even the Test result indicates as Test Failed, the setting is in fact working. If you confirm that all the settings are correct, but still can not get the test successful, please kindly check the Sender account to see whether it sends out testing mail to the receiver account. If yes, you can go directly to click on Save. And the Setting is successful then


14 4.6 Set Up APP Alert Push Note: 1. The APP alert is in text only. No pictures nor videos. 2. lf you can't get the App alert, please go to the 'Notifications' in your phone 'Settings' to check if you have allow the App to push alert to your phone. And if your phone is Android, you have to go to the 'Permission manager' - 'Applications' in your phone 'Setting' to see if you have trusted the App to send alert to your phone as above too. Operation: Enable APP Alarm function on the APP Go to the main interface, click 'Alarm Setting' to enable 'Motion Detection. And then go to 'Alarm Setting' - open the 'Motion Detection' - go to 'Action with Alarm' to enable' Alarm Notifications'. And the APP Alert function will work then. When there is motion detected, there will be alert push to your phone as the above image shows


15 4.7Time Setting (If the camera's time isn t same as your time zone or your phone time) Operation: Please click 'Time Setting' on the main menu interface. And then you can click on 'Sync with Phone Time' to make the device time zone the same as your phone's time setting. Or you can choose to set up 'Device Time Zone' same as your time zone. And select the 'Daylight Saving Time(DST) according to the season time of the year. Then click on 'Saving Time Zone for Device' and click 'Yes' on the pop-out page. And then click 'Back' to save all the settings. Note: If there are different devices in different time zone access the camera at the same time, then the video time which recorded in the SD card will same as the last device. Camera 4.8 Backup Recorded Videos Stored on the SD Card to Your Phone Operation: To backup recorded videos stored on the SD Card to Your Phone, please kindly click Video at the bottom, and click Online on the top, and then click the name of the camera you want to backup videos. And the recordings list will show. Then Choose a time period and click it, the Plan Recording interface will pop out and click Download to start backup automatically. And the video will be stored on your phone then. To view the video, please kindly click Video Local, and then click the name of the camera you chose to back videos. Then click Download and you will see the backup videos then
 and install it on your PC.")
 in www.luowice.")
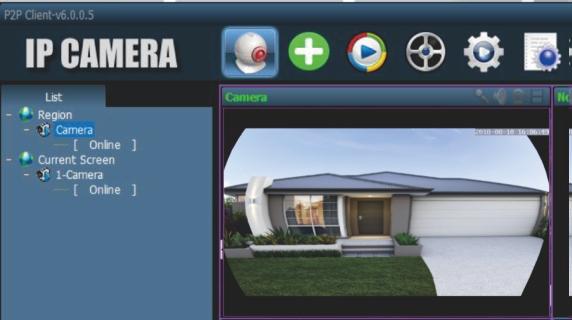
16 Note: Please kindly note that the PC Client(HiP2P Client) only supports windows operation systems. It does not support Mac and Linux. Please use a windows operation computer to access it. To download PC Client for the camera: Please kindly download the PC Client (HiP2P Client) and install it on your PC. For installing the PC Client and select the language you want, please refer to: For more detail of the PC client setting, please refer to the (Detail Instruction for Camera Setting on the PC Client) in Open the PC Client, and the default interface is as follows:click any button on the middle of the top and the Log In page will pop out.the log in interface is as follows: Default user name: admin, and can not be modified. Password: no password, just leave it blank and click OK to log in
 User Name: default is: admin, and cannot be modified. d) Password: default is: admin, and can be modified.")
17 Note: a) UID: You can find it from the label on the camera or the phone APP after you pairing the camera with your phone. b) Name: the name you set up for the camera. Default is: Camera. It can be modified. c) User Name: default is: admin, and cannot be modified. d) Password: default is: admin, and can be modified. Please keep the modified password within 15 letters and avoid using special characters such as %, #, *, &,~, `,?,,,, #, $, ), <, *, =, +, &,, :, ;, /,etc. e) Area: default is Region and cannot be modified. Then click the Preview icon. And the camera will indicate as Offline. Then take the mouse cursor to the Camera icon the top left side under the Region list and right click the mouse


18 31 32


19 5.4 Pan & Tilt Function Operation: Step 1:Connect a headset which is with microphone to computer. Step 2:Click the Audio icon and drag the audio bar to turn up the sound. Step 3:Click the intercom icon to make it activated. Step 4:Speak through the headset, then what you said can be heard on the camera side. Step 5:Speak on the camera side, then you can hear the sound on the computer side by the headphone. Operation: To control Pan & Tilt directions, please kindly click the any of the eight direction icons Automatic Cruise:Click the icon and the camera will cruise 355 degrees horizontally and cruise Please note: 1) The intercom icon on the top right side shows a bright one, then it means the intercom function has been activated. 2) The audio icon on the top right side shows a bright one, then it means the audio function has been activated. 120 degrees vertically
 To format the SD card, please kindly click Format SD and the SD card will be formatted. Please kindly backup important files before formatting the SD card.")
20 Note: a) The default setting of record length is 600 seconds per video record. You can modify the length from seconds per record. b) To format the SD card, please kindly click Format SD and the SD card will be formatted. Please kindly backup important files before formatting the SD card. c) The default setting is recording for 24 hours everyday. To modify the recording schedule, please kindly take the mouse cursor to the hour bar, for example, SUN 1, then press the mouse and move the mouse slightly. Loosen the mouse and then the area of SUN 1 will turn into white color and there will be no video recording during 1:00am-2:00am on Sunday. If you want to set up record for SUN 1 again, please kindly take the mouse cursor to SUN 1. Then press the mouse and move it slightly. Loosen the mouse and the area of SUN 1 will turn into green color and there will be video record during 1:00am-2:00am on Sunday then


21 Operation: Please click the Remote Playback icon. And choose the record type, select the channel, date, start time/end time. And then click Search and the record list will show on the left side. Double click the time you want to playback and the recorded video will start playback. Note: the playback speed is fixed and cannot be modified. You can drag the blue bar at the bottom right side to choose a specific time to start video playback. Record: Choose the live view camera you want to enable local recording function, and then click the recording button to apply recording. When this icon appears on the top right side, video recording starts and it will be stored in the PC. Click the record button to stop recording
 The default General Record Length is 5 Min. It can be modified from 1-30 Min.")
22 Operation: Please kindly click the Config icon - Record Management to open the local record setting interface. And then check Enable the plan of record to modify the record schedule. And then choose a Disk on your PC to store the record. Note: a) The default General Record Length is 5 Min. It can be modified from 1-30 Min. b) Alarm Duration Time: the default Alarm Duration Time is 10 Sec. It can be modified from 5 Sec to 60 Sec. Alarm Duration Time means the duration time of video record triggered by motion. c) g disk begins recovery control : You can choose to leave a specific storage space in the disk for the PC that the camera cannot use. You can modify the leaving space from 1-50 GB. Please confirm that the disk you chose for the camera s local record has sufficient storage space. d) The default record format is: 264. When you find the recorded videos cannot be played via the player, please change it to AVI format

23 Operation: Please kindly click the Remote Playback icon on the top and the interface shows as below. Select the channel, date and so on on the left side and click Search


24 Note: 1. To watch the videos you have downloaded, you will need to download the specific player from our official website to play the videos, for the videos cannot be played on any other players. 2. To change the video file into another format, please kindly download the Video Conversion software from our official website. Then you can change the format of the videos to watch it via other players. Download URL for All the Related Materials of Luowice Wi-Fi Security Camera:

 If you confirm that all the information are correct, but the testing result keeps indicating Test failed, please log in your FTP server to check whether snapshots videos are received")
25 Note: The camera supports up to 128G SD card. Operation: Please kindly click FTP Setting on the main menu interface. And insert the relevant information on the pop-out page. And then click Test FTP Settings to check whether the snapshots videos are sent to the FTP successfully. If yes, please click Save and the setting is successful then. Note: a) Please keep the user name and password within 8 letters and avoid using special characters such as #, &,#, *, &,~, `,?,,,, #, $, ), <, *, =, +, &,, :, ;, /,etc. b) If you confirm that all the information are correct, but the testing result keeps indicating Test failed, please log in your FTP server to check whether snapshots videos are received successfully. If yes, go directly click on Save and the setting is successful then


26 Video Instruction of Hotspot Mode is Available from: Step1. Plug the camera in power. Then please kindly use the iron needle in the package to press the reset button on the back of the camera for 15 seconds. Step 2. Wait for 1 minute, please kindly click Setting on your phone - Click WLAN - Choose the WLAN with the name starts with IPC - Insert the default password Click Join. And your phone has been connected the the camera s Wi-Fi Hotspot now. Step 3. After confirming your phone has been connected to the camera s Wi-Fi Hotspot, please kindly open the APP on your phone. And then click Add Camera. Then please kindly click Search Camera from LAN on the Add Camera page. And then click the UID on the Device on LAN list. Note: If you cannot find the camera, please kindly scan the QR code on the camera to get it. Or you can also insert the UID directly if you can not get the UID after scanning the QR Code


27 Step 4. The default name of the camera on the APP is Camera. If you want to change it, please kindly change the name of the camera before click Done. Then click Done and the camera will show Online on the main page. Click the Setting button on the main page to enter the Camera Setting page. Then click Wi-Fi Setting to enter the Wi-Fi Setting page. Click Wi-Fi manager to search applicable Wi-Fi. Step 5. And then click on the Wi-Fi you chose. Input the Wi-Fi Password and click Apply. Then the APP will be back to the main page and the camera shall show Online. Disconnect the network cable from the camera and your local router. Now you can take the camera to anywhere within your local Wi-Fi range to install it. And you can remote view the camera or playback the recorded videos wirelessly from anywhere at anytime. Note: 1. Please kindly note that if you want the camera work wireless, you have to connect the camera to your local router and finish the WIFI for remote view. make sure your local router name and password without any space and special characters such as ~, `,?,,,, #, $, ), <, *, =, +, &,, :, ;, /,etc. Otherwise the WIFI Setting will fail. Cause the camera can t recognize special characters automatically. If your local router name or password with special characters or space, then you have to change your router password or name and configure the 'Wi-Fi Setting' again. 1. If the 'Current Wi-Fi' list have shown your local WIFI and the camera still can't work wiressly after removing the network cable, please press the reset button for 10 seconds and configure the 'Wi-Fi Setting' again. 2. If your local Wi-Fi network is not stable, you can keep connecting the camera with your local router via network cable to gain more stable signal transmission. 3. If your Wi-Fi network is not stable, you can connect the camera with your local router via a network cable to gain more stable signal transmission
 When there is a view delay, or other abnormal situation, please choose Reboot Camera to solve the problem.")

28 9 System Setting Operation: Please kindly click System Setting on the main menu interface. And choose Reboot Camera / Reset Camera based on your need. And then click Yes to apply your choice and click Back to save all the settings. Note: a) When there is a view delay, or other abnormal situation, please choose Reboot Camera to solve the problem. b) When Reboot Camera does not work, the camera cannot be viewed, or you have installed the camera on the wall or ceiling and you can t touch the camera s reset button and you have to reset the camera. Please apply Reset Camera. Please kindly note that Reset Camera will erase all the settings and the camera needs to be paired to your phone again, just like a new camera. But the video records are still stored in the SD card

29 10 FAQ 1) The camera cannot be connected to my local WiFi network. What can I do? How can I add the camera to my DVR/NVR? There can be problem with the network setting. Operation: Step 1. Please connect the camera to your local router via a network cable. And then download the PC Client and install it on your computer. Then add the camera on the PC Client. Step 2. Go to the Config - Parameter Settings - Network. Step 3. Please check whether the Subnet mask, Gateway, Primary DNS and Http Port is in compatible with your router. If not, modify the settings to make them be in compatible with the router and click Apply. Note: a) The default Http Port is: 80. If you have modified the Http Port, for example, 81, then you have to add 81 behind the IP address ( :81) when you want to view the camera via browser. b)to add the camera to your NVR/DVR, please input the IP Address and Server Port of the device to the NVR s/d-vr s corresponding interface. 2) If this camera work on Blue Iris? As long as Blue Iris support ONVIF, it can work with the camera. We suggest you to use the PC Client software we developed for the camera. You can get it from our official website. 3) Can I mount the camera on the place which is about 60 feet away from my house with a wall? Yes, you can mount the camera on the place as long as the signal of your wireless network is available to support the camera online

 What is the night vision range? About 30ft. It depends on your installed environment. 7) If this camera work on a duel band internet or other internet?")
30 4) Can I use this with a mobile hotspot? We suggest not to use the camera with a mobile hotspot only. Because when the mobile is not within 30ft with the camera, the mobile hotspot will not work for the camera. Please kindly note that the camera need to configure to a stable wifi network to support remote view. 5) Does the power adapter work with 220 volts? Yes, the power adapter work with 220 volts. 6) What is the night vision range? About 30ft. It depends on your installed environment. 7) If this camera work on a duel band internet or other internet? Please kindly note that the camera works with 2.4G network only. 8) When the memory card gets full, the camera will stop recording? When the memory card gets full, the camera will automatically record new data and the old data would be deleted. 9) When the camera turns to night vision at night, the image turns into red, what can I do? There can be problem with the IR switching. Please unplug the camera for seconds. And the plug it in power again. And the image shall be in black and white then. 10) The camera can't work wirelessly and it will never connect to my local router? Please kindly note that if you want the camera work wireless, you have to connect the camera to your local router and finish the WIFI for remote view as below. Note: 1. Make sure your local router name and password without any space and special characters such as ~, `,?,,,, #, $, ), <, *, =, +, &,, :, ;, /,etc. Otherwise the WIFI Setting will fail. Cause the camera can t recognize special characters automatically. If your local router name or password with special characters or space, then you have to change your router password or name and configure the 'Wi-Fi Setting' again. 2. If the 'Current Wi-Fi' list have shown your local WIFI and the camera still can't work wirelessly, please press the reset button for 10 seconds and configure the 'Wi-Fi Setting' again. 3. If you have checked the above steps and the camera still can't work wirelessly, you can connect the camera with your local router via network and the camera will work with wire. 4. If your local Wi-Fi network is not stable, you can keep connecting the camera with your local router via network cable to gain more stable signal transmission
LWS Wireless Security Camera User Manual
 LWS Wireless Security Camera User Manual Preface...1 Default Setting... 1 1. Camera Installation... 2 1.1 Precautions... 2 1.2 Preparation...2 1.3 Installation...3 1.3.1 Camera Panel...3 1.3.2 Screw the
Luowice. R8 PC Client User Manual. Instruction for Operation on PC Client
 When the Video conversation process finish, please click' Done' and you can view the MP4 video file in the your album or file manager under the Convert folder. R8 PC Client User Manual 45 1 1.1 2.3.4 Operation
IP Camera User Manual
 the world through my eyes R IP Camera User Manual EN App Store Google Play Version:TWS20180723 1Product description 1.1Product Feature 1.2Package Contents 1.3IP Camera Overview 1.4Operating System Requirement
Mobile App User Manual For 3G/4G IP Cameras Powered by Solar Panels. Version:V2018.5
 Mobile App User Manual For 3G/4G IP Cameras Powered by Solar Panels http://iotsmatsolutions.net Version:V2018.5 1 1.App introduction The App CamHi is designed for the 4G camera remote access, preview,
IP Camera Quick Start Guide ==================== H Series V3.1
 IP Camera Quick Start Guide ==================== H Series V3.1 1. Package Contents IP Camera 5V Power Adaptor Bracket and Screws Wi-Fi Antenna Network Cable Quick Start Guide 2. Get Started Step-1 Download
User Manual For AT-100BW/200BW
 User Manual For AT-100BW/200BW www.alptopsecurity.com support@alptopsecurity.com This manual is written based on the current version of the software and hardware. If there are any inaccuracies or imperfect
IP Camera CMS User manual (Android Version) 1. IP Camera CMS User Manual (Android Version) V1.3
 1. IP Camera CMS User Manual (Android Version) V1.3") IP Camera CMS User manual (Android Version) 1 IP Camera CMS User Manual (Android Version) V1.3 IP Camera CMS User manual (Android Version) 2 Content 1. Software description... 3 2. One key to configure
IP Camera CMS User manual (Android Version) 1 IP Camera CMS User Manual (Android Version) V1.3 IP Camera CMS User manual (Android Version) 2 Content 1. Software description... 3 2. One key to configure
TENVIS Technology Co., Ltd. User Manual. For H.264 Cameras. Version 1.0.0
 TENVIS Technology Co., Ltd User Manual For H.264 Cameras Version 1.0.0 Catalogue Basic Operation... 3 Hardware Installation... 3 Search Camera... 3 For Internet Explorer... 6 Playback Record Files... 9
1. Introduction Overview Product Information... 3
 1. Introduction... 3 1.1 Overview... 3 1.2 Product Information... 3 2. Device Connection... 3 2.1 Connection Diagram... 3 2.2 Wi-Fi Setting... 4 2.2.1 Set up WiFi by Mobile Phone... 4 2.2.2 WPS/QSS One
HooToo IP Camera User Manual(part two)
") HooToo Inc. HooToo IP Camera User Manual(part two) For Model: HT-IP210P Published by SunvalleyTek Group 2014/9/14 Content 1. IPCamClient (windows software)...3 Set up...3 CAM... 13 Local Setting... 13
HooToo Inc. HooToo IP Camera User Manual(part two) For Model: HT-IP210P Published by SunvalleyTek Group 2014/9/14 Content 1. IPCamClient (windows software)...3 Set up...3 CAM... 13 Local Setting... 13
HIP2P Network Video Camera Client Terminal User Manual
 HIP2P Network Video Camera Client Terminal User Manual Document version:5.1 Page 1 of 34 } Preface Thank you for using our company's products. The network video camera client terminal is used to implement
QUICK START GUIDE. Wireless Pan&Tilt IP Camera FSC880. Smart Reliable Secure. Faleemi Technologies Ltd.
 Wireless Pan&Tilt IP Camera QUICK START GUIDE FSC880 Smart Reliable Secure Faleemi Technologies Ltd www.faleemi.com support@faleemi.com support@faleemi.com www.facebook.com/faleemi Apple, Apple Store,
User Manual (Not all functions applicable for RSCM W)
") User Manual (Not all functions applicable for RSCM-121001W) Support Email:techsupport@rosewill.com 1 CONTENT 1 Android Operation... 3 1.1 Android App Installation... 3 1.2 App Interface... 4 1.2.1 Interface...
User Manual (Not all functions applicable for RSCM-121001W) Support Email:techsupport@rosewill.com 1 CONTENT 1 Android Operation... 3 1.1 Android App Installation... 3 1.2 App Interface... 4 1.2.1 Interface...
IP Camera user manual
 IP Camera user manual Product name:high definition IP Camera Document version:4.2 Editions suit for 1080P IP Camera Precautions Search and Login...1 Device searching...2 Install plugin...3 A. Real-time
Do not place or mount Ocli 1 in an area where it will be exposed to water. Ocli 1 is designed for indoor use.
 1 Manual: Ocli 1 with Observeye Viewer App for Android Setting Up Ocli 1 Live Viewing with Ocli 1 Recording Video and Taking Snapshots Using Advanced Features Setting Up Ocli 1 Place or Mount the Camera
Version: DSD0221EN01. Quick Start Guide
 Version: DSD0221EN01 Quick Start Guide Table of Contents Quick Installation Guide... 1 What s in the Box... 1 Quick Start Guide... 2 Notes for Installation... 2 Operation Steps for ios Device... 3 Live
Enrich and Secure Your Life. User Manual. (G6 Plus Camera) Hunan Gaozhi Science And Technology Co., Ltd.
 Hunan Gaozhi Science And Technology Co., Ltd.") Enrich and Secure Your Life User Manual (G6 Plus Camera) Hunan Gaozhi Science And Technology Co., Ltd. Content 1. Structure....3 2. Main Parameter... 4 3. Networking Diagram... 5 3.1.1. WIFI Connection...
Enrich and Secure Your Life User Manual (G6 Plus Camera) Hunan Gaozhi Science And Technology Co., Ltd. Content 1. Structure....3 2. Main Parameter... 4 3. Networking Diagram... 5 3.1.1. WIFI Connection...
Video surveillance kit PNI House WiFi 400
 Video surveillance kit PNI House WiFi 400 NVR and 4 wireless cameras USER MANUAL NVR menu (Android / ios) app Software HCMS (Windows) IP CAMERA: NVR: 1 2 3 4 5 1 2 3 4 5 6 1 - Antenna 1 - Antenna connector
What s in the Box Get Started Hardware Installation For Mobile Device Set Up Camera... 6
 Quick Start Guide Table of Contents What s in the Box... 1 Get Started... 1 Hardware Installation... 2 For Mobile Device... 2 Set Up Camera... 6 Set Up Wi-Fi Without Network Cable... 8 View in Windows
IP Mini PTZ CAMERA USER GUIDE
 IP Mini PTZ CAMERA USER GUIDE TYPE A: To switch the mount style, remove the two screws on the pan bottom and rotate 180 degree to remount. This Mini PTZ cylinder camera can support both wall mount and
Mobile APP " CamHi"User Manual (Android Version) V1.3
 V1.3") Mobile APP " CamHi"User Manual (Android Version) 1 Mobile APP " CamHi"User Manual (Android Version) V1.3 Mobile APP " CamHi"User Manual(Android Version) 2 Content 1. Software description... 3 2. One key
Mobile APP " CamHi"User Manual (Android Version) 1 Mobile APP " CamHi"User Manual (Android Version) V1.3 Mobile APP " CamHi"User Manual(Android Version) 2 Content 1. Software description... 3 2. One key
LeFun IP Camera Quick Install Guide
 LeFun IP Camera Quick Install Guide Website: www.lefunsmart.com E-mail: support@lefunsmart.com Catalog 1. Introduction... 2 1.1. Thank you for Choosing LeFun IP Camera... 2 1.2. Introducing LeFun IP Camera...2
power port make sure the ac adapter is plugged into the correct port Make sure to include at the beginning.
 Quickstart Guide If you have a blank SD card, you may insert it into the camera. To set up your camera for use on the network, connect the camera's wired network port to a router. Connect the AC adapter
Wireless IP Bird Box Camera
 Wireless IP Bird Box Camera Model: 4901-18 Operation and Installation Manual 1 WELCOME... 3 PRODUCT OVERVIEW... 4 HARDWARE INSTALLATION... 4 Attach the External Power Adapter... 4 SMARTPHONE OR TABLET
User Manual of P2P IP Cameras
 Updated on 20 August, 2013 User Manual of P2P IP Cameras This user manual applies to all the P2P IP Cameras as follows IPA Series: Home Pan-tilt IP Cameras IPB Series: Outdoor Waterproof IP Cameras IPC
User Manual. Wireless IP Camera
 User Manual Wireless IP Camera Introduction Hi. Thank you for purchasing the AUKEY VT-CM1 Wireless Security IP Camera. Please read this user manual carefully and keep it in a safe place for future reference.
Simpli.Fi. App for wifi DK series cameras OWNER'S MANUAL. APP DSE Simpli.Fi for Wi-Fi DK series cameras. Product description. Download DSE Simpli.
 Page: 1 Simpli.Fi App for wifi DK series cameras Product description Simpli.Fi is THE app to control all our WIFI hidden cameras to investigate Series DK. Our investigation for cameras are IP cameras to
Instruction Manual. Wi-Fi Full HD 1080p IP Concealed Junction Box Hidden Camera. V 1.3
 Instruction Manual Wi-Fi Full HD 1080p IP Concealed Junction Box Hidden Camera After Sales Support techsupport@123anfang.com www.yooseecamera.com V 1.3 Hardware Installation 1. Connect the power supply
Version B Wi-Fi IP CAMERA
 HD Version B-1.0.0 Wi-Fi IP CAMERA Quick Start Guide Table of Contents Get Started... 1 Hardware Installation... 1 Live Video... 2 Live Video via Wi-Fi... 6 Camera Settings... 8 Change Password... 8 Alarm
HD Pan Tilt IP Camera
 IP Camera User Guide Version 1.0.0.1 HD Pan Tilt IP Camera Page 1 Content 1. Hardware installation... 4 1.1 Hardware connection... 4 1.2 Network connection...5 1.3 WPS setting...5 2. ipad, iphone App introduction...5
Wireless PIR Smoke Detector IP Camera
 Wireless PIR Smoke Detector IP Camera Model: 2643-62/2650-62/2651-62 en Operation and Installation Manual 1 WELCOME... 4 PRODUCT OVERVIEW... 5 HARDWARE INSTALLATION... 5 Attach the External Power Adapter...
1080P P2P Wifi Pinhole Hidden Alarm Clock Camera
 1080P P2P Wifi Pinhole Hidden Alarm Clock Camera 1 PRODUCT OVERVIEW Features: Real-time Audio & Video Recording Complete Digital Clock Function Wifi IP Network Function IR Night Vision Support Smartphone
Smart Home System Kit
 Smart Home System Kit IP SECURITY ALARM SERIES More information, please visit the online CD information on the website http//netcam360.com 0 P a g e BRIEF INSTRUCTION 1. Start Infrared box camera a. Install
Cloud IP Camera Note:
 Version:V2.0 Cloud IP Camera User s Manual Note: Due to the continuous updating of the product and software, there may be a discrepancy between the operating guide and the APP interface.all the instructions
mcamview HD for ipad User Manual
 mcamview HD for ipad User Manual Seeing the video from anywhere 1. INSTALL AND STARTUP MCAMVIEW HD... 4 2. THE LAYOUT OF MCAMVIEW HD... 5 3. MANAGE MCAMVIEW HD IP CAMERAS... 6 3.1 NEW CAMERA... 6 3.2.
HD Pan Tilt IP Camera
 IP Camera User Guide Version 1.0.0.1 HD Pan Tilt IP Camera NIP-09L2J NIP-16L2J NIP-22L2J NIP-21L2J Page 1 Content 1. Hardware installation... 4 1.1 Hardware connection... 4 1.2 Network connection...5 1.3
Quick Start Guide HGWIP-811
 TM TM Quick Start Guide HGWIP-811 GIVES PEACE OF MIND WHEREVER YOU ARE Welcome Thank you for choosing HOMEGUARD. Getting starting is easy. ELDERLY Relatives 2 CHILDREN Sleeping/playing PETS Monitoring
Pro7400H1 Hybrid DVR User Manual
 Pro7400H1 Hybrid DVR User Manual User Information Admin User Name: Admin Password: IP Address: System Name: Table Of Contents 1. Menu Operation... 4 1.1 Main Menu... 4 2. Start Up/Shutdown System... 5
Pro71600N3 NVR User Manual
 Pro71600N3 NVR User Manual User Information Admin User Name: Admin Password: IP Address: System Name: Table Of Contents 1. Menu Operation...4 1.1 Main Menu...4 2. Start & Shutdown System...5 2.1 Start
Installation guide for IP Camera G2
 Installation guide for IP Camera G2 Part I: Mobile Network connection For better experience the convenience that brought by this product, please download mobile phone software before using this product.
IP Camera KK002 Quick Start Guide
 HD 720P Version 1.0.2 EN IP Camera KK002 Quick Start Guide Shenzhen Keekoonvision Technology Co., Ltd Table of Contents What s In the Box...... 1 Get Started... 1 Hardware Installation...... 2 For Mobile
Quick Install Guide. Model: PLC-223W, PLC-233W
 Quick Install Guide Model: PLC-223W, PLC-233W This installation guide provides basic instructions for installing the PLC-213W/ PLC-223W/PLC-233W indoor wireless IP camera on your network. By following
Neposmart NS14WG Indoor and NS14BG Outdoor Camera Web App User Manual
 Neposmart NS14WG Indoor and NS14BG Outdoor Camera Web App User Manual TM Contents Using the Desktop Web Interface... 3 Viewing Video Using VLC Media Player... 6 Web on Internet Explorer and Neposmart Control
SC550W WIFI IP HIDDEN CAMERA
 USER MANUAL SC550W WIFI IP HIDDEN CAMERA 1 YEAR WARRANTY All RecorderGear brand products are backed by our 1 Year Warranty. For full details visit WWW.RECORDERGEAR.COM This Device is Compliant with USA
Cloud IP Camera Note:
 Version:V2.0 Cloud IP Camera User s Manual Note: To protect your privacy, please change the initial password after login. Please keep your user name and password safely. Contents 1. Introduction... 2 1.1
User Manual. ELRO CC60RIP11S HD IP surveillance camera with real white light for colour nightview
 User Manual ELRO CC60RIP11S HD IP surveillance camera with real white light for colour nightview HD Wi-Fi Camera with LED Light Table of contents (1) What s in the box? -------------------------------03
User Guide. For the latest version of the user guide go to
 User Guide For the latest version of the user guide go to www.watchbotcamera.com Please visit www.watchbotcamera.com/guide for the most up to date information on the latest features and configuring your
NS15WG 1080P Web App User Manual
 NS15WG 1080P Web App User Manual Table of Contents 1. Getting Started... 4 Download the Web App...4 2. Web App Top Menu... 5 Live Video...6 Video Playback...6 Settings...6 3. Device Configuration... 6
Pro7804N1 NVR User Manual
 Pro7804N1 NVR User Manual Pro7804N1 User Manual BW R6.indd 1 User Information Admin User Name: Admin Password: IP Address: System Name: Table Of Contents 1. Menu Operation...4 1.1 Main Menu...4 2. Start
User Manual. For H.264 Cameras. Version 2.0.0
 User Manual For H.264 Cameras Version 2.0.0 Catalogue Basic Operation... 3 Camera Settings... 3 System... 3 Device Name... 4 Time... 4 User... 4 Network... 5 IP... 5 Port... 5 WiFi... 6 UPnP... 6 DDNS...
IPCAMHD61 User Manual
 IPCAMHD61 User Manual TABLE OF CONTENTS: PRODUCT STRUCTURE DIAGRAM SETUP AN ACCOUNT USERNAME ADD CAMERA TO APP CONNECT TO YOUR NETWORK WEB ACCESS PASSWORDS MOBILE APP LAYOUT CAMERA VIEW PAGE CAMERA RECORDINGS
ProHome IPC App. Operating Manual. easy to operate using the "ProHomeIPC" app from Olympia en
 ProHome IPC App easy to operate using the "ProHomeIPC" app from Olympia Operating Manual 11.2016 en General Information... 5 Installing the ProHomeIPC App... 5 Connecting the Smartphone/Tablet PC to the
Ctdigi.com. Instruction manual. Production by S & W Technology Labs
 Ctdigi.com Instruction manual Production by S & W Technology Labs I. Install app II. Guard camera Guard camera Introduction Accessory Sensor Scenario Guard 360 Introduction - Catalog - Install app Scenario
Operation Guide. ismartviewplus V1.0.2 (For windows) July, 2017 Rev1.0
 July, 2017 Rev1.0") Operation Guide ismartviewplus V1.0.2 (For windows) July, 2017 Rev1.0 Statement If the user manual doesn t help you to resolve the problem, please contact us via our website for technical support. Notice
Operation Guide ismartviewplus V1.0.2 (For windows) July, 2017 Rev1.0 Statement If the user manual doesn t help you to resolve the problem, please contact us via our website for technical support. Notice
HSIP2 User Manual. ios Application Android Application PC Setup
 HSIP2 User Manual ios Application Android Application PC Setup Please read all instructions carefully before use to get the most out of your HSIP2 Wireless Surveillance Camera. The design and features
HSIP2 User Manual. ios Application Android Application PC Setup
 HSIP2 User Manual ios Application Android Application PC Setup Please read all instructions carefully before use to get the most out of your HSIP2 Wireless Surveillance Camera. The design and features
SMART WI-FI BABY MONITOR. User Guide
 SMART WI-FI BABY MONITOR User Guide PNMAL2 What s inside Welcome!... 2 Getting started... 3 Tour of the system... 10 Everyday use...14 Alexa...15 Lullabies...15 Motion detection...16 Sound detection...16
KB Door Bell Camera Setup Guide
 Knowledge Base Text: Jimmy Wang KB Door Bell Camera Setup Guide Key Features: Replacing to the existing doorbell button, no extra wire needed * 2.1MP 1080P Full HD @30fps with audio 180 panoramic view
NVR Equipment WEB Operation Guide ISSUE V1.1 DATE
 NVR Equipment WEB Operation Guide ISSUE V1.1 DATE 2018-05-15 About This Document About This Document Purpose This document describes how to use the web management system for NVR and the cameras managed
Cloud WiFi Camera. Operation Manual
 Cloud WiFi Camera Operation Manual Dear user, welcome to use this product, please read the operating instruction carefully before using this product and keeping this manual for future use. 1 Main Function
IP Camera User Manual
 Statement IP Camera User Manual If the user manual cannot help you to solve the problem, please call our technology center about the solutions. We will update the content for the new functions without
Sotion Wireless Camera. User Manual.
 Sotion Wireless Camera User Manual Email: Help@sotiongroup.com App Download & Installation The camera is compatible with Wi-Fi 2.4 GHz only, please connect camera to 2.4 GHz Wi-Fi. Make sure your network
iminicam 1080p Wireless Spy Camera User Manual
 iminicam 1080p Wireless Spy Camera User Manual imini Spy Camera User Manual Introduction Thank you for choosing the imini Spy Camera. Experience cutting edge technology and enjoy the security that the
SC600W WIFI IP HIDDEN CAMERA
 USER MANUAL SC600W WIFI IP HIDDEN CAMERA 1 YEAR WARRANTY All RecorderGear brand products are backed by our 1 Year Warranty. For full details visit WWW.RECORDERGEAR.COM This Device is Compliant with USA
Smart Wireless WIFI Camera Instructions
 Smart Wireless WIFI Camera Instructions Dear users, Thanks for using this product. Please read the users' manual carefully and keep it for future reference. Thank you. 1 Content 1, How to download the
Features: (no need for QR Code)
") The Capp-Sure series brings a revolution in surveillance. Utilising a range of high-quality IP Wireless cameras, Capp-Sure provides stunning video clarity and optional Talk-Back audio over internet via
The Capp-Sure series brings a revolution in surveillance. Utilising a range of high-quality IP Wireless cameras, Capp-Sure provides stunning video clarity and optional Talk-Back audio over internet via
Cloud WiFi Camera. Operation Manual
 Cloud WiFi Camera Operation Manual Dear user, welcome to use this product, please read the operating instruction carefully before using this product and keeping this manual for future use. 1 Main Function
IP Camera. Apr 2012 V
 H Series with Pan/Tilt Mega pixel IP Camera Apr 2012 V1.4.0.1.4 User Manual Index 1 INTRODUCTION... 4 1.1 THE PACKAGE INCLUDES... 4 1.2 FUNCTION AND FEATURES... 4 1.3 TECHNICAL PARAMETERS... 5 2 APPEARANCE
User Guide LC4. Before using this product, please read the guide carefully to avoid any damage to the product.
 User Guide LC4 Before using this product, please read the guide carefully to avoid any damage to the product. 1. Product Description 1.1 Packing list IP Camera User Manual Before using this product, please
HD IPCameras User's Mannual
 Thank you for purchasing our products, if you have any questions or need, please feel free to contact us. This manual applies to IPC-XXX series of network cameras. This manual may contain technical inaccuracies
Quick Start Guide HGWIP-818
 TM TM Quick Start Guide HGWIP-818 GIVES PEACE OF MIND WHEREVER YOU ARE ELDERLY Relatives CHILDREN Sleeping/playing PETS Monitoring HOME Surveillance Welcome Thank you for choosing HOMEGUARD. Getting starting
WIFI BABY MONITOR. User Guide
 WIFI BABY MONITOR User Guide PNMWIFIAC What s inside Welcome!... 2 Getting started... 3 Tour of the system... 9 Everyday use...13 Motion detection...14 Sound detection...14 Auto-record time...15 Battery
HD 1080 Pro Black Box Security Wi-Fi Camera
 HD 1080 Pro Black Box Security Wi-Fi Camera User Manual Version: Oct, 2017 Content Quick Guide...P2 Overview...P3 Packing List...P3 Product structure...p4 Camera Part Setting...P5 Camera name and password
WiFi Video Doorbell. User Manual
 WiFi Video Doorbell User Manual Introduction Content With Hisilicon Hi3518E processor and H.264 compression technology, this Wifi video intercom provides smooth realtime video transmission while keeps
Quick Start Guide HGWOB-751
 TM TM Quick Start Guide HGWOB-751 GIVES PEACE OF MIND WHEREVER YOU ARE Welcome Thank you for choosing HOMEGUARD. Getting starting is easy. HOME OFFICE RETAIL WAREHOUSE 2 3 What s included Part names &
Product Features. LED Light. LED Indicator light. Camera Lens. Microphone. IR LEDs. PIR Sensor. Reset button. Micro-SD card slot. Speaker.
 Aria USER MANUAL Contents Introduction 4 Product Features 5 LED Indicators 6 What s Included 7 Wi-Fi Requirements 8 Mobile Device Requirements 8 Installation Requirements 9 Aria Installation 10 App Setup
SP007 Quick User Manual
 SP007 Quick User Manual Customer Service Monday - Saturday 9:00-18:00 Beijing Time (UTC +8) E-Mail: Support@sricam.com Skype ID: tech.sricam Website: www.sricam.com For Videos of how to setup IP Cameras
1. NVR Connection Diagram Wizard Setup Access System Using Mobile Device Access System Using PC Client Software 5
 1 1. NVR Connection Diagram 2 2. Wizard Setup 3 3. Access System Using Mobile Device 4 4. Access System Using PC Client Software 5 5. Access System Using Internet Explorer 8 6. Recording Setup 9 Motion
Chapter 1 Introduction of the Camera 4. Chapter 2 Install Reolink App System Requirement Install the App 5
 Content Chapter 1 Introduction of the Camera 4 Chapter 2 Install Reolink App 5 2.1 System Requirement 5 2.2 Install the App 5 Chapter 3 Device Management 7 3.1 Add New Device 7 3.2 Modify Camera Login
Welcome Contents Diagram
 Welcome Congratulations on your purchase of our GBF PL960 Series of IP Doorbells. Our factory engineers were the first to enable viewing of multiple security cameras through your handheld smart device,
WIFI Hidden Camera USER MANUAL
 WIFI Hidden Camera USER MANUAL A. Get started Step1: Download and install the App named HDMiniCam from Google Play Store (for Android) or Apple Store (for ios) or by scanning the code below: NOTE: 1, Please
Indoor IP Camera Quick User Manual
 Indoor IP Camera Quick User Manual Products Introduction Hardware Installation 1: Screw the mount on the wall with the two screws Provided. 2: Loosen the thumb screws to adjust the mount to the desired
SP017 Quick User Manual
 SP017 Quick User Manual Customer Service Monday - Saturday 9:00-18:00 Beijing Time (UTC +8) E-Mail: Support@sricam.com Skype ID: tech.sricam Website: www.sricam.com For Videos of how to setup IP Cameras
Everything in your eyes. ismartviewpro. (For Android) User Manual VER 5.2
 User Manual VER 5.2") IP Cloud Network Camera Everything in your eyes ismartviewpro (For Android) User Manual 2017-08 VER 5.2 1. ismartviewpro Summary ismartviewpro for android is our company developed application software
IP Cloud Network Camera Everything in your eyes ismartviewpro (For Android) User Manual 2017-08 VER 5.2 1. ismartviewpro Summary ismartviewpro for android is our company developed application software
Table of Content. 1.1 Overview P Key Functions...P Specifications...P Package content...p Attention...P5
 Table of Content 1. Summary 1.1 Overview P3 1.2 Key Functions...P3 1.3 Specifications...P4 1.4 Package content.....p5 1.5 Attention....P5 2. Product layout.....p6 3. How to install.....p7 4. Client Software
Wireless Pan & Tilt Camera
 User Manual Wireless Pan & Tilt Camera CIPCAMPTIWL v1.0 Index 1 INTRODUCTION... 4 1.1 THE PACKAGE INCLUDES... 4 1.2 FUNCTION AND FEATURES... 4 1.3 TECHNICAL SPECIFICATIONS... 4 2 APPEARANCE AND INTERFACE...
WELCOME... 2 USING THE SYSTEM... 3 MOUSE CONTROL... 3 UNLOCK NAVIGATING MENUS... 3 CHANGE THE PASSWORD OF NVR... 4 NVR/DVR NETWORK SETTING...
 WELCOME... 2 USING THE SYSTEM... 3 MOUSE CONTROL... 3 UNLOCK NAVIGATING MENUS... 3 CHANGE THE PASSWORD OF NVR... 4 NVR/DVR NETWORK SETTING... 5 SETTING THE TIME... 6 CONNECT THE IP CAMERAS TO RECORDER...
HD Pan/Tilt Wi-Fi Camera
 HD Pan/Tilt Wi-Fi Camera See up to 360 degrees horizontally and 150 degrees vertically Night Vision Motion Detection Micro SD Card Slot Highlights Stay Connected and Secure Anywhere. Anytime Access. The
Wireless P2P Cellphone Camera
 Wireless P2P Cellphone Camera Chapter 1 Features NEW S5030-MP2P is the latest model developed by SIEPEM, Inc., it is suitable for family, offices and chain store monitoring. It is the latest version. P2P
NVMS1000. User Manual
 NVMS1000 User Manual Contents 1 Software Introduction... 1 1.1 Summary... 1 1.2 Operation Environment... 1 1.3 Install and Uninstall... 2 1.3.1 Install the Software... 2 1.3.2 Uninstall the Software...
User Manual Indoor HD Pan/Tilt IP Camera
 User Manual Indoor HD Pan/Tilt IP Camera Model: FI9821P Color: Black/White Model: FI9826P Color: Black/White Model: FI9831P Color: Black/White Model: FI9816P Color: Black/White V3.6 Table of Contents Security
User Manual. HD Wireless PTZ Dome IP Camera. Model: FI9828P V2.2.4
 User Manual HD Wireless PTZ Dome IP Camera Model: FI9828P V2.2.4 Table of Contents Security Warning...1 1 Overview... 1 1.1 Key Features...1 1.2 Read before Use... 2 1.3 Package Contents...2 1.4 Physical
Outdoor IP Camera Quick User Manual
 Outdoor IP Camera Quick User Manual Products Introduction Antenna Lens IR LED Power Jack Reset LAN Port MicroSD Card Slot MicroSD Card Slot Power Jack Reset LAN Port Lens IR LED Before starting setup Make
Wireless PTZ Cloud Camera TV-IP851WC (v1.0r)
") (v1.0r) TRENDnet s Wireless PTZ Cloud Camera, model, takes the work out of viewing video over the internet. Previously to view video remotely, users needed to perform many complicated and time consuming
(v1.0r) TRENDnet s Wireless PTZ Cloud Camera, model, takes the work out of viewing video over the internet. Previously to view video remotely, users needed to perform many complicated and time consuming
Copy 2013 Eazzy Digital Video Technology Company. All rights reserved.
 Model No. : BC-881H Hidden Bulb WiFi/AP HD960P P2P IP Network DVR Camera (Motion Detection, Email Alert) - Simple installation, screw in -like a bulb - No Light at night (invisible to human eyes) - New
OUTDOOR SECURITY CAMERA WITH LED FLOODLIGHT
 OUTDOOR SECURITY CAMERA WITH LED FLOODLIGHT Wifi Security Camera With LED Floodlight Features 20W with 1600 Lumens Indoor and Outdoor Wifi IP Camera with LED flood light Passive IR and Motion sensor Support
4-Sensor IP Dome Camera
 4-Sensor IP Dome Camera Model: 2679-21/2679-30 en Operation and Installation Manual 1 Welcome... 4 Product Overview... 5 Hardware Installation... 5 Using CMS5 for PC or Mac... 12 System Requirements...
Everything in your eyes. ismartviewpro. (For iphone) User Manual VER 5.0
 User Manual VER 5.0") IP Cloud Network Camera Everything in your eyes ismartviewpro (For iphone) User Manual 2018-01 VER 5.0 1. ismartviewpro Summary ismartviewpro (iphoneversion) is developed application software based on
IP Cloud Network Camera Everything in your eyes ismartviewpro (For iphone) User Manual 2018-01 VER 5.0 1. ismartviewpro Summary ismartviewpro (iphoneversion) is developed application software based on
Table of Contents CHAPTER 1: FCC WARNINGS... 7 CHAPTER 2: SAFETY INSTRUCTIONS... 9
 Table of Contents CHAPTER 1: FCC WARNINGS.................................... 7 CHAPTER 2: SAFETY INSTRUCTIONS.............................. 9 CHAPTER 3: SPECIFICATIONS..................................
Outdoor User Manual. ios Application Android Application PC Setup
 Outdoor User Manual ios Application Android Application PC Setup Please read all instructions carefully before use to get the most out of your Outdoor Wireless Surveillance Camera. The design and features